• Skip to main content
  • Skip to primary sidebar

Learn how food affects your body. Get Free Nutrition Info Today

the-lean-green-bean-logo
  • Home
  • Recipes
  • Kids
  • Resources
    • Ebooks
    • Food Prep
    • Videos
    • Snack Round-Ups
    • Gift Guides
  • About
    • Become An RD
    • Work With Me
  • Search
Search field required
the-lean-green-bean-logo
  • Home
  • Recipes
  • Kids
  • Resources
    • Ebooks
    • Food Prep
    • Videos
    • Snack Round-Ups
    • Gift Guides
  • About
    • Become An RD
    • Work With Me
  • Search

blog

Kitchen Tasks For Kids

September 25, 2015 by Lindsay 7 Comments

Thanks to Kohls and Fitfluential for sponsoring this post.

Hi Friends!

One of the things I’m most excited about as Squish gets older is the fact that he’ll soon be able to start helping me in the kitchen! I used to love helping my mom in the kitchen and still remember the recipe my sister and I made every time we were in charge of making dinner (Tuna Wiggle).

Want some extra help in the kitchen? Get the kids involved. Here are some ideas based on age and skill level!

Getting kids into the kitchen is a great way to teach them about food and encourage them to try new foods. It can also help them with their hand-eye coordination and give them a sense of responsibility and accomplishment. As they get older they can work on their math and reading skills as well by following recipes.

I reached out to some of my mom friends to ask them how their kids help them in the kitchen. It made my heart happy to see how many responses I got. Hopefully this will give you some ideas of different tasks you can give your kiddos.

Here’s what my fellow moms had to say. If they’re bloggers – I’ve linked to their blogs so you can go check them out!

Kristy –

I love that my kids show such interest in the kitchen. It’s so true that the more they help prepare foods, the more likely they are to eat them and feel empowered! And of course, it takes more time with the kids helping, but the skills they are learning are so important.

Chocolate Slopes
 
Get these bowls with non-skid bottoms:
OXO Good Grips Mixing Bowls

Katie – 

Joey’s favorite part about being in the kitchen with me is seeing the before and after of something I cook. I’m guessing it’s similar to cause and effect. Here’s what something looks like before it goes into the oven or stove or grill, and here’s the final, cooked product. I also let him touch the different foods before and after and of course, we talk about food colors and shapes too! He’s almost two… I’m hoping he can start helping me prep in a few months instead of just poke at the food 😉 

IMG_4594

Perfect for kid-sized food:
Mini Muffin Tin

Kristi-

I use the learning tower for any cooking activity as well as where Declan can have his snack and come and go as he pleases to eat it.  He just leaves it there and then I don’t have to get him in and out of the high chair.
 
I let him do pouring, stirring, and measuring.  Then with things like pancakes he counts as we pour and helps me decide when to flip.  He’s always very proud of himself!  He has a “special” pig spatula he uses for all our cooking, and we use a non-skid mixing bowl so the bowl doesn’t turn as he is mixing.  He really enjoys it!
 
IMG_7370
 
Give them their own special kitchen tools:
Guitar Spatula

Melissa – 

Most of the time my boys would rather be playing in the dirt but when they do want to help I try and incorporate them (even though cooking is often my “quiet” time)  Ira is showing more interest in helping than Theo did so I’m looking forward to seeing how his desire to cook pans out as he ages!

september2015-6126


Holley – 

Ellie loves to help crack eggs, shuck corn, and peel carrots. These are both tasks she started helping me do at age 3. I found that with the corn and the carrots, she will often start eating the food raw as soon as she’s finished with her job.

IMG_0826

Amelia –

Cooking with kids isn’t neat, tidy, efficient or particularly productive. But boy do they love it! And I’ve found it to be the best way to get kids interested in trying new foods and eating healthy. It’s also a great time to talk about where food comes from and give them a sense of ownership in an important household duty. I try to involve my daughter in the kitchen on weekends and times when I am not stressed about getting a meal on the table quickly – that makes it more fun for both of us!
 
IMG_2151
 
Give them a boost to the counter:
High Rise Step Stool

Katie – 

My four year old Hudson and I love cooking together! He loves to smell spices and ingredients and taste test them before we add them to a dish. He measures, pours, stirs and even cuts soften ingredients. I often give him his own pot (off the flame) to use to make his own dish with the ingredients on hand. His latest obsession is balling melon and grating cheese with the microplane. True story:  Hudson and I were “cooking” dinner.  He has his own pot of goodies into which he added raw potatoes, navy beans, an ENTIRE jar of fennel seeds plus some salt and pepper to season it, of course.  He proudly stirred it around and went in for a HUGE bite.  I (in disgust) almost stopped him.  I paused and let him have his taste.  His reply…”Mmmmm, Yummy”.  He went back for seconds.

hudson


Katie –

My kids are 2 and 4. I let them help measure and pour ingredients. They are so proud when it all comes together. I also let them help with assembly if it’s not too messy.

NeighborGifts2-300x225

Brittany –

My favorite invention is “worms” with the garlic press- avocados work great, as do bananas. Beans are fun for them to squish too and cheap. Great for any age- especially 2 on, but even at almost 4, my daughter loves it. She also pulls leaves off of kale or herbs, pushed the salad spinner and I let her mix her own ingredients, then we bake whatever she creates. Lots of fun!

Make worms with this Garlic Press

Diane –
My two granddaughters love to help me cook. They measure and stir and help decorate. Great memories and fun.

11210438_10204771344273533_3598946080027827052_n

Tara – 

I nanny a 7 year old and she helps cut things with a butter knife that we call a “beginner’s knife”. Things like broccoli, cucumber, banana, anything soft she is able to help cut. She makes guacamole ALL on her own (I just peel and cut the avocado for her), she tears the lettuce for salads and I also call her my “spice girl” because she seasons almost every dish we make. If something needs exact measures, she holds the measuring spoon/cup and I pour the ingredient into the measuring spoon/cup and she dumps it in the bowl.

Robin –

I’ve written several articles about the value of getting kids in the kitchen. Check out Kids In the Kitchen – It’s Worth the Mess & Building Kitchen Confidence In Kids.

1981865_10203201200287950_1160576669_n


Lauren –

My two-yr-old keeps his step stool by the counter and mixes, dumps pre-measured ingredients, cracks eggs, puts veggies in the food processor and cranks the pasta maker. He especially likes prepping his own breakfast– scooping out oatmeal or cracking and stirring eggs.

Claire –
Cora (2) helps stir things, pulls spinach off the stem to add to things, and helps put things like shredded cheese or cut up fruit into bowls. I also usually have some uncooked dry beans or pasta for her to scoop and play with to keep her occupied while I do things she can’t help with.

Shannon –
My teenage son enjoys doing the chopping & baking. Soon I will teach him how to grill. My kids also know how to make their own eggs & several go-to simple meals.

Kate –
Not a parent, but as a teacher, we include cooking as part of our curriculum (it’s great for math, teamwork, and to promote healthy eating and trying new foods). Tasks vary, but generally kids help measure, pour, stir/mix (we have a mixing song that we sing so everyone gets a turn). There are kid-safe knives that they use sometimes with 1:1 supervision. They also do all the spreading, juicing/squeezing, tearing and mashing (e.g., we made strawberry lemonade and the kids each got a Ziploc baggie with strawberries in it and they went to town pounding and mashing until it was pureed).


As you can see, there are tons of ways to get kids into the kitchen. They won’t all enjoy it, but for those that do, it’s the perfect balance of fun, learning and letting their imagination run wild!

PS. Squish is for sure getting a play kitchen like this one soon. Maybe for Christmas?!

1777151

Step 2 Lifestyle Custom Kitchen

Now it’s your turn:

Do your kids help you in the kitchen? What are their favorite ways to help?
If not, I challenge you to #makeyourmove and invite them to help you this week!

Enjoy!
–Lindsay–

This post is sponsored by FitFluential on behalf of Kohl’s.

Filed Under: Sponsored

Slow Cooker Apple Cranberry Chicken

September 21, 2015 by Lindsay 27 Comments

This Slow Cooker Apple Cranberry Chicken recipe is the perfect one-dish meal for fall. It’s freezer-friendly so you can prep it ahead of time. In the morning, just dump it in the crockpot and dinner will be waiting when you get home.

This Slow Cooker Apple Cranberry Chicken recipe is perfect for fall. Plus it's freezer friendly. Just pull it out, dump in the crockpot and dinner cooks itself!

Hi friends!

Have no fear. Bean Bytes will be here tomorrow. I had to do a little switcharoo because today is Recipe Redux day. This month’s theme was freezer meals, which was perfect for me because you guys are always asking for easy dinner ideas.

To me, freezer meals and crockpot meals go hand in hand. It’s so easy to fill several ziploc bags with raw ingredients, freeze them and then simply dump a bagful into the crockpot and have dinner waiting when you get home!

This dish is fall-inspired and features apples and cranberries. I also used carrots because I like the way they retain their texture in the crockpot…but you could easily use sweet potatoes or butternut squash instead (or in addition to). I also experimented with adding an uncooked grain to my freezer meal and it worked great!

crockpot apple cranberry chicken

Another thing I realized is that if you’re planning to add your meal to the crockpot when it’s frozen, it’s better to freeze without any liquid. This recipe calls for chicken broth and usually I just throw it in the bag. If you’re going to let it thaw overnight before cooking that’s no big deal because it melts and you can just dump into the crockpot…but if you try to add it from frozen, the broth makes everything freeze into a big square block that doesn’t fit into the oval crockpot. So, if you freeze it flat without the liquid, you can just smack it against the counter a couple times and everything breaks up enough to dump easily.

A final note- I would add the farro to the very top, not to the middle like I did. That way, when you dump it in, the farro will fall to the bottom of the crockpot where it can get covered in broth and cook well. If you don’t do this, you’ll probably need to stir halfway through to help submerge the farro.

This Slow Cooker Apple Cranberry Chicken recipe is perfect for fall. Plus it's freezer friendly. Just pull it out, dump in the crockpot and dinner cooks itself!

So anyways, here’s how you make it:

You can peel the apple if you want to. I was too lazy. And like I mentioned above, feel free to add some extra veggies like squash or sweet potato!

This Slow Cooker Apple Cranberry Chicken recipe is perfect for fall. Plus it's freezer friendly. Just pull it out, dump in the crockpot and dinner cooks itself!

I really liked this because it’s simple and the ginger really shined. The apples add some sweetness and the cranberries add a pop of tartness. Feel free to play around with the seasonings. If you don’t like ginger you could try curry powder!

[Tweet “Stock your freezer with this Slow Cooker Apple Cranberry Chicken from @leangrnbeanblog!”]

Enjoy!
–Lindsay–

For more freezer meal ideas, check out the linkup below!

An InLinkz Link-up


Filed Under: Dinner Tagged With: Apple, Carrot, Chicken, Cranberry, Onion

Blog Brulee 2015

September 18, 2015 by Lindsay 7 Comments

In exchange for speaking at Blog Brulee this year, my travel and lodging expenses were covered and I was compensated for my time. All thoughts and opinions are my own.

blog_brulee_2015_attendees_thumb

Photo Credit: California Almonds

Hi Friends!

As you may have seen if you follow me on social media, I spent last weekend in Vermont with a group of lovely ladies at Blog Brulee.

Blog Brûlée is an invitation-only, exciting, experiential weekend shared among a small, intimate number of healthy food bloggers and Registered Dietitian bloggers. The event is designed to provide education and professional development opportunities, as well as a forum for discussion and relationship building surrounding topics such as blogging and social media best practices, fundamentals of food photography, communication and marketing strategies, community niche development, brand identity and monetization.

IMG_3566

I was scheduled to speak at BB last year but it ended up being too close to my due date for me to fly, so I was thrilled to have the chance to attend as a speaker this year! The conference is organized by some of my favorite RDs – Regan, Deanna, Robin & Gretchen. They rounded up some awesome sponsors (Siggi’s, Smuggler’s Notch, Davidson’s Safest Choice Eggs, California Almonds, and California Ripe Olives) who also helped make the weekend possible!

IMG_3593

That’s Siggi!!

This year’s group of attendees were pretty fabulous as well:

  • Alanna Waldron, RD – Eat Real Food
  • Emily Hein, RDN, LD – Zen & Spice
  • Lisa Lin – Healthy Nibbles & Bits
  • Katie Oberwager – 24 Carrot Life
  • Sally Twellman, RD – Twellman Nutrition
  • Whitney Reist, RD, LMNT – Sweet Cayenne
  • Selena Sharpless – The Nutritious Kitchen
  • Amee Livingston – Amee’s Savory Dish
  • Alexandra Caspero, RD – Delicious Knowledge
  • Vicki Shanta Retelny, RDN – Simple Cravings. Real Food.
  • Jennifer Pullman, MA, RDN, LDN – Nourished Simply
  • Lauren Harris-Pincus, MS, RDN – Nutrition Starring YOU
  • Sara Haas, RDN, LDN – Sara Haas, RDN
  • Katie Sullivan Morford, MS, RD – Mom’s Kitchen Handbook
  • Emily Cooper, RD, LD – Sinful Nutrition
  • Anne Danahy, MS, RD, LDN – Craving Something Healthy
  • Deborah Davis, MS, RDN – Dietitian Debbie Dishes
  • Dana Artinyan, RD, LDN – Art of Nutrition
  • Marisa Westbrook – Uproot From Oregon

I’ve gotten to know many of these ladies online over the past several years and it was so fun to get to meet them in person! Be sure to go check out their blogs for great recipes and nutrition info.

IMG_3609

Over the course of the weekend, there were several very informative sessions. Regan and Deanna give us some tips and tricks for food photography both using a DSLR and an iphone. Katie of Healthy Seasonal Recipes (one of my personal photography idols) shared some great tips about food styling and editing photos. She inspired me to dig out the cord that came with my camera so I can try shooting tethered! Lisa, an editor at Eating Well, gave some great tips for improving your writing and pitching editors. Katy Widrick (one of my blogging heroes) gave an amazing presentation about SEO…something I’m constantly working to improve. And finally Anne, from Fannetastic Food, shared all sorts of great info about monetizing your blog, working with brands and more!

IMG_3617

Which brings me to my session! I teamed up with Kylie from Yeah Imma Eat That and Sally from Real Mom Nutrition to talk about building your virtual community. Kylie is an Instagram rockstar so she shared some tips for success and Sally has built an amazing Facebook community and she had some great examples of how to write great Facebook posts that get engagement and drive traffic.

I talked a little bit about social media, but I spent most of my time talking about building your blogging brand. I shared some suggestions for growing your blog and talked a lot about some of the things I wish I’d done from the very beginning to help define my brand and focus my blog.

I have a few Periscope broadcasts planned to share some of these tips with you guys and I’ll be sure to upload them to YouTube in case you miss them.

IMG_3547

For now I’ll leave you with a quick list of lessons from the weekend:

  • Take a step back when you’re taking your pictures. You can always crop in, but there’s nothing you can do to fix a photo that’s cropped too tightly.
  • There are apps for your phone (like Camera+) that give you a lot of control and allow you to adjust things like aperture and shutter speed when taking a photo.
  • You can be confident without knowing everything. Add people to your team who excel at your weaknesses and improve your chances of success.
  • In Lightroom, you can increase the saturation to add some color and then individually turn down colors like orange if they look a little over the top. You can also make preset filters to apply to all photos you take in a common lighting situation (like at a certain time of day wherever you take pics in your house).
  • Cut to the chase. You can almost always cut at least 100 words from a blog post after it’s written. Remember that more and more people are reading on mobile devices which means you have less screen space to initially get them interested.
  • Focus on growing your search traffic. Get a plugin like Yoast and be sure you’re filling in your alt text, meta descriptions and key words.
  • Take the time to define your ideal reader. <– This is from me. It’s my #1 piece of advice to help you define and build your blog brand. (More to come).

That’s all for today! If you’re an RD or healthy living blogger, definitely check out the Blog Brulee website and consider applying to go next year!

Enjoy!
–Lindsay—

Filed Under: Uncategorized

How To Make Back To School Less Stressful

September 17, 2015 by Lindsay 3 Comments

Thanks to Kohl’s and Fitfluential for sponsoring this post.

Hi Friends!

It’s time for another post in the series I’m doing for the #MakeYourMove campaign! In case you missed any of the previous posts, be sure to check them out here:

  • Get Ready To Make Your Move
  • A Babywearing Workout
  • 5 Food Prep Tips For Beginners
  • Thai Chicken Salad
  • A Stroller Workout

Today we’re switching gears from fitness and talking about back to school season. Although Squish is not in school yet, I know that these first few weeks can be super stressful for both parents and kids.

How To Make Back To School Less Stressful

I reached out to some of my mom friends on Facebook and asked them to share the most stressful part of back to school season for them. I got a lot of great responses but immediately noticed some trends. Most of the responses fell into the following 4 categories:

  • The morning rush
  • Breakfast
  • New schedules and routines
  • Paperwork

So let’s take a closer look at each of those areas! Plus I’ll share some awesome products from Kohl’s that can help ease your stress!

calendar

Get organized:

Chalkboard Basket
Weekly Calendar
Wall Chalkboard
Hardwood Monthly Calendar

The morning rush was by far the most common stressor. Packing lunches and snacks, getting everyone up, fed and dressed and getting out the door ON TIME with everything needed for the day can be a huge challenge.

Luckily, there are a few ways to make mornings less stressful:

  • Pack lunches and snacks at night. Trying to worry about packing lunch in the morning on top of everything else is just an added stress. Get food ready at night and simply transfer from fridge to bag in the morning.
  • Get a big bag.  One that is big enough to hold everything you need – paperwork, computer, lunch, workout clothes, etc. Consider packing it up and putting it in the car the night before to save you a step in the morning.
  • Write it down. To-do lists on your phone are great, but usually only you can see them. Especially if you have older kids, having a written list of everything they need for the day can transfer some of the responsibility to them to ensure they have what they need before they head out the door. Physically being able to cross things off the list can be helpful. Consider a dry erase board or a chalkboard that you can hang in the kitchen or near the door.
  • Designate a space. Whether it’s in the kitchen, in a basket, on the floor next to the front door, find a spot in the house where you can store everything that needs to leave the house with you in the morning. Having a bookcase or shelf with a basket for each person could be very helpful.

freezerfriendly

Breakfast is another challenging area. Most parents were looking for quick, healthy breakfast options that can be prepared and eaten quickly without turning to junk food or a drive-thru.

Some breakfast tips to consider:

  • Have favorites on hand. Breakfast may not always be the time to get kids to try new foods, especially if you’re in a hurry. Know what kids like and will eat most days and always have those on hand. Try new things on the weekends or slower days.
  • Stock the freezer. I recently did a round-up for Parade with 9 Freezer-Friendly Breakfast Ideas.
  • Do some food prep. If you’re not a fan of freezer breakfasts, there are still plenty of things that you can make ahead of time and store in the fridge or pantry for the week. It could be as simple as portioning some oats into baggies with mix-ins so all you have to do is dump it into a bowl, add milk and stick it in the microwave. You can also bake a batch of breakfast bars and portion into single servings.

IMG_0398

Back to school means the end of summer schedules. It may mean earlier bedtimes and spending some time figuring out how to fit homework, sports and family time into a shorter period of time.

To help establish new routines:

  • Focus on bedtime. Sleep is so important for kids and getting them into the habit of going to bed at an appropriate time for their new school schedule is crucial.
  • Limit TV time. Prioritize homework first so it gets done, then use any remaining time for fun.
  • Make family dinners a priority. Busy schedules mean less time to relax and enjoy each other’s company. Family dinners are a great opportunity to catch up, talk about the day, etc.

Wall storage

Wall Storage Unit

With school comes a lot of paperwork. There are forms for each new school and school year. If you have multiple kids that can mean double or triple the amount of forms for physicals, allergies, sports registration, etc.

To stay organized:

  • Note the due dates. Whenever you get a form to fill out, make a note on your calendar of when it’s do.
  • Don’t wait. Try not to let the forms pile up. Take a few minutes each time you get one to fill it out right them.
  • File them. Have a designated tray or area to keep all the forms. Consider two trays- one for “to be completed” and one for “all done, ready to file”.
  • Ask. Check backpacks to see if kids came home with any forms. Ask them every day if they got anything from their teachers to give to you. Ask the teacher/school yourself if you’re missing any forms.
  • Start early. If you know your child has allergies that require special paperwork, start working on them as soon as possible. Don’t wait until the last minute when you’re more likely to be scrambling and forget something.


Now it’s your turn!

Share your best tip to help  #makeyourmove towards a stress-free back to school season! Not a parent? How about a tip for a stress-free morning?

Enjoy!
–Lindsay–

This post is sponsored by FitFluential on behalf of Kohl’s.

Filed Under: Sponsored

Stovetop Macaroni and Cheese with Sausage and Peas

September 16, 2015 by Lindsay 31 Comments

This recipe for Stovetop Mac and Cheese with Sausage and Peas is an easy, kid-friendly dinner idea for a busy night and the leftovers work well for lunch!

This recipe for Stovetop Mac and Cheese with Sausage and Peas is quick, easy and kid-friendly. Perfect for dinner on a busy night!

Thanks to the Healthy Aperture Blogger Network and PastaFits for sponsoring this post.

Hi Friends!

Story time. When I was in high school, my parents went to dinner pretty much every Friday night. Although there were times my sister and I accompanied them, more often than not I chose to stay home. I was in high school. Dinner with your parents was so not cool, right?

Anyways, since I was perfectly capable of navigating the kitchen at that age, feeding myself dinner became my responsibility. I’m going to let you in on a little secret. I ate the same thing for dinner pretty much every Friday night for 4 years.

Any guesses what it was?

I’ll tell you:

Plain pasta with butter and salt.

I kid you not.

I, the now Registered Dietitian, ate buttered noodles for dinner once a week while growing up. And I loved it.

This recipe for Stovetop Mac and Cheese with Sausage and Peas is quick, easy and kid-friendly. Perfect for dinner on a busy night!

It’s no secret that I love pasta.  It cooks quickly, can be used in a wide variety of recipes and is quite affordable. And while lately it may seem like everyone you know is shunning carbs, I’m here to tell you that pasta can most certainly be eaten as part of a balanced diet. 

Key word is balanced. I would not recommend taking after my high school self and choosing a huge bowl of plain, buttered noodles with salt for dinner.

Here’s what I’d recommend instead:

  • Choose whole wheat pasta to help get your daily servings of whole grains.
  • Be aware of portion size. A serving of cooked pasta is about the size of your fist and typically has 7g of protein and 200 calories per serving.
  • Add veggies and protein to bulk it up. By doing this, you can enjoy a nutrient-rich dish that’s healthy, filling and full of flavor!

So that brings us to this mac and cheese. When I felt like getting fancy on a Friday night, I’d make a box of mac and cheese instead of just plain noodles. It’s one of the ultimate comfort foods for me…and probably a lot of other people. Fast forward to today and now, at the wise old age of 30, I now typically put a little more effort into making my mac and cheese and try to focus on making it more of a complete, balanced meal.

This recipe for Stovetop Mac and Cheese with Sausage and Peas is quick, easy and kid-friendly. Perfect for dinner on a busy night!

I focus on three things:

  • I always add veggies – frozen veggies are perfect for this.
  • I usually throw in a protein source – chicken, pork, sausage, beans, etc.
  • I make my own cheese sauce.

That may sound like a lot of extra work, but I promise it’s not. This recipe can all be made in one pan. I used pre-cooked chicken sausage but you could use any leftover meat you have on hand, or even tofu or beans. Added bonus- customize with your favorite veggies. I love adding peas to mine, but broccoli or a bag of mixed veggies would also be great!

Here’s how you make it:

Now don’t go freaking out because there’s pumpkin in there. It is optional, but I’d highly recommend adding at least 1/ 2 cup. I’d wager you won’t even know it’s in there. So start with 1/2 cup and then add more if you want. I use a full cup. I also make mine extra spicy!

This recipe for Stovetop Mac and Cheese with Sausage and Peas is quick, easy and kid-friendly. Perfect for dinner on a busy night!

Another note- you’re more than welcome to cook the pasta in one pan and start on step two in another pan while the noodles are cooking. This will save time. It will also dirty another pan. Your call.

[Tweet “This Stovetop Mac and Cheese from @leangrnbeanblog is quick, easy and kid-friendly!”]

Enjoy!
–Lindsay–

For more delicious pasta recipes, visit PastaFits.org.

Filed Under: Dinner, Lunch, Sponsored Tagged With: Cheese, Chicken, Chicken Sausage, Garlic, Milk, Onion, Pasta, Peas, Pumpkin

Cheerios with Squish

September 11, 2015 by Lindsay 11 Comments

Thanks to General Mills for sponsoring this post.

Cheerios with Squish


Hi Friends!

As you may know, several months ago I was invited on an (expense paid) visit to the General Mills headquarters in Minneapolis. While I was there, I learned a lot about the company, the way Cheerios are made and some of the changes General Mills has been making to their cereals over the past several years,  including  removing high fructose corn syrup, reducing sugar, and most recently committing to remove artificial flavors and colors from all of their cereals.

In addition to those changes, we also learned a lot about the new processes they were developing to make several of Cheerios varieties gluten-free. Now here we are several months later and the process has been refined, tested and implemented! Five varieties of Cheerios (Original, Honey Nut, Apple Cinnamon, Frosted and Multigrain) are now officially gluten-free. Look for the new gluten-free label on the box!

When my friends at General Mills reached out to me to help them celebrate this exciting launch, I jumped at the chance.

Truth is, I’m a longtime Cheerios lover. My mom will tell you I pretty much lived on them for about 20 years. They were my favorite snack as a kid, my go-to breakfast in high school and hubby will gladly tell you how much money my dad threw away on a college meal plan since I pretty much ate nothing but Cheerios and blueberry bagels during my 4 years of college. And when I was pregnant and sick for several long months, Cheerios once again saved the day.

IMG_7165_2

I was world’s pickiest eater for the first 25 years of my life and Cheerios have always been my go-to comfort food. Fun fact- even now, as a Registered Dietitian and semi-reformed picky eater, I still eat a bowl of Cheerios at least once a day!

Clearly eating Cheerios has always kinda been “my thing”. Recently, however, our house has gained another Cheerio lover.

Cheerios5 copy

Squish!

Cheerios were one of the very first solid foods he tried. I actually learned during my visit that Cheerios are specially formulated to dissolve easily, making them a great first food for babies.

IMG_7448

When he was about 6 months old, we developed a little morning routine – Cheerios for breakfast. Over the past several months this has quickly become one of my favorite parts of the day. Squish is generally super happy when he wakes up. I bring him downstairs and turn on Curious George while make my own breakfast (oatmeal or Cheerios) and brew my coffee. Then I head into the family room and we eat breakfast together.

Cheerios4 copy

When he first started eating solid foods, I put the Cheerios into his mouth. As he grew, I started letting him feed himself.

Cheerios

This is one of my favorite things about Cheerios. They’re a healthy snack AND they’re helping him with his hand-eye coordination. It’s been so fun to watch him go from barely being able to grab one with his fist to learning to quite proficiently pick them up one at a time with his thumb and index finger.

Cheerios11 copy

Cheerios have a permanent place in our diaper bag. They go with us to the park, to restaurants, to the gym…and they’ve saved the day on multiple occasions.

IMG_1561


As an RD, I’m often asked about gluten-free foods. There are lots of food options out there that do not contain gluten, but due to the foods they’re processed with or the equipment they’re processed on, they cannot be certified gluten-free.  Since Cheerios are made with oats, which are naturally gluten-free, the Cheerios you know and love aren’t changing! They’re just being made via a new process that allows stray wheat, rye and barley grains to be removed from the oats.The only flavor that was reformulated was Multigrain Cheerios and that involved replacing wheat and barley with gluten-free grains sorghum and millet. An added bonus? The price and availability shouldn’t change either!

I love that General mills is taking the necessary steps to allow some of their Cheerios varieties be available as a breakfast or snack option for more people, including the 30% of the population who follow a gluten-free diet.

Cheerios8 copy

 My Cheerio time with Squish has already led to so many cherished memories and I hope that many other moms out there, even ones who choose to or need to eat gluten-free can make similar memories with their kiddos!
Let’s chat:
What’s one of your favorite childhood foods that you still eat regularly today?
Enjoy!
–Lindsay–


Filed Under: Sponsored

Pumpkin Apple Baked Mini Pancakes

September 10, 2015 by Lindsay 23 Comments

These Pumpkin Apple Baked Mini Pancakes are kid-friendly with no added sugar and are perfect for a fall breakfast or lunch!

These Pumpkin Apple Baked Mini Pancakes are kid-friendly with no added sugar and are perfect for a fall breakfast or lunch!

Hi friends,

I’m gonna level with you guys. I had absolutely no idea what to call these. I made the first batch yesterday with the intention of them being bars. They ended up not being very thick and since the only sweetness comes from the banana and apple in them, they’re not overly sweet. The texture is moist and kinda eggy. They reminded me a lot of my Sweet Potato Protein Pancakes and that got me thinking. I knew baked pancakes were a thing…and a quick google searched told me that they were often made by pouring the batter into a pan and cutting into squares. However, in my world, pancakes need to be circles, not squares.

So I made a second batch of batter and tried making them in muffin tins. BAM! Perfectly circular mini pancakes.

These Pumpkin Apple Baked Mini Pancakes are kid-friendly with no added sugar and are perfect for a fall breakfast or lunch!

I actually wasn’t going to post this recipe because I wasn’t sure what to call them, wasn’t sure if people would like the texture, yada yada…but then over the course of the day yesterday, I literally ate half the pan. And I decided if I liked them that much, maybe someone else would too.

So here’s your disclaimer:

  • You can make these in a pan or in muffin tins.
  • You can call them bars, mini muffins, baked pancakes, whatever suits you.
  • I made mine with oat flour. You could probably make them with other kinds of flour but I haven’t tried.
  • These are not Bisquick-texture pancakes. They’re moist, chewy and kinda eggy.

If you’re into all that, you’ll probably like these. I pretty much dumped all things fall in a bowl and this is what came out.

You can eat them topped with a little syrup (pancake-style), topped with yogurt or nut butter, or turn them into mini sandwiches with some nut butter in between. They’d be perfect for lunch boxes!

Here’s the recipe:

Like I mentioned above, if you don’t care about circles, it’s easiest to just make these in a 9×9 pan. If you want circles, use the muffin tins. Make sure they’re well greased. The smaller you chop the apples the better. To remove, trace around with a knife, then I found it easiest to just use a spoon to kinda scoop them out so they don’t stick.

These Pumpkin Apple Baked Mini Pancakes are kid-friendly with no added sugar and are perfect for a fall breakfast or lunch!

Store in the fridge!

[clickToTweet tweet=”The kids will love these Easy Baked Pumpkin Apple Mini Pancakes!” quote=”The kids will love these Easy Baked Pumpkin Apple Mini Pancakes!”]

Enjoy!
–Lindsay–

Filed Under: Breakfast, Lunch Tagged With: Apple, Banana, Egg, Oat Flour, Pumpkin

Slow Cooker Asian Pulled Pork

September 8, 2015 by Lindsay 10 Comments

Serve this Slow Cooker Asian Pulled Pork in lettuce wraps with rice for a quick dinner!

Serve this Slow Cooker Asian Pulled Pork in lettuce wraps with rice for a quick dinner!

Thanks to the Ohio Pork Council and the Ohio Soybean Council for sponsoring this post.

Hi Friends!

Lots of you have been asking for quick, easy dinner ideas now that school is back in session and nights are a little crazier. Coincidentally, I was recently asked by my friends at the Ohio Pork Council to share a simple slow cooker recipe made with pork! We eat a fair amount of pork in our house and cooking it low and slow is definitely my favorite way to do it. It’s perfect for food prep because you can easily cook a large amount and use it in a variety of ways throughout the week. Plus it freezes well, so whenever it’s on sale I buy a shoulder, cook it in the slow cooker, shred it and freeze it. Then I can pull it out to put in soups, casseroles, quesadillas, etc on busy nights!

My go-to pork recipe is to throw a pork shoulder in the crockpot (or oven) with a bottle of beer, cooked, shred and top with bbq sauce. For this recipe I decided to expand my horizons a bit and put an Asian twist on it!

Serve this Slow Cooker Asian Pulled Pork in lettuce wraps with rice for a quick dinner!

This recipe is super simple. Once the meat is cooked, just shred and eat. OR, if you want to spend an extra 5 minutes on dinner, wash a few bibb lettuce leaves and cook a package of (no salt added!) 90 second rice and make some lettuce wraps like I did! You could also skip the lettuce and just serve the pork with some rice and steamed frozen veggies for a quick weeknight dinner. The possibilities are pretty much endless!

Here’s the recipe:

I opted for a drizzle of sauce AND  the sriracha topping 🙂

Serve this Slow Cooker Asian Pulled Pork in lettuce wraps with rice for a quick dinner!


That’s all there is to it, friends!

[Tweet “This Slow Cooker Asian Pulled Pork from @leangrnbeanblog is perfect in lettuce wraps!”]

If you have questions about Ohio farms, pigs or pork or questions for the farmers, be sure to visit the Ohio Pork Council’s website or the Ohio Pork Facebook page! They’d be more than happy to answer any questions you may have!

Enjoy!
–Lindsay–


Filed Under: Dinner, Slow Cooker, Sponsored Tagged With: Bell Pepper, Garlic, Ginger, Onion, Peanut Butter, Pulled Pork, Soy Sauce, Sweet Thai Chili Sauce

America’s Fittest BBQ and A Reebok Giveaway

September 5, 2015 by Lindsay 91 Comments

Thanks to Reebok for sponsoring this post!

Hi Friends!

Just popping in to share some fun fitness news! My friends over at Reebok are having a fun Instagram contest this weekend and would love to have some of you guys get in on the fun! Reebok believes the gym is everywhere and it’s their mission to  encourage people to get fit and healthy whenever (and wherever!) possible.

So this Labor Day weekend they’re hosting a contest to find the Fittest BBQ in America (#AmericasFittestBBQ). They’re asking you guys to share a :15 Instagram video that exemplifies what makes your BBQ the fittest in the USA. This can be anything from food to fitness! Are you having a handstand contest in the backyard? Serving a bunch of healthy appetizers and side dishes? Playing tag with the kiddos? Reebok wants to see it! The winning entry gets an awesome prize pack from Reebok including 20 pairs of Reebok Nano 5.0s and 20 sets of head-to-toe Reebok gear. Everyone at your BBQ will love you!!

Here are a couple tips to help keep your weekend on track if you have a BBQ to attend:

      • Try to squeeze a workout in ahead of time! We have a community workout at our gym every Saturday at 9:15. It’s a great way to kick off the weekend, socialize and work up a sweat before going on about your day. Head out for a walk, hit the gym or do a quick at-home workout before the day gets crazy.
      • Bring something healthy! All the food at the party might not be healthy, but you’re in control of what you bring.
      • Be mindful. It’s definitely ok to treat yourself but no need to go completely overboard! Tune in and be present no matter what you’re eating and make sure you’re eating slowly and enjoying it!

bbq   Need some healthy ideas to bring to your BBQ? Try one of these!

Greek Hummus Plate

Mexican Layer Dip

Almond Butter Protein Balls

Pumpkin Energy Balls

Tomato Cucumber Salad

Pesto Corn Salad


Cheers to a healthy weekend! Now go enjoy your BBQ, make a fun video and enter to win cool stuff. Be sure to follow Reebok on Twitter and Instagram and search the hashtag #AmericasFittestBBQ to see more entries from the contest! Tag me on IG too so I can see your video!

Oh yeah, and before you go, I have something for you! Reebok has generously offered to hook one of you guys up with some goodies. As in, a pair of sweet Reebok Nanos and head-to-toe Reebok gear!!! Giveaway ends at 11:59PM Monday Sept 7th.

Check out the Rafflecopter giveaway below to enter: a Rafflecopter giveaway

Enjoy!
–Lindsay–


Filed Under: Uncategorized

7 Tips For A Healthy Relationship With Food

September 4, 2015 by Lindsay 10 Comments

Hi Friends!

As we head into the three-day weekend, I have a special treat for you today! My friend and fellow RD Corinne Dobbas is filling in for me  to share a great post about forming a healthy relationship with food.  I love her life philosophy and the work she’s doing with women to help them love their bodies.

Read on and be sure to go check out her blog if you enjoy today’s post!


Nobody teaches you how to have a healthy relationship with food … or your body. At least no one taught me when I was growing up. And oh how I wish they had.

Below are 7 tips for a healthy relationship with food you can start using today. I’ve gathered these tips through my own personal work and after helping hundreds of clients. I hope these ideas help you just as much as they helped me and my coaching clients.

7 Tips For A Healthy Relationship With Food

  1. Food is nourishment

It’s easy to make food the “bad guy.” After all, if you’re trying to button-up your favorite pair of jeans – that used to fit – you’ll likely be told to eat less or stop eating that. The constant chatter to restrict to look prettier or more desirable, leaves us forgetting the very simple fact that we literally need food to survive. In fact, when we eat the “right” foods (real whole foods and lots of plants), food can actually heal.

Shift your perspective from food being the “bad guy” to being nourishment and with that thought alone, you’ll start making making healthier choices and feel that much more free.

I choose to honor my hunger & fullness.

  1. Trust your body 

Have you ever watched a child eat? They start when they’re hungry and stop when they’re full. They trust their bodies. You used to do this too. And you can do it again. Instead of counting calories or points, start tuning-in to your hunger. Think of your hunger like a scale. It starts at 0 (starving) and goes up to 10 (I ate so much I feel sick stuffed). You want to eat when you’re feeling hunger pangs (around a 3) and stop when you’re satisfied (around a 6 or 7).

Check-in with yourself throughout the day and before a meal to see where you’re at on the hunger scale. And throughout your meal, breathe, taste, and tune-in to where you are on the full scale. When you hit comfortably satisfied (a 6 or 7), you’re golden. Practice with the hunger scale and overtime it’ll become natural. Repeat after me: I choose to honor my hunger and fullness.

  1. Learn to play in the “grey”

Black and white thinking is such a downer. It looks something like this: “I ate the entire bag of chips. There it goes! The day is ruined. I might as well eat whatever I want now.”

Don’t do that to yourself! Instead of getting so judgmental and emotionally wrapped up in your decision, take a step back and look at WHY you did what you did. When you can observe and figure out your WHY, you can then make a better choice next time. Remind yourself that observation is power for change.

I choose to honor my hunger & fullness. (1)

  1. Focus on how you feel instead of the scale

The scale can make you crazy. And if you’re like every other woman out there, the number changes all the time, based on when you just worked out, how much water you’ve had, time of day, time of month, your recent sodium intake … and the list could go on.

Ditch the scale and start focusing on how the foods you’re eating make you feel. And I don’t just mean how they make you feel short-term. Because let’s be honest, if that were the case, I’d down an entire bag of Reese’s Pieces. In the short-term, that bag would make me feel awesome, but no doubt, within an hour, I’d feel sick. Bottomline: choose foods that make you feel good long-term. With this outlook, choosing whole fresh foods (and lots of produce) will become your way of living.

  1. Connect the dots 

Take a step back and begin to ask yourself questions.

Am I really hungry – or just bored?

Do I want to overeat every time I get off the phone with her?

Or (gasp!), is my nightly ice-cream routine just a habit?

When you’re done with diets, you stop relying on meal plans telling you when and what to eat. Instead, you start to connect the dots between why you do what you do. You start to observe, and when you have this powerful information and are ready for true change you learn how to continually make better choices that stick.

I choose to honor my hunger & fullness. (2)

  1. Find your tribe

Who are you spending your free time with? If they’re people who don’t make you feel good after you hang out with them, it may be time to reconsider your social circle and start rebuilding. For example, if you’re focusing on nourishing your body, uplifting your spirit, and exercising to empower and connect with yourself, and you’re hanging out with people who are constantly trying to lose 5 pounds, get rid of cellulite, and working out to burn calories, you’re going to have a hard time being happy.

Get clear on what type of people you want in your life. Once you’re clear, think about where they’d be (Yoga studios? CrossFit gyms? Book clubs?) and then go out and make some friends. Over time, you’ll form a new like-minded crew that will allow you to flourish in mind, body, soul, and spirit.

  1. Keep it simple

There are so many diet rules and books out there and by this point, I bet your eyes glaze over when you see them. Ditch the food rules and go back to point #2, trusting your body and honoring your hunger and fullness. And when it comes to food – keep it simple – real whole fresh foods.

Here’s an easy motto I share with all my coaching clients: protein and produce. The idea is you want to make sure all of your meals have some form of protein (beans, lentils, chicken, seafood, fish, bison, turkey, tempeh, eggs, yogurt, etc) and produce (vegetables and/or fruit). The protein will keep you fuller longer and fuel lean muscle mass. And the produce, especially veggies, will fill you up with fiber, antioxidants, vitamins, and minerals. You can’t go wrong with too many vegetables.

Lastly, if you’ve been having a really hard time shifting away from your diet mindset, stop thinking of what you can’t eat and start thinking of what you should be eating more of. Nine out of ten times (even for myself at times!) the answer is more vegetables. It’s a simple mindshift, but it gets you thinking more (not less), and that’s a good thing.

What tip did you find most helpful? Or, maybe you have something to add to the list? Would love to hear from you in the comments below!

Corinne Dobbas, MS, RD is a Registered Dietitian, Wellness Coach, and yogi (in training) with a Masters in Nutrition. Corinne helps kind, caring, compassionate women develop a healthy positive relationship with food, their body, and themselves. Specifically, Corinne helps women get MORE. More life. More laughter. More friendships. More health. More happiness. More self-love. More self-acceptance. Visit her at www.CorinneDobbas.com

Filed Under: Uncategorized

Stroller Workout

August 28, 2015 by Lindsay 8 Comments

This Stroller Workout is a fun way to break up your next walk or run by adding short fitness breaks that include lunges, squats, burpees and planks. Fun for you AND baby!

This Stroller Workout is a fun way to break up your next walk or run by adding short fitness breaks that include lunges, squats, burpees and planks. Fun for you AND baby!

This post was sponsored by Fitfluential on behalf of Kohls.

Hi Friends!

It’s time for another post in the series I’m doing for the #MakeYourMove campaign! In case you missed any of the previous posts, be sure to check them out here:

  • Get Ready To Make Your Move
  • A Babywearing Workout
  • 5 Food Prep Tips For Beginners
  • Thai Chicken Salad

Today we’re talking a little more about family fitness. As I mentioned in my intro post, one of my goals is to make it a priority to workout with Squish and be a good fitness role model. This has gotten infinitely easier since we opened a gym, but I want to show Squish that fitness can exist outside the gym as well.

This Stroller Workout is a fun way to break up your next walk or run by adding short fitness breaks that include lunges, squats, burpees and planks. Fun for you AND baby!

We try to take a family walk every night and most afternoons, Squish and I go to the park to play. Our walks to the park can get a little boring, so I came up with this stroller workout that you can use to break up your next walk or run by stopping for little fitness breaks that include lunges, squats, burpees and planks!

You can customize this workout to make it as long or short as you’d like. If you like to run, pick a distance to run between breaks. If you prefer to walk (like me!) that’s fine too. Adjust the distance and number of reps based on how long you want the workout to take!

Here’s what I did before we hit the park the other day:

This Stroller Workout is a fun way to break up your next walk or run by adding short fitness breaks that include lunges, squats, burpees and planks. Fun for you AND baby!

When it’s time to stop and do the workout moves, just pull the stroller to the side of the path, or into the grass to make it a bit more comfortable!

This workout allows you to interact with baby during your breaks. I’m also working on a workout that uses the stroller as more of a weight. It works well on a hill so stay tuned for that!

A little bit about the movements:

  • Lunges – I did walking lunges while pushing the stroller but you could also choose to come around front and do stationary lunges.
  • Burpees – Start on the ground in a pushup position. Push up and jump your feet underneath you. Raise your hands in the air and jump as high as you can. Feel free to stop and tickle baby’s feet after you land, then return to the push-up position on the ground and repeat.
  • Plank – Hold yourself at the top of a push-up positions, balancing on your toes and palms with your arms fully extended. Over the course of one minute, alternate extending one hand out in front of you to tickle baby’s feet. Return to plank position and repeat with opposite arm.
  • Squat – Stand in front of the stroller and squat up and down. Talk to your baby as you move!

Here’s  a little demo video for you:


Stroller Workout Video

Like I said, you can adjust the reps and length of the workout to fit your needs!

[Tweet “Grab a stroller and baby for this fun workout from @leangrnbeanblog! #makeyourmove @Kohls”]

Now it’s your turn to #makeyourmove! I’m challenging you to do a family workout this week. Take a hike, go for a run, head to the park, whatever sounds fun!

Tell me:

What’s your favorite way to be active with your family?!

Enjoy!
–Lindsay–

This post is sponsored by FitFluential on behalf of Kohl’s.

Filed Under: Kids, Sponsored, Workouts

Grilled Zucchini Roll-ups + 5 Healthy Zucchini Recipes

August 27, 2015 by Lindsay 21 Comments

Another way to enjoy zucchini. These Grilled Zucchini Roll-ups are an easy appetizer or snack idea and the filling is totally customizable!

Another way to enjoy zucchini. These Grilled Zucchini Roll-ups are an easy appetizer or snack idea and the filling is totally customizable!

Hi Friends!

First of all, thanks so much for all the love on my 5th blogiversary yesterday! Be sure to check out my Best of the Bean post if you missed it!

Moving on to today. It’s time for another recipe round-up with some of my fav bloggers! In case you missed our past round-ups, check out my Mexican Black Bean Dip + 5 Healthy Black Bean Recipes and my Small Batch Chocolate Chip Cookies + 6 Ways To Use Almond Flour.

Today we picked a seasonally appropriate veggie to focus on – Zucchini!

You guys know I’ve been going zoodle crazy over here! I just shared 6 Quick & Easy Zoodles Recipes last week. So I decided to push my own limits and go beyond zoodles and zucchini bread (which would have been my next choice). Instead, I made you these fun little zucchini roll-ups. They make a fun appetizer or snack and can easily be customized using your favorite dips, meats, veggies, etc!

Another way to enjoy zucchini. These Grilled Zucchini Roll-ups are an easy appetizer or snack idea and the filling is totally customizable!

Here’s how I made mine:

There are no quantities needed here. You can make as many or as few as you’d like. It may take a little practice to slice your zucchinis to the thickness you want so you might want to buy an extra. Good thing they’re super cheap 🙂 I prefer them on the thinner side so you have more of a chance to taste what’s inside.

Another way to enjoy zucchini. These Grilled Zucchini Roll-ups are an easy appetizer or snack idea and the filling is totally customizable!

Feel free to change up the contents. Easily make them vegetarian or vegan by leaving out the meat. If you have a favorite dip that you want to use instead of hummus, go for it! (My Spicy Feta Dip would be good!) Just don’t fill them too full or they’ll be hard to roll.

[Tweet “These Grilled Zucchini Roll-ups from @leangrnbeanblog make a perfect appetizer or snack!”]

6 Healthy Zucchini Recipes for breakfast, lunch, dinner and dessert!

And now, just in case your garden or grocery cart is overflowing with zucchini, you’re also gonna want to try all of these recipes!

1 Min Flourless Chocolate Cake

Hello delicious. Everybody has one minute!

Healthy 1-Min Flourless Chocolate Cake
via Arman @ The Big Man’s World

Zucchini Corn Fritters with Black Bean Salsa

I could probably eat 27 of these in one sitting!

Zucchini Corn Fritters with Black Bean Salsa
via Sarah @ Making Thyme For Health

Goat Cheese, Tomato & Zucchini Frittata

Can you say breakfast perfection?!

Goat Cheese, Tomato & Zucchini Frittata
via Julia @ The Roasted Root

Banana Zucchini Oatmeal Cups

The perfect mid-morning snack!

Banana Zucchini Oatmeal Cups
via Alexis @ Hummusapien

Shredded Zucchini Breakfast Pizza For One

Get your veggies in at breakfast!

Shredded Zucchini Breakfast Pizza for One
via Kylie @ Yeah Imma Eat That

[Tweet “6 Healthy Ways To Eat Zucchini for any meal via @leangrnbeanblog!”]

Enjoy!
–Lindsay–

Filed Under: Appetizer, Snack Tagged With: Chicken, Feta, Hummus, Zucchini

Best of the Bean – Year 5

August 26, 2015 by Lindsay 35 Comments

Hi Friends!

Today’s a special day. My little blog is celebrating its 5th birthday! So hard to believe. You guys, SO MUCH has changed since I first started blogging. In the beginning, I had about 5 readers, blogged only about food,  didn’t use any social media, took terrible photos and used ridiculously corny blog titles. Instagram and Pinterest didn’t even exist and I didn’t know what Twitter was.

Over the past five years I’ve expanded by readership base considerably, started working with brands, made friends, figured out how to take decent photos, learned about SEO, joined a million different social media platforms, gone back to school, become a Registered Dietitian, become a mom and so much more.

It seems to be customary in these blogiversary posts to share a list of lessons learned about blogging. Since I know many of my readers are not bloggers, I’m going to do something a little different this year and share some blogging lessons via Periscope.  Have you heard of it? It’s another form of social media for you to add to your ever-growing list. Here’s an article that will give you the basics, but basically:

Periscope is a “live video streaming platform”, which basically means you can transmit a live recording of yourself to your Persicope and Twitter followers. Imagine Skyping someone, but instead of video calling a single person, you’re instead linked up to the whole community. Not only that, whoever’s watching you can comment and ask questions. These show up on your screen whilst broadcasting making it easy to answer and interact.

So anyways, I’ve been looking for an excuse to try out Periscope and this seemed like a good occasion. So, here’s the short list:

5 Things I Wish I Knew Before I Started Blogging:

  1. Define your ideal reader & write a mission statement for your blog.
  2. Choose quality over quantity.
  3. You cannot do it all.
  4. Know your worth.
  5. Remember why you started.

If you want hear me ramble on in more detail about each of these things, download the app and follow me on Periscope. Since it’s connected to Twitter,  you should find me under my twitter handle @LeanGrnBeanBlog. I’ll probably be broadcasting sometime around 3:00 PM (EST) but I make no guarantees. The good news is if you miss the live broadcast you can watch the replay for up to 24 hours. I’ll be posting the link on social media so you can check it out!

Healthy recipes from a Registered Dietitian during her 5th year of blogging.

So anyways, on to the main reason for this post. Every year I round up my best posts and recipes from that year of blogging and share them for you all together in one post. See previous Best of the Bean posts here.

Take a look and maybe you’ll find something you missed the first time around. I would LOVE it if you clicked through to a couple of recipes that look good and pinned them!!

Breakfast

Healthy Breakfast Ideas
Sausage & Egg Vegetable Bake
Berry Crunch French Toast Cups
Apple Cinnamon Blender Waffles
Egg Waffles
Double Chocolate Granola
Sweet Potato Waffles
Breakfast Nachos
Berry Green Smoothie
Pumpkin French Toast Bake
Pumpkin Apple Protein Pancakes


Appetizers/Sides

Healthy appetizer and side dish recipes
Mexican Layer Dip
Spicy Red Pepper Feta Dip
Easy Cucumber Tomato and Cucumber Salad
Chili Lime Corn
Pesto Corn Salad

Spicy Roasted Garlic Hummus


Lunches & Dinners

Healthy dinner recipes

Beef/Turkey/Pork
Crockpot Meatballs
Italian Wedding Soup
Beer Braised Pulled Pork
Mexican Skillet Casserole
California Turkey Burgers
Chili Cornbread Skillet
Paleo Turkey Sweet Potato Meatballs

Healthy dinner recipes with chicken

Chicken
Sweet & Spicy Bacon Wrapped Chicken
Freezer Chicken Tenders
Salsa Verde Chicken Casserole 
Zoodles with Chicken & Spicy Almond Butter Sauce
Grilled BBQ Chicken Salad
Kale Panzanella with Chicken Sausage
Sausage & Wild Rice Stuffing 
Thai Chicken Salad

Healthy tuna and shrimp recipes

Seafood
Baked Shrimp Cakes
Tuna Quinoa Cakes
Curried Tuna Salad with Apples
Spicy Shrimp Tacos
Shrimp Edamame Succotash
Paleo Shrimp Scampi

Healthy Vegetarian Recipes

Vegetarian 
Lentil Macaroni & Cheese
Crockpot Loaded Sweet Potatoes
Tex Mex Migas
Cheesy Cauliflower Mash Bowls
Ribollita *omit bacon*


Desserts

Healthy Dessert Recipes

Baked & No-Bake 
Banana Cream Pie Bars
Chocolate Avocado Pudding
Lemon Cashew Cream 
Gluten-Free Peanut Butter Chocolate Chip Bars
Almond Butter Banana Cookies
Small Batch Chocolate Chip Cookies
Pumpkin Cranberry Oat Bars

Healthy Dessert Recipes

Frozen 
Wild Blueberry Ice Cream
Wild Blueberry Yogurt Pops
Pumpkin Pie Peanut Butter Cups
Frozen Yogurt Pumpkin Pie Bites
Peanut Butter & Jelly Ice Cream Pie
Vegan Ice Cream Sandwiches

Looking for some new healthy dessert recipes? Here are 30 delicious dessert recipes from some of the best food bloggers around!

To celebrate my 30th bday, I rounded up desserts from my fav bloggers!

30 Healthy Dessert Recipes


Snacks

Healthy Snack Recipes

Pumpkin Energy Balls
Frozen Yogurt Bites
Almond Butter Protein Balls
Coffee Protein Shake
Wild Blueberry Mini Muffins
Pumpkin Gingerbread Muffins
Easy Pumpkin Bread
How To Roast Chickpeas
Homemade Raisin Newtons
Almond Sweet Potato Flatbreads
Wild Blueberry Energy Bars
10 Healthy Toddler Snacks

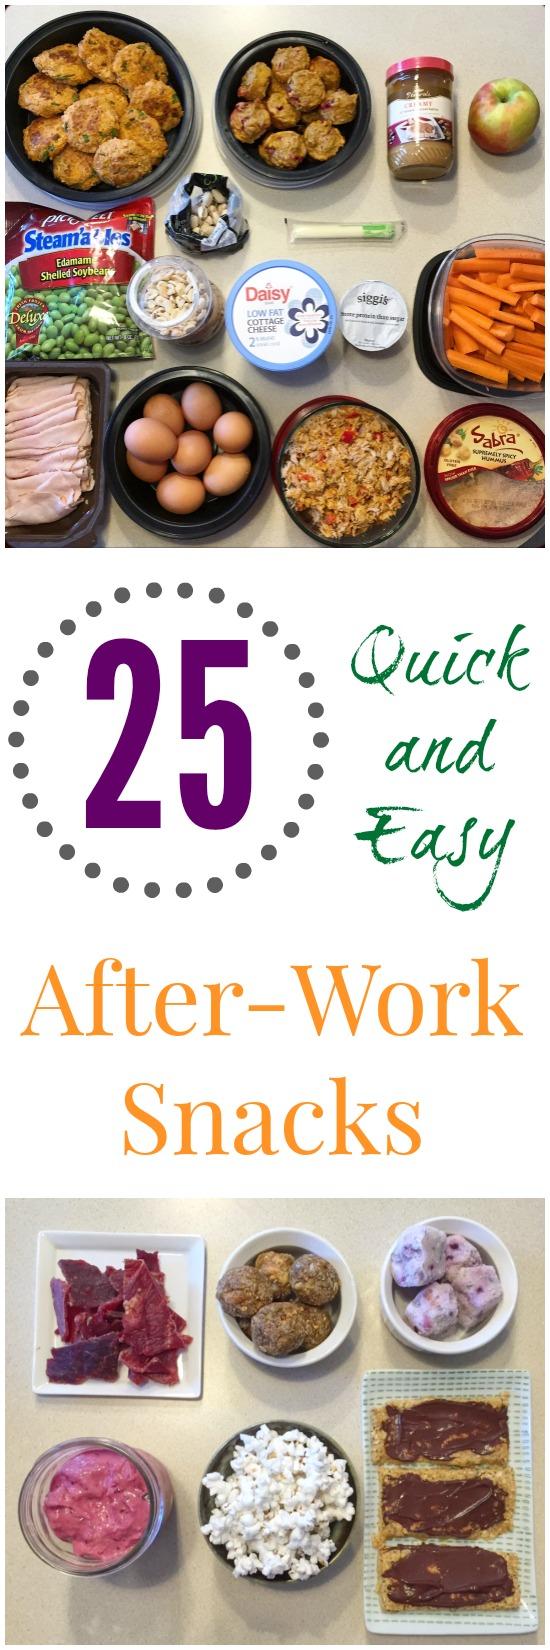
Here are 25 easy, healthy snacks you can have after work to tide you over until dinner!

25 Quick & Easy After Work Snacks


Homemade DIY

Healthy homemade recipes
Homemade Enchilada Sauce
Homemade Chocolate Milk
Salsa Yogurt Dressing
Maple Cinnamon Sunflower Seed Butter
Frozen Spinach Cubes
How To Make Chia Jam
How To Cook Spaghetti Squash
Homemade Oat Cereal For Babies 


Tips & Tricks

BOTB Tips & Tricks
7 Tips To Reduce Your Sugar Intake
20 Kitchen Tips and Tricks
12 Ways to Use Leftovers
5 Food Prep Tips For Beginners
Don’t Be Fooled By The Sugar Free Label
Tips For Gluten-Free Baking


Baby

BOTB 5 baby
10 Things That Surprised Me About Pregnancy
5 Traits I Hope Our Son Gets From His Dad
Introducing Baby Bean
Breastfeeding is Hard
10 Tips For New Moms
The Difference A Year Makes
Crossfit After Baby
I Want to Freeze Time
You’re Still a Great Mom If
How to Modify Baby Led Weaning
A Baby Wearing Workout

If you’re interested in my Dear Chase monthly letters or the occasional day in the life posts, you can find them here.


Weekly Meal Plans

Check out the direct links below!

A Week of Gluten-Free Meals
A Week of Slow Cooker Meals
A Week of Quick, Healthy Meals
A Week of Vegan Meals
A Week of Spring Meal Ideas
A Week of Grab and Go Meals
A Week of Kid Friendly Meals
A Week of Paleo Meals
5 Easy Weeknight Dinners
A Week of 5 Ingredient Meals
A Week of No Cook Meals
A Week of Grilled Meals
A Week of Summer Meals
A Week of Dairy-Free Meals
A Week of Meals Featuring Blueberries
A Week of Meals with Chicken
A Week of Spiralized Meals
A Week of Meals Featuring Nuts and Seeds


Other

A couple other notable posts:

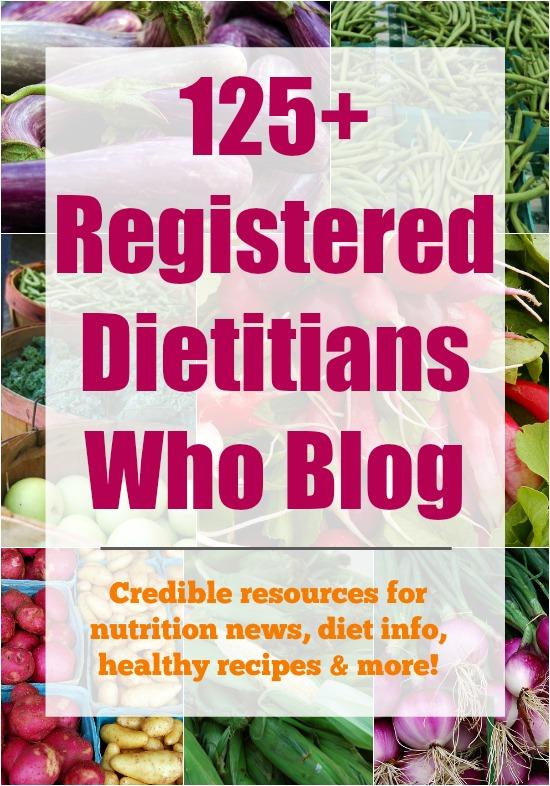
Have nutrition questions? Here are 125 Registered Dietitians who blog - great CREDIBLE resources in the online world!

Registered Dietitians Who Blog

CrossFit1803
We opened our own Crossfit gym.
Crossfit 1803

[Tweet “All the best recipes from @leangrnbeanblog’s 5th year of blogging!”]

Thank you so much to each and every one of you who reads this blog, whether it’s every day or just occasionally. Your support means the world to me and I wouldn’t be where I am today without you guys!

Enjoy!
–Lindsay–

Filed Under: Uncategorized

6 Quick and Easy Zoodles Recipes

August 22, 2015 by Lindsay 16 Comments

These 6 quick and easy zoodles recipes are ready in 15-20 minutes and easy enough to make after a long day of work.

Taco Zoodles

Hi friends!

If you follow me on social media, you’ve probably noticed hubby and I have been eating zoodles like crazy this summer. Hubby loves them and requests them often and I’ve taken on the challenge of coming up with a variety of ways to eat them so we don’t get bored.

This isn’t your typical food blogger post where you will see a well-tested, perfectly styled recipe.

This is real life.

6 Quick and Easy Zoodles recipes to eat for dinner on a busy night.

Be sure to PIN THIS for later!

All six of these dishes are things we’ve eaten for dinner in the past two weeks. I spent about 10 seconds snapping a photo with my iphone in between trying to get food on the table for hubby, feeding a screaming baby and washing dishes.

There are no exact quantities, no measuring cups, no recipe testing.

Just simple, basic meal ideas that we enjoyed and I thought you guys might as well. (Especially since you go crazy over these posts on Instagram!)

Onward!
Paleo Shrimp Scampi

Paleo Shrimp Scampi. Ok so I lied. This one actually does have a recipe. I shared this Paleo Shrimp Scampi on the blog a few weeks ago and it’s been a big hit. I make it often for us because it only takes about 10 minutes and it’s just a few ingredients. I never measure…just heat some butter in a pan, toss in some garlic, onion, peppers and shrimp. Sprinkle with basil and oregano and add some zoodles for the last few minutes to heat through.

Pesto Zoodles with Corn

Pesto Zoodles with Corn. This was a simple side dish I whipped up one night while hubby was grilling chicken.  I lightly sauteed some corn, peppers and onions and then mixed in some pesto, paprika and zoodles and served it alongside some grilled chicken with bbq sauce.

Sweet and Spicy Zoodles

Sweet and Spicy Zoodles. Add whatever veggies you have on hand to the pan. Throw in some leftover grilled chicken, pork, tofu, whatever protein you want. Add zoodles, some sweet Thai chili sauce and some sriracha and heat through.

Shrimp with zoodles, bacon and mozzarella

Shrimp & Bacon Zoodles with Fresh Mozz. Saute some garlic, bacon, onion and your fav veggies over high heat. Add shrimp. Toss in some zoodles and some chopped fresh mozzarella at the end.

Spaghetti Zoodles with Chicken Sausage

Spaghetti Zoodles with Chicken Sausage. A twist on classic spaghetti. Garlic, onion, a bag of frozen veggies, some baby bok choy and a bell pepper sauteed with some chicken sausage. Topped off with zoodles, tomato sauce and mini mozzarella balls.

Taco Zoodles

Taco Zoodles. Peppers, onions, black beans, corn and ground turkey sauteed with cumin, cayenne and paprika. Add zoodles and heat through. Top with cheese, salsa and guacamole!

[Tweet “Six quick and easy ways to eat zoodles for dinner from @leangrnbeanblog”]

Let’s chat:
What’s your favorite way to eat zoodles?!

Enjoy!
–Lindsay–

Filed Under: Dinner, Ingredient Round-Ups, Lunch Tagged With: Zucchini

Baked Shrimp Cakes

August 21, 2015 by Lindsay 6 Comments

These Baked Shrimp Cakes are cooked straight from frozen. Prep them ahead of time to stock your freezer and enjoy an easy dinner during a busy week. 

These Baked Shrimp Cakes are cooked straight from frozen. Prep them ahead of time to stock your freezer and enjoy an easy dinner during a busy week.

Hi Friends!

Time for another Recipe Redux post! The theme for this month was “Back to the Dinner Table”.

After the hustle and bustle of the holiday/vacation season, August is the time many families get ‘back to routine.’ Show us your favorite recipe to help families get ‘back to the dinner table.’ It might be a favorite family recipe from your childhood that you’ve ReDuxed; or maybe it’s your family’s current favorite. Let’s all gather back at the table!

After seeing this theme, I knew immediately that I wanted to create a freezer-friendly recipe. So that’s exactly what I did! These shrimp cakes are designed to be prepped ahead of time, making them a perfect addition to your Sunday Food Prep! They need to be frozen before baking, so make a couple batches, throw them in the freezer and then pull them out and put them straight in the oven on a busy night.

I used my food processor to make these. It takes less than 5 minutes and clean-up was a breeze!

Here’s how you make them:

Like I said, these are designed to make ahead of time and cook from frozen. The cake mixture will be wet and kinda sloppy but freezing will help them stick together.

These Baked Shrimp Cakes are cooked straight from frozen. Prep them ahead of time to stock your freezer and enjoy an easy dinner during a busy week.

You can add all sorts of flavor to these. I used sriracha and lime juice for my first batch. Next time I’m definitely making them with Old Bay! I’d probably add about a tsp of dried seasonings or about 1-2 Tbsp of liquids like sriracha depending on how hot you like them.

These Baked Shrimp Cakes are cooked straight from frozen. Prep them ahead of time to stock your freezer and enjoy an easy dinner during a busy week.

While they’re baking you could whip up a quick sauce to top them with – I’m thinking an avocado yogurt sauce would be good…or even just some salsa!

So there you have it! Although I haven’t tried it, these would probably also work with a meaty white fish like cod!

[Tweet “These Shrimp Cakes from @leangrnbeanblog are baked straight from frozen for an easy weeknight dinner!”]

Enjoy!
–Lindsay–

For more dinner ideas, check out the links below:

An InLinkz Link-up


Filed Under: Dinner Tagged With: Bell Pepper, Garlic, Onion, Panko, Shrimp

Lemon Cashew Cream

August 19, 2015 by Lindsay 22 Comments

This recipe for Lemon Cashew Cream is so simple and flavorful you’d never guess it’s vegan. Pair it with fresh berries or use it to make a no-bake tart for dessert!

This recipe for Lemon Cashew Cream is so simple and flavorful you'd never guess it's vegan. Pair it with fresh berries or use it to make a no-bake tart for dessert!


Hi Friends-

We’re changing gears from CrossFit back to food today! I have a delicious recipe to share with you guys that I whipped up a few weeks ago! I’ve been wanting to make another cashew cream for a while now. Pretty much ever since last summer when I made these Blueberry Cashew Bars! Since those are a frozen treat, I decided to go a different route this time and just focus on the cream itself. I figured if I could make it taste good, it would be a pretty versatile ingredient that could be used in a variety of desserts.

This recipe for Lemon Cashew Cream is so simple and flavorful you'd never guess it's vegan. Pair it with fresh berries or use it to make a no-bake tart for dessert!

I actually ended up liking it best just drizzled over some fresh summer fruit, but I also made some bite-sized tarts while my parents were in town. I made a date/almond crust, pressed it into mini muffin tins, filled with the lemon cream and topped each one with a strawberry!

Let your imagination run wild here- there are tons of ways you could use this! It’s pretty much perfect for a summer dessert!

Here’s the recipe:

Pretty simple, right?

This recipe for Lemon Cashew Cream is so simple and flavorful you'd never guess it's vegan. Pair it with fresh berries or use it to make a no-bake tart for dessert!

If you wanted to make this a bit thicker for a tart or something, just use a little less water.

This recipe for Lemon Cashew Cream is so simple and flavorful you'd never guess it's vegan. Pair it with fresh berries or use it to make a no-bake tart for dessert!

I spooned this into a ziploc and piped it over the berries but you could add more water or lemon juice to thin it out a bit and just drizzle it straight from the jar.

Store it in the fridge for a week or so while you enjoy it!

[Tweet “This 4 ingredient Vegan Lemon Cashew Cream from @leangrnbeanblog is perfect over fresh fruit!”]

Enjoy!
–Lindsay–


Filed Under: Dessert Tagged With: Cashew, Lemon, Maple Syrup

CrossFit 1803

August 18, 2015 by Lindsay 39 Comments

Located in Lewis Center, Ohio (just north of Columbus), CrossFit 1803 is a small, family-friendly CrossFit gym that feels like a second home!

CrossFit 1803

Hi Friends!

So, as I’ve mentioned a few times, the last few months have been a little crazy.

Hubby and I, along with our business partner & friend Pat, opened our very own Crossfit gym!

The whole process has been quite a whirlwind. Within just a couple months, it went from a pipe dream to reality. We formed an LLC, became an official CrossFit affiliate (we chose CrossFit 1803 because 1803 is the year Ohio became a state), found a location, negotiated a lease, wrote an operating agreement, bought equipment, etc.

Then, once we got the keys, Hubby, Pat & I (along with Jackie- my BFF & Pat’s girlfriend) totally overhauled the space, including cleaning, painting everything but the bathrooms, laying rubber flooring, installing a rig, mounting our computer system and tvs, assembling shelving, setting up equipment (and more!) in just 12 days.

The gym went from this:

CrossFit 1803

to this:

CrossFit 1803

Each day I put together a little video of what we accomplished to post on our Instagram page (follow us!). Now that we’re all done, I put all those videos together into one so you can see the transformation!

Pretty crazy, right?!

CrossFit 1803

It was a lot of long days (and nights) at the gym and then even later nights coming home to work on all my other work…but it was totally worth it to see it up and running now!

CrossFit 1803

We had an opening workout and kickoff on August 2nd and were fully up and running on August 5th. The rest of the photos in this post were taken by our amazing photographer friend Jessica (ignore the fact that some of them look blurry bc I had to compress them for the blog!)

Gym:

CrossFit 1803

Lobby:

CrossFit 1803

So we’ve been at it about 2 weeks now and it’s been amazing.

CrossFit 1803

Squish has pretty much been living at the gym and he’s been such a trooper. It was challenging during the buildout as he was very mommy-attached and we were there for really long days…plus tools laying around, it was hot, etc…but we got through it. Now he comes with us every day for workouts and he’s getting more and more used to the place. He has his own office for naps and his own bucket of gym toys.

CrossFit1803

We’re really focusing on building a community, not just a gym.

From our website:

This is a passion project.  We are turning our vision into a reality- “Home”. We’ll measure success not by how many pounds were lifted or lost, but by the amount of ENCOURAGEMENT, determination, and effort given, and how many people improved from the day before. As unlikely as it may sound, we KNOW that a workout can be the best hour of your day. This will be as much as a home to those who workout here as the place they lay their head at night. It will be an inviting atmosphere, with your typical barbells, kettlebells, and rubber flooring, but we want to hang your family picture out in the lobby because this is OUR Home. You can’t wait to get here and attack a workout with your usual crew, celebrating their efforts as well as your own. You’ll end up hanging around afterwards for a morning cup of coffee, in your usual mug, because you genuinely want to learn more about these people. After all, they discovered right alongside you that they are capable of so much more than they ever thought.

CrossFit 1803

CrossFit 1803

CrossFit 1803

CrossFit 1803

We’ve already got some amazing members and our little community is growing every day! I couldn’t be prouder of how everything turned out. Check out our website and if you’re ever in Columbus, be sure to drop by for a visit!

Cheers to dreams coming true, hard work paying off and all the new adventures yet to come!

Enjoy!
–Lindsay–

Filed Under: Uncategorized

4 Mini-Meals For Lunch

August 14, 2015 by Lindsay 12 Comments

Thanks to Sargento® Foods for sponsoring this post.

Hi Friends!

Can you believe it’s almost August? That means we’re pretty much at the hottest point of the year. We’ve had a fairly rainy summer here in Ohio but for the past week or so we’ve finally gotten some sun and had some hot days. I don’t know about you, but when it’s hot out, the last thing I want to do is sit down to a heavy meal in the middle of the day. I want something light and refreshing that I can eat quickly. Remember that I have a 9 month old who now crawls around at warp speed, which doesn’t leave me a lot of time for a sit down lunch.

But that doesn’t mean I’m willing to sacrifice nutrition or flavor. Lately I’ve found myself eating more of what you might call a mini-meal for lunch and then sneaking another one in mid-afternoon during naptime. I’ve really been focusing on putting together a balanced meal that has enough protein to keep me full for the next couple of hours. I want something that’s quick to prepare, easy to eat and packed with protein. Over the past month or so, I’ve been coming up with lots of different combos for these mini-meals to carry me through the mid-day slump.

4 Mini Meal Ideas that will fill you up but not weigh you down!

Over the past couple weeks I’ve come up with some pretty delicious mini-meal combos so I thought I’d share a few of them with you today! For me they’re the perfect balance of protein and carbs and they keep me full and satisfied for a few hours without leaving me feeling overly full or sluggish. They’re the perfect way to add a protein punch to your midday meal!

Each of these meals include a variety of Sargento® Natural Cheese Snacks. With 4-8 grams of protein per serving, they’re a natural source of protein to help fill you up and boost your energy. In fact, Sargento® Natural String Cheese Snacks have 8 grams of protein per serving, which is more than a serving of almonds (about 23 almonds) or a hard-boiled egg! Added bonus- they come in 14 different varieties and are easy to eat at-home or on the go!

Here are some of the combos I’ve been loving lately:

Meal Meal - Lettuce wrap, crackers and fruit

Bibb leaf lettuce + 2 slices turkey + Sargento® Colby Jack Natural Cheese Snack
Strawberries
Crackers

Mini Meal: chicken wrap and apple slices

Wheat tortilla + chicken + avocado +Sargento® Pepper Jack Natural Cheese Snack
Salsa for dressing
Apple slices

Mini meal- hummus and veggies, cheese and sweet potato mini muffins

 Sargento® Natural Blends Cheddar-Mozzarella Cheese Snack
Snap peas + carrots + cherry tomatoes + hummus
Mini sweet potato banana muffins

Mini Meal - PB&J Crackers, cheese and fruit

Grapes
Sargento® Natural String Cheese Snack
PB + J cracker sandwiches

I’m a fruit lover so most of these include fruit, along with whole grains, healthy fats like avocado, hummus and peanut butter, and protein from the cheese sticks, chicken, turkey, etc!

Let’s chat:

Are you a mini-meal lover? What are some of your favorite combos?!

For more smart snack ideas visit the Sargento® website!

Enjoy!
–Lindsay–


Filed Under: Lunch, Sponsored

Thai Chicken Salad

August 12, 2015 by Lindsay 29 Comments

This Thai Chicken Salad is light, crunchy and refreshing, perfect for lunch or dinner on a hot day. Make a big batch and eat the leftovers all week!

This Thai Chicken Salad is light, crunchy and refreshing, perfect for lunch or dinner on a hot day. Make a big batch and eat the leftovers all week!

This post is part of my ongoing partnership with Fitfluential and Kohl’s. I was compensated for my time. All thoughts and opinions are my own.

Hi Friends!

Time for the third post in the #makeyourmove series of posts I’m working on over the next couple months! In case you missed the first two, check out my previous posts: A Babywearing Workout & How To Food Prep- 5 Tips For Beginners.

For today’s post, I challenged myself to try a new fruit or vegetable. Sometimes I find myself stuck in a produce rut, always choosing the same options as I wander the aisles at the grocery store. There are so many things I haven’t tried yet so this year I’m making more of an effort to try some new ones! First on my list, jicama. I’ve always been intrigued by jicama because quite frankly, it’s so ugly. It couldn’t possibly taste good, right?

jicama

Wrong. It’s delicious.

Wondering what exactly jicama is? This post from Cooking Light gives some great info about it. They describe it as a cross between a water chestnut and a pear. I would agree with that, although I think it tastes more like a less sweet pear or apple than a water chestnut.

This Thai Chicken Salad is light, crunchy and refreshing, perfect for lunch or dinner on a hot day. Make a big batch and eat the leftovers all week!

To use it, just peel it with a veggie peeler and slice or chop it. It can be eaten raw or cooked quickly in things like stirfry.

y peeler

I’ve been loving my Y Peeler lately to peel things like jicama and carrots!

So, how did I use my jicama? In a new lunch recipe. I’ve had a few requests for more packable lunch recipes lately and this is my new favorite! You can make a big batch all at once and eat it all week!

Here’s how you make it:

Pretty easy, right? Once it’s made you can store in a big bowl in the fridge or portion into individual containers to make packing your lunch a snap! I prefer glass containers even though they can make your lunchbox a little heavier.

This Thai Chicken Salad is light, crunchy and refreshing, perfect for lunch or dinner on a hot day. Make a big batch and eat the leftovers all week!

Like I mentioned in the recipe notes, feel free to play around with the ingredients. Use all one color cabbage, a pre-bagged cabbage mix, or use all broccoli slaw and leave out the cabbage.

I like my salads pretty lightly sauced. If you want yours to have more sauce, try making 1.5 times the sauce.

Now it’s your turn! I’m challenging you to try a new fruit or vegetable this week! Leave a comment and tell me which one you’ll try. Have kiddos? Make it more fun by taking them to the store with you and letting them pick out something new- then figure out how to use it!

[Tweet “Light, crunchy and refreshing, try this Thai Chicken Salad with jicama from @leangrnbeanblog!”]

Enjoy!
–Lindsay–

This post is sponsored by FitFluential on behalf of Kohl’s.

Filed Under: Dinner, Lunch, Sponsored Tagged With: Bell Pepper, Broccoli Slaw, Chicken, Peanut Butter, Rice Vinegar, Soy Sauce

A Day In The Life – 9 Months

August 5, 2015 by Lindsay 25 Comments

Hi Friends!

It’s hard to believe it’s been 3 months since I did my last day in the life post. Now that Squish is 9 months old, I thought it was about time to do another one.

So here’s a look at how our day went yesterday:

day1

5:00 AM- Get up and feed the animals. Go back to bed.

6:30 AM – Squish wakes up. I get him from his crib, change his diaper and we head downstairs to start the day. He’s typically in a pretty good mood when he wakes up and is happy just playing in his pen and watching a little tv. I sit on the couch, drink my coffee, read blogs, answer emails and do some work.

8:30AM – Give Squish a bottle, say bye bye to daddy and then I eat my breakfast…with a sidecar of Cheerios that I toss into the pen a few at a time so Squish can stay busy fetching and eating them while I eat 🙂 After breakfast we play and spend some time crawling around the kitchen.

IMG_1339

9:15 AM – Naptime. I put Squish to sleep in his crib. This is a new thing as of last week. Up until then I’d just put him down for a nap on the couch beside me but our trip to the doctor gave me the push I needed to start transitioning him to napping in the crib and putting him to sleep in the crib at night instead of letting him fall asleep on the couch and then moving him to the crib. It’s going pretty well so far. Once he’s asleep I head downstairs to get some work done…and do some online shopping for a new camera since mine is dying.

9:45 AM – Squish wakes up. Typically this nap is 45 min – 1 hour. On this day, it was about 25 minutes. Whomp whomp. For the next couple hours, we usually play around the house, but yesterday I decided to take him on a little excursion.

IMG_1361

The past couple weeks have been crazy with trying to work and open the gym so I’m trying to take advantage of the fact that things have slowed back down. I put him in his swimsuit and took him to the splash pad fountains at a nearby shopping center.

He wasn’t thrilled with them. The water was kinda cold and it wasn’t super hot out. He didn’t cry, and after half an hour or so he did crawl towards them a little bit…but he spent most of his time chewing on the sunscreen bottle and watching the other kids running around.

He did fall asleep on the car ride home though, which is what I was hoping for…and then I sat in the driveway for another 15 minutes when we got home so he could get a bit more sleep.

day2

11:45 AM – Daddy comes home from work and we all eat lunch + Squish gets another bottle, then dad entertains Squish for a little while so I can get some work done.

day 3

1:30 PM – Naptime. Marcus joins Squish in the nursery for a nap while I work. He sleeps for about an hour and wakes up in a terrible mood. I think the past couple weeks caught up to him because he woke up screaming and didn’t stop for 45 minutes. He finally cried himself to sleep on the floor of his playpen, which he never does, and slept for another 30 minutes or so.

day4

3:45 PM – This time when he wakes up he’s in a better mood. This is typically when we all start to get restless after being in the house all day and usually take the dogs for a walk…but it’s been too hot for them lately so I put Squish in the stroller and we walk to the park. It’s hot, but we stay mostly in the shade and he has a great time crawling around, standing and even doing a little balancing with no hands!

4:30 PM – We head home to cool off and drink some water. Squish is practicing drinking from a real cup and he’s doing pretty well!

day 5

5:00 PM – Daddy comes home, changes and grabs a snack while I get a bottle and the diaper bag ready. We head to the gym around 5:15. Class starts at 5:45. We’re still experimenting with how things will work as far as watching Squish, both of us working out, etc. On Monday, I put him down for a nap right when we got to the gym and he slept for about 3/4 of the class. Then my friend Jackie watched him since she had worked out earlier in the day so we were able to both finish the class.

Yesterday we had a longer wod so we didn’t have a strength part of the class, so I set up his pen in the gym while we warmed up, then put him down for a nap (the gym has two offices so we use one as his napping room)  and we were both able to wod. I’m sure there will be days when one of us is taking a rest day, or where one of us will have to wod at 5:45 while the other watches him and then we’ll switch for the 7:00 class. We’re just taking it day by day and it’s going well so far. We hung out after the workout for an hour or so and then headed home.

IMG_1417

8:15 PM – Dinner. True life messy kitchen shot. This is pretty typical. Hubby sits at the island, I stand and eat my dinner while simultaneously adding bites of food to Squish’s tray.

IMG_1420

8:45 PM – Family walk around the neighborhood. (Dad’s feet are missing from the pic!).

IMG_1425

9:15 PM – Bedtime for Squish. I give him his last bottle (that’s his “ugh mom why are you using the flash” face) and put him to bed in the crib.

9:45 PM – I write this blog post, answer emails and do more work.

12:00 AM – Shower and bed.


So there you have it! If you like these posts, check out my 3 Month and 6 Month posts!

Enjoy!
–Lindsay–

Filed Under: Uncategorized

  • « Go to Previous Page
  • Page 1
  • Interim pages omitted …
  • Page 31
  • Page 32
  • Page 33
  • Page 34
  • Page 35
  • Interim pages omitted …
  • Page 65
  • Go to Next Page »

Primary Sidebar

Lindsay Livingston The Lean Green Bean Healthy Living Tips and Tricks

I'm a Registered Dietitian and mom of three from Columbus, Ohio. I use this blog to share simple, healthy recipes, nutrition tips, and an honest glimpse of motherhood!

Learn More →

Questions? Comments? Email me: [email protected]

The Lean Green Bean Facebook The Lean Green Bean Instagram The Lean Green Bean Pinterest The Lean Green Bean Twitter The Lean Green Bean Feed
footer-logo
The Lean Green Bean Facebook The Lean Green Bean Instagram The Lean Green Bean Pinterest The Lean Green Bean Twitter The Lean Green Bean Feed
Recipes

Breakfast
Dinner
Snack
Slow Cooker

Kids

Cooking With Kids
Favorite Gifts
Toddler Meals
Indoor Activities

Resources

Easy Packed Lunches for Kids
Dinner Spark
Snack Spark
Ultimate Guide to Food Prep

About

Meet Lindsay
Become an RD
Work with Me

The Lean Green Bean is a participant in the Amazon Services LLC Associates Program, an affiliate advertising program designed to provide a means for sites to earn advertising fees by advertising and linking to amazon.com.
Read the full privacy and disclosure policy here.

Copyright © 2022 · The Lean Green Bean

Join the conversation!

Get my free weekly email where I share recipe ideas, products we use and love and an honest look at life with 3 busy kids!

[email protected]