• Skip to main content
  • Skip to primary sidebar

Learn how food affects your body. Get Free Nutrition Info Today

the-lean-green-bean-logo
  • Home
  • Recipes
  • Kids
  • Resources
    • Ebooks
    • Food Prep
    • Videos
    • Snack Round-Ups
    • Gift Guides
  • About
    • Become An RD
    • Work With Me
  • Search
the-lean-green-bean-logo
  • Home
  • Recipes
  • Kids
  • Resources
    • Ebooks
    • Food Prep
    • Videos
    • Snack Round-Ups
    • Gift Guides
  • About
    • Become An RD
    • Work With Me
  • Search

blog

A Week of 5 Ingredient Meals

May 23, 2015 by Lindsay 10 Comments

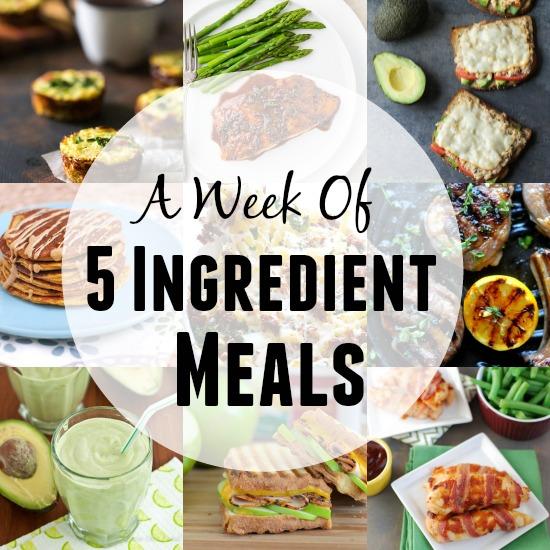
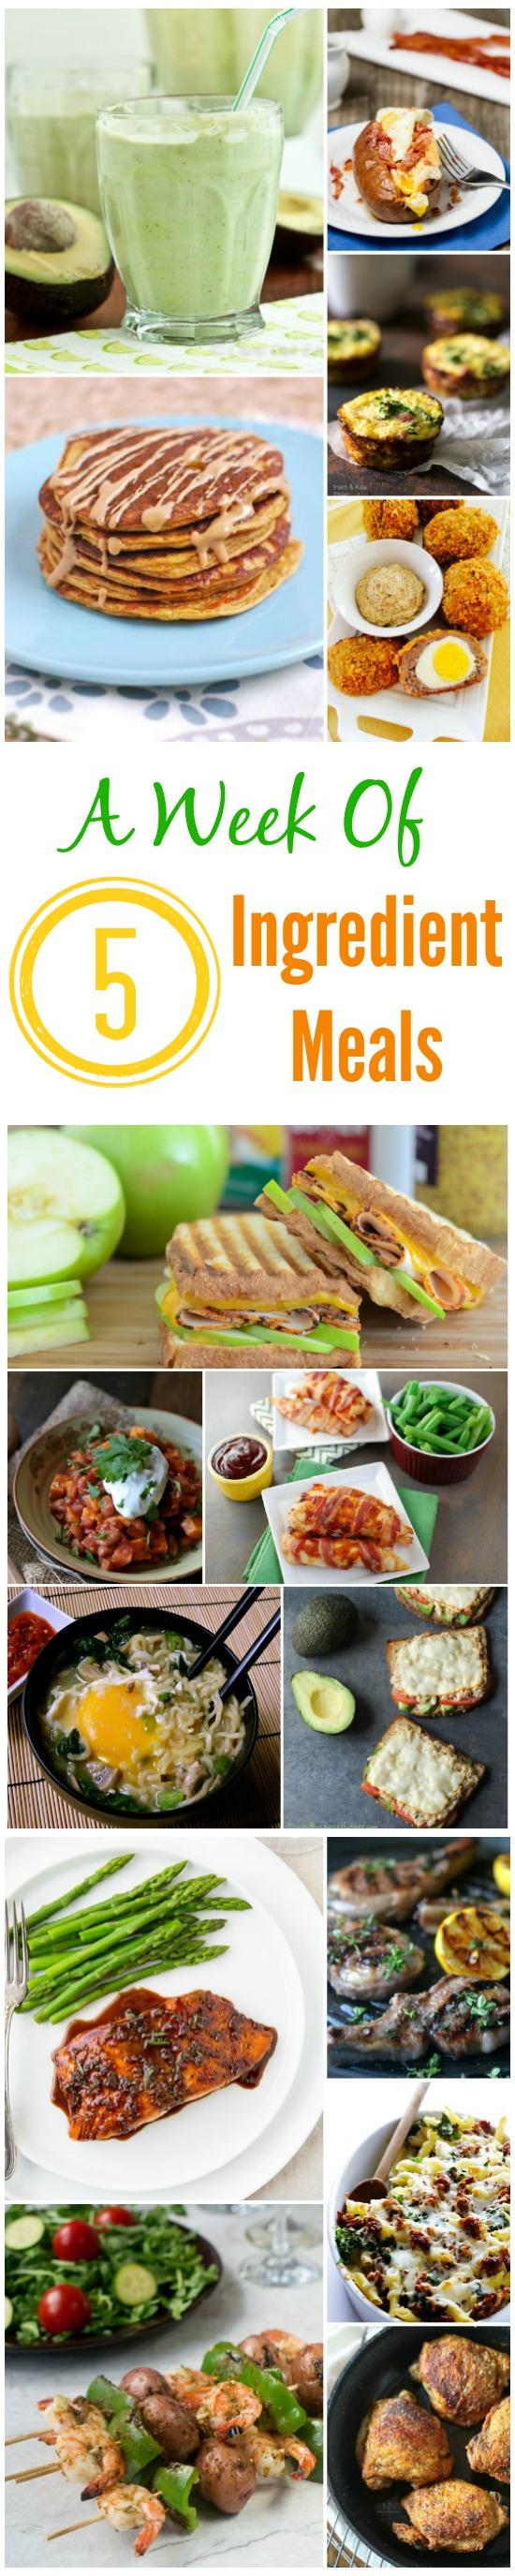
Need some simple new meal ideas? Try one of these 5 ingredient meals this week for something new, healthy and easy!

5 ingredient meals

Hi Friends!

We’re back with another week of meal ideas! This week I rounded up some nice, simple meal ideas! They’re all made with 5 ingredients or less, not counting spices and things like that, so they can come together quickly and without a lot of effort!

Need some quick, easy meal ideas? These recipes can all be made with 5 ingredients or less!

Hope you see something that strikes your fancy!

Breakfast

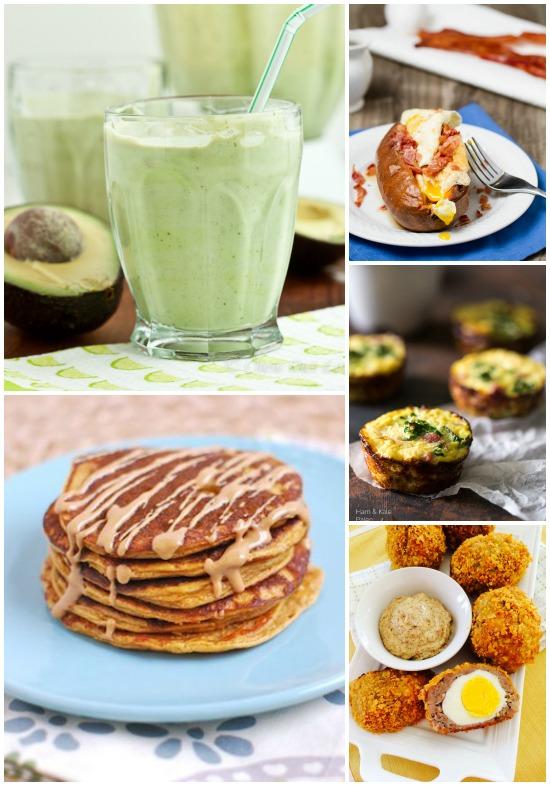
5 breakfast recipes you can make with 5 ingredients or less!

  • Breakfast Stuffed Sweet Potatoes via Ari’s Menu
    • Feel free to throw some veggies on there as well!
  • Egg Muffins with Ham and Kale via Food Faith Fitness
    • Perfect for a quick grab and go breakfast.
  • Sweet Potato Protein Pancakes via The Lean Green Bean
    • No protein powder required!
  • Avocado Coconut Smoothie via Chew Out Loud
    • Thick, creamy and packed with nutrients.
  • Baked Scotch Eggs via Left Side of the Table
    • A different way to enjoy eggs for breakfast!

Lunch

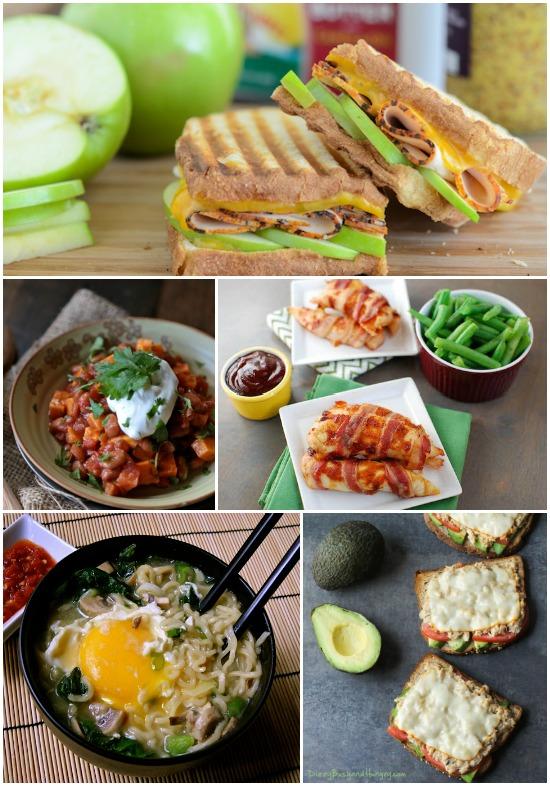
5 lunch recipes you can make with 5 ingredients or less.

  • 20 Minute Sweet Potato Chili  via Wanna Be A Country Cleaver
    • Make a big pot and enjoy for lunch all week!
  • Quick Ramen Bowl via Budget Bytes
    • So much better than the pre-packaged kind!
  • Apple, Cheddar & Turkey Panini via The Novice Chef
    • Not your average lunchbox sandwich.
  • Sweet & Spicy Bacon Wrapped Chicken via The Lean Green Bean
    • Make these for dinner, then eat the leftovers for lunch. Throw them in a tortilla with some avocado and cheese to change things up!
  • Avocado Tuna Melt via Dizzy Hungry & Busy
    • Avocado adds some extra nutrition to a classic!

Dinner

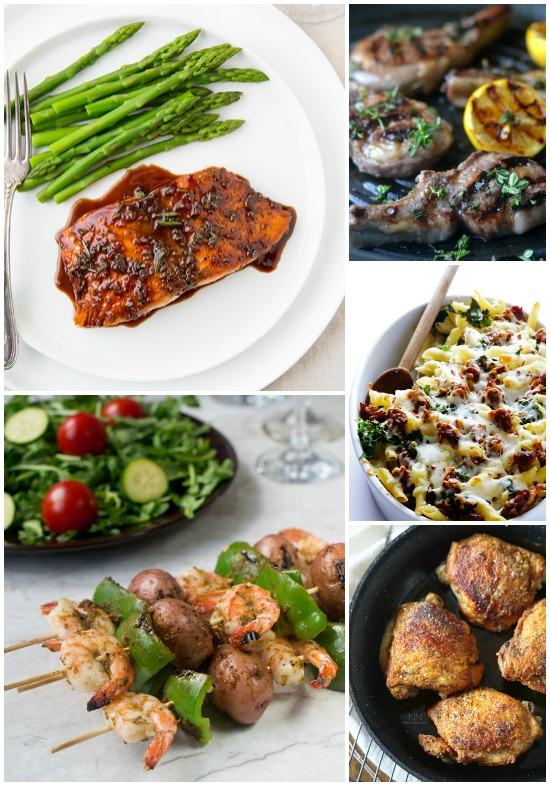
5 dinner recipes you can make with 5 ingredients or less.

  • Lemon Thyme Lamb Chops via The View From Great Island
    • Sounds fancy but they’re super simple to make!
  • Crispy Pan Roasted Chicken Thighs
    • Change things up from chicken breast. Serve with veggies and rice for an easy dinner.
  • Balsamic Glazed Salmon
    • A simple glaze that adds so much flavor!
  • Grilled shrimp and potato kebabs
    • Fun for the grill!
  • Italian Sausage Kale Baked Ziti
    • Fulfill your pasta craving!


Looking to do a little food prep based on this menu? You could:

  • Make a batch of sweet potato pancakes. Just warm and top with nut butter the morning of.
  • Make some scotch eggs for a grab and go breakfast.
  • Make some egg cups to eat throughout the week.
  • Make a batch of chili.
  • Prep some sweet and spicy chicken so all you have to do is bake it, or bake it and reheat later.
  • Prep your kebabs for the grill.
  • Make some ziti
  • Prep easy side dishes to go with this meals like steamed or roasted veggies, quinoa, rice or another grain, etc.

weekly meal plans

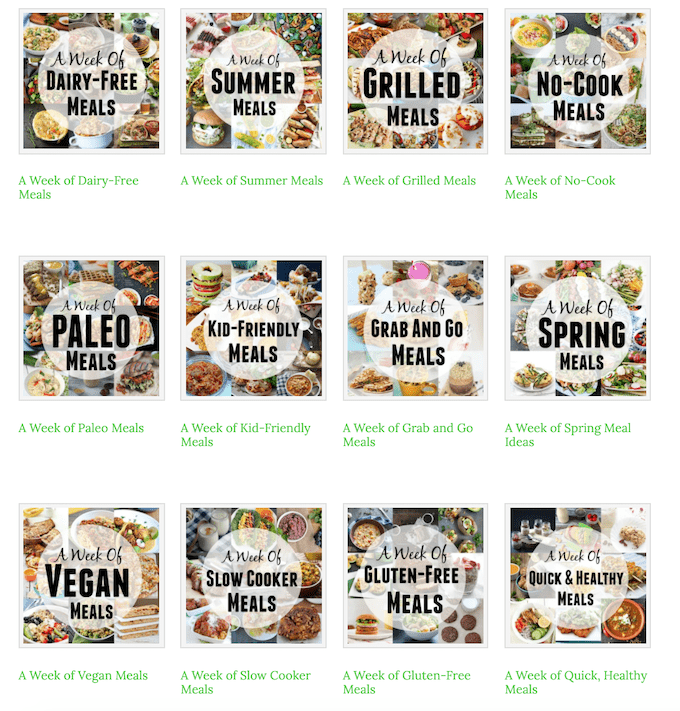
Want more ideas? Check out the full gallery of weekly meal plans here.


Enjoy!
–Lindsay–

Filed Under: Ingredient Round-Ups, Weekly Meal Plans

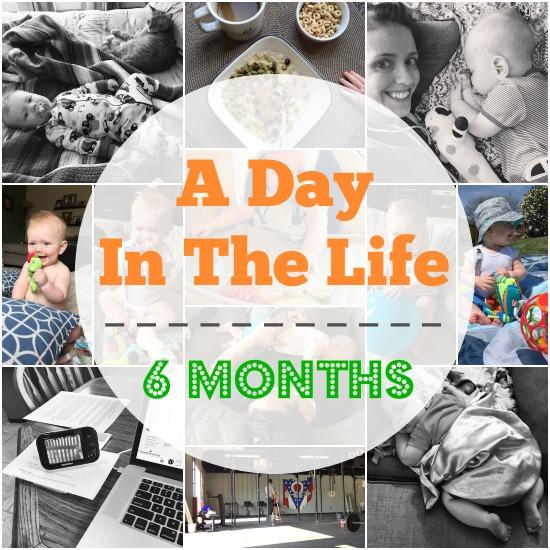
A Day In The Life – 6 Months

May 22, 2015 by Lindsay 15 Comments

Hi Friends!

It’s been about 3 months since I did my last day in the life post, so I thought I’d throw together another one. I know not everyone is interested in these but I do get questions about our schedule so I thought I’d share! Plus I like looking back on them 🙂

day in the life

Note, all of these pics aren’t from the same day and of course our schedule varies day to day but this should give you a rough idea of how we spend our time! So here we go:

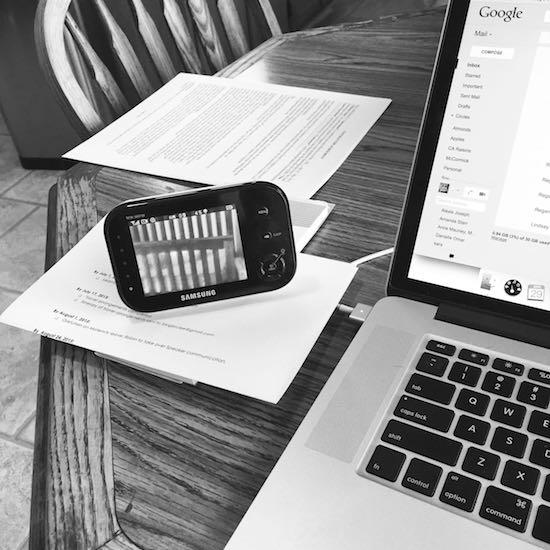
6:00 – I get up and feed the animals. I usually spend about 30 min on the computer while they eat, go outside etc. If I’m super busy with deadlines and work I’ll stay up , if not, back to bed.

morning wakeup 6 months old

7:30/8:30 – Squish wakes up sometime in this hour window usually. I get him from his crib and bring him into our bed for a little while to chat with daddy, wake up, etc…then we head downstairs and eat while dad gets ready for work. Note- he’s only been sleeping in his crib overnight for about a week. I was planning to start the transition when we got back from Minnesota and while we were there he went several nights without waking up to eat around 5am like he had been doing previously so I knew he was ready to drop that early morning feeding and it seemed like a good time to transition to the crib.

IMG_7452

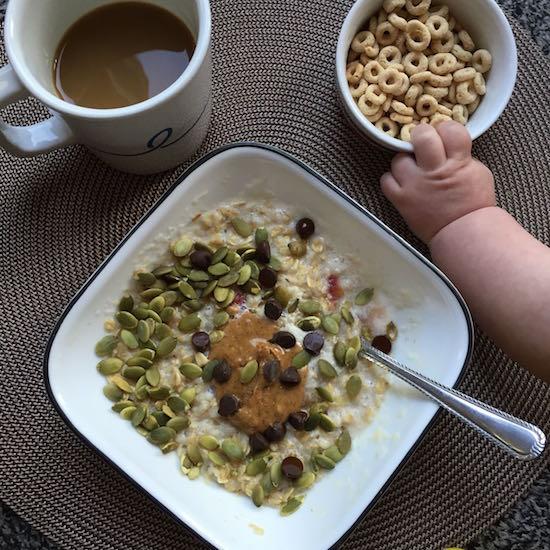
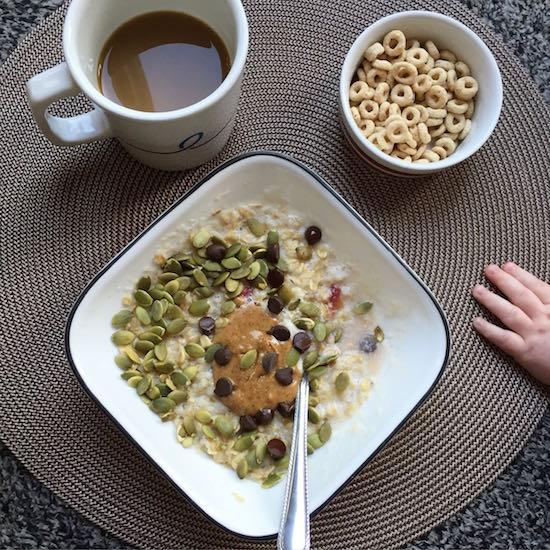
I give him a bottle, then get my oatmeal ready. We sit on the floor and I eat my oats, while feeding him Cheerios to distract him from sticking his fingers in my bowl.

playing baby 6 months old

We play for a while. He’s usually in a great mood in the morning but only likes to stay up for a hour to an hour and a half after he wakes up before he starts to get tired again.

napping baby

9/10am – Sometime around this time he does down for a nap, depending on when he woke up. I usually just let him nap on the couch and once he falls asleep I grab my computer and get to work.

IMG_6297

I try to cram as much work as possible into naptime. He usually takes his best nap in the morning and it typically lasts 1.5- 2 hours.

6 months old

11/11:30 – He typically wakes up from his nap. We play some more and I typically let him play by himself for at least a little while while I sit nearby and chat with him while I work or head to the kitchen and do some recipe development while he plays. I want him to be able to play independantly and not just when he has someone to entertain him.

6 months

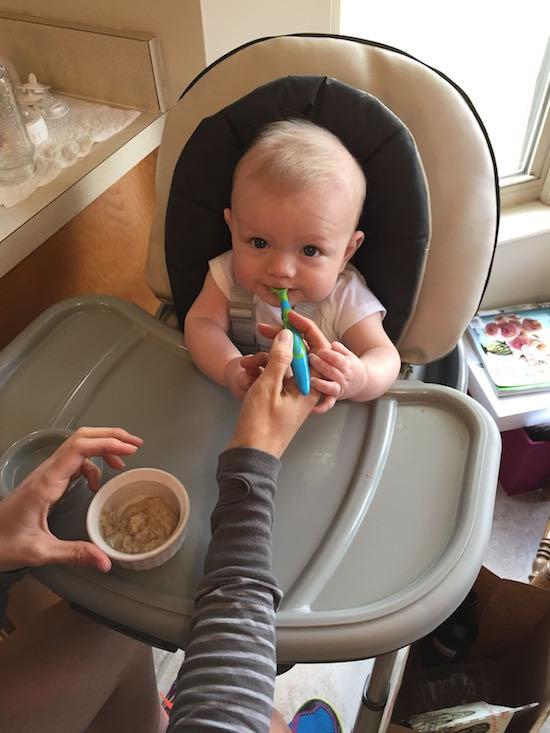
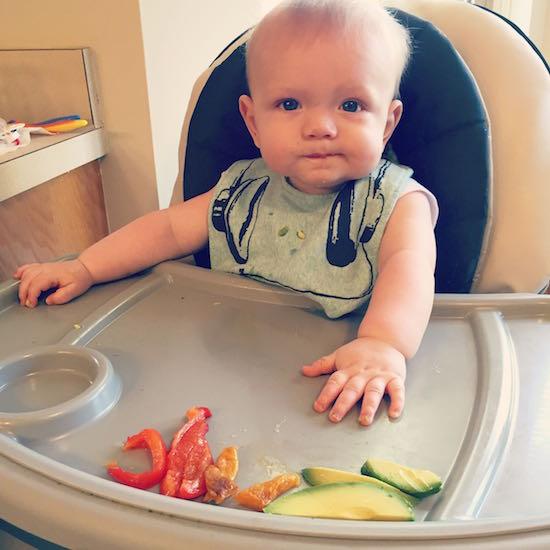
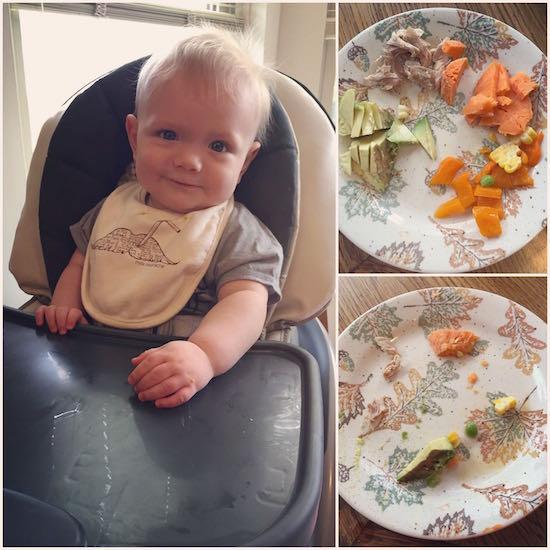
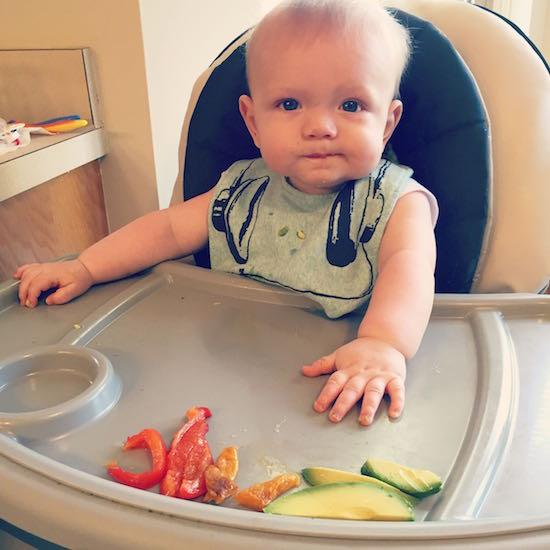
12/12:30 – Daddy comes home for lunch. He eats and I put Squish in his high chair so he can eat to. After that he hangs with dad for a little bit and I try to inhale some food or take pictures or work a little more.

6 month old baby

1:30ish – He gets another bottle and typically goes down for another nap. This time I usually put him down on the bed upstairs. Then it’s a race against the clock because I never know how long he’s sleep but this is when i try to cram in my picture taking, more work, etc and occasionally a workout if i can’t get to the gym for some reason (like when we had several weeks of evening swim classes). He usually sleeps 1-1.5 hours if I’m lucky.

IMG_6347

3:00 – When he wakes up, we play, throw the ball for Tucker, sit outside if it’s nice, walk the dogs, etc. He gets another bottle around 4:30/5.

IMG_6398

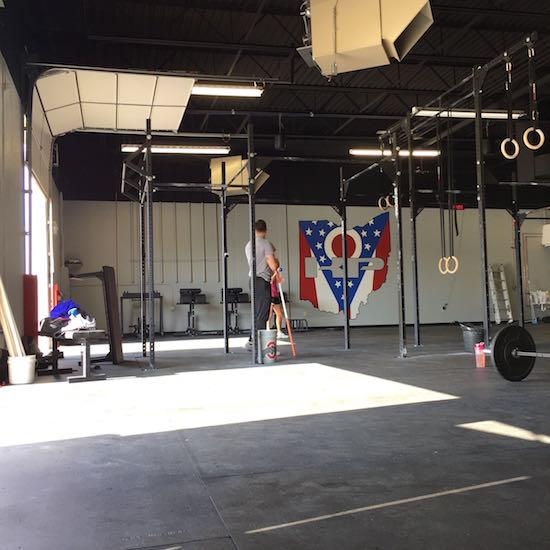
5:15- Dad comes home. I pass him off and go get ready to workout. I head to Crossfit while Squish and dad hang.

IMG_6378

They usually end up napping  around 6 and are typically still sleeping when I  get home.

6 months

6:30/8 – Squish wakes up. This nap is super variable. Sometimes he wakes up right when I get home, sometimes he sleeps til 7:30 or 8. Whenever he wakes up we head downstairs to hang out while dad works out. If we’re eating dinner early because it’s a rest day or are out to dinner or with friends or something, he’ll get some more finger foods to keep him busy while we eat…it just depends on the timing of our dinner that night.

IMG_7342

9:00 – He gets his last bottle of the night around this time and then we get him ready for bed. Around 9:30 I give him his oatmeal (it’s actually a mix of oatmeal, scrambled egg and prunes. It’s quite the mixture but he loves it). This helps get him nice and full before bed and right now he’s going about 11 hours without eating overnight.

IMG_6632

9:30/10 – Squish goes to bed on the couch around this time. Yes, we could bring him upstairs but he sleeps fine on the couch and we like having him close by 🙂 Hubby and I eat dinner, watch tv and I typically do more work, especially early in the week when I’m busiest.

12/12:30 – I head to bed. I bring Squish up and put him in his crib, read a little bit and then fall asleep!


I know this isn’t the most typical schedule, but it’s working for us right now and I think that’s the most important thing I’ve learned as a parent – Do what works for you and don’t worry about anyone else!

Enjoy!
–Lindsay–

Filed Under: Uncategorized

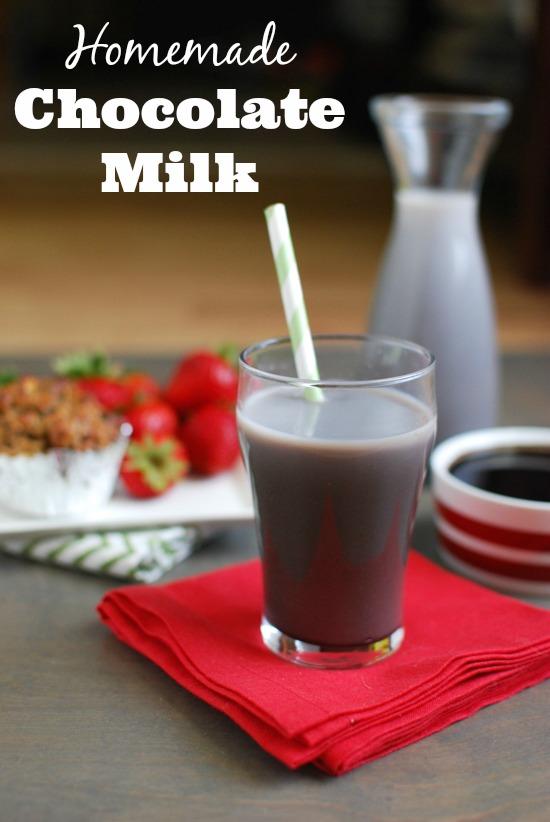
Homemade Chocolate Milk

May 21, 2015 by Lindsay 17 Comments

Made with just 4 simple ingredients, this homemade chocolate milk can be made quickly and without all the added ingredients in the storebought version!

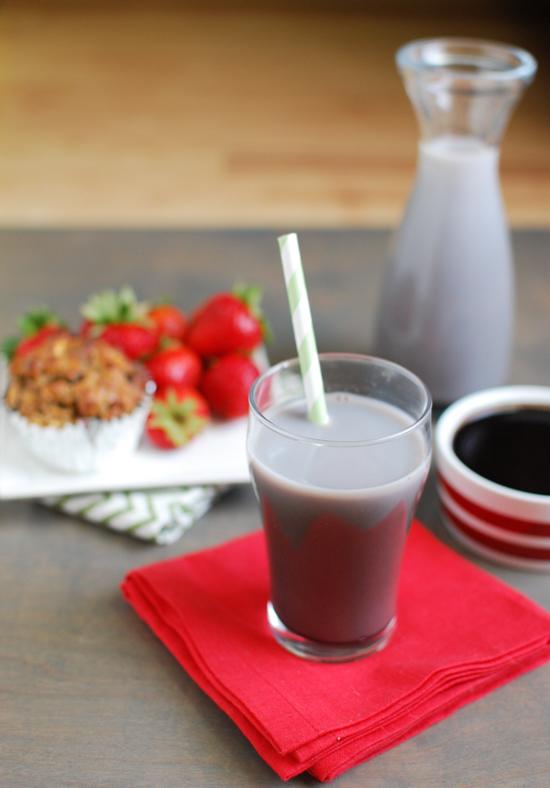
Homemade chocolate milk made with just 4 simple ingredients!

Hi Friends!

It’s Recipe Redux time again! The theme for this month was:

DIY Kitchen Essentials

What favorite kitchen staples do you now make from scratch – but in the past you purchased? Show us your best DIY recipe for keeping cupboards, fridge or freezer stocked with healthy basics. Think homemade frozen waffles, salad dressing, broth or other kitchen essentials.

Skip the store bought and make your own homemade chocolate milk with just 4 simple ingredients!

When I saw this theme I knew immediately what I was going to make. Hubby has been drinking a lot of chocolate milk lately and I’ve been looking at the ingredient lists of a lot of different brands. Turns out I’m not crazy about any of them. I knew there had to be a way I could easily make it at home so that I’d have control over the ingredients so I headed to the kitchen and got to work.

I figured the easiest way would be to just throw everything in a blender and give it a whirl.

Not so much.

I added milk, cocoa powder and some maple syrup, which I chose because I figured it would mix better with liquid milk than granulated sugar, blended it up and served it to hubby – who immediately told me it tasted too chalky. Plus the cocoa powder started to separate out almost immediately, so it was back to the drawing board.

For my second attempt I decided to make a chocolate syrup of sorts. I mixed the maple syrup with some water to dilute it a bit, boiled it and then added the cocoa powder.

Perfect! It doesn’t actually turn into a thick syrup, more of just a chocolate liquid that I then added to regular milk, gave it a stir and voila! Chocolate milk that the hubby gave a thumbs up!

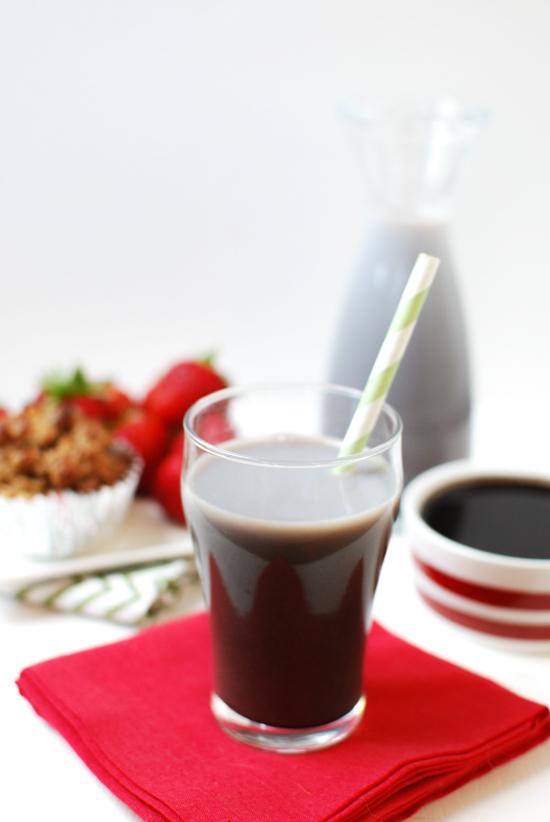
Homemade chocolate milk with just 4 simple ingredients!

Honestly, the most challenging part of creating this recipe was taking the photos 🙂

So here’s how you make it:

Print

Homemade Chocolate Milk

homemade chocolate milk 4 2
Print Recipe

5 Stars 4 Stars 3 Stars 2 Stars 1 Star

No reviews

An easy, 4-ingredient version of chocolate milk you can make at home.

  • Author: Lindsay L

Ingredients

Scale
  • 1 cup water
  • 1/2 cup maple syrup
  • 1/3 cup unsweetened cocoa powder
  • milk of choice (cow, almond, soy, etc)

Instructions

  1. In a small saucepan, combine the water and maple syrup and bring to a boil.
  2. Reduce heat, add cocoa powder and stir until well mixed.
  3. Let simmer for 5 minutes.
  4. Remove from heat and store in a glass jar in the fridge.
  5. When you’re ready to make your chocolate milk, simply give the jar a good shake and then add some of the chocolate mixture to your glass and stir to combine.
  6. I would start with 1 tablespoon and add more as needed to reach your desired chocolate flavor!

Did you make this recipe?

Tag @theleangreenbean on Instagram

The cocoa powder starts to separate out a little bit in the chocolate mixture but not nearly the way it did the first time. Just give the jar a quick shake or stir before you add some of the mixture to your milk and you should be good to go!

a
[Tweet “Homemade Chocolate Milk with just 4 simple ingredients from @Leangrnbeanblog!”]

Let’s chat:
Are you a chocolate milk lover? I’m not but hubby thinks it’s the bee’s knees.

Enjoy!
–Lindsay–

See the links below to check out what other homemade goodies people came up with:

An InLinkz Link-up


Filed Under: Snack Tagged With: Cocoa Powder, Maple Syrup, Milk

Salsa Verde Chicken Casserole

May 20, 2015 by Lindsay 21 Comments

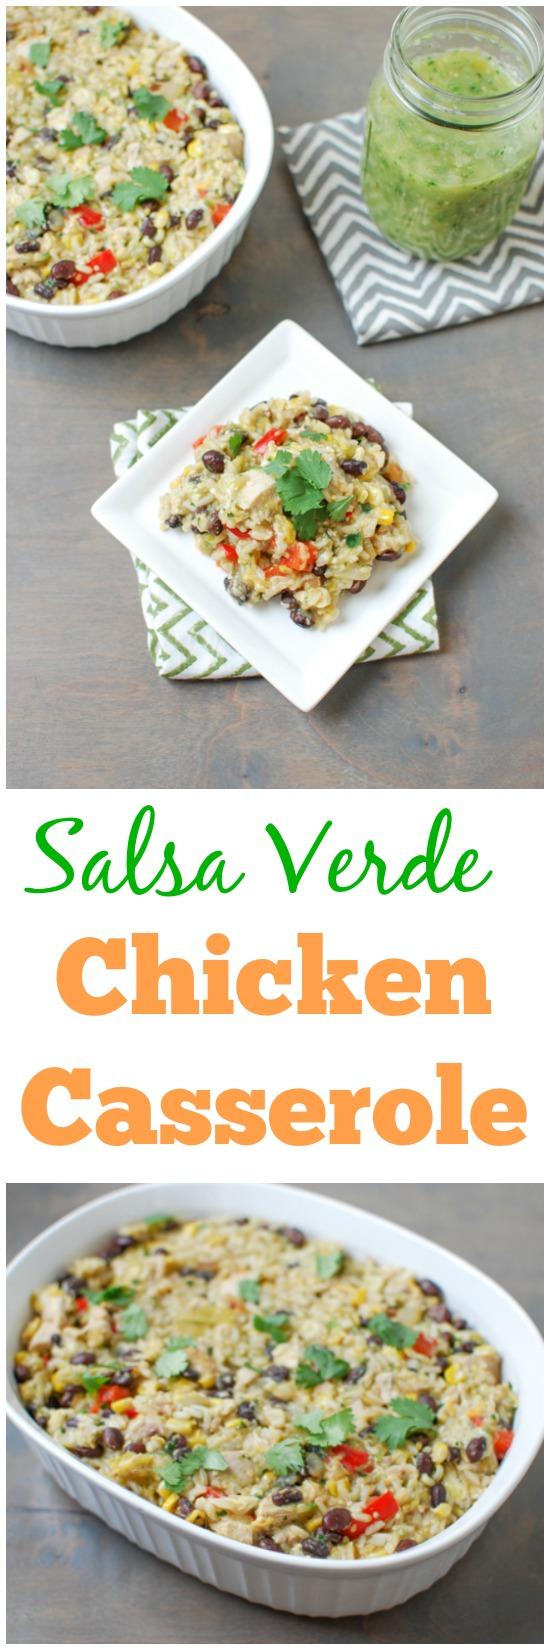
This Salsa Verde Chicken Casserole is packed with flavor and super simple! The perfect recipe for a busy weeknight dinner and you’ll have leftovers to pack for lunch!

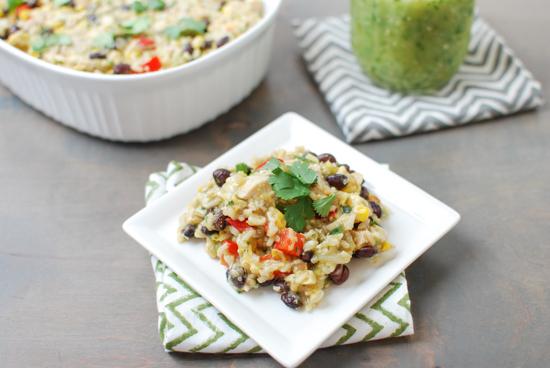
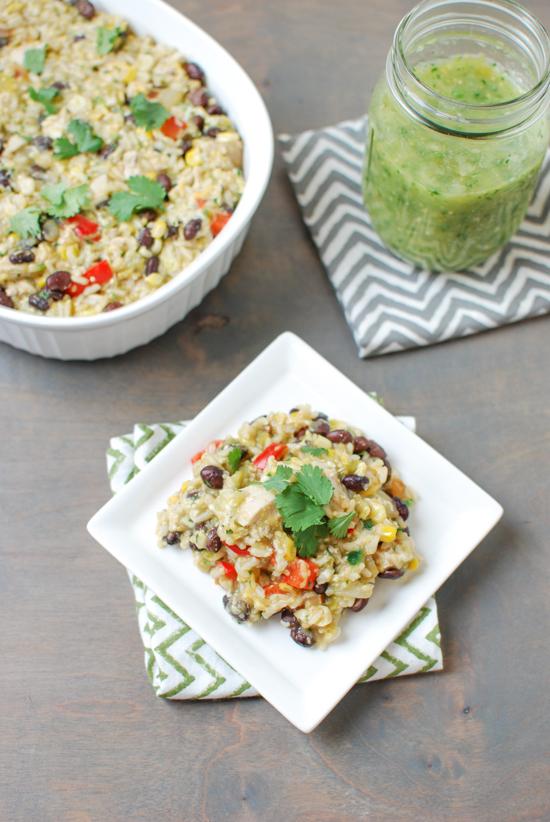
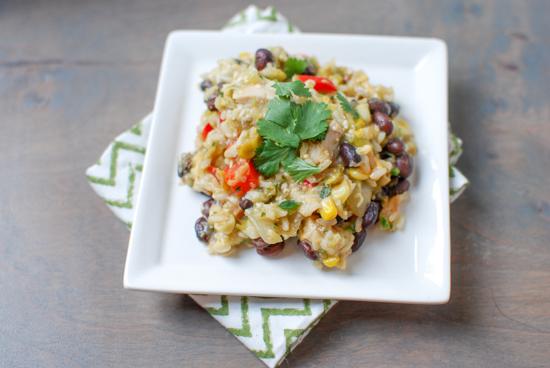
This Salsa Verde Chicken Casserole is easy to make and full of flavor! The perfect recipe for a busy weeknight dinner.

Hi Friends!

I have another easy dinner recipe for you today! I was walking through the grocery store the other day and I saw some tomatillos that were pretty much begging to be turned into salsa. A couple years ago I learned how to make Homemade Salsa Verde and it’s SO easy! So I came home and whipped up a double batch, which then inspired me to make this casserole.

This Salsa Verde Chicken Casserole is easy to make and full of flavor! The perfect recipe for a busy weeknight dinner.

If you use pre-cooked chicken, this casserole comes together super quickly but even if you start from scratch it can be ready in about 30 minutes!

This Salsa Verde Chicken Casserole is easy to make and full of flavor! The perfect recipe for a busy weeknight dinner.

Here’s how you make it:

Print

Salsa Verde Chicken Casserole

Salsa Verde Chicken Casserole 5
Print Recipe

5 Stars 4 Stars 3 Stars 2 Stars 1 Star

5 from 1 review

This Salsa Verde Chicken Casserole is easy to make and full of flavor! The perfect recipe for a busy weeknight dinner.

  • Author: Lindsay L
  • Prep Time: 25 minutes
  • Cook Time: 10 minutes
  • Total Time: 35 minutes
  • Yield: 4 1x

Ingredients

Scale
  • 2/3 cup brown rice, uncooked
  • 1 pound chicken
  • 1/2 cup onion, diced
  • 1 cup red peppers, diced
  • 1 cup corn
  • 1 cup black beans
  • 1 tsp cumin
  • 2 cups salsa verde
  • 2/3 cup shredded cheese
  • optional toppings: cilantro, avocado, cheese, salsa

Instructions

  1. Cook rice according to package directions.
  2. Dice and cook chicken if needed, or use pre-cooked chicken.
  3. Make salsa verde if you’re making it homemade.
  4. In a large pan, saute onion, peppers, corn, beans and cumin for 5 minutes.
  5. Add cooked rice, cooked chicken, salsa verde and cheese and mix well.
  6. Top as desired and serve warm.

Did you make this recipe?

Tag @theleangreenbean on Instagram

Feel free to use store-bought salsa verde, or make your own. For my recipe, scroll down to the bottom of this post. I like to make mine extra spicy! Make a double batch and make some of my Pork Chili Verde as well!

Salsa Verde Chicken Casserole

Change things up and use farro, quinoa or whatever else you desire instead of rice or easily make it vegetarian by leaving out the chicken!

[Tweet “Make this Salsa Verde Chicken Casserole from @leangrnbeanblog for dinner this week!”]

Dinner is served!

Enjoy!
–Lindsay–

Filed Under: Dinner Tagged With: Bell Pepper, Cheese, Chicken, Corn, Rice, Salsa Verde

5 Easy Weeknight Dinners

May 19, 2015 by Lindsay 12 Comments

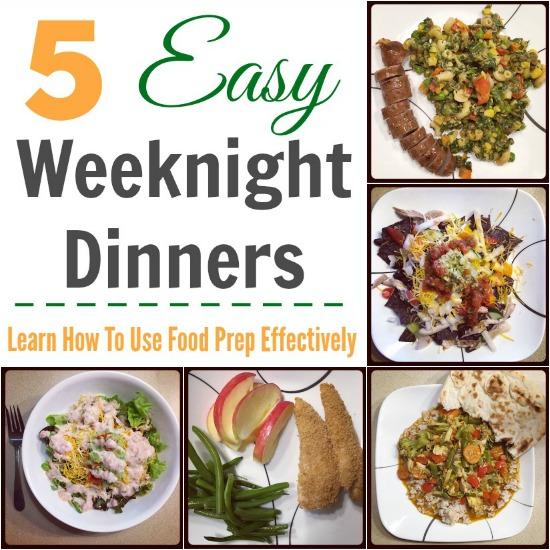
Need quick and easy weeknight dinners? Learn how to use food prep effectively to make it easy to throw together healthy and delicious weeknight meals!

Need quick and easy weeknight dinners? Learn how to use food prep effectively to make it easy to throw together healthy and delicious weeknight meals!

Hi Friends!

My apologies for not posting a food prep post for the past couple of weekends! Hubby was traveling a few weeks ago so my prep was smaller than normal and then two weekends we were heading out of town so I didn’t prep. But have no fear! I got back on track last weekend so I’ll have prep to share with you on Sunday. In the meantime, I thought I’d make it up to you by showing you how I use some of my food prep to make easy weeknight dinners.

Need quick and easy weeknight dinners? Learn how to use food prep effectively to make it easy to throw together healthy and delicious weeknight meals!

I was planning to share a Weekly Eats post today but decided this might be a fun way to change it up. Hopefully it’ll show you why I think food prep can be so helpful. I don’t share pics of my dinner nearly as much as I used to but these are all meals we eat regularly and my Sunday food prep definitely makes them easy to throw together!

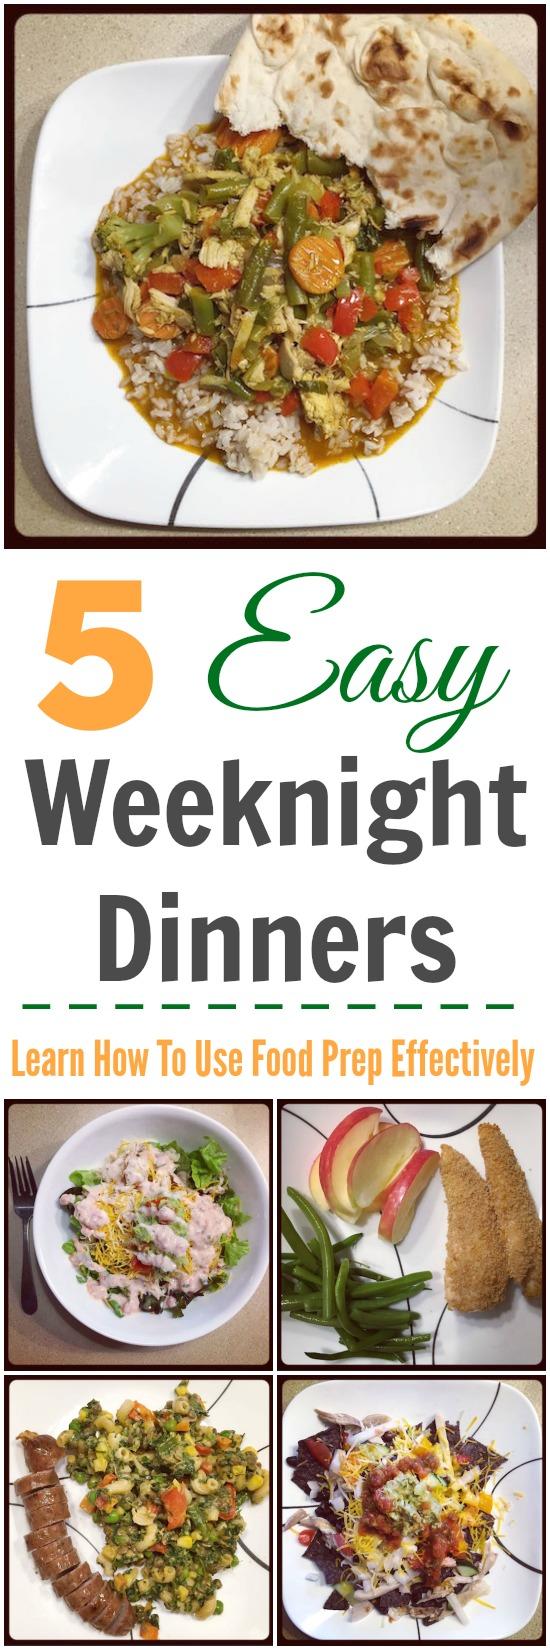
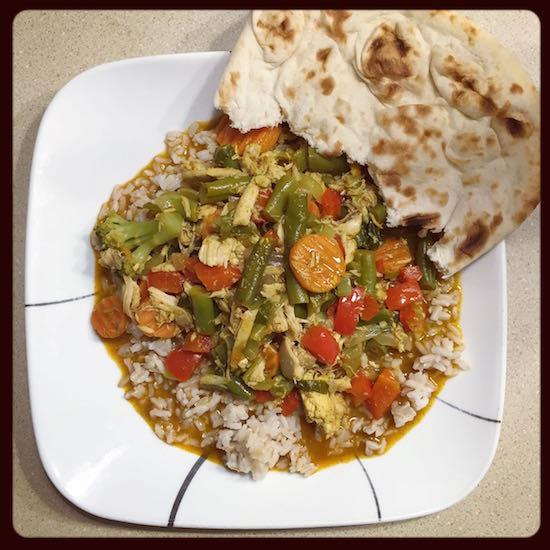
Lentil Chicken Curry

Curry with Rice & Naan

Food Prep Options:

  •  Prep the whole dish and just reheat to eat throughout the week.
  • Roast a chicken
  • Cook some lentils  (don’t forget you can cook extra and freeze them for later!)
  • Cook some rice

During the week:

  • Simply throw some frozen veggies in a pan, add some coconut milk, curry paste, chicken and/or lentils and heat through. Warm up some rice and some frozen naan from the freezer (I like Trader Joe’s) and dinner is ready in 15 minutes or so!

Recipes:

  • Lentil Veggie Curry (add chicken or another meat if you desire)
  • Crockpot Rotisserie Chicken 

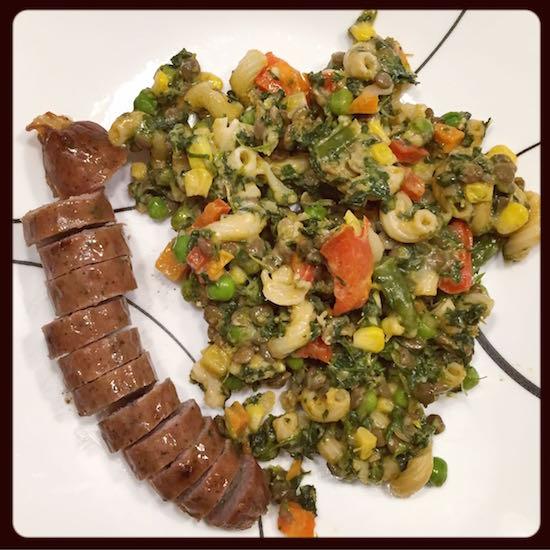
Lentil Mac & Cheese with Sausage

Mac & Cheese with Chicken Sausage

Food Prep Options:

  • Prep the whole dish and just reheat to eat throughout the week.
  • Cook some lentils  (don’t forget you can cook extra and freeze them for later!)
  • Cook some quinoa, farro, wheatberries, etc if you don’t want pasta.
  • Prep your favorite meat (chicken, pork, etc)

During the week:

  • Cook pasta (or get out another grain you’ve prepared) according to package directions. While pasta is cooking, saute veggies (fresh or frozen). Add some of the pre-cooked lentils or meat you prepped, along with a little milk and cheese and stir to combine. Or simply pan-sear a pre-cooked chicken sausage to heat it up and serve on the side.

Recipes:

  • Lentil Veggie Mac & Cheese
  • Crockpot Rotisserie Chicken 
  • How To Sprout Lentils

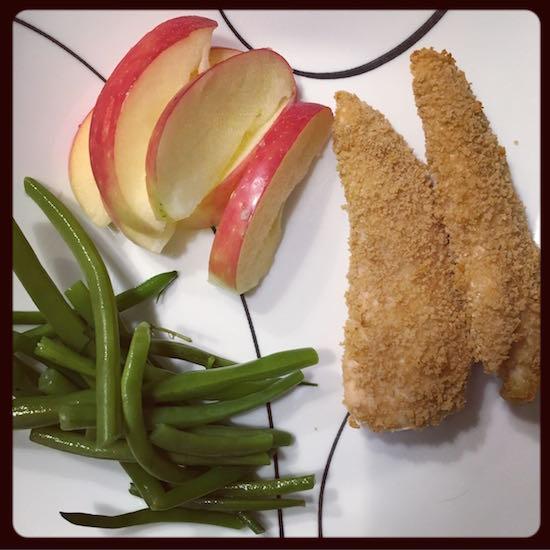
Freezer Chicken Tenders

Chicken Tenders with Veggies & Fruit

Food Prep Options:

  • Prep several batches of chicken tenders and freeze them.
  • Prep some fresh veggies.

During the week:

  • Simply take out a batch of chicken tenders and throw them in the oven. Serve with fruits and veggies and your favorite dipping sauce.

Recipes:

  • Freezer Chicken Tenders

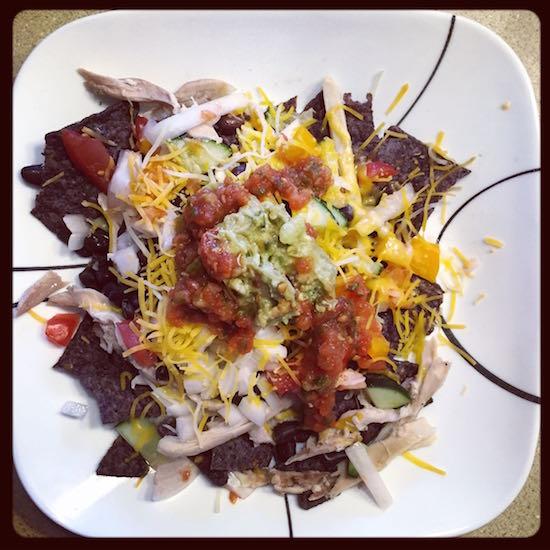
Nachos

Nachos

Food Prep Options:

  • Prep your protein of choice – beans, chicken, pork, ground beef or turkey.
  • Chop peppers and onions.
  • Prep a bag of Crockpot Cilantro Lime Chicken and Freeze
  • Make homemade salsa or guacamole

During the week:

  • Top tortilla chips with protein of choice, pre-chopped veggies and cheese and heat in the microwave or oven. Add salsa and avocado and serve!
  • Or, pull the cilantro lime chicken out one morning and let it cook in the crockpot all day, then serve over chips and top with cheese and salsa.

Recipes:

  • Beer Braised Pulled Pork
  • How To Cook & Freeze Beans
  • Crockpot Rotisserie Chicken
  • Crockpot Cilantro Lime Chicken
  • Black Bean Guacamole

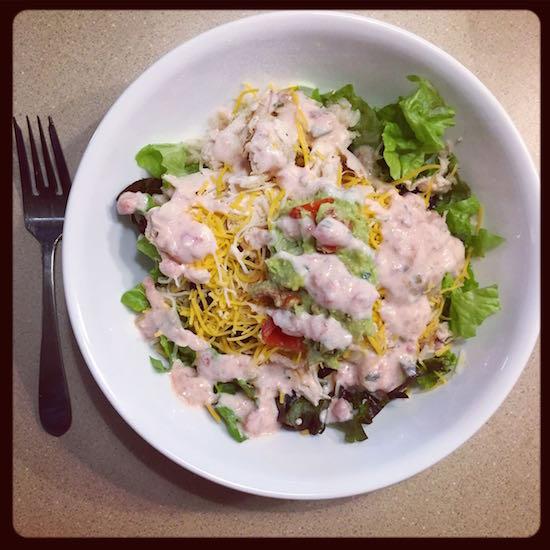
Burrito  Salad

Burrito Salad Bowls

Food Prep Options:

  • Prep your protein of choice – beans, chicken, pork, ground beef or turkey.
  • Chop peppers, onions or any other veggies that you want to add raw.
  • Roast a pan of veggies to add (try sweet potatoes!)
  • Make Salsa Yogurt Dressing
  • Cook rice
  • Wash and chop lettuce
  • Make some guacamole

During the week:

  • Put lettuce in a large bowl and add rice, beans, meat, veggies, cheese and avocado. Top with dressing. You could probably make this faster than the amount of time you’d spend standing in line at Chipotle.

Recipes:

  • Salsa Yogurt Dressing
  • Burrito Salad


Most of these meals can easily be made to fit your dietary needs and habits – ie, make them paleo-friendly, gluten-free, vegetarian etc! If you haven’t already, I hope you’ll give food prep a try!

[Tweet “Learn how to use food prep to make 5 Easy Weeknight Dinners via @leangrnbeanblog!”]

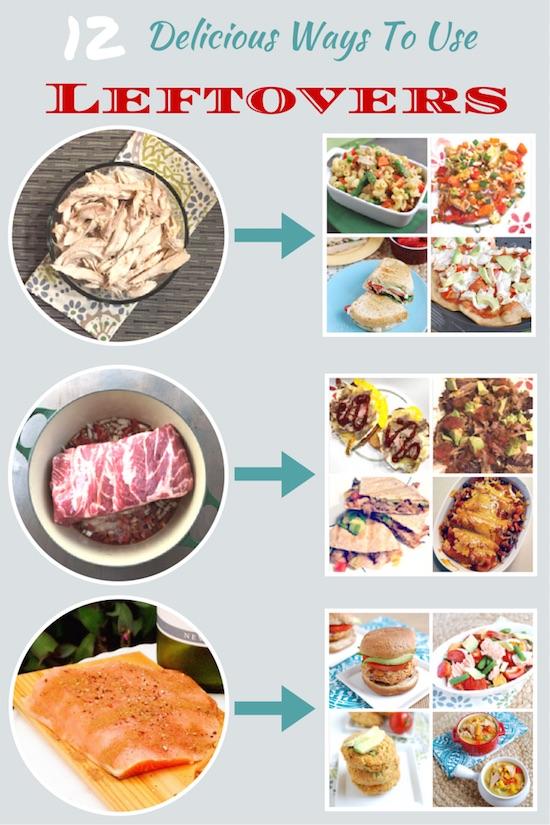
For more easy dinner ideas check out this post: 12 Ways To Use Leftovers

Looking for some ways to use leftovers? Here are 12 ideas for repurposing leftover chicken, pork and salmon!

Enjoy!
–Lindsay–


Filed Under: Dinner, Food Prep, Ingredient Round-Ups

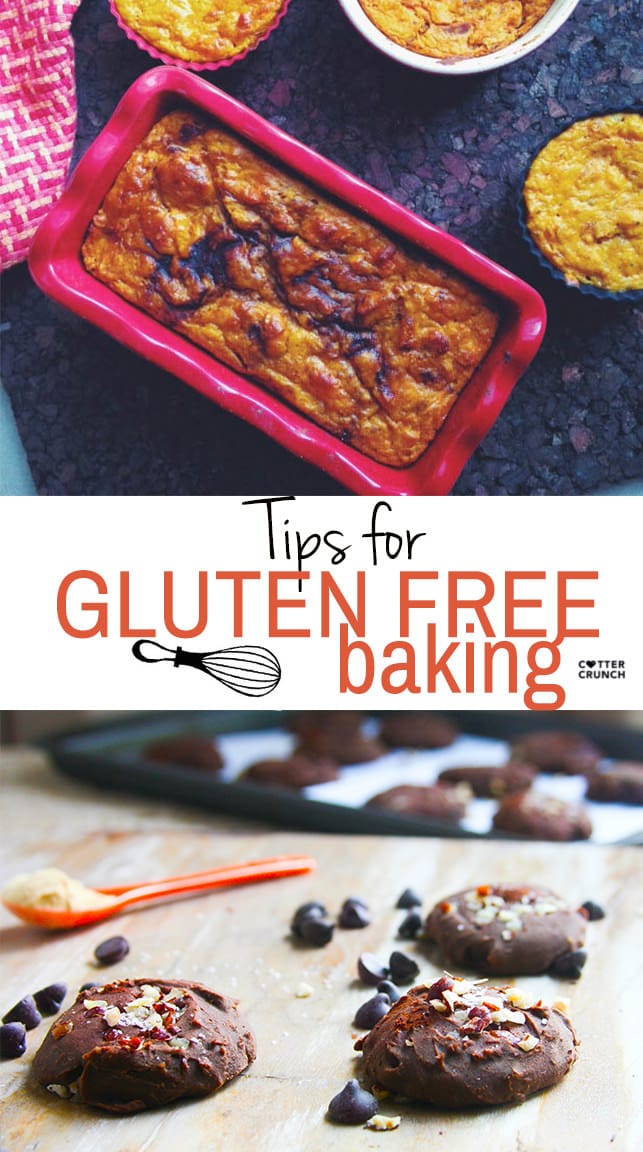
Tips For Gluten-Free Baking

May 13, 2015 by Lindsay 28 Comments

Need some tips for Gluten-Free Baking? Learn the basics and then head to your kitchen to start experimenting with delicious recipes.

Hi Friends!

As you guys know, I’m not gluten-free…but lately I’ve been getting some questions from readers about how to adapt my recipes, especially baking recipes, to be gluten-free. Since I’m most definitely not an expert in that area, I’ve found myself having trouble offering suggestions.

So, I asked my gal pal Lindsay to give you guys some tips for gluten-free baking! Hope you find them helpful!


Hi there Fellow bean lovers! My name is Lindsay Cotter and I blog over at Cotter Crunch. So happy Linz is letting me share my love for GLUTEN FREE TODAY.

Need some tips for Gluten-Free Baking? Learn the basics and then head to your kitchen to start experimenting with delicious recipes.

But first, about me. I’m married to a pro triathlete and Tri Coach. I’m also a Fitness Professional and Nutrition Specialist that specializes in Gluten free Eating and Endurance sports. Hence how I married a triathlete. My blog is a gluten free guide (for all), and I want to be there to help others maintain proper nutrition as you work toward your goals, fitness or not. That’s why I’m called the SHERPA wife; to support and FUEL others!!

Cotter Crunch

But the other main reason I blog is to (hopefully) make gluten free eating easy and healthy for those who are either new to gluten free due to a diagnosis, or who want to experiment with gluten free for their own personal reasons. I’ve been gluten free since 2008 due to health reasons. Back then, I was a bit overwhelmed with the what to do next or where to even start with the whole diet process.

Which is why I am here today!

Let’s start with the Basics –> Gluten Free Baking

paleo cocoa molasses hazelnut bread 7 (4 of 1)

Thankfully a lot has changed over the past 5 years and there are a lot more gluten free baking/cooking options.

But I still get a lot of questions about GF baking.

Like what flours are gluten free and what GF flours mixes work well together?

It actually took me a while to figure this one out. There was lot of trial and error and researching. I also found great blogs (like Sarena) that have been doing this for years and know what gluten free flours work well and where.

So let’s make it simple and focus on these four flours. These are the most versatile anyway.

Tapioca flour – Tapioca flour comes from the root of a cassava plant. Same thing as tapioca pearls, like you would use for a pudding, but tapioca flour is when the pearls are grounded into a flour texture.

  • Tapioca flour/starch adds structure to gluten free baking. It also helps give things an even chewiness, which we often lack in gluten free foods. It’s great for baking things like cookies and cakes.

Amaranth flour – A high protein gluten-free grain- even more protein than wheat. One cup of raw amaranth contains 28.1 grams of protein.

  • Amaranth absorbs water quite easily, which makes it a great emulsifier. But it can make your gluten free baking very dense if you don’t use it with other gluten free flours/starches. I like to use amaranth in savory dishes like pizza dough or some other kind of thick crust.

Sorghum Flour– sorghum is the probably the easiest gluten free flour to work with. Great substitute for wheat flour in baking or pancakes. It improves the texture for sure and is light in taste. It works best when combined with other gluten free flours, such as rice flour and tapioca flour.

silver dollar gluten free protein pancakes

Potato Starch –Potato starch acts like a thickening agent. Great to add to stews, soups, sauces, etc. It also can help add more moisture to your baking mixes.

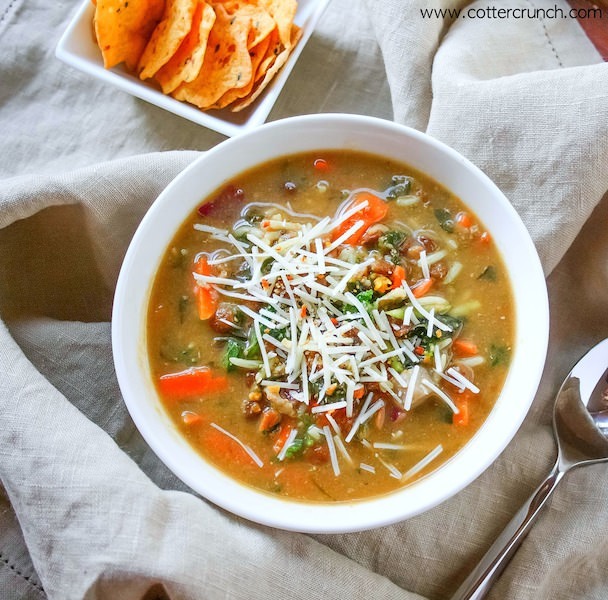
Everything but the kitchen sink soup 2 (GF) - Vegan option. Budget friendly. #glutenfree www.cottercrunch.com

Note: Also check the labels on the starches, just in case they’ve added any other agents that are not GF.

Not into baking with grains? You can easily sub in coconut flour or almond meal, but BE WARE, coconut flour soaks up much more moisture than almond. So recipes with coconut flour will need to have some sort of wet ingredient (like milk, egg, yogurt, etc) prevent them from getting crumbly and dry.

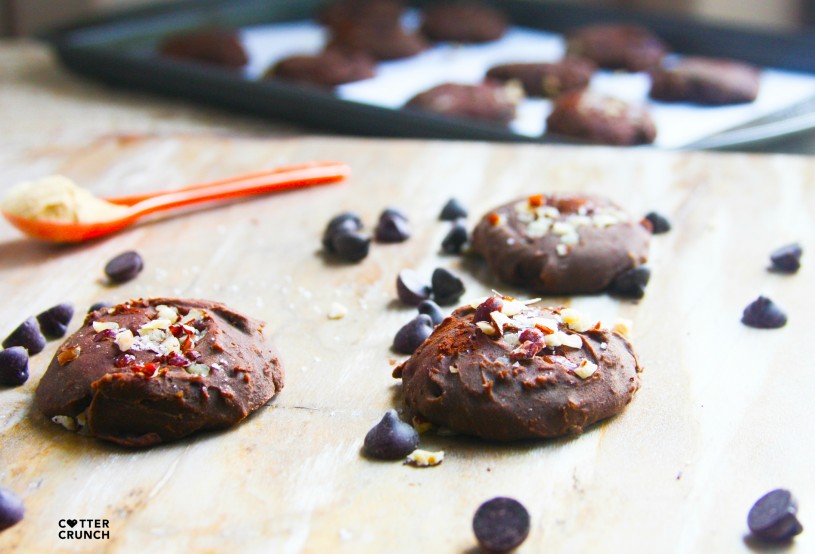
Want to give this whole GF baking this a whirl? Try this simple, yet healthy, cookie recipe to begin. , which of course includes a gluten free flour, and is perfect for SPRING! Click on picture to go to recipe!

gluten free and dairy free chocolate mesquite cookies! Great for a post workout snack or breakfast on the goal! Nutrient dense and full of sweetsmokey flavor! cottercrunch.com @cottercrunch

Well folks, that’s all for now. Let me know if you give this gluten free baking a whirl or if you have ANY questions! I’d love to answer!

Cheers,

Lindsay C.


Be sure to follow Lindsay every which way so you don’t miss any of her amazing recipes! \

[Tweet “Intimidated by gluten-free baking? Get tips and tricks from @lccotter on @leangrnbeanblog today!”]

Enjoy!
–Lindsay–

Filed Under: Baking

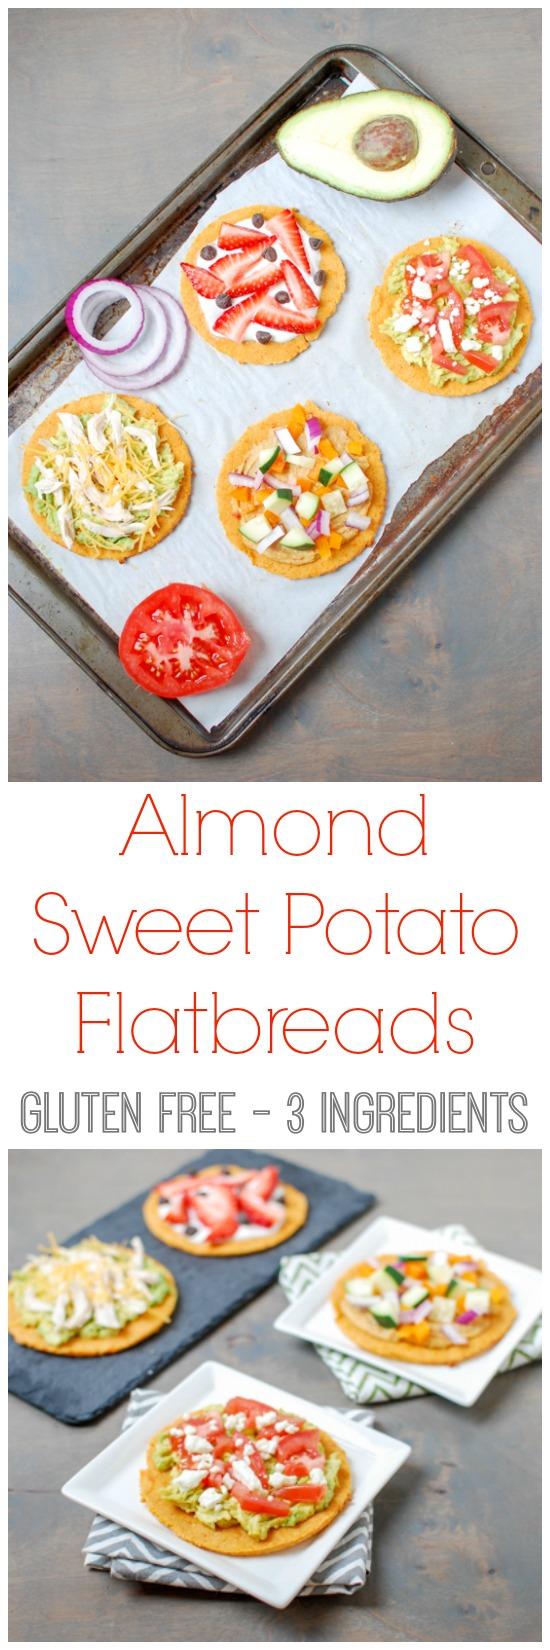
Almond Sweet Potato Flatbreads

May 12, 2015 by Lindsay 34 Comments

With just 3 main ingredients, these gluten-free Almond Sweet Potato Flatbreads are simple to make and easy to customize!

With just 3 main ingredients, these gluten-free Almond Sweet Potato Flatbreads are simple to make and easy to customize. Perfect recipe for lunch or snack time!

Thank you to the Healthy Aperture Blogger Network for sponsoring this post as part of the #CrunchOn campaign with California Almonds.


Hi friends!

These flatbreads. They’re my new favorite thing! I’m so excited to share the recipe with all of you so you can make them yourselves.

I’m not even going to tell you how many trial runs I did of this recipe. I wanted to get the perfect ratio and combination of ingredients. Let’s just say it’s a good thing I got a HUGE bag of almond flour to be used for recipe testing….because use it, I did 🙂

With just 3 main ingredients, these gluten-free Almond Sweet Potato Flatbreads are simple to make and easy to customize. Perfect recipe for lunch or snack time!

With just three main ingredients, these flatbreads come together quickly and you can customize them with all your favorite spices. I liked mine with cayenne pepper, paprika and a little garlic powder but you could try with curry powder or whatever else floats your boat. You could even try a sweet version by adding a pinch of sugar and some cinnamon!

The main ingredient is almond flour, which I love experimenting with!  Almonds are packed with nutrients! They’re full of vitamins and minerals, high in fiber and are a good source of magnesium and Vitamin E. Plus they’re full of healthy monounsaturated fats and protein. I enjoy snacking on them in pretty much any form. I eat them raw in my trailmix, turn them into nut butter, add them to baked goods etc.

This time I wanted to change things up and use almond flour. I’ve made a few gluten-free treats using almond flour but these are much simpler. And they make the perfect snack-time vehicle to top with all your favorite things!

With just 3 main ingredients, these gluten-free Almond Sweet Potato Flatbreads are simple to make and easy to customize. Perfect recipe for lunch or snack time!

Here’s how you make them:

Print

Almond Sweet Potato Flatbreads

Almond Sweet Potato Flatbread 4 368x550
Print Recipe

5 Stars 4 Stars 3 Stars 2 Stars 1 Star

5 from 4 reviews

With just three ingredients, these Almond Sweet Potato Flatbreads are gluten-free and easy to customize- perfect for snack time!

  • Author: Lindsay L
  • Prep Time: 5 minutes
  • Cook Time: 10 minutes
  • Total Time: 15 minutes
  • Yield: 6 1x

Ingredients

Scale
  • 1.5 cups almond meal
  • 1 large egg white
  • 1/2 cup mashed, cooked sweet potato
  • Spices of choice: paprika, cayenne, garlic powder, cinnamon, curry powder, etc
  • Toppings of choice: avocado, hummus, veggies, yogurt, fruit, meat, etc

Instructions

  1. In a large bowl combine the almond meal, spices and sweet potato. Mix with a fork until well combined.
  2. Add egg white and mix until dough forms.
  3. Divide dough into 6 pieces.
  4. Place one section of dough between 2 pieces of parchment paper and flatten with hand (or rolling pin) into a 1/4 inch thick circle.
  5. Transfer to a baking sheet lined with parchement paper and repeat with remaining dough.
  6. Bake at 375 degrees for 10 minutes.
  7. Top as desired.

Did you make this recipe?

Tag @theleangreenbean on Instagram

A few notes:

  • If you want bigger flatbreads, divide dough into 4 pieces instead.
  • You can really make these as thick or thin as you want.
  • They don’t have to be perfectly circular!
  • Definitely use parchment paper or they might stick!
  • Play around with the spices you mix in to flavor them to your liking!

With just 3 main ingredients, these gluten-free Almond Sweet Potato Flatbreads are simple to make and easy to customize. Perfect recipe for lunch or snack time!

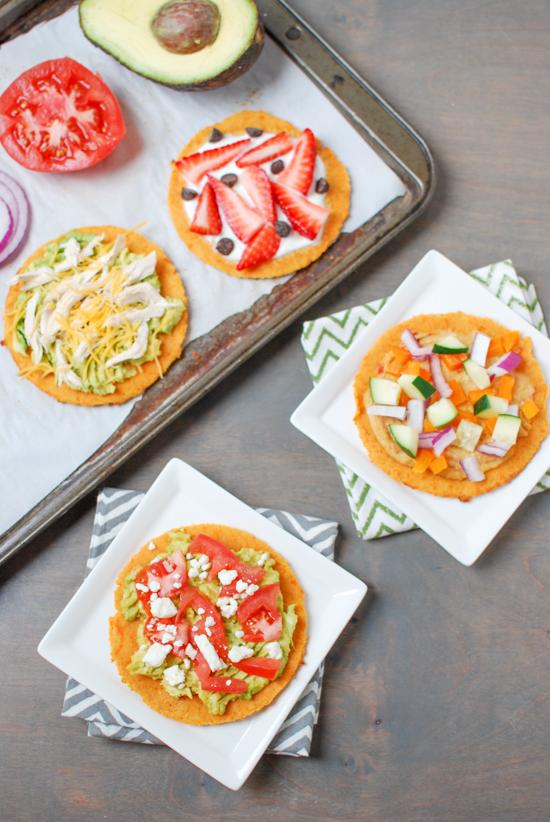
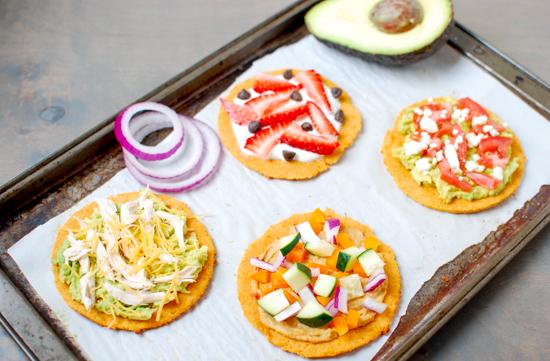
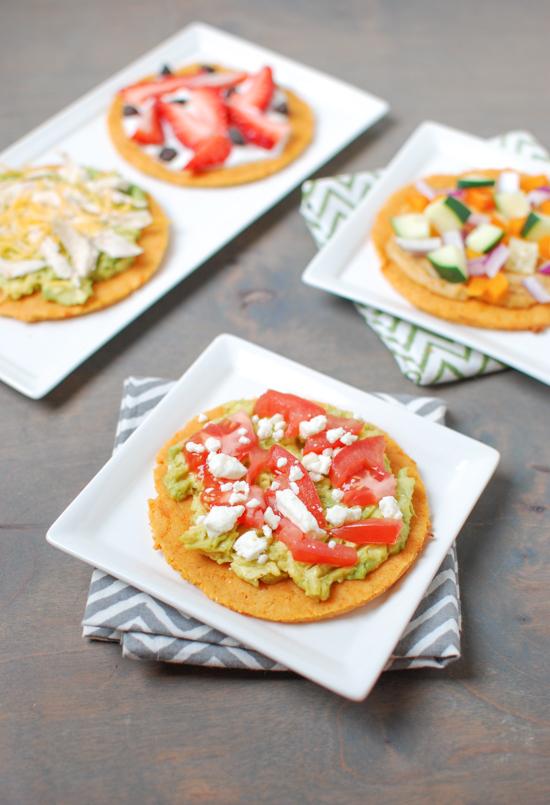
Once they’ve baked, the real fun starts- topping them! You’re pretty much only limited by your imagination here. A few options include:

  • hummus + veggies
  • smashed avocado + tomatoes + feta
  • plain yogurt + berries + chocolate chips
  • mustard + deli turkey slices
  • smashed avocado + chicken + cheese

I ate most of these as an open-faced flatbread with toppings but one day for lunch I tore one in half and sandwiched some deli turkey between the two pieces and called it lunch! Delish!

[Tweet “These Almond Sweet Potato Flatbreads from @leangrnbeanblog are the perfect snack time vehicle!”]

Enjoy!
–Lindsay–


Filed Under: Lunch, Sponsored Tagged With: Almond Flour, Egg, Sweet Potato

A Week of Paleo Meals

May 9, 2015 by Lindsay 17 Comments

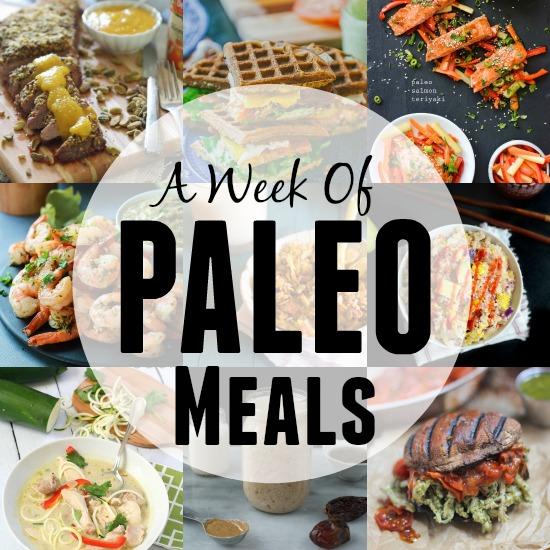
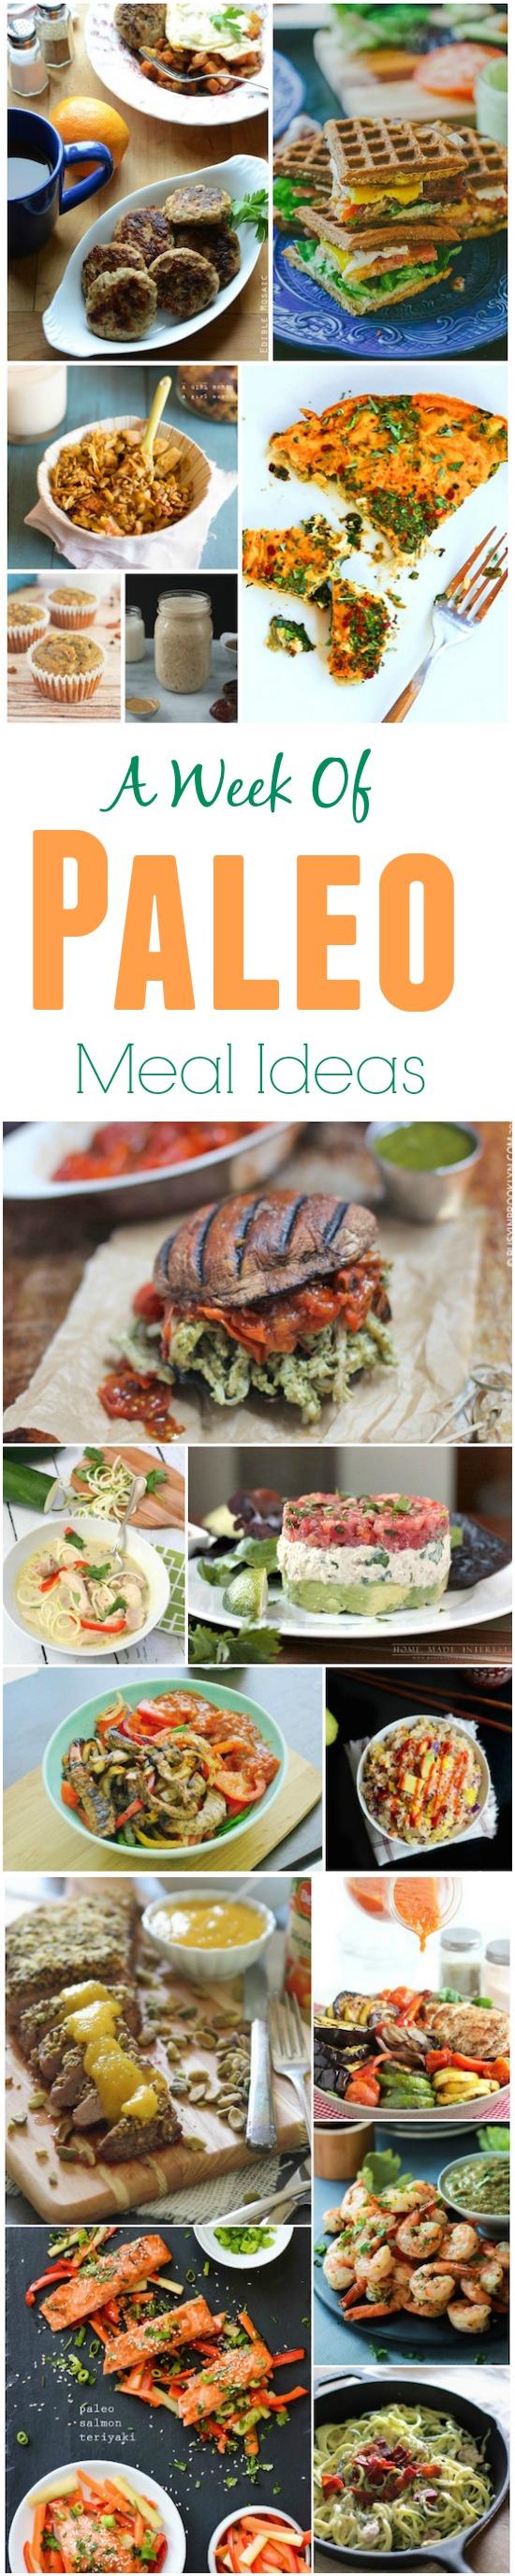
A week of paleo meals that are so delicious you’ll want to eat them no matter what diet you follow!

A Week of Paleo Meals

Hi Friends!

Time for another batch of recipe ideas! This week I rounded up a week of paleo meals. The Paleo diet is all the rage right now and although I don’t personally follow it, I do think there there are a lot of delicious, healthy meals out there that also happen to be paleo!

A week of paleo meal ideas to help you plan your menu next week!

So I thought I’d round up some tasty meals that just so happen to be paleo and hopefully some of them will sound good to you, no matter what style of eating you follow!

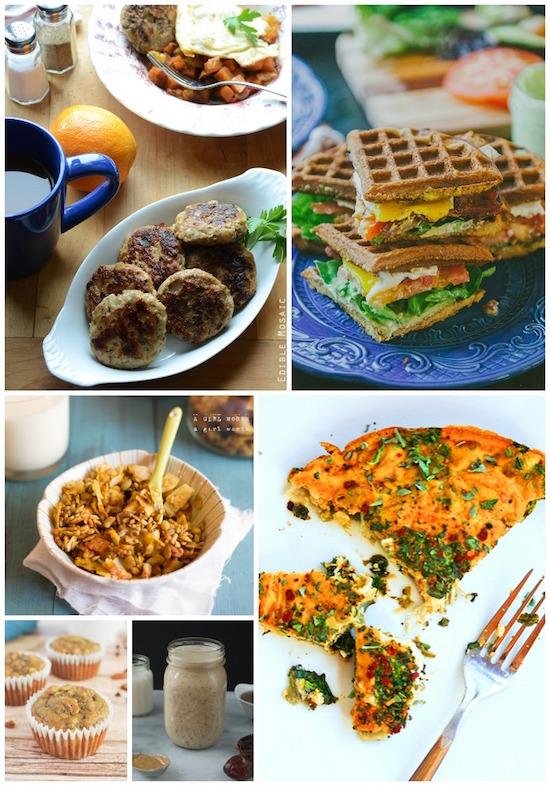
Breakfast

A week of paleo breakfast ideas

  • Sweet Potato Waffle Breakfast BLT via So Let’s Hang Out
    • Swap in some sausage or leftover chicken for bacon if you want.
  • Paleo Pumpkin Granola via A Girl Worth Saving
    • Try it over coconut milk yogurt or with some almond milk.
  • Paleo Banana Muffins via Fake Ginger + Paleo Chia Almond Smoothie via Plaid & Paleo
    • Grab a muffin and smoothie for an easy breakfast on the run!
  • Paleo Pumpkin, Kale & Turkey Frittata via Cotter Crunch
    • Make and reheat all week long or serve it for brunch on the weekend!
  • Apple Onion Chicken Breakfast Sausage via An Edible Mosaic
    • Pair it with some eggs and sweet potato hashbrowns for a hearty breakfast.

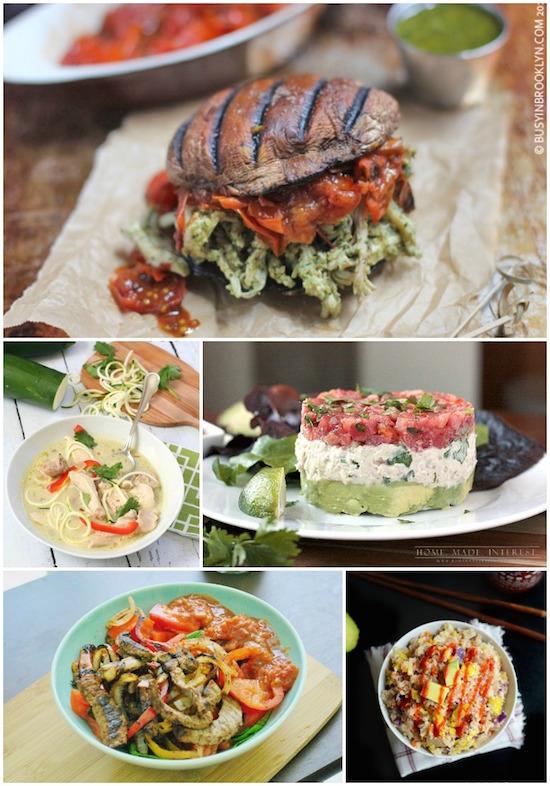
Lunch

A week of paleo lunch ideas

  • Paleo Fried Rice via Fit Foodie Finds
    • Better than takeout!
  • Paleo Thai Chicken Zoodle Soup via All Day I Dream About Food
    • Have some fun spiralizing different veggies to add in place of noodles.
  • Pulled Pesto Chicken Burger via Busy In Brooklyn
    • Perfect way to use up some of that summer basil!
  • Tuna Avocado Salad via Homemade Interest
    • It looks fancy but it’s super easy to make!
  • Steak Fajita Bowls via Krystals Kitsch
    • Sub whatever grilled protein you prefer- easy to change up all summer long!

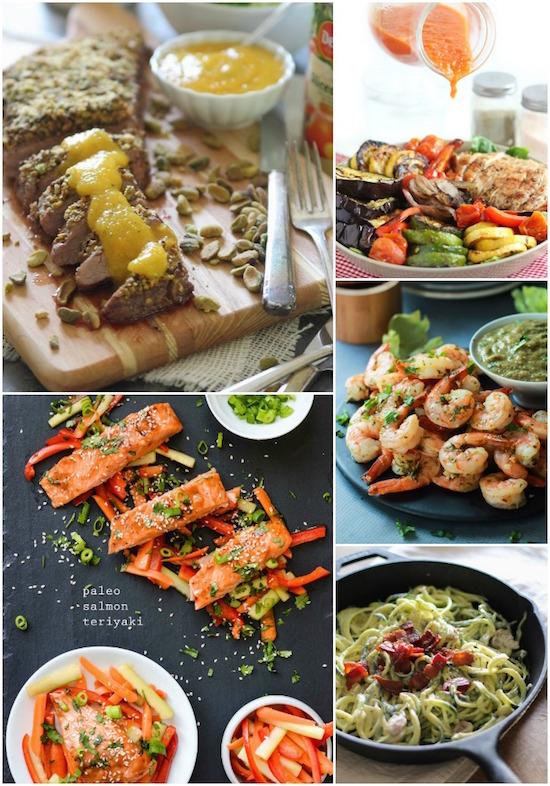
Dinner

paleo dinner ideas

  • Paleo Salmon Teriyaki via A Healthy Life For Me
    • Turn leftovers into salmon cakes for a new meal!
  • Dairy-Free Zucchini Carbonara via The Roasted Root
    • Another fun way to use spiralized veggie noodles. Try it with sweet potatoes next!
  • Pistachio Crusted Flank Steak with Peach Puree via Running To The Kitchen
    • Impress your dinner guests with this one!
  • Cilantro Lime Roasted Shrimp with Tomatillo Sauce via Joyful Healthy Eats
    • Use your extra shrimp to top a salad for lunch the next day!
  • Grilled Chicken & Veggie Salad with Tomato Vinaigrette via Lexi’s Clean Kitchen
    • Take advantage of the warm weather and grill ALL the things!


Looking to do a little food prep based on this menu? You could:

  • Make a batch of sweet potato waffles so it’s easy to assemble breakfast sandwiches
  • Make a double batch of sausage and freeze some.
  • Bake some muffins.
  • Make a frittata to reheat during the week.
  • Prep the cauliflower rice for your fried rice.
  • Make a pot of soup.
  • Make the pesto pulled chicken.
  • Prep veggies for the grill.
  • Make the sauce for your salmon and shrimp.
  • Grill some chicken for your salad.

weekly meal plans

Want more ideas? Check out the full gallery of weekly meal plans here. 


Enjoy!
–Lindsay–

Filed Under: Ingredient Round-Ups, Weekly Meal Plans

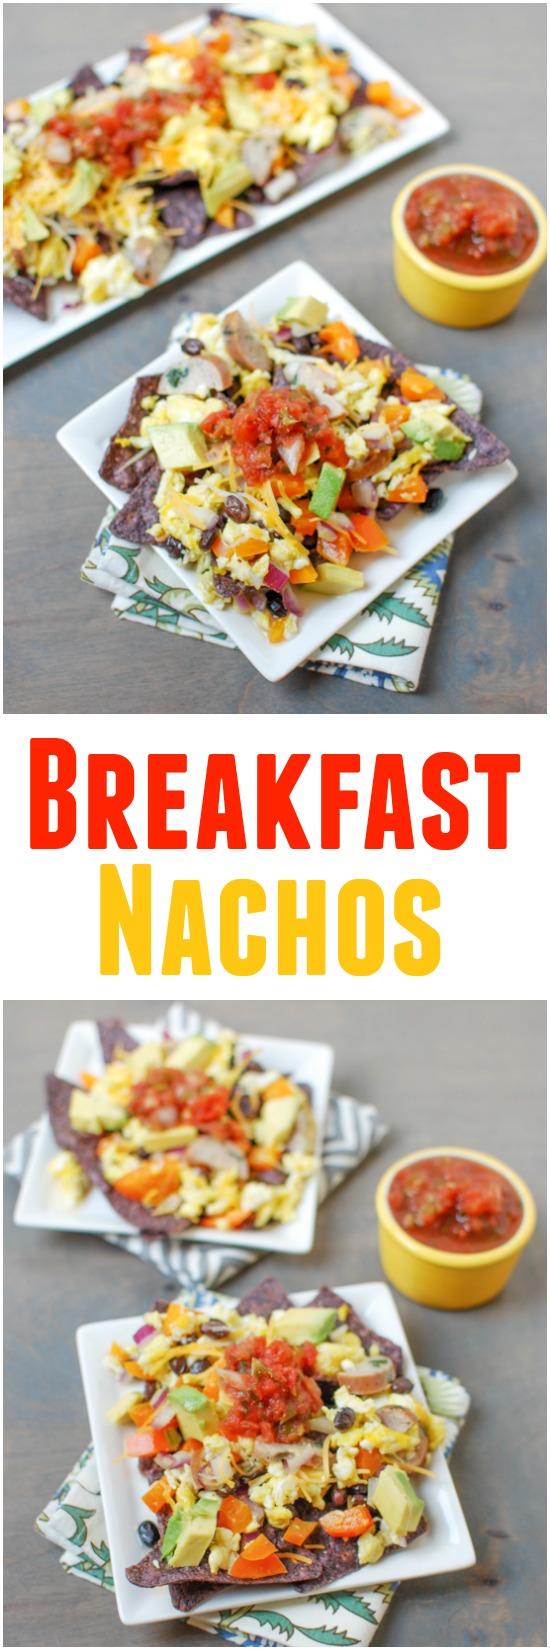
Breakfast Nachos

May 8, 2015 by Lindsay 15 Comments

Gluten-free and easy to customize, these Breakfast Nachos are quick, easy way to change up your breakfast routine!

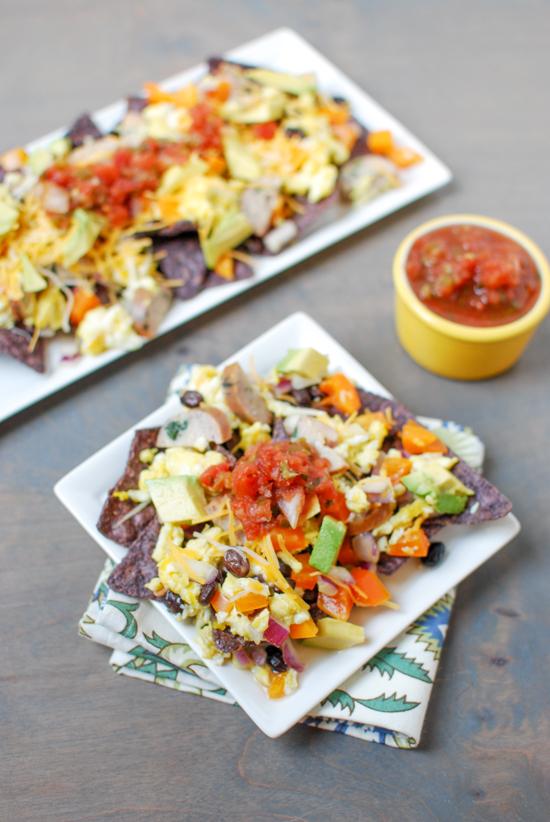
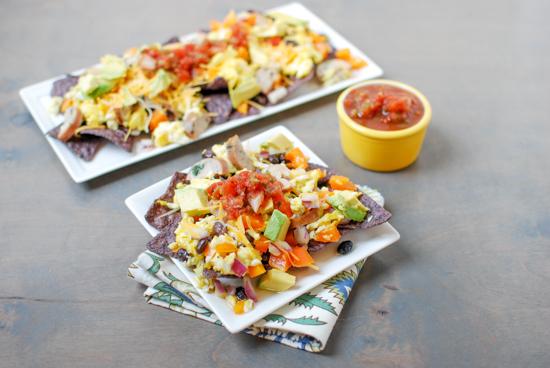
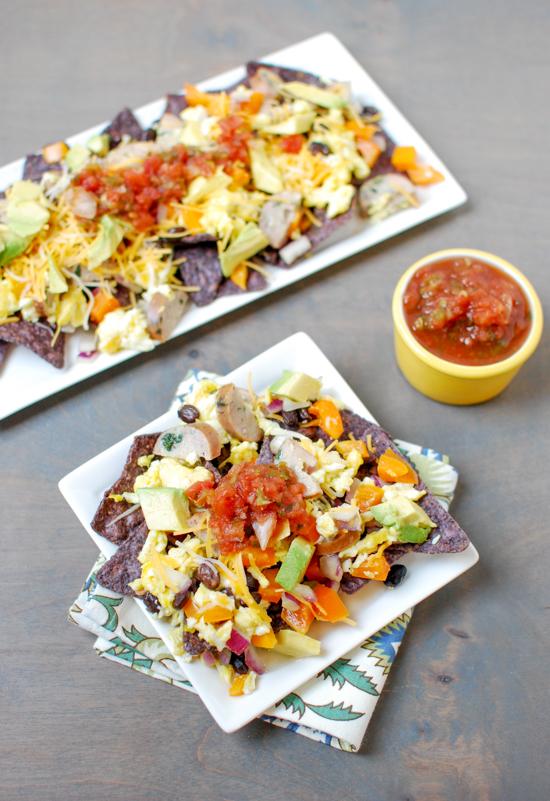
Gluten-free and easy to customize, these Breakfast Nachos are quick, easy way to change up your breakfast routine!

Hi Friends!

Let’s talk about these breakfast nachos. If you’ve been reading the blog for any length of time, you know I love breakfast. Not only do I love it, I NEED it. I pretty much cannot function unless I eat within 30 minutes of waking up. Usually I’m an oatmeal kinda girl but every once and a while it’s fun to change things up.

Gluten-free and easy to customize, these Breakfast Nachos are quick, easy way to change up your breakfast routine!

By change it up, I pretty much mean switch from oatmeal to eggs. I love eggs and truth be told, I don’t just eat them for breakfast. I’ve eaten eggs for dinner 3 nights this week, including eating these “breakfast nachos” last night. They’re perfect for pretty much every meal…but I’m calling them breakfast because for many people, eggs = breakfast food.

I guess what I’m saying is, don’t limit yourself! If you wanna eat these for lunch or dinner, by all means…go for it!

Gluten-free and easy to customize, these Breakfast Nachos are quick, easy way to change up your breakfast routine!

I’m not giving you any ingredient quantities either, because like most nachos, you simply adjust the toppings for the amount of people you want to feed. They’re very forgiving and exact quantities aren’t needed in order for you to make these successfully!

Here’s what you do:

Print

Breakfast Nachos

breakfast nachos 3
Print Recipe

5 Stars 4 Stars 3 Stars 2 Stars 1 Star

No reviews

Gluten-free and easy to customize, these breakfast nachos are a fun way to change up your morning routine!

  • Author: Lindsay L

Ingredients

  • bell pepper, diced
  • onion, diced
  • black beans
  • chicken sausage
  • eggs
  • avocado
  • salsa
  • cheese
  • corn tortilla chips

Instructions

  1. Saute peppers, onions, chicken sausage and beans for 5 minutes. Push the mixture to one side of the pan and add eggs.
  2. Cook until scrambled and mix well.
  3. Spoon mixture over chips and top with cheese, avocado and salsa.
  4. Serve warm.

Notes

Feel free to customize. Use your favorite veggies, leave out the meat or beans, etc to fit your liking.[br][br]If you’re making a big batch, feel free to put them on a baking sheet and put them under the broiler for a few minutes once you add the cheese. [br][br]If you’re making a smaller batch and want the cheese extra melty, pop your plate in the microwave for 30 seconds.

Did you make this recipe?

Tag @theleangreenbean on Instagram

Pretty easy right?! Like I mentioned in the notes above, these are easy to customize! Leave out the sausage or beans if you want to.

Gluten-free and easy to customize, these Breakfast Nachos are quick, easy way to change up your breakfast routine!

If you’re making a big pan and want lots of cheese you can always pop them under the broiler to melt the cheese!

[Tweet “Make these Breakfast Nachos from @leangrnbeanblog to change up your morning routine!”]

Enjoy!
–Lindsay–

Filed Under: Breakfast Tagged With: Bell Pepper, Black Bean, Cheese, Chicken Sausage, Egg, Salsa

Salsa Yogurt Dressing

May 6, 2015 by Lindsay 24 Comments

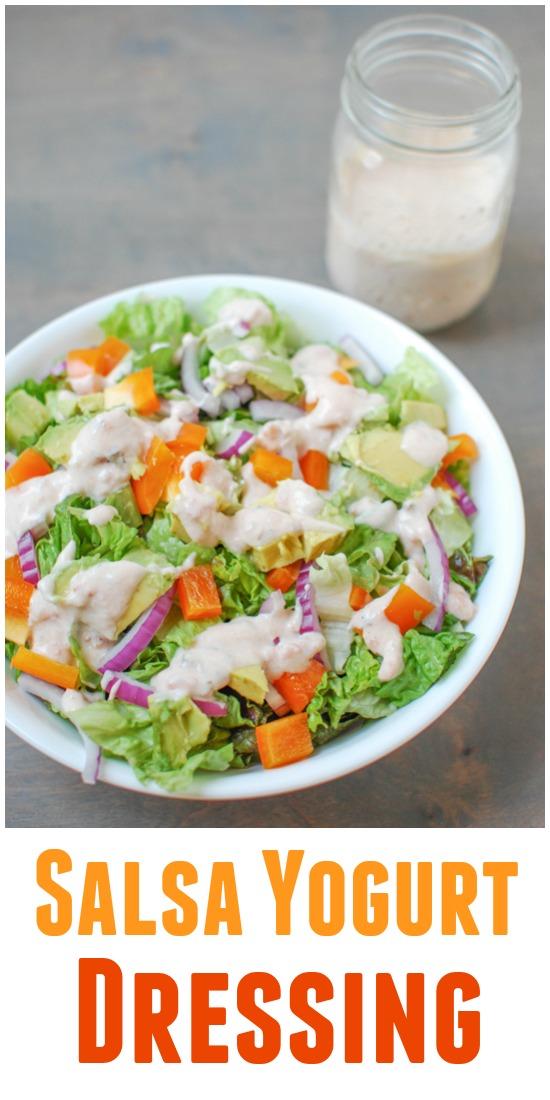
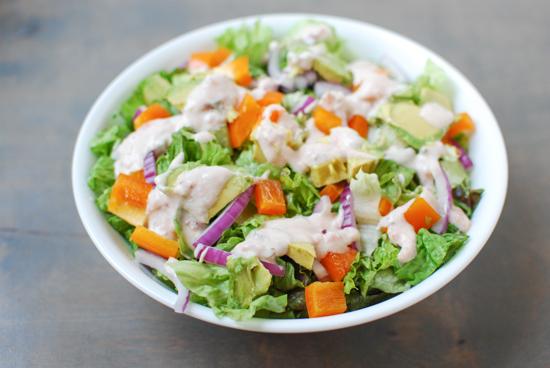
This Salsa Yogurt Dressing is a  simple combination of plain yogurt and salsa. It makes a great salad dressing and can also be used as a dip or marinade!

This Salsa Yogurt Dressing is simple to make and great for salads! It can also be used as a marinade or dip!

You guys, this dressing.

You need it in your life.

It isn’t so much a recipe….more just a thing you need to know about.

This Salsa Yogurt Dressing is simple to make and great for salads! It can also be used as a marinade or dip!

We made this to go on our taco salads when I was out in Cali and it was nothing new- I’d made the combo myself before…but ever since I’ve been back I can’t seem to get enough! It’s like finding a favorite purse in the back of your closet. You used to love it, then you forgot about it and now that you’ve found it again, you seem to love it even more!

I’ve made a batch for myself the past two weekends and so many of you got excited about it on Instagram that I decided that it needed a post all its own.

This Salsa Yogurt Dressing is simple to make and great for salads! It can also be used as a marinade or dip!

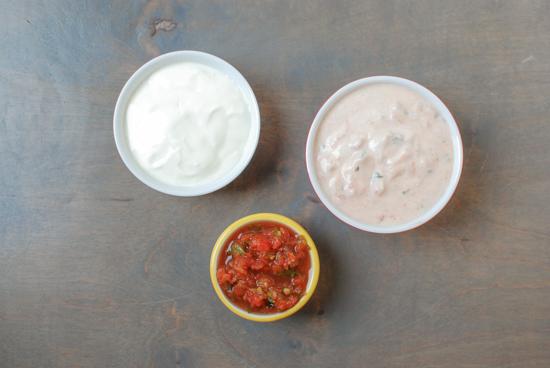
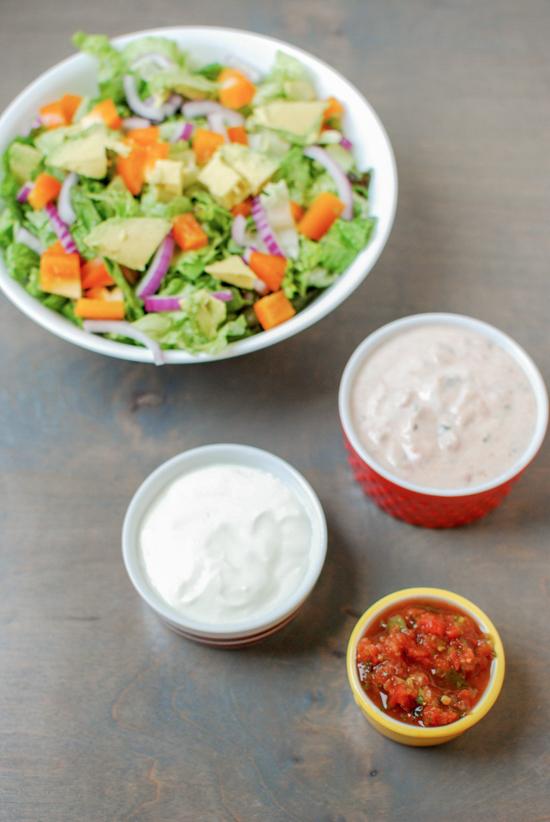
Plain yogurt + your favorite salsa = Salsa Yogurt Dressing!

This Salsa Yogurt Dressing is simple to make and great for salads! It can also be used as a marinade or dip!

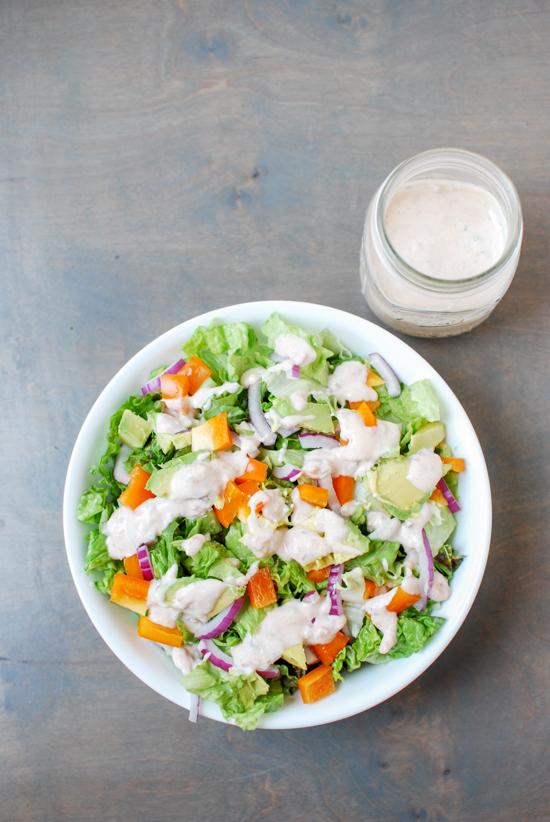
Start with 3/4 cup plain yogurt and 1/4 cup salsa. Taste it and add more salsa if you want! You can use Greek or regular yogurt…Greek will just be a little bit thicker. I use whole milk plain yogurt.

Salsa Yogurt Dressing

I’ve also used this as a dip for veggies and a marinade for chicken and salmon!

[Tweet “You need this Salsa Yogurt Dressing from @leangrnbeanblog in your life!”]

Enjoy!
–Lindsay–

Filed Under: Lunch Tagged With: Salsa, Yogurt

A Week of Kid-Friendly Meals

May 2, 2015 by Lindsay 7 Comments

Here’s a week of Kid-friendly meals to inspire you to try something new this week! Keep trying if they’re picky. They might surprise you someday!

A Week of Kid-Friendly Meals

Hi Friends!

Time for another recipe round-up! This week I put together a week of Kid-Friendly Meals to inspire you! Hopefully you’ll find a couple of new meal ideas your kiddos (and YOU!) will enjoy!

A Week of Kid-Friendly Meal Ideas to inspire you!

If you have kids that are picky eaters, it can be easy to fall into a food rut and make the same things over and over. Remember it’s important to keep trying new things. Some day they might surprise you and eat them!

Breakfast

Several kid-friendly breakfast ideas for you to try!

  • Carrot Cake Breakfast Cookies via Iowa Girl Eats
    • A perfect grab & go option for those busy mornings. Don’t like carrot cake? Try my Almond Butter Banana Breakfast Cookies!
  • Healthy Chocolate Crepes via The Adventure Bite
    • Stuff these with all sorts of delicious options like nut butter, fresh fruit, yogurt, etc. Not in the mood for chocolate? Make my Vanilla Cinnamon Crepes. You could even wrap up scrambled eggs!
  • Instant Oatmeal Packs via The Yummy Life
    • Super easy to personalize the mix-ins for each kiddo. If you have an older kid, they can heat water in the tea kettle and make the oats for themselves and younger siblings! Top with nut butter or fresh fruit if desired! Have a younger baby? Make them some of my Homemade Oat Cereal for Babies so they can join the party!
  • Breakfast Banana Split via Eat Drink Love
    • Feel free to mix up the toppings with their fav fruits, nut butter, fruit sauce, nuts and seeds or even a few chocolate chips!
  • Pancake Bites via Cooking Classy
    • Customize with their fav mix-ins! Go sweet with fruit, choc chips, etc or savory with a few veggies or some sausage.


Lunch

Some delicious kid-friendly lunch ideas

  • Vegetable Beef Alphabet Soup via An Edible Mosaic
    • The alphabet noodles make it fun and making it homemade with lean protein and veggies makes it healthy!
  • Chicken Sausage Pretzel Dogs via Mariah’s Pleasing Plates
    • Easy to make and the kids will love eating them!
  • Homemade Lunchables from Bentos For My Girls
    • So many options – just be sure to include a protein, some fruits and veggies and a healthy cracker. Or try this Kiddie Salad Bar idea from Nutritious Eats
  • Apple Sandwiches from Finger Pricking Good
    • Dip in lemon juice to keep from browning, add nut butter & some nuts or granola for a little crunch!


Dinner

Some new kid-friendly dinner ideas!

  • Baked Parmesan Chicken Tenders via Cookin Canuck
    • Or stock the freezer with my Freezer Chicken Tenders for an easy weeknight option!
  • Slow Cooker BBQ Chicken Melts via Aggie’s Kitchen
    • Serve with a salad or their favorite veggie. Tired of chicken? Make them with my Beer Braised Pulled Pork!
  • Cheesy Meatball Pasta Casserole via Give Recipe
    • Make it even easier by using slices of chicken sausage instead of meatballs!
  • Build Your Own Taco Bar via Pocket Change Gourmet
    • Kids will have fun picking their own taco fillings!
  • Tuna Quinoa Cakes via The Lean Green Bean
    • Make them mini-sized, try them with chicken if they don’t like tuna and serve them with dipping sauce!


See anything that looks good? Don’t forget to do some food prep once you have your meal plan in place! It’ll only make your week easier!

Here are some food prep ideas for this menu:

  • Make several baggies of instant oats so they’re easy to grab in the mornings.
  • Make a batch of crepes and store them in the fridge for easy filling.
  • Bake some pancake bites and reheat during the week before serving.
  • Bake a  double batch of breakfast cookies and freeze some!
  • Make a big pot of soup.
  • Write down a few lunchable ideas so you can quickly and easily pack lunches each night.
  • Make some spaghetti-o’s and meatballs.
  • Stock your freezer with some chicken tenders.
  • Prep some chicken in your crockpot so all you have to do is turn it on one morning.
  • Prep a casserole so it’s ready to throw in the oven.
  • Bake a batch of quinoa cakes, or at least cook the quinoa so you can make them faster!

weekly meal plans

Want more ideas? Check out the full gallery of weekly meal plans here!

Enjoy!
–Lindsay-

Filed Under: Ingredient Round-Ups, Weekly Meal Plans

Almond Butter Banana Cookies

April 29, 2015 by Lindsay 52 Comments

These Almond Butter Banana Cookies are gluten-free and lightly sweetened with maple syrup. They’re packed with protein and fiber and are healthy enough for breakfast. Add a little glaze and you’ve got dessert!

These Almond Butter Banana Cookies are gluten-free and lightly sweetened with maple syrup. They're packed with protein and fiber and are healthy enough for breakfast. Add a little glaze and you've got dessert!

You guys.

These cookies. I love them.

Last week I found myself with 6 overly ripe bananas on my counter. Typically I turn them into muffins but to be honest, that sounded a little boring. Plus I already have some great muffin recipes on the blog like these Peanut Butter Banana Oat Muffins and these Blueberry Muffins.

So the thought of a muffin was doing nothing to spark my creativity. Cookies on the other hand? Those I can get behind. Since I like a good challenge, I decided to attempt a relatively healthy cookie- one I’d feel good about eating as a snack.

These Almond Butter Banana Cookies are gluten-free and lightly sweetened with maple syrup. They're packed with protein and fiber and are healthy enough for breakfast. Add a little glaze and you've got dessert!


It took a few tries – good thing I had all those bananas…but I figured it out. And then I added a glaze because glaze = delicious. Duh.

Let me tell you a little about these cookies. I rarely analyze my recipes for nutritional content (even though I get asked to all the time) because I think it’s easy to get hung up on the numbers. Instead I focus on creating tasty recipes made from real food ingredients. But every once and a while, I make something like this and find myself wondering what the nutritional stats have to say.

These Almond Butter Banana Cookies are gluten-free and lightly sweetened with maple syrup. They're packed with protein and fiber and are healthy enough for breakfast. Add a little glaze and you've got dessert!

So I ran it through My Fitness Pal to get a rough estimate:

If you make 12 cookies, each one will have approximately 6 grams of protein and 4 grams of fiber. If you make them without the glaze, they have 5 grams of sugar and they’re about 180 calories. So you could eat 2 for breakfast and you’d get 12g protein, 8g fiber, 360 calories and 10g sugar. That’s pretty good in my book.

Or, add the glaze for a little extra sugar rush 🙂 Or don’t add the maple syrup to lower the sugar content even further. The possibilities are endless!

These Almond Butter Banana Cookies are gluten-free and lightly sweetened with maple syrup. They're packed with protein and fiber and are healthy enough for breakfast. Add a little glaze and you've got dessert!

They’re packed with chia seeds and hemp hearts for omegas and extra protein. Oh, and they just so happen to be gluten-free.

Ready to make them?

Here’s how:

Print

Almond Butter Banana Cookies

Almond Butter Banana Cookies 2
Print Recipe

5 Stars 4 Stars 3 Stars 2 Stars 1 Star

4.7 from 3 reviews

Gluten-free and sweetened with maple syrup, these cookies are packed with protein and fiber. Perfect of breakfast or a snack. Or add a glaze and eat them for dessert!

  • Author: Lindsay L
  • Prep Time: 5 minutes
  • Cook Time: 12 minutes
  • Total Time: 17 minutes
  • Yield: 12 1x

Ingredients

Scale
  • 3/4 cup mashed ripe banana (approx 2 medium)
  • 3 Tbsp chia seeds
  • 3 Tbsp hemp seeds
  • 3/4 cup almond butter
  • 1 egg
  • 1 cup oats
  • 1 tsp cinnamon
  • 1 tsp vanilla
  • 3 Tbsp maple syrup*
  • Optional glaze: 4 Tbsp powdered sugar, 2 Tbsp maple syrup

Instructions

  1. Combine all ingredients in a large bowl and stir until well combine.
  2. Scoop onto greased or lined baking sheet.
  3. Bake at 350 for 12-15 minutes.
  4. Let cool completely and drizzle with glaze before serving if desired.
  5. Store in the fridge.

Notes

*The amount of sweetener used is up to you. When I make them with the glaze, I leave the 3 tbsp of maple syrup out…If you have a sweet tooth you might want to leave it in.[br]-The glaze may soak into the cookies a bit so i could glaze right before serving if possible. You can glaze them all at once, just know some of the glaze might disappear.[br]- These cookies are moist so I would store them in the fridge.[br]- Make sure your cookie sheet is greased well. They might stick a little but you should be able to get them off with a spatula!

Did you make this recipe?

Tag @theleangreenbean on Instagram

When I make these, I leave out the maple syrup and add the glaze and they’re sweet enough for me. But if you have more of a sweet tooth, I’d leave the maple syrup in.

These Almond Butter Banana Cookies are gluten-free and lightly sweetened with maple syrup. They're packed with protein and fiber and are healthy enough for breakfast. Add a little glaze and you've got dessert!

So there you have it, friends! Hope you enjoy. Remember you could use any kind of nut butter if almond isn’t your fav.

These Almond Butter Banana Cookies are gluten-free and lightly sweetened with maple syrup. They're packed with protein and fiber and are healthy enough for breakfast. Add a little glaze and you've got dessert!

[Tweet “Enjoy these Almond Butter Banana Cookies from @leangrnbeanblog for breakfast OR dessert!”]

Enjoy!
–Lindsay–

Filed Under: Baking, Breakfast, Dessert, Healthy Muffins & Bars, Snack Tagged With: Almond Butter, Banana, Chia Seed, Hemp Seed, Maple Syrup, Oat Flour, Peanut Butter

Homemade Oat Cereal For Babies

April 28, 2015 by Lindsay 32 Comments

Want to make baby oatmeal? Made with just oats, water and a little cinnamon, this homemade oat cereal for babies is ready in 15 minutes and is cheaper than store-bought!

Made with just 3 ingredients and ready in 15 minutes this homemade oat cereal for babies is an easy alternative to store bought!

Hi Friends!

Today I wanted to share how to make baby oatmeal. When my oldest was little, we used a mixed approach that involves some baby-led weaning and some spoon fed things like oatmeal. Baby oat cereal was definitely one of his favorites but I got tired of paying so much for oat cereal marketed specifically at babies so I decided to figure out my own baby oatmeal recipe. It’s not really a recipe since it’s basically just oats…and water…and a little cinnamon but I think it’s worth sharing because it’s SO easy.

How To Make Baby Oatmeal

Learn how to make baby oatmeal! You're just 3 ingredients away from homemade baby oatmeal cereal.

Since oat cereal is basically made out of just oats, I figured it would be easy enough to make my own. Since I food prep every weekend anyway, why not add this to the mix and save a little money by avoiding pre-packaged baby cereal. I calculated it out and if I buy a 10-pound box of oats at Costco and make this myself it costs something like $0.08/serving vs. $0.55/serving for a packaged brand!

A Note About Oatmeal For Babies

One thing that’s important to remember is that a lot of parents use homemade baby oatmeal (or storebought) as a source of iron for babies. One of the best things you can do to help your babe absorb the iron in oats is pair their baby oat cereal with a source of vitamin C. This helps them absorb the iron, which is a critical nutrient. You can easily add vitamin C to baby oatmeal by topping it with fresh berries like berries like strawberries, mixing it with pureed  or mashed sweet potatoes or serving with a side of kiwi!

Ready to make your own? Here’s how you make it:

Homemade Oat Cereal For Babies

Print

Homemade Oat Cereal For Babies

DSC 0052 368x550
Print Recipe

5 Stars 4 Stars 3 Stars 2 Stars 1 Star

5 from 1 review

A super simple recipe for homemade oat cereal for babies.

  • Author: Lindsay L
  • Prep Time: 5 minutes
  • Cook Time: 10 minutes
  • Total Time: 15 minutes

Ingredients

Scale
  • 1/4 cup ground oats (place rolled oats in food processor and process until finely ground, then measure)
  • 1 cup water
  • cinnamon, optional

Instructions

  1. Bring water to a boil in a small saucepan.
  2. Add ground oats.
  3. Reduce heat to simmer and let cook, stirring frequently, for 10 minutes.
  4. Stir in cinnamon
  5. Store in the fridge.
  6. *Note, mixture will thicken as it cools. Feel free to add formula or breast milk to thin it out before serving if desired

Did you make this recipe?

Tag @theleangreenbean on Instagram

This recipe can easily be doubled or tripled to make a bigger batch.

Homemade Oat Cereal for babies

Like I mentioned in the recipe, this will firm up into a semi-gelatinous mass once it cools and is stored in the fridge. I serve them thick to my kiddos but if you want to thin them out, feel free to add a little formula or breast milk.

Made with just 3 ingredients and ready in 15 minutes this homemade oat cereal for babies is an easy alternative to store bought!

I love exposing him to spices at such a young age so I add cinnamon when I make them. I also often mix in some fruit or veggies before serving. He loves them mixed with pears, applesauce or avocado!

One nutritional note: Store-bought infant cereal is typically fortified with iron, which is an important part of a baby’s diet. Formula is also typically fortified with iron and since my oldest was formula fed, I wasn’t concerned that he would be missing out on iron in his cereal. However, if your baby is exclusively breastfed and is 6 months of age or older, it’s important to make sure they are getting iron from other sources if you are giving them homemade cereal. The good news is there are plenty of other ways to add iron to your baby’s diet as they delve into the world of solid foods! If you’d like to alternate between homemade oat cereal for babies and storebought, one brand I really like is the Happy Family Organic Oats and Quinoa Baby Cereal. It comes fortified with iron as well as vitamin C to help absorption!

Enjoy!
–Lindsay–

Filed Under: Food Prep, Kids

A Week of Grab and Go Meals

April 25, 2015 by Lindsay 16 Comments

Looking for some healthy recipes you can eat on the run? Here’s a week of grab and go meals that are easily portable and can be eaten quickly!

A Week of Grab and Go Meals

Hi Friends!

Time for another week of meal plan ideas. This time I put together a week of Grab and Go Meals for you. So many of my readers are busy during the week and I wanted to give you some healthy options that you could eat on the run!

Looking for healthy meals you can eat on the run? Here's a week of grab and go meal ideas!

Most of these recipes are easily portable and many can be eaten with one hand! Hopefully you’ll find some delicious new ideas!

Breakfast

Grab and Go Breakfast Ideas


  • Blueberry Baked Oatmeal Singles via Emily Bites
    • Customize with your favorite fruit. Toss them in the microwave for a few seconds before you head out the door or eat them cold!
  • Breakfast Banana Pops via Chocolate Covered Katie
    • A fun, yet nutritious breakfast for those busy mornings with the kids.
  • Chocolate Peanut Butter Breakfast Quinoa via Simply Quinoa
    • Quinoa’s not just for dinner! Try it in place of oatmeal for a quick breakfast.
  • Grab and Go Omelette In A Bag via Lovely Bits
    • Let this cook while you get ready, wrap in foil and eat it during your commute.
  • Grab and Go Breakfast Cakes via Wholehearted Eats
    • Nutritious and super portable!


Lunch 

Grab and Go Lunch Ideas

  • Strawberry Spinach Mason Jar Salad via Eating Bird Food
    • Easy to make several ahead of time and throw in your lunchbox all week.
  • Chicken Avocado Pita via The Cookie Rookie
    • Packed with protein and healthy fats, this can be eaten with just one hand.
  • Sweet Potato, Kale & Black Bean Quesadillas via Cookie Monster Cooking
    • Use cheese to help everything stick together, then eat freshly cooked or make ahead of time and eat cold or reheat.
  • Berry Cheesecake Smoothie via Cotter Crunch
    • Drink up for a protein-packed, satisfying meal.
  • Sweet Potato Waffle Sandwiches via The Lean Green Bean
    • A fun change on a traditional sandwich.


Dinner

Grab and Go Dinner Ideas

  • Tropical Chicken Burgers via The Healthy Foodie
    • Slap it on a bun or wrap it and lettuce and eat on the go!
  • Spinach Ricotta Lasagna in a Mug via Healthy Nibbles & Bits
    • No huge pans or serving spoons needed! Perfectly portioned and easy to grab when you head out the door.
  • Meat Bagels via Ditch the Wheat
    • A fun spin on burgers
  • BBQ Chicken Pizza Calzones via Rock Recipes (learn how to freeze them here)
    • Change up the fillings to fit your taste preferences. Stock your freezer and then just reheat and go!
  • Quick & Easy Chicken Burritos via Gimme Delicious
    • Mix everything in one dish, spoon into a tortilla and wrap in foil to make it easy to hold and eat!


Looking for some food prep ideas for the recipes in this meal plan?

You could:

  • Make a batch of banana pops and freeze them.
  • Make a double batch of oatmeal cups and freeze half for another week.
  • Prep a batch of breakfast cakes.
  • Cook the quinoa for your parfaits.
  • Cook chicken to use in the mason jar salads and pitas.
  • Prep a couple of mason jar salads for lunch.
  • Make a batch of sweet potato waffles to have on hand to make sandwiches.
  • Bake or grill some chicken burgers.
  • Prep and freeze some pizza calzones.
  • Cook the chicken, rice and beans for burritos.

weekly meal plans

Need more ideas? Check out the full gallery of weekly meal plans here. 


Enjoy!
–Lindsay–

Filed Under: Ingredient Round-Ups, Weekly Meal Plans

Chili Cornbread Skillet

April 24, 2015 by Lindsay 14 Comments

Simple and flavorful, this Chili Cornbread Skillet is ready in about 30 minutes for an easy weeknight dinner the whole family will love.

Simple and flavorful, this Chili Cornbread Skillet is ready in about 30 minutes for an easy weeknight dinner.

Hi Friends!

Wanna know what’s irritating? Buying a new memory card for your camera because you lost yours, making something great to photograph for the blog and then realizing the memory card you bought is WAY too big and won’t work with your camera.

Then you’re faced with the dilemma of either eating what you made without taking pics and having to remake it or not eating it until you can get a new memory card and then going hungry.

I went with option 3- take a few quick pictures with your iphone, hope they turn out halfway decent and then eat! Seems like a win all-around, right?

Because let’s be honest…we all know how the photo-taking sessions have been going around here lately. Rushed with a side of screaming baby. This mom doesn’t have time for remakes of a recipe that turned out perfectly fine the first time 🙂

Simple and flavorful, this Chili Cornbread Skillet is ready in about 30 minutes for an easy weeknight dinner the whole family will love.

So anyways, bottom line is – excuse the photos and focus on the delicious recipe.

I made a version of this Chili Cornbread Skillet way back when I first started my blog and recently decided it was worth revisiting. I made mine with beef but you could use turkey…or even tempeh probably if you wanted to. I also used a cast iron skillet. If you don’t have one, you could make it in a regular baking dish (I’d probably try a 9×13 pan).

Here’s how you make it:

Print

Chili Cornbread Skillet

Chili Cornbread Skillet 5 550x550
Print Recipe

5 Stars 4 Stars 3 Stars 2 Stars 1 Star

No reviews

Simple ingredients and ready in about 30 minutes, this skillet is sure to be a hit with the whole family!

  • Author: Lindsay L
  • Prep Time: 15 minutes
  • Cook Time: 20 minutes
  • Total Time: 35 minutes
  • Yield: 6 1x

Ingredients

Scale
  • 1 Tbsp oil
  • 1.5 pounds ground beef (or turkey)
  • 1 bell pepper (any color is fine)
  • 1 jalapeno (optional)
  • ⅔ cup onion, diced (about 1 small)
  • 1 can kidney beans, drained (no salt added)
  • 1 can no salt added diced tomatoes – undrained
  • 8 oz tomato sauce (optional)
  • 1 tsp cumin
  • 2 Tbsp chili powder
  • 1 batch cornbread batter (use your favorite recipe)

Instructions

  1. Heat oil in a cast iron skillet or saute pan.
  2. Add remaining ingredients, except cornbread, and saute over medium heat until beef is cooked through. I make mine without the 8 oz of tomato sauce but if you prefer your chili a little more tomato based and liquidy you can add it.
  3. If using cast iron skillet, remove from heat and leave contents in skillet. If not, transfer to a 9×13 baking dish.
  4. Top with cornbread batter – you can spread evenly over the whole pan or just place dollops across the top.
  5. Bake at 400 degrees for 20-25 minutes or until cornbread is cooked and golden brown on top.

Did you make this recipe?

Tag @theleangreenbean on Instagram

I’m lazy and usually just use the recipe for cornbread that’s on the Quaker cornmeal container. Here’s the Quaker Cornbread recipe. This makes a pretty thick piece of cornbread on top. If you want less cornbread, more chili you could halve your cornbread recipe for a thinner layer or half the recipe and just plop some blobs of batter across the top instead of making a solid layer.

Simple and flavorful, this Chili Cornbread Skillet is ready in about 30 minutes for an easy weeknight dinner the whole family will love.

Hubby suggests serving it upside down so the cornbread is on the bottom.

[Tweet “Need an easy weeknight dinner? Try this Chili Cornbread Skillet from @leangrnbeanblog!”]

Enjoy!
–Lindsay–

Filed Under: Dinner Tagged With: Ground Beef, Onion, Tomato

We Rise By Lifting Others

April 22, 2015 by Lindsay 74 Comments

This post recaps a sponsored trip. My expenses were covered. All thoughts and opinions are my own.

IMG_5681

Hi Friends-

Last week I had the pleasure of attending the Eat Sea Retreat at Terranea Resort in Rancho Palos Verdes, CA. Thanks to the resort and a couple of other amazing sponsors – Stonyfield and Nature’s Path, a small group of amazing bloggers were able to get together for a few days to eat, drink and chat about blogging and life.

Our group included:

  • Amelia at Eating Made Easy
  • Liz at The Lemon Bowl
  • Ashley at Edible Perspective
  • Lauren at Climbing Grier Mountain
  • Kristin at Iowa Girl Eats
  • Megan at Wanna Be A Country Cleaver
  • Nikki at Seeded At The Table
  • Me!

The group was the perfect size for productive, yet intimate blogging sessions and for me it was a great mix of bloggers I knew very well and some I was less familiar with. When I was initially invited on this trip, I wasn’t sure if I wanted to go. My plan was not to travel much until Squish was a little older but as I learned more about it- who was going, what the agenda was, I decided it would be worth it.

IMG_5793

And I was so right. It’s probably the most valuable thing I’ve ever done for my blog.

Being a part-time or full-time blogger is a somewhat unique career and because of that, it can be a bit isolating. It’s not like we all work in the same building, or even the same city! We don’t always get a chance to meet the people we interact with every day. Opportunities like this are wonderful because they allow bloggers to connect in person and talk about the behind the scenes blogging things that people in your personal life might not necessarily understand because they’re not bloggers themselves. It allowed us to share tips and tricks, offer constructive criticism and critiques, brainstorm and problem solve.

But probably most importantly, it allowed us to support each other. I titled this post with one of my favorite quotes “We rise by lifting others”, because although all 8 of us are bloggers and some of us even blog in similar niches, work with the same brands, etc, there wasn’t a single time during the trip where I didn’t feel 100% SUPPORTED & ENCOURAGED by everyone else who was there.

IMG_5801

Blogging is a tricky beast and if you let it, it can easily become a cut-throat, competitive, money-obsessed occupation. But it doesn’t have to be. In fact, this retreat just went to show that in many cases, bloggers can be each other’s best advocates and supporters.

One of my favorite activities from the trip was what I’d call the “struggle circle”. We all came up with one thing we’ve been struggling with lately, described our problem to the group and then we went around and everyone offered a suggestion or solution. Since we all had unique experiences and insights, everyone left with several different ideas and suggestions for fixing their problem. We covered everything from time management to rebranding to blogging burnout to figuring out how much to charge the companies we work with and so much more. And many of us found ourselves relating to more than one of the struggles.

IMG_5831

It was so refreshing to be able to chat with people who understood what I was going through or had been in my position previously and could offer insight. Most of us have been blogging for 5+ years and to be able to have a “meeting of the minds” like this where we could share experiences, tools, suggestions and encouragement was absolutely invaluable.

I could go on and on about my trip but I’ll leave you with these 5 valuable lessons that this trip helped remind me of:

1) Stop comparing yourself to others. What are you doing when you’re comparing yourself to others? You’re doing nothing to move yourself forward!

2) Just do it. There’s never going to be a “perfect” time to do something, whether it’s increasing your rates, quitting your job, rebranding, whatever. It’s always going to be scary, but you’ll never know until you try.

3) Find your niche and rock it! You cannot please everyone. If you try to, you’ll end up being mediocre in lot of areas instead of excelling at a few.

4) Get help. If there are things you don’t enjoy doing or don’t make the best use of your skills or talents, find someone else to help you do them.

5) Spread the love. Surround yourself with people who believe in you, support you and encourage you and make sure you’re doing the same for those people.


IMG_5635

To give you a brief recap of our trip: I got to LAX around 9am on Thursday and took a cab to Amelia’s house. We ran to Whole Foods & the farmer’s market to get some supplies and then headed up to the resort. After we unpacked, we met up with Ashley, Megan and Lauren at the pool. Liz & Kristin arrived and we headed back to our villas for a happy hour.

IMG_5661

That evening we had a several course dinner complete with wine pairings that was incredible. Friday morning we were up early and after a delicious breakfast thanks to our sponsor and then we spent the rest of the morning taking turns leading sessions.

IMG_5710

IMG_5716

Liz and I shared our tips for productivity tools and time management techniques, Ashley and Kristin talked about building a loyal following and Lauren and Nicki branched out and talked a bit about how to approach brands and expand your portfolio. The great thing about the sessions is that we had a rough outline but then we were able to each chime in whenever we wanted and address other related issues that came up.

IMG_5773

After our session we had lunch on the patio of our villa cooked by some of the resort chefs and then we squeezed in a little more time at the pool before heading back to our villa to get head shots taken. We enjoyed a happy hour at one of the other resort restaurants and then came back to make dinner and chat some more.

IMG_5800

IMG_5820

Saturday morning we fit in a couple more sessions before the first group of us headed to the airport. It was a quick trip but it was jam packed with useful information.


Like I mentioned before, I found the chance to get together with such amazing women and fellow entrepreneurs in a small-group setting to invaluable and it definitely gave me a push to make some changes and improvements I’ve been contemplating for a while now.

Huge thanks again to Terranea, Stonyfield and Nature’s Path for making it possible and to Amelia for organizing such a great retreat.

A few sponsor-related notes:

  • If you’re looking for a California vacation destination, I highly recommend Terranea Resort. The resort staff was incredibly friendly and helpful, the rooms/villas we stayed in were spacious and clean and the resort itself was beautiful, with all sorts of available activities from hiking to spa treatments to poolside lounging. It was like escaping to Hawaii for the weekend- without the extra-long flight!
  • Stonyfield has a couple of relatively new products you should check out: Greek & Chia Yogurt and Oh My Yog! I hadn’t tried either before the retreat and I liked them both! The Oh My Yog is delicious for dessert!
  • Nature’s Path Organic also has tons of great products. My favorite was the Qi’a Superfoods Hot Oatmeal packets we got to try for breakfast. They were a fun change from my regular oatmeal and SO delicious. I loved the Cinnamon Pumpkin Seed flavor!


Let’s chat:
What’s the most valuable life lesson you’ve learned or been reminded of lately?

Enjoy!
–Lindsay–

Filed Under: Uncategorized

California Turkey Burgers

April 21, 2015 by Lindsay 47 Comments

These California Turkey Burgers are packed with delicious flavors thanks to the addition of avocado, roasted red peppers and bacon! Perfect for grilling season!

These California Turkey Burgers are packed with delicious flavors thanks to avocado, roasted red peppers and bacon. Perfect for grilling season!

Hi Friends!

Time for another month of Recipe Redux!

The theme for this month was spring cleaning. Here’s the prompt:

Go through your pantry, cupboards, freezer, or fridge; what ‘treasures’ have you found? Pick an ingredient/spice/condiment that’s been hanging out for a while and give it the attention it needs. Share a healthy recipe made using your new-found pantry prize.

I’m actually pretty good about cleaning out my pantry but sometimes I find things lurking in the back of my fridge so I checked my shelves and sure enough, I found some roasted red peppers that my mom bought while she was in town. I really like roasted red peppers and typically I like to roast my own, but until lately it had been forever since I’d done it. For the past few weeks I’ve gotten back into the swing of it because they’re one of Squish’s favorite foods….but anyways, I found this jar and knew I needed to use it up!

With grilling season upon us, I knew I wanted to make something we could make on the grill and burgers came to mine. I don’t like beef burgers but I do enjoy a good turkey burger every once and a while so I decided to make those, with a California spin in honor of my upcoming trip to Cali. That trip is now over, but I made these a few weeks ago when I was getting excited about it!

These California Turkey Burgers are packed with delicious flavors thanks to avocado, roasted red peppers and bacon. Perfect for grilling season!

Of course, it ended up raining the day I made these so I made them in the oven, but you could easily make them on the grill. I added some typical burger toppings to the inside of the burger to change things up – roasted red peppers, avocado, bacon, etc.

Here’s how you make them:

Print

California Turkey Burgers

California Turkey Burgers
Print Recipe

5 Stars 4 Stars 3 Stars 2 Stars 1 Star

4.7 from 3 reviews

An easy burger filled with flavor thanks to the bacon, avocado and roasted red peppers.

  • Author: Lindsay L
  • Prep Time: 10 minutes
  • Cook Time: 25 minutes
  • Total Time: 35 minutes
  • Yield: 6-8 1x

Ingredients

Scale
  • 1 pound ground turkey
  • 2 strips bacon, diced
  • ¼ cup diced avocado
  • ¼ cup diced roasted red peppers
  • 2 tsp minced garlic
  • ¼ cup diced onion
  • 1 egg
  • 2 Tbsp crumbled feta
  • Optional toppings: avocado, lettuce, tomato, onion, peppers
  • Bun or lettuce for serving

Instructions

  1. Combine all ingredients through feta in a large bowl.
  2. Mix by hand until well combined.
  3. Form into 6-8 patties.
  4. Grill until internal temperature reaches 165 degrees F.
  5. OR
  6. Bake at 400 degrees F for 25 min, flipping once (or until 165 degrees F is reached internally).
  7. Serve with desired toppings on a bun or lettuce.

Did you make this recipe?

Tag @theleangreenbean on Instagram

Feel free to add or subtract mix-ins to fit your taste. Also make sure your mix-ins are pretty finely diced before mixing to make it easier for the burgers to stick together.

These California Turkey Burgers are packed with delicious flavors thanks to avocado, roasted red peppers and bacon. Perfect for grilling season!

Be sure to check out the link-up below to see how others turned their spring cleaning into a new recipe!

[Tweet “These California Turkey Burgers from @leangrnbeanblog are perfect for grilling season!”]

Enjoy!
–Lindsay–

An InLinkz Link-up

Filed Under: Dinner Tagged With: Avocado, Bell Pepper, Feta, Ground Turkey

Mini Greek Yogurt Pies

April 17, 2015 by Lindsay 14 Comments

Ready in 60 seconds, these super simple mini Greek Yogurt pies are the perfect way to satisfy your sweet tooth. 

mini-greek-yogurt-pies-3-via-@semihealthnut-at-semihealthyblog

Hi Friends!

I’m away at a little blogging conference today so my girl Amanda is taking over to share a tasty treat with all of you! Enjoy!


Hello there Lean Green Bean readers! My name is Amanda and I blog over at Diary of a Semi-Health Nut about a variety of things like semi-healthy recipes, my attempts at running, and lately my new cat, Zoey Fluffy Butt.

I’ve had the pleasure of following Lindsay’s blog for the past 3(?!) years and I’m so excited to have the opportunity to take it over for the day. Hopefully this means she gets a little more time to snuggle squish (<-her cute baby, incase you didn’t know) and update her Bean Bytes so I know what posts I need to be reading next week.

Keep it Simple and Semi-Healthy

I’m with Lindsay—healthy food shouldn’t be complicated! I think sometimes we get into our heads that to live a healthy life, we have to do workout for hours every day, and spend another couple of hours cooking healthy meals with weird healthy ingredients so we can be a healthy living goddesses.

That’s simply not true! Don’t overwhelm yourself with complex workout routines and recipes. Just keep it simple! That way you won’t give up after a week due to unrealistic expectations.One unrealistic expectation (for me anyways) is giving up dessert. I often wonder…is this person who says they are giving up dessert never going to eat another piece of chocolate again? How is this possible?

Instead of totally giving up desserts, why not try to make your desserts semi-healthy? Adding bananas and protein to cookies, flaxseed flour to fudgy hot cocoa bars and even making your own homemade fruit roll-ups are just a few ways to satisfy your sweet tooth while adding some needed nutrients into your body.

Win-win, right?

This isn’t to say that I don’t ever eat regular desserts, I just try to make most of my desserts semi-healthy so I’m at least getting some health benefits. Chocolate is always a viable option by the way…hello antioxidants!

Mini Greek Yogurt Pies

Ready in 60 seconds, these Mini Greek Yogurt Pies are the perfect way to satisfy your sweet tooth!

I’ve brought you guys a super simple semi-healthy dessert you can whip up in 60 seconds flat. You could probably even get your significant other, kids, friends or anyone who doesn’t like to eat “healthy” to dig into this tasty sneakily-healthy creation.

One of my favorite things to do is whip up a semi-healthy dessert, feed it to friends and not tell them there’s anything healthy in it until they are done raving over it.

Then boom! I drop the health bomb on them!

Okay not really, I just let them know there are a few healthy ingredients and watch their surprised faces! These mini Greek yogurt pies have been perfect for me as a treat after a run or as a little something sweet after dinner without being TOO sweet.

Mini Greek Yogurt Pies Recipe

Ready in 60 seconds, these Mini Greek Yogurt Pies are the perfect way to satisfy your sweet tooth!

Ingredients:

Mini graham cracker pie crust*

1/2 cup your choice of Greek yogurt

Toppings such as sprinkles, cinnamon-sugar, whipped cream, mini chocolate chips, chopped nuts

Instructions:

Pile your Greek yogurt and toppings into a cute little mini graham cracker pie crust. I used leftover sprinkles and cinnamon sugar from my recent (sweet sugar and butter-filled) dessert Lemon Snickerdoodle Funfetti Cookies. Grab a spoon and dig in!

*I found these at Target, but you can also find them on Amazon. An alternative could be made by putting some graham crackers and melted butter into a food processor and pressing the mixture into the bottom of a small bowl or cupcake liner. Scale down this recipe for precise measurements. You could also just use crushed graham crackers if you want to nix the butter. It’s your dessert!

Ready in 60 seconds, these Mini Greek Yogurt Pies are the perfect way to satisfy your sweet tooth!

Benefits of Greek Yogurt

Not all Greek yogurts are created equally, but in general, these tend to be the benefits:

-Higher in protein than regular yogurt

-Lower in sugar than regular yogurt

-Probiotics which aid digestion

-Calcium for your bones

-Other surprising benefits

So what are you waiting for? Whip up your own awesome Mini Greek Yogurt Pies and be sure to let me know what you came up with!

smile-picture-profile-me


Thanks Lindsay for letting me take over your blog for the day.

Questions:

Are you a fan of Green yogurt? Which brand and flavor?

Do you make semi-healthy desserts? What’s your favorite recipe? Share it below in the comments!

Filed Under: Dessert

30 Healthy Dessert Recipes

April 15, 2015 by Lindsay 44 Comments

Got a sweet tooth? Here are 30 Healthy Dessert Recipes for you to try! 

Chocolate Almond Meal Cake

Hi Friends!

Today is a big day. It’s my birthday! And not just any birthday. I’m turning 30! Eeeeek! So it seems only natural that we talk about healthy dessert recipes.

On Monday hubby threw me a little surprise birthday party (he’s the best) so I got to celebrate in person with my friends and family! Now if I could just figure out a way to get together with all of my fabulous blogger friends and readers to celebrate as well, my birthday would be perfect! Since I can’t, we’ll have to settle for celebrating virtually. To make it more fun, I invited 30 of my favorite food bloggers to my virtual party and asked them to bring dessert. Here are 30 of their favorite dessert recipes for everyone to check out! Funny thing is, I never said anything about them having to be healthy. That’s just how it ended up. Fairly healthy, as far as desserts goes. I guess that’s just how me and my bloggy friends roll!

Looking for some new healthy dessert recipes? Here are 30 delicious dessert recipes from some of the best food bloggers around!

Get ready to start drooling. And be sure to pin some of these so you can make them for yourself later! I tried to notate any special dietary categories they fit into if applicable.

30 Healthy Dessert Recipes

Chocolate Raspberry Tarts

Chocolate & Raspberry Tartlets via Living Well Kitchen

Lemon Berry Napoleons

Fresh Lemon Berry Napoleons via Wanna Be A Country Cleaver

Vegan Chocolate Peanut Butter Ice Cream

Chocolate Peanut Butter Ice Cream via The Lemon Bowl
{Vegan, Gluten-Free}

Chocolate Chip Gingerbread Chickpea Blondies

Chocolate Chip Gingerbread Chickpea Blondies via Hummusapien
{Gluten-Free, Vegan}

Doughy Peach Pie Bars

Doughy Peach Pie Bars via Yeah…Imma Eat That
{Gluten-Free}

Paleo Cashew Butter Cookies

Cashew Butter Cookies via Fit Foodie Finds
{Grain-Free, Paleo}

Paleo Orange Maple Sugar Cookies

Orange Maple Sugar Cookies via Cotter Crunch
{Grain-Free, Paleo}

Vegan No Bake Blueberry Custard Pie

No Bake Blueberry Custard Pie via Fannetastic Food
{Vegan, Gluten-Free}

Rhubarb Chai Cream Pie

Light Rhubarb Chai Cream Pie via Healthy Seasonal Recipes

Paleo Dark Chocolate Cake

Deep Dish Dark Chocolate Cake w/ Almond Butter Swirl via A Clean Bake
{Paleo, Gluten-Free}

Gluten-Free Carrot Cake

Carrot Cake via The Healthy Maven
{Gluten-Free}

Peanut Butter and Jelly Cupcakes

Peanut Butter and Jelly Cupcakes via Keep it Sweet

Black Bean Brownies

Black Bean Brownies via Meal Makeover Moms
{Gluten-Free}

Dark Chocolate Almond Oatmeal Cookies

Dark Chocolate Almond Oatmeal Cookies via The Foodie Dietitian
{Gluten-Free, Dairy-Free}

Crepe Cake

Chocolate Crepe Cake via Food Faith Fitness

Chocolate Ice Cream Sandwiches

Chocolate Ice Cream Sandwiches via Kumquat
{Gluten-Free, Vegan}

Cinnamon Raisin Spice Cookies

Cinnamon Spice Raisin Cookies via An Avocado A Day
{No Added Sugar, Grain-Free}

Creamy Avocado and Lime Tart

Creamy Lime & Avocado Tart via Eating Bird Food
{Vegan, Gluten-Free}

Flourless Peanut Butter Oatmeal Bars

Peanut Butter Oatmeal Bars via Well Plated
{Gluten-Free}

Welcome To Chunkytown Cookies

Welcome To Chunky Town Chocolate Chip Cookies via Crave by Taylor
{Paleo, Grain-Free}

Light Triple Coconut Cream Pie

Light Triple Coconut Cream Pie via Back To Her Roots

Chocolate Almond Meal Cake

Chocolate Almond Meal Cake via Edible Perspective
{Gluten-Free, Dairy-Free}

Flourless Double Chocolate Brownies

Flourless Double Chocolate Brownies via Running with Spoons
{Gluten-Free}

German Chocolate Cupcakes

German Chocolate Cupcakes w/ Pecan Coconut Icing via The Spicy RD
{Gluten-Free, Vegan}

Banana Chocolate Peanut Butter Swirl Bread

Banana Chocolate & Peanut Butter Swirl Bread via Healthy Nibbles & Bits
{Gluten-Free}

No Bake Salted Caramel Slice

No Bake Salted Caramel Slice via The Big Man’s World
{Gluten-Free, Vegan}

Mini Chocolate Layer Cakes for Two

Mini Chocolate Layer Cakes via Dessert for Two

Small Batch Dark Chocolate Cupcakes

Small Batch Dark Chocolate Cupcakes via Peas and Crayons

Reeses Cupcakes

Vanilla Bean Cookie Butter Cupcakes via Ari’s Menu

Fudgy Paleo Brownie

Fudgy Skillet Brownie via Running to the Kitchen
{Grain-Free, Paleo}


Anything catch your eye? Leave a link to your favorite healthy dessert in the comments!

[Tweet “Hungry? Here are 30 Healthy Dessert Recipes for you to drool over via @leangrnbeanblog!”]

Enjoy!
–Lindsay–
Filed Under: Dessert, Ingredient Round-Ups

A Look In My Diaper Bag

April 14, 2015 by Lindsay

This post was sponsored by Boppy™. I was compensated for my time. All thoughts and opinions are 100% honest and my own.

Hi Friends!

Today we’re switching gears from food to babies! More specifically, I’m going to introduce you to my new Boppy™ Diaper Bag and give you a peek of what I keep inside.

boppy diaper bag

Let me start by saying this bag was a serious a fashion upgrade from my previous bag which was functional but a totally boring plain black. My new bag is so pretty! I love the colors and pattern (there are several fun ones to choose from!) and I also love the fact that it’s fashionable, but not over-the-top girly, so hubby still feels comfortable carrying it!

boppy diaper bag


The bag itself is well made and sturdy. It has tons of pockets both inside and out to help keep things organized, a binky holder (clutch!) and an external strap to to clip on extra items like a nursing pillow or a sweater. And it zips closed on top- critical for me because I’m constantly throwing the bag around when I’m in a hurry and I don’t need things spilling out all over the place.

boppy diaper bag top

As an added bonus, it comes with a matching clutch and changing pad. When I published my 10 Tips For New Moms post a couple months ago, one reader had a great suggestion to keep an extra diaper bag in the car because you never know when you’re going to run out of the house in a hurry and forget the diaper bag. As a frequent sufferer of mom brain (believe me when I say, mom brain is a real thing) I pretty much thought this was the best idea ever! The clutch is the perfect size for a pack of wipes, a few diapers and a clean onsie. I’m leaving the clutch and diaper pad in my car from now on for emergencies!

boppy diaper bag clutch

When you leave the house with a baby, you need a lot of stuff. Gone are the days when I could just run out the door at the last minute with nothing more than a credit card and my keys. Now, when I venture out with Squish, I not only need him and his carseat, but I need diapers, wipes, and a changing pad so I can change his diapers. I need a change of clothes in case he has a blowout. I need a bottle and formula in case he needs to eat. I need toys in case I need to entertain him…..see what I mean??

So, I thought i’d be fun to share what I keep in our diaper bag, so I made a little video!

And here it is laid out all nice and pretty! Like I said, it’s a lot of stuff and I love that all fits in my Boppy™ Diaper Bag AND there’s room for more!

diaper bag contents

I asked Squish what he thought about the bag and he gave it his seal of approval as well!

boppy diaper bag and baby

He did get a little tired of me taking pictures though 🙂

boppy diaper bag

Anyways, I hope some of you found this review helpful. Keep it in mind next time you need a gift for a baby shower!You can find them at Amazon, Babies ‘R’ Us or Buy Buy Baby.

Oh, and they also have this super convenient changing pad station for a smaller grab and go option! That clip makes it perfect for clipping on a stroller which is making me want to get one for myself for summer!

a

Be sure to check out the Boppy™ website to see all the fun pillows, bags, toys and chairs they have.

boppy® logo 3.5.15 white outline


Enjoy!
–Lindsay–

This is a sponsored conversation written by me on behalf of Boppy via Burst Media. The opinions and text are all mine.
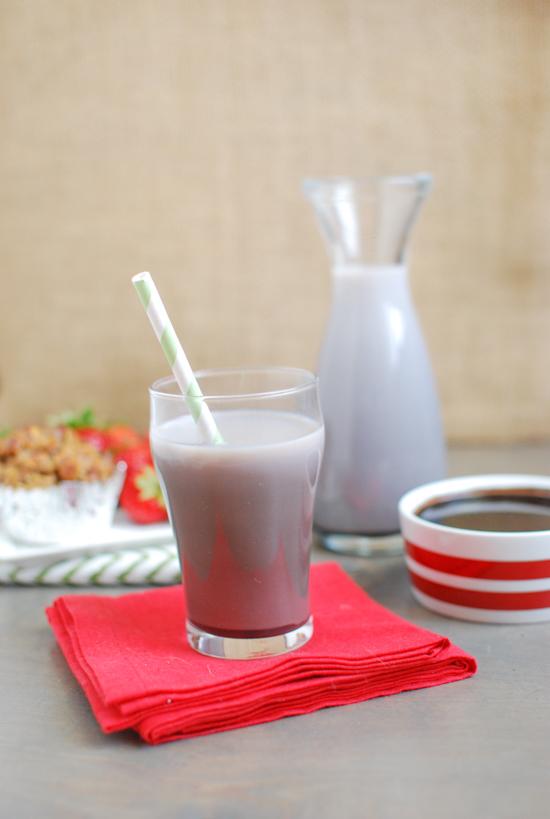
Filed Under: Kids

  • « Go to Previous Page
  • Page 1
  • Interim pages omitted …
  • Page 33
  • Page 34
  • Page 35
  • Page 36
  • Page 37
  • Interim pages omitted …
  • Page 65
  • Go to Next Page »

Primary Sidebar

Lindsay Livingston The Lean Green Bean Healthy Living Tips and Tricks

I'm a Registered Dietitian and mom of three from Columbus, Ohio. I use this blog to share simple, healthy recipes, nutrition tips, and an honest glimpse of motherhood!

Learn More →

Questions? Comments? Email me: [email protected]

The Lean Green Bean Facebook The Lean Green Bean Instagram The Lean Green Bean Pinterest The Lean Green Bean Twitter The Lean Green Bean Feed
footer-logo
The Lean Green Bean Facebook The Lean Green Bean Instagram The Lean Green Bean Pinterest The Lean Green Bean Twitter The Lean Green Bean Feed
Recipes

Breakfast
Dinner
Snack
Slow Cooker

Kids

Cooking With Kids
Favorite Gifts
Toddler Meals
Indoor Activities

Resources

Easy Packed Lunches for Kids
Dinner Spark
Snack Spark
Ultimate Guide to Food Prep

About

Meet Lindsay
Become an RD
Work with Me

The Lean Green Bean is a participant in the Amazon Services LLC Associates Program, an affiliate advertising program designed to provide a means for sites to earn advertising fees by advertising and linking to amazon.com.
Read the full privacy and disclosure policy here.

Copyright © 2022 · The Lean Green Bean

table talk series

Learn how food affects your body.

Get my free Table Talk email series where I share bite-sized nutrition information about carbs, protein, and fat, plus bonus information about snacks and sugar!

[email protected]