• Skip to main content
  • Skip to primary sidebar

Learn how food affects your body. Get Free Nutrition Info Today

the-lean-green-bean-logo
  • Home
  • Recipes
  • Kids
  • Resources
    • Ebooks
    • Food Prep
    • Videos
    • Snack Round-Ups
    • Gift Guides
  • About
    • Become An RD
    • Work With Me
  • Search
the-lean-green-bean-logo
  • Home
  • Recipes
  • Kids
  • Resources
    • Ebooks
    • Food Prep
    • Videos
    • Snack Round-Ups
    • Gift Guides
  • About
    • Become An RD
    • Work With Me
  • Search

blog

Gift Ideas For A Second or Third Time Mom

October 17, 2018 by Lindsay Leave a Comment

Looking for gift ideas for when a mom has their second or third baby? They’ll probably have the basics but here a few ideas that both mom and baby will appreciate. 

Thanks to Meijer for sponsoring this post

gift ideas for a second or third baby

Hi friends!

Let’s talk baby gifts shall we? We’ve all seen how elaborate baby showers can get when someone is about to become a first time mom. There is so much baby gear you need when you bring home your first kid! But what about the kids that come after that? See, a funny thing happens when you have your first baby. You start to make mom friends! And then more often than not, you and all your mom friends start having more babies around the same time.

While a lot of people don’t even have baby showers for their second or third kid (and beyond!) you may find yourself wanting to pick up a few things for a close mom friend that’s about to deliver a baby that’s not their first. And if your current situation has you pregnant yourself, or running around like crazy with a few kids of your own, consider using Meijer Home Delivery to save your sanity. Just use the ‘shopmeijer’ app, throw a few things in your cart and let someone else shop for them and deliver them right to your door! Then you can do the fun part, ie dropping them off to your mama friend and soaking up a few newborn snuggles! You could even give the gift of Meijer Home Delivery itself to a new mama so she can use it for herself!

baby gifts

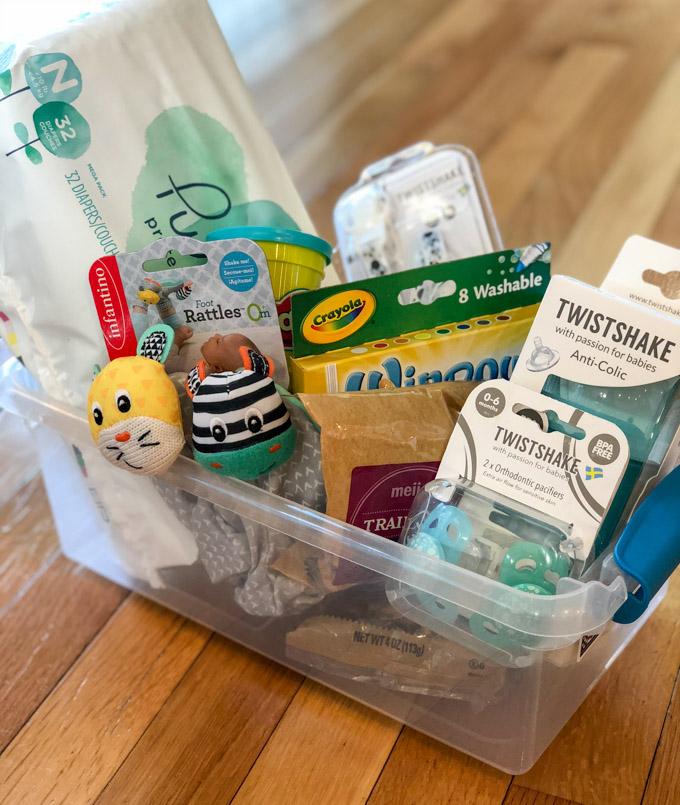
While most families will already have a lot of the basics that can be used with siblings, here are a few ideas that may be helpful for mom and baby:

diapers and rattles

First of all, diapers. You can never have too many. And by the time the second and third kids roll around, many moms have learned that babies often don’t stay in newborn diapers all that long. If they had that experience with their first, they may concentrate more on stocking up on size 1 and 2 diapers and could potentially forget completely about size newborn diapers (been there, done that)! So grab them a pack of newborn diapers so they have one less thing to worry about.

Babies also love rattles and newborns flail around a lot so these cute little foot rattles are perfect for those little feet that are constantly moving. Older siblings also love shaking rattles for babies! These Rattle and Shake Barbells are fun for both siblings and babies!

baby pacifiers, clips and bottles

Quick little newsflash in case you don’t know- not all babies take pacifiers. I’ve had one who was sucking on one from day 3, and one who wouldn’t touch one even though I tried for 6 months straight. However, they’re still great to have on hand to give moms that option of trying them out with their newborn. (Check out these TwistShake Orthodontic Pacifiers) If baby does happen to take a pacifier, these pacifier clips are a lifesaver to help avoid losing a million pacifiers.

Another thing mamas may or may not have experienced with their first kiddo is a need for formula. While some moms breastfeed without issue and some may choose formula from the start, still others may attempt to breastfeed and run into issues that require supplementation. When my first baby was 3 days old, he was suffering from jaundice and we had to immediately supplement with formula. Since I was planning to breastfeed, I didn’t have any on hand. Help a fellow mama be prepared for a situation like that by gifting them with formula and a bottle to have on hand just in case!

mom and sibling gifts

And finally, don’t forget about mama herself and any older siblings. Simple toys and activities that can keep siblings occupied while mom is busy feeding baby will always be appreciated!

And non-perishable snacks that mama can stash around the house to feed herself while she’s feeding the little one will also come in handy! Trail mix, granola bars, dried fruit, nut butter packets etc are all great options!

Hopefully this gave you a few ideas! I’d love to hear from you guys! If you’re a second or third time mama, what were some of the best gifts you got with your later kids?

Enjoy!
–Lindsay–

This is a sponsored conversation written by me on behalf of Meijer. The opinions and text are all mine.

Filed Under: Kids, Sponsored

Apple Graham Cracker Snack Nachos

October 15, 2018 by Lindsay 2 Comments

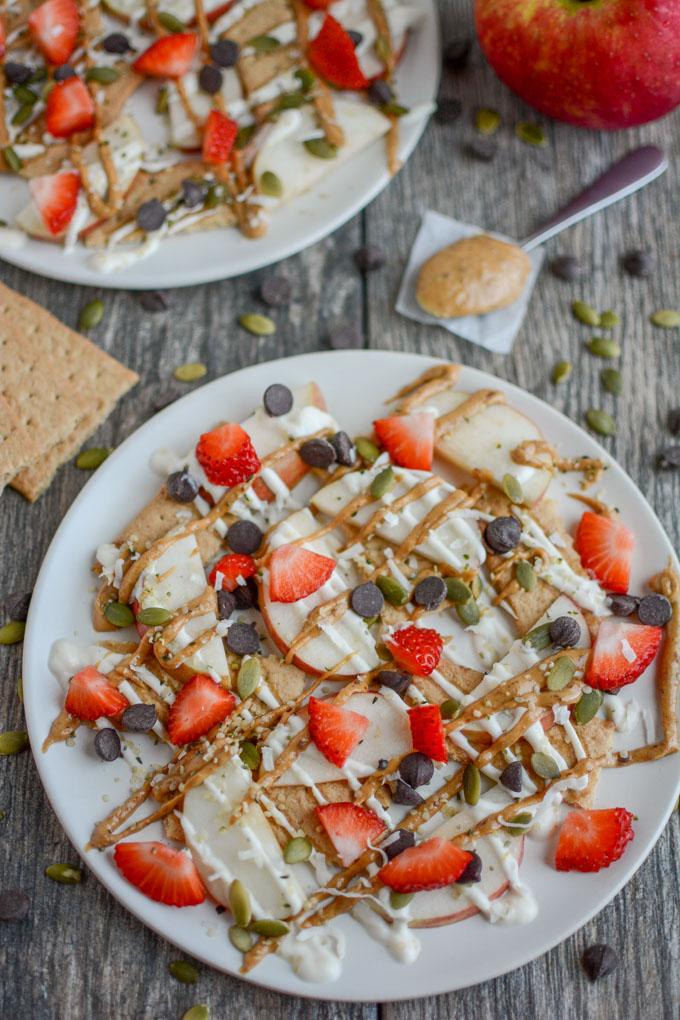
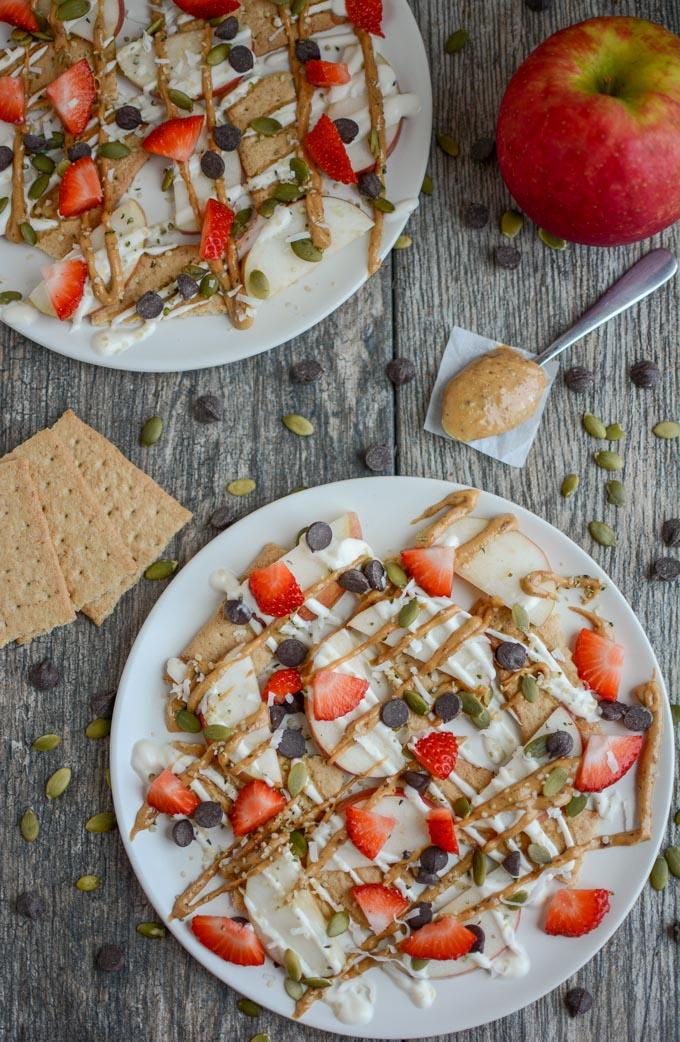
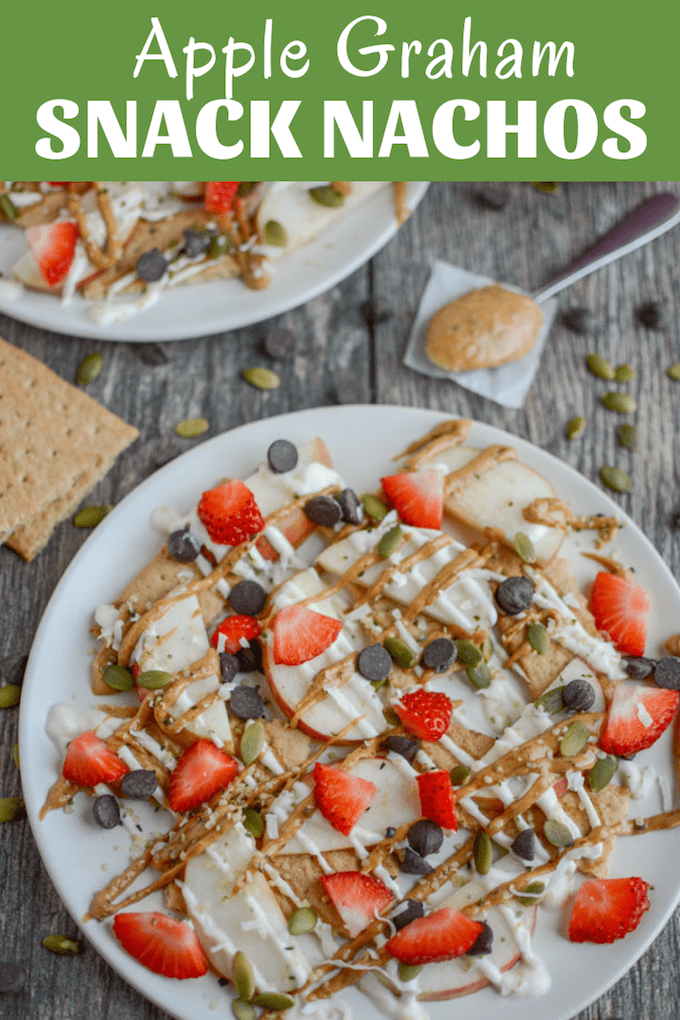
These Apple Graham Cracker Snack Nachos are a fun after school treat for the kids. A great way to mix familiar and new foods and make eating fun!

Apple Graham Snack Nachos

Hi friends!

If you follow me on IG stories, you saw me try out these Apple Graham Cracker Snack Nachos with my kids last week. I’m always thinking about ways to make our after-school snack more fun and these certainly fit the bill. I like them because they’re an easy way to take familiar foods that a toddler loves (in this case apples, graham crackers, strawberries, yogurt, peanut butter, chocolate chips) and add in a few less familiar ingredients (hemp seeds, flax, pumpkin seeds etc) in a non-threatening way.

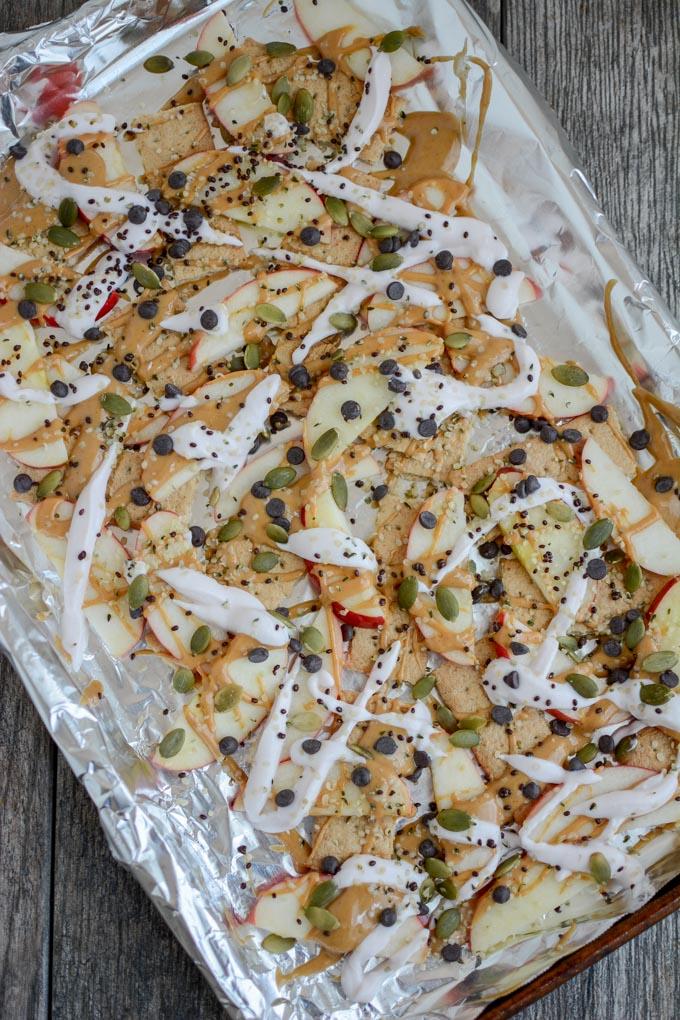
sheet tray apple graham snack nachos

This is the first batch I made for the kiddos to try last week. As expected, he immediately climbed up and proclaimed “I don’t like those” but then eventually went on to eat almost the whole tray. I did learn a few things from my first offering though:

  • I put them on a sheet pan, which made for easy cleanup, but looking back, I also think it may have been a bit overwhelming. The second time I put a smaller amount on a plate and he seemed more receptive.
  • I served them again a few days later, mixed some ground flax into the peanut butter and traded the chocolate covered chia seeds (from Salba Chia-unfamiliar to him) for fresh strawberries (which he loves and are brightly covered to catch his attention) and also scaled back on the pepitas. I still included them, just used less since they’re a new food for him.

I like this snack because you can totally customize it to your household and use whatever you have on hand to make them. You could use all apples instead of including graham crackers. You could add some strips of avocado toast mixed in with the apple slices, or even slices of sweet potato toast with peanut butter – both options I think my younger kiddo would actually prefer to graham crackers. You can mix ground flax or hemp seeds into peanut butter or yogurt so it’s still visable but doesn’t stand out as much. You can also let the kids help with the assembly!

Apple Graham Cracker Snack Nachos with fresh strawberries

Here’s how I made mine:

Print

Apple Graham Cracker Snack Nachos

Apple Graham Snack Nachos
Print Recipe

5 Stars 4 Stars 3 Stars 2 Stars 1 Star

No reviews

These Apple Graham Cracker Snack Nachos are a fun after school treat for the kids. A great way to mix familiar and new foods and make eating fun!

  • Author: Lindsay

Ingredients

Apple slices
graham crackers
yogurt
peanut butter
fresh fruit
chocolate chips
pepitas
hemp seeds
ground flaxseed
chia seeds
chopped nuts
other options: Sweet potato toast slices, avocado toast slices, anything else you can think of!

Instructions

Use the apple slices and graham cracker quadrants as the base. (Or the sweet potato/avocado toast slices if using)
Drizzle with yogurt and peanut butter (I mixed ground flaxseed into my peanut butter. You could also mix hemp seeds or chia seeds in
Add toppings and serve.

Notes

For a pretty drizzle, put the yogurt into a ziploc bag, cut the corner off and squeeze to drizzle as desired.
For the peanut butter I just microwave it for 30 seconds or so to make it runnier and then drizzle off a spoon.

Did you make this recipe?

Tag @theleangreenbean on Instagram

Aren’t these so fun?!

These Apple Graham Cracker Snack Nachos are a fun after school treat for the kids. A great way to mix familiar and new foods and make eating fun!

Enjoy!
–Lindsay–


Filed Under: Snack Tagged With: Apple, Chocolate Chips, Fruit, Graham Cracker, Ground Flaxseed, Hemp Seed, Peanut Butter

How To Food Prep – Step By Step

October 12, 2018 by Lindsay 4 Comments

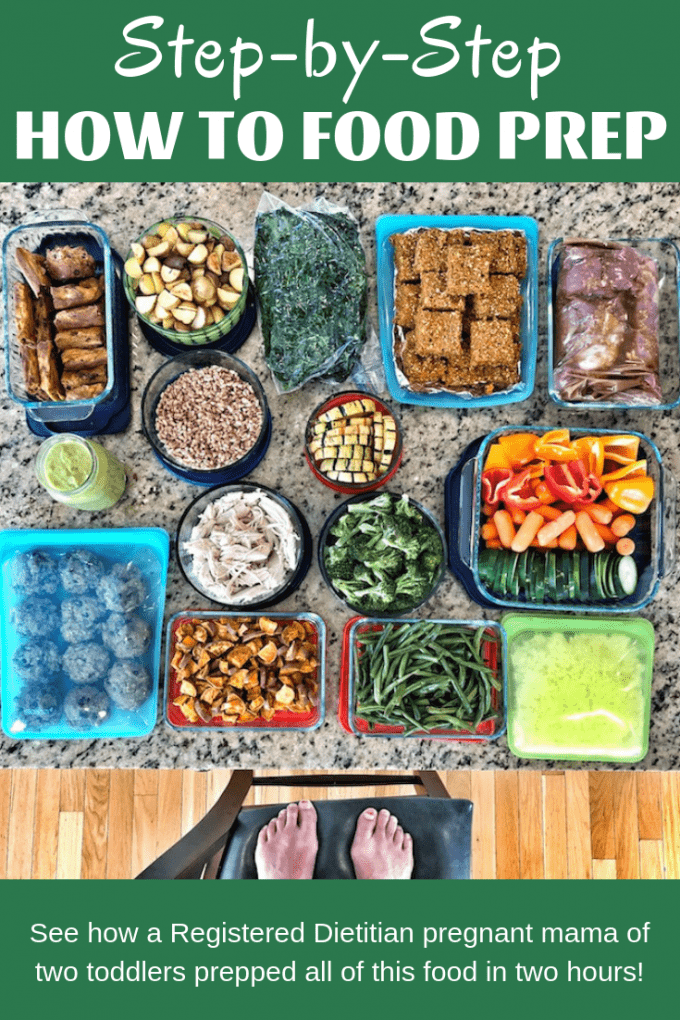
An example from a Registered Dietitian showing you How To Food Prep – Step By Step. I share what I prepped in 2 hours for a healthy week and what order I did things in so that I could utilize my time most efficiently.

2 hours of food prep from an RD, split into two sessions.

Hi friends!

A lot of you seem to like to watch me food prep over on Instagram Stories so I’ve been trying to be more intentional about showing you my step by step process so that  you can see exactly what order I do things, and how I utilize my time to make the most of my food prep sessions. Here’s an example of a prep session I did a few weeks ago.

If this post is helpful to you, you’ll love my Mastering Food Prep course. I teach you the five steps to food prep, plus I talk about meal prep beyond dinner, give you tips for adding variety, talk about flexible meal prep and food safety and cover some of the most common roadblocks to food prep.  I also have an ebook called Ultimate Guide to Food Prep.

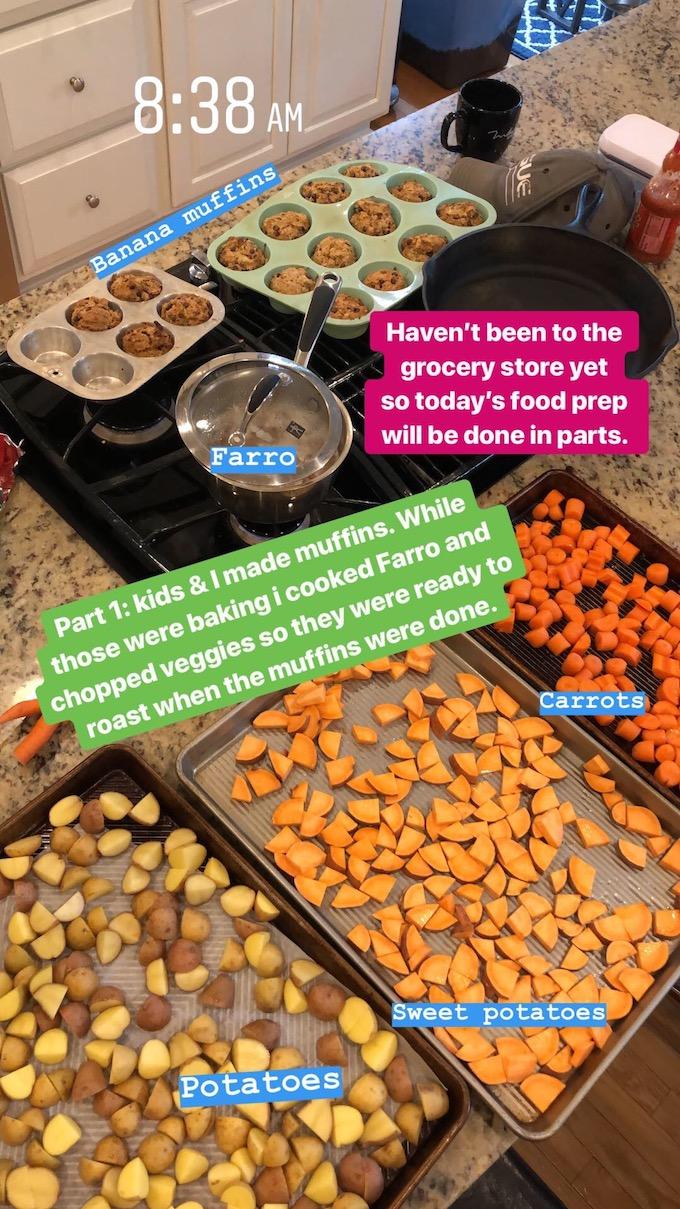
So, typically we go to the grocery store on Saturday but on this particular weekend, we didn’t go until Sunday afternoon. I had some time in the morning so I used what I had on hand to get some prep out of the way before we even went to the store.

early food prep

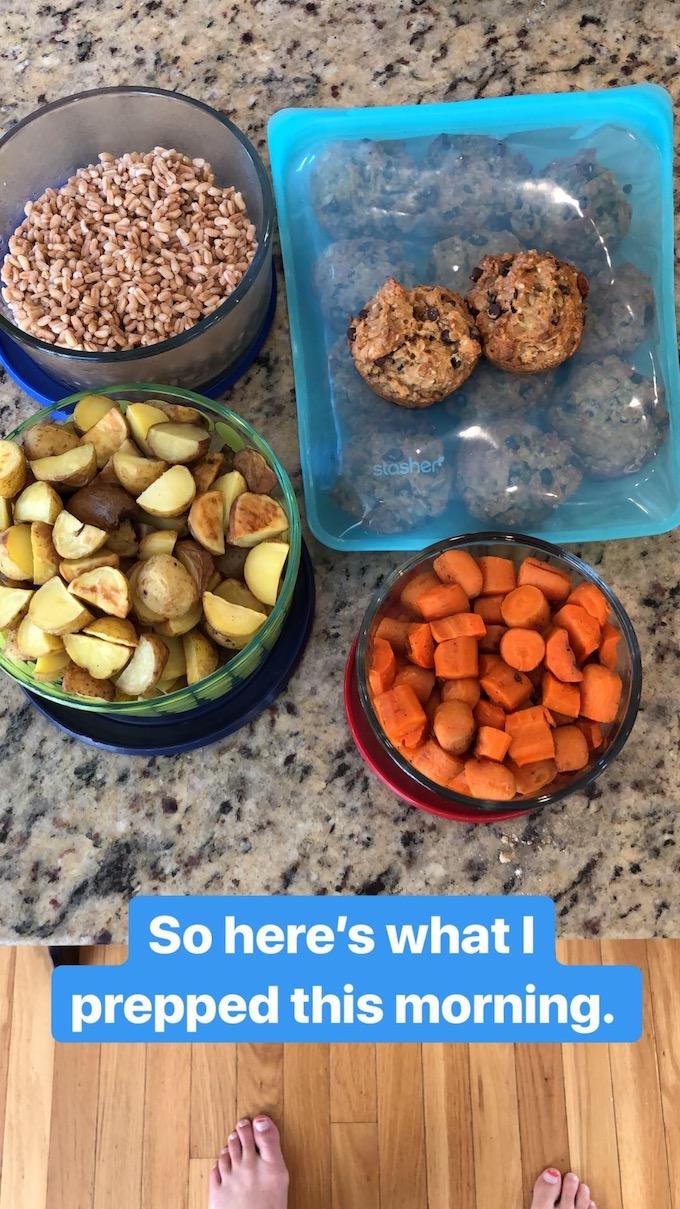
Sunday morning is the perfect time for me to bake with the kiddos. We started the day by making some Coconut Oil Banana Muffins. Once those were in the oven, I sent the kids off to play and I started some farro on the stovetop and chopped carrots, sweet potatoes and potatoes so they’d be ready to roast in the oven once the muffins were done. It only takes 5 min or so to chop them up and then it’s just a matter of sticking them in the oven and stirring once or twice. Very hands off.

food prep roasted veggies

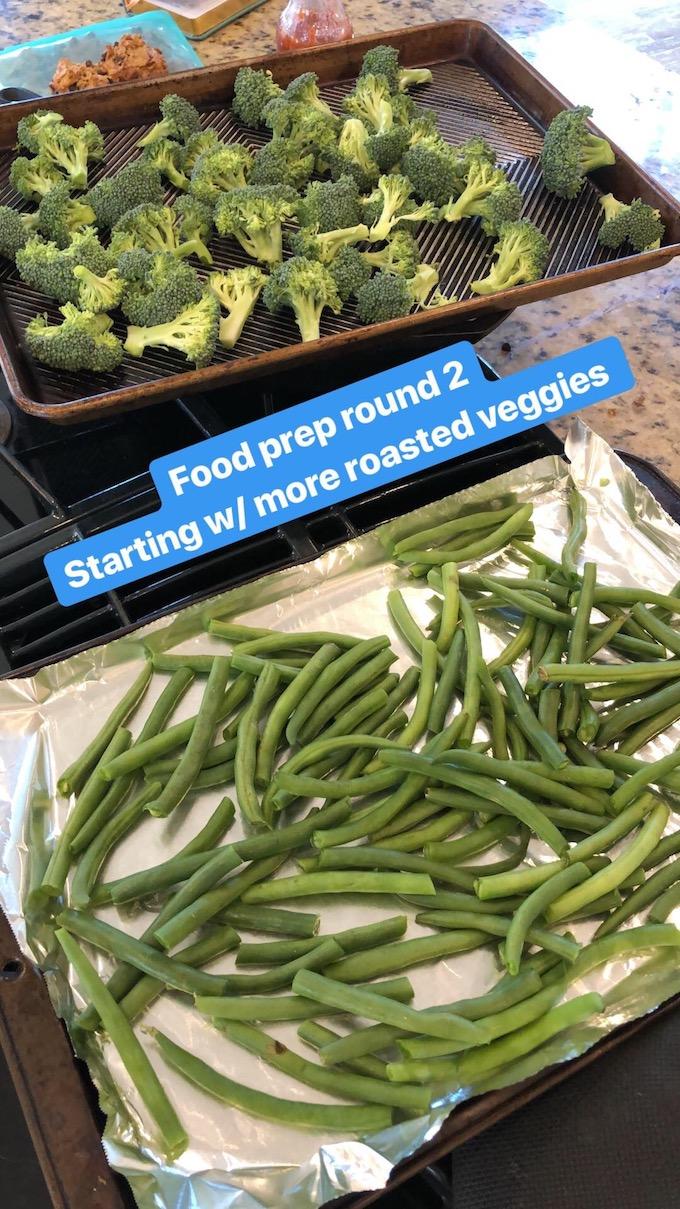
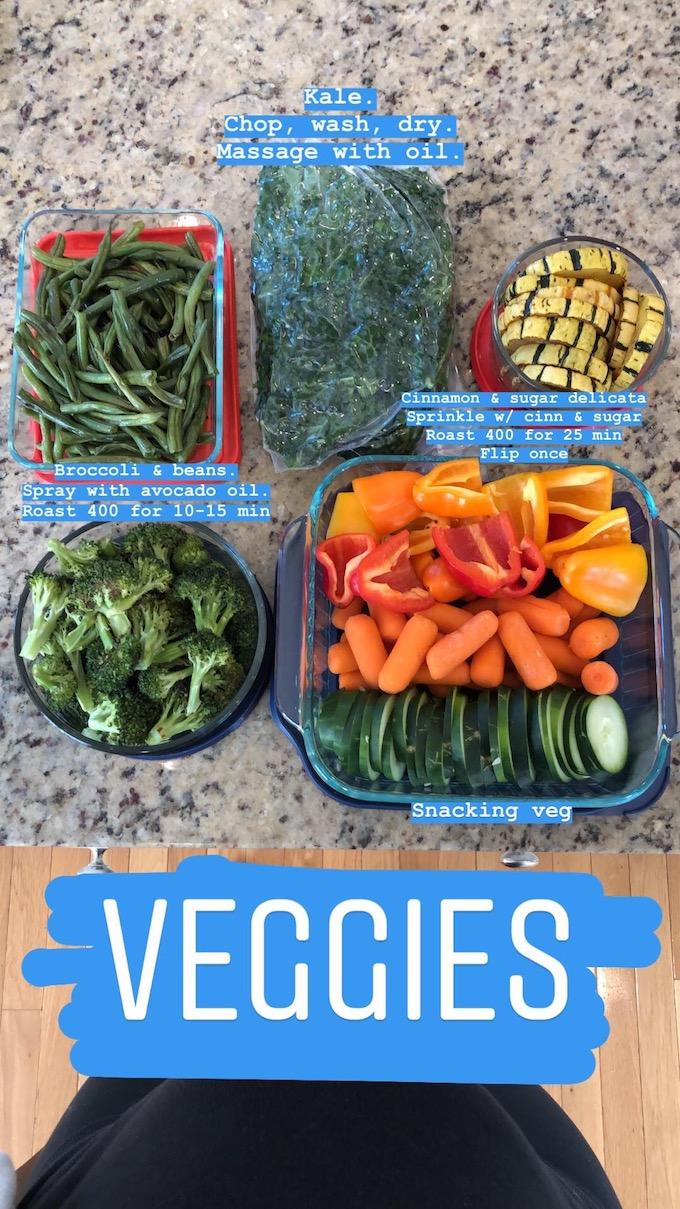
After we made it to the grocery store, I started my second round of food prep. I roasted some green beans and broccoli first.

food prep roasted veggies

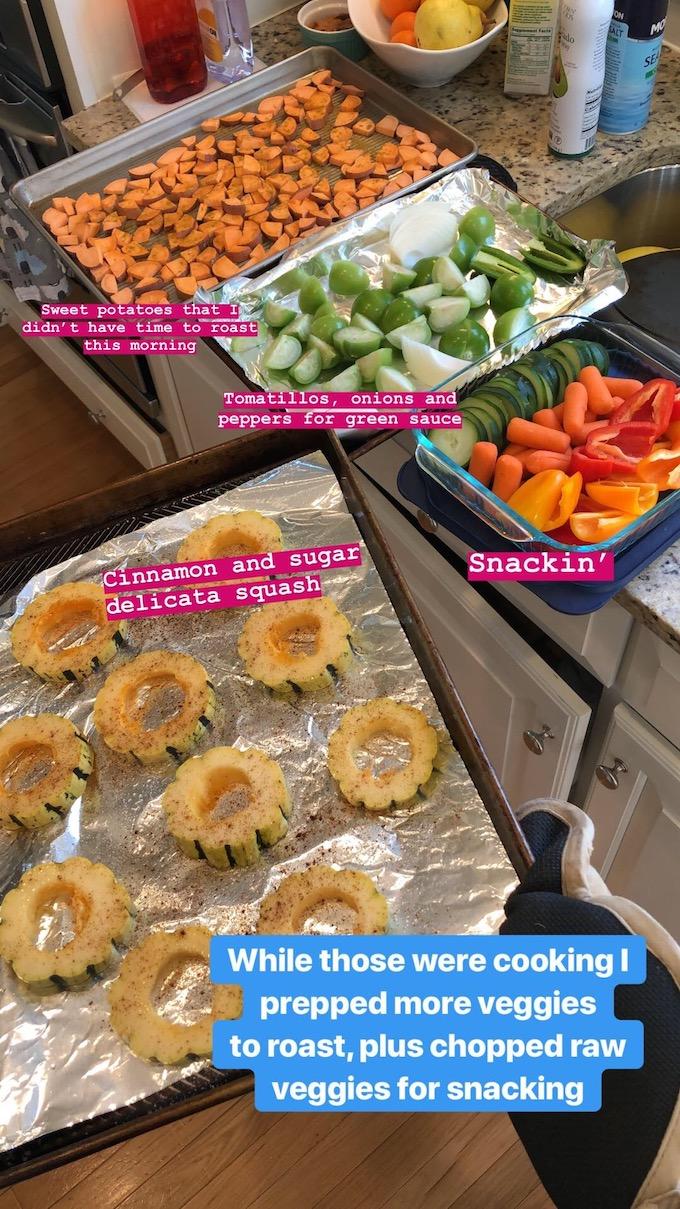
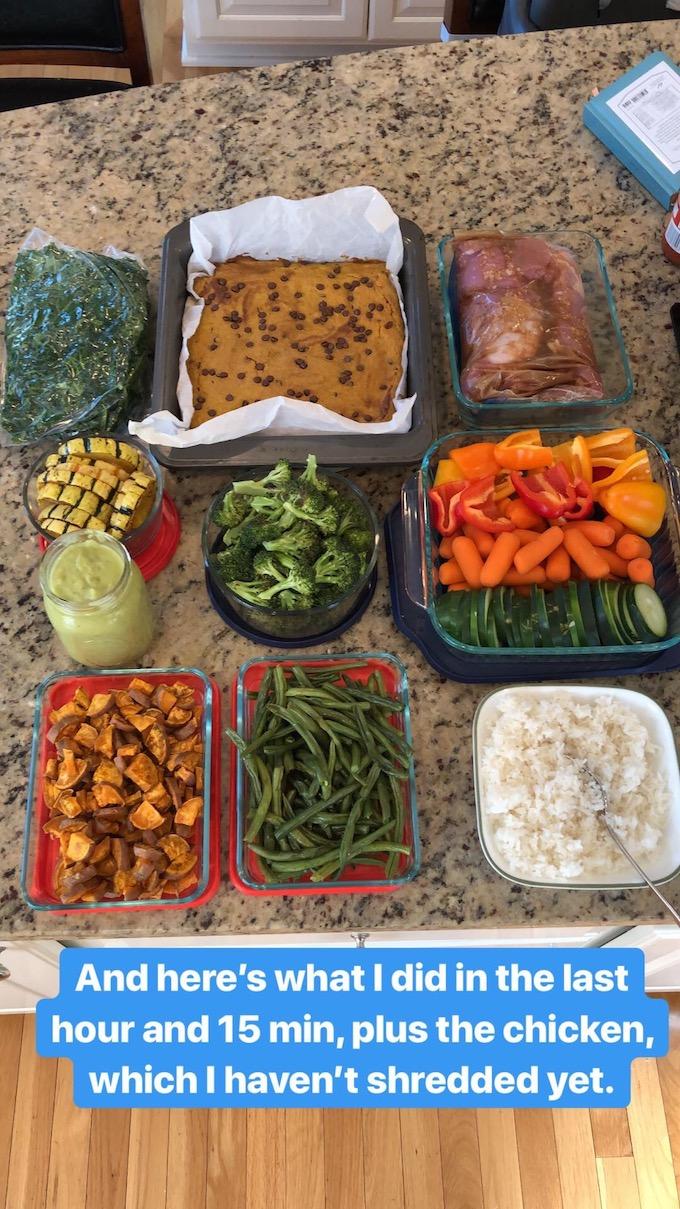
Earlier in the morning I ended up roasting the white potatoes and carrots in the oven together but ran out of time for the sweet potatoes so I just saved those for the afternoon session. While the broccoli and beans were roasting, I chopped some delicata squash and tomatillos to roast next, along with the sweet potatoes. I also chopped up our snacking veggies.

food prep instant pot

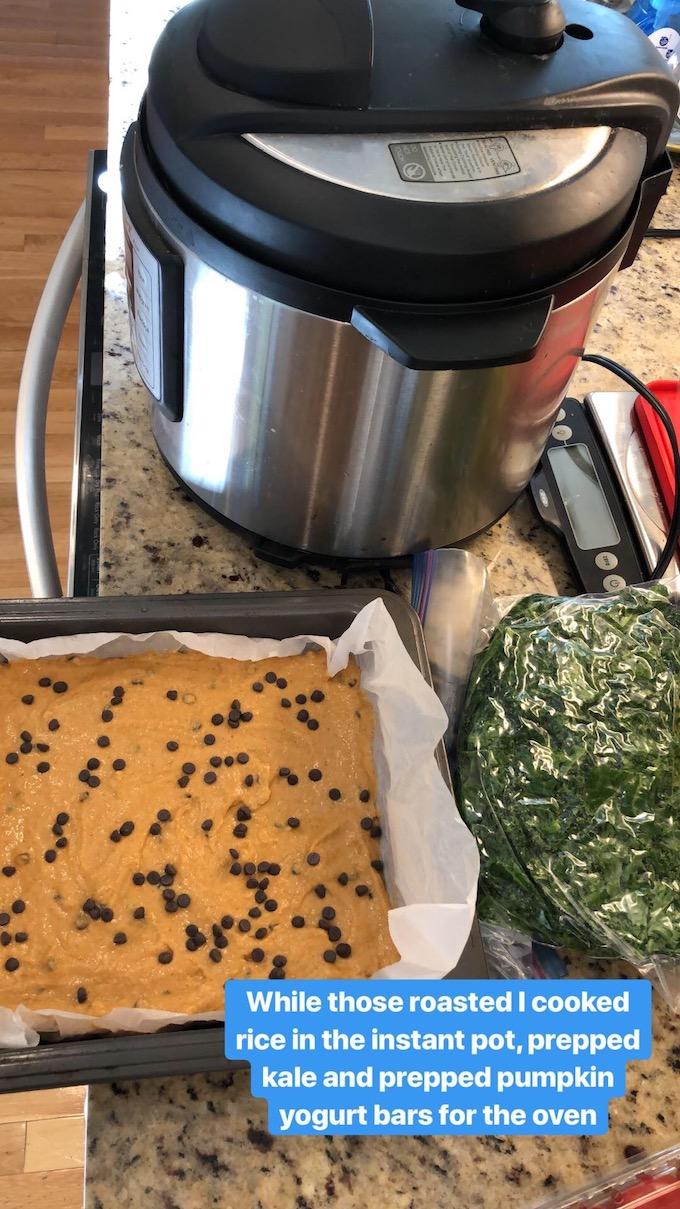
After the next round of veggies were in the oven, I put some rice in the Instant Pot to cook, prepped my kale, and made a batch of Pumpkin Yogurt Bars so they’d be ready to go in the oven.

food prep instant pot meat

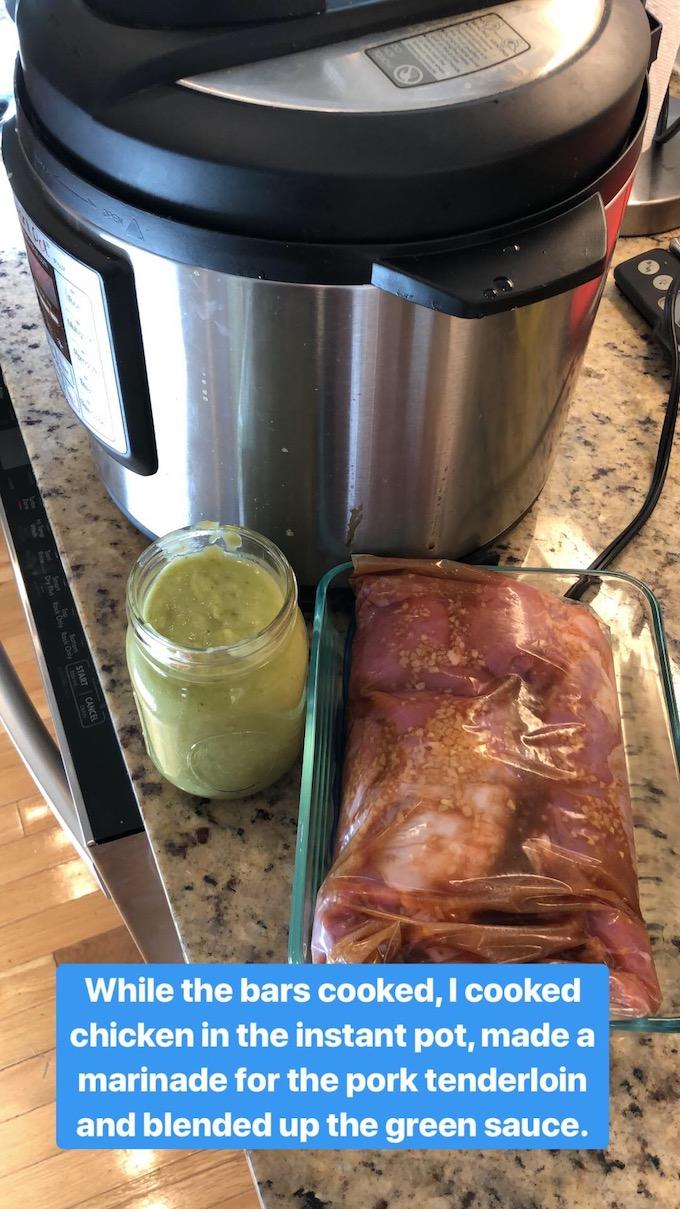
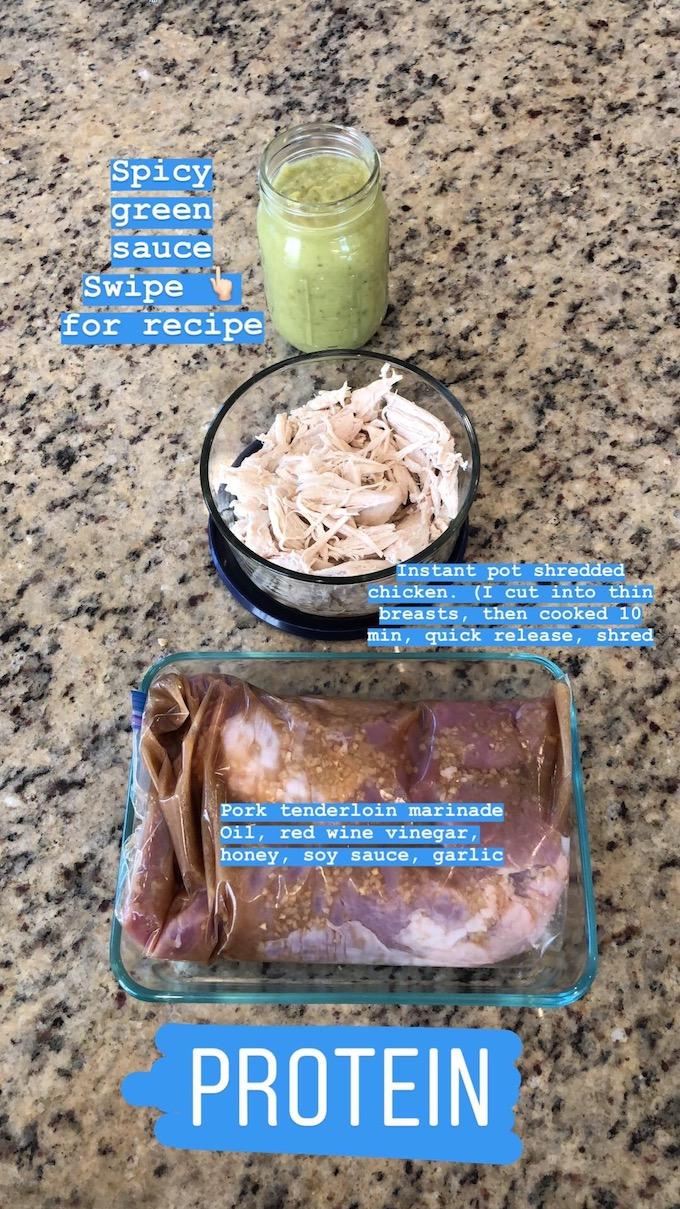
After I put the bars into the oven, I put some chicken breasts in the instant pot, made a marinade for my pork tenderloin and used the tomatillos I roasted to make a Spicy Green Sauce.

food prep recap

So to recap, this is what I prepped during my morning session: roasted carrots and potatoes, Coconut Oil Banana Muffins and farro.

food prep recap

And then I spent about an hour and 15 minutes after grocery shopping making all of this: roasted sweet potatoes, green beans, squash and broccoli, snacking veggies, kale, spicy green sauce, rice, pumpkin yogurt bars, pork marinade and shredded chicken.

food prep carrot oat bars

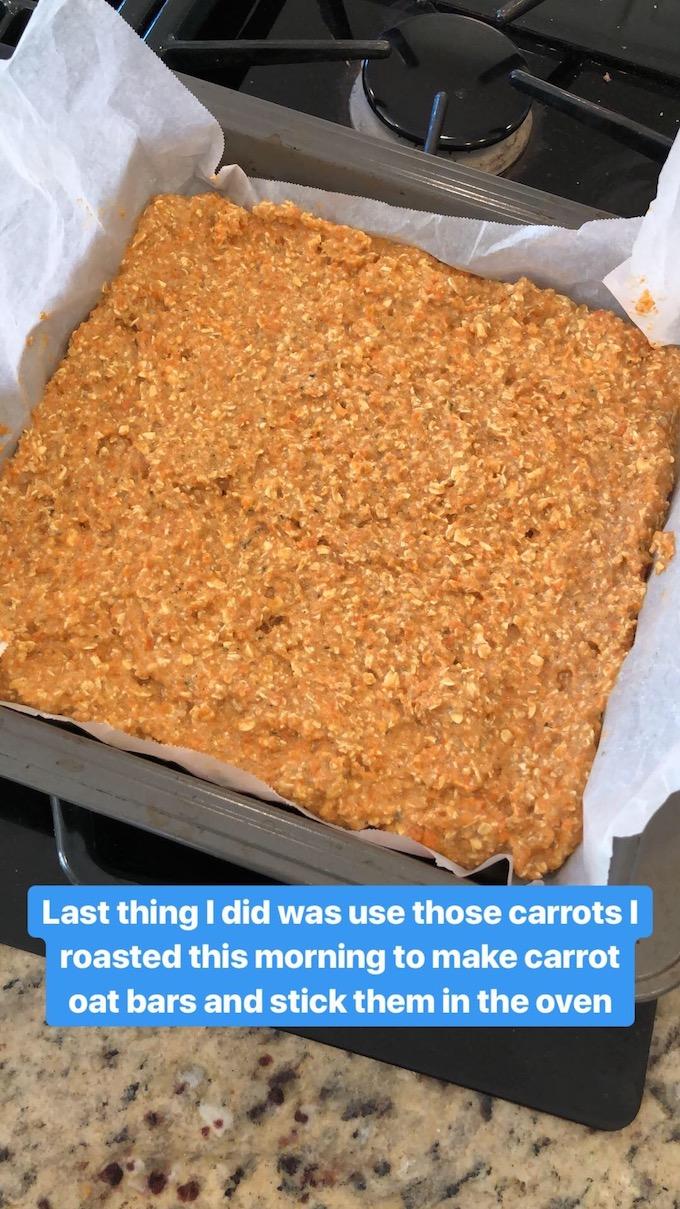
The last thing I did was make a batch of Carrot Oat Bars with the carrots I roasted in the morning, since they’re my daughter’s favorite snack.

food prep carbs

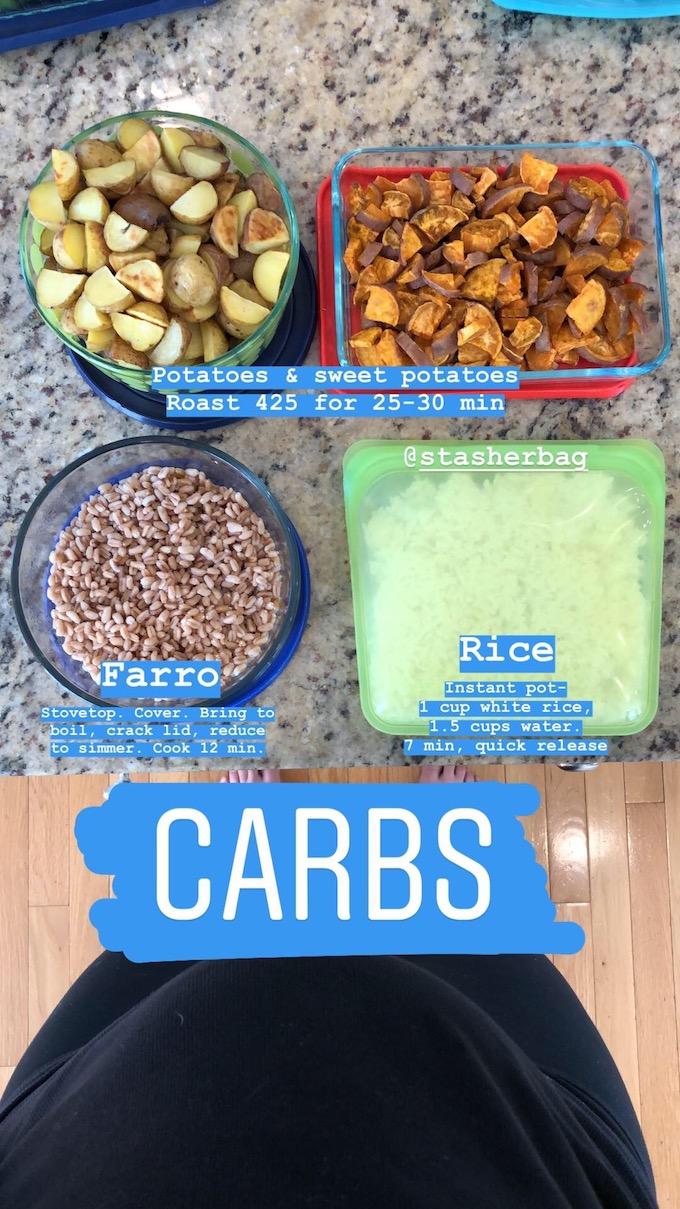
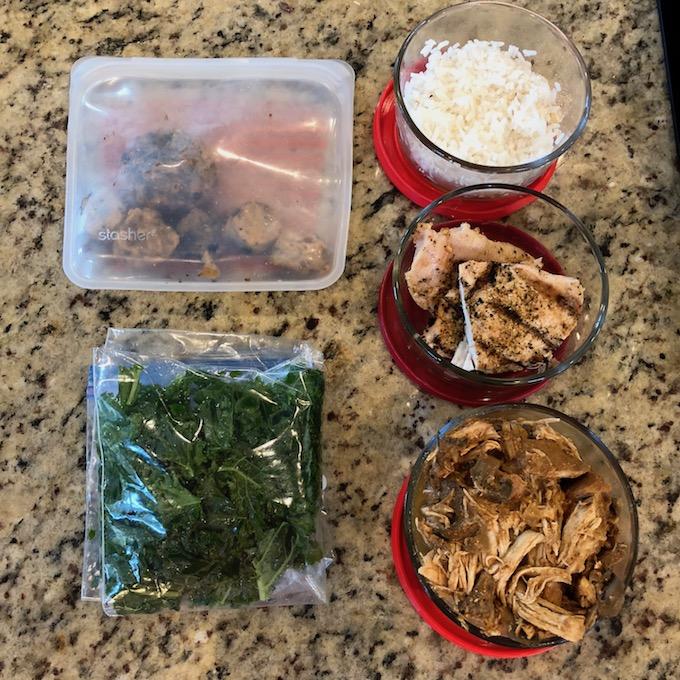
Then I like to give a breakdown of what I prepped in different groups and share how I cook everything. I do my rice in the Instant pot and store in a stasher bag. I do my farro on the stove and my potatoes in the oven. These are all quick and easy carb sources that my Type 1 diabetic husband can measure easily for his meals.

food prep veggies

I always roast a lot of veggies to make them easy to reheat in the microwave and add to the kids’ plates and ours, plus raw veggies for snacking and kale that my hubby uses for salads.

food prep meat

I love putting my Spicy Green Sauce on chicken and veggie bowls throughout the week and I use the shredded chicken to make all sorts of stuff for the kids. My hubby grills the pork tenderloin, or I pan sear it and roast in the oven. We usually do that on Monday or Tuesday night.

food prep snacks

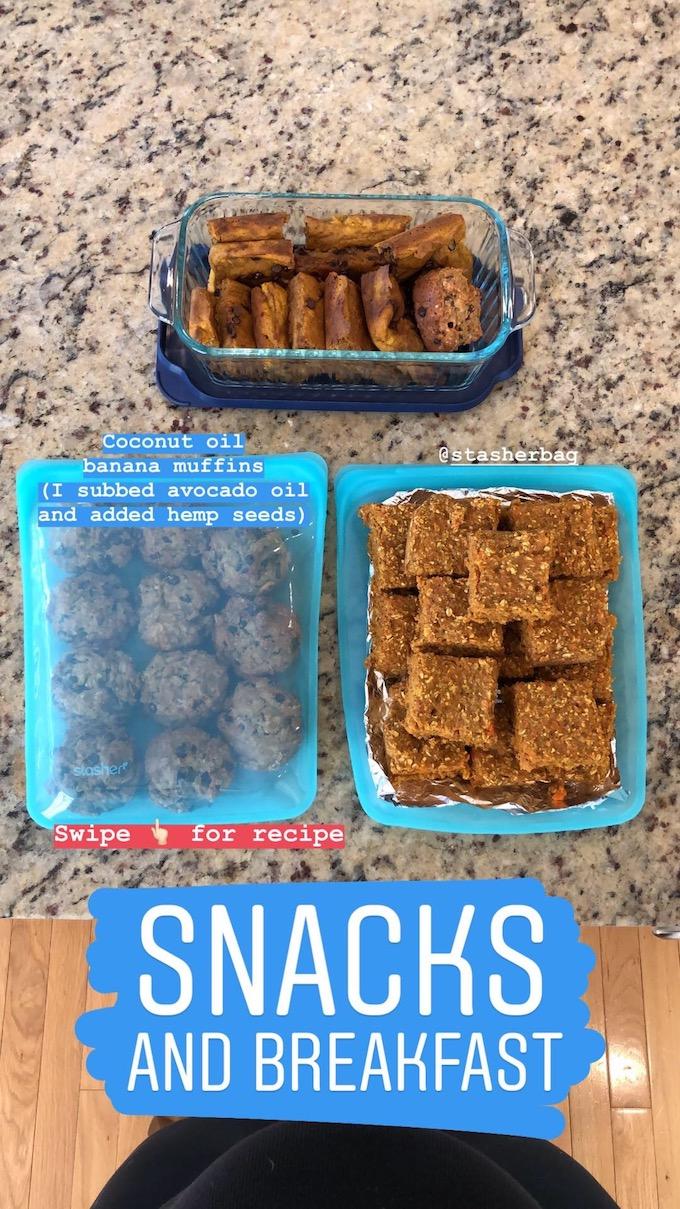
And finally, I always like to have baked goods on hands for snacks and breakfasts for the kids (and for mama!). I made my Coconut Oil Banana Muffins with avocado oil and added some hemp seeds.

food prep breakfasts and snacks

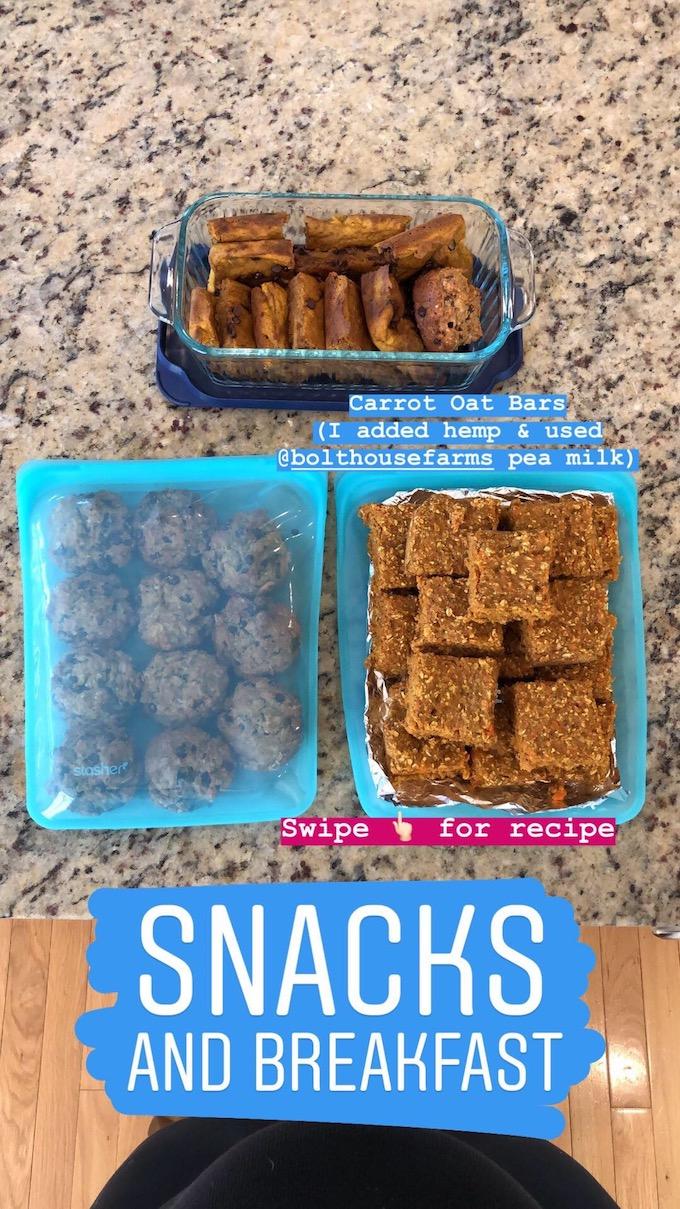
I made the Carrot Oat Bars for my little one. I make them dairy-free with Bolthouse Farms pea milk and I always add hemp seeds.

food prep breakfast and snacks

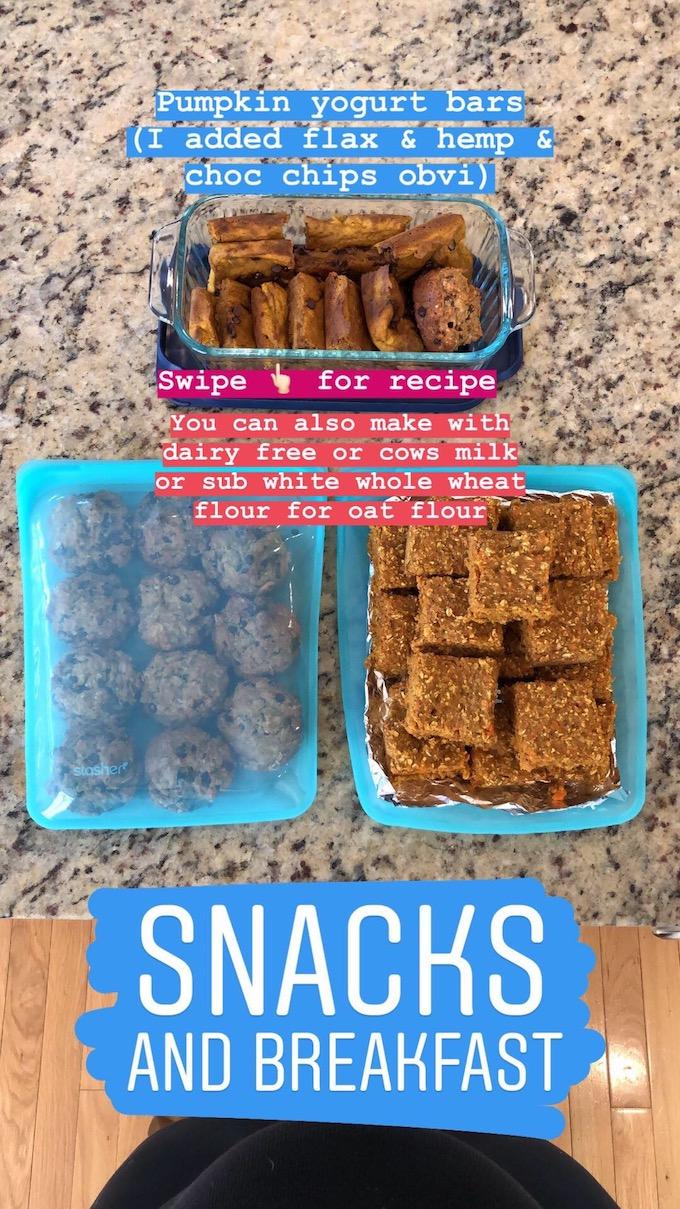
And for the Pumpkin Yogurt Bars, I added hemp and flax and chocolate chips this time.

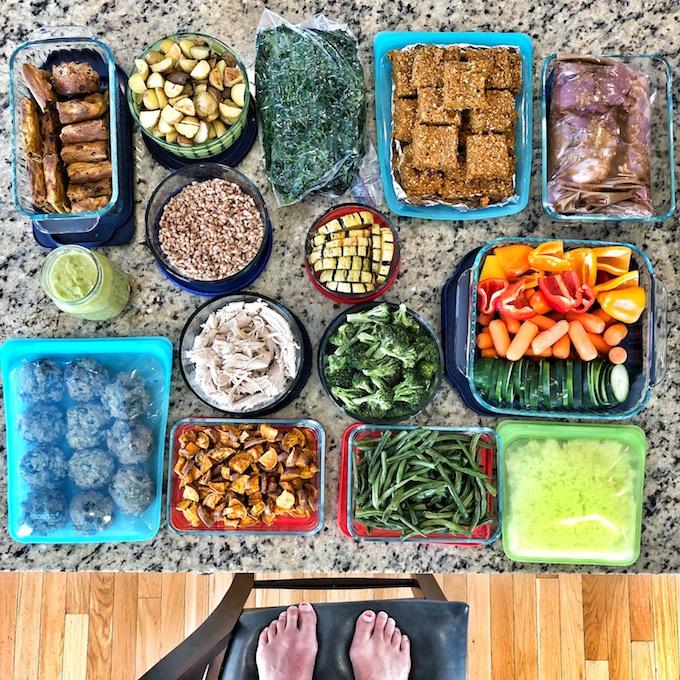
Here it is all together:

View this post on Instagram

Today’s #foodprep – watch my stories (also saved in my highlights) to see how I did this in a little over 2 hours- split into an AM & PM session, plus links and cooking directions! I made: Coconut Oil Banana Muffins, Spicy Green Sauce, GF Pumpkin Yogurt Bars, roasted potatoes, farro, instant pot shredded chicken, roasted sweet potatoes, roasted green beans & broccoli, cinnamon & sugar delicata squash, kale, Carrot Oat Bars, pork tenderloin marinade, snacking veggies & rice.

A post shared by Lindsay L, RD (@theleangreenbean) on Sep 23, 2018 at 2:42pm PDT


So there you go! Hope that was helpful!! If you’re looking for more info about how we use the food I prep during the week, check out this post: 

A Week of Component Food Prep {and How To Use It} where I share my food prep and then exactly how we used it for meals during the week and how much we had leftover at the end of the week!

An example from a Registered Dietitian showing you How To Food Prep - Step By Step. I share what I prepped in 2 hours for a healthy week and what order I did things in so that I could utilize my time most efficiently.

Enjoy!
–Lindsay–
Filed Under: Food Prep

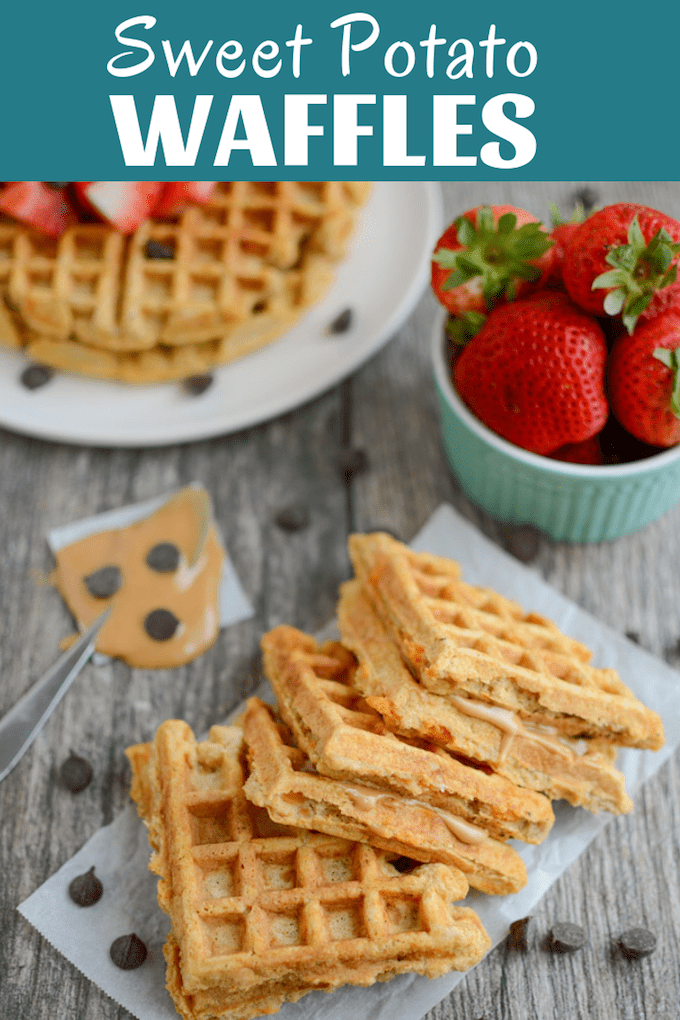
Sweet Potato Waffles

October 3, 2018 by Lindsay 80 Comments

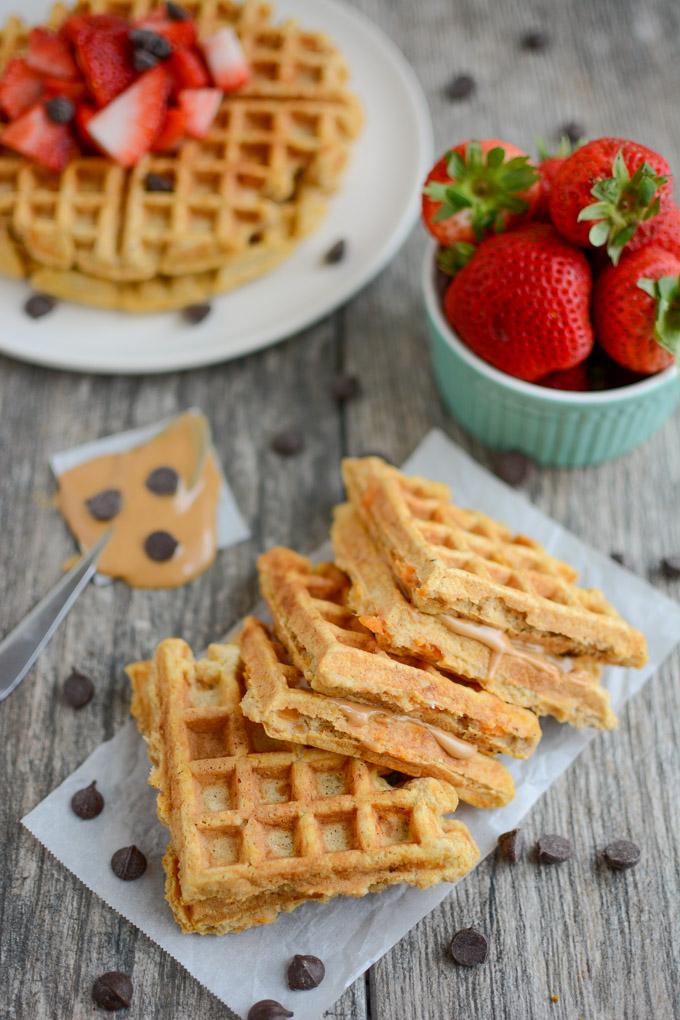
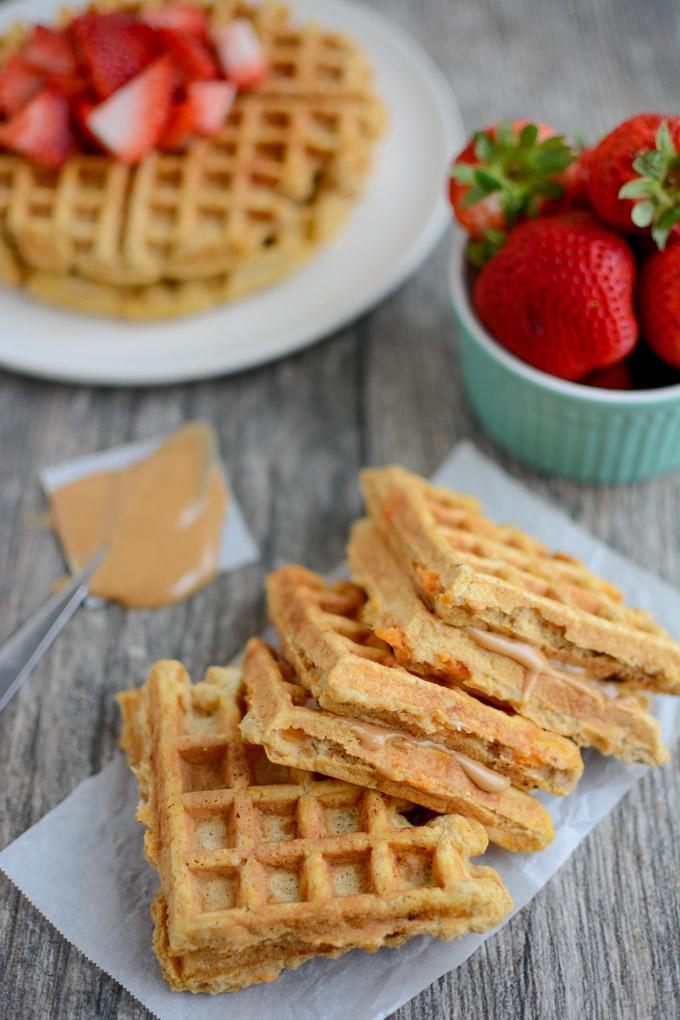
These Sweet Potato Waffles are kid-friendly and perfect for breakfast, pre-workout fuel or an afternoon snack. Add some peanut butter in the middle for a fun waffle sandwich!

Sweet Potato Waffles with chocolate chips and fresh strawberries

Hi Friends!

It’s been about 4 years since I shared this recipe for Sweet Potato Waffles with you! They’re still a favorite of mine, especially to turn into little waffle sandwiches because they’re just so darn cute and delicious. I don’t know what it is about this pregnancy but waffles have become one of go to foods – one of the few things I can almost always stomach. Regular waffles are fine, but I like the sweet potato twist that these have!

This is a small batch recipe. The original recipe made just two waffles so I tweaked it a little bit and now it makes 4. (If you’ve made these before, i’ll include the original recipe in the notes section so you can make just two again if you want.

If you have more sweet potatoes to use, here are 20+ Baked Sweet Potato Recipes. 

Sweet Potato Waffles


Here’s how you make them:

Print

Sweet Potato Waffles

Sweet Potato Waffles 2 copy
Print Recipe

5 Stars 4 Stars 3 Stars 2 Stars 1 Star

5 from 5 reviews

These Sweet Potato Waffles are kid-friendly and perfect for breakfast, pre-workout fuel or an afternoon snack. Add some peanut butter in the middle for a fun waffle sandwich!

  • Author: Author: Lindsay L
  • Prep Time: 5 minutes
  • Cook Time: 5 minutes
  • Total Time: 10 minutes
  • Yield: 4 waffles 1x

Ingredients

Scale

2/3 cup cooked, mashed sweet potato
1/2 cup milk (dairy or non-dairy)
3 eggs
1/2 cup white whole wheat flour
1.5 tsp baking powder
1 tsp cinnamon
1 tsp vanilla
topping options: nut butter, fresh fruit, yogurt, syrup, chocolate chips etc

Instructions

  1. Combine all ingredients in a small bowl. Depending on how well you mash your sweet potato, you may have a few chunks. That’s fine. You could also put everything in a blender or food processor for a smoother batter.
  2. Grease waffle maker and cook 4 waffles.
  3. Top as desired and serve.

Notes

For my sweet potato I just poke some holes in a large sweet potato, microwave 5 minutes, let cool and mash with a fork.

Original recipe for 2 waffles: 1/3 cup cooked, mashed sweet potato + 1/4 cup plain yogurt + 2 eggs + 1/4 cup white whole wheat flour (or oat flour) + 3/4 teaspoon baking powder + 1/2 teaspoon cinnamon + 1/2 teaspoon vanilla extract

Did you make this recipe?

Tag @theleangreenbean on Instagram

You can eat them plain, but really…toppings are the best part so go crazy! I  love making them into peanut butter sandwiches!


These Sweet Potato Waffles are kid-friendly and perfect for breakfast, pre-workout fuel or an afternoon snack. Add some peanut butter in the middle for a fun waffle sandwich!


Enjoy!
–Lindsay–
Filed Under: Breakfast, Snack Tagged With: Egg, Milk, Sweet Potato, White Whole Wheat Flour

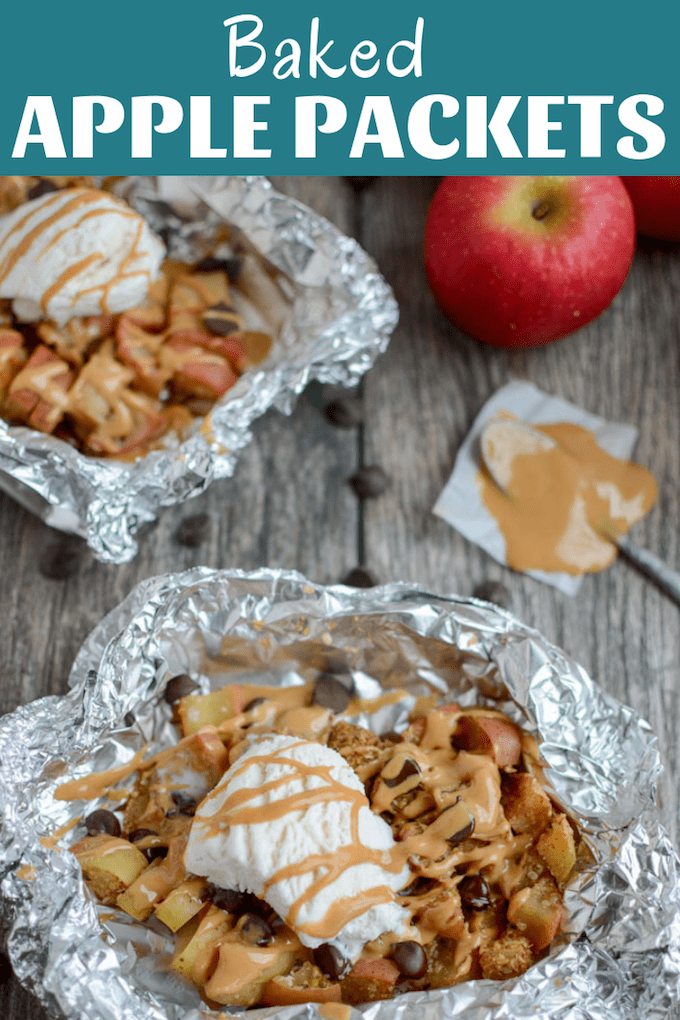
Baked Apple Packets

September 28, 2018 by Lindsay 64 Comments

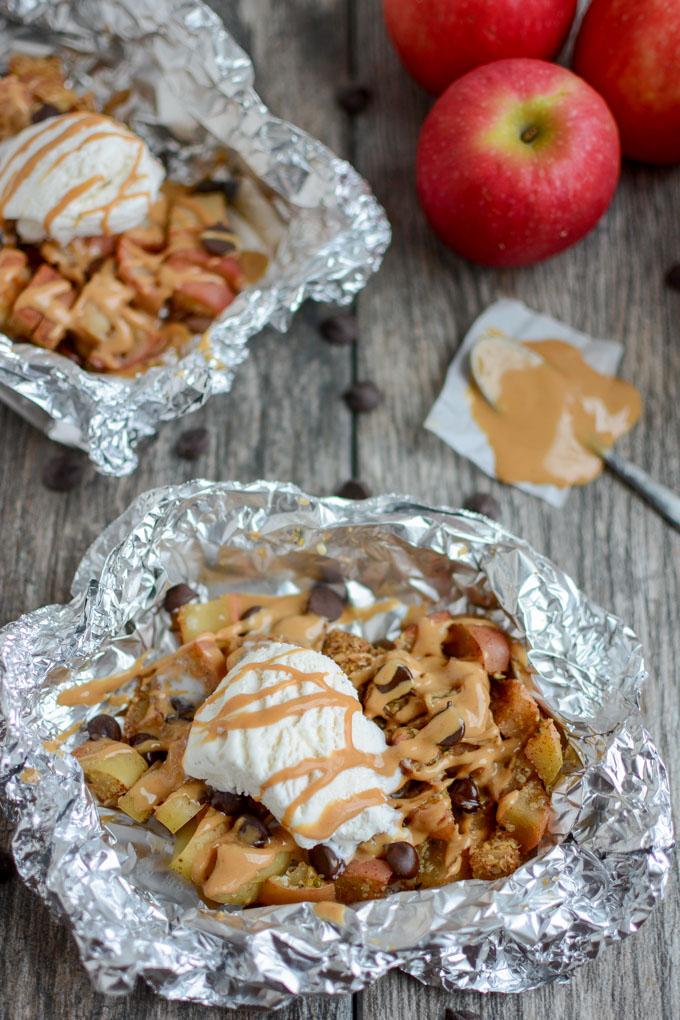
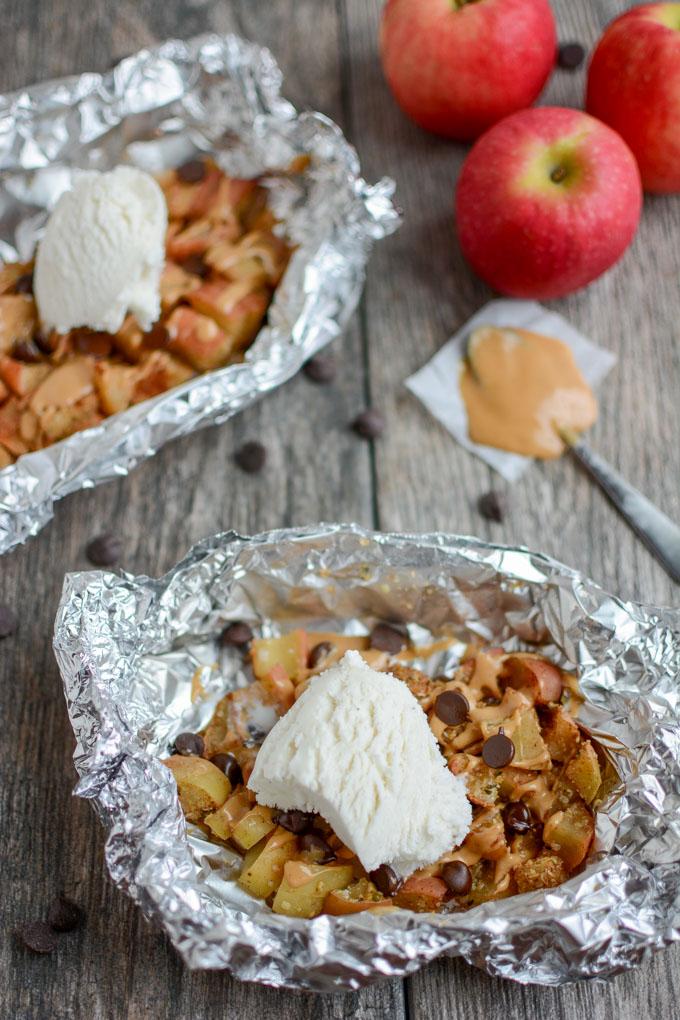
These Baked Apple Packets are a super simple fall recipe. Enjoy them with ice cream for dessert or top with yogurt for breakfast or an afternoon snack. The perfect way to end a day of apple picking.

Baked Apple Packets - an easy fall dessert recipe

Originally published 10/2012. Photos and post updated 9/2018.

Hi Friends!

Allow me to introduce you to these Baked Apple Packets. Have you been apple picking yet this year? Or perhaps you have it on your to-do list for an upcoming weekend? This easy recipe idea is the perfect way to use up some of those apples.

I like these as a dessert, topped with ice cream….but you could easily top them with yogurt or extra peanut butter and enjoy them for breakfast or an afternoon snack. Plus they’re easy to customize. I mixed my apples with cinnamon, ground flaxseed and hemp seeds and then topped with peanut butter, chocolate chips and ice cream. You could toss yours in just cinnamon and sugar if you wanted, drizzle with chocolate sauce, top with chopped nuts or granola, add a scoop of yogurt on top etc.

Baked Apple Packets with ice cream

There’s no real recipe here because you can make as many or as few as you want. And no exact cooking time because you can cook them as long as you want depending on how soft you want your apples. AND if you wanted to, you could cook these on the grill or over a camp fire!

Here’s what you do:

Print

Baked Apple Packets

baked apple packet 2
Print Recipe

5 Stars 4 Stars 3 Stars 2 Stars 1 Star

5 from 1 review

These Baked Apple Packets are a super simple fall recipe. Enjoy them with ice cream for dessert or top with yogurt for breakfast or an afternoon snack. The perfect way to end a day of apple picking.

  • Author: Author: Lindsay
  • Prep Time: 5 minutes
  • Cook Time: 20 minutes
  • Total Time: 25 minutes
  • Yield: 1

Ingredients

  • small or medium apples, chopped
  • cinnamon, ground flaxseed, hemp seeds, chia seeds and/or sugar for tossing
  • peanut butter, chopped nuts, granola, chocolate chips, pumpkin seeds or other desired toppings
  • ice cream or yogurt if desired.

Instructions

  1. Place chopped apple slices in a bowl.
  2. Sprinkle with cinnamon, ground flax and hemp seeds (and sugar if desired).
  3. Split equally between pieces of foil and fold into sealed packets.
  4. Bake at 400 degrees for 15-25 minutes depending on how soft you want your apples.
  5. Carefully open each packet and top with nuts, granola, chocolate chips etc.
  6. Add a scoop of ice cream or yogurt and serve!

Notes

You can also add the peanut butter before baking if you’d like!

Did you make this recipe?

Tag @theleangreenbean on Instagram

Don’t be afraid to experiment with other fruit either. I’m trying it with pears next 🙂 Peaches would also be a great option for the summer!

These Baked Apple Packets are a super simple fall recipe. Enjoy them with ice cream for dessert or top with yogurt for breakfast or an afternoon snack. The perfect way to end a day of apple picking.

Enjoy!
–Lindsay–
Filed Under: Dessert, Snack Tagged With: Apple, Peanut Butter, Yogurt

Omelet Spirals

September 26, 2018 by Lindsay 4 Comments

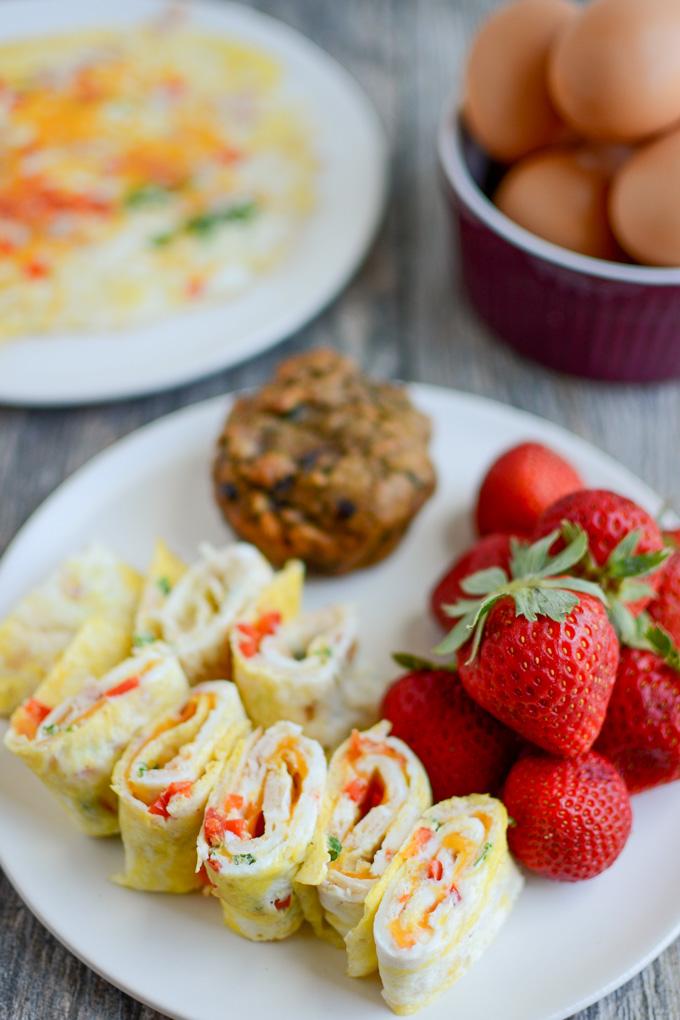
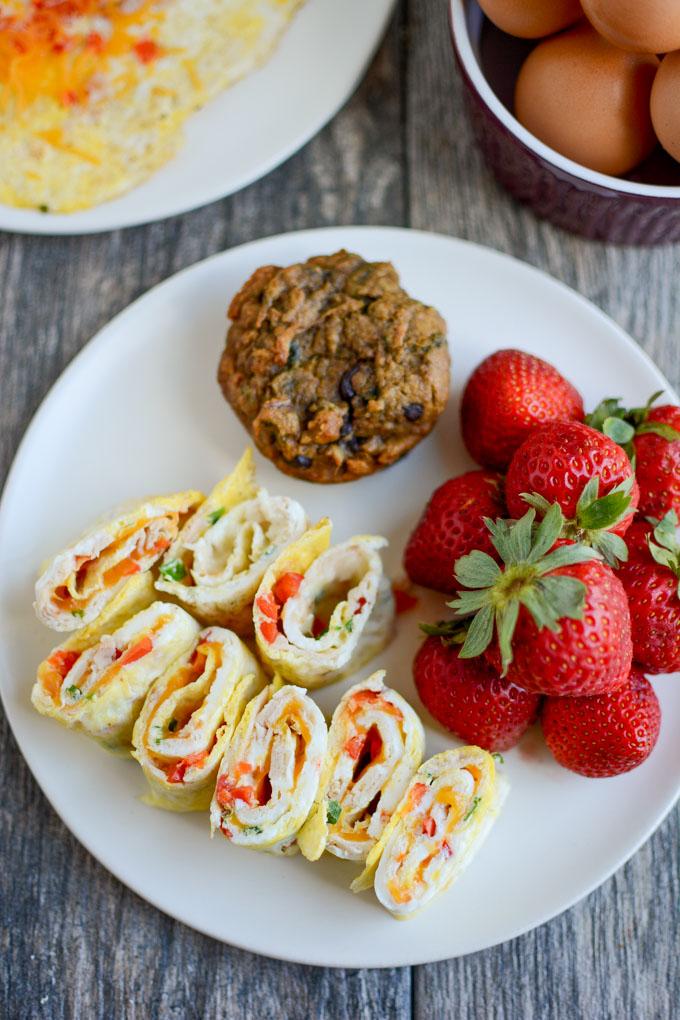
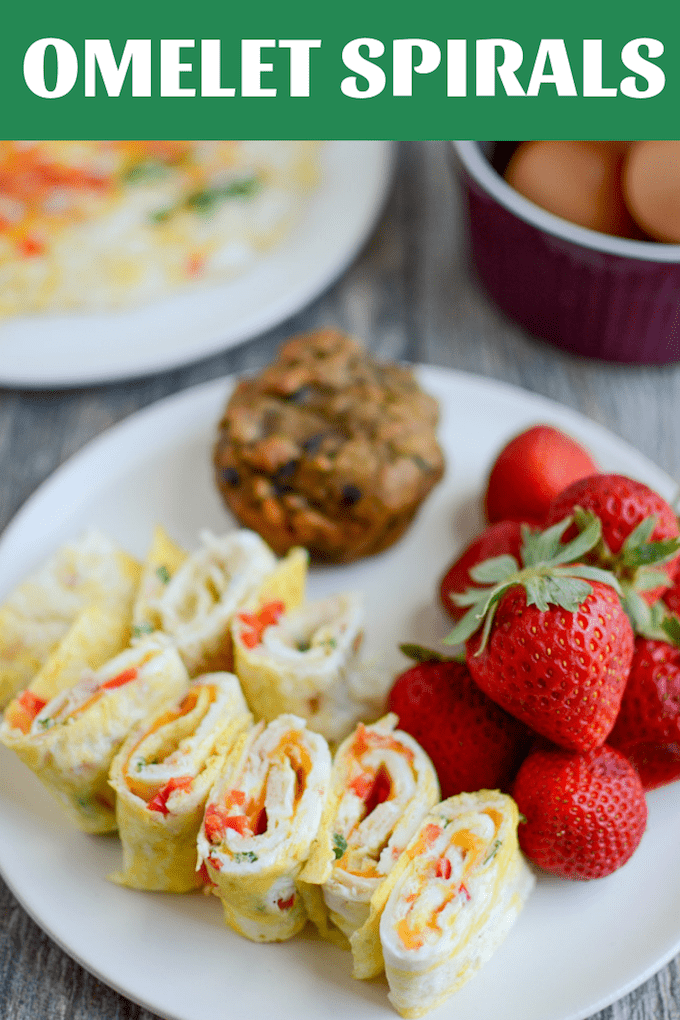
These Omelet Spirals are a fun, kid-friendly twist on egg wraps. Add your favorite mix-ins and whip up a batch in just a few minutes. Perfect for school lunches, breakfast and snack time!

Omelet spirals with turkey, peppers and onions

Hi friends!

Just popping in today to share these little Omelet Spirals. These are an easy twist on one of my most popular blog recipes – these Easy Egg Wraps. I’ve been making the egg wraps for a few years now and love making a batch ahead of time and then quickly filling them with combos like guacamole and turkey or hummus and veggies for a quick lunch. My kids love them with pepperoni and cheese.

These Omelet Spirals are a fun twist because they’re quick and easy to make, with all the same goodies you’d get while eating an omelet. I think they’re a little more kid-friendly and you could definitely whip some up quickly the night before and pack in a lunch box! Plus they’re easy to customize – just pick your favorite protein and veggies.

Easy Omelet Spirals

You don’t really need exact quantities for these because it all depends how many you want to make. Each wrap has one egg and I typically slice each one into 4 spirals.

Print

Omelet Spirals

Omelet spirals for a quick, healthy breakfast or lunch
Print Recipe

5 Stars 4 Stars 3 Stars 2 Stars 1 Star

5 from 1 review

These Omelet Spirals are a fun, kid-friendly twist on egg wraps. Add your favorite mix-ins and whip up a batch in just a few minutes. Perfect for school lunches, breakfast and snack time!

  • Author: Lindsay

Ingredients

eggs

meat, optional – deli meat turkey or ham works great, as does pepperoni. You could also use chicken sausage if you chopped it very finely.

veggies- i used finely diced red peppers and green onions. You could use green peppers, mushrooms, etc, just make sure they’re finely diced.

shredded cheese

Instructions

Make sure all mix-ins are finely diced.

Crack one egg in a small bowl and whisk well.

Pour into a medium hot skillet (greased with butter or oil). Tilt pan if needed to spread egg into a somewhat circular shape.

Quickly sprinkle your desired mix-ins (meat and veggies) all across the egg. After 45 seconds to a minute, flip the egg wrap, pressing down with your spatula afterwards to help secure the mix-ins. Cook an additional 30 seconds, then flip back over and place on a plate.

Sprinkle with cheese and roll the wrap up. Cut into 4 spiral pieces.

Repeat as many times as desired.

Did you make this recipe?

Tag @theleangreenbean on Instagram

See what I mean? So easy to customize and so easy to make!

These Omelet Spirals are a fun, kid-friendly twist on egg wraps. Add your favorite mix-ins and whip up a batch in just a few minutes. Perfect for school lunches, breakfast and snack time!

Enjoy!
–Lindsay–
Filed Under: Lunch, Breakfast, Snack Tagged With: Cheese, Egg

A Week of Component Food Prep and How To Use It

September 24, 2018 by Lindsay 9 Comments

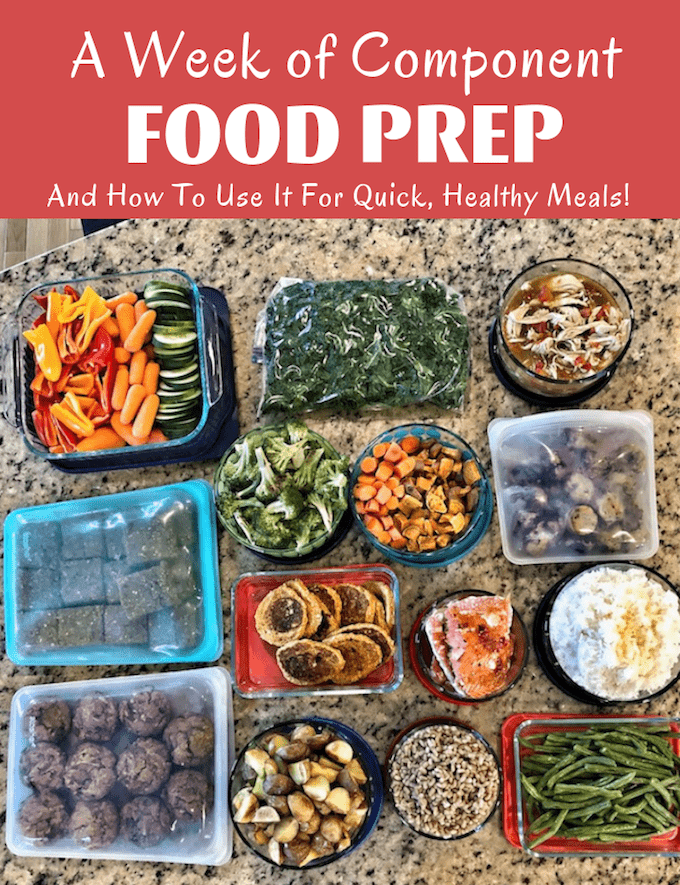
Here’s a week of component food prep from a Registered Dietitian and how to use it to make quick, healthy meals during the week!

A week of component food prep from a registered dietitian and how to use it for quick, healthy meals during the week

Hi friends!

I’ve been meaning to write a post like this for a while now and I finally got my act together. You guys know I love food prep. You may also know that I don’t typically prep full meals…instead, I prep components and then throw them together, as well as cook some new things, to make meals during the week. Last week I documented what I prepped and then all of our meals so I could show you how I use what I prep throughout the week.

If you’re not already, be sure to follow me on Instagram, where I share my food prep sessions on Sundays, plus meals during the week.

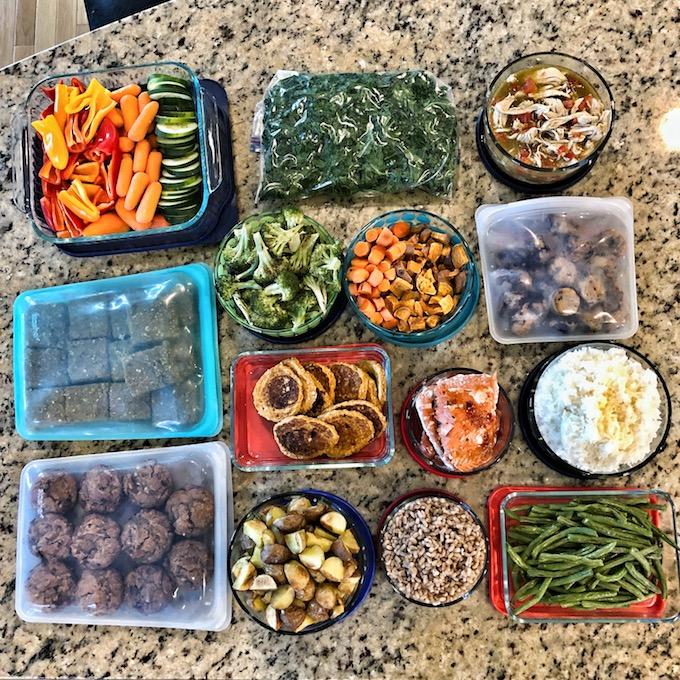
So here’s what I prepped on Sunday:

Food prep

I made:

  • Sweet Potato Muffins
  • Carrot Oat Bars
  • snacking veggies
  • massaged kale
  • roasted broccoli & sweet potatoes
  • Sweet Potato Cottage Cheese Pancakes
  • Thai Chili Salmon
  • roasted potatoes
  • Farro
  • roasted green beans
  • rice
  • Sweet Potato Banana Bites
  • Salsa Verde Chicken
  • Not pictured: BBQ mushroom chicken that was in the crockpot

On my Instagram stories, I shared exactly how I prepped everything. In case you don’t follow me there, I grabbed screenshots of the process so here’s what I did:

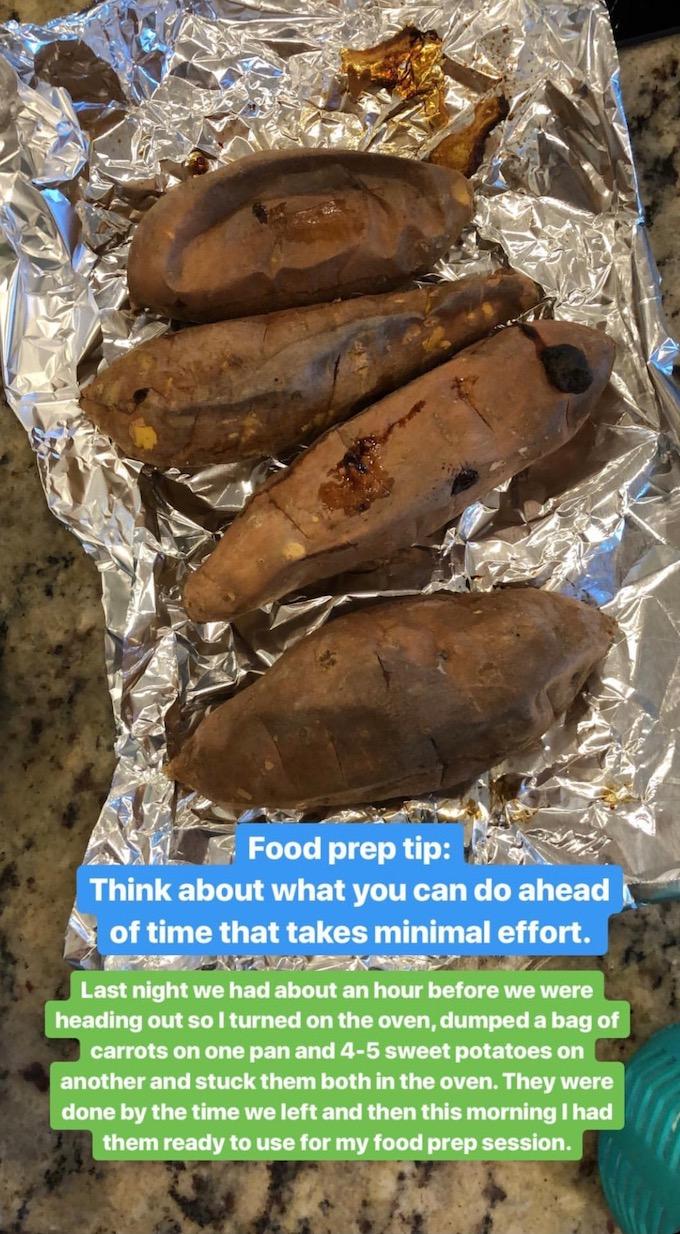
food prep tip

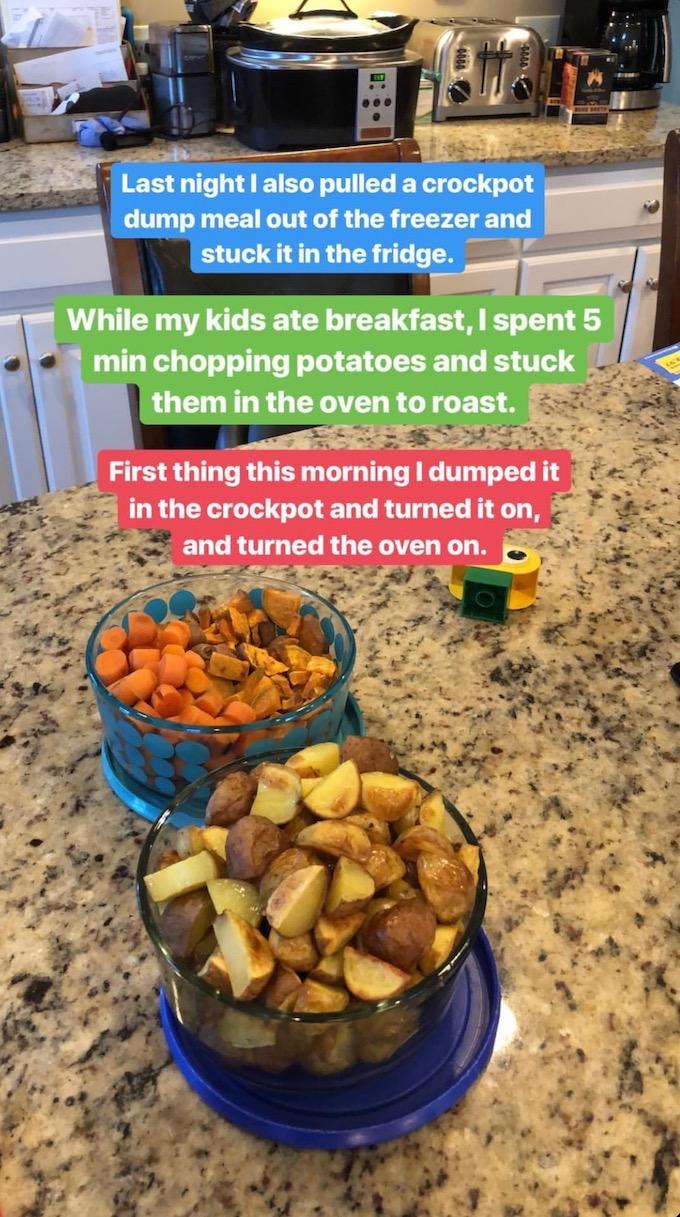
One of my favorite food prep tips is to think about what you can do ahead of time what takes minimal effort. On Saturday evening I had about an hour before we were headed to a dinner party. I turned on the oven, dumped a bag of baby carrots on one pan and put 5 sweet potatoes on another pan and stuck them both in the oven at 400 degrees. Literally took 1 minute of effort and by the time we were ready to leave, they were both done and in the fridge, ready for me to use in the morning. I also pulled one of my freezer crockpot dump meals out of the freezer and stuck it in the fridge.

food prep roasted potatoes

So, when I woke up Sunday morning, I turned on the oven first thing and dumped the crockpot meal into the crockpot. While my kids were eating breakfast, I spent 5 minutes chopping the sweet potatoes and regular potatoes and stuck them in the oven to roast.

food prep pancakes and carrot oat bars

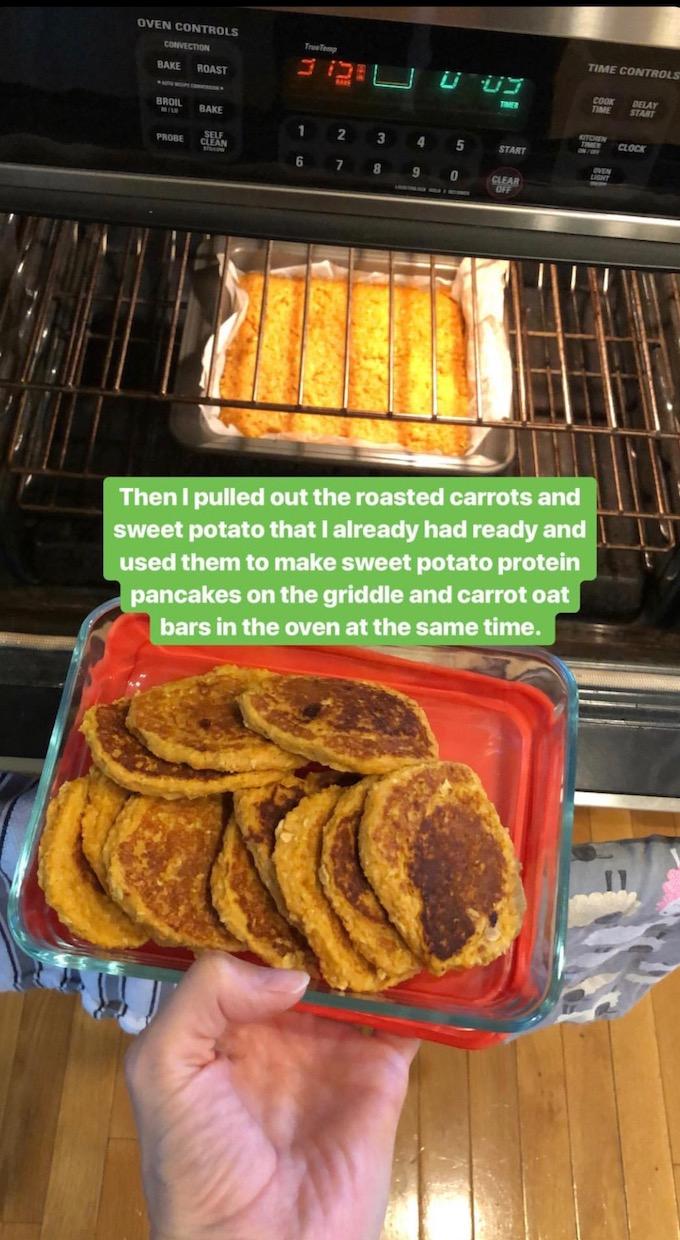
While those veggies were roasting, I got out the carrots I’d roasted the night before and whipped up a batch of Carrot Oat Bars. As soon as the veggies were done, I stuck the carrot bars in the oven, rinsed the food processor and used one of the sweet potatoes I’d cooked the night before to make the batter for my Sweet Potato Cottage Cheese Pancakes. I cooked those on the griddle while the bars were in the oven.

food prep veggies and grains

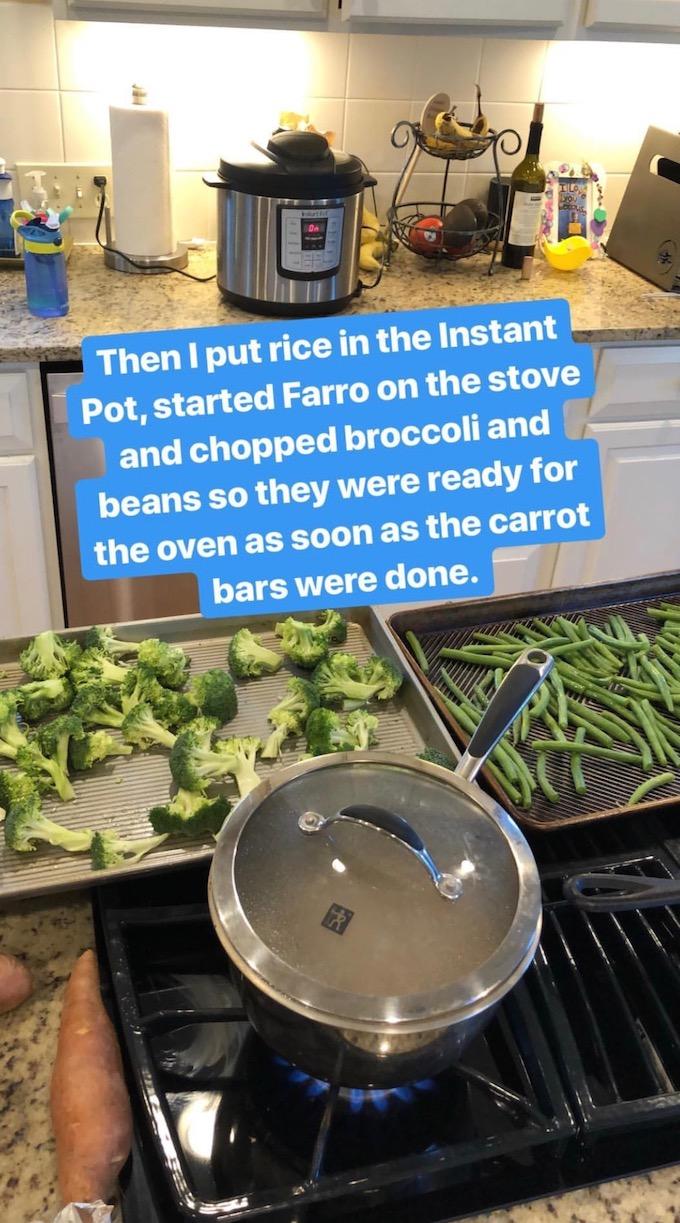
I had about 5 minutes left before the bars were done so I chopped up a head of broccoli and snipped the ends off green beans to get them ready to go in the oven. I also dumped some rice in the Instant Pot (I do 1 cup white rice to 1.5 cups water for 7 minutes, quick release) and started some farro on the stove. I put the farro and water in a pot, cover, bring to a boil, crack the lid, reduce heat and simmer for 12 minutes, then drain the water.

food prep muffins

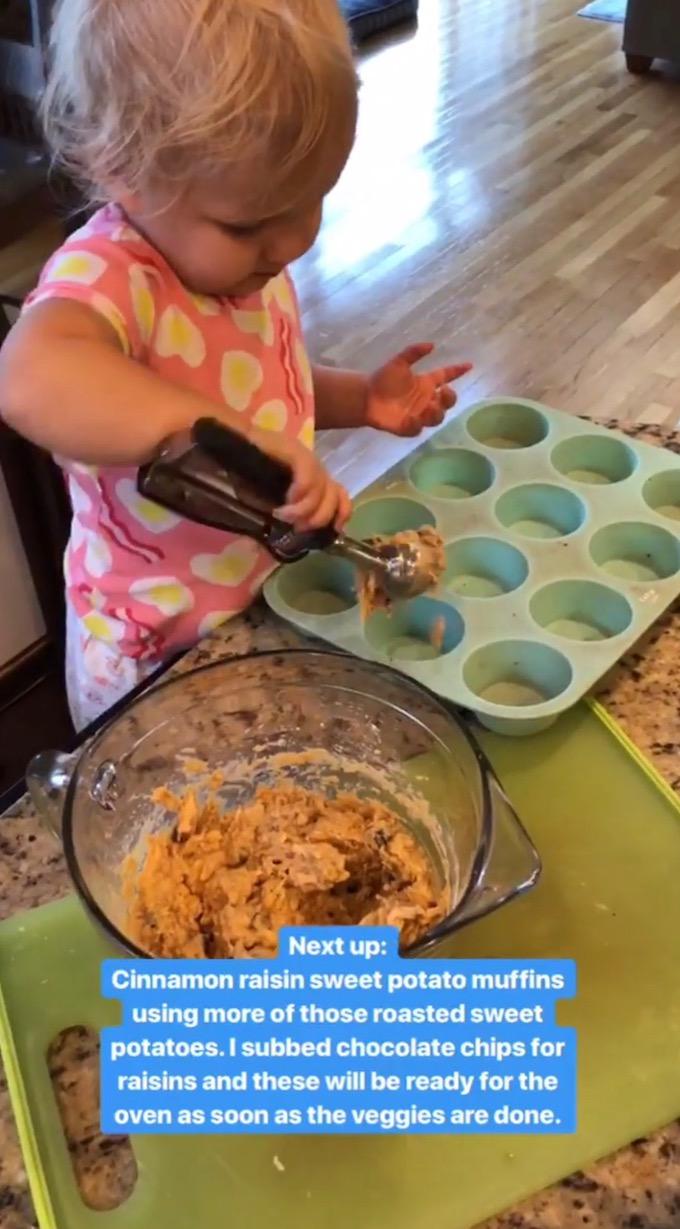
After I took the bars out and put the veggies in (I spray with avocado oil, and roast at 400 for 12-15 minutes), Little Miss and I made some Cinnamon Raisin Sweet Potato Muffins. I subbed chocolate chips for raisins. We had them ready to go into the oven as soon as the veggies were done.

food prep sweet potato bites

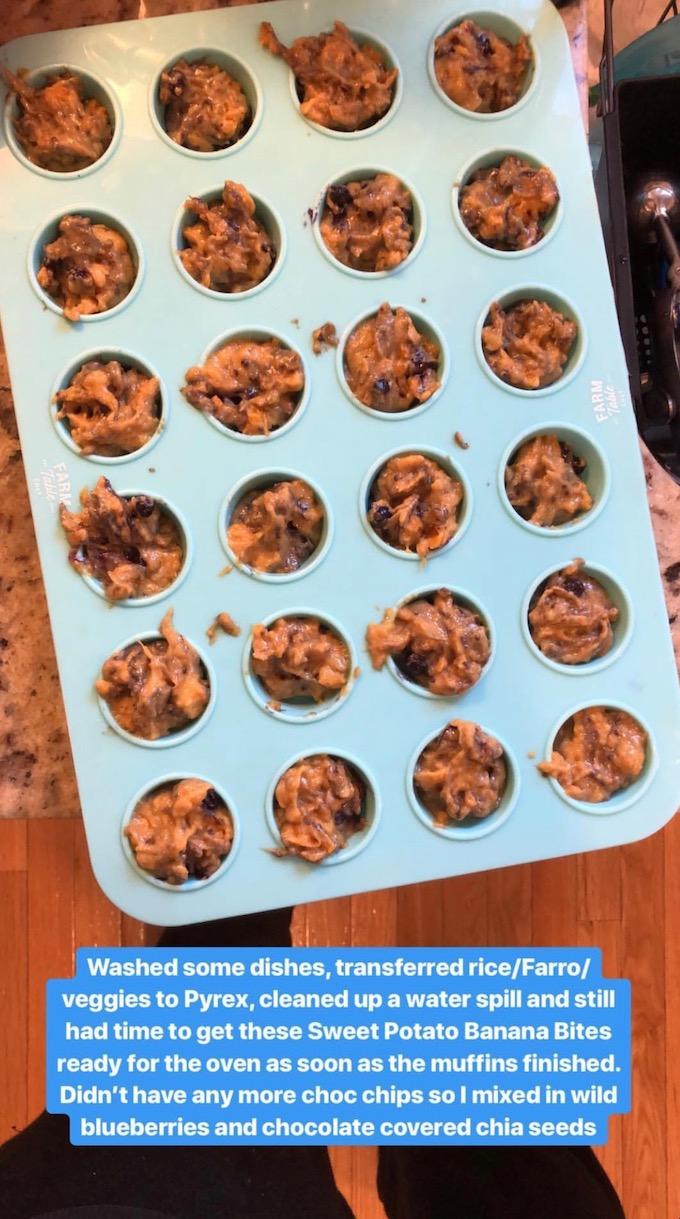
While the muffins were baking, I did some dishes, started transferring stuff to my Pyrex containers. I can’t find my exact set but this is a similar set of Pyrex containers (aff link)  and made a batch of my Sweet Potato Banana Bites. We were out of chocolate chips so I added frozen wild blueberries and chocolate covered chia seeds from Salba Chia.

food prep instant pot shredded chicken

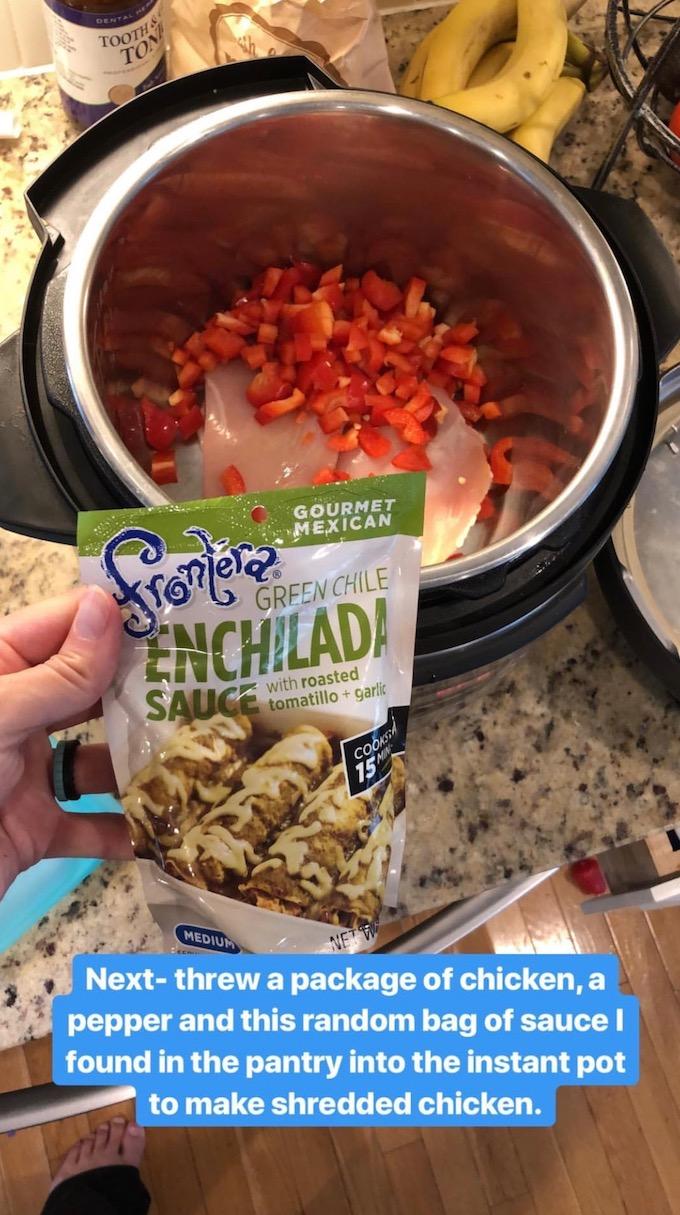
Once I put the sweet potato bites in, I threw some chicken into the Instant Pot with a package of Frontera enchilada sauce that my mom bought sometime while visiting. The chicken breasts were thick so I cooked them for 16 minutes and then shredded.

food prep salmon

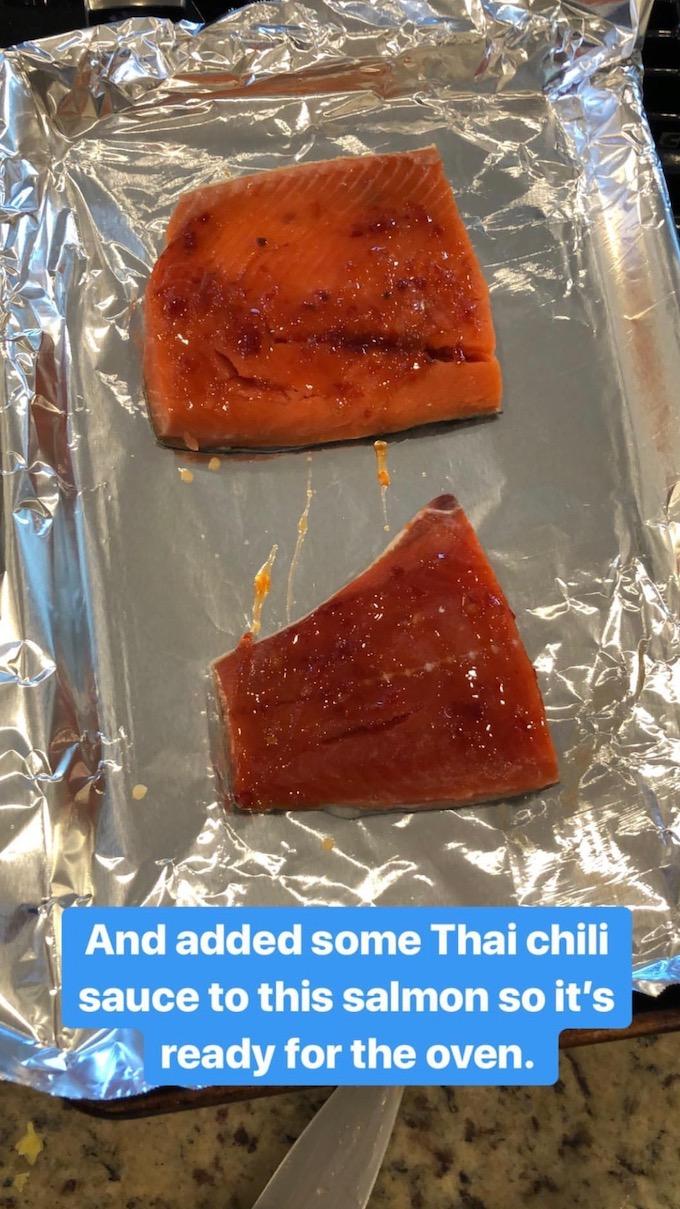
I also put some salmon on a pan, added a little sweet thai chili sauce and had it ready to go in the oven when the sweet potato bites were done.

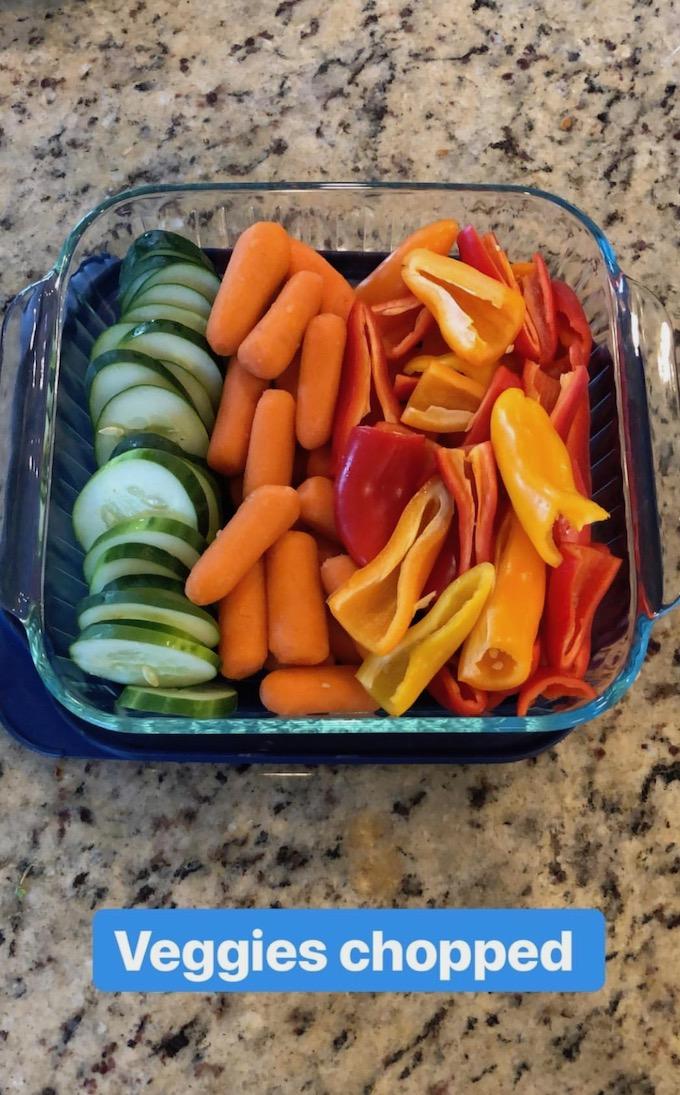
food prep snacking veggies

The last thing I did was chop some veggies for snacking and prep the kale. I remove the stems, chop it up, wash it and spin it dry, then put it in a ziploc, drizzle a little avocado oil on it and massage it until it starts to soften.

Food prep

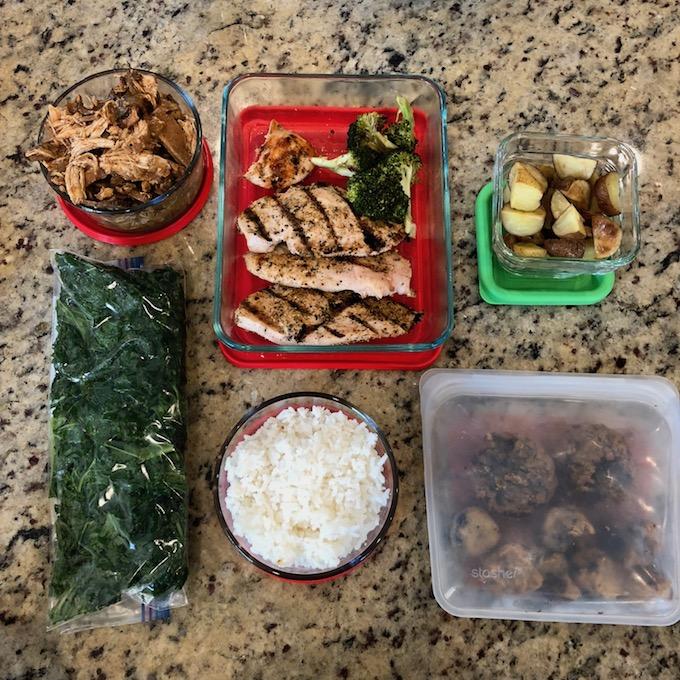
Once everything was done, here’s what it looked like. Plus the bbq chicken and mushrooms that was still in the crockpot. (Recipe will be in my freezer ebook) Since most of these are components, I wanted to show you guys how we used the food I prepped throughout the week to make quick meals.

The baked goods are often eaten for breakfast and snacks. Both my kids eat Dole peaches in 100% juice and yogurt almost every morning. Then we change things up with either a fried egg and toast, pb&J toast, oatmeal etc. My youngest usually eats a muffin. She also eats 2 carrot oat bars when she wakes up from her afternoon nap every single day. I usually eat a fried egg on toast with avocado and a muffin for breakfast every day. My husband doesn’t eat breakfast.

Everything in red in the meals below is from my food prep session.

food prep lunch and dinner 1

On Monday, for lunch, the kids at some of the shredded chicken, with cheese in a taco. They each had a clementine and Squish had sweet potato bites while Little Miss had a carrot bar. I made a bowl with farro, shredded chicken and roasted sweet potatoes. I topped it with avocado, salsa and chips. My husband had to run out to get lunch between work meetings. He usually comes home for lunch since his office is close to home.

For dinner, I made a package of cheese ravioli from the freezer and the kids both ate that, plus a sweet potato cottage cheese pancake, banana with peanut butter and some leftover Braciole (stuffed flank steak) that we brought home from dinner at my in-laws on Saturday. I have the recipe for Braciole on the blog. I made quick soup using some shredded chicken and roasted carrots, plus some Lotus Foods ramen and chicken broth but only ended up eating about half of it (thanks pregnancy). My husband had leftover braciole, some roasted broccoli, farro and snacking veggies, plus fruit.

food prep meals - tuesday

On Tuesday, for lunch the kids had naan pizza. I usually have mini naan bread in the freezer so I just pulled a couple pieces out, microwaved to thaw, topped with hummus, some shredded chicken and cheese. Squish had his with carrots and ranch and apple slices with peanut butter. Lyssie had hers with roasted sweet potatoes and strawberries. I had a couple sweet potato pancakes, plus a few omelet spirals that I made that morning to shoot for the blog. My husband had shredded bbq chicken and mushrooms, rice and broccoli plus fruit.

For dinner, my hubby grilled a few burgers and a package of chicken we bought over the weekend. The kids each had half a cheeseburger, avocado toast and sweet potato bites for dinner (plus Little Miss had some roasted potatoes. I had another bowl with farro, shredded chicken, roasted sweet potatoes and roasted green beans topped with salsa, avocado and chips. My hubby had a burger, roasted potatoes and snacking veggies and strawberries.

food prep lunches and dinners

On Wednesday, we went to the bakery after swimming. For lunch the kids had pb&j on farmhouse white bread from the bakery (they typically eat Dave’s Killer Bread), veggie straws, clementines and sweet potato bites. I had some of the bbq chicken and mushrooms on a bun+ snacking veggies. Hubby had a burger, plus green beans, rice, kale and snacking veggies and some strawberries.

For dinner, I made a box of mac and cheese. I added some of the roasted broccoli and leftover grilled chicken to it. Plus they had roasted sweet potatoes and strawberries. I had mac and cheese with some of the shredded chicken and roasted sweet potatoes plus a few sweet potato pancakes and leftover omelet spirals. Hubby had leftover grilled chicken, plus farro, roasted potatoes and green beans.

easy food prep plates

On Thursday, for lunch turkey and hummus sandwiches, leftover ravioli, some sweet potato chips I’d tested for the blog that morning, a green bean and leftover omelet spiral. I had a bowl with farro, green beans and shredded chicken and hubby had leftover grilled chicken with bbq sauce plus rice and broccoli.

For dinner, Squish had a date with pb, cottage cheese, hb egg and bbq chicken and mushrooms on a bun. Little Miss had an egg, roasted potatoes, shredded chicken and sweet potato bites. I had two eggs on avocado toast and hubby had 3 eggs, avocado toast and some roasted potatoes and kale.

food prep leftovers

Here’s what was left from my food prep session after dinner on Thursday night:

  • some kale
  • about 1 cup rice
  • 2 muffins
  • a few sweet potato bites
  • about a cup of potatoes
  • some shredded bbq chicken and mushrooms
  • a few broccoli stalks
  • some chicken (which wasn’t cooked until Tuesday and not part of my Sunday prep).

final day of food prep food

On Friday for lunch, Little Miss had a muffin and roasted potatoes, plus turkey and leftover tortellini. Squish had apples with pb, Love Grown sea stars cereal, tortellini, turkey and sweet potato bites. I had an egg on toast with pumpkin energy balls. Hubby had chicken, rice and potatoes, kale, hummus and veggies and strawberries.

We always go out to dinner Friday night….so after lunch on Friday, here’s all that was left:

food prep

  • 1 muffin
  • 5 sweet potato bites
  • 1 cup kale
  • 1 cup bbq chicken and mushrooms
  • 1/2 cup rice
  • (plus some grilled chicken).

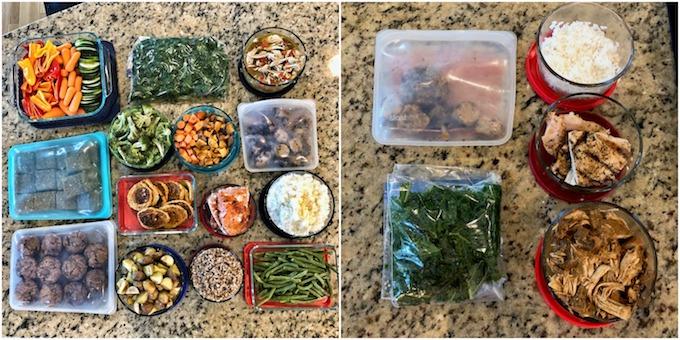
Here’s a side by side of what we prepped and what we ended with:

food prep vs leftovers

A few notes:

  • We obviously don’t mind repeating the same meals a few times during the week, but the beauty of component food prep is that you can do that, or put it together in different ways and flavor differently using sauces etc.
  • No, our family does not all eat the exact same meal every night. I realize this isn’t the norm but it works for us. Because of the component food prep I do, it’s easy for me to quickly throw together different combinations as shown above in the same amount of time as it would take for me to make one dish for all of us to eat.
  • No I don’t prep every single thing we eat all week. You can see that I cooked a few things during the week. I use food prep to help me but don’t think you need to prep every morsel of food for the week in order for it to be successful.
  • We do a pretty good job of not wasting food, but it does take a little practice to understand your family’s needs. I always suggest under prepping as you learn what works for you and then slowly increase the amount you prep until you find what works best.
  • Most weeks, the majority of the food I prep Sunday nights is gone by Thursday. Most leftovers are good in the fridge for 3-4 days. We typically stretch it to 5 days but it’s certainly up to you and your food safety comfort level when it comes to food prep. If you like to err on the safer side, you can prep enough to get you through Wednesday as well as a freezer meal that you could thaw overnight and cook to eat on Thursday. It’s all about finding what works for you and your family!
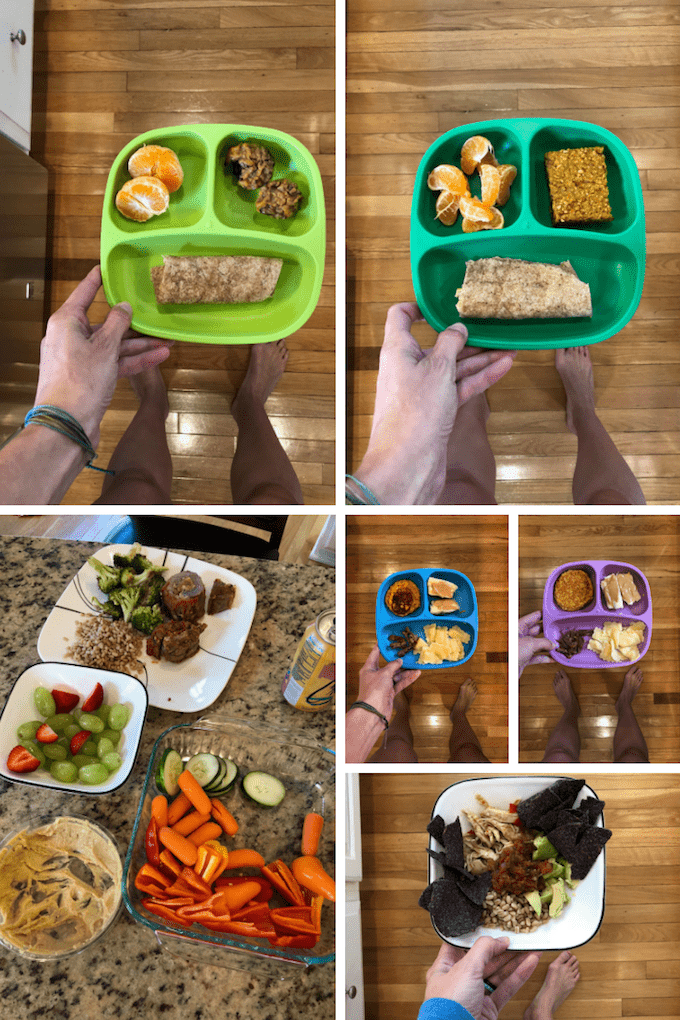
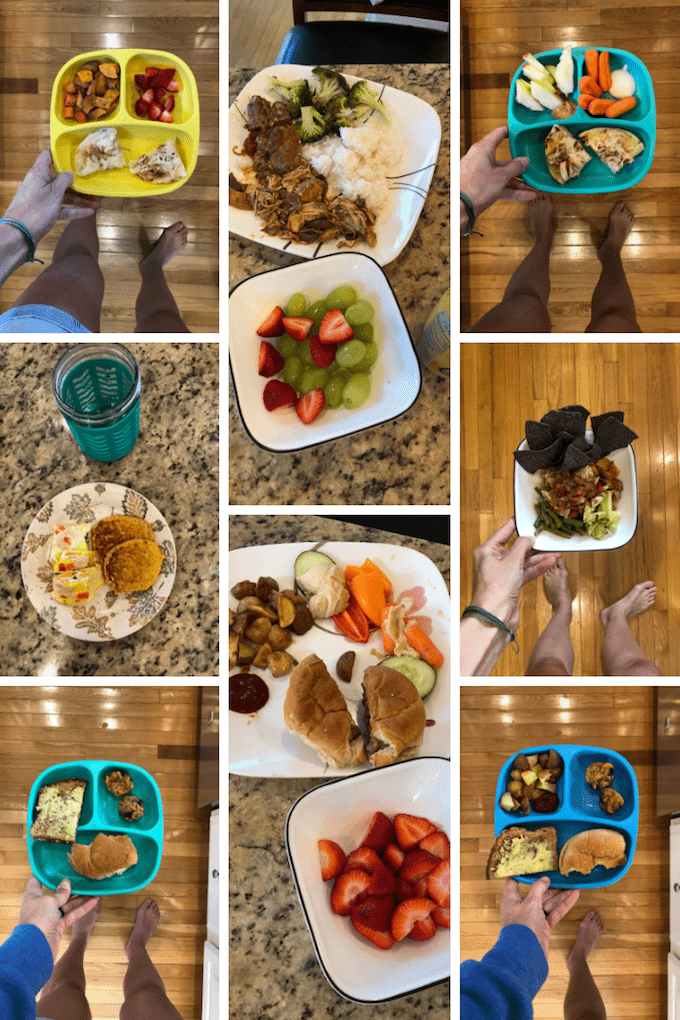
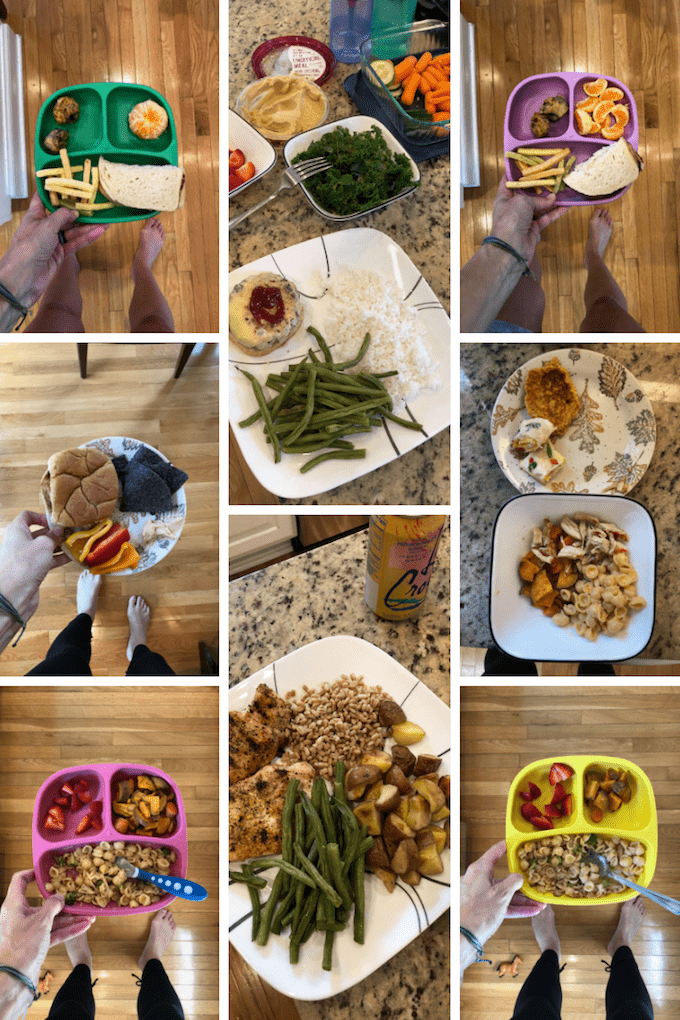
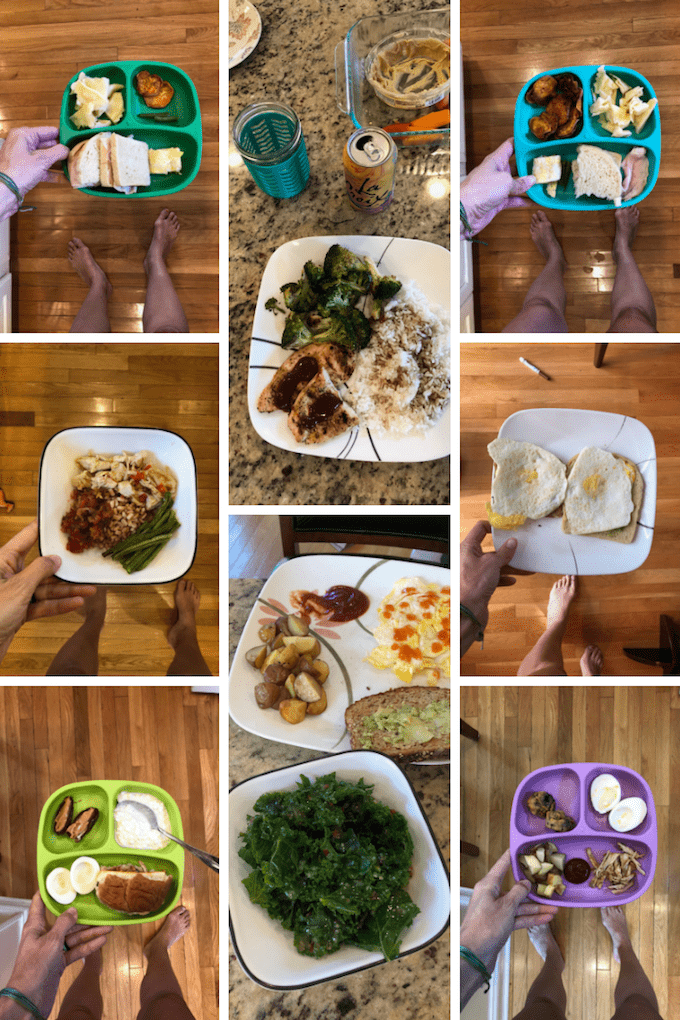
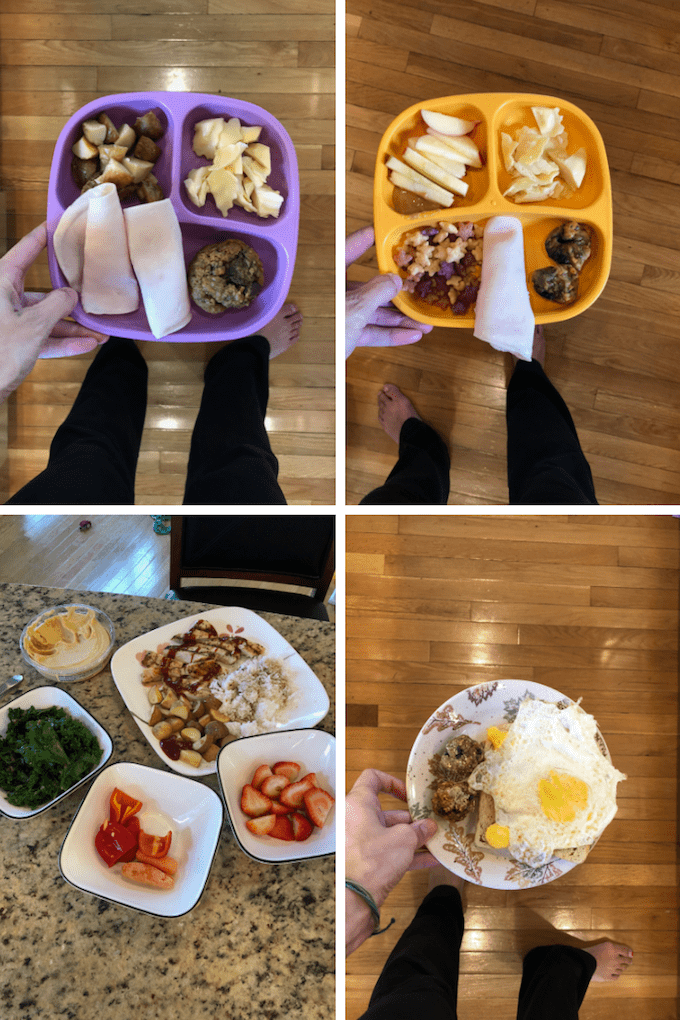
  • If you want to see how much of the meals my kids actually eat, be sure to follow me on Instagram. I share before and afters of their plates for most lunches and dinners.


Hope this helped!

Enjoy!
–Lindsay–
Filed Under: Food Prep

Pumpkin Energy Balls

September 21, 2018 by Lindsay 44 Comments

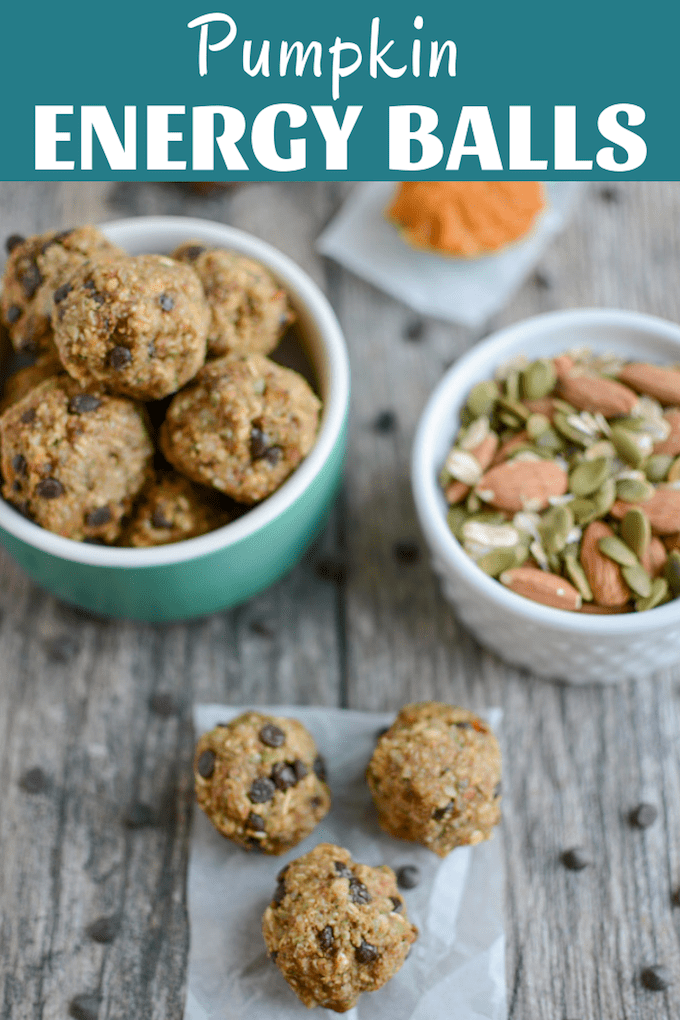
These Pumpkin Energy Balls are packed with fiber, protein & healthy fats for energy. Freezer-friendly & the perfect addition to a lunch or afternoon snack.

Pumpkin Energy Balls

*Originally published 9/2014. Post & photos updated 9/2018*

Hi Friends!

I can’t believe it’s been almost exactly four years since I first shared these Pumpkin Energy Balls. Over the years these have continued to be one of my go-to fall snacks. I stash them in the freezer so I made triple batches of them before both my babies came and will be doing the same for baby 3 here in a few weeks. If you’re looking for healthy pumpkin recipes, look no further!

I tweaked the recipe a little bit this week when I made them again to update the photos and I think I like them even better now! They’re a simple mix of nuts, seeds, pumpkin, oats, dates and spices which means they’re a gluten-free pumpkin recipe packed with fiber, protein and healthy fats – perfect for adding to lunch boxes, serving for an after-school snack, fueling up for a workout etc.

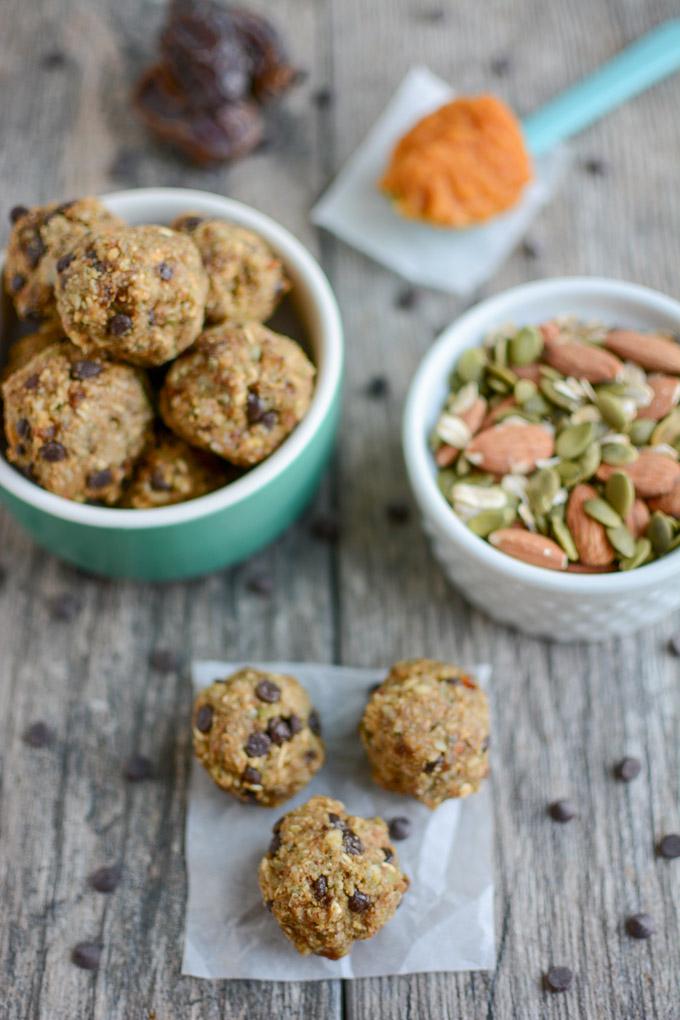
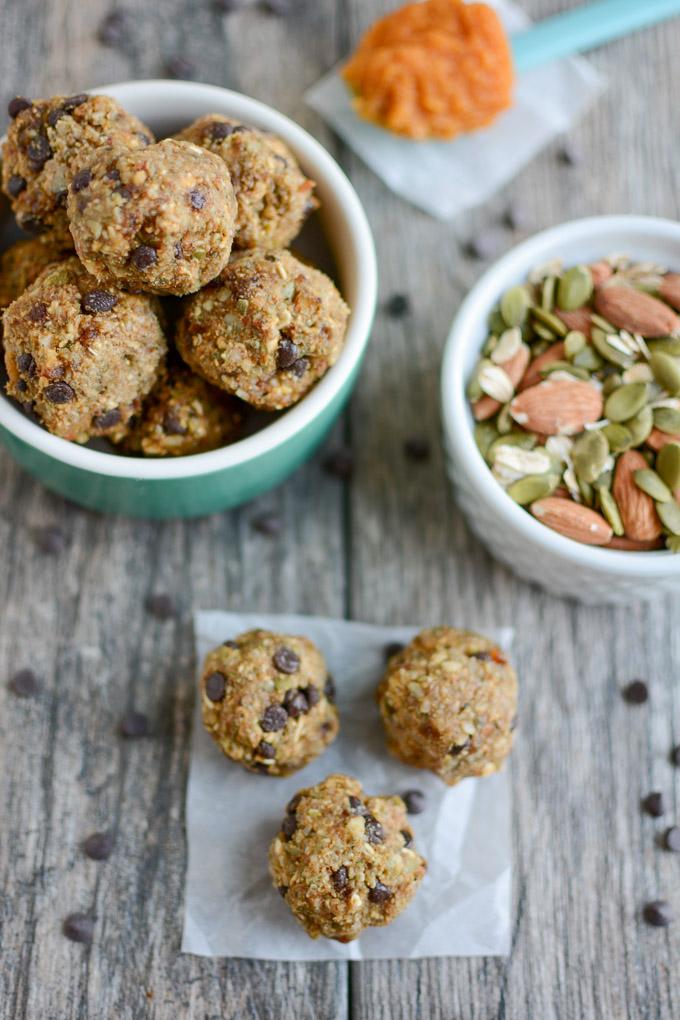
Pumpkin Energy Balls made with dates, almonds and pepitas

Here’s how you make this easy canned pumpkin recipe:

Print

Pumpkin Energy Balls

pumpkin energy balls
Print Recipe

5 Stars 4 Stars 3 Stars 2 Stars 1 Star

4.4 from 5 reviews

These Pumpkin Energy Balls are packed with fiber, protein and healthy fats for energy. The perfect addition to a quick lunch or to serve for an afternoon snack.

  • Author: Lindsay
  • Yield: makes 24 balls 1x

Ingredients

Scale
  • 3/4 cup pepitas (shelled pumpkin seeds)
  • 3/4 cup almonds
  • 1 cup chopped, pitted dates
  • 1/2 cup rolled oats
  • 1/4 cup hemp hearts (you could sub a few Tbsp chia seeds)
  • 1/2–2/3 cup pumpkin puree
  • 1–2 teaspoon cinnamon
  • 1/2–1 teaspoon ginger
  • 1/2 – 1 teaspoon vanilla
  • mini chocolate chips, optional

Instructions

  1. Put almonds and pepitas in a food processor and process until well ground. Transfer to a bowl.
  2. Put dates, oats, hemp hearts, cinnamon and ginger in the food processor and process until well chopped.
  3. Add pumpkin and pulse a few times.
  4. Add nut and seed mixture and process until well mixed. You may need to use a spoon to help get everything mixed.
  5. Taste and adjust if needed, adding more pumpkin and/or spices if desired.
  6. Add mini chocolate chips and pulse a few times to mix.
  7. Form into balls and freeze on a baking sheet. Transfer to a bag or storage container and store in the freezer.

Notes

I always start on the low end for the ranges of pumpkin and spices. Once mixed, taste and add more if desired.

Mixture will be slightly sticky when forming into balls. Wet your hands lightly or freeze the mixture for a little bit to help with this if you want. Or just press into a pan and cut into bars.

Here’s the original recipe: 1/2 cup pepitas, 1/2 cup sunflower seeds, 1 Tablespoon chia seeds, 1/2 cup almonds, 1/2 cup pumpkin puree, 1 cup chopped & pitted dates, 1/2 cup rolled oats, 1 teaspoon cinnamon, 1/2 teaspoon ginger

Did you make this recipe?

Tag @theleangreenbean on Instagram

I almost always make two batches of this recipe whenever I make them, but I typically make a single batch and then just repeat with another instead of trying to double all the ingredients and make a giant batch all at once because I’ve found they don’t mix together as well.


These Pumpkin Energy Balls are packed with fiber, protein & healthy fats for energy. Freezer-friendly & the perfect addition to a lunch or afternoon snack.

[click_to_tweet tweet=”Try these Pumpkin Energy Balls for a quick afternoon snack and stock your freezer to have them on hand for busy days!” quote=”Try these Pumpkin Energy Balls for a quick afternoon snack and stock your freezer to have them on hand for busy days!”]

Let me know if you try them!

Enjoy!
–Lindsay–
Filed Under: Snack Tagged With: Chocolate Chips, Dates, Hemp Seed, Oats, Pepitas, Pumpkin

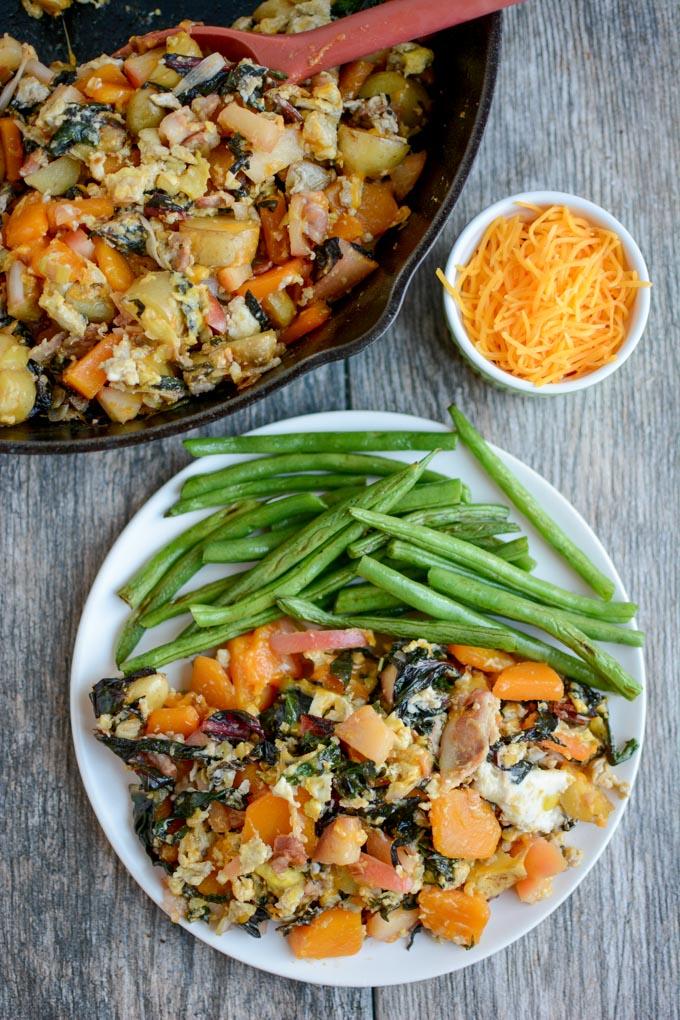
Fall Vegetable Skillet Hash

September 19, 2018 by Lindsay 3 Comments

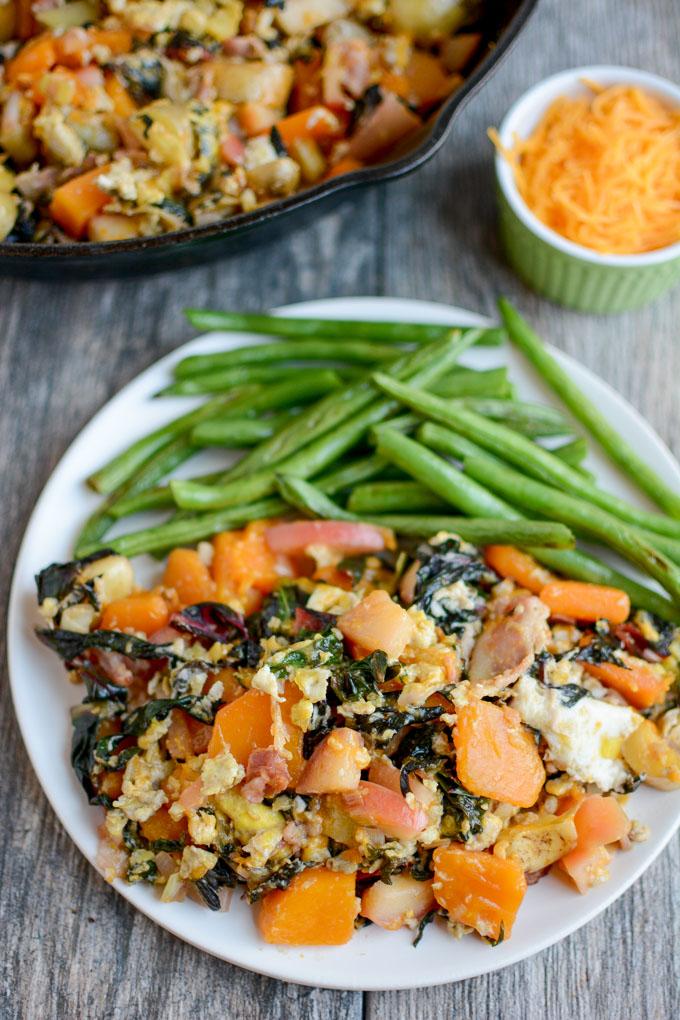
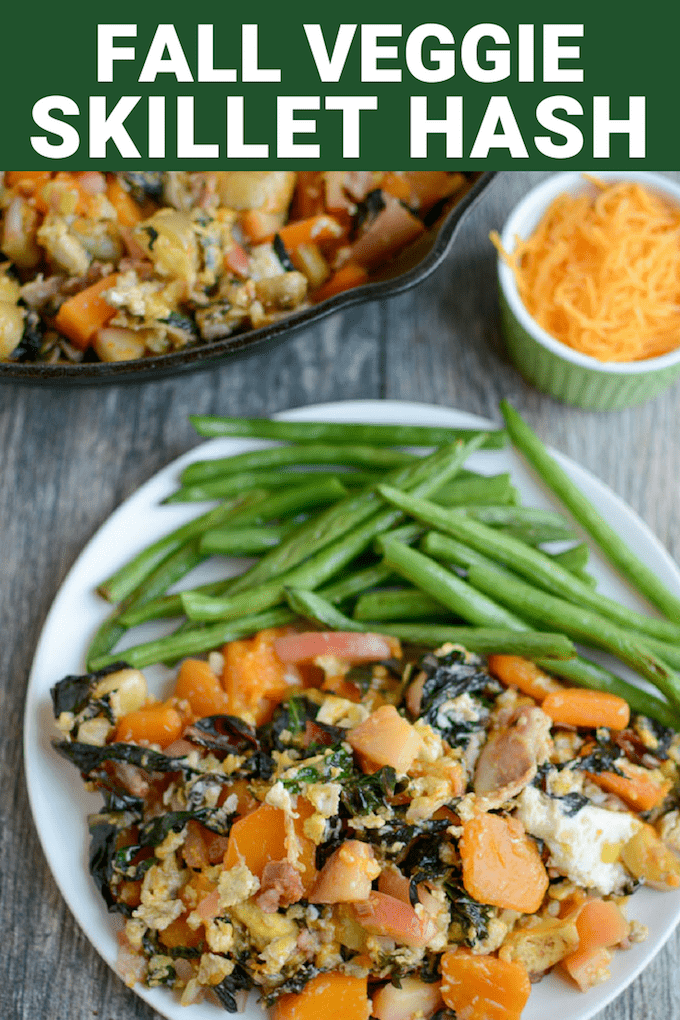
This Fall Vegetable Skillet Hash makes a quick, easy dinner (or breakfast) that’s easy to customize. Perfect for busy nights and packed with protein and vegetables!

Thanks to Meijer for sponsoring this post.

Fall Vegetable Skillet Hash with scrambled eggs

Hi friends!

I’ve got another delicious recipe to share with you guys today. By now, most of us are knee-deep in school season and while the days are getting shorter, the activities are piling up and the nights are getting busier. Am I right??

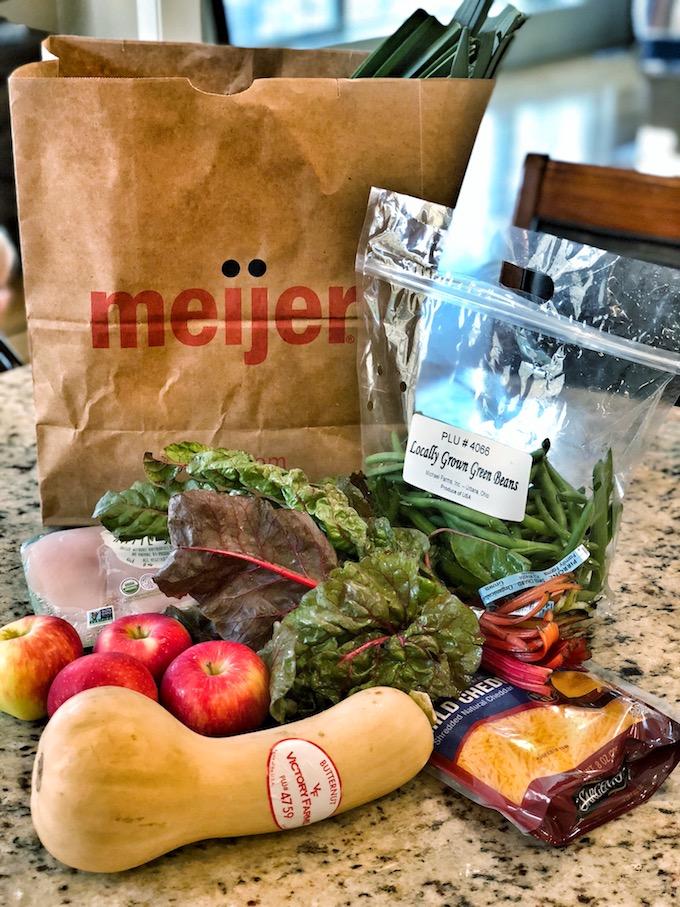
Now is not the time for elaborate recipes…we all need quick, easy and nutrient dense. Enter this Fall Vegetable Skillet Hash. This easy dinner is packed with vegetables and protein, easy to customize based on what’s in season in your area and your taste preferences and comes together quickly. And don’t forget you can make things even easier on yourself by using Meijer Home Delivery to have all the ingredients delivered right to your door!

local fall vegetables home delivery with shopmeijer

Fall is the perfect time to take advantage of local veggies that are in season. I chose to use butternut squash, apples, potatoes, swiss chard and green beans. You could easily sub a different type of squash or leafy greens or roast another veggie like broccoli for the side dish if that’s in season in your area!

I also chose to have all my ingredients for this easy dinner delivered using the ‘shopmeijer‘ app on a particularly busy night. I love that you can request local produce. I bought a bag of locally grown green beans last time I was there so I knew they’d have them and asked my shopper to look for them! If you’re buying things like avocados or bananas, you can also specify how ripe you want them to be.

Another thing I like about this dish is that you can customize the protein. I originally planned to make it with chicken but when the time came to actually cook, I just wasn’t feeling like chicken (pregnancy problems!) so I subbed scrambled eggs and it worked great! To make this dairy-free, you could also easily leave out the cheese.

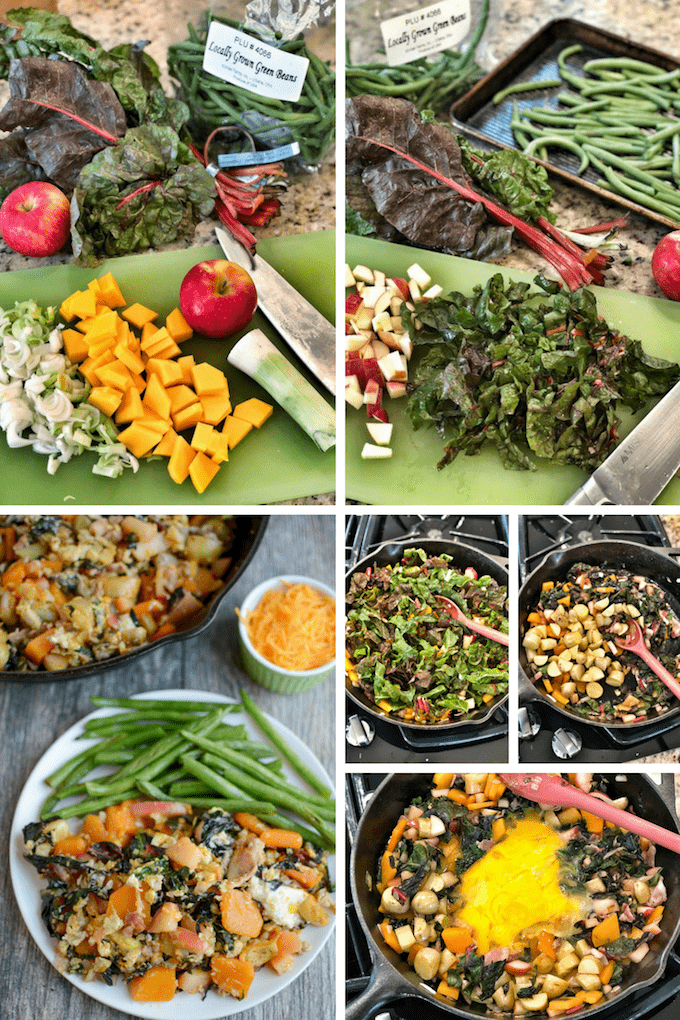
Fall Veggie Hash process shots

Green beans are one of my favorite vegetables to roast because they only take about 12 minutes. That means you can easily pop them in the oven while you whip up this skillet hash and everything will be ready at the same time!

When you chop your veggies, be sure to dice your squash fairly small so it cooks quickly. For the potatoes, I use one of my favorite tricks and cook them most of the way in the microwave to cut down on cooking time.

Skillet hash with eggs or chicken and fall vegetables

Here’s how you make it:

Print

Fall Vegetable Skillet Hash

Fall Veggie Skillet Hash 1 copy
Print Recipe

5 Stars 4 Stars 3 Stars 2 Stars 1 Star

No reviews

This Fall Vegetable Skillet Hash makes a quick, easy dinner (or breakfast) that’s easy to customize. Perfect for busy nights and packed with protein and vegetables!

  • Author: Lindsay

Ingredients

Scale

1 Tbsp butter or oil
2 strips bacon, diced
2/3 cup leeks, thinly sliced (approx 1 medium)
1.5 cup cubed and peeled butternut squash
2 cups chopped swiss chard (or kale, spinach, etc)
1 cup diced apple (approx 1 medium)
1 cup diced red or yellow potatoes
6 eggs
1 pound green beans, ends trimmed
1 cup shredded cheddar cheese, optional

Instructions

  1. Preheat oven to 400 degrees. Place green beans on a baking sheet, spray with oil and roast for 12 minutes.
  2. While oven is preheating and beans are roasting, make the hash.
  3. Heat butter or oil in a large skillet.
  4. Add bacon, leeks and butternut squash and saute over medium high heat for 7-8 minutes.
  5. Place potatoes in a bowl, drizzle lightly with oil and microwave for 2 minutes.
  6. Add potatoes, swiss chard and apples to pan and saute another 5 minutes.
  7. Whisk eggs in a bowl, clear a space in the skillet and pour into center of the pan.
  8. Scramble eggs to the desired doneness and mix all skillet ingredients together until combined.
  9. Stir in cheese if using and serve warm along side roasted green beans.


Did you make this recipe?

Tag @theleangreenbean on Instagram

Easy, right? This is the recipe that made me fall in love with butternut squash. And I know the apples may sound like a weird addition but trust me, they work!

This Fall Vegetable Skillet Hash makes a quick, easy dinner (or breakfast) that's easy to customize. Perfect for busy nights and packed with protein and vegetables!

Enjoy!
–Lindsay–
This is a sponsored conversation written by me on behalf of Meijer. The opinions and text are all mine.

Filed Under: Dinner, Breakfast, Sponsored Tagged With: Apple, Bacon, Butter, Cheese, Egg, Green Beans, Potato, Spinach, Squash

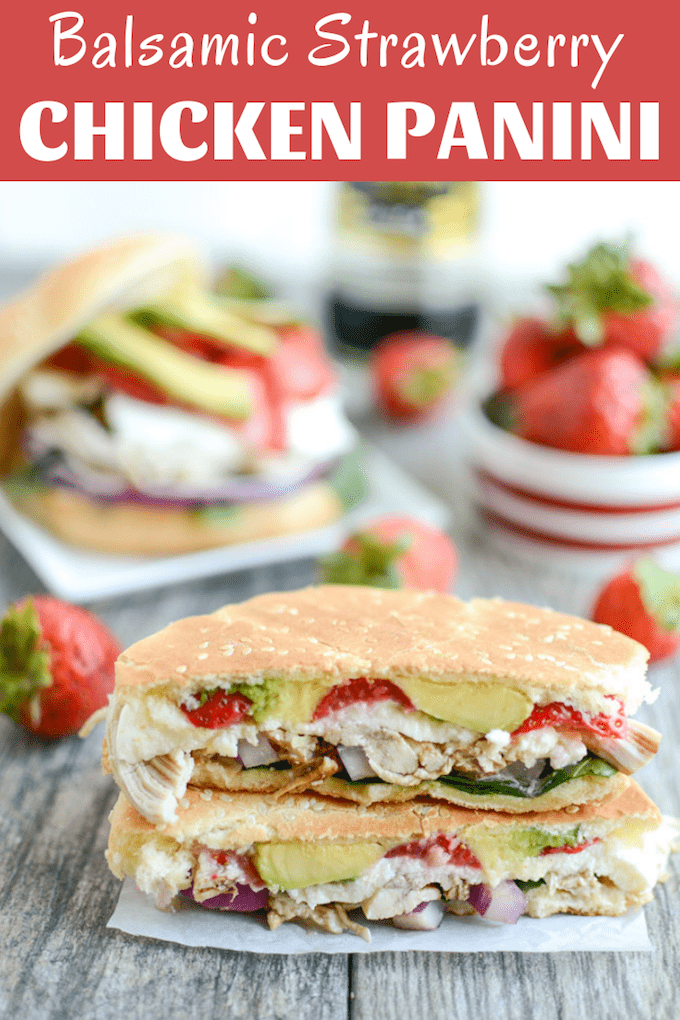
Balsamic Chicken & Strawberry Panini

September 13, 2018 by Lindsay 39 Comments

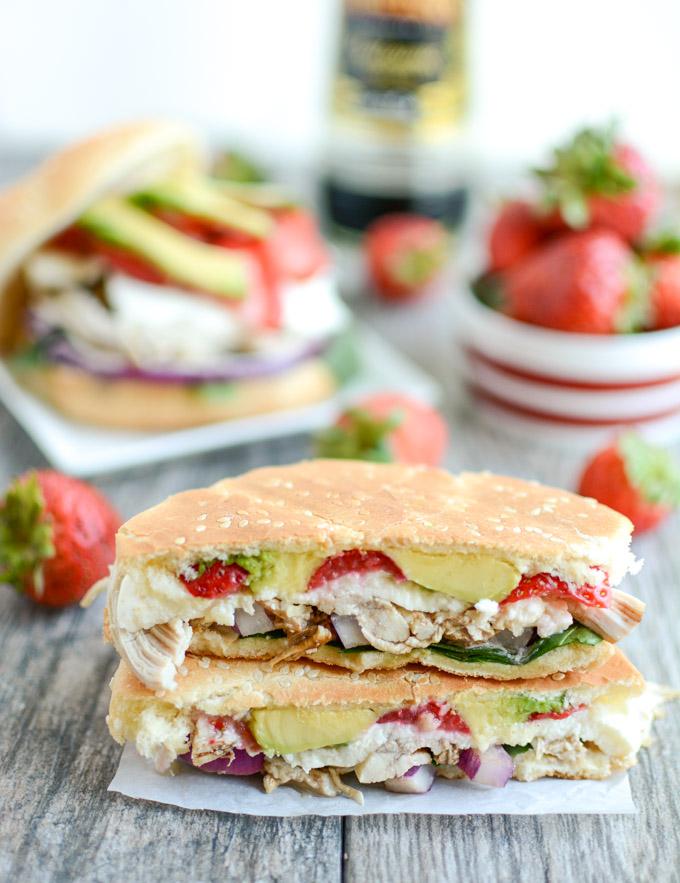
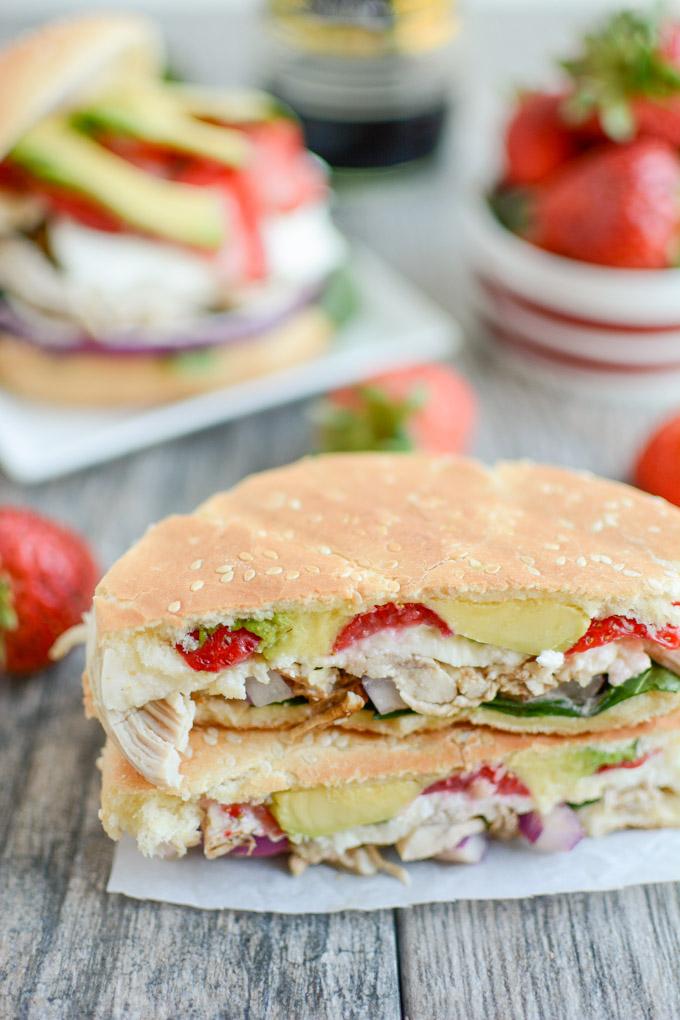
This Balsamic Chicken & Strawberry Panini strikes the perfect balance of flavors for a quick and easy summer lunch! A great way to transform leftover chicken into a new meal!

Balsamic Strawberry Chicken Panini

Originally published March 2014. Photos and post updated Sept 2018.

Hi Friends!

I decided it was time to give one of my favorite sandwiches a little update. I’ve been making this Balsamic Chicken & Strawberry Panini for about 5 summers now and lemme tell you, it never disappoints!

It’s pretty much the best combo of ingredients I can think of. I love strawberry spinach salad, so when I decided to make this sandwich, I knew I wanted to include that flavor combo. And since leftover chicken is something I always seem to have laying around, I figured why not come up with a way to transform it into something new and exciting for lunch. I added fresh mozzarella because – DELISH! and avocado because it’s my firm belief that all sandwiches should have avocado!

Balsamic Chicken and Strawberry Panini for lunch

Added bonus- The Vitamin C in the strawberries will help you absorb the iron in the spinach!

So here’s the official recipe:

Print

Balsamic Chicken & Strawberry Panini

Balsamic Strawberry Chicken Panini
Print Recipe

5 Stars 4 Stars 3 Stars 2 Stars 1 Star

5 from 2 reviews

This Balsamic Chicken & Strawberry Panini strikes the perfect balance of flavors for a quick and easy summer lunch! A great way to transform leftover chicken into a new meal!

  • Author: Author: Lindsay L
  • Prep Time: 5 minutes
  • Cook Time: 5 minutes
  • Total Time: 10 minutes
  • Yield: Serves 2

Ingredients

Scale
  • 4 slices sourdough bread or your favorite bun
  • 2 teaspoons butter
  • 1/2 cup fresh baby spinach leaves, optional
  • 6 ounces cooked, sliced chicken or shredded
  • 1 Tbsp balsamic vinegar
  • 1/3 cup sliced California strawberries
  • 4 ounces fresh mozzarella, sliced
  • 1/4 cup sliced or mashed avocado

Instructions

  1. Spread butter on the outsides of the bread.
  2. Form the sandwich by layering spinach, if using, chicken drizzled with balsamic, strawberries, mozzarella and avocado.
  3. Form a sandwich and place on panini press or grill pan and cook until the outsides are golden brown and the cheese is melted.

Did you make this recipe?

Tag @theleangreenbean on Instagram

This sandwich is quite to assemble and a fun change if your’e stuck in a sandwich rut.

This Balsamic Chicken & Strawberry Panini strikes the perfect balance of flavors for a quick and easy summer lunch! A great way to transform leftover chicken into a new meal!

Enjoy!
–Lindsay–
 

Filed Under: Lunch Tagged With: Avocado, Chicken, Spinach, Strawberry

5 Ways To Get Babies To Eat More Vegetables

September 10, 2018 by Lindsay 1 Comment

Should babies eat more vegetables? Yes! Try these easy tips from two Registered Dietitian moms, including a quick recipe for Superfood Popsicles.

visual guide babyled weaning

Hi friends!

Today I’m thrilled to have two friends and fellow RDs taking over the blog to share some tips for introducing veggies to babies and the importance of doing it early and often!


Hello! Let us introduce ourselves. We’re Whitney and Alex, Registered Dietitians, moms and co-creators of Plant-Based Juniors. While we’re both “predominantly plant-based” eaters ourselves, our mission is to get more plants on the table — regardless of what else you’re serving! After seeing private clients for the past decade, we believe that most of us could use a few more plants in our diet, so why not begin that habit right from the start?!

As we both became moms in the last year, we know the struggles that come with deciding what (and how) to feed your children. It’s the reason that we started the Plant-Based Juniors community; a space to share evidence-based nutrition research on feeding kids and a judgment-free zone where we could help each other with all of the many decisions that come with raising healthy eaters, including things like division of responsibility and baby-led weaning (BLW).

Plant Based Juniors ebook

Because this mission is so important to us, we also wrote a book, Plant-Based Juniors: First Bites (aff link) that guides parents in guiding baby toward a happy, healthy relationship with food. We provide you with a comprehensive guide to starting solids and answer all of the questions you may have along the way – from the first bite and beyond. We’ve also included 20 plant-based recipes that are perfect for infants!

Think of your baby’s palate like a blank canvas, easily shaped by each new taste and experience. As dietitians and parents, we’re focused on shaping that palate to enjoy all foods, especially nutrient-rich foods like vegetables. At Plant-Based Juniors, we take a baby-led weaning approach for many reasons, but no matter what approach to feeding you take, we recommend adding vegetables at almost every meal.

Studies have shown that babies who eat a wide variety of vegetables during the first year of life go onto eat more vegetables than those that don’t. Sweet-tasting vegetables, like carrots and sweet potatoes, might be accepted more than bitter-tasting vegetables but that’s OK. Continuing to offer different vegetables in different ways helps improve acceptability, even if it gets frustrating for mom and dad!

plant based juniors first bites ebook

Now that we’ve shared WHY it’s so important to introduce veggies early and often, here are 5 tips to get you started:

  1. Vary your own diet: Breastfeeding? Then your diet may be just as important as baby’s. According to recent studies, babies are more likely to enjoy the foods their moms ate while breastfeeding over new foods they were never exposed to. If you are nursing, here’s one more reason to pile on the vegetables.
  2. Add spice: Yes, babies like flavor! We don’t know where the idea of bland baby-food came from, but it likely wasn’t from a baby! Season baby’s food the same way you would yours. All seasonings are on the table, except for salt, sugar and anything too spicy. Experimenting with different spice blends is a great way to expose your baby to new flavors. 
  3. Make superfood popsicles: We consider popsicles to be the perfect place for leftover smoothies and green juices – throw them into a popsicle mold, freeze and you’re done! Enjoy the recipe below for our Superfood Popsicles.
  4. Offer them often: The key to acceptability? Making vegetables part of baby’s everyday routine. This is true for kids of all ages. The more they are exposed to veggies, the more they are willing to try them. We like to offer a vegetable in some form at every meal; it doesn’t need to be fancy – even steamed broccoli or finely-chopped spinach in scrambled eggs works!
  5. Make a dip: We all know that kids love dips! If your baby is less than a year old, dollop the vegetable dip onto steamed vegetable fingers or spread a thin layer on toast. For older kids, offer the dip alongside items you know they will eat. Almost any vegetable dip works. We like blending spinach, cooked beets or steamed carrots into hummus or yogurt.


If you want to learn more about BLW, our First Bites ebook provides guidance on how to start baby-led weaning, 20 baby-led weaning recipes, and how to incorporate key nutrients in a baby-led weaning approach. You can use code ‘pbjpartner’ for 10% off.

superfood popsicles for babies

And now it’s recipe time! Like we mentioned above, superfood popsicles are an easy way to get vitamin and mineral-rich greens into your infant’s diet.  We use a basic formula of greens + a vitamin C source (for enhanced iron absorption) + fruit to balance. The possibilities with these popsicles are endless! Bonus – they’re especially appealing to teething babies who need a little extra love on their gums.

Remember, the first few weeks and months of introducing solids to babies can shape their eating preferences for a lifetime. Therefore, we recommend introducing bitter greens early and often!  

Print

Superfood Popsicles

superfood popsicles for babies
Print Recipe

5 Stars 4 Stars 3 Stars 2 Stars 1 Star

5 from 1 review

An easy way to introduce vitamin & mineral-rich bitter greens to babies.

  • Author: Lindsay
  • Yield: Makes 4 popsicles 1x

Ingredients

Scale

1/3 cup breast milk, formula or water
½ cup chopped greens of choice (try spinach, arugula, kale)
½ cup chopped fruit of choice (try peach, apple, pear, berries)
1 teaspoon freshly squeezed lime or lemon juice

Instructions

  1. Puree all ingredients in a high-powered blender or food processor until smooth.
  2. Strain, using a fine mesh strainer. This step is optional, but provides a smoother texture when using heartier greens or fruits with peels.
  3. Pour into popsicle molds, cover and freeze until hardened, about 3-4 hours.

Did you make this recipe?

Tag @theleangreenbean on Instagram

For more tasty, easy recipes for kids, check out our ebook Plant-Based Juniors: First Bites (aff link) and follow us on Instagram @plantbasedjuniors!

Enjoy!
–Lindsay–
Filed Under: Kids

5 Kid-Friendly Activities in Butler County, Ohio

September 7, 2018 by Lindsay Leave a Comment

Looking for kid-friendly activities in Butler County, Ohio? Located just outside Cincinnati, it’s the perfect destination for a quick weekend getaway with plenty of things to do, sights to see, places to eat and more!

Kid-friendly activities in Butler County, Ohio

Thanks to the Butler County Visitors Bureau for sponsoring our trip. 

Hi friends!

Just popping in to tell you about a fun little trip we had the opportunity to take last month. Hubby and I slacked a little bit on summer vacation plans this year, but being pregnant made me not really feel like going on any big trips anyways. I was, however, feeling a little sad that we hadn’t taken the kids anywhere at all this summer.

Butler County Visitors Bureau to the rescue! A few weeks ago they offered to host us for the weekend and we thought it would be the perfect opportunity for a weekend getaway with the kids before school started. Butler County is right outside Cincinnati so it only took us about an hour and 45 minutes to get there from our house just north of Columbus.

We were only there for 48 hours but we packed a lot into our trip. I wanted to recap all the great kid-friendly activities we did in case you’re looking to make a similar trip yourself!

Here are 5 Kid-friendly Activities in Butler County, Ohio:

Entertrainment Junction

EnterTRAINment Junction

This was our first stop after arriving in Butler County. We went before we even checked into our hotel! If you have train lovers, this is a must-visit. So many activities under one roof including:

  • World’s Largest Train Display: 90 large, G-scale trains run on over 2 miles of track with a panoramic journey through three distinct times in U.S. history in a 25,000 square-foot interactive display.
  • Coney Island replica: A 1,000 square foot replica of historic Ohio Coney Island Amusement Park that recreates the park as it was in 1965. It has tons of interactive buttons that you can push to make the rides move, lights blink and music play.
  • Imagination Junction:  An interactive play area designed specifically for kids. A 5,000 square-foot railroad-themed entertainment center including a giant play structure for climbing, crawling and more. My littlest loved shoveling coal and my 3-year-old liked pushing the buttons to move the model trains.
  • American Railroad Museum: A 5,000 square foot interactive museum that explores the history of the railroad.
  • Great Train Expo Center & Seasonal Rides

entertrainment junction

My 3-year-old ran through the train display at warp speed but loved pushing all the buttons and my 1-year-old loved the imagination junction kids area.

As an added bonus, on the other half of the building is the A-Maze-N Funhouse! There’s a mirror maze, a curtain maze, a black hole and a clown college. I’ll admit I found the mirror maze a little challenging, especially with my toddler running into mirrors at every turn until he learned to walk with his hand out in front of him 🙂

Indian Springs Berry Farm

Berry Picking at Indian Springs Berry Farm

This is a cute little farm where you can go and pick USDA certified organic blackberries. The season is short, but if you’re there at the right time, it’s definitely worth checking out.

blackberry picking butler county

The owners are so nice! They gave us a quick picking tutorial and then gave us free reign. My kids had a blast! The berries were plentiful and easy to pick. You can bring your own buckets if you want to and they accept all forms of payment.

Marcum park fountains

Fountains at Marcum Park & The Hamilton Flea

This is such a fun Saturday morning activity. It’s held on the second Saturday of each month. Definitely bring a stroller if you have little ones and a change of clothes or swimsuits! We went berry picking first, then headed to the park. They have a bunch of food trucks set up so we grabbed coffee for the adults and the kids split a smoothie. Then we let them run around in the fountain while we drank our coffee in peace. And by in peace I mean I got about 4 sips in before my 3-year-old needed to go potty…but oh well.

marcum park and the hamilton flea

Once they were tired of the water, we took a walk around the Hamilton Flea which is set up right there in the park. Tons of local vendors with all sorts of goodies from shirts to art to beer! If you’re there on a non-flea weekend, the park itself is still worth checking out. There was a yoga class going on when we got there and there’s a big amphitheater that might be having a concert!

pyramid hill

Picnic and Art Cart at Pyramid Hill Sculpture Park

This one ended up being even more fun than anticipated. After visiting the park and the flea, we grabbed a picnic lunch from Alexander’s Market and Deli which was right around the corner. Then we made the short drive over to Pyramid Hill.

pyramid hill

They offer art cart (golf cart) rentals which I would highly encourage. You can rent a cart and drive to the picnic spot of your choice. After we ate, we spent quite a while driving around the park enjoying the art cart and checking out all the sculptures. The kids loved riding on the cart! They also have holiday lights, a summer series for kids, gardens and more so definitely check out their website before you go.

holtman's donuts

Butler County Donut Trail

Perhaps the most well-known attraction in Butler County, the Donut Trail is definitely worth checking out. There are 12 stops on the donut trail so unless you’re amazingly ambitious, you might have to make a couple of visits to hit them all.

holtman's donuts

We’ve only checked one off the list so far but they make it super fun by providing a passport so you can get a stamp at each shop, a map and a t-shirt once you visit them all and mail in your passport!

fort liberty playland

A few other kid-friendly activities we threw in – swimming in the hotel pool, a trip to a local playground (we checked out Fort Liberty Playland after a quick google search) and a visit to a local brewery (Rivertown Brewery and Barrel House) with free arcade games.

kid-friendly activities

Plus you’re also only 20 minutes or so from downtown Cincinnati if you want to hit up things like the children’s museum or the aquarium and King’s Island is about 15 minutes away as well!

Hopefully, this inspires you guys to take a quick weekend trip to check out Butler County! Be sure to visit the Butler County Visitors Bureau for even more options for kids and lots of ideas for an adults-only trip as well!

Enjoy!
–Lindsay–
 

Filed Under: Sponsored

Chocolate Lentil Bars

September 5, 2018 by Lindsay 16 Comments

The Chocolate Lentil Bars are a healthy, kid-friendly snack made with just a few simple ingredients. They’re gluten-free, nut-free and dairy-free, perfect for school lunches! 

Chocolate Lentil Bars - snack full of protein and fiber

Hi friends!

I’m so excited to share these Chocolate Lentil Bars with you guys! If you follow me on Instagram you got early access to the recipe last week and they’ve already gotten some good reviews. After so many of you have been loving my Lentil Banana Muffins, I decided I wanted to try my hand at using them in another baked good.

These bars took SEVERAL rounds of testing. The taste was good from the first round but they were way too crumbly. I finally figured it out after about 5 tries I think. I knew I wanted to keep them nut-free so that they’d be an option for school lunch boxes and since I only used oats, no flour, they’re gluten-free as well if that’s important to you!

I always get questions about what kind of lentils I use. Mine are generic lentils that don’t say a specific kind. They’re not red, yellow or black. They’re greenish brown! The recipes calls for one cup cooked, which I’ve found to be about a heaping 1/3 cup dry. I usually cook 1 cup, which gives me enough to have 1 cup to use and then another 2 cups to freeze in one cup portions so I can just thaw them out and use in baked goods!

Chocolate Lentil Bars

Like most of my baked goods, these are on the lightly sweetened side. If you’re looking for a sweeter treat, you can always increase the maple syrup or more chocolate chips.

Here’s the recipe:

Print

Chocolate Lentil Bars

chocolate lentil bars
Print Recipe

5 Stars 4 Stars 3 Stars 2 Stars 1 Star

4.5 from 4 reviews

The Chocolate Lentil Bars are a healthy, kid-friendly snack made with just a few simple ingredients. They’re gluten-free, nut-free and dairy-free, perfect for school lunches! 

  • Author: Lindsay
  • Yield: Makes 9-12 bars 1x

Ingredients

Scale

1 cup cooked green lentils
1/3 cup avocado oil (olive or canola oil also work)
2 eggs
1 tsp vanilla extract
1/3 cup maple syrup (more if desired)
1/3 cup cooked sweet potato
1.5 cups rolled oats
1/4 cup ground flaxseed
1/2 tsp baking soda
3 Tbsp cocoa powder
1/4 cup chocolate chips
1/4 cup Craisins

Instructions

  1. Put lentils, oil, eggs, vanilla, maple syrup and sweet potato in a food processor and blend until smooth.
  2. Add oats, flaxseed, baking soda and cocoa powder and process until well mixed.
  3. Add chocolate chips and craisins and pulse a few times.
  4. Press into 9×9 pan lined with parchment paper.
  5. Bake at 350 for 15 minutes.


Did you make this recipe?

Tag @theleangreenbean on Instagram

Don’t they look yummy?? I’ve had several people tell me you can also make them as cookies!

The Chocolate Lentil Bars are a healthy, kid-friendly snack made with just a few simple ingredients. They're gluten-free, nut-free and dairy-free, perfect for school lunches! 

Filed Under: Snack, Baking, Healthy Muffins & Bars Tagged With: Chocolate Chips, Cocoa Powder, Egg, Lentils, Maple Syrup, Oat Flour, Oil, Sweet Potato

Slow Cooker Pesto Chicken Tortellini

August 29, 2018 by Lindsay 7 Comments

This Slow Cooker Pesto Chicken Tortellini is so easy to throw together for an easy dinner that practically cooks itself! It’s freezer-friendly, kid-friendly and the perfect gift for new moms or busy families.

Slow Cooker Pesto Chicken Tortellini

Hi friends!

This Slow Cooker Pesto Chicken Tortellini was originally going to just be a recipe in my upcoming ebook, but I love it so much I decided to share it here on the blog! I’ve made it at least 4 times since I first tested it for the ebook. My husband and kids all love it and I consider that a major win around here.

And it really couldn’t be easier. It’s just chicken breasts cooked in the crockpot with some broth, pesto, onions and red peppers. For the last 15 minutes, you throw in the tortellini and then just stir in some cheese and serve. Added bonus, you can prep this ahead of time for the freezer. Just throw everything in a ziploc bag and put it in the freezer (be sure to freeze the tortellini in a separate bag) and then thaw in the fridge and cook when ready. Perfect gift for new mamas too!

Slow Cooker Pesto Chicken Tortellini with mozzarella cheese

You could easily throw in some extra veggies if you wanted to and use your favorite brand of tortellini.  It’s also easy to halve this recipe using a 9oz package of tortellini and 1 large chicken breast. I haven’t tried it, but you could also cook this in your Instant pot. Just cook on manual for 12 minutes or so, then switch to saute and add the tortellini to cook for a few minutes.

Here are your directions:

Print

Slow Cooker Pesto Chicken Tortellini

Slow Cooker Pesto Chicken Tortellini 1 copy
Print Recipe

5 Stars 4 Stars 3 Stars 2 Stars 1 Star

5 from 1 review

This Slow Cooker Pesto Chicken Tortellini is so easy to throw together for an easy dinner that practically cooks itself! Serve it with a side of veggies for a kid-friendly meal the whole family will love.

  • Author: Lindsay

Ingredients

Scale

½ cup onion, diced
1 red pepper, diced
2-3 cloves garlic
1 pound boneless, skinless chicken breasts
1.5 cups chicken broth
¾ – 1 cup pesto
15-18 oz tortellini (fresh or frozen)
1 cup shredded mozzarella cheese (optional)

Instructions

  1. Add onion, peppers, garlic, chicken, pesto and broth to slow cooker and cook on low 4-6 hours.
  2. Remove chicken and shred, return to slow cooker.
  3. Add tortellini, cover and cook additional 15 minutes.
  4. Stir in shredded mozzarella cheese if desired and serve.

Notes

Liquid will absorb as it sits but feel free to ladle out some of the excess liquid before adding the cheese if desired.

To prep for the freezer, put the onions, peppers, garlic, chicken, pesto and broth in a ziploc bag and freeze. Freeze tortellini separately.
When ready to eat, thaw in the fridge and cook according to directions. Tortellini can be added frozen, no need to thaw.

To cook in the Instant Pot, cook on manual for 12 minutes, shred chicken then switch to saute mode and add tortellini.

Did you make this recipe?

Tag @theleangreenbean on Instagram

So simple right? You could also use chicken thighs if you wanted.

This Slow Cooker Pesto Chicken Tortellini is so easy to throw together for an easy dinner that practically cooks itself! It's freezer-friendly, kid-friendly and the perfect gift for new moms or busy families.

Enjoy!
–Lindsay–
 

Filed Under: Dinner, Instant Pot, Slow Cooker Tagged With: Bell Pepper, Chicken, Chicken Broth, Onion, Pasta, Pesto

Best of the Bean – Year 8

August 27, 2018 by Lindsay 1 Comment

Hi friends!

Today’s a big day around here. It’s the 8th anniversary of The Lean Green Bean. That means I’ve been in charge of this little corner of the internet since this day in 2010. Is that crazy or what?!

I’m so grateful to each and every one of you who makes my recipes, visits my blog, shares my posts with others and follows me on social media. Thanks for allowing me to both raise my babies and do what I love every single day!

Like I do every year, I like to put together a roundup of the best posts and recipes I’ve shared (along with old recipes I’ve retested and reshared) over the past year. So here you go! Have a look, pick a few you haven’t tried yet and give them a whirl! I can’t wait to hear what you think.

BREAKFAST & SNACKS

Healthy Breakfast Recipes

  • Cinnamon Raisin Sweet Potato Muffins 
  • Blueberry Beet Muffins
  • Carrot Oat Bars
  • Butternut Squash Pancakes
  • Chocolate Squash Muffins 
  • Pumpkin Gingerbread Muffins
  • Sweet Potato Protein Pancakes 
  • Lemon Blueberry Zucchini Bread
  • Lentil Banana Muffins
  • Blueberry Muffins
  • Zucchini Carrot Apple Muffins 
  • Apple Cinnamon Blender Waffles
  • Sweet Cherry Oat Bars (not pictured)

Healthy Breakfast Recipes

  • Chocolate Peanut Butter Cauliflower Oatmeal
  • Instant Pot Oatmeal With Caramelized Bananas
  • Baked Oatmeal French Toast Sticks
  • Breakfast Enchilada Casserole
  • Fruit Pizza With Oatmeal Flax Crust
  • Cottage Cheese Egg Muffins 

Healthy Snack Recipes

  • Fruit Chia Slush
  • Peanut Butter Hemp Energy Balls
  • Chocolate Pea Cookies 
  • No Bake Granola Bars
  • Peanut Butter Chia Crackers
  • Gluten Free Apple Pecan Snack Cookies 

This list of healthy packaged snacks for kids (and adults too!) is meant to provide inspiration for busy parents who are looking for some new ideas. Homemade snacks are great but there are also some good store-bought options available!

60+ Healthy Packaged Snacks

LUNCH AND DINNER

Healthy Dinner Recipes

  • Hummus Crusted Chicken
  • Baked Ranch Chicken Taquitos
  • Persian Pulled Chicken
  • Grilled Foil Packet Hawaiian Chicken
  • Skillet Cashew Chicken
  • Mexican Chicken and Veggie Noodle Bowls
  • Freezer to Crockpot Cilantro Lime Chicken
  • Instant Pot Chicken Marsala
  • Sweet Potato Chicken Chili
  • Zoodles With Chicken and Spicy Almond Butter Sauce
  • Freezer Chicken Tenders
  • Crispy Chicken Potato Bowls

healthy salad recipes

  • Pulled Pork Fajita Salad
  • Lentil Taco Salad
  • Broccoli Slaw Salad in a Jar
  • Roasted Vegetable Pasta Salad

7 Easy Salads for summer. Perfect for lunch or dinner.

7 Easy Salads for Summer

Healthy dinner recipes

  • Salmon Nicoise Salad
  • Sheet Pan Shrimp Fajitas
  • Thai Peanut Salmon Burgers
  • Shrimp Curry Noodle Bowls
  • Instant Pot Vegetarian Lasagna Soup
  • Spicy Green Sauce

These easy lunch bowls also make quick, healthy options for dinner. They're simple, come together quickly and are packed with vegetables, lean proteins and healthy fats.

Quick and Easy Lunch & Dinner Bowls

Healthy Dinner Recipes

  • Mexican Burgers
  • Beef Cauliflower Stuffed Pepper Casserole
  • Sheet Pan BBQ Meatballs
  • Instant Pot Pork Chili Verde
  • Crockpot Shredded Beef 
  • Crockpot Meatballs

healthy lunch and dinner recipes

  • Mac and Cheese Muffins
  • Pizza Meatballs
  • Steak and Potato Kabobs
  • Slow Cooker Balsamic Potroast
  • Lemon Roasted Broccoli
  • Confetti Cauliflower Rice

DESSERTS

healthy dessert recipes

  • Frosted Carrot Cookies
  • Black Bottom Cheesecake Cupcakes
  • Healthy Fruit Crisp
  • Graham Cracker Toffee Squares
  • Instant Pot Gingerbread Bread Pudding
  • Sweet & Spicy Almonds

Homemade Edible Christmas Gift Ideas

Homemade Edible Christmas Gifts

Dinner on the fly ebook

I also released my second ebook, all about cooking quick and healthy dinners on the fly!

Dinner on the Fly Ebook

PARENTHOOD & LIFE

BOTB life

  • Kitchen Tools for Kids
  • Simple Toddler Meal Ideas
  • Why My Toddler Doesn’t Always Eat What I Eat
  • Quick Toddler Meal Ideas
  • How to Help Picky Eaters
  • Flying With Young Kids
  • Cheap Toddler Activities
  • Type 1 Diabetes as an Adult
  • Living With Diabetes

Thanks so much for reading! I love you all.

Enjoy!
–Lindsay–
 

Filed Under: Uncategorized

Thursday Things – Skoy

August 23, 2018 by Lindsay 1 Comment

Hi friends!

Time for another round of Thursday Things! Here are a few things to check out.

Twist Me Pretty

If you have longish hair and want to learn some fun braids and styles, follow Twist Me Pretty on Instagram. She does all sorts of videos and just did a 30 in 30 hairstyle challenge with a new braid each day.

skoy products

I’ve been hearing my friend Sally rave about these Skoy products lately so I just ordered some. I’m forever trying to find something I like, especially to help reduce my paper towel usage so I’ll let you guys know how I like them.

pack your own lunch email course

Speaking of Sally, she just launched a free 5 day email course for parents who want to teach kids how to pack their own lunches! CLICK HERE to check it out!

plant based juniors

For my parent friends, I’m also loving this new ebook from my friends and fellow RDs over at Plant-Based Juniors. Here’s what’s inside:

Everything you need to know about starting solids to set your child up for success! Following #evidencebased guidelines on iron, zinc, and omega-3 fatty acids for that critical 6-12 month period, PBJ’s makes it easy to ensure your little one gets all the nutrients they need to thrive.

The book includes:

  • a nutrition guide for your #plantbasedbaby
  • 20 easy + delicious recipes for baby that can be easily adapted for the whole family!
  • step-by-step instructions on baby-led weaning
  • tips for meal prep
  • a grocery list
  • a BLW FAQ section
  • an RD-approved products list

CLICK HERE to get more details and grab a copy of the book. (Affiliate link) And be sure to follow them on Instagram!

pyrex ultimate

You guys know I love my Pyrex glass containers. I recently saw my friend Paige talking about their newest kind, Pyrex Ultimate, that have glass lids instead of plastic and I’m thinking about getting some. Has anyone tried them?

snackroots

I recently came across this website started by a fellow Columbus mom called SnackRoots. She makes it super easy to create a list of snack ideas that are free of specific allergies. You can then share that list with the parents of classmates, teammates, etc. Check it out and follow her on Instagram!

the social shift

Here’s another great project from my friend Nicole Culver. You guys know I always share these because they’re such a great resource. In a few weeks she’s launching a FREE 4-part video series that’s all about teaching bloggers and influencers how to shift their thinking from focusing on pageviews and traffic to connecting and engaging with their audience. I love love love the message behind this and definitely think it’s the way of the future for a lot of bloggers! CLICK HERE to sign-up for this free course! (Aff link)

anjie + ash teething necklace

I haven’t used teething necklaces with either of my kids, but I saw Ali over at Inspiralized using one of these necklaces from Anjie + Ash and loved it. She uses it not for teething but to let baby Luca play with while nursing now that he’s a little older and it helps him stay more focused/less distracted while nursing. Love that idea and may try with baby 3 since he may be nursing in some chaotic situations.

That’s it for today!

Enjoy!
–Lindsay–
Filed Under: Uncategorized

Frosted Carrot Cookies

August 20, 2018 by Lindsay 24 Comments

These Frosted Carrot Cookies are an easy way to add some veggies to your breakfast or afternoon snack. They’re lightly sweetened and taste great with or without the frosting! 

Frosted Carrot Cookies with cream cheese frosting

*Originally published in 2011. Photos and recipe updated August 2018*

Hi friends!

Seven years ago, when I was on spring break from RD school, I shared this recipe for Frosted Carrot Cookies at the request of a reader. They got buried in the archives and a couple weeks ago I decided to dig them out and revamp the recipe. It turned out great so I took some new photos and decided to share it with you guys here today!

I actually like these better without the frosting but if you’re a frosting kinda person, this one is pretty simple- just a little cream cheese mixed with a little yogurt and powdered sugar.

Frosted Carrot Cookies

Frosted Carrot Cookies for breakfast or snack!

Plus I stuffed a lot of shredded carrots in there. My one year old loves them, which is no surprise because she loves carrots and also inhales these Carrot Oat Bars. I love this recipe because it makes just a dozen cookies, perfect for serving with breakfasts and snacks for my kids but not so many leftover that they go to waste when they get tired of them for the week.

Here’s how to make them:

Print

Frosted Carrot Cookies

Frosted Carrot Cookies with shredded carrots and cinnamon
Print Recipe

5 Stars 4 Stars 3 Stars 2 Stars 1 Star

5 from 1 review

These Frosted Carrot Cookies are an easy way to add some veggies to your breakfast or afternoon snack. They’re lightly sweetened and taste great with or without the frosting! 

  • Author: Lindsay
  • Yield: makes 12 cookies 1x

Ingredients

Scale

4 Tbsp butter, melted
1/4 cup maple syrup
1 tsp vanilla
1 egg
3/4 cup shredded carrots (squeeze in paper towel to remove excess moisture)
3/4 cup white whole wheat flour
3/4 cup oats
1 tsp cinnamon
1 tsp ginger
1 tsp baking soda
2 Tbsp ground flax
2 oz cream cheese, softened
2 Tbsp vanilla yogurt
2 Tbsp powdered sugar

Instructions

  1. In a large bowl, mix melted butter, maple syrup, vanilla, eggs and carrots until well combined.
  2. Add flour, oats, cinnamon, ginger, baking soda and flax and stir until just mixed.
  3. Scoop onto greased or lined baking sheet, flatten gently with a fork and bake at 375 for 10 minutes.
  4. If frosting, let cookies cool completely. Combine softened cream cheese, yogurt and powdered sugar and stir vigorously to remove any lumps.
  5. Spread lightly on cookies just before serving.

Did you make this recipe?

Tag @theleangreenbean on Instagram

Don’t they look yummy? I’m ready to make another batch right now! Sometimes I shred the carrots by hand and sometimes I just chop them up with my food processor.

These Frosted Carrot Cookies are an easy way to add some veggies to your breakfast or afternoon snack. They're lightly sweetened and taste great with or without the frosting! 

Let me know if you and the kiddos try these! They’re a hit around here for sure!

Enjoy!
–Lindsay–
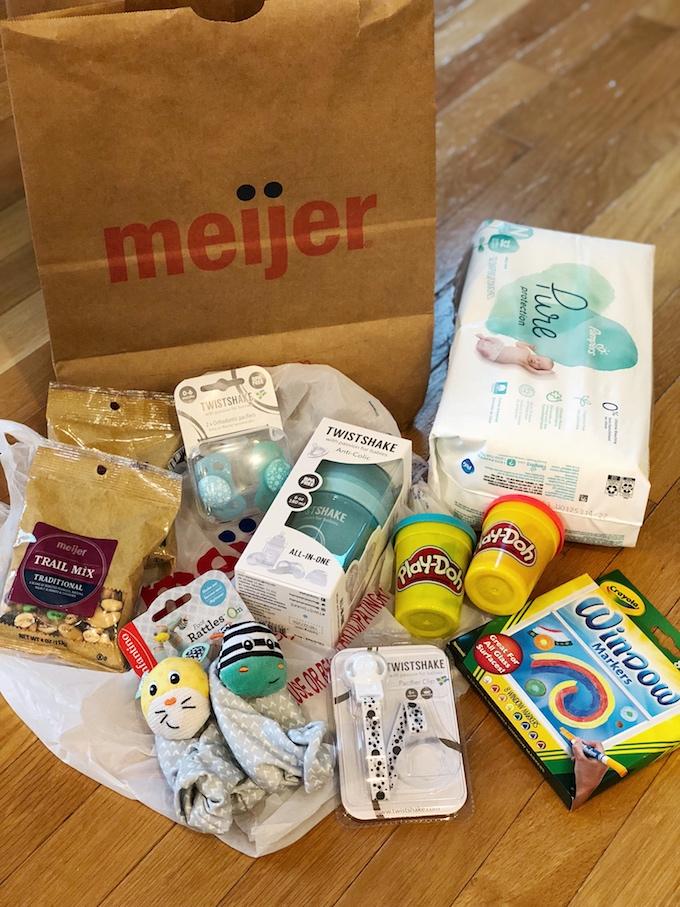
Filed Under: Baking, Breakfast, Dessert, Healthy Muffins & Bars, Snack Tagged With: Butter, Carrot, Cream Cheese, Egg, Ground Flaxseed, Maple Syrup, Oats, White Whole Wheat Flour

Sweet Cherry Oat Bars

August 17, 2018 by Lindsay 17 Comments

These Sweet Cherry Oat Bars are the perfect addition to breakfast on a busy weekday morning or for serving as a kid-friendly after school snack! They’re lightly sweetened and full of fiber and protein. 

Sweet Cherry Oat Bars with sweet cherries, chocolate chips, pecans and coconut

Thanks to NW Cherry Growers for sponsoring this post.

Hi friends!

I’m so excited to share these Sweet Cherry Oat Bars with you today because they feature a fruit we’ve been loving this month – sweet northwest cherries! Have you picked any up yet this summer? They’re in season right now (August), but only for another week or so, and they’re oh-so-delicious! I feel like sweet cherries don’t always get the love they deserve, so I was immediately on board when my friends at NW Cherry Growers reached out about collaborating for a recipe. They’re a cool organization that’s working to research, as well as promote and educate people about stone fruits grown in Washington, Oregon, Idaho, Utah and Montana orchards. Check out their website here.

We’re teaming up today to share a little bit about the benefits of fresh sweet cherries, as well as encourage you to stock up now so that you can enjoy these sweet gems all year long! My favorite way to preserve them is by freezing. Then I use them in the winter, spring, and fall to make chia jam, smoothies, popsicles, sauces, baked goods and more. If you’re a fan of canning, you can also do that, or even dry them yourself in a dehydrator or oven!

Sweet Cherry Oat Bars

Sweet Cherry Oat Bars with Peanut Butter Drizzle

If you’re a cherry fan, you definitely need a cherry pitter. My 3-year-old likes helping me pit them and I actually find the pitting process to be quite therapeutic. I just put on some tunes, zone out for a little bit and work my way through a bag…then chop them up and throw them in the freezer! Stay tuned in the upcoming months because I’ll be sharing another recipe around the holidays to show you how to make use of those cherries you froze this month.

pitting sweet cherries to freeze

Did you know that dark sweet and Rainier cherries both offer a bunch of health benefits? Even though they’re naturally sweet, cherries actually have one of the lowest glycemic indexes of any fruit. That means they release glucose slowly and help you maintain a steady blood sugar. Plus, research shows that cherries contain anthocyanins, which shut down enzymes that cause tissue inflammation, in the same way ibuprofen does! They’re also a great source of fiber, which almost all Americans need more of.

Have I convinced you that you should be enjoying cherries more often yet? Let’s start with these Sweet Cherry Oat Bars. They’re full of fiber thanks to the cherries, oats and whole wheat fiber, plus some healthy fats from the peanut butter and pecans. I’ve been adding them to my breakfast plate this week and serving them to Squish when he comes home from school.

Sweet Cherry Oat Bar crumbled over yogurt

They are slightly crumbly if you try to slice them when they’re still warm…but save those crumbles! They’re perfect over yogurt with some extra cherries for a filling breakfast!

Here’s how you make them:

Print

Cherry Oat Bars

Cherry Oat Bars
Print Recipe

5 Stars 4 Stars 3 Stars 2 Stars 1 Star

5 from 2 reviews

These Cherry Oat Bars are the perfect addition to breakfast on a busy weekday morning or for serving as a kid-friendly after school snack! They’re lightly sweetened and full of fiber and protein. 

  • Author: Lindsay
  • Yield: Makes 9-12 bars 1x

Ingredients

Scale

1/3 cup avocado oil (olive or canola oil would also work!)
1/4 cup maple syrup
1/2 cup peanut butter
2 eggs
1/4 cup vanilla yogurt
1 tsp vanilla extract
1 cup chopped sweet cherries (be sure to remove stems and pit them first!)
1.5 cups rolled oats
3/4 cup white whole wheat flour
1 tsp baking soda
1/2 c dark choc chips, divided
2–3 Tbsp unsweetened coconut flakes, optional
2–3 Tbsp chopped pecans, optional

Instructions

In a large bowl, combine oil, maple syrup, peanut butter, eggs, yogurt and vanilla extract and stir until well combined.
Add chopped sweet cherries, oats, flour, baking soda and 1/4 cup chocolate chips and stir until just combined.
Press into a 9×9 pan lined with parchment paper.
Top with remaining chocolate chips, pecans and coconut if using.
Bake at 350 degrees F for 20-25 minutes.
Let cool completely before slicing.

Notes

Feel free to throw in some extra sweet cherries if you want!
You could also use 1/3 cup maple syrup if desired.
Although I haven’t tried it, you could likely spread these into a 9×13 pan instead of 9×9 for a bit thinner bar.

Did you make this recipe?

Tag @theleangreenbean on Instagram

Guys, these are my new fav for sure. Let me know if you try them. They’re super flexible too. You could use almonds instead of pecans, skip the coconut if it’s not your favorite or just mix all the chocolate chips in instead of sprinkling half on top. Do what works for you! I’d imagine you could also sub almond butter for peanut butter without any problems.

These Sweet Cherry Oat Bars are the perfect addition to breakfast on a busy weekday morning or for serving as a kid-friendly after school snack! They're lightly sweetened and full of fiber and protein. 


Be sure to follow NW Cherry Growers on Facebook,  Twitter, Instagram and Pinterest for more news and recipes.

Enjoy!
–Lindsay–
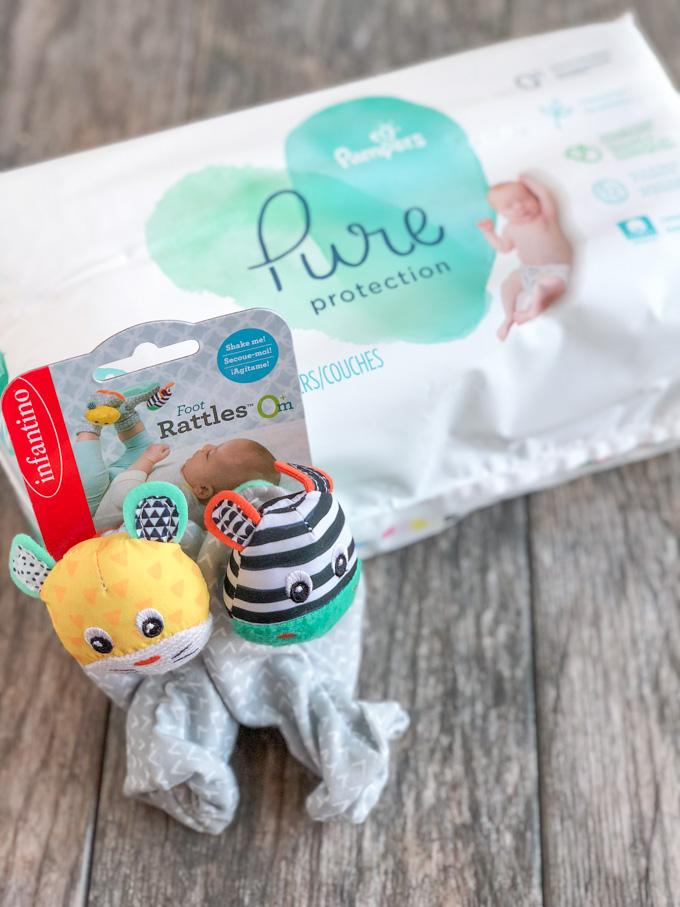
 

Filed Under: Breakfast, Baking, Snack, Sponsored Tagged With: Cherry, Chocolate Chips, Egg, Maple Syrup, Oats, Oil, Peanut Butter, White Whole Wheat Flour, Yogurt

Macaroni and Cheese Muffins

August 13, 2018 by Lindsay 5 Comments

These Macaroni and Cheese Muffins are a fun way to change up your kid’s favorite dinner. They’re perfect to pack in a lunchbox or for an after school snack! Add sausage and peas for a protein boost and watch your kids gobble them up.

Macaroni and Cheese Muffins with sausage and peas

Hi friends!

Just popping in with another lunchbox-friendly recipe for you guys today. These Macaroni and Cheese Muffins are a fun way to put a twist on the mac and cheese dinner that every kid loves. I always try to boost the nutrition of mac and cheese by adding some healthy mix-ins. In this case, I used peas, chicken sausage and a little bit of pumpkin, but you can mix in whatever your kids like best. You could use chopped broccoli or some red peppers and leftover chicken or pulled pork would work just as well as chicken sausage.

In other good news, you can make these fun little muffins with either homemade or boxed mac and cheese. I tested both. The boxed version didn’t stick together QUITE as well as homemade but still worked. I like these muffins because they don’t require utensils. You can pack them in lunch boxes or even throw a couple in a baggie and eat them for dinner on the go in the car.

Macaroni and Cheese Muffins for a portable meal

Another note- I used colby jack cheese when I made my homemade version of these, but I prefer regular cheddar. I also used 2% milk but you can use whole milk for a richer version. And I topped mine with crushed cheddar bunnies – you could use goldfish or panko breadcrumbs or even crushed potato chips! And use whatever pasta you want…but the smaller the better!

Also, I used my silicone muffin tins for these and they popped out with no problem. If you’re using regular muffin tins, grease them really well or line them with parchment paper.

Here’s the recipe:

Print

Macaroni and Cheese Muffins

Macaroni and Cheese Muffins topped with cheddar bunnies
Print Recipe

5 Stars 4 Stars 3 Stars 2 Stars 1 Star

No reviews

These Macaroni and Cheese Muffins are a fun way to change up your kid’s favorite dinner. They’re perfect to pack in a lunchbox or for an after school snack! Add sausage and peas for a protein boost and watch your kids gobble them up.

  • Author: Lindsay
  • Yield: 10 muffins 1x

Ingredients

Scale

2 cups dry elbow noodles
2 chicken sausages, diced
1/2 – 3/4 cup frozen peas (or your fav veggie – chopped steamed broccoli would be good!)
6 oz cheese,  shredded (I use cheddar)
¾ cup milk (whole or 2% work best)
2 tbsp butter
2 tbsp flour
1/2 tsp garlic powder
1/4 cup pumpkin, optional
crushed cheddar crackers or breadcrumbs for topping

Instructions

  1. Cook pasta according to package directions. Drain and set aside.
  2. In a skillet, melt butter. Stir in flour.
  3. Slowly add milk, stirring constantly to avoid lumps.
  4. Add cheese and stir until melted.
  5. Add chicken sausage, peas, noodles, garlic powder and pumpkin if using.
  6. Scoop into silicone or well-greased muffin tins. (Mine made about 10 muffins)
  7. Top with cheddar crackers or breadcrumbs.
  8. Bake at 375 for 18 minutes.
  9. Let cool at least 15 minutes in the muffin tins before removing.

Notes

Feel free to use your favorite homemade mac and cheese recipe.

You can also used boxed mac and cheese. Prepare as directed and add your mixins.

Change up the mix-ins as desired. Leftover chicken or pork and other vegetables will work fine.

Did you make this recipe?

Tag @theleangreenbean on Instagram

Essentially just make mac and cheese however you want. Feel free to use your favorite homemade recipe instead of mine, then bake, let cool and remove from muffin tins!

These Macaroni and Cheese Muffins are a fun way to change up your kid's favorite dinner. They're perfect to pack in a lunchbox or for an after school snack! Add sausage and peas for a protein boost and watch your kids gobble them up.

[click_to_tweet tweet=”Try these Mac and Cheese Muffins with Sausage and Peas for a fun addition to your kid’s lunchbox!” quote=”Try these Mac and Cheese Muffins with Sausage and Peas for a fun addition to your kid’s lunchbox!”]

Enjoy!
–Lindsay–
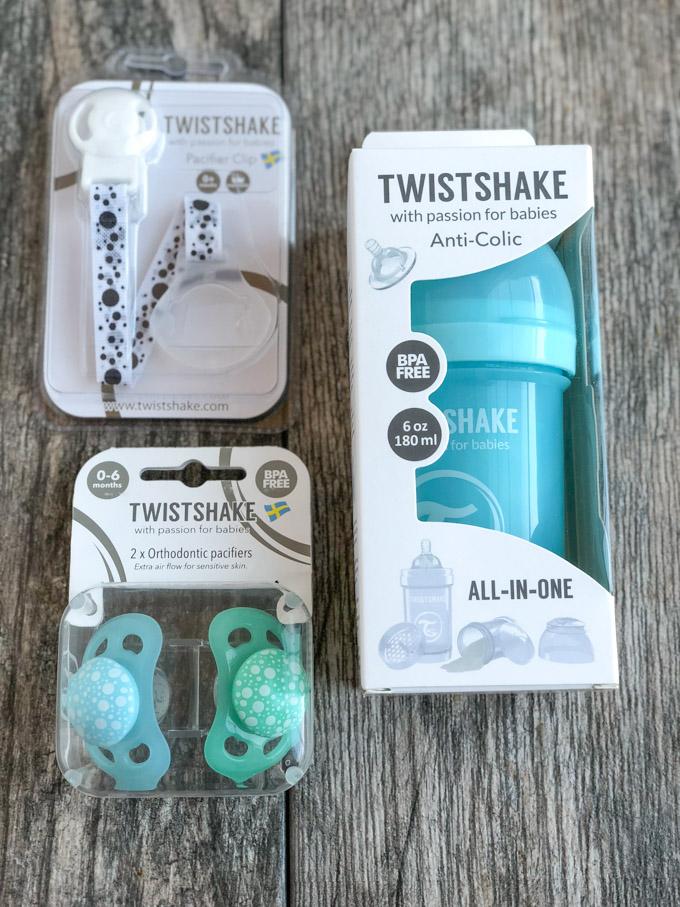
Filed Under: Dinner, Lunch Tagged With: Butter, Cheese, Chicken Sausage, Milk, Pasta, Peas

Cinnamon Raisin Sweet Potato Muffins

August 6, 2018 by Lindsay 8 Comments

These kid-friendly Cinnamon Raisin Sweet Potato Muffins are packed with fiber and perfect for breakfast, lunch boxes or an after-school snack! They’re nut-free and can easily be made dairy-free!

Cinnamon Raisin Sweet Potato Muffins

Thanks to Bob’s Red Mill for sponsoring this post. 

Hi friends!

I’ve got a brand new muffin recipe for you and I’m SUPER excited about it. Cinnamon Raisin Sweet Potato Muffins! As you guys know, we’re huge muffin lovers around here. I make a batch every weekend and I’m starting to stock my freezer with them as well for when the baby comes. I love them because they’re great for breakfast or snack time and they can easily be packed in a lunchbox or taken in the car to eat on the way to school on a busy morning.

Cinnamon Raisin Sweet Potato Muffins made with Bob's Red Mill Oat Flour

I wanted to come up with a new flavor combination that I hadn’t shared on the blog yet. (You can see all of my muffin recipes here) I also knew I wanted to make it nut-free so that it would be safe for school lunchboxes!

When Bob’s Red Mill reached out to me to develop a recipe using some of their products, I immediately jumped on board because, spoiler, I already use and love so many of them!! I love their Ivory Wheat Flour (their version of white whole wheat flour) and their super-fine almond flour. Plus we use their farro all the time for dinner and they have so many delicious seeds like chia seeds, hemp hearts and pumpkin seeds which are great for mixing into oatmeal, energy balls and baked goods. And their oatmeal cups are perfect for breakfast when traveling!

For this recipe, I tested out a couple new-to-me Bob’s Red Mill products: the Gluten-free Oat Flour which is whole grain and perfect for baking and the Golden Flaxseed Meal, which I’ve been adding to everything lately for an extra dose of omega 3’s, fiber and protein.

All Bob’s Red Mill products are minimally processed and Non-GMO and then have hundreds of products to fit specific dietary needs like vegan, paleo or gluten-free. So be sure to check out their website if you haven’t already!

Cinnamon Raisin Sweet Potato Muffins (nut-free)

As for the rest of the ingredients, I added sweet potato to help keep them moist, maple syrup and cinnamon for some fall flavors and raisins because my kids are obsessed with them.

These muffins took 6 rounds of trial and error but the end result is so worth it! Here’s how you make them:


Print

Cinnamon Raisin Sweet Potato Muffins

Cinnamon Raisin Sweet Potato Muffin with oat flour and flaxseed meal
Print Recipe

5 Stars 4 Stars 3 Stars 2 Stars 1 Star

5 from 2 reviews

These kid-friendly Cinnamon Raisin Sweet Potato Muffins are packed with fiber and perfect for breakfast, lunch boxes or an after-school snack! They’re nut-free and can easily be made dairy-free!

  • Author: Lindsay
  • Prep Time: 5 min
  • Cook Time: 18 min
  • Total Time: 23 minutes
  • Yield: Makes 10-12 muffins 1x

Ingredients

Scale

1/4 cup melted butter (or oil for dairy-free)
3/4 cup cooked sweet potato, mashed
1 egg
1/3 cup maple syrup
1 tsp vanilla extract
1/3 cup milk (dairy or non-dairy)
1/4 cup Bob’s Red Mill Golden Flaxseed Meal
3/4 cup Bob’s Red Mill Oat Flour
1/2 cup Bob’s Red Mill Ivory Wheat Flour
2 tsp cinnamon
1 tsp baking soda
1 tsp ground ginger
1/2 cup raisins (you could also sub dried blueberries or Craisins)
1/4 cup shredded apple, excess moisture removed (approx 1 small apple)

Instructions

  1. Combine melted butter and mashed sweet potato in a large bowl and mix well.
  2. Add egg, maple syrup, vanilla and milk and stir to combine.
  3. Add flaxseed meal, oat flour, ivory wheat flour, cinnamon and baking soda and stir until just combined.
  4. Gently mix in raisins and shredded apple. Do not overmix.
  5. Scoop into silicone, greased or lined muffin tins. Makes 10-12 muffins depending on how big you want them.
  6. Bake at 375 degrees F for 18 minutes.

Did you make this recipe?

Tag @theleangreenbean on Instagram

I hope you guys love this recipe as much as I do. It’s definitely my new favorite for fall.

These kid-friendly Cinnamon Raisin Sweet Potato Muffins are packed with fiber and perfect for breakfast, lunch boxes or an after-school snack! They're nut-free and can easily be made dairy-free!

[click_to_tweet tweet=”Try these Cinnamon Raisin Sweet Potato Muffins for a quick breakfast or snack. They’re nut-free and packed with whole grains and fiber. ” quote=”Try these Cinnamon Raisin Sweet Potato Muffins for a quick breakfast or snack. They’re nut-free and packed with whole grains and fiber.”]

Enjoy!
–Lindsay–
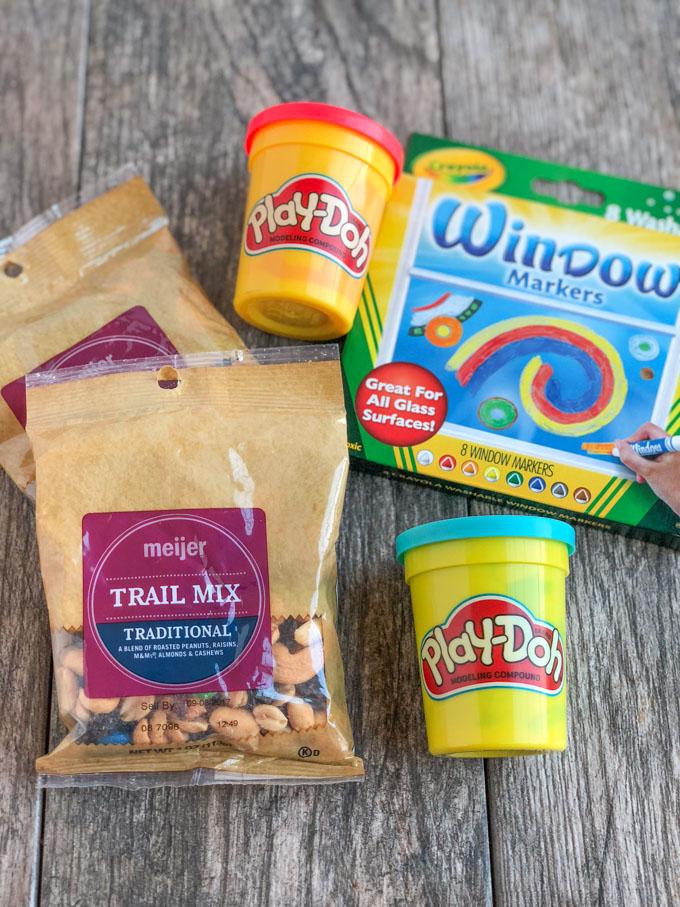
Filed Under: Breakfast, Baking, Healthy Muffins & Bars, Snack, Sponsored Tagged With: Apple, Butter, Egg, Ground Flaxseed, Maple Syrup, Milk, Oat Flour, Sweet Potato, White Whole Wheat Flour

  • « Go to Previous Page
  • Page 1
  • Interim pages omitted …
  • Page 16
  • Page 17
  • Page 18
  • Page 19
  • Page 20
  • Interim pages omitted …
  • Page 65
  • Go to Next Page »

Primary Sidebar

Lindsay Livingston The Lean Green Bean Healthy Living Tips and Tricks

I'm a Registered Dietitian and mom of three from Columbus, Ohio. I use this blog to share simple, healthy recipes, nutrition tips, and an honest glimpse of motherhood!

Learn More →

Questions? Comments? Email me: [email protected]

The Lean Green Bean Facebook The Lean Green Bean Instagram The Lean Green Bean Pinterest The Lean Green Bean Twitter The Lean Green Bean Feed
footer-logo
The Lean Green Bean Facebook The Lean Green Bean Instagram The Lean Green Bean Pinterest The Lean Green Bean Twitter The Lean Green Bean Feed
Recipes

Breakfast
Dinner
Snack
Slow Cooker

Kids

Cooking With Kids
Favorite Gifts
Toddler Meals
Indoor Activities

Resources

Easy Packed Lunches for Kids
Dinner Spark
Snack Spark
Ultimate Guide to Food Prep

About

Meet Lindsay
Become an RD
Work with Me

The Lean Green Bean is a participant in the Amazon Services LLC Associates Program, an affiliate advertising program designed to provide a means for sites to earn advertising fees by advertising and linking to amazon.com.
Read the full privacy and disclosure policy here.

Copyright © 2022 · The Lean Green Bean

table talk series

Learn how food affects your body.

Get my free Table Talk email series where I share bite-sized nutrition information about carbs, protein, and fat, plus bonus information about snacks and sugar!

[email protected]