• Skip to main content
  • Skip to primary sidebar

Learn how food affects your body. Get Free Nutrition Info Today

the-lean-green-bean-logo
  • Home
  • Recipes
  • Kids
  • Resources
    • Ebooks
    • Food Prep
    • Videos
    • Snack Round-Ups
    • Gift Guides
  • About
    • Become An RD
    • Work With Me
  • Search
the-lean-green-bean-logo
  • Home
  • Recipes
  • Kids
  • Resources
    • Ebooks
    • Food Prep
    • Videos
    • Snack Round-Ups
    • Gift Guides
  • About
    • Become An RD
    • Work With Me
  • Search

blog

Pizza Meatballs

April 23, 2018 by Lindsay 12 Comments

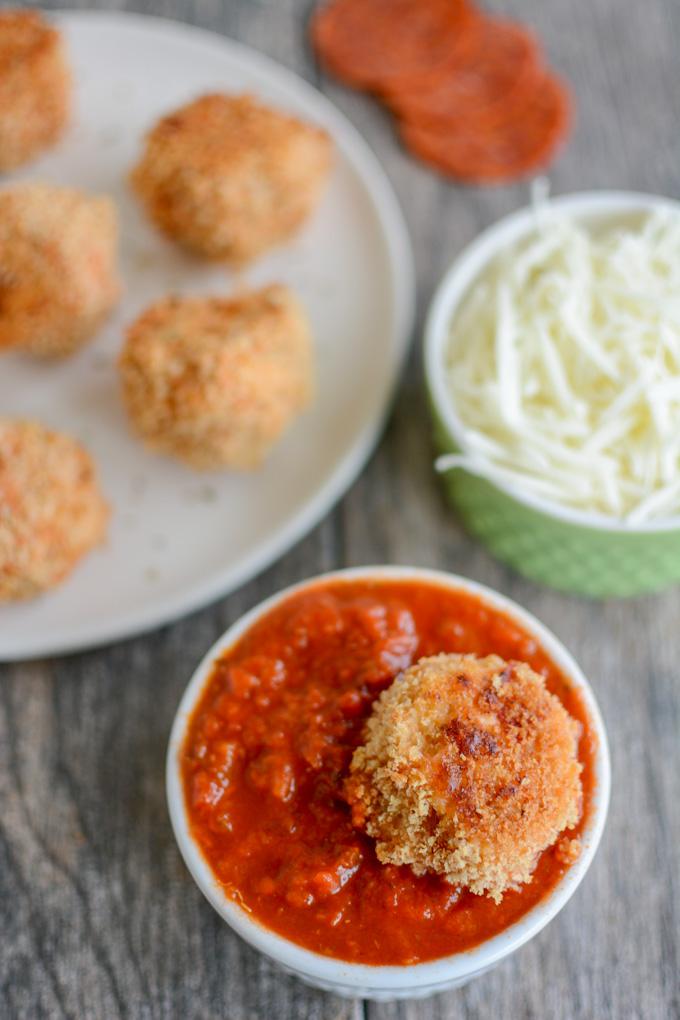
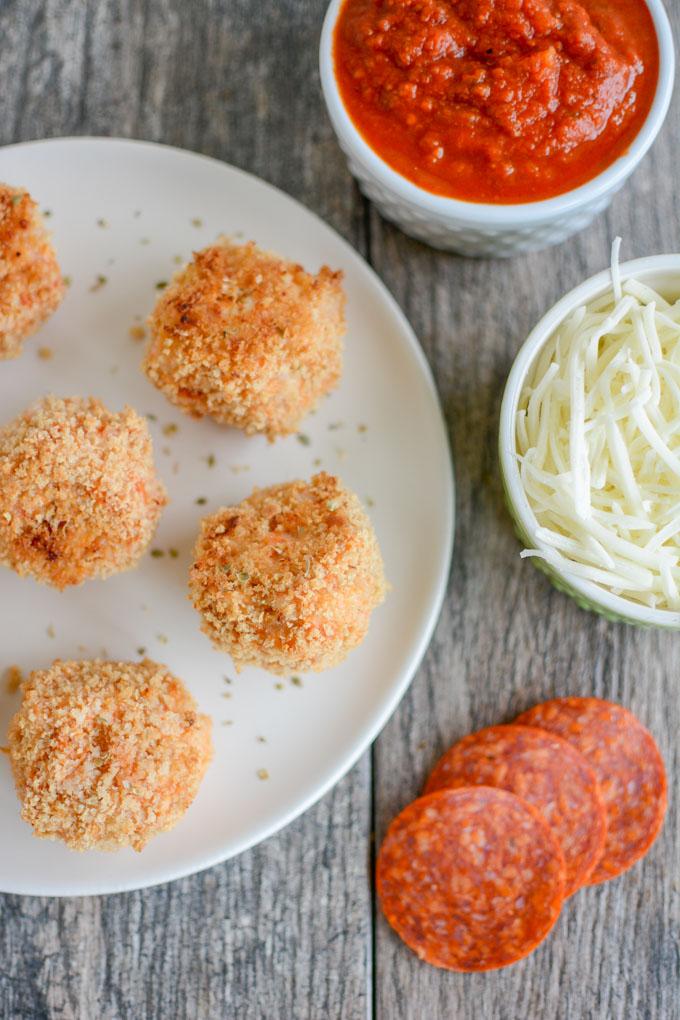
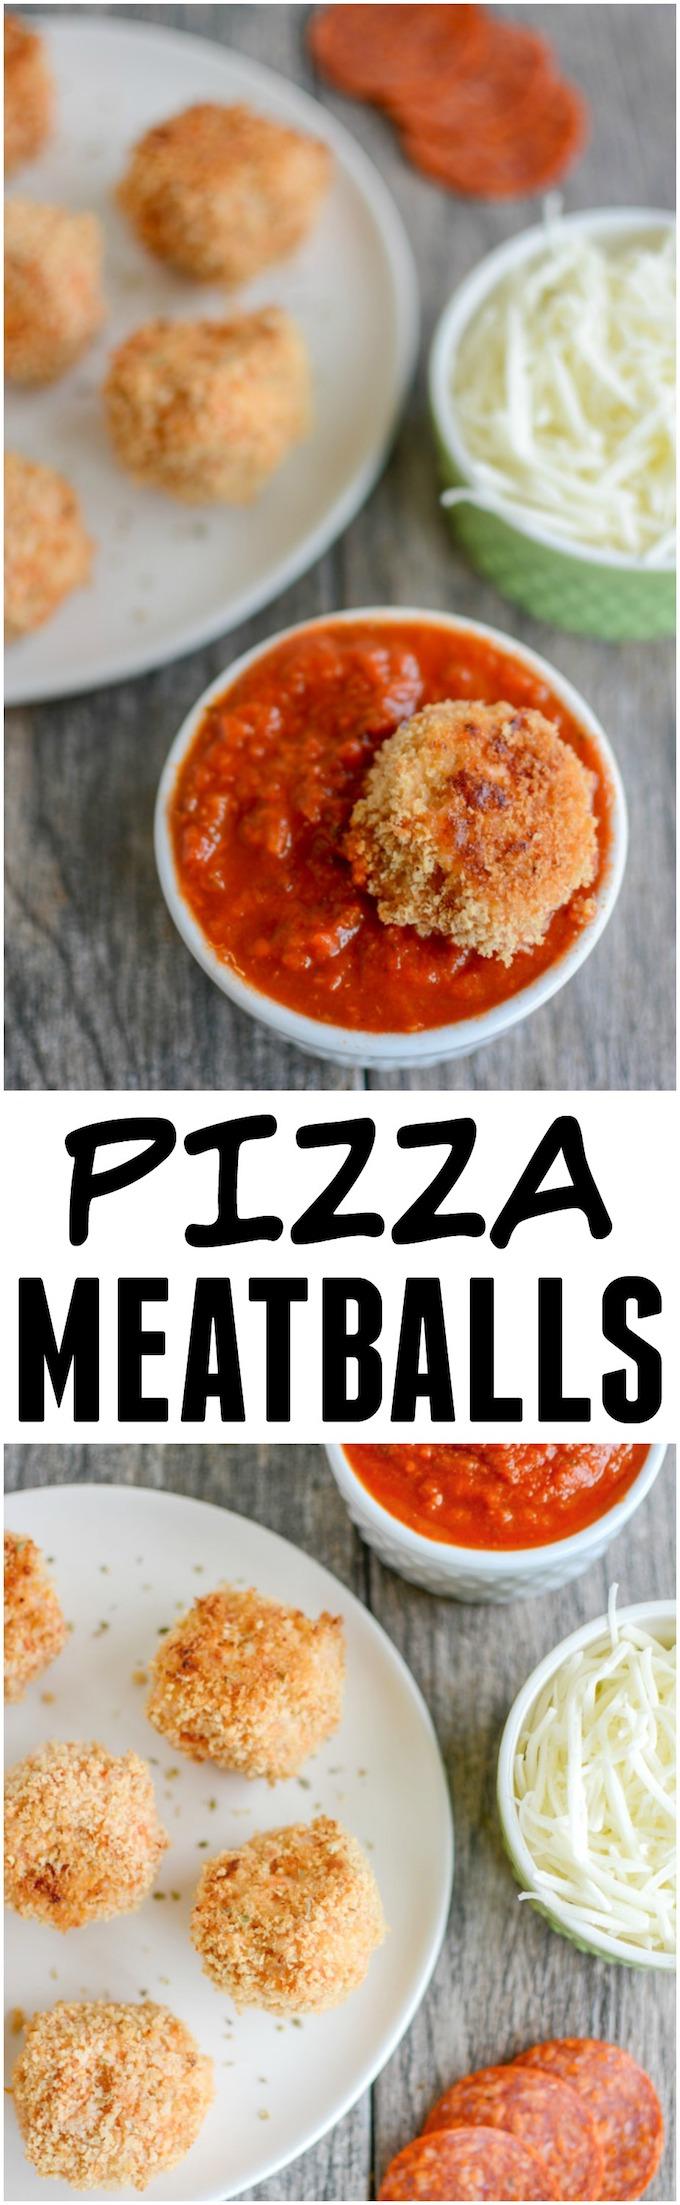
These Pizza Meatballs are a quick, easy and kid-friendly lunch or dinner option. They’re lower-carb,  packed with protein and taste great on their own and dipped in marinara!

Pizza Meatballs - lower carb and full of flavor

Hi friends!

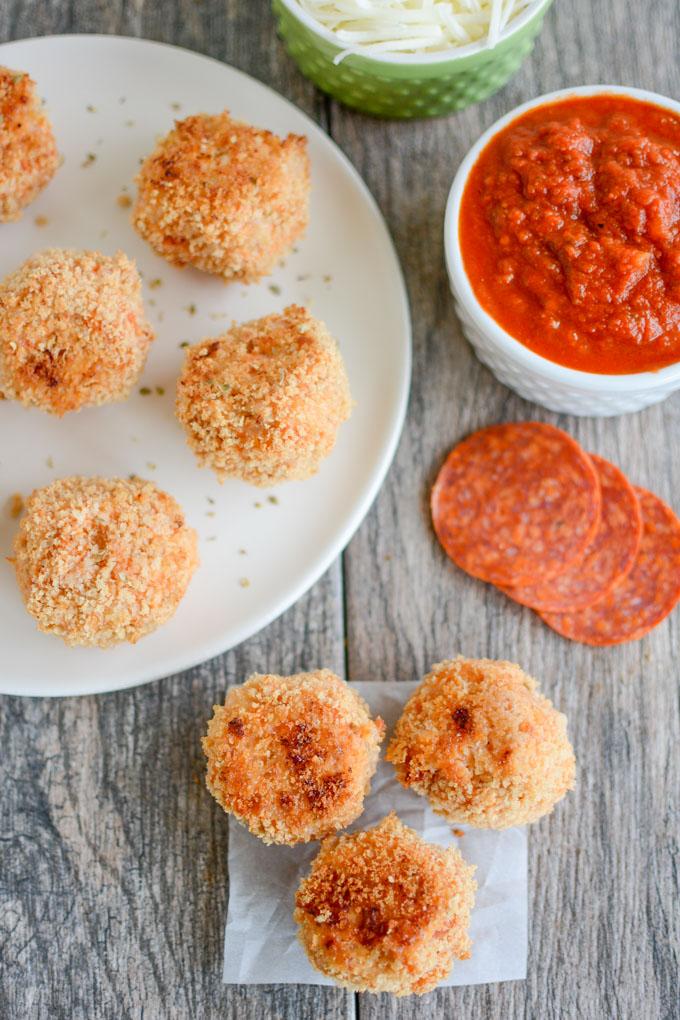
We’ve been loving these Pizza Meatballs around here for the past week or two so I figured it was time to share them with you. If you follow me on Instagram, you know it took me several tries to get these right. But they were worth the extra effort!

Pizza Meatballs - enjoy on their own or dipped in marinara

The first time I made these I made them with tuna…and it just didn’t work out all that well. I had the idea floating around in my head…and then Kelsey posted her Tuna Pizza Bites that looked delish so I knew I had to give my version a try. But…my version was dry and “not yummy” as Squish would say. The second time, I switched to ground chicken and continued with my idea of stuffing them with cubes of string cheese or pieces of fresh mozzarella. They were better, but still missing something.

The final time I went with shredded mozzarella to spread the cheese throughout and also mixed in a little marinara sauce to keep them nice and moist and flavorful. Definite winner. I rolled mine in breadcrumbs but I suppose you don’t have to if you don’t want to!

If you like the breadcrumbs for a little bit of crispy outer coating, these are best eaten the night you make them. The breadcrumbs won’t stay crispy after being refrigerated but they still taste good and I made myself a batch to enjoy all week long.

Tuna Pizza Bites

The kids gobbled these up and the hubby also enjoyed them as a lower-carb alternative to pizza. They’re great by themselves but I like dipping them in some extra marinara…or even in some bbq sauce. Yum!

Here’s how you make them:

Print

Pizza Meatballs

Pizza Meatballs - lower carb and full of flavor
Print Recipe

5 Stars 4 Stars 3 Stars 2 Stars 1 Star

4.3 from 3 reviews

These Pizza Meatballs are a quick, easy and kid-friendly lunch or dinner option. They’re low-carb,  packed with protein and taste great on their own and dipped in marinara!

  • Author: Lindsay
  • Prep Time: 5 min
  • Cook Time: 20 min
  • Total Time: 25 minutes
  • Yield: Makes 14 meatballs 1x

Ingredients

Scale
  • 1 pound ground chicken
  • 10 pepperoni, chopped
  • 1 cup panko breadcrumbs, divided
  • 1/2 tsp oregano
  • 1/2 tsp garlic powder
  • 1/2 cup shredded mozzarella cheese
  • 1/3 cup marinara sauce + extra for dipping

Instructions

In a large bowl, combine chicken, pepperoni, 1/4 cup breadcrumbs, spices, cheese and 1/3 cup sauce.

Mix well. 

Place remaining breadcrumbs on a plate. 

Form mixture into balls. They will be wet and a little sticky. Roll in breadcrumbs and place on a greased, foil-lined baking sheet. 

Bake at 400 degrees for 18-20 minutes, flipping the meatballs halfway through.

Notes


Did you make this recipe?

Tag @theleangreenbean on Instagram

Easy right? Let me know if you try these! Can’t wait to hear what you think!

These Pizza Meatballs are a quick, easy and kid-friendly lunch or dinner option. They're low-carb,  packed with protein and taste great on their own and dipped in marinara!

[clickToTweet tweet=”These Pizza Meatballs are quick, easy and kid-friendly. Perfect for lunch or dinner, they’re great on their own or dipped in some extra marinara.” quote=”These Pizza Meatballs are quick, easy and kid-friendly. Perfect for lunch or dinner, they’re great on their own or dipped in some extra marinara.”]

Enjoy!
–Lindsay–

Filed Under: Dinner Tagged With: Cheese, Ground Chicken, Panko, Pepperoni

Blueberry Beet Muffins

April 18, 2018 by Lindsay 47 Comments

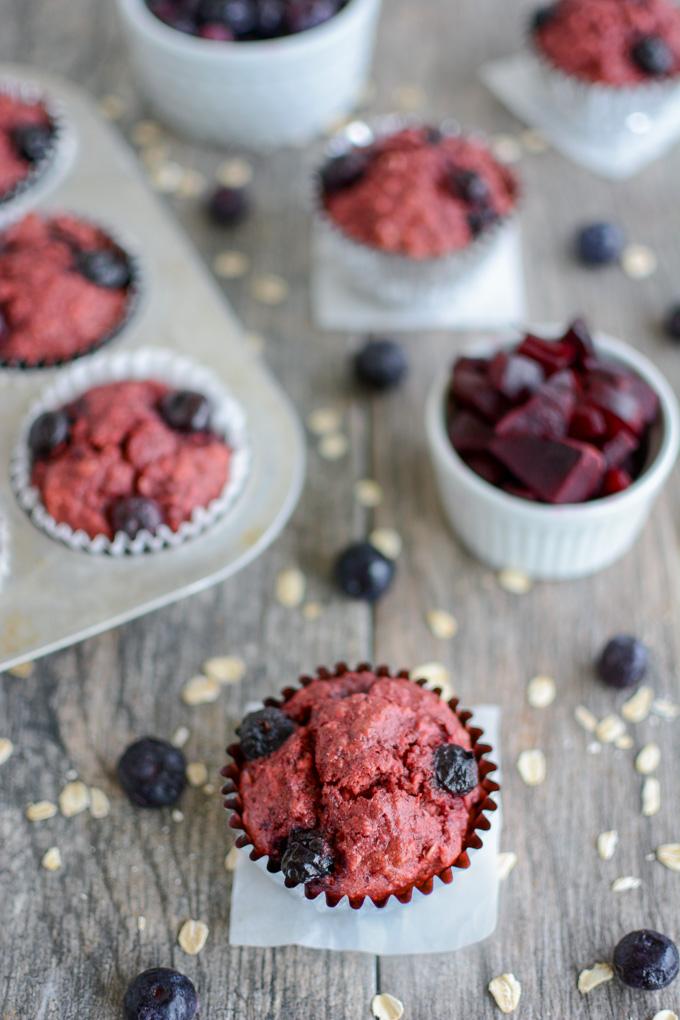
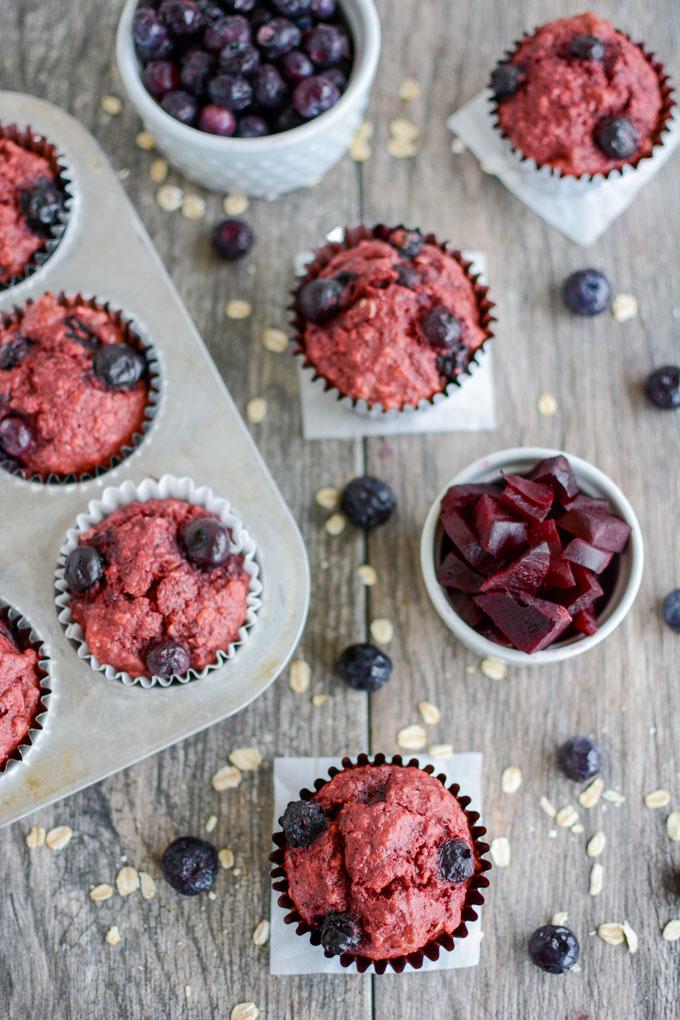
These Blueberry Beet Muffins are a healthy, kid-friendly breakfast or snack. Their pink color makes them fun to eat and you’d never know they’re packed with vegetables!

Blueberry Beet Muffins

Hi friends!

Let’s talk beets. Specifically, these Blueberry Beet Muffins. As you may have noticed, I’ve been having a lot of fun lately adding vegetables to different recipes! Be sure to check out my Chocolate Pea Cookies, Carrot Oat Bars and PB Chocolate Cauliflower Oatmeal if you missed them! I asked the mamas over in my Turnips & Tantrums group which veggie I should tackle next and beets won by a landslide.

That worked out perfectly because I’d had a Blueberry Beet Muffins idea floating around in the back of my brain for a while now and this was just the push I needed to put it into action!

Blueberry Beet Muffins. Kid-friendly and packed with vegetables

Let me start by saying I am not a fan of beets. I don’t like how messy they are. I don’t like the way they smell. I hate eating them plain, no matter how hard I try to like them. But I love these Blueberry Beet Muffins. So that should tell you something. If you can get past the smell of steaming the beets in the microwave, I don’t think the muffins themselves taste like beets at all.

And Squish, who is definitely the pickier of my kids, has gobbled up 6 of these in the past 3 days…and he doesn’t like the Chocolate Pea Cookies or the Carrot Oat Bars like his sister does. So that should also tell you something.

I used frozen blueberries from my stash we picked last summer (which is getting dangerously low by the way) but you could also use fresh blueberries. I steamed my beets in the microwave, but you could also just wrap them in foil and throw them in the oven for a while if you happen to be roasting other veggies.

Here’s how you make them:

Print

Blueberry Beet Muffins

Blueberry Beet Muffins
Print Recipe

5 Stars 4 Stars 3 Stars 2 Stars 1 Star

4.8 from 9 reviews

These Blueberry Beet Muffins are a healthy, kid-friendly breakfast or snack. Their pink color makes them fun to eat and you’d never know they’re packed with vegetables!

  • Author: Lindsay
  • Prep Time: 10 min
  • Cook Time: 30 min
  • Total Time: 40 minutes
  • Yield: makes 10-12 muffins 1x

Ingredients

Scale
  • 1 cup chopped beets (steamed or roasted and peeled)
  • 1 egg
  • 1/2 cup sugar
  • 1/4 cup milk (I used non-dairy)
  • 1/3 cup oil (i used avocado oil)
  • 1 cup white whole wheat flour
  • 1 cup rolled oats
  • 1 tsp cinnamon
  • 1 tsp vanilla extract
  • 1 tsp baking powder
  • 3/4 cup fresh or frozen blueberries

Instructions

In a food processor, combine beets, egg, sugar, oil and milk and process until smooth.

Add flour, oats, cinnamon, vanilla and baking powder and process until just combined. 

Stir in blueberries. 

Scoop into lined muffin tins and bake at 375 degrees F for 25-30 minutes. 

Notes

To steam the beets, cut into quarters and put in a glass dish with about 2 Tbsp water. Cover the dish with saran wrap and place it on a plate and microwave for 5 minutes. Carefully remove the plastic wrap, stir, re-cover and microwave for another 2-3 minutes until beets pierce easily with a knife. Drain the water and let cool for a few minutes. Then use a spoon or knife to remove the skins. 

You could try making these in a high-powered blender but I haven’t tried it myself yet.

White flour will also work if you don’t have white whole wheat. I don’t recommend regular whole wheat flour as I find it too dense for baking.

Did you make this recipe?

Tag @theleangreenbean on Instagram

Easy, right??

These Blueberry Beet Muffins are a healthy, kid-friendly breakfast or snack. Their pink color makes them fun to eat and you'd never know they're packed with vegetables!

[clickToTweet tweet=”Add some vegetables to your breakfast or snack with these Blueberry Beet Muffins!” quote=”Add some extra vegetables to your breakfast or snack with these Blueberry Beet Muffins!”]

Enjoy!
–Lindsay–

Filed Under: Breakfast, Baking, Healthy Muffins & Bars, Snack Tagged With: Blueberry, Egg, Milk, Oats, Oil, Sugar, White Whole Wheat Flour

5 Ways To Support Your Favorite Bloggers

April 13, 2018 by Lindsay 27 Comments

Hi friends!

Today I just wanted to pop in a share a few words about a topic that’s been on my heart lately. Although I know I have a lot of readers who are also bloggers, but this post is mainly for my “regular readers”. All you amazing people out there who don’t blog yourselves, but take the time to read my blog posts, make my recipes, etc.

How to support bloggers you love

Sometimes the world of blogging and social media can be tough. There are a lot of bloggers out there and a lot of social media platforms, all of which have constantly-changing algorithms that are hard to figure out and keep up with. It can be hard to get your work seen. And there’s nothing more frustrating than when you work really hard developing and testing a recipe, taking photos and putting it out there, only have people not see it because social media platforms decide not to show it to them.

So I wanted to take a few minutes and let you guys know about some easy ways you can show your appreciation for the bloggers you love. Not just me…but any blogger who you regularly follow and enjoy! It feels a little weird to write this post and I don’t want it to come across in any way as unappreciative or negative. But after thinking about it for a while, I realized that if you’re not in the blogging space, you might just not know exactly how much of a positive impact some of these things can have on the blogs you follow.  These are simple things you can do as a reader to help us get our content seen by more people and trust me when I say we appreciate it so much:

blogger

Leave a comment. If you make one of our recipes, leave a quick comment on the post! This not only lets us know that people are trying our recipes, but it’s a great place to share substitutions you might have made, how they turned out, how the recipe turned out in general, etc. The feedback is helpful for us, but it’s also great for other readers who might come across the recipe later and have questions about similar substitutions or results. For example, someone made my Carrot Oat Bars the other day and turned them into muffins and said they turned out great. If they left that info in the comments, other people could read it if, perhaps, they were planning to try that as well and wondering if it would work. Or if you try freezing a certain recipe and it comes out great, leave a comment and let us know! We can edit our posts to include all that feedback from readers and help more people in the future!

5 star review

Rate the recipe! If there’s an option to rate a recipe (ie give it 5 stars) on the blog, do it! It helps show us you liked the recipe and helps show other readers that people are making the recipe and loving it!

recipe tag on IG

Tag and share! If you make one of our recipes or crafts or DIY projects or whatever, share a photo on Instagram and tag us! This helps direct other people, who may follow you, but not us, to our social media platforms and blogs so they can try the recipes and projects for themselves. Or share the link on your Facebook page so your friends can follow the link and check it out!

instagram likes and views on post

Engage with new posts! Follow us on social media and when you see our new posts, like them, share them, comment on them! The more people interact with our posts, the more people the social media networks show them to. Similarly, platforms like Instagram have algorithms to show you the content they THINK you want to see. So the more you interact with us, the more likely they are to show you our future content so you don’t miss anything! We love interacting with you guys, love to hear when you try our recipes or are excited to try them and are always happy to answer your questions! Your engagement makes us happy and also helps more people see our content. Win-win!

Screen Shot 2018 04 13 at 7.55.22 AM

Use the share buttons. If you’re on Pinterest, pin our photos! Pinterest has become a huge search engine and even if you don’t have thousands of followers, it still helps us a lot when you pin our content and help get it into the mix for others to see! Or you could tweet a recipe or share it on FB! Most of us try to make it really easy by putting share buttons throughout our posts.

Added bonus: sign up for our email lists! If we write a post or recipe you really love, hit forward and send it to a few of your friends to check out.


Blogging takes a lot of work. Yes, some of us make money working with brands, running ads, etc….but we also put a lot of money back into our blogs, just like any businesses owner does! It’s hard to constantly adapt, stay afloat and be seen. We love what we do…and couldn’t do what we do without you guys, the readers. You taking the time to share our posts means the world to us, and also helps ensure we can keep providing the kind of content you love to see from us!

As always, thank you guys so much for your support over the years! I love you all.

–Lindsay–

Filed Under: Uncategorized

Thursday Things – Mabel’s Labels

April 12, 2018 by Lindsay 1 Comment

Hi friends!

It’s been a while since I did a Thursday Things so I rounded up a few things to share with you guys today:

Mabel's Labels

Mabel’s Labels

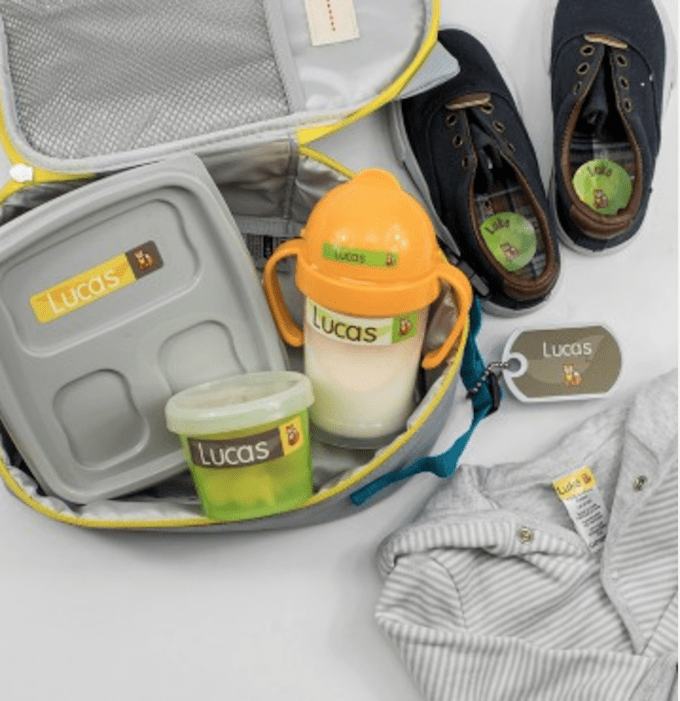
I’m not quite at the point where I need a ton of labels but I know it’s coming soon. This company is so cute and offers customized labels. They’re dishwasher safe, microwave safe and waterproof so you can put them on almost everything.

grimm's toys

Grimm’s Toys

A family-owned wooden toy company headquartered in Germany. They have tons of fun-looking toys, blocks, cars, puzzles and so much more. I love looking at their website.

Rockets of Awesome

Rockets of Awesome

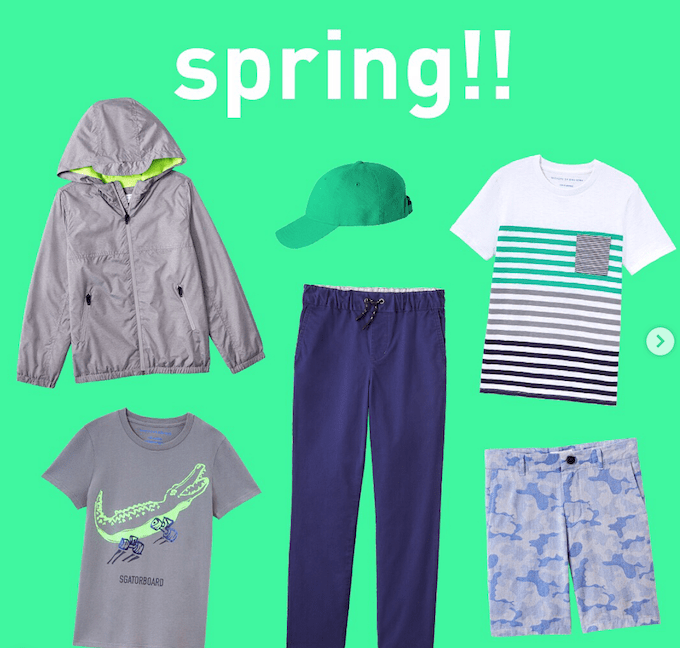
Basically, this sounds like Stitch Fix for kids. Four times a year you get a box based on the style profile you create for you kids. You get 8 items. Keep and pay for what you want and return the rest. You also get to review and approve the assortment before it ships and prices range from $16-38. I haven’t tried it yet but might try it out for the kiddos soon!

a

Turnips and Tantrums

The FB group for mamas that I recently launched with a fellow RD mom. Come join us if you haven’t already! We have daily questions about everything from favorite rainy day activities for kiddos to travel tips to planners, live recipe demos, prizes and more! It’s a judgement-free zone and a great place to ask questions! Join us here.

Have you found anything cool lately?

Enjoy!
–Lindsay–

Filed Under: Uncategorized

Frozen Layered Brownie Bars

April 11, 2018 by Lindsay 2 Comments

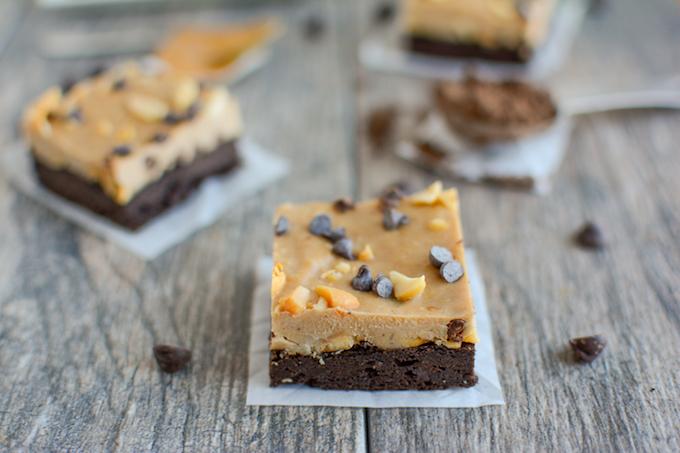
These dairy-free Frozen Layered Brownie Bars are perfect for dessert or an afternoon treat! They pair a layer of sweet potato brownies and a layer of peanut butter banana cream and even sneak in some cauliflower!

Frozen Layered Brownie Bars with sweet potato and cauliflower

Thanks to Elmhurst™ for sponsoring this post.

Hi friends!

Allow me to introduce you to your new favorite treat. These Frozen Layered Brownie Bars are actually two delicious desserts in one. The bottom layer is a sweet potato brownie (a spin on this recipe) and the top layer is a creamy dairy-free blend of Elmhurst Milked Cashews™, peanut butter, bananas and, gasp, cauliflower. That’s right, I put sweet potatoes and cauliflower in your dessert and you’re going to love it!

I’m not really sure how this idea filtered its way into my brain, but I’m oh so glad it did. While it may be hard to believe here in Ohio, warm weather IS coming. And there’s nothing better than a cold treat on a hot day, am I right?

Frozen Layered Brownie Bars

As I’ve mentioned a few times, especially if you follow me on social media, both my kids are currently having a little trouble with dairy products. They cause eczema flare-ups for Little Miss and constipation issues for Squish…so I’ve been trying to limit them. We’ve been trying out some different plant-based milk beverages lately and have fallen in love with Elmhurst Milked.

They have both nutmilks (almond, cashew, hazelnut, walnut and peanut) and grainmilks (oats and brown rice) and I’m so in love with their simple ingredient lists. They don’t use emulsifiers, stabilizers or thickeners and yet their products are so creamy and delicious thanks to their innovative process! They also offer both sweetened and unsweetened varieties.


Milked Cashews

For this treat, I used the Milked Cashews ™, which has 4g of protein and 2g sugar per serving.

Toddler eating Frozen Layered Brownie Bars

Here’s how you make them:


Print

Frozen Layered Brownie Bars

Print Recipe

5 Stars 4 Stars 3 Stars 2 Stars 1 Star

5 from 1 review

These dairy-free Frozen Layered Brownie Bars are perfect for dessert or an afternoon treat! They pair a layer of sweet potato brownies and a layer of peanut butter banana cream and even sneak in some cauliflower!

  • Author: Lindsay
  • Prep Time: 10 min
  • Cook Time: 20 min
  • Total Time: 30 minutes
  • Yield: Makes 12 bars 1x

Ingredients

Scale

Brownie Layer:

  • 1/2 cup mashed sweet potatoes
  • 1/2 cup pitted, chopped dates (4–5 dates)
  • 1/3 cup peanut butter
  • 3 Tbsp cocoa powder
  • 1 egg
  • 1 Tbsp maple syrup
  • 1/2 cup Elmhurst Cashew Milk
  • 1/2 tsp baking soda

Top Layer:

  • 1/2 cup mashed banana
  • 1/2 cup peanut butter
  • 1 cup raw cauliflower rice
  • 1/2 cup Elmhurst Cashew Milk
  • 2 Tbsp maple syrup
  • 1/2 cup chopped peanuts
  • 1/2 cup chocolate chips

Instructions

In a high powered blender or food processor, combine ingredients for the brownie layer.

Process until smooth. 

Spread into a 9×9 pan lined with parchment paper (batter will be thick) and bake at 375 for 20 min. 

Clean the blender while brownie layer is baking. Then add remaining ingredients, except peanuts and chocolate chips, and process until smooth. 

Remove brownie layer and let cool 10 minutes. Sprinkle 1/4 cup chopped peanuts and chocolate chips on top. 

Top with banana layer and spread until evenly fills the whole pan. 

Sprinkle remaining peanuts and chocolate chips on top and freeze at least 4 hours or overnight. 

Remove from freezer and let sit for 5 minutes. Cut into pieces and store in airtight container in the freezer.  

Notes

These are best if you let them sit on the counter for 2-3 minutes for eating!

Did you make this recipe?

Tag @theleangreenbean on Instagram

Just a couple easy steps and these beauties can be in your freezer! Remember to use dairy-free chocolate chips if you need to keep this recipe dairy-free!

These dairy-free Frozen Layered Brownie Bars are perfect for dessert or an afternoon treat! They pair a layer of sweet potato brownies and a layer of peanut butter banana cream and even sneak in some cauliflower!

[clickToTweet tweet=”Try these Frozen Layered Brownie Bars for a delicious frozen treat on a hot afternoon!” quote=”Try these Frozen Layered Brownie Bars for a delicious frozen treat on a hot afternoon!”]


Enjoy!
–Lindsay–


Filed Under: Dessert, Sponsored

Spicy Green Sauce

April 4, 2018 by Lindsay 6 Comments

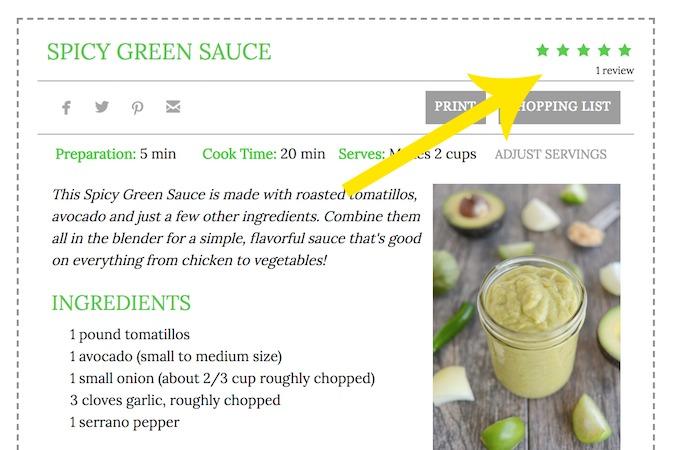
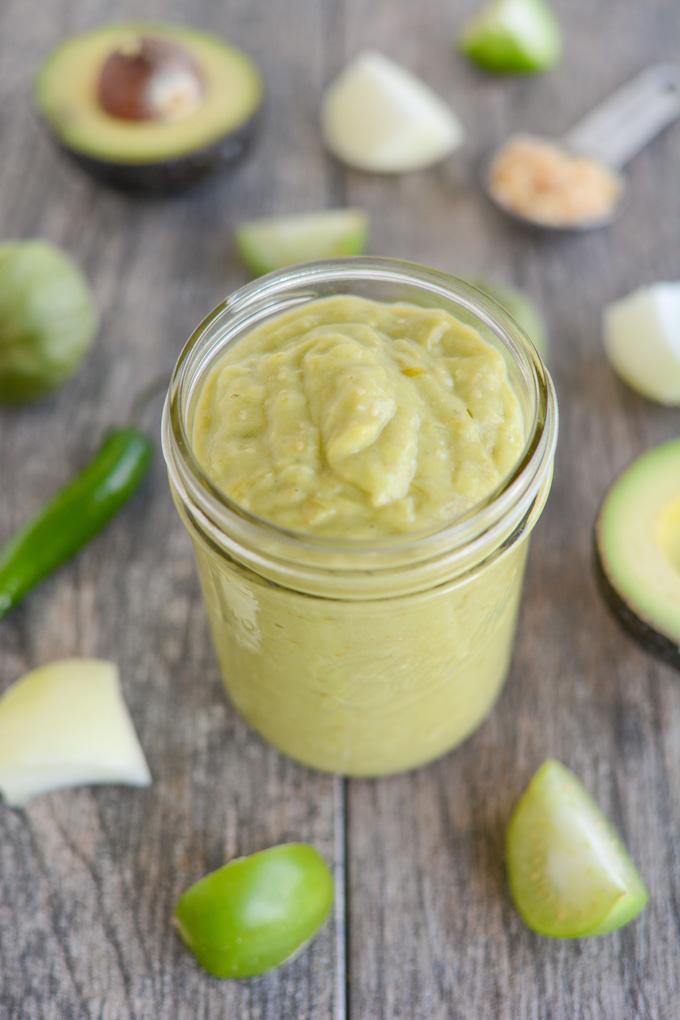
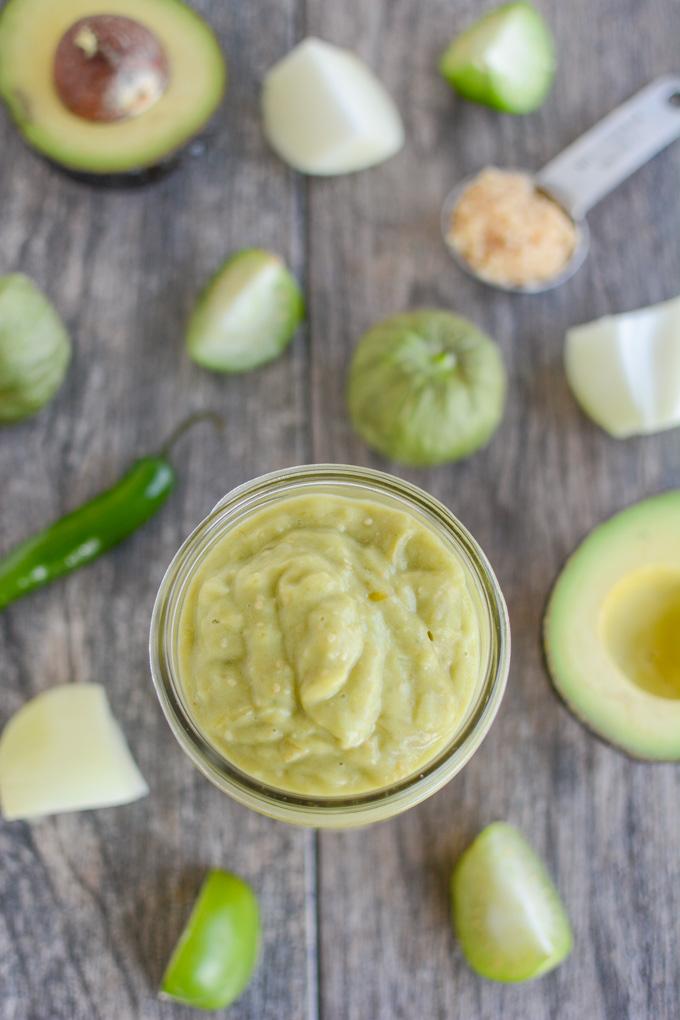
This Spicy Green Sauce is made with roasted tomatillos, avocado and just a few other ingredients. Combine them all in the blender for a simple, flavorful sauce that’s good on everything from chicken to vegetables!

Spicy Green Sauce made with roasted tomatillos and avocado

Hi friends!

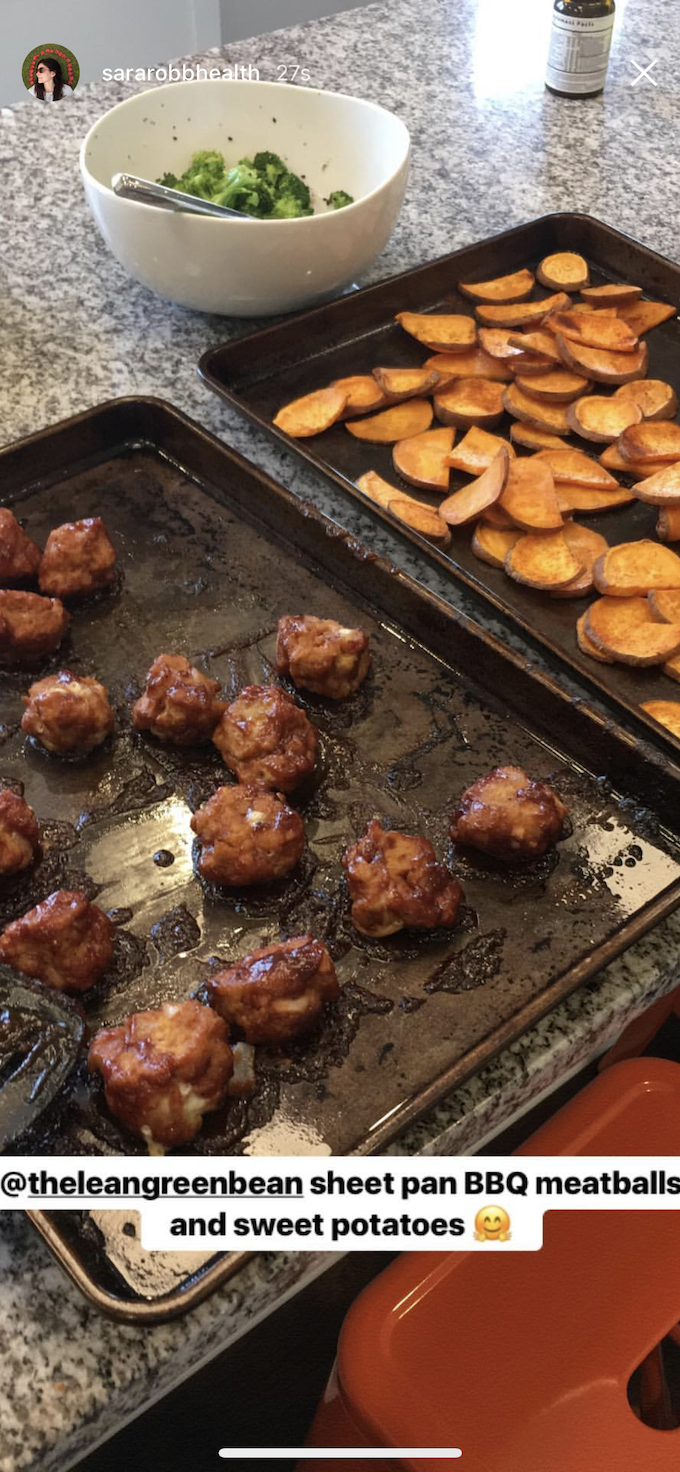
Meet my newest obsession – spicy green sauce. If you follow me on Instagram or checked out my recent post with Easy Lunch Bowls, you know that I’ve been putting this on literally everything.

It’s SO easy to make and adds a delicious spice and flavor to anything you put it on. Plus it keeps well in the fridge so you can make a batch over the weekend and use it all week long.

Spicy Green Sauce

Spicy Green Sauce

This sauce came about a few weeks ago when I bought some tomatillos to make homemade salsa verde…and then realized I didn’t have any cilantro for that. So I threw in an avocado instead, along with some onions, garlic and a serrano pepper and boom! This sauce was born.

This recipe is very forgiving. Exact measurements aren’t required. You could also add a splash of lime juice if you wanted. I love this for breakfast on scrambled eggs, for lunch on bowls full of roasted veggies and for dinner over things like chicken, meatballs and more!

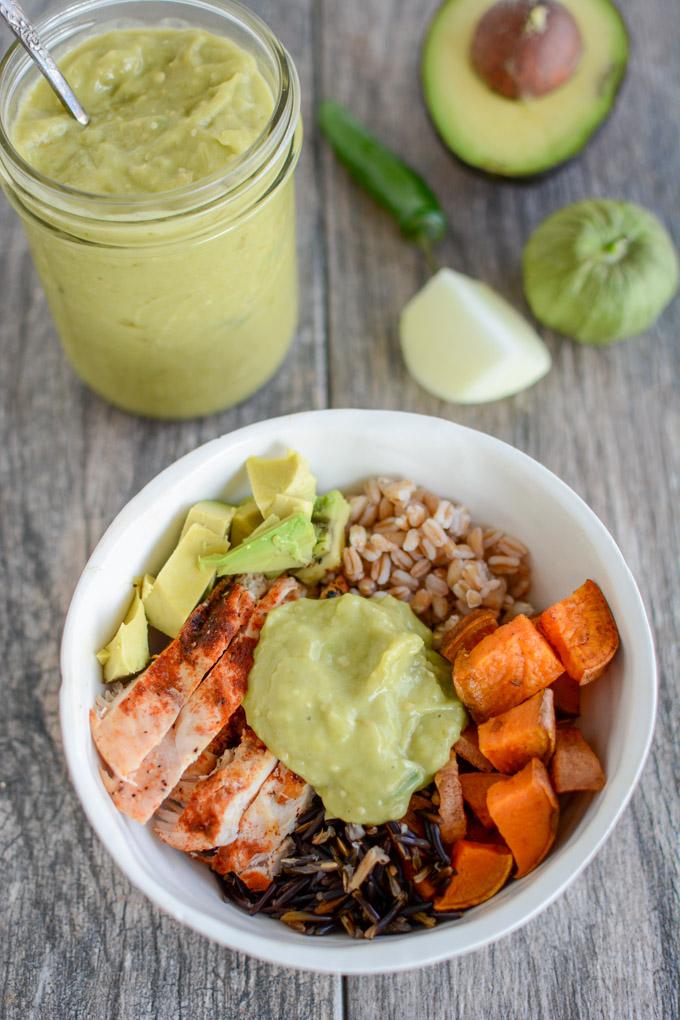
Spicy Green Sauce on a bowl of chicken, roasted vegetables, farro and wild rice.

You could even use it to make things like enchiladas or tuna salad.

Here’s how you make it:

Print

Spicy Green Sauce

Spicy Green Sauce made with roasted tomatillos and avocado
Print Recipe

5 Stars 4 Stars 3 Stars 2 Stars 1 Star

5 from 1 review

This Spicy Green Sauce is made with roasted tomatillos, avocado and just a few other ingredients. Combine them all in the blender for a simple, flavorful sauce that’s good on everything from chicken to vegetables!

  • Author: Lindsay
  • Prep Time: 5 min
  • Cook Time: 20 min
  • Total Time: 25 minutes
  • Yield: Makes 2 cups 1x

Ingredients

Scale
  • 1 pound tomatillos
  • 1 avocado (small to medium size)
  • 1 small onion (about 2/3 cup roughly chopped)
  • 3 cloves garlic, roughly chopped
  • 1 serrano pepper

Instructions

Line a baking sheet with foil. Peel the papery skin off the tomatillos and cut into quarters. 

Roast at 400 degrees F for 20 minutes. 

Let cool for about 10 minutes. 

Pour roasted tomatillos (and the liquid on the pan) into a blender. 

Add onion, garlic, avocado and pepper. 

Blend until well mixed. Makes about 2 cups

Store in the fridge for up to a week.

Notes


Did you make this recipe?

Tag @theleangreenbean on Instagram

So easy right? If you’ve never bought tomatillos, I get them at my regular grocery store in the same aisle as the bell peppers, jalapenos, serrano peppers etc.


This Spicy Green Sauce is made with roasted tomatillos, avocado and just a few other ingredients. Combine them all in the blender for a simple, flavorful sauce that's good on everything from chicken to vegetables!

[clickToTweet tweet=”Try this Spicy Green Sauce, made with roasted tomatillos and avocado, on everything from chicken to roasted vegetables!” quote=”Try this Spicy Green Sauce, made with roasted tomatillos and avocado, on everything from chicken to roasted vegetables!”]

Enjoy!
–Lindsay–

Filed Under: Food Prep, Dinner Tagged With: Avocado, Garlic, Onion

Salmon Nicoise Salad

April 2, 2018 by Lindsay 1 Comment

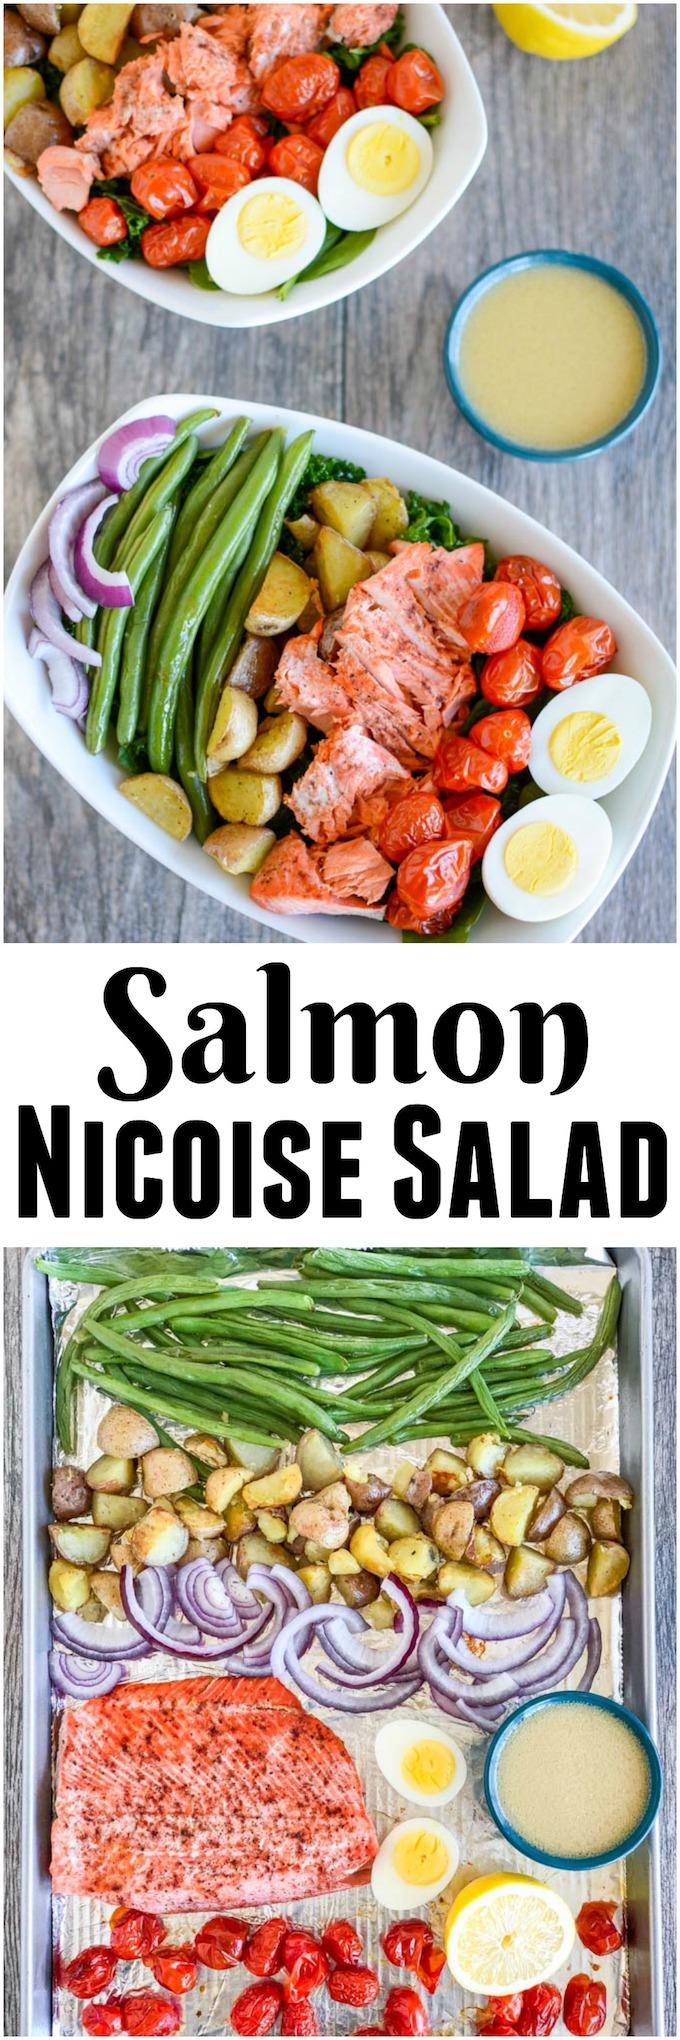
This Salmon Nicoise Salad is an easy, flavorful twist on a classic recipe. Made with roasted vegetables, baked salmon and a simple dressing, it’s perfect for a healthy lunch or dinner!

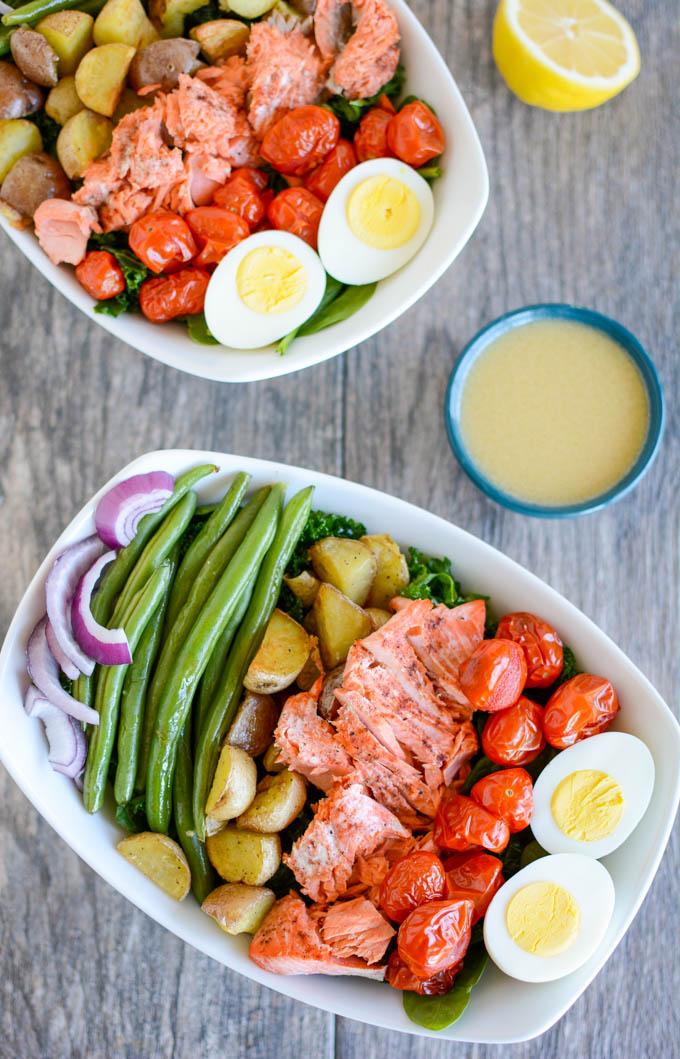
This Salmon Nicoise Salad is an easy, flavorful twist on a classic recipe. Made with roasted vegetables, baked salmon and a simple dressing, it's perfect for a healthy lunch or dinner!

Hi friends!

Hope you all had a great Easter weekend. Just popping in to share this simple Salmon Nicoise Salad recipe with you guys today. Might be a good way to use of some of those extra hard-boiled eggs you have laying around.

I’m going to be honest and let you know that until last week, I’m not sure I’d even had a nicoise salad. They’re traditionally made with tuna and for some reason that just never sounded all that great to me. But I had some salmon to use up last week and as I was staring at the ingredients in my fridge (and using my 4-step method for dinner on the fly) I realized that I had all the ingredients typically needed for this salad. AND realized that it actually fit right in line with the simple lunch/dinner bowls I’ve been enjoying for the last month or so.

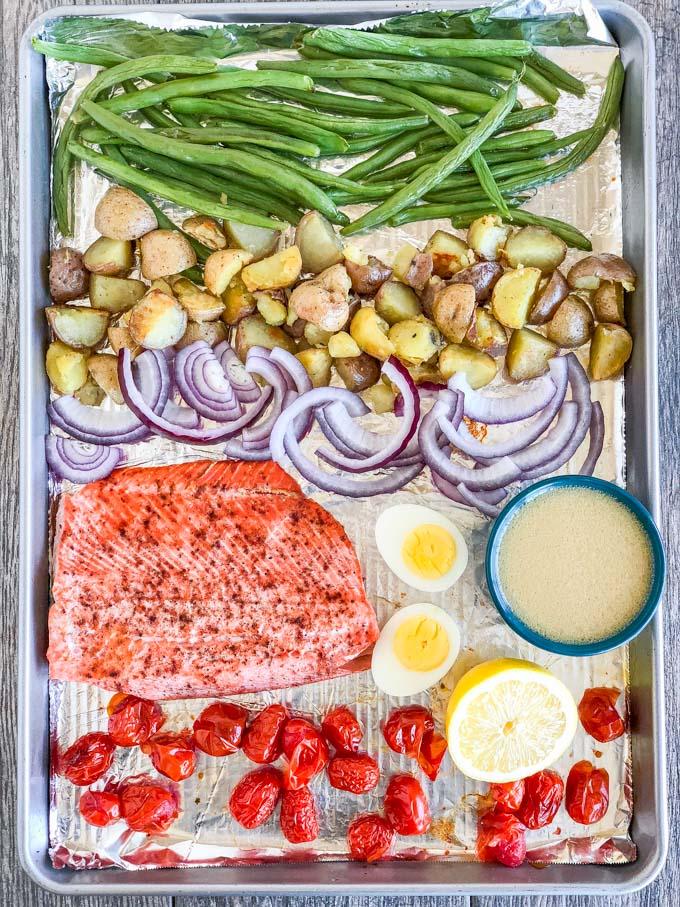
Salmon Nicoise Salad on a sheet pan

And since you guys know my love of roasted veggies is going strong, with no signs of stopping anytime soon, I decided to put my own spin on the salad….using salmon instead of tuna and roasting the veggies.

A few good things about this Salmon Nicoise Salad:

  • It’s easy. Just requires a few sheet pans in the oven- very minimal hands-on time.
  • The dressing is super easy, but if you don’t want to make your own, your fav store-bought dressing will do just fine.
  • I served mine over a mix of spinach and kale but use whatever greens you’d like.
  • You can prep a lot of this ahead of time and just reheat and assemble when needed.
  • This is a pretty salad. Serve it when you’re having a couple friends over for dinner. Put everything on a couple pans and let people assemble themselves.
  • If salmon isn’t your thing, you could easily sub chicken or tofu.

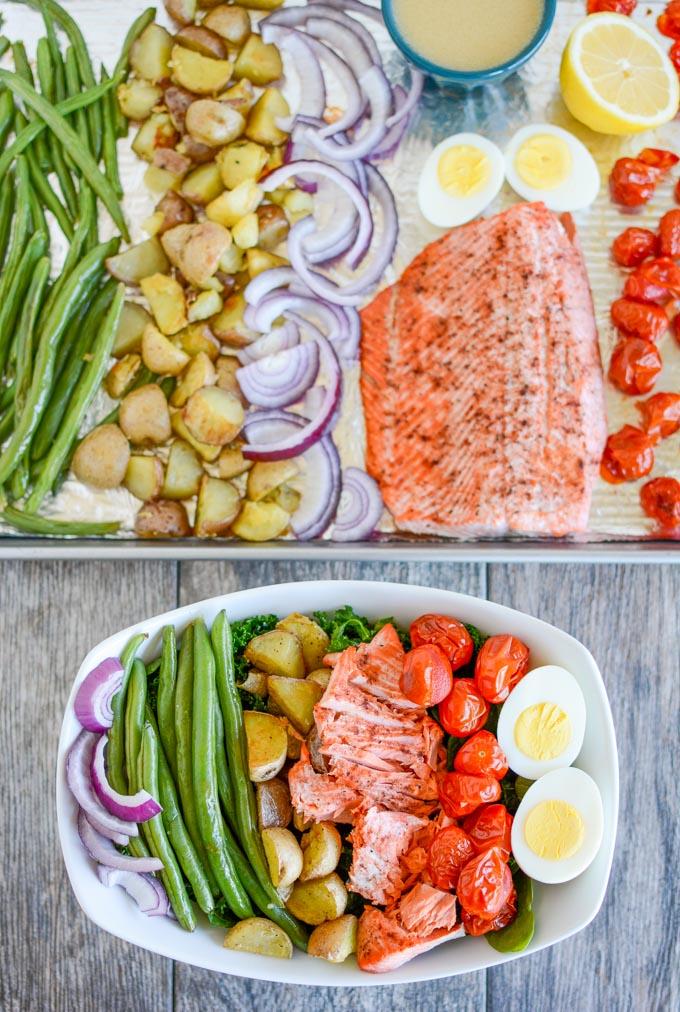
Salmon Nicoise Salad in a bowl and on a sheet pan

So here’s how you make it:

Print

Salmon Nicoise Salad

This Salmon Nicoise Salad is an easy, flavorful twist on a classic recipe. Made with roasted vegetables, baked salmon and a simple dressing, it's perfect for a healthy lunch or dinner!
Print Recipe

5 Stars 4 Stars 3 Stars 2 Stars 1 Star

4 from 1 review

This Salmon Nicoise Salad is an easy, flavorful twist on a classic recipe. Made with roasted vegetables, baked salmon and a simple dressing, it’s perfect for a healthy lunch or dinner!

  • Author: Lindsay
  • Prep Time: 10 min
  • Cook Time: 30 min
  • Total Time: 40 minutes
  • Yield: serves 4

Ingredients

Scale

For the Salad:

  • 1 pound salmon -sprinkled with salt, pepper, paprika & lemon juice (optional)
  • 4 hard boiled eggs
  • 1 pound green beans, ends trimmed
  • 1.5 pounds baby yellow or red potatoes, quartered (I use Little Potato Company)
  • 1 (10 ounce) package cherry tomatoes
  • 3/4 cup sliced red onion
  • 8 cups salad greens (I used a mix of baby spinach and kale)

For the dressing:

  • 2 Tbsp lemon juice
  • 1/4 cup oil (i used avocado oil)
  • 1/4 cup white wine vinegar
  • 2 Tbsp dijon mustard
  • 1 Tbsp maple syrup (or to taste)

Instructions

Drizzle quartered potatoes with a little oil, sprinkle with salt and pepper and place on a baking sheet. 

Place tomatoes on a second baking sheet. 

Place both in the oven and roast at 400 degrees for 10 minutes. 

Add green beans to the baking sheet with the tomatoes, stir the potatoes and return all to the oven for an additional 15 minutes. 

Remove both trays, place salmon on a foil-lined baking sheet and bake for 10-12 minutes or until flakes easily with a fork. If you want your potatoes a little crispier you can leave them in a little longer while the salmon is cooking. 

While salmon is cooking, combine all dressing ingredients in a bowl. Whisk until well mixed. (If you like a lot of dressing, I’d double the dressing recipe). 

Place 2 cups greens in each bowl. Top each with 4 ounces of salmon. Add tomatoes, beans, potatoes, onions and a hard-boiled egg to each bowl. 

Serve with dressing!

Notes

To make this go faster you can roast the veggies ahead of time and just reheat to serve. You could also prep the salmon ahead of time. 

OR, you could pan sear the salmon while the veggies are roasting in the oven!

Did you make this recipe?

Tag @theleangreenbean on Instagram

Easy right??

This Salmon Nicoise Salad is an easy, flavorful twist on a classic recipe. Made with roasted vegetables, baked salmon and a simple dressing, it's perfect for a healthy lunch or dinner!

[clickToTweet tweet=”Try this Salmon Nicoise Salad with roasted veggies for an easy lunch or dinner during the week. Prep the components ahead of time to make it even easier!” quote=”Try this Salmon Nicoise Salad with roasted veggies for an easy lunch or dinner during the week. Prep the components ahead of time to make it even easier!”]

Enjoy!
–Lindsay–

Filed Under: Dinner, Lunch, Soup & Salad Tagged With: Egg, Green Beans, Potato, Salmon, Spinach, Tomato

Easy Lunch Bowls

March 29, 2018 by Lindsay Leave a Comment

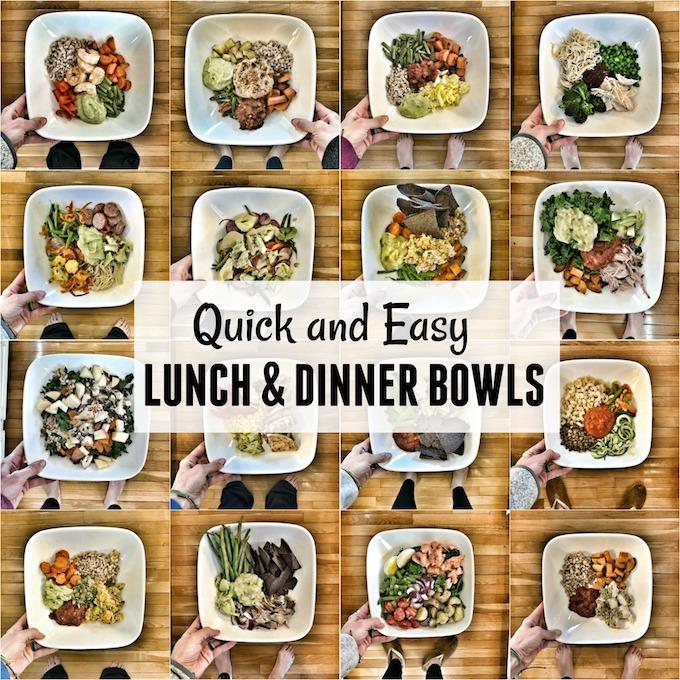
These easy lunch bowls also make quick, healthy options for dinner. They’re simple, come together quickly and are packed with vegetables, lean proteins and healthy fats.

These easy lunch bowls also make quick, healthy options for dinner. They're simple, come together quickly and are packed with vegetables, lean proteins and healthy fats.

Hi friends!

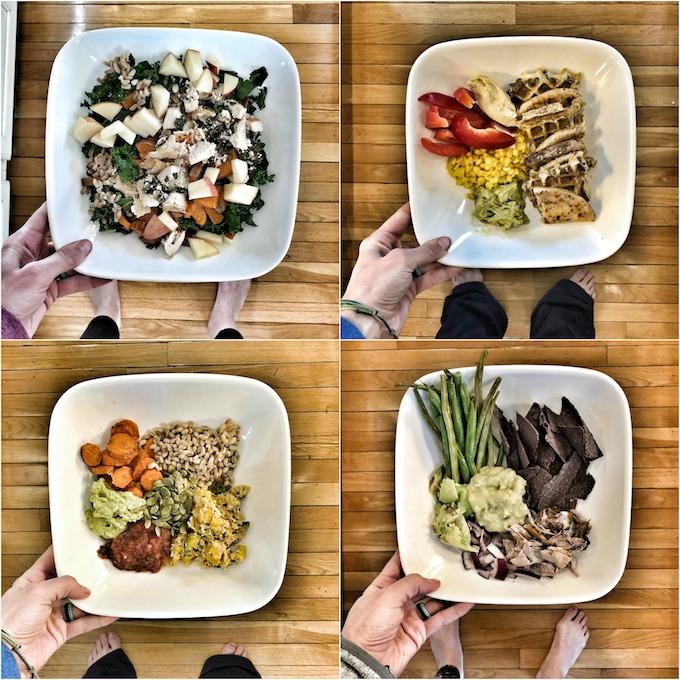
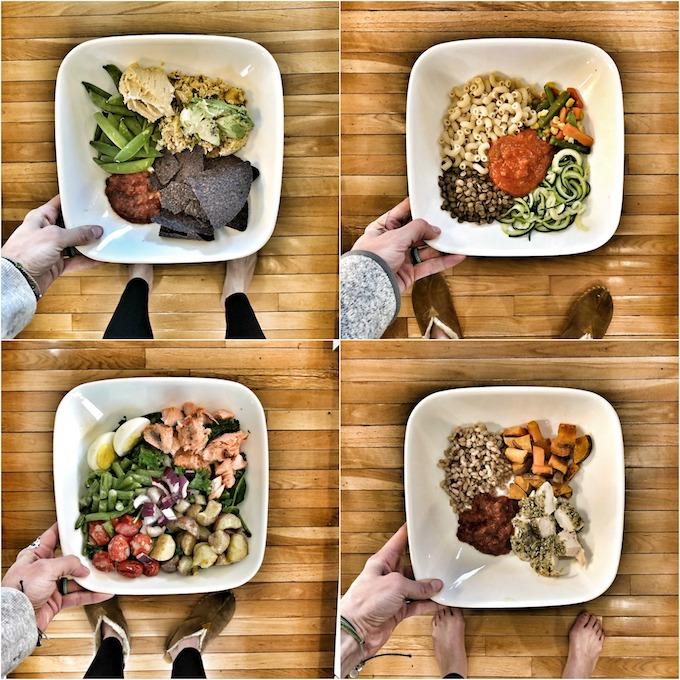
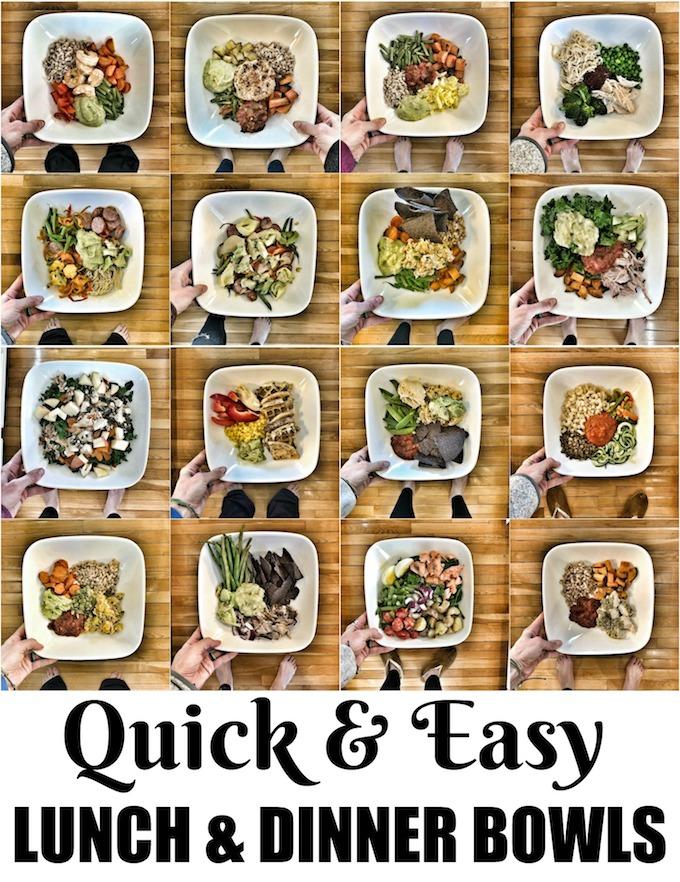
In the past, I’ve shared several roundups of healthy toddler meals, but I rarely share what I eat myself. Lately, I’ve been loving meals in a bowl, so over the past couple weeks, I’ve started snapping pictures of some of my lunches and dinners and sharing them on Instagram stories, along with my kids’ meals. Several of you have mentioned that you enjoy seeing them so I thought I’d share a roundup so you’d have several of them all in one place for inspiration!

Before we start, let’s cover a few things:

  • Some of these are lunches and some are dinners…I just titled the post lunches because it was easier 🙂
  • This is not necessarily everything I eat for the entire meal. I often snack while cooking, eat some fruit or chips on the side, etc.
  • I roast all my veggies pretty much the same way. At 400 degrees, tossed in Chosen Foods avocado oil (i buy it at Costco), sprinkled with sea salt or other spices (curry powder on sweet potatoes, rosemary on white potatoes, paprika on cauliflower, lemon juice on broccoli etc). Sometimes i mix some diced bacon when I roast carrots. I usually roast a bunch of veggies on Sunday and just reheat during the week…but I also roast new ones throughout the week because we go through a lot. We also buy a lot of steamfresh veggies.
  • I’ve been obsessed with my green sauce lately. I’m planning to put it on the blog but for now, here’s the recipe: about a pound of tomatillos (roasted at 400 for 20 min), 1 Tbsp garlic, 1 small onion, 1 small to medium avocado and a serrano pepper all in a blender and blended until smooth.
  • Farro is one of my favorite grains. I buy it at my regular grocery store near the rice and quinoa but you can also buy it online from Amazon. It cooks like rice (in water or broth, cover and simmer for 20 min or so) but is much chewier. I cook a big batch on Sunday and eat it all week. You could do something similar with rice, wheatberries, quinoa etc.
  • To prep my kale, I remove the stems, chop it up, wash and dry it and then pour on some oil and lemon juice and massage it with my hands…then I store it in a ziploc bag and eat it for 3-4 days.
  • If I use a certain brand of something consistently, I’ll mention it below!
  • I eat very similar meals day after day and I’m totally fine with it. And most of these meals are over the past 2-3 weeks. I tend to use similar meal components for an entire week thanks to food prep.

So here we go! Here are 16 meals I’ve eaten this month:

Easy lunch ideas

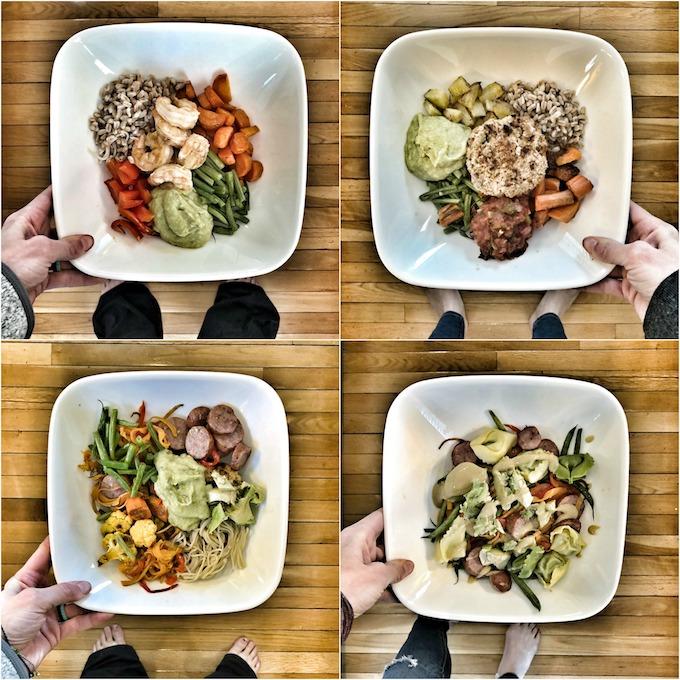
  1. Farro + roasted carrots, green beans and peppers + lemon garlic shrimp (just sauteed shrimp in a pan with butter, lemon juice and garlic) + green sauce
  2. Farro + roasted green beans, potatoes, carrots + Thai Peanut Salmon Burger + salsa + green sauce
  3. Sheet pan green beans, spiralized sweet potatoes and peppers and chicken sausage + leftover salmon burger + Lotus Foods ramen + green sauce + avocado + roasted cauliflower
  4. Sheet pan chicken sausage with green beans, spiralized sweet potatoes and peppers + Giovani Rana tortellini + maple mustard dressing (similar to the one in this recipe)

4 easy dinner ideas

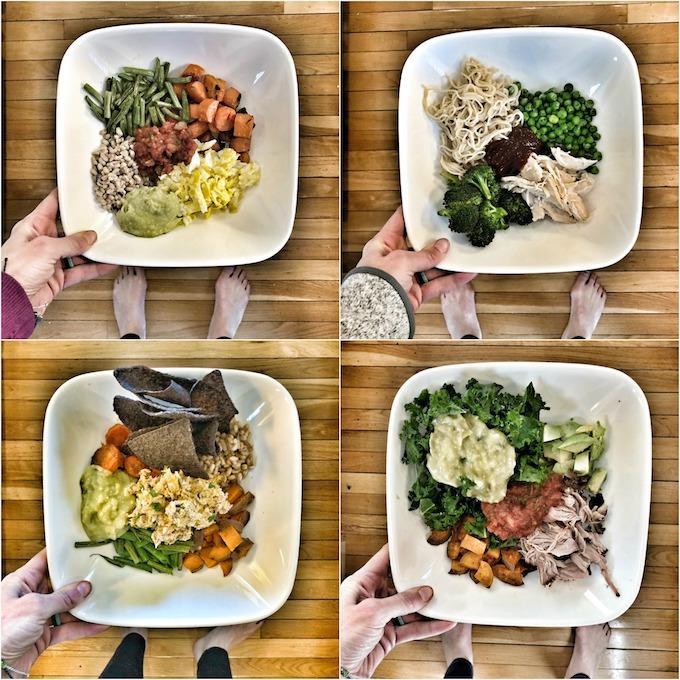
  1. Farro + roasted carrots + green beans + Jack’s Special Salsa + green sauce + scrambled eggs
  2. Lotus Foods ramen + steamed peas + roasted broccoli + Instant Pot shredded chicken + Stubb’s bbq sauce
  3. Tuna salad (similar to this recipe) + green sauce + farro + roasted sweet potatoes + carrots and green beans + Garden of Eatin’ Blue Corn tortilla chips
  4. Kale + smoked pulled pork + salsa + green sauce + farro + roasted sweet potatoes + avocado

4 quick and easy lunch ideas

  1. Kale + apples + kale and goat cheese stuffed chicken (similar to this) + roasted sweet potatoes + farro
  2. Chili lime chicken burger from Trader Joe’s + french toast waffles (just french toast cooked on a waffle iron instead of griddle), Wholly Guacamole + Sabra hummus + red peppers
  3. Roasted carrots + farro + tuna salad + salsa + guacamole + pumpkin seeds
  4. Roasted green beans + chips + pulled pork + red onions + green sauce + avocado

4 quick and easy lunch or dinner ideas

  1. Chips and salsa + snap peas and hummus + tuna salad + avocado
  2. Barilla protein pasta + lentils + zoodles + steamed mixed veggies + Rao’s pasta sauce
  3. Kale + salmon + hard boiled egg + green beans + red onion + roasted tomatoes and potatoes + maple dijon dressing
  4. Farro + roasted sweet potatoes + salsa + hummus & pepita crusted chicken

So there you go! Hopefully that gave you a few new ideas! Be sure to pin this post for later so you can go back and reference it!

Quick and Easy Lunch and Dinner Bowls that are packed with vegetables, lean proteins and healthy fats!

[clickToTweet tweet=”Looking for some quick and easy lunch and dinner bowls? Here are 16 ideas packed with vegetables, lean proteins and healthy fats!” quote=”Looking for some quick and easy lunch and dinner bowls? Here are 16 ideas packed with vegetables, lean proteins and healthy fats!”]

If you like these posts, be sure to let me know and I’ll try to do them more often!

Enjoy!
–Lindsay–
 

Filed Under: Lunch, Dinner, Ingredient Round-Ups

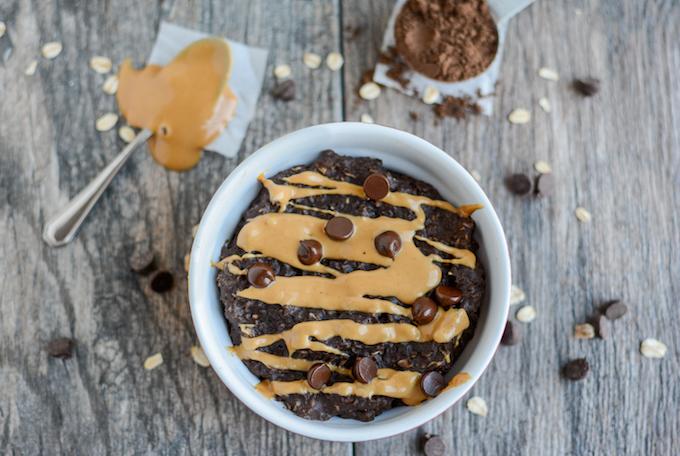
Chocolate Peanut Butter Cauliflower Oatmeal

March 28, 2018 by Lindsay 17 Comments

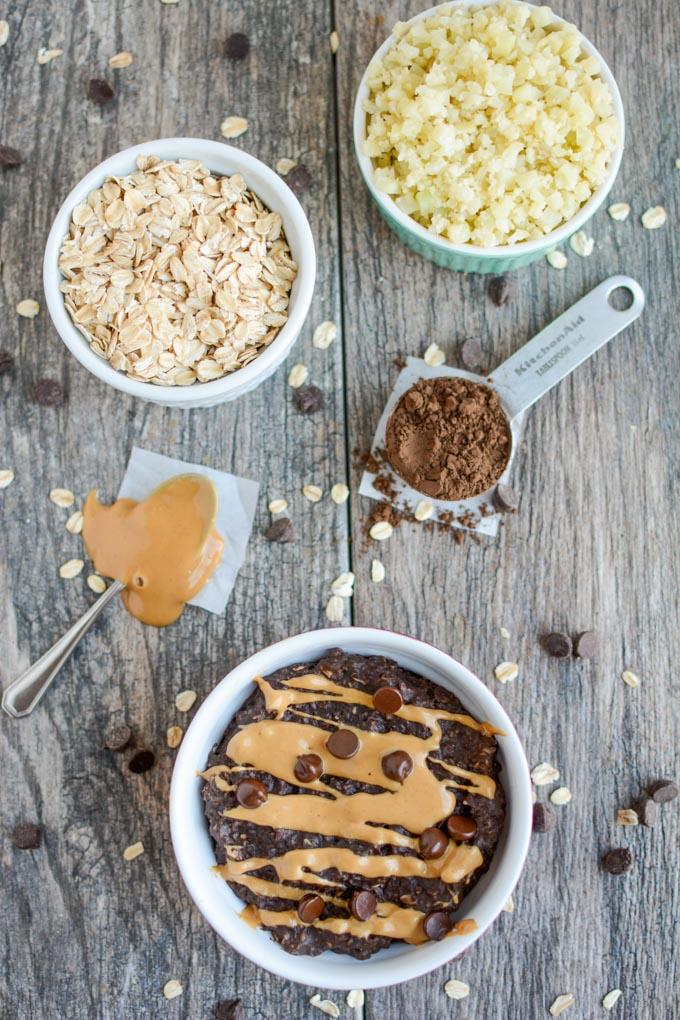
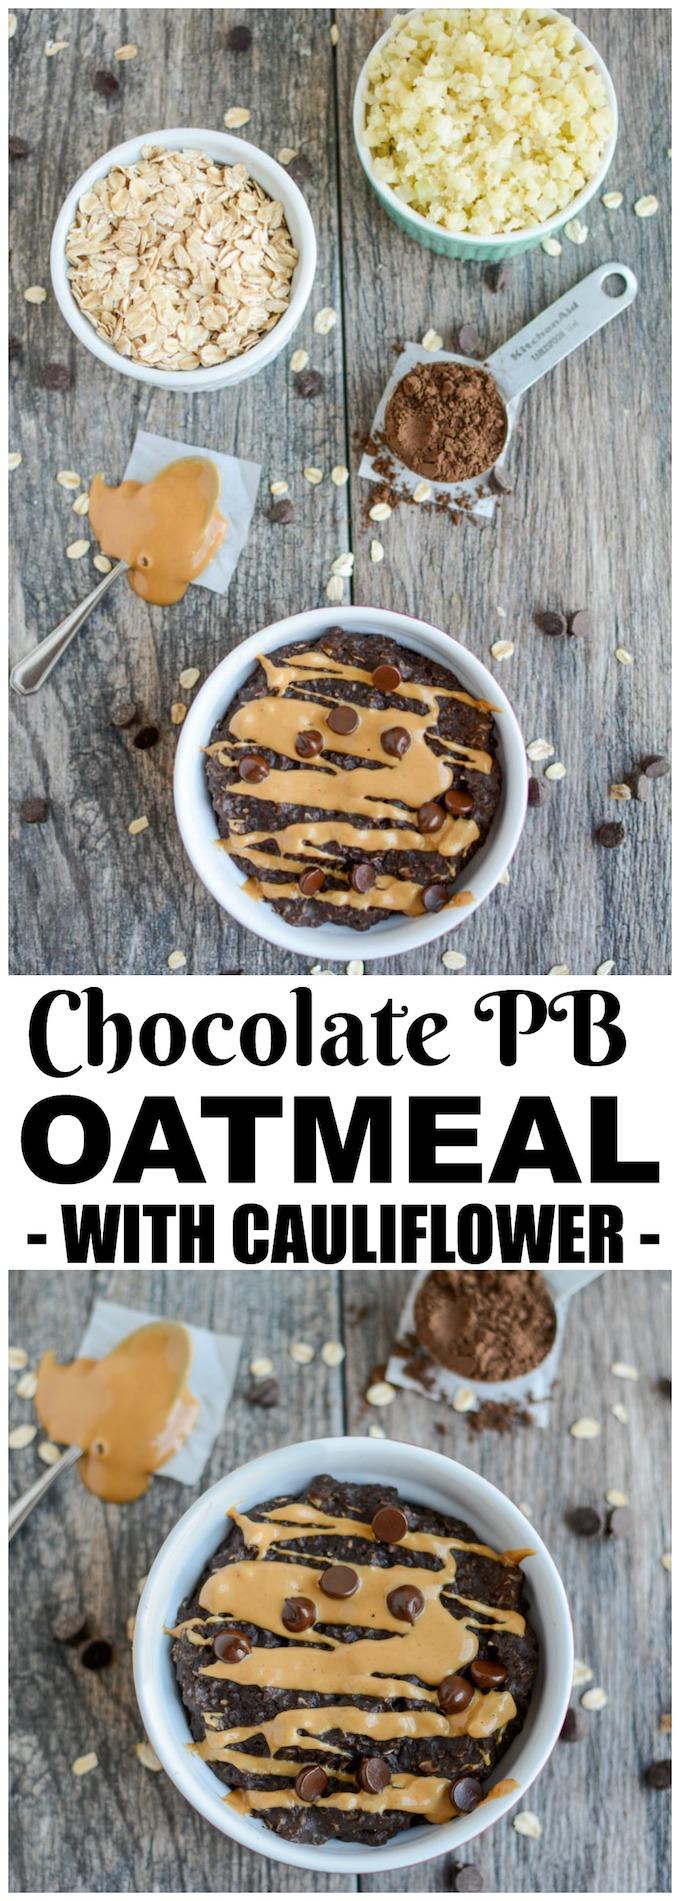
This Chocolate Peanut Butter Cauliflower Oatmeal will be a hit with kids and adults. Give your regular breakfast bowl of oats some added nutrients by blending in some steamed cauliflower!

Chocolate Peanut Butter Cauliflower Oatmeal - perfect for breakfast!

Hi friends –

Allow me to introduce you to this Chocolate Peanut Butter Cauliflower Oatmeal. Now before you get all crazy and start thinking that this is some version of “oatless” oatmeal…that is not the case. This is regular oatmeal….with an added nutrient boost from some steamed cauliflower…which doesn’t alter the taste at all.

We’ve been buying this Farm Day Organic Cauliflower Crumbles (basically raw cauliflower rice) from Costco and it’s like a one pound bag so I’ve been trying to come up with some new ways to use it!

Since I’m always trying to come up with new ways to add veggies to the meals I make for my kids, I put my thinking cap and got to work! I’ve done a lot lately with snacks and dinner so I wanted to focus on breakfast. About a year ago I shared this Blueberry Cauliflower Smoothie and since then, adding cauliflower to smoothies has become a staple for me. It blends in easily and doesn’t alter the taste. That got me thinking about oatmeal.

Chocolate Peanut Butter Cauliflower Oatmeal

Cauliflower is white, so that makes it a great candidate for blending into almost any flavor of oatmeal, even those bowls that don’t have anything to alter the color. For this recipe, I went with a chocolate version but you could easily do peanut butter banana, or apple cinnamon or something like that.

Squish is pretty picky lately and I knew if I just added some steamed crumbles/cauli rice, he would notice…so I decided to try blending it all up before cooking it in the microwave and it worked like a charm! To steam the cauliflower, I place it in a glass dish, cover it tightly with plastic wrap and microwave for 3 minutes.

So here’s how you make it!

Print

Chocolate Peanut Butter Cauliflower Oatmeal

Chocolate Peanut Butter Cauliflower Oatmeal - perfect for breakfast!
Print Recipe

5 Stars 4 Stars 3 Stars 2 Stars 1 Star

4.7 from 3 reviews

This Chocolate Peanut Butter Cauliflower Oatmeal will be a hit with kids and adults. Give your regular breakfast bowl of oats some added nutrients by blending in some steamed cauliflower!

  • Author: Lindsay
  • Prep Time: 5 min
  • Cook Time: 2 min
  • Total Time: 7 minutes
  • Yield: 1 1x

Ingredients

Scale
  • 1/2 cup steamed cauliflower rice
  • 3/4c – 1 cup milk (dairy or non-dairy)
  • 1 Tbsp cocoa powder
  • 1–2 Tbsp peanut butter
  • 1/2 cup rolled oats
  • maple syrup to sweeten- optional

Instructions

Place ingredients in a blender and blend until smooth. 

Pour into a bowl. Microwave for one minute. 

Stir and microwave another 30 seconds. 

Top with additional peanut butter, maple syrup, chocolate chips or other desired toppings.

Notes

You could also add half a banana for sweetness, or try adding some ground flaxseed, chia seeds, etc!

Use 3/4 cup milk for a thicker oatmeal, 1 cup for a slightly thinner version.

Did you make this recipe?

Tag @theleangreenbean on Instagram

Pretty easy, right?! Like I said…feel free to sweeten to your desired level and experiment with different flavor combos! And if you’re feeling extra adventurous you could probably even add an egg! See this post: How To Cook Oatmeal with an Egg in the Microwave!

Edited to add: I recently tried these as steelcut oats. I cooked one cup of steel cut oats in 3 cups cashew milk according to package directions. While it was cooking, I steamed 2 cups raw cauliflower rice and then processed in the mini food processor until smooth. When the oats were almost done, I stirred in the cauliflower, about 1/3 cup peanut butter, half a banana, a splash of maple syrup and 1/4 cup cocoa powder…and stored it in the fridge for Squish to eat all week long.

This Chocolate Peanut Butter Cauliflower Oatmeal will be a hit with kids and adults. Give your regular breakfast bowl of oats some added nutrients by blending in some steamed cauliflower!

[clickToTweet tweet=”Add a boost of nutrients to your morning oatmeal without altering the taste by using steamed cauliflower! This Chocolate PB Oatmeal with Cauliflower is kid-friendly and delicious!” quote=”Add a boost of nutrients to your morning oatmeal without altering the taste by using steamed cauliflower! This Chocolate PB Oatmeal with Cauliflower is kid-friendly and delicious!”]

Enjoy!
–Lindsay–

 

Filed Under: Breakfast Tagged With: Cauliflower, Cocoa Powder, Milk, Oats, Peanut Butter

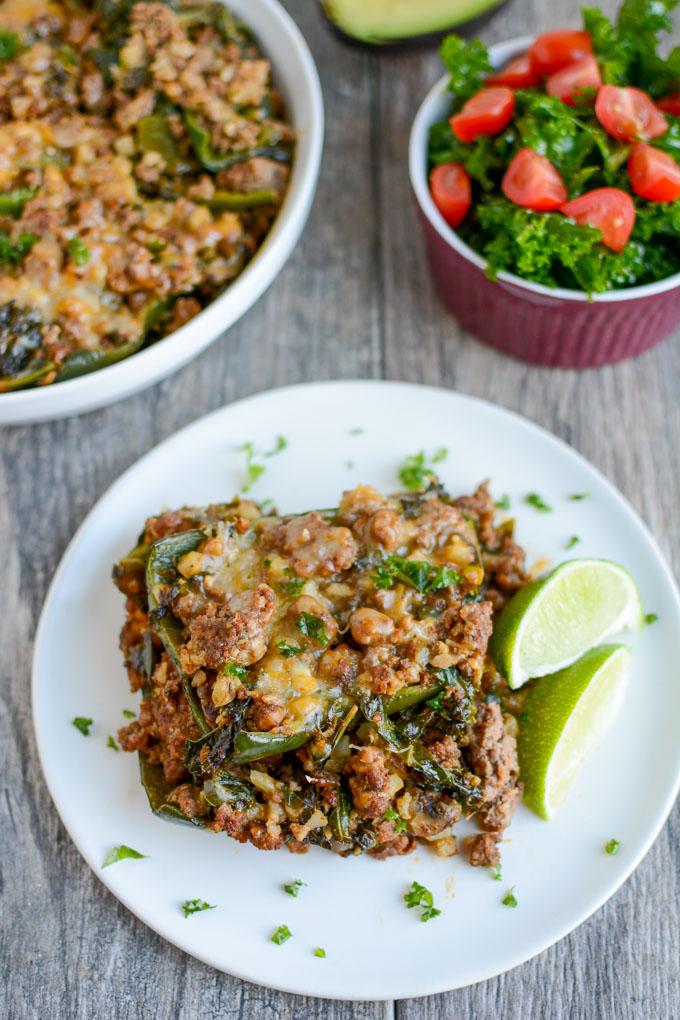
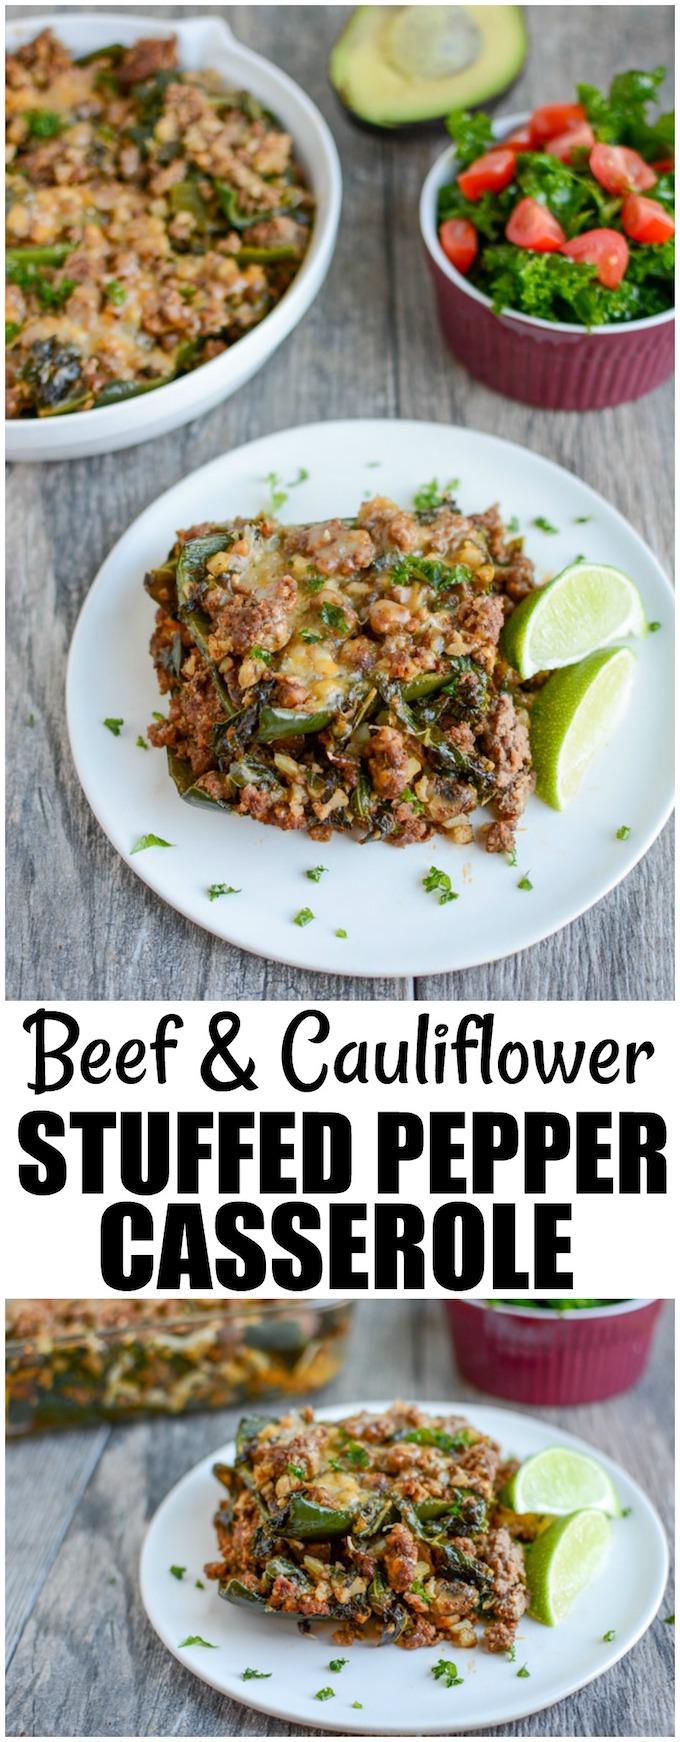
Beef and Cauliflower Stuffed Pepper Casserole

March 26, 2018 by Lindsay 8 Comments

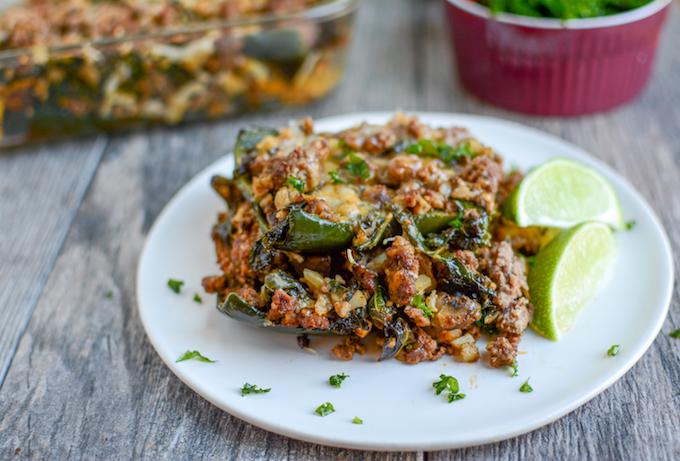
This gluten-free Beef and Cauliflower Stuffed Pepper Casserole is a low-carb dinner recipe that’s also great for lunch! A flavorful mixture of ground beef and cauliflower rice is layered with cheese and poblano peppers instead of stuffed into traditional bell peppers. 

Beef and Cauliflower Stuffed Pepper Casserole with poblano peppers

Hi friends!

Hope you guys had a great weekend. I just wanted to pop in and share this Beef and Cauliflower Stuffed Pepper Casserole that I made for my hubby last week. This recipe idea was born thanks to some poblano peppers that were on sale at the grocery store and a giant bag of cauliflower rice we snagged at Costco.

I was originally planning to stuff the peppers but poblanos are a lot longer and skinnier than bell peppers, which most stuffed pepper recipes call for, and I wasn’t sure how much meat I’d actually be able to fit instead them so I decided to change things up a bit.

Instead of stuffing the peppers, I sliced off the tops and cut them lengthwise down one side so that they could lay flat. And then I used them similar to the way you’d use a lasagna noodle when making a lasagna. I started with a layer of peppers, topped it with a mixture of beef and cauliflower rice, added some cheese and then repeated the layers one more time before baking.

One note- one of my followers on Instagram suggested that you could char the peppers over a flame on the stove and then peel the skin off if you wanted, but I didn’t take that extra step.

Beef and Cauliflower Stuffed Pepper Casserole

We’ve also been eating a lot of kale lately as my hubby has discovered he likes it as much, if not better than spinach…so I threw some of that into the mix too for an additional boost of nutrition.

This casserole is super simple, packed with veggies and tastes great thanks to some flavorful spices. Top it with avocado and your favorite salsa and serve it with some tortilla chips!

Here’s how you make it:

Print

Beef and Cauliflower Stuffed Pepper Casserole

Beef and Cauliflower Stuffed Pepper Casserole with poblano peppers
Print Recipe

5 Stars 4 Stars 3 Stars 2 Stars 1 Star

5 from 2 reviews

This gluten-free Beef and Cauliflower Stuffed Pepper Casserole is a low-carb dinner recipe that’s also great for lunch! A flavorful mixture of ground beef and cauliflower rice is layered with cheese and poblano peppers instead of stuffed into traditional bell peppers. 

  • Author: Lindsay
  • Prep Time: 15 min
  • Cook Time: 30 min
  • Total Time: 45 minutes
  • Yield: serves 4

Ingredients

Scale
  • 1.25 pounds ground beef
  • 2 cloves garlic, minced
  • 1/2 cup diced onion
  • 2 cups cauliflower rice (raw)
  • 2 cups chopped mushrooms
  • 2 cups chopped kale
  • 2 Tbsp low-sodium taco seasoning
  • 1 Tbsp chili powder
  • 2 tsp cumin
  • 1.5 cups shredded mexican cheese
  • 4 large poblano peppers
  • optional toppings: salsa, avocado, cilantro, fresh tomatoes, hot sauce

Instructions

In a large pan over medium-high heat, saute garlic, onion and ground beef for 5 minutes. Add cauliflower rice, mushrooms, kale and seasonings and cook until beef is no longer pink. 

Cut the tops off the poblano peppers and slice in half lengthwise.

In a 9×9 pan or glass baking dish, lay 4 pepper halves (two peppers) in the bottom of the pan. They won’t cover the entire bottom but should cover most of the surface area. 

Top with half the beef mixture and then half the cheese. 

Repeat the layers again. 

Cover with foil and bake at 400 degrees for 30 minutes. Top as desired.


Notes

You can sub regular cooked rice for cauliflower rice. You can also sub spinach for kale.

Did you make this recipe?

Tag @theleangreenbean on Instagram

Pretty easy, right?? You could easily cook some regular rice and use it in place of the cauliflower rice in this recipe, or swap the kale for some spinach. Add some cayenne pepper for extra heat if desired!

This gluten-free Beef and Cauliflower Stuffed Pepper Casserole is a low-carb dinner recipe that's also great for lunch! A flavorful mixture of ground beef and cauliflower rice is layered with cheese and poblano peppers instead of stuffed into traditional bell peppers. 

[clickToTweet tweet=”Try this Beef and Cauliflower Stuffed Pepper Casserole for an easy, gluten-free dinner that’s bursting with flavor!” quote=”Try this Beef and Cauliflower Stuffed Pepper Casserole for an easy, gluten-free dinner that’s bursting with flavor.”]

Enjoy!
–Lindsay–
 

Filed Under: Dinner Tagged With: Cauliflower, Cheese, Garlic, Ground Beef, Kale, Onion

When You Get Type 1 Diabetes As An Adult

March 21, 2018 by Lindsay 54 Comments

Yes, you can get Type 1 diabetes as an adult. My husband’s diagnosis at age 33 had a huge effect on our family, but with a positive attitude and a lot of trial and error, you can find your new normal and live life to the fullest!

When You Get Type 1 Diabetes As An Adult

Hi friends!

As many of you know if you follow me on social media, two weeks ago my husband was diagnosed with Type 1 diabetes at the age of 33. Since this is a major diagnosis, impacting pretty much all areas of our life, I wanted to take some time and write down our story. I’ve discovered that many people don’t actually know a lot about type 1 diabetes so I think it’s a good opportunity to use this platform to educate. I’ve also realized just how much a diagnosis like this (of a chronic, long-term autoimmune disease) affects not only the person themselves, but family members and those around them as well….so I wanted to give you some insight into how it’s affecting him, me and our family in general.

Type 1 Diabetes at age 33, with kids

Types of Diabetes

So, first a little clarification for those of you who don’t know -there are several types of diabetes. Before his diagnosis, I knew the basics about type 1 and 2 and that was about it. I was not an expert then and I’m certainly not an expert now, but I’ve done a lot of reading lately and learned a lot! So here’s a brief overview:

Type 1 diabetes is an autoimmune disease with a fairly sudden onset. While it is most often known for being diagnosed in young children and teens (often known as juvenile diabetes), it’s actually almost as common for people in their 20’s & 30’s (and beyond) to be diagnosed. With Type 1, the body’s immune system attacks the cells in the pancreas that produce insulin so they stop producing it. While the exact cause is unknown, it’s likely a combination of genes you’re born with and an environmental trigger that activates it. If you’re not producing insulin, sugar builds up in the blood instead of going into cells where it’s needed…so you need injected insulin (a combination of long-acting and short-acting) for the rest of your life.

Type 2 diabetes has a more gradual onset. Your body is still producing insulin, you just become less sensitive to it over time. Typically, you can initially manage Type 2 with diet and exercise and take oral medication to stimulate the pancreas to make more insulin. Eventually, your pancreas may stop working and you’ll require insulin. The cause of type 2 diabetes is multifactorial- you can inherit genes that make you more susceptible but lifestyle factors like diet, exercise & obesity also play a role.

In addition, there’s another type known as LADA- latent autoimmune diabetes in adults (sometimes called type 1.5 diabetes), that is often initially misdiagnosed as Type 2. They have similar symptoms but LADA develops faster and people are often at a healthy weight, whereas Type 2 is often (but not always) diagnosed in people who are overweight. So even though they may initially be able to get by because their pancreas is still producing some insulin, oral drugs prescribed for type 2, like metformin, will eventually stop working for LADA patients because their immune system will continue to destroy insulin-producing cells.

There are blood tests that can be used to diagnose LADA by measuring the amount of c-peptides in the blood. C-peptides are a byproduct of insulin production, so low levels can indicate that your body is not producing much insulin on its own. Another blood test often given to LADA patients looks for the presence of insulin-destroying antibodies.

Type 1 diabetes diagnosis at hospital

Hubby’s Story

Here’s what happened to my husband: Starting sometime around the beginning of 2018, we noticed he was having some unusual symptoms that included increased thirst, increased hunger and increased urination. He was feeling generally sluggish, having some vision changes, losing some weight etc. I prompted him several times to go to the doctor for his annual exam. We knew something was wrong but weren’t sure whether it was diabetes, thyroid-related etc.

He finally scheduled his exam for the first week of March and on Friday, March 9th he had his appointment where he shared everything with his doctor. They took a lot of blood for bloodwork and also took a urine sample. Within an hour or two, they had called him back and told him that his urine test showed his blood sugar was over 400, there were ketones in his urine and he needed to go to the ER immediately.

His parents came over to watch the kids and we headed to the ER. There, they did more bloodwork, gave him insulin and fluid and decided to admit him. My parents drove from Chicago to stay with the kids while we handled all of this.

new Type 1 diabetes diagnosis, A1c 12.7

Saturday morning he was officially diagnosed with Type 1 diabetes. We got the results of his Hemoglobin A1c blood test back and it was 12.7, which is extremely high. A1c is a test used to measure a person’s average blood glucose level over the past 2-3 months. Normal is below 5.7. So, his results indicated that his average blood sugar over the past 3 months was in the high 200’s. Normal blood sugar levels are 70-99 when fasting and below 140 within 2 hours after eating.

They decided to keep him at the hospital one more night so that they could continue to track his blood sugar and see how it was responding to the insulin. We were also supposed to speak to a diabetes educator but apparently, at the hospital we were at, they don’t work on the weekends. So, since we were there Friday night to Sunday afternoon, we didn’t speak to one.

type 1 diabetic learning to inject insulin

However, he had an awesome nurse that really stepped up to help teach us about some of his new daily activities like checking his blood sugar and injecting insulin and let him practice on himself so he was comfortable doing it.

Sunday afternoon we were sent home with instructions to check his sugar at least 4 times a day and see an endocrinologist within 3 days. We were completely overwhelmed but trying to just take things one day at a time. On the way home, we stopped at the pharmacy to pick up all the supplies including a glucose monitor, test strips, lancets, alcohol swabs, insulin pens and more.

type 1 diabetes supplies

The first time we had to do everything at home was incredibly stressful. Both the glucose monitor and the insulin pens were slightly different than the ones he’d been practicing with at the hospital. The glucose monitor was different. The insulin pens he had practiced on had a type of safety cap so only the very tip of the needle came out wheras the kind we came home with had the whole needle exposed. At the hospital they threw away the insulin pens after injecting him, wheras the ones we came home with you just throw away the needle and the pen itself has enough insulin in it for many injections.

We tried to make an appointment with an endocrinologist, found out we needed a referral, got a referral and still haven’t even been able to get an appointment on the calendar (two weeks later). Our hope is to get him on both a continuous glucose monitor and an insulin pump as soon as possible, we’re just not sure exactly how soon that will be.

low blood sugar supplies

Luckily my husband was able to take a few days off work to take some time and adjust to everything. We experienced our first low blood sugar episode and now have stashes of fruit snacks and juice boxes all around the house, in both cars, in my purse, out in the garage gym, at work, next to the bed etc.

We definitely would not have survived the first few days without my online community. My friend Mary Ellen (who is an RD and Type 1 diabetic herself) has been endlessly patient and answered dozens of texts from me each day as new questions and situations came up that we had no clue how to handle. We also had several certified diabetes educators who follow me on social media reach out and be willing to answer questions for us.

I may be a Registered Dietitian, but that does not automatically make me a diabetes expert. So I am learning right along with him.

We ordered a few books that people recommended (Think Like A Pancreas and Sugar Surfing) and also went back to see our family doctor to answer some immediate questions, as well as get prescriptions for new supplies as we discovered that the needles that came with the insulin pens he got were a bit too long for him. You’re supposed to pinch your skin and inject the insulin, without pushing it into the muscle. Since he doesn’t have a ton of body fat, sometimes it’s tricky to keep a longer needle from going in too far. We also discovered the finger-sticking needles he got were too fine and not making his fingers bleed enough to get a sample to test his blood sugar.

We’ve been testing his blood sugar about 6 times a day and are using an app to keep track of all the readings so we can analyze them and share with doctors. We have learned how to count carbs, looked up the carb counts of a lot of foods, learned how to dose insulin and treat highs and lows and more….all in the span of just a few days.

reading about Type 1 diabetes

So Many Questions

You never really think about just how many questions and unknowns come along with a diagnosis like this until it actually happens and you find yourself with a mile long list of questions. Here are just some of the things that came up:

  • Can he take his long acting and short acting insulin at the same time in the morning?
  • What should his daily carb goal be?
  • Should he be taking insulin to correct his blood sugar levels before meals as well as in anticipation of what he’s about to eat?
  • How many grams of carbs does he need to correct a low?
  • How will he know when his blood sugar gets too low?
  • What if we’re going out to eat and don’t know how long it will be until we eat? Does he need to take all the supplies with him to the restaurant?
  • What do we do the first time he gets sick and doesn’t feel like eating? Or if he takes insulin and then throws up?
  • How should he handle drinking alcohol?
  • Should he be taking insulin before bed even if he’s not having a snack? What should he be eating for a bedtime snack?
  • What should he do about exercising? Eat beforehand? Take insulin? Not take insulin? Can he exercise when his sugar is high?
  • How soon can we get a pump and a CGM?
  • Are our kids going to get Type 1?
  • What do we do if we go on vacation and he loses his insulin?

These are just a few of the questions we had to work through after his diagnosis. And I still have a running list of questions for when we finally get in to see the endocrinologist.

toddler watching dad check blood sugar

A Family Affair

This diagnosis is obviously having a huge impact on my husband. We’re in for a lifelong series of expenses and constant adjustments. It’s his body and he’s the only one who truly knows how he’s feeling. He has to be responsible about checking his sugar levels and taking insulin. He has to pay attention to how certain foods make him feel, what causes his sugar to spike and drop, etc. He has to prick his finger and inject himself constantly until we’re able to get him on a pump and get him a continuous glucose monitor.

There will constantly be new experiences that he has to learn how they will affect his body (lifting, cardio, yardwork in the summer, playing with the kids, not getting enough sleep etc). He has to remember to bring his supplies with him to work so he has his insulin in case he gets stuck at work and can’t come home for lunch, or in case he goes low during a meeting at work and needs to raise his blood sugar. It’s way harder to eat out if he doesn’t know the exact carb counts for what’s on the menu. (Not impossible…just takes more planning)

IMG 1112

Right now our kids are fairly unaware of what’s going on but Squish does see him checking his sugar and giving shots and asks questions about it so we’re trying to find ways to explain it to him in a way his three-year-old mind can understand. As they get older, we’ll have to teach them what signs to look for when daddy has low blood sugar and what to do to help him (ie how to call 911, where his food supplies are, etc). We’re also dealing with the fact that the fruit snacks and juice boxes we have on hand for daddy are some of Squish’s favorite snacks…so we have to keep him out of those.

As for how it’s affecting me? It is…in a huge way. I’m constantly worried about him, want to know what his blood sugar is all the time, am always afraid it’s going to go low while he’s driving, or in the middle of the night while he’s sleeping (one of the main reasons why we want to get him on a CGM as soon as possible…because you can set alerts to go off if it goes too high or too low and i’ll be able to see his blood sugar levels through an app on my phone).

I’m worried about complications that could arise in the future and whether our kids are going to get this same diagnosis. I’ve had to learn how to use the glucose monitor to check his sugar, how to inject insulin so he can rotate injection sites to different parts of his body that he can’t reach by himself (like his tricep).

IMG 1173

I’ve had to make a lot of adjustments to the way I cook. No longer can I just throw whatever I feel like in a pan. He needs to know how many carbs he’s eating so I have to do a lot of measuring. I made a stuffed pepper bake the other day and I measured all the ingredients, looked up the carb counts for all of them, divided the dish into 4 servings etc so he’d know exactly how many carbs were in each portion. Same thing with the salmon burgers I made for dinner last night. I haven’t exactly figured out yet how to tackle things like soups and casseroles where there’s so much stuff all mixed together making it harder to measure what’s in each portion but I’m sure that will come with time and practice and probably using something like My Fitness Pal.

While hubby doesn’t need to follow a crazy low-carb diet, he does have to be smarter about the carbs he’s eating. No more snacking willy-nilly on things like chips and pretzels…instead, he’s focusing more on getting his carbs from things like fruits, vegetables and whole grains. It’s not a huge change from the way he was eating before but there have definitely been some adjustments.

Some people have asked if that means I’m eating low carb..and the answer is no not really…I’m still snacking on chips with hummus while drinking a beer and eating a handful of m&ms before bed…but I’m definitely more aware. And I do occasionally feel guilty when I’m eating a carb-heavy snack like that that I know isn’t the best choice for him.

Similarly, I’m affected by things like the fact that we probably won’t be ordering a basket of chips and salsa when we go out to eat at a Mexican restaurant anymore..because I’d be eating them by myself. Or the fact that I probably won’t bake my standard cookies as often anymore because he won’t be eating them as frequently and I don’t want them to be around to tempt him. Again, it’s not like he can’t have sweets…but before, he could come home from work and grab a cookie and it was no big deal. Now he needs to know exactly how many carbs are in that cookie, factor that into the amount of insulin he’s taking etc.

type 1 diabetes shirt

I’m trying to observe him closely and learn how his moods change as his blood sugar changes. We know that when it’s super high or super low, he gets increasingly irritable and anxious (not his fault) so during those times I’m trying to manage the kids and keep them calm and out of his way while he works on regulating his sugar.

I’m trying to plan ahead, make sure we know what we’re doing and where we’re going whenever we leave the house so we know what supplies to take, whether he needs to eat beforehand, pack a snack etc. We can’t even just leave on a spur of the moment family walk anymore without making sure we have some fruit snacks or a juice box to take with us in case his blood sugar goes low.

I’m sure reading through all this may sound like I’m complaining…but I’m not. I’m just sharing our experience and give people an overall picture of what it’s like to go through a diagnosis like this. It’s overwhelming and scary and definitely impacts everyone in the family and all aspects of your life together.

family

The good news is, we make a great team. We’re both smart people and are willing to work hard together to figure things out, get our questions answered and experiment with various things to figure out what works best. We were already eating healthy and exercising so although I’ve had to make some adjustments in the kitchen, they’ve been fairly minor and overall, our lifestyles changes have been relatively minor and more adaptive versus a major diet and exercise overhaul.

The medication side has definitely been the most challenging for us. We’re still making changes and trying to figure out what works best to keep his blood sugar under control and we know there’s no instant fix. So far we’ve had to increase his dose of long-acting insulin, change his correction factor (carbs per unit insulin) and split his long-acting insulin in half to take it twice a day instead of just once because it was wearing off too quickly and causing his sugar to get way too high in the morning. We also learned that working out when his sugar was already high makes his sugar spike even higher, whereas if it’s normal, working out can make it drop. Almost all the stuff we’re doing with the insulin has been based on our own research and with the help of Mary Ellen who has been invaluable in sharing both her clinical knowledge of diabetes and her first-hand experiences.

I’m sure there will be good days and bad days from here on out but we’ll face them together and do what we can to make the best of our new normal – life with Type 1 Diabetes. I’m forever grateful that my hubby is so level-headed and is facing this diagnosis with a positive attitude. He’s already conquered so many aspects of the disease and is willing to do whatever it takes to stay as healthy as possible for the future.

Yes, you can get Type 1 diabetes as an adult. My husband's diagnosis at age 33 had a huge effect on our family, but with a positive attitude and a lot of trial and error, you can find your new normal and live life to the fullest!


Thanks for letting me share our story! If you have any questions that I didn’t already answer, feel free to send them our way!

Enjoy!
–Lindsay–

 

Filed Under: Uncategorized

Dinner On The Fly Ebook

March 19, 2018 by Lindsay 1 Comment

Ready to learn how to cook dinner on the fly? In this ebook, a Registered Dietitian and mom of two will teach you a simple 4-step process to put together quick, healthy dinners with very little prior planning.

Dinner on the Fly - an ebook written by a Registered Dietitian

Hi friends!

Today’s the day. When I sent out my reader survey at the end of last year, one of the most requested topics was how to cook dinner on the fly – ie how to cook quick healthy dinners without planning ahead.

You guys know I’m a huge fan of food prep, but I actually make most dinners on the fly with very little prior planning. It’s something that comes easily to me and has definitely saved my sanity many nights while I was knee-deep in whiny toddlers, screaming babies and attempting to work from home and run several businesses.

But I realize this method can be intimidating. So I wrote this ebook to give you the tools you need to be confident in your ability to whip up a quick healthy dinner. I give you an inside look into my thought process so you can repeat the same steps in your own kitchen, along with helpful tips and tricks about pantry staples, making sauces, combining spices, using your Instant Pot, and more.

Here’s exactly what you’ll find in the book:

dinner on the fly table of contents

You’ll also find:

  • Flavoring tips to quickly and simply kick up your chicken, seafood, pork, beef, pasta and other dishes
  • Theme night ideas to inspire you and get the ball rolling
  • Kitchen equipment and tools that may make your life easier

I’m so excited to share this book with you so we’re kicking off the week with a little discount!

dinner on the fly discount code

Regular price for the Dinner on the Fly ebook is $24.99. Regular price for a bundle of my Dinner on the Fly ebook + my Ultimate Guide to Food Prep ebook is $34.99.

For this week only, use the code ‘dinnerfly‘ to get Dinner on the fly for $17.99 or the bundle for $29.99.

(Ends March 26, 2018 at 11:59pm EST)

To learn more about all the ebook I have for sale, go to my ebooks and free resources page.

To purchase the Dinner on the Fly ebook –> CLICK HERE.

To purchase the bundle of Dinner on the Fly & Ultimate Guide to Food Prep –> CLICK HERE.


Ready to learn how to cook dinner on the fly? In this ebook, a Registered Dietitian and mom of two will teach you a simple 4-step process to put together quick, healthy dinners with very little prior planning.

[clickToTweet tweet=”Learn how to cook dinner on the fly in this ebook from a Registered Dietitian and mom of two. Quick, healthy meals with little to no planning!” quote=”Learn how to cook dinner on the fly in this ebook from a Registered Dietitian and mom of two. Quick, healthy meals with little to no planning!”]

Enjoy!
–Lindsay–
Filed Under: Dinner

Chocolate Pea Cookies

March 14, 2018 by Lindsay 50 Comments

These gluten-free Chocolate Pea Cookies are packed full of a green vegetable and you’d never know it! They’re kid-friendly and make a great breakfast or healthy snack.

Chocolate Pea Cookies made with green beans and peanut butter.

Hi friends!

Allow me to introduce you to my latest invention – Chocolate Pea Cookies! So many of you loved my Carrot Oat Bars that it got me all excited and I wanted to come up with another new way to add some veggies to a baked good.

I know green can sometimes be a tricky color to get kids excited about, so I decided to depend on some cocoa powder and make a chocolate cookie. Then I snuck a full cup of sweet green peas into the recipes! I really had no idea how they were going to turn out, but much to my surprise, the recipe came out great!

toddler eating chocolate pea cookie with blankie

Little Miss has been gobbling these up for the past couple of weeks. And they’re so easy to make. Just steam the peas in the microwave whenever you have a minute and then when it’s time to bake, just dump everything in a food processor, whirl and scoop.

These cookies are gluten-free and dairy-free (as long as you use dairy-free chocolate chips! I like Enjoy Life). They’re nice and fluffy and not too sweet. I use 1/3 cup sugar but if you’d like a slightly sweeter cookie you can increase to 1/2 cup.

Chocolate Pea Cookies made with green peas

Be sure to let me know if you guys try these! I’d love to see pictures of you and your kiddos enjoying them!

Here’s how you make these Chocolate Pea Cookies:


Print

Chocolate Pea Cookies

Chocolate Pea Cookies made with green beans and peanut butter.
Print Recipe

5 Stars 4 Stars 3 Stars 2 Stars 1 Star

4.9 from 20 reviews

These healthy Chocolate Pea Cookies are packed full of a green vegetable and you’d never know it! They’re kid-friendly and make a great breakfast or snack.

  • Author: Lindsay
  • Prep Time: 10 min
  • Cook Time: 10 min
  • Total Time: 20 minutes
  • Yield: Makes 14–16 cookies 1x

Ingredients

Scale
  • 1 cup steamed green peas (cooled)
  • 2 eggs
  • 3/4 cup peanut butter
  • 1/4 cup cocoa powder
  • 1/3 – 1/2 cup sugar
  • 1 tsp vanilla extract
  • 1 tsp baking soda
  • pinch of salt
  • 1/2 cup chocolate chips

Instructions

Add all ingredients except chocolate chips to a food processor.

Process until smooth and well-blended.

Stir in chocolate chips.

Scoop onto cookie sheets lined with parchment paper and bake at 375 degrees for 9-10 minutes.

Notes

Dough will seem wet but you can scoop with a cookie scoop. If you want them slightly bigger, press on the tops with a fork to spread them out a bit. The dough will be sticky and wetting the fork or using wet fingertips can help.

Did you make this recipe?

Tag @theleangreenbean on Instagram

So easy, right?

These healthy Chocolate Pea Cookies are packed full of a green vegetable and you'd never know it! They're kid-friendly and make a great breakfast or snack.

Want more chocolate baking recipes? Try these Healthy Black Bean Brownies or Healthy Chocolate Muffins.

Enjoy!
–Lindsay–
Filed Under: Breakfast, Baking, Healthy Muffins & Bars, Snack Tagged With: Chocolate Chips, Cocoa Powder, Egg, Peanut Butter, Peas, Sugar

Thursday Things – Nugget Comfort

March 8, 2018 by Lindsay 2 Comments

Hi friends!

Time for another round of Thursday things. Here are a few things I’m loving this week:

nugget comfort

Nugget Comfort

I’m kind of obsessed with these 4-piece foam couches from Nugget. They come in all different colors and you can move the pieces around to make it into a lounger, a tent, etc. Looks so fun!

superstraps

SuperStraps

These SuperStraps are on Kickstarter right now and they sound pretty cool. They’re mainly designed for backpacks to help take tension off your back, shoulders and neck, but they caught my attention because you can also use them with an Ergo (or similar style) baby carrier! They won’t be out until the Fall but you can check them out and pre-order if you’re interested.

[Read more…] about Thursday Things – Nugget Comfort

Filed Under: Uncategorized

Carrot Oat Bars

March 7, 2018 by Lindsay 92 Comments

These Carrot Oat Bars make the perfect healthy snack. They’re dense, chewy and easy to make in the blender or food processor. Plus they’re kid-friendly and also make a great addition to breakfasts and lunches.

Healthy Carrot Oat Bars

Hi friends!

I’m so excited to share these Carrot Oat Bars with you guys today. This may be the recipe that sets the record for most requests to receive the recipe early on social media. I’ve had tons of people ask for it already and I happily sent along a photo of my chicken scratch, but i’m glad to have it up on the blog now in a more organized fashion.

I had my whole production crew with me on this one. Squish helped with the photos and Little Miss completed her first solo video!

toddler doing food photography

I’ve actually been testing these bars for a couple of weeks now. I first tried them a few times with steel cut oats. Don’t do that. They were a gooey mess. They work much better with rolled oats. You could even use quick oats. These do require a little bit of prep ahead of time to roast the carrots, but guys…that’s like so easy. I just peel and chop mine into 1-inch pieces, throw them on a baking sheet with a little oil and roast them at 400 degrees F for about 30 minutes, stirring them once or twice.

Roasting the carrots brings out their natural sweetness so you only need a little bit of maple syrup in this recipe. You could also use steamed carrots. I had a friend test them that way and they worked, I’d just recommend adding a touch more maple syrup. You could also mix in some raisins or shredded coconut. I don’t. I just think they’d taste good because they’re often used in carrot cake.

These bars are dense, chewy and very lightly sweetened. Kinda like baked oatmeal, but not exactly because everything is more blended up. They’re moist (I know people hate that word, but it’s true) and very sturdy, not crumbly. Be sure to store them in the fridge! If you’re looking for a fluffy, cake-like texture, this is not the recipe for you. If you want to turn them into dessert, mix together a little cream cheese and powdered sugar and spread it on top!

Carrot Oat Bars

Carrot Oat Bars with Cream Cheese Frosting

But I like them plain. Little Miss has been devouring them. In fact, between the two of us, we ate an entire pan in 24 hours. Not kidding.

Here’s how you make them:

Print

Carrot Oat Bars

Healthy Carrot Oat Bars
Print Recipe

5 Stars 4 Stars 3 Stars 2 Stars 1 Star

4.8 from 21 reviews

These Carrot Oat Bars make the perfect healthy snack. They’re dense, chewy and easy to make in the blender. Plus they’re kid-friendly and also make a great addition to breakfasts and lunches.

  • Author: Lindsay
  • Cook Time: 25 min
  • Total Time: 25 minutes
  • Yield: Makes 9 bars 1x

Ingredients

Scale
  • 2 cups roasted carrots
  • 1 egg
  • 3/4 cup milk (I used non-dairy but cow’s milk would be fine)
  • 1/4 cup maple syrup
  • 2 cups rolled oats
  • 1 tsp baking soda
  • 1 tsp cinnamon
  • 1 tsp vanilla extract
  • 2–3 Tbsp ground flaxseed
  • optional: raisins or shredded coconut

Instructions

  1. Add ingredients to blender or food processor in order listed (except raisins and/or coconut if using).
  2. Blend/process until smooth.
  3. Stir in optional mix-ins if desired.
  4. Spread into a 9×9 pan lined with parchment paper.
  5. Bake at 375 degrees F for 25 minutes.
  6. Store in the fridge!

Notes

You can sub steamed carrots but add 1-2 Tbsp more maple syrup.

I don’t use mix-ins. I just imagine they’d taste good because they pair well with carrot cake.

If you want to add frosting, you can use whatever kind you want. I just mixed together cream cheese (softened) and powdered sugar until it reached the right sweetness and spread it on top of a couple.

You can also make these as muffins.

Did you make this recipe?

Tag @theleangreenbean on Instagram

These are so easy to make. I’ve made them both in the food processor and blender. I actually find it easier to use the food processor! I’ve also baked these in muffin tins and they turned out just fine! I hope you guys love them as much as we do!

These Carrot Oat Bars make the perfect healthy snack. They're dense, chewy and easy to make in the blender. Plus they're kid-friendly and also make a great addition to breakfasts and lunches.

Enjoy!
–Lindsay–
Filed Under: Baking, Breakfast, Healthy Muffins & Bars, Lunch, Snack Tagged With: Carrot, Egg, Ground Flaxseed, Milk, Oats

How To Help Picky Eaters Try New Foods

March 5, 2018 by Lindsay 8 Comments

Want to learn how to help picky eaters try new foods? If you have a toddler or child who struggles with only liking a few foods, the “love it, like it, learning approach” from this Registered Dietitian may help them become a more adventurous eater at meal time!

How To Help Picky Eaters Try New Foods

Hi friends!

As promised, I have a great post to share with you guys today about picky eating. This is one of the questions I hear most often, both as a mom and as an RD. I’ve shared an approach I use in this post about Why My Toddler Doesn’t Always Eat What I Eat, but I recognize that not all approaches work for everyone. So, I asked Ashley, my friend and fellow RD mama, to share her “Love it, like it, learning it” approach with you guys today! Let us know if you give it a try!


Hi, I am Ashley and I am the mom of two (with another on the way!) and pediatric dietitian over at Veggies & Virtue. I share meal planning systems and feeding strategies that help families experience “Less mealtime stress and more feeding success.”

As a dietitian mom, I wish I was immune to picky eaters in my home. However, that has definitely not been my family’s story.

toddler smelling broccoli

Shortly after my oldest daughter turned one, I started seeing signs of “picky eating” or what I prefer to label as an apprehensiveness towards the foods I was offering. We experienced the gradual and yet progressive switch from having an infant who ate and enjoyed a variety of foods to a young toddler who exercised her independence most often at the table.

As I know many fellow parents can relate, it was exhausting.

I had a lot of foot in mouth moments as a new dietitian mom. There were tips and tricks I had learned throughout my education and dietitian experience that seemed completely logical for share as solutions for helping children overcome picky eating. Nothing could quite prepare me though for the endless trials of having to execute these very approaches with my own kid.

That’s what led me to working to adopting a “Love it, Like it, Learning it” at (almost) every meal.

As a registered dietitian who values evidenced-based information, I knew the Division of Responsibility in Feeding was the only approach I could confidently use for my food parenting style. What I found to be a stumbling block for our family though was how to both establish “my role” (of what, when, and where food was offered) while only offering one meal for the whole family (more on this here).

At the time, my daughter’s list of accepted foods was so small. When I listed out the foods I knew she would eat, I didn’t see any red flags for extreme picky eating. The list was still limited enough that I was still constantly stressed over what to feed her (without always making her a separate meal).

So I took the principles I knew to be sound from Ellyn Satter’s research, and I began to reorganize how I mentally worked through our family’s menus with the simple phrase, “Love it, Like it, Learning it.”

toddler muffin tin meals

What is “Love it, Like it, Learning it?”

“Love It, Like It, Learning It” is a way to repeatedly expose individuals to a variety of new or non-preferred foods alongside their known favorites. This approach minimizes age-appropriate pickiness by establishing a new standard for how meals are offered. Through the simple saying of “Love It, Like It, Learning It” and straight-forward strategy of organizing meals in this way, parents can help kids “learn to like” new foods without the food fight nor parental frustration.

What are “Love it,” “Like it,” and “Learning it” foods?

Love It Foods: Foods your child consistently likes and preferentially favors compared to all others. These are foods your child eats most of the time.

Like It Foods: Foods your child usually likes but may eat less (or none) of when offered alongside “love it” foods. These are foods your child eats some of the time they are offered.

Learning It Foods: Foods your child rarely (if ever) likes and may or may not have ever been exposed to before. These are foods your child rarely if ever eats.

Why use a “Love it, Like it, Learning it” approach?

As mentioned in the introduction to this article, an obvious reason many moms (like myself) are motivated to use this approach is because we feel near defeat. When our level of frustration over finding foods our children will eat becomes an ongoing issue that impedes our ability to even enjoy mealtimes, we know we need to find another approach.

What’s more is using the “Love it, Like it, Learning it” approach puts a practical, tangible tagline on figuring out “what” to feed your family. As advisable with the Division of Responsibility of feeding, parents remain responsible for figuring out what to offer our children. Instead of always defaulting to the foods we *know* they will eat, however (their love it or like it foods), this approach helps us to work towards intentionally developing a foundation for future eating habits and taste preferences without the use of pressure, frustration, or force.

This approach helps parents capitalize on their child’s relationship with food in the early years by exposing them to wide variety of real foods and establishing a positive family feeding environment. By having a framework for exposing our children to “Learning It Foods,” we move away from prematurely assuming our child “doesn’t like it” but rather needs ongoing, repeated exposure so they can eventually “learn to like it.”

toddler lunchbox

How does a “Love it, Like it, Learning it” approach work?

Research shows that when familiar and unfamiliar foods are offered together, it may make children more likely to try the unfamiliar “Learning It Food” (especially for the child with neophobia, or a fear of new foods). Research also reminds us often that many children need as many as 20 or more repeated food exposures before they will eat a new food. In order for parents and children to not fatigue early over these foods, having an expectation over how to offer these foods help set families up for greater long-term success.

Rather than children expecting every meal to be made up of only their specific favorites (such as short-order cooking), they can come to understand that family meals include a variety of foods that each member of the family enjoys. For the child, this helps establish trust in the feeding relationship with their that there will be foods the child both “loves” and is “still learning” at any given meal (instead of a “eat this or starve” approach). This also helps children to feel more calm and confident around new foods being offered, rather than anxious or even obnoxious towards them being on their plate.

For parents, pairing meals with a “Love it, Like it, Learning it” approach offers peace of mind that there is always something being offered that their kid should/could/usually would eat (i.e. the parent is not “making them starve). This lessens the mom guilt during meals when the child, who is responsible for if/whether and how much they eat, chooses not to eat nor enjoy the foods that is offered. This again re-establishes a Division of Responsibility in feeding for your family that can gradually help restore enjoyment for family meals.

toddler lunch

What is an example of what “Love it, Like it, Learning it” looks like in real life?

Each week, I share meal plans over on Veggies & Virtue. While the menu ideas shared on my blog are for everyone, I take it a step further in my weekly newsletters to share with subscribers how I break down every weekly menu to what fits my family’s “Love it, Like it, Learning it” lists. With two children whose lists continue to change, I am often adapting this to work for us as I always recommend others do for their own families.

The framework remains the same though in how you can serve any given meal and find ways to make it work for your unique family.

Here is a sneak peak at how this week’s Lean Green Bean inspired meal plan would look with “Love it, Like it, Learning it” applied. You can find the complete blog post here.

1 ǁ Family Dinner Sunday: Slow Cooker Rotisserie Chicken

LOVE IT: roasted red potatoes, “chicken bones” (legs from chicken), strawberries

LIKE IT: roasted broccoli

LEARNING IT: kiwi

2 ǁ Meatless Monday: Lasagna Soup

LOVE IT: apple slices, whole grain baguette with butter, milk

LIKE IT: shredded mozzarella cheese

LEARNING IT: lasagna soup

3 ǁ Taco Tuesday: Crockpot Cilantro Lime Chicken

LOVE IT: shredded cheddar, multigrain tortilla chips, fresh pineapple

LIKE IT: cilantro lime chicken

LEARNING IT: salad fixings (spinach/greens, diced tomato, avocados, olives), salsa

4 ǁ Pasta Night: Spaghetti and Slow-Cooker Meatballs

LOVE IT: whole grain spaghetti tossed in olive oil, satsumas, milk

LIKE IT: sauteed green beans

LEARNING IT: slow-cooker meatballs

5 ǁ Leftovers

6 ǁ Pizza Night

7 ǁ Soup/Stew Saturday: Slow-Cooker Sweet Potato Chicken Chili

LOVE IT: corn on the cob, grapes, milk

LIKE IT: cornbread muffins with butter and honey

LEARNING IT: sweet potato chicken chili

toddler baking

Where can I get more info?

If you are interested in learning more about Love it, Like it, Learning it and how to see it applied to everyday life, you can follow me on Instagram @veggiesandvirtue or sign up for my weekly newsletter here.


If you liked this post, be sure to pin it for later and share with friends!

Want to learn how to help picky eaters try new foods? If you have a toddler or child who struggles with only liking a few foods, the "love it, like it, learning approach" from this Registered Dietitian may help them become a more adventurous eater at meal time!

Enjoy!
–Lindsay–

Filed Under: Kids

Peanut Butter Chia Crackers

February 26, 2018 by Lindsay 13 Comments

These Peanut Butter Chia Crackers are a healthy, kid-friendly snack recipe made with just a few simple ingredients. Similar to a homemade graham cracker, you can make a batch for an after-school snack or pack some in your purse for a busy day!

These Peanut Butter Chia Crackers are a healthy, kid-friendly snack recipe made with just a few simple ingredients. Make a batch for an after-school snack or pack some in your purse for a busy day!

Hi friends!

If you follow me on IG stories, you’re already quite familiar with these Peanut Butter Chia Crackers. They’re kinda like my version of a homemade graham cracker and I have literally tested the recipe 10 times in the past 2 weeks. Luckily the flavor was fine from batch one so all ten batches got eaten…it was just the execution I was trying to master. I wanted to make it as easy as possible for you.

I first tried doing these freehand with a rolling pin…but what I’ve found is that the dough doesn’t really lend itself well to being rolled. Especially when you cut off the edges to make them straight and then try to re-roll it. Then I tried just pressing the dough into a 9×9 pan. That works well…but they’re just a little too thick for me. If you want the easiest route, that’s it.

Peanut Butter Chia Crackers

Peanut Butter Chia Crackers

If you’re like me and want them just a little bit thinner, here’s what I found works best: divide the dough in half. Press half of it into a 9×13 pan. Work with it until it’s about an inch or an inch and a half from one end. There’s not quite enough dough to fill a 9×13 pan…it seems like 9×11 or 9×12 is ideal for me.

I always line my pans with parchment paper, so then you just pull that first half of dough out and repeat the process on a new sheet of parchment paper in the 9×13 pan for the second half of the dough. I do both halves right away and just let one sit on the counter because I like using the 9×13 pan to help guide me and give me straight edges. So once one half is baked, I just pull out the parchment paper in, pop in the other piece of parchment paper and bake round 2.

It takes me about 5 minutes of work pressing the dough in the pan and working with it to get it to the 9×11 or 9×12 size. The warmth from your hands seems to help make it easier to work with instead of being too crumbly.

Peanut Butter Chia Crackers made with white whole wheat flour horizontal photo

So, if you want to give these a whirl yourself, here’s the recipe:

Print

Peanut Butter Chia Crackers

These Peanut Butter Chia Crackers are a healthy, kid-friendly snack recipe made with just a few simple ingredients. Make a batch for an after-school snack or pack some in your purse for a busy day!
Print Recipe

5 Stars 4 Stars 3 Stars 2 Stars 1 Star

No reviews

These Peanut Butter Chia Crackers are a healthy, kid-friendly snack recipe made with just a few simple ingredients. Similar to a homemade graham cracker, you can make a batch for an after-school snack or pack some in your purse for a busy day!

  • Author: Lindsay
  • Prep Time: 15 min
  • Cook Time: 10 min
  • Total Time: 25 minutes

Ingredients

Scale
  • 4 Tbsp butter, melted
  • 1/2 cup peanut butter
  • 1/4 cup sugar
  • 2 Tbsp honey
  • 3 Tbsp chia seeds
  • 1 tsp vanilla
  • 1 tsp cinnamon
  • 1/4 tsp baking soda
  • 1.5 cups white whole wheat flour
  • 1/4 cup water

Instructions

Preheat oven to 375 degrees F.

In a large, microwave-safe bowl, melt butter. 

Add peanut butter, sugar, honey, chia seeds, cinnamon, vanilla and baking soda and stir until well combined. 

Add one cup of flour and stir until just combined.

Add remaining 1/2 cup flour and 1/4 cup water and mix well. If the dough still seems too crumbly, you can add one more Tbsp of water…but there will still be some crumbs. The warmth of your hand will help it all come together.

Form dough into a ball with your hands and divide into two equal sections. 

Line a 9×13 pan with parchment paper. 

Place one section of dough in the pan. Slowly, with your hands, work the dough to spread it out. I usually put the dough a little closer to one end, press it out until it reaches the corners and then begin to work it towards the other end of the pan. 

Press the dough until it covers all but about 1-1.5 inches at one end of the pan. Make sure it’s not too thick around the edges of the pan or in the middle. You’re going for an all-around even thickness. 

Use a knife to cut into crackers. I usually divide the pan into thirds horizontally and then cut vertically. Take a fork and use the tines to make three rows of holes in each cracker at the top, middle and bottom.

Use the edges of the parchment paper to remove it from the pan. Repeat the process on a new sheet of parchment paper with the second section of dough. 

Leave round 2 in the pan, bake for 8-10 minutes. (I start checking them at 8 min) Let sit for 5 min, then carefully remove the parchment paper from the pan and drop the first piece of parchment paper with the prepared crackers from the first section of dough into the pan and bake for 8-10 minutes at 375 degrees.

Let cool completely. Crackers will soften after the first day.


Notes

 If you don’t mind a thicker cracker, you can divide the dough in half and press each half into a 9×9 pan instead of a 9×13 pan.

Did you make this recipe?

Tag @theleangreenbean on Instagram

One thing to note is that these crackers will soften after the first day. So they’re crunchiest once they’re cool on day one, but on the following days they will get softer. This doesn’t impact the taste.

These Peanut Butter Chia Crackers are a healthy, kid-friendly snack recipe made with just a few simple ingredients. Make a batch for an after-school snack or pack some in your purse for a busy day!

Let’s chat:

Do you ever make your own crackers?

Enjoy!
–Lindsay–
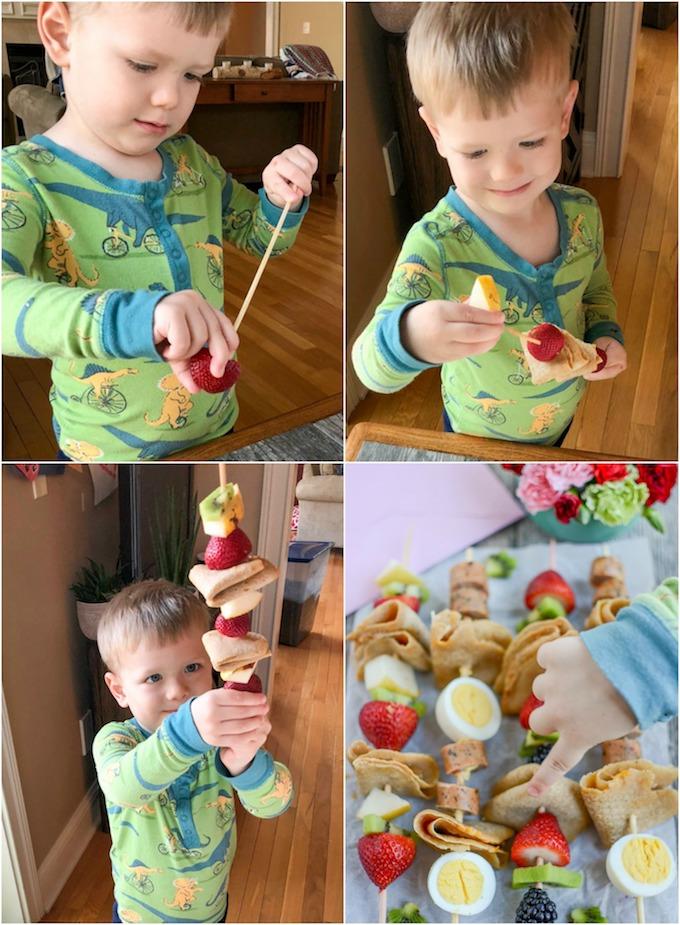
Filed Under: Snack Tagged With: Butter, Chia Seed, Peanut Butter, Sugar, White Whole Wheat Flour

Life Lately

February 23, 2018 by Lindsay 12 Comments

Hi friends!

It’s been quite a while since I’ve done a day in the life post (you can see all my previous posts here), so I thought it was about time to write one. This time I decided to change it up and give you some general life updates. I share a lot of my day to day life on my Instagram Stories, so I feel like I’ve talked about a lot of these issues, but sometimes I forget not everyone follows me there! (But you should! Click here.)

toddler throwing snow

So, I thought I’d fill the rest of you in on life lately in a couple areas and shares some takeaways:

School

The biggest change lately is that Squish has switched to a new preschool. You may recall that in the fall, he started going to a preschool 2 mornings a week. From the very beginning, we had some challenges and behavior issues, specifically with him hitting his peers and throwing toys. After a few months, we met with his teachers and they told us about a free Preschool Child Check offered by our school district. It was basically a free screening for kids ages 3-5 that provides information about a child’s current development in the areas of motor, language, concept, self-help and social-emotional development.

I took him to screening and to be honest, it didn’t go very well. I felt like a lot of the activities and stations were geared at more 4 and 5 year olds and it was hard for him to focus…but we did the best we could. Then, based on the results, they determine whether a child qualifies for additional screening. He did qualify, which meant we then had an in-home evaluation with a psychologist from the school district, as well as a one-on-one speech evaluation with a speech therapist at our house. They also sent someone to his school to observe him in the classroom.

After all of those evaluations, we then had a big meeting. It was determined that he did qualify for additional services, specifically in the area of speech articulation and social interaction. He does great when interacting with adults, and even older kids, but needs help learning how to interact with his peers.

Based on those results, and with the help of the team, we put together an Individualized Education Plan (IEP) for him and made the decision to pull him from his current preschool and start him at the school district preschool.

toddler in chef outfit

It’s only been a couple of weeks but here are a few things I want to point out:

-At this school, he’s getting specific help for his speech issues from a speech therapist one day per week. They also have detailed plans in place to help him meet specific, measurable goals to help improve his behavior. As they get to know him, they’re tailoring things in the classroom to his needs – such as making a chart to help with reminders about gentle hands, creating a timeline so he can see upcoming transitions to different stations and learn the daily routine and schedule, etc.

-This school is 4 days a week (Tues-Fri) from 9:00-11:30. I was not ready to send him 4 days a week at this point, but they assured me that a lot of kids actually prefer it because it helps give them a better sense of routine. It’s only been a couple weeks and he’s definitely still adjusting to 4 days straight but I think it will be good for him. He’ll be off school in the summer and then start again in the fall going in the afternoons.

The Takeaway – Ignore the Labels

I guess technically where we are currently is that he has a diagnosis of “special needs”. I just want to encourage and remind all of you out there to ignore labels like that, especially as parents. It does not mean that there’s anything wrong with your child. It’s not weird or scary. ALL it means is that you’re taking extra steps to get them the extra help they need and deserve. As a parent, it’s your job to be their advocate and do what’s best for them. The earlier you start, the better the chances of it helping! So if you notice your child needs help in the area of speech, behavior, sensory issues, whatever it is….do your research! Find out what you can do to help them!

If you’re looking for a similar child check in your area, my suggestion would be to search something like “preschool child check + your school district”. We also have a program here in Ohio called Help Me Grow, which is what we used to get Squish evaluated for speech back at 18 months and are currently using again to get my daughter evaluated. I’ve heard it might be a national program, or at least in several states so check it out!

Toddlerhood

We have had some rough days behavior-wise with Squish lately.

This is our timeout chair. This is my three year old who today literally screamed himself to sleep in our timeout chair. It’s been a ROUGH few days over here in the parenting world, trying to navigate life with him at this age. Illness, skipped naps, changes to routine etc have all come to a head, leaving me feeling overwhelmed and questioning my parenting abilities many many times. So if you’re out there feeling the same way as a parent, know that you’re not alone. Keep your head up- you’re doing great. This is a tough age and there will be good days and bad days. Just remember that the bad days don’t make you any less of a good parent ❤

A post shared by Lindsay L, RD (@theleangreenbean) on Jan 30, 2018 at 6:32pm PST


A few weeks ago he literally screamed himself to sleep in the timeout chair. It’s hard as a parent, especially when you’ve never had a toddler before (or even as you have), to navigate these waters and keep yourself from feeling like you’re totally failing every single day. Whether it’s changing routine, adjusting to no naps, general toddler defiance, pent-up energy from a long winter, etc…there’s no denying the fact that 3-year-olds are hard to parent.

This kid. Every day is a battle. At least once a week, I’m honestly not sure we’re going to make it to age 4. No matter how hard I try, I totally lose my cool with him and least once a day. The endless stream of “No. No. No.” and “Why? Why? Why?” can be overwhelming, frustrating and exhausting. So to all my fellow parents out there in the thick of the threenager stage, I SEE YOU. And I hope that you’re stashing away these fleeting sweet smiles and cuddles like I am…because some days it feels like that stash is the only thing getting me through until bedtime. Am I right?!

A post shared by Lindsay L, RD (@theleangreenbean) on Dec 30, 2017 at 3:01pm PST


The Takeaway – Give Yourself A Break

Chances are, if you’re spending time worrying about whether or not you’re a good parent, then you ARE a good parent. There are going to be good days and bad days, but just keep doing the best you can. Spend time figuring out what works for your child and your family, whether it’s timeouts, loss of priveledges, redirection, behavior charts, etc. Parenting is a lot of trial and error and you may not get it right the first time, or even the second…but the important thing is you keep trying. Give yourself a little grace when you have a day (or two!) where you lack patience or lose your temper. It’s ok. Take a quick break (even if it’s just one minute hiding in the bathroom with the door shut) and reset yourself. And remember that many parents before you have survived the threenager stage and lived to tell the tale 🙂

Work From Home Mom Life

Most of you know that I work from home and also watch my kids full-time. It’s a balance I’ve struggled with ever since Squish was born and it’s not easy.

The blogging world is a tricky beast. Since the online space is constantly changing, there’s a lot of pressure on bloggers/influencers/entrepreneurs to stay on top of things and keep up. Even people like me, who have been doing this for a long time, can fall victim to the comparison trap and get overwhelmed with feeling like we constantly need to do more, create more, sell more, work more, go go go. Every once and a while I have to just take a step back and remind myself to just “do me”. Yes there are other bloggers out there doing more, working more, selling more…but maybe they’re younger, without young kids to take care of. Or maybe they have full-time childcare. Or you know what? Maybe they just want it more than I do right now. And that’s ok. I love what I do. But I also love being a mom. So here’s a reminder to myself, and those of you out there who might be in a similar position: it’s ok to take the pressure off yourself occasionally and enjoy a little more time with your kids. It’s ok to not kill yourself trying to work 100 hours week after week. It’s ok to just take a step back sometimes and enjoy where you are right now. So for me that’s raising tiny humans to be the best they can be, in a messy house, while continuing to share easy recipes and real life moments. And I’m super grateful to have all of you along for the ride! ❤

A post shared by Lindsay L, RD (@theleangreenbean) on Feb 19, 2018 at 5:39pm PST


Here’s where I’m at right now: I’m cutting myself a little bit of a break. My kids are only going to be little once. I’m lucky enough to have the flexibility to spend a lot of time with them and I want to soak it up. If that means a few less blog posts, or going on a family walk instead of photographing a recipe, that’s OK!

The Takeaway – You do you.

Every blogger is different and every blogger’s life is different. I’m choosing to do what’s best for me at this stage of my life and you should too, no matter what anyone else is doing.

toddler with computer

A Day In The Life

So there you go. Those are the big things going on lately. I also wanted to include a quick peek into our daily routine. Per usual, there’s no “normal” day, but we are trying to start settling into a routine on Squish’s school days from now until May.

Here’s how those days are shaping up:

7am – Wakeup. Squish is still using his OK to Wake clock and he always comes out of his room at 7am on the dot…so I’m not really sure when he wakes up..I’m just glad he stays in there until then. And Little Miss is a bit more unpredictable but she’s been sleeping well at night and usually wakes up between 7 & 7:30. So I get up at 7 with him and we head downstairs for breakfast.

7:30-8:30 – Breakfast is a long, drawn out ordeal for Squish…but when he finally finishes he usually either goes up to hang out with daddy while he gets ready, or watches a show downstairs while I finish up breakfast with Little Miss and usually try to cram some work in at the counter while she eats. During this hour we also change diapers, get everyone dressed, etc.

8:40 – Load the kids in the car and drop Squish off at school. It’s about a 12 minute drive from our house and they can get into their classroom at 8:55 (and not a minute sooner!).

9:15 – By the time I get home and get her and I back inside, I usually have about a 2 hour window to get things done. On a good day, she naps for about 30 minutes of that time. The rest of the time is split between entertaining her, running errands if we need to…because lord knows they’re easier with just one kid….and working. Sometimes that means writing blog posts, sometimes it’s cooking, sometimes it’s trying to cram making and photographing a recipe into 30 minutes with a one year old underfoot.

11:20 – Load her back into the car and go back to school to pick up Squish.

12:00 – Home for lunch. Hubby comes home for lunch so if he beats us home he usually helps start get their lunches ready.

12:30 – 1:30  – Variable. Most days Squish is ready to go down for a nap right after lunch.  Some days we play for a while first. Some days he doesn’t nap. Little Miss usually isn’t ready to go down for a nap until 1:30 or so.

1:30 – If I’m lucky, I have 30-60 minutes when both of them are contained in their rooms. On the days Squish doesn’t nap I still make him go to his room for at least 30 minutes. This is usually when I prefer to cram in photo shoots if I can.

2:00 – 5:00 – Variable. Some days Squish naps from 1-3 or 2-4. Some days he naps from 12:30-2. Some days she naps from 1-2. Some days she doesn’t go down for a nap until he wakes up. Some days neither of them nap. In any event…these are the hours where I try to stay flexible and keep one or both of them entertained. We cook and bake, we do arts and crafts, we play games, we can not wait until it gets warm so we can go outside. We usually make dinner at some point during the afternoon as well.

5:00 – By 5pm we are all very ready for daddy to come home. We typically eat around 5:15/5:30 and then have some play time.

6:30 – Little Miss goes to bed. If she had a couple of short naps or only one nap she’s often in bed even earlier, around 6.

6:30 – 7:30 – Squish watches a couple of shows.

7:30 – Bedtime for Squish. Workout time for mommy and daddy.

8:30 – 10 – TV time, computer work etc.

10:00ish – reading and bed.

siblings

So there you have it! A little glimpse into our crazy life!

Enjoy!
–Lindsay–



Filed Under: Uncategorized

Thursday Things – Google Keep

February 22, 2018 by Lindsay 1 Comment

Hi friends!

Time for another round of Thursday Things. Here are some things I’m loving lately:

Google Keep

Google Keep

Someone recommended this app to me for to do lists and I finally got around to checking it out. Spoiler alert- I’m loving it! I’ve tried Wunderlist and Evernote and they were ok, but I never really stuck with them and always went back to just the basic iphone notes. I’m loving Google Keep because it’s clean and simple, you can see it on your computer, you can make checklists, rearrange the notes, make voice notes, handwritten notes, add photos, invite collaborators etc. Love love love.

[Read more…] about Thursday Things – Google Keep

Filed Under: Uncategorized

Instant Pot Chicken Marsala

February 21, 2018 by Lindsay 5 Comments

This Instant Pot Chicken Marsala is perfect for a busy weeknight dinner or a fancy date night in. It’s easy to make, full of flavor and using the pressure cooker makes it even less work than the already simple stovetop version.

This Instant Pot Chicken Marsala is perfect for a busy weeknight dinner or a fancy date night in. It's easy to make, full of flavor and using the pressure cooker makes it even less work than the already simple stovetop version.

Hi friends!

So excited to share this Instant Pot Chicken Marsala recipe with you guys today. If you follow me on Instagram stories, you know I’ve actually made it about 4 times in the past month or so, but am just now getting around to sharing it. The main reason for that is that it’s not a pretty dish and the last time I made it and tried to take pictures I gave up.

Instant Pot Chicken Marsala

Instant Pot Chicken Marsala

But, after taking a little break because my hubby was getting tired of eating it every week, I made it this weekend and got some decent photos…so here it is, ready to share with the world!

Here’s the thing – Chicken Marsala is not a hard dish to make. I love it because it looks and sounds fancy but is so easy to make. If you don’t have an Instant Pot, check out my Gluten-Free Chicken Marsala recipe that you can make on the stovetop in just 20 minutes. The basic difference with using the Instant Pot is that you don’t have to watch it cooking on the stove or worry about stirring.

And lately, when I have two screaming kids who need my attention, I’ll take the seal it and forget option any day!

So here’s how you make it:

Print

Instant Pot Chicken Marsala

This Instant Pot Chicken Marsala is perfect for a busy weeknight dinner or a fancy date night in. It's easy to make, full of flavor and using the pressure cooker makes it even less work than the already simple stovetop version.
Print Recipe

5 Stars 4 Stars 3 Stars 2 Stars 1 Star

5 from 1 review


  • Author: Lindsay
  • Prep Time: 5 min
  • Cook Time: 15 min
  • Total Time: 20 minutes
  • Yield: serves 4

Ingredients

Scale
  • 2 Tbsp butter
  • flour for dredging
  • 1 to 1.5 pounds thinly sliced chicken breasts
  • 8–12 ounces sliced mushrooms (i use baby portobellas)
  • 4 ounces pancetta, finely cubed
  • 2/3 cup marsala cooking wine
  • 1 cup chicken broth
  • 2 cloves garlic, minced
  • 1 Tbsp cornstarch + 1 Tbsp water
  • fresh parsley to garnish

Instructions

Turn Instant Pot to saute function and add butter to melt. 

Dredge chicken breasts in flour on both sides, then place into Instant Pot. Let them brown in the butter for 1-2 minutes per side, then remove and set aside. 

Add garlic, pancetta, mushrooms and marsala wine and saute for 2 minutes. 

Turn Instant Pot off. Add chicken breasts back in, along with chicken broth, nestling chicken down into the mushrooms. 

Using the manual (or pressure cook) button, set the timer for 8 minutes. 

Use quick release and remove just the chicken breasts from the pot.

Switch the Instant Pot to saute and wait 1 minute until sauce starts to bubble. Add the mixture of cornstarch and water and let simmer 5-10 minutes, stirring occasionally while sauce thickens. 

Place chicken on plates, spoon mushroom sauce over chicken, garnish with parsley and serve warm.

Notes


Did you make this recipe?

Tag @theleangreenbean on Instagram

Whether you make it in the Instant Pot or on the stovetop…just make it. So good.

This Instant Pot Chicken Marsala is perfect for a busy weeknight dinner or a fancy date night in. It's easy to make, full of flavor and using the pressure cooker makes it even less work than the already simple stovetop version.

[clickToTweet tweet=”Make this super easy Instant Pot Chicken Marsala for a busy weeknight dinner or a date night in!” quote=”Make this super easy Instant Pot Chicken Marsala for a busy weeknight dinner or a date night in!”]

Enjoy!
–Lindsay–
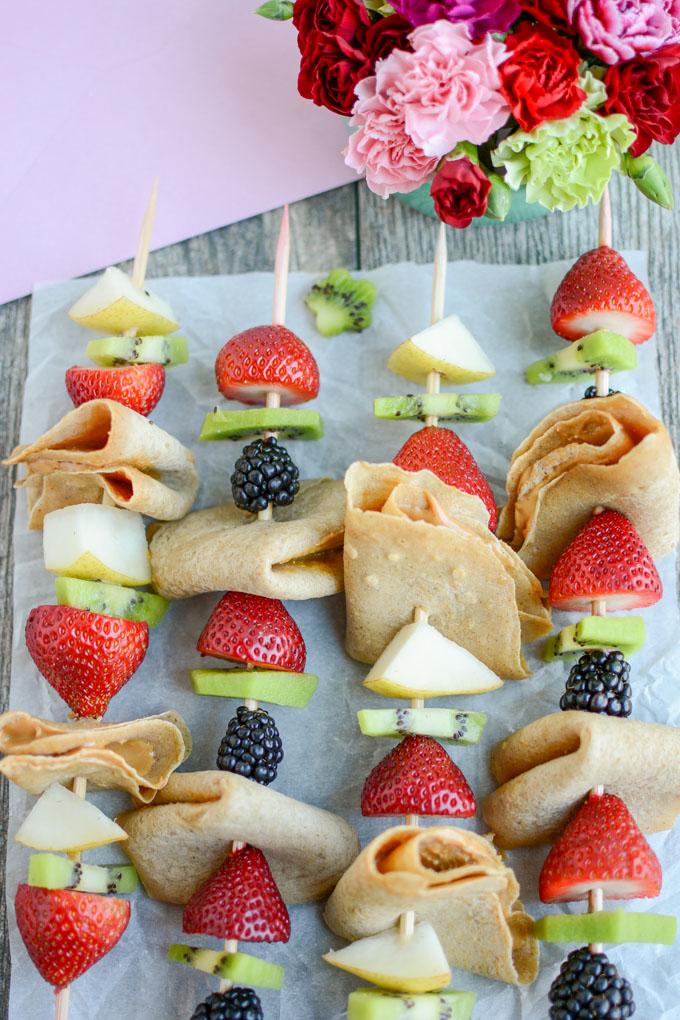
Filed Under: Dinner, Instant Pot Tagged With: Chicken, Chicken Broth, Mushroom

  • « Go to Previous Page
  • Page 1
  • Interim pages omitted …
  • Page 18
  • Page 19
  • Page 20
  • Page 21
  • Page 22
  • Interim pages omitted …
  • Page 65
  • Go to Next Page »

Primary Sidebar

Lindsay Livingston The Lean Green Bean Healthy Living Tips and Tricks

I'm a Registered Dietitian and mom of three from Columbus, Ohio. I use this blog to share simple, healthy recipes, nutrition tips, and an honest glimpse of motherhood!

Learn More →

Questions? Comments? Email me: [email protected]

The Lean Green Bean Facebook The Lean Green Bean Instagram The Lean Green Bean Pinterest The Lean Green Bean Twitter The Lean Green Bean Feed
footer-logo
The Lean Green Bean Facebook The Lean Green Bean Instagram The Lean Green Bean Pinterest The Lean Green Bean Twitter The Lean Green Bean Feed
Recipes

Breakfast
Dinner
Snack
Slow Cooker

Kids

Cooking With Kids
Favorite Gifts
Toddler Meals
Indoor Activities

Resources

Easy Packed Lunches for Kids
Dinner Spark
Snack Spark
Ultimate Guide to Food Prep

About

Meet Lindsay
Become an RD
Work with Me

The Lean Green Bean is a participant in the Amazon Services LLC Associates Program, an affiliate advertising program designed to provide a means for sites to earn advertising fees by advertising and linking to amazon.com.
Read the full privacy and disclosure policy here.

Copyright © 2022 · The Lean Green Bean

table talk series

Learn how food affects your body.

Get my free Table Talk email series where I share bite-sized nutrition information about carbs, protein, and fat, plus bonus information about snacks and sugar!

[email protected]