• Skip to main content
  • Skip to primary sidebar

Learn how food affects your body. Get Free Nutrition Info Today

the-lean-green-bean-logo
  • Home
  • Recipes
  • Kids
  • Resources
    • Ebooks
    • Food Prep
    • Videos
    • Snack Round-Ups
    • Gift Guides
  • About
    • Become An RD
    • Work With Me
  • Search
the-lean-green-bean-logo
  • Home
  • Recipes
  • Kids
  • Resources
    • Ebooks
    • Food Prep
    • Videos
    • Snack Round-Ups
    • Gift Guides
  • About
    • Become An RD
    • Work With Me
  • Search

blog

Costco Favorites

April 1, 2019 by Lindsay 13 Comments

Hi friends!

This post has been about 2 years coming and I FINALLY got around to putting it together for you! I get asked all the time what I buy at Costco so I wanted to share all our favorites. We’re lucky enough to have a Costco right down the road so we go every weekend! There’s also a lot of great options at Costco that we don’t necessarily buy, so I tried to share some of those too! Plus, some non-food items we’ve purchased there that you might not know were available. Also note we don’t buy a ton of stuff from the frozen and refrigerated section so I’m sure there are some good pre-packaged options not included in this post simply because I haven’t tried them.

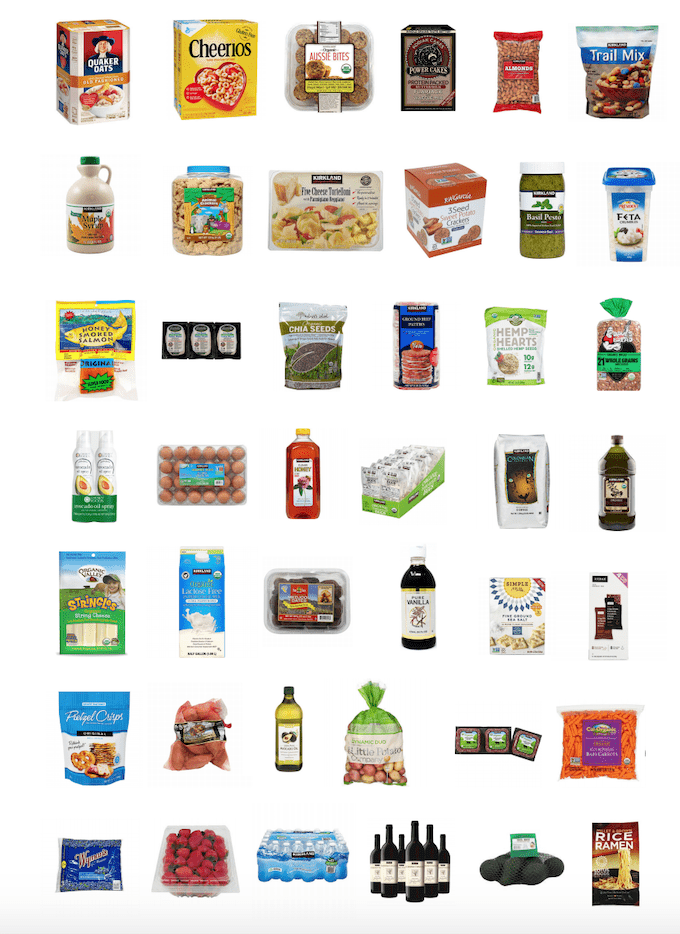
dietitian favorite food items at Costco

Here are the food items we buy regularly:

  • Fresh fruit (mostly berries, peaches, pears, other depending on season)
  • Baby carrots
  • Avocados
  • Dates
  • Little Potato Company potatoes
  • Sweet potatoes
  • Organic eggs
  • Organic hard boiled eggs
  • Organic 2% milk
  • Coffee
  • Organic Valley String Cheese
  • Aussie Bites
  • Wine (hubby buys Kirkland Sonoma County Old Vine Zin 2016 by the case)
  • Dave’s Killer Bread 
  • Cheerios
  • Quaker Oats
  • Manitoba Harvest Hemp Hearts
  • Chia seeds
  • Almonds
  • Vanilla extract
  • Avocado oil
  • Spray avocado oil
  • Olive oil
  • Kirkland brand maple syrup
  • Honey
  • Rx Bars
  • Kodiak Cakes pancake/waffle mix
  • Bottled water
  • RW Garcia Sweet Potato Crackers
  • Kirkland Brand animal crackers
  • Kirkland Organic Ground beef
  • Honey Smoked Fish Co Smoked Salmon
  • Tortellini
  • Feta
  • Kirkland Brand pesto
  • Frozen wild blueberries
  • Frozen Beef Burgers
  • Plainville Organic turkey deli meat
  • Trailmix
  • Pretzel chips
  • Simple Mills Almond Crackers
  • Lotus Foods Brown Rice Ramen

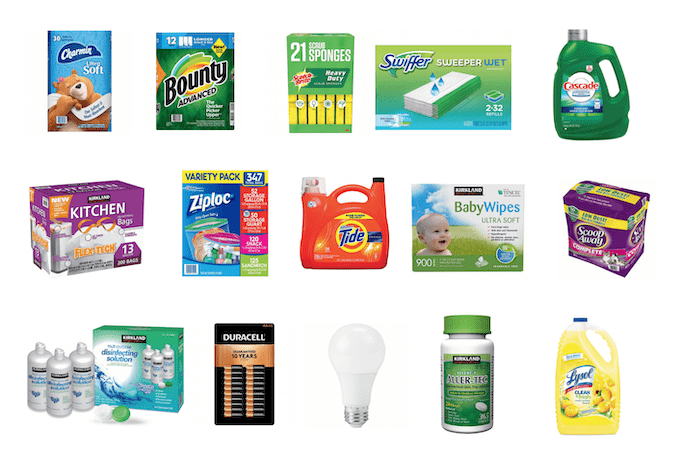
non food costco items

Non-food items we buy as needed:

  • Baby wipes
  • Laundry detergent
  • Dish detergent
  • Swiffer wipes
  • Lysol
  • Trash bags
  • Paper towels
  • Contact solution
  • Allergy medicine (Allertec and Flonase)
  • Lightbulbs
  • Batteries
  • Ziplocs
  • Sponges

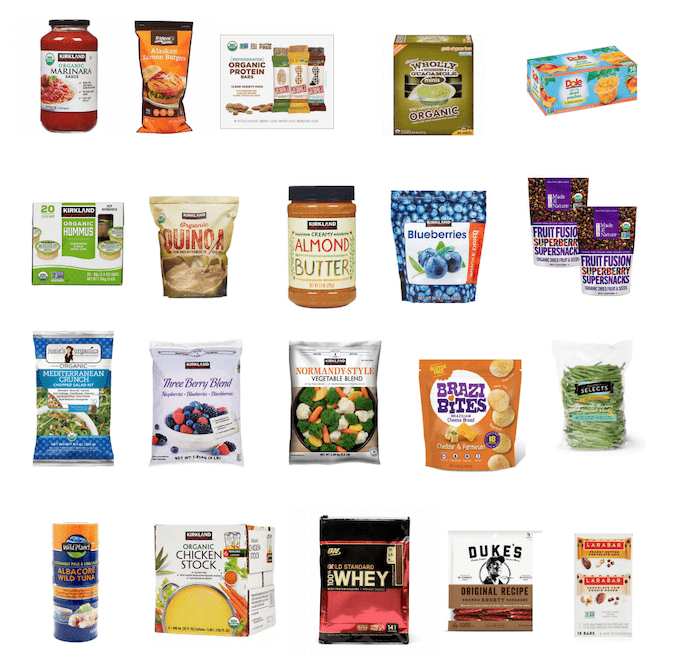
more costco food options

Other food options I like. We don’t buy all of these but do buy some occasionally:

  • Hummus
  • Guacamole 
  • Perfect bars
  • Trident Salmon burgers
  • Kirkland brand marinara sauce (Rao’s is also good)
  • Fruit in 100% juice
  • Dried Fruit
  • Almond butter
  • Quinoa
  • Made in Nature figgy pops/snacks
  • Chopped salad kits or leaf lettuce
  • Any of the frozen fruit and veggies
  • Any of the fresh fruit and veggies
  • Canned tuna and salmon
  • Chicken broth/stock/bone broth
  • Brazi Bites
  • Jerky
  • Larabars
  • Nuts and nut/seed mixes
  • Protein powder/Creatine (if that’s your thing- my husband buys them)

Not pictured

  • Rotisserie chicken
  • Steak
  • Frozen fish/shrimp
  • Wild Brine Sauerkraut 
  • Amylu Kale & Mozz Chicken Burgers
  • Coconut Oil
  • Almond Flour
  • Gluten-free Flour Mix
  • Canned beans
  • Cholula/Tabasco
  • Avocado Mayo
  • Balsamic Vinegar
  • Banza chickpea pasta
  • Skinnypop popcorn
  • Baby formula
  • Greenridge farm refrigerated beef sticks
  • Don Lee Farms Grilled Chicken Patties (frozen)

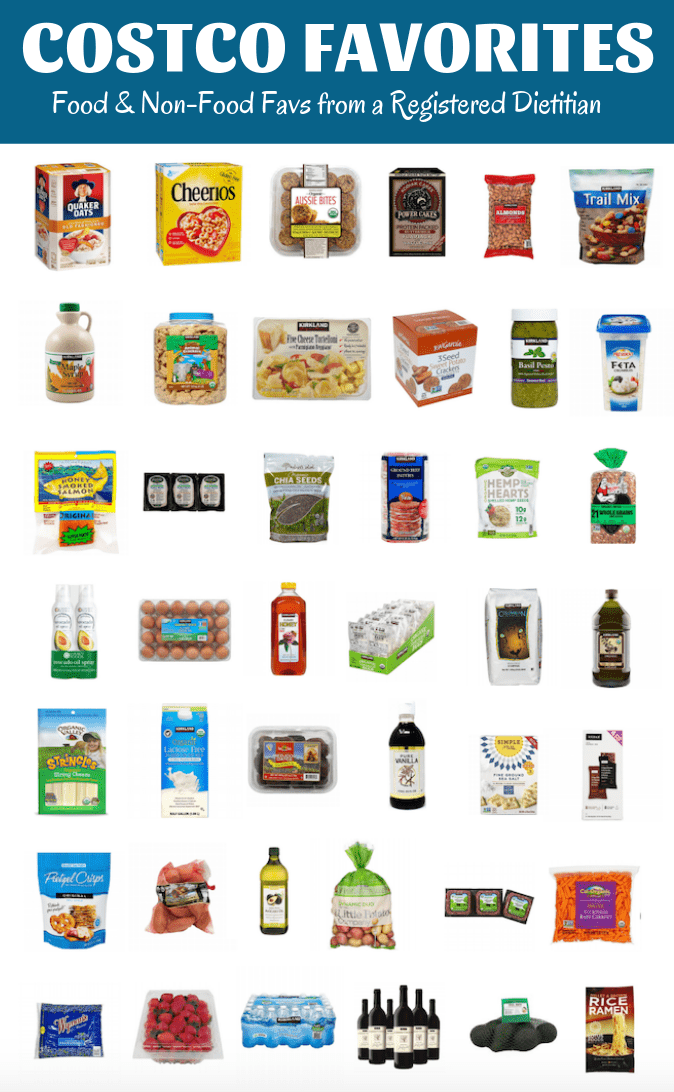
Favorite Costco food and non-food items from a Registered Dietitian

Like I mentioned, we buy A LOT of stuff at Costco. I tried to remember some of the things we’ve purchased over the years so if you’re looking for some of these things, you might want to consider Costco as an option! 

  • Eyeglasses
  • Novaform Mattress (we haven’t actually bought this yet but it’s on our to do list)
  • Patio furniture
  • We’ve gotten our flu shots there
  • Water bottles
  • Pots and pans
  • Printer
  • Printer ink
  • TV
  • Dexcom transmitters (for husband’s glucose monitor)
  • LG Soundbar
  • External hard drive
  • Tires
  • Dog bed
  • Paper/plastic party supplies
  • My husband buys pretty much all his clothes there and we also get the kids some stuff
  • Books
  • Furniture (our under-tv console, ladder bookshelves…)
  • American flag
  • Lawn and leaf bags
  • Stamps
  • Fertilizer
  • Garden hose
  • Giant poof (bean bag)
  • Photo prints/canvases
  • Patio lights
  • Ladder
  • Pressure washer

Hope that helps! Would love to hear some of your Costco favs!

Enjoy!
–Lindsay–
Filed Under: Ingredient Round-Ups, Uncategorized

Easy Pulled Pork Recipes

March 29, 2019 by Lindsay Leave a Comment

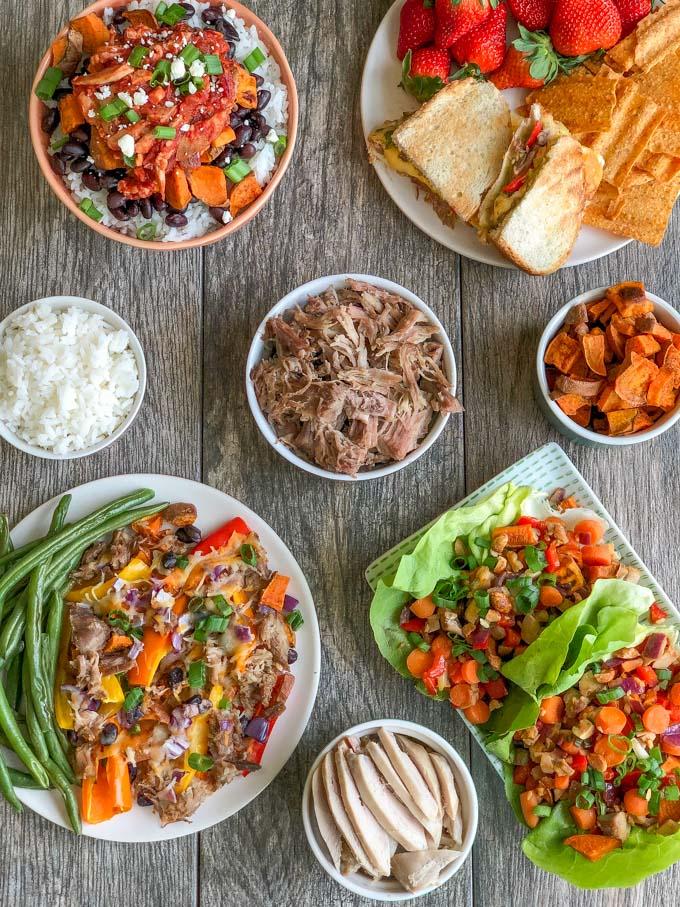
These Easy Pulled Pork Recipes can also be made with chicken or another protein source. Prep four simple ingredients on the weekend and combine for four quick, healthy meals during the week.

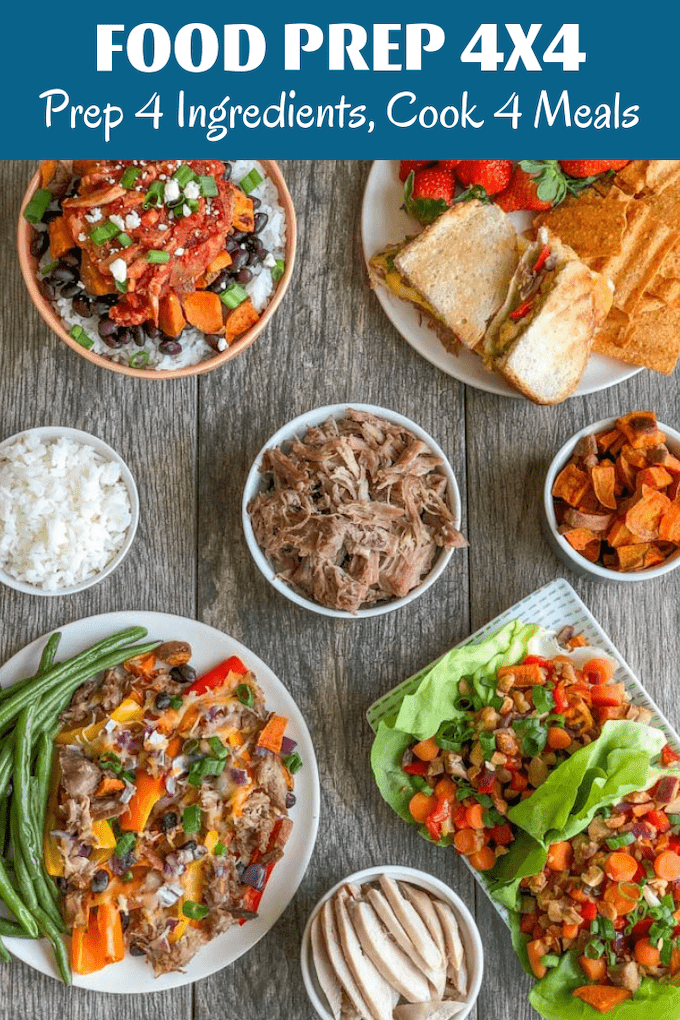
Four Easy Pulled Pork Recipes made quickly using component food prep

Hi friends!

I’m here to share these Easy Pulled Pork recipes with you guys as another 4×4 flexible food prep idea! I actually made two recipes with pulled pork and two with chicken thighs but you could make all of them with either….or mix and match like I did. 

If you missed the first two 4×4’s, be sure to check out these Easy Farro Recipes and Easy Egg Recipes as well!

In each post, I’ll give you four ingredients to prep (at a minimum). You should be able to prep these four ingredients in under an hour so I also give you suggestions of other things you can prep if you have additional time. 

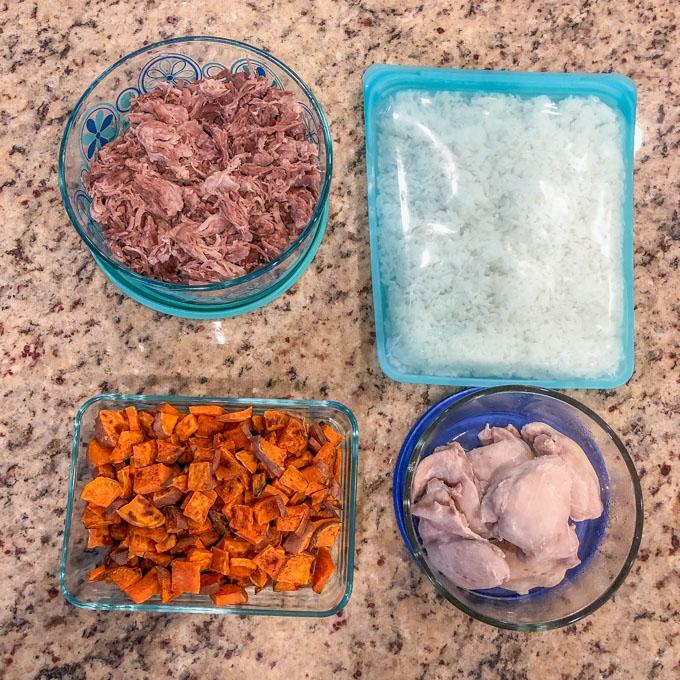
food prep for easy pulled pork or chicken recipes

Easy Pulled Pork Recipes

This week’s recipes:

  • Mini Pepper Pulled Pork Nachos
  • Pulled Pork and Egg Sandwich
  • Ginger Soy Lettuce Wraps
  • Chicken Tinga Bowls

Here’s what you need to prep:

  • Pulled pork: I used a 4-pound pork shoulder, cut into big chunks and cooked in the instant pot with some broth for about an hour
  • Chicken (thighs or breasts): I used 2 pounds chicken thighs in the instant pot with broth cooked for 10 min. Shred or leave whole and slice
  • Roasted Sweet Potatoes: Dice and roast at 400 for 20-30 minutes stirring occasionally
  • Rice (or another grain): Cook as desired on the stovetop or in the instant pot

Let’s talk options:

  • If you want to do all your meals with one meat, you could prep some additional veggies (roasted/steamed/sauteed) for your fourth item, or prep something totally separate like hb eggs to snack on, muffins for breakfast, an egg bake, etc
  • If you’re not a fan of using mini peppers for the nachos, use chips instead!
  • Tired of sandwiches? Take all the sandwich components and serve them in a bowl over some roasted sweet potatoes or rice
  • Don’t want to make the tinga sauce? Used a store-bought simmer sauce (Frontera makes good ones, or an Indian curry sauce)

Have more time?

  • Make some fajita veggies or an avocado crema for your tinga bowls or just make the tinga chicken ahead of time.
  • Prep some snacks or breakfast items for the week.
  • Roast a red pepper to add to your sandwiches or some extra veggies for side dishes.
  • Wash and dry lettuce leaves for the lettuce wraps.
  • Make the whole filling for the lettuce wraps so all you have to do is reheat.

Time for the “recipes”. I’m reluctant to even call them recipes because they are so easy and flexible. You really don’t need to measure ingredients for any of these and you can make the meals as large or small as you’d like depending on how many people you’re serving so this week I’m just giving you basic directions for most of them and letting you fill in the specific quantities.

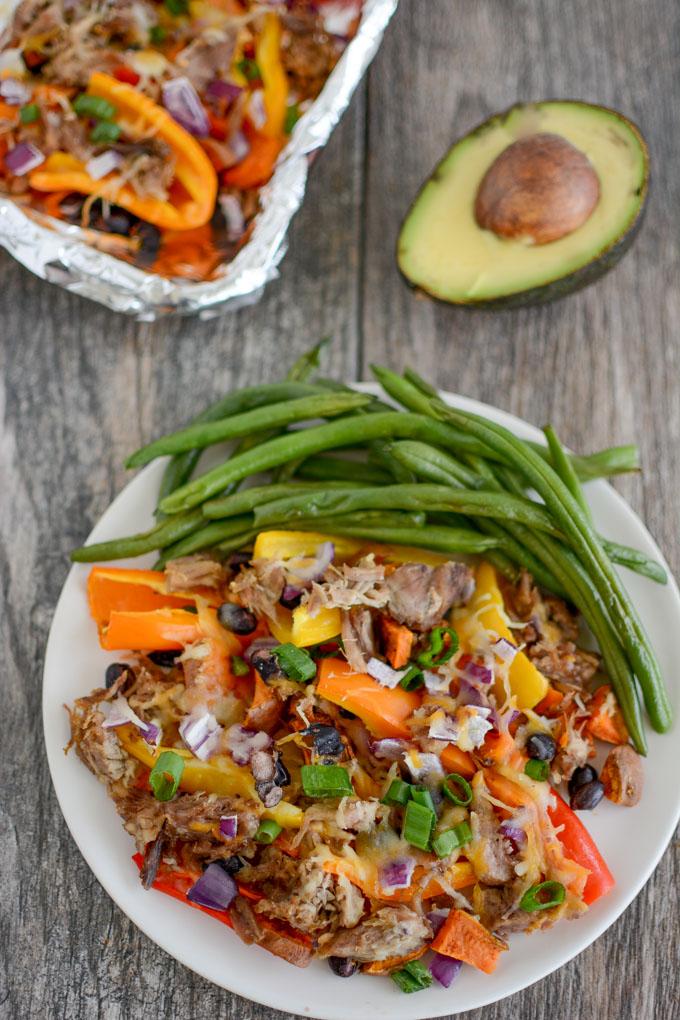
Mini Bell Pepper Pulled Pork Nachos

Mini Bell Pepper Pulled Pork Nachos

Grab a boneless pork shoulder/boston roast/whatever you can find at the store. If you’re using the instant pot, cut it into large chunks, add one cup broth or water, and cook for 60 minutes. Quick release and check to see if it shreds easily with a fork. If not, reseal and cook another 10-15 minutes. Shred and store. 

To make the nachos, cut the mini peppers in half and remove seeds/stems. (This could be done ahead of time). Arrange them on a foil-lined pan. Top with pulled pork, roasted sweet potatoes, black beans, onions, cheese, etc. Bake at 400 for 10 minutes. Add salsa and avocado. I like to bake mine because it softens the peppers just a bit but if you want them extra crunchy, you can also just broil for a minute or two to melt the cheese. If you don’t want to use peppers, use regular chips!

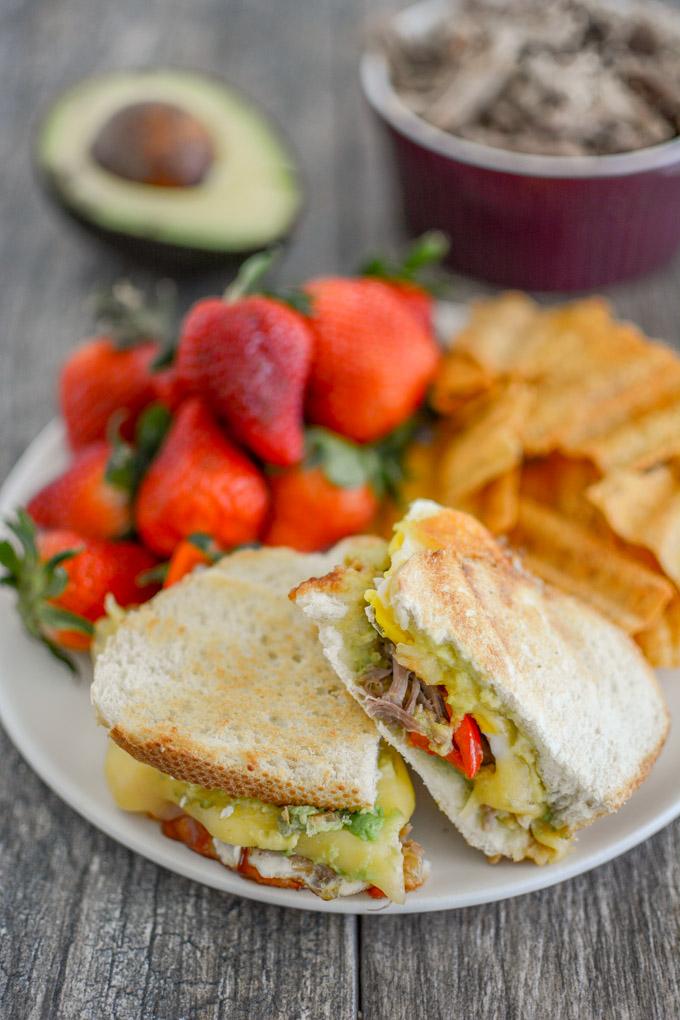
Pulled Pork and Egg Sandwich

BBQ Pulled Pork and Egg Sandwich

This is a replica of my all-time favorite sandwich from a cute little restaurant spot in downtown Columbus. Grab some delicious bread from the bakery and cut two thick slices. Top one slice with pulled pork, red pepper (roasted if you have it), bbq sauce, cheese (I used Gouda) and a fried egg. Smash avocado onto the other slice and put it on top. Add butter to the outsides of the bread and throw it on a griddle or panini press. Enjoy.

Ginger Soy Chicken Lettuce Wraps

Ginger Soy Lettuce Wraps

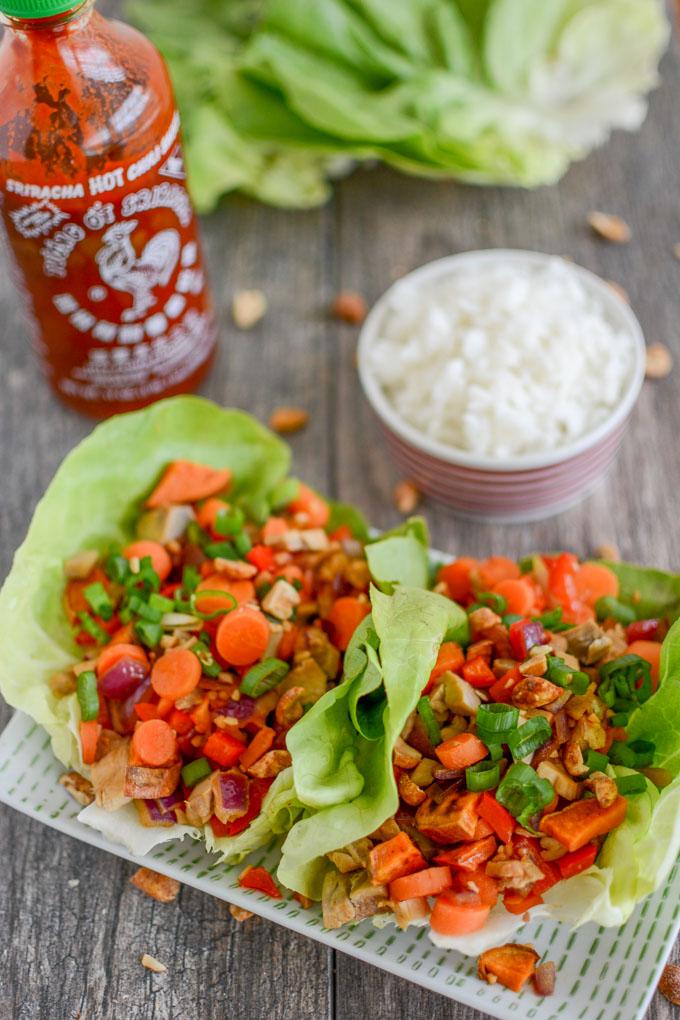
This can easily be done with either pork or chicken. I used chicken thighs cut into chunks. In a skillet, sauce some garlic, onions, chopped carrots and peppers for 5-10 minutes until soft. Add roasted sweet potatoes and cooked chicken. Add a few Tablespoons of soy sauce and some fresh ginger (I use ginger paste). I also like to add a Tablespoon of dijon mustard and a splash of maple syrup but that’s optional. You could also mix in some of your cooked rice instead of sweet potatoes if you wanted. Stir well and heat through. Spoon into lettuce cups and top with sriracha, green onions and chopped peanuts. 

Chicken Tinga Bowls

Chicken Tinga Bowls

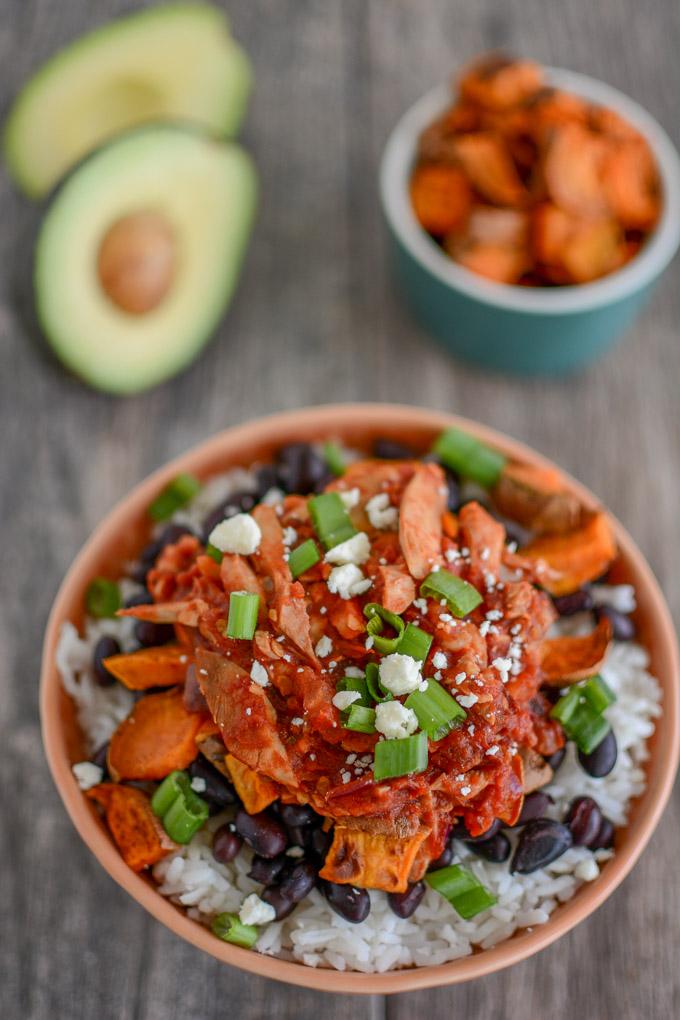
One of our favorite taco places serves these AMAZING Chicken Tinga Tacos that I get every time we go there. They’re full of tinga chicken, red onions, feta cheese and an avocado crema and they’re out of this world. I finally got around to looking up exactly what a tinga sauce is and it’s so easy to make at home! I turned these into bowls and ran out of time to make the crema but I’ll definitely be making Chicken Tinga Tacos next time.

1 (14.5 oz can) fire roasted crushed tomatoes
2-3 chipotle peppers in adobo sauce
1/2 cup diced onion
3 cloves garlic, minced
1 tsp oregano
1 tsp cumin
1 pound cooked chicken

In a pan, or small pot, saute garlic, onion and spices with some oil for 3-4 minutes. Chop the chipotle peppers (number depends on how spicy you want it) and add them to the pan along with your chicken. Pour in half the can of crushed tomatoes, stir to combine. Taste and add salt or additional peppers if needed. Decide what sauciness level you want. I like mine a bit less tomato-y so I usually only use half a can of tomatoes but you can add the whole can if desired!

Serve over bowls of rice, beans, roasted sweet potatoes etc and top with crumbled feta, avocado and green onions. Feel free to throw in some other roasted veggies if you want!

These Easy Pulled Pork Recipes can also be made with chicken or another protein source. Prep four simple ingredients on the weekend and combine for four quick, healthy meals during the week.

Here are some things you might need at the grocery store:

  • pork shoulder
  • chicken breasts or thighs
  • mini bell peppers
  • sweet potatoes
  • black beans
  • onion
  • green onion
  • tomatoes/salsa
  • avocados
  • shredded Mexican cheese
  • bread for sandwiches
  • eggs
  • roasted red peppers
  • cheese for sandwiches
  • bbq sauce
  • Bibb lettuce
  • ginger
  • soy sauce
  • carrots
  • garlic
  • peanuts
  • sriracha
  • fire roasted crushed tomatoes
  • chipotles in adobo (in a can in the mexican aisle)
  • oregano
  • cumin
  • rice

Enjoy!
–Lindsay–

Filed Under: Dinner, Food Prep, Ingredient Round-Ups Tagged With: Bell Pepper, Pulled Pork, Sweet Potato

Peanut Butter Avocado Cookies

March 27, 2019 by Lindsay 94 Comments

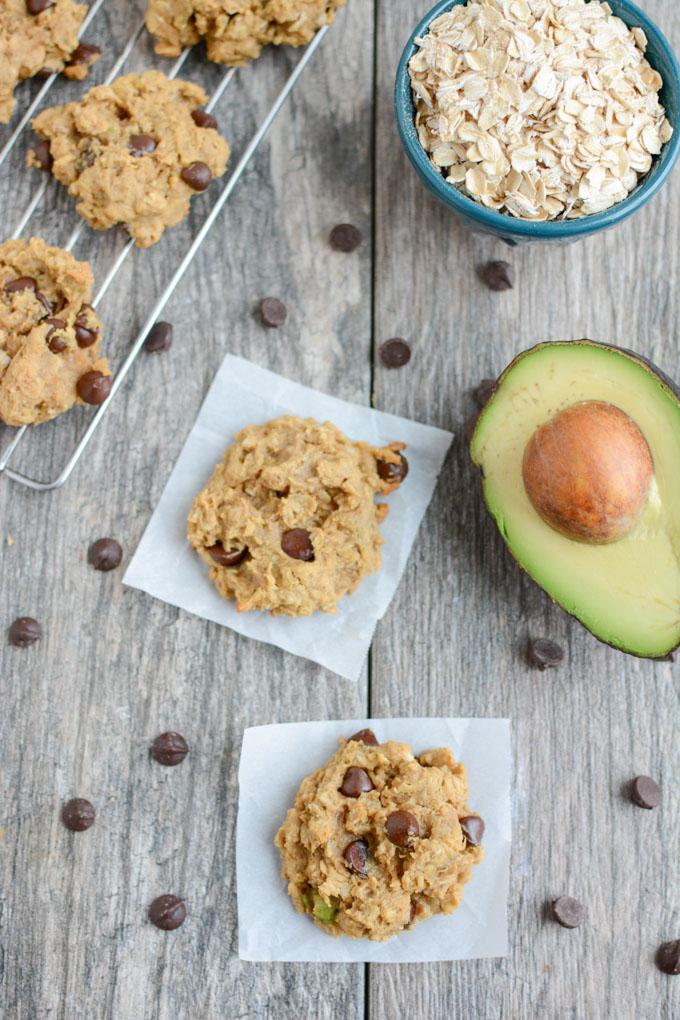
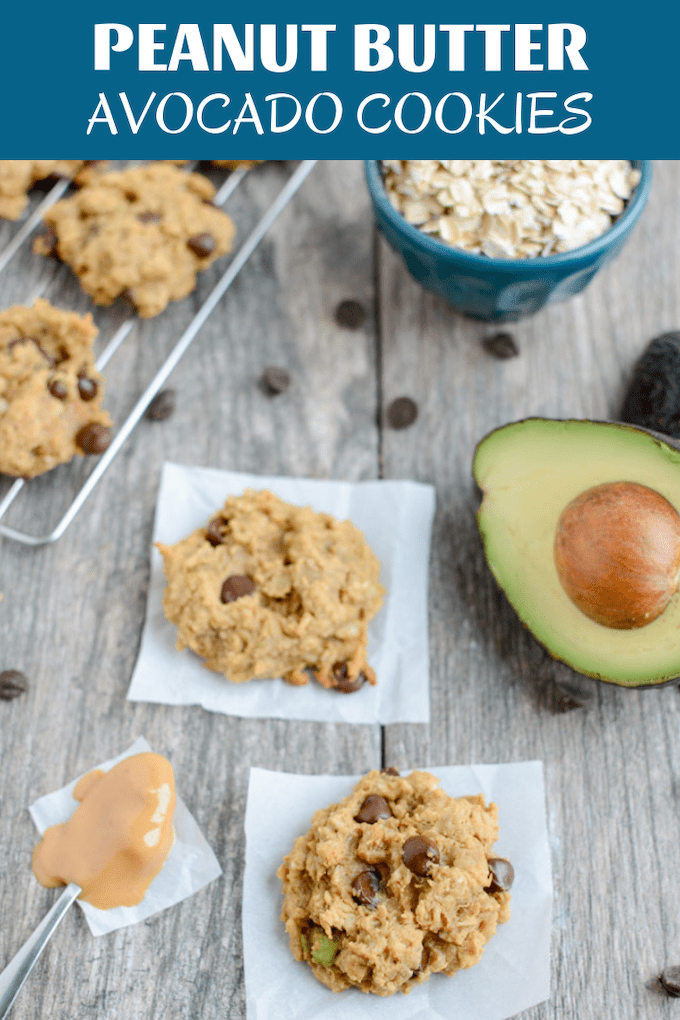
These Peanut Butter Avocado Cookies are gluten-free, dairy-free and packed with healthy fats! Enjoy one for an afternoon snack or for dessert after dinner!

These Peanut Butter Avocado Cookies are gluten-free, dairy-free and packed with healthy fats! Enjoy one for an afternoon snack or for dessert after dinner!

**Originally published May 2013. Photos updated March 2017**

Hi friends!

I’m resharing these Peanut Butter Avocado Cookies today because even though it’s been six years since I first shared them, I still make them regularly and love them just as much! They’re packed with healthy fats and a fun way to change things up from a regular chocolate chip cookie. Plus, I promise you can’t taste the avocado. Check out how easy they are to make!


When I originally made them, it took about 4 tries to get them right. But now I’ve zoned in on the correct recipe and even my kids love them. I even entered AND WON a recipe contest with these little beauties several years ago!

Here’s how you make them:

Print

Peanut Butter Avocado Cookies

Peanut Butter Avocado Cookies 2
Print Recipe

5 Stars 4 Stars 3 Stars 2 Stars 1 Star

4.7 from 6 reviews

These Peanut Butter Avocado Cookies are gluten-free, dairy-free and packed with healthy fats! Enjoy one for an afternoon snack or for dessert after dinner!

  • Prep Time: 5 minutes
  • Cook Time: 14 minutes
  • Total Time: 19 minutes
  • Yield: one dozen cookies 1x

Ingredients

Scale
  • 1/3 c mashed avocado
  • 2/3 c peanut butter
  • 1 egg
  • 1/4 cup maple syrup (or honey)
  • 3/4 c oats
  • 1/2 tsp baking powder
  • 1/2 c dark chocolate chips

Instructions

  1. Combine wet ingredients until well mixed.
  2. Add dry ingredients.
  3. Stir in chocolate chips.
  4. Scoop onto baking sheet and flatten slightly with a fork.
  5. Bake at 350 for 12-14 minutes.

Did you make this recipe?

Tag @theleangreenbean on Instagram

 These cookies are so simple even my toddler can make them! Be sure to try them out next time you have an extra avocado laying around!

These Peanut Butter Avocado Cookies are gluten-free, dairy-free & packed with healthy fats! Enjoy one for an afternoon snack or dessert.


Dig in, friends.

Let’s chat! Have you ever baked with avocado?

Enjoy!
–Lindsay–

Filed Under: Baking, Dessert Tagged With: Avocado, Chocolate Chips, Egg, Maple Syrup, Oats, Peanut Butter

Should I See A Pelvic Floor Specialist?

March 25, 2019 by Lindsay 9 Comments

The answer to Should I See A Pelvic Floor Specialist and other questions relating to what the pelvic floor is, signs of damage, whether new moms should see one during pregnancy or after delivery and more!

pregnant mom - should i see a pelvic floor specialist

Hi friends!

Should I see a pelvic floor specialist? That’s a question I found myself asking a few months ago so we’re  taking a break from food today to talk about the pelvic floor. A couple of months ago I mentioned that I went to see a pelvic floor therapist for the first time after having baby 3. It’s something I should have done after each kid but if you want the truth, 4 years ago I had never even heard of a pelvic floor. Enter Instagram and a huge rise in the number of people talking about it, which left me wondering- should I see a pelvic floor specialist?

After a little research, I decided I should.  I met with a PFPT, who did an internal exam, asked lots of questions etc, determined I didn’t have any major issues. I went on my way and kind of forgot about it. A few weeks later, I was having intense hip pain. I’ve always struggled with hip pain and have actually been seeing a muscle activation specialist for about 2 years now. They’ve gotten a lot better but after baby, they were pretty much back where they started. We determined that the problem could actually be stemming from my pelvic floor. Mind blown. 

When I mentioned this on my IG stories, I got a huge number of questions about the pelvic floor and it is clearly not my area of expertise. But i think this is a super important topic, especially for moms, so I knew I wanted to help educate. I reached out to 3 physical therapists who specialize in pelvic floor/women’s health and asked them to answer some of the questions my followers had! And then I compiled them all into a blog post for easy reference!

Huge thanks to these ladies for their expertise:

  • Krystle Howard, PT, DPT of Expecting and Empowered 
  • Jessica Valent, PT of Jessica Valent Pilates
  • Allison Bell, PT, DPT

Ready to learn? Here we go!

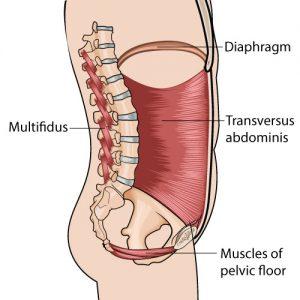
pelvic floor muscles

What is the pelvic floor and how does it work?

The “pelvic floor” is a group of muscles that are housed inside your pelvis. It forms a basin-like structure that spans from your tailbone to your pubic bone. Together they form a sling of muscles that provide support and help stabilize EVERYTHING above, including your bladder, uterus, rectum/bowels & all your abdominal cavity contents. The muscles themselves work like any other skeletal muscle in the body (think biceps) they contract to help hold in urine/stool/gas and relax to help empty bladder/bowel. They are also a critical player in “core stability” so they help to stabilize our body against outside forces. The pelvic floor should work on its own without a lot of help from us, but in many cases, trauma or injury can occur which means we need to help re-educate and train the muscles again!

Should you see a pelvic floor therapist while pregnant or after delivery? How long after delivery should you wait before seeing one?

During pregnancy, you should definitely see a PFPT (pelvic floor physical therapist) if you’re having pain or significant incontinence. Internal work is only recommended in certain cases during pregnancy because it could disrupt the membranes and potentially cause contractions. However, external work can definitely be done during pregnancy and some PFPTs may specialize in pregnant patients and could help you prepare for delivery by training your pelvic floor and hip muscles, practicing positions, pushing techniques, etc.

After baby 100% YES! EVERY woman should see a PFPT after delivering children, regardless of how “easy” delivery was. If only to learn how to recruit their pelvic floor & that they are “okay”. Delivering a baby IS a major trauma to your body so proper recovery is necessary. A pelvic floor PT can re-teach you how to properly use your muscles after delivery.

It’s best to be cleared from your OB prior to PT postpartum, they will likely (& should) do an internal assessment to determine the health of your pelvic floor and most want you to be cleared first.

An additional factor to consider is your insurance… some only give 60 CONSECUTIVE days of therapy PER calendar year, so if that’s the case, waiting until you’re postpartum may be the better option.

IMG 9332 e1553084284559

How long after giving birth is it too late to see a therapist?

It’s never too late!!! Early intervention is always best but it’s NEVER EVER TOO LATE! Anyone having incontinence, pain with sex or pelvic pain, even ten years after giving birth, could benefit from the proper training. Both a Women’s health PT and an orthopedic PT are great options because an orthopedic PT can also help with other postpartum problems such as back pain, carpal tunnel, and other problems related to being a mom.

Should only moms see pelvic floor therapists? If not, who else might benefit?

Everyone has a pelvic floor & pelvic floor dysfunction is NOT isolated to pregnancy & postpartum. Or even just women. Men have a pelvic floor and can have problems as well and there is also a need in the transgender community as transitional surgeries become more common. You should see a PFPT if you experience urine leakage, pain with intercourse, pain with tampon insertion, endometriosis, pain in your pelvis…), have bowel troubles (both constipation and bowel leakage) or anything else that doesn’t “seem right”. This could be heaviness or pressure that’s new or changing.

PFPTs are seeing more and more women in their 60’s and 70’s who benefit tremendously from pelvic floor PT. As our estrogen decreases with age, our muscle elasticity also decreases. That means the musculature in our vaginal wall and pelvic floor loosens. Prolapse becomes very common as well as incontinence.

How can you find a pelvic floor therapist in your area? What should their title be? What degrees/certifications should they have?

This can be the hardest part!!! Finding a good PFPT is tough, the field is still small. Start by asking around. Ask your OB, your primary care doctor, friends or other health care professionals you know (chiropractor, PT, OT, acupuncture, etc). Look online by searching “women’s health PT” or “pelvic floor PT” in your area or go to www.apta.org, click search for a PT and choose the Women’s health category.

Their title will likely just be Physical Therapist but they should specialize in “women’s health” or “pelvic health”, they should have continuing education courses which have trained them in treating the pelvic patient.Degrees necessary are at minimum a masters or doctorate in physical therapy (DPT or MSPT).

More than anything you want someone you have a personal rapport with and who you trust. This can be a frustrating and scary and confusing time and it obviously involves a personal part of your body. If you meet someone and you don’t feel listened to or cared for or you don’t see a clear plan in place, find someone else. Keep searching and advocating for yourself until you get the care you need.

family of 5

Is it really necessary for all moms to see one?

Likely, yes. If you had major knee surgery, you wouldn’t expect to just go home, rest for 6 weeks and then resume normal activities on your own. You’d expect surgery, healing and then rehab. Pregnancy is a traumatic event that happens to our body. We go through 9 months of physical changes, then months of hormonal changes while caring for a newborn. We need to change the stigma that women should be “normal” after a few weeks giving birth.

This doesn’t mean every woman will have pelvic floor problems postpartum but many do. And even more can have problems develop months or years after giving birth. That means you can feel great after birth, start running right away and being hard on your body, and not know you are causing damage. It would be great for everyone to know how to protect their bodies for the long term. Pelvic floor PT isn’t a bad thing. It can be extremely beneficial and can open your eyes to things you didn’t think we wrong & should be normalized. In many European countries (Sweden, Norway, France, Germany) its standard practice for women to be AUTOMATICALLY sent to PT postpartum regardless of birth event or symptoms. Preventative Rehabilitation is key for long term health & wellness.

The problem with moms though is that they will fall off the bandwagon, meaning that they’ll come in for one or two sessions (when really they need 6) until its partially better and then their follow through is poor. Resources like the Expecting & Empowered Guides are meant to “pre-hab” these injuries before they happen, if they happen, and after they happen. The strength training is specific to moms and can help provide a long term fix.

How would you even know you have an issue/What sort of issues could your pelvic floor be causing?

  • pain: in pelvic floor, with intercourse, during menstruation, with tampon insertion…
  • Pressure “down there”
  • Urinary incontinence: none is normal… running to the bathroom, leaking when coughing/sneezing/laughing/lifting/exercising, waking at night to go to the bathroom
  • Bowel problems: constipation, pain with bowel movements, leaking stool…
  • Diastasis recti
  • Back pain
  • Prolapse

Your pelvic floor could be leading to many problems, for example, it could even lead to a foot problem because if your pelvis can’t stabilize, then you have SI and pubic symphysis problems, thus leading to foot pain. The pelvic floor in an essential part of making things automated in your body.

diaphragmatic breathing

What exercises can be done during pregnancy to help prevent problems?

While pregnant it’s important to learn how to recruit and use your pelvic floor muscles. You should also learn how to manage pressure systems (breath, core, pelvic floor) by working on diaphragmatic breathing and activation of the deep core muscles (TA). . It can be beneficial to avoid certain exercises like planks, jumping, lunging, twisting etc when you reach a certain point in pregnancy and not return to them too quickly postpartum.

Sometimes problems can’t be avoided. They can often be caused by long labors, long pushing and the use of vacuums and forceps. Anyone who has experienced those would benefit from pelvic floor PT.

What are the best at home exercises to strengthen the pelvic floor and how often to do them?

There is no specific exercise that is best for your pelvic floor. The best is a combination of exercises that changes the angle that the pelvic floor is at. The best thing to do is to start BREATHING PROPERLY and then start turning on your pelvic floor as you do things so that you can begin to automate this system. ex. Kegel in quadruped

Expecting and Empowered has fitness guides for each trimester of pregnancy (which also teach diaphragmatic breathing) as well as a postpartum guide. You can find some pelvic floor exercises in this video from Jessica. You can also check out this course from Julie Wiebe, PT which is a series of videos which are written for the female and can teach you how to find your pelvic floor & how to recruit it with your breath.

The answer to Should I See A Pelvic Floor Specialist and other questions relating to what the pelvic floor is, signs of damage and more!

Hope this was helpful! There is obviously so much more information about the pelvic floor out there and lots more to learn. I encourage everyone (especially moms) to consult with a pelvic floor PT if you haven’t already!  Here are a few more people to follow on Instagram for more pelvic floor info:

  • Expectingandempowered
  • Jessicavalentpilates
  • Brianna.Battles
  • The.vagina.whisperer
  • The.smiling.vagina
  • Drsarahduvall
  • Pelvicguru1
  • Lisa.marie.ryan
  • Thetummyteam
  • Mypelvicfloormuscles
  • Jessiemundell
  • Movewell.pt
  • Birthfit

Enjoy!
–Lindsay–

Filed Under: Kids

Easy Egg Recipes

March 22, 2019 by Lindsay 1 Comment

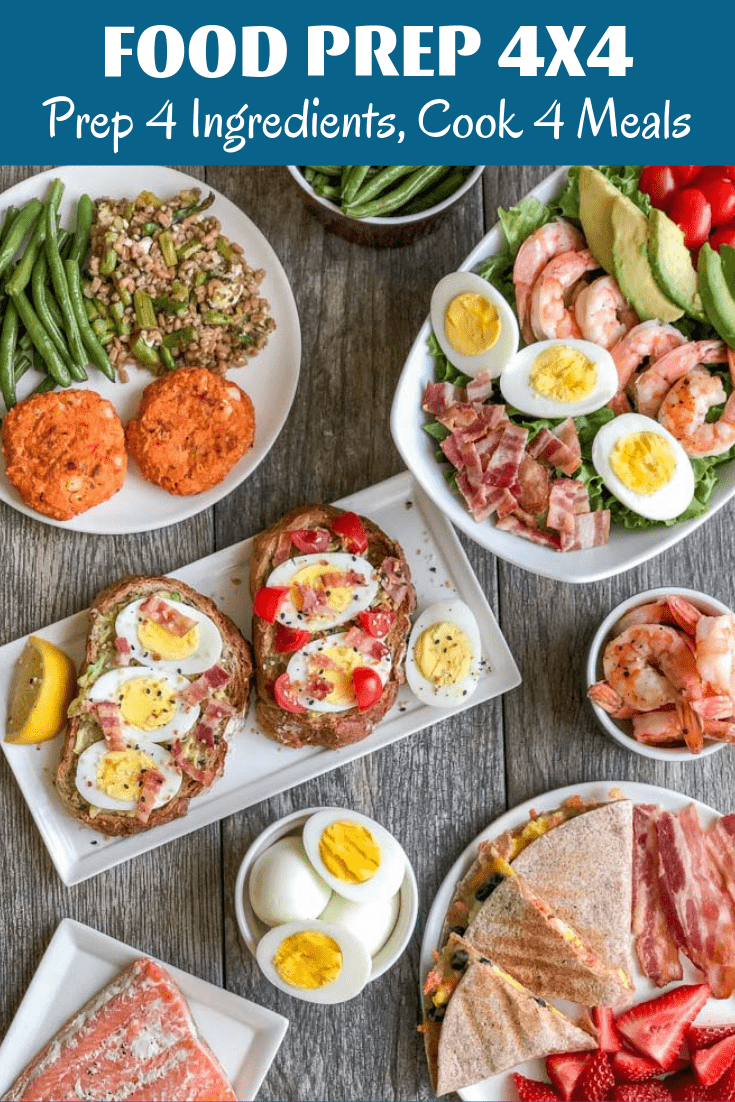
These easy egg recipes are perfect for lunch or dinner. You can add salmon to many of the recipes for an extra dose of omegas and heart-healthy fats. Use food prep to make mealtime even easier!

These easy egg recipes are perfect for lunch or dinner. You can add salmon to many of the recipes for an extra dose of omegas and heart healthy fats. 

Hi friends!

We’re back for another edition of the 4×4 Flexible Food Prep Method. I’m so glad you guys enjoyed the Easy Farro Recipes. In case you’re new here, I developed this component food prep method and series because I favor prepping ingredients versus full meals on the weekend. I like having prepped ingredients on hand that I can throw together quickly during the week. 

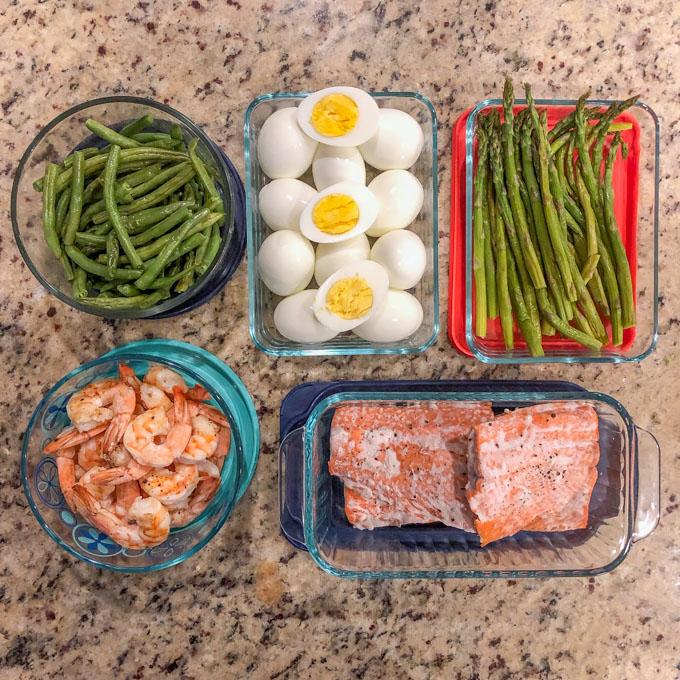
This is the second post in the series. In each post, I’ll give you four ingredients to prep (at a minimum). You should be able to prep these four ingredients in under an hour so I’ll try to give you suggestions of other things you can prep as well if you have additional time. This week we’re focusing on eggs and salmon. 

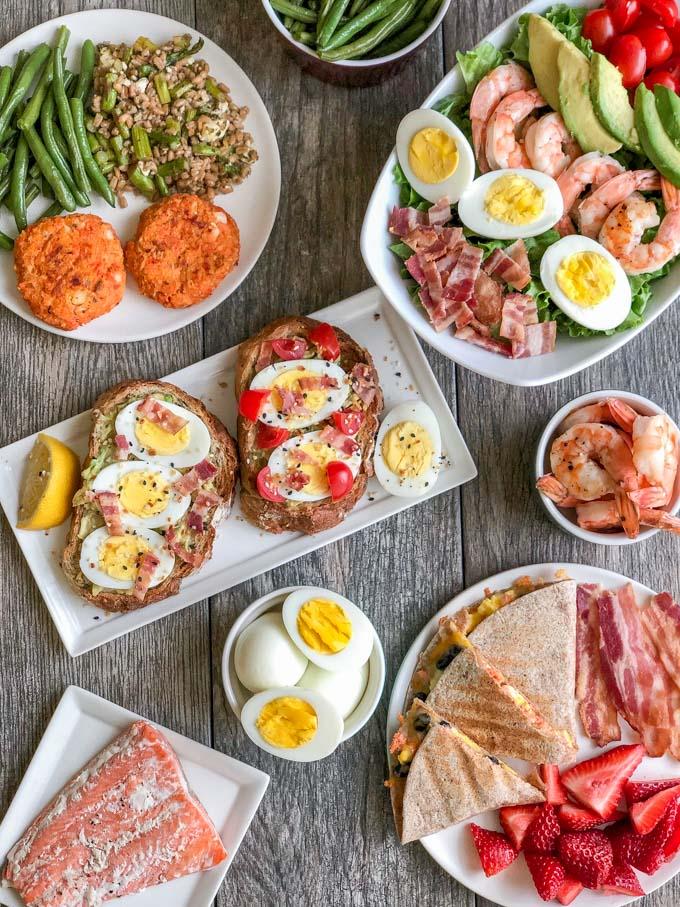
Easy egg and salmon recipe food prep

Easy Egg Recipes

Alright, so what’s on the menu this week?

  • Salmon Breakfast Quesadillas
  • Salmon Cakes
  • Everything Bagel Avocado Toast with Eggs
  • Shrimp Cobb Salad

Here’s what you need to prep to help make this week’s meals easier:

  • Baked salmon (I did two 12 oz packages. Just place on a baking sheet lined with foil, bake at 400 for 12-20 min depending on the thickness of the salmon. Seasoning however you want!)
  • Grilled shrimp (1 pound. Put them on skewers and throw them on the grill for 2 min per side. I did mine on the George Foreman grill on the counter)
  • Hard Boiled Eggs (One dozen. I cook mine in the instant pot on the rack with 1 cup water. 5 minutes, 5 min natural release, 5 min ice bath)
  • Roasted veggies or a grain (your choice!) I ended up roasting green beans and asparagus (and also made farro)

Let’s talk options:

  • Not crazy about baked salmon? Pan sear it! You could even make some extra to enjoy pan-seared Sunday night.
  • Don’t like salmon or shrimp? Use tuna for the salmon cakes or make some chicken for the quesadillas and/or cobb salad.
  • Have extra salmon? Throw some on your avo toast along with the eggs!
  • If you don’t like one of these recipes, you could easily make a few minor adjustments and swap one of yours into the meal plan.

Have more time? 

  • You can actually make the salmon cakes ahead of time and just reheat during the week (or eat cold). 
  • Roast some extra veggies or cook a grain to use as side dishes. 
  • Bake some bacon.
  • Prep the lettuce for your salad.
  • This week I ended up prepping my lettuce, baking bacon and roasting green beans and asparagus.

Now let’s dive into the recipes. Again, these recipes are quite forgiving. You can use the ideas and sub in different proteins based on your personal preferences and you don’t need exact quantities. And you can easily make a small or large amount depending on how many people you’re prepping for. Enjoy them for lunch or dinner!

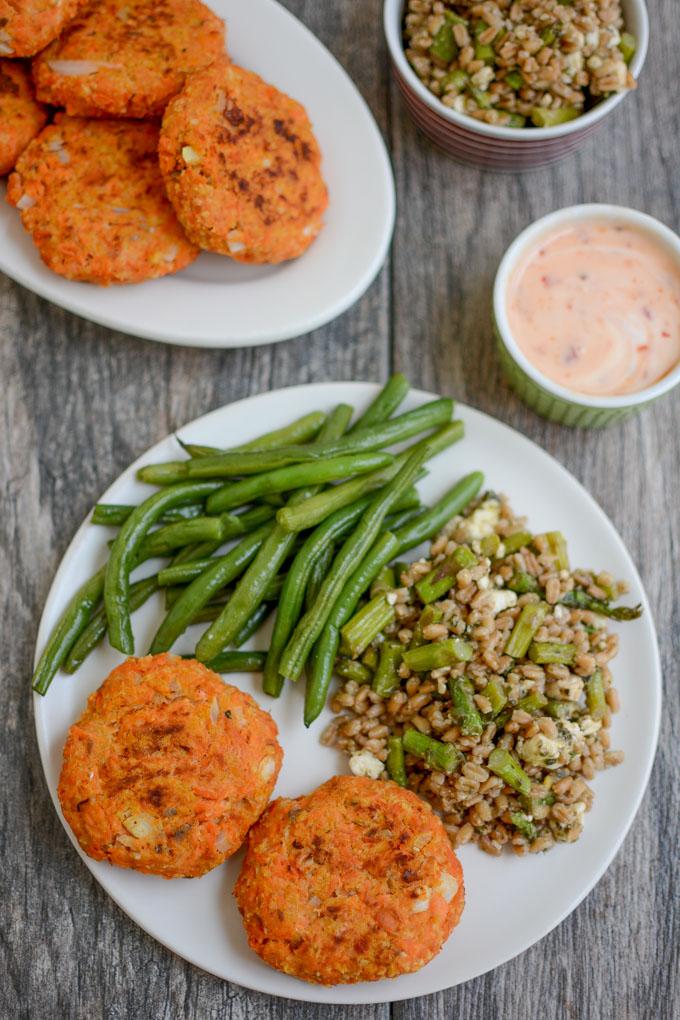
Salmon Cakes with roasted green beans and farro salad

Salmon Cakes

Ingredients

12 ounces salmon, cooked
1/2 cup mashed sweet potato
1/4 cup hummus
1/2 cup onion (or green onion)
3 cloves garlic
1 Tbsp dijon mustard
1 tsp paprika
1 egg
1/2 cup breadcrumbs

Directions

  1. In a large bowl, flake salmon apart into pieces. 
  2. Add remaining ingredients and mix well. 
  3. Form into 8 cakes, place on a sheet pan lined with parchment paper and bake at 400 for 18 minutes, flipping once. 

Notes
-To make the mashed sweet potato I just poke holes in a sweet potato and microwave for 5 minutes. 
-For an easy dipping sauce, mix thai chili sauce and sriracha with plain yogurt to taste.
-For an easy side dish, I mixed some of the farro and roasted asparagus I prepped on Sunday with some crumbled feta, a little balsamic and a scoop of pesto!
– If you don’t like salmon, you could swap two cans of tuna!

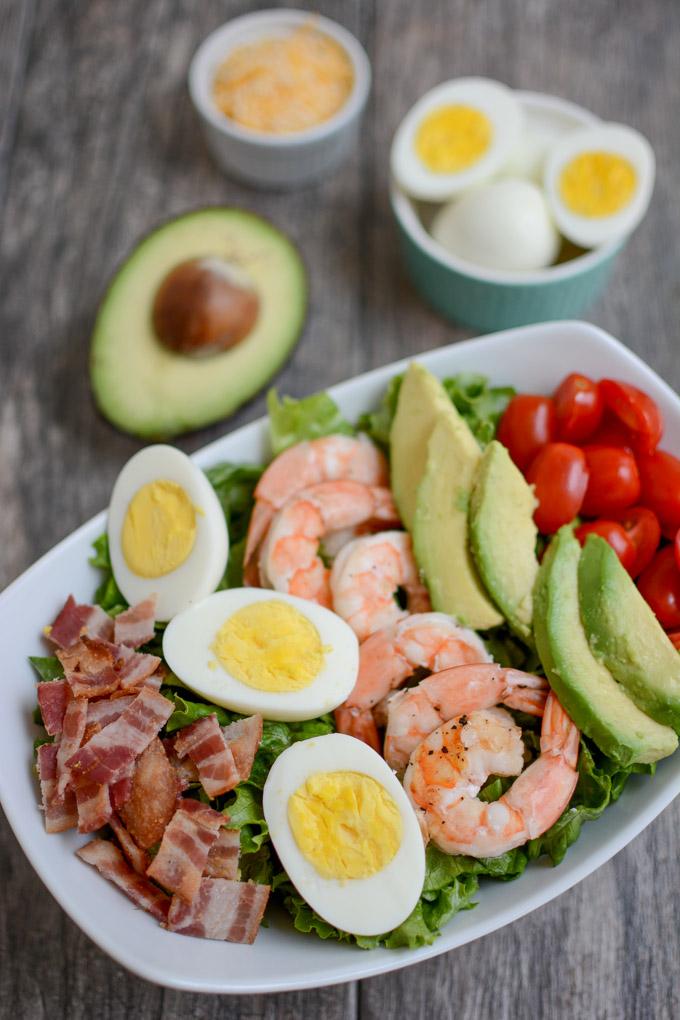
Shrimp Cobb Salad

Shrimp Cobb Salad

Ingredients (makes 4 salads)

8 cups leaf lettuce (or greens of your choice)
6 hard boiled eggs
1 pound grilled shrimp (or chicken)
1 large avocado
6-8 strips bacon, chopped
1 cup cherry tomatoes, sliced
shredded cheese

Directions

  1. Divide lettuce between 4 bowls. 
  2. Halve hard boiled eggs and add 1.5 to each bowl, along with 4 ounces of shrimp, avocado, bacon, cheese and tomatoes. 
  3. Serve with your favorite dressing.

Notes
– If you’re not a shrimp lover, make some grilled chicken, steak or even extra salmon to use on the salad. 
– Switch up your greens and use spinach, kale or a spring mix.
– Add some nuts/seeds for a little crunch.

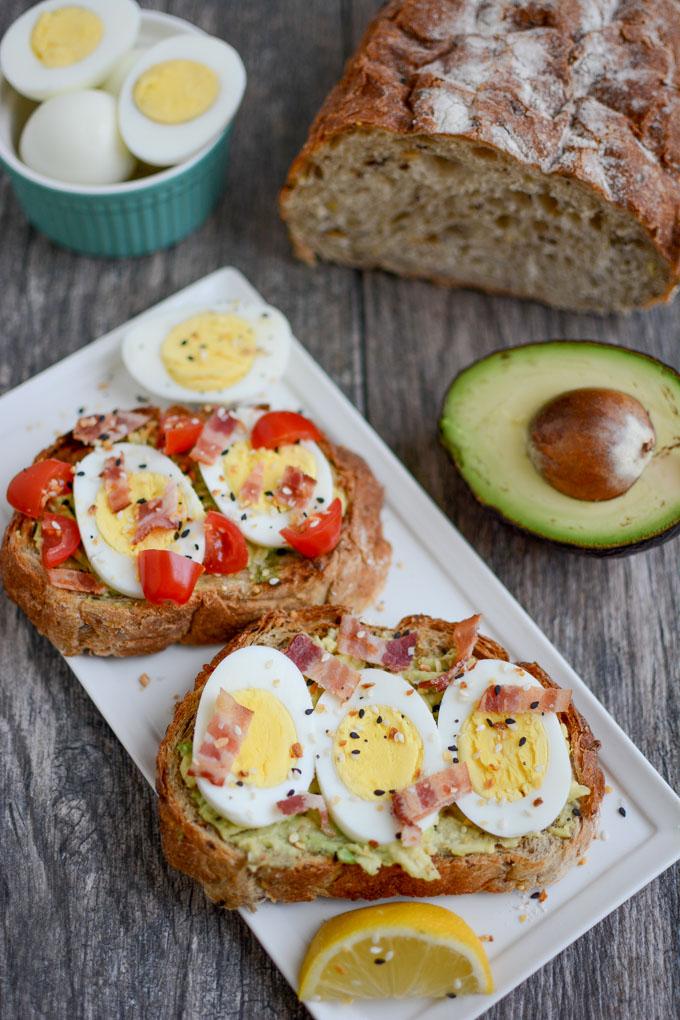
Avocado Toast with Hard boiled egg and everything bagel seasoning

Hard Boiled Egg Avocado Toast

Ingredients (serves 4)

8 slices of bakery bread of choice
2 large avocados
6 hard boiled eggs
chopped cooked bacon
chopped tomatoes
cooked salmon, flaked (optional)
everything but the bagel seasoning
lemon juice

Directions

  1. Slice bread to desired thickness and toast. 
  2. Spread with mashed avocado. Squeeze lemon juice on top if desired.
  3. Top with sliced hard boiled eggs, bacon, tomatoes (and salmon if desired)
  4. Sprinkle with everything but the bagel seasoning.

Notes
– I like to save this meal until later in the week because it’s super easy, great for lunch or dinner and a good way to use up any leftover salmon/shrimp/chicken you might have along with some hard boiled eggs which keep well all week.
– Bake the bacon over the weekend so you don’t have to do it when you’re making these to make them even quicker!
-Swap out sweet potato toast if you’re not a bread eater.

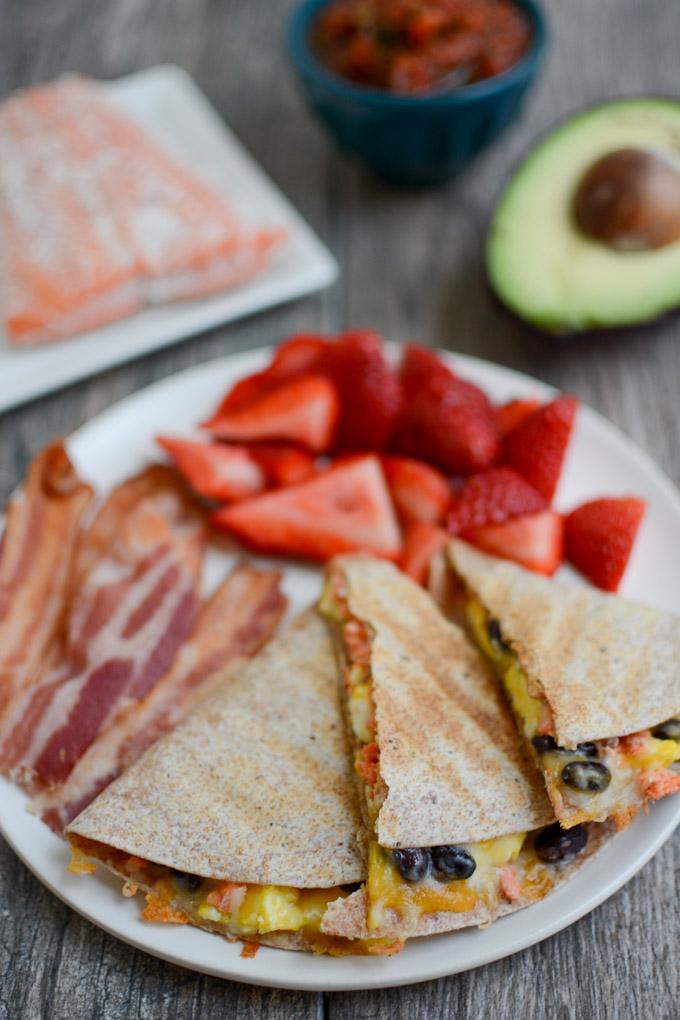
Salmon Breakfast Quesadillas

Salmon Breakfast Quesadillas

Ingredients (serves 4)

6 scrambled eggs
12 ounces salmon, cooked and flaked
3/4 cup black beans, drained and rinsed
shredded Mexican cheese
4 whole wheat tortillas
salsa and avocado for topping

Directions

  1. Spread scrambled eggs, flaked salmon, beans and cheese onto half of a tortilla. 
  2. Fold over and cook in pan, on griddle, on George Foreman, in microwave. 
  3. Repeat with remaining tortillas. 
  4. Cut into wedges and serve with salsa and avocado.

Notes
– Make these vegetarian by leaving out the salmon or swap salmon for grilled chicken, chicken sausage or other protein. 

These easy egg recipes are perfect for lunch or dinner. You can add salmon to many of the recipes for an extra dose of omegas and heart-healthy fats. Use food prep to make mealtime even easier!

Here’s a basic grocery list for you. Be sure to double check it and remove items you already have and read the recipes to see if you’re going to make any changes and adjust the grocery list accordingly.

  • 2 (12-oz) packages salmon (frozen or fresh)
  • 1 pound raw shrimp (i buy wild caught, peeled and deveined with tail on)
  • 1 large sweet potato
  • hummus
  • 1 medium onion
  • 1 bulb garlic
  • dijon mustard
  • paprika
  • 2 dozen eggs
  • breadcrumbs
  • 1 large head leaf lettuce
  • 4 large avocado
  • 1 package bacon
  • 1 container cherry tomatoes
  • Shredded mexican cheese
  • bakery bread for avocado toast (I used multigrain)
  • everything but the bagel seasoning
  • 1 lemon
  • 1 can black beans
  • whole wheat tortillas
  • salsa
  • optional: chicken or other protein to sub for salmon if desired. Tuna for cakes if desired.

Enjoy!
–Lindsay–

Filed Under: Food Prep, Dinner, Ingredient Round-Ups Tagged With: Avocado, Egg, Salmon

White Bean Muffins (or Bars!)

March 18, 2019 by Lindsay 68 Comments

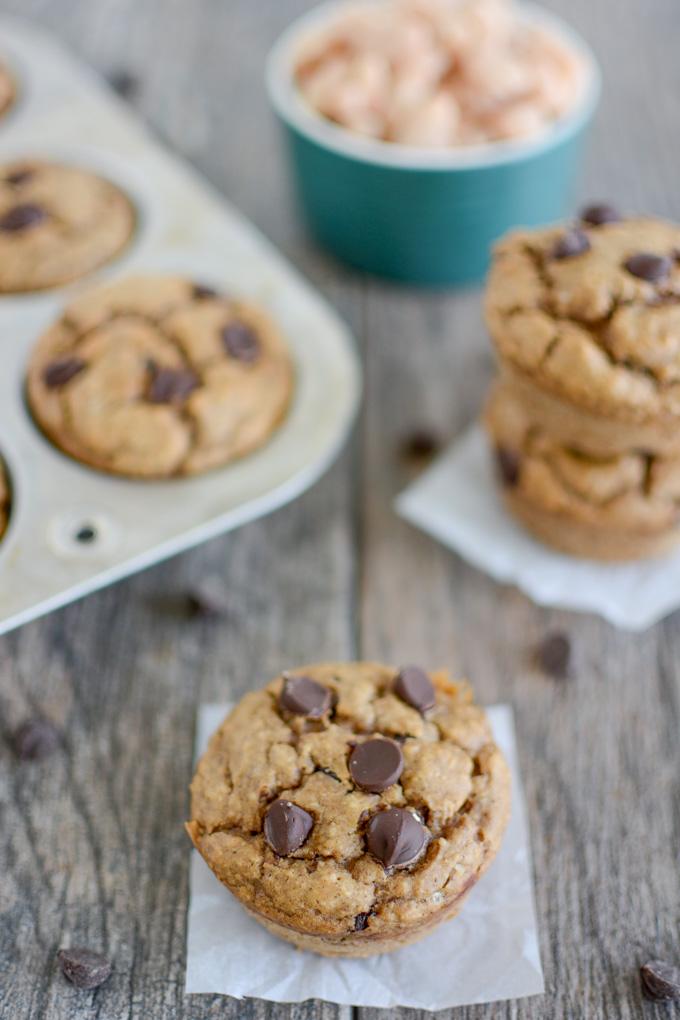
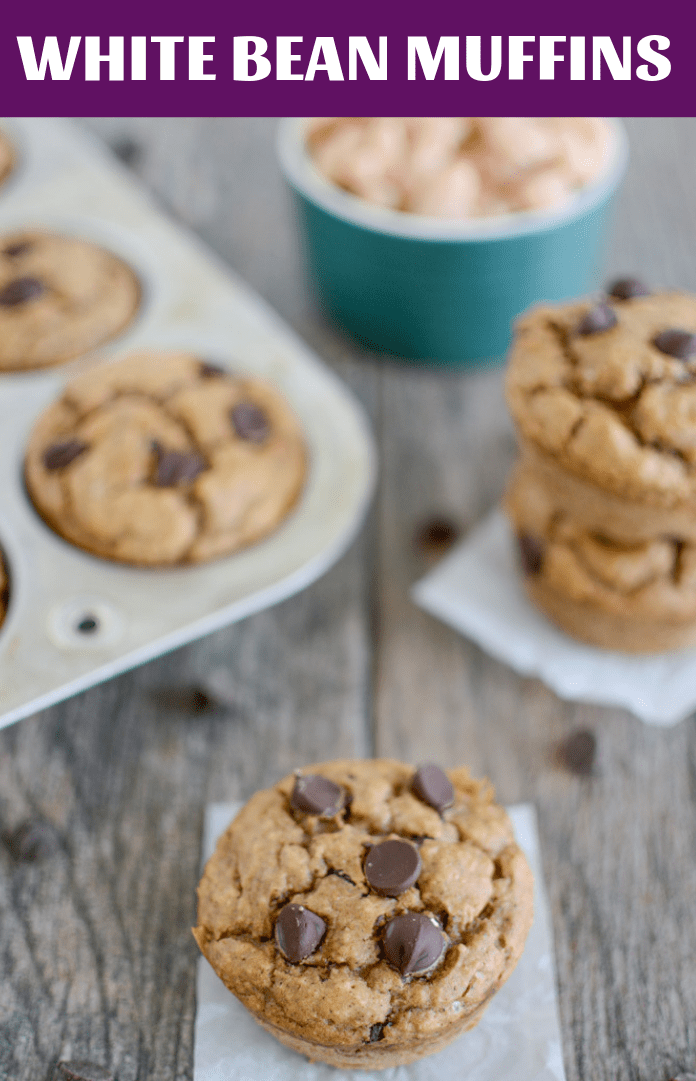
These White Bean Muffins (or bars!) pack an entire can of great northern beans into a dozen muffins. They’re full of protein and fiber and perfect for breakfast or snack time!

White bean muffins

Hi friends –

So excited to share these White Bean Muffins with you guys! I’ve been testing them for a few weeks now and even had several of you test them out on your families to see if they needed any tweaks!

The good news about these muffins is that you can’t taste the beans at all. I use great northern beans which have a very mild flavor to begin with and after you add in the nut butter, the taste is undetectable. They’re also gluten-free (use certified gluten-free oats if needed) and dairy-free. (PSST! If you need a nut-free version, try my Sweet Potato White Bean Bars!)

White Bean Baking Recipes

Want more bean baking recipes? Try these:

  • Sweet Potato White Bean Bars
  • Gluten-Free Pumpkin Bean Bread
  • Blondie Snickerdoodle Bars

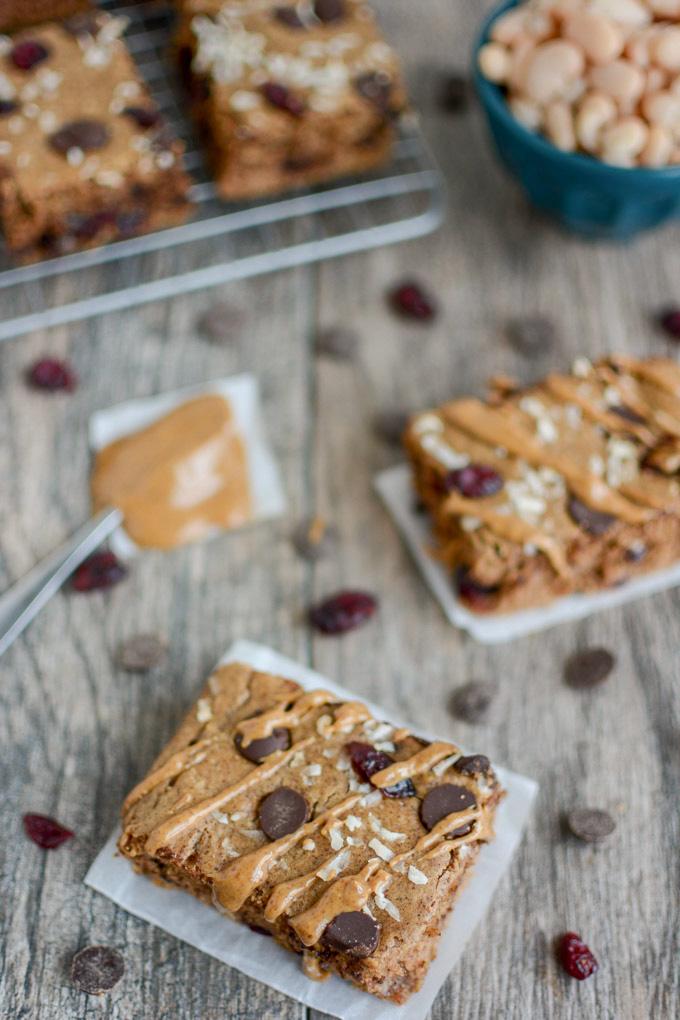
The first few times I made these, I used almond butter because I think it has a stronger flavor and I wanted it to cover any bean flavor. But I’ve tested them with peanut butter and the beans still go unnoticed. I also made them as bars at first and they’re great. My personal preference is muffins but you decide!

White Bean Bars with almond butter, craisins and coconut

You can also choose your favorite mix-ins. I’ve used just chocolate chips in a few batches and have also made bars that included Craisins and shredded coconut.

Here’s how you make these little beauties:

Print

White Bean Muffins (or Bars!)

White Bean Muffins 2 copy
Print Recipe

5 Stars 4 Stars 3 Stars 2 Stars 1 Star

4.9 from 27 reviews

These White Bean Muffins (or bars!) pack an entire can of great northern beans into a dozen muffins. They’re full of protein and fiber and perfect for breakfast or snack time!

  • Author: Lindsay

Ingredients

Scale

1 (15 oz can) great northern beans, drained and rinsed
2 eggs
1/3 cup maple syrup
3/4 cup rolled oats
1/2 cup peanut butter (or almond butter)
1 tsp baking soda
1 tsp cinnamon
1 tsp vanilla
1/2 tsp salt
chocolate chips, craisins, shredded coconut etc for optional mix-ins

Instructions

  1. Combine beans, eggs and maple syrup in the food processor and blend until smooth.
  2. Add oats, peanut butter, baking soda, cinnamon, vanilla and salt and blend again.
  3. Add mix-ins, pulse a few times to mix.
  4. Pour into greased or lined muffin tins (or 9×9 pan). Add additional toppings if desired.
  5. Bake at 375 degrees for 18-20 minutes.

Did you make this recipe?

Tag @theleangreenbean on Instagram

See how easy it is?

These White Bean Muffins (or bars!) pack an entire can of great northern beans into a dozen muffins. They're full of protein and fiber and perfect for breakfast or snack time!

Enjoy!
–Lindsay–
Filed Under: Baking, Breakfast, Healthy Muffins & Bars, Snack Tagged With: Chocolate Chips, Egg, Great Northern Beans, Maple Syrup, Oats, Peanut Butter

Easy Farro Recipes

March 15, 2019 by Lindsay 11 Comments

These Easy Farro Recipes can be made quickly throughout the week after prepping four simple ingredients during your food prep session. Component food prep is the key to saving you time during the week while still keeping your meal plan flexible.

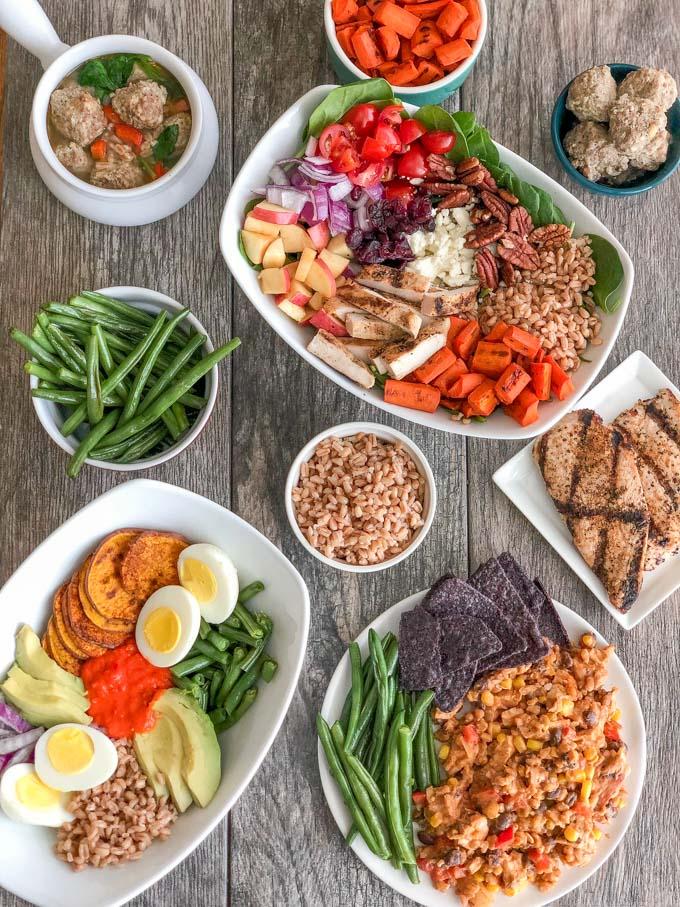
Easy Farro Recipes made quickly thanks to component food prep

Thanks to Bob’s Red Mill for sponsoring this post.

Hi friends!

I am SO excited to kick off this new 4×4 series on the blog. You guys have been asking for something like this for a long time now and I finally got my act together. You know I love food prep but my deeper, more specific love, is for component food prep. Instead of prepping full meals ahead of time, I like to prep ingredients and then quickly throw them together to make meals during the week. 

Many of my readers have told me that they like the concept of component food prep but they’re unsure how to execute it. They can make the ingredients but then can never figure out how to put them together during the week so that they don’t end up eating the same thing over and over. Well, I’m here to teach you. 

This is the first post in the series. In each post, I’ll give you four ingredients to prep (at a minimum). You should be able to prep these four ingredients in under an hour so I’ll try to give you suggestions of other things you can prep as well if you have additional time. 

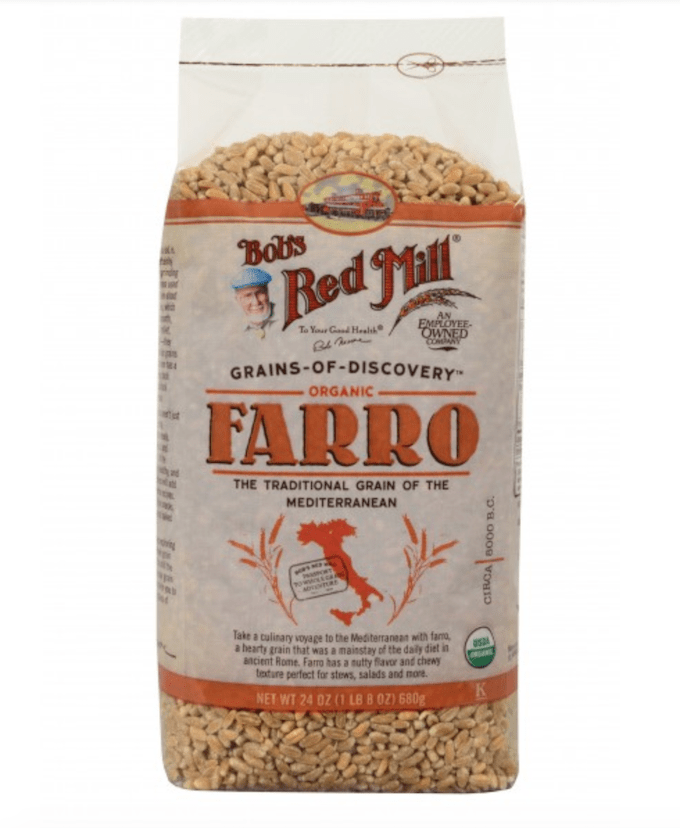
Today the four recipes I’m sharing feature Bob’s Red Mill farro. Farro is one of my favorite things to food prep. If you’ve followed me for any length of time you know I make it pretty much ever week. And I always get lots of questions about what exactly it is, what it tastes like, how to cook it, how to eat it, etc so I thought this would be a good way to introduce you to it!

Bob's Red Mill Farro

Farro (pronounced FAR-oh, although i’ve always called it FAIR-oh) is an ancient grain and relative of modern day wheat. It’s not gluten-free but it does have less gluten than wheat and it’s a good source of protein and fiber. Although similar in shape to rice, it’s much chewier (which I love), but it can be used in most recipes that call for rice. Bob’s Red Mill’s farro grains are lightly scratched for a faster cooking time. Although the bag says to cook for 30 minutes, I’ve found mine to be done in 15. 

To cook it, I simply add to a pot, cover with water (you don’t have to measure because you can just drain the excess water when it’s done cooking) and then put a lid on the pot and bring it to a boil. Once it’s boiling I crack the lid and reduce the heat and let it simmer for 15 minutes. 

Some sources say 1 cup dry farro yields 3 cups cooked but I’ve found that for me 1 cup dry yields just over 2 cups cooked as farro doesn’t expand as much as some grains do when cooked. 

I hope you’re excited to try farro if you haven’t already because it’s definitely a favorite around here. 

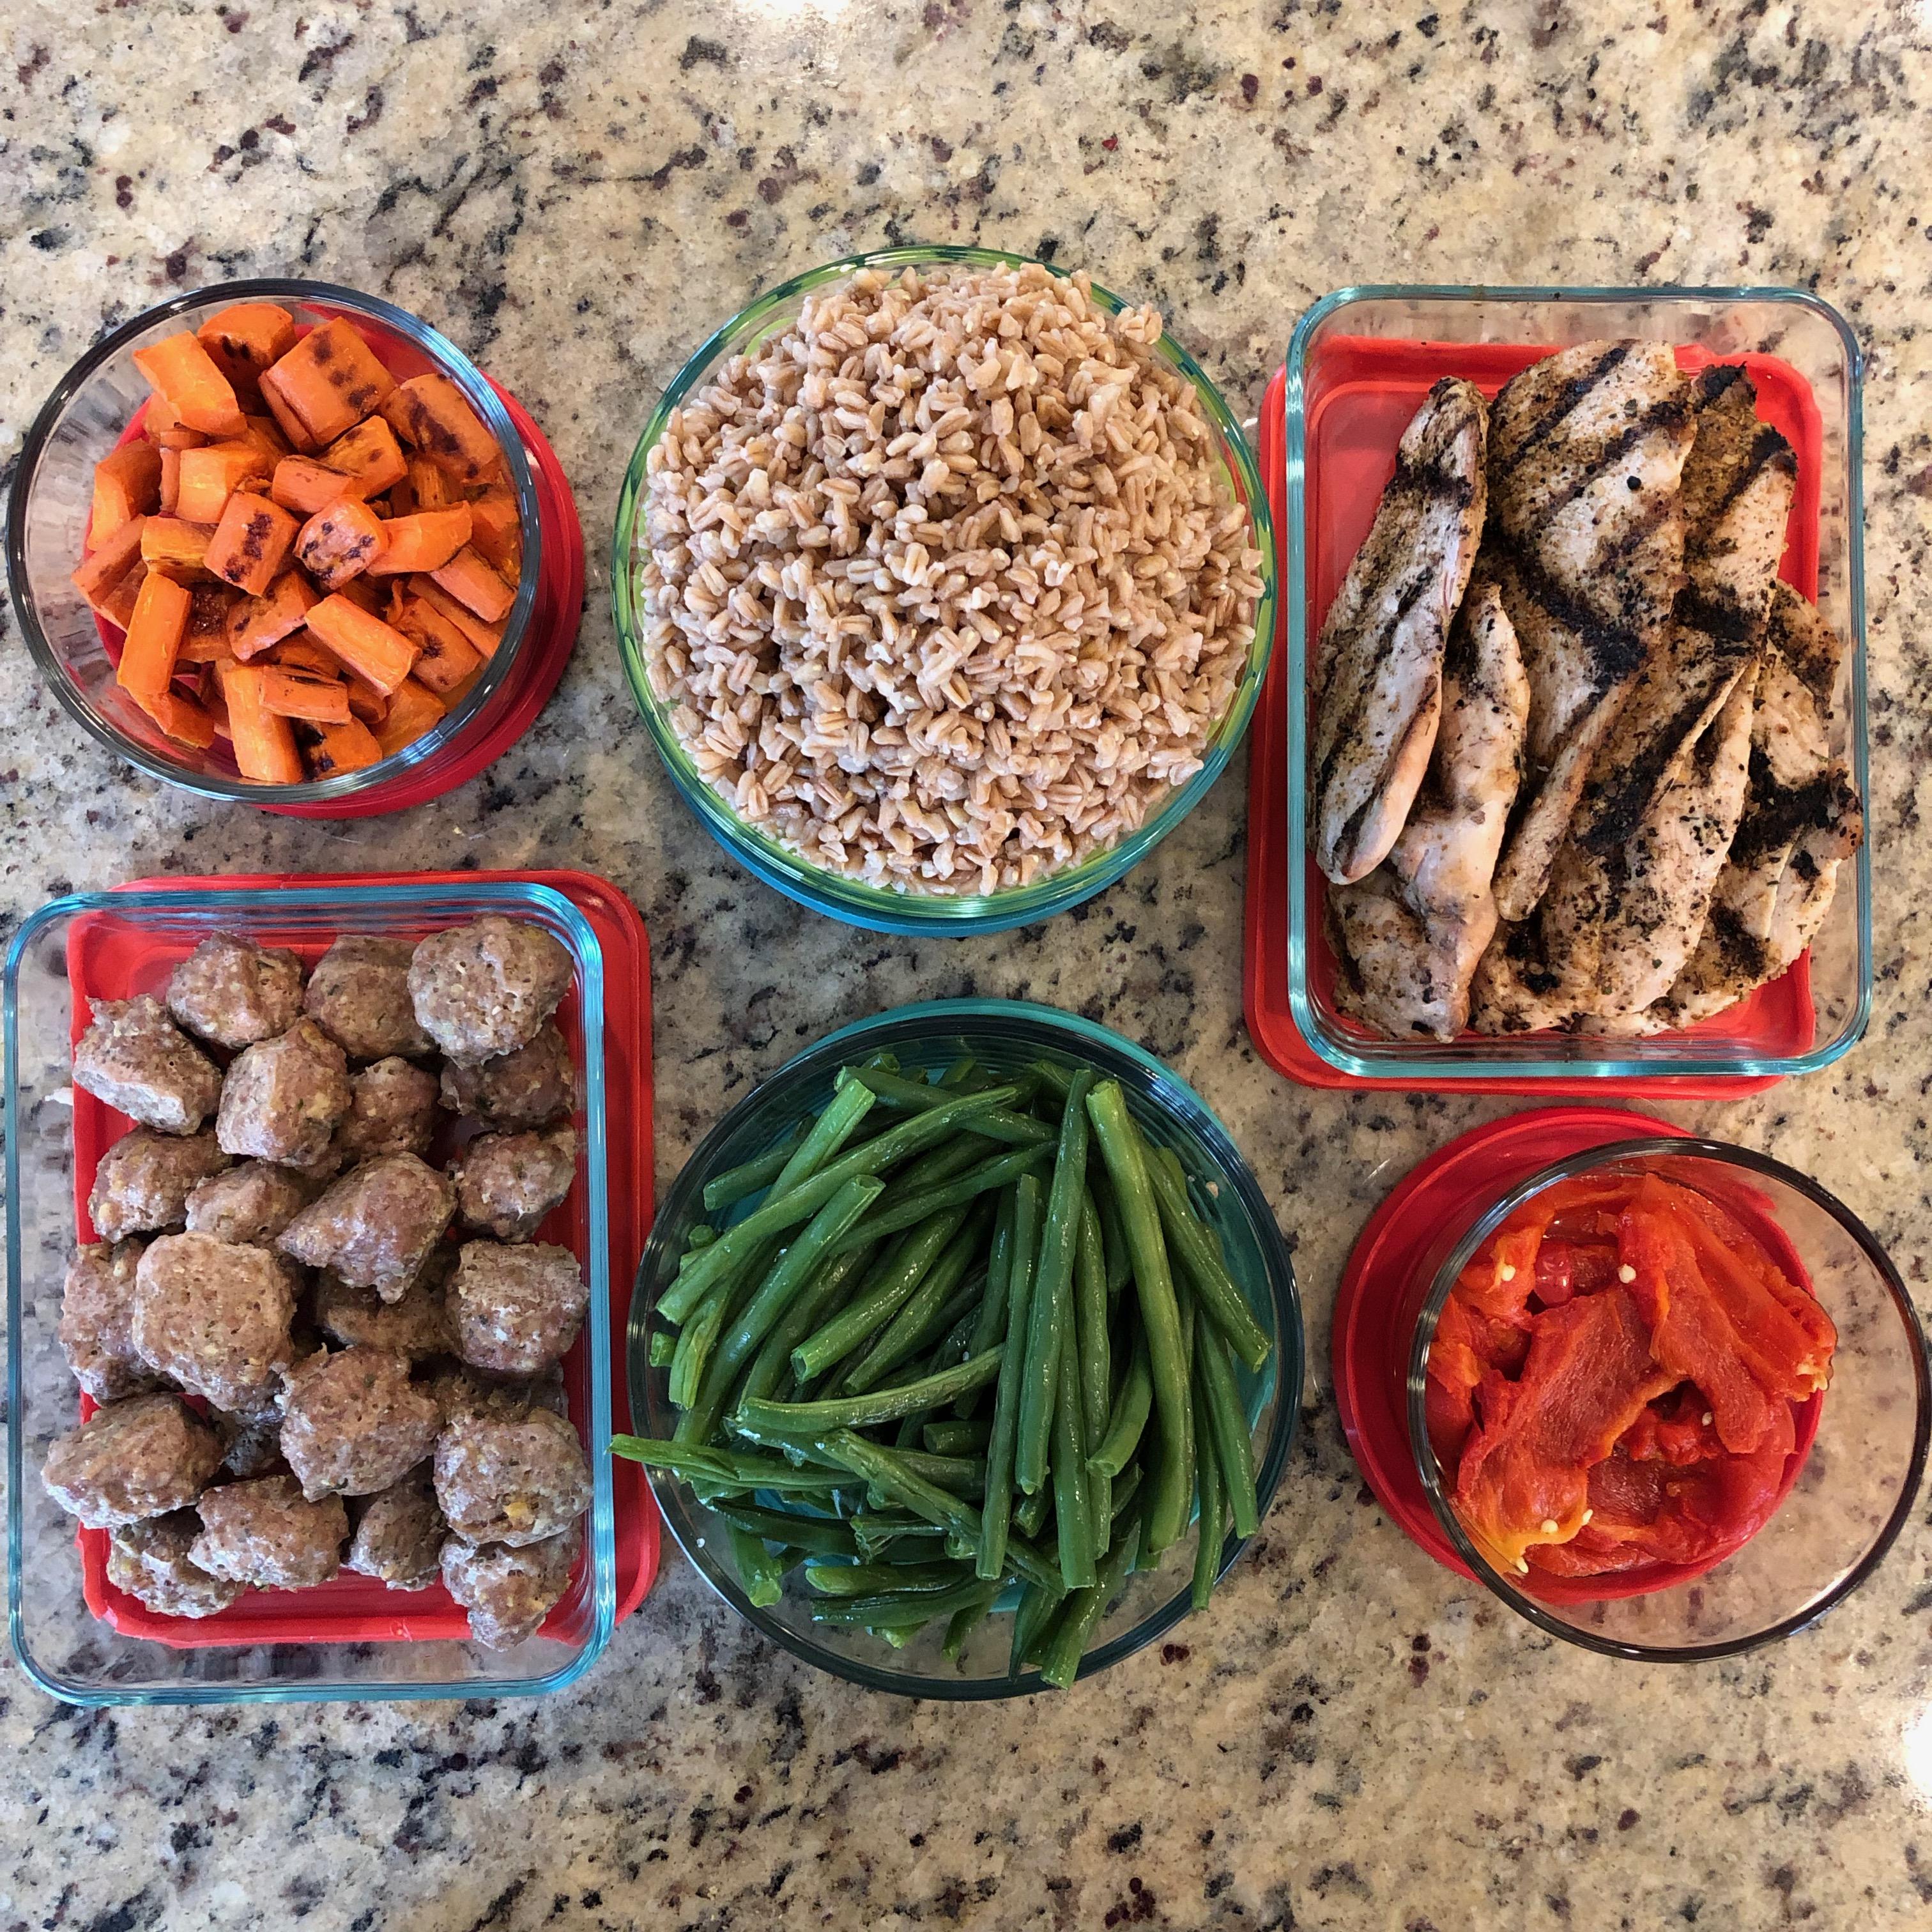
component food prep

The Game Plan

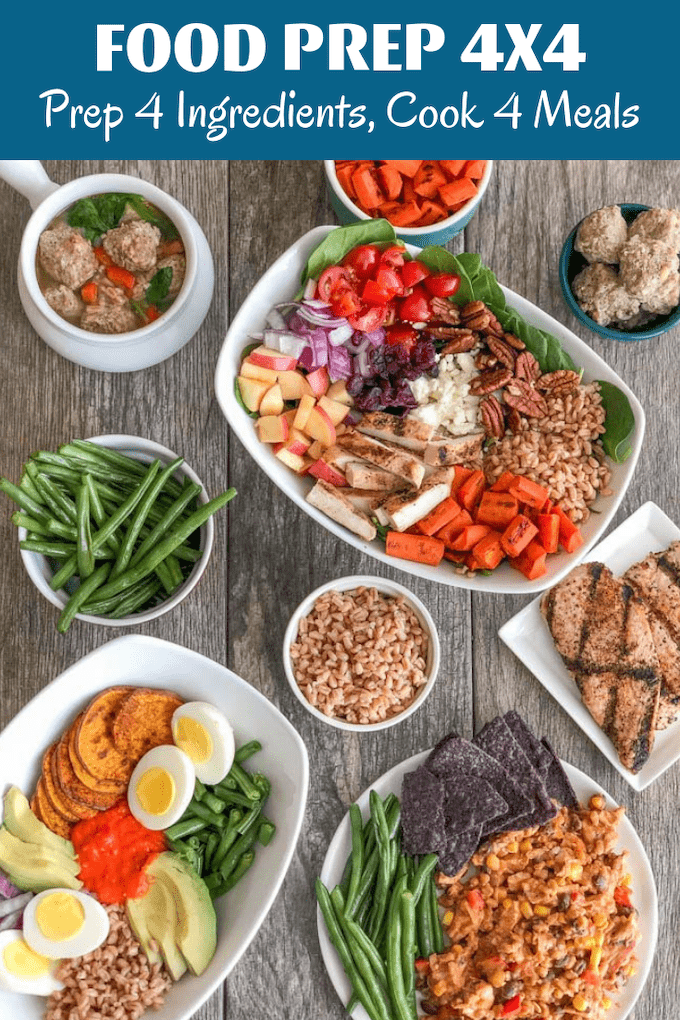
Alright, so what’s on the menu this week?

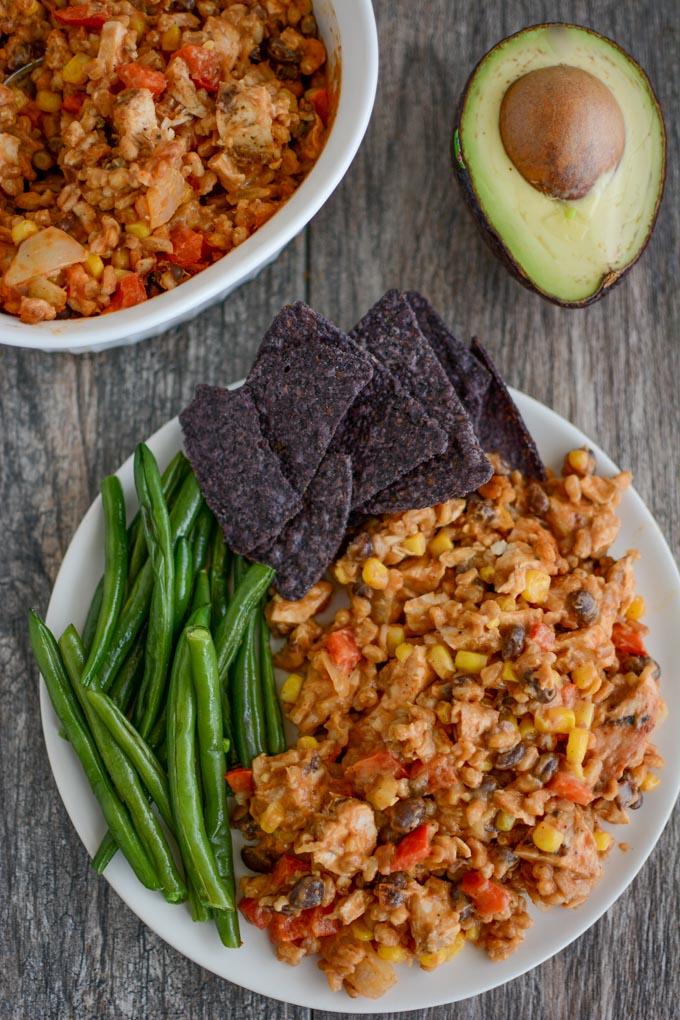
  • Chicken Farro Enchilada Bake
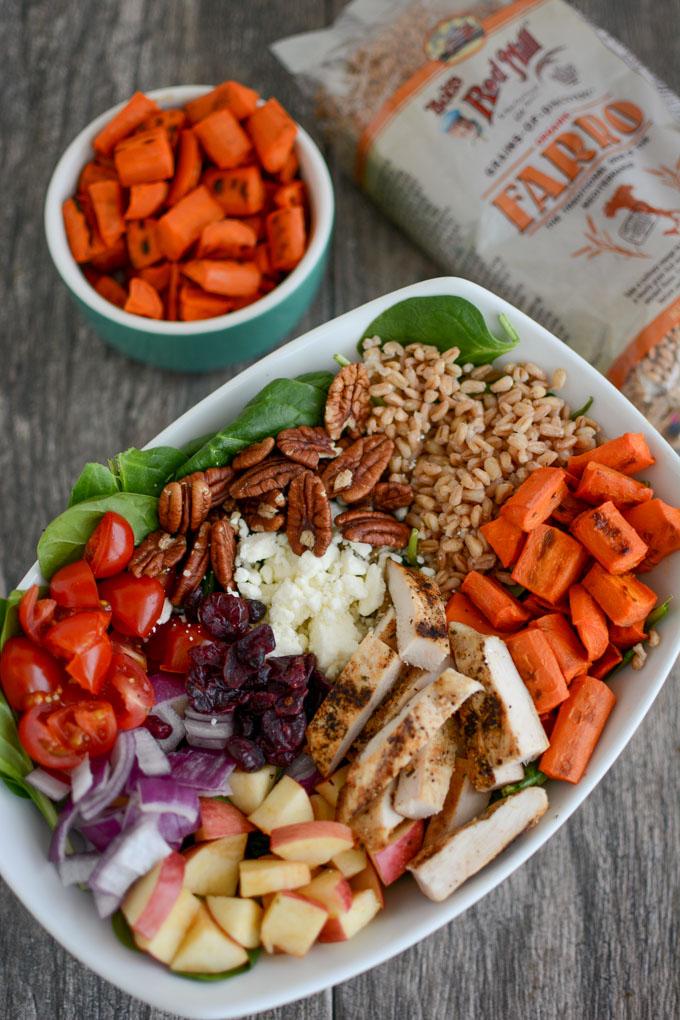
  • Chicken and Farro Spinach Salads
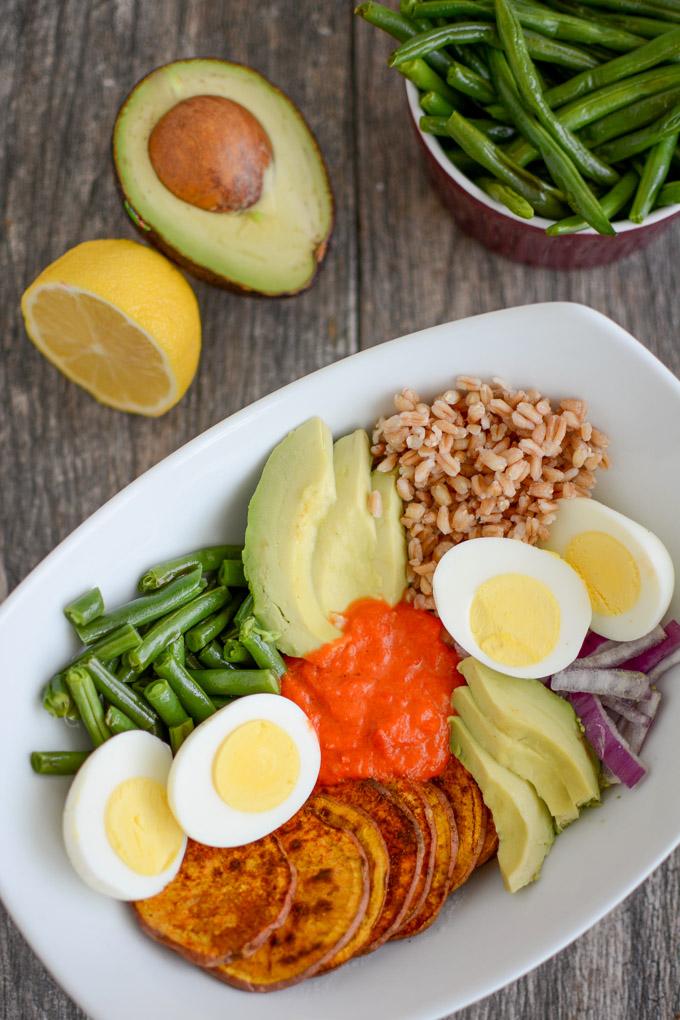
  • Farro Power Bowls with Roasted Red Pepper Sauce
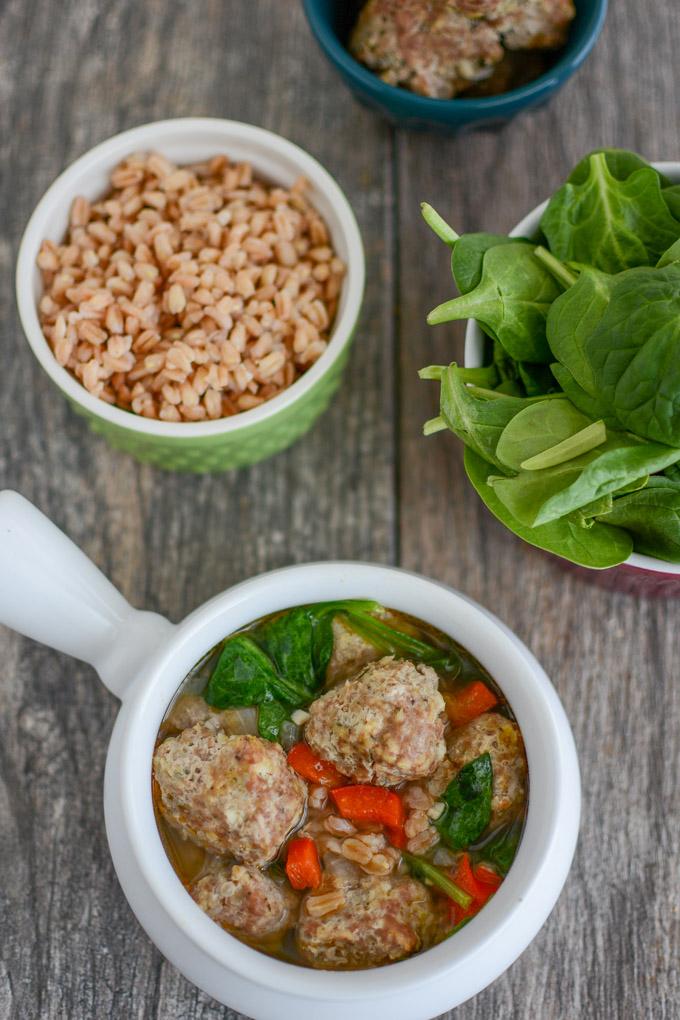
  • Italian Meatball and Farro Soup

Here’s what you need to prep to help make this week’s meals easier:

  • Grilled Chicken (2 pounds. You’ll use one pound in the enchilada bake and one pound for the salads)
  • Turkey Meatballs (recipe below)
  • Farro (about 3 cups dry)
  • Roasted veggies (3-4 cups carrots, 1 pound green beans and 2 whole red peppers)

Let’s talk options:

  • Too cold to grill or don’t have a grill? Make some shredded chicken in the Instant Pot or Crockpot or even just chop and saute it on the stove. 
  • Not into meatballs? They’re for a soup so you could make it vegetarian by just cooking some dried beans. 
  • Don’t like green beans or carrots? Check out the recipes below and pick another vegetable to sub. Broccoli, cauliflower or sweet potatoes would all be good options!
  • If you don’t like one of these recipes, you could easily make a few minor adjustments and swap one of yours into the meal plan.

Have more time? 

  • You can actually prep the entire enchilada bake and/or soup ahead of time and just reheat during the week. 
  • Roast some extra veggies to use as side dishes. 
  • Make the roasted red pepper sauce ahead of time. 
  • Hard boil some eggs or saute some shrimp for your power bowl. 
  • If you want to use kale in the salad and soup instead of spinach, you could prep that ahead of time.
  • Prep the salad dressing.

Now let’s dive into the recipes. What I love about these recipes is that they’re very forgiving. You don’t need exact quantities or measurements. You can add or subtract things according to your taste preferences. And you can easily make a small or large amount depending on how many people you’re prepping for. Enjoy them for lunch or dinner!

Chicken and Farro Enchilada Bake

Chicken and Farro Enchilada Bake

Ingredients

  • 1.5 – 2 cups cooked farro (about 3/4 cup dry)
  • 1 pound cooked chicken, chopped
  • 1 red pepper, diced
  • 1 (15 oz) can black beans, drained and rinsed
  • 1 cup corn kernels (fresh, frozen or canned)
  • 1/2 cup diced onion
  • 2 cloves garlic, minced
  • 1/2 cup hummus (plain or spicy)
  • 1 cup shredded Mexican cheese, optional
  • 1 Tbsp taco seasoning
  • 1 (10 oz) can enchilada sauce (mild or hot)
  • avocado and salsa for topping

Directions:
1. In a skillet, saute peppers, onions, corn and garlic for 5 minutes over medium-high heat to soften.
2. Transfer to a large bowl with remaining ingredients and mix well.
3. Pour into casserole dish, cover with foil and bake at 375 for 20-25 min until heated through.

Notes:
-Make it vegetarian by omitting the chicken and adding extra beans. 
-Make it dairy-free by leaving out the cheese and adding some extra hummus.
-Make it even quicker by sauteing the veggies, then just adding the rest of the ingredients to the skillet and stirring until it’s heated through…no baking required.

Chicken and Farro Spinach Salad

Chicken & Farro Spinach Salad

Ingredients (for 4 salads)

2 cups cooked farro
1 pound grilled chicken
8 cups baby spinach (or kale)
2 cups chopped apples
3 cups roasted carrots
1 cup diced red onion, to taste
1 cup diced cherry tomatoes 
Crumbled feta, Craisins and pecans (or other nuts) to taste 

1/4 cup avocado oil
1/4 cup red wine vinegar
2 Tbsp dijon mustard
1 clove garlic, minced (or a little garlic powder)
splash of honey or maple syrup, to taste

Directions:
1. Divide salad ingredients between four bowls. 
2. In a jar or small bowl, combine garlic, red wine vinegar, dijon mustard, honey or maple syrup and oil and whisk or shake until well mixed. Pour over salads and enjoy!

Notes: 
-Don’t like carrots? Try roasted sweet potatoes or another veggie of your choice! 
-Don’t like feta? Try goat cheese!
-Don’t like honey mustard dressing? Use your favorite – storebought or homemade.
-Swap massaged kale for spinach to change things up.

Farro Power Bowl

Farro Power Bowl

Ingredients (for 4 bowls)

2-2.5 cups cooked farro (about 1 cup dry)
1 large avocado
3/4 cup sliced red onion
1 pound roasted green beans, chopped
8 hard-boiled eggs (or other protein of choice)
2 medium sweet potatoes (or other roasted vegetables of choice)

2 roasted red peppers, skin, seeds and stem removed
juice from and zest of 1 lemon
1/2 cup avocado oil
3-4 cloves garlic

Directions
1. Slice sweet potatoes into rounds. Spray with oil and sprinkle with curry powder and paprika. Bake at 425 for 20 minutes flipping once. 
2. In a blender, combine roasted red peppers, lemon juice and zest, oil and garlic and blend until smooth. Taste and add additional garlic or lemon if desired. 
3. Assemble the bowls. In each bowl, place a heaping 1/2 cup farro, 2 hard boiled eggs, some sweet potato rounds, avocado, onion and green beans. Top with red pepper sauce and serve.

Notes:
-This is a vegetarian option. You could skip the eggs and top with some sauteed shrimp instead…or even grill some extra chicken to throw on top.
-If you don’t like green beans, try broccoli. 
-If you’re not a fan of roasted red pepper sauce, mix some salsa with hummus or plain yogurt and use that as a dressing!
-To bulk up the red pepper sauce, add some almonds or plain greek yogurt. You could also roast some garlic along with the peppers during your prep and use the roasted garlic in the sauce.

Italian Meatball and Farro Soup

Italian Meatball Farro Soup

Ingredients

1 pound ground turkey
1/3 cup breadcrumbs
2 cloves garlic
1 egg
2 Tbsp parmesan cheese (optional)
1 tsp parsley (or 2 Tbsp fresh parsley)
1 tsp oregano

1 cup cooked farro (about 1/2 cup dry)
1-quart broth
2-3 handfuls baby spinach
2 cloves garlic
1/2 cup diced onion
1 red pepper, diced
2 Tbsp oil
More oregano, fresh lemon juice or fresh parsley to season if desired.

Directions:
1. Make meatballs during food prep: Combine first 7 ingredients in a bowl and mix well. Form into tablespoon-sized mini meatballs (I got about 24) and bake at 400 for 12 min or until internal temp reaches 165 degrees, flipping once.
2. To make soup: Heat oil in a dutch oven. 
3. Add onion, pepper and garlic and saute for 5 minutes. Add meatballs, broth and farro. Bring to a boil, reduce heat and simmer 10 minutes. Stir in baby spinach until wilted. Taste and adjust seasonings if needed. 
4. Top with extra parmesan if desired and serve with bread!

Notes:
-This soup could easily be made ahead of time and simply reheated.

These Easy Farro Recipes can be made quickly throughout the week after prepping four simple ingredients during your food prep session. Component food prep is the key to saving you time during the week while still keeping your meal plan flexible.

Here’s a basic grocery list for you. Be sure to double check it and remove items you already have and read the recipes to see if you’re going to make any changes and adjust the grocery list accordingly.

Grocery List

  • Bob’s Red Mill Farro (approx 3 cups dry)
  • 2# boneless, skinless chicken breasts
  • 4 red peppers
  • 1 can black beans
  • 1 cup frozen corn
  • 1 large yellow onion
  • 1 large red onion
  • Plain hummus
  • Shredded Mexican cheese
  • Taco seasoning
  • 1 can enchilada sauce
  • 2 bags baby spinach
  • 2 apples
  • 4 large carrots
  • Feta or goat cheese
  • Craisins
  • Pecans (or other nuts)
  • Cherry tomatoes
  • Large avocado
  • 1 pound green beans
  • 8 Eggs to hardboil (plus one raw egg)
  • 2 lemons
  • Avocado oil
  • 1 bulb garlic
  • 1 # ground turkey
  • Breadcrumbs
  • Parmesan cheese
  • Fresh parsley (or dried)
  • 1 egg
  • Oregano
  • 1 qt chicken broth
  • Dijon mustard
  • Honey or maple syrup
  • Red wine vinegar
  • Veggies of choice to roast
  • Almonds or plain yogurt, optional

Join me over on IG stories this weekend and next week to see me prep these ingredients and make these meals right along with you! And be sure to grab a bag of Bob’s Red Mill farro before you get cooking!

This Berry Farro Breakfast Bowl recipe is a fun twist on overnight oats. Packed with protein and fiber, it's a healthy breakfast option that's ready in minutes!

Oh, and if you have extra farro and are looking for another idea, try this Berry Breakfast Farro!

Enjoy!
–Lindsay–
 

Filed Under: Sponsored, Dinner, Food Prep, Ingredient Round-Ups Tagged With: Black Bean, Chicken, Farro, Ground Turkey, Spinach

Resources for Feeding Kids

March 1, 2019 by Lindsay Leave a Comment

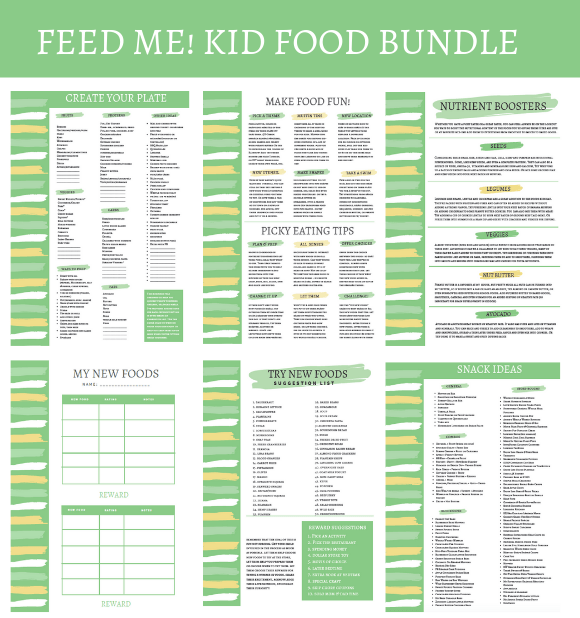
This Resources for Feeding Kids PDF bundle is designed to make feeding toddlers and young kids easier. Bundle includes a Create Your Plate guide, tips for picky eaters, snack ideas and a printable chart to encourage them to try new foods!

This Resources for Feeding Kids PDF bundle is designed to make feeding toddlers and young kids easier. Bundle includes a Create Your Plate guide, tips for picky eaters, snack ideas and a printable chart to encourage them to try new foods!

Hi friends!

Just popping in to let you know my Kid Food PDF Bundle is now live and available to purchase. From now until Sunday 3/3/19 at 11:59 PM PST you can snag it for $7.99 before the price increases! Just CLICK HERE or click the the “I Want This” button below.


Loading…

Enjoy!
–Lindsay–
Filed Under: Kids

My Go-To Energy Ball Recipe

February 13, 2019 by Lindsay 21 Comments

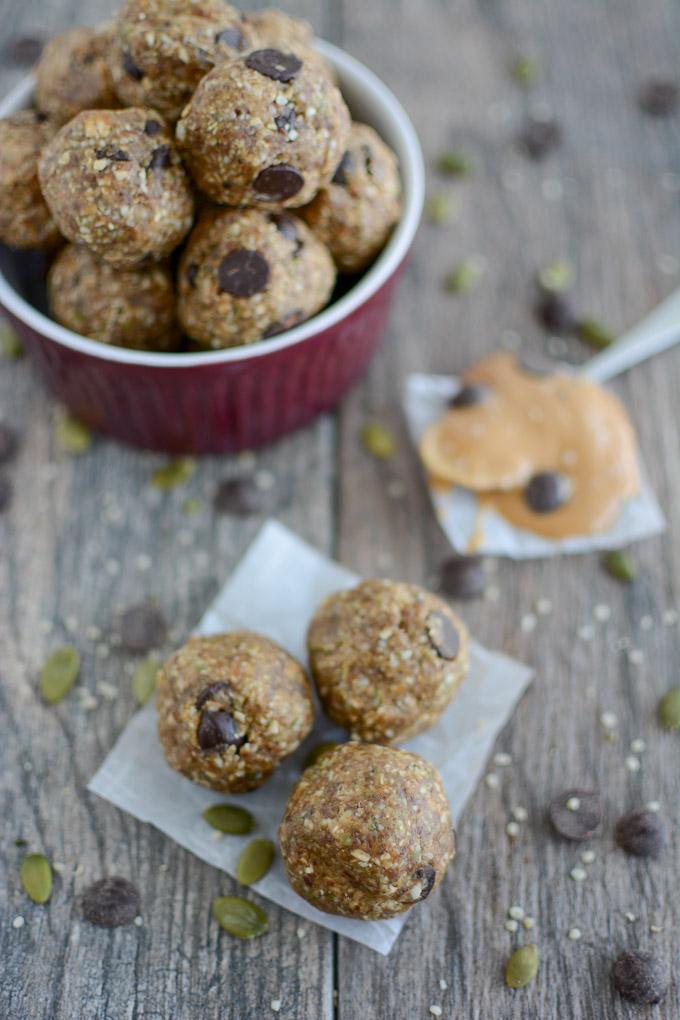
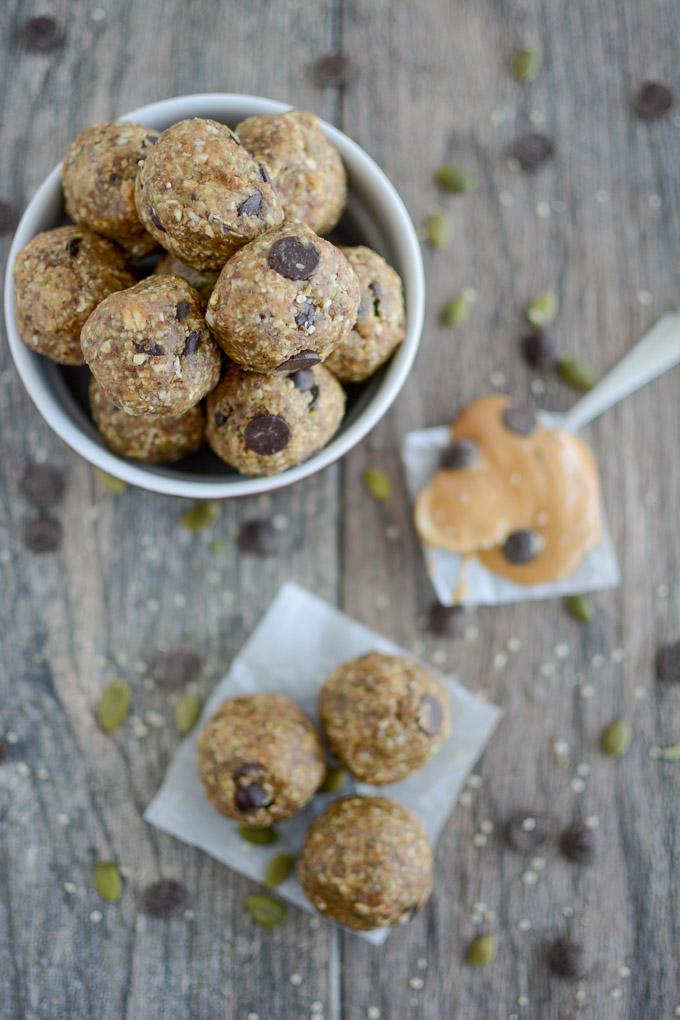
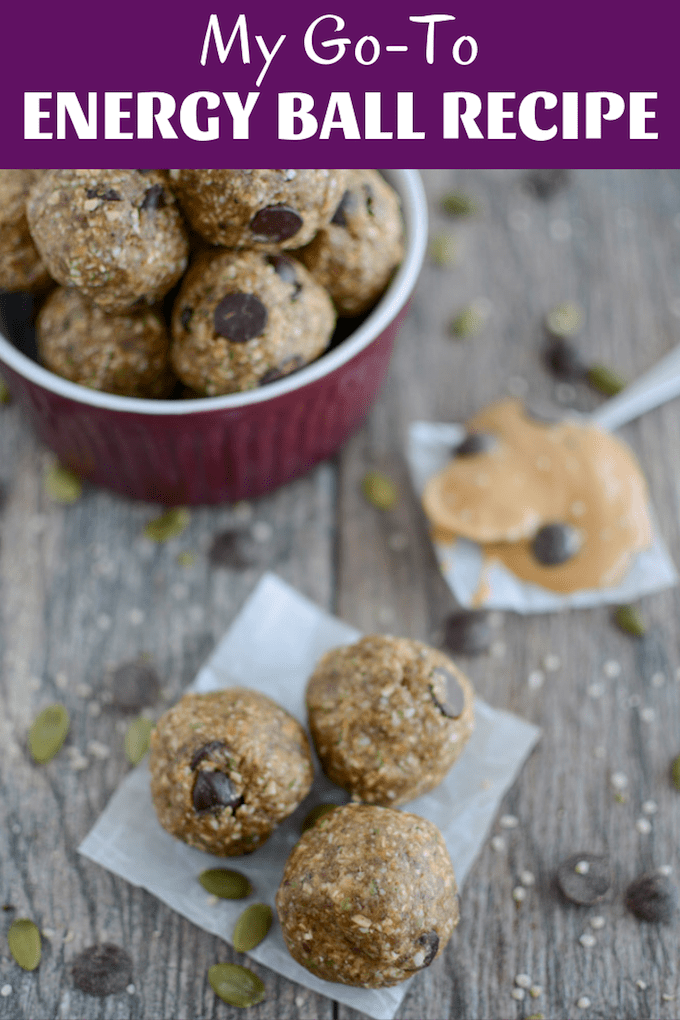
My Go-To Energy Ball Recipe is perfect for kids, nursing moms, athletes and anyone looking for a healthy snack. They’re full of fiber, protein, and healthy fats and easy to prep ahead of time to keep your freezer stocked.

Go-To Energy Ball Recipe great for kids or snack for breastfeeding moms

Hi friends!

Today I’m sharing my go-to energy ball recipe and I already know you’re gonna love it. I shared it on Instagram a few weeks ago and many of you have already tried and loved them! They’re super easy to make, packed with protein, fiber and healthy fats and perfect for stocking your freezer. I’ve become especially reliant on them while nursing. I find myself constantly starving having healthy, calorie-dense snacks like these on hand have been a total lifesaver while I’m feeding a tiny human and trying to keep my calorie intake up.

An added bonus? My kids also love them. They’re the perfect make-ahead snack that I can prep ahead of time on the weekend and have on hand to grab for them when they’re cranky and hungry.

go-to energy ball recipe, kid-friendly, breastfeeding snack

This recipe is gluten-free and can be made dairy-free if you use non-dairy milk and dairy-free chocolate chips (I like Enjoy Life). I use peanut butter in mine but you could swap another nut butter or try sunflower seed butter for a nut-free version.

Here’s how you make them:

Print

My Go-To Energy Ball Recipe

My easy go-to energy ball recipe made with dates, hemp, peanut butter and flax
Print Recipe

5 Stars 4 Stars 3 Stars 2 Stars 1 Star

4.7 from 15 reviews

My Go-To Energy Ball Recipe is perfect for kids, nursing moms, athletes and anyone looking for a healthy snack. They’re full of fiber, protein, and healthy fats and easy to prep ahead of time to keep your freezer stocked.

  • Author: Lindsay

Ingredients

Scale

6–8 pitted Medjool dates (approx 1 cup)
1 cup rolled oats
1/2 cup pepitas
1/4 cup hemp seeds
1/4 cup ground flax
1/2 cup peanut butter
2–4 Tbsp milk (dairy or non-dairy) or water
chocolate chips

Instructions

  1. Place dates, oats, pepitas, hemp and flax in a food processor and process until well chopped.
  2. Add peanut butter and process until mixed.
  3. Add 2 Tbps milk or water and process until the mixture starts to clump into a giant ball. Add more liquid 1 Tbsp at a time as needed.
  4. Add chocolate chips, pulse a few times to mix, then scoop or roll into balls.
  5. Store in the freezer!

Notes

Sub another nut butter or sunflower seed butter for peanut butter if desired.

You can eat these directly out of the freezer.

Did you make this recipe?

Tag @theleangreenbean on Instagram

I’m not lying when I say we go through about two batches of these per week.

My Go-To Energy Ball Recipe is perfect for kids, nursing moms, athletes and anyone looking for a healthy snack. They're full of fiber, protein, and healthy fats and easy to prep ahead of time to keep your freezer stocked.

Let me know if you try them! If you like these, you might also like my Lemon Energy Balls and my No Bake Peppermint Chocolate Bites.

Enjoy!
–Lindsay–
Filed Under: Snack Tagged With: Dates, Ground Flaxseed, Hemp Seed, Milk, Oats, Peanut Butter, Pepitas

Kid-Friendly Smoothies with Vegetables

January 31, 2019 by Lindsay 4 Comments

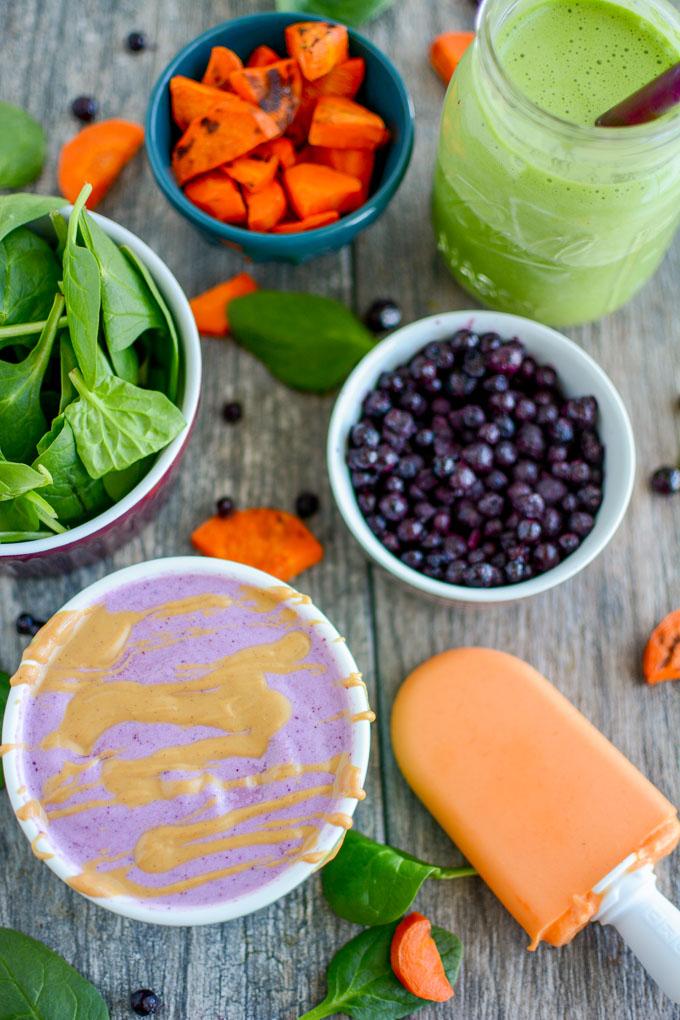
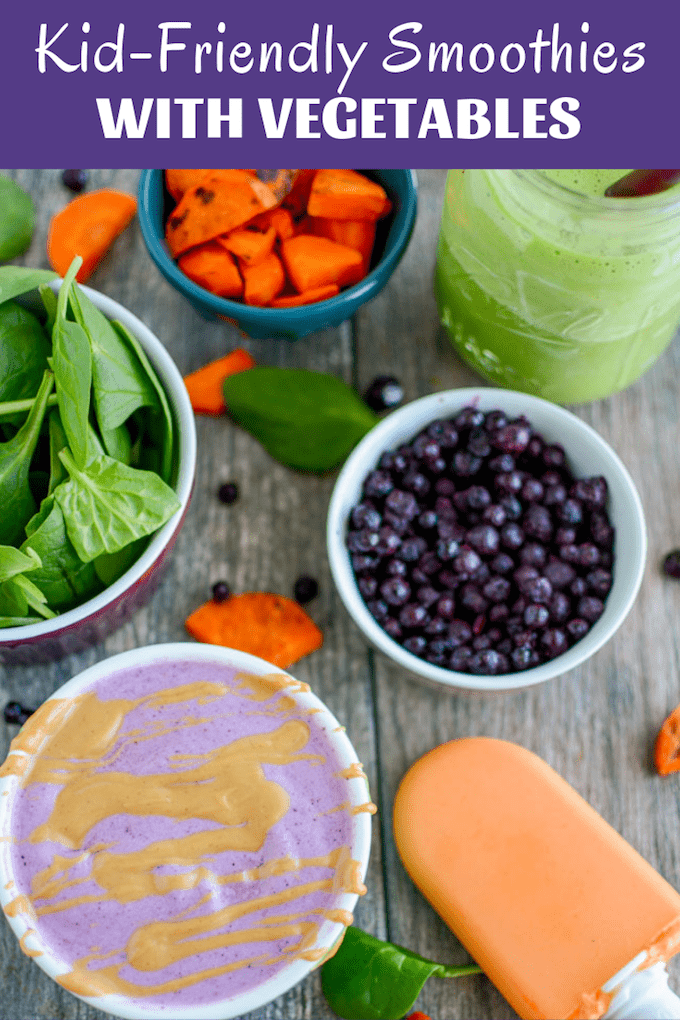
These kid-friendly smoothies with vegetables are perfect for snack time. Packed with carrots, spinach or cauliflower, both kids and adults will love these simple, healthy smoothies or popsicles.

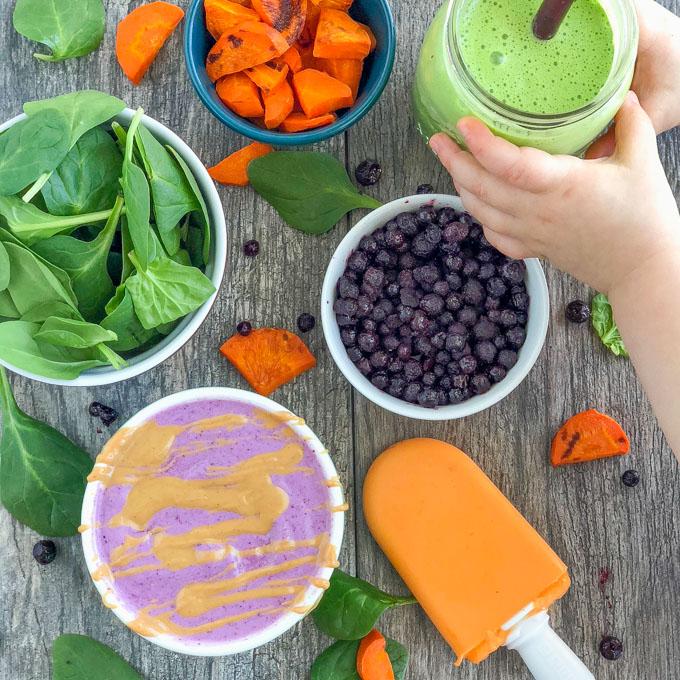
Kid-friendly smoothies with vegeteables, carrot smoothie popsicle

Hi friends!

Just popping in to share a few kid-friendly smoothies with vegetables what we’ve been loving around here lately. But before we get there, I want to give you a little back story.

I’ve never been a huge smoothie drinker. I’m not someone who makes a daily green smoothie to start my day. But, a few years ago, I realized that smoothies might be a good way to get some extra veggies into my kids. Since then we’ve tried MANY smoothie recipes and never really found a real winner. Some were complete fails. Some warranted a few sips or spoonfuls and that was it.

So this January, when Squish developed a bit of an obsession with popsicles (ideal timing right…in the dead of winter?) I went back to the drawing board, determined to find a combo that both kids liked so I could start whipping up smoothies and smoothie popsicles at snack time. And you know what I realized the key was? Simplicity.

When I was first making all those smoothies, I was trying to cram so many ingredients into each one…trying to make it the ultimate healthy snack. 3 kinds of vegetables, peanut butter or avocado, yogurt, chia seeds, kefir…basically, you name it, I was throwing it in. FAIL. But suddenly when I scaled back and just used 3 basic ingredients – vanilla yogurt, orange juice and a vegetable- BOOM! Instant success!

Kid-friendly smoothies with vegetables

So here’s your reminder that sometimes with kids, simple is just best. Here are a few simple combos that my kids have been loving lately. I’ve been alternating between serving them as a drink and freezing them into popsicles. Squish has been particularly fond of the carrot combo, which was a total shock to me, but I love that he loves it. You could also serve them as a smoothie bowl with some peanut butter and granola.

Carrot smoothie or carrot popsicle

If you’re serving these smoothies to your kids, let them watch you or help you make them. Show them the ingredients you’re putting in. This is not about hiding veggies. My kids are well aware that they’re eating a carrot popsicle or a spinach smoothie. It’s been a great way to show them that some veggies they think they don’t like…like spinach or cauliflower or roasted carrots…can actually be prepared in a way they enjoy!

Here’s how I make them. Keep in mind that smoothie measurements don’t have to be exact!

Print

Kid-Friendly Smoothies with Vegetables

Kid-friendly smoothies with vegetables
Print Recipe

5 Stars 4 Stars 3 Stars 2 Stars 1 Star

5 from 1 review

These kid-friendly smoothies with vegetables are perfect for snack time. Packed with carrots, spinach or cauliflower, both kids and adults will love these simple, healthy smoothies or popsicles.

  • Author: Lindsay

Ingredients

Scale

1/2 cup orange juice
3/4 cup vanilla yogurt
Veggie of choice: 1 cup roasted carrots OR 1 cup steamed cauliflower + 1/4 cup wild blueberries OR 3 handfuls fresh baby spinach
Ice

Instructions

  1. Combine all ingredients in a high powered blender until well mixed.
  2. Serve in a glass, freeze into popsicle molds or pour into a bowl and top with peanut butter and granola.

Notes

My kids usually split these. You can drink half and freeze extras in a mason jar, ice cube trays or popsicles.

Feel free to experiment with swapping plain yogurt + sweetener of your choice, half plain/half flavored yogurt or adding extra mix-ins like more veggies, nut butter, hemp or chia seeds, etc.

Did you make this recipe?

Tag @theleangreenbean on Instagram

Like I mentioned in the notes, once you find a combo or two your kids loves, you can try moving to half plain/half flavored yogurt, plain yogurt with a little sweetener or adding extra veggies, nut butter, seeds, etc!

These kid-friendly smoothies with vegetables are perfect for snack time. Packed with carrots, spinach or cauliflower, both kids and adults will love these simple, healthy smoothies or popsicles.

Be sure to let me know if you try any of these combos and share any new favs you discover!

Enjoy!
–Lindsay–
Filed Under: Breakfast, Lunch, Snack Tagged With: Carrot, Cauliflower, Spinach, Yogurt

Instant Pot Asian Peanut Noodles

January 28, 2019 by Lindsay 20 Comments

These Instant Pot Asian Peanut Noodles are packed with chicken and vegetables for a quick, healthy dinner the whole family will love! Ready in under 20 minutes, they’re perfect for a busy weeknight.

Instant Pot Asian Peanut Noodles with chicken

Hi friends!

I’m so excited to share these Instant Pot Asian Peanut Noodles with you guys today! I’ve spent the last week or two back in the kitchen working on some new recipes and it feels good to be back! You guys know I love my Instant Pot and this recipe is no exception. It’s so quick and easy, perfect for throwing together on a busy night. (See stovetop directions below if you don’t have an Instant Pot.) I love how many veggies are packed in there and with a little sriracha at the end, you can give these a nice little kick!

I’m newly obsessed with carrot noodles and have been grabbing one or two of the giant ones from the bulk section each week to spiralize. But if you can’t find any big enough to spiralize, you could try sweet potato or butternut squash noodles as well!

Instant Pot Asian Peanut Noodles gluten free

These took two tries to get the liquid ratio right, but the second time was a charm. It’ll look pretty saucy right when you take the lid off, but the rice noodles will absorb the sauce a little bit as it sits and even more overnight. You only have to set the Instant Pot timer for 3 minutes so these cook quickly. Be sure to cut your chicken into bite-sized pieces so it will cook quickly.

These also make great leftovers. You can enjoy them warm or cold depending on your preference.

And if you don’t have an instant pot you can make them on the stove. Just cook the chicken and veggie noodles in a large pot. Cook the rice noodles in a separate pot and add them to the chicken mixture. In a bowl, mix together soy sauce, peanut butter, garlic, ginger, chili sauce and 1/2 cup -1 cup broth. Add sauce to chicken mixture and omit remaining broth.

Here’s how you make them:

Print

Instant Pot Asian Peanut Noodles

Instant Pot Asian Peanut Noodles
Print Recipe

5 Stars 4 Stars 3 Stars 2 Stars 1 Star

4.9 from 8 reviews

These Instant Pot Asian Peanut Noodles are packed with chicken and vegetables for a quick, healthy dinner the whole family will love! Ready in under 20 minutes, they’re perfect for a busy weeknight.

  • Author: Lindsay

Ingredients

Scale

1 – 1.5 pounds boneless, skinless breasts
1 red bell pepper, spiralized
2–3 cups spiralized carrot noodles
2 cups broccoli slaw
1/4 cup soy sauce
2 Tbsp sweet chili sauce
1/3 cup peanut butter
2 cloves garlic, minced
1–2 tsp fresh ginger, grated (or paste)
2 cups chicken broth
3 oz rice noodles, broken in half
optional toppings: green onion, chopped peanuts, sriracha

Instructions

  1. Cut chicken into small bite-sized pieces and add to Instant Pot.
  2. Add spiralized peppers and carrots, broccoli slaw and rice noodles.
  3. In a bowl, mix together soy sauce, sweet chili sauce, peanut butter, ginger, garlic and half cup broth. Mix well and taste. You can add more sweet chili sauce or some brown sugar for a sweeter sauce if desired.
  4. Pour sauce, along with remaining 1.5 cups broth into Instant Pot and mix everything up really well, ensuring sauce covers all the noodles and vegetables.
  5. Lock lid in place, press manual and adjust the time to 4 minutes.
  6. Release pressure immediately when finished and stir well. You can let it simmer for a few minutes or serve. Top with green onions and peanuts and add sriracha to achieve the desired level of spiciness.

Notes

You can sub sweet potato or squash noodles for carrot noodles.

Noodles will absorb sauce as it sits and especially when refrigerated.

Eat the leftovers warm or cold!

To make this on the stovetop, cook the chicken and veggie noodles in a large pot. Cook the rice noodles in a separate pot and add them to the chicken mixture. In a bowl, mix together soy sauce, peanut butter, garlic, ginger, chili sauce and 1/2 cup -1 cup broth. Add sauce to chicken mixture and omit remaining broth.

Did you make this recipe?

Tag @theleangreenbean on Instagram

Don’t they look yummy??

These Instant Pot Asian Peanut Noodles are packed with chicken and vegetables for a quick, healthy dinner the whole family will love! Ready in under 20 minutes, they're perfect for a busy weeknight.

Be sure to let me know if you try them!

Enjoy!
–Lindsay–
Filed Under: Dinner, Instant Pot Tagged With: Bell Pepper, Broccoli Slaw, Carrot, Chicken, Chicken Broth, Garlic, Peanut Butter, Rice Noodles, Soy Sauce, Sweet Thai Chili Sauce

Life Lately – Six Weeks Old

January 16, 2019 by Lindsay 13 Comments

Helloooooooo friends!

Anybody still out there? Hard to believe it’s been so long since my last post. I’ve missed you guys! Although I’ve been away from the blog, I’ve still been fairly good at sharing our daily life over on Instagram stories so we sure to follow me there if you don’t already!

IMG 0982

Today is officially 6 weeks since little man was born and I’m headed back to my OB for my six-week checkup! I’m feeling good and oh so ready to start easing into working out again.

Here’s a quick recap of the past six weeks:

1

At baby’s 1 week appointment, we found out he wasn’t gaining weight. So I spent about 4 days feeding him every two hours around the clock, then pumping and then feeding him the pumped bottle. After 4 days, he’d gained almost 8 ounces. Then I stopped pumping but spent the next week nursing him every 2 hours during the day and 3 hours at night. After that, he had continued to gain weight and I was able to just start nursing him on demand, without following a rigid time schedule. It was an exhausting couple of weeks but I’m thankful we turned the corner and that feeding has continued to go well.

My husband was home for two weeks on paternity leave and as a family, we spent a lot of time hanging out, watching tv and readjusting to having a baby in the house. I got back into my food prep game, we had some newborn pictures taken and even ventured out to eat a couple times.

2

We celebrated Christmas and enjoyed watching the big kids love on their little brother. They’re both doing so well with him. They think he’s “so cute” and keep close tabs on where he is and what he’s doing. They both have their challenging days, but I think it’s more related to their ages (4 & 2) than it is to having a new baby in the house. Hubby went back to work for 2 days after paternity leave ended and then was home for basically another two weeks for Christmas and new years.

3

My parents came to visit for a week at new years and my sister was also able to come out for a couple of days! Hubby went back to work January 2nd so my parents were here to help for another couple of days before I was totally on my own.

4

Since new years, baby has hit the one month mark, i’ve made several solo outings with all three kids including a few trips to the doctor (one for the baby’s well check – he’s up over 10 pounds (8 pounds at birth) and growing well….and another for sister who hurt her foot after brother pushed her off the end of the bed), Squish has gone back to school after break and I’ve survived my share of toddler meltdowns and sleepless nights.

One thing I haven’t done much is work. And I’m pretty proud of myself for it. I’ve been working hard to really just soak up this time with my kids and not worry about rushing back to work like I did with my other two. I’ve only opened my computer a handful of time and it’s been so nice. I’m getting ready to slowly start easing back into things, figuring out what our new schedule looks like, spending more and more time in the kitchen etc so look for some new recipes in the next few weeks!

IMG 1005

Overall, life with 3 kids is going wonderfully. It’s loud, hectic, a little stressful sometimes and did I mention loud? But it’s also everything I hoped it would be and more…so full of love, adventure and excitement. If you’ve been around a while, you may remember that Little Miss was a colicky baby who did nothing but scream for 7 months. I’m pleased to report this little nugget is not following in his sister’s footsteps and I am oh so thankful! He’s a good baby who is eating well, sleeping decently, likes to be held, doesn’t mind his carseat and seems generally unphased by the chaos his brother and sister create.

Thanks for sticking around during this big transition. I’m excited to get back into the swing of things with some new recipes and posts for you guys. I’m also working on a toddler feeding resource that I can’t wait to share with you.

If you have recipes you’d like to see, baby questions you want answered or any other requests or questions, feel free to leave them below or email me!

Enjoy!
–Lindsay–
Filed Under: Uncategorized

Sweet and Spicy Popcorn Snack Mix

December 29, 2018 by Lindsay 21 Comments

This Popcorn Snack Mix is the perfect balance of spicy and sweet, healthier than traditional Chex mix and highly addictive. Make a batch for your next party, game day or afternoon snack.

The perfect balance of spicy and sweet, this Popcorn Snack Mix is healthier than traditional Chex mix and highly addictive. Make a batch for your game day party or an afternoon snack.

*Originally published Jan 2016*

Hi friends!

It’s snack time! I first made this snack mix a few years ago and have continued to make it a few times a year ever since. It’s the perfect balance of spicy and sweet and full of goodies! I wanted a Chex mix-type recipe but after looking at several recipes, I decided to do my own thing. I subbed popcorn for pretzels for a boost of whole grains, threw in some rice chex, almonds and peanuts and then made a game-time decision to also add some Annie’s Cheddar Bunnies.

The perfect balance of spicy and sweet, this Popcorn Snack Mix is healthier than traditional Chex mix and highly addictive. Make a batch for your game day party or an afternoon snack.

This makes a great afternoon snack but it also makes enough to feed a crowd. Bring a batch along to your next party or next time you head out to watch a football or basketball game! Your friends will thank you.

Here’s how you make it:

Print

Sweet and Spicy Popcorn Snack Mix

Popcorn Snack Mix 3
Print Recipe

5 Stars 4 Stars 3 Stars 2 Stars 1 Star

No reviews

The perfect balance of spicy and sweet, this Popcorn Snack Mix is healthier than traditional Chex mix and highly addictive. Make a batch for your game day party or an afternoon snack.

  • Prep Time: 5 minutes
  • Cook Time: 45 minutes
  • Total Time: 50 minutes

Ingredients

Scale
  • 1 cup cheddar bunnies
  • 1.5 cups Rice Chex
  • 4 cups air-popped plain popcorn
  • 1.5 cup mixed nuts
  • 3 Tbsp butter, melted
  • 1 tsp cayenne pepper
  • 1 tsp paprika
  • 1/2 tsp garlic powder
  • 1 Tbsp brown sugar

Instructions

  1. Combine first 4 ingredients in a large bowl.
  2. In a small bowl, combine melted butter, spices and brown sugar and stir to combine.
  3. Pour slowly over popcorn mixture while stirring. Stir until well-coated.
  4. Transfer to a large baking sheet and bake at 250 degrees F for 45 minutes, stirring every 15 minutes.

Did you make this recipe?

Tag @theleangreenbean on Instagram


It’s pretty much foolproof! This uses about half the butter that most of the recipes I looked at used, but it’s enough to add a bit of richness. The brown sugar gives it a hint of sweetness and the spices really take it to the next level!

This Popcorn Snack Mix is the perfect balance of spicy and sweet, healthier than traditional Chex mix and highly addictive. Make a batch for your next party, game day or afternoon snack.

Feel free to sub in your favorite nuts or add even more goodies!

Sweet & Spicy Popcorn Snack Mix for an edible Christmas gift at the holidays!

Added bonus? You can make a big batch and package it up to give to friends and family for an edible Christmas gift at the holidays!


Enjoy!
–Lindsay–
Filed Under: Food Prep, Snack Tagged With: Butter, Popcorn, Rice Chex

Puppy Chow Almonds

December 3, 2018 by Lindsay 47 Comments

These Puppy Chow Almonds are a fun twist on a classic treat. The nuts add an extra boost of protein and healthy fats, making it perfect for a special snack or dessert!

These Puppy Chow Almonds are a fun twist on a classic treat. The nuts add an extra boost of protein and healthy fats, making it perfect for a special snack or dessert!

*Post and photos updated 12/2017*

Hi Friends!

If you find yourself craving a little treat anytime soon, I’m here to suggest these Puppy Chow Almonds. I don’t know about you, but I grew up with a major love for the original puppy chow/muddy buddies/whatever you want to call it recipe.

It’s one of those recipes that you learn to make at a young age, all by yourself, and it just never lets you down. So while I’m don’t really think it’s necessary to mess with the original recipe, sometimes it’s fun to change things up.

Puppy Chow Almonds

The idea for these Puppy Chow Almonds was born one afternoon when I found myself with craving for puppy chow, a giant bag of almonds and no cereal besides Cheerios. I don’t really consider Cheerios a good sub for Chex in this recipe so I thought I’d give the almonds a whirl.

The end result was delicious! Way better than eating a handful of plain almonds if you ask me 🙂

Here’s how you make them:

Print

Puppy Chow Almonds

These Puppy Chow Almonds are a fun twist on a classic treat. The nuts add an extra boost of protein and healthy fats, making it perfect for a special snack or dessert!
Print Recipe

5 Stars 4 Stars 3 Stars 2 Stars 1 Star

No reviews

These Puppy Chow Almonds are a fun twist on a classic treat. The nuts add an extra boost of protein and healthy fats, making it perfect for a special snack or dessert!

  • Author: Lindsay
  • Prep Time: 5 min
  • Total Time: 5 minutes

Ingredients

Scale
  • 2 cups raw, unsalted almonds
  • 1/4 cup peanut butter
  • 1/4 cup dark chocolate chips
  • 2/3 cup powdered sugar

Instructions

In a microwave-safe bowl, combine peanut butter and dark chocolate chips and microwave in 30-second intervals until melted. Let cool for 2 minutes.

Put almonds in a large ziploc bag (or bowl).

Pour melted pb mixture over almonds and shake or stir until well-coated.

Add powdered sugar and stir or shake until well-coated.

Notes

Add more powdered sugar if needed or desired.

Did you make this recipe?

Tag @theleangreenbean on Instagram

So easy, right?!


Give these a try next time the puppy chow craving strikes!

These Puppy Chow Almonds are a fun twist on a classic treat. The nuts add an extra boost of protein and healthy fats, making it perfect for a special snack or dessert!

[clickToTweet tweet=”These Puppy Chow Almonds are a fun twist on a classic recipe!” quote=”These Puppy Chow Almonds are a fun twist on a classic recipe!”]

Enjoy!

–Lindsay–
Filed Under: Dessert, Snack Tagged With: Almond, Chocolate Chips, Peanut Butter

Spinach Feta Meatballs

November 29, 2018 by Lindsay 5 Comments

These Spinach Feta Meatballs are perfect for a quick, healthy dinner. They’re freezer friendly and a fun change from plain meatballs. 

Spinach Feta Meatballs with pasta and green beans

Hi friends!

Just popping in to share a quick dinner recipe with you guys! These Spinach Feta Meatballs are a new favorite around here. Super easy to make, full of flavor and a fun change from traditional beef meatballs.

Feta adds it’s unique flavor to the mix, which I love, without being overpowering. Since these meatballs have such good flavor, I prefer to eat them plain and serve with a side of spaghetti or noodles with marinara but next time I’m also going to try simmering them in red sauce for a while and then serving to the kids!

If you decide to make these, I definitely recommend you double the recipe and freeze some, just like I do with all meatballs. They’re one of those things that you can prep and freeze raw with minimal effort and then all you have to do is pop them on a baking sheet when you’re ready to eat them!

Spinach Feta Meatballs with pasta and salad

Here’s the recipe:

Print

Spinach Feta Meatballs

Spinach Feta Meatballs 1 copy
Print Recipe

5 Stars 4 Stars 3 Stars 2 Stars 1 Star

5 from 3 reviews

These Spinach Feta Meatballs are perfect for a quick, healthy dinner. They’re freezer friendly and a fun change from plain meatballs. 

  • Author: Lindsay

Ingredients

Scale

1 pound ground turkey (or chicken)
3 cloves garlic, minced
5 oz frozen spinach (defrosted and squeezed to remove excess water)
1 egg
1/2 cup breadcrumbs
1/3 cup crumbled feta

Instructions

  1. Combine all ingredients in a large bowl.
  2. Mix well and form into 12-14 balls.
  3. Bake at 400 degrees F, flipping once, for 18 minutes.

Notes

To freeze, mix and form into balls. Freeze on a plate or baking sheet, then transfer to a Ziploc bag and store in the freezer. When ready to bake, thaw in the fridge overnight and bake as directed or bake straight from frozen…you may just need to add a few extra minutes cooking time to ensure they reach an internal temperature of 165 degrees F.

You could also bake all of them, freeze cooked and simply reheat when needed.

If you’d prefer to use fresh spinach, simply saute until cooked, chop and mix into the meatballs.

Did you make this recipe?

Tag @theleangreenbean on Instagram

Easy, right?

These Spinach Feta Meatballs are perfect for a quick, healthy dinner. They're freezer friendly and a fun change from plain meatballs. 

Let me know if you try them for your next quick and easy Italian night at home!

Enjoy!
–Lindsay–
Filed Under: Dinner Tagged With: Breadcrumbs, Feta, Garlic, Ground Turkey, Spinach

Sweet Potato Apple Cranberry Crumble

November 14, 2018 by Lindsay 1 Comment

This Sweet Potato Apple Cranberry Crumble is the perfect addition to your holiday dinner. Make it for a quick and easy Thanksgiving side dish or pop it in the oven while eating and serve it with ice cream for dessert!

Thanks to Meijer for sponsoring this post.

Sweet Potato Apple Cranberry Crisp

Hi friends!

Can you believe Thanksgiving is just around the corner?! I find Thanksgiving to be a tricky holiday because while I do often crave all of the traditional family recipes year after year, occasionally I get the itch to add something new to the menu. That was the case this year. When I was younger, my mom used to make a Thanksgiving side dish that was basically a mix of butternut squash, apples and fresh cranberries. Since I’ve just never been a huge fan of butternut squash, I decided to use that recipe idea as inspiration and put my own twist on it..starting by swapping sweet potato for squash, as well as adding some bacon for flavor and a sweet crumble topping.

Sweet Potato Apple Cranberry Crumble with oat topping

The end result was a simple, sweet side dish that could also easily double as dessert! I’d consider simple to be the key word here because at 9 months pregnant, that’s about all I have the energy for. I’ve mentioned the benefits Meijer Home Delivery several times this year, but honestly, it’s just becoming more and more convenient the more pregnant I get 🙂 I decided to make a mini Thanksgiving feast…complete with a turkey… for the family to go along with this new recipe- just in case baby decided to come early…but grocery shopping is feeling like a chore lately so I used the ‘shopmeijer app’ to get all the ingredients delivered!

shop meijer app home deliver

And did you know that now, in addition to choosing a home delivery time (as soon as an hour after ordering), you can also pick up your order at the store, at a time that’s convenient for you?! For me, getting the groceries delivered allowed me to conserve my energy for the cooking! Here’s what I whipped up:

Thanksgiving dinner

All of my favorites:

  • Maple Bacon Roasted Carrots
  • Ginger Garlic Green Beans
  • Fresh Cranberry Sauce
  • Sausage and Wild Rice Stuffing
  • Cranberry Corn Muffins
  • Meijer Frozen Turkey
  • Sweet Potato Apple Cranberry Crumble

Also, don’t forget Meijer also carries lots of festive Thanksgiving decor like tablecloths, napkins and paper plates and you can also get your foil, parchment paper, turkey roasting bags, electric carving knives and pretty much anything else you may need to celebrate Thanksgiving with family and friends!

Sweet Potato Apple Cranberry Crumble

I can’t wait to make this Sweet Potato Apple Cranberry Crumble again on Thanksgiving. In case you want to give it a try as well, here’s the recipe:

Print

Sweet Potato Apple Cranberry Crumble

Sweet Potato Apple Cranberry Crumble on a Thanksgiving plate
Print Recipe

5 Stars 4 Stars 3 Stars 2 Stars 1 Star

No reviews

This Sweet Potato Apple Cranberry Crumble is the perfect addition to your holiday dinner. Make it for a quick and easy Thanksgiving side dish or pop it in the oven while eating and serve it with ice cream for dessert!

  • Author: Lindsay
  • Yield: Serves 6

Ingredients

Scale

1 pound apples, diced (approx 3 small)
3/4 – 1 pound sweet potatoes (approx 1 large or 2 small)
1 cup fresh (or frozen) cranberries
2 Tbsp True Goodness Organic Maple Syrup
2 strips bacon, finely chopped
1 cup roughly chopped pecans, divided
2/3 cup True Goodness Old Fashioned Rolled Oats
1/3 cup True Goodness Organic Light Brown Sugar
1 tsp cinnamon
4 Tbsp True Goodness Organic Unsalted Butter

Instructions

  1. In a bowl, combine apples, cranberries, maple syrup, bacon and 1/2 cup pecans and stir to combine.
  2. Slice sweet potatoes as thinly as possible (use a mandolin if you have one). Then cut the slices in half.
  3. Line a 9×9 pan with parchment paper. Divide sweet potatoes in half and place a layer on the bottom of the pan.
  4. Top with half the apple mixture.
  5. Add another layer of sweet potatoes and the remaining apple mixture.
  6. In a small bowl, mix oats, brown sugar and cinnamon.
  7. Cut butter in to small cubes and cut in with a pastry blender or two knives until resembles coarse meal. Add in remaining pecans.
  8. Spread crumble mixture over the top of the pan.
  9. Bake at 375 for 30-40 minutes or until sweet potatoes reach desired softness. (You may need to take it out and taste test a potato). Check around 25 minutes and if you feel the crumble is getting too brown, cover pan with foil.

Notes

This can be served as a side dish or dessert. If serving as a dessert, you could omit the bacon and top with ice cream.

You can also thinly slice and then dice the sweet potatoes and mix everything together instead of layering if you’d like. Just make sure the sweet potato slices are as thin as possible so they cook through!

Did you make this recipe?

Tag @theleangreenbean on Instagram

Sounds deliciously easy, right?

This Sweet Potato Apple Cranberry Crumble is the perfect addition to your holiday dinner. Make it for a quick and easy Thanksgiving side dish or pop it in the oven while eating and serve it with ice cream for dessert!

Enjoy!
–Lindsay–
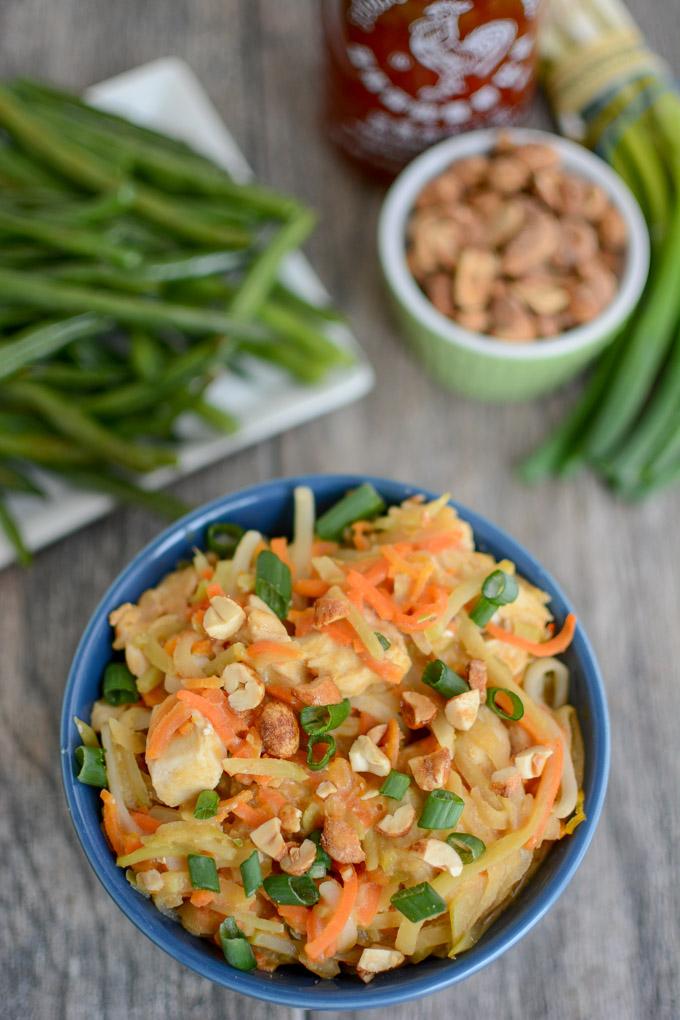
Filed Under: Sponsored, Dessert, Side Dish Tagged With: Apple, Butter, Cranberry, Maple Syrup, Oats, Pecan, Sweet Potato

Veggie Corn Muffins

November 11, 2018 by Lindsay 28 Comments

These Veggie Corn Muffins are packed with shredded veggies and cheese. The perfect side dish for dinner, plus they’re kid-friendly and easy to customize!

Veggie Corn Muffins

*Originally published 5/2014. Recipe and photos updated 11/2018*

Hi Friends!

It’s been over 4 years since I first shared these Veggie Corn Muffins so I thought they deserved another minute in the spotlight! You guys know I love my muffins, and I’m pretty good at packing veggies into them. A few examples:

  • Blueberry Beet Muffins
  • Chocolate Squash Muffins
  • Pumpkin Gingerbread Muffins
  • Cinnamon Raisin Sweet Potato Muffins
  • Zucchini Carrot Apple Muffins

I keep my muffin recipes lightly sweetened, but all of the above do trend towards the typical sweet baked good. These Veggie Corn Muffins are definitely more on the savory side. They pair better as a dinner side dish than a breakfast but they’re still easy to throw together, pretty kid-friendly and easy to customize.

I revamped the recipe slightly from the one I first published but man, I forgot how much I loved these. Last week I enjoyed one for an afternoon snack every day.  I made them full-sized and I’ll be honest, my kids didn’t eat them the first time I served them. But next time I might try making mini-muffins to give them a little more kid appeal.

Since they’re a more savory muffin, I like to add some shredded cheese. My assistant enjoyed eating that during my photo shoot.

Veggie Corn Muffins toddler eating cheese

Feel free use whatever veggies you want in these! I used carrots, zucchini and corn. Shredded sweet potato or yellow squash would be good too!


Print

Veggie Corn Muffins

vegetable corn muffins
Print Recipe

5 Stars 4 Stars 3 Stars 2 Stars 1 Star

3 from 1 review

These Veggie Corn Muffins are packed with shredded veggies and cheese. The perfect side dish for dinner, plus they’re kid-friendly and easy to customize!

  • Author: Author: Lindsay L
  • Prep Time: 5 minutes
  • Cook Time: 20 minutes
  • Total Time: 25 minutes
  • Yield: 12 muffins 1x

Ingredients

Scale
  • 1.25 cups shredded vegetables, squeezed to remove excess water (I used zucchini and carrots)
  • 3/4 cup corn kernals, frozen or fresh
  • 3/4 cup milk
  • 2 eggs
  • 1/2 cup shredded cheese (Mexican blend or cheddar)
  • 1 cup white whole wheat flour
  • 1/2 cup cornmeal
  • 1/4 cup sugar
  • 1 teaspoon baking soda
  • pinch of salt

Instructions

  1. Preheat oven to 375 degrees F.
  2. Combine shredded veggies, corn, milk, eggs and cheese in a large bowl and stir to combine.
  3. Add remaining ingredients and stir until just combined.
  4. Spoon into lined muffin tins and bake for 18 minutes.

Did you make this recipe?

Tag @theleangreenbean on Instagram

Soooooo good! Get creative with the veggies you throw in there. You could even try some chopped broccoli!

These Veggie Corn Muffins are packed with shredded veggies and cheese. The perfect side dish for dinner, plus they're kid-friendly and easy to customize!

Enjoy!
–Lindsay–
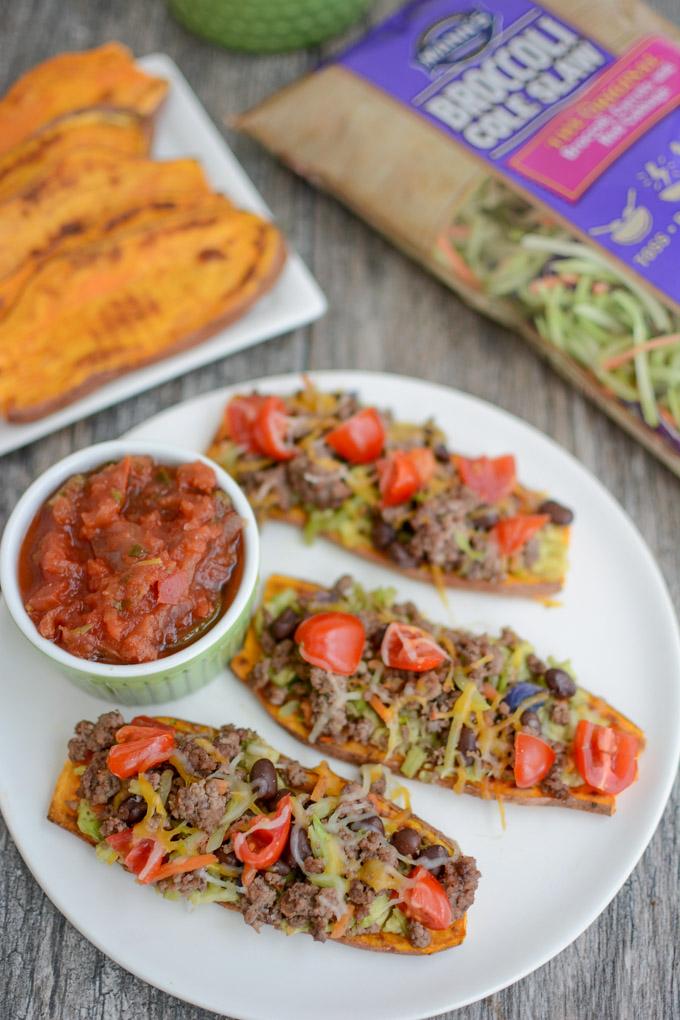
Filed Under: Baking, Side Dish Tagged With: Carrot, Corn, Cornmeal, Egg, Milk, Sugar, White Whole Wheat Flour, Zucchini

Sweet Cherry Gingerbread French Toast Bake

November 8, 2018 by Lindsay 1 Comment

This Sweet Cherry Gingerbread French Toast Bake is the perfect breakfast or brunch recipe for the holiday season. It can be prepped the night before to make your morning easier and is packed with flavor.

Sweet Cherry Gingerbread French Toast Bake

Thanks to Northwest Cherry Growers for sponsoring this post. 

Hi friends!

I’ve been waiting to share this Sweet Cherry Gingerbread French Toast Bake with you guys for what feels like forever. In an effort to stay on top of things in case baby came early, I tested this recipe back in August! And I’ll confess that I’ve made it a couple of times since then to enjoy myself. It’s super easy and I love that you can prep it the night before and just throw it in the oven in the morning. And to me, the flavor combination is absolute perfection.

You may recall that back in August I shared these Sweet Cherry Oat Bars in partnership with NW Cherry Growers and they were a huge hit with a lot of you! The Northwest cherry growers are working to research, as well as promote and educate people about the many health benefits of sweet cherries grown in Washington, Oregon, Idaho, Utah and Montana orchards. Check out their website here.

I told you that August was the perfect time to stock up on sweet cherries, as fresh cherries are typically only available June through August. If you followed my advice, your freezer should be well stocked with a nice little stash of these sweet gems, like mine is! This means you’ve got no excuse not to make this for your holiday guests.

Sweet Cherry Gingerbread French Toast Bake topped with maple syrup and chocolate chips

Let’s talk about this French toast bake for a minute, shall we? While the holidays aren’t exactly known for healthy recipes, I think this dish strikes the perfect balance of nutritious and sweet! First of all, it’s packed with sweet cherries, which are a healthy addition to just about anything!

Dark sweet or Rainier cherries are great for adding natural sweetness without added sugar. Cherries boast a lower glycemic index than almost any other fruit, which means they release glucose slowly and evenly and help you maintain steady blood sugar levels. Cherries also contain anthocyanins, which shut down the enzymes that cause tissue inflammation in the exact same way that ibuprofen does. Three cheers for an anti-inflammatory boost!

In addition to sweet cherries, I also packed the recipe with eggs for protein and added hemp hearts for another boost of nutrients! I typically use  a whole wheat or multigrain baguette but you can use whatever bread you prefer. In addition, you could add some chopped or slivered almonds or pecans for a dose of healthy fats and a fun little crunch! For even more protein, serve it topped with yogurt instead of syrup, or add some breakfast sausage on the side!

Most importantly, relish in the fact that this recipe comes together super quickly, with minimal effort, giving you more time to spend with family and friends. I’m planning to make it Christmas morning and I cannot wait!

Here’s the recipe:

Print

Sweet Cherry Gingerbread French Toast Bake

Cherry Gingerbread French Toast Bake 2 copy
Print Recipe

5 Stars 4 Stars 3 Stars 2 Stars 1 Star

No reviews

This Sweet Cherry Gingerbread French Toast Bake is the perfect holiday breakfast or brunch recipe for Thanksgiving or Christmas. It can be prepped the night before to make your morning easier and is packed with flavor.

  • Author: Lindsay
  • Yield: Serves 6

Ingredients

Scale

1 baguette (whole wheat, multigrain, etc)
10 eggs
1 cup milk (dairy or non-dairy)
1/4 cup molasses
2 tsp cinnamon
2 tsp vanilla
1 tsp ground ginger
1/4 cup hemp seeds (optional)
2 cups chopped frozen sweet cherries
1/2 cup dark chocolate chips, optional

Instructions

  1. Cube bread and place in a greased 9×13 pan.
  2. In a large bowl, mix eggs, milk, molasses and spices and whisk well.
  3. Pour over bread and mix well with hands to coat.
  4. Add hemp seeds, frozen cherries and 1/4 cup chocolate chips. 
  5. Mix well and press into pan.
  6. Sprinkle with extra frozen cherries and remaining chocolate chips.
  7. Cover with plastic wrap and refrigerate overnight (if needed)
  8. Bake at 375 for 40 minutes.

Notes

You don’t have to make this the night before, but I’d let it sit for an hour or two if possible to help the bread absorb the egg mixture before baking.

Feel free to mix in chopped or slivered nuts or sprinkle some on top!

Did you make this recipe?

Tag @theleangreenbean on Instagram

What do you think? Are you as excited about this recipe as I am?

This Sweet Cherry Gingerbread French Toast Bake is the perfect holiday breakfast or brunch recipe for Thanksgiving or Christmas. It can be prepped the night before to make your morning easier and is packed with flavor.

Be sure to follow Northwest Cherries on Facebook,  Twitter, Instagram and Pinterest for more news and recipes.

Enjoy!
–Lindsay–
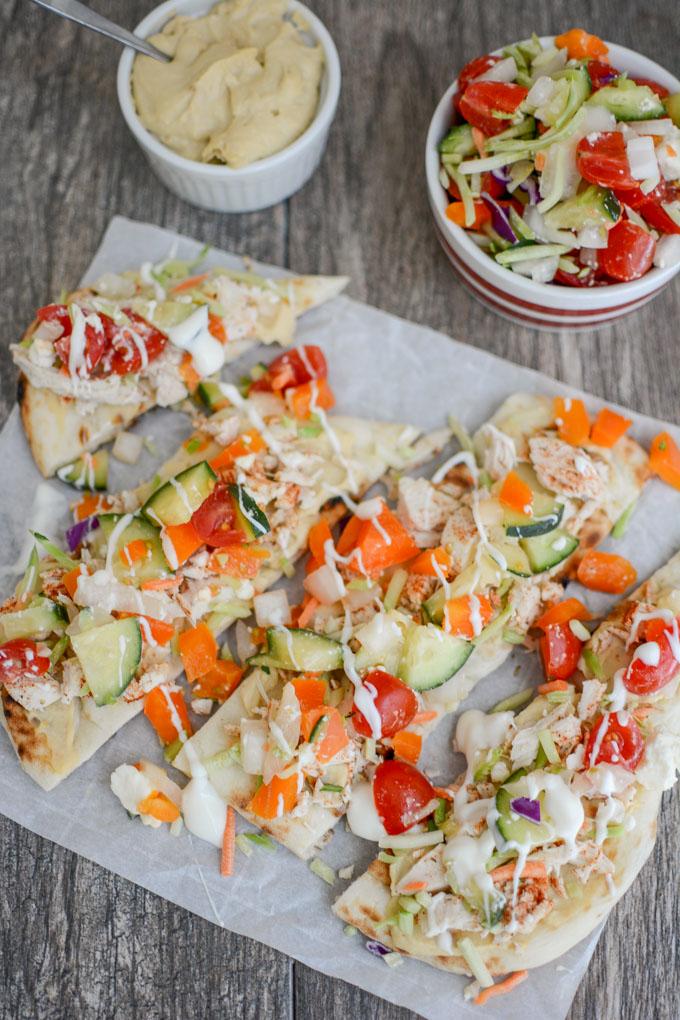
Filed Under: Breakfast, Baking, Sponsored Tagged With: Cherry, Chocolate Chips, Egg, Ginger, Hemp Seed, Milk, Molasses

My New Ebook! Freezer Magic

October 28, 2018 by Lindsay Leave a Comment

freezer magic ebook

Hi friends!

Just popping in with a very special announcement. My new ebook – Freezer Magic is now available to purchase! I’ve been working hard on this ebook over the past 3 months – writing the content, choosing the recipes, testing and photographing the recipes and just overall working to make it the best resource it can be for you guys.

Freezer meals are one of the most requested topics from you guys and with baby 3 on the way, it seemed like the perfect time for me to gather all my thoughts and share my favorite tips, tricks and recipes. Here’s what you’ll find inside:

Screen Shot 2018 10 28 at 8.25.22 PM

There are over 50 recipes in the book, including 20 that aren’t on the blog- everything from breakfasts to snacks to dinners to help you stock your freezer. I even put together 7 power prep sessions that give you a list of meals to prep, along with a grocery list, suggested plan of attack and recipe cards so you can knock out a bunch of meals or snacks all at once!


This week only, Freezer Magic is on sale for $12.99. On Friday, the price will increase to $14.99. OR if you haven’t checked out my first ebook – The Ultimate Guide to Food Prep, you can snag both for $19.99 this week only!

To purchase, click the buttons below!

Loading…

Loading…

Enjoy!
–Lindsay–
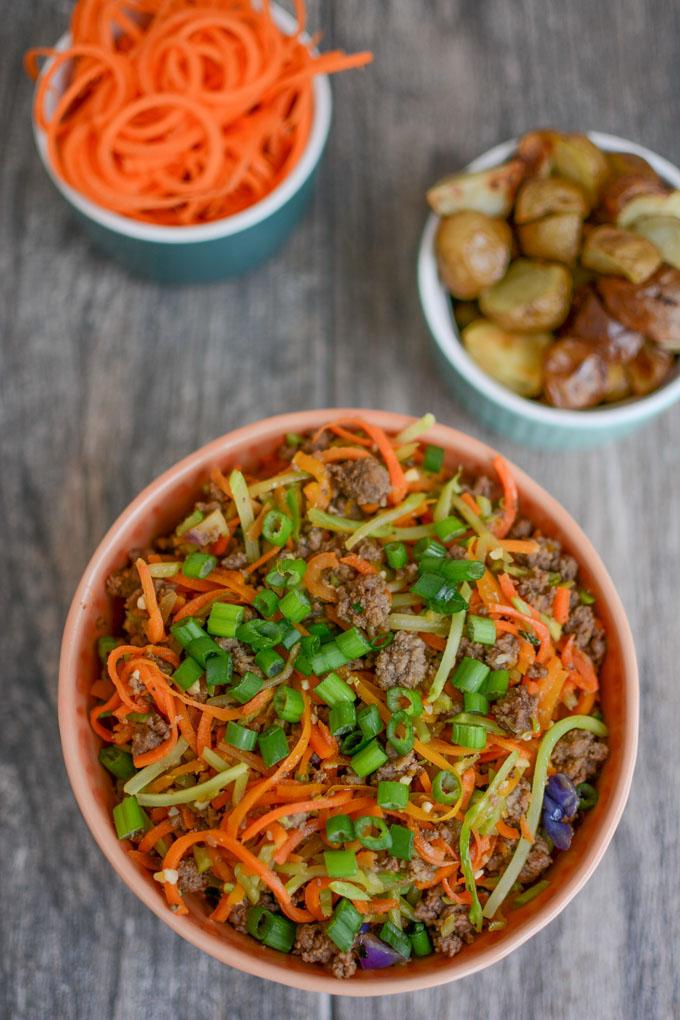
 

Filed Under: Food Prep

Sheet Pan Sausage and Smashed Potatoes

October 22, 2018 by Lindsay 4 Comments

Sheet Pan Sausage and Smashed Potatoes is a quick weeknight dinner and an easy, healthy way to feed the whole family. Serve with your favorite steamed vegetables or a simple salad and let the kids help smash the potatoes!

Sheet Pan Sausage and Smashed Potatoes

Hi friends!

I made this super quick Sheet Pan Sausage and Smashed Potatoes dinner a few weeks ago and almost forgot to share it with you guys. This one is so so easy – almost one of those non-recipe recipes but I wanted to post it because it’s great for those nights you need something easy and filling with very minimal effort.

You can use your favorite brand of chicken sausage for this. I love the ones that are fully cooked so all I’m focusing on is heating them up and browning a little bit for flavor. For the potatoes, I cook them in them in the microwave first until they’re soft enough to smash, then put them in the oven to crisp them up.

Sheet Pan Sausage and Smashed Potatoes with parmesan

I served mine with a side of marinated kale to keep it simple but it would be equally good with some steamed broccoli or green beans…or whatever your favorite veggie may be. You could even give it a breakfast spin by serving with some scrambled eggs. We’re big fans of breakfast for dinner around here. OR stick that kale in the oven on a separate pan and make your own kale chips.

Here’s your super easy recipe:

Print

Sheet Pan Sausage and Smashed Potatoes

Sheet Pan Sausage and Smashed Potatoes
Print Recipe

5 Stars 4 Stars 3 Stars 2 Stars 1 Star

No reviews

This quick weeknight dinner is an easy, healthy way to feed the whole family. Serve with your favorite steamed vegetables or a simple salad and let the kids help smash the potatoes!

  • Author: Lindsay
  • Yield: Serves 4

Ingredients

Scale

approx 25 mini potatoes (I use Little Potato Co Dynamic Duo white and red)
1 Tbsp oil
parmesan cheese, to taste
salt and pepper, to taste
4 fully cooked chicken sausages
green onion to garnish

Instructions

  1. Stab each potato with a knife a couple of times. Place them all in a microwave-safe bowl, toss in oil and microwave 3-4 minutes until soft.
  2. Place potatoes on baking sheet and smash flat with the bottom of a small glass.
  3. Bake at 400 degrees F for 10 minutes.
  4. Remove from oven. Flip potatoes over and top with grated parmesan cheese and salt and pepper.
  5. Slice chicken sausage (I use a diagonal angle to get longer slices) and place the slices on the baking sheet.
  6. Bake for 10 more minutes.
  7. Garnish with green onion and serve with vegetables.

Notes

Use your favorite brand of fully-cooked chicken sausage.

Feel free to skip the parmesan cheese and season your potatoes with different spices if you desire.

Did you make this recipe?

Tag @theleangreenbean on Instagram

Pretty simple right?

This quick weeknight dinner is an easy, healthy way to feed the whole family. Serve with your favorite steamed vegetables or a simple salad and let the kids help smash the potatoes!

Let me know if you try it!

Enjoy!
–Lindsay–
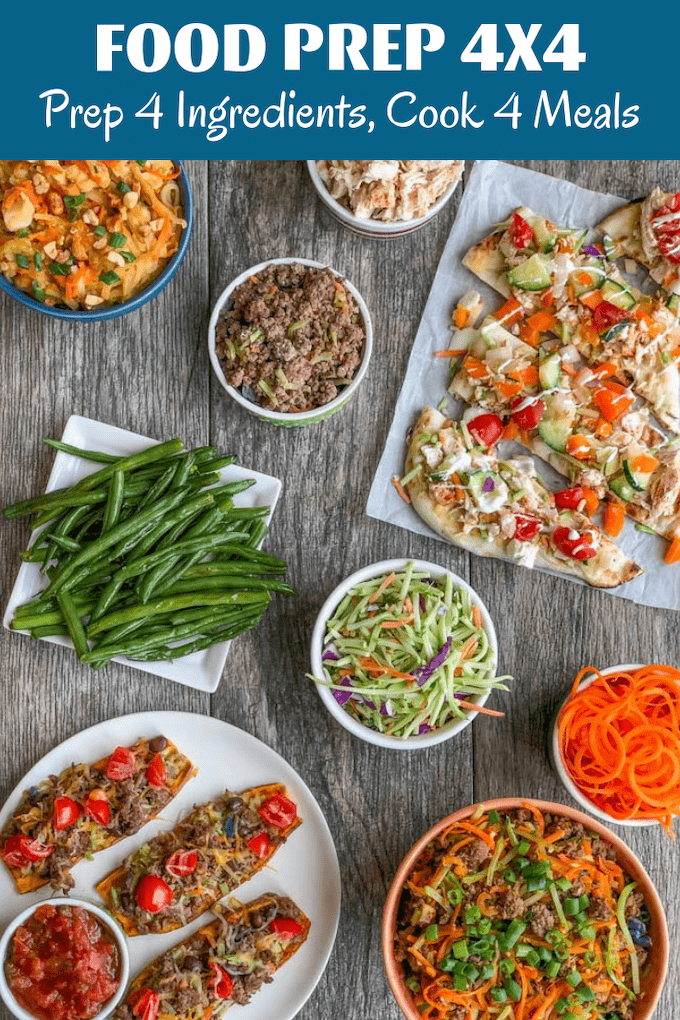
Filed Under: Dinner Tagged With: Chicken Sausage, Oil, Potato

  • « Go to Previous Page
  • Page 1
  • Interim pages omitted …
  • Page 15
  • Page 16
  • Page 17
  • Page 18
  • Page 19
  • Interim pages omitted …
  • Page 65
  • Go to Next Page »

Primary Sidebar

Lindsay Livingston The Lean Green Bean Healthy Living Tips and Tricks

I'm a Registered Dietitian and mom of three from Columbus, Ohio. I use this blog to share simple, healthy recipes, nutrition tips, and an honest glimpse of motherhood!

Learn More →

Questions? Comments? Email me: [email protected]

The Lean Green Bean Facebook The Lean Green Bean Instagram The Lean Green Bean Pinterest The Lean Green Bean Twitter The Lean Green Bean Feed
footer-logo
The Lean Green Bean Facebook The Lean Green Bean Instagram The Lean Green Bean Pinterest The Lean Green Bean Twitter The Lean Green Bean Feed
Recipes

Breakfast
Dinner
Snack
Slow Cooker

Kids

Cooking With Kids
Favorite Gifts
Toddler Meals
Indoor Activities

Resources

Easy Packed Lunches for Kids
Dinner Spark
Snack Spark
Ultimate Guide to Food Prep

About

Meet Lindsay
Become an RD
Work with Me

The Lean Green Bean is a participant in the Amazon Services LLC Associates Program, an affiliate advertising program designed to provide a means for sites to earn advertising fees by advertising and linking to amazon.com.
Read the full privacy and disclosure policy here.

Copyright © 2022 · The Lean Green Bean

table talk series

Learn how food affects your body.

Get my free Table Talk email series where I share bite-sized nutrition information about carbs, protein, and fat, plus bonus information about snacks and sugar!

[email protected]