• Skip to main content
  • Skip to primary sidebar

Learn how food affects your body. Get Free Nutrition Info Today

the-lean-green-bean-logo
  • Home
  • Recipes
  • Kids
  • Resources
    • Ebooks
    • Food Prep
    • Videos
    • Snack Round-Ups
    • Gift Guides
  • About
    • Become An RD
    • Work With Me
  • Search
the-lean-green-bean-logo
  • Home
  • Recipes
  • Kids
  • Resources
    • Ebooks
    • Food Prep
    • Videos
    • Snack Round-Ups
    • Gift Guides
  • About
    • Become An RD
    • Work With Me
  • Search

blog

Fruit Chia Slush

August 1, 2018 by Lindsay 2 Comments

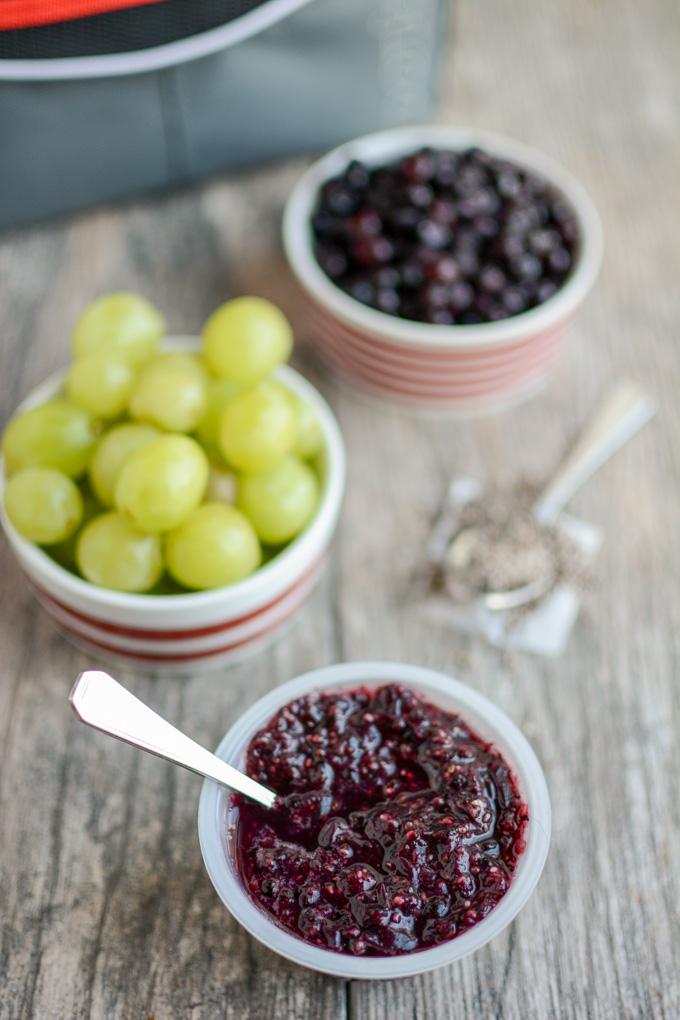
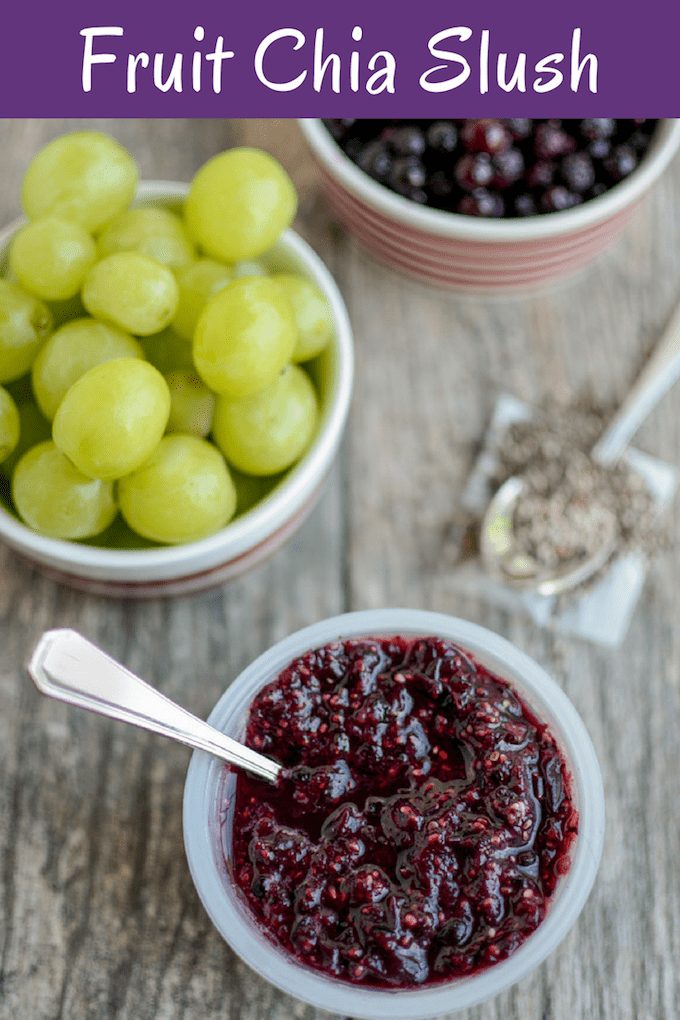
This Fruit Chia Slush is a fun, kid-friendly addition to a lunchbox once school starts! It’ll help keep the other food cool and thaw just enough by lunchtime to enjoy as a little treat. 

Fruit Chia Slush - use your favorite fruits for a kid-friendly lunch box treat

Hi friends!

Welcome to August! I don’t know about you, but around here, school starts mid-August which means this mama is officially in countdown mode since our preschool follows the school district calendar. Have I mentioned lately how much we need school structure back in our lives? SO MUCH.

Anyways, even though Squish doesn’t need a packed lunch yet, I know a lot of my fellow mamas are gearing up to start packing daily lunches again so I thought I’d throw out this Fruit Chia Slush as a fun alternative to just packing plain old fruit. Not that there’s anything wrong with fruit, it’s just fun to change things up occasionally!

Fruit Chia Slush

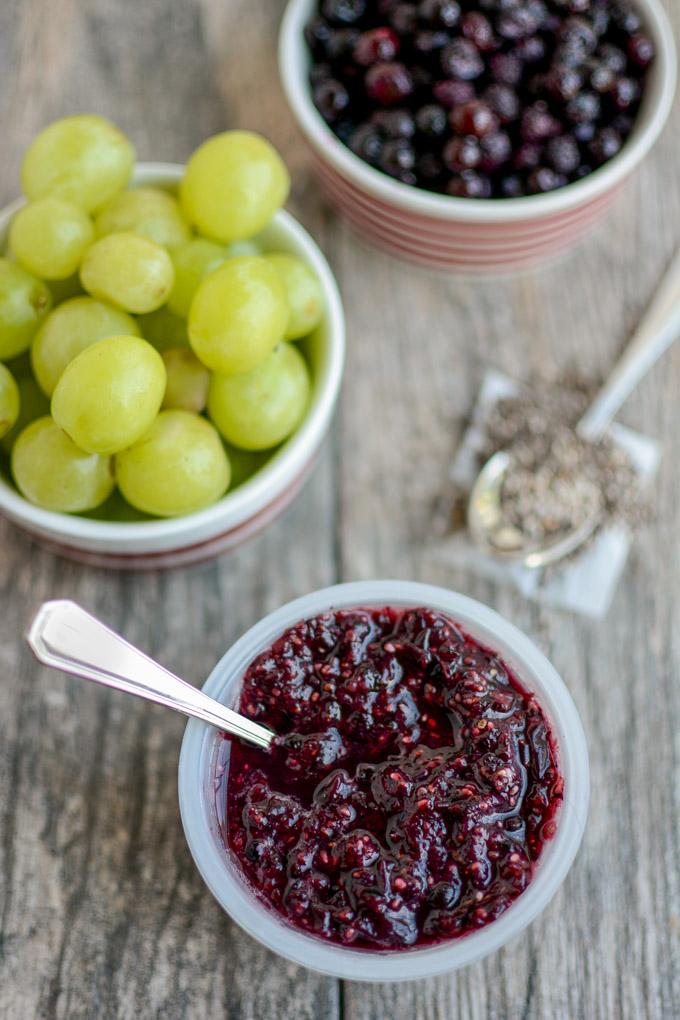
This recipe is super flexible. You can use whatever fruits your kids like – I chose grapes because I like their naturally icy texture when frozen and wild blueberries because they help the chia seeds blend in a little bit! Note- I used red grapes to make these, but green grapes in the photos because no one likes an all purple and red photo!

To put these in the freezer, I saved a bunch of the plastic containers from our Dole peach cups that the kids eat for breakfast and just reused them. I also made some in mason jars since we mostly eat them at home, not at school. Use whatever small containers you have on hand. Yogurt containers would work too. Then I just cover them with foil and make sure they’re stored upright in the lunchbox.

If you’re eating them at home, just pull them out of the freezer about 45 minutes before you want to eat them. Or stick them in a lunchbox just before you head out the door in the morning. Be sure to pack a sturdy spoon so the kids can chop them up into a slushy treat!

Here’s the recipe I used. Remember that you can use your favorite fruits and start with either fresh or frozen fruit. I used fresh grapes and frozen wild blueberries.

Print

Fruit Chia Slush

Fruit Chia Slush with grapes and blueberries
Print Recipe

5 Stars 4 Stars 3 Stars 2 Stars 1 Star

5 from 1 review

This Fruit Chia Slush is a fun, kid-friendly addition to a lunchbox once school starts! It’ll help keep the other food cool and thaw just enough by lunchtime to enjoy as a little treat. 

  • Author: Lindsay
  • Prep Time: 5 min
  • Total Time: 5 minutes
  • Yield: makes approx 4 (1/4 cup) servings 1x

Ingredients

Scale

1.5 cups grapes (I used red)
1 cup frozen wild blueberries
2–3 Tbsp chia seeds

Instructions

Combine ingredients in a blender and mix until well combined. (If needed, add 1-2 Tbsp water to get the blending started).
Pour into small cups and freeze. Use a spatula to scrape down the sides of the blender and get all those chia seeds! I use plastic fruit cups and portion into approximately 1/4 cup servings.
Set on counter 45 minutes before eating or pack in a lunch box. (Cover container with foil)

Notes

Feel free to use whatever fruit you’d like and experiment with the amount of chia seeds you like.

Did you make this recipe?

Tag @theleangreenbean on Instagram

Pretty easy, right??

This Fruit Chia Slush is a fun, kid-friendly addition to a lunchbox once school starts! It'll help keep the other food cool and thaw just enough by lunchtime to enjoy as a little treat. 

[click_to_tweet tweet=”Try this Fruit Chia Slush in the kiddo’s lunchbox this year for a fun, healthy treat!” quote=”Try this Fruit Chia Slush in the kiddo’s lunchbox this year for a fun, healthy treat! “]

Let me know if you try this recipe!

Enjoy!
–Lindsay–

Filed Under: Snack, Lunch Tagged With: Blueberry, Chia Seed

Living with Diabetes: What You Should Know

July 24, 2018 by Lindsay 12 Comments

Hi friends!

Some have you have asked for an update on how my husband is doing since his diagnosis with Type 1 diabetes. Read his story here. He’s taking over the blog today to give you guys an update about some of the things he’s learned over the past 4 months, as well as some of the things we think everyone should know and be aware of when it comes to diabetes!


On March 9th, I drug my sluggish, thirsty, insatiably hungry, constantly urinating, 33-year-old body to the doctor for my annual physical. I had convinced myself that I had a thyroid issue because I didn’t want to believe I could have diabetes, even though my wife had already suggested the possibility… My doctor called me back within the hour and told me to go to the ER because my blood sugar was over 400mg/dl (100 is normal). It was definitely diabetes, and I was devastated.

family photo

Four months in, I can confidently say to anyone else recently diagnosed with Type 1 Diabetes: “EVERYTHING IS GOING TO BE OK! YOU ARE IN CONTROL!”

I’ve cried twice since I got diagnosed. The first time was when I was calling my wife to tell her we needed to head to the ER, and calling my Mom to ask her to watch the kids. I think it was just the shock that something seriously bad had happened within my body and it would never be the same. I had tears rolling down my face as I drove.

The second time, I was reading a book that began by highlighting how diabetics are at higher risk for dozens of terrible afflictions. This was probably four days in. I had remained uncharacteristically calm and rolled with the punches up to this point- the punches primarily being adding insulin, needles, and lancets into my life. I was trying to arm myself with more knowledge and was taking the initiative to educate myself. Too much, too soon. The levee broke. I put that book down and lost it. I started sobbing uncontrollably. I was thinking about my kids, my wife, and how their healthy and physically fit father/husband had been leveled to a heap of rubble.

However, with a little more experience and education, I learned that diabetics WHO DON’T HAVE GOOD CONTROL OF THEIR BLOOD GLUCOSE, are at much higher risk for those things. Simplified, blood with a lot of sugar in it is bad. It’s thicker. It’s like a sludge gumming up your body/engine. Hurting capillaries in your eyes, nerves, your organs- it’s not good.

dad and toddler at park

Luckily, I’ve been able to learn the ropes pretty quickly, and I’m happy to say my A1C is already back down from my initial 12.7% to 5.9%! (That’s good). Now I actually believe my mantra. “EVERYTHING IS OK! I AM IN CONTROL!”

Learning about diabetes has kind of been like trying to take a sip from a firehose, but wanted to share some thoughts on my 4-month crash course of adjusting to this new lifestyle.

dad and toddler at the movies

What I’ve learned over the past few months

I really knew nothing about diabetes- and a lot of people don’t. Here’s what I thought I knew:

  • My grandma had Type 2
    • TRUE (maybe?) She was told she had Type 2, but based on what I’ve learned, she definitely could have had Type 1 as some people are misdiagnosed as Type 2 when they are in fact Type 1 or 1.5.
  • Kids get Type 1 and Adults get Type 2
    • FALSE. I honestly didn’t think I could get Type 1 at age 33. This disease does not discriminate based on age.  You can get it at any age.
  • Diabetics need Insulin
    • Type 1 yes, Type 2 maybe.
  • People who have it just get an insulin pump and it handles it.
    • FALSE. And SO very false indeed. My good friend in high school had an insulin pump and I never really asked about it. I thought it just did everything for her. Now I realize how wrong I was. If anything, the pump really just minimizes the number of times you need to pierce your skin. You still need to count carbs and bolus. You adjust settings and rates based on what you’re doing. It’s still a lot of work and you should high-five any type 1 friends you have for working around the clock to keep their numbers in check, whether they have a pump or not.

Here’s what I think most people think they “know” about diabetes:

  • Wilford Brimley says “Diabeetus”
    • This is True
  • You can’t drink alcohol
    • FALSE. You can, you just have additional concerns that most people don’t need to think about. I’ve found that red wine has basically no impact to my blood sugar and am able to drink some types of beer, while others spike my blood sugar no matter how I time it or how much insulin I take. It’s a trial and error process that’s different for everyone.
  • You get it because you eat too many donuts
    •  False for Type 1, but eating habits can definitely play a role in the development of Type 2.

dad and toddler eating hotdog

Here are the KEY points that most people can’t articulate:

  • Difference between Type 1 and Type 2
    • Type 1- Body stops making insulin. You have a bum pancreas so you must act as your own pancreas and take insulin.
    • Type 2- Body becomes resistant to insulin. Your pancreas is likely cranking out a ton of insulin, but it’s still unable to regulate your blood sugar because your body is resistant to it. This can often be mitigated by diet and exercise but oral medication or injected insulin may still be required.
  • What is Insulin?
    • It’s a hormone that transfers glucose from your blood to your cells. It’s essentially how you get energy from the food you eat.  When you don’t have enough, sugar hangs out in your bloodstream until it builds up and your body tries to filter and pee it out. That’s why constant urination is a symptom. And of course, FATIGUE, since you are not getting much-needed glucose into your cells.

dad and toddler with food prep

And here are my main takeaways since being diagnosed:

  • It’s SO IMPORTANT to know the signs, no matter who you are. You could be the key to saving somebody. It could be a friend, a friend’s child, your own child. Encourage them to go to the doctor if you notice or hear them complaining about:
    • Constant Thirst
    • Frequent Urination
    • Fatigue
    • Rapid weight loss
    • Complaints of blurry vision
  • Your health and lifestyle are such an important buffer against the unexpected.
    • I think more than anything, I can credit my lifestyle for bouncing back quickly from my initial diagnosis. I had lost 20 pounds. Because I was already exercising and eating well, really the only thing that changed for me was having to take insulin. I easily gained the 20 pounds back and am feeling great again. An active, healthy lifestyle is also so important.
  • Attitude is everything.
    • Your efforts are better spent attacking diabetes head-on than wallowing in self-pity. I’ve focused on figuring out how to thrive with this condition and that’s made it easier to tackle on a day-to-day basis.
  • It’s a full-time job.
    • There are no days off. It’s rare that more than an hour or two goes by where I don’t think about my blood sugar.
  • You can adapt to diabetes quickly.
    • After only 4 months, it’s already like second nature. Counting carbs. Bolusing and timing insulin. Knowing how your glucose will react to different foods. Knowing how to adjust your insulin if you’re going to be doing different activities like yard work or cleaning the house. It’s hard to believe I didn’t even know what Type 1 diabetes was at the beginning of March.
  • Diabetes won’t hold you back, you just have to plan around it.
    • I have juice boxes stashed everywhere. Sometimes I have to turn around and go back to the house if I forget my insulin. But at the end of the day, I’m doing the things I want to do, they just require a little extra planning.
  • If it had to happen to me, thank God it happened to me at this point in my life.
    • I would not have had the discipline, ESPECIALLY AS A COLLEGE STUDENT, to deal with this. I once ate an entire “Barnyard Buster” at TeeJays country place and a Steakburger platter at Steak and Shake during a night of drinking. If you’re local to central Ohio you know how disgusting that is. Shout out to all the T1Ds who were able to manage adolescence and college years carrying this heavy responsibility.
That’s all for today! Let us know if you have any questions!
Enjoy!
–Lindsay–
Filed Under: Uncategorized

Mexican Burgers

July 18, 2018 by Lindsay 1 Comment

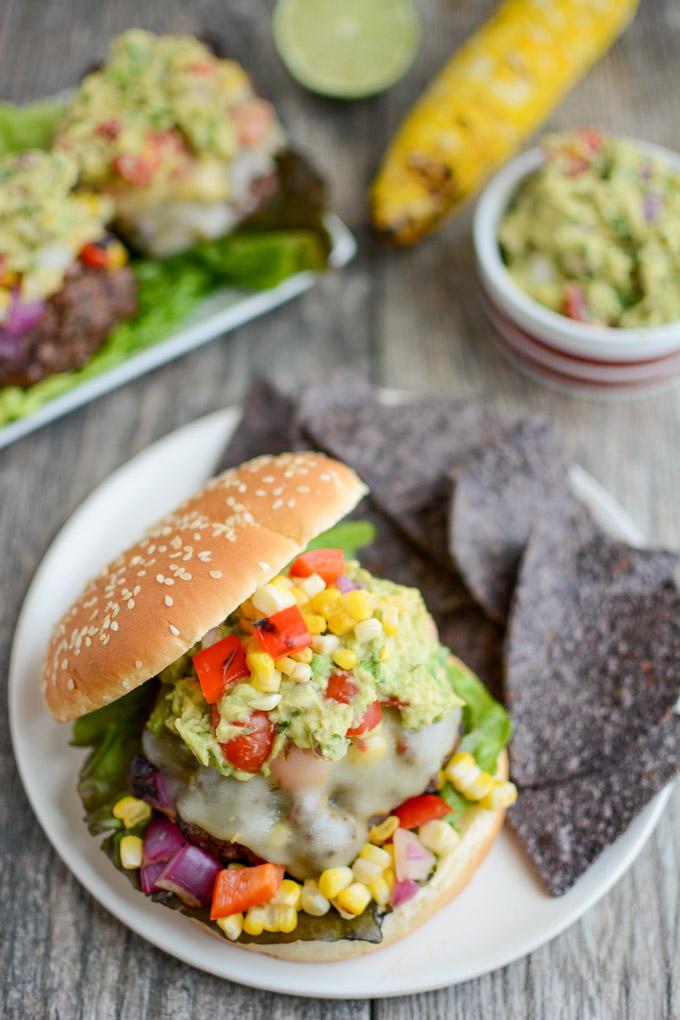
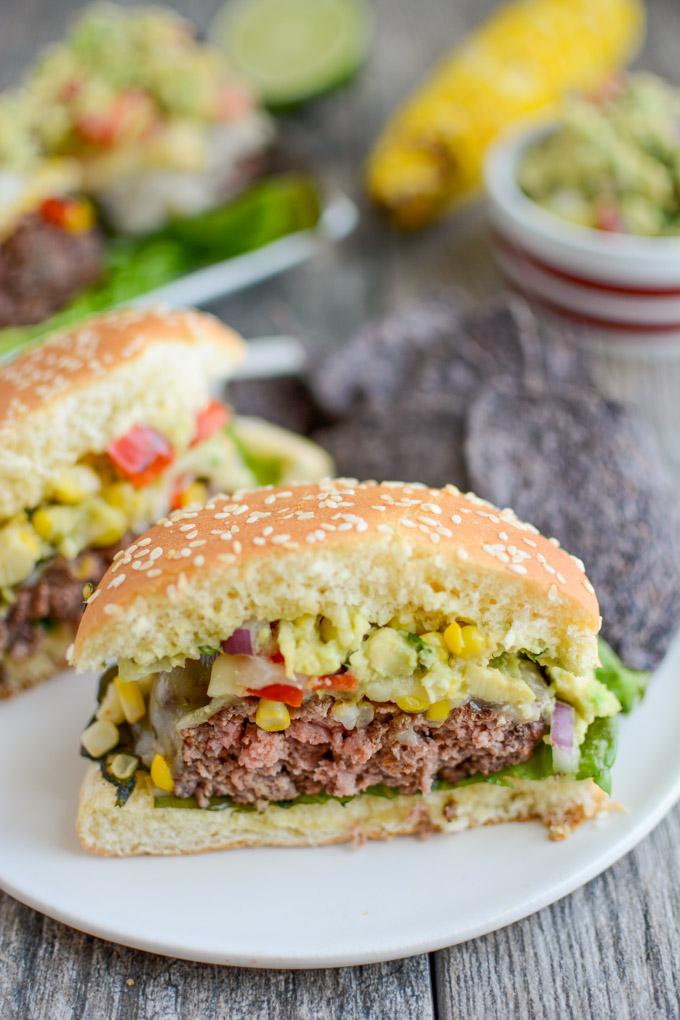
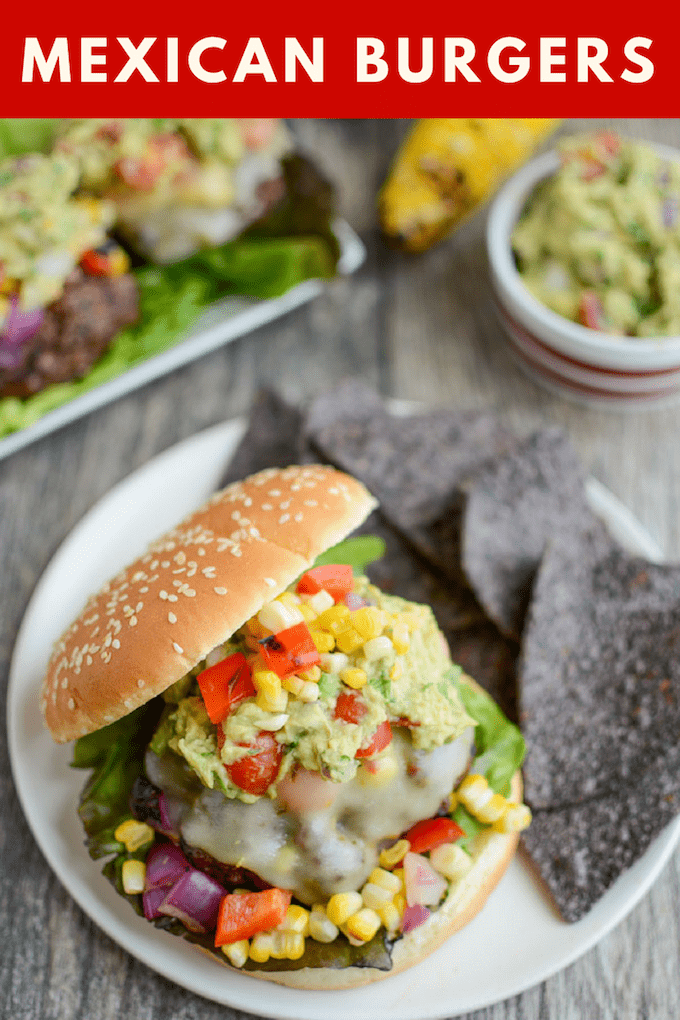
These Mexican Burgers are perfect for your summer cookout or party. Topped with grilled corn salsa, pepper jack cheese and lots of guacamole, each bite is packed with flavor!

Mexican Burgers topped with grilled corn salsa, pepperjack cheese and guacamole

Thanks to Meijer for sponsoring this post.

Hi friends!

Are you drooling over these burgers yet? If not, you should be! They are most certainly a new favorite around here. I’m not actually a huge burger girl myself…but my husband is and he seems to have passed his love along to Squish as well. When I told him I was on a mission to develop a delicious new burger recipe, he immediately suggested a Mexican inspired burger.  We both immediately agreed on pepper jack cheese and LOTS of guac and after some deliberation, we decided on a grilled corn salsa to pull it all together.

Meijer Home Delivery

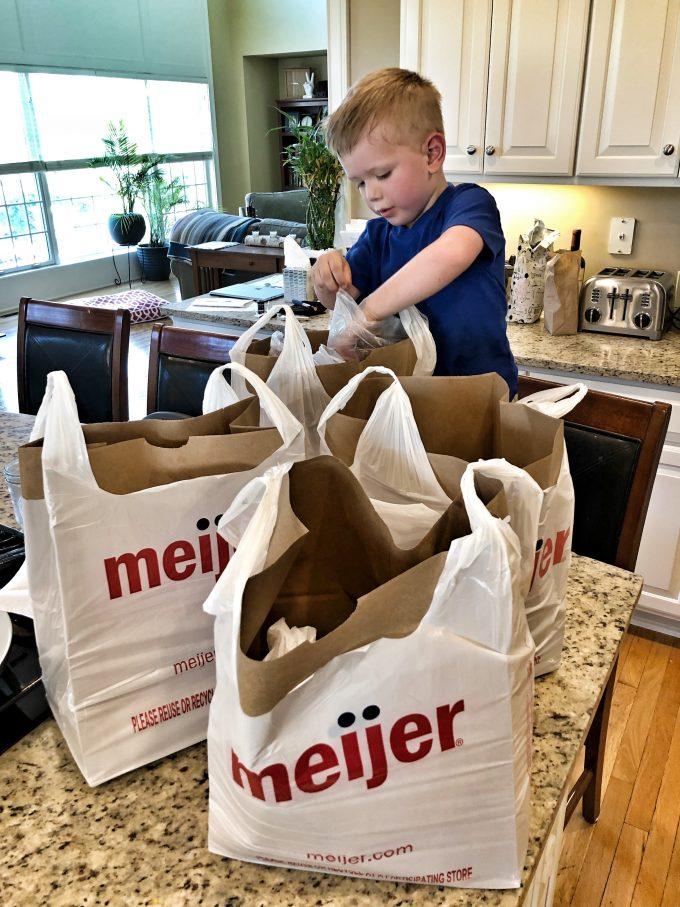
We’ve tested these burgers a few times now to make sure we perfected them before sharing with you guys and a few weeks ago, my husband had a strong craving for a lunchtime burger. I had a busy morning with the kids and no chance of making it to the store…but what I did have was a mom’s secret weapon: Meijer Home Delivery. I pulled up the shopmeijer app on my phone and ordered all of the burger ingredients and they were delivered right to my door leaving us plenty of time to make them for lunch!

Something else to think about: Say you made last minute plans with some friends for a get-together at their house and no one had any food prepared. You could easily use the shopmeijer app to order what you need and get it delivered to your friend’s house for a cookout! Or if both you and your spouse work outside the home and you need ingredients for dinner the next day, set up a 6am delivery so it’s taken care of before you leave for work! Check out Meijer Home Delivery here.

Grilled Mexican Burger cut in half

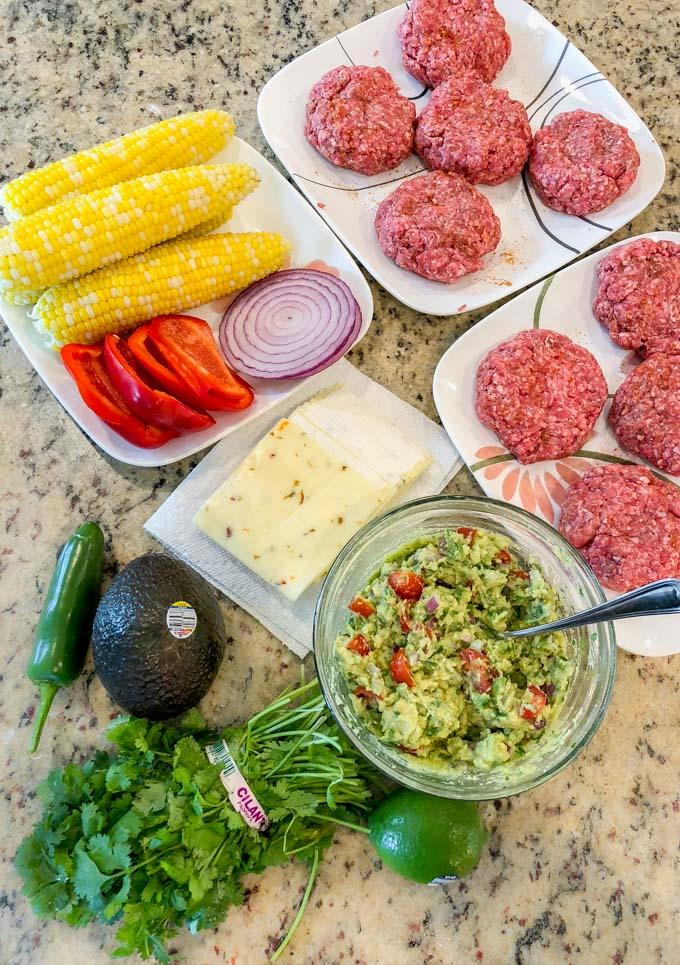
Now back to the burgers! So, our ingredients were delivered to our front door in plenty of time for lunch and then it was all hands on deck to get them ready. I prepped the burgers (a simple mix of Certified Angus Beef® brand ground beef and your favorite taco seasoning) while Little Miss had fun peeling the corn (ie throwing corn husks all over the kitchen floor).

ingredients for the Mexican Burgers

When my hubby came home from work, he grilled the veggies and the burgers while I made the guacamole and the corn salsa. When everything was done, we popped them on our favorite Meijer Gourmet Griller buns and dug in. Squish took the position of official taste tester.

Here are your burger-making directions:

Print

Mexican Burgers

Mexican Burgers topped with grilled corn salsa, pepperjack cheese and guacamole
Print Recipe

5 Stars 4 Stars 3 Stars 2 Stars 1 Star

No reviews

These Mexican Burgers are perfect for your summer cookout or party. Topped with grilled corn salsa, pepper jack cheese and lots of guacamole, each bite is packed with flavor!

  • Author: Lindsay
  • Prep Time: 10 min
  • Cook Time: 10 min
  • Total Time: 20 minutes

Ingredients

Scale

3 pounds Certified Angus Brand® ground beef
2 Tbsp taco seasoning
2 ears of corn
2 thick slices of red onion rings
1 medium red bell pepper
1 cup quartered cherry tomatoes, divided
2 limes
2 medium avocados
2 Tbsp fresh cilantro, minced
1/2 cup diced red onion
6–8 slices pepper jack cheese
6–8 Meijer Gourmet Grillers buns
Lettuce and tomato optional.

Instructions

  1. Steam corn on the stovetop or in the microwave and set aside.
  2. Mix ground beef and taco seasoning together and form into 6-8 burger patties (depending on how big you like your burgers)
  3. Slice red pepper into 4 sections and remove the seeds and stem.
  4. Preheat grill to high heat.
  5. Grill corn, peppers and onion rings for a few minutes until slightly charred.
  6. Place burgers on the grill.
  7. While burgers are cooking on one side, cut the corn off the cob, dice the red pepper and onion and mix with 1/2 cup cherry tomatoes and juice from one lime.
  8. Flip burgers and top with corn salsa, then top with cheese and finish cooking.
  9. Make guacamole by mashing avocados and mixing with 1/2 cup diced red onion, 1/2 cup cherry tomatoes, cilantro and juice from one lime.
  10. Place burgers on Meijer Gourmet Griller buns, top with guacamole and serve.

Did you make this recipe?

Tag @theleangreenbean on Instagram

This recipe works best with two people so one can be manning the grill while the other makes the salsa and the guac.

These Mexican Burgers are perfect for your summer cookout or party. Topped with grilled corn salsa, pepperjack cheese and lots of guacamole, each bite is packed with flavor!

Be sure to let us know if you try these burgers this summer! Hopefully they’ll be a new favorite for you too!

Enjoy!
–Lindsay–
This is a sponsored conversation written by me on behalf of Meijer. The opinions and text are all mine.

Filed Under: Dinner, Sponsored Tagged With: Avocado, Bell Pepper, Cheese, Corn, Ground Beef

Hummus Crusted Chicken

July 16, 2018 by Lindsay 1 Comment

This Hummus Crusted Chicken recipe is a quick, healthy recipe that’s perfect for lunch or dinner. Serve it with a side of rice, throw it in a wrap or pita or serve it over a bed of greens. 

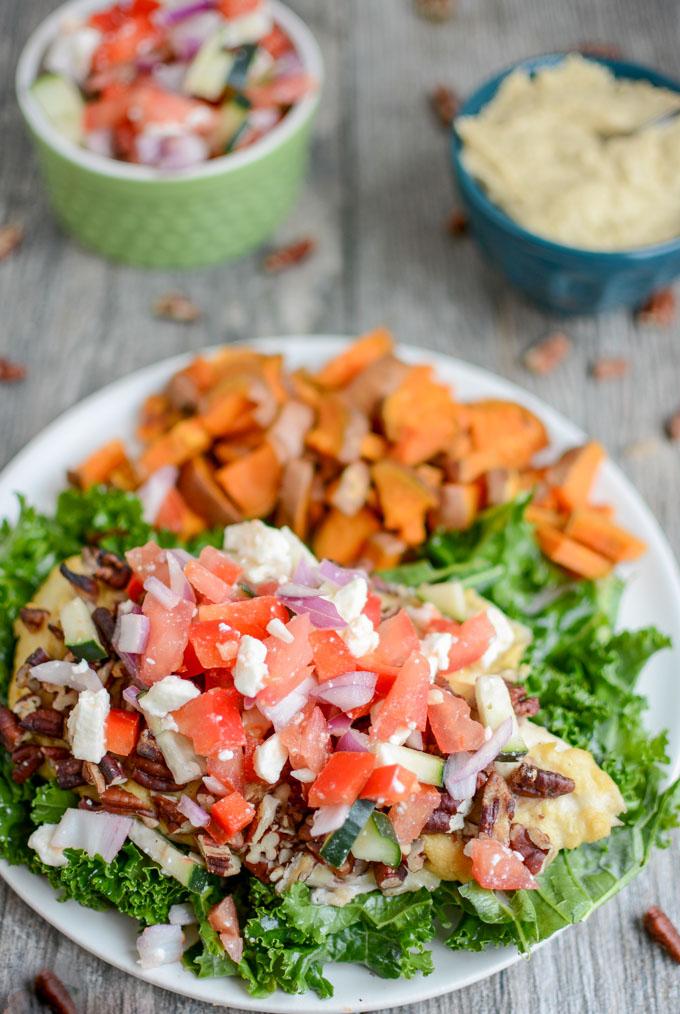
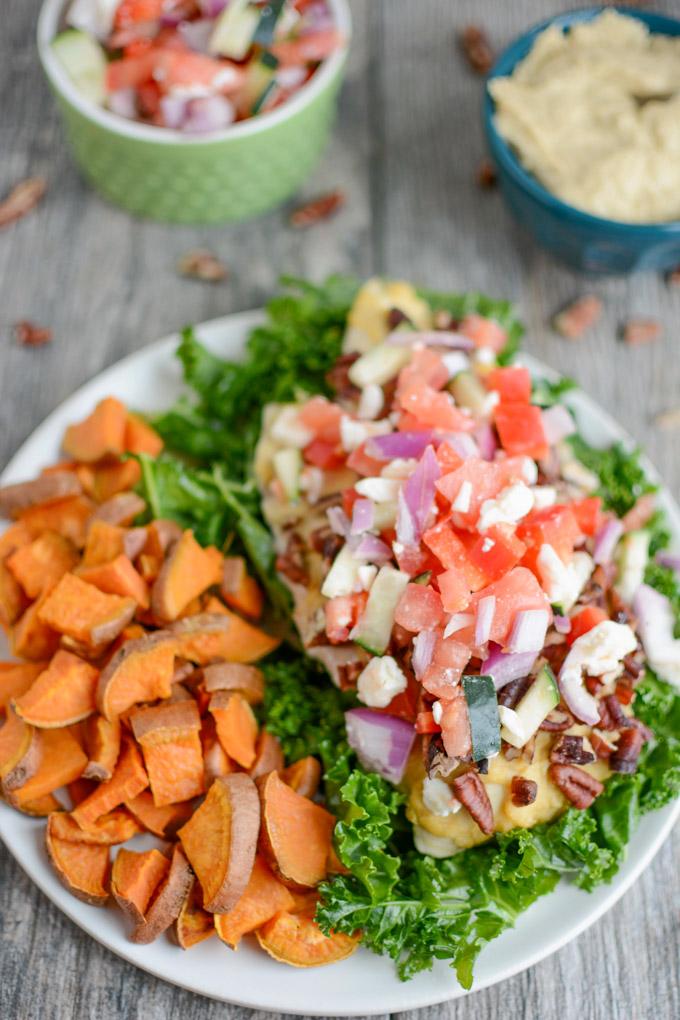
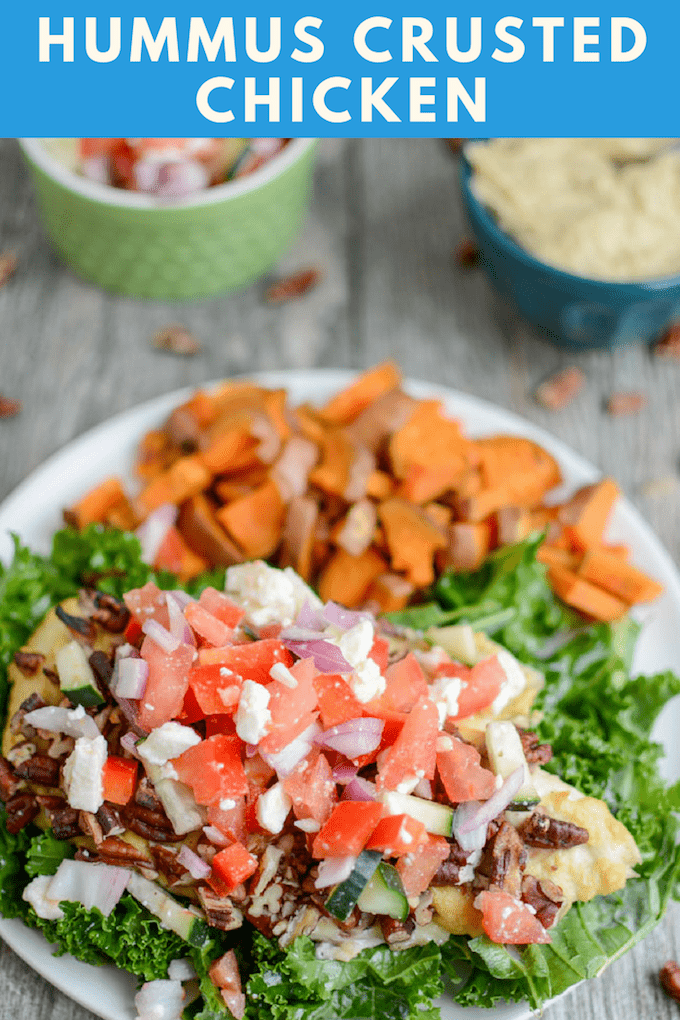
Hummus Crusted Chicken topped with feta and tomato mixture

Hi friends!

Just popping in to share this quick and easy recipe for Hummus Crusted Chicken with you guys on this lovely Monday. This is one of those recipes that’s so easy, I hesitate to really call it a recipe…but I’m always looking for new ways to cook chicken so I thought I would share with you.

Basically, all you do is cover chicken breasts with hummus and chopped nuts – I used pecans but you could use whatever your favorite nut is, then bake and top with a simple mixture of red onions, peppers, cucumbers, tomatoes and feta.

If you want to take things a step further, you could marinate the chicken with some oil and red wine vinegar and greek seasoning for a couple of hours before baking it! Check out this recipe- Mediterranean Turkey Spinach Salad for a simple marinade.

Hummus Crusted Chicken with roasted sweet potatoes

For my hubby, I served this on a bed of kale with a side of roasted sweet potatoes. For myself, I prefer it baked and then sliced up and put in the pita with the toppings and some red leaf lettuce. No need for dressing in my opinion, but if you’re up for it, a simple oil and vinegar dressing would be perfect!

Here’s the recipe:

Print

Hummus Crusted Chicken

Greek Chicken 1 copy
Print Recipe

5 Stars 4 Stars 3 Stars 2 Stars 1 Star

No reviews

This Hummus Crusted Chicken recipe is a quick, healthy recipe that’s perfect for lunch or dinner. Serve it with a side of rice, throw it in a wrap or pita or serve it over a bed of greens. 

  • Author: Lindsay
  • Prep Time: 5 min
  • Cook Time: 15 min
  • Total Time: 20 minutes
  • Yield: serves 3-4 1x

Ingredients

Scale

1/4 cup hummus (use your favorite flavor!)
1 cup chopped pecans (or other nuts)
1 pound boneless, skinless chicken breasts, thinly sliced
2/3 cup red peppers, diced
2/3 cup cucumbers, diced
2/3 cup tomatoes, diced
1/2 cup red onion, diced
1/4 cup crumbled feta

Instructions

  1. Pat chicken dry with paper towels.
  2. Spread a layer of hummus on top of the chicken breasts and top with chopped nuts (press lightly to help them stick in the hummus)
  3. Bake at 400 degrees F for 12-15 minutes or until chicken reaches 165 degrees F. Watch carefully at the end and if the nuts start to get too dark, cover the pan with foil.
  4. Meanwhile, combine diced veggies and feta in a bowl and stir to combine.
  5. Top chicken with veggie mixture and serve over rice, in a pita or over a bed of greens.

Notes

Optional step – prior to baking, marinate chicken in oil, red wine vinegar, garlic, onion and oregano or greek seasoning.

Did you make this recipe?

Tag @theleangreenbean on Instagram

Pretty easy right? Be sure to let me know if you give this one a try!

This Hummus Crusted Chicken recipe is a quick, healthy recipe that's perfect for lunch or dinner. Serve it with a side of rice, throw it in a wrap or pita or serve it over a bed of greens. 

Enjoy!
–Lindsay–
Filed Under: Dinner, Lunch Tagged With: Bell Pepper, Chicken, Feta, Hummus, Pecan, Tomato

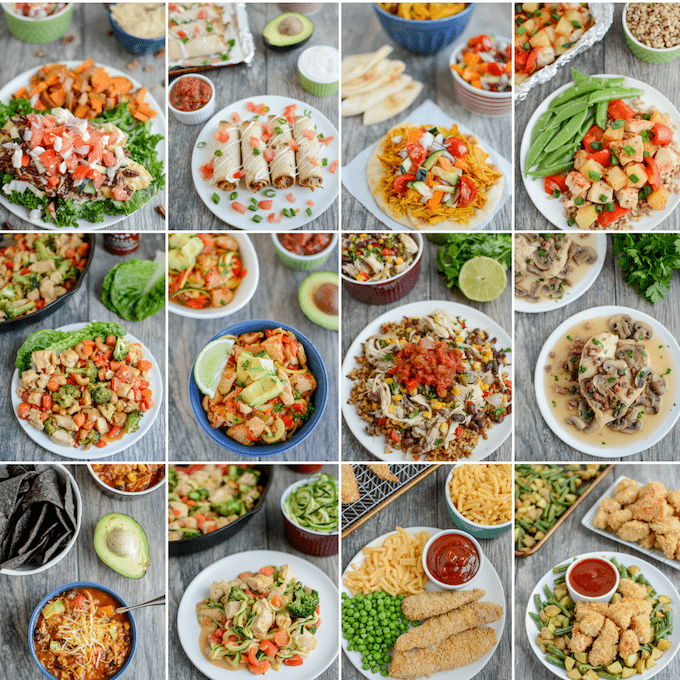
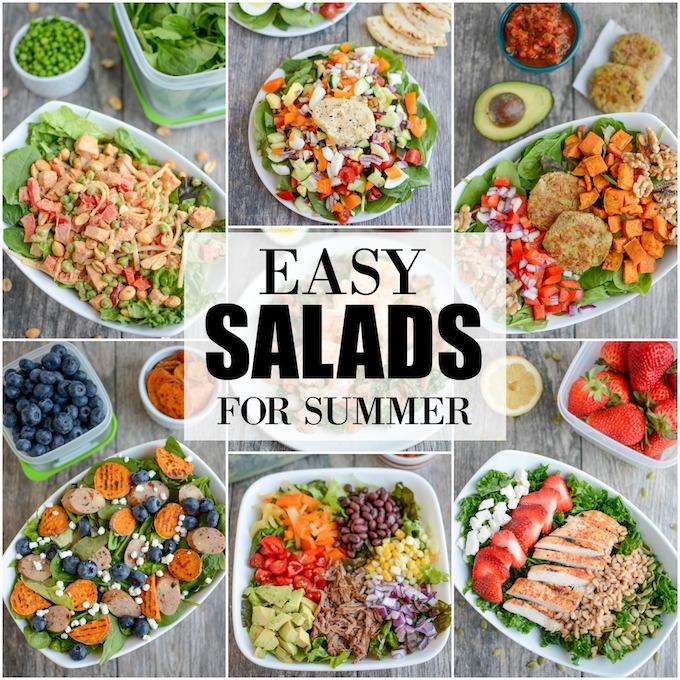
Salad Recipes for Lunch or Dinner

July 11, 2018 by Lindsay 1 Comment

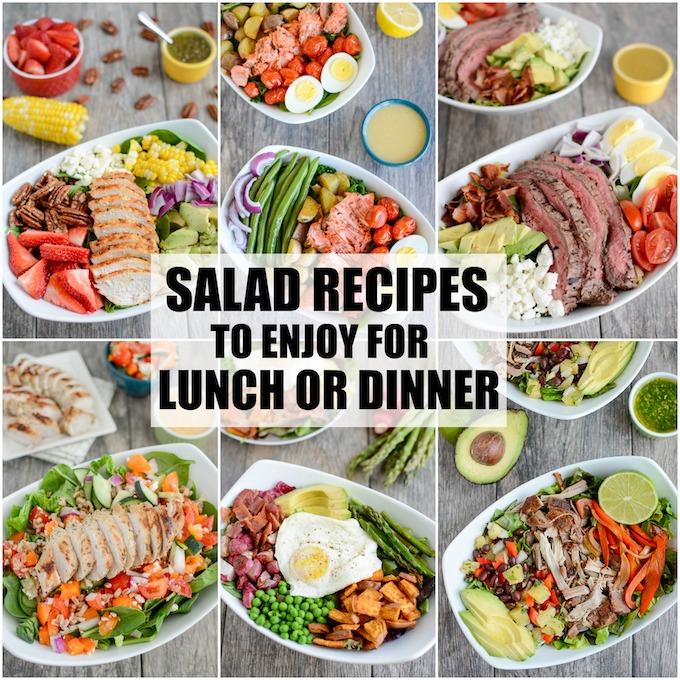
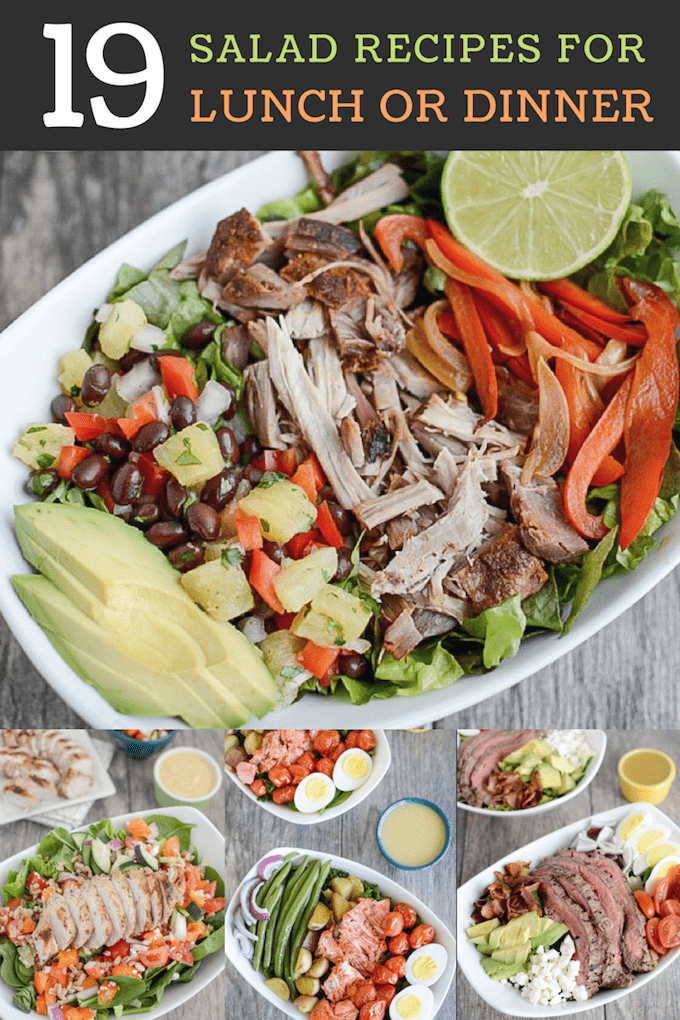
Looking for some salad recipes for lunch or dinner? These hearty salads are packed with fiber, protein, healthy fats and lots of veggies. Perfect for a quick summer meal!

Hearty Salad Recipes For Lunch Or Dinner

Hi friends!

A few months ago I shared 7 Easy Salads For Summer. These are some easy flavor combos that we’ve been enjoying for lunches and dinners at our house this spring and summer. Since then, I’ve heard from a lot of you saying you really enjoy salads as meals during the warm months but are always looking for new ideas.

So, I rounded up a few of the salads I’ve shared on my site over the years:

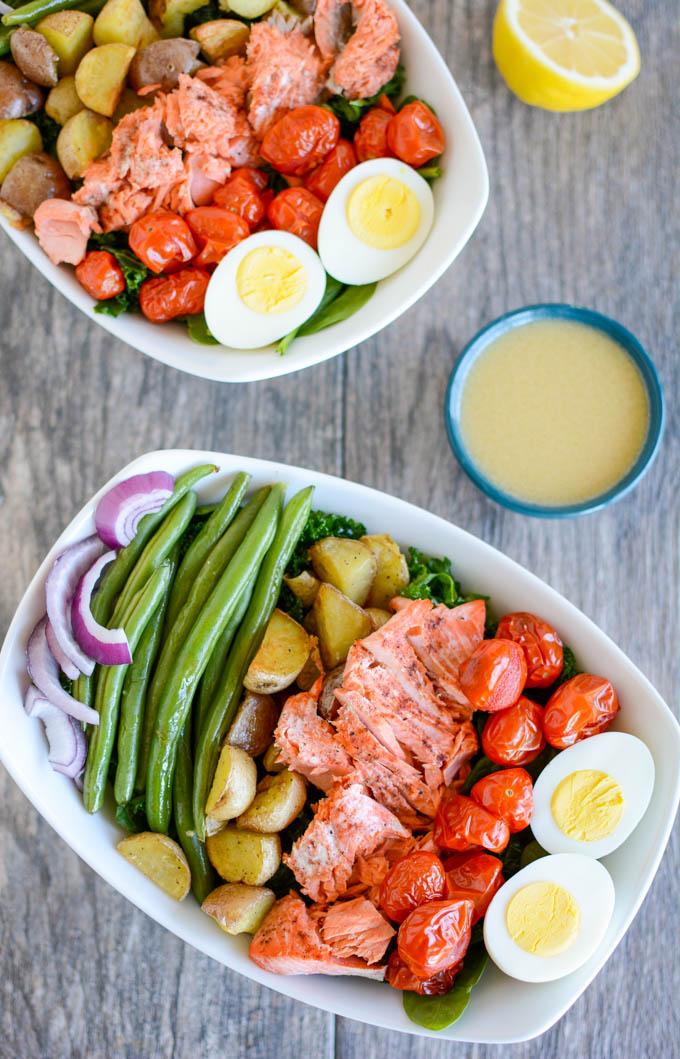
This Salmon Nicoise Salad is an easy, flavorful twist on a classic recipe. Made with roasted vegetables, baked salmon and a simple dressing, it's perfect for a healthy lunch or dinner!

Salmon Nicoise Salad

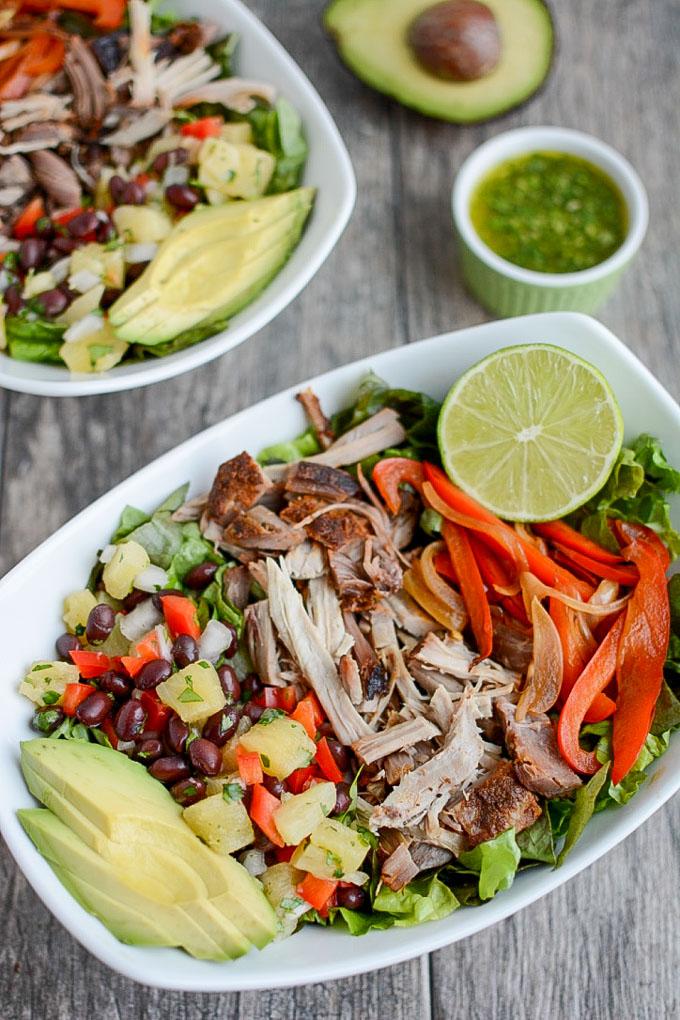
This Pulled Pork Fajita Salad is the perfect way to transform leftover pulled pork into a healthy new lunch or dinner. A pineapple black bean salsa and a light cilantro-lime dressing add extra flavor!

Pulled Pork Fajita Salad with Pineapple Salsa

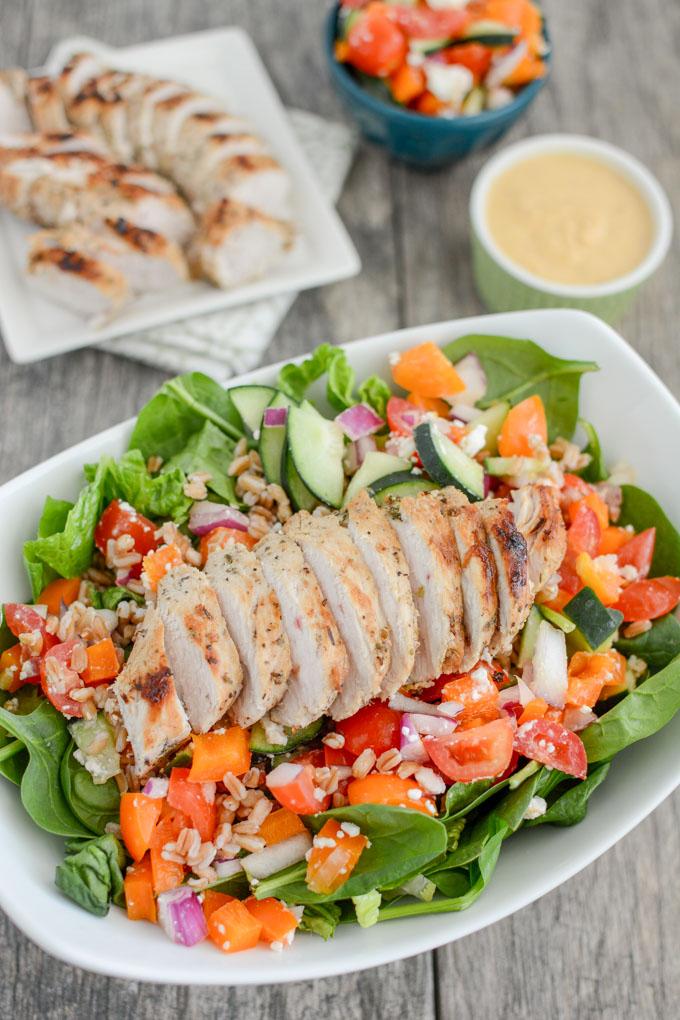
This Mediterranean Turkey Spinach Salad recipe is packed with protein and flavor! Prep the components ahead of time and assemble for a quick, healthy lunch or dinner!

Mediterranean Turkey Salad

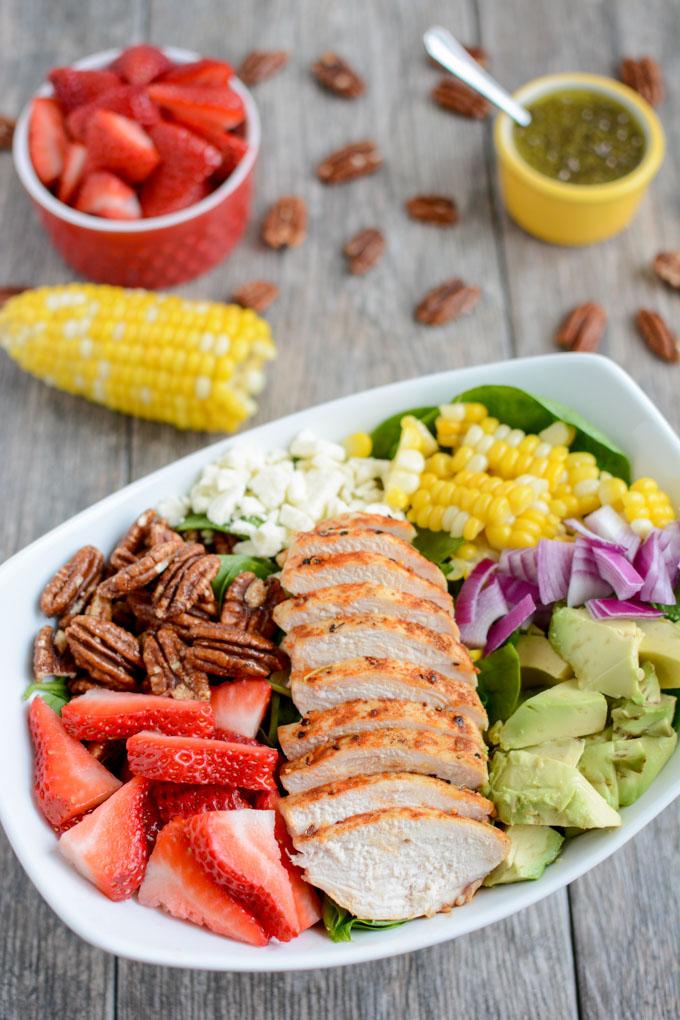
This Strawberry Chicken Spinach Power Salad is perfect for summer! It's packed with protein, fresh produce & nuts and topped with a lemon poppyseed dressing. A great recipe for lunch or dinner!

Strawberry Chicken Spinach Power Salad

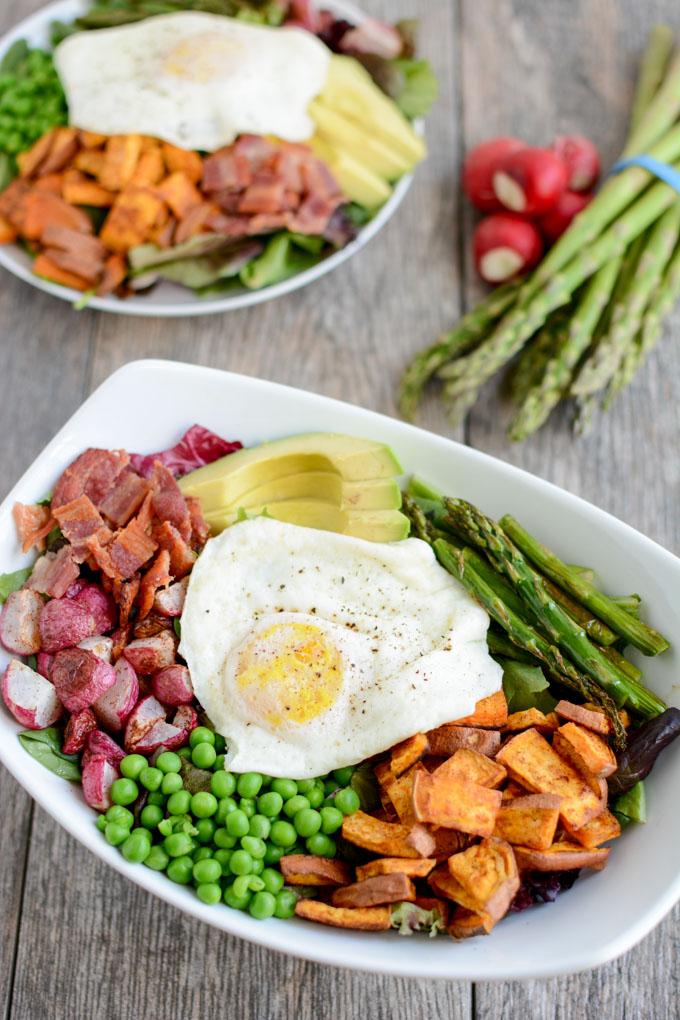
Loaded with spring vegetables and topped with over-easy eggs, this paleo, gluten-free Spring Breakfast Salad is an easy and delicious way to start your day with more veggies!

Spring Breakfast Salad

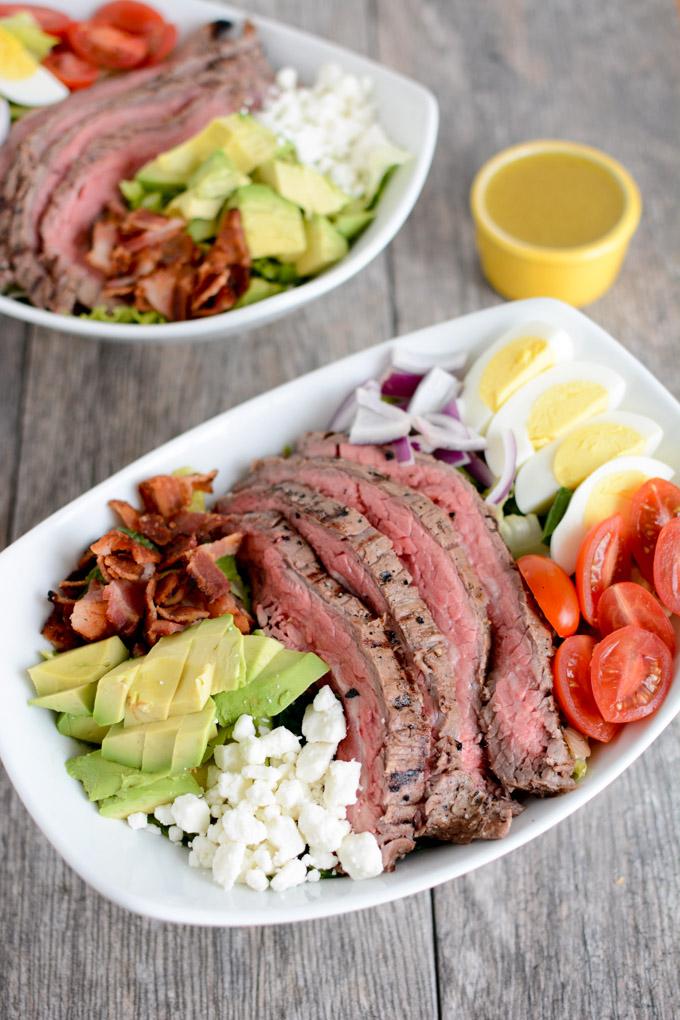
This Steak Cobb Salad Recipe is packed with protein and nutrients, easy to assemble and makes a great lunch or dinner option as the weather gets warmer.

Steak Cobb Salad

As well as some brilliant and flavorful ideas from some of my blogging friends:

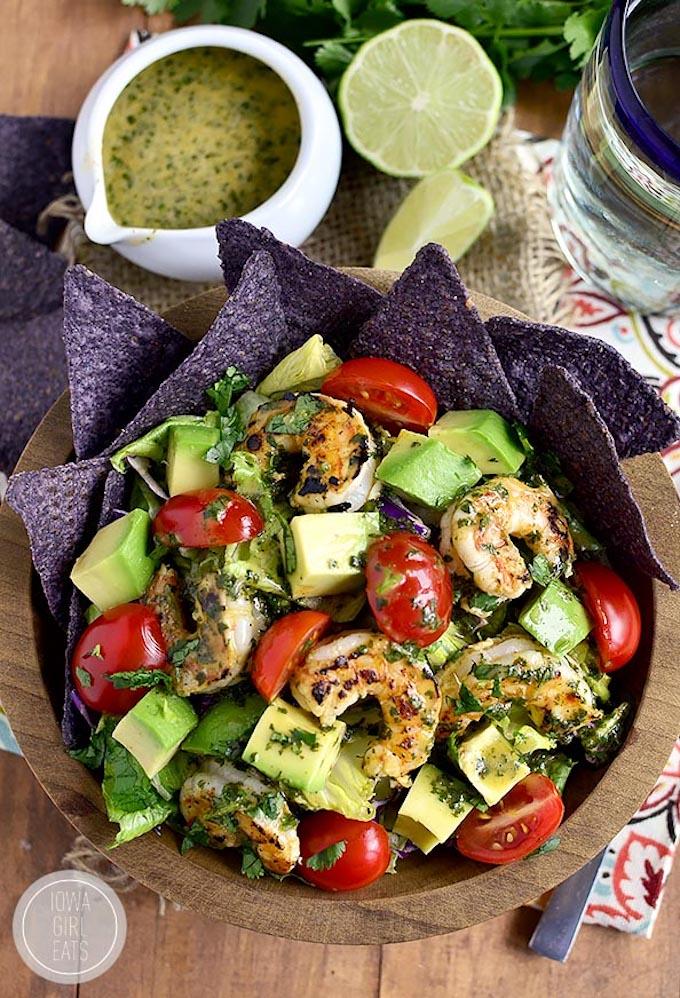
Shrimp & Avocado Taco Salad

Shrimp & Avocado Taco Salad 
via Iowa Girl Eats

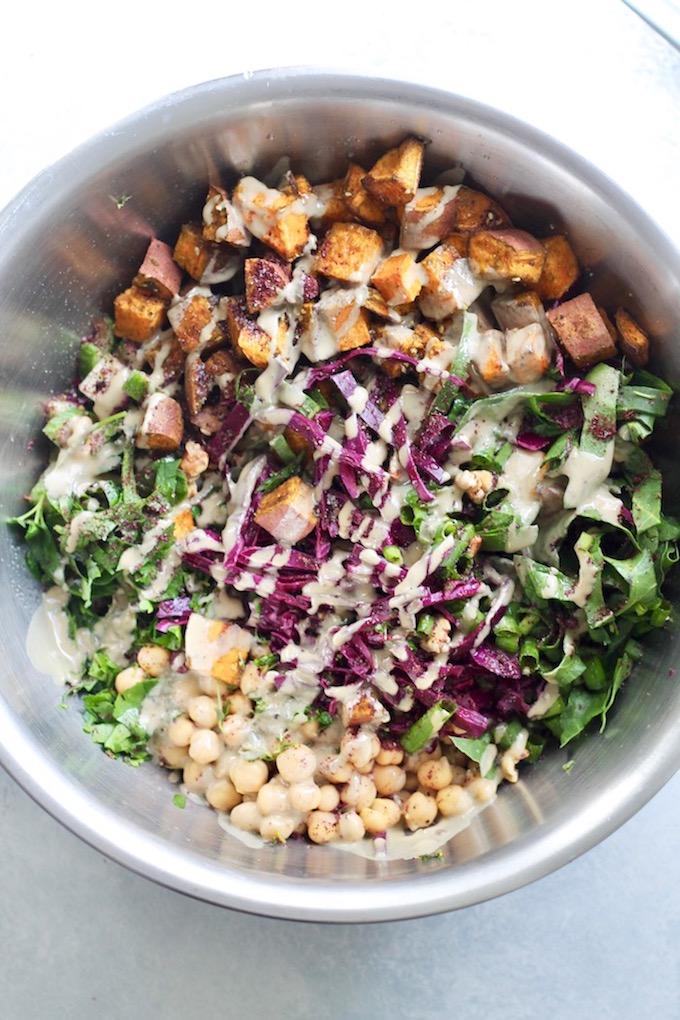
Israeli Power Salad

Israeli Power Salad 
via Hummusapian

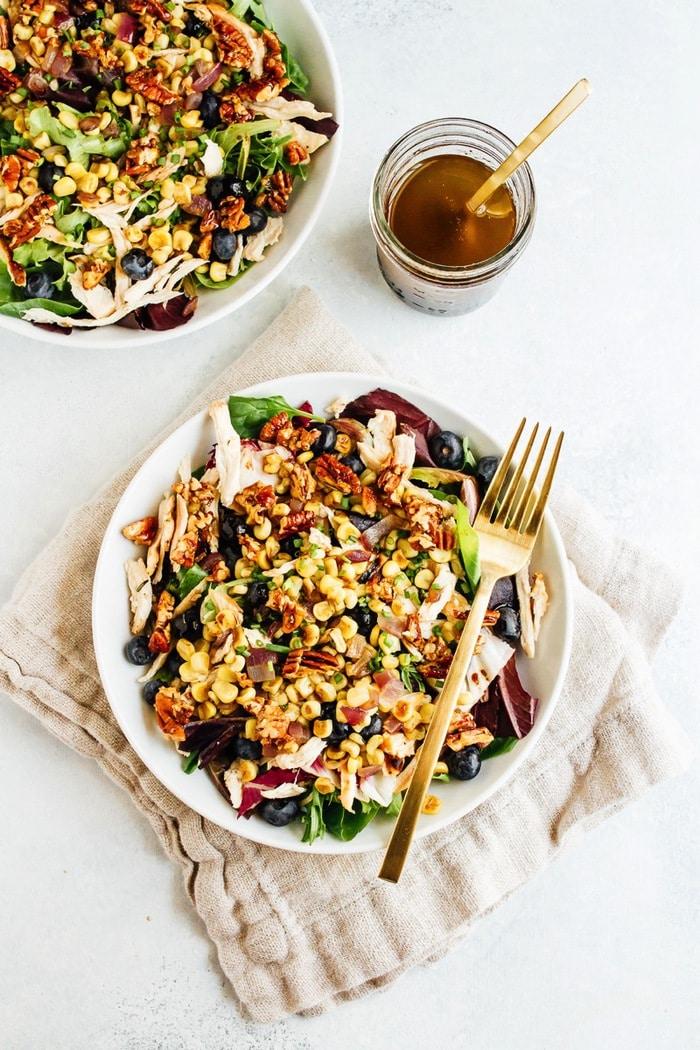
Blueberry Corn Chicken Salad

Blueberry Corn Chicken Salad 
via Eating Bird Food

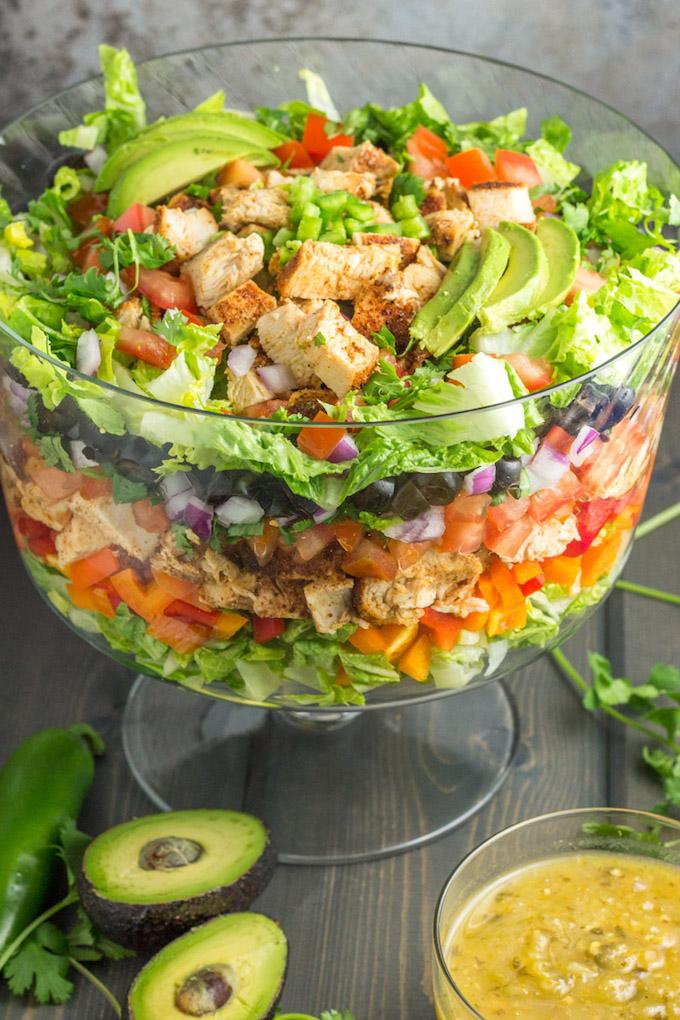
Layered Cold Taco Salad

Layered Cold Taco Salad 
via Physical Kitchness

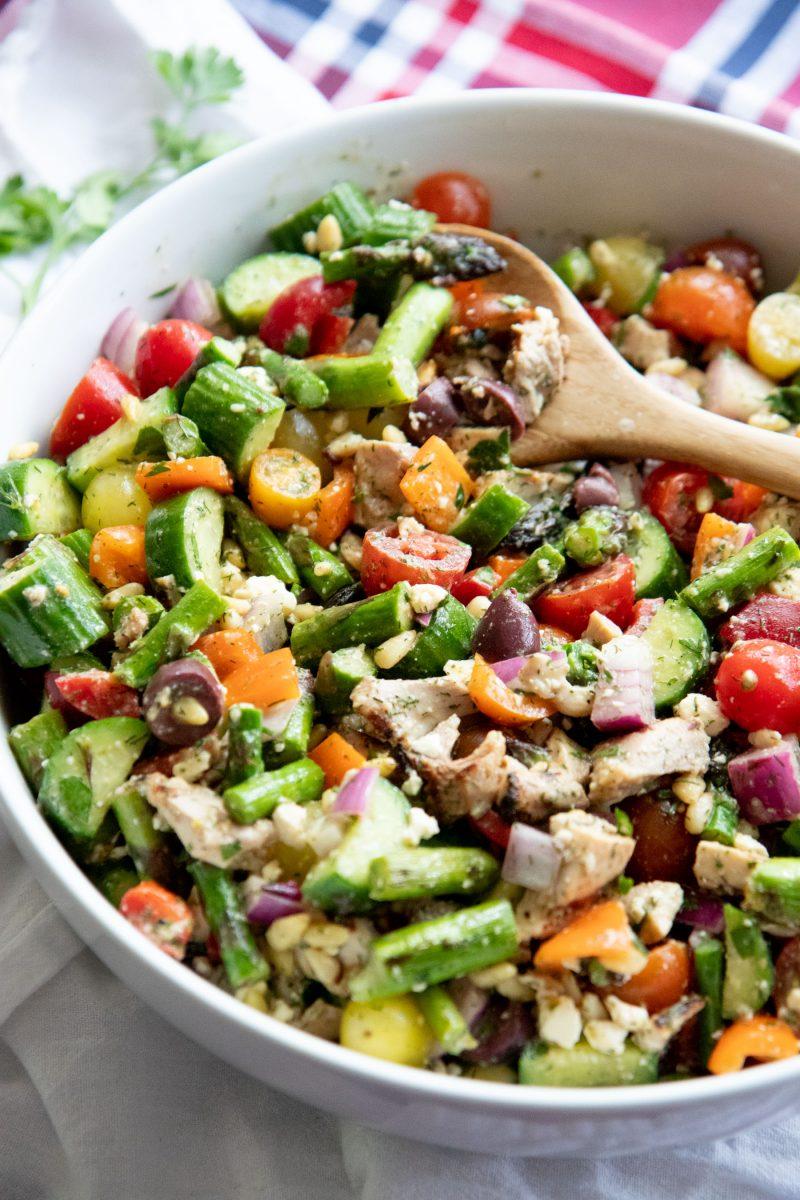
Grilled Chicken & Asparagus Chopped Greek Salad

Grilled Chicken and Asparagus Chopped Salad 
via Wholefully

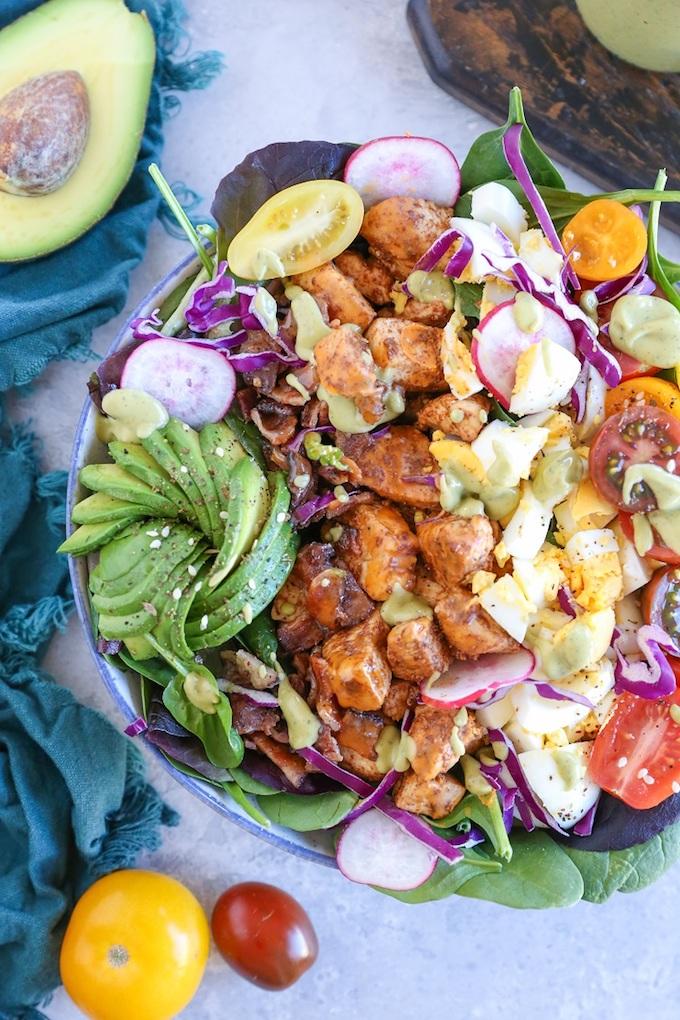
California Cobb Salad

California Cobb Salad
via The Roasted Root

So there you go! 7 recipes from the original post plus 12 more ideas! The great thing about salads is they’re so customizable. Make them big or small depending on your hunger levels, swap out proteins if you’re in the mood for something else and play around with the toppings and dressings to make the salads unique to you! Hopefully you can use some of these delicious ideas for summertime salad inspiration.

Looking for some salad recipes for lunch or dinner? These hearty salads are packed with fiber, protein, healthy fats and lots of veggies. Perfect for a quick summer meal!

Enjoy!
–Lindsay–
Filed Under: Dinner, Ingredient Round-Ups, Lunch, Soup & Salad Tagged With: Chicken, Lettuce, Shrimp, Spinach, Steak

Peanut Butter Hemp Energy Balls

July 9, 2018 by Lindsay 8 Comments

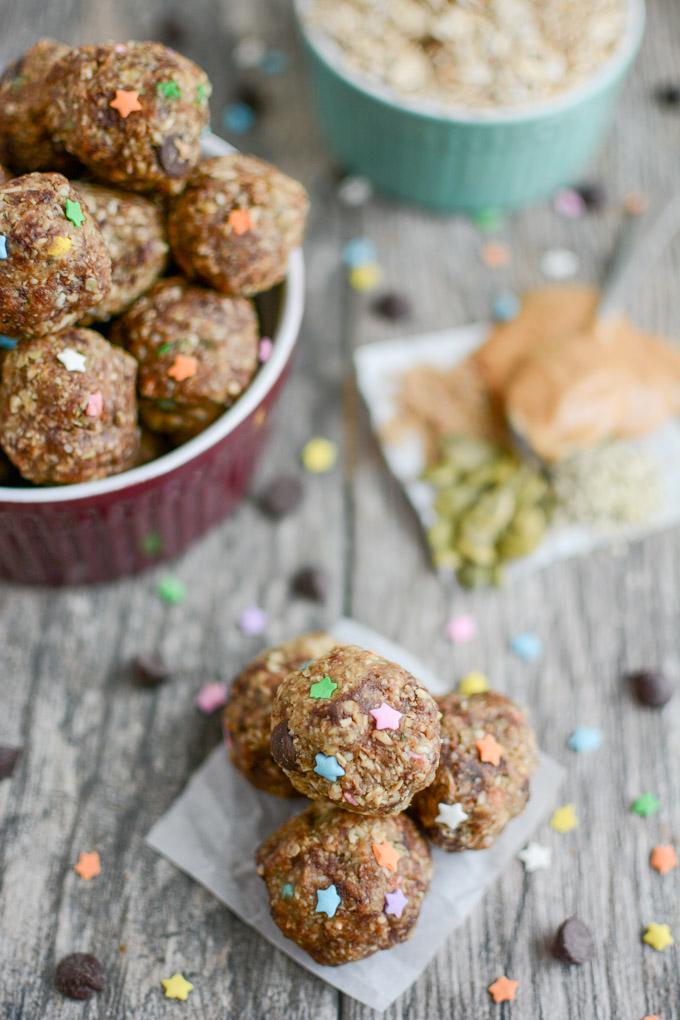
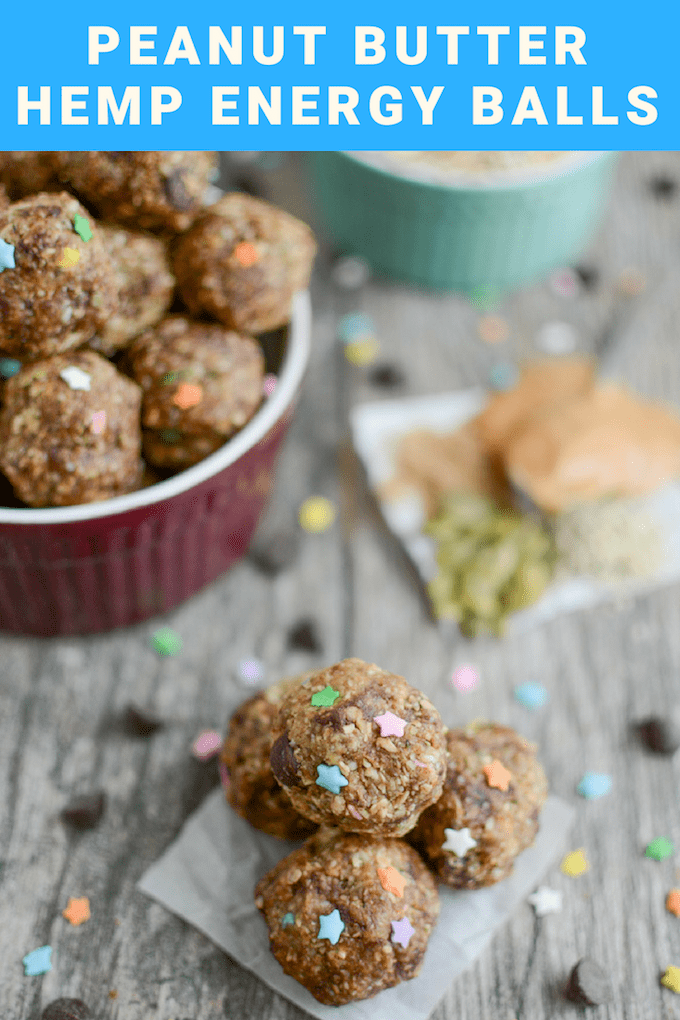
These Peanut Butter Hemp Energy Balls are packed with fiber and protein and low in added sugar. A healthy, kid-friendly snack that’s easy to make- no protein powder required!

Peanut Butter Hemp Energy Balls made without protein powder

Hi friends!

If you follow me over on IG stories, you’ve seen these energy balls for several weeks now. They’re basically my new favorite snack! I like them because they’re packed with nut butter, lots of seeds, oats, and other goodies but they don’t have a ton of added honey like most energy balls do. I add some sprinkles and chocolate chips to make them more enticing to my kiddos but those are optional!

I also like that one batch makes 24 good-sized balls. I can prep a batch on the weekend and store them in the fridge to enjoy all week long. These start with a base of rolled oats and then I add hemp hearts, ground flax and pepitas (pumpkin seeds) and grind them all up in the food processor until they’re well mixed with no big chunks. Then I add some peanut butter, honey, and a bit of vanilla extract. You could sub your favorite nut butter or try sunflower seed butter to make them nut-free. Last I add a little water or milk to help everything stick and mix in the fun stuff (sprinkles and chocolate chips).

Are hemp heart cookies more your style? Try these Peanut Butter Hemp Seed Cookies!

Peanut Butter Hemp Energy Balls made with oats and flax

Here are your exact directions:

Print

Peanut Butter Hemp Energy Balls

Peanut Butter Hemp Energy Balls
Print Recipe

5 Stars 4 Stars 3 Stars 2 Stars 1 Star

5 from 2 reviews

These Peanut Butter Hemp Energy Balls are packed with fiber and protein for a healthy, kid-friendly snack made without protein powder

  • Author: Lindsay
  • Prep Time: 5 min
  • Total Time: 5 minutes
  • Yield: 24 balls 1x

Ingredients

Scale

2 cups rolled oats

1/4 cup hemp hearts

1/4 cup ground flaxseed

1/2 cup pepitas (shelled pumpkin seeds)

1/4 cup honey

1/2 cup peanut butter

1 tsp vanilla extract

2–3 Tablespoons water or milk

chocolate chips and sprinkles (optional)

Instructions

  1. In a food processor, combine rolled oats, hemp, flax and pumpkin seeds. Process until finely ground.
  2. In a microwave-safe bowl, combine honey, peanut butter and vanilla and microwave 30-45 seconds. Mix well.
  3. Pour honey mixture into food processor and process until well combined.
  4. Add water (or milk) by the Tablespoon and pulse until wet enough for the mixture to stick together when you squeeze it in your hands.
  5. Add sprinkles and/or chocolate chips if using and pulse a couple times to mix in.
  6. Roll into balls and store in the fridge.

Notes

If you don’t want the chocolate chips to melt, you’ll need to let the mixture sit for a few minutes after adding the honey mixture since it will be warm. Otherwise, add them right away and they’ll get melty and add a nice chocolate goodness throughout the balls.

Did you make this recipe?

Tag @theleangreenbean on Instagram

That’s all there is to it! Be sure to pin this recipe to save it for later!

These Peanut Butter Hemp Energy Balls are packed with fiber and protein and low in added sugar. A healthy, kid-friendly snack that's easy to make- no protein powder required!

Looking for more energy balls? Here are 12 Kid-Friendly Energy Ball Recipes Made Without Protein Powder.

[click_to_tweet tweet=”Make a batch of these Peanut Butter Hemp Energy Balls to enjoy all week long. They’re packed with protein and fiber and make a great, kid-friendly snack!” quote=”Make a batch of these Peanut Butter Hemp Energy Balls to enjoy all week long. They’re packed with protein and fiber and make a great, kid-friendly snack!”]

Enjoy!
–Lindsay–
Filed Under: Snack Tagged With: Ground Flaxseed, Hemp Seed, Oats, Peanut Butter, Pepitas

Thursday Things – Breakfast Invitations

July 5, 2018 by Lindsay 2 Comments

Hi friends!

It’s been a hot minute since I did a Thursday Things roundup so I thought I’d pop in today and share a few things that have caught my eye lately!


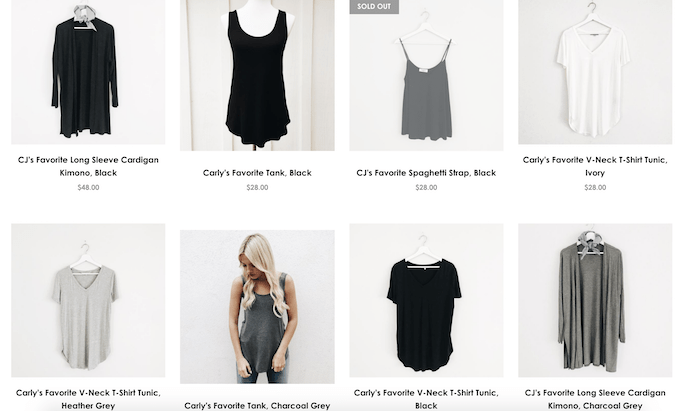
Carly Jean Los Angeles

Carly Jean Los Angeles

Has anyone tried this brand? I’ve seen so many people loving it for basic wardrobe staples on Instagram lately that I just might have to check it out!

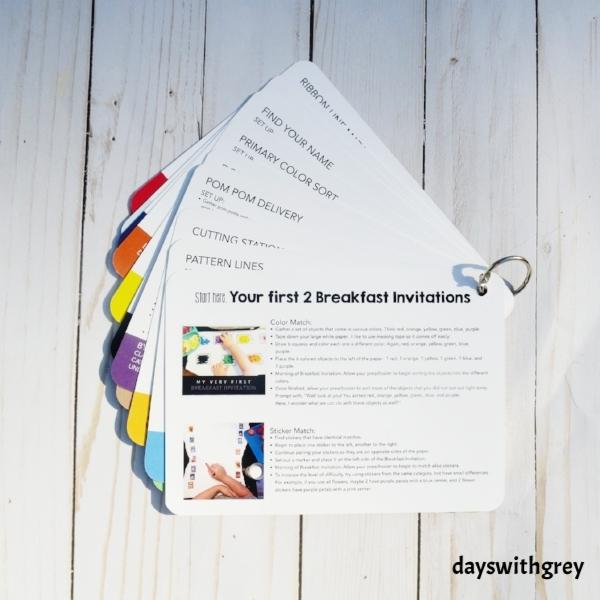
Breakfast Invitations

Breakfast Invitations

Love this idea from Days with Grey. Here are cards you can buy with lots of ideas. She also has a great list of Breakfast Invitations Supplies and shares tons of ideas on her Instagram.

[Read more…] about Thursday Things – Breakfast Invitations

Filed Under: Uncategorized

Persian Pulled Chicken {Slow Cooker or Instant Pot}

June 27, 2018 by Lindsay 8 Comments

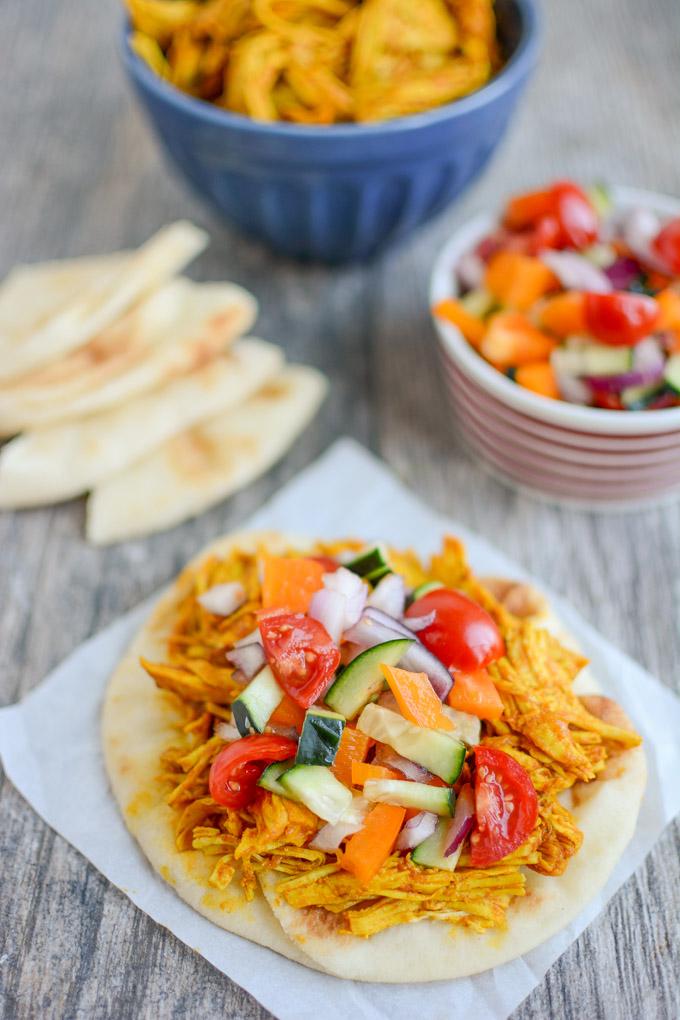
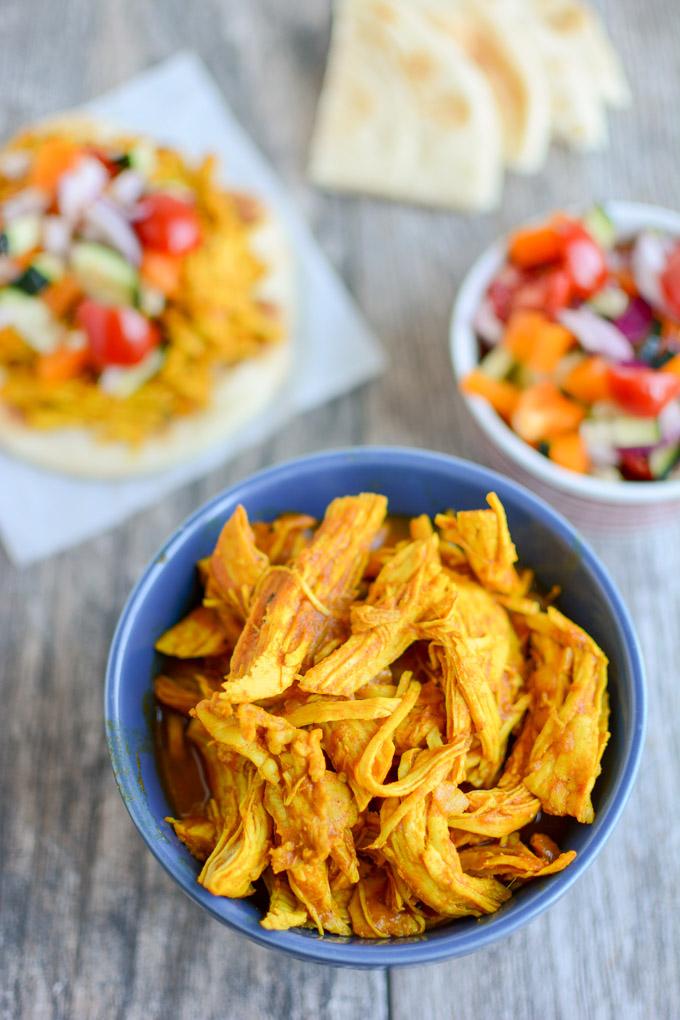
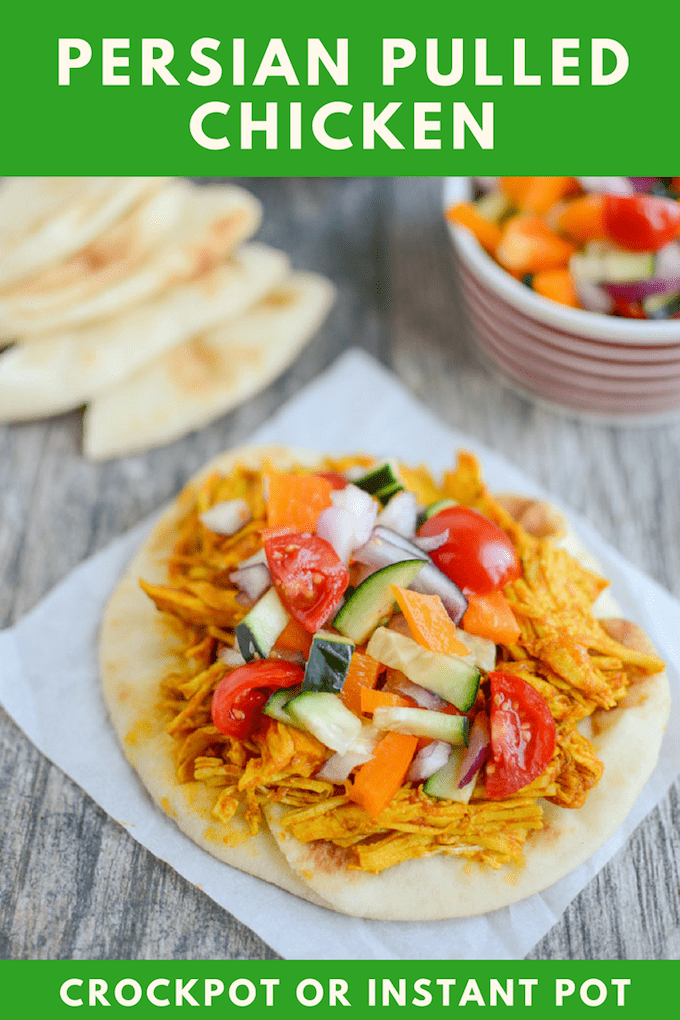
This Persian Pulled Chicken is a simple healthy recipe that can be made in the slow cooker or instant pot. It’s full of flavor and great served over rice, on a pita, in a wrap or over a salad for a quick lunch or dinner that can be prepped ahead of time!

Persian Pulled Chicken in the slow cooker or instant pot

Hi friends!

You all have been asking for more slow cooker recipes and I aim to please! As you now know, things have been a little busy around here lately…so a few weeks ago I reached out to a few blog friends to see if anyone had any delicious crockpot recipes they wanted to share with you guys.

My friend Lauren, a fellow RD mama and blogger over at Bite of Health Nutrition offered to share this super simple recipe for Persian Pulled Chicken. She’s a huge fan of slow cooker recipes because as we mamas know, meals that require minimal effort to cook are lifesavers when you have a toddler you need to keep up with! If you’re not familiar with Lauren’s blog, you’re definitely going to want to go check it out! She has tons of great recipes like these Strawberry Rhubarb Pie Overnight Oats, these Vegetable and Cheese Sheet Pan Eggs, and these Blender Peanut Butter Banana Oat Bars.

Here’s a note from Lauren about the recipe:

The inspiration for my Slow Cooker Persian Pulled Chicken recipe comes from a couple different dishes that my husband and his family make. If you have ever had the pleasure of eating authentic Persian food you know how good it is. And if you haven’t I highly suggest it! Their dishes are full of flavor and packed with nourishing ingredients. This specific dish uses some Persian staple ingredients including onion, turmeric, curry powder, and tomato paste. The original dish is more of a stew but this recipe turns out to be less saucy and goes well served alongside basmati rice or in a pita with plain yogurt and Salad Shirazi (a Persian cucumber and tomato salad). 

Persian Pulled Chicken

After Lauren sent me the recipe, I knew I wanted to check it out for myself. I decided to try it in the instant pot so I could share both sets of directions for you depending on your preference.

So here’s the recipe:

Print

Persian Pulled Chicken

Persian Pulled Chicken in the slow cooker or instant pot
Print Recipe

5 Stars 4 Stars 3 Stars 2 Stars 1 Star

4.3 from 3 reviews

This Persian Pulled Chicken is a simple healthy recipe that can be made in the slow cooker or instant pot. It’s full of flavor and great served over rice, on a pita, in a wrap or over a salad for a quick lunch or dinner that can be prepped ahead of time!

  • Author: Lindsay
  • Prep Time: 5 min
  • Total Time: 5 minutes
  • Yield: serves 4-6 1x

Ingredients

Scale
  • 1 Tbsp oil
  • 1 medium onion, diced
  • 1.5 pounds boneless, skinless chicken breasts
  • 1.5 cups low-sodium chicken broth
  • 3 Tbsp tomato paste
  • 1 Tbsp ground turmeric
  • 1 tsp curry powder
  • 1/8 tsp ground cinnamon
  • salt & pepper to taste

Instructions

  1. In a medium bowl add chicken broth, tomato paste, turmeric, curry powder, cinnamon, salt and pepper. Whisk to combine and set aside.
  2. Place a sauté pan or a stove-top safe slow cooker pan on to the stove on medium-high heat. Add olive oil and onions, sauté for 5 minutes or until onions are translucent.
  3. If using a sauté pan add cooked onions to slower cooker then layer on chicken, then pour liquid and spice mixture over the chicken.
  4. Set slow cooker to low for 6 hours. 
  5. Once cooked shred chicken using a fork or the back of a large spoon.
  6. Serve on top of cooked rice, or in a pita with diced tomatoes, cucumber and onions and plain Greek yogurt.

Notes

You can use frozen chicken in the slow cooker, but increase cooking time to 8 hours.

To cook in the Instant Pot, reduce chicken broth to 1 cup, saute onions in oil using saute function on IP for 5 min. Add chicken and broth mixture. Usual manual mode to set for 12 minutes. Use quick release and check to see if it shreds easily with a fork. If not, set for an additional 2-3 minutes.

Did you make this recipe?

Tag @theleangreenbean on Instagram

Easy right? I served mine over naan bread and topped with a mixture of cucumbers, tomatoes, onions and peppers. So easy and delicious.

This Persian Pulled Chicken is a simple healthy recipe that can be made in the slow cooker or instant pot. It's full of flavor and great served over rice, on a pita, in a wrap or over a salad for a quick lunch or dinner that can be prepped ahead of time!

[clickToTweet tweet=”This Persian Pulled Chicken can be made in the slow cooker or instant pot for a delicious and healthy meal the whole family will love. ” quote=”This Persian Pulled chicken can be made in the slow cooker or instant pot for a delicious and healthy meal the whole family will love.”]

Enjoy!
–Lindsay–
Filed Under: Dinner, Instant Pot, Slow Cooker Tagged With: Chicken, Chicken Broth, Onion

Party of 5!

June 25, 2018 by Lindsay 7 Comments

Baby 3 Announcement

Minivan life…we’re comin’ for ya!
Baby Bean #3 is due December 4th.

Baby 3 announcement photo

We’re so excited!
I’ll be 17 weeks tomorrow!
Feel free to comment below with questions and I’ll answer them in Tuesday’s post.

–Lindsay–

PS. Photo credit goes to Alisha Skeel Photography who captured these sweet photos before our spring family session about 6 weeks ago.


Filed Under: Uncategorized

Grilled Foil Packet Hawaiian Chicken

June 20, 2018 by Lindsay 5 Comments

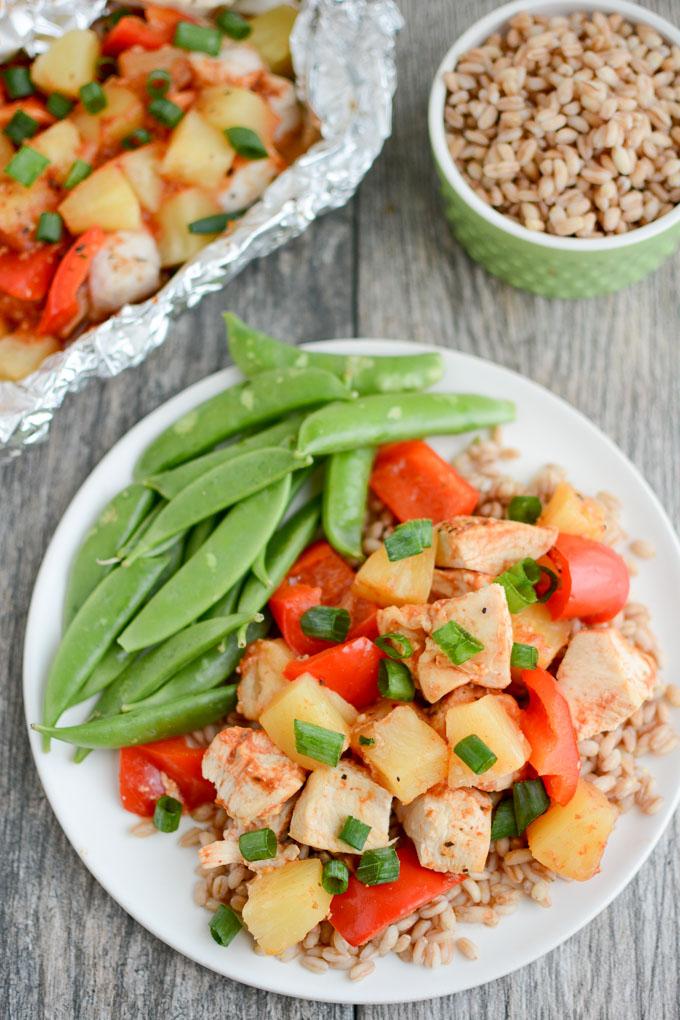
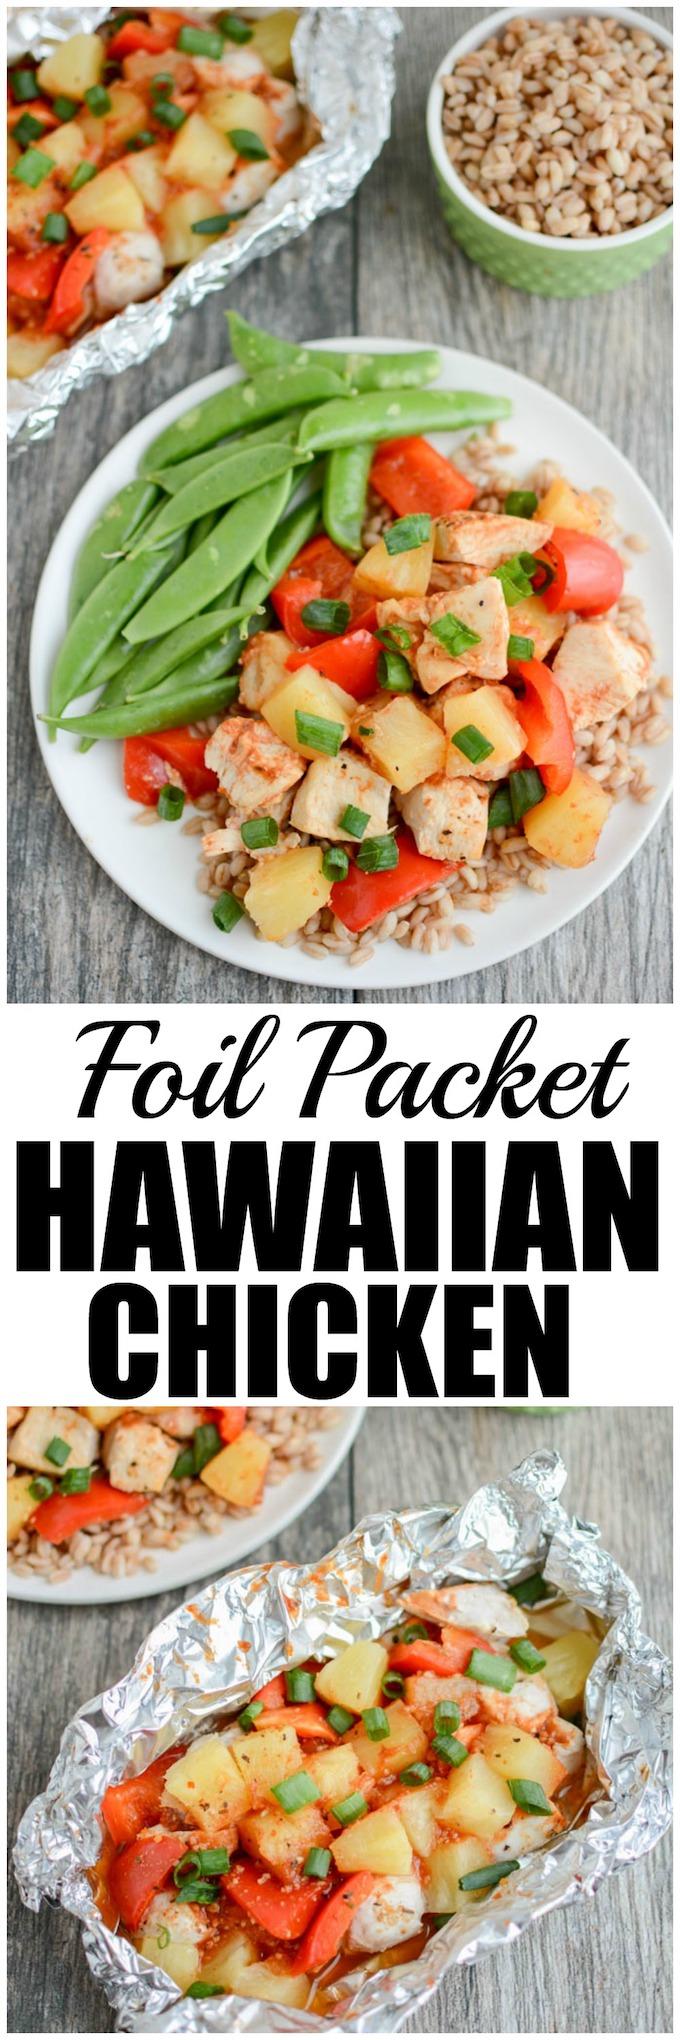
This Grilled Foil Packet Hawaiian Chicken recipe is perfect for summer. Assemble the packets quickly, toss them on the grill and dinner is served! Plus, cleanup is a breeze and the leftovers are great for lunch!

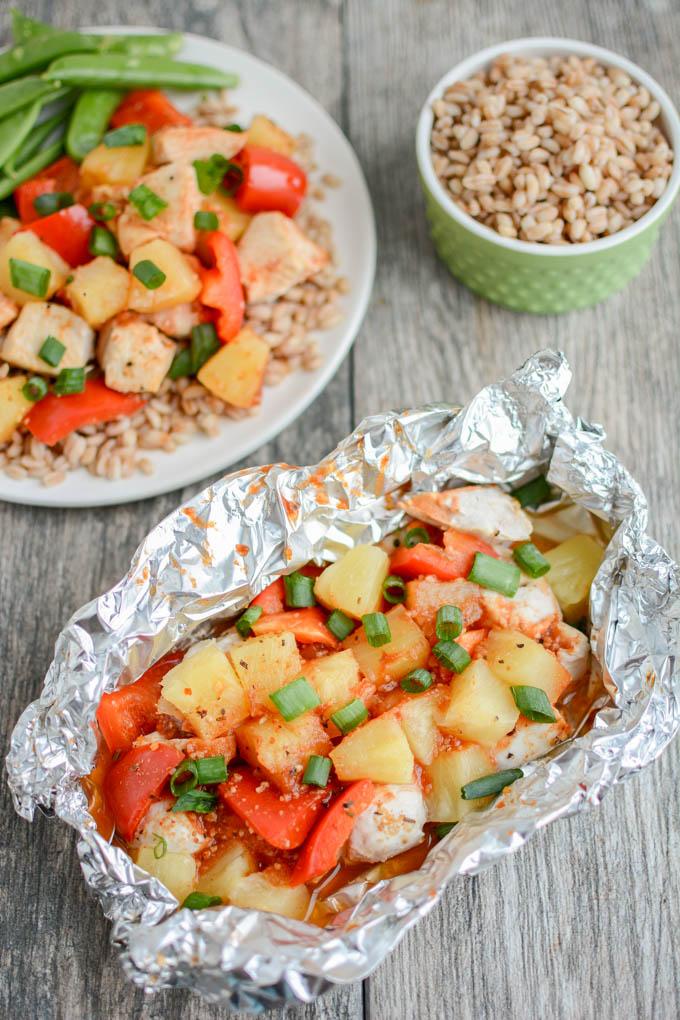
Grilled Foil Packet Hawaiian Chicken served over farro.

Thanks to Meijer for sponsoring this post.

Hi friends!

I’m excited to pop in today and share this recipe for Grilled Foil Packet Hawaiian Chicken. It’s my first grilling recipe of the season on the blog, but our grill has been getting a lot of use already this summer. With 4th of July BBQs fast approaching, I thought now would be the perfect time to add a new grilling recipe to your arsenal!

Before we dive into the recipe, let’s talk a little bit about the ingredients…and how I snagged them all using Meijer Home Delivery.

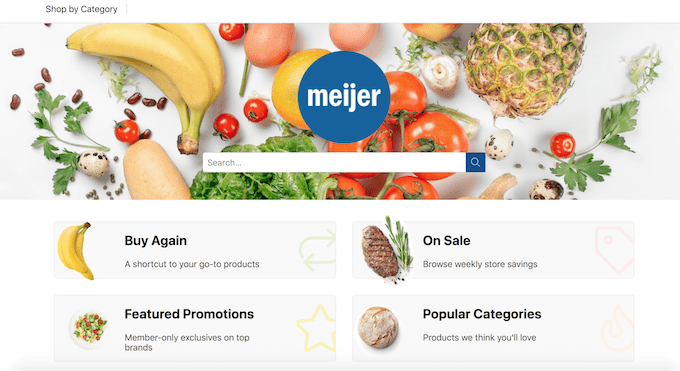
Meijer Home Delivery

Yep, you can order your groceries on the computer or via the shopmeijer app on your phone! I actually tend to prefer going to the grocery store myself to do my shopping. I think it’s fun. However, as a mom, there are some days when it’s not fun or convenient to go to the store. Like the time when you have 2 sick or cranky kids or when one kid is napping and you realize you forgot a few ingredients for dinner or a blog recipe. These are the times when Meijer Home Delivery really comes to the rescue.

You can browse a variety of categories, including what’s on sale, what you’ve bought before or marked as your favorites, or what you’ve added to your shopping list…or you can search for specific items and brands. When you checkout, you can add notes to specific items like “avocados ripe enough to use tomorrow” or “green bananas”. You can even choose your delivery window (in as little as one hour from the time you place your order!) and add notes like “text me when you arrive” so your dog doesn’t bark like crazy and wake a sleeping kid.

Meijer Home Delivery

And don’t forget it’s not just for food. You can shop for those last minute party supplies for your 4th of July BBQ, a box of bandages or even a new toy and the “shopmeijer” app and website are very user-friendly! If you’d like to give it a try, use the promo code “68BH4PBA67F” for a free 2-week trial of Meijer Home Delivery and a $15 credit.

Grilled Foil Packet Hawaiian Chicken

So, I used the shopmeijer app to get all of the ingredients for this recipe on a day when my kids really needed a nap and I really needed to work! I love foil packet recipes because they’re easy to prep. I chose to cut up the chicken for these so they cook quickly on the grill in a simple sauce made with lime juice, pineapple juice, ketchup and bbq sauce and the pineapple chunks helps keep them nice and moist! I served them over farro but they’d also be great over rice or even over a big bed of lettuce or spinach!

Here’s how you make them:

Print

Grilled Foil Packet Hawaiian Chicken

Grilled Foil Packet Hawaiian Chicken served over farro.
Print Recipe

5 Stars 4 Stars 3 Stars 2 Stars 1 Star

No reviews

This Grilled Foil Packet Hawaiian Chicken Recipe is perfect for summer. Assemble the packets quickly, toss them on the grill and dinner is served! Plus, cleanup is a breeze and the leftovers are great for lunch!

  • Author: Lindsay
  • Prep Time: 5 min
  • Cook Time: 12 min
  • Total Time: 17 minutes
  • Yield: serves 4

Ingredients

Scale
  • 1.25 pounds boneless, skinless True Goodness chicken breasts
  • 1 large red bell pepper
  • 1 (20 oz) can pineapple chunks in 100% juice (reserve juice)
  • 1 tsp Chicken seasoning (I use salt-free)
  • 1 Tbsp freshly squeezed lime juice
  • 2 Tbsp BBQ sauce
  • 2 Tbsp ketchup
  • 2 Tbsp pineapple juice
  • 2 cloves garlic
  • green onions to garnish

Instructions

  1. Preheat grill to medium.
  2. Cut chicken into bite-sized chunks and sprinkle with chicken seasoning.
  3. Cut bell pepper into large chunks (similar in size to pineapple and chicken pieces)
  4. Drain pineapple and reserve juice.
  5. Tear 4 large pieces of heavy duty aluminum foil. 
  6. Divide chicken evenly between 4 pieces. 
  7. Divide pineapple chunks and pepper pieces evenly and place on top of chicken. 
  8. In a small bowl, combine lime juice, bbq sauce, ketchup, pineapple juice and garlic. Stir until well combined. Taste and add additional pineapple juice if desired.
  9. Pour sauce mixture evenly over chicken mixtures. 
  10. Pull sides of aluminum foil to meet in the middle and fold over several times. Fold each of the ends in toward the middle at least 2 times. 
  11. Place foil packets on grill (medium on my grill is about 425 degrees F) and cook 12 minutes. Carefully open one packet and temp chicken to ensure it has reached 165 degrees F. 
  12. Remove from grill and serve in foil packets or transfer to plates. Garnish with green onions. 

Notes

You could use fresh pineapple and sub orange juice for pineapple juice.

I served mine over farro. You could also use rice, cauliflower rice or lettuce.

Did you make this recipe?

Tag @theleangreenbean on Instagram

Easy right?

{AD} This Grilled Foil Packet Hawaiian Chicken Recipe is perfect for summer. Assemble the packets quickly, toss them on the grill and dinner is served! Plus, cleanup is a breeze and the leftovers are great for lunch!

[clickToTweet tweet=”This Grilled Foil Packet Hawaiian Chicken is the perfect summer dinner!” quote=”This Grilled Foil Packet Hawaiian Chicken is the perfect summer dinner!”]

Enjoy!
–Lindsay–
This is a sponsored conversation written by me on behalf of Meijer. The opinions and text are all mine.

Filed Under: Dinner, Sponsored Tagged With: BBQ sauce, Bell Pepper, Chicken, Pineapple

Healthy Fruit Crisp

June 6, 2018 by Lindsay 15 Comments

This Healthy Fruit Crisp is low in added sugar and packed with fiber and healthy fats. Serve it over yogurt or cottage cheese for breakfast or with ice cream for dessert.

healthy fruit crisp

*Originally published 6/2018. Updated 12/2022*

Hi friends!

This healthy fruit crisp is a fun way to change up your breakfast routine. I use frozen fruit which means I can make it any time of year and I added in chia seeds and ground flax for a dose of omegas and some peanut butter for healthy fats

Use whatever fruit you want but my biggest suggestion though is to always include some blueberries if you’re serving it more selective eaters. The dark purple color helps camouflage the chia seeds and make them less noticeable.

Healthy Fruit Crisp

Healthy Fruit Crisp served over cottage cheese and drizzle with peanut butter.

The great thing about this Healthy Fruit Crisp is that it works two ways. With only 2 Tbsp added sugar in the whole recipe, you can feel good about serving it for breakfast. My kids love it over plain yogurt or vanilla yogurt or cottage cheese and they’ll eat it both warm and cold. You can serve it warm with a scoop of vanilla ice cream on top!


Here’s how you make it:

Print

Healthy Fruit Crisp

Healthy Fruit Crisp that can be made in the slow cooker or oven.
Print Recipe

5 Stars 4 Stars 3 Stars 2 Stars 1 Star

5 from 3 reviews

This Healthy Fruit Crisp is low in added sugar and packed with fiber and healthy fats. Serve it over yogurt or cottage cheese for breakfast or with ice cream for dessert.

  • Author: Lindsay
  • Prep Time: 5 min
  • Cook Time: 40 min
  • Total Time: 45 minutes
  • Yield: serves 4-6 1x

Ingredients

Scale
  • 5 cups mixed fruit (berries and stonefruits work best)
  • 3 Tbsp chia seeds
  • 1 cup rolled oats
  • 1/3 cup flour
  • 2 Tbsp sugar
  • 1 tsp cinnamon
  • 2–3  Tbsp ground flaxseed
  • 4 Tbsp butter
  • 1/4 cup peanut butter

Instructions

  1. Place frozen fruit in a 9×9 pan lined with parchment paper and sprinkle with chia seeds.
  2. In a bowl, combine oats, flour, sugar, cinnamon, flax and stir to combine.
  3. Cut butter into small chunks and add to the flour mixture. Cut in with a pastry blender or two knives until mixture resembles coarse meal.
  4. Add peanut butter and stir until coated with flour. Use your hands to mix everything together really well and crumble the peanut butter and butter so it combines with all of the flour and oats.
  5. Sprinkle crumble mixture over top of fruit.
  6. Cook at 350 for 35-40 minutes.
  7. Serve over yogurt or cottage cheese, or topped with ice cream.

Notes

For a sweeter crisp you could mix a few Tbsp sugar in with the fruit and chia seeds as well.

Did you make this recipe?

Tag @theleangreenbean on Instagram

Sounds delicious right?! It’s one of my new favorites for sure!

Low-Added-Sugar Fruit Crisp

This Healthy Fruit Crisp is low in added sugar and packed with fiber and healthy fats. Serve it over yogurt or cottage cheese for breakfast or with ice cream for dessert.

Be sure to let me know if you try it! Want more recipes with baked fruit?

This Dinner Roll French Toast Bake is the perfect recipe to use up leftover dinner rolls after a holiday meal. Prep the night before, let it sit in the fridge overnight and enjoy it for breakfast in the morning.

Dinner Roll French Toast Bake

This Dinner Roll French Toast Bake is the perfect recipe to use up leftover dinner rolls after a holiday meal. Prep the night before, let it sit in the fridge overnight and enjoy it for breakfast in the morning.

Grab the recipe!
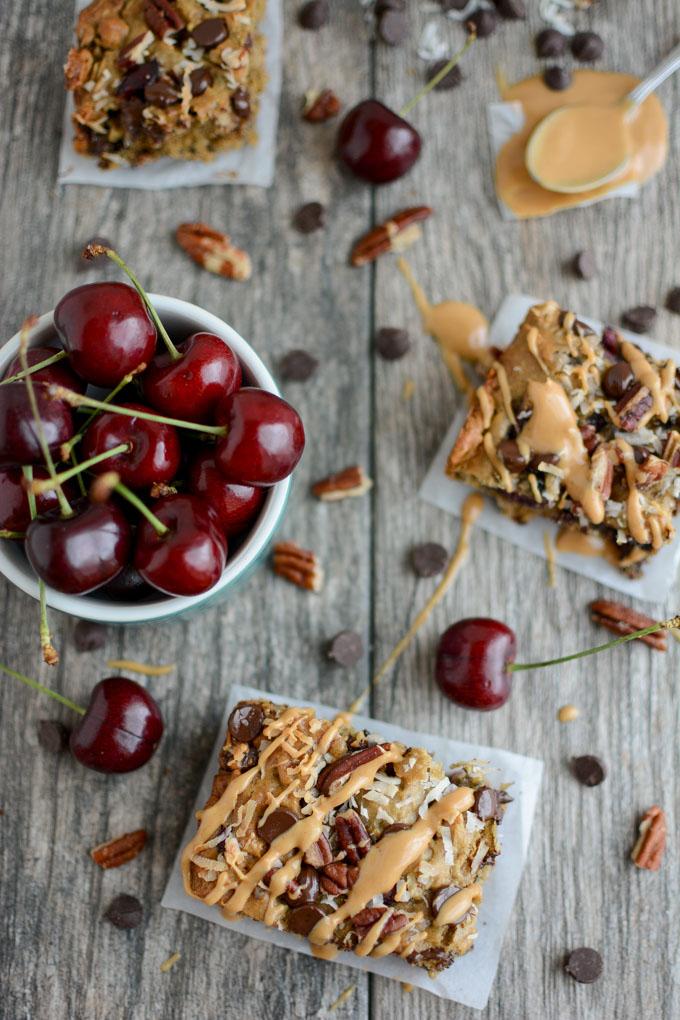
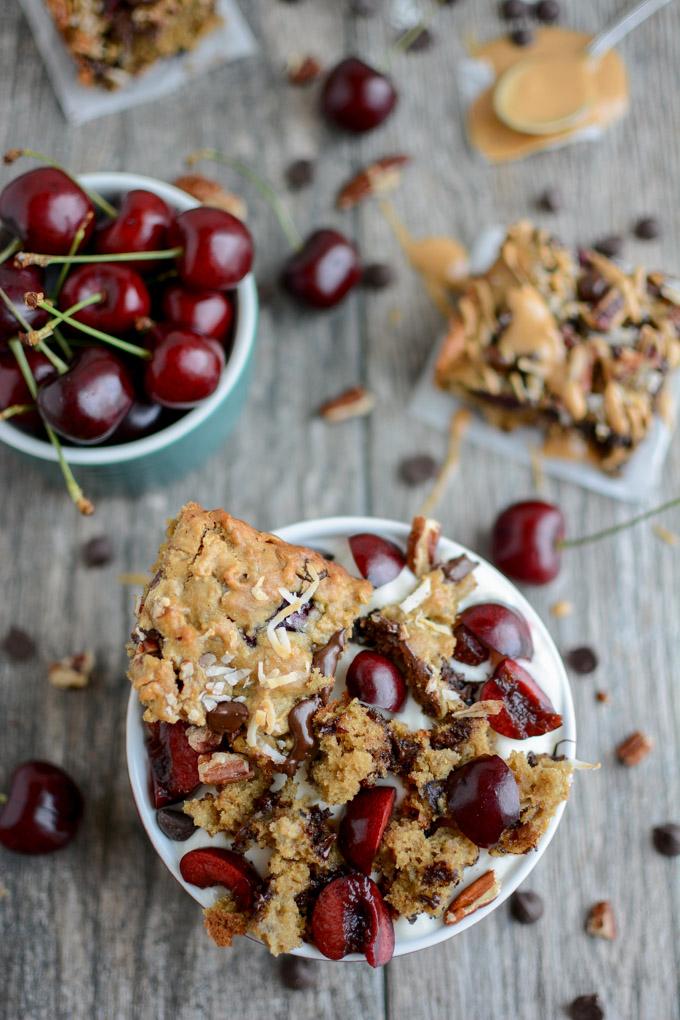
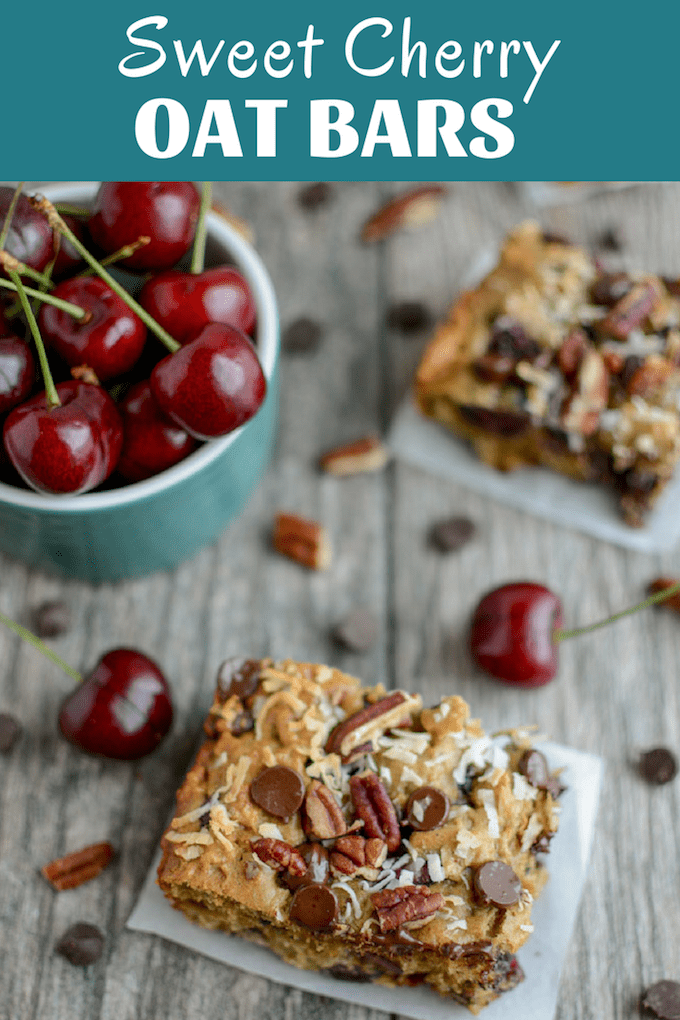
Cherry Oat Bars

Sweet Cherry Oat Bars

These Cherry Oat Bars are the perfect addition to breakfast on a busy weekday morning or for serving as a kid-friendly after school snack! They’re lightly sweetened and full of fiber and protein. 

Grab the recipe!
Blueberry French Toast Muffins with bowl of blueberries

Blueberry French Toast Muffins

These Blueberry French Toast Muffins are quick, healthy and kid-friendly. Make a batch over the weekend and serve them for breakfast or pack them for lunch! They can easily be customized with different mix-ins.?

Grab the recipe!
Cherry Gingerbread French Toast Bake 2 copy

Sweet Cherry Gingerbread French Toast Bake

This Sweet Cherry Gingerbread French Toast Bake is the perfect holiday breakfast or brunch recipe for Thanksgiving or Christmas. It can be prepped the night before to make your morning easier and is packed with flavor.

Grab the recipe!
Lemon Blueberry Cheesecake Oat Bars two squares

Lemon Blueberry Cheesecake Oat Bars

These Lemon Blueberry Cheesecake Oat Bars are the perfect summer breakfast. Make them ahead of time and enjoy all week long for a quick, healthy meal or snack!

Grab the recipe!

Enjoy!
–Lindsay–
Filed Under: Dessert, Breakfast Tagged With: Chia Seed, Fruit, Ground Flaxseed, Oats, Peanut Butter, White Whole Wheat Flour

Baked Ranch Chicken Taquitos

May 30, 2018 by Lindsay 6 Comments

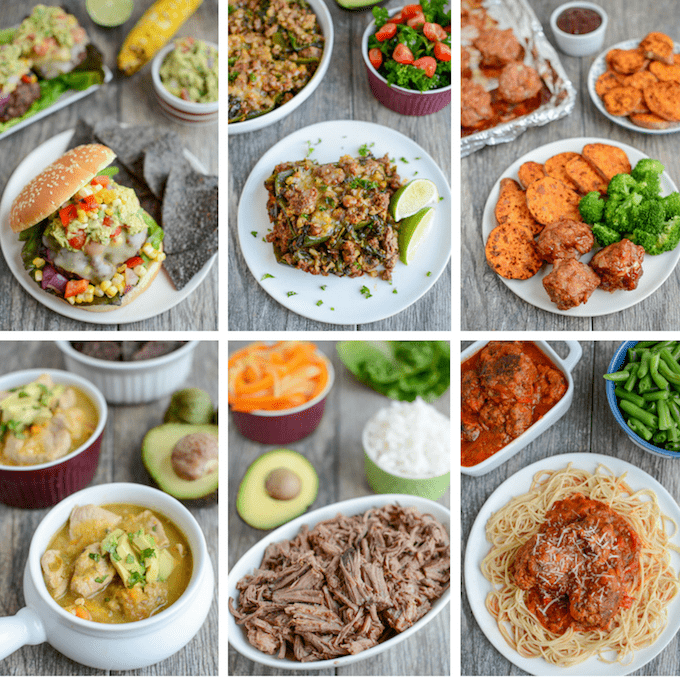
These Baked Ranch Chicken Taquitos are a quick and easy, kid-friendly option for lunch or dinner and a great way to use up leftover chicken. Make a double batch and freeze some for a busy week!

Baked Ranch Chicken Taquitos

Hi friends!

Just popping in to share the recipe for these Baked Ranch Chicken Taquitos that I made yesterday.  I took some time away from the kitchen last weekend so yesterday I got back into the swing of things with two new recipes and this was one of them!

Here’s the thing about taquitos. They’re like tacos, which my kids love…but they’re rolled up really tightly which makes it easier for me to pack a lot of stuff into them without worrying about them pulling a taco open and inspecting every single thing that’s inside. When Squish eats tacos, it’s chicken and cheese. That’s it. And if he had it his way, it would just be cheese.

These taquitos have some black beans and hummus in there, along with shredded chicken, some cheese and a little ranch. I’m not a huge ranch fan and lemme tell you, I LOVED THESE.

Ranch Chicken Taquitos that can be baked from frozen.

Even more good news about these Baked Ranch Chicken Taquitos – they can be frozen after assembly and then baked straight from frozen. Win, win, win. That means you could easily make a double batch, freeze one and bake the other right away.

I served these to Squish for lunch with extra ranch for dipping but if you’re not a ranch fan, you could leave it out and serve with salsa or guac for dipping. They’re the perfect way to transform leftover chicken into a fun, easy meal the whole family will love!

Here’s how you make them:

Print

Baked Ranch Chicken Taquitos

Baked Ranch Chicken Taquitos
Print Recipe

5 Stars 4 Stars 3 Stars 2 Stars 1 Star

5 from 2 reviews

These Baked Ranch Chicken Taquitos are a quick and easy, kid-friendly option for lunch or dinner and a great way to use up leftover chicken. Make a double batch and freeze some for a busy week!

  • Author: Lindsay
  • Prep Time: 5 min
  • Cook Time: 12 min
  • Total Time: 17 minutes
  • Yield: Makes 12 taquitos 1x

Ingredients

Scale
  • 1/2 cup black beans, drained and rinsed
  • 1/3 cup hummus
  • 2 tsp taco seasoning
  • 1.5 cups cooked, shredded chicken (finely chopped)
  • 1/2 cup shredded Mexican cheese
  • 2–3 Tbsp Ranch dressing
  • 6 (10-inch) whole wheat tortillas, cut in half
  • optional: ranch, guac or salsa for drizzle/dipping, tomatoes, green onions for garnish

Instructions

  1. Preheat oven to 425 degrees F.
  2. In a bowl, mash black beans with a potato masher or fork until paste-like.
  3. Add hummus and taco seasoning and mix well. 
  4. Add chicken, cheese and ranch and stir to combine. 
  5. Place 2-3 Tbsp of the mixture in each half-tortilla and roll tightly. 
  6. Place on a baking sheet and bake for 12 minutes. 
  7. Drizzle with additional ranch if desired, garnish with tomato and green onion, serve with ranch, guac or salsa for dipping.

Notes

To freeze: Assemble as directed. Freeze on a plate or baking sheet. Wrap in plastic wrap and place in ziploc bag in the freezer. Bake from frozen for 12-14 minutes.

If you don’t like Ranch, you can leave it out. You can also add extra cheese or beans if you want and you can leave the beans whole if desired.

Did you make this recipe?

Tag @theleangreenbean on Instagram

Simple right? Like I mentioned in the notes, I only mash the beans to make them less noticeable for my kids so feel free to leave them whole if you want!

These Baked Ranch Chicken Taquitos are a quick and easy, kid-friendly option for lunch or dinner and a great way to use up leftover chicken. Make a double batch and freeze some for a busy week!

[clickToTweet tweet=”Try these Baked Ranch Chicken Taquitos for an easy way to transform leftover chicken into kid-friendly meal the whole family will love!” quote=”Try these Baked Ranch Chicken Taquitos for an easy way to transform leftover chicken into a kid-friendly meal the whole family will love!”]

Enjoy!
–Lindsay–
Filed Under: Appetizer, Dinner, Lunch Tagged With: Black Bean, Cheese, Chicken, Hummus, Tortilla

BBQ Chicken Pasta Salad

May 23, 2018 by Lindsay 1 Comment

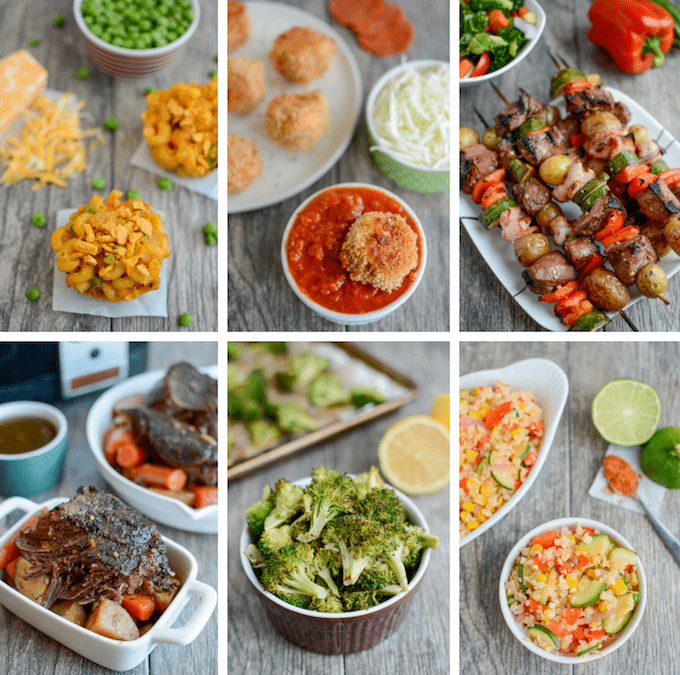
This BBQ Chicken Pasta Salad is perfect for everything from dinner on a hot night to a summer picnic or cookout. It’s packed with protein, fiber, and vegetables and can be made ahead of time!

BBQ Chicken Pasta Salad made with Dreamfields rotini pasta

Thanks to Dreamfields for sponsoring this post. 

Hi friends!

I’m excited to share this BBQ Chicken Pasta Salad with you guys today, just in time for your Memorial Day cookout! I think it’s best eaten cold, which makes it the perfect option for prepping ahead of time so you have one less thing to stress about on a busy day.

To make this pasta salad, I teamed up with Dreamfields to help introduce you guys to a fun summer event they’re hosting called #Pastapalooza2018! For the next six weeks, from Memorial Day until 4th of July, Dreamfields will be sharing delicious summer pasta blockbuster recipes, hosting exciting weekly giveaways (including a Grand prize of a year’s supply of pasta and a $1,000 VISA gift card), sharing coupons, and basically making summer more fun!

BBQ Chicken Pasta Salad with Dreamfields rotini

If you haven’t heard of Dreamfields, their pasta is made with premium durum wheat semolina and a blend of fiber and plant proteins that offers 5g fiber and 7g plant protein per serving! It also provides prebiotic fiber which aids in healthy digestion, all with the taste and texture of regular pasta!

When they asked me to create a recipe showcasing their pasta, this BBQ chicken pasta immediately came to mind. I don’t know about you, but for me, pasta salad basically screams summer. I love that you can make it ahead of time, throw in all your favorite veggies, add a flavorful sauce and boom! A healthy, flavorful dinner or side dish is born.

Here’s how you make it:

Print

BBQ Chicken Pasta Salad

BBQ Chicken Pasta Salad made with Dreamfields rotini pasta
Print Recipe

5 Stars 4 Stars 3 Stars 2 Stars 1 Star

4 from 1 review


  • Author: Lindsay
  • Prep Time: 10 min
  • Cook Time: 15 min
  • Total Time: 25 minutes
  • Yield: serves 8

Ingredients

Scale
  • 1 box (13.25 oz) Dreamfields rotini pasta (uncooked)
  • 2 Tbsp avocado oil (or olive oil)
  • 2 pounds boneless, skinless chicken breasts, diced
  • 2 tsp cumin
  • 2 tsp paprika
  • 1 cup diced red onion (or white onion)
  • 2 cups diced bell pepper (red, orange or yellow)
  • 1.5 cups fresh or frozen corn kernals
  • 1.5 cups cherry tomatoes, quartered
  • 1 cup no-salt-added black beans, drained
  • 2/3 cup BBQ sauce
  • 2 medium avocado (approx 1 pound)
  • 2 tbsp freshly squeezed lime juice (1 medium lime)
  • 1/2 tsp kosher salt
  • fresh cilantro to garnish, optional

Instructions

  1. Cook Dreamfields pasta according to package directions. 
  2. While Dreamfields pasta is cooking, heat avocado oil in a large pan over medium-high heat. 
  3. Add diced chicken, cumin, paprika, onion, and peppers and cook 5-6 minutes, stirring frequently.
  4. Add corn, tomatoes, and black beans and cook an additional 5-6 minutes until chicken is cooked to 165 degrees F (stack several cubes of chicken and pierce with a thermometer to register temperature).
  5. Transfer chicken mixture to a large bowl. Add BBQ sauce and mix well. 
  6. Stir in cooked, drained pasta and stir to combine. 
  7. In a small bowl, scoop avocado out of shell, remove pit and mash with a fork. Add lime juice and salt and stir to combine. 
  8. After chicken and pasta mixture cools at least 20 minutes (or just before serving), stir guacamole into pasta mixture. 
  9. Garnish with fresh cilantro if desired. 
  10. Optional: Mix some minced fresh cilantro into guacamole before adding to pasta mixture and drizzle with additional bbq sauce if desired.

Notes

This BBQ Chicken Pasta Salad is perfect for everything from dinner on a hot night to a summer picnic or cookout. It’s packed with protein, fiber, and vegetables and can be made ahead of time!

Did you make this recipe?

Tag @theleangreenbean on Instagram

Pretty easy, right? This would also be great to make for dinner and then you’ll have leftovers to pack for lunch all week long!

This BBQ Chicken Pasta Salad is perfect for everything from dinner on a hot night to a summer picnic or cookout. It's packed with protein, fiber, and vegetables and can be made ahead of time!

Be sure to follow Dreamfields on Facebook, Twitter, Instagram and Pinterest and enter to win some great prizes during #Pastapalooza2018.

Enjoy!
–Lindsay–
Filed Under: Dinner, Lunch, Soup & Salad, Sponsored

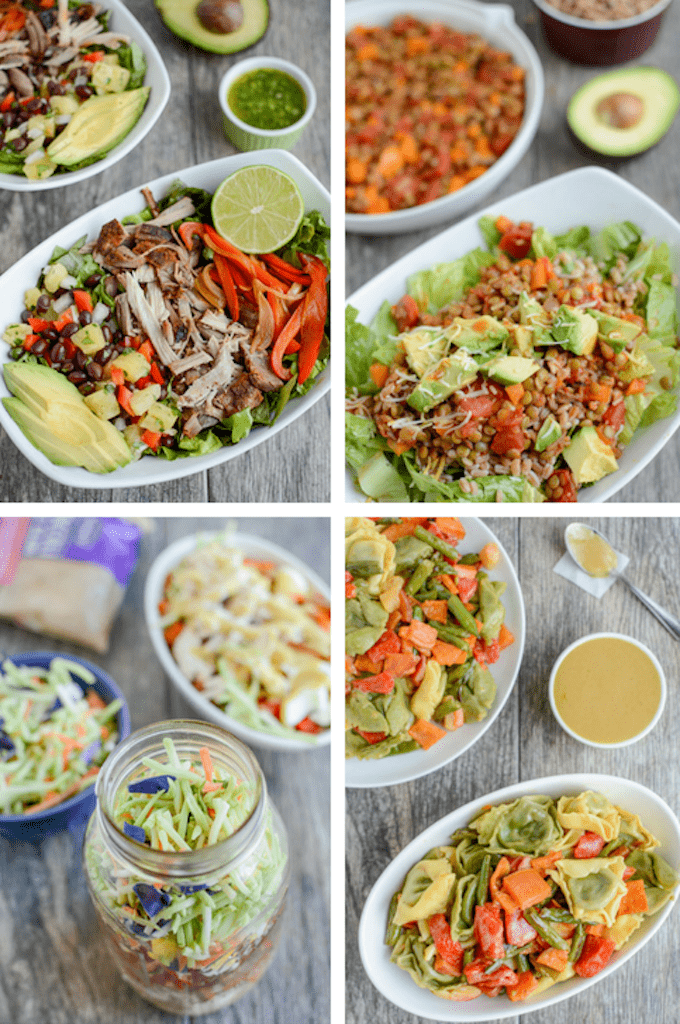
7 Easy Salads for Summer

May 21, 2018 by Lindsay 1 Comment

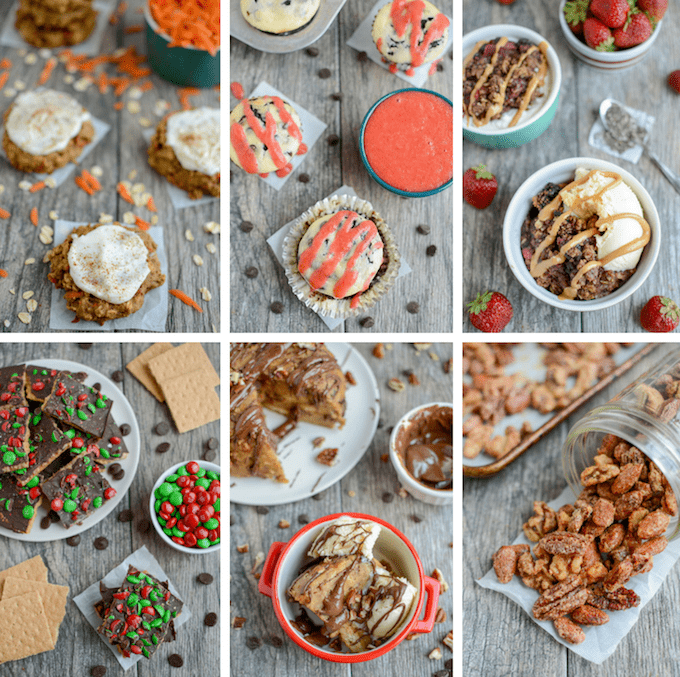
Try these 7 Easy Salads for Summer for quick and easy lunches and dinners. Use Rubbermaid FreshWorks containers to help keep your fruits and veggies as fresh as possible.

7 Easy Salads for summer. Perfect for lunch or dinner.

Thanks to Rubbermaid for sponsoring this post.

Hi friends!

I’m excited to share some easy salads for summer in today’s post. They are jam-packed with deliciousness. Warm weather is finally here and for a lot of people that means they start craving salads.  They’re light and fresh, but can easily be made into a full meal! Which is why it’s no coincidence May is National Salad Month! I’ve been testing up a storm over the past month and I’ve come up with 7 delicious combos that I can’t wait to share with you.

But first, I want to introduce you to my new storage containers. A few weeks ago, my friends at Rubbermaid reached out to see if I’d be interested in testing out their FreshWorks containers. As someone who buys a lot of fresh produce, I readily agreed. Over the next few weeks, I tested out the various sizes on a variety of fruits and veggies, including lettuce, kale, spinach, strawberries, blueberries, broccoli and more!

I was very pleased with the results and wanted to show you a few side-by-side comparisons. For the comparison, I bought two of everything and left one in the plastic bag from the grocery store and put the other in a FreshWorks container (without washing) and left them in the fridge for at least 4 days before checking on them.

Here are the results for the kale and lettuce:

kale in rubbermaid freshworks vs plastic bag

For the kale, I pulled the leaves off the stems so I could fit them in the container but did not wash or cut them. They stayed crisp and fresh. The kale in the bag was soft and wilted when I took it out to check on it.

lettuce in plastic bag vs freshworks container

For the lettuce, I pulled the leaves off the stem so I could pile them up in the container but did not wash or cut them. The leaves stayed vibrant, crunchy and fresh vs the wilted leaves on the head of lettuce stored just in the plastic bag.

I found less of a difference on spinach stored in FreshWorks versus leaving it in a plastic tub or container that it came in at the store, but the FreshWorks certainly didn’t negatively impact the produce.

I also tested out the smaller FreshWorks containers on strawberries and blueberries. I bought two pints in plastic packaging from the store, transferred one to the Freshworks and left the other for 4-5 days. Here are the strawberry results.

strawberries in freshworks vs store plastic container

The ones in the FreshWorks container stayed pretty much blemish-free whereas the ones in the original container had several bad or spoiled spots after several days.

Other types of produce you could use these containers for include green beans, broccoli, asparagus, tomatoes, raspberries and more! The storage containers use a lid with patented FreshVent technology to regulate airflow and create the optimal environment for produce. All you have to do is move your produce into the FreshWorks containers after purchasing and refrigerate to help reduce moisture and spoilage. Don’t wash or cut your produce before storing! The CrispTray at the bottom of the container helps elevate the produce away from the moisture and promotes proper airflow to help reduce spoilage. Pretty cool huh?

FreshWorks containers

So now that you know the best way to store all of your nice fresh produce, let’s talk about how to use it to make these 7 delicious salads – one for every day of the week! I tried to include a variety of toppings, proteins and leafy green bases so hopefully, there will be something for everyone!

I often use a mix of spinach and leaf lettuce for my salads, while my husband prefers solely using kale. Feel free to change up the greens in each salad and use your favorites. You could also swap in your favorite fruits and veggies to make a combination more appealing for your personal tastes!

Here’s a run-down of some of the flavor combos we’ve been loving lately:

Barbacoa Taco Salad

Barbacoa Taco Salad

I made a big batch of this Slow Cooker Barbacoa and ate it all week long in this Barbacoa Taco Salad. You can prep pretty much all of the components ahead of time so all you have to do is assemble and eat. Here’s what you need:

  • Barbacoa
  • Avocado
  • Tomatoes
  • Fajita peppers & onions
  • Black beans
  • Corn
  • Red onion

I use my favorite salsa in place of salad dressing on this one! You can also try mixing salsa with some plain Greek yogurt for a creamier dressing!

Blueberry Chicken Sausage Salad

Blueberry Chicken Sausage Salad

This one is packed with all of my favorite things. Chicken sausage comes fully cooked so I like to just sear it in a pan for a couple minutes. I prep the roasted sweet potatoes ahead of time by thinly slicing, misting with avocado oil and sprinkling with paprika and cayenne. Then I roast at 400 for 20 minutes or so, flipping once. When ready to assemble, here’s what you need:

  • Chicken sausage
  • Leaf lettuce + spinach
  • Roasted sweet potato coins
  • Blueberries
  • Crumbled goat cheese

Sometimes I add avocado to this one as well, and I like it with a balsamic vinegar dressing.

Mediterranean Chop Salad

Mediterranean Chop Salad

This Mediterranean Chop Salad is a vegetarian option that’s super easy to throw together. You can chop the veggies ahead of time and store them in the fridge and you can hard boil some eggs and cook a batch of farro ahead of time as well. When you’re ready to assemble, grab some spinach from your FreshWorks container and add:

  • Peppers
  • Red onion
  • Tomato
  • Cucumber
  • Hard boiled egg
  • Hummus
  • Farro (or another whole grain)
  • Everything Bagel seasoning (optional)
  • Crumbled feta (optional)

I use the hummus as the dressing for this one, but you could also add some Italian dressing if you wanted. Sometimes I swap the plain hummus & everything bagel seasoning for spicy hummus to give it a little kick!

Strawberry Chicken Kale Salad

Strawberry Chicken Kale Salad

This Strawberry Chicken Kale Salad is another one that’s super easy to meal prep. We always grill a big batch of chicken on the weekends in the summer and I like to cook a batch of farro or rice to have on hand as well. When ready to serve, I simply massage the kale with a little lemon juice and olive oil and then top it with:

  • Grilled chicken
  • Farro
  • Strawberries
  • Feta
  • Pumpkin seeds for an added crunch

This salad is great with Italian or honey mustard dressing!

Warm Bacon Kale Salad

Warm Bacon Kale Salad with Shrimp

To change things up, I occasionally like to enjoy a warm salad. Shrimp is one of my favorite quick-cooking proteins so this salad comes together in a jiffy. I just saute some bacon, mushrooms and kale for a few minutes. Then once the bacon starts to crisp up, I add tomatoes and shrimp. Once the shrimp are cooked (should take 5 min or less), I add some chopped hard boiled egg and balsamic vinaigrette.

Here’s a recap of what you need:

  • Bacon
  • Mushrooms
  • Tomatoes
  • Kale
  • Shrimp
  • Hard boiled eggs
  • Balsamic vinaigrette

You could also try eating this one cold and see how you like it and feel free to swap spinach for kale.

Thai Peanut Chicken Salad

Thai Peanut Chicken Salad

This Thai Peanut Chicken Salad is one of my favorites for summer. Again, I use grilled chicken that I’ve cooked previously so it comes together quickly. I just steam some peas and whip up a quick peanut sauce while my rice noodles are cooking. Then I toss the noodles, peanuts, peas, and some red peppers in the peanut sauce, serve over a mix of leaf lettuce and spinach and top with peanuts for a little extra crunch!

No need for extra dressing on this one. The peanut sauce makes the perfect dressing.

To make enough sauce for two salads I use:

  • 1/4 cup peanut butter
  • 1/4 cup chicken broth
  • 2 Tbsp sweet thai chili sauce
  • 1-2 tsp ginger

Whisk together in a small bowl and then toss with 6-8 ounces of chopped chicken and however many rice noodles you want. If you want to make more salads or want it extra saucy you can always 1.5 times or double the sauce recipe!

Tuna Cake Salad

Avocado Tuna Cake Salad

Tuna cakes are another quick and easy protein source that are perfect for salads. I like to fry a couple in a pan (crispy) and serve them over spinach and combine with some previously roasted sweet potatoes (soft) and some freshly chopped peppers, onions and walnuts (crunchy) for the perfect combination of textures and flavors.

To make these tuna cakes for two salads, I just combined:

  • 1 can tuna
  • 1/2 a medium avocado
  • 1/4 cup panko

Mix well and form into 6 small patties. Fry in avocado oil over medium high heat for a couple minutes each side. I like to use flavored tuna (garlic and herb is my favorite) to make it even easier, but if you’re using plain tuna, just throw in a few of your favorite seasonings – curry powder, paprika, cayenne pepper or lemon pepper seasoning all work great!

I like this one with salsa for a dressing as well, but feel free to use your favorite. I have a sesame ginger dressing that I also love that’s great with this combo!

So there you have it! 7 Easy Salad so for summer. Be sure to let me know if you try any of these combos and feel free to leave your favorite salad combos in the comments! I’m always looking for new flavor combos!

Looking for some easy Salad Recipes For Summer? Here are 7 healthy salads that come together quickly for lunch or dinner. Keep your produce fresh ahead of time with Rubbermaid FreshWorks containers for the best salads possible!

To check out all of the Rubbermaid Freshworks containers, check out their website! You can also find them at stores like Target, Meijer, Kroger, Bed Bath & Beyond and on Amazon. And be sure to follow them on Facebook, Twitter, Instagram and Pinterest!

Enjoy!
–Lindsay–
Filed Under: Dinner, Ingredient Round-Ups, Lunch, Soup & Salad, Sponsored

No Bake Granola Bars

May 18, 2018 by Lindsay 28 Comments

These No-Bake Granola Bars are lightly sweetened with honey and packed with chia, flax and hemp seeds. Full of fiber, protein, and healthy fats, they make a healthy, kid-friendly afternoon snack!

No Bake Granola Bars made with chia, flax and hemp seeds

*Originally published July 2014. Post, recipe & photos updated May 2018*

Hi Friends!

Let’s talk about these No Bake Granola Bars. It’s hard to believe it’s been almost 4 years since I first shared this recipe on the blog. A few weeks ago, I took Little Miss to a toddler playtime at our local community center. Can we also talk about how she almost never gets to do all the fun things by herself with mama like her brother did at that age? Second kid problems. Anyways, as we headed to pick up brother, I realized I’d forgotten to grab his after-school treat. So we made a quick stop at the vending machine and I snagged a $0.50 chocolate chip granola bar.

It was a big hit with the Squish man…..which made me think about this homemade version I’d made so many years ago. I’ve found most homemade granola bars to be overly sweetened in order to help them stick together…but really if you also use nut butter, and you store them in the fridge, you really don’t need that much sweetener.

No Bake Granola Bars

No Bake Granola Bars made with peanut butter and seeds

So yes, these crumble a little bit…but for the most part, if you eat them straight out of the fridge, they do their part to hold up as a no-bake granola bar. When I originally made these, I mixed in chopped almonds and pepitas…which I love, but my three-year-old would immediately spit out. So, for this updated version, I omitted those and went with a mix of chia, flax and hemp seeds. They’re all kinda the same color as the oats which helps them blend in so that the only thing that really stands out is the mini chocolate chips, which is what I wanted the focus to be.


So, here’s the updated recipe. For those of you who are fans of the original recipe, I’ve included it in the comments.

Print

No Bake Granola Bars

No Bake Granola Bars made with peanut butter and seeds
Print Recipe

5 Stars 4 Stars 3 Stars 2 Stars 1 Star

4.3 from 3 reviews

An easy snack packed with healthy ingredients that’s also sweet enough for dessert!

  • Author: Lindsay
  • Yield: 8 1x

Ingredients

Scale
  • 2.5 cups rolled oats
  • 3 Tbsp chia seeds
  • 3 Tbsp hemp hearts
  • 3 Tbsp ground flaxseed
  • 2/3 cup nut butter
  • 1/4 cup honey
  • 3 Tbsp water
  • 3 Tbsp mini chocolate chips

Instructions

  1. Combine dry ingredients in a bowl.
  2. Microwave honey and nut butter in a separate bowl for 30 seconds and stir to combine.
  3. Add wet ingredients to dry and mix until well coated. Let cool slightly, then mix in chocolate chips
  4. Press into a 9×9 pan (line with parchment paper for easy removal) and freeze for 30 minutes.
  5. Cut into 12 bars and store in the fridge.

Notes

This recipe has been updated. Original recipe is as follows: 1 c rolled oats, 1 c Rice Chex, 2 Tbsp chia seeds, 2 Tbsp hemp hearts, 1/4 cup pumpkin seeds, 1/4 cup chopped almonds, 1/2 cup peanut butter, 1/3 cup honey, 2 Tbsp chocolate chips.

Did you make this recipe?

Tag @theleangreenbean on Instagram

If you don’t have one of the types of seeds, feel free to leave them out. As mentioned in the notes, I think they’re sweet enough with 1/4 cup honey, but feel free to bump it up to 1/3 cup if you want!

These No-Bake Granola Bars are lightly sweetened with honey and packed with chia, flax and hemp seeds. Full of fiber, protein, and healthy fats, they make a healthy, kid-friendly afternoon snack!

[clickToTweet tweet=”Make these kid-friendly No Bake Granola Bars, packed with 3 kinds of seeds, for a healthy after-school snack!” quote=”Make these kid-friendly No-Bake Granola Bars, packed with 3 kinds of seeds, for a healthy, after-school snack!”]


Enjoy!
–Lindsay–

 

Filed Under: Snack Tagged With: Chia Seed, Chocolate Chips, Ground Flaxseed, Hemp Seed, Honey, Oats, Peanut Butter

Freezer Cooking Tips

May 14, 2018 by Lindsay 1 Comment

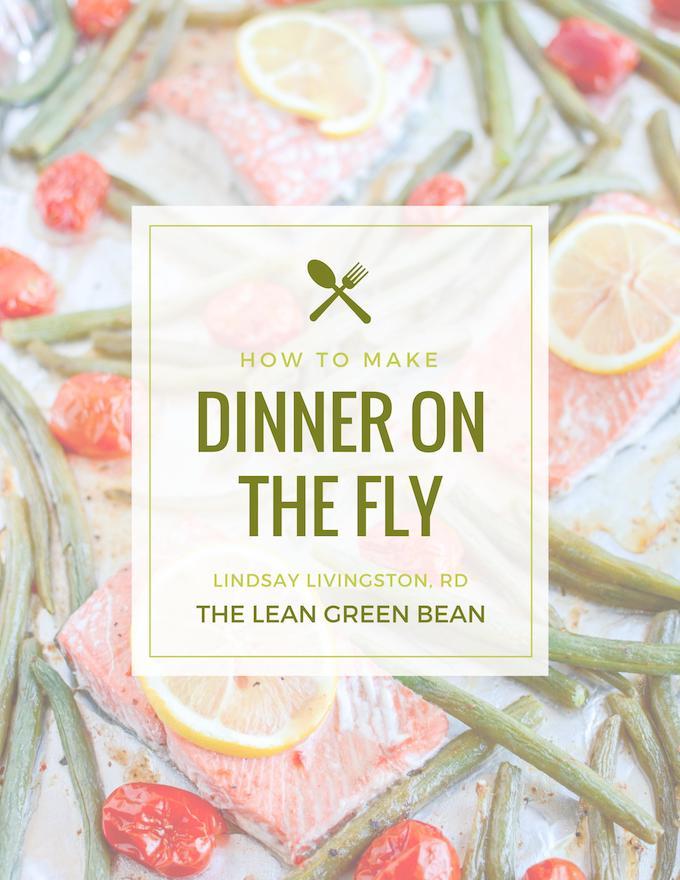
Looking for some Freezer Cooking Tips? These simple ideas from a Registered Dietitian will teach you how to make freezer cooking work for you by saving time and reducing stress during a busy week.

Freezer Cooking Tips to make healthy meals easier and less stressful.

Hi friends!

Let’s talk freezer cooking tips, shall we? One of my number one requests from you guys is more freezer meals so I hope you’ll find today’s post helpful. First I want to introduce you to my friend and fellow RD Mary Ellen over at Milk & Honey Nutrition. (You may recall we started a mama support group over on Facebook last month called Turnips & Tantrums. Be sure to join us over there if you haven’t already!) She just so happens to be a freezer cooking pro. She even wrote an ebook about it! So I asked her to share a few tips with you guys and here’s what she had to say:


Freezer Cooking brings up a number of ideas for different people, but regardless of your previous opinion… keep reading to see how my version of freezer cooking can not only save you time, but also money and stress. Most people I’ve talked to, if they haven’t tried freezer cooking already, say they’re scared about being in the kitchen for “so long” and worry they’ll be so stressed having to prepare so much food.

BUT, if done right, freezer cooking actually accomplishes the opposite… you’ll feel less stress the day of, and for the whole month ahead knowing you’ve got dinner already done… every single night!

Cheesy Beef and Kale Pasta Bake

Stress less in the kitchen

Here are a few ways to ensure you experience less stress in the kitchen, especially on your prep day:

  • Double and triple check you have all the ingredients you need.
  • Set aside uninterrupted time (no other distractions) for cooking.
  • Read through all of your recipes before beginning and print them out! (imagine your phone or tablet locking up with you’re elbow deep in shredded chicken and spinach.)
  • Prep the meat and vegetables first. Whether you’re just doing some basic meal prepping or a full freezer cooking session, these are often the most time-consuming parts. Once you have these done, everything else goes pretty quickly.
  • Use freezer-friendly disposable containers to store prepped meat and vegetables, and finished recipes once ready to be stored.
  • Prepare the recipes in a logical order… if something needs to bake, get that going first, and work on other recipes while that one is baking in the oven.
  • Have a designated “trash” area on the counter, a common place to rest spoons, wrappers, continers, egg shells, etc.

How to pick the right recipes

Build collections of 6-9 recipes that you feel comfortable making all at once. Try to group recipes that have similar ingredients to reduce the cost at the grocery store and the time you’ll need to spend preparing them. And look for recipes that are easy to double. Some of my favorites include:

  • Asian fried rice
  • Hearty lentil stew
  • Cranberry Quinoa Veggie Sauté
  • Carrot Apple Butternut Squash Soup
  • Cheesy Beef and Kale Pasta Bake

Building your grocery list

  • Set aside time to do a totally separate grocery trip for a freezer cooking day.
  • Build a separate grocery list as well. (Doing this typically means I’m less likely to forget things)
  • If a recipe calls for canned beans or veggies, look for reduced sodium or no salt added varieties whenever possible and if a recipe calls for them to be drained, also rinse them off before using them in the recipe.
  • When using canned tomato products specifically, try to find preservative-free varieties (without calcium chloride; citric acid is ok) when possible. One nationally known brand available at many stores is Pomi.

Freezer Cooking with Milk and Honey Nutrition

Freezer Cooking is an excellent meal planning tool. It allows you to spend less time in the kitchen, while still making healthy choices. But if the idea of choosing your own recipes, and building a grocery list seems too time-consuming, my eBook, Freezer Cooking with Milk & Honey Nutrition provides you with step by step instructions for how to prepare 9 different recipes in a matter of hours, ensuring you have dinner and/or lunch prepared for weeks in advance. Once completed, you’ll have 50+ adult meals. Check it out here and use code LEANGREEN for $5 off.


This Cilantro Lime Chicken is the perfect healthy dinner recipe and can be made in the slow cooker or the Instant Pot. Serve it over rice or as a filling for tacos. You can even prep it ahead of time and freeze until you need it.

Big thanks to Mary Ellen for these tips! I wanted to pop in an add a few of my own thoughts as well.

  • Like she mentioned, my best tip for freezer meals is to pick recipes that can easily be doubled. It’s super easy to prep 2-3 batches of the same recipe all at once and have them on hand. Things like casseroles, soups, burgers and meatballs work especially well for this. Then you can spread them out over the next few months so you don’t get bored with them.
  • Think beyond dinner. A lot of people think only dinners can be prepped for the freezer but my freezer actually tends to full of a lot of breakfast and snack options. I like to make and freeze energy balls, smoothie bags, popsicles, pancakes and waffles, muffins, baked oatmeal and more to have on hand for quick meals and snacks for the kids.
  • Use your slow cooker! Some of the easiest meals to prep are dump and go crockpot meals. You can just throw everything in a ziploc bag and freeze them. The night before you want to make them, put them in the fridge to thaw and then just dump everything in the slow cooker the morning of.
  • Prep components. It’s super easy to prep a big batch of shredded chicken, pork or beef. Portion it out and freeze. Then you can just pull it out and use it for things like enchiladas, casseroles, soups and more. Same goes for things like rice!
  • Invite a friend. If you’re going to do a big prep day, it might be a fun to invite a friend to prep along with you. Then you can chat the whole time and both end up with a freezer full of food. Make a master list, split it in half and you can each go to the store for half the items.
  • For a few more resources, be sure to check out my friend Regan’s podcast called This Unmillenial Life. She has a whole episode of freezer meals that you may find helpful. And my friend Kelly over at New Leaf Wellness is another queen of freezer meals with tons of ebooks and blog post full of great freezer recipes.

This recipe for Slow Cooker Honey Garlic Chicken Thighs is an easy, kid-friendly weeknight dinner. Let the crockpot do all the work and serve with rice and steamed veggies for a balanced meal.

Some of my favorite freezer recipes are:

  • Lemon Energy Balls
  • Whole Wheat Yogurt Waffles
  • Baked Oatmeal French Toast Sticks
  • Freezer Chicken Tenders
  • Cilantro Lime Chicken
  • Slow Cooker Honey Garlic Chicken Thighs

Looking for some Freezer Cooking Tips? These simple ideas from a Registered Dietitian will teach you how to make freezer cooking work for you by saving time and reducing stress during a busy week.

That’s it for today! Hope these Freezer Cooking Tips were helpful! Be sure to check out Mary Ellen’s blog for more great recipe ideas and check out her ebook as well to get started on your freezer meals journey.

Have your own freezer cooking tips or favorite recipes? Leave them in the comments!!

Enjoy!
–Lindsay–
Filed Under: Dinner, Food Prep

Crepe Kabobs

May 9, 2018 by Lindsay 3 Comments

These Crepe Kabobs are fun, kid-friendly breakfast treat! Make them sweet with peanut butter filled crepes and fresh fruit or savory with cheese-filled crepes, sausage and eggs. 

Sweet and Savory Crepe Kabobs

Thanks to Meijer for sponsoring this post. 

Hi friends!

I’m super excited to introduce a new partnership today with my friends at Meijer. If you’ve followed me for a while, you know that Meijer is where we shop weekly, so teaming up with them was a perfect fit! Today we’re kicking things off with these Crepe Kabobs that just so happen to be perfect for Mother’s Day!

As I was brainstorming for this post, I wanted to come up with something super easy and kid-friendly because you guys know I’m a big fan of getting the kids in the kitchen! These Crepe Kabobs are perfect for little hands to help assemble and just require a little help from dad or another adult to make the crepes in a hot pan! The crepes can even be made the night before for easy assembly in the morning.

Toddler assembling fruit crepe kabobs

My toddler was super excited about this morning project and so proud of himself for helping. He loved spreading the peanut butter on the crepes and carefully assembling his kabob.

The great thing about this little Mother’s Day project is that we only had to make one stop (at Meijer) to get everything we needed! Meijer is great for creative kitchen projects like this! While we were doing our weekly grocery shopping, we snagged all the recipe ingredients we needed – from the fresh fruit to the chicken sausage and eggs, to the flour and milk for the crepes. We also grabbed some wooden skewers, a Mother’s Day card, some beautiful flowers, and a cute bamboo tray to make it easy for the kiddos to treat mom to breakfast in bed! My hubby makes a great breakfast and I told him I’d love it if he helped the kids make me some Crepe Kabobs for breakfast on Sunday!

Family serving crepe kabobs to mom in bed for Mother's Day

Whether or not they’re actually thrilled about executing the breakfast in bed situation is kind of a toss-up 🙂

Now let’s talk about the crepes themselves! I opted to make two versions: sweet and savory, so there’s something for everyone. The sweet version has crepes filled with peanut butter and lots of fresh fruit while the savory version has crepes filled with cheese, chicken sausage, and hard-boiled eggs. You can easily do all sweet or all savory, change things up with different fruits or use fried eggs and breakfast sausage if you wanted!

Fruit Crepe Kabobs

The crepes can be made the night before and stored in the fridge so then in the morning, all you (or your husband) have to do is spread the peanut butter or melt the cheese, fold them up and assemble your crepe kabobs. For the crepes themselves, I made mini versions so that they wouldn’t be super giant when I folded them up and put them on the skewers. One batch of batter made about 16 mini crepes.

Toddler and some crepe kabobs

These are such a fun and festive breakfast treat, but really you don’t need a special occasion. Make these for a quick weekday breakfast or an after school snack if you want, just for something different!

Here’s how you make them:

Print

Crepe Kabobs

Sweet and Savory Crepe Kabobs
Print Recipe

5 Stars 4 Stars 3 Stars 2 Stars 1 Star

No reviews

These Crepe Kabobs are fun, kid-friendly breakfast treat! Make them sweet with peanut butter filled crepes and fresh fruit or savory with cheese-filled crepes, sausage and eggs.

  • Author: Lindsay
  • Prep Time: 5 min
  • Cook Time: 10 min
  • Total Time: 15 minutes
  • Yield: Makes 8 kabobs 1x

Ingredients

Scale
  • 2 eggs
  • 1 cup flour
  • 1 cup milk
  • 1 Tbsp melted butter
  • vanilla, cinnamon & 2 tsp sugar optional (for sweet crepes)
  • peanut butter
  • shredded cheese
  • fresh fruit
  • hard boiled eggs
  • chicken sausage
  • wooden skewers

Instructions

In a bowl, combine eggs, flour, butter and milk. Add milk slowly and whisk until well mixed. (You can also mix everything in a blender). 

Heat a pan over medium-high heat. Grease pan with butter or oil. Add 2 Tbsp batter to the pan. Tilt the pan to spread into a thin circle. 

Let cook about 1 minute before flipping. Repeat with remaining batter. 

Let crepes cool slightly. 

Spread peanut butter over half the crepe, fold in a half and then in half again. Or sprinkle shredded cheese on half, microwave to melt and then fold into quarters. 

For sweet kabobs, alternate fruit and 2 peanut butter-filled crepes per skewer. 

For savory kabobs, alternate chicken sausage, hard-boiled eggs and 2 cheese-filled crepes per skewer. 

Notes

Add vanilla, cinnamon and 2 tsp sugar to your batter for even sweeter crepes.

Feel free to use your favorite kinds of fresh fruit, sausage and eggs to make the crepe kabobs to your liking! You could also add roasted veggies like sweet potato or peppers to the savory kabobs!

I love the True Goodness products and used several of them in this recipe. While the True Goodness brand flour isn’t gluten-free, there are lots of gluten-free flour options available at Meijer!

Did you make this recipe?

Tag @theleangreenbean on Instagram

So easy, right?!

Toddler breakfast in bed crepe kabobs

Mamas- share this recipe with your co-parent ASAP so they can head to Meijer and get everything they need and put the kiddos to work on Mother’s Day. You deserve a break! And what’s cuter than a toddler serving you breakfast and bed? And then attempting to eat all your breakfast before you even get a chance?!

(#AD) These Crepe Kabobs are a great way to get kids in the kitchen and they'd make the perfect Mother's Day treat! Make one quick stop at @Meijerstores to grab all the ingredients, plus a card, flowers and even a cute tray to serve her breakfast in bed!

[clickToTweet tweet=”These Sweet & Savory Crepe Kabobs are a kid-friendly breakfast or snack option that’s perfect for Mother’s Day!” quote=”These Sweet & Savory Crepe Kabobs are a kid-friendly breakfast or snack option that’s perfect for Mother’s Day!”]

Enjoy!
–Lindsay–
This is a sponsored conversation written by me on behalf of Meijer. The opinions and text are all mine.

Filed Under: Sponsored, Breakfast Tagged With: Egg, Milk, White Whole Wheat Flour

Slow Cooker Shredded Beef (Barbacoa)

May 7, 2018 by Lindsay 24 Comments

This Slow Cooker Shredded Beef is easy to make in the crockpot for dinner and tastes better than the Barbacoa at Chipotle. Perfect in burrito bowls, on salads, in enchiladas and more.

Slow Cooker Shredded Beef (Barbacoa)

*Originally published 11/2014. Photos and post updated 5/2018*

Hi Friends!

Allow me to introduce this Slow Cooker Shredded Beef. You might also know it as barbacoa if you get it at Chipotle or other restaurants. You guys have been asking for more slow cooker recipes so today I decided to revisit an old recipe that my friend Marisa shared as a guest post several years ago. Back when she shared this recipe, I was super excited about it…but I never actually made it myself.

A couple weeks ago I decided to change that! Whenever I make shredded meat at home, I tend to use pork or chicken…but hubby is a big beef fan and this recipe has some seasonings that I don’t typically use so I was excited to test it out. What I was not excited about was the fact that when I strategically went to the grocery store while I only had one kid, they didn’t have the cut of beef I needed. So then I had to go to a second grocery store after I picked up kid #2…which made it even more work. Nevertheless, we prevailed and came home with what we needed.

Slow Cooker Shredded Beef, similar to Chipotle Barbacoa

This sauce does require a food processor or blender, which is one extra step, but I think it’s totally worth the effort. It’s super easy to throw everything in and it added such great flavor to the meat.

I love having a big batch of shredded meat on hand that I can then use throughout the week to make various dishes like burrito bowls, nachos, taco salads, enchiladas, sandwich wraps and more.

Adding the peppers does give it a bit of zing so I didn’t give this batch to the kids but hubby and I are big fans of spicy food so we loved it! You can reduce the number of peppers you use to make it less spicy. And if you have extra peppers in your can like I did, I just froze mine in a ziploc bag to use in the future!

Here’s how you make it:

Print

Slow Cooker Barbacoa (Shredded Beef)

Slow Cooker Shredded Beef (Barbacoa)
Print Recipe

5 Stars 4 Stars 3 Stars 2 Stars 1 Star

5 from 2 reviews

This Slow Cooker Shredded Beef is easy to make in the crockpot for dinner and tastes better than the Barbacoa at Chipotle.

  • Author: Lindsay

Ingredients

Scale
  • 3 chipotle peppers in adobo sauce
  • 1/2 bunch fresh cilantro
  • 3/4 cup chopped white onion
  • 5 garlic cloves
  • 2 teaspoons cumin
  • 1 teaspoon oregano
  • 2 teaspoons salt
  • 1 lime, juiced
  • 1/4 cup apple cider vinegar
  • 3 pounds beef roast (i used chuck roast or you could use bottom round)
  • 2 cups water

Instructions

  1. In a food processor or blender, combine the 3 chipotle peppers (removed from the can with some adobo sauce), cilantro, onion, garlic, cumin, oregano, salt, the juice of one lime, and the apple cider vinegar. Blend until almost smooth.
  2. Place beef in slow cooker.
  3. Pour the homemade sauce on top. Add two cups of water.
  4. Cook on low for 8 hours.

Did you make this recipe?

Tag @theleangreenbean on Instagram

There you have it! Simple and delicious.

This Slow Cooker Shredded Beef is easy to make in the crockpot for dinner and tastes better than the Barbacoa at Chipotle. Perfect in burrito bowls, salads and enchiladas!

If you’re not familiar with Marisa’s blog, Uproot Kitchen, be sure to go check it out! She shares great recipes like Whole Wheat Banana Bread, Peanut Butter Chocolate Chip Granola Bars and Slow Cooker Short Rib Ragu with Polenta.

Enjoy!
–Lindsay–

Filed Under: Dinner, Slow Cooker Tagged With: Beef

Thursday Things – Poshmark

May 3, 2018 by Lindsay 2 Comments

Hi friends!

Time for another round of Thursday Things. Here are some things I’m loving lately.

breathe+ app

Breathe+ Simple Breath Trainer

I’ve talked a little bit before on IG stories about how I occasionally battle anxiety. One of the things that helps me is breathing. I’m not a huge yoga and extended meditation person, but I found this simple app that I’ve been loving. You can choose how many seconds you want to breathe in, hold it or not, and breathe out and the screen fills up with pretty colors as you count up and then the colors disappear as you breathe out. You can set the app to repeat your desired breath sequence for however many minutes you want. It’s free, but I paid the $2 to get rid of the ads at the bottom so I could just focus on the wave of pretty colors. It’s simple but it’s been very effective for me.

brown leather purse

Poshmark

I think I’m late to the game on this one, but I recently discovered this site for buying and selling clothes, accessories, etc. I’m not looking to sell stuff but I was looking for a brown crossbody purse forever and couldn’t find one that I like anywhere. So I checked out Poshmark and found this one from Anthropologie that someone was selling and loved it! My transaction went smoothly and it was shipped quickly. Definitely a win!

podcasts for kids

Podcasts for Kids

I mentioned on IG that we’ve been trying out some podcasts for kids in the car on the way to school lately and I got some great suggestions. Then my friend Sally just happened to write a great post about this exact topic. Some of the ones on her list are for kids a bit older but I’m definitely bookmarking it. We’ve been loving Story Pirates and the Disney podcast for Squish.

bumkins reusable bags

Bumkins Reusable Bags

I love my Stasher bags to store stuff in my fridge and freezer and pack in larger coolers, but I find them to be a bit too big for regular lunch boxes, which I discovered as I was packing a lunchbox for our first picnic of the year yesterday. So I ordered a bunch of these Bumkins reusable bags to use for the upcoming summer. They come in lots of cute patterns and sizes.

jujube

Jujube Diaper Backpack

I decided for this summer I wanted to try out a diaper bag backpack so that when I’m carrying Little Miss, wearing my cross body purse and trying to hold Squish’s hand, the bag can just be on my back out of the way. After asking my mama friend, the Jujube brand came highly recommended. They’re pretty expensive and I decided that while I would love one, I probably didn’t need a brand new one, so I’ve been searching on eBay (you guys know I love eBay) and scored one yesterday in pretty much brand new condition for only $70 instead of $180 new! Excited for it to arrive next week! I love all their patterns and kinda want two…one for each car 🙂


That’s it for this week!

Enjoy!
–Lindsay–
Filed Under: Uncategorized

Fruit Pizza with Oatmeal Flax Crust

April 30, 2018 by Lindsay 43 Comments

This Fruit Pizza with Oatmeal Flax Crust is packed with fiber and so easy to make. Let everyone top this kid-friendly breakfast or snack recipe with their favorite nut butter, yogurt and fruit!

Fruit Pizza with Oatmeal Flax Crust

*Originally published July 2013. Photos and post updated April 2018*

Hi Friends!

I originally shared this post almost 5 years ago. I was on vacation and my friend Lauren, a fellow Columbus RD (we actually did our Dietetic Internship together at Ohio State), took over for the day.. She shared this Fruit Pizza with Oatmeal Flax Crust and this week I decided to give it a little upgrade and reintroduce it to you guys because it’s the perfect, kid-friendly breakfast or snack…especially for summer with all the fresh fruit available!


What I love about this recipe is that it’s so easy to customize. I tested Lauren’s original recipe using unsweetened pea milk (instead of vanilla almond milk, adding pumpkin seeds for some extra protein and leaving out the coconut. I found that the crust wasn’t quite sweet enough for my liking. So, I made a few tweaks and Squish loved it! I added a couple of dates for some natural sweetness and added fiber. If you make it with vanilla flavored milk and include the coconut, you could probably leave out the dates, but I like the addition. I also adjusted the recipe to make two personal pizzas at a time.

Fruit Pizza with an easy, vegan, oatmeal flax crust

I’ve left the original recipe in the notes section of the recipe if you’d like to see it!

Print

Fruit Pizza with Oatmeal Flax Crust

Fruit Pizza with Oatmeal Flax Crust
Print Recipe

5 Stars 4 Stars 3 Stars 2 Stars 1 Star

5 from 2 reviews

This Fruit Pizza with Oatmeal Flax Crust is packed with fiber and super easy to make. Let everyone top this kid-friendly breakfast or snack creation with their favorite nut butter, yogurt and fruits!

  • Author: Lindsay
  • Prep Time: 10 min
  • Cook Time: 10 min
  • Total Time: 20 minutes
  • Yield: makes 2 personal pizzas 1x

Ingredients

Scale
  • 2–3 dates, roughly chopped
  • 1/4 c pepitas (shelled pumpkin seeds)
  • 1 cup rolled oats
  • 2 Tbsp ground flaxseed
  • 1 Tbsp unsweetened shredded coconut (optional)
  • 1–2 tsp ground cinnamon
  • 1/2 cup milk of choice (i use unsweetened pea milk)
  • 1 tsp vanilla
  • peanut butter or yogurt and fresh fruit for topping
  • Chocolate chips optional

Instructions

  1. Preheat the oven to 400 degrees. Line baking sheet with parchment paper
  2. Add dates and pumpkin seeds to the food processor and process until chopped.
  3. Add oats, flax, cinnamon (and coconut if using) and process until well combined and chopped.
  4. Add milk and vanilla and process until a ball starts to form.
  5. The dough will be sticky and wet. Scoop out with a spoon, divide in half and use a small piece of parchment paper to press each half of the dough into a circle of your desired thickness. You can also wet your fingers and spread it that way so it doesn’t stick as much.
  6. Bake for 8 minutes, then let crust cool for a few minutes.
  7. Spread with your choice of peanut butter or yogurt and top with fruit and chocolate chips

Notes

Here’s the original recipe: 1/2 cup rolled oats, 1/2 cup vanilla almond milk, 1 Tbsp shredded coconut, ground flax, 1-2 tsp cinnamon. 

Did you make this recipe?

Tag @theleangreenbean on Instagram

In the five years since Lauren first shared this recipe, she has started both a blog and her own nutrition business. You can check out her blog and her Instagram for some amazingly delicious plant-based recipes and also check out her website to see what services she offers!

This Fruit Pizza with Oatmeal Flax Crust is packed with fiber and so easy to make. Let everyone top this kid-friendly breakfast or snack recipe with their favorite nut butter, yogurt and fruit!

[clickToTweet tweet=”Try this Fruit Pizza with Oatmeal Flax Crust for a fun, kid-friendly breakfast or snack that’s packed with fiber!” quote=”Try this Fruit Pizza with Oatmeal Flax Crust for a fun, kid-friendly breakfast or snack that’s packed with fiber!”]

Enjoy!
–Lindsay–
 

Filed Under: Breakfast, Healthy Muffins & Bars, Snack Tagged With: Dates, Fruit, Ground Flaxseed, Milk, Oats, Peanut Butter, Pepitas

  • « Go to Previous Page
  • Page 1
  • Interim pages omitted …
  • Page 17
  • Page 18
  • Page 19
  • Page 20
  • Page 21
  • Interim pages omitted …
  • Page 65
  • Go to Next Page »

Primary Sidebar

Lindsay Livingston The Lean Green Bean Healthy Living Tips and Tricks

I'm a Registered Dietitian and mom of three from Columbus, Ohio. I use this blog to share simple, healthy recipes, nutrition tips, and an honest glimpse of motherhood!

Learn More →

Questions? Comments? Email me: [email protected]

The Lean Green Bean Facebook The Lean Green Bean Instagram The Lean Green Bean Pinterest The Lean Green Bean Twitter The Lean Green Bean Feed
footer-logo
The Lean Green Bean Facebook The Lean Green Bean Instagram The Lean Green Bean Pinterest The Lean Green Bean Twitter The Lean Green Bean Feed
Recipes

Breakfast
Dinner
Snack
Slow Cooker

Kids

Cooking With Kids
Favorite Gifts
Toddler Meals
Indoor Activities

Resources

Easy Packed Lunches for Kids
Dinner Spark
Snack Spark
Ultimate Guide to Food Prep

About

Meet Lindsay
Become an RD
Work with Me

The Lean Green Bean is a participant in the Amazon Services LLC Associates Program, an affiliate advertising program designed to provide a means for sites to earn advertising fees by advertising and linking to amazon.com.
Read the full privacy and disclosure policy here.

Copyright © 2022 · The Lean Green Bean

table talk series

Learn how food affects your body.

Get my free Table Talk email series where I share bite-sized nutrition information about carbs, protein, and fat, plus bonus information about snacks and sugar!

[email protected]