• Skip to main content
  • Skip to primary sidebar

Learn how food affects your body. Get Free Nutrition Info Today

the-lean-green-bean-logo
  • Home
  • Recipes
  • Kids
  • Resources
    • Ebooks
    • Food Prep
    • Videos
    • Snack Round-Ups
    • Gift Guides
  • About
    • Become An RD
    • Work With Me
  • Search
the-lean-green-bean-logo
  • Home
  • Recipes
  • Kids
  • Resources
    • Ebooks
    • Food Prep
    • Videos
    • Snack Round-Ups
    • Gift Guides
  • About
    • Become An RD
    • Work With Me
  • Search

blog

You Made It

October 5, 2013 by Lindsay 15 Comments

madeit1

made2

madeit3

made4

madeit5

madeit6

madeit7

madeit8

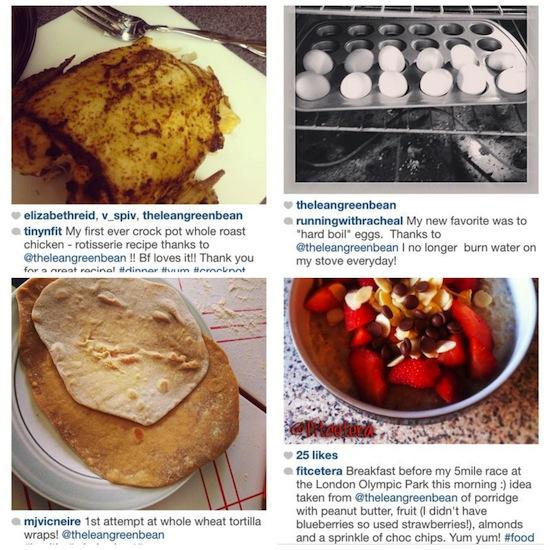
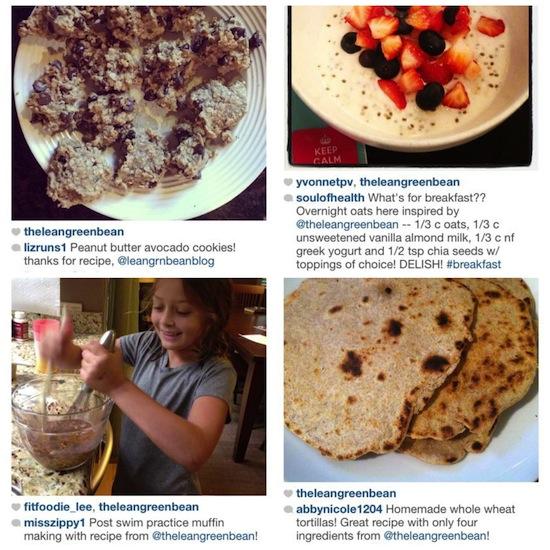
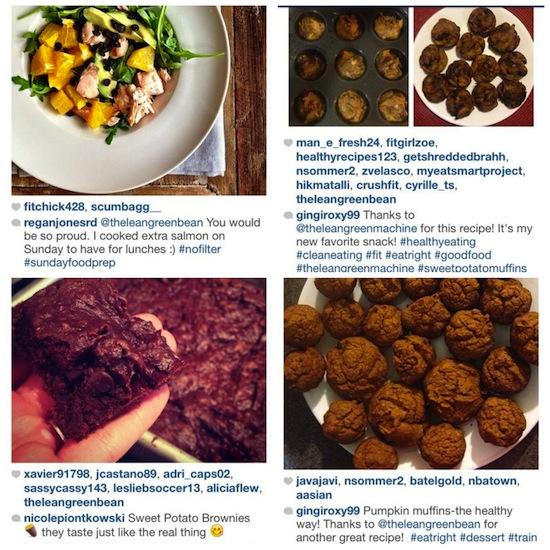
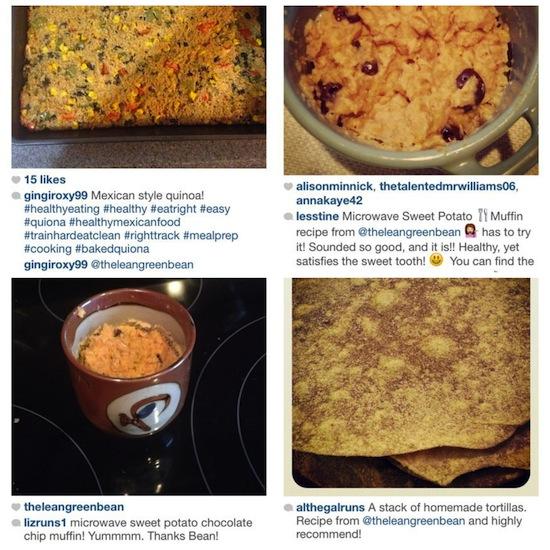
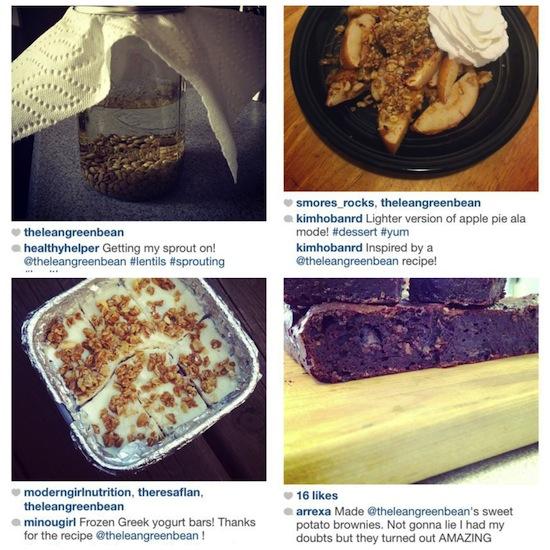
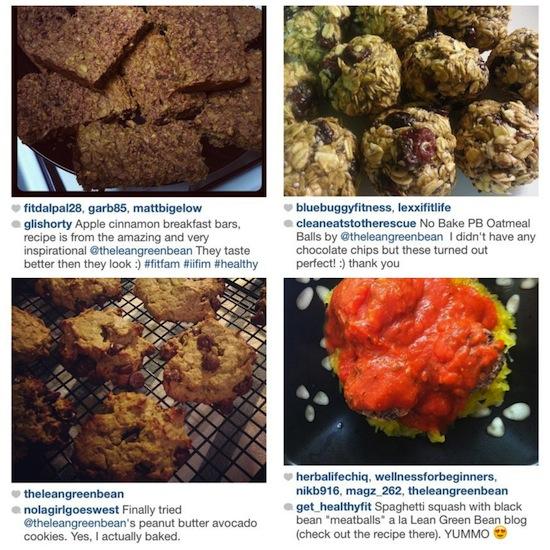
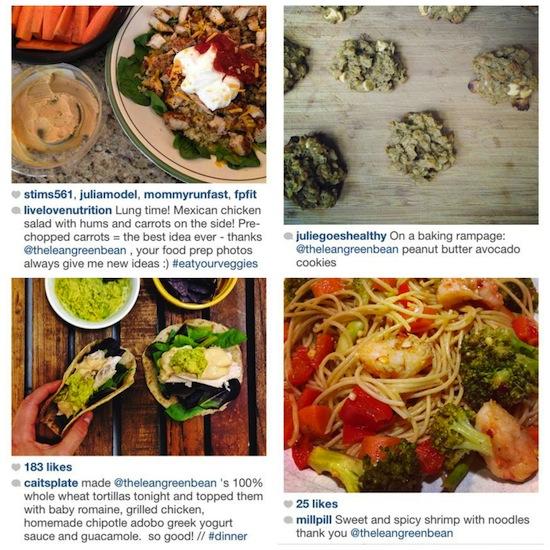
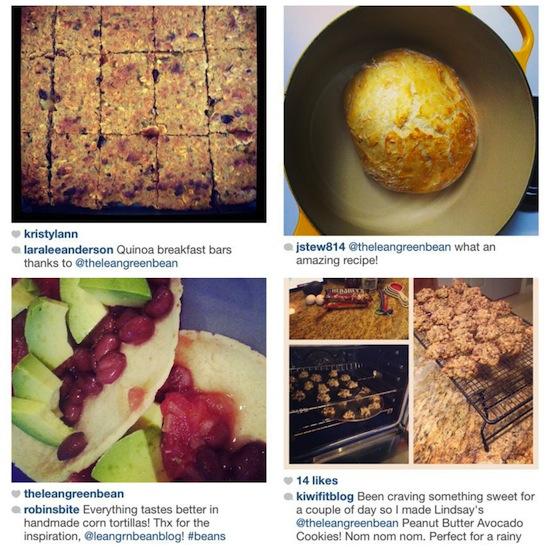
I just wanted to take a minute to say thank you to every single person out there who has ever made one of my recipes! You guys are what makes blogging worthwhile and I absolutely LOVE seeing you recreate my recipes AND enjoy them!! Keep sharing!

Thanks for helping spread the message that healthy eating doesn’t have to be boring! You guys rock!!!

xoxo,
Lindsay

Filed Under: Uncategorized

Fitness Friday 58

October 4, 2013 by Lindsay 23 Comments

Hi Friends!

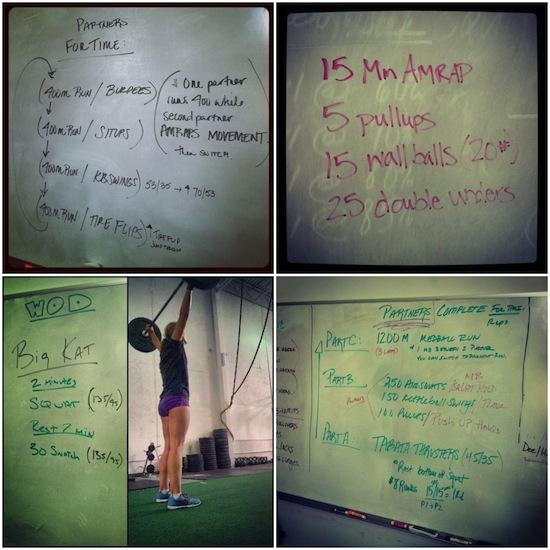
Whelp, somehow it’s been almost a month since we talked fitness and boy do we have a lot to talk about. First I’ll recap some of my wods from the past month…and then at the end we’ll talk a little bit about progress! Soooo, let’s go way back to the beginning of September and recap shall we?

FF1

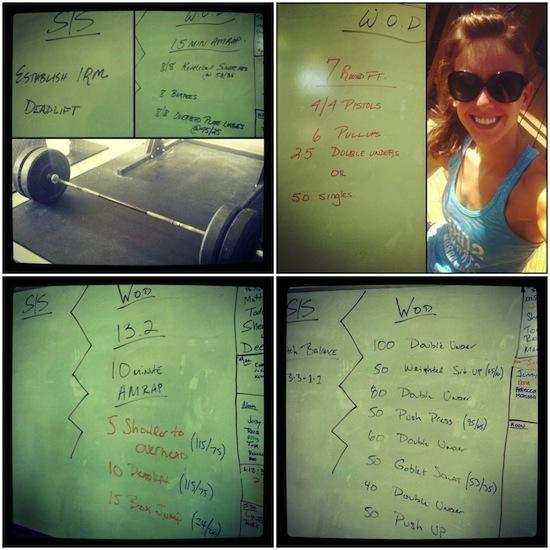
1. Saturday morning partner WOD
2. Sunday morning WOD – 8 rounds completed!
3. 40 squats, then 5:32 with 85# for the snatches
4. Saturday morning partner WOD – 4 min of tabata, then 27:47 for parts B & C

IMG_8322

Getting better at snatches!

ff2

1. A new deadlift PR! 230# plus 5+7 for the wod
2. This wod is called – Lindsay in her element! Crushed it! 7:22 rx
3. We redid open #wod 13.2- in march I got 230 reps. Today I finished 266!
4. Holy effing shoulders! 17:25 Rx plus dead lifts, snatch balance and box squats

ff3

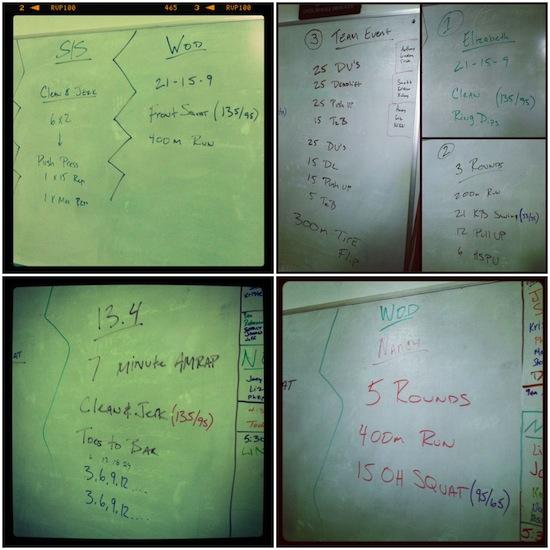
1. Lots of clean & jerks at 115#, then 9:32 Rx for the wod
2. Team training – wod 1- 6:05 w/ banded ring dips, wod 2- 9:02 w/ hand release pushups instead of hspu bc my neck is bothering me, then 14:27 for the team wod.
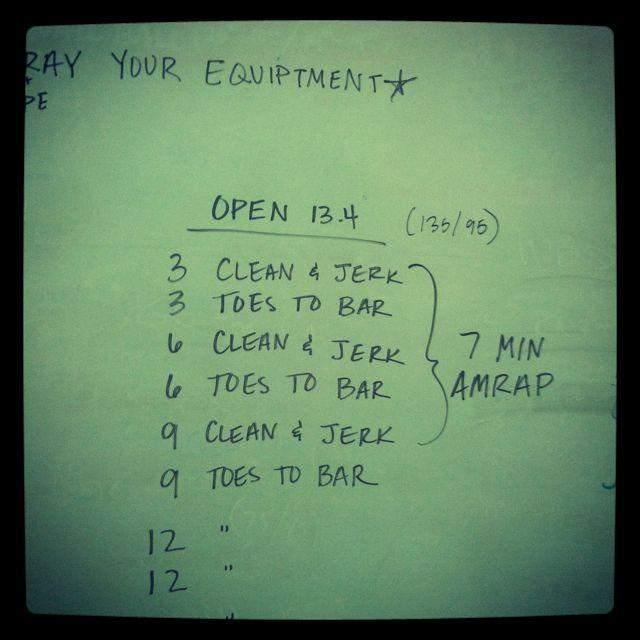
3. Redid open #wod 13.4- in March I got 25 reps. Today i got thru 63 reps!
4. PR’d my Nancy time my 90 seconds! 13:39

FF6

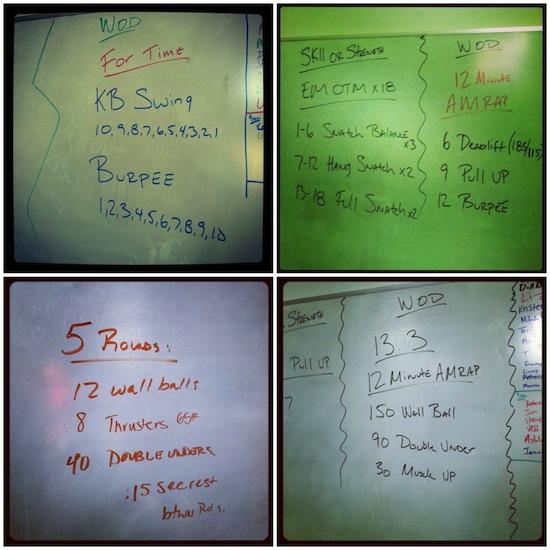
1. Harder than it looks! First time using a 53# kb! 7:21 with a 53# kettlebell
2. PR’d my overhead squat before class – 115 x 2! Then a shitload of snatches…then 6 + 12 for the wod
3. 2×400, 3×300, 3×200 sprints, then 11:32 for the wod
4. Redid open wod 13.3 – in march I finished the wall balls in 8:11 and got thru 56 double unders. Today I PR’d my Karen time- 7:43 and finished all my double unders with 2:29 left!

ff4

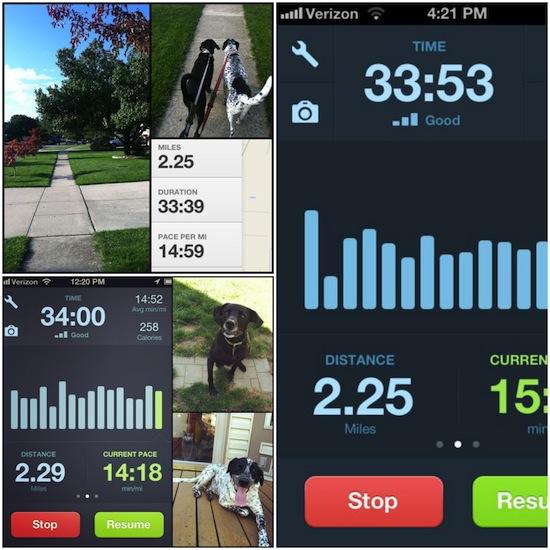
Lots of walk with the dogs!

Then & Now 

I just want to take a second to chat about progress. If you were reading carefully, you may have noticed I mentioned that we’ve been redoing the Open WOD. If you’ve been reading long enough, you’ll remember way back in March when The Crossfit Open started there were 5 weeks of workouts and you complete them with a judge to count your reps/record your times…then the people from all over the world with the best times in the open qualify for regionals. Since it’s been about 6 months since we did the workouts, our box is going back through and doing the exact same workouts again to track our progress.

Just for fun, I went back to my previous Fitness Friday posts to see what I wrote about the workouts right after I did them. I’ll share what I wrote back in March, and then how I felt in September after the redo:

Open 13.1

IMG_2453

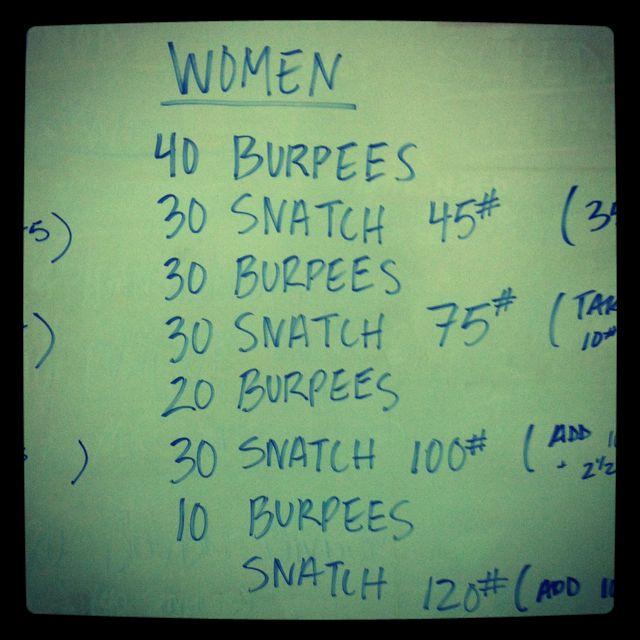
March: My goal was to get through the first 40 burpees, the 30 snatches at 45 pounds, the next 30 burpees and then to at least get a few snatches at 75#. I knew that would be a PR for me. The most I’d ever snatched was 60#. I got through the first set of burpees, the first set of snatches and then second set of burpees. Then we had to change our own weight. By the time I got the bar set up for the 75# snatches, we were 11 minutes into the workout. That meant I had six minutes left to get as many snatches as I could. In those six minutes I got 7 snatches at 75#. I also had about 20 failed reps.  My form wasn’t pretty, but I’m proud of the ones I got!

September: Repeated #crossfit open 13.1- five months ago I got 107 reps and spent 11 minutes struggling to get 7 snatches at 75#. Today I finished all 30 reps at 75# + 20 more burpees with 1:45 left in the workout! 150 total reps! Now I just gotta work on that 100# snatch!

Progress: Then I could barely snatch 60 pounds. Now I can do 30 snatches in a row at 85 pounds. 

Open 13.2

IMG_8395

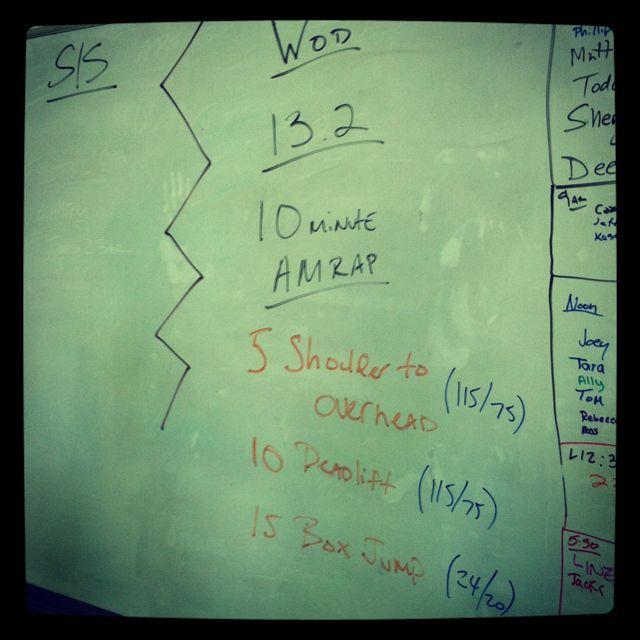
March: My goal was 210 reps (7 full rounds). I got 230 reps! I was proud of myself. I really struggled with the very last shoulder to overhead I did and had to try 3 times to get it up, which cost me time…otherwise I think I could have finished that 8th round. I also hit myself in the teeth with the bar as I was moving from shoulder to overhead to deadlift. It hurt like crazy and I spent most of the workout hoping I didn’t chip a tooth!

September: We redid open #wod 13.2- in march I got 230 reps. Today I finished 266!

Progress: Then I struggled to get 75# over my head. Now I can get 125# over my head and 75# feels LIGHT!

Open 13.3

j

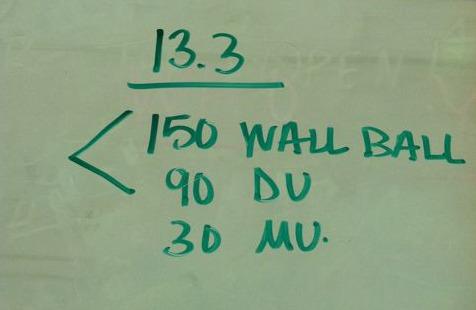
March: My goal was to finish the double unders. I’m pretty good at double unders, but I’m not good at them when I’m gasping for breath after doing 150 wall balls. So I got through all the wall balls and 56 of the 90 double unders for a total score of 206 reps. This workout was BRUTAL. 

September: Redid open wod 13.3 – in march I finished the wall balls in 8:11 and got thru 56 double unders. Today I PR’d my Karen time- 7:43 and finished all my double unders with 2:29 left!

Progress: I remember this workout completely destroyed me back in March. I was gasping for breath…I couldn’t get my legs to move…it was miserable. I left thinking “I want to die.” Now, I finished my wallballs almost 30 seconds faster (even after a heavy leg day the day before) AND I easily finished all my double unders. I left thinking “well that wasn’t so bad”. Still working on getting a muscleup though!

Open WOD 13.4

IMG_3140

March: First of all…anyone that does crossfit with me knows how much i hate toes to bar. I can do them, I just can’t string them together. And a 95# clean and jerk is 20# more than i’ve ever put over my head…so I knew that’d be tough. My goal going in was 20 reps. I was able to do 25! I got through 7 of the clean and jerks out of the set of 9 and then it just got too heavy and I could clean it but I couldn’t push it up over my head anymore. I knew this one would be tough for me though so I was happy with my 25!

September: BOOM! Redid open #wod 13.4- in March I got 25 reps. Today I got thru 63 reps!

Progress: Then 75# was a lot of weight for me to put over my head. Now, I regularly use 95# in workouts. I still am not great at stringing TTB together but I’ve gotten better! Felt so good about this workout after redoing it.

———–

Open WOD 13.5 is the last one we have to redo and we’ll be tackling it next week so I’ll be sure to let you know how it goes!

Although I’m pretty proud of myself, I’m not sharing these comparisons with you guys to brag. I’m sharing because I want to show you guys that if you stick with something, work hard, push yourself and believe in yourself, you WILL improve. You’ll get better at your weaknesses, you’ll get stronger, you’ll get more efficient…and there’s no better feeling than crushing a workout you previously struggled with!

Let’s chat:

Do you ever re-do workouts to see if you’ve improved?!

Enjoy!
–Lindsay–

Filed Under: Workouts

Pumpkin Pie Balls

October 3, 2013 by Lindsay 72 Comments

Hi Friends!

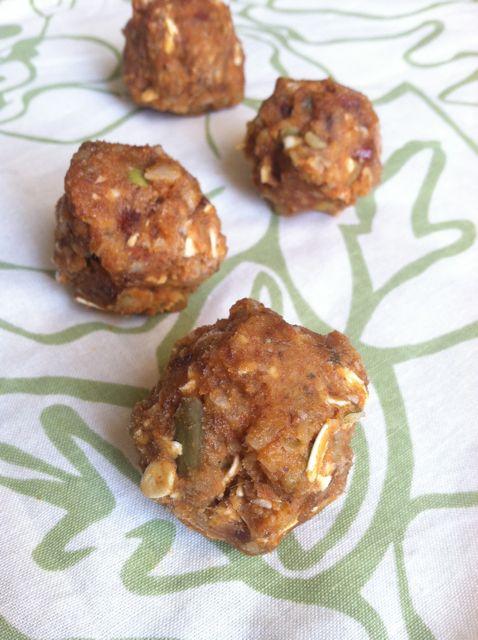
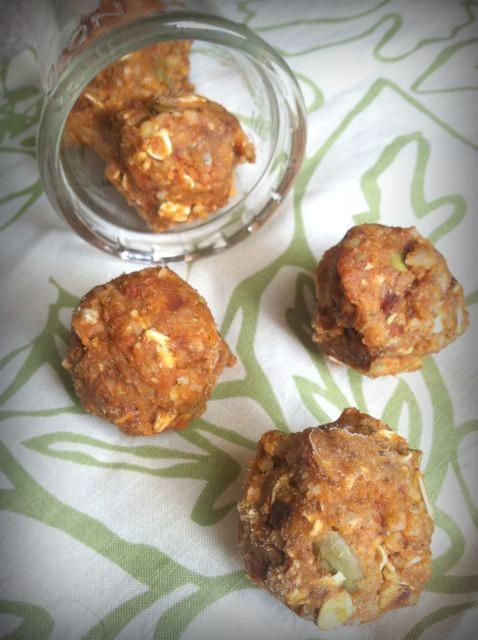
Here’s your first pumpkin treat of the year. While hubby was out of town for a few days this week, I spent several nights playing around in the kitchen. These balls were an experiment gone totally right.

Pumpkin Pie Balls

These Pumpkin Pie Balls are packed with healthy fats and fiber, sweetened with dates and make the perfect snack!

They taste just like pumpkin pie!

The only thing you need to know about these is that they’re a bit softer than your typical energy balls. They’re much softer than the ones I made with just dates, almonds and peanut butter…but I think it works out well for them because it makes them taste even more like the middle of a pumpkin pie, which is soft! Also, you store these in the freezer and they firm up, but don’t get super hard so you can eat them right after you take them out…no need to let them thaw out at all!


Print

Pumpkin Pie Balls

pumpkin pie balls
Print Recipe

5 Stars 4 Stars 3 Stars 2 Stars 1 Star

4.3 from 3 reviews

A easy, nutritious snack that taste just like pumpkin pie!

  • Author: Author: Lindsay L

Ingredients

Scale
  • 1/2 c pumpkin seeds (shelled)
  • 1/2 c sunflower seeds (shelled)
  • 1 Tbsp chia seeds
  • 1/2 c almonds
  • 1/2 cup pumpkin puree
  • 1 c dates (chopped & pitted)
  • 1/2 c oats
  • 1 tsp cinnamon
  • 1/2 tsp ginger

Instructions

  1. Place the seeds and almonds in a food processor and pulse several times.
  2. Add the dates and pumpkin and process well.
  3. Add the oats and spices and pulse several times.
  4. Taste and adjust spices as desired.
  5. Scoop mixture onto saran wrap, form into a ball and freeze for 30 minutes.
  6. Form into balls and store in an airtight container in the freezer.

Did you make this recipe?

Tag @theleangreenbean on Instagram


Pretty simple right? You can also store these in the fridge…I just prefer the freezer.

These Pumpkin Pie Balls are packed with healthy fats and fiber, sweetened with dates and make the perfect snack!

Play around with the ingredient quantities until you find a combo you love!

These Pumpkin Pie Balls are packed with healthy fats and fiber, sweetened with dates and make the perfect snack!

Enjoy!
–Lindsay–

Filed Under: Snack Tagged With: Pumpkin

Cranberry Whole Wheat Muffins

October 1, 2013 by Lindsay 38 Comments

Hi Friends!

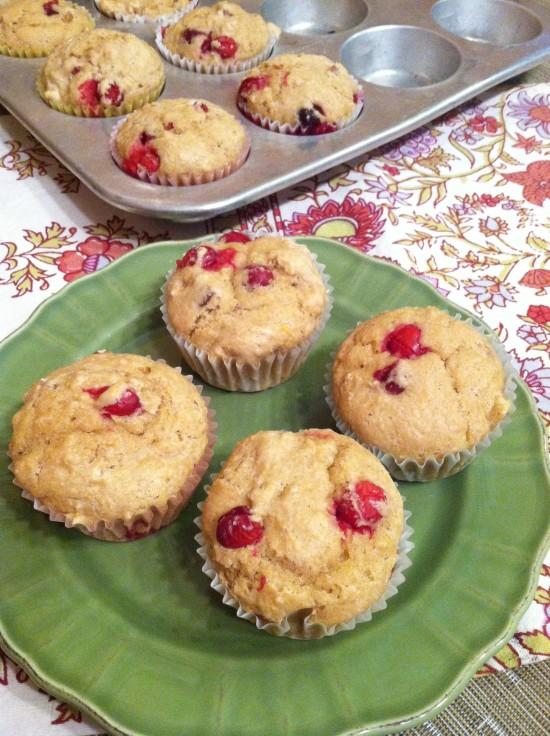
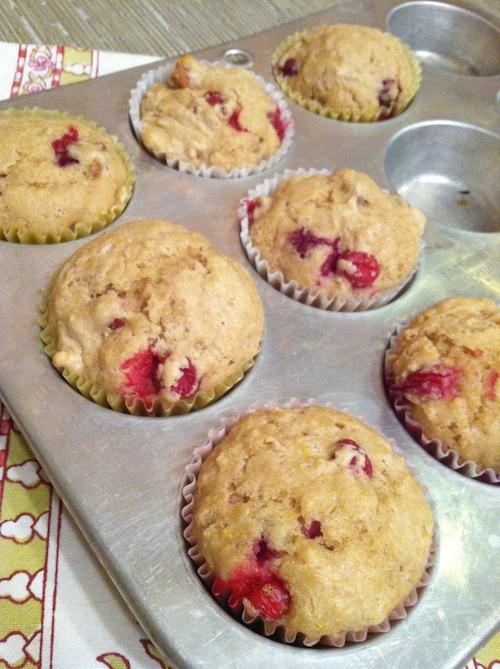
I made you some muffins.

Cranberry Whole Wheat Muffins

Packed with whole grains, these Whole Wheat Cranberry Muffins make a great on-the-go breakfast!

But first, let’s have a little chat about cranberries shall we?
*This post is sponsored by The Cranberry Institute*

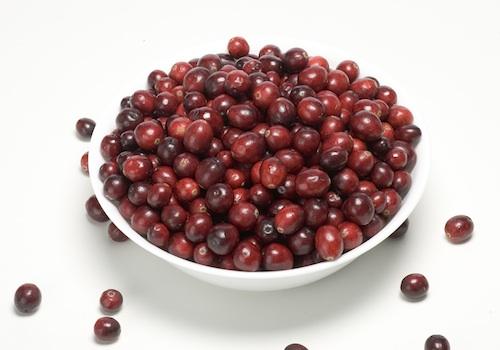
Fresh cranberries are far and away one of my favorite parts of fall. I’m one of those crazy ladies that stocks up when they go on sale for $1 a bag and I’m not afraid to buy 10 bags to keep in my freezer and use throughout the year!

Cranberries are super versatile. I use them in both savory and sweet dishes.

Milwaukee Nov. 8, 2006. (Photo Andy Manis)

PLUS they have tons of health benefits. Here are a few:

  • They’re nutrient dense. Cranberries provide vitamins, minerals and phytonutrients without providing an excess of calories (1 cup of raw cranberries has about 50 calories). They’re also naturally fat-free and contain very little sodium.
  • They contain  the flavonoid, proanthocyanidin (PAC) that help prevent UTIs. The PACs in cranberries help prevent the adhesion of certain harmful bacteria, including E. coli, associated with urinary tract infections (UTIs).2,3
  • They’re good for your heart!  Whole cranberries are a good source of dietary fiber and all cranberry products contain flavonoids and polyphenolics that offer a wide range of potential heart health benefits including defense against atherosclerosis and anti-inflammatory properties.15,16
  • They can help protect against ulcers. Cranberries may prevent adhesion of the bacteria H. pylori to the lining of the stomach which can help reduce the risk of stomach ulcers.
  • They may help prevent cancer. Research suggest that PACs from cranberries may have anticancer and anti-angiogenic properties, while cranberry juice may help inhibit the growth of cancer cell lines.27,28  Scientists continue to investigate this area of research.

 —————-

If you’re not a fan of fresh cranberries, have no fear! Dried cranberries are another great option. Here’s why:

  •  MyPlate suggests trying dried fruits, including dried cranberries, as a snack because they are easy-to-carry and store well.
  • Dried cranberries are  a good source of fiber – 10% of the Daily Value – with 2.3 grams per serving (40 gram serving).
  • The amount of sugar in dried cranberries is equal to that of other dried fruits.  Dried cranberries are sweetened because unlike other berries, cranberries are naturally low in sugar and high in acidity so they require sweetening to be palatable. Sweetening helps balance out their natural tartness. 
  • They can be easily added to oatmeal, rice and grain side dishes, meat entrées, casseroles, salads and more!

 *Note, you can also look for reduced sugar dried cranberries which is what I buy!

So, now that you know a little bit more about how amazing cranberries are for you….let’s move on to how you should use them!

Packed with whole grains, these Whole Wheat Cranberry Muffins make a great on-the-go breakfast!

Here’s an easy way to incorporate fresh cranberries into diet as a grab & go breakfast or snacks:

Print

Cranberry Whole Wheat Muffins

cranberry whole wheat muffins e1380075620283
Print Recipe

5 Stars 4 Stars 3 Stars 2 Stars 1 Star

3.5 from 2 reviews

The perfect muffin for grab and go Fall breakfast!

  • Prep Time: 10 minutes
  • Cook Time: 15 minutes
  • Total Time: 25 minutes
  • Yield: 12 1x

Ingredients

Scale
  • 2 cups all-purpose flour
  • 3/4 cup whole wheat flour
  • 1/3 cup granulated sugar
  • 1 tablespoon baking powder
  • 2 teaspoons ground ginger
  • 1/2 teaspoon orange zest (grated orange peel)
  • 1/4 teaspoon salt
  • 11/4 cup milk
  • 5 tablespoons melted butter
  • 1 egg
  • 1 cup fresh or frozen, thawed cranberries, halved
  • 1 cup chopped, toasted pecans

Instructions

  1. Preheat oven to 350 degrees. Line muffin pan with paper liners.
  2. In a medium bowl combine flours, sugar, baking power, ginger, orange zest, and salt. Set aside.
  3. In a medium mixing bowl whisk together milk, melted butter, and egg. Stir in cranberries and nuts.
  4. Add wet ingredients to dry and stir just until blended. Do not over mix.
  5. Divide batter evenly among muffin cups. Sprinkle granulated sugar on top of muffins, if desired.
  6. Bake for 15 to 18 minutes or until lightly browned.

Did you make this recipe?

Tag @theleangreenbean on Instagram

Like I mentioned in the notes above, I make these using all white whole wheat flour and replace some of the butter with applesauce.
These muffins are also easily customizable. I used lemon zest instead of orange zest and almonds instead of pecans.

 Let’s chat!
Are you a cranberry fan? What’s your favorite cranberry recipe?

Enjoy!
–Lindsay–

PS.  It’s this guy’s birthday today 🙂

brettbday

Happy birthday hubby! I love you!!


Sources:

2. Howell A. Cranberry Proanthocyanidins and the Maintenance of Urinary Tract Health. Crit Rev Food Sci Nutr 2002; 42(S): 273-278.
3. Gupta K, Chou M, Howell A, Wobbe C, Grady R, Stapleton A. Cranberry products inhibit adherence of p-fimbriated Escherichia coli to primary cultured bladder and vaginal epithelial cells. J Urol 2007; 177(6): 2357-2360
8. Foxman B, Barlow R, D’Arcy H, Gillespie B, Sobel JD. Urinary tract infection: self-reported incidence and associated costs. Ann Epidemiol 2000 Nov; 10(8): 509-15.
15. McKay DL, Blumbery JB.  Cranberries (Vaccinium macrocarpon) and Cardiovascular Disease Risk Factors. Nutrition Reviews 2007; 65: 490-502.
16. Shabrova EV., et al. Insights into the molecular mechanisms of the anti-atherogenic actions of flavonoids in normal and obese mice.  PLoS One 2011;6(10):e24634. 
22.  Kivimaki AS, et al.  Lingonberry, cranberry and blackcurrent juices affect mRNA expressions of inflammatory and atherothrombotic markers of SHR in a long-term treatment.  J Funct Food 2012; 4:496-503. 
27.  Kim KK, et al. Anti-angiogenic activity of cranberry proanthocyanidins and cytotoxic properties in ovarian cancer cells. Int J Oncol 2012;40(1):227-235. 
28.  Vu KD, et al. Effect of different cranberry extracts and juices during cranberry juice processing on the antiproliferative activity against two colon cancer cell lines. Food Chem 2012; 132(2):959-967. 

Filed Under: Baking, Breakfast, Snack, Sponsored Tagged With: Cranberry

Five Years

September 27, 2013 by Lindsay 42 Comments

Five years ago today:

anniversary

To my hubby:
I’ve enjoyed every second of the last 5 years.

anniv2

There’s no one I’d rather have by my side!

Happy anniversary.

I love you!
–Lindsay–

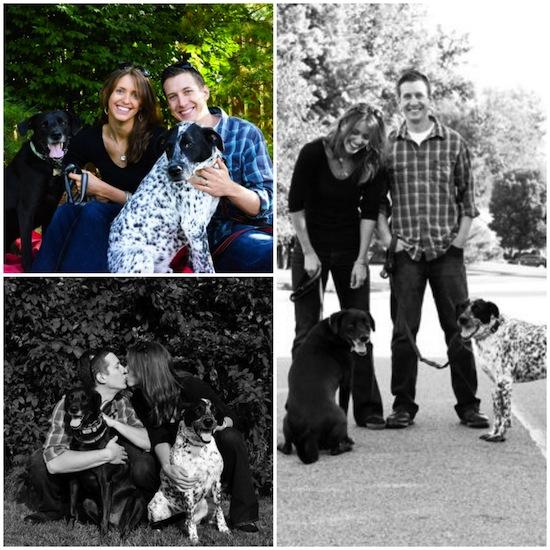
PS. We had a friend take some 5 year anniversary pictures for us. Here’s a sneak peek. Yes, that’s the same cornfield as the one we took our wedding pics in 🙂

a3

a1

Filed Under: Uncategorized

Dutch Oven Bread

September 26, 2013 by Lindsay 57 Comments

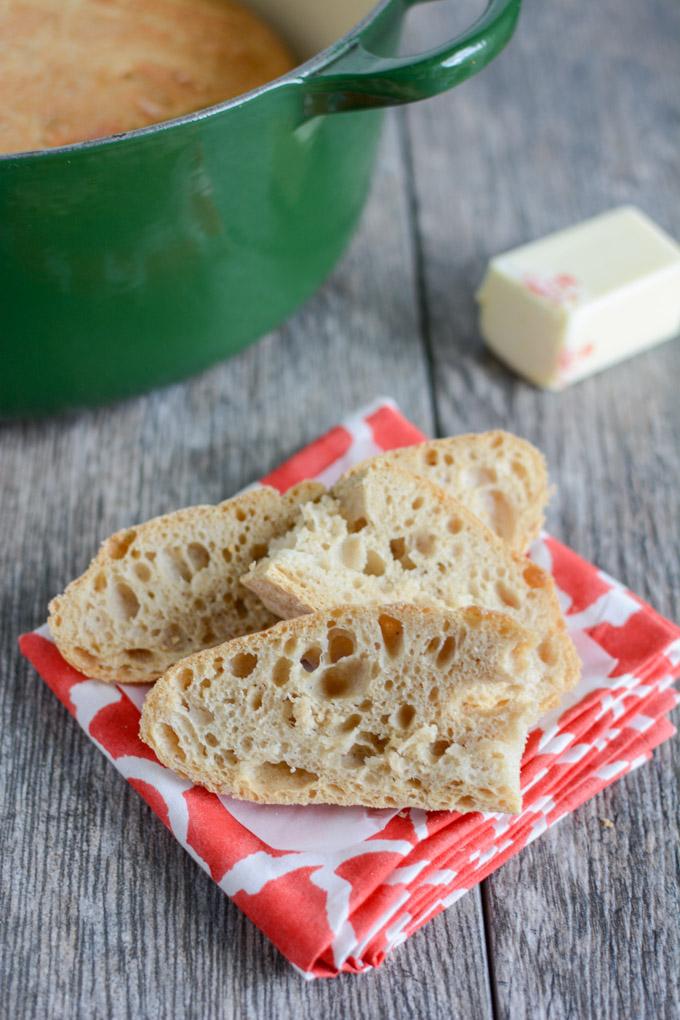
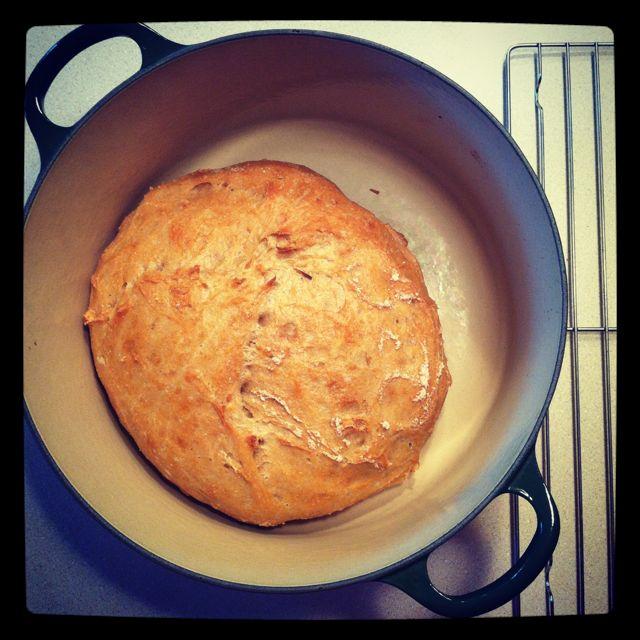
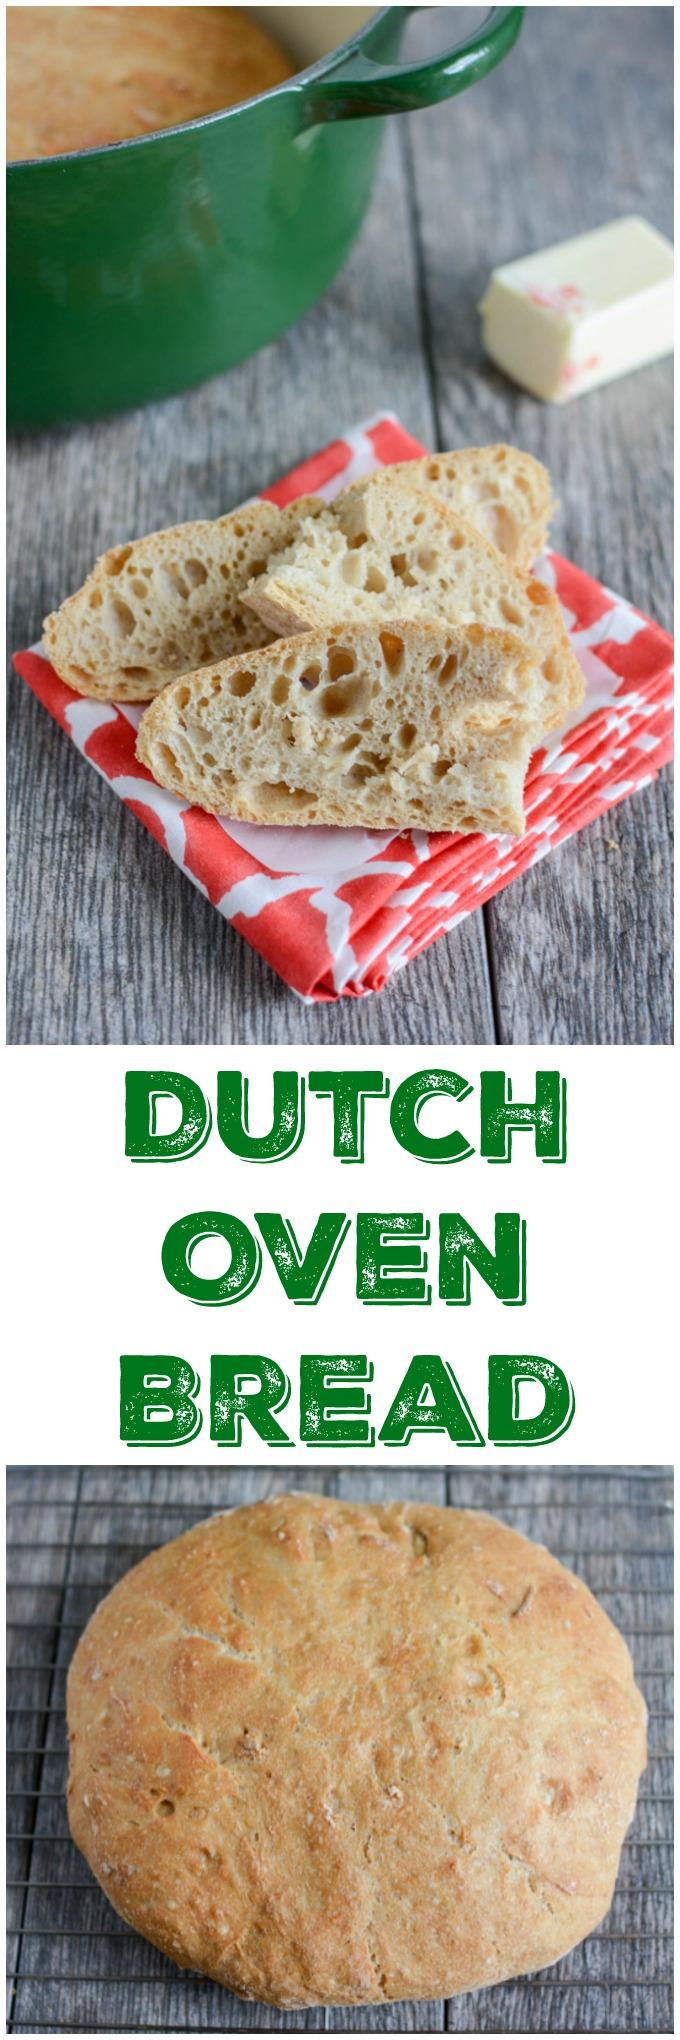
This easy recipe for Dutch Oven Bread requires minimal effort and is basically foolproof. Enjoy homemade bread made with real, healthy ingredients and no processed junk.

This easy recipe for Dutch Oven Bread requires minimal effort and is basically foolproof. Enjoy homemade bread made with real, healthy ingredients and no processed junk.

**Photos updated April 2016**

Hi Friends!

I first shared this recipe over two years ago in a guest post. Last week I came to a few realizations:

  1. It had been far too long since I made this bread
  2. I should definitely share this recipe with all of you!

So here it is. A super easy way to make an absolutely delicious loaf of bread. It requires almost no kneading and it’s pretty much foolproof!

Dutch Oven Bread

Here’s the recipe:

Print

Dutch Oven Bread

dutch oven bread 5
Print Recipe

5 Stars 4 Stars 3 Stars 2 Stars 1 Star

5 from 3 reviews

A foolproof recipe that requires very little kneading and comes out perfectly every time!

  • Author: Author: Lindsay L
  • Prep Time: 4 hours
  • Cook Time: 40 minutes
  • Total Time: 4 hours 40 minutes

Ingredients

Scale
  • 2 c bread flour
  • 1 c white whole wheat flour
  • 1 tsp salt
  • pinch of sugar
  • 1.5 c warm water
  • 2+3/4 tsp active dry yeast

Instructions

  1. Pour the warm water into a large bowl. Add yeast and a pinch of sugar and let sit for 5 minutes.
  2. Add salt and flours and stir until a shaggy ball of dough is formed.
  3. Cover and let rise in a warm place for 4 hours.
  4. Turn dough out onto a floured surface. With floured hands, knead the dough 5-10 times.
  5. Return dough to the bowl and let rise for another 30 minutes.
  6. While dough is rising, place your dutch oven (uncovered) in the oven and preheat to 430 degrees F.
  7. After 30 minutes, use floured hands to reshape dough into a ball and carefully drop into the dutch oven.
  8. Cover and let bake for 30 minutes.
  9. Uncover and let bake 10-15 minutes longer.
  10. Remove loaf from dutch oven and let cool.

Did you make this recipe?

Tag @theleangreenbean on Instagram

In case you haven’t picked up on it yet, I love my Dutch oven 🙂

Homemade bread couldn't be easier. This Dutch Oven Bread bakes up perfectly every time with very little effort on your part!

I’ve tried this recipe with all bread flour and it’s fantastic. I’ve tried it with 2 cups white whole wheat flour and 1 cup bread flour and it’s ok, but not great It doesn’t rise as much and it’s much denser. I personally think the best ratio is 2 cups bread flour and 1 cup white whole wheat flour.

This easy recipe for Dutch Oven Bread requires minimal effort and is basically foolproof. Enjoy homemade bread made with real, healthy ingredients and no processed junk.

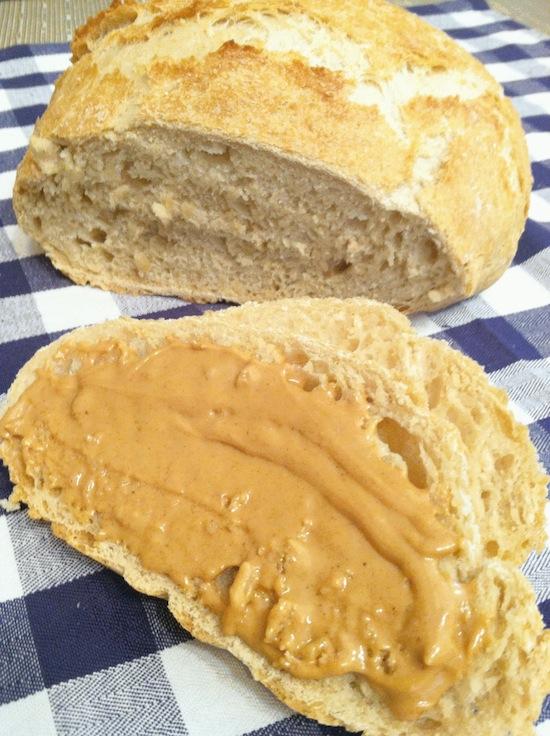
Enjoy with some peanut butter or make yourself a sandwich!

Homemade bread couldn't be easier. This Dutch Oven Bread bakes up perfectly every time with very little effort on your part!

Let’s chat:
Do you bake your own bread?!
Do you have a favorite recipe?

Enjoy!
–Lindsay–

Filed Under: Baking, Side Dish, Snack Tagged With: White Whole Wheat Flour

Greek Yogurt Chicken

September 25, 2013 by Lindsay 44 Comments

Hi Friends!

I’ve got a new recipe to share with you today:

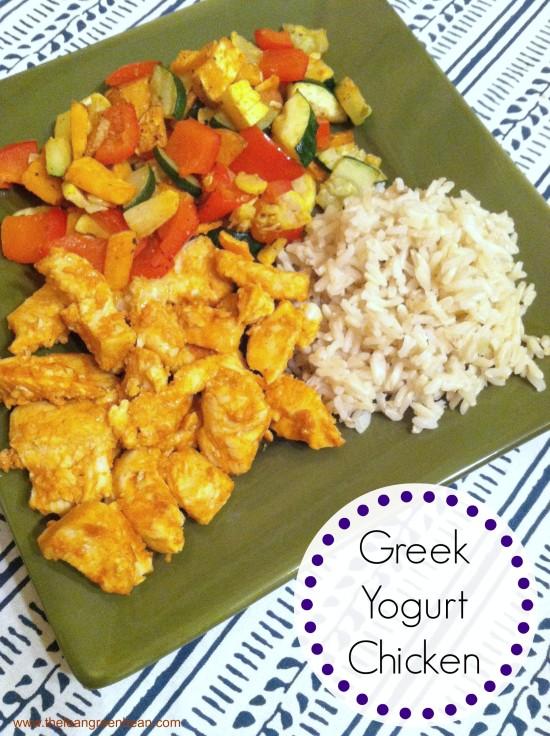
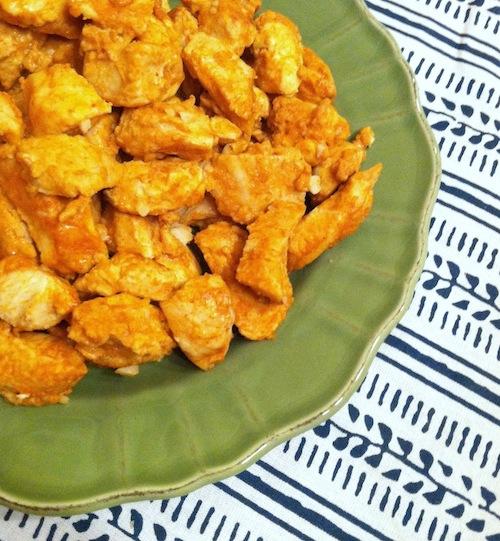
Greek Yogurt Chicken

A Greek Yogurt Marinade helps add flavor and moisture to your chicken. Try it for a quick weeknight dinner!

I created this recipe on behalf of the National Dairy Council. I’m working with them as part of a blog tour to help educate people (you guys!) about lactose intolerance. Because I’m slightly lactose intolerant myself, I always love the opportunity to help people gain a better understanding of what it means.

So what is lactose intolerance?

  • It’s a type of food sensitivity characterized by a deficiency in lactase, the enzyme that breaks down lactose (a sugar naturally found in milk).
  • People who are lactose intolerant don’t have enough lactase, and therefore may experience gastrointestinal issues following the consumption of an amount of lactose greater than their body’s ability to digest and absorb.
  • Lactose intolerance is not the same as having a cow’s milk allergy, meaning that those who are lactose intolerant can consume dairy products.

People can handle different amounts of lactose and  dairy foods contain varying amounts of lactose. Some, like lactose-free dairy milk have had the lactose removed, and others, like certain cheeses (Cheddar, Colby, Monterey Jack, Mozzarella and Swiss), low-fat or fat-free plain yogurt (including Greek-style varieties) and cottage cheese, are naturally lower in lactose.


I personally started having trouble digesting lactose my junior year of high school. Adults tend to produce less lactase than children, which is why some people can develop LI in adulthood. I noticed I was having abdominal pain, gas and bloating particularly after drinking a lot of milk and eating certain cheeses. After working with my doctor to determine what the issue was (they can perform a lactose tolerance test), I set about determining what worked for ME in terms of consuming dairy products.

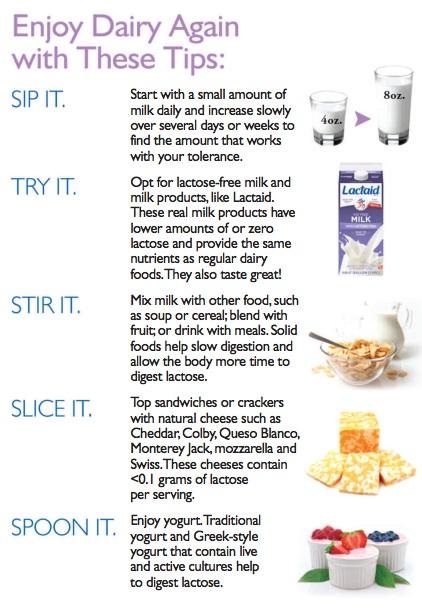
The NDC has some tips to help you enjoy dairy again if you suffer from lactose intolerance:

tips

LI is different for everyone and it’s a trial and error process to figure out what works for you. For me, it means not going overboard with milk (unless it’s lactose-free), not drinking milk by itself and limiting the amount of cheese I eat. I typically have no problem with Greek yogurt, eating one bowl of cereal or enjoying dishes with moderate amounts of Colby, cheddar or mozzarella cheese!

I love the #beyondLI campaign because it’s helping people with LI realize they can still get the nutritional benefits found in dairy products. I was asked to create a lactose-intolerance friendly recipe and decided to use Greek yogurt…since you all know how much I love it 🙂

This is a quick, simple dish with minimal ingredients that’s perfect for a weeknight dinner.

Print

Greek Yogurt Chicken

greek yogurt chicken e1380066342799
Print Recipe

5 Stars 4 Stars 3 Stars 2 Stars 1 Star

4.8 from 4 reviews

A quick, easy weeknight dinner that’s moist and full of flavor! Serves 4

  • Author: Author: Lindsay L

Ingredients

Scale
  • 1 pound boneless, skinless chicken breasts
  • 1/4 c mashed avocado
  • 3/4 c low-fat Greek yogurt
  • 2 tsp paprika
  • 2 tsp Sriracha
  • 1 tsp cayenne pepper
  • 2 cloves garlic, minced

Instructions

  1. Cut the chicken breasts into bite-sized pieces and place in a large bowl.
  2. In a small bowl, combine remaining ingredients and mix well.
  3. Add yogurt mixture to the bowl with the chicken and stir to coat.
  4. Spoon chicken onto a foil-lined baking sheet and bake at 425 for 20-25 minutes until chicken is cooked through.

Did you make this recipe?

Tag @theleangreenbean on Instagram

Pretty easy right? I made this expecting it to be pretty spicy and it wasn’t quite spicy enough for my taste…so next time I’ll up the spices.

A Greek Yogurt Marinade helps add flavor and moisture to your chicken. Try it for a quick weeknight dinner!

Taste the yogurt mixture before adding it to the chicken and adjust seasonings as needed. You could also add additional spices to the mix! Try cumin, curry powder or chili powder for a different twist!

A Greek Yogurt Marinade helps add flavor and moisture to your chicken. Try it for a quick weeknight dinner!

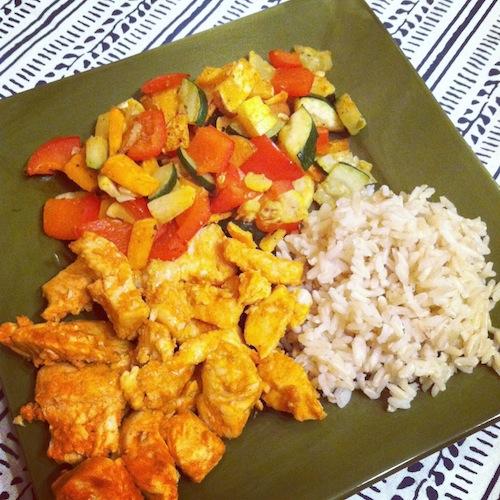
I served mined with roasted veggies and brown rice, but it was also be great on a salad or in a wrap!

Enjoy!
–Lindsay–

This post was sponsored by the National Dairy Council. The recipe and all thoughts and opinions are my own. 

Filed Under: Dinner, Sponsored Tagged With: Chicken, Yogurt

Advice for the World

September 24, 2013 by Lindsay 65 Comments

Hi Friends!

Last week, Cori over at Olive to Run wrote an AMAZING post called What Would You Say. In it, she shared an activity that she did with her students and after reading the post I just couldn’t stop thinking about it. Here’s the activity:

Imagine that I handed you a microphone.
When you speak into it,
the whole world can understand you.

————

You can make 3 statements.
What would you say?

She shared photos of the statements her students wrote…as well as one of her own. Today I decided to share my 3 statements with you!

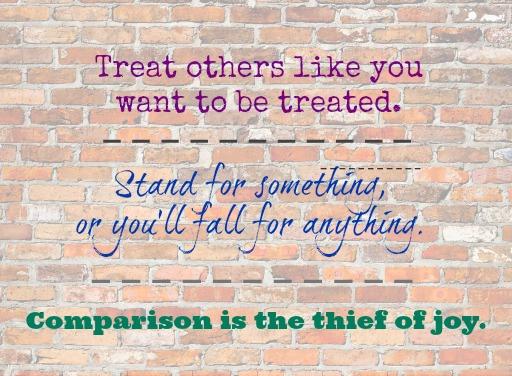
If you could share 3 pieces of advice with the world, what would you say? Here are my three. Click to read why I picked them!


#1: Treat others like you want to be treated.
One of the most important things in life is to be polite and respect others. There’s nothing worse than working super hard on something and not being recognized or thanked. It seems like every single day, I’m astounded by how rude people are to each other. I’m not saying I’m perfect, but I do make a daily effort to use my manners and treat others like I would want them to treat me. I’ve found that if you smile first, you almost always get a smile in return. If you’re polite, most people are polite in return. I’ve also learned that’s not always the case. During those times, I try to remember that you never truly know what someone else is going through. Give out a few free passes. Excuse a few acts a rudeness and choose to believe that those people are not always that way. Before you judge someone for their actions, put yourself in their shoes…because you just never know.

—————-

#2: Stand for something or you’ll fall for anything.
Figure out what you believe in and own it. Realize that it’s ok to have a different opinion than someone else, but it’s not ok to disrespect the opinions of others. Everyone is entitled to their own beliefs….In fact, I think differences of opinion are healthy and make the world more interesting. Once you figure out what you believe in, stand up for those beliefs. If you don’t like something…figure out how to change it. Never give up on the things that make you smile.

—————

#3: Comparison is the thief of joy.
The easiest way to be disappointed in your own life is to compare it to the life of someone else. Every single person on this earth leads a different life. You may not have as much money as someone else…but that doesn’t mean you’re not as rich. You may not be able to give as much as others…but that doesn’t mean you’re not as generous. You may not have as many material possessions as someone else…but that doesn’t mean you’re not as lucky. Consider all aspects of your life and be grateful for the people who love you, your abilities and the things you have. Enjoy the little things in your life. Even if they seem small, you might some day look back and realize just how big and important they were  in making your life wonderful.

—————-

Let’s chat:

What would you tell the world? Tell me your three things!

Enjoy!
–Lindsay–

Filed Under: Uncategorized

My Top 10 Kitchen Gadgets

September 19, 2013 by Lindsay 58 Comments

Hi Friends!

Let’s take a little kitchen tour today, shall we? There are A LOT of kitchen tools, gadgets and equipment out there. I thought it might be fun to roundup a few of the things in MY kitchen that I use most often and share them with you guys! Plus, I want to hear what YOUR favorites are!

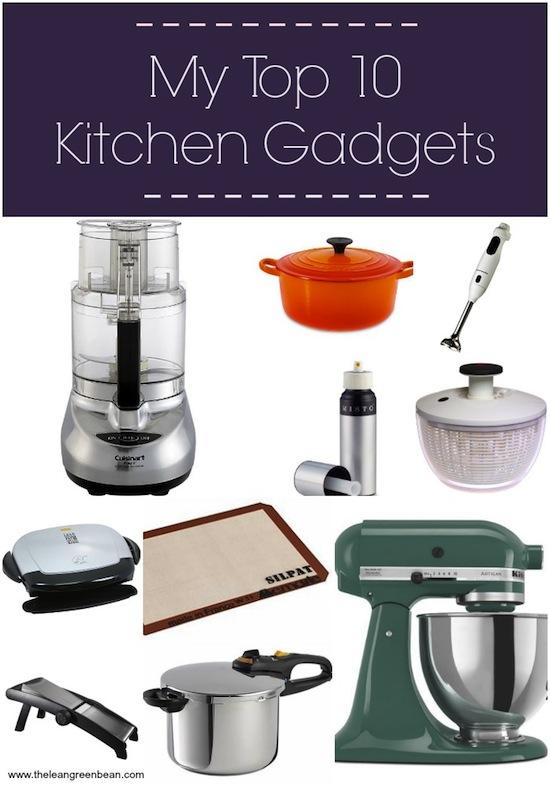
My Top 10 Kitchen Gadgets

Looking to step up your game in the kitchen? Here are my Top 10 Kitchen Gadgets that I think everyone should have!

I’ll link to the ones that I have, but please know that I’m not getting paid to say any of this. Just sharing some gadgets I love that were either purchased with my own money or given to me as gifts by family and friends!

1. Cuisinart 11 cup food processor . Although I have an 11 cup, I personally think that a 9 cup would do just fine for most home cooks. I use mine to make nut butter and energy balls almost weekly. I use the shredding attachment to shred carrots,  zucchini, apples, etc when I’m baking! So much easier than hand grating. I also have this mini-prep 4 cup food processor and I love it! It’s the perfect size when I just need to make a small batch of breadcrumbs or oat flour or something like that and don’t want to drag out the big one. I also use it to make hummus and banana froyo.

2. Le Creuset 5 1/2 Quart Round French Oven. The one I have is actually hunter green and I’m pretty much obsessed with it. I’ve only had mine for a year or so but I’ve been coveting them pretty much since childhood. Le Creuset is expensive…and I no matter how many times I looked at this, I could never bring myself to spend the money. Last Christmas, hubby surprised me with one! I use it all.the.time. It’s my go to for soups, stews and other stovetop dishes. I also bake bread in it! My opinion is that it’s definitely worth the money and will last forever if you take care of it. Quick tip: Before you buy one full price, check Marshall’s, Home Goods & TJ Maxx. They almost always have them on sale!

3. Kitchenaid 3-Speed Immersion Blender. I got this as a wedding present and I’ll be the first to admit I thought it was stupid. And even now, I don’t think I utilize it to its fullest potential..but I have come to love it. I mostly use this to puree soups and sauces. It’s so much easier than having to transfer it to a blender. However, it also comes with some awesome attachments, like a whisk…which you could use to beat egg whites and a chopper which can chop up nuts or graham crackers for a crust. Side note- Mine has a cord…but if you’re going to buy one…for the love- get a cordless one!

4. Misto Gourmet Olive Oil Sprayer. One of my absolute favorite kitchen gadgets. I use this to spray my pans before baking and to mist olive oil onto my veggies before roasting. It’s great for portion control because, as we know, oils are very calorie dense. This helps you evenly coat whatever you’re cooking without going overboard!

5. OXO Salad Spinner. Another simple kitchen tool that I use every week. Mine is big enough to hold a whole head of lettuce, so I chop or tear the lettuce up, rinse it and spin it dry. Sometimes I take out the strainer insert, dump the lettuce back into the container and just store it in there with the top on. Having lettuce chopped, washed and ready to eat makes it way more likely that we’ll eat salad during the week. I also use this when I’m making sweet potato chips. I let my sweet potato slices soak in a bowl of water before baking. This helps remove some of the sugar so they don’t burn as easily! After they’ve soaked, I use the salad spinner to spin them dry before baking!

6. George Foreman Grill. When we lived in an apartment after college, I used this all the time to grill our chicken and burgers. Mine is big enough to hold 3-4 chicken breasts. Now that we have a house and an actual grill, I use it less for meat and more for things like quesadillas, paninis, etc.

7. Silpat Non-Stick Baking Mat. If you bake at all, you need one of these. Or two. Seriously. I use them for baking things like cookies in the oven and I also use them on my counter when I’m rolling out dough!

8. OXO Good Grips Mandoline Slicer. I inherited this from my mom and I love it. I use it to make sweet potato chips, apple chips, etc and it’s so much easier than doing it by hand because it makes it easy to get all the chips the same thickness. You can also turn the dial and it lets you julienne veggies for garnishes, fries and more!

9. Fagor Duo Pressure Cooker. If I was going to recommend one must-have out of these ten items, this would be it! My parents gave it to me for Christmas a couple of years ago and it is amazing. Mine is a 10 quart but I think an 8 quart would be fine too. I use it every weekend. You may remember that I wrote a whole post about why I love my pressure cooker. I use it to cook dried beans, without soaking, in 20 minutes. I use it to hard boil my eggs in under 10 minutes. I use it to make risotto without having to sit there and stir the whole time. You can use it to cook meat, make stews and so much more!

10. Kitchenaid Stand Mixer. Probably my favorite wedding present. I literally stalked my wedding registry for this item and may have squealed a little when I saw someone bought it! I love my hand mixer if I’m just whipping up a quick batch of cookies, but if I’m going on a baking marathon…I always use the stand mixer! I also use it often when I’m making bread or pizza dough because it does the kneading for me. Plus there are so many fun attachments you can get to make everything from meatballs to shredded veggies.

So there you go! I’m in my kitchen a lot…so I definitely have more favorites…might have to do a part 2 🙂 It would definitely include my crockpot…which I use ALL the time…and my french press coffee maker!!

Let’s chat:

What are your favorite kitchen gadgets?!

Enjoy!
–Lindsay–

Filed Under: Uncategorized

Almond Orchard Experience Tour

September 17, 2013 by Lindsay 46 Comments

Hi Friends!

After an amazing few days in Lodi, California last week, I’m back in Columbus and ready to recap my Almond Orchard Experience Tour for you guys!

IMG_8122

First of all, I must say how grateful I am to The Almond Board of California for sponsoring my trip! Honestly, when I saw the list of attendees, I was a little overwhelmed and felt like I was a bit out of my league! Some of the people who attended are pretty much superstars in the nutrition and fitness world- they’ve trained celebrities, written books, etc…and many have years and years more experience than I do. But one of the things I loved best about this trip was that everyone was so welcoming. I made so many new connections and friends and everyone was so supportive and encouraging to me as a fairly new RD.

The Almond Board staff (Jenny, Stacey, Molly & Natalie), as well as all the wonderful ladies from Porter Novelli (Amaris, Andrea & Michelle) did a great job putting this trip together and I learned so much about almonds!

Let’s recap, shall we?

I arrived in Sacramento on Monday afternoon along with 4 other RDs who were on my flight from Dallas- Angela, Neva, Lisa & Jim.

IMG_8047

There was a guy waiting for us with a sign. Kinda made me feel like a superstar 😉

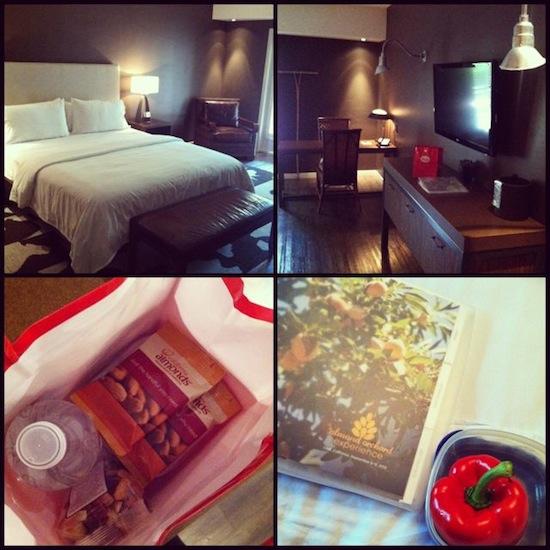
After an hour of driving, we made it to Wine & Roses where we’d be staying. We had a couple of hours to get settled before dinner so I had a snack and rested for a bit:

IMG_8062

Then I took a walk! It was beautiful.

WR

Monday evening we had a welcome dinner and it was great to get a chance to mingle and meet some of the other attendees like Kerry & Melissa Joy.

welcomedinner

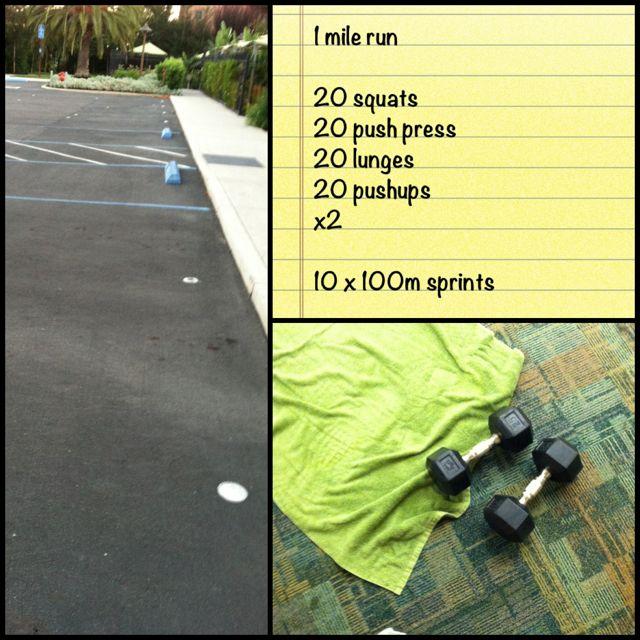
After dinner I was more than ready for bed. Tuesday morning, since my body was still on East Coast Time, I was up at 4:30, which left me plenty of time to get some work done and then head to the fitness center for a quick workout before breakfast!

IMG_8099

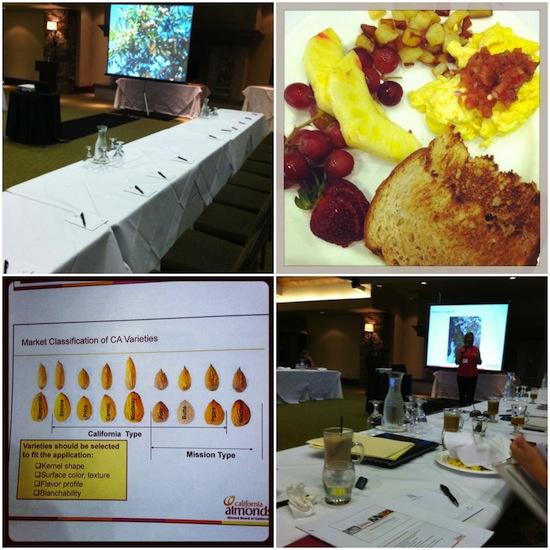
There were about 8 people in the fitness center right when it opened at 6am and they were all from the Almond Tour 🙂 You could definitely tell we were a group interested in fitness and nutrition! After my workout, I got ready and headed to breakfast and a full day of presentations. I sat next to Larysa & Andrea (two superstar fitness professionals) and enjoyed chatting with them throughout the day.

almondtour1

We heard from a wide variety of speakers and learned about all aspects of the almond industry.

Stacy Humble, the  Executive Director of Global Marketing for the Almond Board actually grew up on an almond farm so she explained how they grow and are harvested. A brief overview:

  • Almonds are botanically related to roses. They grow on trees that blossom in the spring. In early March, the petals drop and nutlets push up on the branches where the blooms used to be.
  • Almond are not self-pollinating. They rely on bees to help them. Without bees, there would be no almonds!
  • Renting bees for the orchard is the single biggest production expense for an almond farmer. They set up bee boxes in the orchards and release the bees to pollinate the almonds.
  • Most almond farms in CA are small family farms of less than 50 acres. Many farmers grow additional crops, have dairy cows or  work full-time jobs in addition to farming almonds.
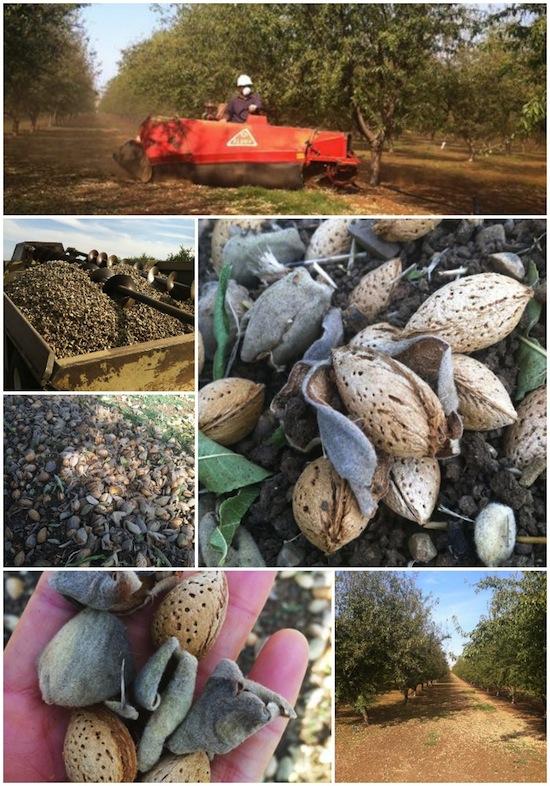
  • All of the almonds on a tree are ready for harvest at the same time, when the hull splits open. Farmers us mechanical shakers to remove the almonds from the trees!
  • When almonds are shaken from the trees, they’re at about 7% moisture. Then they lay on the orchard floor for about a week to dry out before they’re harvested.
  • Almonds have an outer hull and a shell. The hulls are a valuable byproduct of the almonds industry and are primarily used in cattle feed.
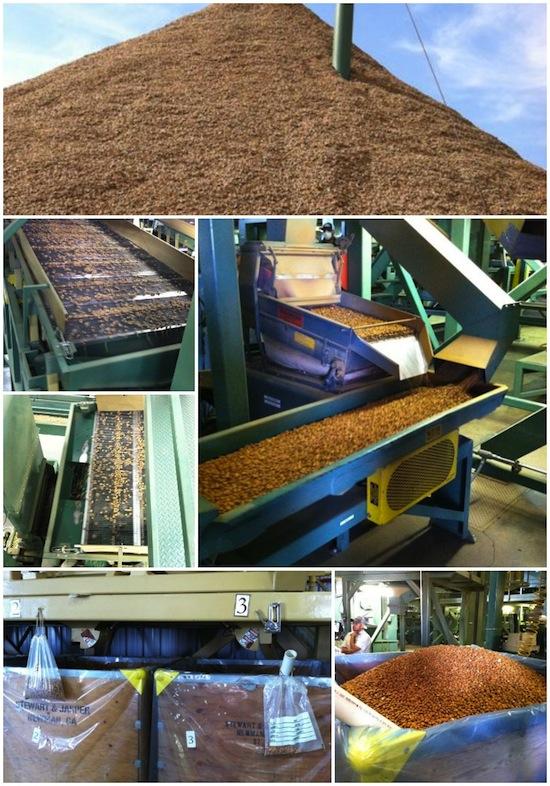
  • Once the shell is removed, the almonds are sorted by size and other buyer specifications.

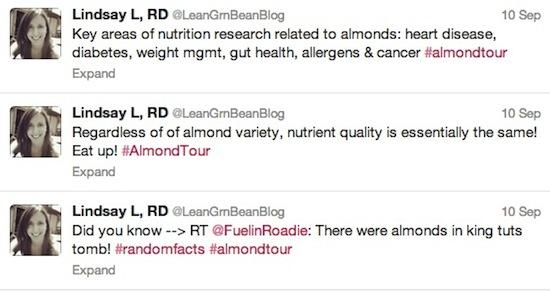
After learning about the growing and harvesting, we heard from a couple of speakers who shared some of the past, current and future research that involves almonds. A few things we learned:

almond4

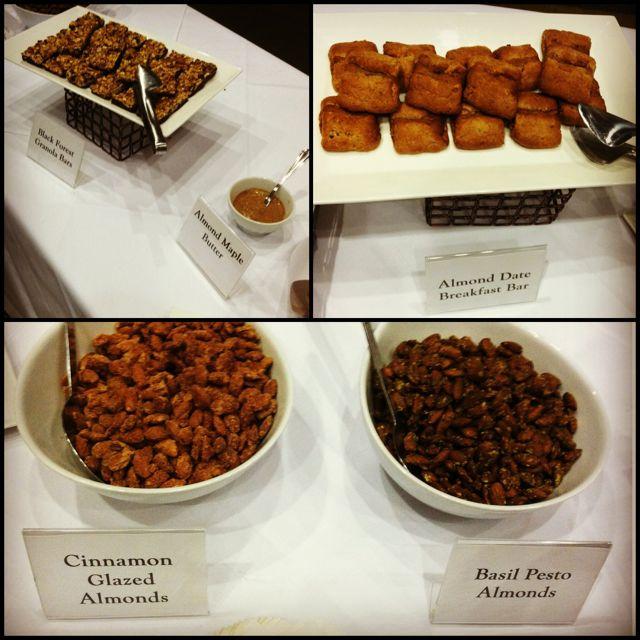
Up next was a quick snack break! We enjoyed all sorts of almond treats. My favorite were the Cinnamon Glazed Almonds! I also got to chat with Desiree & Francy and learn a bit about RD life up in Canada!

IMG_8118

Next we heard from the Director of Quality Assurance for the Almond Board. Almond farmers do a lot to keep their orchards clean and free of pests and disease. There are currently 170 validated processes in place to ensure the quality and safety of the almonds we eat. Did you know that all almonds, even those labeled as raw, have to be pasteurized? However, the core of the almonds is not being heated so they can still be labeled as raw.

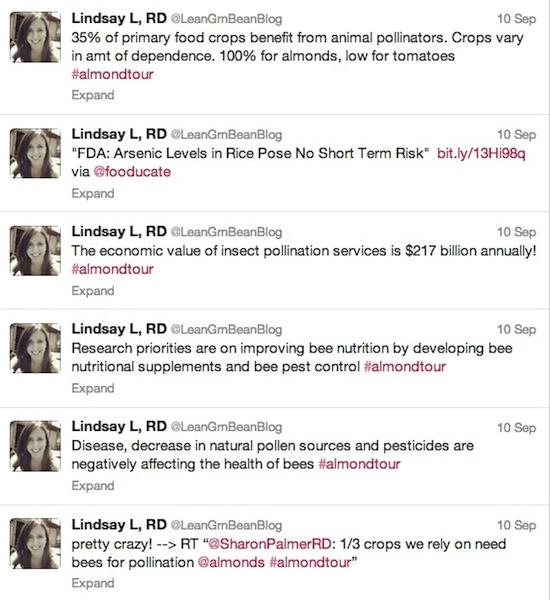
We also heard from couple of actual almond farmers who told us more about how important bees are to growing almonds!

almond8

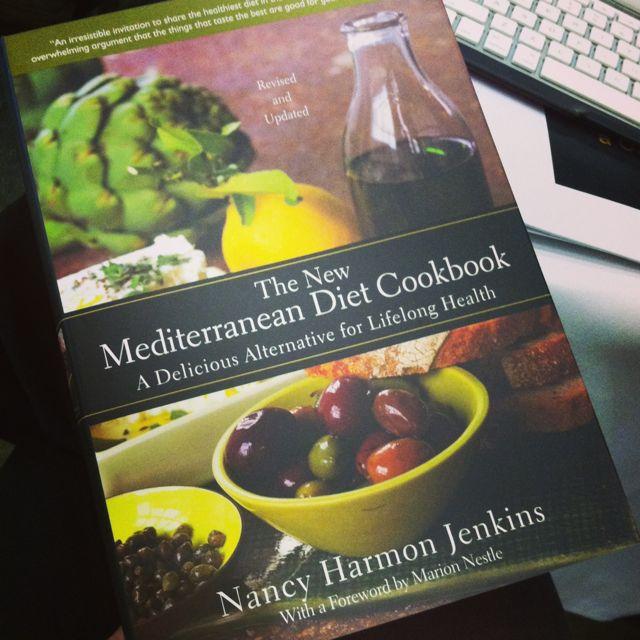
Up next was lunch! We heard from Nancy Harmon Jenkins, author of The New Mediterranean Diet cookbook and we all received a copy of the cookbook to take home!

IMG_8133

 The main focus was on the idea that there’s not one right way of Mediterranean eating. Lots of different styles and combos are possible but overall the terminology is familiar, the ingredients are easy to find and the recipes are simple.

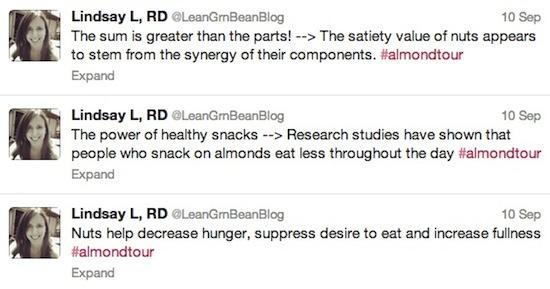
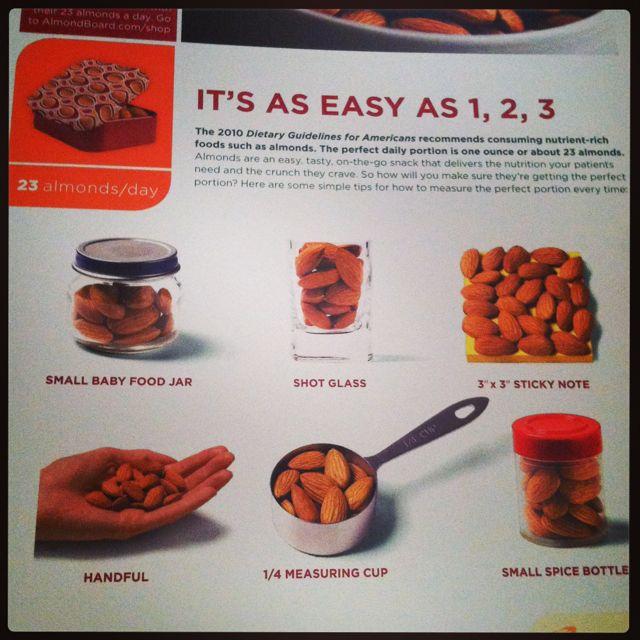
After lunch we heard more about the benefits of almonds as a healthy snack:

almond12

IMG_8064

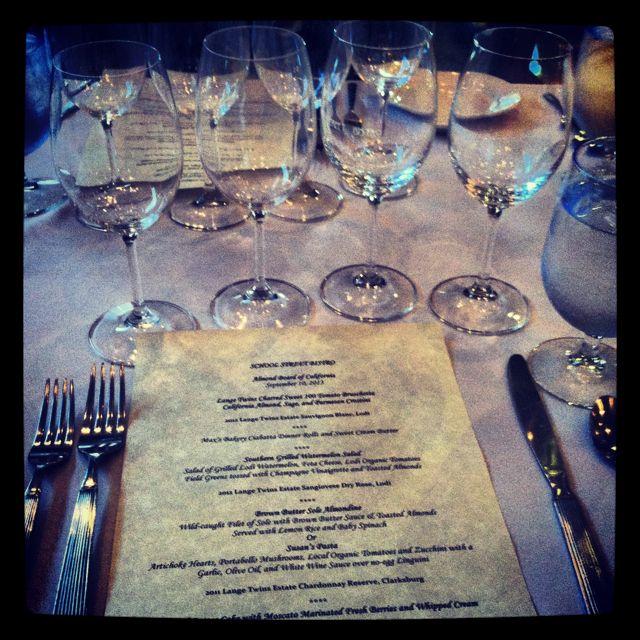
After wrapping up for the day, we had a couple of hours to ourselves before heading into town for four course dinner with wine pairings! The food was delicious and I enjoyed chatting with Wendy Jo, Tina, Amaris, Molly, Angela and Kristi.

IMG_8143

Wednesday we were up early for a trip to the orchards!

IMG_8171

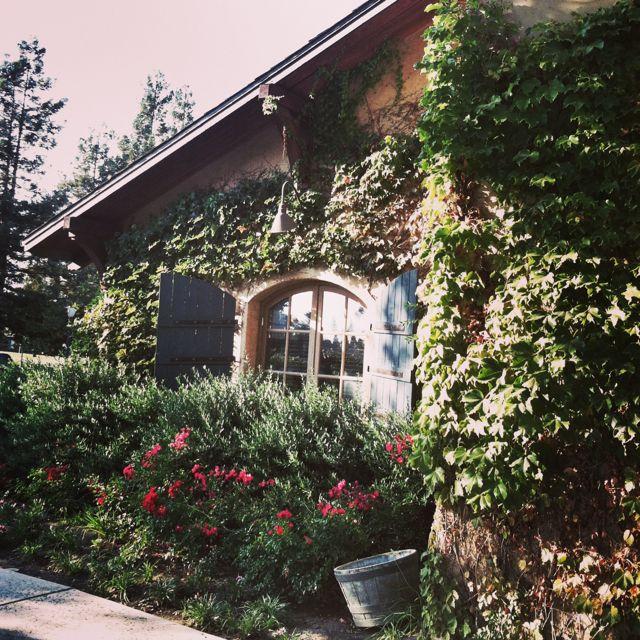
We got to visit Stewart & Jasper orchards and see the orchards and the processing facilities!

stewartjasper orchard

Just like we had learned about the previous day, we saw the almonds on the tree ready to be harvested and then saw them being shaken from the tree, which was by far the coolest part. Here’s a video:

So cool, right? Next we headed to the processing facility where we saw the almonds being sorted, sized and stored. The top photo is a GIANT pile of almond hulls that will eventually be used in cattle feed:

almond processing

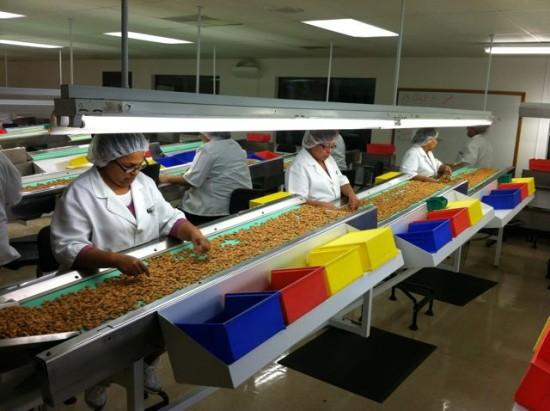
Most of the sorting is done by machines but there is still some done by hand:

IMG_8249

We learned that China is pickiest about the quality of their almonds. They don’t want any visible imperfections, which is a demanding order…but they pay a higher price to get the higher quality.

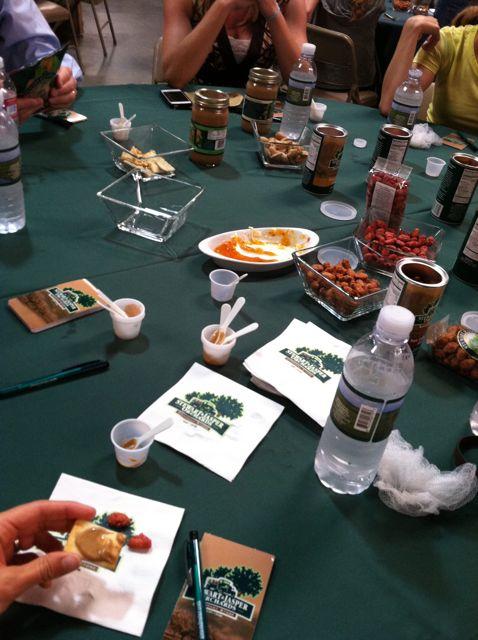
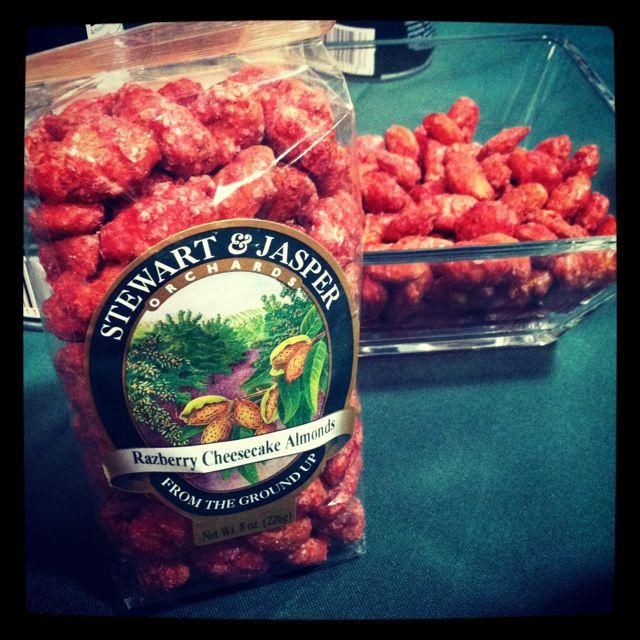
After our tours, we got to sample some of the Stewart & Jasper products. They had tons of amazing flavored almonds but the raspberry cheesecake was by far my favorite!

IMG_8260

IMG_8259

Next, we hopped back on the bus and headed to the Almond Board headquarters in Modesto, CA. We had lunch with the CEO, listened to a little presentation from him and then headed back to the hotel.

We had enough of a break that I was able to squeeze in a workout, and then headed to the cocktail hour where I had a long chat with Sharon. She’s the author of The Plant Powered Diet, which some of you may remember I’m reading for CEUs right now. I got so excited when I saw she was on the list of attendees! She also loves Crossfit…so as you can imagine, we had lots to talk about!

From there, we headed to our last dinner. I got the chance to chat with several people I hadn’t spent much time with yet, including Danielle, Amie and Chris.

Thursday morning I was up at 4:30 am to head back to the airport!

IMG_8140

It was a whirlwind couple of days, but I had wonderful time, learned a lot and met some great people. Be sure to check out all the people I linked to throughout the post and follow them on twitter for great nutrition, fitness and health advice!

Huge thanks again to The Almond Board for inviting me on the Almond Orchard Experience Tour!

Enjoy!
–Lindsay–

*This trip was paid for by The Almond Board of California. All thoughts and opinions are my own*

Filed Under: Uncategorized

Friday Five

September 13, 2013 by Lindsay 51 Comments

Hi Friends!

After an amazing few days in Cali and a long day of travel yesterday, I’m home! I had grand intentions of having an awesome recap post ready to go for you today…but I was too ADD to write it on the plane and our Internet wasn’t working when I got home. So instead, here are five random tidbits to brighten your Friday:

1) I entered my peanut butter avocado cookies in a Hass Avocado recipe contest. Winner gets a free trip to the Food & Nutrition Conference & Expo (the annual conference for Registered Dietitians) and I’ve made it into the top 10! If you have a second to vote for me I would really appreciate it! Just CLICK HERE

20130912-233100.jpg

2) I don’t even have these Fridge Coasters and I’m already obsessed with them! Love. Want. Need! How fun are they?!

20130912-225439.jpg

3) This is Max. He weighs 80 pounds and is terrified of storms. My MIL found him IN the dryer the other day during a storm! Silly boy.

20130912-225554.jpg

4) We have a summer 2013 playlist. That’s code for, we’ve pretty much been listening to the same 10 songs on repeat all summer long.

20130912-230632.jpg

It also includes Blurred Lines, Same Love and Molly. Don’t judge 😉

5) Last night I took my most liked IG photo EVER. This is what we call stocking up on avocados. I mean, they were on sale…but still! Also, squirrel shirt for the win!

20130912-231119.jpg

Tell me something you’re loving lately! A song, a food, a workout…let’s hear it!

Enjoy!
–Lindsay–

Filed Under: Uncategorized

Is a Calorie Just a Calorie?

September 10, 2013 by Lindsay 94 Comments

Hi Friends!

As I mentioned yesterday, I’m in California this week thanks to The Almond Board of California! After a lovely meet and greet dinner last night, we’re spending the day today listening to various presentations and learning all almonds! It’s going to be a busy few days, so I have my lovely friend Amy filling in for me here on the blog today! Amy is a fitness coach and writer at Strong Inside Out, and she tours the country teaching bootcamps to benefit suicide prevention charity. She is tackling a subject that I’m extremely passionate about as an RD…calories. More specifically, she’s arguing that a calorie is not just a calorie…and she’s making the case for REAL food, which I love! Take it away, Amy!

———————

My best advice as an RD? Eat real food. Click to read why I think this is the best advice for everyone!

Back at the beginning of my fitness journey, I had very different goals than the ones I have now.

My #1 Goal? Get skinny like a supermodel.

Having moved out to LA by myself at 19, I was a bit impressionable. I started reading magazines that told me, “It’s all about calories in, calories out!” or “Just eat less and exercise more!” So I started to focus on cutting my calories, while maintaining an exercise routine that would lead to a 1 pound deficit every week.

There was just one thing keeping me from success: my love of sugar.

100-calorie-packs

I have a cuh-razy sweet tooth! I didn’t know anything about macronutrients, vitamins or minerals, but I knew that I wanted cookies! So rather than eating sweets in moderation and focusing on whole foods full of nutrients, I decided to get my calories in the form of the glorified 100-Calorie Packs of cookies and chips and more fun stuff I just didn’t want to give up.It was no wonder I started feeling faint all the time, needing nap breaks at work and feeling too shaky to complete my 30-minute elliptical workout every day. I felt like my brain was swimming in a pool of jello all the time!

I was starving my body of what it needed. I was lacking protein and healthy fat because I would have rather eaten something that resembled the baked goods I loved than risk a higher calorie count with some nuts! No matter that those artificially-sweetened substitutes didn’t taste anything like the original…

Only a few months in to my journey, I hit a plateau that didn’t budge for a solid few weeks and got so frustrated that I canned the whole thing, gaining back all the weight I’d lost… and then some. I was so angry with myself for not having the willpower to just eat fewer calories. So what if my brain was dying? The skinny girls could do it, so why couldn’t I?!

Why Processed Foods & Sugar Substitutes Can Be Detrimental To Your Weight Loss Success

Here’s the thing: artificial sweeteners found in 100-Calorie Packs or Diet versions of the sweets we love can actually be worse for you than the real S word. (Sugar, you silly!)

Project 365, Day 64: Easter is saved!

What happens when you eat artificial sweeteners is that your body’s insulin response launches when it tastes something sweet (just as it does when you eat sugar), but then your reward center doesn’t get the signal that real sugar sends, leaving your mind craving and craving and craving until you either go to bed miserable or binge eat to satisfy the intense yearning for sweet stuff. Additives found in those processed food items can be just as harmful if not more so! The act of processing foods often times removes most of the nutrients from the food. It can also impede our body’s ability to process any nutrients that remain thanks to added chemicals you’d be surprised to even find in food.

Want another reason to avoid the diet stuff? If you’re consuming calories without nutrients in mind, you may be setting yourself up for failure. Muscular failure. In order to recover from workouts that raise metabolism and get you that lean, toned look, you need to feed them the nutrients they need, otherwise, your body will turn catabolic and start eating itself. Say no to Zombie body. 😉

While weight loss is largely about calories in, calories out, there is a whole lot to be said for going through the process feeling energized and in control, rather than faint and constantly craving “naughty” foods.

It wasn’t until years after my weight went back up, when I was already a personal fitness trainer and had lost a bit of it, that I decided to focus on health and wellbeing instead of solely on looks. I started thinking long-term health and fitness, and what kind of example I wanted to be to my clients, blog readers, and even future child (way future… I’m not quite there yet). I filled my diet with leafy greens, lean proteins, fruits and healthy fats, and my body reacted splendidly.  My energy went way up, and my body fat percentage went way down.

I went from about 24% body fat to a steady 17-18%, just be refocusing my diet on whole foods.

amybeforeandafter

The Case for Whole Foods

Here’s the down and dirty truth of the matter when it comes to weight loss: your body needs a certain amount of macronutrients, vitamins and minerals to sustain optimal function at all times.What’s the point of being skinny if you don’t even have the wherewithal to experience it? If your body can’t recover correctly or your workouts make you feel like death by the end?

Carrots, Carrots and Carrots

Eating a whole-food diet that feeds your muscles and brain like it needs to be fed, makes the process of weight loss much easier on your body. Losing weight is a traumatic experience for your body after getting used to holding on to the excess fat. It gets rid of fat because it thinks you need the fuel; it thinks you’re dying!Take some stress off your body by making sure you get adequate nutrients through eating a varied diet of vegetables, fruits, organic meats and healthy fats. You won’t find the nutrients in processed junk that you will in whole food, and if you do, your body may not even be able to use it because of other additives.

But What About My Sweet Craving?

Unfortunately, I didn’t lose my sweet tooth when I lost the body fat, but even so, I have maintained my lower body fat percentage thanks to relaxing a little on my view of “naughty” foods. Now, I live by something called The 90% Principle. Considering that I eat about 5 meals a day including snacks, that makes for 35 meals per week. 10% of those meals (3-4) I allow myself to go off-plan and have the full-fat, full-sugar version of what I crave (or try one of Lindsay’s awesome recipes!). With this restriction-free philosophy, I’ve been able to maintain my lower body fat percentage without feeling deprived! Some people can even do it with 80% clean.

When it comes down to it, fit, healthy people think long-term instead of immediate satisfaction.

Sure, weight loss is possible with processed, fake foods, but what kind of life are you living if you’re tired, achy and only half here all the time? You deserve to live a vibrant, present life as a healthy, fit person. To do that, you need nutrients found in whole foods, not empty calories that cause nasty side effects.

Eat for life, and enjoy the ride! You are worthy of this life you’re creating!

Enjoy!
–Lindsay & Amy–


Filed Under: Uncategorized

Fitness Friday 57

September 6, 2013 by Lindsay 12 Comments

Hi Friends!

It’s once again been a hot minute since I did a Fitness Friday post. Not quite sure how that happens…but rest assured that I have indeed been sweating up a storm! Here are some of the workouts I’ve done over the past few weeks:

ff 1

1. First workout back after competing at the Fit Club Summer Games! New 3RM back squat at 165#, then 13:27 for the wod with 65#
2. A sweaty one! 6:16 Rx
3. Not my favorite. 14:12 with 1 abmat for hspu – plus 3 sets of 3 push press at 105#
4. A little strength session

IMG_7573

My happy hour

ff2

1. Open gym wod:  22:15. This is a modified version of the Lumberjack 20 workout.
2. Loved this one! Did 20# wall balls unbroken for the buyin, then 10+9 rx for the wod
3. 12:54 Rx
4. Ladder work, suicide sprints then a wod- 19:50 Rx

IMG_7833

How I feel immediately after a workout vs. 30 minutes after 🙂

ff3

1. Saturday morning partner #wod and then a quick oly session!
2. Hotshots19 hero wod- 43:02 with 95# cleans and strict pullups with the smallest band
3. Holy hard workout. Rope climbs and 175# DLs, then the wod – 22:17 Rx
4. Repeated #crossfit open 13.1- five months ago I got 107 reps and spent 11 minutes struggling to get 7 snatches at 75#. This time I finished all 30 reps at 75# + 20 more burpees with 1:45 left in the workout! 150 total reps! Now I just gotta work on that 100# snatch. CRUSHED IT!

IMG_7858

Fun with photo editing apps 🙂

IMG_7854

Ok friends, that’s all!

Let’s chat:

What’s the best workout you’ve done lately? Leave me a link!

Enjoy!
–Lindsay–

Filed Under: Workouts

Homemade Corn Tortillas and Tortilla Chips

September 3, 2013 by Lindsay 85 Comments

Need a tortilla recipe? Skip the store bought! With just a few ingredients you can make your own homemade corn tortillas and tortilla chips!

Hi Friends!

Ask and you shall receive! I got several requests for a recipe for Homemade Corn Tortillas after I posted my recipe for Homemade Whole Wheat Tortillas. It took a few weeks, but I finally got my act together and headed to the kitchen to give it a shot. The good news is, it’s pretty darn easy.

Homemade Tortilla Chips and Tortillas

Skip the store bought! With just a few ingredients you can make your own homemade corn tortillas and tortilla chips!

All you really need is some masa harina (corn flour), hot water and a bit of salt. I got my masa harina in the Mexican section of my grocery store and all they had was white corn flour, so that ‘s what I used…but this could easily be done with yellow as well. Similar to my whole wheat tortillas, it’s a learning process to make these at home. At first, I didn’t use quite enough water so they were a little dry, but the flavor was great… so I made another batch and added just a bit more water.

I won’t lie, corn tortillas are a bit more delicate than flour. You have to be gentle and patient. The edges will not be perfect, they might rip a little bit, and that’s all okay!

How To Make Tortilla Chips From Scratch

Here’s the recipe:

Print

Homemade Corn Tortillas and Tortilla Chips

homemade corn tortillas 1
Print Recipe

5 Stars 4 Stars 3 Stars 2 Stars 1 Star

4.4 from 7 reviews

A simple way to make corn tortillas and tortilla chips at home with only 3 ingredients!

  • Author: Author: Lindsay
  • Prep Time: 1 hour
  • Cook Time: 15 minutes
  • Total Time: 1 hour 15 minutes
  • Yield: 8 1x

Ingredients

Scale
  • 1 cup masa harina
  • 1/2 –3/4 c hot water
  • 1/2 tsp salt

Instructions

  1. Mix the masa harina and salt in a bowl.
  2. Slowly add hot water and mix until a dough forms and you can shape it into a ball. Start by stirring with a spatula, then knead a few times with your hands.
  3. Form into a ball and let sit for 30-60 minutes.
  4. Divide dough into 8 sections and roll into balls.
  5. Cut a ziploc bag around the edges so that you have two pieces of plastic (or use parchment paper).
  6. Place a dough ball in between two pieces of plastic. Use a plate to flatten the ball into a circle. It may help to place it on the floor and stand on the plate to flatten (or use a rolling pin).
  7. Slowly peel back one of the pieces of plastic, being careful of the edges, then pull off the other side of the plastic.
  8. Drop into a hot non-stick or cast iron pan.
  9. Let cook for one minute, flip and cook a minute more. The tortilla should start to puff up while cooking. If it doesn’t. flip it one more time.

Notes

If you want to make tortilla chips, cut your finished tortillas into triangles, spray with oil and sprinkle with salt. Bake at 400 degrees for 10-15 minutes. Watch them carefully so they don’t burn!

Did you make this recipe?

Tag @theleangreenbean on Instagram

I actually tried to buy a tortilla press this weekend, but after not being able to find one in stores, hubby got a little creative and found that standing on a plate works just as well 🙂


Like I said, it’s a simple process. Just add the water to the masa harina and salt. Then form the mixture into a ball, let it sit, divide and roll into balls, flatten and cook!

corntortillas

The texture of the dough is kind of like playdough. When it first starts to form a ball, you may need to add a bit more water to get the desired playdough texture. If the ball shows cracks as you form it, add a bit more water.

This recipe makes 8 small tortillas (about 5 inches). It can easily be doubled, which I would recommend if you’re going to go through the trouble of making the tortillas.

Skip the store bought! With just a few ingredients you can make your own homemade corn tortillas and tortilla chips!

If you don’t think you’ll eat 16 tortillas, let me show you how to make homemade tortilla chips!

Just cut the tortillas into triangles, spray with a bit of olive olive and sprinkle with a little bit of salt.

Skip the store bought! With just a few ingredients you can make your own homemade corn tortillas and tortilla chips!

Bake at 400 degrees for about 10 minutes and voila!

Skip the store bought! With just a few ingredients you can make your own homemade corn tortillas and tortilla chips!

That’s all there is to it!

[Tweet “You’re just 3 ingredients away from these homemade corn tortillas (and chips) from @leangrnbeanblog!”]

Try adding a batch of these tortillas or chips to your weekly food prep session to make dinner easier. If you liked this post, you’ll love my ebook – The Ultimate Guide To Food Prep. It dives into even more detail about how to food prep, troubleshoots common problems and provides tons of tips to make it easier! Click the image below for more details!

The Ultimate Guide To Food Prep Ebook

Enjoy!
–Lindsay–

Filed Under: Appetizer, Side Dish, Snack

August Foodie Penpals Reveal Day

August 30, 2013 by Lindsay 19 Comments

Hi Friends!

Time for another Foodie Penpals Reveal Day!

fpp

This month, I received my box from Laura at Catching My Breath! Look at all the goodies she sent me:

fpp1

Let’s break it down shall we:

1. Farro: one of my favorite grains!!
2. Muesli Fusion: I got to try this stuff at Blend Retreat and it’s fabulous!
3. I heart keenwah: A fun new snack I hadn’t tried before
4. Risotto and Dirty rice from a local business- so fun!
5. Chocolate: enough said 🙂

Thanks Laura for a fabulous box! I love it!!

augFPP

And now it’s time for some details about Foodie Penpals.  In case you’re a new reader, here’s a reminder of what the program is all about:

-On the 5th of every month, you will receive your penpal pairing via email. It will be your responsibility to contact your penpal and get their mailing address and any other information you might need like allergies or dietary restrictions.
-You will have until the 15th of the month to put your box of goodies in the mail. On the last day of the month, you will post about the goodies you received from your penpal! 
-The boxes are to be filled with fun foodie things, local food items or even homemade treats! The spending limit is $15. The box must also include something written. This can be anything from a note explaining what’s in the box, to a fun recipe…use your imagination!
-You are responsible for figuring out the best way to ship your items depending on their size and how fragile they are. (Don’t forget about flat rate boxes!)
-Foodie Penpals is open to blog readers as well as bloggers. If you’re a reader and you get paired with a blogger, you are to write a short guest post for your penpal to post on their blog about what you received. If two readers are paired together, neither needs to worry about writing a post for that month. 
-Foodie Penplas is open to US, Canadian & European residents.  Please note, Canadian Residents will be paired with other Canadians only. Same with Europeans. We’ve determined things might get too slow and backed up if we’re trying to send foods through customs across the border from US to Canada and vice versa. 

If you’re from the US or Canada and are in participating for September, please CLICK HERE to fill out the participation form and read the terms and conditions. 

You must submit your information by September 4th as pairings will be emailed on September 5th!

——————

Enjoy!
–Lindsay–


Filed Under: Uncategorized

Doing More AND Less Thanks to Technology

August 27, 2013 by Lindsay 88 Comments

Hi Friends!

Lately I’ve been thinking a lot about technology and just how much it impacts my life.

IMG_3204

I will be the first to tell you that I’m addicted to technology. More often than not, this is how you’ll find me during the day…at my computer with my iphone within arm’s reach.

And when I do break away from my computer, you can usually find me like this:

IMG_7180

No matter what I’m doing, my phone is never far away. In fact, I send myself into full-on panic mode if I can’t find it. When I think about it, it’s a bit ridiculous. I’m old enough to have lived almost half my life without a cellphone, as well as a good portion without a computer. In today’s world, the thought of living without even one of those is almost unthinkable.

But here’s the thing: Without technology, I wouldn’t be able to do what I’m doing today.

lgbrd

I run my own business, with nothing more than my computer and my cellphone. I’m able to counsel The Lean Green Bean RD clients without need to be physically near them. I can help people develop healthy habits, plan menus, lose weight, learn how to meal prep no matter where they are. (Side note: If you or anyone you know needs help with any of those things, email me! I’d love to help.)

My office is my kitchen table. Technology allows me to work flexible hours. It allows me to work when I’m not at home or “in my office”.  It allows my clients to get ahold of me quickly, no matter what day of the week it is or time of day it is.

myfitnesspal

Thanks to technology, I can log in to a website and see everything my clients have eaten in the past few days and give them feedback.

It also allows me to work remotely for another RD. I can get all of my assignments, projects and instructions via phone and email, complete the work and send it instantaneously for edits and approval.

IMG_9500

Technology has opened me up to the blog world, which has changed my life.

I can write a blog post in Ohio and people all over the world can read it as soon as I hit publish. I can send a tweet and thousands of people can see it. I can even use websites like Buffer to schedule tweets in advance. Essentially, technology is tweeting for me even when I am not able to. I can take a photo in terrible, dark lighting and use PicMonkey on my computer or Snapseed & Instagram on my phone to make it look pretty:

IMG_7540

Going beyond work, technology keeps me connected to loved ones. I haven’t lived in the same state as my extended family since I was 8 years old. I haven’t permanently lived in the same state as my immediate family members in 10 years, but technology makes it easy to keep in touch. Although I’m hundreds of miles away from many of my family and friends, they’re never more than a call, text or email away.

b

I can use Facebook and Twitter to keep up with things that are happening in their daily lives. I can Facetime with my hubby when he goes out of town on business trips. I can even track my friends running races to see where they are on a race course in real time.

When you think about it, technology is downright amazing. I am doing so much MORE because of technology…

….but I’m also doing LESS. And that’s not necessarily a good thing.

Alysa shared this video in one of her recent blog posts and it hits close to home for me, as I’m sure it does for a lot of people.

Look familiar? Thanks to technology, I’m doing less of the things I used to do when I was little. As much as I try to avoid it, this is often the scene from BOTH of us when we’re out to eat:

IMG_5411

As a country:

  • We’re doing less talking and more texting.
  • We’re doing less reading and more watching tv.
  • We’re doing less exercising and more sitting.
  • We’re doing less sleeping and more work on our phones and computers.
  • We’re doing less mindful eating and more mindless eating in front of the tv.
  • We’re doing LESS DISCONNECTING…

All thanks to technology.

When people ask my opinion about all of the advances in technology …I find myself torn in my response.

I wouldn’t be able to do what I do today without the technology we have now. I wouldn’t be able to stay as connected to those far away. I wouldn’t have met all the wonderful friends I’ve made through blogging. I’m eternally grateful for everything that technology allows me to do…. But I also think that the technology we have now almost makes it too easy to be connected all the time…and sometimes that means we miss out on LIFE because we’re too worried about work, email, social media or documenting life.

IMG_0581
So what does this all mean?

I’m not really sure. There’s no right answer here. This is just a reminder…to myself…and to all of you…that we should all be striving to find a balance between technology and life.

Enjoy technology and all of the amazing things it can do for you…but don’t forget to LIVE LIFE as well!

IMG_2108

Go for a drive with the windows down and the radio blasting.

IMG_3382

Send someone a package via snail mail
(please don’t mail your cat)

IMG_5028

Read a book.

IMG_4551

Do a project.

IMG_7241

Get some exercise.

IMG_5050

Enjoy some technology-free time together.

Then go check your email.

Because it’s all about balance, right?

Let’s chat:

  • How does technology help you do more? 

  • Does it also cause you to do less?

Enjoy!
–Lindsay–

PS. Interesting side note: I wrote this post yesterday afternoon. Last night we had friends over for dinner and I made an effort to use my phone less. I took it to the table to take a picture of my dinner and then planned on putting it away. But you know what? Because I was making an effort to be more focused and present, I legitimately forgot to take a picture of my dinner for the first time in ages!

I enjoy sharing photos of my meals with you guys and I’ll continue to do so…I’m just saying maybe it’s not such a bad thing to take the picture and then put the phone away for the rest of the meal 🙂

Filed Under: Uncategorized

Best of the Bean: Year 3

August 23, 2013 by Lindsay 74 Comments

Hi Friends!

Hold on to your party hats! Today we’re celebrating my third year of blogging. I cannot believe it’s been that long! Blogging has, quite literally, changed my life and I’m so thankful every day for those people (namely my hubby) who bugged me about started a blog back then.

bestofthebean

To celebrate, I rounded up the best posts from the past year to share with you guys!  Here you go:

Breakfasts

breakfast

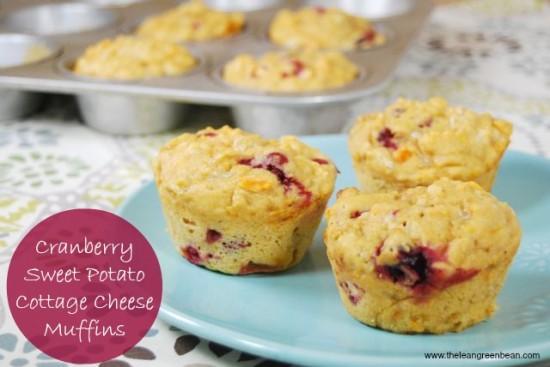
Cranberry Sweet Potato Cottage Cheese Muffins
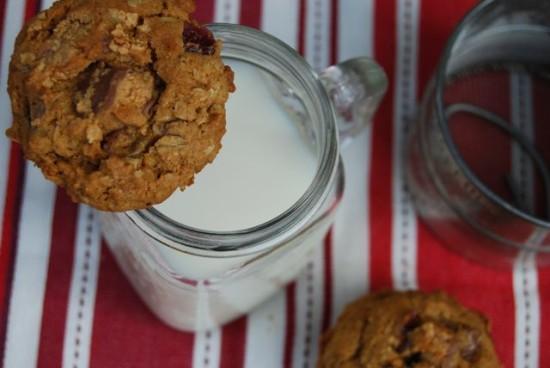
Lentil Banana Muffins
Quinoa Breakfast Bars
90 Second Breakfast Sandwich
Cottage Cheese Egg Muffins
Salmon Breakfast Quesadillas

Snacks

snacks

Baked Apple Chips
Frozen Yogurt Trail Mix Bars
Perfectly Roasted Chickpeas
Healthy Microwave Popcorn
Sweet Potato Banana Bites
Homemade Whole Wheat Tortillas

Meatless Main Dishes

meatless

Crockpot Lentil Vegetable Lasagna
Mexican Quinoa Bites
Hot Mexican Layer Dip
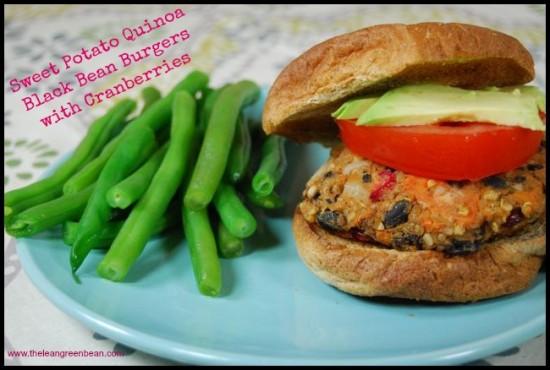
Sweet Potato Quinoa Black Bean Burgers w/ Cranberries

Cheesy Mexican Quinoa
Crockpot Roasted Vegetable Sauce
Black Bean Meatless Meatballs
Lasagna Soup
Greek Black Bean Burgers
Asian Black Bean Burgers
Crockpot Enchilada Casserole
Chili Stuffed Peppers

Main Dishes with Meat

meat

Chicken Tortilla Soup
Asian Lettuce Wraps
Bacon Wrapped Chicken w/ Goat Cheese
Crockpot Rotisserie Chicken

Seafood

seafood

Teriyaki Salmon w/ Pineapple Black Bean Salsa
Pecan Crusted Salmon
Salmon Quinoa Salad
Tuna Salad with Avocado

Desserts

dessert

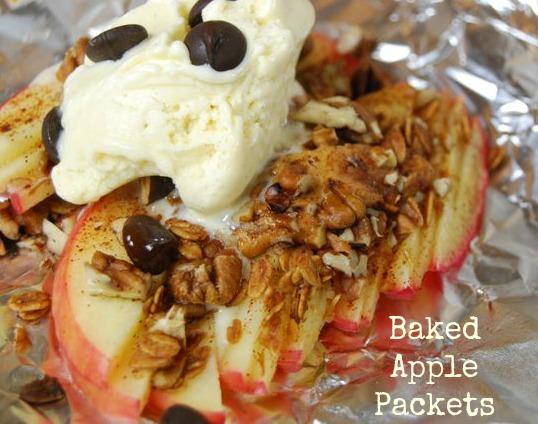
Baked Apple Packets
Healthy Ice Cream Sandwiches
Peanut Butter Avocado Cookies
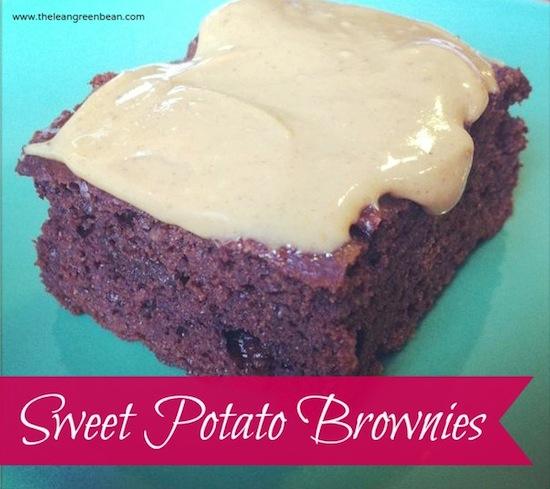
Sweet Potato Brownies
Microwave Sweet Potato Muffin

Healthy Eating Tips & Roundups

howto

50 Packable Lunch Ideas
3 Ways to Cook Spaghetti Squash
Weekend Food Prep For Easy Weekday Meals
How to Prep Food On the Weekend
What’s In My Grocery Cart
Smart Snacking
5 Quick Healthy Breakfast Ideas
10 More Healthy Breakfast Ideas
How to Hard Boil Eggs in the Oven
How to Sprout Lentils
5 Frozen Summer Snack Ideas
How to Cook & Freeze Beans

Fitness

fitness

What is Crossfit
Things Crossfit Has Taught Me
My First Crossfit Competition

What’s Beautiful: Strength
Strength is What’s Beautiful
What Makes Strength Beautiful

DIY Workout Tanktop

Other

other

Things Blogging Has Taught Me- Part 2

Blog Smarter Twitter Chat Recap
Blog Smarter Twitter Chat Recap 2
Blog Smarter Twitter Chat Recap 3
Registered Dietitians Who Blog

11 Healthy Living Tips
A Day in the Life & Nobody’s Perfect
My Diet Doesn’t Need A Label
My Body Doesn’t Make Me Beautiful

———-

To everyone who reads this blog, I just want to say thank you! Whether it’s your first time here, you just read it occasionally or you read every single post…The Lean Green Bean wouldn’t be the same without you. Thanks for reading, commenting, sharing and appreciating my posts. Special thanks to my hubby who has been my biggest fan since day 1. I love you all!

Enjoy!
–Lindsay–
 

Filed Under: Uncategorized

My First Crossfit Competition

August 20, 2013 by Lindsay 115 Comments

Hi Friends!

As promised, I’m back with a recap of my first Crossfit competition! On Saturday, I competed in the Fit Club Summer Games.

my first crossfit competition

There was an Elite division with about 10 women and 20 men and an Open division. I competed in the Women’s Open division and finished 17th out of 76 competitors!

They told us a little bit about the first WOD on Friday, but we didn’t find out about the other WODS until about an hour before we did them.

Here’s how it went down. We carpooled with some friends of ours (There were about 15 of us competing from my gym) and arrived around 7:30. We unloaded our car, set up our tent, etc.

IMG_7470

There was an athlete’s meeting at 8:15 where they gave us the details of the first WOD and then we had some stretch and get ready before the heats started at 9. They had guys and girls heats running simultaneously during the events. The Elite heats went first, then the Open heats.

DSC_0134

IMG_7464

Wod #1:

2 min AMRAP squats.
1200 m run

DSC_0164

For the open division the weight was 165# for the guys/ 105# for the girls. You could do any kind of squat you wanted (back, front, overhead). 99% of us chose to clean the bar up, put it over our head and do back squats with the bar resting on our shoulders. There were 1-2 girls that did front squats but that’s about it. Luckily, 105# is not that heavy for me so I was able to get it on my back no problem. I did 34 squats in 2 min. Looking back, I probably could have gotten a few more, but I was focusing on making sure I went down low enough each time so I wouldn’t get no-repped and waste a rep. I tend to squat REALLY low anyways and I never really have to worry about it….so I probably should have focused on going a little faster, but oh well.

DSC_0166

*Photo note: I’m one of those people that always looks absolutely miserable while working out. Some people look like they’re having fun…I usually look like I’m about to die 🙂

DSC_0171

I wore my running shoes for this wod instead of my nanos because they didn’t tell us how far the run was ahead of time. Since I get shin splints easily, I didn’t want to be running a long way in my nanos. After the squats you had 2 minutes to walk across the road to the starting line of the run. We had to run out 600m, pick up a brick and run back carrying the brick.

DSC_0177

The run was hard after doing all of those squats. The brick wasn’t heavy, but it had sharp edges and was just kind of annoying to carry. I finished the run in 6:27.

DSC_0180

The second WOD took place in a field and involved dumbbells. Open guys used 35# dbs, girls used 25# dbs.

Wod #2:

10 DB Deadlift Burpees
Walk/run 50 yards
10 DB Hang Squat Cleans
Walk/run 50 yards
20 DB Push Press
Turn around
Walk/run 50 yards
10 DB Hang Squat Cleans
Walk/run 50 yards
10 DB Deadlift Burpees

Here’s a little interview with hubby where he shares his thoughts on how he thought I’d do with this WOD:

The deadlift burpees were by far the easiest part of this wod. The hang squat cleans were hard because our legs were already tired. Mine ended up being more of a db clean and then squat.

DSC_0211

The push presses were hard as well because I’m used to doing them with a bar, not with dumbbells.

DSC_0209

The hardest part was probably just carrying the dbs. They were heavy and awkward and I was definitely feeling the burn in my forearms. I tried resting them on my shoulders as I ran/walked to the next marker but they were bouncing around so I gave up and ended up just kind of lumbering along. I started off kinda slow on this event but once I did the push presses and turned around and came back for round 2 of hang squat cleans I made up a lot of ground.

DSC_0215

I finished this WOD in 4:40.

Here’s a video of me doing WOD 2.

After WOD 2 we had about a 2 hour break. They made the announcement about what the final WOD was going to be and then we had a while to just sit around and think about how awful it was going to be!

IMG_7467

And we were right. It was terrible.

 WOD #3

5 min AMRAP of Fran
5 min break
5 min 115# sled pull

If you know anything about Crossfit, you’ve probably heard of Fran. It’s a benchmark workout: 21-15-9 reps of thrusters and pullups. A thruster is basically a front squat straight up into a push press. Fran is hard on a good day when you have fresh legs. It’s pretty much the worst when you’ve already done two other WODs already. The elite athletes can do Fran in 2-3 minutes so many of them got through the whole WOD and then started over at 21 again since they were still under the 5 minute timecap. My Fran PR is 6:40…so I knew going into it that I wasn’t going to finish in 5 minutes.

DSC_0225

I finished 21 thrusters, 21 pullups, 15 thrusters and 15 pullups before the time ran out. What’s crazy is, that I’m pretty sure I could have PR’d my Fran time if we’d had to just do Fran without a time cap. It probably would have taken me less than 1:40 to do that last round of 9 thrusters and pullups…but I was happy to be able to stop at 5 minutes!

Here’s the video. I did my set of 21 thrusters unbroken for the first time ever. Usually I split it up into 11 and 10. My hands were way too close together on the pullups….which usually happens when I’m tired and stop thinking about it. During the 21 pullups I was able to string 5-6 together at a time. Not so much on the round of 15. When I get out of breath, I can’t string more that 2-3 pullups together.

After Fran, we had 5 minutes to walk down the hill and back to the field to do a 5 minute sled pull.

DSC_0233

I’d never actually done a sled pull before. Turns out I kinda like them. I don’t, however, like them after Fran and two other wods. That combination was one of the hardest things ever.

DSC_0231

We got points for every flag we passed. I made it down to the other end of the field, turned around and came back and then went about 1/2 way back again. I think I got 66 points. I was exhausted by the end!

Our car decided to not stay for the finals. The top 10 men and women in the open division made it to the finals. Going into WOD 3 I was in 34th place so I knew I didn’t to well enough to make it into the top 10….plus we were hot, sweaty, tired and ready for a shower so we packed up and headed home.

Overall it was a fun competition! I’m glad I did it, even though I was nervous. Big thanks to the hubby for cheering me on all day and taking all the amazing pictures and videos! He’s the best and he captured lots of great pics and videos of me and our friends!

IMG_7469

IMG_7468

I woke up Sunday feeling much sorer in my upper body than I expected. My legs got a bit sorer as the day went on, but even by Monday they were still feeling better than expected, so that was good!

A few other things to note:

Food:

We packed a giant cooler with our friends and filled it with food and water for the 4 of us. We brought:

  • Chicken
  • Tortillas
  • Avocado
  • Fruit- strawberries, grapes, apples, bananas
  • Bread
  • Peanut butter
  • PB Banana cookies
  • Jerky
  • Quinoa breakfast bars
  • Water

My best advice is to bring stuff you know you’ll want to eat. You know your body and how you feel after workouts. If you think you’ll have trouble eating, consider bringing some protein powder or pre-made smoothies you can drink. I opted for most fruit and breakfast bars until our large break and then I ate some chicken and a pb sandwich.

Equipment:
I packed a TON of stuff…and didn’t end up needing all of it….but I was glad I had it to be prepared. Depending on the competition, you might need more or less stuff. I brought:

  • Extra shorts
  • Extra tank tops
  • Extra sports bra
  • Oly Shoes
  • Nanos
  • Running shoes
  • Flip flops
  • Compression sleeves
  • Wrist wraps
  • Weight belt
  • Jump Ropes
  • Tape
  • Change of clothes for afterwards
  • Long sleeve shirt

Other stuff to consider

  • Blanket
  • Chairs to sit in
  • Tent/canopy (our friend brought one and it was great to have shade)
  • Cooler
  • Warm-up equipment: foam roller, lacrosse ball, bands, pvc pipes
  • Extra hair ties!

I ended up staying in the same clothes all day, but if I had gotten any sweatier, I probably would have changed between wods and would have been very glad to have the extra clothes!

me

That’s all I’ve got 🙂

Enjoy!
–Lindsay–

 

Filed Under: Workouts

Fitness Friday 56

August 16, 2013 by Lindsay 26 Comments

Hi Friends!

Just popping in with a quick Fitness Friday update for you! Here are some of my workouts from the past couple of weeks:

ff 2

1. Grace is one of my favorite crossfit benchmarks. A couple months ago I did it with the RX weight for the first time and did it in 5:08. This time I was determined to do it in under 5 minutes and I did. 4:34 Rx. New PR and it just about killed me!
2. Saturday open gym WOD- 23:31 with a 35# kb and a 24 inch box
3. Did a little bonus wod with hubby afterwards- 7:48 for me. He did it in 7:32 with weighted stepups instead of box jumps.
4. This was a good one. Hit a 115# push press PR and then finished the WOD in 17:16. My legs were definitely feeling the burn on that last row.

ff 3

1. My friend Scott & I tackled this hero wod. It was rough. I finished in 20:05 and used 105# for the front squats and jerks and 155# for the deadlifts.
2. Another super tough one. Finished in 34:50 with only 90 sec rest between rounds instead of 3 min.
3. Another saturday wod- 11:36 rx
4. Sunday morning Sealfit class! Finished 5 rounds + 14 reps of round 6

ff 4

1. Sweaty mess after this one! 4×8 one and a quarter back squats at 115#, 11:54 rx for the first wod and 2:12 for the second
2. Finished this one in 10:20. I subbed v-ups for toes to bar because I didn’t want my hands to rip…

And here’s why:

a

I’m competing in my first Crossfit competition this weekend! Quite honestly, I had no idea what I was getting myself into when I signed up. First of all, it’s a bigger comp than I thought it was. There are two divisions- Elite & Open. The Elite group is about 10 women and 20 men. Then there are about 65 women and 80 men in the Open division, which is what I’m doing. Second of all, you don’t find out the WODs until the morning before…which is this morning…so I’ll try to update this post after they announce them!

I’m going in with absolutely no expectations and just kinda hoping I can do all the movements in the WODS 🙂 I guess we’ll see! All in all, it should be fun. A lot of my friends are competing as well and it’s a local competition so we don’t have to stress about travel or anything. I’ll let you guys know how it goes!

Have a great weekend, friends!

Enjoy!
–Lindsay–

Filed Under: Workouts

Chicken Tortilla Soup

August 15, 2013 by Lindsay 50 Comments

Hi Friends!

First things first…if you’re stopping by thanks to Julie’s blog post yesterday…HI! Glad you’re here 🙂

Now, let’s talk about this Chicken Tortilla Soup! I don’t know about where you are, but here in Ohio the weather is doing some crazy things! And by weird I mean when I woke up yesterday it was 53 degrees and it didn’t get above 72 for the entire day. In AUGUST. Say whaaaa?! Anyways, I’m not complaining. In fact, I celebrated by making some soup!

Chicken Tortilla Soup

This Chicken Tortilla Soup is packed with veggies, beans and chicken and makes a healthy, flavorful lunch or dinner option.

Let me just take a second to apologize that I haven’t gotten out my real camera to take a picture in approximately 20 years. I’m just lazy. So, phone pics it is! Anyways, back to the soup. I had some leftover chicken and black beans in the fridge, which immediately made me think of tortilla soup. I made it a bit non-traditional by adding some extra veggies…but the more the better in my book!

Here’s the recipe:

Print

Chicken Tortilla Soup

chicken tortilla soup 3
Print Recipe

5 Stars 4 Stars 3 Stars 2 Stars 1 Star

5 from 2 reviews

A lightened up version of a traditional favorite. Packed with protein and lots of veggies, it’s easily customizable and comes together in a snap!

  • Author: Author: Lindsay L
  • Prep Time: 10 minutes
  • Cook Time: 30 minutes
  • Total Time: 40 minutes
  • Yield: 4 1x

Ingredients

Scale
  • 1/2 c onion, diced
  • 2 cloves garlic, minced
  • 1–2 jalapeno, minced
  • 1 c bell peppers, diced
  • 3/4 c sweet potato, diced
  • 1 c green beans, chopped
  • 1– 14.5 oz can no-salt-added diced tomatoes
  • 1 c black beans
  • 1.5 c chicken, cooked and diced
  • 4 cups low-sodium chicken broth
  • 1 Tbsp cumin
  • 2 tsp chili powder
  • 1 Tbsp paprika
  • 1/4 c fresh cilantro
  • cheese & avocado for topping

Instructions

  1. In a dutch oven or large soup pot, saute the first 6 ingredients over medium heat for 10 minutes.
  2. Add the tomatoes (with liquid), beans, chicken, broth and dry spices.
  3. Bring to a boil, reduce heat and simmer until vegetables reach desired tenderness.
  4. Taste and adjust seasonings.
  5. Just before serving, stir in cilantro and top with a sprinkle of cheese & avocado

Did you make this recipe?

Tag @theleangreenbean on Instagram


The thing I love about soup is that it’s super forgiving. You don’t really ever have to follow a soup recipe exactly…and 95% of the time it still turns out great. So modify away, my friends! Don’t like one of those veggies? Leave it out or add a different one.

This Chicken Tortilla Soup is packed with veggies, beans and chicken and makes a healthy, flavorful lunch or dinner option.

This batch wasn’t quite spicy enough for me. I only used one jalapeno so next time I’ll probably use 2 and bump up the other spices a little bit as well. Serve over quinoa for an added protein boost and add a side salad to make a complete meal!

IMG_7427

Let’s chat!
What’s your favorite kind of soup?

Enjoy!
–Lindsay–
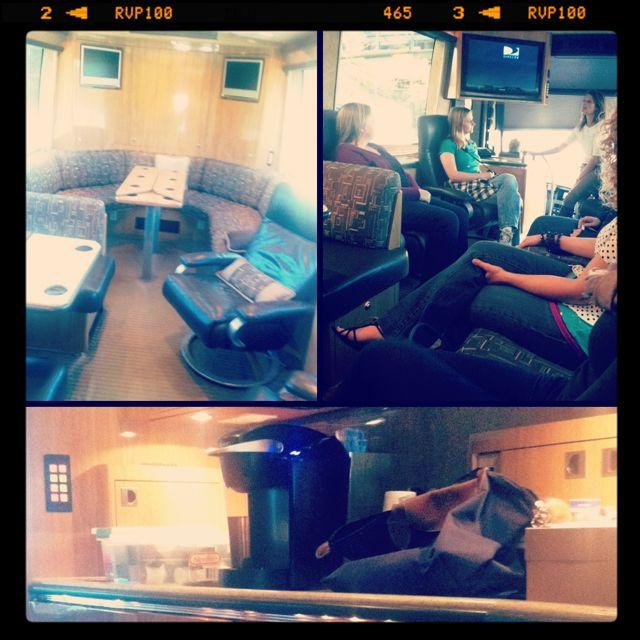
Filed Under: Dinner, Lunch, Soup & Salad Tagged With: Chicken

  • « Go to Previous Page
  • Page 1
  • Interim pages omitted …
  • Page 45
  • Page 46
  • Page 47
  • Page 48
  • Page 49
  • Interim pages omitted …
  • Page 65
  • Go to Next Page »

Primary Sidebar

Lindsay Livingston The Lean Green Bean Healthy Living Tips and Tricks

I'm a Registered Dietitian and mom of three from Columbus, Ohio. I use this blog to share simple, healthy recipes, nutrition tips, and an honest glimpse of motherhood!

Learn More →

Questions? Comments? Email me: [email protected]

The Lean Green Bean Facebook The Lean Green Bean Instagram The Lean Green Bean Pinterest The Lean Green Bean Twitter The Lean Green Bean Feed
footer-logo
The Lean Green Bean Facebook The Lean Green Bean Instagram The Lean Green Bean Pinterest The Lean Green Bean Twitter The Lean Green Bean Feed
Recipes

Breakfast
Dinner
Snack
Slow Cooker

Kids

Cooking With Kids
Favorite Gifts
Toddler Meals
Indoor Activities

Resources

Easy Packed Lunches for Kids
Dinner Spark
Snack Spark
Ultimate Guide to Food Prep

About

Meet Lindsay
Become an RD
Work with Me

The Lean Green Bean is a participant in the Amazon Services LLC Associates Program, an affiliate advertising program designed to provide a means for sites to earn advertising fees by advertising and linking to amazon.com.
Read the full privacy and disclosure policy here.

Copyright © 2022 · The Lean Green Bean

table talk series

Learn how food affects your body.

Get my free Table Talk email series where I share bite-sized nutrition information about carbs, protein, and fat, plus bonus information about snacks and sugar!

[email protected]