• Skip to main content
  • Skip to primary sidebar

Learn how food affects your body. Get Free Nutrition Info Today

the-lean-green-bean-logo
  • Home
  • Recipes
  • Kids
  • Resources
    • Ebooks
    • Food Prep
    • Videos
    • Snack Round-Ups
    • Gift Guides
  • About
    • Become An RD
    • Work With Me
  • Search
the-lean-green-bean-logo
  • Home
  • Recipes
  • Kids
  • Resources
    • Ebooks
    • Food Prep
    • Videos
    • Snack Round-Ups
    • Gift Guides
  • About
    • Become An RD
    • Work With Me
  • Search

blog

Microwave Sweet Potato Muffin

August 13, 2013 by Lindsay 95 Comments

Hi Friends!

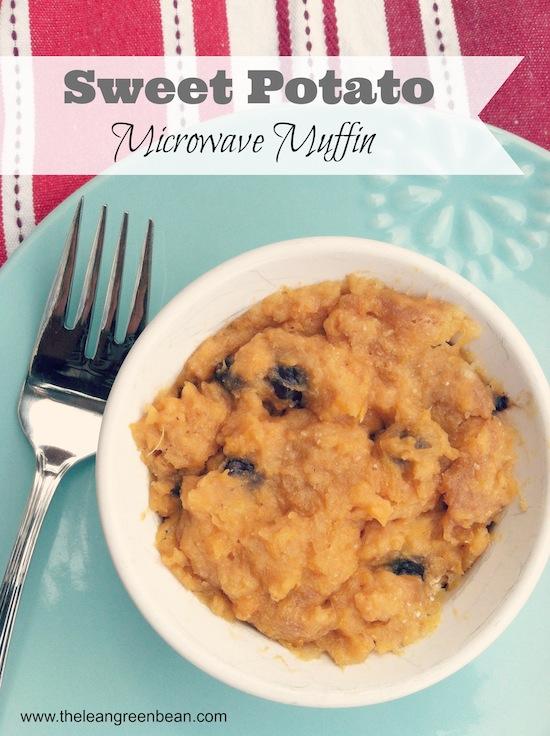
I have a delicious recipe to share with you guys today! A microwave sweet potato muffin recipe to be exact.

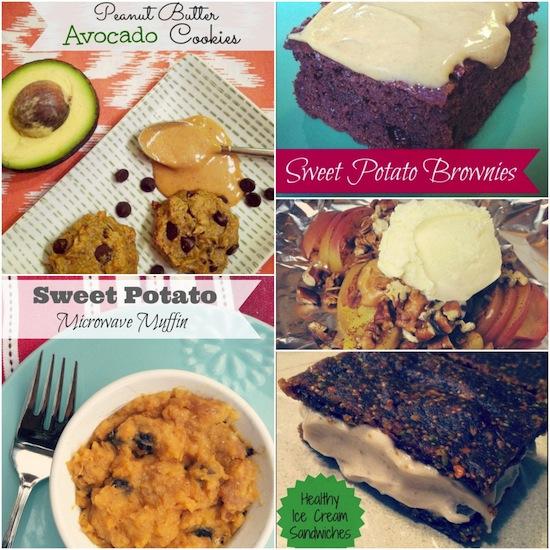
You're just 5 minutes away from an easy Sweet Potato Microwave Muffin that's perfect for breakfast or dessert!


That’s right…I finally had some success with the microwave muffin/mug cake. I consider this more of a muffin than a cake, but as you can see, I’ve been enjoying it for both a pre-workout snack and dessert….so take your pick!

Here’s the recipe:

Print

Microwave Sweet Potato Muffin

sweet potato microwave muffin
Print Recipe

5 Stars 4 Stars 3 Stars 2 Stars 1 Star

4.3 from 4 reviews

A simple, microwave muffin with basic ingredients. Perfect for a pre-workout snack or a post-dinner dessert!

  • Author: Author: Lindsay
  • Prep Time: 5 minutes
  • Cook Time: 2 minutes
  • Total Time: 7 minutes
  • Yield: 1 1x

Ingredients

Scale
  • 3 Tbsp mashed sweet potato
  • 1 Tbsp peanut butter
  • 1 Tbsp applesauce
  • 1 Tbsp milk
  • 1 Tbsp white whole wheat flour
  • 1/4 tsp baking powder
  • 1–2 tsp dark chocolate chips (optional)

Instructions

  1. In a small bowl, combine the sweet potato, peanut butter, applesauce and milk and mix well.
  2. Add the flour and baking powder and stir until combined.
  3. Stir in the chocolate chips.
  4. Scoop into a greased ramekin and microwave on high for 2 minutes.

Did you make this recipe?

Tag @theleangreenbean on Instagram

I’ve found it easiest to just microwave a whole sweet potato and then just scoop out a few tablespoons every time you want to make one!

If you’re having it for dessert, top it with a scoop of ice cream 🙂

You're just 5 minutes away from an easy Sweet Potato Microwave Muffin that's perfect for breakfast or dessert!

You can also make this in a small mason jar, which works out great when you add the ice cream. I rarely take the time to take it out of the ramekin or jar like I did for the photo above so don’t be fooled!

I haven’t tried it, but I would assume this could easily be make vegan by using almond or soy milk and probably gluten-free by using a GF flour…but you’ll have to do your own experimenting for that one.

Let’s chat: Are you a fan of microwave muffins/cakes?

Enjoy!
–Lindsay–


Filed Under: Breakfast, Dessert, Snack Tagged With: Sweet Potato

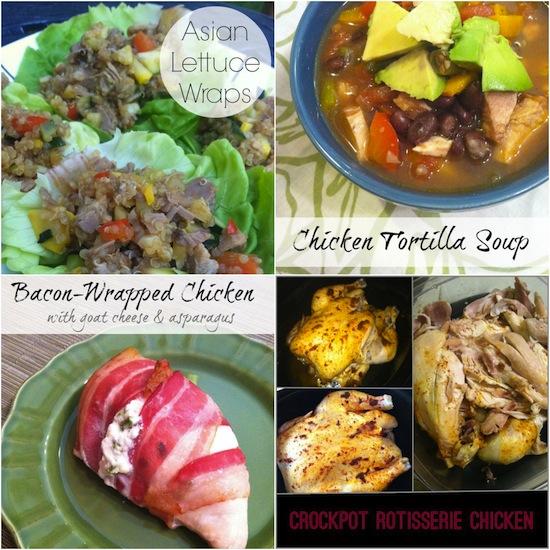
Asian Lettuce Wraps

August 8, 2013 by Lindsay 31 Comments

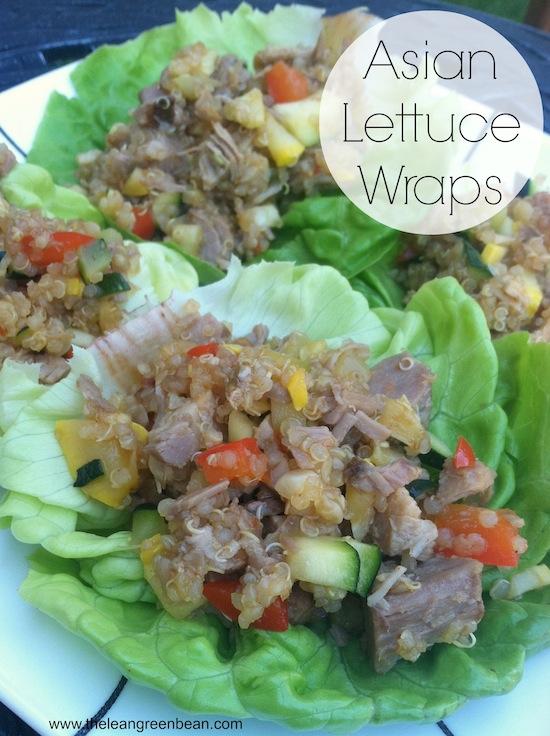
These Asian Lettuce Wraps make a healthy dinner option that’s packed with protein from quinoa and pork. They’re full of flavor and fun to eat!

Hi Friends!

Just popping in to share a quick, easy recipe with you guys.

These Asian Lettuce Wraps make a healthy dinner option that's packed with protein from quinoa and pork. They're full of flavor and fun to eat!

These Asian Lettuce Wraps are so good that I’ve made them twice this week! Once on a whim, and then again with measurements so I could share them with you guys! Packed with protein and the perfect way to use up some summer veggies, they’re a cinch to prepare and you could easily double the recipes to have leftovers for lunch the next day!

Here’s the recipe:

Print

Asian Lettuce Wraps

asian lettuce wraps
Print Recipe

5 Stars 4 Stars 3 Stars 2 Stars 1 Star

No reviews

An easy homemade recipe with a restaurant entree taste and an extra punch of protein. And you don’t even need to leave a tip!

  • Author: Author: Lindsay L.
  • Prep Time: 5 minutes
  • Cook Time: 10 minutes
  • Total Time: 15 minutes
  • Yield: 2 1x

Ingredients

Scale
  • 1 – 2 cloves, minced
  • 1.5 c diced vegetables
  • 1.5 c diced pork (cooked)
  • 1 c cooked quinoa
  • 2 Tbsp sweet Thai chili sauce
  • 2 Tbsp low sodium teryaki sauce
  • Bibb or Boston lettuce leaves

Instructions

  1. Over medium heat, saute the veggies and garlic for about 5 minutes.
  2. Add the remaining ingredients, mix well and heat through.
  3. Spoon into lettuce cups and serve!

Did you make this recipe?

Tag @theleangreenbean on Instagram

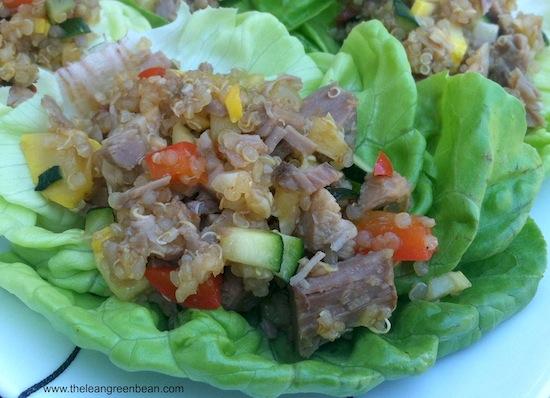
So easy, right? For my veggies I used zucchini, summer squash, and red peppers. You can mix it up based on what you like, though! I chopped them fairly small so they would cook quickly. For the pork, I used some crockpot pulled pork and just chopped it up. You could also use leftover pork tenderloin or pork chops. My store was out of Bibb lettuce so I used Boston and it worked quite well.

These Asian Lettuce Wraps make a healthy dinner option that's packed with protein from quinoa and pork. They're full of flavor and fun to eat!

[clickToTweet tweet=”Asian Lettuce Wraps from @leangrnbeanblog are fun to eat and packed with protein!” quote=”Asian Lettuce Wraps from @leangrnbeanblog are fun to eat and packed with protein!”]

Happy Eating!

Enjoy!
–Lindsay–

Filed Under: Lunch

Recipe Remix: Bacon Wrapped Chicken Stuffed with Goat Cheese

August 6, 2013 by Lindsay 23 Comments

Hi Friends!

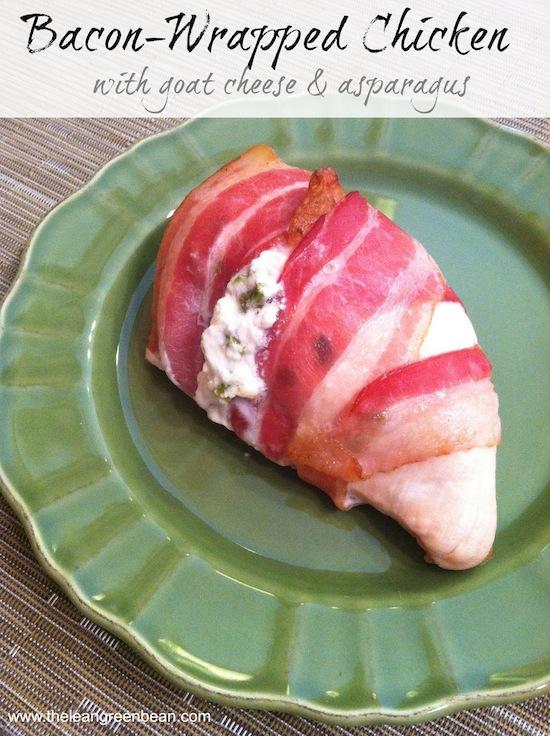
I’ve got a quick & easy recipe to share with you today! Bacon-Wrapped Chicken Stuffed with Goat Cheese & Asparagus.

This Bacon Wrapped Chicken looks fancy but couldn't be easier to make. Stuffed with goat cheese and asparagus it's sure to be a hit!

If you’ve been reading The Bean for a while now…and by that I mean like over 2 years…you may remember when I posted this Goat Cheese, Spinach & Bacon Stuffed Chicken. Hubby said it was the best chicken he’d ever had. And it was delicious.

This is just a fun little spin on that recipe, which mostly came about because I was lazy. I didn’t feel like cooking the bacon first, so instead of chopping it up and stuffing it inside, I just wrapped it around the outside. I didn’t have any spinach, so I just chopped up some asparagus and used that instead.

The end result was still delicious. Make either this version or the original and you’ll be happy!

Here’s the recipe for this version:

Print

Recipe Remix: Bacon Wrapped Chicken Stuffed with Goat Cheese

bacon wrapped chicken
Print Recipe

5 Stars 4 Stars 3 Stars 2 Stars 1 Star

No reviews

A new spin on a tried classic. No one will believe that this dish takes less than 30 minutes to prepare!

  • Author: Author: Lindsay L
  • Prep Time: 5 minutes
  • Cook Time: 20 minutes
  • Total Time: 25 minutes
  • Yield: 2 1x

Ingredients

Scale
  • 2 boneless chicken breasts
  • 3–4 slices of bacon
  • 2 oz goat cheese
  • 1/4 c chopped asparagus
  • black pepper & paprika to taste

Instructions

  1. Slice the chicken breasts on the thick side to create a pouch. Don’t slice all the way through to the other side.
  2. Microwave the goat cheese for 10 seconds to soften it, then mix in the asparagus and spices.
  3. Divide the mixture in half and stuff into the chicken breasts.
  4. Wrap the chicken in 1-2 slices of bacon, depending how big each piece is.
  5. Bake at 400 degrees for 20 minutes or until internal temperature reaches 165 degrees F.

Did you make this recipe?

Tag @theleangreenbean on Instagram


Pretty simple right? Sorry I wasn’t in the mood to get some nice photos for you. Just trust me when I say this is great for serving at dinner parties because it’s super easy to make, but looks semi-fancy!

Enjoy!
–Lindsay–

Filed Under: Dinner Tagged With: Chicken

July Foodie Penpals Reveal Day

July 31, 2013 by Lindsay 13 Comments

Hi Friends!

Time for another Foodie Penpals Reveal Day.

FPP-post

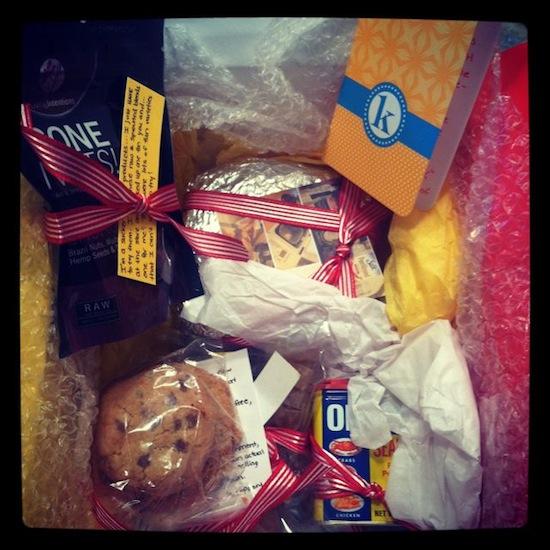
This month I was lucky enough to receive my package from Kerry at The Adventures of Z & K. She is the absolute sweetest and hooked me up with some delicious treats!

Here’s what she sent me:

IMG_6774

World’s cutest package. It was so colorful and she tied everything up with cute little ribbons and attached hand-written notes. I loved it!

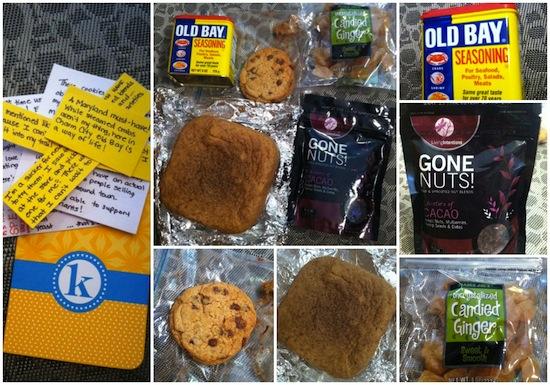
Here are all the goodies!

fppjuly

  • Cookies from her local farmer’s market- SO GOOD!
  • Homemade spelt bread- LOVED IT!
  • Candied ginger- I added it to my trailmix like she suggested. New fav!
  • Gone Nuts- I love trying new products. Saving this to top my yogurt sometime soon!
  • Old Bay- One of my fav seasonings 🙂

Thank you SO MUCH Kerry!

————

And now it’s time for some details about Foodie Penpals.  In case you’re a new reader, here’s a reminder of what the program is all about:

-On the 5th of every month, you will receive your penpal pairing via email. It will be your responsibility to contact your penpal and get their mailing address and any other information you might need like allergies or dietary restrictions.
-You will have until the 15th of the month to put your box of goodies in the mail. On the last day of the month, you will post about the goodies you received from your penpal! 
-The boxes are to be filled with fun foodie things, local food items or even homemade treats! The spending limit is $15. The box must also include something written. This can be anything from a note explaining what’s in the box, to a fun recipe…use your imagination!
-You are responsible for figuring out the best way to ship your items depending on their size and how fragile they are. (Don’t forget about flat rate boxes!)
-Foodie Penpals is open to blog readers as well as bloggers. If you’re a reader and you get paired with a blogger, you are to write a short guest post for your penpal to post on their blog about what you received. If two readers are paired together, neither needs to worry about writing a post for that month. 
-Foodie Penplas is open to US, Canadian & European residents.  Please note, Canadian Residents will be paired with other Canadians only. Same with Europeans. We’ve determined things might get too slow and backed up if we’re trying to send foods through customs across the border from US to Canada and vice versa. 

If you’re from the US or Canada and are in participating for August, please CLICK HERE to fill out the participation form and read the terms and conditions. 

You must submit your information by August 4th as pairings will be emailed on August 5th!

*If you’re from Europe, please CLICK HERE to signup.

——————

Enjoy!
–Lindsay–


Filed Under: Uncategorized

6 Healthy Habits You Should Start Today

July 30, 2013 by Lindsay 84 Comments

Hi Friends!

Today we’re talking simple healthy habits with the lovely Alysia from Slim Sanity. It’s hard to remember exactly but I think Alysia and I met through Foodie Penpals. She’s been a wonderful supporter of my blog over the past couple of years and she has an amazing blog of her own that you should definitely go check out. 

Take it away Alysia!

———–

What comes to mind when you think of habits? I often think of bad habits like nail biting, being late or playing with your hair. The definition of a habit is ‘a settled or regular tendency or practice, especially one that is hard to give up.’
Why does it seem as if the habits that are hard to give up are bad? I know changing any habit is hard, whether it be ridding a bad habit or adding a good habit. There are plenty of good habits we can all start putting into practice. If we try hard enough, maybe they’ll stick! Here are seven healthy habits that I try to keep up with.

Ready to start getting healthier but not sure where to start? Here are 6 Healthy Habits You Should Start Today!

1. Turn off your phone. This is a hard one for me as a blogger. I’m constantly reading other blogs, connecting with people, and checking e-mail. Time spent with family, having personal time, or just down time in general is a lot more relaxing when we aren’t staring into the blinding light of social media. I try to turn mine off at night, or leave it at home when we go for a walk. It’s also good to keep your device from malfunctioning!

2. Walk on your lunch break. I was really great at this one for a long time, and I found myself getting busy (or lazy, perhaps) and they slipped from my normal routine. I’m getting better at them again now. I’ll go for a 20-30 minute walk over my lunch break. It’s pretty easy to do since I pack my own lunch. I don’t drive anywhere for food and I get a little more free time. Depending on the weather, I’ll walk outside or around the halls of my buildings at school!

3. Floss daily. I get this one checked off the list about 3 times a week. That’s also due to laziness (maybe we have a theme going on here?).

4. Make more smoothies. Making a protein shake or smoothie is an easy way to add more fruits and veggies into your diet! I promise you, you can’t really taste the spinach in a green smoothie when you add some fruit to it!

5. Foam roll. I still haven’t purchased one of my own, but I’ll use a foam roller when I go to the gym. It’s a great way to loosen up your muscles. It’s really quite relaxing once you’re done. For those with IT band issues, it’s a great tool!

6. Be social. It’s easy to get caught up with work and routines and be too tired during the week to catch up with friends. Choose a night to routinely get together. Just because you are trying to eat healthy doesn’t mean you need to avoid parties and happy hours. If that is the case for you, set limits for yourself and stick to them. Go on date nights with your significant other. Quality time is so important! We have a few select places where we can go to catch a cheap bite to eat and a drink during the week. Having fun and enjoying time with friends and loved ones is necessary for your mental health, which is just as important as your physical health.

————

I love her tips because they cover all aspects of healthy living, not just food! Huge thanks to Alysia for filling in for me today!

Let’s chat:
What’s one healthy habit you will start working on this week?

Enjoy!
–Lindsay–

Filed Under: Uncategorized

Chunky Monkey Paleo Cookies

July 25, 2013 by Lindsay 40 Comments

Hi Friends!

Today seems like a good day for a treat doesn’t it? Well you’re in luck. Allow me to introduce you to Taylor from Taylor Made It Paleo. She’s a fellow Columbus tall girl and although we haven’t met in person *YET*, we’ve bonded over our love of Crossfit, the Buckeyes, froyo and delicious food. I don’t care whether you eat paleo or not (I clearly don’t), you should be following this girl’s blog. She’s an instagram phenom and she makes the most DELICIOUS food in the kitchen- like this chocolate coconut cashew butter, or these almond butter cookie dough truffles or these walnut raisin cinnamon rolls! Plus she is hilarious. Like I literally laugh out loud in my kitchen when I read her posts.

Go check out her blog, then come back to read more about these delicious cookies she’s sharing with you guys!

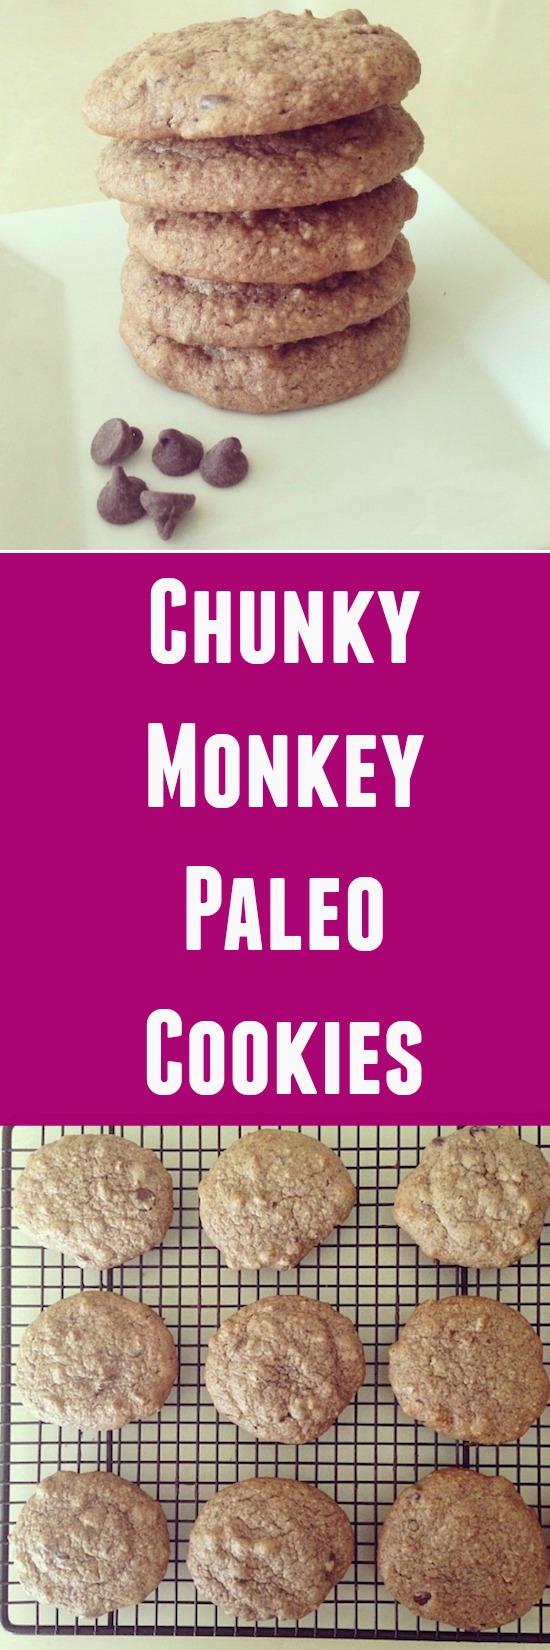
These Chunky Monkey Paleo Cookies are packed with delicious mix-ins and the perfect evening treat!

Hey Bean readers! Taylor here from Taylor Made It Paleo. I’m so excited to be doing a guest post for Lindsay while she’s out at the CrossFit Games. And also extremely jealous of her. It will be almost the same watching them on TV from my living room, right? I thought so.

So from the name of my blog, some of you may have guessed that I eat paleo (a diet based on meat, vegetables, fruit, nuts, seeds, and healthy fats without grains, dairy, legumes, and refined sugars). If you did, you are right. I do eat paleo. Most of the time. But I also eat frozen yogurt. And I also love making naughty-looking treats from paleo ingredients, which some people frown upon. But I am a full on supporter of paleo goodies. So if that doesn’t make me a real “cavegirl,” then I’m okay with that. But it’s what works for me.

I started eating this way about a year ago. I’ve been a type 1 diabetic since I was ten years old (I’m now 21), and my blood sugars are the best they’ve ever been since going paleo, and I feel great. That’s why I do it. I’ve done Whole30s (30 days of extremely strict paleo with no “cheating” and definitely no paleo goodies) and other strict forms of the diet, which I by no means discourage anyone from trying. But, I’m glad that I have recently found more of a balance, and created a style of paleo that works for me. That’s the great thing about it. You can make your own version. And my version just so happens to include dessert.

Which is where these cookies come in. Now, I get it. You’re probably thinking paleo cookies?! What are they going to taste like? Cardboard and vegetables? Stop that. I promise after you try them, you will be shocked and won’t even believe they are paleo at all. Actually, you’ll probably be so impressed that it will make you want to become a caveman yourself. Okay, I may have taken that too far. But I can promise you there is no hint of cardboard or vegetables in these babies.

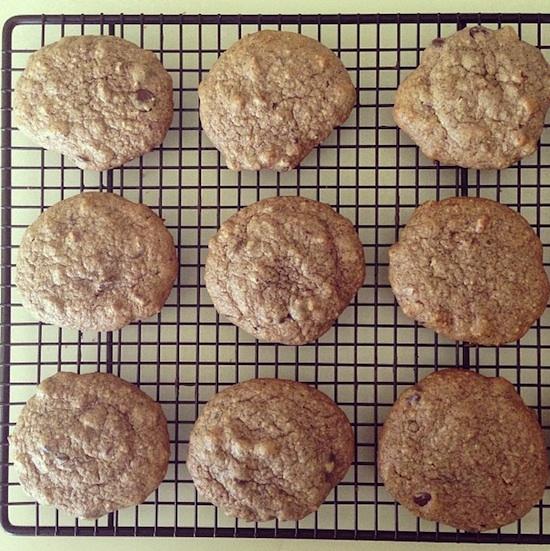
Chunky Monkey Paleo Cookies

These Chunky Monkey Paleo Cookies are packed with delicious mix-ins and the perfect evening treat!

Print

Chunky Monkey Paleo Cookies

cookies
Print Recipe

5 Stars 4 Stars 3 Stars 2 Stars 1 Star

4 from 2 reviews

You don’t have to sacrifice taste with these delicious paleo treats. And with a recipe so simple, a caveman in the kitchen couldn’t mess these cookies up!

  • Author: Author: Lindsay L
  • Prep Time: 10 minutes
  • Cook Time: 15 minutes
  • Total Time: 25 minutes
  • Yield: 15 1x

Ingredients

Scale
  • 1 cup chunky sunflowerseed butter (or other nut butter)
  • 1/4 cup honey
  • 1 egg
  • 1/2 cup (ripe) banana, mashed (about 1 large banana)
  • 2 tbsp Justin’s chocolate hazelnut butter (or other chocolate nut butter)
  • 1 tsp vanilla
  • 1 tbsp cinnamon
  • 1/2 tsp baking powder
  • 1/2 tsp baking soda
  • salt to taste
  • 1/2 cup chopped pecans (or other nut)
  • 1/2 cup Enjoy Life Mega Chocolate Chunks (or dark chocolate chunks, the darker, the better!)

Instructions

  1. Preheat oven to 350.
  2. Combine all ingredients (adding pecans and chocolate chunks last) in a large bowl until thoroughly mixed.
  3. Using a large spoon, scoop batter onto a parchment paper lined cookie sheet (making sure you leave plenty of room in between each).
  4. Bake for 12-15 minutes.
  5. Remove from oven and allow to cool on pan for 5 minutes, then completely cool on wire rack.

Did you make this recipe?

Tag @theleangreenbean on Instagram

These Chunky Monkey Paleo Cookies are packed with delicious mix-ins and the perfect evening treat!

Delicious right?! Huge thanks to Taylor for sharing. I cannot wait to make these. Plus, I heard that even her dad liked them…and he usually runs away from Paleo goodies!

Let’s chat:
Cookies or cake? Which do you prefer?

Enjoy!
–Lindsay–

Filed Under: Baking, Dessert

French Toast Oat Muffins

July 23, 2013 by Lindsay 35 Comments

Hi Friends!

Today we’re kicking off a series of guest posts over here on The Bean while I take a little break. Not to worry though, I’ve left you in good hands! I’ve got some of my very favorite bloggers filling in for me. My hope is that you’ll love the posts they’ve written as much as I do and find a few fun new blogs to follow!

First up is Morganne from NutButter Runner. Morganne and I have connected on Twitter over the past few months and she’s become one of my blog’s biggest supporters. In turn, I’ve come to love her blog as well. She is a Sunday Food Prep rockstar, always sending me amazing submissions for my Sunday series! Plus, she a rockstar runner and she’s amazing in the kitchen. She’s always whipping up delicious recipes like Lentil Almond Burgers and we share a love of dillas- like this Garden Baked Turkey Dilla. Plus she puts together great workouts- like this Tank Top Arms circuit to share with her readers. Go check out her blog!

Today she’s sharing a fabulous recipe with all of you. I didn’t even tell her that french toast is my favorite 🙂 She just knows the way to my heart!

—————

Hi Lean Green Bean readers! I’m Morganne and blog at NutButterRunner. As a long-time reader of Lindsay’s blog, I was so excited when she asked if I would write a post while she is away this week. How fun is it that she gets to spend a week in California doing something she loves surrounded by amazing people?

To share a little information about me, my blog is mainly focused on food and fitness, with my number one loves being nut butter and running (hence the name…clever, right?). I’m a big fan of Sunday food prep and love Lindsay’s posts regarding the topic. I thought it would be fun to share an easy recipe that you could make ahead of time for the week that is a great healthy breakfast!

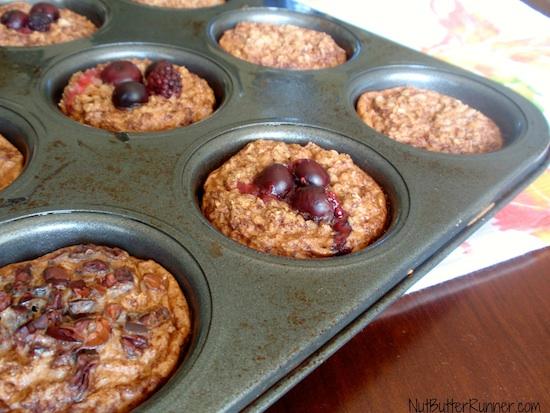
Make a batch of these French Toast Muffins for easy morning breakfast. They can be customized to the liking of each family member!

Print

French Toast Oat Muffins

FrenchToastMuffins1
Print Recipe

5 Stars 4 Stars 3 Stars 2 Stars 1 Star

No reviews

Ingredients

Did you make this recipe?

Tag @theleangreenbean on Instagram

Prep time
10 mins
Cook time
20 mins
Total time
30 mins
Like portable portions of French toast, these muffins are surprisingly nutritious. Add your favorite mix-ins or toppings and the possibilities are endless. Pass the syrup, please!
Author: Morganne
Serves: 9
Ingredients
  • 1 cup Old Fashioned Oats
  • ½ cup Milk of choice (I used almond)
  • ¾ cup Liquid Egg Whites (equivalent to 4 large egg whites)
  • 1 tsp Nutmeg
  • 2 tsp Cinnamon
  • 3 tsp Vanilla Extract
  • Mix-ins/toppings of choice
Instructions
  1. Preheat oven to 375 degrees. Prepare a muffin tin by spraying it with nonstick cooking spray.
  2. Combine all ingredients in a large bowl and mix well.
  3. Bake for 20 minutes, until a toothpick comes out clean.
3.2.1255


Make a batch of these French Toast Muffins for easy morning breakfast. They can be customized to the liking of each family member!

I stored these in the refrigerator and ended up having some cold, which was the perfect snack! I also enjoyed these warmed in the microwave for 45 seconds or you could rewarm them in an oven or toaster!

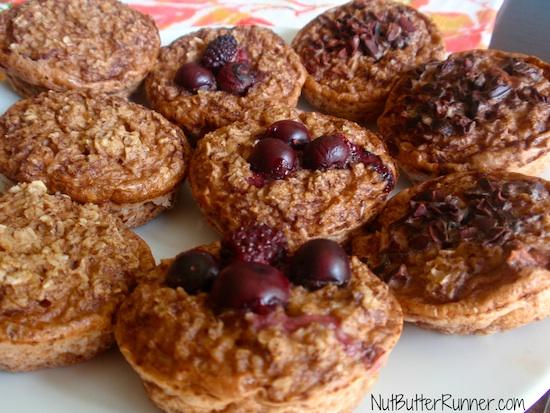
Make a batch of these French Toast Muffins for easy morning breakfast. They can be customized to the liking of each family member!

What I love is that they can easily be personalized to include any of your favorite mix-ins and toppings. I made one large batch, with different toppings on each. The first kind I made was with chocolate chips mixed in and chocolate shavings on top.I also made some with mixed berries.

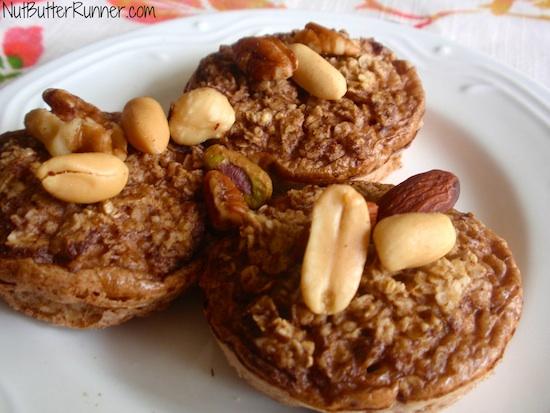
And lastly I left some plain for those mornings that I may want something different! I topped these with nuts, but you could also do any fruit (fresh or frozen), nut butter, syrup, honey, etc.

Make a batch of these French Toast Muffins for easy morning breakfast. They can be customized to the liking of each family member!

Breakfast just happens to be my favorite meal of the day, but the mornings can quickly become hectic around our house. I love having versatile options on hand for the week; it certainly makes life a little easier! I hope you enjoy this recipe as much as we have!

If you have any questions or comments, please feel free to email me at NutButterRunner(at)gmail(dot)com. You can also find me on twitter, Instagram, and Pinterest @NutButterRunner.

————

Huge thanks to Morganne for sharing this recipe today!

Let’s chat:
Are you a french toast, pancake or waffle kinda person?

Enjoy!
–Lindsay–

Filed Under: Breakfast

5 Frozen Summer Snack Ideas

July 18, 2013 by Lindsay 31 Comments

Hi Friends!

I don’t know about where you are, but it is HOT here in Ohio. After a couple weeks of nothing but rain, the summer heat has kicked into full gear and it’s brutal.

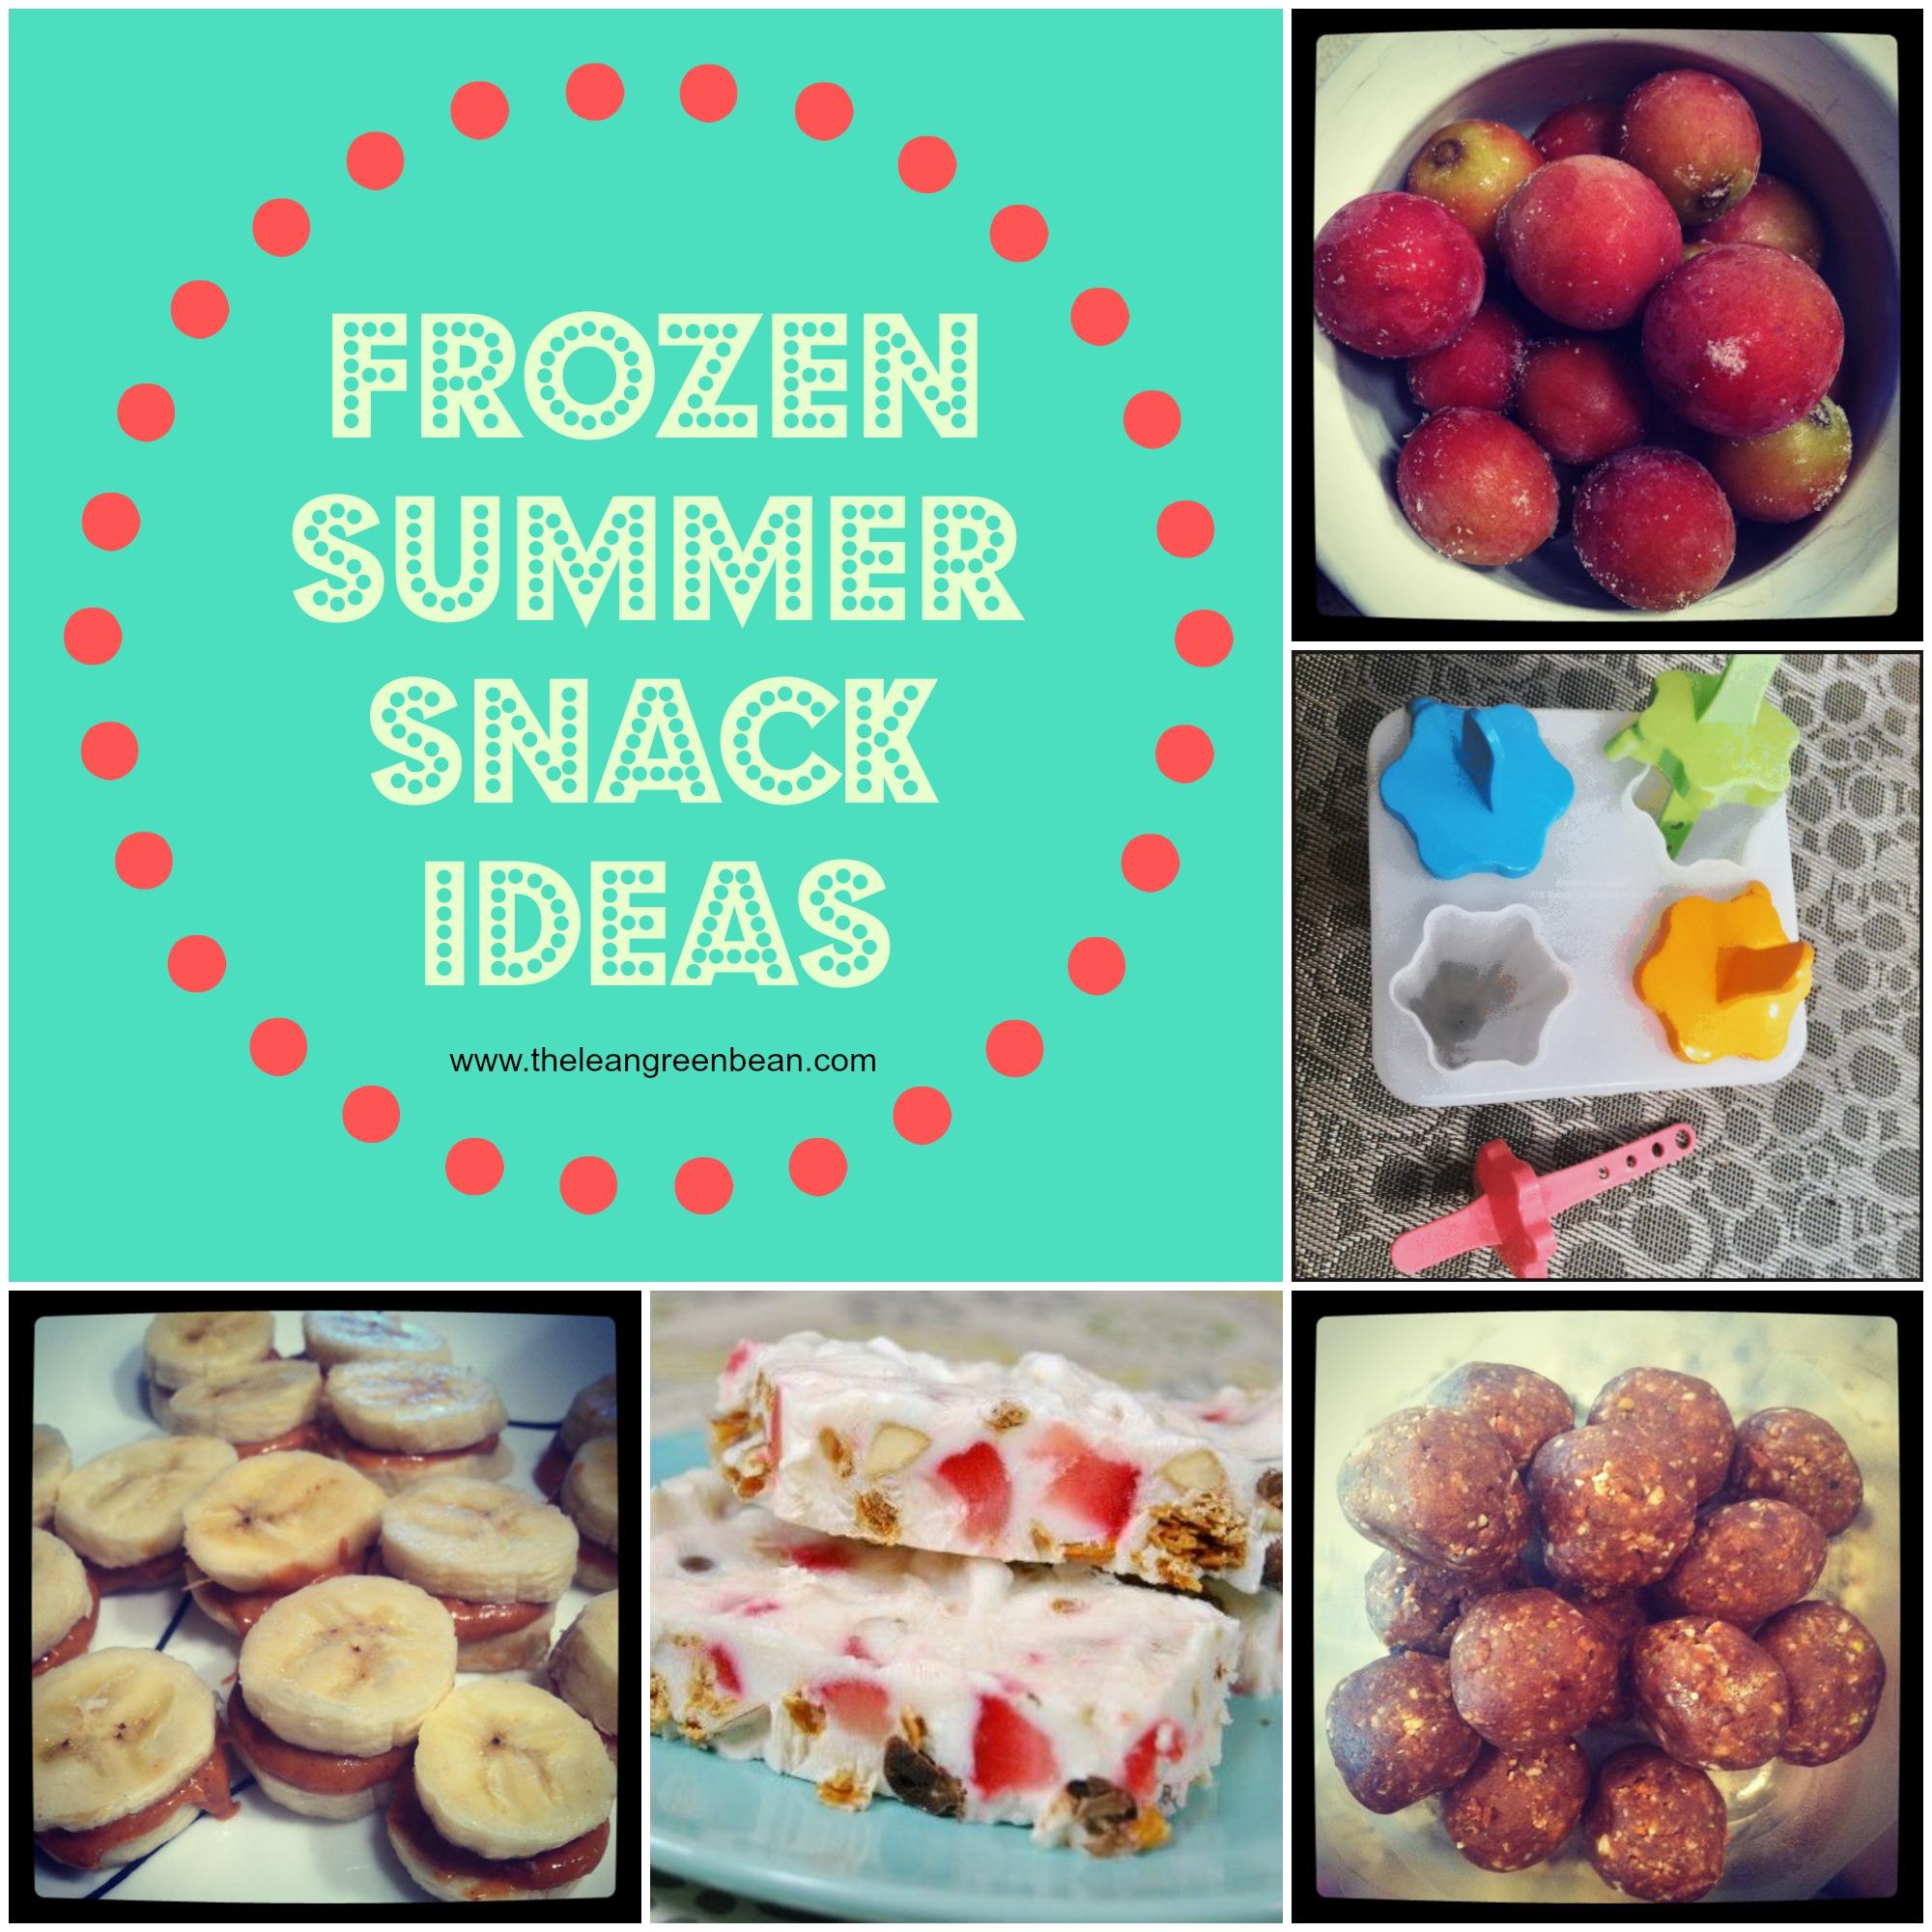
When the weather heats up, these 5 Frozen Summer Snacks will help you beat the afternoon slump!

So, I thought I’d round up a few of my favorite frozen summer snack ideas. These are things I usually have stashed in my freezer to help cool things down on a hot day:

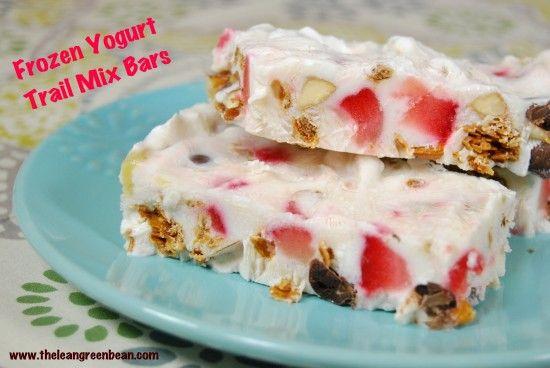
 Frozen Yogurt Trail Mix Bars

IMG_0777

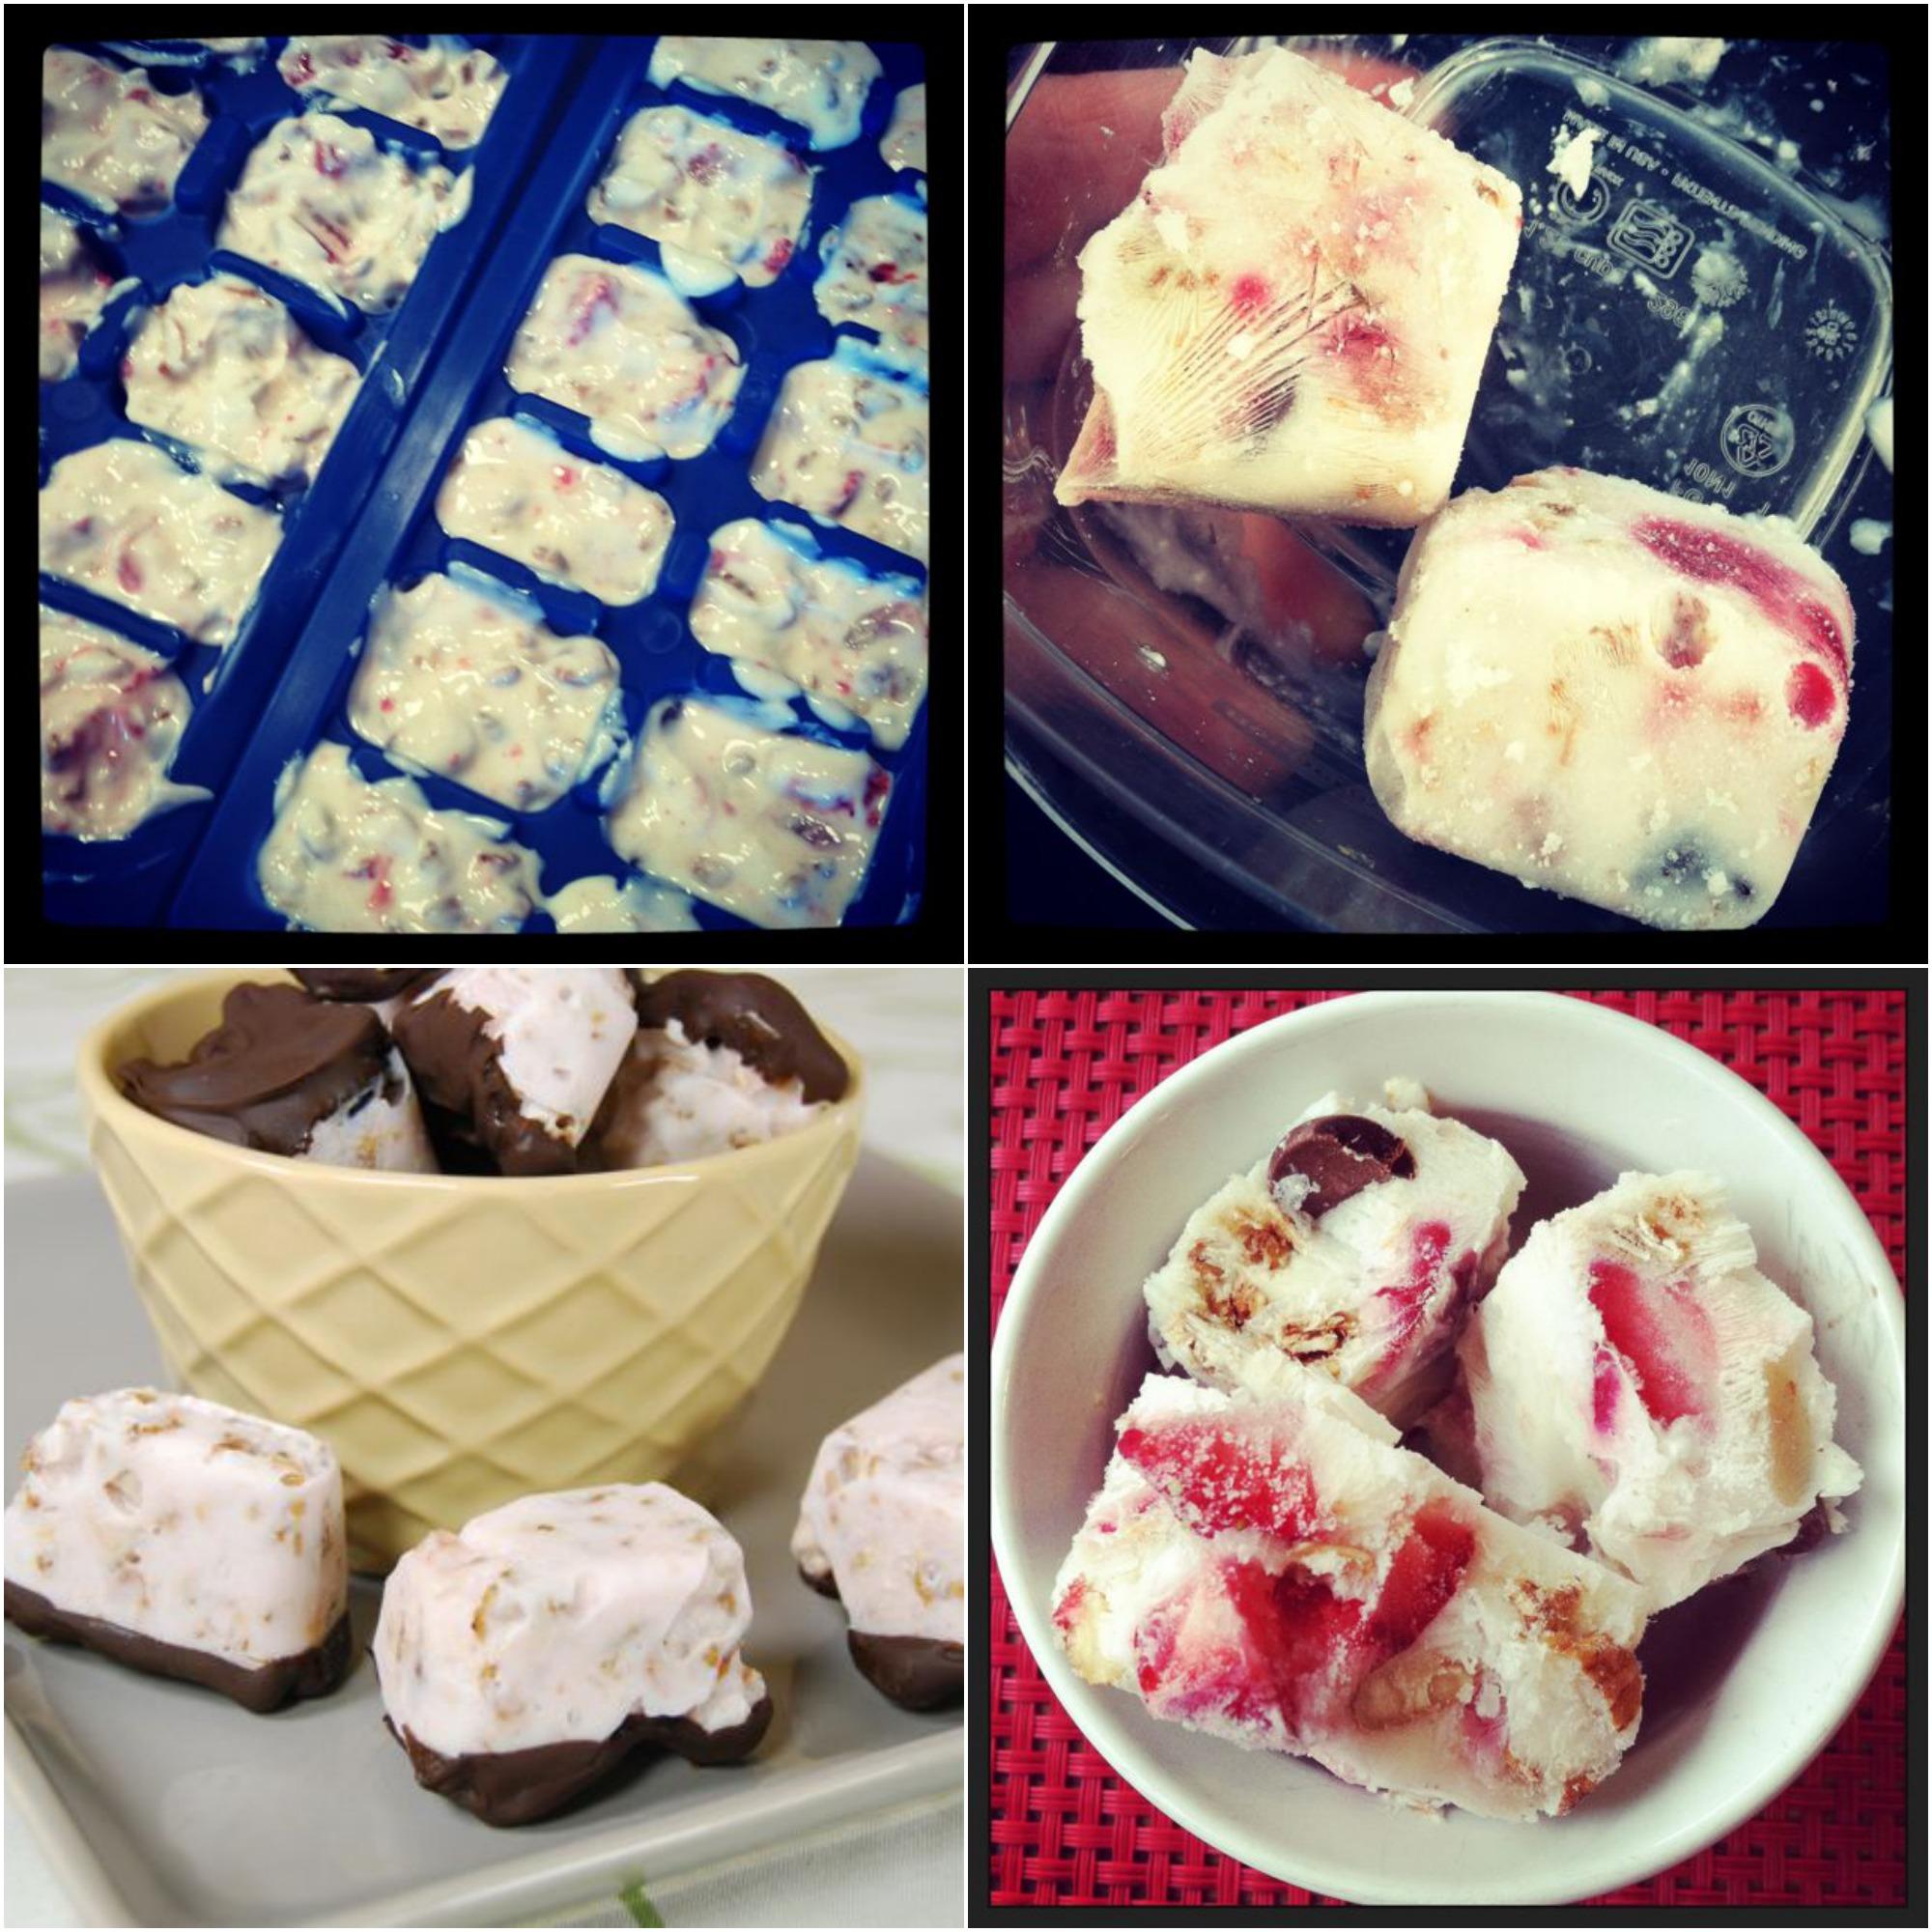
This is one of the most popular recipes on my blog! They’re super easy to make, but if you want to make things even easier, go with Fro Yo Bites like I usually do. Mix the ingredients the same way, then scoop into ice cube trays and freeze. Store in an airtight container or ziploc bag in the freezer. I make a batch of these pretty much every week! Dip them in chocolate if you’re feeling fancy, but I usually just throw a handle of chocolate chips into the mix and call it a day.

fro yo bites

If you want even less work, open up a six oz container of greek yogurt, add a handful of granola, a few nuts and some berries, stir it up and stick it in the freezer. Eat as it thaws!

 Nut Butter Banana Bites

IMG_5728

Slice a banana, spread some of your favorite nut butter on one slice, top with a second slice and freeze. Store in an airtight container in the freezer!

Energy Balls

IMG_4844

Combine 2 cups chopped, pitted dates, 1 1/2 cups almonds and 1/2 cup nut butter in a food processor and process until well combined. Dump the mixture onto a piece of saran wrap and squeeze tightly into a large ball. Freeze for 20 minutes, then remove and form the dough into about 30 bite-sized balls. Store in the freezer for an extra cold treat (or keep them in the fridge!).

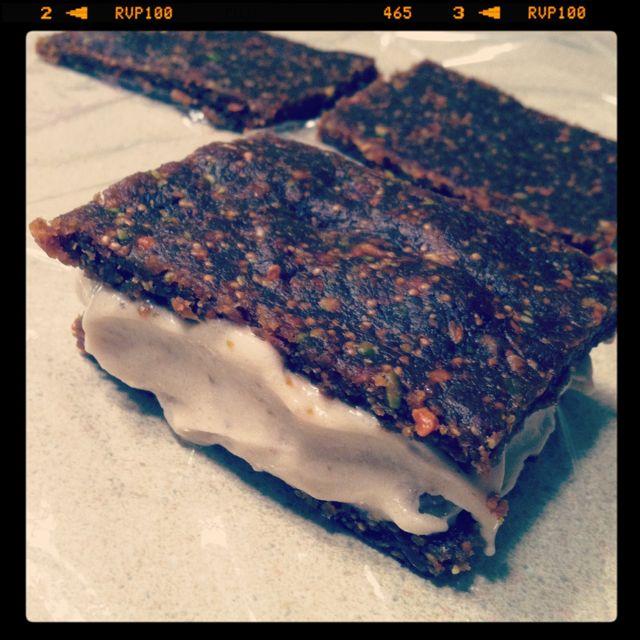
If you want to get fancy, make some  Healthy Ice Cream Sandwiches!

IMG_3562

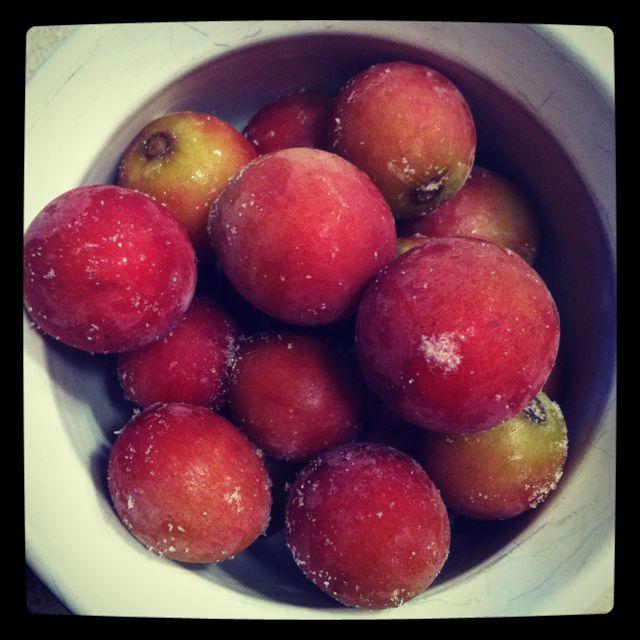
Frozen Fruit

IMG_6001

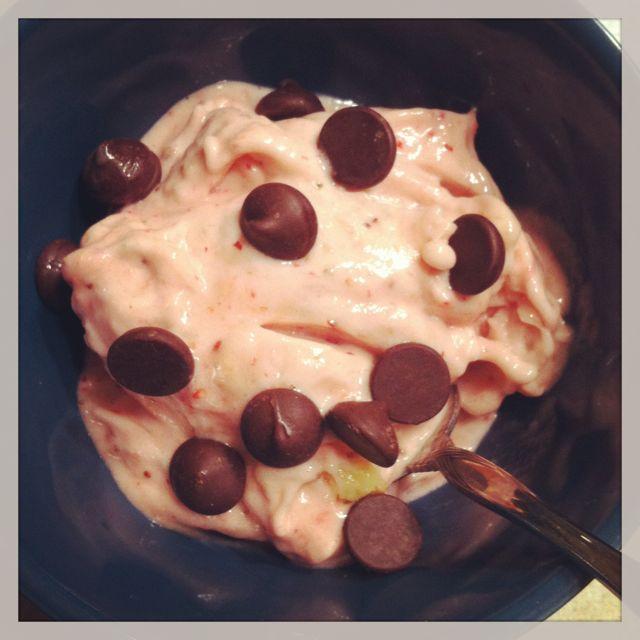
Grapes are my personal favorite.  If you want to expend a little more energy, stick some frozen banana chunks in the food processor with a strawberry or two and voila! “Fro yo”

IMG_5712

A few chocolate chips don’t hurt either!

Just remember if you’re having frozen fruit as a snack to pair it with a protein source. Add some nut butter to your banana fro yo or enjoy your frozen grapes with a cheese stick or a couple of hard boiled eggs!

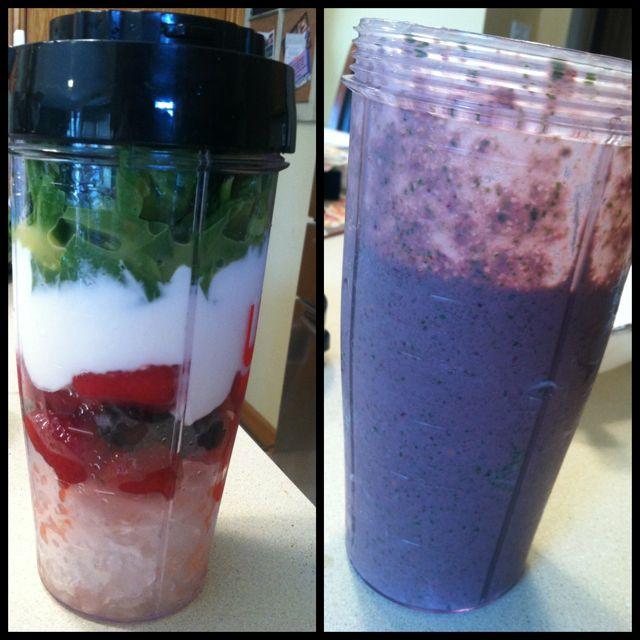
Smoothie Pops

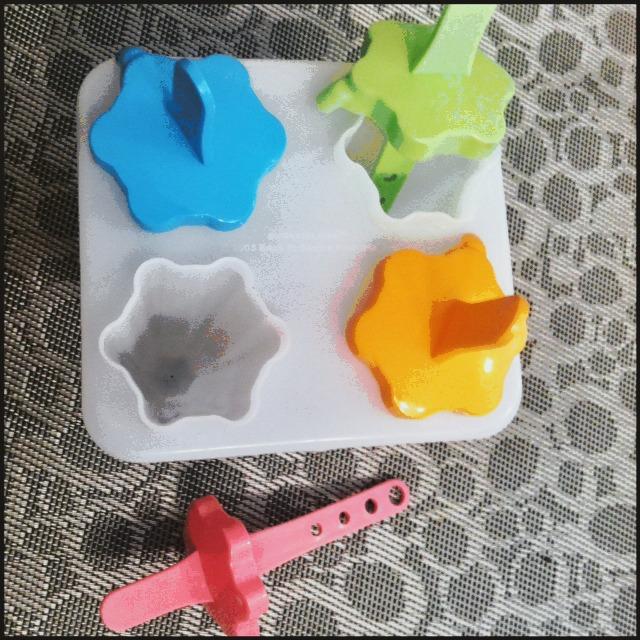
Invest in a few popsicle molds from the dollar store, especially if you have kids (or are a kid at heart, like me!). Whip up a smoothie- make sure to add some sort of protein like greek yogurt…and bonus points if you throw some spinach or kale in there…

IMG_4536

Pour into popsicle molds…freeze & enjoy!

smoothie pops

Let’s chat!

  • Do you have a favorite frozen snack?
  • Tell me about it or leave a link in the comments so everyone can check it out!

Enjoy!
–Lindsay–
 

Filed Under: Snack

How to Cook and Freeze Beans

July 16, 2013 by Lindsay 32 Comments

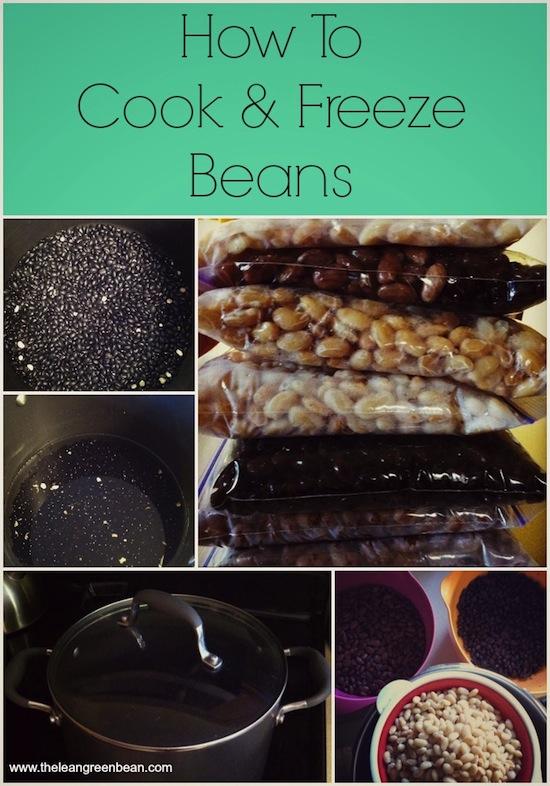
Did you know you can cook and freeze dried beans? Make a whole bag and stock your freezer so you have them on hand to add to meals!

Hi Friends!

It’s no secret around here that I love beans. Especially green beans 🙂 But today we’re going to focus on dried beans. More specifically, how to cook dried beans – and then how to freeze them.

Let me start by saying that I don’t think there’s anything wrong with eating canned beans occasionally. Canned beans are better than no beans! However, canned beans are often loaded with sodium. If you buy them, look for no-salt-added or low-sodium varieties, and be sure to rinse them well before using.

Dried beans are the best option, in my opinion, though. A lot of people tell me that they’re unsure how to cook dried beans, so they avoid them. Well friends, I’m here to show you how easy it is! And as an added bonus, I’ll show you how to freeze them. That way, you will always have them on hand when you need them. It’s a great way to save time and money!

Did you know you can cook and freeze dried beans? Make a whole bag and stock your freezer so you have them on hand to add to meals!

So, let’s start with cooking methods. Here are three to choose from:

  • Stovetop
  • Pressure Cooker
  • Crockpot

The pressure cooker is my personal favorite way to cook beans because you can go from dried (unsoaked) beans to completely cooked beans in about 25 minutes. However, I realize that not everyone has a pressure cooker, so I’ll explain the other methods as well.

Did you know you can cook and freeze dried beans? Make a whole bag and stock your freezer so you have them on hand to add to meals!

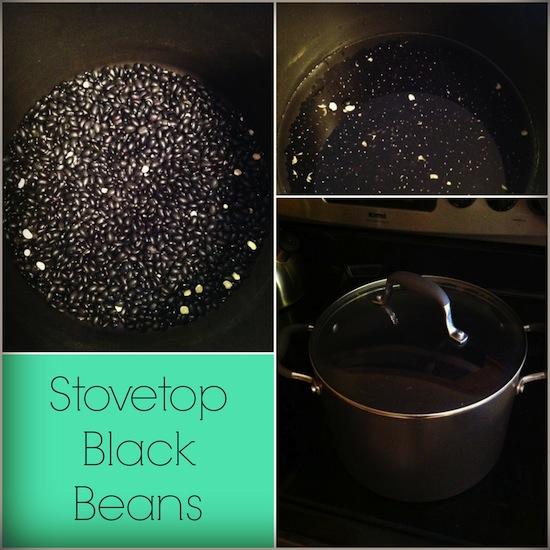
Stovetop

Black beans are the most commonly cooked beans in my house. I also cook great northern white beans and pinto beans on occasion. They all have slightly different cooking times, but if you’re cooking them on the stove top, you need to soak them first! The very first step is to look through the beans and remove any small stones or other debris that may have made it into the bag. Then, move on to soaking.

Soaking methods: 
Long Soak: Put the beans in a bowl, cover with three times the amount of water, and let soak 6-8 hours or overnight.
Quick Soak: Put the beans in a pot, cover with three times the amount of water (so for a bag of beans you need 6-8 cups), bring the water to a boil, then remove from heat, cover and let sit for one hour.

Rinse #1:
After whichever soaking method you choose is complete, you need to rinse the beans. The beans will swell while soaking so make sure you use a large pot and enough water. The water will also turn black if you’re using black beans! Totally normal. Set up a colander in the sink, dump the beans and water into the colander and run some water over the beans until the water runs clear into the sink.

Cook:
Return the beans to the pot after rinsing and cover with 3x the amount of water again. Bring the water to a boil, then reduce heat to a simmer, cover and let simmer for 45 min – 1 hour. I would start checking them around 40 minutes because every stove is different and cooking times can vary widely. Plus, some people like their beans extremely soft and others like them a little firmer. Depending on your “simmer” temperature, your beans could take anywhere from 40 minutes to 90 minutes. Every so often, just remove the lid, scoop out a bean and taste test. When they reach your desired doneness, remove the beans from heat.

Rinse #2:
Set the colander in the sink again and carefully drain the beans into the colander. Rinse with cold water to stop the cooking process.

Did you know you can cook and freeze dried beans? Make a whole bag and stock your freezer so you have them on hand to add to meals!

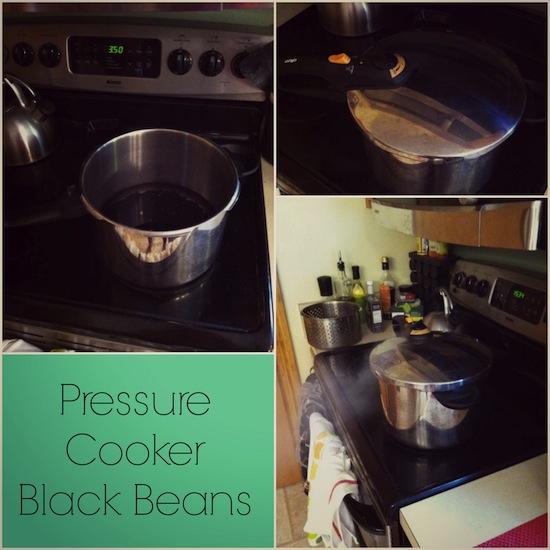
Pressure Cooker

This is by far the fastest way to cook dried beans. No soaking required! Just dump a bag of beans into the pressure cooker, cover with 3x the amount of water and cook on high for 15-20 minutes (will vary by cooker so you’ll have to test it out with yours). Use the natural release method and transfer the beans to a strainer to rinse them.

Crockpot

If you’re using a crockpot to cook your beans, you can fix it and forget it. I haven’t actually tried this myself, but I’ve read several recipes from people who have. The consensus is that cooking times vary widely based on how fresh your beans are. They could be done after as little as 3 hours on high, but it looks like most take about 5-6 hours on high or 8-10 hours on low. It might be a good idea to make some while you’re home to check on them until you get a feel for how long they’ll take in your crockpot. You do not need to presoak them if you’re using this method.

Notes:

  • A lot of people like to season their beans, especially if they’re cooking them in the crockpot. You can add chopped onion, garlic and other spices for flavor and you could also use broth to replace half the liquid for some added flavor.
  • If you add salt to your beans (which is unnecessary in my opinion) don’t add it until the very end. Salt can cause it to take much longer for the beans to cook.
  • Red kidney beans specifically contain a toxin that might not be destroyed by crockpot cooking alone. To be safe, they should be soaked overnight, rinsed and cooked in boiling water for 10 minutes before being cooked in a crockpot. Read more here.

Did you know you can cook and freeze dried beans? Make a whole bag and stock your freezer so you have them on hand to add to meals!

Storing Methods:

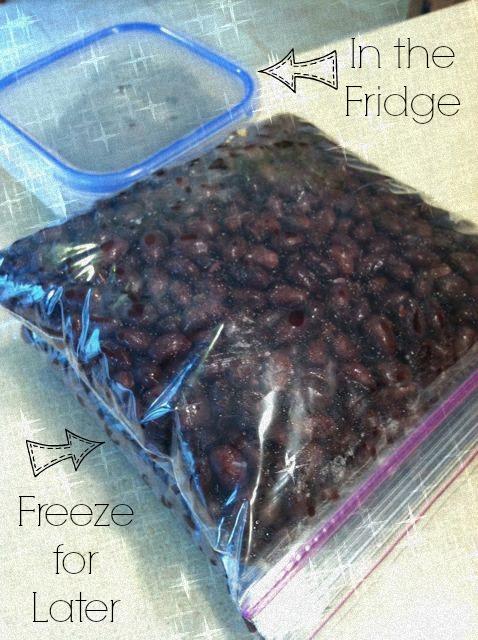
  • Refrigerator: Transfer to a tupperware container and store in the fridge for up to 5 days.
  • Freezer: Let the beans cool completely. Portion into ziploc bags. Lay bags flat on side and stack to store in the freezer. When you need to use them, just remove a bag, smack it against the counter to loosen up the beans and either pour directly into the pan of whatever you’re cooking to let them thaw, or pour into a bowl and defrost in the microwave.
  • Edited to add: You can freeze lentils as well! They cook much faster on the stove top, but I freeze them in bags the same way!

[clickToTweet tweet=”Ditch the can! Use these tips from @leangrnbeanblog to cook & freeze dried beans instead!” quote=”Ditch the can! Use these tips from @leangrnbeanblog to cook & freeze dried beans instead!”]

So there ya go! Easy peasy and a great way to make sure you always have cooked beans on hand in the freezer!

Enjoy!
–Lindsay–
Filed Under: Food Prep

Fitness Friday 54

July 12, 2013 by Lindsay 23 Comments

Hi Friends!

Just popping in for a quick Fitness Friday update for you guys!

fitnessfriday1

Let’s play catchup, shall we?

THURSDAY

IMG_6360

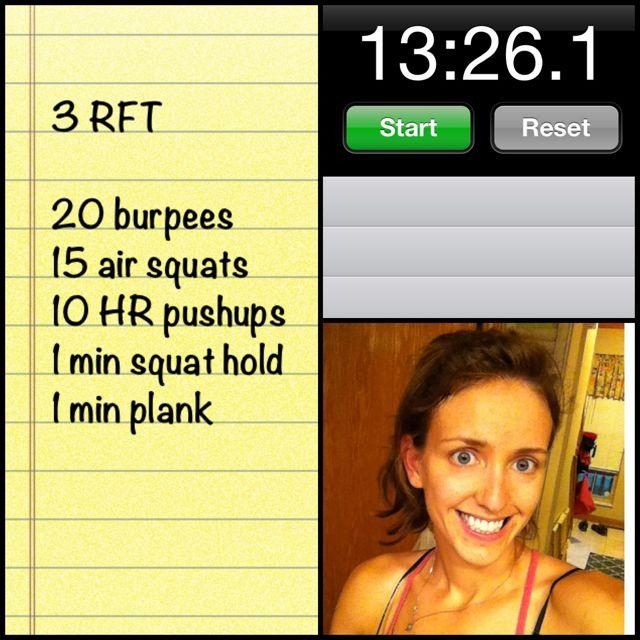
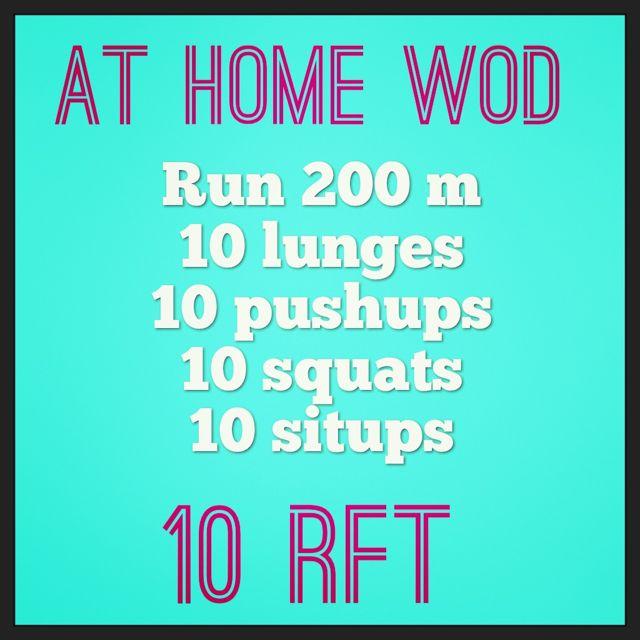
We left off on 4th of July! Our box was closed for the holiday so I made up my own WOD to do in the basement. It was short and sweet but it got the job done.

FRIDAY

IMG_6370

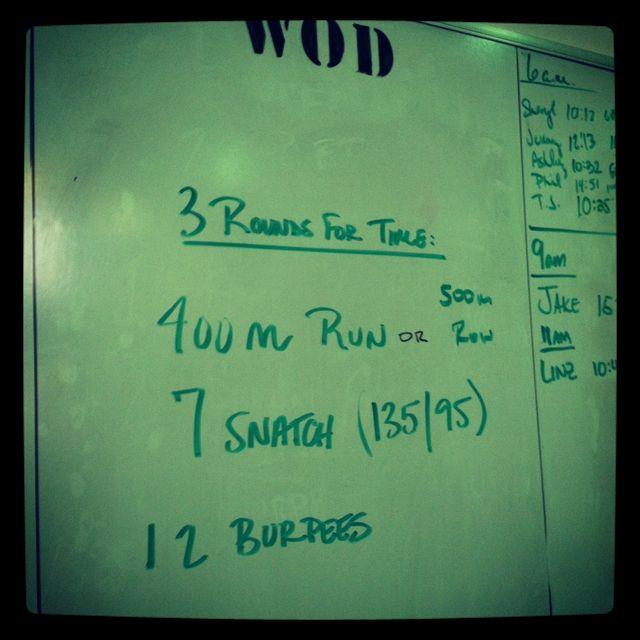
Friday I headed in for a mid-morning WOD during open gym. I did it in 10:42 with 75# snatches and running.

IMG_6386

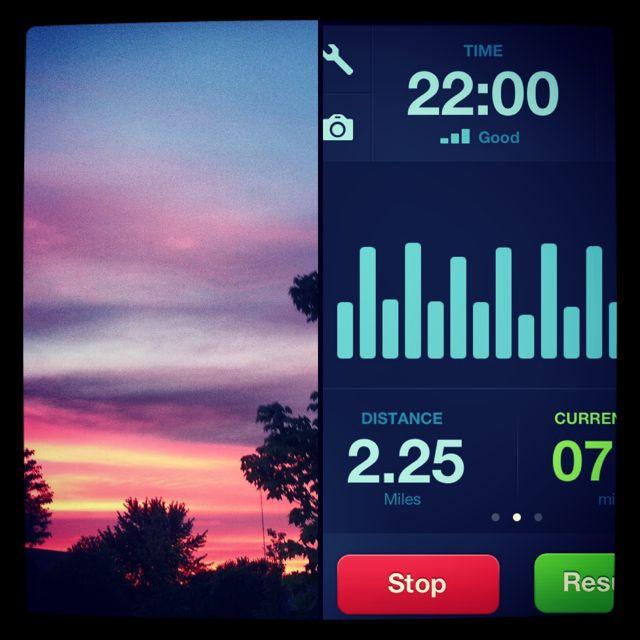
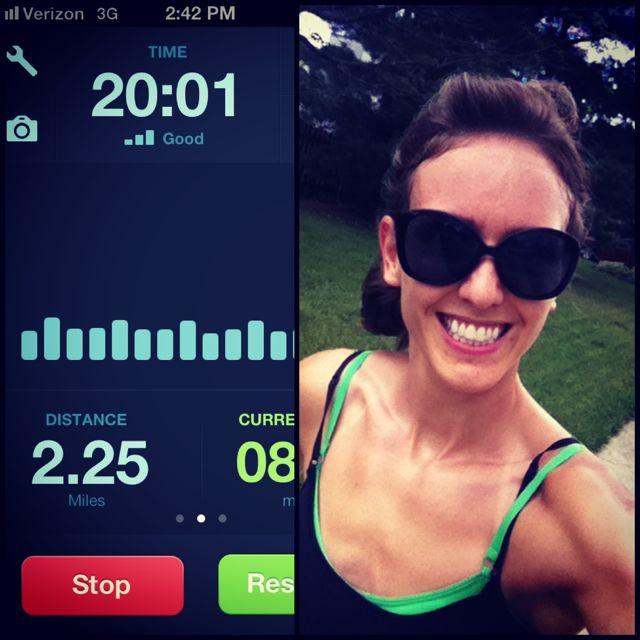
We headed out for happy hour but were home pretty early so I grabbed the dogs and headed out to do some intervals. Walk 1 minute/run 1 minute.

SATURDAY

IMG_6392

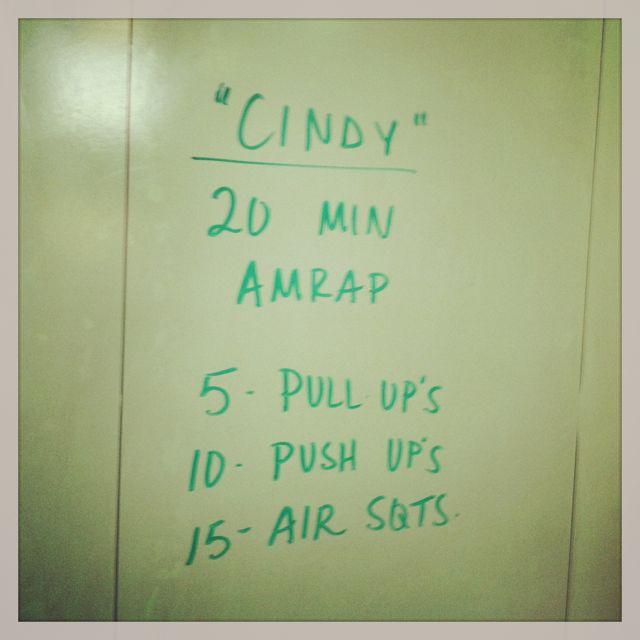
Saturday morning we headed in to do Cindy. It’s a tough benchmark because it looks deceptively simple…but it leaves me sore for days EVERY TIME. This wasn’t my best effort. Got 16 rounds + 2.

IMG_6393

THEN, I hit that 125# clean and jerk that I was struggling with last week. New PR 🙂

IMG_6406

Saturday afternoon it finally stopped raining for a couple hours so I headed out for more intervals. This time I ran 1 minute/walked 30 seconds.

SUNDAY

IMG_6431

Another at home WOD. I did it in the backyard running back and forth between our fence posts and put a towel down for the pushups and situps. Finished in 20:24.

MONDAY

IMG_6461

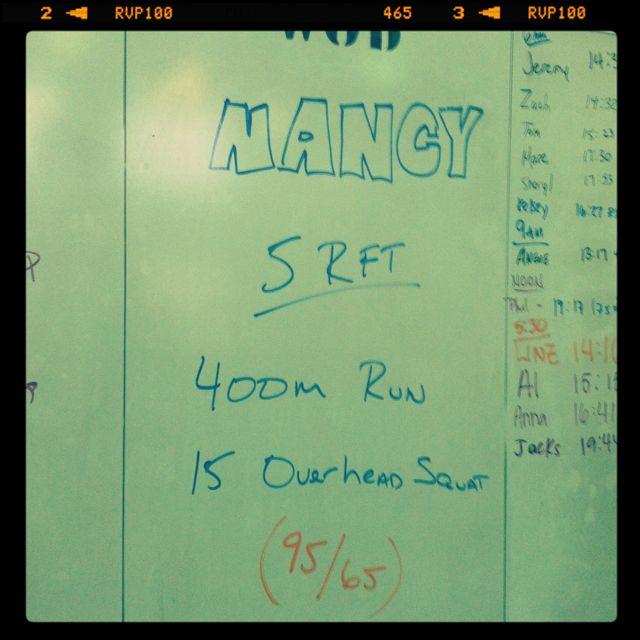
Another benchmark. Crushed it! 14:16 Rx. I love this one because overhead squats are one of my strengths and i’ve been working on my endurance so the running was easier than it has been.

TUESDAY

IMG_6475

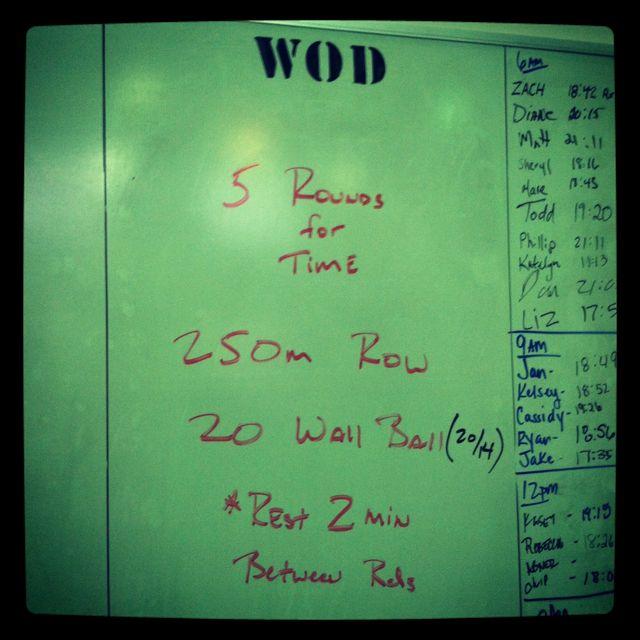
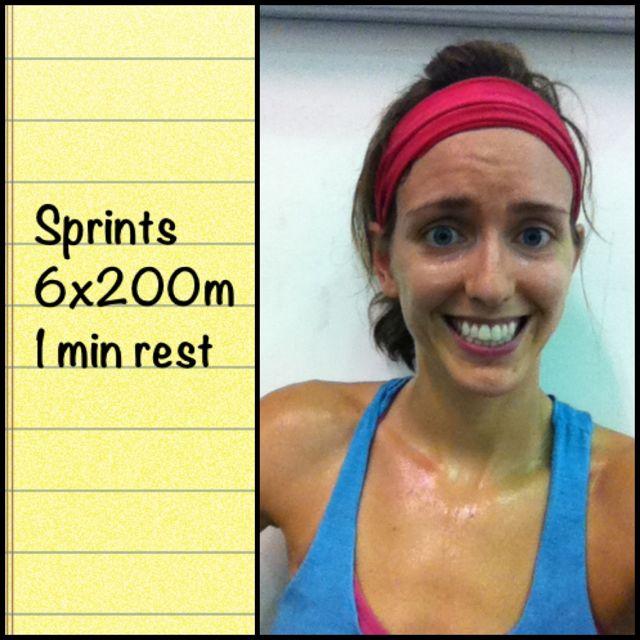
I really pushed myself on this one and ended up doing the workout with no rest between sets AND I used a 20# wallball instead of a 14#. Finished in 12:44. Then I ran some sprints. Sprint 200 meters, rest 1 minute x 6:

IMG_6480

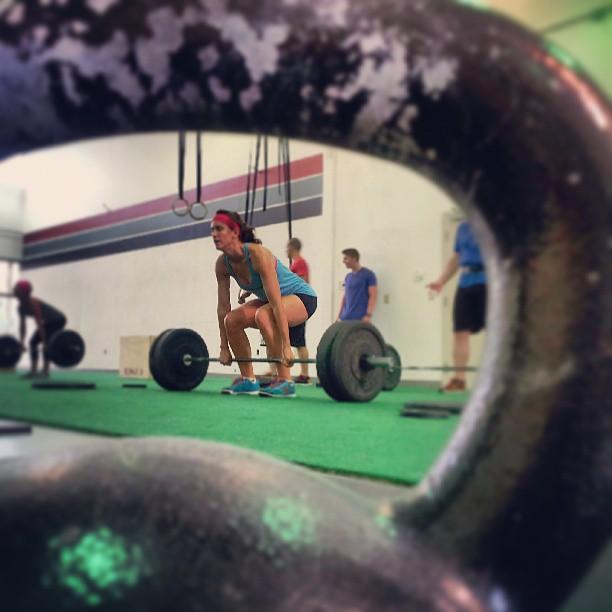
We did deadlifts for the skill/strength and my coach took this fun pic of me!

a1

WEDNESDAY

IMG_6534

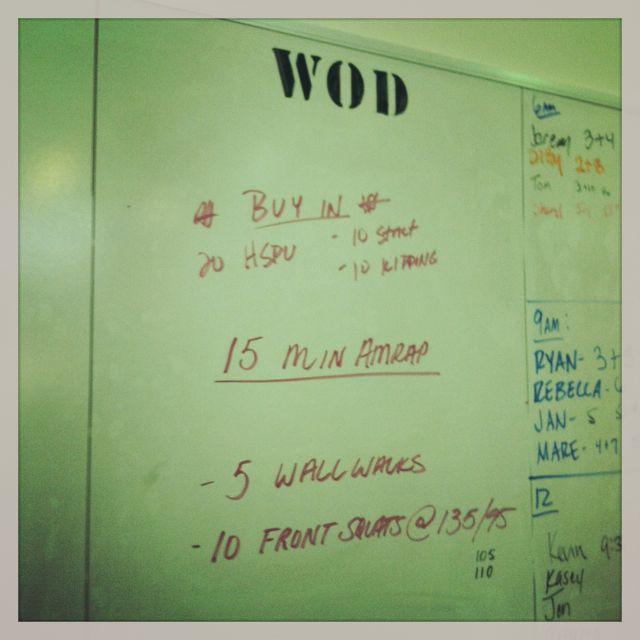
This was supposed to be a rest day, but hubby had a bad day at work and wanted to go in so I dragged myself in after him. Turns out it shoulda been a rest day. It wasn’t my best workout. Walk walks are hands down my least favorite part of crossfit. I still can’t get my stomach all the way to the wall and I’m terrible at getting down from them. The clock started, then you did your 20 handstand pushups…which took me forever because I’m finally doing them with just 1 abmat…and then you started your wall walks/front squats (I did 105#). I got through 3 rounds + 4 and hated every minute of it.

THURSDAY

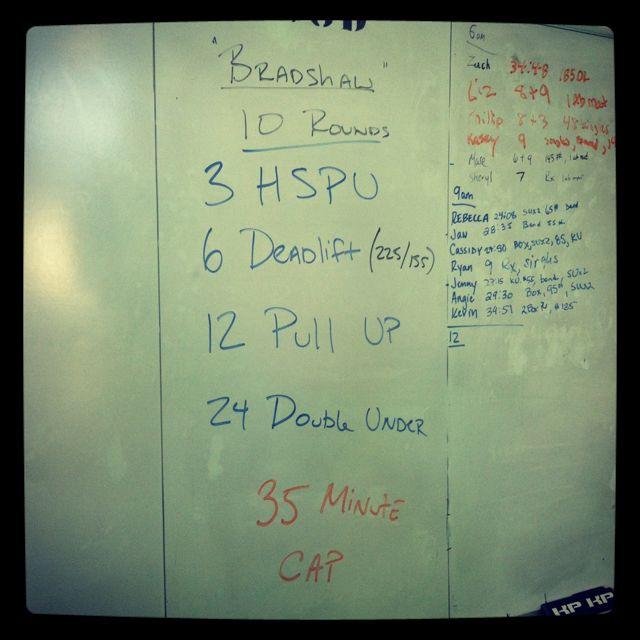
IMG_6556

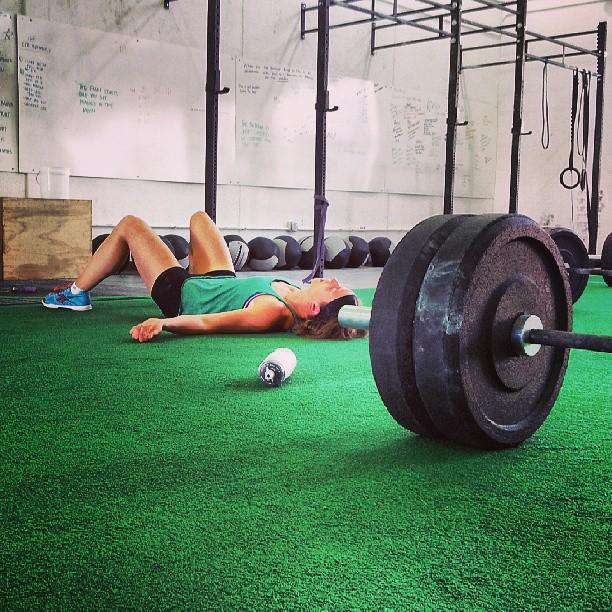
Our coach said we had to do the deadlifts unbroken and my back was SORE so I opted to do 135# instead of 155#. Finished in 27:06. The worst part was the pullups. I tore my hands BIG TIME (i’ll spare you the picture) for the first time in like 6 weeks and it always sucks. I made it through 8 rounds of pullups no problem, but then BOOM! Round 9, rips galore. Here’s how I felt afterwards:

a

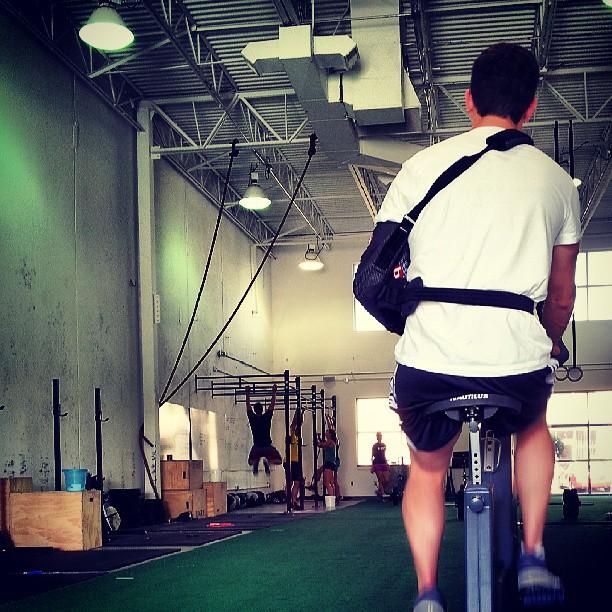
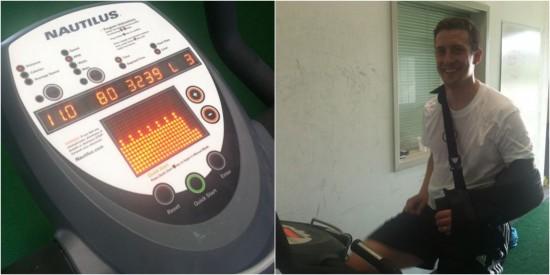
Hubby update: We’re over halfway through his 6 weeks in the sling and he’s totally over it. But he’s doing a good job of wearing it most of the time. He’s frustrated that he can’t do the WODS with us, but he’s been doing pretty well on his own! He’s been doing a lot of  squats, lunges and box stepups holding a medicine ball, plus sit ups and back extensions on the GHD…and he’s been riding the bike! I’m so proud of him.

a2

a3

And today, is a MUCH needed rest day! Can’t wait 🙂

Happy friday, friends! Any fun weekend plans? I’m hoping to get outside since it’s the first time we haven’t had rain in the forecast in 3 weeks!

Enjoy!
–Lindsay–

Filed Under: Workouts

10 More Healthy Breakfast Ideas

July 9, 2013 by Lindsay 38 Comments

Hi Friends!

Let’s talk breakfast again, shall we? Last week I posted 5 Quick, Healthy Breakfast Ideas and it was a big hit! It seems that people always enjoy getting new breakfast ideas. Well, you guys are in luck because I LOVE BREAKFAST and I always have more ideas to share!

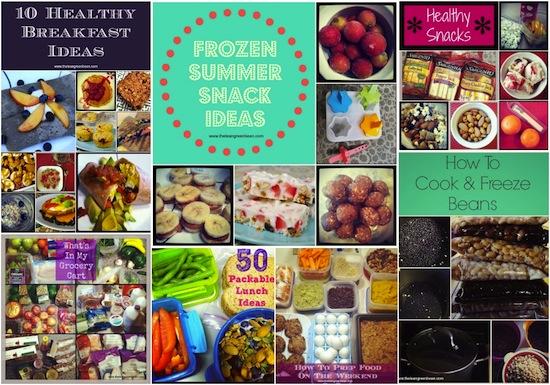
In a breakfast rut? Here are 10 Healthy Breakfast Ideas to try!

So, here are 10 more healthy breakfast ideas for you:

Overnight Oats

overnight oats

Combine 1/3 c oats, 1/3 c milk, 1/3 c Greek yogurt, 1/3 c berries and 2 tsp chia seeds (optional). Let sit in the fridge overnight. In the morning, top with some nuts or nut butter and enjoy! No cooking required 🙂

————-

Breakfast Burrito

breakfast burrito

Scrambled eggs, black beans, peppers and cheese. You can also make ahead of time and freeze (see this post about How To Eat Healthy During the Week for details on how to freeze them), then just microwave to defrost and top with avocado and salsa!

 —————-

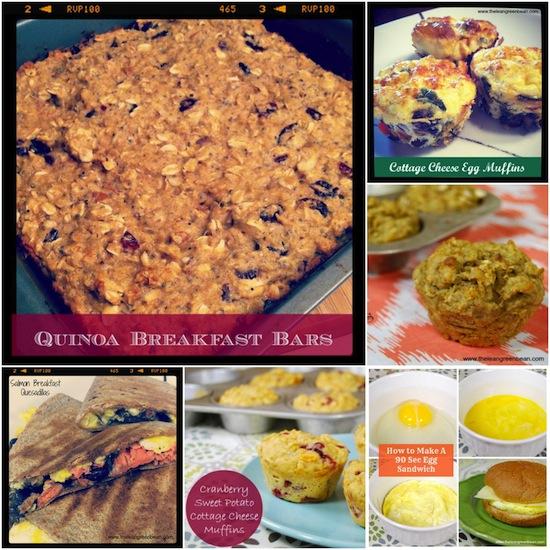
Quinoa Breakfast Bar

quinoa breakfast bar

My hubby’s favorite grab and go breakfast and the only way he’ll eat breakfast during the week! CLICK HERE for the Quinoa Breakfast Bars recipe.

 ————-

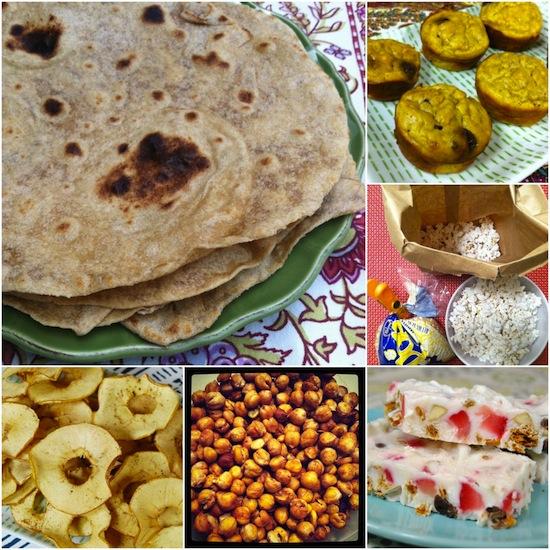
Buckwheat crepes w/ fruit and yogurt

buckwheat crepes

You can pretty much stuff these with whatever you want. CLICK HERE for the Buckwheat Crepes recipe.

—————

Salmon Breakfast Quesadilla

salmon breakfast quesadilla

A great way to use up leftover salmon! CLICK HERE for the Salmon Breakfast Quesadilla recipe!

————

Berry Breakfast Quinoa

berry breakfast quinoa

A fun way to change it up from traditional oatmeal! CLICK HERE for the Berry Breakfast Quinoa recipe.

———–

Sweet Potato Cottage Cheese Muffins

cranberry cottage cheese muffin

A super quick, grab and go breakfast that’s packed with protein! CLICK HERE for the Cranberry Sweet Potato Cottage Cheese Muffin recipe.

—————

Sweet Potato Egg Boats

sweet potato egg boats

This can also be done with half an avocado! CLICK HERE for the Sweet Potato Egg Boats recipe.

————

Cereal & Milk

cereal and milk

Yes, this can be a healthy option. Just be sure to choose a sugar that’s low in sugar and has some protein and fiber to help keep you full!

————-

Pancakes

whole wheat oatmeal pancakes

These are made with greek yogurt for protein and whole wheat flour & oats for fiber! CLICK HERE for the Whole Wheat Oatmeal Pancakes recipe. Other options for pancakes include making a batch with cottage cheese for added protein, or try just combining some oats and a mashed banana and cooking on a griddle. Beware though, I’ve tried the kind that uses cottage cheese, oats and a banana in a blender a couple times now and they always stick terribly to the griddle!

——————

Bonus: 90 sec Breakfast Sandwich

90 sec egg sandwich

Doesn’t get any easier than this, friends. Click here for instructions.

—————

There you go! Hopefully I’ve inspired you to try at least one new breakfast 🙂

Enjoy!
–Lindsay–
PS…Be sure to check out last week’s post for 5 more Quick, Healthy Breakfast Ideas that are ready in 7 minutes or less!

Busy in the morning? Here are 5 quick, healthy breakfast ideas ready in 7 minutes or less!

Filed Under: Breakfast, Food Prep

Fitness Friday 53

July 5, 2013 by Lindsay 17 Comments

Hi Friends!

Happy Friday! Once again, I’m behind on Fitness Friday posts.

IMG_5682

I haven’t updated you guys on my workouts since before hubby had his surgery! Here are some of the workouts I’ve been doing lately:

ff2

1. 12:36 with 1 abmat on a 5# plate for hspu and 24 inch box jumps plus front squats and single leg deadlifts
2. Working on that endurance: run 400m + row 500m x 4 with 2 min rest btwn each
3. One of my fav benchmark workouts: Improved my reps from 244 in January to 278 in 3 rounds!
4. Another one I enjoy. 31:11 – don’t quite get my knees all the way to my elbows but did everything else rx. We subbed good mornings for back extensions. I did them with the 45# bar

ff3

1. Partner wod for hubby’s last workout before surgery. Our time was 20:06 for the #wod and 7:42 for the 2000m partner row.
2. Workout frands
3. Two days after hubby’s surgery. So rough when you’re tired- 17:16 Rx
4. I LOVED this WOD! 15 min of EMOM 3,2,1 squat cleans and then crushed the #wod – 8:25 rx

ff4

1. A saturday morning partner WOD:  we did 3 rounds plus a 100m farmers carry & 100 DUs for a cash out
2. Went to the sealfit endurance class at my friend’s box. This partner deck of cards workout kicked my ass: 37:33 rx
3. Holy sweatfest!!! Got a 120# clean and jerk PR (previous was 95# and i was SO close to 125#!!) and I cleaned 125# (5# more than my previous 1RM) at least 10 times! THEN did the #wod! 9 rounds + 8- killed it!
4. Hated this one. So hard. 11:52 with 75#

ff5

1. Every crossfitter loves to hate fran. Crushed my previous record and got a new #fran PR baby! 6:17!!!! Previous was 8:53. So proud of myself!
2. Front squats and double unders at open gym. 105# front squats. 24:15. Not a good one to do on your own. Went slowwwww but got it done!
3. Another sealfit class: 6 + 1 – Rx+ I used a 20 inch box and a 20# medball & 95# clean and jerk
4. Squeezed in a 6am class before going out of town for the funeral: total reps per move: 23/57/33/45

I took Tuesday and Wednesday off. I had plans to go try a new box while I was in Maine but it just didn’t work out logistically. Yesterday our box was closed for 4th of July so I put together my own WOD at home:

photo (15)

Today I can’t wait to get back to the box and get back at it!

How were your workouts this week?
Enjoy!
–Lindsay–

Filed Under: Workouts

Celebrating Grandpa

July 4, 2013 by Lindsay 38 Comments

Hi Friends-

Hubby and I have been out of town for the past couple of days, spending time with family and celebrating the life of my grandfather.

IMG_6274

We flew out to Portland, Maine on Monday afternooon and got home late last night. My grandparents lived in Massachusetts while I was growing up, and my aunt lives in Portland, so every summer my mom, sister and I would pack our bags and spend a couple of weeks with them on the east coast. When my grandpa got older, we moved him into an assisted living facility in Portland, so that’s where we had the funeral. I hadn’t actually been to Maine in about 11 years…since right before my senior year of high school, so it was nice to be able to get out there and spend some time with family and revisit some of the places I used to go growing up.

IMG_6217

We dropped these two off at the vet. The place we usually board them was all booked up due to 4th of July. Luckily this was only for a few days. It’s always so hard to leave them.

maine1

We survived hubby’s first time traveling with his sling, and stayed in a cute little bed and breakfast up the road from where my parents and sister were staying at a family friend’s house.

IMG_6240

The service was Tuesday morning. It was very small, mostly just family since he outlived almost all of his friends at age 93…but it was very well done.

maine2

We headed back to have lunch with the family and Jake!

maine3

Then came my favorite part of the trip. My grandpa was a bit of a packrat and he saved a TON of stuff over the years. We spent several hours going through a couple of boxes of amazing old things. He was in the navy and he and my mimi wrote each other every day during the war. They saved ALL of the letters so there was just folders and folders of amazing love letters to read. Plus things like old chemistry tests, report cards and other stuff from his childhood and his time in the navy. We also found out he was at the game in the 1956 World Series when Larsen pitched the only perfect game in series history!

maine4

Plus there were tons of amazing photos of my grandparents when they were younger. They were SO adorable and so in love. It was fun to look at all the pictures with my mom and aunt and hear more stories about their family.

IMG_6289

This was by far the best thing we found. A letter from my grandpa’s friends to my grandma encouraging her to marry him 🙂

IMG_6295

We also found some pictures of little Bean!

maine5

Tuesday night we went out to dinner and met up with one of my oldest friends, who recently moved back to Portland, for a beer. Wednesday we spent the day with my parents and sister wandering around, doing a little shopping and fulfilling my desire for a lobster roll! Then we headed home.

I’m grateful we were able to make it out there and spend a few days celebrating the life of my grandpa, a wonderful man who meant so much to a lot of people!

Hope everyone is having a safe & happy 4th of July and that you’re able to enjoy some time with family and friends.

Enjoy!
–Lindsay–
 

Filed Under: Uncategorized

5 Quick, Healthy Breakfast Ideas

July 2, 2013 by Lindsay 57 Comments

Hi Friends!

If you follow me on Instagram, you may have noticed that I spent last week posting several  new breakfast ideas. As a Registered Dietitian, I’m always looking to help people make healthy living choices. One of my top recommendations is that EVERYONE eat SOMETHING for breakfast.

Are your mornings super busy? That's no excuse to skip breakfast! Here are 5 quick, healthy breakfast ideas ready in 7 minutes or less!

Since the most common excuse I hear is that people don’t have time in the morning, here are 5 breakfast that can be ready in 7 minutes or less:

 Oatmeal

IMG_6018

This is 1/2 c rolled oats cooked with 1/4 c banana slices and 1/2c skim milk. Topped with 2 tbsp pb, 1/4 c blueberries, 1/2 oz almonds & a few chocolate chips!

Fried Eggs & Pb Toast

IMG_6032

This is a nectarine, whole wheat toast with 1.5 tbsp peanut butter, 2 Tbsp avocado and two fried eggs w/ 1 tbsp salsa! Protein, whole grains and fruit for your carbs and healthy fats!

Quinoa Parfait

IMG_6055

Protein packed breakfast- layer 1/4 c leftover quinoa or wheatberries, 2-3 oz plain Greek yogurt, 2 tbsp defrosted/smashed strawberries. Repeat once. Top with 10-12 almonds, another 1/4 c berries and 2 tbsp granola!

Green Smoothie

IMG_6091

Perfect for busy mornings. Combine some ice, frozen fruit, plain Greek yogurt and a couple handfuls of spinach or kale in a blender. Whirl until smooth and drink up! Add some ground flax seeds or chia seeds if you want.

Banana Sandwich with Eggs & Energy Balls

IMG_6182

Super Simple: banana with pb, hard boiled eggs and energy balls (2 c chopped dates, 1.5 c almonds, 1/2 c pb in food processor until combined, then formed into balls)

So there you have it! Most of these can be made in under 5 minutes…the one with the eggs takes the longest and I timed it…mine was done in 7 minutes! Everyone can get up five minutes early to make time for breakfast. It’ll help jump start your metabolism, plus give you energy and help you focus!

And remember, you don’t have to eat traditional breakfast foods. If you aren’t a fan of eggs or yogurt, you could have a turkey sandwich, or some leftovers from dinner the night before. Just focus on getting a balance of lean protein, healthy fats and complex carbs!

Let’s chat: What’s your favorite breakfast?

Enjoy!
–Lindsay–
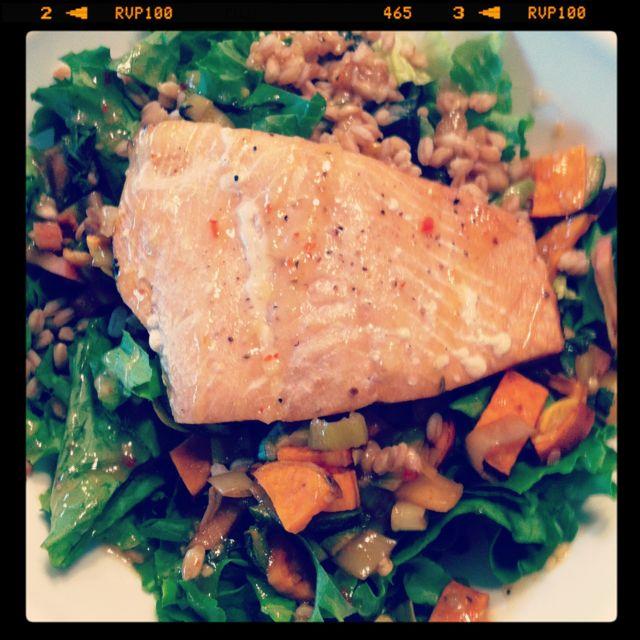
Filed Under: Breakfast, Food Prep

June Foodie Penpals Reveal Day

June 28, 2013 by Lindsay 19 Comments

Hi Friends!

Time for another Foodie Penpals Reveal Day!

FPP-post

This month I was super lucky to receive my package from my girl Melissa. We bond over Crossfit all the time on Twitter and I just love her. Plus she totally hooked me up with an amazing FPP box. Check out what I got:

fpp

Kale Chips
Pineapple Chips- so good!
Sunflower seed butter- a fun change from my typical pb
Fat Cat Purry-Purry Sauce- pretty much the best name ever, right? I’m so excited to try this! Love that it’s super low in sodium.
HOMEMADE COOKIES- enough said.

I got my box a couple days after hubby had his surgery. I was exhausted and grumpy and finding those cookies in my package was just about the best thing ever! Delicious.

Thank you so much for the amazing package Melissa!!!!!

——————-

And now it’s time for some details about Foodie Penpals.  In case you’re a new reader, here’s a reminder of what the program is all about:

-On the 5th of every month, you will receive your penpal pairing via email. It will be your responsibility to contact your penpal and get their mailing address and any other information you might need like allergies or dietary restrictions.
-You will have until the 15th of the month to put your box of goodies in the mail. On the last day of the month, you will post about the goodies you received from your penpal! 
-The boxes are to be filled with fun foodie things, local food items or even homemade treats! The spending limit is $15. The box must also include something written. This can be anything from a note explaining what’s in the box, to a fun recipe…use your imagination!
-You are responsible for figuring out the best way to ship your items depending on their size and how fragile they are. (Don’t forget about flat rate boxes!)
-Foodie Penpals is open to blog readers as well as bloggers. If you’re a reader and you get paired with a blogger, you are to write a short guest post for your penpal to post on their blog about what you received. If two readers are paired together, neither needs to worry about writing a post for that month. 
-Foodie Penplas is open to US, Canadian & European residents.  Please note, Canadian Residents will be paired with other Canadians only. Same with Europeans. We’ve determined things might get too slow and backed up if we’re trying to send foods through customs across the border from US to Canada and vice versa. 

If you’re from the US or Canada and are in participating for July, please CLICK HERE to fill out the participation form and read the terms and conditions. 

You must submit your information by July 4th as pairings will be emailed on July 5th!

*If you’re from Europe, please CLICK HERE to signup.

——————

Enjoy!
–Lindsay–
Filed Under: Uncategorized

Crockpot Rotisserie Chicken

June 25, 2013 by Lindsay 50 Comments

Have you ever tried crockpot rotisserie chicken? It’s cheap and easy! Learn the best ways to cook a whole chicken and what to make with rotisserie chicken!

crockpot rotisserie chicken

*Recipe and photos updated 1/2022*

Hi Friends!

Let’s talk about this crockpot rotisserie chicken! Did you already know you can make a rotisserie-style chicken in the crockpot? It’s not actually a rotisserie chicken because it’s just sitting in your crockpot, not spinning, but the end result is similar!

You get fall-off-the-bone tender meat with very little effort on your part. Plus, it’s healthier than the rotisserie chickens you get at the store (although those certainly are delicious, aren’t they?!).

What to make with rotisserie chicken

The best thing about cooking a whole chicken this way is the amount of meat you cook at once. Depending on the size, you should have enough for 2-3 meals for the family, which makes it ideal for food prep!

Here are a few recipes you could make using your chicken:

  • Pesto Chicken Tortellini
  • Gluten-Free Chicken Ramen
  • White Chicken Chili
  • Baked Ranch Chicken Taquitos

step by step crockpot rotisserie chicken

How to make crock pot rotisserie chicken

Here’s how you do it in just a few simple steps:

  1. Place foil balls in the crockpot.
  2. Pat the chicken dry and sprinkle with seasonings. 
  3. Place breast-side down in the crockpot with a little water and cook on low.

Here are the full directions:

Print

Crockpot Rotisserie Chicken

crockpot rotisserie chicken
Print Recipe

5 Stars 4 Stars 3 Stars 2 Stars 1 Star

No reviews

This crockpot rotisserie chicken is the easiest way to cook a whole chicken to use for multiple meals.

  • Author: Lindsay L
  • Prep Time: 5 minutes
  • Cook Time: 4 hours
  • Total Time: 4 hours 5 minutes
  • Yield: 4-6 1x

Ingredients

Scale
  • 1 whole young chicken (5–6 pounds)
  • 1 tsp garlic powder
  • 1 tsp paprika
  • salt & pepper
  • 1/2 cup water

Instructions

  1. Tear four sheets of aluminum foil, scrunch them up into balls and place them in the bottom of the crockpot.
  2. Remove the giblets from the chicken and pat the chicken dry with a paper towel.
  3. Sprinkle with seasonings.
  4. Place the chicken breast side down on top of the foil balls. Add 1/2 cup water to crockpot. Cook on low for 8-10 hours or until the meat easily pulls off the bone.
  5. Optional step- remove all the meat, fill the crockpot with water and cook on low another 10 hours to make chicken stock.

Did you make this recipe?

Tag @theleangreenbean on Instagram

Chicken can also be cooked on high for 4-5 hours but I’ve found that cooking it on low and also cooking it breast-side down yields the best results.

Have you ever tried crockpot rotisserie chicken? It's cheap and easy! Learn the best ways to cook a whole chicken and what to make with rotisserie chicken!

Notes:

  • The aluminum foil balls help elevate the chicken so it isn’t just sitting on the bottom of the crockpot.
  • The seasonings listed above are just suggestions. Use your own favorite spices, or try adding some grated garlic or lemon zest to the mix!
  • The skin will not get crispy in the crockpot. If you’re looking for crispy skin, the oven is definitely the way to go.

Enjoy!
–Lindsay–

Filed Under: Dinner, Food Prep, Slow Cooker Tagged With: Chicken

How to Hard Boil Eggs in the Oven

June 21, 2013 by Lindsay 76 Comments

Did you know you can make perfect hard-boiled eggs without boiling water? Let me show you how to hard boil eggs in the oven! 

Hi Friends!

Things are super busy around here so I’m just popping in with a quick tip. I’m certainly not the first one to use this trick, but I shared it on Instagram last week and got a huge response from people who didn’t know about it, so I thought I’d share it here to spread the knowledge!

How To Hard Boil Eggs In The Oven

I want to show you how to hard boil eggs in the oven. Yes, you can get perfectly cooked “hard boiled” eggs without even boiling water! It couldn’t be easier!

Did you know you can use the oven to hard boil or cook your eggs? Give this fool-proof method a try !

Here’s what you do:

1. Put your eggs in a muffin tin. You don’t need to put any water in the tins or anything. Just set them in there. If you want to, you can also stand them upright using mini muffin tins.
2. Put the pan in the oven and bake at 350 degrees for 30 minutes.
3. Remove and put the eggs in a bucket of ice water for at least 10 minutes.

The only tricky part about this method is that the cooking time will vary from oven to oven. So, if your oven runs hot, you may need to cook them at 325. However, for my oven, if I cook them at 325 for 30 minutes, they don’t cook all the way. So I cook mine for 30-32 minutes at 350 degrees. So, it may take a couple test batches, but let me tell you, once you a little trial and error, this method is AMAZING. So easy and they’ll cook perfectly every time!

Just a word of advice. Do a SMALL test batch until you figure out your oven temp. Don’t, say, test 18 eggs all at once if you’re not sure what temperature to use…not that I did that or anything. Luckily eggs are cheap!

The eggs might get some brown spots as they bake:

egg

Don’t worry, they rinse off when you put them in the ice bath!

[clickToTweet tweet=”Let @leangrnbeanblog show you how to make perfect hard boiled eggs in the oven! ” quote=”Let @leangrnbeanblog show you how to make perfect hard boiled eggs in the oven! “]

Happy baking.

Enjoy!
–Lindsay–
Filed Under: Food Prep, Snack

How To Sprout Lentils

June 20, 2013 by Lindsay 100 Comments

Can you sprout lentils at home? You can! Learn how to sprout lentils at home and you can enjoy lentil sprouts benefits with very little extra work!

Hi Friends!

Just popping in with a quick little post today about sprouting. More specifically, I want to tell you how to sprout lentils!

How To Sprout Lentils At Home

Learn how to sprout lentils! It's super easy and you can enjoy the added nutritional benefits with hardly any extra work!

So, you may be wondering about sprouting lentils in a jar- how to make lentil sprouts, lentil sprouts benefits etc! 

Learn how to sprout lentils! It's super easy and you can enjoy the added nutritional benefits with hardly any extra work!

Sprouted lentils vs lentils:

  • Lentils contain phytic acid, which can be difficult to digest. Sprouting neutralizes the phytic acid, which means more vitamins and minerals can be absorbed by your body as they’re digested.
  • When you sprout lentils, you’re actually starting the germination process, which changes the composition of the lentils. Sprouting increases the amounts of vitamins and minerals in the lentils, especially B vitamins and carotene.
  • Sprouting produces Vitamin C.
  • Like many legumes, lentils have sugars that create intestinal gas. Sprouting helps break down some of those sugars.

Sounds pretty good, right? What’s even better is that sprouting is super easy to do! It requires very little equipment and hardly any effort on your part. Although you can buy special sprouting jars, all you really need is a mason jar and some light fabric or cheesecloth to go over the top.

While you can use any lentils you find at the grocery store, especially if you’re going to cook them afterward. If you’re planning to eat them raw, you may want to consider buying from a site like Sprout People to make the process as safe as possible. 

Sprouting Lentils In A Jar

Learn how to sprout lentils! It's super easy and you can enjoy the added nutritional benefits with hardly any extra work!

How to sprout lentils:

So let’s learn how to grow lentils with sprouts!

1. Put the dry lentils in a jar. Add water and let sit overnight. Remember that the lentils will eventually almost triple in size so be sure your container is big enough. I used about 2/3 cup dry lentils in a 1 quart mason jar and added about 2 cups water, and there was plenty of room. Don’t put an airtight lid on the jar. I used a piece of thin cloth (cheesecloth would be perfect) and secured it with the ring part of the jar top.
2. Drain the water out of the jar, replace the cloth and let the jar sit on the counter, out of direct sunlight. Every 12 hours, add water to the jar, give it a swirl and then drain it out again.
3. I started seeing little tails in 24-36 hours and decided they were long enough after about 2 days. Depending on the amount of lentils you’re sprouting, this process could take up to 4 days.
4. When they’re done, spread them on a paper towel to let them dry out a little bit, then store in an airtight container in the fridge.

How to use sprouted lentils:

You can eat the sprouted lentils plain for a snack, use them as a salad topping, or add them to whatever dish you would add non-sprouted lentils to when you’re cooking.

If you’re feeling ambitious like I was, you can make some homemade bread and add some sprouted lentils to it! Try this Sprouted Lentil and Grain Bread or this Sprouted Bread recipe.

Or you can use them in any recipe that calls for cooked lentils like soups, curries, tacos etc.

Learn how to sprout lentils! Sprouting is super easy and you can enjoy the added nutritional benefits with hardly any extra work!

If you want more details on sprouting lentils and other things, my friend Cassie is the expert. Check out her post Sprouting 101: How To Sprout Anything and Why. Wondering how to sprout mung beans in a mason jar? Check out her post for details. Spoiler – it’s the same method.

Let’s chat:

Have you sprouted before? Are you willing to try it?

Enjoy!
–Lindsay–

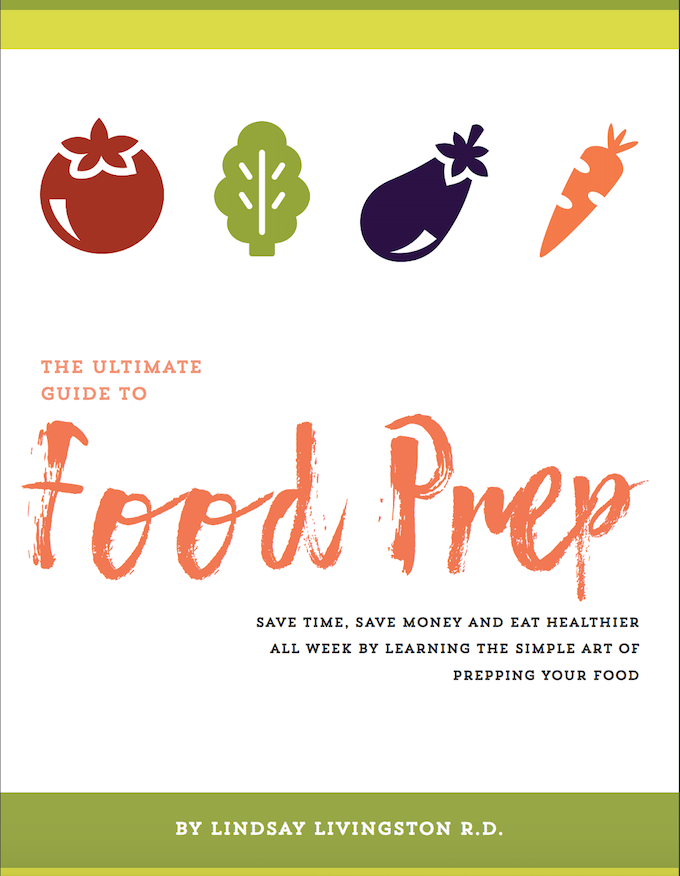
This would make a great addition to your weekly food prep session! If you liked this post, you’ll love my ebook – The Ultimate Guide To Food Prep. It dives into even more detail about how to food prep, troubleshoots common problems and provides tons of tips to make it easier! Click the image below for more details!

The Ultimate Guide To Food Prep Ebook

Filed Under: Dinner, Gluten-Free Tagged With: Lentils

11 Healthy Living Tips

June 13, 2013 by Lindsay 112 Comments

Hi Friends!

Today I wanted to share an article with you guys that I wrote for Food and Nutrition Magazine, the magazine of The Academy of Nutrition and Dietetics! I shared the link yesterday so some of you may have read it, but I wanted to share a jazzed up version of it (with pictures) here as well because it covers all of my most common recommendations and tips that I give to anyone trying to live a healthier lifestyle!

Healthy living doesn't have to be complicated. Here are 11 Healthy Living Tips from a Registered Dietitian that you can start practicing today!

Although I don’t think that there’s a one-size-fits-all diet, I do think there are some general principles that everyone should practice when it comes to healthy living.

Here they are:

IMG_2626

1) Eat Enough Calories
Everyone’s calorie needs are different, and it’s important to not go overboard, but not eating enough sends your body into starvation mode and also makes it harder to lose weight. Figure out how many calories YOUR body needs and strive to eat that amount daily by creating balanced meals and choosing healthy snacks.

IMG_3267

2) Practice Moderation
Allow yourself to eat the things you really want every once and a while. It’s perfectly fine to enjoy things like ice cream, cookies or a latte with whipped cream. Just don’t make it an every day occurrence. I may be an RD, but I love a big bowl of froyo topped with oreos and m&ms every once and a while!

IMG_5431

3) Eat Breakfast
Skipping breakfast does nothing but lead to low blood sugar, moodiness and overeating later. Just remember that you aren’t limited to “traditional” breakfast foods. If you like leftover chicken and rice for breakfast, go for it! If you’re an oatmeal fan, more power to you! Focus on putting together a breakfast with complex carbs, lean protein and healthy fats. It will increase your metabolism, energy and focus.

IMG_5216

4) Limit Processed Foods
Processed foods are almost always packed with sodium, sugar, artificial ingredients and other things your body doesn’t need. Eat lots of fruits and vegetables, lean proteins and healthy fats like avocado and nut butter. Experiment in the kitchen and learn to make your own versions of your favorite processed foods like granola bars, crackers, etc.

IMG_4942

5) Drink Water
Remember that the calories in your drinks count towards your total calories for the day! Choose water most of the time and remember that if you’re thirsty, you’re already dehydrated. Take a water bottle with you everywhere to remind you to drink more often. And use additions like berries, mint or lemon to flavor your water if you don’t like it plain.

IMG_3138

6) Eat More Vegetables
Make an effort to increase your vegetable intake every day, especially the non-starchy kind. Also try to eat a variety of different vegetables and colors so that you get all the different nutrients they offer.

IMG_5338

7) Cook More at Home
When you do the cooking, you control the ingredients. Cook extra for dinner and pack the leftovers for lunch. If you do eat out, be smart about it. Watch your portion sizes, save half for later, order extra veggies instead of starches, and ask for things like dressings and sauces on the side.

IMG_5055

8) Buy Local and Choose Organic (When Possible and Practical)
Shop your local farmer’s market. You’ll often find fruits and vegetables that were picked that very day and haven’t lost their nutrients while traveling or sitting on a shelf. Know the “dirty dozen” (foods that have the most pesticide residue) and focus on buying organic versions of those fruits and vegetables as well as possibly dairy and meat products.

IMG_2828

9) Be Aware of What You’re Eating
Learn proper portion sizes and take the time to learn about the quality of the foods you’re eating and where they come from. Pay attention to how often you’re eating and make sure you’re not doing so out of boredom.

IMG_4976

10) Be Physically Active
Physical activity can help control your blood pressure, cholesterol and triglyceride levels, as well as your weight. It can also help improve your brain function, concentration and sleep quality. Whether it’s running, crossfit, basketball or walking the dog…get yourself up and moving every day!

IMG_2941

11) Sleep Enough
Aim for eight hours every night. To help meet this goal, power down and disconnect from your electronics at least one hour before bedtime and focus on more calming activities like meditation, reading or journaling. When you’re tired, you’re more likely to eat poorly — so make an effort to get enough sleep each night.

If you’re looking to improve your health, these 11 simple ideas are a great place to start! Don’t overwhelm yourself  by trying to tackle them all at once. Instead, choose a few to work on immediately and slowly add more as they turn into healthy habits.

Let’s chat:
What are some other healthy living tips you would add to this list?!

Enjoy!
–Lindsay–

Filed Under: Uncategorized

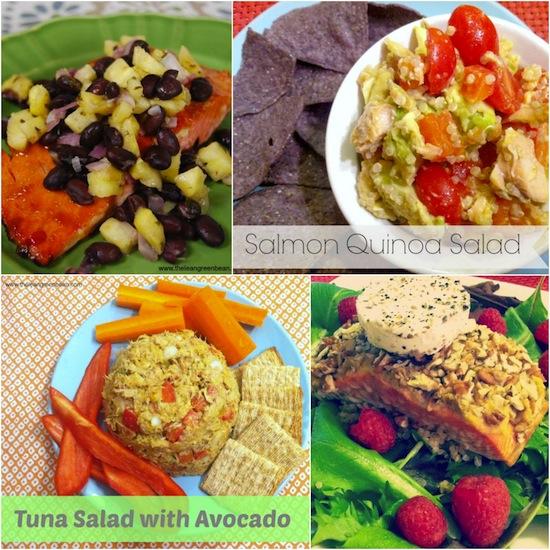
Tuna Salad with Avocado

June 11, 2013 by Lindsay 38 Comments

Hi Friends!

This recipe has been a long time coming. I finally got my act together so that I could share the best tuna salad recipe with you. It’s one of my staple lunch/dinner/snacks and many of you have asked for the recipe!

Tuna Salad with Avocado 

This tuna salad is protein packed and adding avocado gives it a dose of heart-healthy fats as well! The perfect lunch!


A few things you should note. I measured the ingredients because I know people will ask, but this is not an exact science. I don’t usually measure when I make it. You can easily add in more ingredients or leave some out and it will still taste just fine! You could also make this with canned chicken. Also, it’s impossible to make tuna salad look visually appealing.

Print

Tuna Salad with Avocado

tuna
Print Recipe

5 Stars 4 Stars 3 Stars 2 Stars 1 Star

No reviews

Dress this lunch staple up or keep it simple, either way this recipe is great when you need a healthy meal in a snap.

  • Author: Lindsay L
  • Prep Time: 5 minutes
  • Total Time: 5 minutes

Ingredients

Scale
  • 2 cans low-sodium tuna (packed in water)
  • ½ c avocado (1 medium Hass avocado should do the trick!)
  • ¼ c hummus (Sabra Pine Nut is my favorite!)
  • ¼ c chopped onion (white, red, yellow or green)
  • ½ c chopped red bell pepper
  • 3 Tbsp salsa
  • 1–2 tsp curry powder
  • • ½ tsp cayenne pepper
  • • squeeze of lemon juice
  • • Optional:
  • • ½ c cooked quinoa
  • • 2-3 chopped hard boiled eggs

Instructions

  1. Combine the tuna, avocado & hummus in a bowl and mix well.
  2. Add remaining ingredients and stir to combine.
  3. Taste and adjust seasonings.

Did you make this recipe?

Tag @theleangreenbean on Instagram

3.2.1255

Let’s chat:

Do you like tuna salad? How do you make yours?

Enjoy!
–Lindsay–

 

Filed Under: Lunch Tagged With: Avocado

  • « Go to Previous Page
  • Page 1
  • Interim pages omitted …
  • Page 46
  • Page 47
  • Page 48
  • Page 49
  • Page 50
  • Interim pages omitted …
  • Page 65
  • Go to Next Page »

Primary Sidebar

Lindsay Livingston The Lean Green Bean Healthy Living Tips and Tricks

I'm a Registered Dietitian and mom of three from Columbus, Ohio. I use this blog to share simple, healthy recipes, nutrition tips, and an honest glimpse of motherhood!

Learn More →

Questions? Comments? Email me: [email protected]

The Lean Green Bean Facebook The Lean Green Bean Instagram The Lean Green Bean Pinterest The Lean Green Bean Twitter The Lean Green Bean Feed
footer-logo
The Lean Green Bean Facebook The Lean Green Bean Instagram The Lean Green Bean Pinterest The Lean Green Bean Twitter The Lean Green Bean Feed
Recipes

Breakfast
Dinner
Snack
Slow Cooker

Kids

Cooking With Kids
Favorite Gifts
Toddler Meals
Indoor Activities

Resources

Easy Packed Lunches for Kids
Dinner Spark
Snack Spark
Ultimate Guide to Food Prep

About

Meet Lindsay
Become an RD
Work with Me

The Lean Green Bean is a participant in the Amazon Services LLC Associates Program, an affiliate advertising program designed to provide a means for sites to earn advertising fees by advertising and linking to amazon.com.
Read the full privacy and disclosure policy here.

Copyright © 2022 · The Lean Green Bean

table talk series

Learn how food affects your body.

Get my free Table Talk email series where I share bite-sized nutrition information about carbs, protein, and fat, plus bonus information about snacks and sugar!

[email protected]