• Skip to main content
  • Skip to primary sidebar

Learn how food affects your body. Get Free Nutrition Info Today

the-lean-green-bean-logo
  • Home
  • Recipes
  • Kids
  • Resources
    • Ebooks
    • Food Prep
    • Videos
    • Snack Round-Ups
    • Gift Guides
  • About
    • Become An RD
    • Work With Me
  • Search
the-lean-green-bean-logo
  • Home
  • Recipes
  • Kids
  • Resources
    • Ebooks
    • Food Prep
    • Videos
    • Snack Round-Ups
    • Gift Guides
  • About
    • Become An RD
    • Work With Me
  • Search

blog

Blizzard Bites

November 21, 2013 by Lindsay 41 Comments

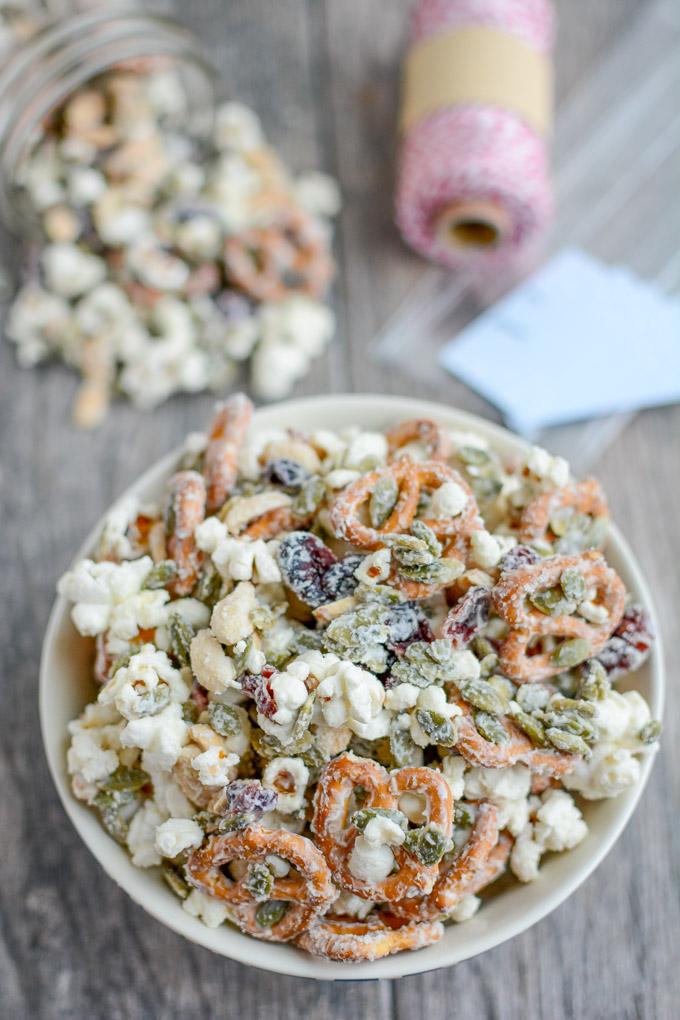
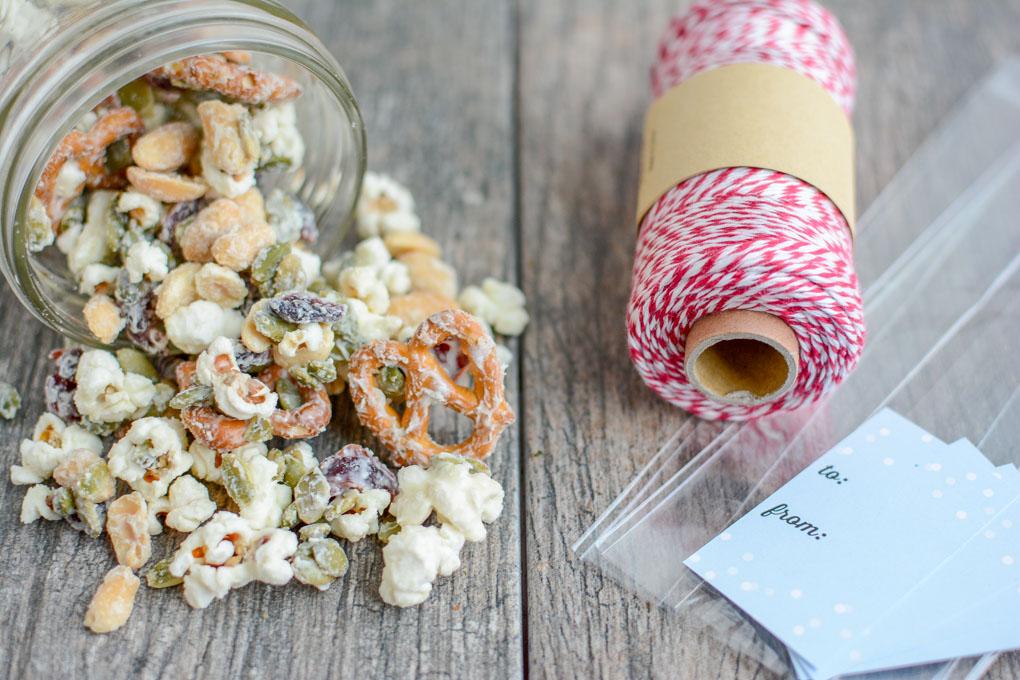
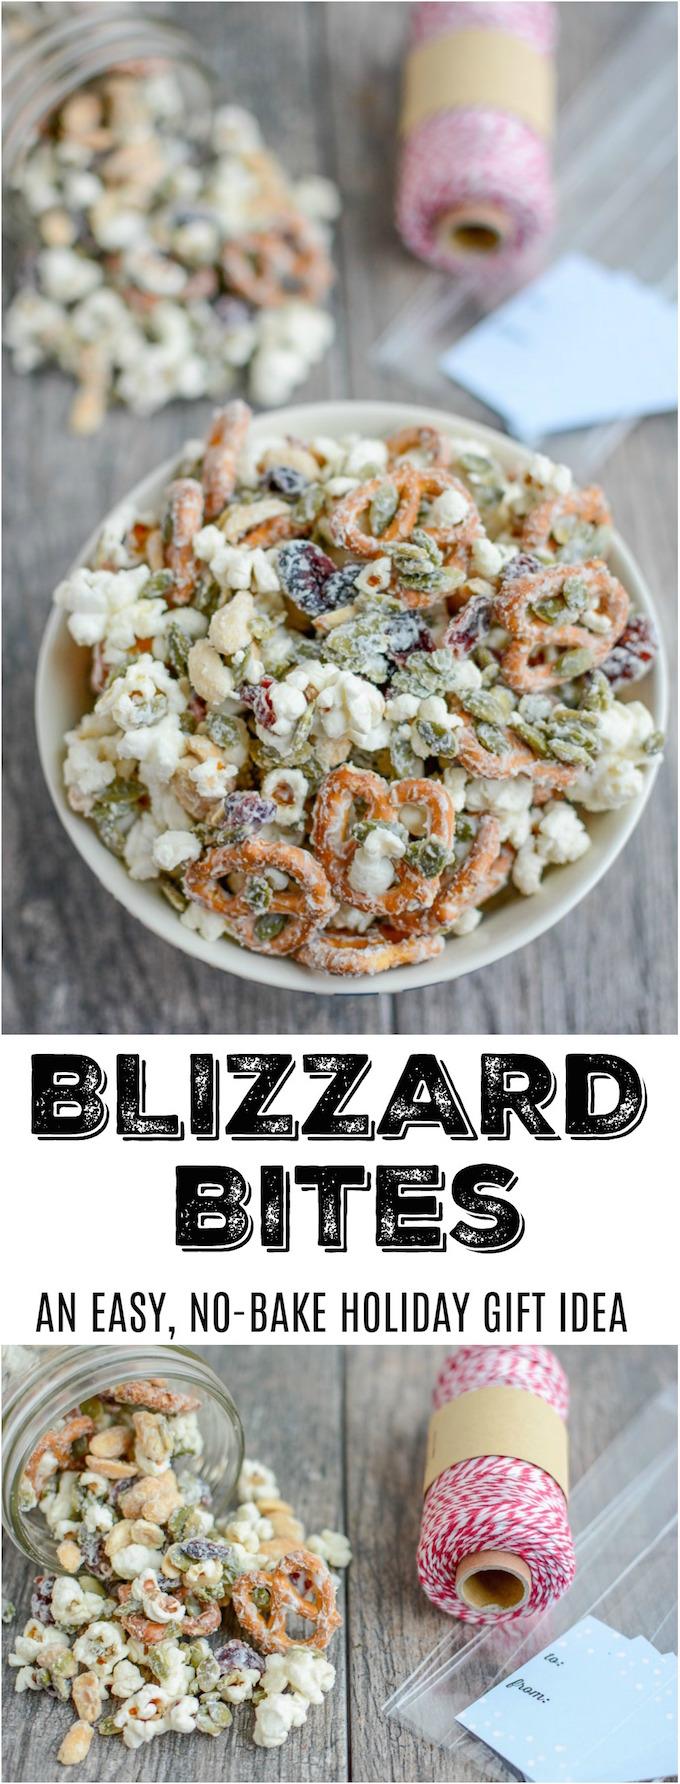
This Blizzard Bites recipe is perfect for the holiday season. Make a batch to share with family, friends, teachers, etc as an easy edible Christmas gift. 

This Blizzard Bites recipe is perfect for the holiday season. Make a batch to share with family, friends, teachers, etc as an easy edible Christmas gift. 

*Post and photos updated 12/2017*

Hi Friends!

If you’re looking for an easy no-bake recipe to whip up and deliver to family and friends this holiday season, I’ve got you covered! I originally shared this recipe over 4 years ago and since then I’ve made it several times as a gift for coworkers, hostess gifts, etc. It takes about 5 minutes to make and can easily be portioned into bags, boxes or jars to spread some holiday cheer.

This simple mix of popcorn, pretzels, pepitas (pumpkin seeds), peanuts and craisins is covered in white chocolate for a festive treat! You can easily customize this mix based on what you have on hand. I’ve subbed Chex cereal for prezels, almonds for peanuts and raisins for craisins.

Blizzard Bites for an easy holiday gift


If you want to make this even easier, you can layer the ingredients into jars, put the white chocolate chips in a ziploc bag at the top and deliver them as gifts to allow recipients to make the mix themselves!

Here’s how you make it:

Print

Blizzard Bites

blizzardbites
Print Recipe

5 Stars 4 Stars 3 Stars 2 Stars 1 Star

5 from 1 review

An easy to assemble gift-in-jar that’s perfect for friends, teachers and coworkers

  • Author: Author: Lindsay L

Ingredients

Scale
  • 1 cup Chex cereal (rice or corn)
  • 1 cup air-popped popcorn
  • 1/2 cup almonds
  • 1/4 cup pumpkin seeds
  • 1/4 cup Craisins
  • 2/3 cup white chocolate chips

Instructions

  1. Layer ingredients into a mason jar in the order listed above.
  2. Attach a tag with the following directions: “To make blizzard bites, carefully remove chocolate chips with a spoon. In a microwave-safe bowl, melt chocolate chips. Pour remaining jar contents into a large bowl, top with melted chocolate and stir until well coated!”

Did you make this recipe?

Tag @theleangreenbean on Instagram


What do you think? Could this recipe BE any easier?! I don’t think so!

This Blizzard Bites recipe is perfect for the holiday season. Make a batch to share with family, friends, teachers, etc as an easy edible Christmas gift. 

Make a few jars for friends, and then make up a batch for yourself. I recommend enjoying this delicious snack mix while watching your favorite holiday movie!


Enjoy!
–Lindsay–
Filed Under: Dessert, Snack Tagged With: Almond, Cranberry, Pepitas, Popcorn, Rice Chex

Elf For Health 2013

November 19, 2013 by Lindsay 33 Comments

Hi Friends!

Are you ready for this? Like I mentioned last week, Elf For Health is back for another year and it’s time to kick things off. Here are all the details about what the challenge entails and how to sign up!

elf4health headerY2


Introducing the Elf for Health Holiday Challenge! This is a four week challenge that will run from the Monday November 25th thru December 22, 2013. The challenges fall into 4 different categories: Food, Fitness, For You & For Others. There will be daily tasks, daily winners, prizes, weekly newsletters, and a Facebook group for support. (This is 2 weeks shorter than the challenge was last year, but we feel like 4 weeks is the perfect amount of time for people to stay motivated and engaged in the challenge!)

And are you ready for the best part? You’ll have an elf to support and encourage you! When you sign up, you will also be committing to be an elf for someone in return. Over the course of the challenge, you will have two different elves.

Sounds like a great way to stay motivated and meet new people over the holidays doesn’t it?! Since this challenge is internet based, anyone can participate… no matter where you’re located! All you need is access to the internet and an email address.

So what does an Elf do?

Elf Duties

As an Elf, you are expected to support your assigned buddy with their holiday health goals and the daily challenges. Elves & buddies will be reassigned after 2 weeks so that hopefully you get to meet 2 new people! You are only asked to email your buddy 2 times per week:

  • Monday: Send your buddy an email to help them with the challenges for that week. Ideas of things to include/attach: your own personal tips & tricks, inspiring words and/or images, a new, healthy recipe or workout to try.
  • Thursday – Saturday: Any time during these days, check in with your buddy! For example, ask them if they tried a new recipe, workout, or had fun with any certain challenges. Feel free to tell them how you did with your challenges, too!

Anything more than those 2 emails is up to you but feel free to go above and beyond this to show your support! Just a few ideas: send your buddy Tweets, shout outs on our Facebook Page, email a fun workout you liked or send a hand written recipe or note.

Important Dates

  • *Friday, November 22rd at 11:59pm EST: sign up deadline
  • Sunday, November 24th: Round 1 Elf assignments emailed
  • Monday, November 25th – Sunday, December 8th: Round 1
  • Sunday, December 8th: Round 2 Elf assignments emailed; Round 1 “Best Elf” winners chosen
  • Monday, December 9th – Sunday, December 22rd: Round 2
  • Sunday, December 22nd: Round 1 “Best Elf” &  participant grand prize winners chosen

*If you missed the initial sign up deadline, you can still participate:

  • Sign up before December 6th for Round 2

Not clear about something? Email Elle or Lindsay!

Prizes

We have some fabulous prizes from some of our favorite companies to give to the winners.

  • 2 prizes for “Best Elf”, one awarded at the end of each round
  • 1 grand prize for best participant awarded at the end of the challenge determined by participation, hashtagging and being an awesome Elf.

There will be a daily challenge winner chosen each day. Daily winners will be entered for a chance to win the grand prize!

Best elf prizes will given based on participation and nomination. If you love your elf, let us know so we can consider them for a Best Elf prize. Best Elf prizes will be awarded at the end of each round.

elf4healthsponsorgraphic

Sponsors for this year include:

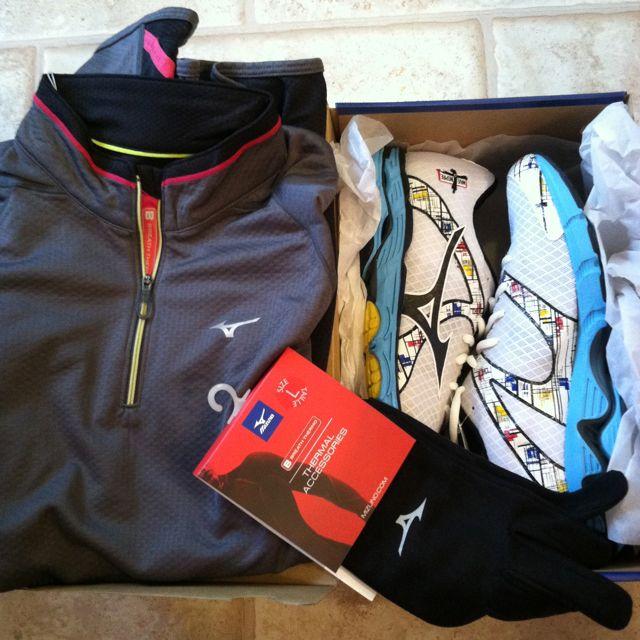
  • Mizuno
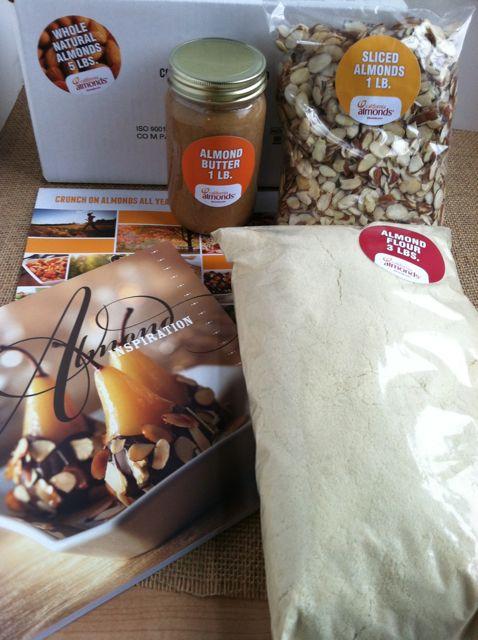
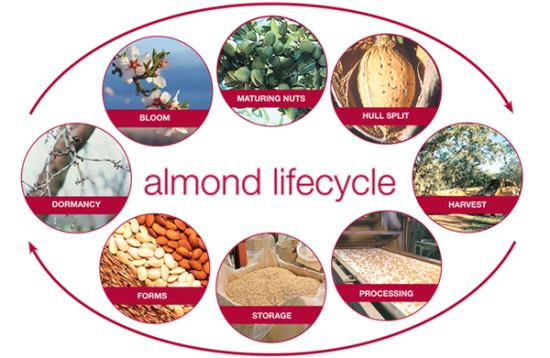
  • The Almond Board of California
  • Naturebox
  • Manitoba Harvest
  • Bondi Band
  • Cook Smarts
  • Love Grown Foods
  • Kodiak Cakes
  • Nuttzo
  • Living Proof Gear

** Unfortunately, due to shipping costs, only USA residents are eligible to win prizes. But we’d still love to have you participate, even if you’re from somewhere else!**

Still with me?

Challenge Calendar

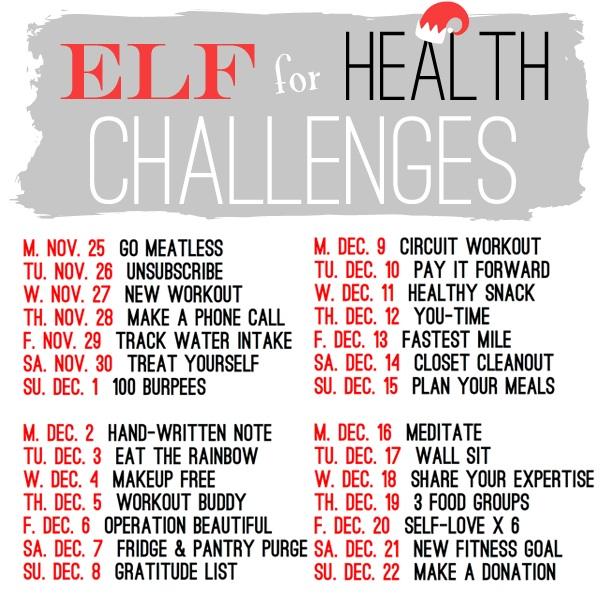
If so, you’re probably wondering what the daily challenges are, right? Here’s a nice square image that you can save on the lock screen of your phone to remind you of the challenges!

challengesquare_edited-1

You can see more detailed descriptions on the calendar below and we’ll expand even more on the challenges in each weekly newsletter. See below for a printable list! Print it out and hang it somewhere to remind you participate, or add it to your Google calendar!

We will be sending out a weekly newsletter reminding you of the weekly challenges so look out for a confirmation email to confirm your participation & newsletter subscription. If you don’t receive a confirmation email, check your spam box. If you still can’t find a confirmation email, let one of us (Elle or Lindsay) know ASAP and we’ll add you to the list.

Enjoy!
–Lindsay–
Filed Under: Uncategorized

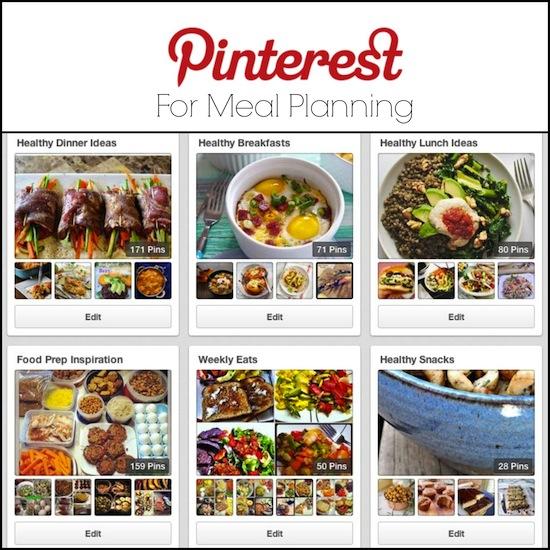
Pinterest For Meal Planning

November 13, 2013 by Lindsay 41 Comments

Hi Friends!

Let’s talk about Pinterest for a minute shall we? Specifically Pinterest for Meal Planning. I know I’m in the minority, but I’ve actually avoided Pinterest for quite some time. Yes I had an account and I occasionally pinned things…but for the most part it was only once every 3 months or so. However, lately I’ve realized what an effective tool it can be for a lot of people as they plan their meals.

Want to start meal planning but not sure where to start? Pinterest can be a great resource! Find out how a Registered Dietitian uses it!

And guess what? I want to help. SO, over the past couple of weeks I’ve been revamping my Pinterest boards. I’ve put together several boards with healthy breakfast, lunch, dinner and snack options. I  went back through all my old Sunday Food Prep Inspiration posts and pinned a bunch of food prep ideas (both my own and those that were submitted!). I also made a Weekly Eats board with some pins from my weekly eats posts to give you more ideas of things I eat on a daily basis…and of course I have a Best of the Bean board as well. My hope is that you guys will be able to use them as a resource when you’re planning your meals for the week.

One of the most annoying things about Pinterest, in my opinion, is the fact that half the pins lead you nowhere. It’s so frustrating when you just go through and pin a bunch of things…and then when you actually go to make something, you click the recipe and it’s a dead end! So, I went the extra mile for you guys. I actually clicked the links on everything I pinned to these boards to make sure they take you to an actual, functioning website with a recipe. THEN, I checked the nutrition of the recipe. Although every recipe isn’t exactly the way I would make it, for the most part, they’re fairly healthy and have been approved by this RD 🙂

You guys know I’m a big fan of making every recipe my own. Here are some things I suggest when making any recipe:

  • Don’t go crazy on the cheese. You can usually get away with less than what’s in the recipe without people noticing.
  • Add extra veggies. Some recipes are stingy on the veggies and you can always add an extra cup or two!
  • If it calls for a lot of heavy cream, try replacing some with lower-fat milk or greek yogurt.
  • If canned items are used, look for  no-salt added or low-sodium varieties (or make your own!)

You get the idea.

So without further adieu…here are some of the boards I made for you:

*Note- If you’re reading this on a mobile device, you might not be able to see the cool Pinterest board widgets that I embeded in this post to give you a preview of each board…so check it out on your computer! Or click the links and that should take you to each Pinterest board so you can follow it!

Breakfast

Lunch

Dinner

Snacks

Food Prep Inspiration

Weekly Eats

Best of the Bean


So there you have it! I’d love to have you follow me on these boards if you’re not already. You can also follow all my boards by CLICKING HERE. Just remember that the boards listed above are the ones where I’ve gone through and done the checking. I also have other boards where I happily just pin based on images!

Let’s chat:

  • Do you use Pinterest for meal planning and food prep ideas?
  • Do you have any healthy-eating/meal-planning pinterest boards? Leave us a link to your favorite so we can all follow them!

Enjoy!
–Lindsay–

After meal planning, the next step is food prep to make your busy nights even easier! If you liked this post, you’ll love my ebook – The Ultimate Guide To Food Prep. It dives into even more detail about how to food prep, troubleshoots common problems and provides tons of tips to make it easier! Click the image below for more details!

The Ultimate Guide To Food Prep Ebook

Filed Under: Food Prep

Asian Noodle Salad

November 12, 2013 by Lindsay 38 Comments

Hi Friends!

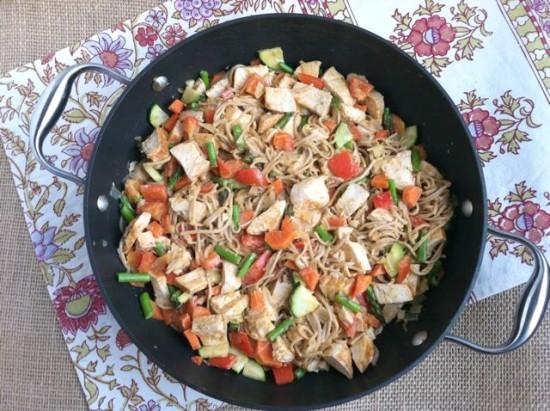
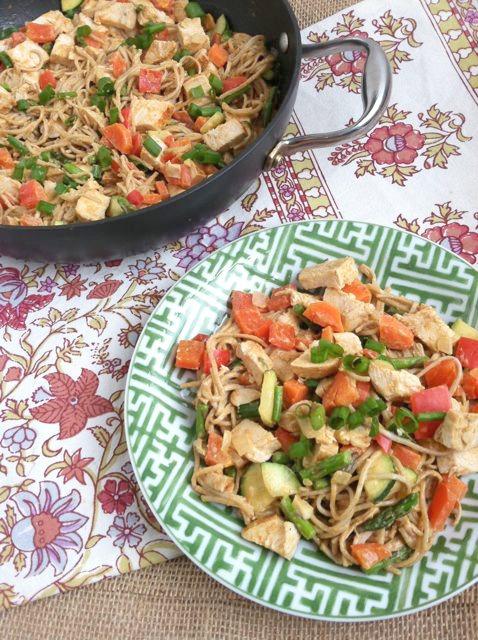
I made you lunch. Or dinner. With leftovers. Leftovers that are good hot OR cold. Are you ready?

Asian Noodle Salad

This Asian Noodle Salad is great served warm or cold. Eat some for dinner and take the rest for lunch the next day!

Here’s what you need:

Print

Asian Noodle Salad

asian noodles 1 e1384213844494
Print Recipe

5 Stars 4 Stars 3 Stars 2 Stars 1 Star

5 from 3 reviews

Delicious hot or cold, this dish is easily customizable to the veggies you have on hand! Make extra and enjoy the leftovers- it’s better the second day!

  • Author: Author: Lindsay L
  • Prep Time: 10 minutes
  • Cook Time: 10 minutes
  • Total Time: 20 minutes
  • Yield: 4 1x

Ingredients

Scale
  • 2 oz soba noodles, uncooked
  • 2 cups cooked chicken, diced
  • 2 cups mixed vegetables, diced
  • 2 cloves garlic, minced
  • 1/4 c peanut butter
  • 1/4 c light coconut milk
  • 1 Tbsp water (more for thinner sauce)
  • 1 tsp low-sodium soy sauce
  • 1 Tbsp rice vinegar
  • 2 Tbsp sweet thai chili sauce
  • 1/4 – 1/2 tsp cayenne pepper
  • 1 tsp fresh ginger, grated

Instructions

  1. Cook noodles according to package directions. Drain and set aside.
  2. In a skillet, saute vegetables and garlic 5-7 minutes or until tender.
  3. Add chicken and noodles to the skillet.
  4. In a small bowl, combine the peanut butter, coconut milk, water, soy sauce, rice vinegar, chili sauce and spices and mix well.
  5. Pour sauce into skillet and stir until everything is well-coated.
  6. Serve warm or cold.

Did you make this recipe?

Tag @theleangreenbean on Instagram


I actually prefer this dish cold…but it’s great either way. And it’s even better the second day!

This Asian Noodle Salad is great served warm or cold. Eat some for dinner and take the rest for lunch the next day!

Enjoy!
–Lindsay–

Filed Under: Dinner

Strategies for Making Healthy Eating Choices

November 9, 2013 by Lindsay 11 Comments

Hi Friends!

Time to recap another FNCE session for you guys! In case you missed it, check out my FNCE 2013 recap which also has links to my first two session recaps! I was drawn to this session immediately because you guys know I’m all about helping people make smart choices. Both presenters were fabulous and very engaging which made it a fun session even at 8am 🙂

Let’s recap:

How Consumers Decide What To Eat: Strategies for Making Healthy Choices
Speakers: Jim Painter, PhD, RD & Elizabeth Ward, MS, RD

Why are Americans gaining weight? We lose track of how much we are eating. The answer to the obesity epidemic is to beware of consumption.

What’s changed?

  • 20 years ago, a bagel was 3 inches in diameter and 140 calories. Today the average bagel is 350 calories – equivalent to 5 slices of toast.
  • When you order a value meal, you get an extra 600 calories on average! 
  • The Toll house cookies recipe yields 60 cookies now vs 100 cookies when the recipe was written in 1949.

What can we do? 

  • The amount of food on a plate, whether it’s one serving or four, is what most people consider a “normal” portion. We need to work on teaching people correct portion sizes. Bigger bowls and bigger spoons can increase portion consumption without you even knowing! Switch to smaller plates, bowls and utensils. 
  • Out of sight, out of mind. People ate 30% less candy when in desk drawer vs. on desk and 60% less when 2 meters away. If you want people to eat better, make healthy choices visible, accessible and readily available!
  • Descriptive labels impact perception. Use this to your advantage and make healthy food sound good! People will enjoy it more!

What do people think?

  • Americans eat according to the my plate pattern(meeting 70% of their nutrient needs) just 7 days per year. 2% of the time. 
  • Half of those people polled think it’s easier to do their own taxes than figure out how to eat healthfully. 
  • More than 40% of actions performed every day qualified as habits, not decisions. Use this to your advantage! Form healthy habits!
  • Throwing info and facts at people doesn’t always mean they will change for the better. Asking people to make a change that’s too different than their regular behavior can be ineffective. Try small changes!
  • Most people want to keep things the way they are. Loss aversion is the reason for inertia. Focus on adding good! 
  • Good for you may = tastes bad in consumer’s mind. Food needs to be healthy and enticing. Eating more produce is unappealing for many. Focus on suggesting tasty cooking methods to try, like roasting to bring out flavor.
  • About half of people say that “taste” drives food choices, rather than “healthfulness. Healthy should never taste bad, healthy can always be delicious.
  • People avoid change by thinking in the abstract. Make concrete, simple, realistic goals that can become healthy habits!

The good news?

  • Willpower” buckles under stress and fatigue and challenging circumstances. But you can improve self control! Will power is like a muscle- work it and it gets stronger! 
  • Self-control in one area of life translates to other areas as well. Work on eating better and it may become easier to exercise more. 
  • You don’t need to try to change forever. Emphasize the process. Deal in the present. One healthy day at a time! 
  • There is power in groups! Obesity may be “contagious” but so is good health! sharing experiences can form healthy habits. 
  • We can help people resist temptation by recognizing triggers for unhealthy habits and forming healthy habits.  


Know that taste and convenience rule the day for most people. Teach them how to make choices that are healthy AND work for them.

Let’s chat: What are you doing to help yourself and those around you make healthier choices?

Enjoy!
–Lindsay–

Filed Under: Uncategorized

Fitmark Bags Review & Giveaway

November 8, 2013 by Lindsay 240 Comments

Hi Friends!

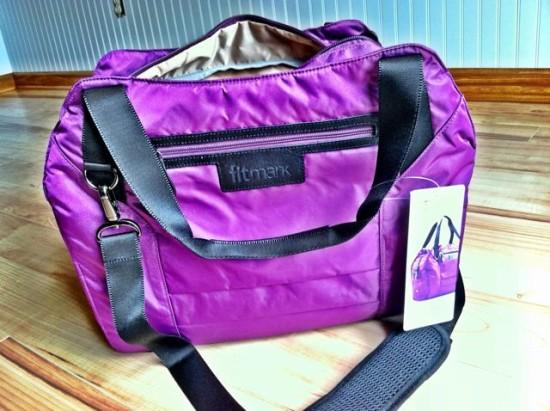
If you follow me on IG and twitter, you may remember a couple of weeks ago when I started raving about my new gym bag from Fitmark Bags.

IMG_9917

(I was sent this bag at no cost to me.
All thoughts and opinions are 100% my own)

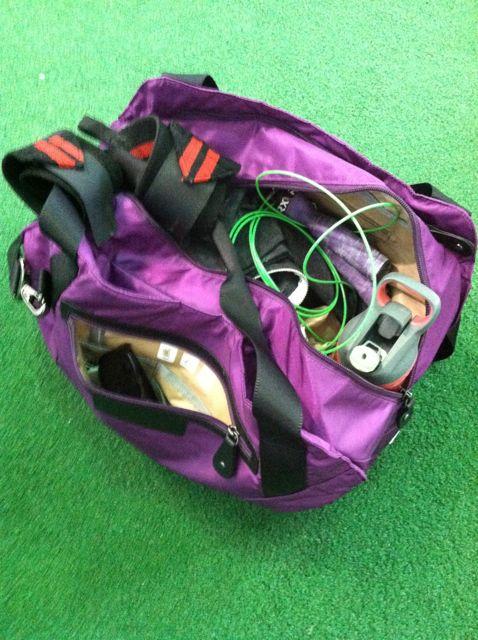
For those of you who have seen my previous “gym bag” (think canvas reusable grocery sack and you’ve pretty much got it), you know this is a serious upgrade. I’ve been looking for a new bag for a while and after connecting with Fitmark on Instagram and Twitter, I knew this was the one for me!

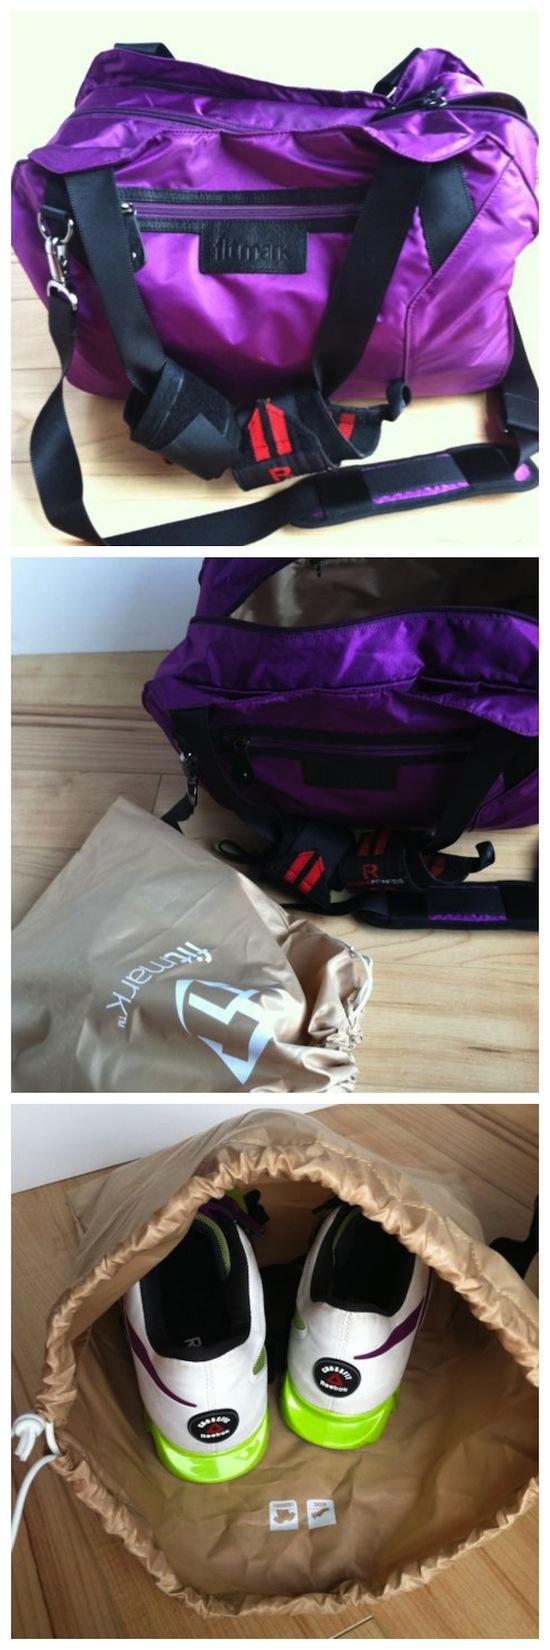
 Fitmark is the first brand to make a gym bag for the fitness enthusiast.  Here are some of the key features of the Sport Tote that I have:

    • Separate Kicks and Laundry bag with anti-microbial protection
    • Fit-All™ Executive-class main compartment for all your needs
    • Fit-Color™ custom interior with hand-selected colorway
    • Rear, detailed zippered utility pocket
    • Ergonomic and fully adjustable shoulder straps with custom detailed stitching
    • Highly polished, custom nickel-coated clips and harnesses
    • Custom leather zipper pulls
    • Enforced custom nickel-coated rivets with logo detail
    • Soft leather Fitmark™ emblem with detailed stitching
    • Soft lined pocket with categorized sections for your phone, keys and valuables
    • Luxurious handles with leather accents and custom detailed stitching

They also carry 3 other styles of tote, plus messenger bags, duffel bags, backpacks and food organizers! And they come in all sorts of fun colors. Mine comes in purple and pink with tan interior or black with pink interior!

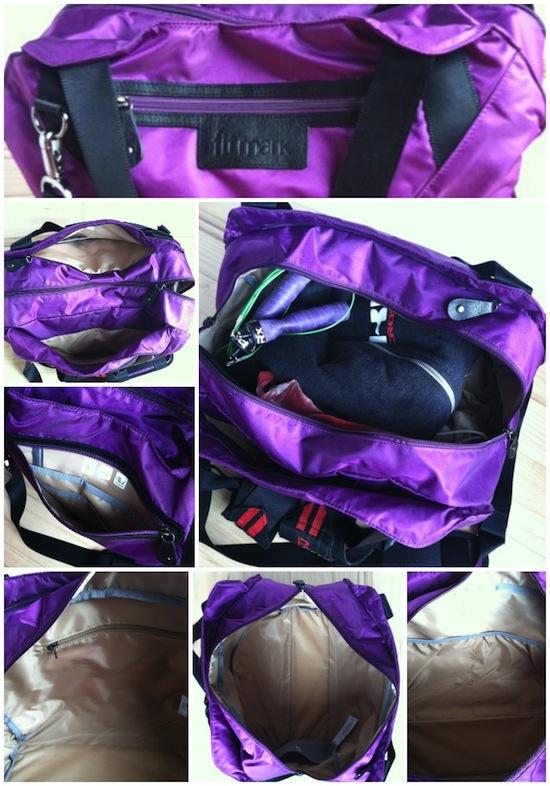
Let’s take a closer look at some of the details shall we?

fitmark1

The bag is super high quality and it’s big enough to fit all my crossfit stuff but still small enough to be stylish and manageable so I’m not losing things IN the bag! It holds my shoes, jumprope, weight belt, tape, hoodie/extra clothes and water bottle with ease. However, I may not even use it as a gym bag forever. I can see myself taking it on weekend trips, etc as a stylish tote bag!

I love how many pockets and compartments there are. There’s a small zipper pocket on the front side that I throw my keys and phone in while i’m at the gym, plus larger pockets on either side of the main opening (on zipper and one with a magnetic closure).

Inside the main compartment there are even more pockets! There’s another zipper pocket, plus two other inner pouches that would be great for toiletries if you’re getting ready at the gym. And probably my favorite part? There’s a waterbottle pocket! I’m notorious for leaving my waterbottle at the gym so I love that it has its own special spot.

IMG_0038

It also comes with a separate bag for shoes or dirty clothes, which I love. I keep my oly lifting shoes and rope climbing socks in it so that they’re always in my bag, but not getting everything else dirty.

fitmark2

So there you have it, friends! My newest obsession!

Now that I’ve told you all about how awesome these bags are, you probably want one, right? Good news! I get to give one away 🙂 One lucky winner will receive a Sport Tote just like the one I have, in a color of your choice!

To enter, use the rafflecopter giveaway widget below! (Giveaway is open to US residents only and ends Tuesday Nov 12, 2013 at 11:59 pm EST.

a Rafflecopter giveaway

Good luck!
If you’re ready to buy a Fitmark Bag today, OR you’re adding one to your Christmas list, pass the word along that using the code “FIT” at checkout will get you 15% off.

Enjoy!
–Lindsay–

 PS. Fitmark also has their very own app called Fitmark Hub so be sure to check that out as well!

Filed Under: Sponsored

Pork Chili Verde

November 7, 2013 by Lindsay 28 Comments

Hi Friends!

Time for a soup recipe. The first time I had this soup was a few years ago when we took a family trip to Santa Fe, New Mexico for Christmas. I remember standing in the kitchen of the amazing house we rented (it had heated floors!!) with my mom making a big batch of this to eat after we went on a candlelight walk. So delicious.

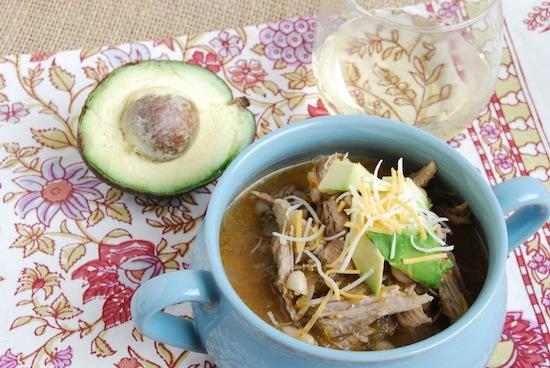
This Pork Chili Verde is a hearty winter soup packed with beans, lean protein and vegetables!

Honestly, I really haven’t thought much about it since then…but while I was grocery shopping over the weekend, I noticed a large pile of tomatillos and it got me thinking. Salsa verde (a key ingredient in this soup) is usually loaded with sodium, so I decided to be brave and try making my own! Turns out it’s super easy. Homemade salsa verde, some crockpot pulled pork and just a few other ingredients and you’ve got yourself a winner of a dinner!

Here’s what you need:

Print

Pork Chili Verde Salsa Verde

pork chili verde
Print Recipe

5 Stars 4 Stars 3 Stars 2 Stars 1 Star

5 from 1 review

A delicious, hearty soup. The perfect way to put a new spin on some of your pulled pork leftovers!

  • Author: Author: Lindsay L
  • Prep Time: 5 minutes
  • Cook Time: 10 minutes
  • Total Time: 15 minutes
  • Yield: 4-6 1x

Ingredients

Scale
  • 3 cloves garlic, minced
  • 1 c onion, diced
  • 3–4 cups pulled pork, cooked
  • 1 can white beans, drained and rinsed
  • 2 c salsa verde
  • 3 c broth
  • 2 tsp cumin
  • 1 tsp paprika
  • 1/2 – 1tsp cayenne pepper
  • 12 oz tomatillos
  • 2 serrano peppers
  • 1/2 c onion
  • 1/4 c water
  • 3 Tbsp fresh cilantro, chopped
  • 1/4 tsp salt

Instructions

  1. In a large dutch oven, saute the onion and garlic until onions are translucent.
  2. Add the remaining ingredients.
  3. Bring to a boil then reduce heat and let simmer for approximately 20 minutes.
  4. Serve topped with avocado and cheese if desired.
  5. Remove the papery skins from the tomatillos.
  6. Slice in half and roast at 425 for 10 min (or 4-5 min under the broiler).
  7. Combine the tomatillos, onion, water, cilantro and salt in a blender and blend until smooth.
  8. Makes approximately 13/4 cups

Did you make this recipe?

Tag @theleangreenbean on Instagram

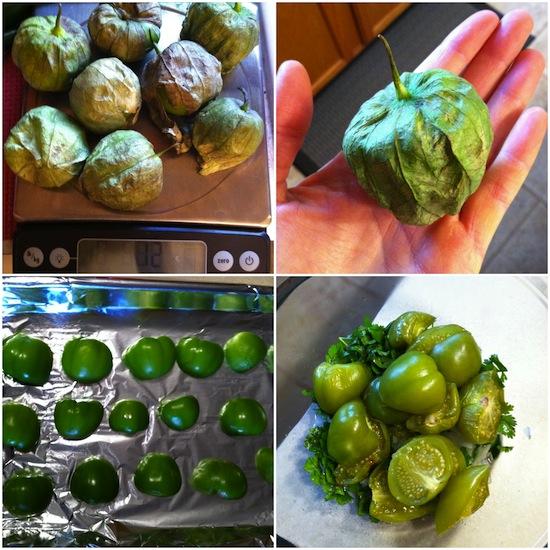
In case you’re unfamiliar with tomatillos, here’s what they look like:

tomatillo

Use a kitchen scale to weigh out 12 oz or just use approximately 7-8 medium tomatillos.

Let’s chat:
Are you a fan of salsa verde? Or do you prefer red salsa?

Enjoy!
–Lindsay–

Filed Under: Dinner, Soup & Salad Tagged With: Chicken Broth, Garlic, Great Northern Beans, Onion, Pulled Pork, Salsa Verde

Salt-Free Seasoning Mix

November 5, 2013 by Lindsay 42 Comments

Hi Friends!

When it comes to spices, I’m a creature of habit. My go-to’s are paprika and cayenne pepper and I tend to put them on pretty much everything. That’s all well and good, but sometimes even I like to switch it up a bit. I love the flavor of spice mixes and there are a lot of good ones out there…but I’m not crazy about the amount of sodium and anti-caking agents found in a lot of them. Spices themselves have such great flavor, there’s no reason to go overboard on the salt as well.

I know there are some good salt-free seasoning mixes out there at well…but over the weekend I did a little project and made my own! Since it turned out well, I thought I’d share my new favorite salt-free seasoning mix with all of you 🙂

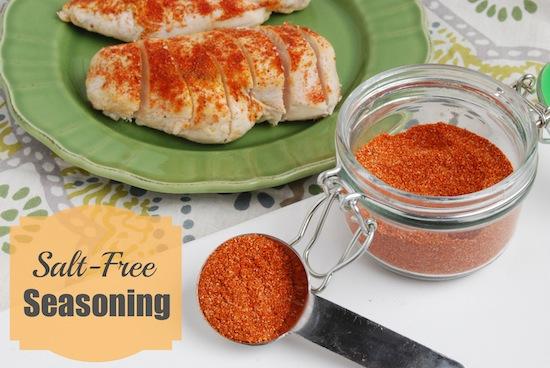
Salt-Free Seasoning

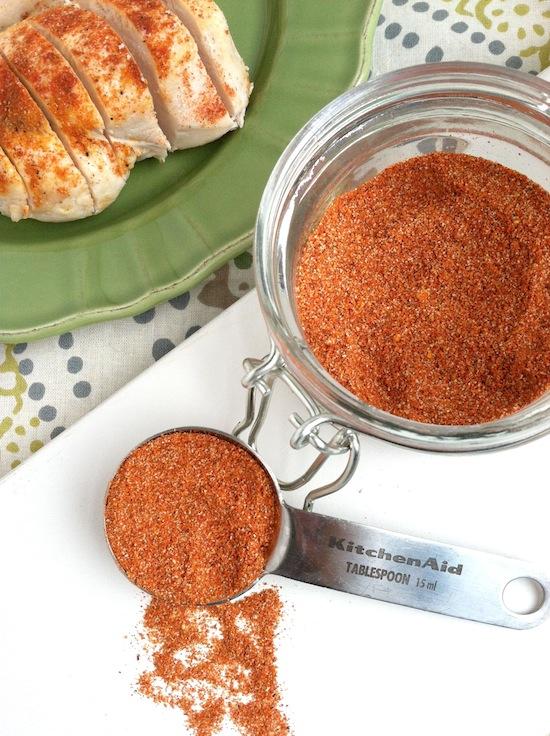
This salt free spice rub is the perfect seasoning mix to put on chicken, pork or fish to add extra flavor!

Here’s what you do:

Print

Salt-Free Seasoning Mix

salt free seasoning
Print Recipe

5 Stars 4 Stars 3 Stars 2 Stars 1 Star

5 from 1 review

An easy to make, all-purpose seasoning mix that’s great on chicken, fish and more!

  • Author: Author: Lindsay L
  • Prep Time: 5 minutes
  • Total Time: 5 minutes
  • Yield: 1 1x

Ingredients

Scale
  • 2 Tbsp paprika
  • 2–3 tsp cayenne pepper
  • 2 Tbsp garlic powder
  • 2 tsp onion powder
  • 1 Tbsp dry mustard
  • 1 tsp cumin

Instructions

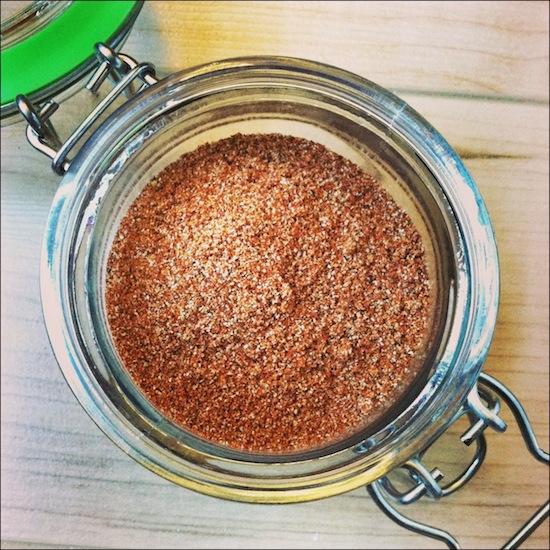
  1. Combine all of the spices in a small bowl.
  2. Mix until well combined.
  3. Store in an airtight container.

Did you make this recipe?

Tag @theleangreenbean on Instagram


This is just about as simple as it gets!

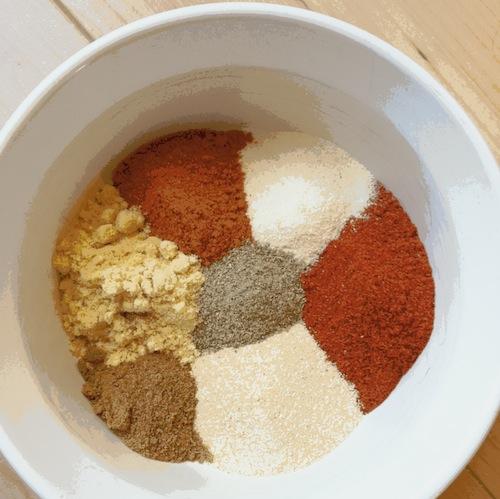
spices

Just combine all the spices, mix well and voila!

This salt free spice rub is the perfect seasoning mix to put on chicken, pork or fish to add extra flavor!

I even treated myself to a cute little $1.99 container from Meijer to store it in 🙂

I used this on my baked chicken over the weekend, but it’d also be good on fish or pork. Feel free to play around with the recipe and make it your own. Cumin is not my favorite spice and I didn’t want it to overpower, so I didn’t use very much in the mix…If you like it, add a little more. Same thing with the cayenne. I like things spicy, so I used at least 3 tsp, probably closer to 4. If you don’t like spicy, leave it out…or just use a little bit!

This salt free spice rub is the perfect seasoning mix to put on chicken, pork or fish to add extra flavor!

Let’s chat:

  • What are your favorite spices?
  • Do you make your own spice mixes?

Enjoy!
–Lindsay–

Filed Under: Food Prep, Side Dish

Visual Food Storytelling to Promote Healthy Eating

November 1, 2013 by Lindsay 36 Comments

Hi Friends!

Time to recap another FNCE session. In case you missed it, you can read my FNCE 2013 recap, as well as check out my first session recap on Beyond Traditional Dietetics. Today I’m recapping one of my favorite sessions!

Ready?

The Power of Visual Food Storytelling to Promote Healthier Eating
Speakers: Regan Jones, RD & Holley Grainger, MS, RD 

regan

*Photo Credit- Regan Jones*

Photography

If a picture is worth 1,000 words, what are your pictures saying about healthy eating? Over the years we’ve seen a rise of the visual web. We’ve gone from long-form blog posts with 1,000+ words, to Facebook statuses with 3 lines of text, to tweets with 140 characters, to Pinterest & Instagram where there are often no words- we’re communicating with the image.

A good image has:

  • Appeal- yum factor (even brussels sprouts can look sexy)
  • Staying power- blog posts get 94% more total views if they have relevant images
  • Key message
  • The potential for the viral effect (ie hundreds of thousands of repins on Pinterest)

Most common photography mistakes:

  • Out of focus
  • Low lighting/harsh lighting/artificial lighting 
  • Cropped too tightly
  • Unnatural angles
  • Distracting background

You can read more about this mistakes in this Top 5 Reasons Editors Decline An Image post.

Best angles to shoot:

  • Directly overhead (especially if using an iphone)
  • 45 degree angle (like you’re sitting at a table taking a pic of your food)
  • Eye level

Composition & Styling tips:

  • Use the rule of thirds. Points where the lines intersect are great visual points that are eyes like. 
  • Layering, texture and abundance are important for healthy foods. It’s easy to make dessert look good. You may have to work a little harder to make healthy food look good, but it can be done!
  • Get a color wheel. Understand how colors work together to make food pop!
  • Let the food shine through. Don’t overstyle. Layer, garnish, show a dipping sauce in the background, etc. 
  • Show food in it’s natural form. That’s often when it looks its best.

It’s not all about traffic. It’s about changing the perception of healthy eating. It doesn’t have to be elaborate to be healthy. Beautiful food pics will make healthy food look tasty and inspire people to eat better!

Take the time to learn how your camera works. Read the manual. Then read it again. Your camera is not as smart as you. You must learn to tell it what to do. Turn off autofocus!

———————

Video 

How do you communicate your nutrition message?

Why video? 

  • It bridges a gap
  • Provides value
  • Entertains
  • Reaches a broader audience
  • Brings your message to life
  • Builds a personal brand

Why now?

  • Every day, 89 million people will watch 1.2 online videos in the US alone. 
  • Online video users are expected to double to 1.5 billion in 2016
  • Video is the next trend! Get ahead now!

Why you?

  • An extra way for your audience to get to know you.
  • It can help you sell something…like your message, a cookbook, etc.
  • They can see your passion and energy and connect with you on a more personal level.

Don’t let perfectionism hold you back! Start small. Use Instagram video and vine. Watch how people engage with you!

What makes an effective online video?

  • Style– Make it your own! Put your own personal spin on it and let your personality shine through.
  • Script– Intro, hook, short/concise sound bites. If your video is longer than 1-2 minutes, turn it into a series
  • Delivery– Bring positive energy to the set, have a one-on-one convo with the person watching your video, think about your body language, voice tone and pace. 
  • Details– Keep the camera close. Control background noise. Look into the eye piece so you can see what the viewer sees. 
  • Optimization– Upload, share, promote! Use key words. Create a video archive. Update regularly. 

Let’s chat: Are you using your camera to its fullest potential? Do you prefer videos or photos on blogs?

Enjoy!
–Lindsay–

Filed Under: Uncategorized

Foodie Penpals Reveal Day with Jeanine

October 31, 2013 by Lindsay 10 Comments

Hi Friends!

Time for another Foodie Penpals Reveal Day!

fpp

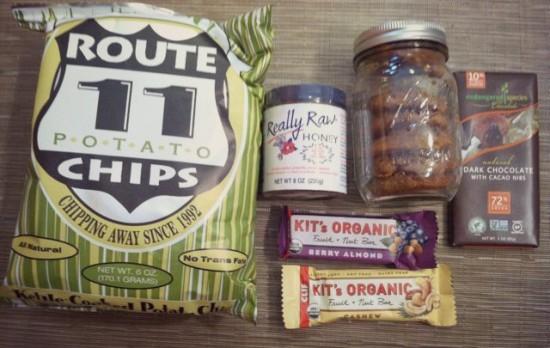
This month I traded boxes with Jeanine. She shares my love of crossfit and indulged my love of homemade cookies so we’re pretty much BFFs now! Here’s what she sent me:

octfpp

  • Potato chips – good thing I took a pic before I left because when I came home, hubby had eaten almost the entire bag!
  • Honey- saving this to mix into my peppermint tea next time I get sick
  • Kit’s Organic Bars – these were new to me! Tasted great!
  • Dark Chocolate – you can never have to much 🙂
  • Homemade cookies! So good. The way to my heart!

Thanks so much Jeanine!!

————

And now it’s time for some details about Foodie Penpals.  In case you’re a new reader, here’s a reminder of what the program is all about:

-On the 5th of every month, you will receive your penpal pairing via email. It will be your responsibility to contact your penpal and get their mailing address and any other information you might need like allergies or dietary restrictions.
-You will have until the 15th of the month to put your box of goodies in the mail. On the last day of the month, you will post about the goodies you received from your penpal! 
-The boxes are to be filled with fun foodie things, local food items or even homemade treats! The spending limit is $15. The box must also include something written. 
-Foodie Penpals is open to blog readers as well as bloggers. 
-Foodie Penplas is open to US, Canadian & European residents.  Please note, Canadian Residents will be paired with other Canadians only. Same with Europeans.  

If you’re from the US or Canada and are in participating for November, please CLICK HERE to fill out the participation form and read the terms and conditions. 

You must submit your information by November 4th as pairings will be emailed on November 5th!

——————

Enjoy!
–Lindsay–

Filed Under: Uncategorized

20 Recipes for Fall

October 29, 2013 by Lindsay 27 Comments

Hi Friends!

It finally feels like Fall is here. The weather is cool. The leaves are changing. The days are getting noticeably shorter.

The good news is, I love Fall. And I love Fall foods.

Do you love all the flavors of Fall like apple, cranberry, sweet potato and pumpkin? Here are 20 recipes to try!

So just in case you need a little Fall kitchen inspiration, here are some recipes you should try!

baked apple packets

Baked Apple Packets 

carrot zucchini apple muffins

Carrot Zucchini Apple Muffins

caramel apple bars

Caramel Apple Bars 

apple cinnamon breakfast bars

Apple Cinnamon Breakfast Bars 

cranberry sweet potato cottage cheese muffins

Cranberry Sweet Potato Cottage Cheese Muffins 

ginger oatmeal cookies

Ginger Oatmeal Cookies w/ Cranberries & Reeses

cranberry corn muffins

Cranberry Corn Muffins

no bake balls

No Bake PB Oatmeal Balls 

vegetarian stuffing

Vegetarian Stuffing 

sweet potato brownies

Sweet Potato Brownies 

sweet-potato-quinoa-black-bean-burgers-e1353804143584

Sweet Potato Quinoa Black Bean Burgers  

sweet potato puffs
Sweet Potato Puffs  

mexican loaded sweet potato
Mexican Loaded Sweet Potatoes 

sweetpotatofalafel

Sweet Potato Falafel 

pumpkin oatmeal bars

Pumpkin Oatmeal Bars 

pumpkin donuts

Baked Pumpkin Donuts 

pumpkin-pie-balls-

Pumpkin Pie Balls 

crockpot steelcut oats

Crockpot Apple Cinnamon Pumpkin Steelcut Oats

whole wheat pumpkin muffins

Whole Wheat Pumpkin Muffins  

Enjoy!
–Lindsay–

Filed Under: Ingredient Round-Ups, Uncategorized

FNCE Session Recap: Beyond Traditional Dietetics

October 26, 2013 by Lindsay 9 Comments

Hi Friends!

As promised in my FNCE 2013 Recap, I’m going to recap a few of the sessions I attended at FNCE for you guys. I’ll try to do one every Saturday for the next few weeks! There was tons of valuable info shared and I think all of you should benefit from it as well! I realize you’re not all RDs but much of the info could be applied to various jobs or just to life in general. I took notes and tweeted a lot during the sessions so I’ll do my best to recap what all the wonderful speakers said.

So here we go:

Beyond Traditional Dietetics: Turning Your RD into Real $$$
Speakers: Leah McGrath, RD, LDN & Susan Mitchell, PhD, RD, LDN, FADA

  • RDs make too little for all their education and training. The average RD salary is $59,000. However, there are high-paying jobs in all areas of dietetics. There’s nothing wrong with getting paid for your passion. 
  • Most RDs struggle with salary negotiations and marketing. RDs need to get comfortable marketing themselves and asking for the money they deserve!
  • Times are changing and skill sets must change as well. Most RDs are not doing food styling, recipe development, nutrient analysis, etc…but these are up and coming trends! Are there opportunities to work with food shoots, test kitchens, create healthy recipes, develop a new products? Yes! Take advantage of them!
  • We must turn chance into opportunity, opportunities into strategies and strategies into success!

The top 4 skills for success are in the areas of writing, media, public speaking and social media.

More and more RDs are going beyond their standard education to gain experience in these areas. But how can we develop these skills?

  • Look at other successful people. What are they doing? What sets them apart?
  • Push yourself outside your comfort zone.
  • Collaborate with colleagues.
  • Hire a business or media coach.

Here are some skill specific suggestions:

Skill #1: Improve Writing Skills

  • Take a class. Practice writing skills daily. Have someone critically read your work.
  • Seek writing opportunities. Offer to write for newsletters, blogs etc at work, in the community, online. Build your portfolio.

Skill #2: Social Media Skills

  • Develop expertise in 1-2 social media platforms. Choose ones that fit your brand, not just what everyone else is doing.
  • Observe those with a strong presence. Follow/read blogs and tips from experts. Learn best practices from webinars and workshops.
  • Social media is a commitment, not a campaign. It becomes part of who you are and what you do.
  • Keep interactions personable, not personal.

Skill #3: Media Skills

  • Get media training. You can always learn something.
  • Develop and prepare a media kit.
  • Practice setting up props and answering questions. Review segments afterwards and learn from them.
  • Opportunities don’t always come knocking. Sometimes you have to do the knocking. There are opportunities out there and if they can’t find an RD, they’ll find someone else that’s not as credible. Make yourself available
  • Send talking points ahead of time so you don’t get caught off guard.

Skill #4: Public Speaking

  • Learn from professional speakers.
  • Join a speaking group like your local chapter of the National Speakers Association or Toastmasters.
  • Practice, practice, practice.
  • Seek opportunities to speak your passion.

Top takeaways:

  • Make sure to get paid what you’re worth. Do your research.
  • Go outside dietetics and network with other professionals.
  • Find and talk to a mentor.
  • Hire a business coach.
  • Don’t be afraid to ask.


Success is what you make it. Define your focus. Evaluate your skills. Develop your weaknesses. Go for your dreams!

Let’s chat:
Do you struggle in any of these areas? What are you doing to make yourself better?

Enjoy!
–Lindsay–


Filed Under: Uncategorized

Fitness Friday 59

October 25, 2013 by Lindsay 21 Comments

Hi Friends!

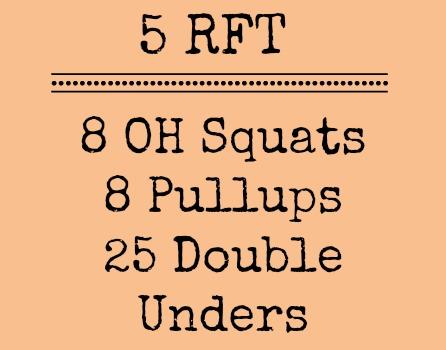
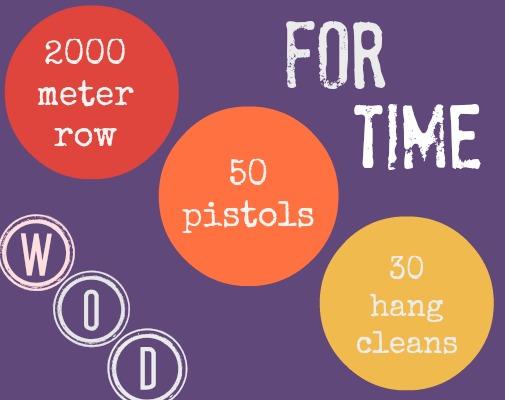
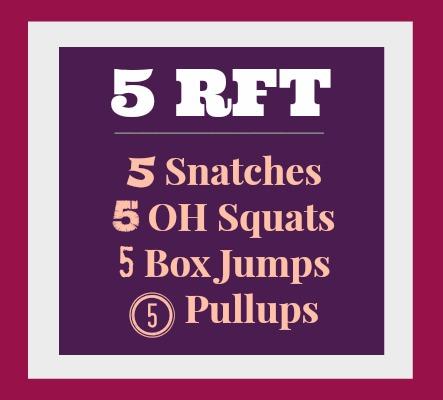
It’s been a few week since we had a fitness friday so I thought we’d play catchup today! Here are some of the workouts I’ve been doing lately:

ff2

1. Holy legs. Squat cleans killed me. 5+15 Rx+ (used a 24″ box) plus a 40 inch box jump PR before the wod
2. Sunday funday! 19:15 for the first wod with 53# kb swings and ttb instead of hspu. 95# snatch PR! 8:56 for the second wod
3. Warmup: 2 x 500m row (sub 2 min) 4 x 250m row (sub 1 min) – last one was my fastest!
4. Strength day

ff3

1. Last open wod redo. In march I got thru 26 reps with my hands in reverse grip for the ctb pull ups. This time I got 46 reps and all my pull ups were forward grip!
2. Squat cleans and a triple wod – 6+5, 5+5, 5+5
3. Not my favorite. 13:53 with burpees instead of hspu
4. Set your rower to 500m intervals w/ 3 min rest. Row, then do 15 pushups & 20 weighted lunges during the rest period…rest remainder of 3 min. Complete 4 times. Rowing interval split has to improve or stay the same each time or you repeat the round.

ff4

1. This is how we do Sunday Funday crossfit style. Wod 1- got thru all but the pullups of round 3, Wod 2- 3:21, Wod 3- 13:41
2. Cut 4+ minutes off my Angie time. I think I did my pullups about 5 minutes faster than last time. Now I just gotta work on those pushups! 22:17 Rx
3. Seriously terrible #wod today. 26:58 Rx
4. PR’d my grace time at the beginning of this (4:30)!! then it went downhill from there. 22:16 Rx

ff5
1. 4×5 front squats (105,115,125,135) then 5+15 for the wod
2. Tabata sprints, then two 5 min amraps – 6 rounds for wod 1, 43 reps for wod 2

In other news:

wodtoberfest

I’m competing in my second crossfit competition tomorrow! It’s at a local box (actually the one I worked out at for a while when mine was closed). This one is a little different than my first one. While that one included some running, dumbbells, etc…this one is more focused on lifting heavy weights. It’s also a partner competition. I’m competing with my coach and it should be a lot of fun! There are a lot of ascending weight wods…meaning the weight gets heavier as the workout goes on, which is always a challenge!

I’ll let you guys know how it goes!

Enjoy!
–Lindsay–

Filed Under: Workouts

Food and Nutrition Conference 2013

October 24, 2013 by Lindsay 28 Comments

Hi Friends!

As promised, I’m back to recap my trip to the 2013 Food & Nutrition Conference & Expo that was held in Houston, Texas this year! I went to FNCE for the first time last year with most of my fellow interns and I loved it so much I immediately knew I wanted to go again this year. My experience this year was very different from last. For me, it was a great reminder of how far I’ve come in the world of nutrition & dietetics in just one year.

As I walked around the convention center this year, it seemed like every time I turned around, I saw someone I knew! I’ve met some amazing RDs over the past year but I don’t think I every really stopped to think about just how many of them are now a part of both my personal and professional life. It was wonderful to chat and catch up with people I’ve gotten to know both online and in person. There are so many dietitians out there doing such incredible things that it’s almost impossible not to walk away from this conference feeling excited and inspired!

IMG_9655

Because of my blog, I was able to apply for a media pass this year and attend for free! Approval for a press pass covers the cost of your registration, which is awesome. It also gets you into the press room where there are all kinds of great books and press kits for you to take home. Added bonus- there’s never a line at the coffee pot. This is a big deal as I’m not sure I ever saw less than 25 people in line at the convention center coffee place the entire weekend!

So, let’s recap, shall we?

I left Columbus around lunchtime on Saturday. After a flight delay that resulted in me missing my connection in Dallas, I arrived in Houston around 5:30pm and took a cab to my hotel. I met up with my roomies Kristina & Kristen and we headed down to the hotel happy hour. The three of us know each other thanks to the world of blogs and social media but had never met in person. Turns out they’re even more wonderful in real life than they are on their blogs and we had a blast together!

Around 7pm we headed to dinner where we met up with Regan, Kelly, Min, Nicole, Laura, Gretchen & Serena.

IMG_9639

Many of us are involved in helping with Healthy Aperture & participate in Recipe Redux so it was awesome to be able to put names faces with names!

Sunday morning we were up early for Day 1! I headed over early because I hadn’t been able to check in the night before, got my press pass and headed to my first session: Beyond Traditional Dietetics: Turning Your RD into Real Dollars. The speakers, Leah McGrath & Dr. Susan Mitchell did a great job.

After a short break, I headed to my second session: The Power of Visual Food Storytelling to Promote Healthier Eating. This session, presented by Regan Jones & Holley Grainer, was also fabulous!

After session #2, I met up with Elle, Kristen, Kristina & Allie for lunch at the local market and then it was time for the Expo!

Turns out we weren’t allowed to take photos on the Expo floor. I didn’t know that the first day so I snapped a few of some of my favorite products and no one said anything, but after I learned about the rule, I didn’t take any the following days.

expo1

Some of my favorites from the expo:

Blendtec Blender – You guys, this blender is AMAZING. Kristina and I spent a good 30 minutes at this booth. It has dull blades so you don’t cut yourself. It can make nut butter in 36 seconds. It can make flour out of things like almonds, rice, etc. And get this…it can make frozen yogurt!!! I am so in love. WANT one!!! One model even has a touch screen display!

Zing Bars– They were created by RDs and this new Dark Chocolate Sunflower Mint bar tastes just like a Thin Mint! Soooo good.

Eat Well, Enjoy Life Hummus –  I loved this! They make low fat hummus that uses Greek Yogurt and also have a whole line of “other bean” hummus with some great flavors!

Food Should Taste Good – I already knew about this company and love them…but they have a newer version of their sweet potato chips that are actual slices of sweet potato instead of chips make with sweet potato puree and I loved them!

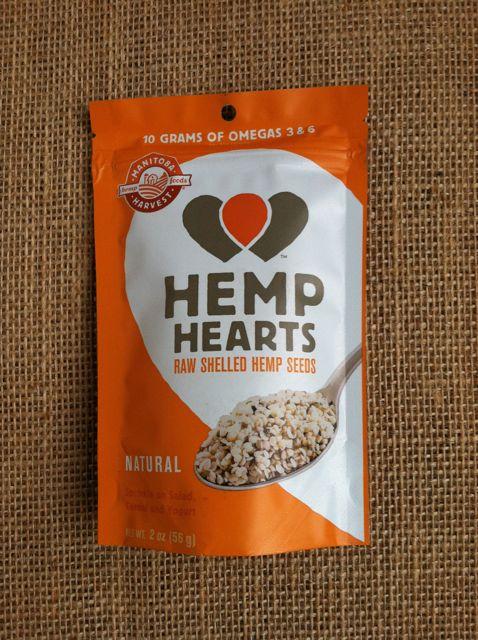
Manitoba Harvest Hemp – I found them at FNCE last year. Hemp hearts are great on salads, in yogurt, etc and they also have lots of different hemp protein powders, many of which are made from just one ingredient (hemp) which I love!

Alvarado Street Bakery – A fun bread company that makes bread using all kinds of sprouted grains…and uses all GMO-free ingredients!

360 Cookware – Neat pots and pans that cook foods and lower temperatures without added water or fats!

———

There were also tons of great boards and commissions there promoting nutritious, whole foods (which I loved) including

  • Hass Avocado Board
  • Almond Board of California
  • Canadian Lentils
  • American Pistachio Growers
  • California Dried Plum Board
  • California Strawberry Commission
  • US Dry Pea & Lentil Council
  • Wild Blueberry Association

—————

Even after several hours at the expo, I still only made it about 1/2 way through…but my bag was full of samples and getting extremely heavy so I headed into another session (On the Shoulders of Giants), charged up my phone and headed to a happy hour even with Food & Nutrition Magazine.

IMG_9690

I was invited to this happy hour since I blog for Stone Soup, the magazine’s blog! They had drinks, appetizers and lots of fun props for pictures!

IMG_9692

I hung out with these lovely ladies- Kristina, Elle & Anne (who came in Sunday afternoon!). After happy hour, we stayed at the restaurant where we were joined by Kylie for dinner!

Monday morning we headed back to the convention center for day 2!  The first session I went to was amazing. It was called How Consumers Decide What to Eat: Strategies for Making Healthy Choices and the speakers were Dr. Jim Painter and Liz Ward. Dr Painter was HILARIOUS and had the whole crowd engaged and laughing, even at 8am. Liz’s portion was great as well- very informative.

Next, I met Regan and we went to a media briefing where Rachel Begun was speaking about The Gluten-Free trend: Past, Present & Future. It was really interesting and Rachel was extremely knowledgeable and a great speaker. You have to have  a press pass to be able to attend media briefings so it was cool that I got to go!

Afterwards, I headed back to the expo to cover the second half of it. There are so many samples and snacks available that I didn’t even have to go to lunch!

Later in the afternoon I attended another session called Moving From Traditional RD to Thriving Entrepreneur. Then I met up with my roomies and we rested for a bit, recharged our phones and then headed to another round of happy hours.

I went to a happy hour for one of the agencies I work with, where I finally got to meet Carissa in person! After popping into the happy hour for another fabulous PR agency, I headed out to dinner! I love FNCE because there are SO many amazing opportunities to network!

IMG_9700

We had a great dinner at Reef. The chef was on The Next Iron Chef and he even came out to chat with us and take a picture!

Tuesday morning we were up and ready for our final day in Houston. FNCE is fabulous…but it’s full of long, busy days…lots of walking and not a lot of sleep. By Tuesday, pretty much everyone is exhausted. I attended a couple of sessions, including Ask, Anchor & Close: Negotiating Your True Market Value. Then, I made one final pass around the expo before I had to be at the Hass Avocado booth at 11:15. Why, you ask?

Remember when I asked you guys to vote for my Peanut Butter Avocado Cookies?

pb avocado cookies

Well guess what?! I made it to the top 3 in the contest out of 66 entries. That means that Hass Avocados paid for my trip to FNCE (as well as the other two finalists). I wasn’t allowed to tell anyone that I was even a finalist (or I would have thanked you guys sooner!!)

They told us they would announce the grand prize winner at FNCE on Tuesday! And guess what?! I won!!!!

finalists

The other two finalists made a dip and a keylime cupcake! Both looked delicious and Molly & Katya were both wonderful. We each got to speak briefly about our recipes and why we love avocados and also heard from two of the founding members of the new Avocado Goodness community, which is coming soon! My grand prize was $1,000 and I just want to say thanks again to every single person who took the time to vote! It means so much to me and I couldn’t have done it without you guys!!!!

Hass Avocados was also raffling off a new digital camera and I got to pick the winning ticket!

What a fabulous end to an amazing few days, right? I headed back to the hotel, grabbed my bags and took a cab to the airport. After another delayed flight and another missed connection, I finally made it home around 11pm.

All my swag made it too! Last year I went a little crazy at the expo so this year I tried to stick with stuff I knew I would eat. Lots of nuts, seeds and dried fruit. The boys thoroughly checked it out!

photo (48)

That’s all for today, friends! I plan on recapping a few of the sessions I enjoyed most so I can share some of the take-away points with you guys! Stay tuned 🙂

EDITED TO ADD:

Below are the links to my session recaps:
FNCE Session Recap: Beyond Traditional Dietetics  
FNCE Session Recap: The Power of Visual Food Storytelling To Promote Healthy Eating 
FNCE Session Recap: How Consumers Decide What To Eat- Strategies for Making Healthy Choices

Enjoy!
–Lindsay–

Filed Under: Uncategorized

5 To Thrive

October 22, 2013 by Lindsay 14 Comments

Hi Friends!

Since I’m finishing up my last day at FNCE today, I thought it would be fun to introduce you to a couple of RDs that you may not know! I “met” Mandy & Beth in the blog world several months ago and have fallen in love with their blog! They have a wellness philosophy that I absolutely adore and they’re here to share it with you guys today!

——–

We, a.k.a. Dietitian Duo, couldn’t be more excited to guest post for Lindsay and share 5-to-Thrive, our guiding wellness philosophy, with you! The 5-to-Thrive approach offers practical strategies and inspiration to help you achieve balanced physical, mental and emotional health, leading you down the path towards a healthier and happier lifestyle, forgiving when you falter and rewarding when you succeed. The first step is right at your fingertips. Take it and see if approaching change with positivity results in a better outcome than you’ve ever experienced before. You can do it; you can Thrive.

Get Started

Begin your commitment to change by printing our 5-to-Thrive postcard and posting it on your dashboard, bathroom mirror, work space or wherever you need a little inspiration. Then, reflect on where you are with each of the five pillars. You may find that each one is in balance with little room for improvement. If so, use this tool to maintain balance and prepare for events that may throw you off course. If, life most of us, you are seeking balance in order to tackle a new life challenge, make your health a higher priority or lose weight, zero in on the ones that could use some extra attention. Once you have identified your areas of improvement, complete our customizable 5-to-Thrive mini-goals postcard. Write specific and achievable short-term goals to take small steps in the right direction. As you make progress, continue creating mini-goals to move towards balance.

Nourish

Eat the foods you love without deprivation or guilt. Get over the “good food-bad food” war and give yourself unconditional permission to eat (and enjoy it too!)

Nourish Example Goal: I will plan my meals for the week every Sunday, including a variety of foods that nourish my body.

Move

Committ to move more every day. Be true to your exercise personality with activities that energize your mind and body and bring you joy. Plan workouts in advance and make no excuses in order to accomplish your goals

Move Example Goal: I will walk over my lunch break 3 times per week for 20 minutes.

Connect

Approach change with a positive “I can and I will” attitude. Set realistic goals that jive with your values, interests and daily schedule. Surround yourself with positive people that love, support and encourage you.

Connect Example: I will schedule 1 lunch date a month with my best friend.

Love

Make time to relax, renew and rejuvenate by getting an ample amount of sleep and honoring your body with TLC every day. Ditch negative self-talk and, instead, embrace your genetic blueprint with love and acceptance.

Love Example Goal: I will meditate for 15 minutes each night before bed.

Breathe

Expel stress and negativity with each exhale and draw in positive energy with each inhale. Be present in the moment instead of consantly dwelling on the past or pondering the future. Soothe emotions with strategies that don’t involve food to free yourself from the cycle of emotional eating.

Breathe Example Goal: I will eat in peace at the table and not in front of the T.V.

Download our free 5-to-Thrive resources to get started and keep yourself on track. If you have an idea for a new resource, let us know!

Healthfully yours,

Beth and Mandy

About the Duo

Mandy Rother and Beth Stark are approaching their one-year anniversary as the Dietitian Duo bloggers. This relatable pair believes in working hard, playing hard and Keepin’ it Real. They are passionate about eating and living well, but get that sometimes work, life and a jam-packed social calendar gets in the way. Recognizing that lifestyle change isn’t a “one-size-fits-all” deal, the Duo coaches their readers and clients on making practical and realistic changes centered on nutritious and delicious foods, regular activity, stress management, self-love and positivity.

———–

Pretty cool, right?! I love their approach to healthy living.

Let’s chat:
How do you thrive?

Enjoy!
–Lindsay–

Filed Under: Uncategorized

Anniversary Photo Shoot

October 19, 2013 by Lindsay 27 Comments

Hi Friends!

We got our pictures back from our five year anniversary photo shoot last month. I just HAD to share some of my favorites. I love them all. Our friend Jessica did an amazing job!

Livingston-22

anniv1

Livingston-38

anniv2

Livingston-56

anniv3

Livingston-75

anniv4

Happy Saturday!
–Lindsay–

Filed Under: Uncategorized

An Extraordin-DAIRY Adventure

October 18, 2013 by Lindsay 27 Comments

Hi Friends!

As you know, I was in Cleveland for the past few days with the American Dairy Association Mideast and the Ohio Dairy Farmers. Myself, along with 8 other bloggers met up for an extraordin-DAIRY adventure…and it was tons of fun!

IMG_9208

I left Columbus around lunchtime on Monday. The weather was perfect and it’s an easy drive up to Cleveland…took me about 2 hours. The leaves are changing, which made for a gorgeous ride. I arrived around 2:45 and checked into my room at The Hyatt- at the Arcade in downtown Cleveland. Suh-weeeeet hotel.

dairy1

At 4pm, I met up with the rest of the bloggers, along with our hostesses from ADA Mideast. In case you’re wondering, the other bloggers on this trip were amazing. I didn’t read too many of their blogs before this trip…but let me tell you, there were some SERIOUS food bloggers on this trip. You must check out their blogs (prepare to DROOL!) :

  • Aimee, Shugary Sweets
  • Jocelyn, Inside Brucrew Life
  • Willow, Will Cook for Friends
  • Tanya, Lemons for Lulu
  • Karly, Buns in My Oven
  • Erin, The Law Student’s Wife
  • Lisa, Garnish with Lemon
  • Christina, Dessert for Two

We hopped on our awesome bus and headed North to Lake Erie for a wine & cheese tasting and dinner at Lakehouse Inn & Winery. Our bus had couches, tvs, a bathroom…so fancy!

IMG_9222

When we arrived at the winery, we headed down to check out Lake Erie…so pretty:

IMG_9240

Then we got started with the tasting. We were joined by Marianne Frantz, founder and president of American Wine School and  she taught us all about pairing different cheese with different wines. We got to try tons of wines and cheeses made right here in Ohio.

IMG_9248

Here were some of our pairings. The brie from Mayfield Road Cremery was UNBELIEVABLE and the cheddar from Middlefield Original Cheese was another favorite of mine:

IMG_9251

The actual winemaker  from Lakehouse Winery showed up as well so it was awesome to hear him speak about some of the wines he made. Look, he’s even on one of their bags of wine!

IMG_9256

Afterwards, we were treated to dinner at the winery restaurant called Crosswinds Grille. The chef, Nate Fagnilli, is famous in Cleveland for his involvement in the local foods movement. At his restaurant, he uses tons of locally sourced ingredients, which I loved!

IMG_9269

The salad had local blue cheese and local eggs. The main course was homemade whole wheat pasta with local, organic chicken, locally grown broccoli and a light cream sauce made with local cream. Dessert was chocolate cake with homemade maple ice cream and a berry sauce. So. Good.

We even caught the sunset over the lake:

IMG_9263

Tuesday morning we were up bright and early, on our way by 6am so that we could arrive at our first dairy farm by 7am. Richman Farms is a 4th generation family farm with about 80 cows. We got to visit the milking parlor to see how they milk the cows.

dairy2

We met Jill, the cow on top…she was sassy. She would flip the hose near her head at us because she wanted us to feed her! We learned all about the three different kinds of cows they had on the farm, how they’re milked, what they do to clean the udders before milking and what they do after milking to help avoid infection. They explained how the milk is collected and stored until it’s picked up. They test the milk to make sure no antibiotics are found in the milk and make sure to keep it at safe temperatures. We also learned that bony hips and visible ribs are signs of healthy dairy cows- they don’t indicate that the cows are sick or underfed. Maggie, the farm dog, enjoyed running around and licking up all the extra milk!

Here’s a really good video that Bill, one of the farmers we met while we were there, made about the milking process:

That’s the same milking parlor we were in.

dairy3

After they’re milked, they’re released back into the barn to eat. We learned about everything the farmers do to keep the cows comfortable including soft bedding, heated floors, lots of rubber instead of concrete flooring, special food formulated to meet their nutrition needs, fans and sprinklers to keep them cool in the summer, etc. These are some happy cows…and SO curious! They wanted to know all about what we were doing in their barn!

And they love to eat!

Up next, Cheese! We headed to Pearl Valley Cheese to get a tour of a cheese plant!

IMG_9394

It was really interesting to hear and see more about how cheese is made. They’re known for their Swiss cheese. What you see floating in the top pic above are 200 pound blocks of swiss cheese. We also saw curds and whey being separated and special mixing machines that are stirring the cheese, forcing the excess liquid out before it’s pressed into molds. Pearl Valley does a great job of using almost all parts of the milk that is brought to them. Some of the non-used liquid is turned into energy, floor scraps are fed to the farm animals, etc! Afterwards we got to shop at the Pearl Valley Market. They were kind enough to give us each a $20 giftcard to bring some cheese home with us. The prices were so cheap that we got A LOT of cheese! And I spent $19.82…fully maximizing my giftcard!

IMG_9445

IMG_9578

Up next? Lunch! We headed to the home of a local Amish family for a home-cooked meal! The family built a large barn for their daughter’s wedding this year and they now cook lunches and dinners for different groups! The farm was beautiful and the food was delicious! Homemade bread that was still warm = heaven 🙂

lunch

After lunch it was on to another dairy farm. The second farm we visited, Andreas Dairy Farm, was much larger (with about 1200 dairy cows) but still 6th generation family owned. It was interesting to see the similarities and differences between the large and small farm. In both places, the farms were very clean, many precautions were taken to ensure the safety of the milk and the cows were well cared for.

andreas

We learned about how they deal with the manure, store it, put it back into their fields and also sell it to be used in compost. We also visited the labor barn. This farm typically has 4 new calves born every day and there were about 20 cows in labor while we were there, due to give birth within the next 48 hours. The highlight of the day was getting to feed the baby calves. We each got to feed a giant bottle to a calf that was just one day old. SO adorable!!

IMG_9493

Afterwards, we headed back to the hotel. We had about an hour to shower away the farm smell and get ready for dinner. We hopped back on the bus and headed to dinner in a suite at the Cleveland Browns stadium!

IMG_9511

We had a very special dinner guest- Joe Thomas, tackle for the Browns! I will be honest and tell you that I had no idea who Joe was before this trip. However, I’m now his new biggest fan. He’s been to the Pro Bowl five times and in 2010 he received the Walter Peyton Man of the Year award, which is the NFL’s only recognition for off-the-field accomplishments and contributions to the community.  Joe is very active in the Fuel Up to Play 60 movement and it was awesome to see how passionate he is about teaching kids the importance of eating a healthy breakfast each day, enjoying healthy snacks and being active!

IMG_9510

I’m 5’11 and he made me look short! His wife Annie also joined us. She played basketball for University of Wisconsin and Joe played football there. He was drafted by the Browns in 2007 (their best draft pick in 15 years, according to one of my diehard Browns fan friends!) and has been playing there for 7 years! Joe and his wife have an 8 month old daughter named Logan and it was fun to chat with them about her over dinner. We also got a signed football!

For dinner, we enjoyed a menu inspired by Chef Michael Simon!

dinner

Wednesday morning we were up early again, but this time we were off to school! We visited the Clara E. Westeropp School and had a chance to eat breakfast with some of the students. Westropp has a pretty high breakfast participation rate and it was fun to talk to the kids about what they liked and didn’t like. We heard from the school principal about Fuel Up to Play 60 and their partnership with the ADA mideast has helped make some healthy, positive changes in their school. The Browns selected this school for a playground renovation and ADA Mideast contributed as well with a cafeteria makeover.

IMG_9544

Next, we headed to the Westside Market. It’s Cleveland’s oldest publicly owned market and it was awesome. So many vendors! We had a chance to do a little shopping and I bought some bread and some spicy jerky for the hubby.

IMG_9546

Finally, we headed across the street to Crop Bistro for lunch. We actually got to eat inside a giant vault in the basement of the building.

IMG_9560

We heard from Steve Schimoler, the owner, about his journey. He’s done a lot of product development for Cabot Creamery and made some brilliant food discoveries that he has sold to various companies. He uses his restaurant as a testing facility for all the various things he comes up with so that they can then be produced on a larger scale. Pretty cool stuff.

lunch

While we were at the market, we each got to pick out a type of cheese and we brought them to the restaurant where they sliced them up for us so we could try them all. During lunch we heard a little nutrition presentation.

We got one final surprise, a little cookbook that our hosts put together for us with one dairy-inspired recipe from each blogger on the trip! So fun!

IMG_9574

Around 1:30pm, we headed back to the hotel to grab our things and head home! It was a whirlwind 48 hours but I had a great time and learned a lot. Huge thanks to ADA Mideast and Ohio Dairy Farmers for being such wonderful hosts and putting the whole trip together!

Enjoy!
–Lindsay–

This trip was paid for by ADA Mideast. All thoughts and opinions are my own.


Filed Under: Uncategorized

Spicy Sausage Lentil & Kale Soup

October 15, 2013 by Lindsay 26 Comments

This Spicy Sausage Lentil and Kale Soup is protein-packed and full of vegetables. Make a batch to enjoy for dinner or pack it for lunch all week!


This Spicy Sausage Lentil and Kale Soup is protein-packed and full of vegetables. Make a batch to enjoy for dinner or pack it for lunch all week!

*Photo updated 9/2016*

Hi Friends!

I have a soup recipe to share with you today. The title is a bit misleading because I actually didn’t use spicy sausage, I just made the soup spicy. However, you could use spicy sausage if you wanted to!

Make a big pot of this Spicy Sausage, Lentil and Kale Soup and enjoy it for lunch all week long!

This soup isn’t much to look at…but it tastes great! I made this at the request of Katie, who asked me a few weeks ago to come up with a recipe for sausage & lentil soup! I love making my readers happy, so I got to work. I made my version extra spicy & hubby and I both loved it! You can easily sub spinach for kale if you’d like!

Here’s the recipe:

Print

Spicy Sausage, Lentil & Kale Soup

sausage lentil kale soup 1
Print Recipe

5 Stars 4 Stars 3 Stars 2 Stars 1 Star

4 from 1 review

  • Author: Lindsay L
  • Prep Time: 10 minutes
  • Cook Time: 30 minutes
  • Total Time: 40 minutes
  • Yield: 4 1x
  • Category: Soup

Ingredients

Scale
  • 1 c carrots, chopped
  • 1 c red peppers, chopped
  • 1 c sweet potato, diced
  • 3 clove garlic, minced
  • 1 leek, diced
  • 2 chicken sausages, sliced
  • 2 c cooked lentils
  • 4 c low-sodium chicken broth
  • 1 can no-salt-added diced tomatoes
  • 1 tsp paprika
  • 1 tsp cumin
  • 1–2 tsp cayenne pepper, to taste
  • black pepper, to taste
  • 3 cups chopped kale

Instructions

  1. In a large pot, saute garlic, leeks, carrots, peppers and sweet potato over medium heat for 10 minutes.
  2. Add the sausage, lentils, broth, tomatoes and spices.
  3. Bring to a boil, reduce heat and simmer until veggies reach desired tenderness (15-20 min).
  4. Stir in kale, let simmer an additional 5 minutes.
  5. Serve warm.

Notes

To make this vegetarian/vegan, use veggie broth, leave out the sausage and add your favorite beans or tofu!
Use whatever veggies are your favorite if you don’t like the ones I used.
You could use spinach or any other leafy greens instead of kale.
Pretty simple, right? Like I mention in the notes, this soup is easy to customize. Use your favorite veggies or whatever you have on hand…Add some beans instead of lentils…you get the idea! I used spinach & mozzarella chicken sausages from Meijer but any kind of sausage should work.

Did you make this recipe?

Tag @theleangreenbean on Instagram


3.2.1255

Enjoy!
–Lindsay–

Filed Under: Appetizer, Dinner, Soup & Salad Tagged With: Bell Pepper, Carrot, Chicken Broth, Chicken Sausage, Kale, Lentils, Sweet Potato

Lemon Avocado Salad Dressing

October 14, 2013 by Lindsay 40 Comments

This Lemon Avocado Salad Dressing is light and flavorful and an easy way to add some healthy fats to your salad.

Hi Friends!

This Lemon Avocado Salad Dressing is light and flavorful and an easy way to add some healthy fats to your salad.

I know it’s Bean Bytes day but I just had to pop in again and share a quick recipe with you guys in honor of a very special lady! Thanks to some wonderful blogger organizers, we’re having a little virtual baby shower for Liz at The Lemon Bowl. If you haven’t checked out her blog, go do so immediately. She posts some amazing recipes!

Today we’re celebrating Liz by putting together a little recipe roundup… and LEMON is the star ingredient!

lizs-baby-shower

I opted to make a salad dressing. You guys know I LOVE avocado on my salad. Usually I just chop it up and put it on top, but sometimes it’s nice to spread the wealth a little bit and give every piece of lettuce a little avocado flavor! Since lemon and avocado naturally go together, it didn’t take long to come up with this recipe.

Print

Lemon Avocado Salad Dressing

lemon avocado dressing
Print Recipe

5 Stars 4 Stars 3 Stars 2 Stars 1 Star

4.8 from 4 reviews

A easy to make, light dressing that’s full of flavor!

  • Author: Author: Lindsay L

Ingredients

Scale
  • 1/3 c mashed avocado (1 medium)
  • 2 Tbsp lemon juice (juice from one lemon)
  • 1 Tbsp olive oil
  • 1 tsp honey
  • 2–3 Tbsp water (to reach desired consistency)

Instructions

  1. Combine all ingredients in a small bowl and stir vigorously until well-combined.
  2. Makes about 1/2 a cup of dressing.

Did you make this recipe?

Tag @theleangreenbean on Instagram

I enjoyed mine on a salad topped with a salmon cake!

This Lemon Avocado Salad Dressing is light and flavorful and an easy way to add some healthy fats to your salad.

Want more lemon? Check out what the other fabulous bloggers made for the shower:

Appetizers

  • Whipped Feta Spread with Lemon, Garlic & Rosemary by Miss in the Kitchen
  • Cauliflower Mashed “Potatoes” in a Lemon Cup with Smoked Paprika by Climbing Grier Mountain
  • Lemon Basil Bruschetta by Dine & Dish
  • Chipotle Sweet Potato Fries w/ Lemon Basil Aioli by What’s Gaby Cooking
  • Lemon Garlic Herb Marinated Olives by Sarah’s Cucina Bella
  • Kalamata Olive and Feta Dip with Baked Lemon Pepper Pita Chips by In Aggie’s Kitchen
  • Creamy Asparagus Guacamole by The Healthy Apple

Beverages

  • Sparkling Honey Rosemary Lemonade by Nutmeg Nanny
  • Basil Hibiscus Lemonade by Fabtastic Eats
  • Jam Mocktails: Lemon & Pineapple by Cooking with Books
  • Lemon Jalapeno Spritzers by Bev Cooks
  • Sparkling Blackberry Lemonade by Crumbs and Chaos
  • Limonana (Middle Eastern Frozen Mint Lemonade) by An Edible Mosaic
  • Tipsy Lemonade Iced Tea by Family Fresh Cooking

Salads

  • Kale Salad with Lemon-Tahini Dressing by Thrifty Veggie Mama
  • Lemon Quinoa Salad with Pistachios & Sun-Dried Tomatoes by Cookin’ Canuck
  • Greek Salad with Garlic-Lemon Vinaigrette by Gimme Some Oven
  • Pear Quinoa Salad by Reluctant Entertainer
  • Lemon Avocado Salad Dressing by The Lean Green Bean
  • Lemony Spinach & Tomato Quinoa Salad by MomAdvice
  • Herbed Calamari Salad with Preserved Lemons by Everyday Maven

Main Dish

  • Italian Lemon Roast Chicken Pot by Eat2Gather
  • Roasted Lemon Garlic Cocktail Shrimp by Simply Scratch
  • Lemon Garlic Shrimp Tostada by A Zesty Bite
  • Lemon Pepper Shrimp Linguine by Taste and Tell
  • Salmon with Lemon Herb Butter by Handle the Heat
  • Lemon Chicken Stew by FoodieCrush
  • Chicken Saltimbocca with Lemon Cream Sauce and Olive Orzo by Baker by Nature

Desserts

  • Honey Lemon Shortbread Cookies by Rachel Cooks
  • Lemon Glazed Cookies by A Cedar Spoon
  • Healthier Lemon Bars by Texanerin Baking
  • Lemon Sugar Cookies by What Megan’s Making
  • Light Lemon Mousse by Country Cleaver
  • Lemon Sugar Cookie Sandwiches by i am baker
  • Mini Lemon Cheesecakes with Gingersnap Crust by The Law Student’s Wife
  • Lemon Cupcakes with Lemon Chips by Seeded at the Table

[Tweet “This Lemon Avocado Salad Dressing from @leangrnbeanblog is the perfect way to step up any salad!”]

Salad dressings can easily be made ahead of time during a food prep session to have on hand to make salads more exciting during the week. If you liked this post, you’ll love my ebook – The Ultimate Guide To Food Prep. It dives into even more detail about how to food prep, troubleshoots common problems and provides tons of tips to make it easier! Click the image below for more details!

The Ultimate Guide To Food Prep Ebook

Enjoy!
–Lindsay–

Filed Under: Food Prep, Side Dish, Soup & Salad Tagged With: Avocado, Lemon, Oil

Freezer Chocolate Peanut Butter Cups

October 8, 2013 by Lindsay 78 Comments

Hi Friends!

I have a little treat for you today!

Always have a stash of these Chocolate Peanut Butter Cups in your freezer. Made with coconut oil and cocoa, they're dairy free and easy to customize!

*Edited 1/2015: I can’t stop making these little guys! I always try to have a stash in the freezer for when a chocolate craving hits. Since I make them so often, I took some updated pictures for you guys to show you how pretty they really are!

Freezer Chocolate Peanut Butter Cups

These Freezer Chocolate Peanut Butter Cups make the perfect dessert! They're loaded with healthy mix-ins like nuts and seeds and perfectly portioned to curb your sweet tooth!

These little guys are so delicious. I’ve been eating them for dessert for the past couple of weeks. They have to be stored in the freezer because they’re made with coconut oil and they start to melt pretty quickly at room temperature.

Always have a stash of these Chocolate Peanut Butter Cups in your freezer. Made with coconut oil and cocoa, they're dairy free and easy to customize!

To make them even tastier, I’ve packed them full of delicious add-ins like almonds, pistachios, chia seeds, pumpkin seeds and Craisins!

Always have a stash of these Chocolate Peanut Butter Cups in your freezer. Made with coconut oil and cocoa, they're dairy free and easy to customize!

So here’s how you make them:

Print

Freezer Chocolate Peanut Butter Cups

peanut butter cups 1
Print Recipe

5 Stars 4 Stars 3 Stars 2 Stars 1 Star

4.8 from 6 reviews

Simple to make and perfectly portioned for a nightly snack or dessert!

  • Author: Lindsay L
  • Prep Time: 5 minutes
  • Total Time: 5 minutes

Ingredients

Scale
  • 3 Tbsp coconut oil
  • 2 Tbsp honey
  • 1/2 cup peanut butter
  • 3 Tbsp unsweetened cocoa powder
  • 2 Tbsp chia seeds
  • 1/3 c pumpkin seeds
  • 1/3 c pistachios
  • 1/3 c almonds
  • 1/4 c Craisins

Instructions

  1. In a small bowl, combine the coconut oil, honey and peanut butter.
  2. Microwave for 30 seconds and stir.
  3. Add cocoa powder and chia seeds and mix until well combined.
  4. From here you have two options: Divide mixture into 12 muffin tins and top with remaining ingredients OR add remaining ingredients to liquid mixture and then portion into muffin tins.
  5. Freeze for 30 minutes, use a knife to pop out of muffin tins and store in an airtight container in the freezer. (Note- you can also make them using muffin tin liners!)

Did you make this recipe?

Tag @theleangreenbean on Instagram

Pretty simple, right? The first time I made these I just mixed the nuts, seeds and fruit into the mixture and then scooped into the muffin tins. The second time, I wanted them to look prettier so I added the nuts and seeds on top. Either way is fine!

These Freezer Chocolate Peanut Butter Cups make the perfect dessert! They're loaded with healthy mix-ins like nuts and seeds and perfectly portioned to curb your sweet tooth!

These are totally customizable. Use your favorite nuts, seeds and dried fruit to make them your own.

These Freezer Chocolate Peanut Butter Cups make the perfect dessert! They're loaded with healthy mix-ins like nuts and seeds and perfectly portioned to curb your sweet tooth!

Let’s chat:
What mix-ins would YOU use?!

Enjoy!
–Lindsay–

Filed Under: Dessert, Snack Tagged With: Chia Seed, Cocoa Powder, Honey, Peanut Butter, Pepitas

  • « Go to Previous Page
  • Page 1
  • Interim pages omitted …
  • Page 44
  • Page 45
  • Page 46
  • Page 47
  • Page 48
  • Interim pages omitted …
  • Page 65
  • Go to Next Page »

Primary Sidebar

Lindsay Livingston The Lean Green Bean Healthy Living Tips and Tricks

I'm a Registered Dietitian and mom of three from Columbus, Ohio. I use this blog to share simple, healthy recipes, nutrition tips, and an honest glimpse of motherhood!

Learn More →

Questions? Comments? Email me: [email protected]

The Lean Green Bean Facebook The Lean Green Bean Instagram The Lean Green Bean Pinterest The Lean Green Bean Twitter The Lean Green Bean Feed
footer-logo
The Lean Green Bean Facebook The Lean Green Bean Instagram The Lean Green Bean Pinterest The Lean Green Bean Twitter The Lean Green Bean Feed
Recipes

Breakfast
Dinner
Snack
Slow Cooker

Kids

Cooking With Kids
Favorite Gifts
Toddler Meals
Indoor Activities

Resources

Easy Packed Lunches for Kids
Dinner Spark
Snack Spark
Ultimate Guide to Food Prep

About

Meet Lindsay
Become an RD
Work with Me

The Lean Green Bean is a participant in the Amazon Services LLC Associates Program, an affiliate advertising program designed to provide a means for sites to earn advertising fees by advertising and linking to amazon.com.
Read the full privacy and disclosure policy here.

Copyright © 2022 · The Lean Green Bean

table talk series

Learn how food affects your body.

Get my free Table Talk email series where I share bite-sized nutrition information about carbs, protein, and fat, plus bonus information about snacks and sugar!

[email protected]