• Skip to main content
  • Skip to primary sidebar

Learn how food affects your body. Get Free Nutrition Info Today

the-lean-green-bean-logo
  • Home
  • Recipes
  • Kids
  • Resources
    • Ebooks
    • Food Prep
    • Videos
    • Snack Round-Ups
    • Gift Guides
  • About
    • Become An RD
    • Work With Me
  • Search
the-lean-green-bean-logo
  • Home
  • Recipes
  • Kids
  • Resources
    • Ebooks
    • Food Prep
    • Videos
    • Snack Round-Ups
    • Gift Guides
  • About
    • Become An RD
    • Work With Me
  • Search

blog

Pre-Kindergarten Daily Schedule

March 16, 2020 by Lindsay 7 Comments

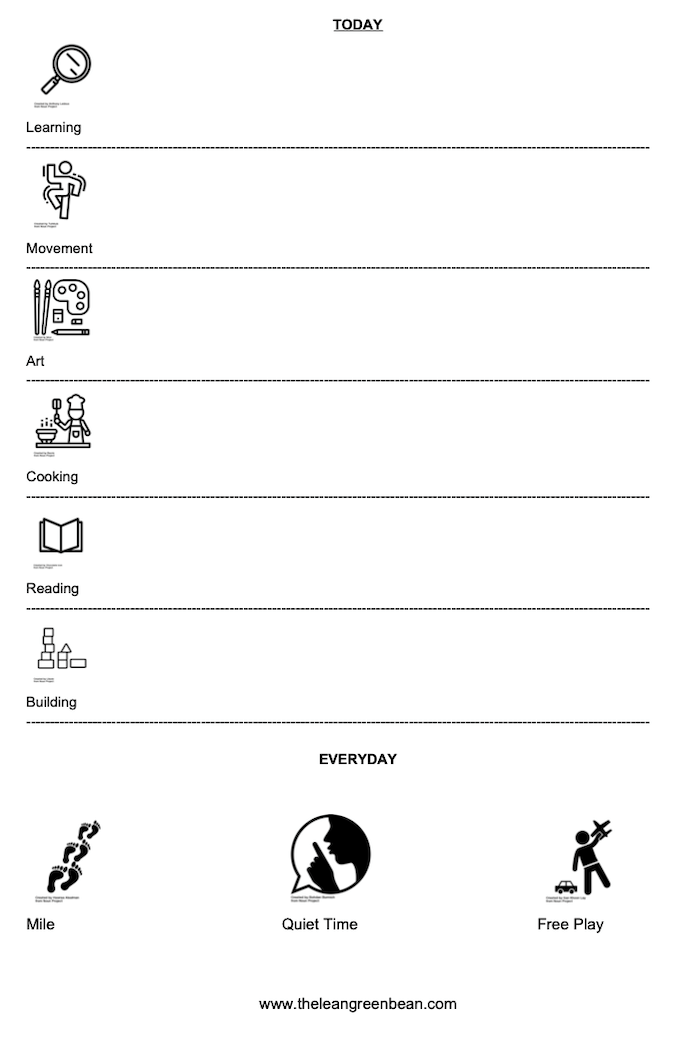
This Pre-Kindergarten Daily Schedule is an easy way to plan your day. Let your child choose an activity in each category and practice writing it if they can! 

Pre-Kindergarten Daily Schedule

Hi friends!

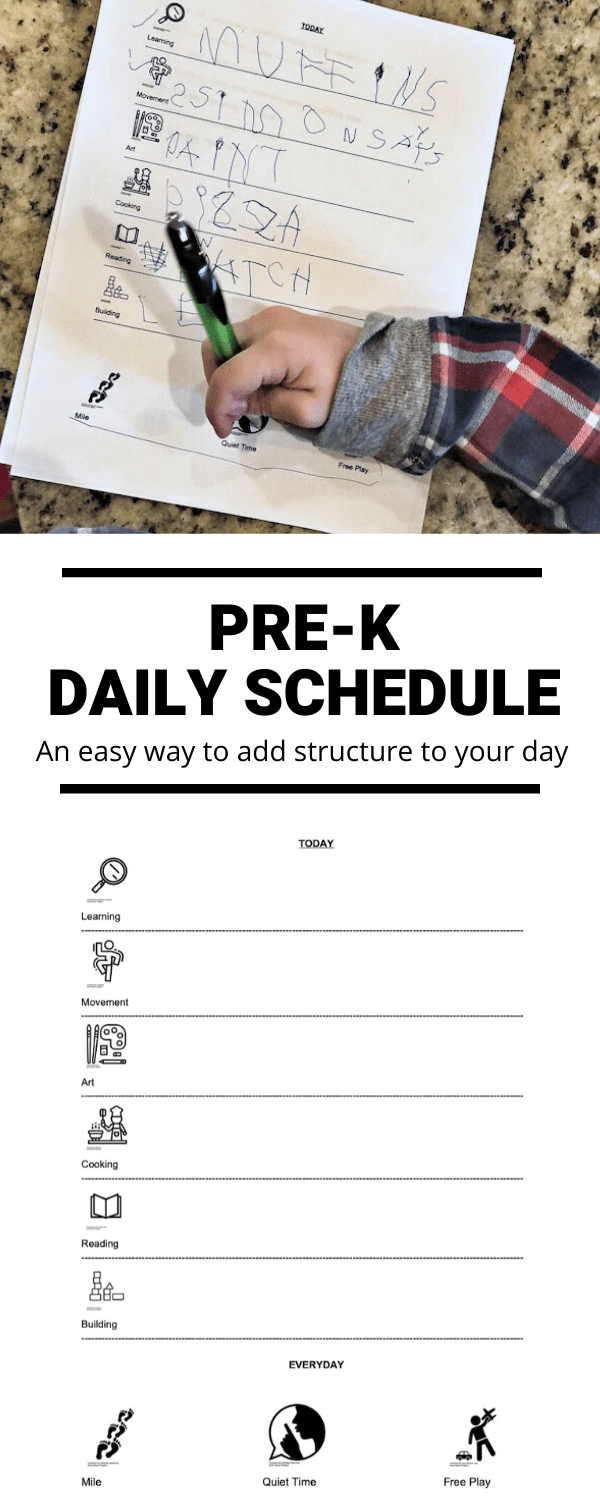
I wanted to share this Pre-Kindergarten Daily Schedule I put together to help provide us with a little structure while my kids are not in school. My oldest is only in pre-k so I wanted something pretty basic but also something that would give him some ownership and let him choose as much as possible so that he would be excited to participate. I created this schedule so that together we could brainstorm and write down an activity in each of the following categories:

  • Learning
  • Movement
  • Art
  • Cooking
  • Reading
  • Building

This schedule focuses more on categories rather than doing things in a specific order.  It allows us to choose some activities each day and then organize them in a way that works best for us each day without being restricted to doing things in the same order daily. My son thrives on routine and schedule, so my guess is we may start naturally doing things in the same order each day anyways, but I like the flexibility.  Or who knows, he may just be happy going through the daily schedule each morning, even if it’s a different schedule from the day before.

Pre-Kindergarten Daily Schedule

Pre-kindergarten daily schedule

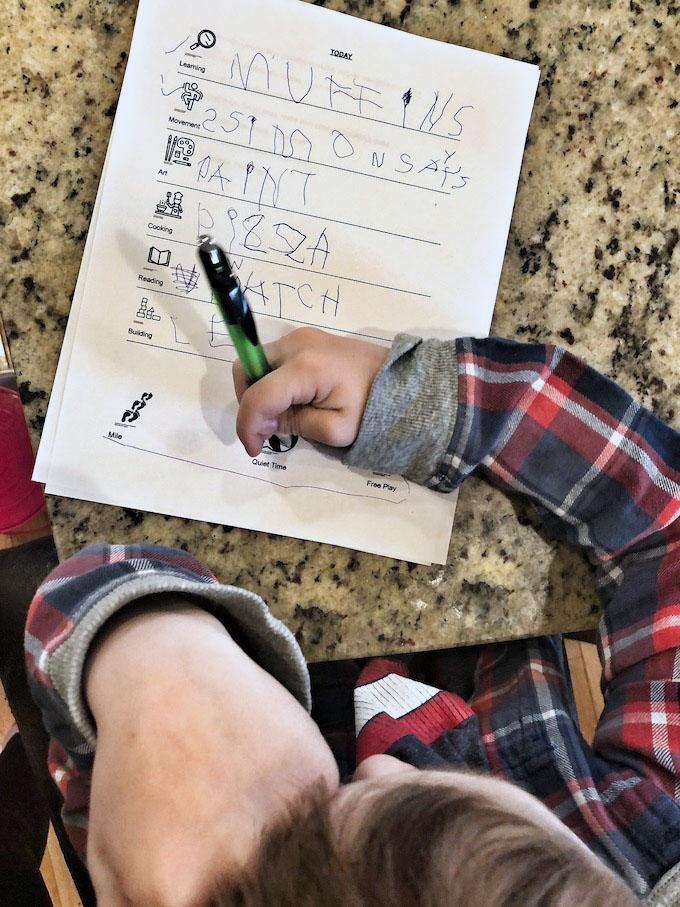
Here’s an example of how we filled out the daily schedule:

  • Learning: Muffins (He wanted to learn about what makes muffins rise)
  • Movement: Simon Says 
  • Art: Painting
  • Cooking: Pizza (He wanted to make homemade pizza)
  • Reading: Watch (He wanted to use Storyline Online to watch an actor read a book)
  • Building: Legos

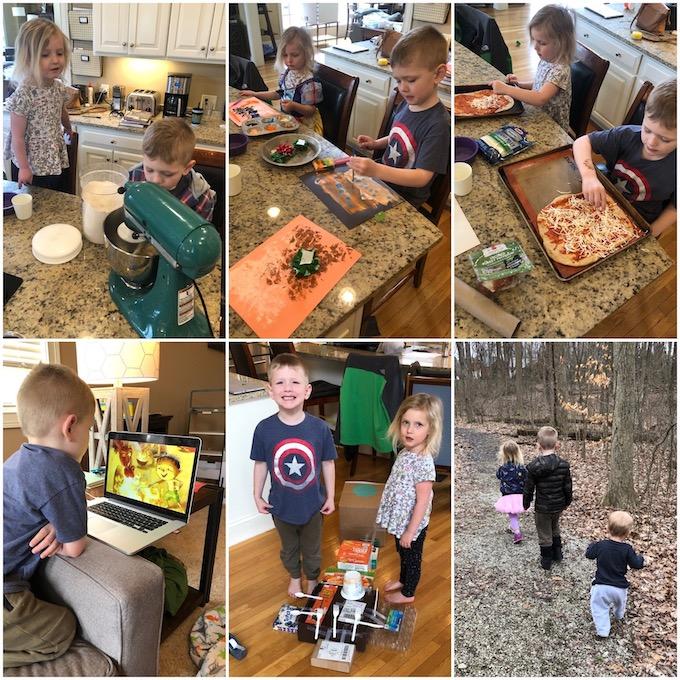
pre-k day at home

And here’s how our day went:

  • Wake up/breakfast/showers/get dressed
  • Make schedule
  • Make pizza dough (watched a video on yeast while yeast was activating)
  • Free play
  • Snack
  • Painting
  • Simon Says for movement
  • Science experiment about the difference between baking soda and baking powder. (Find it here)
  • Lunch – shaped, baked and ate our pizzas…plus some math with pepperonis
  • Quiet time
  • Storyline online books
  • Daily mile – bike/walk/scooter + a little nature hike
  • Snack
  • Free play + dinner prep
  • Outside time
  • Dinner
  • TV
  • Bed

This Pre-Kindergarten Daily Schedule is an easy way to plan your day. Let your child choose an activity in each category and practice writing it if they can! 

This is a flexible schedule that’s working well for us so far. Add your own categories to make it work for you. If you decide to use it, you can prompt your kids to help them choose the activity for each category: 

  • Learning – Ask them if they want to learn about a certain animal or person, how something works, do a science experiment, learn a new skill, etc 
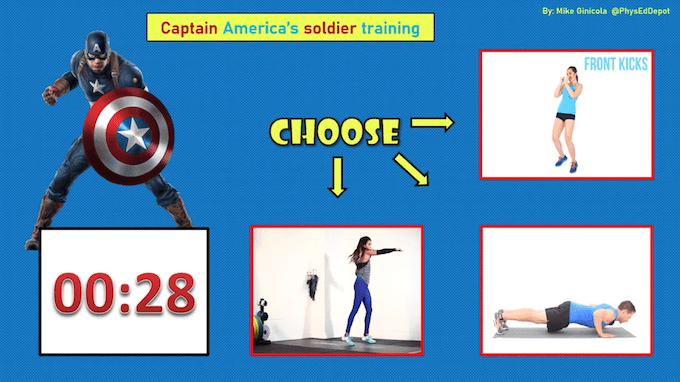
  • Movement – They could make up their own workout, do Cosmic Kids Yoga, play a sport, build an obstacle course, go on a scavenger hunt or hike, play Simon says…anything to get their body moving
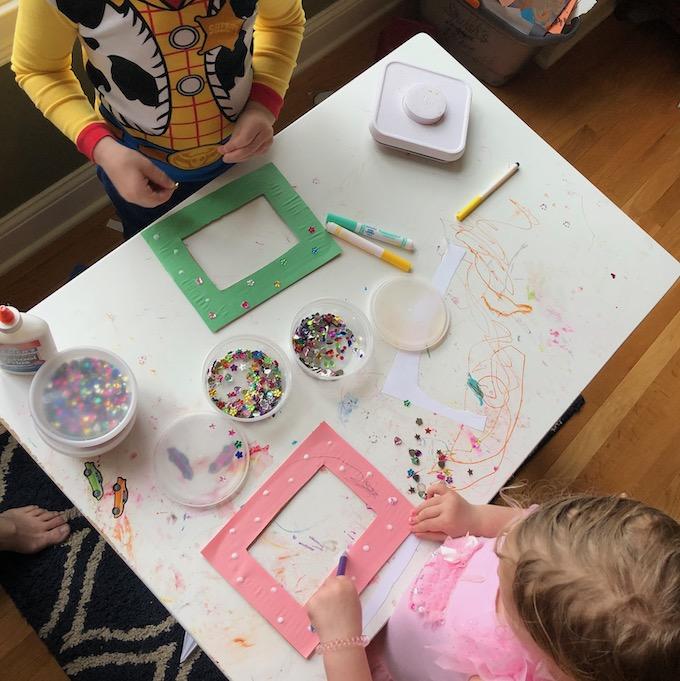
  • Art – Let them choose the art medium: paint, markers, crayons, watch a video to help them learn to draw something, help them illustrate their own story, make a collage, do a craft, etc
  • Cooking – Have your kids help you prep food for the week, prep food for dinner or help you make dinner, make their own lunch or breakfast, bake something, invent their own recipe…
  • Reading – Read a book, listen to a bok at Storyline Online, listen to an audiobook. After reading or listening, ask them to summarize what happened or ask a few questions to check their comprehension.
  • Building– Encourage them to use their imagination and create something using legos, Magnatiles, blocks, items from the recycling bin, playdough etc
  • Daily: Things we do every day- quiet time and free play, plus walk a mile (weather permitting) 

If things come up during the day that you want to learn about the next day, fill them in before bed! During our day today we talked about woodpeckers on our nature walk and freckles & moles at dinner so we wrote them both down to investigate more tomorrow!

You can download your own copy of this Pre-Kindergarten Daily Schedule here!

Enjoy!
–Lindsay–

Filed Under: Kids

Easy Pantry and Freezer Meals

March 14, 2020 by Lindsay 2 Comments

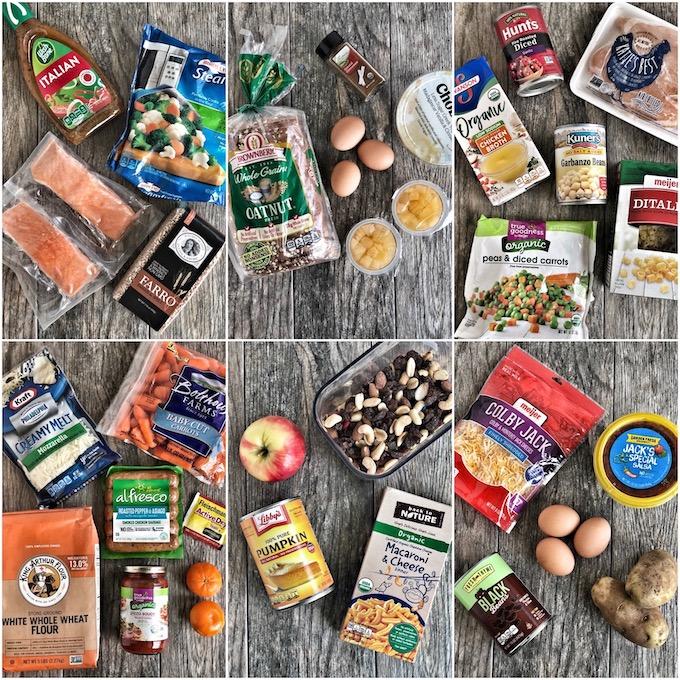
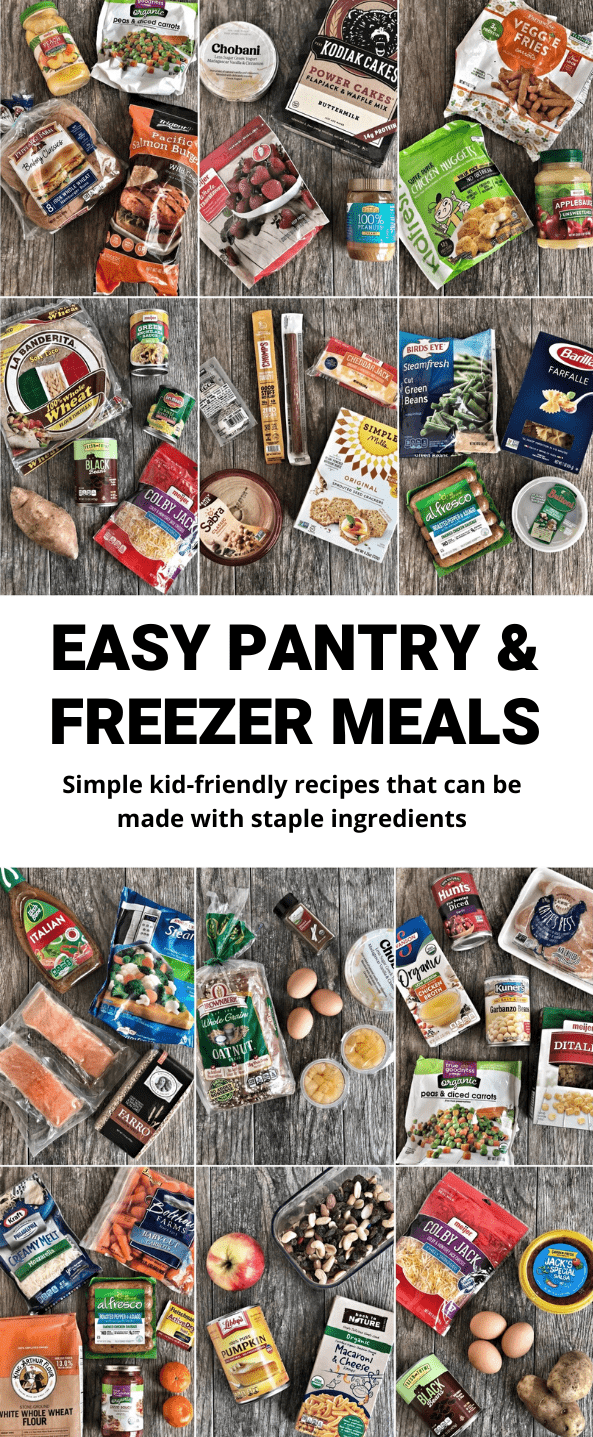
These Easy Pantry and Freezer Meals use staple ingredients, plus a few things that last a while in the fridge, to make simple, kid-friendly dinners.

Easy Pantry and Freezer Meals

Hi friends! 

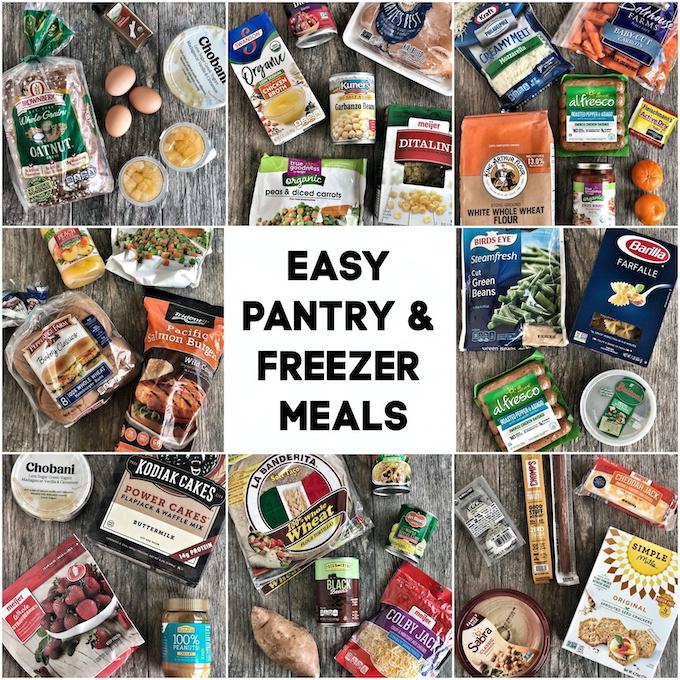
I’ve gotten a lot of requests for easy pantry and freezer meals so I wanted to put together a post of simple ideas for you guys! I used ingredients from my pantry and freezer, along with a few things that last a while in the fridge like pre-packaged hard-boiled eggs, yogurt, carrots, cheese, pesto etc! For veggies I relied on vegetables that have a long shelf life in the pantry like potatoes, squash and onions, carrots in the fridge, plus frozen vegetables (canned vegetables also work!). For fruits, I tried to include things like apples and oranges that last a while, plus frozen and canned/packaged fruit. 

Remember that these meals are flexible. You can easily swap in your favorite type of frozen vegetables, crackers, pasta, beans, frozen meat etc. I’m not sponsored by or endorsing any specific brands for this post. I took these photos using what I had on hand, without any special trips to the store because these are all actual meals I would make for my family, especially during this time when we might not be able to get to the grocery store as often as usual!

Easy Pantry and Freezer Meals

Easy Pantry and Freezer Meals that are kid-friendly

**The ideas in red do not have links. They’re just general ideas!**

  1. Burger + Fruit + Veggies – Choose your favorite meat, fish or veggie burger and pair with steamed veggies and fruit
  2. Pancakes + Smoothie – Make pancakes from scratch or use your favorite mix. Pair with a yogurt-based smoothie and throw in some frozen fruits (and veggies like spinach, cauliflower or zucchini if you want!) and healthy fat like peanut butter
  3. Chicken Nuggets + Veggie Fries + Applesauce – Swap veggie fries for regular fries if you want and add an extra side of veggies
  4. Sweet Potato & Black Bean Enchiladas – Mix roasted sweet potatoes with black beans, corn and cheese. Spoon into tortillas and top with enchilada sauce and cheese before baking. If you have meat in your freezer you can cook and use that instead of sweet potatoes, or you could skip the tortillas and mix in some cooked quinoa, farro or rice and scoop with chips. You could also use canned chicken. 
  5. Snack Plate – Make a plate with crackers, sliced cheese, meat sticks/pepperoni/smoked meats, hard-boiled eggs and hummus for everyone to share. Throw on some carrots and a side of fruit if you want!
  6. Pesto Pasta + Chicken Sausage – Cook the pasta, add sliced sausage and pesto and mix. Serve with steamed veggies.

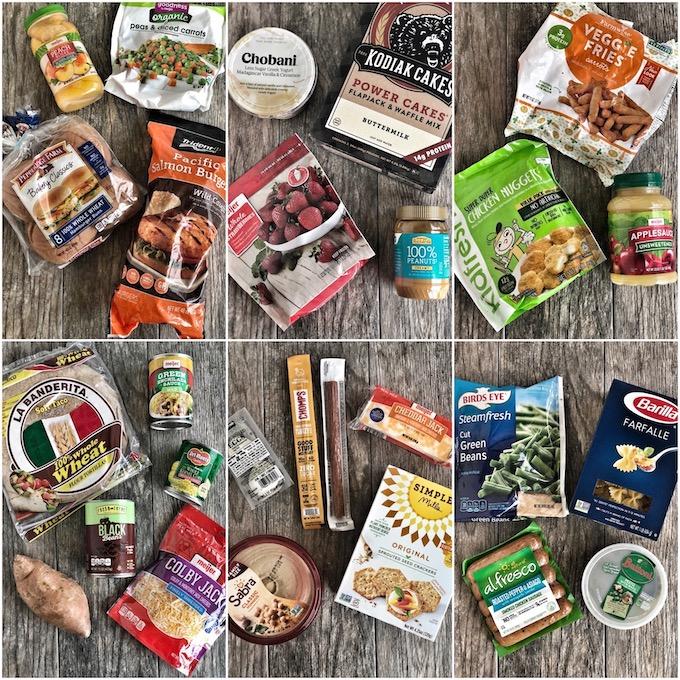
Simple pantry and freezer dinners that are kid-friendly

  1. Italian Salmon + Farro + Veggies – Drizzle salmon with dressing and bake. Serve with farro/rice/quinoa and your favorite veggies. If you have frozen broccoli or green beans etc you could roast them right on the pan with the salmon from frozen.
  2. French Toast + Fruit + Yogurt – Mix eggs, milk and cinnamon. Dip bread and cook on the stove or griddle. Serve with packaged fruit and yogurt. If you don’t have yogurt, drizzle the french toast with peanut butter or add a handful of nuts to the plate!
  3. Chicken & Chickpea Soup – Cook chicken in a dutch oven with garlic, onion and some frozen veggies. Add a can of chickpeas and tomatoes, some broth and your favorite noodles. Make it vegetarian by leaving out the chicken or swap chickpeas for white beans if you prefer!
  4. Sausage Pizza + Carrots + Oranges – Make your own pizza dough. Top with pizza sauce, chicken sausage and cheese. Serve with carrots or another veggie and apple slices or clementines!
  5. Pumpkin Mac & Cheese + Apples + Trailmix – Make a box of mac and cheese but stir in some pumpkin. Or skip the pumpkin and throw in some peas. 
  6. Breakfast Hash – Roast potatoes. Mix with black beans and scrambled eggs. Top with cheese and salsa.

And now here are some recipes already on the blog that can be made with little to no modification.

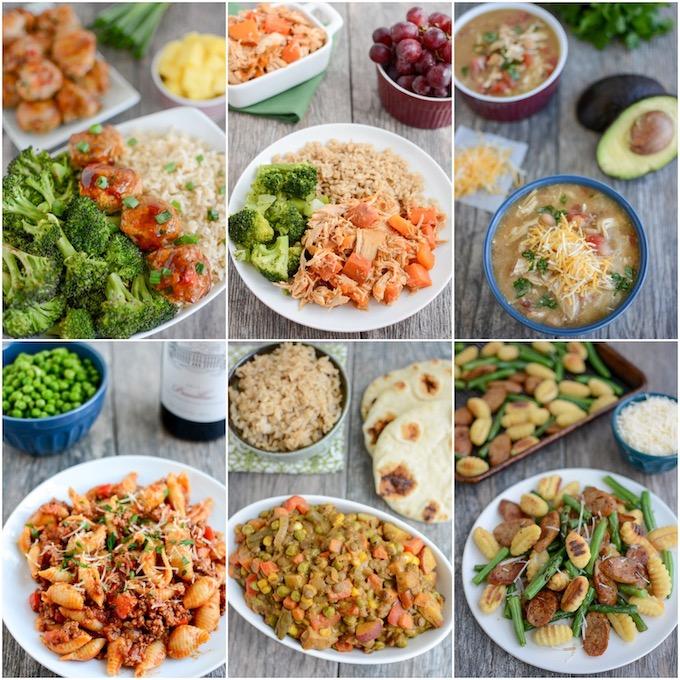
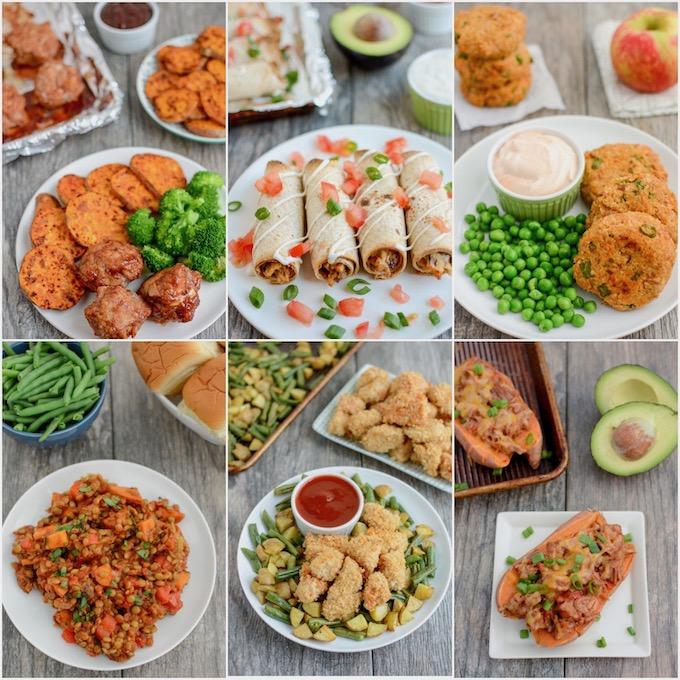
Easy Dinners using pantry and freezer staples

**click the recipe title to be taken to the recipe on the blog!**

  1. Carrot Pineapple Turkey Meatballs – Swap green onions for white onions if you need to. You can also leave out the red pepper if you don’t have. Serve with rice/farro/quinoa/cauliflower rice and broccoli (roasted from frozen).
  2. Slow Cooker Honey Garlic Chicken Thighs – Add extra vegetables if you want! Or serve with steamed veggies and rice.
  3. White Chicken Chili – The recipes calls for fresh chicken. If you don’t have some in your freezer to cook you can sub canned chicken or use extra beans.
  4. Instant Pot Pasta With Meat Sauce – If you don’t have an Instant Pot, just cook some ground meat, mix it with a jar of sauce and serve over your favorite noodles.
  5. Lentil Veggie Curry – You can leave out the potatoes or peppers if you don’t have them. Swap lentils for chickpeas if you don’t have them. 
  6. Sheet Pan Gnocchi with Sausage – I’ve never roasted frozen green beans but I have done it with broccoli. Or you could just steam veggies and mix them in

dinner ideas using freezer and pantry staples

  1. Sheet Pan BBQ Meatballs with Sweet Potatoes – Use whatever ground meat you have. Or try these Pesto Lentil Balls. 
  2. Baked Ranch Chicken Taquitos – Swap chicken for canned chicken if you need to or make them vegetarian with extra beans.
  3. Tuna Quinoa Cakes – You can also use canned salmon or probably even canned chicken
  4. Lentil Sloppy Joes – Leave out the mushrooms if you don’t have them
  5. Crispy Chicken Bowls with Potatoes  – Swap steamed veggies for roasted and mix with potatoes. You could also use chicken nuggets from the freezer.
  6. BBQ Pulled Pork Loaded Sweet Potatoes – If you don’t have meat, make a vegetarian bean chili with canned beans and tomatoes and serve over baked potatoes

A couple of other ideas? Tuna casserole with egg noodles, frozen mixed veggies and a can of cream of mushroom soup or black bean nachos!

These Easy Pantry and Freezer Meals use staple ingredients, plus a few things that last a while in the fridge, to make simple, kid-friendly dinners.

Hope this was helpful!

–Lindsay–

Filed Under: Dinner, Ingredient Round-Ups

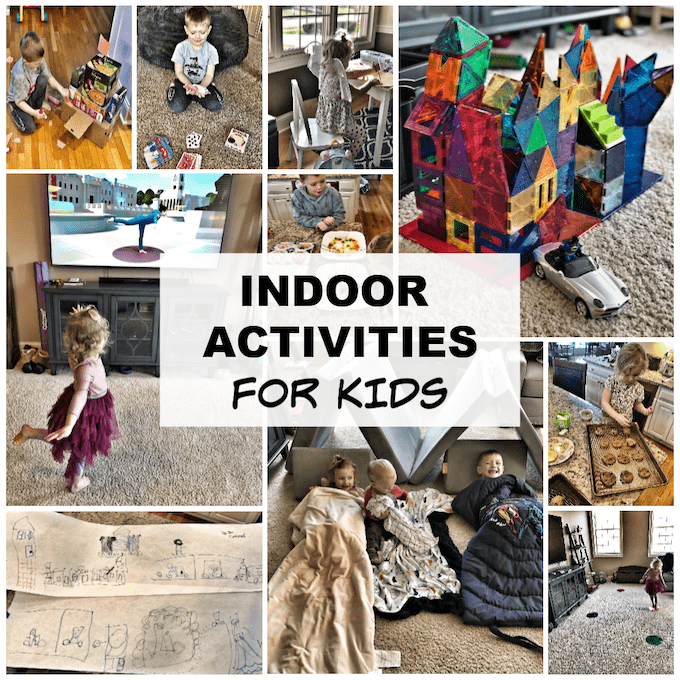
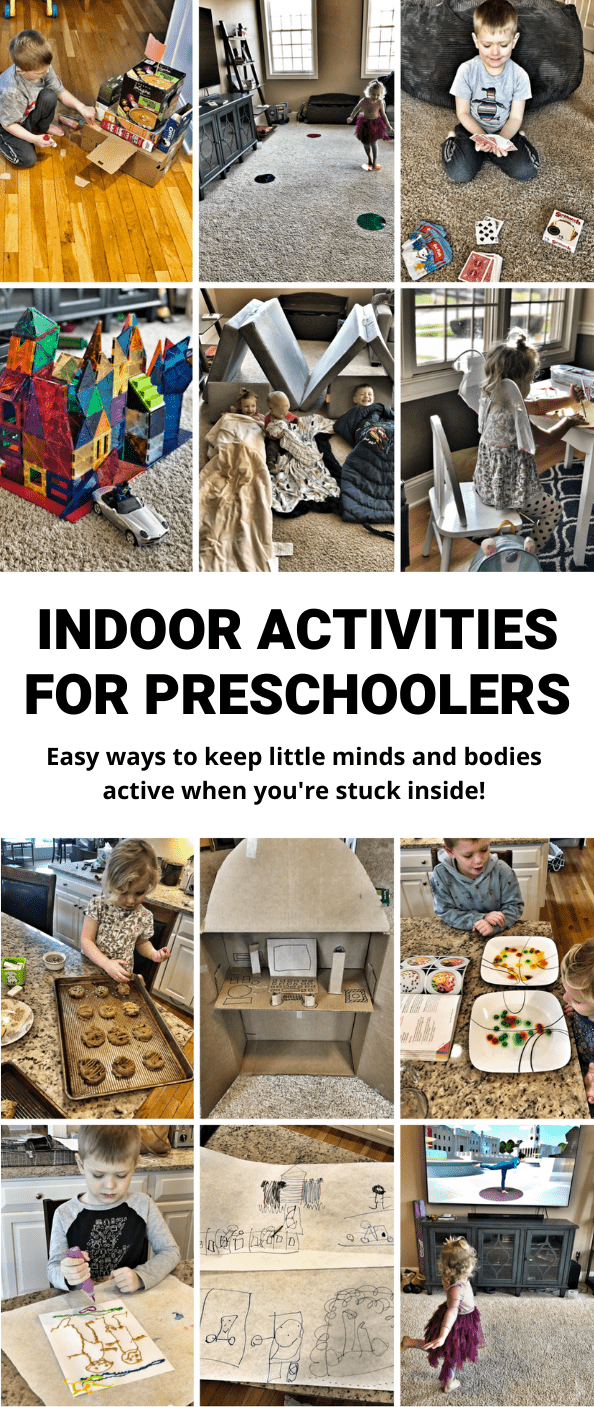
Indoor Activities for Kids

March 13, 2020 by Lindsay 2 Comments

Here are 35+ Indoor Activities for Kids that are perfect for helping preschoolers and kids in elementary school keep their bodies and minds active indoors when it’s too hot, cold or rainy to go outside.

Indoor Activities for Kids from preschool to elementary school

Hi friends!

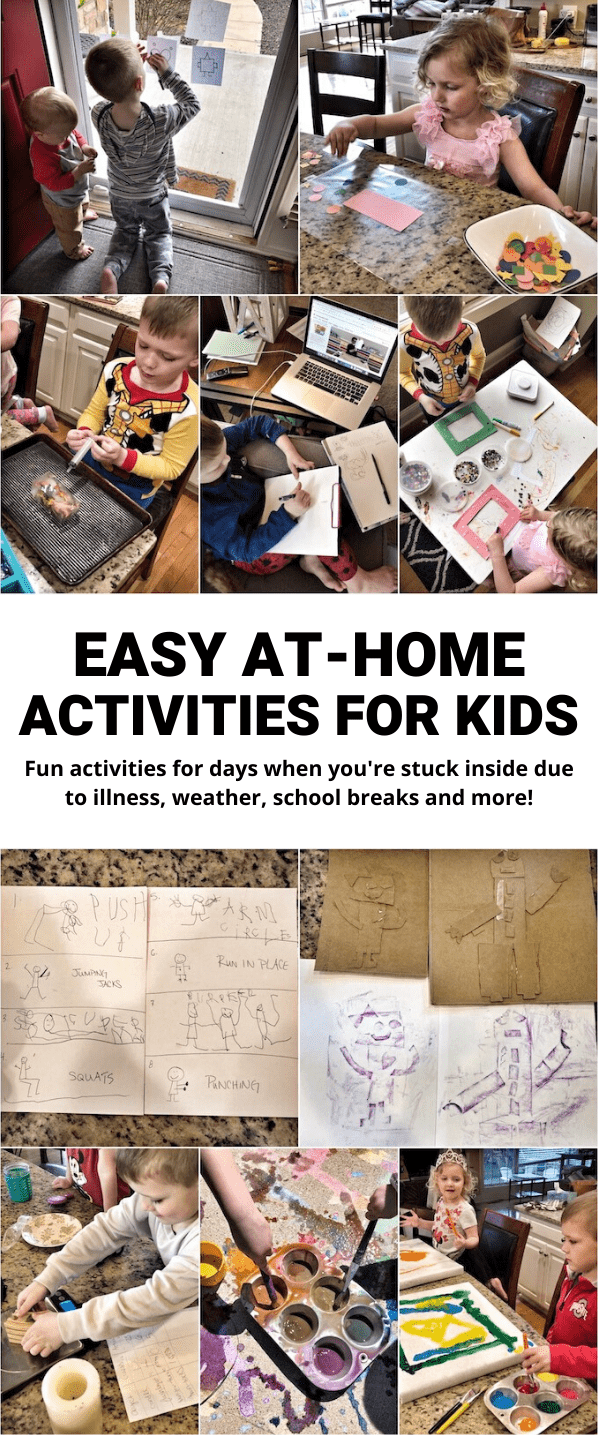
A few years ago, I shared these Indoor Activities For Toddlers and Cheap Toddler Activities and they were a big hit! Now that my kids are older and in preschool, I’ve been meaning to compile a list of indoor activities for slightly older kids! Now that many of us will be spending a lot more time at home, it seemed like the perfect time to put it together. So here are some simple ideas to help keep your kids entertained and maybe even give you a little time to yourself! These should be good for preschoolers and younger elementary school-aged kids. And if you need more ideas you can find them in my At-Home Activities for Kids post!  (PS- If you have good weather, here are some Scavenger Hunt Ideas For Kids!)

Indoor Activities for Kids

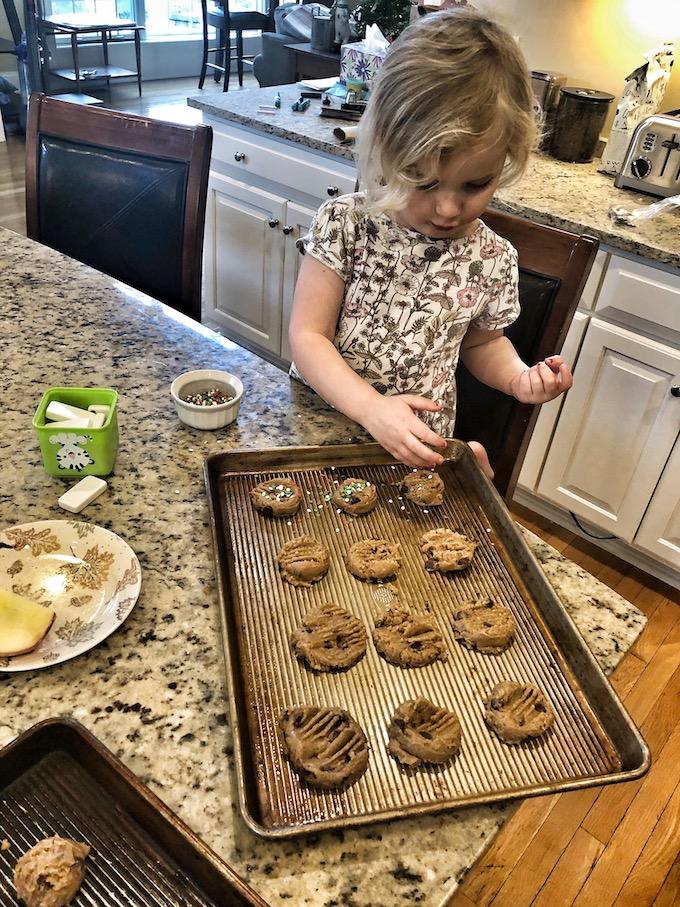
preschooler baking cookies

  • Get Cooking – Let them help you cook or bake. As they gain the confidence they can do more and more themselves. Check out these Kitchen Tasks for Toddlers. 
  • Dot Simon – Make a few colored dots and spread them around the room. Make a home base. Call out one color and have the child run to it and then back to base. Next call the first color + another color. The child runs to color 1 and then color 2. Continue adding a color each time until the child can no longer remember the order once they start.
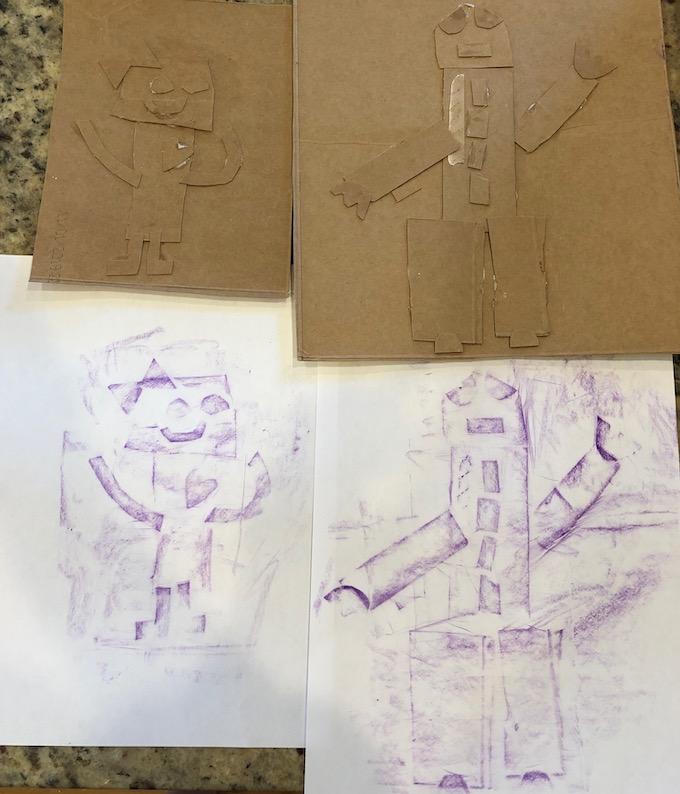
  • Recycling Robot – Turn the kids loose on the recycling bin. Give them some tape or help them use a hot glue gun to build a robot or any creation they can imagine!
  • Make Your Own Puzzles – Draw a picture, cut it into puzzle piece shapes and mix them up. Let them put it back together.
  • Build an Obstacle Course – Make them as hard or easy as you want, get out a timer and let the kids go through as quickly as they can. 
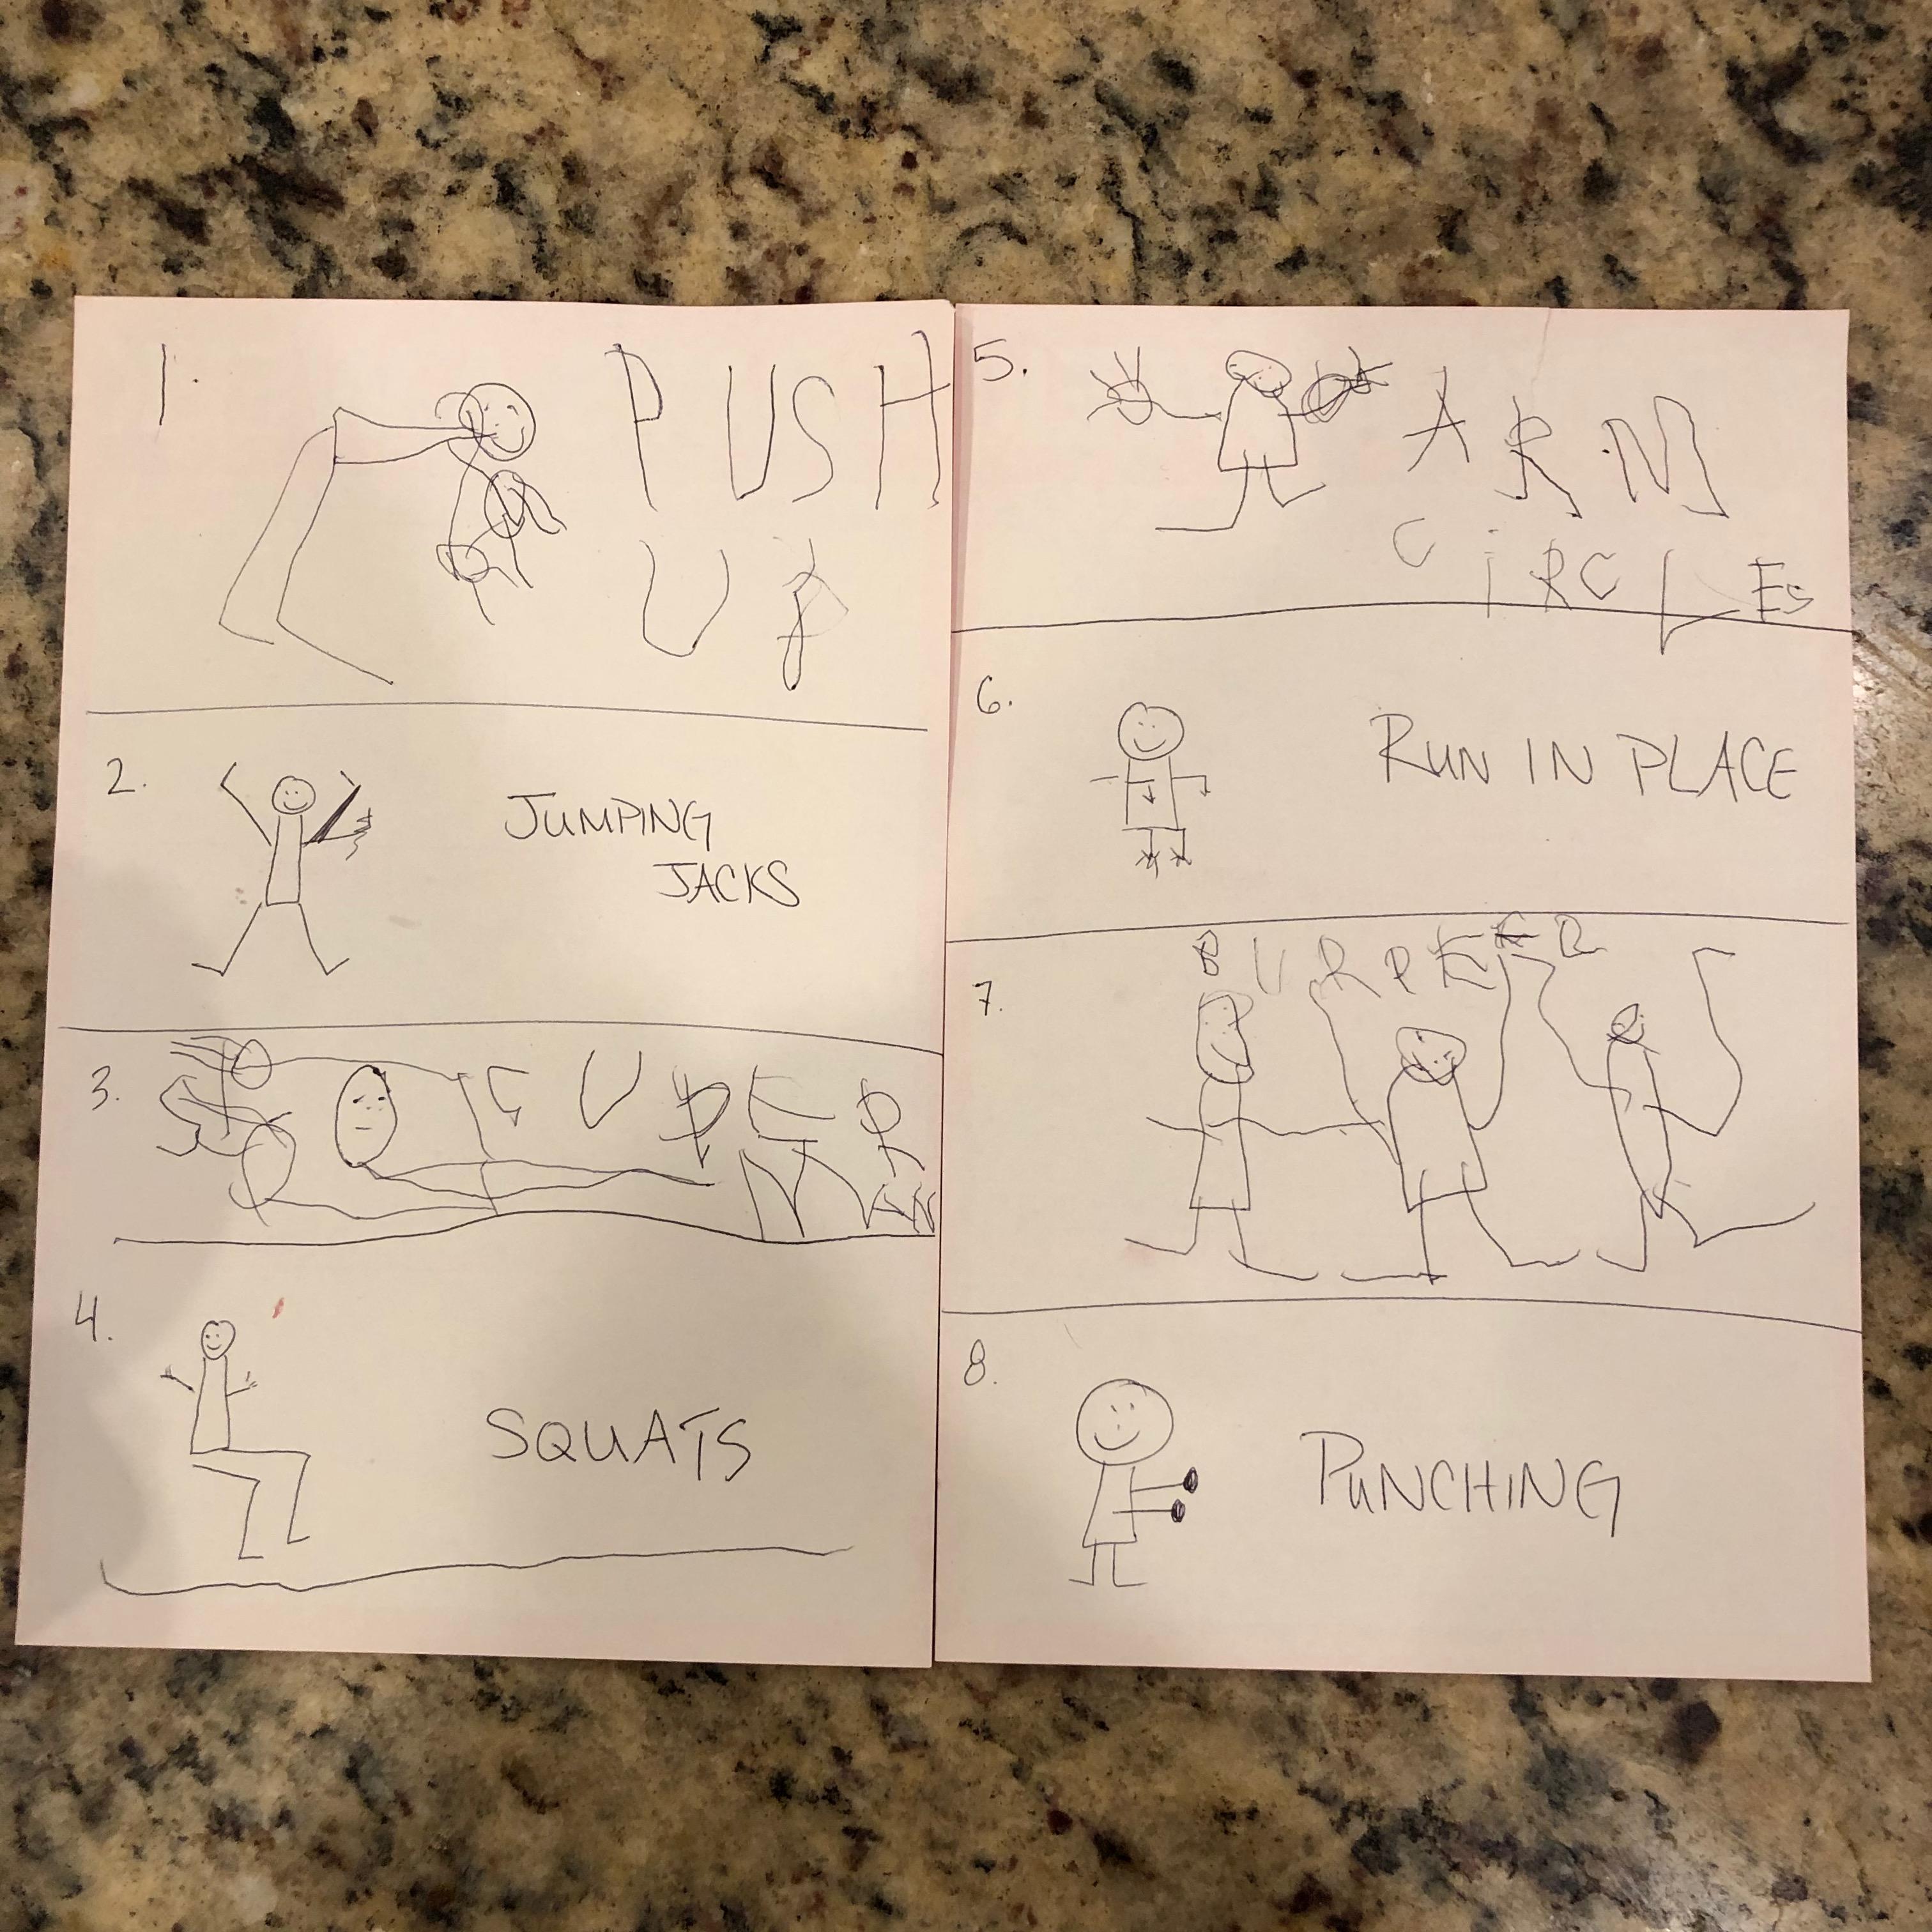
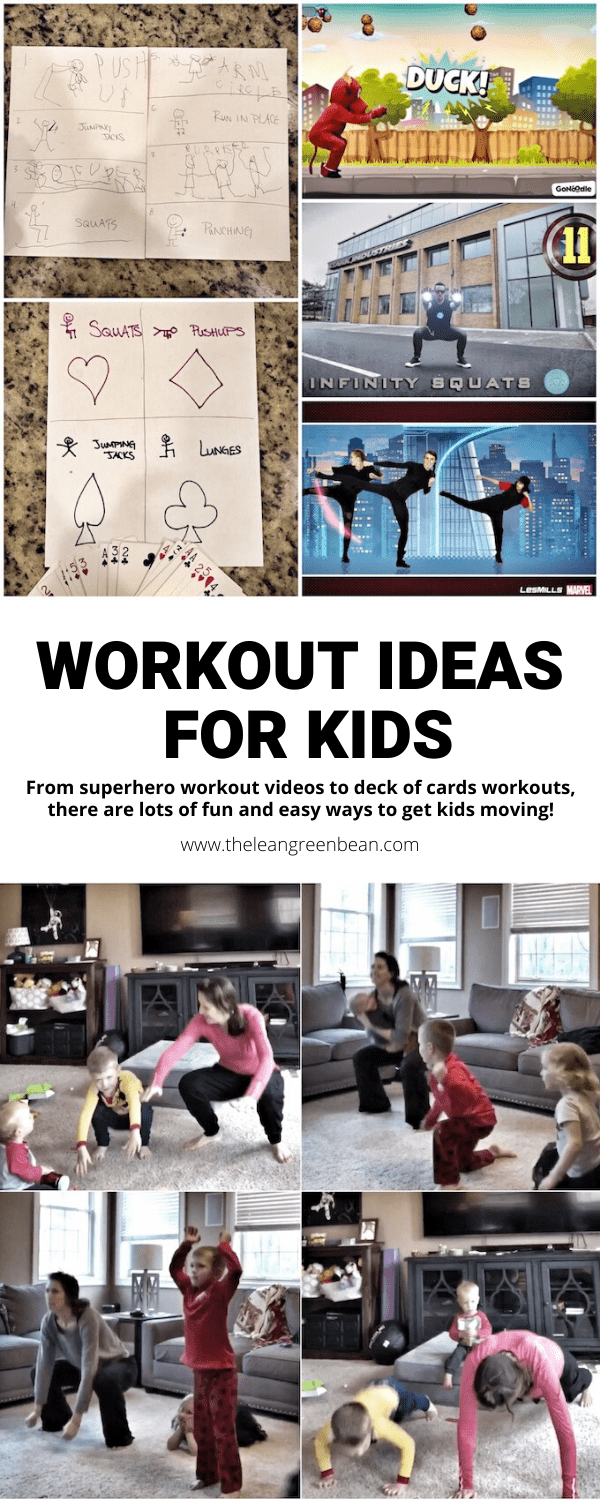
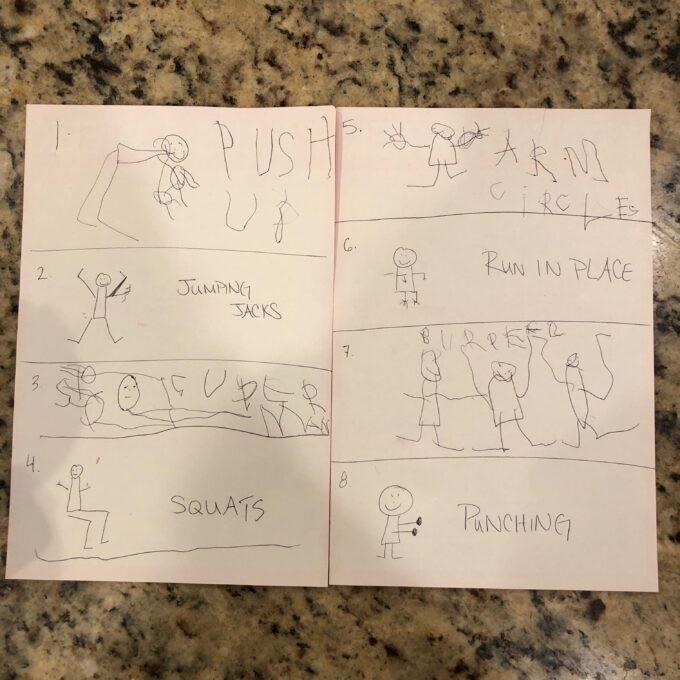
  • Make Your Own Workout – Let the kids make up their own workout and then do it with them!
  • Scavenger Hunt – Tape words, letters, numbers etc around the house and send the kids to look for them. You can write all the words you hide on a piece of paper and give them the list on a clipboard so they can cross them off as they find them. Bonus points if you let them do all or some of the writing. Or take it up a notch and write a bunch of clues so that they have to figure out each clue in order to find where the next one is hidden and leave them a prize at the end.
  • Guess It Box – Put 3-4 small objects in a box. Cut a hole and let the child stick their hand in and try to guess the objects just by feel. 
  • Homemade Playdough – Let them whip up a batch of homemade playdough

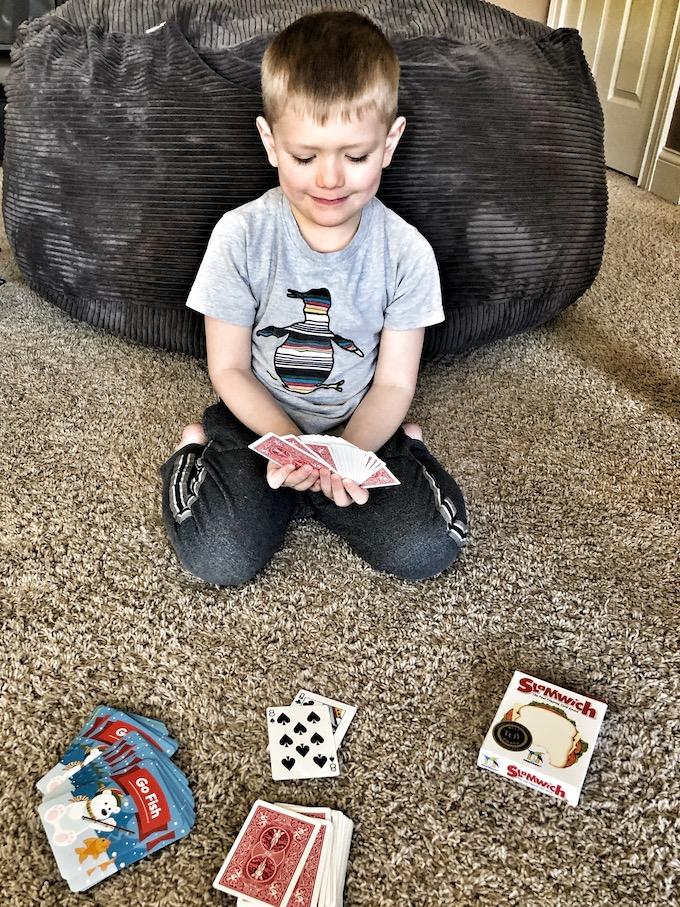
kids playing cards

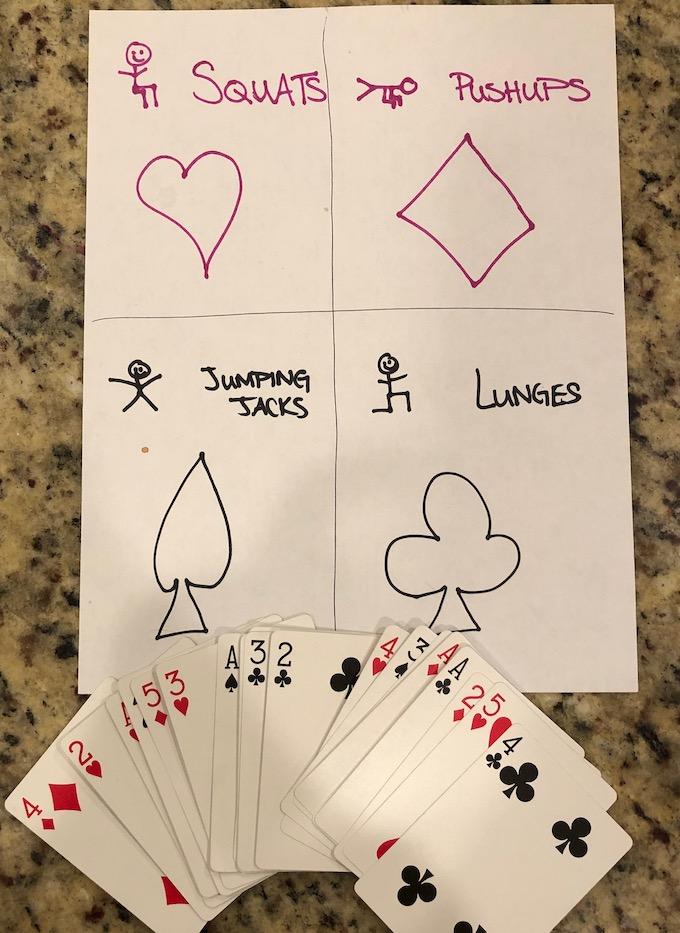
  • Play Cards – Teach them games like go fish, crazy eights, rummy, war, solitaire etc
  • Paper Airplanes or Origami – Find some instructions online and challenge them to create a paper airplane or an origami animal
  • Tongs – Challenge them to do anything with tongs! Cut a slot in a box and let them use tongs to put the magnatiles through the slot, spread pom poms on the floor and have them put them into a cup, etc
  • Build a City – Connect multiple kinds of toys -Make structures and roads with magnatiles/blocks, make schools for people, a farm for animals, garages for cars, etc
  • Take an Adventure – Use the Nugget or some couch cushions, or even painters tape, on the floor to make a boat or plane or train and go on an adventure
  • And Scene! – Make a stage and let them film their own show or movie
  • Make Your Own Game – Play some board games for inspiration and then let them create a game of their own, make the rules, design the pieces etc.
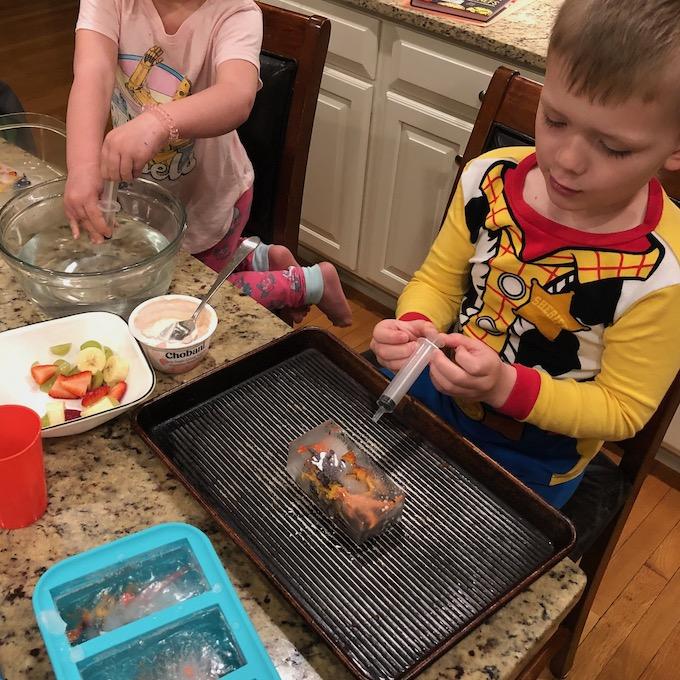
  • Free the Dinosaurs –  Freeze mini dinosaurs in ice cube trays. Let them melt the ice cubes with hot water and a syringe
  • Toy Wash – Dump some animals or cars in a bin with dish soap and water. Give them a toothbrush and towel and let them go to down. Bonus points if you go rub the toys in some sand or dirt first to make it more fun. Worried about a mess? Let them sit in the bathtub.

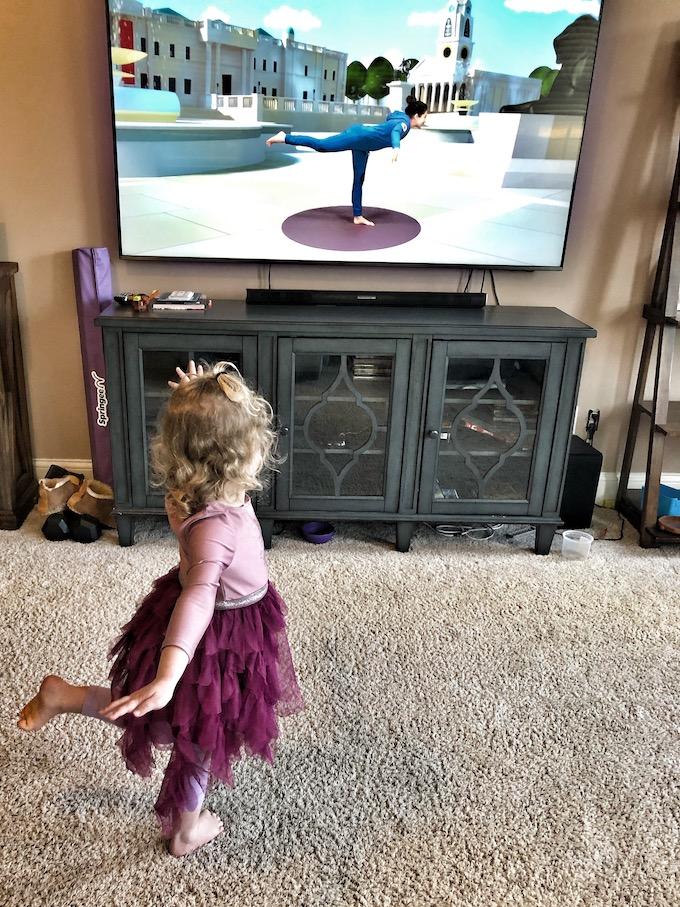
cosmic kids yoga

  • Cosmic Kids Yoga – You can find it on youtube or Amazon Prime for free!
  • Make A Collage – Grab some magazines/newspapers/junk mail catalogs/grocery store ads etc and let them make a collage
  • Make Puppets – Use old socks or some paper lunch sacks and make puppets!
  • DIY Things – Give them a theme and let them use stuff around the house to make their own musical instruments, superhero masks, stuffed animals etc! 
  • Find the Treasure – Draw a treasure map for various rooms around the house and see how quickly they can find the treasure.
  • Bowling – Set up some cans and go bowling with a tennis ball. 
  • Toss It – Set up paper plates or tape circles on the ground and practice tossing a small toy onto certain ones
  • Play Restaurant – Let them write a menu, write down your order, pretend to (or actually make) the food etc
  • Build it – Practice fine motor skills by making paperclip chains, building structures with toothpicks and mini marshmallows/grapes etc
  • Cut it – Let them practice their scissor skills!
  • Writing practice – Give them things to tracing or write, make dot to dots and mazes
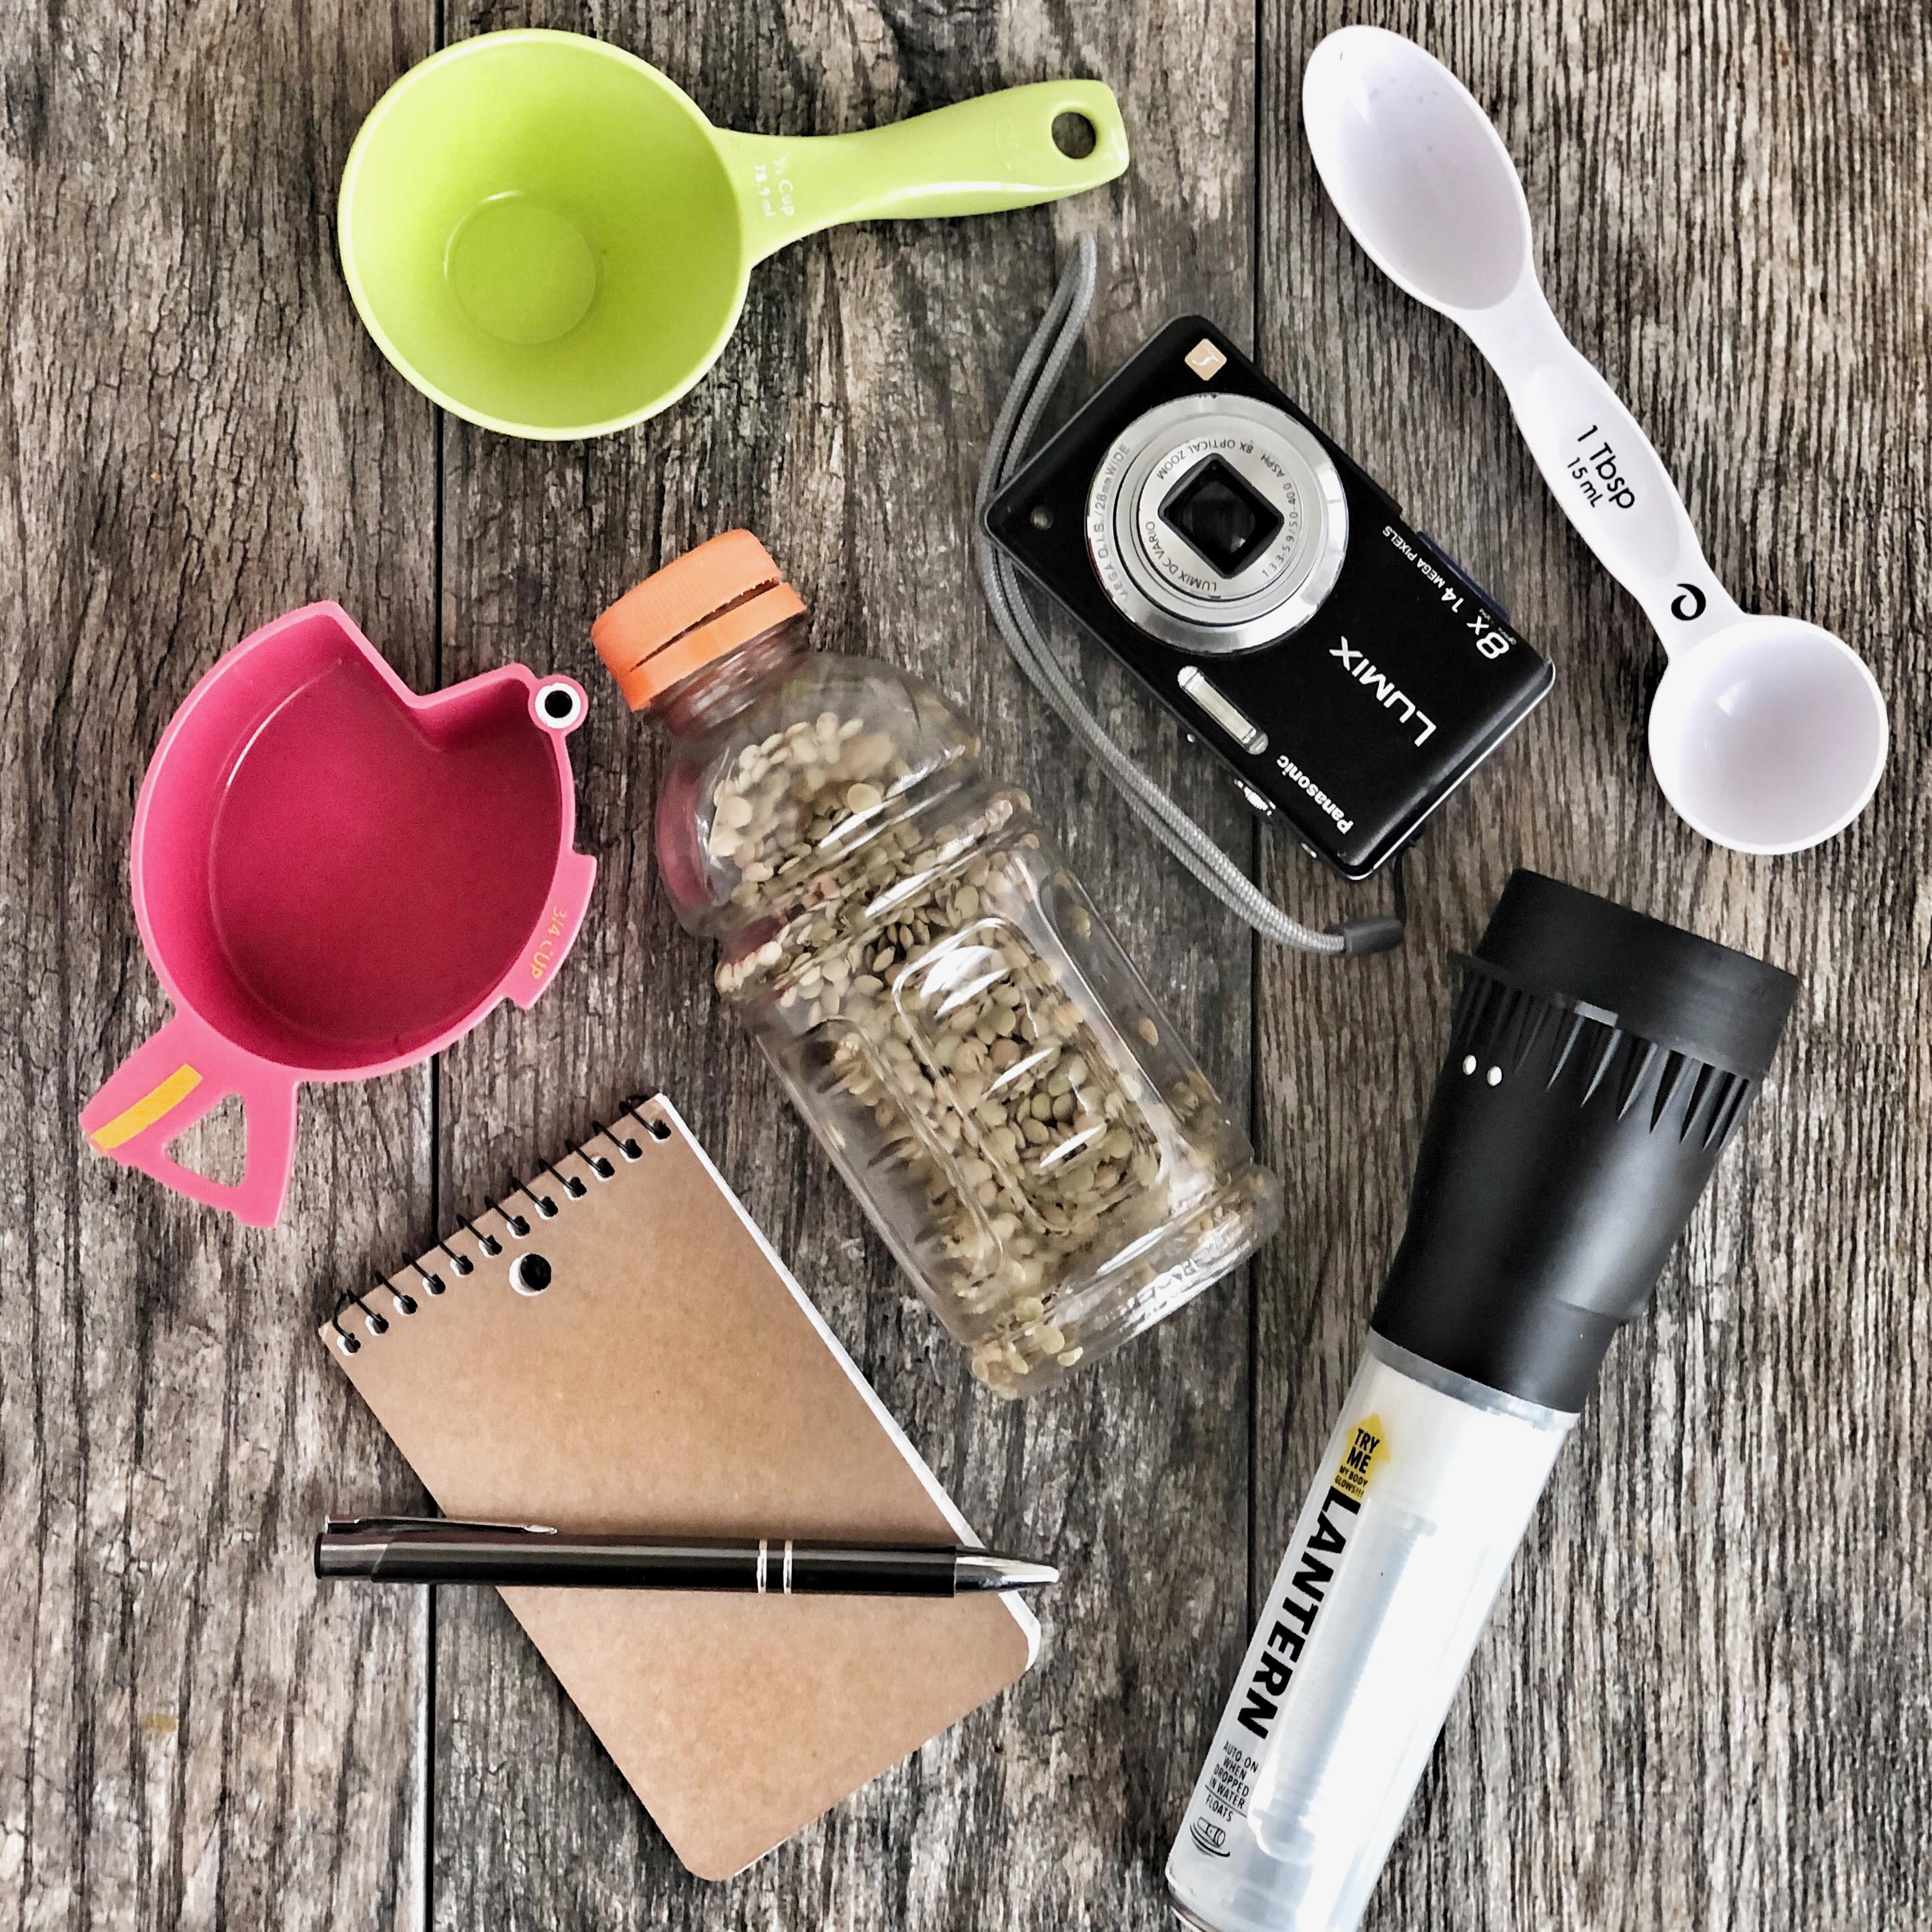
  • Go Camping – Have an indoor campout with a tent (real if you have one or make a fort with blankets), sleeping bags, a flashlight or lantern etc
  • Pillow Fight – No explanation needed.
  • Painters Tape – Endless things to do with it! Make shapes and have them do different activities to each shape (ie run to the circle, hop to the triangle, crabwalk to the square), put a couple lines on the floor in a row and have them jump/hop/backwards/run and jump etc from a starting point to see which line they can reach each time….

draw your own story for kids

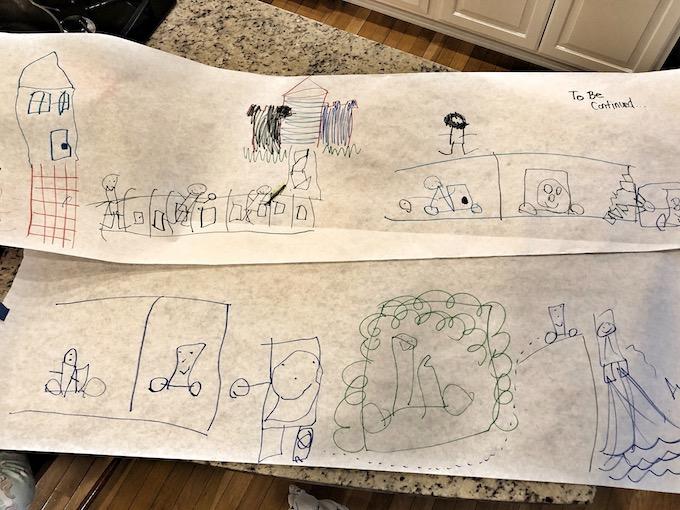
  • Draw Your Own Story – Roll out a long piece of paper or staple a few folded pieces of paper together, let them make up their own story and illustrate it! (You can help!)
  • Hot Balloon – See how long they can keep the balloon off the ground with their hand, a spatula, a fly swatter etc
  • Go Skating – Put some paper plates on the floor (or wear some empty kleenex boxes to skate around the floor.
  • Match the Paint – Have some old paint chips lying around? Challenge them to find things in the house that match the colors.
  • Active Puzzle – Grab a toddler puzzle with 6-8 pieces and spread them around the room. Have them do a movement from each piece to put it in place. Ie wheelbarrow walk, crab walk, hop on one foot etc. 
  • Science Experiments – a quick google search will give you lots of easy ideas, or this book Awesome Science Experiments for Kids is great (aff link)
  • Drawing Lessons – Check out Art Hub for Kids or search for draw with me videos on YouTube

If you’re looking for more physical activities, check out my Sensory Diet Ideas for Sensory Seekers post. 

If you’re looking for a few new toys to purchase like Magnatiles, craft supplies, puzzles and more, I have lots linked in my amazon shop in the KIDS section (all affiliate links). 

Here are 35+ Indoor Activities for Kids that are perfect for helping preschoolers and kids in elementary school keep their bodies and minds active indoors when it's too hot, cold or rainy to go outside.

I’ll continue to add to this post as new ideas come to me!

Enjoy!
–Lindsay–


Filed Under: Kids

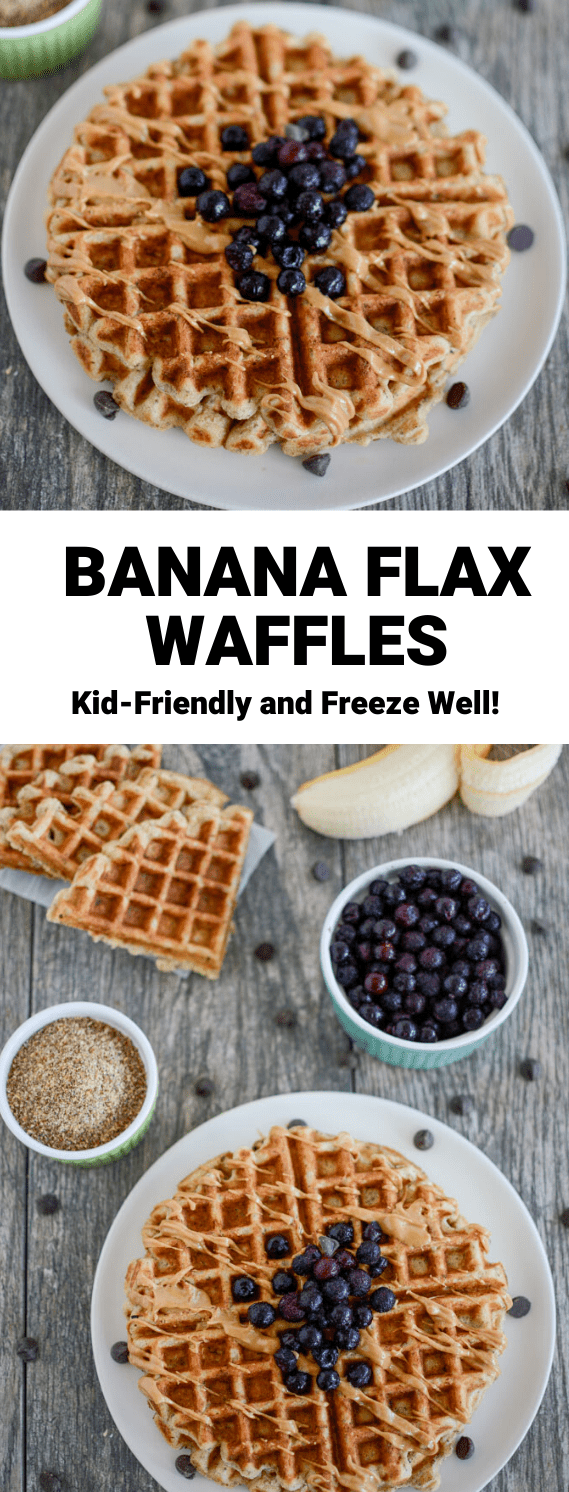
Banana Flax Waffles

February 21, 2020 by Lindsay 17 Comments

These Banana Flax Waffles are made with just seven ingredients and no added sugar. They freeze well and make a great breakfast or snack!

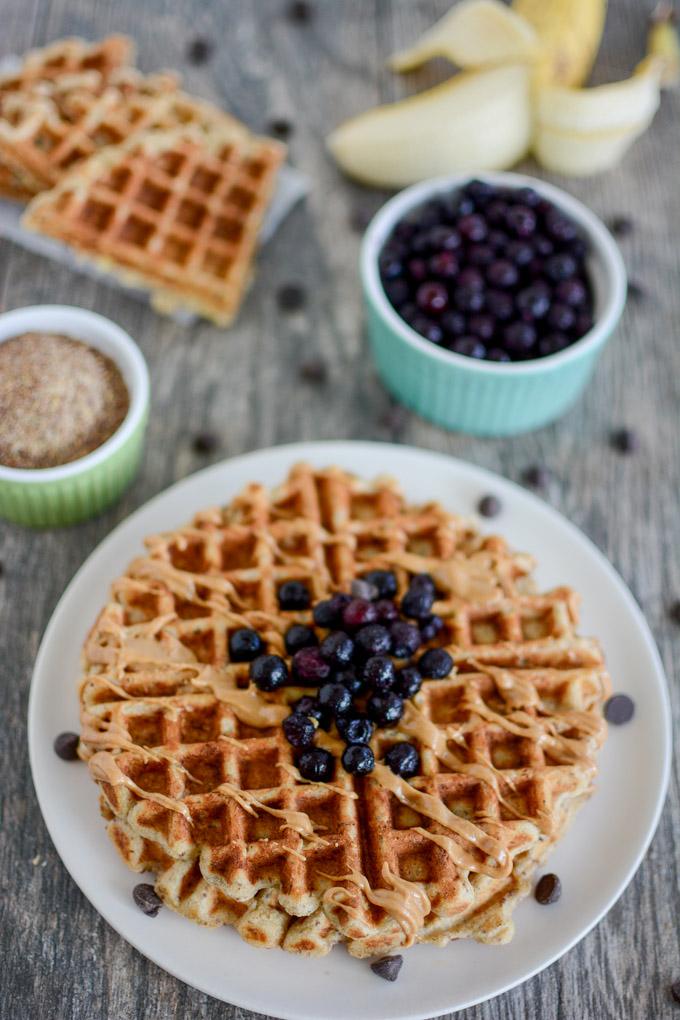
Banana Flax Waffles topped with blueberries and peanut butter

Hi friends!

I made these Banana Flax Waffles three times this week because I knew I needed to share them with you as soon as possible. My youngest is a huge waffle fan and I’ve gotten into the habit of buying a couple of boxes of frozen waffles each week at the store so we can both eat them for breakfast. I’ve had it on my list to develop a new homemade recipe because I think a good waffle recipe is something you should always have in your back pocket. 

In my opinion, a good waffle is hearty, not overly sweet and can easily be frozen and then popped in the toaster for a quick meal or snack.

This recipe fits the bill. It’s made with just seven ingredients. It’s a good way to use up a couple of ripe bananas if you’re tired of muffins or bread. And they freeze beautifully. 

Banana Flax Waffles

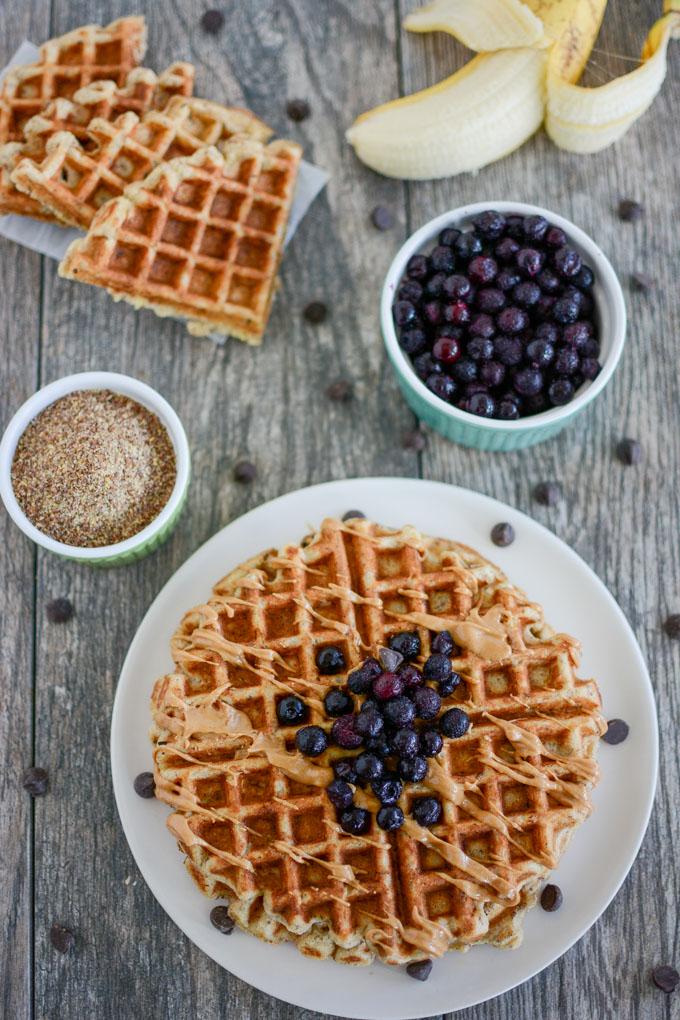
Overhead shot of Banana Flax Waffles topped with blueberries and peanut butter

These Banana Flax Waffles can be topped with peanut butter, syrup, yogurt or smashed berries. You can add chocolate chips, hemp or chia seeds or peanut butter to the batter. And they’re nut-free so they’d make a great addition to a school lunch box!

They’re made with kefir, which I think is part of why they’re so good. But you can also use whatever dairy or non-dairy milk you have on hand!

Here’s how you make them. (I have this Cuisinart Waffle Maker (aff link) and love it. Basic but you don’t need anything fancy).

Print

Banana Flax Waffles

Banana Flax Waffles topped with blueberries and peanut butter
Print Recipe

5 Stars 4 Stars 3 Stars 2 Stars 1 Star

5 from 12 reviews

These Banana Flax Waffles are made with just seven ingredients and no added sugar. They freeze well and make a great breakfast or snack!

  • Author: Lindsay
  • Yield: six waffles 1x

Ingredients

Scale

3/4 cup mashed ripe bananas (approx 2 medium)
2 eggs
1 cup plain kefir (i use whole milk kefir, or any dairy/non-dairy milk should work)
1/4 cup oil (i use avocado oil)
1/4 cup ground flaxseed
1.5 cups white whole wheat flour
1 tsp cinnamon
1 Tbsp baking powder
Optional mix-ins: chocolate chips, blueberries, hemp seeds, chia seeds

Instructions

  1. In a bowl, combine mashed bananas, eggs, kefir and oil.
  2. Stir in ground flax, flour, cinnamon and baking powder.
  3. Let sit for 5-10 minutes while waffle iron preheats.
  4. Grease waffle iron and scoop approx 1/3 cup onto waffle iron and cook as directed

Notes

You can sub 1/4 cup peanut butter for the oil if you want, or mix in some peanut butter in addition to the oil. Omitting the oil will make them a little bit denser but just as delicious.

To freeze, cool completely on wire cooling rack, break in half and stack. Place in a ziploc or reuseable bag, remove excess air and store in the freezer. Pop them in the toaster when ready to eat!

Did you make this recipe?

Tag @theleangreenbean on Instagram

These will definitely be a new staple in our house. My youngest has taste-tested all three batches and is a huge fan.

These Banana Flax Waffles are made with just seven ingredients and no added sugar. They freeze well and make a great breakfast or snack!

I think you could make these vegan by turning the ground flax into 2 flax eggs and using non-dairy milk, but I haven’t tried it myself!

Enjoy!
–Lindsay–

Filed Under: Breakfast, Food Prep, Snack Tagged With: Banana, Egg, Ground Flaxseed, Kefir, Oil, White Whole Wheat Flour

Sensory Diet Ideas for Sensory Seekers

January 31, 2020 by Lindsay 31 Comments

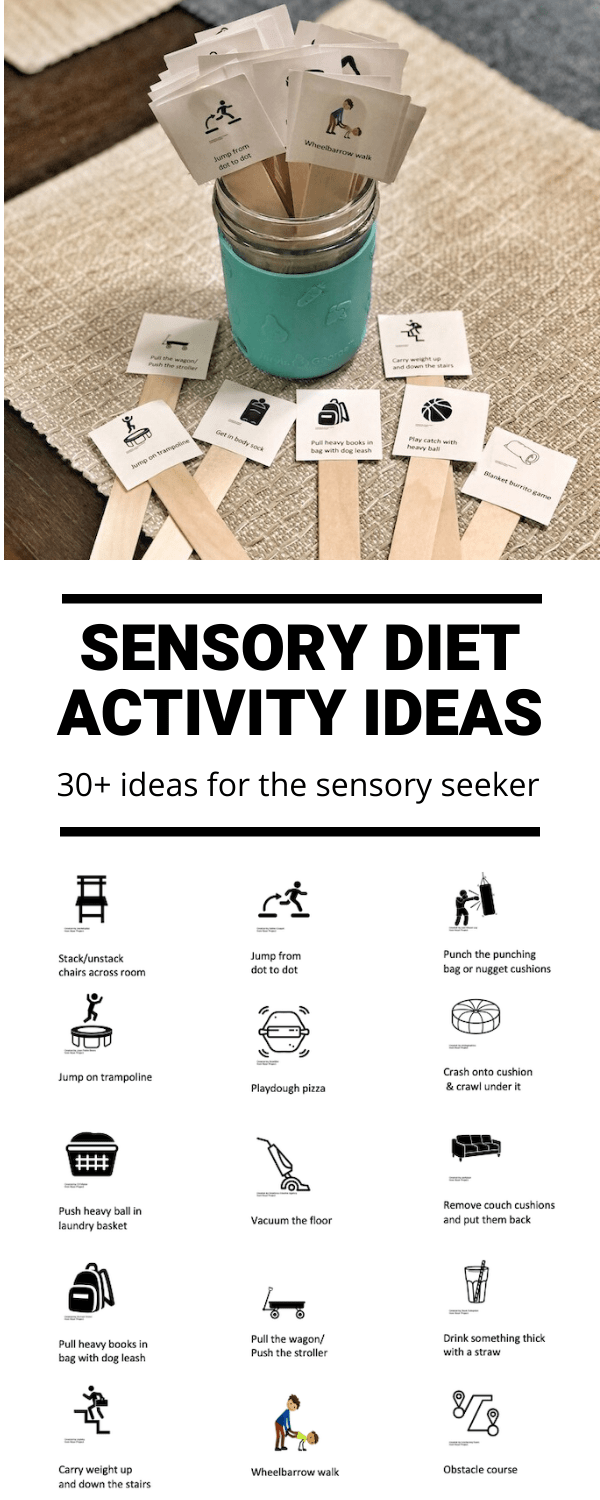
These Sensory Diet Ideas for Sensory Seekers may be helpful if your child struggles with sensory processing disorder and needs extra sensory feedback. Work them in throughout the day to help the child regulate their behavior, attention and emotion.

Sensory Diet Activities for the Sensory Seeker

Hi friends- 

This post will not be for everyone. But if you have a child with sensory processing issues, specifically a sensory seeker, this might be helpful. I’ve been doing a lot of reading lately and educating myself about Sensory Processing Disorder. There are several components and I’m not an expert but the one we deal with at our house is sensory seeking. One podcast I listened to said that to understand what your sensory seeking kid is living with you should imagine living your life underwater. That’s why they’re so loud, constantly fidgeting and moving. They’re seeking out those sensations that are muted to them. 

If you’re interested in reading more about SPD or are wondering if your child may be dealing with it, here are a few resources:

  • The Out of Sync Child by Carol Kranowitz (Aff link) – A great book that explains SPD in an easy to understand way with lots of checklist, examples, etc
  • The Out of Sync Child Has Fun by Carol Kranowitz (aff link) – lots of activity ideas for kids with SPD
  • The STAR Institute for SPD – a great website with lots of info, resources, checklists etc

A few excerpts from The Out of Sync Child that describe a sensory seeker:

  • “He may be a ‘toucher and a feeler’ a ‘bumper and a crasher’. His brain and body are telling him he must act but he often acts in a disorganized way.”
  • “He may chew on his shirt cuffs and collars for extra input.”
  • “To get vestibular sensations, the child may seek to resist gravity in unusual ways. For instance, she may hang over the edge of her bed, or place her head down on the floor and pivot around it.”
  • “The child may frequently seek intense movement sensations such as jumping from the top of the jungle gym or running fast when a sedate pace would do.”
  • “The sensory craving child is a ‘bumper and a crasher’ He craves active movement, pushing, pulling, making ‘crash landings’ by throwing himself to the ground, and lunging into walls, tables and people. He craves passive input to muscles and joints, as well, such as strong bear hugs and being pressed, squeezed or pummeled while roughhousing.”
  • “The sensory craver loves crowds and places with noisy action. He welcomes loud noises and usually wants to turn the volume up. He may make his own noisy sounds, using his ‘outside voice’ in the classroom and kitchen and clapping and singing boisterously.”

Sensory Diet Ideas

These Sensory Diet Ideas for Sensory Seekers may be helpful if your child struggles with sensory processing disorder and needs extra sensory feedback to meet their threshold. Work them in throughout the day to help the child regulate their behavior, attention and emotion.

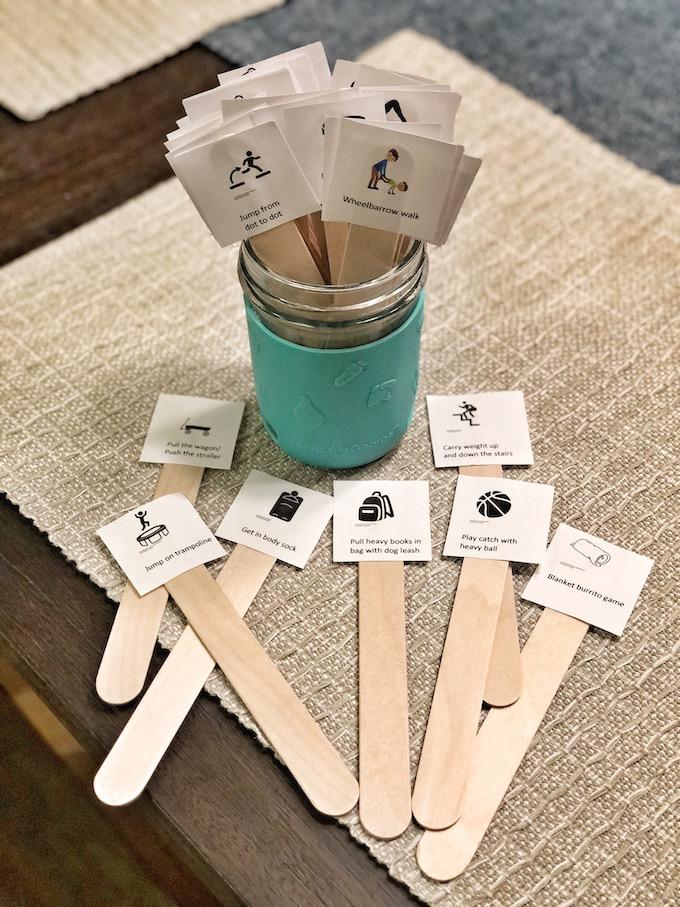
In our case, we deal with his sensory seeking behaviors at home but not at school. So, while an evaluation at school wasn’t helpful for us, it can be a good place to start if you’re concerned. We had an evaluation done by a private occupational therapist and began private OT. I’ve been working with our OT to develop a sensory diet to be used at home. A sensory diet isn’t actually food-related. It’s a collection of activities that can be done throughout the day to help a child meet their sensory threshold and regulate behavior. Over the years I’ve found a lot of activities that work for us. However, I found myself not doing them consistently and struggling to remember them when I needed them most.

So I made a list of all the things that have been helpful for us. Then I used The Noun Project, a great free website for images, to add a picture to each activity. (I also used The Noun Project to get images for my 75 Acts of Kindness for Kids free printable booklet!) I printed out my list, cut the ideas out and glued them on popsicle sticks and stuck them in a jar. Now both my son and I have all the ideas in an easily accessible place. We can choose a stick when we need an activity break or pick a few and combine them. It’s an easy way to give him some input into what activities we do to help calm his body down.

If you want a free printable version of our list, enter your email in the box below! Remember that this list is customized to us so some of the activities may not work for your child but you can always add more activities specific to them!


Enjoy!
–Lindsay–

Filed Under: Kids

Low Mess Snacks for Kids

January 30, 2020 by Lindsay Leave a Comment

Hi friends!

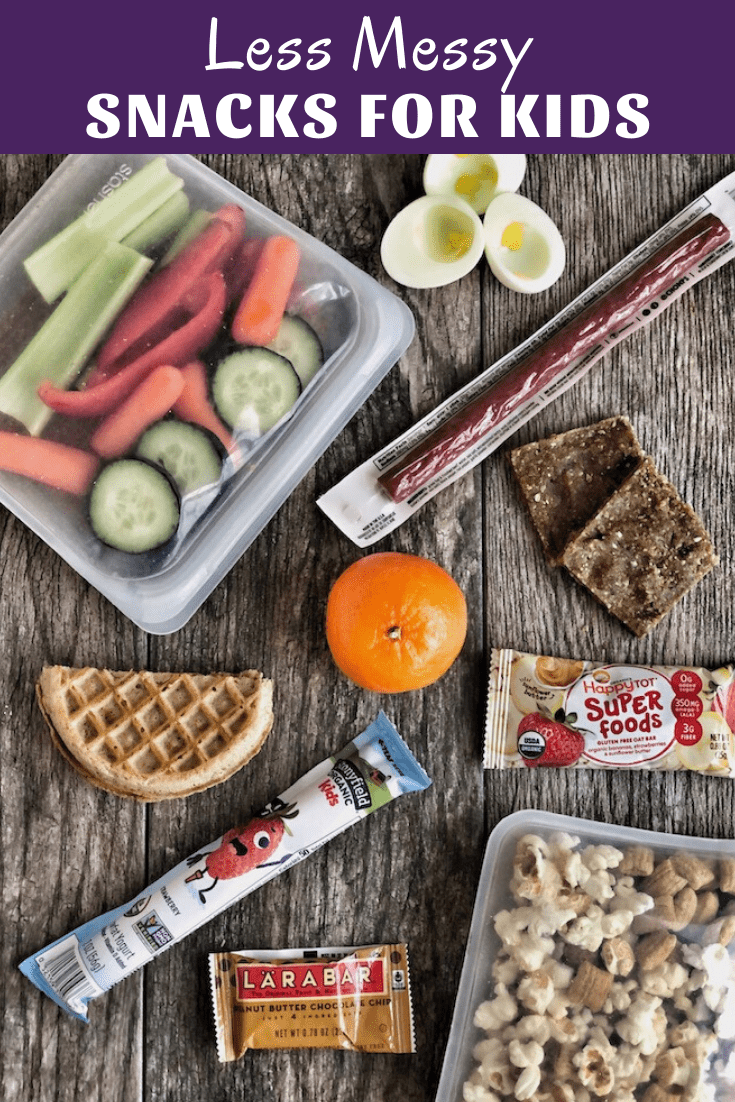
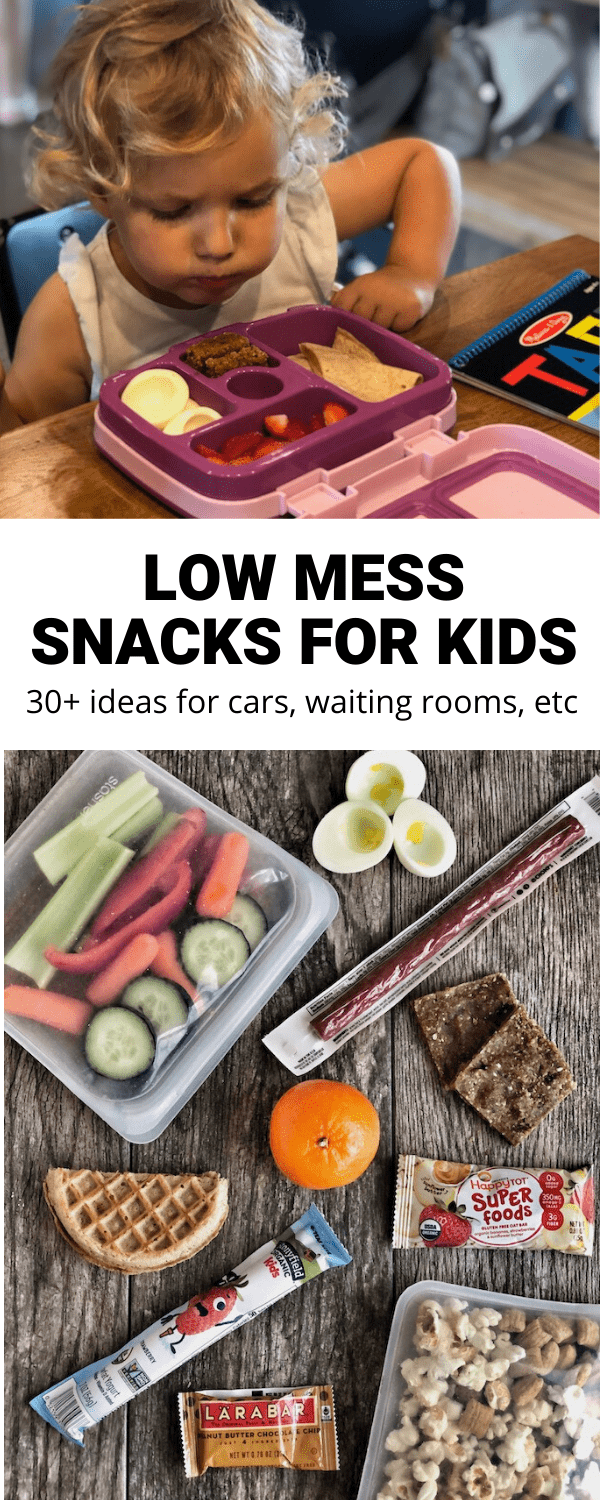
Looking for some low mess snacks for kids? This post has been highly requested and I’ve finally gotten around putting it together! 

Before we dive in, let’s address a few things:

A lot of you asked for low mess car snacks. I think it’s important to note that eating in the car can be a choking hazard. I try to limit my kids eating in the car to times when a time crunch makes it pretty much necessary. For us, that’s one day a week when I have to go straight from my oldest’s swimming lesson to pick my daughter up from preschool and then turn around at get home and get my oldest on the bus for school, all in a span of about 20 minutes. In most cases, if they need to eat in the car, I pack their lunch boxes and then they sit in their seats and eat either before we leave the parking lot or after we arrive. I recognize that sometimes eating in the car is unavoidable, but I encourage you to make it the exception, not the rule. Also, I don’t let my kids eat in the car until they are big enough to have their seats facing forward so that I can see them.

If you need more ideas, check out my Healthy Road Trip Snacks post for more on the go snack options and my 60+ Healthy Packaged Snacks post for general snack ideas. 

toddler eating cheese stick in the car

Also, the term low mess is pretty relative. Some kids (mine) are extremely messy eaters. They can turn pretty much anything into a giant mess and it’s the main reason why the floors at our house are never ever clean. Some kids eat very neatly. Also, age can impact the messiness factor. In most cases, a 5-year-old is more capable of limiting their mess than a 2-year-old. So, this list is snacks that I find to be lower mess, but messes can still be made. It might come down to a little trial and error with your own kids.

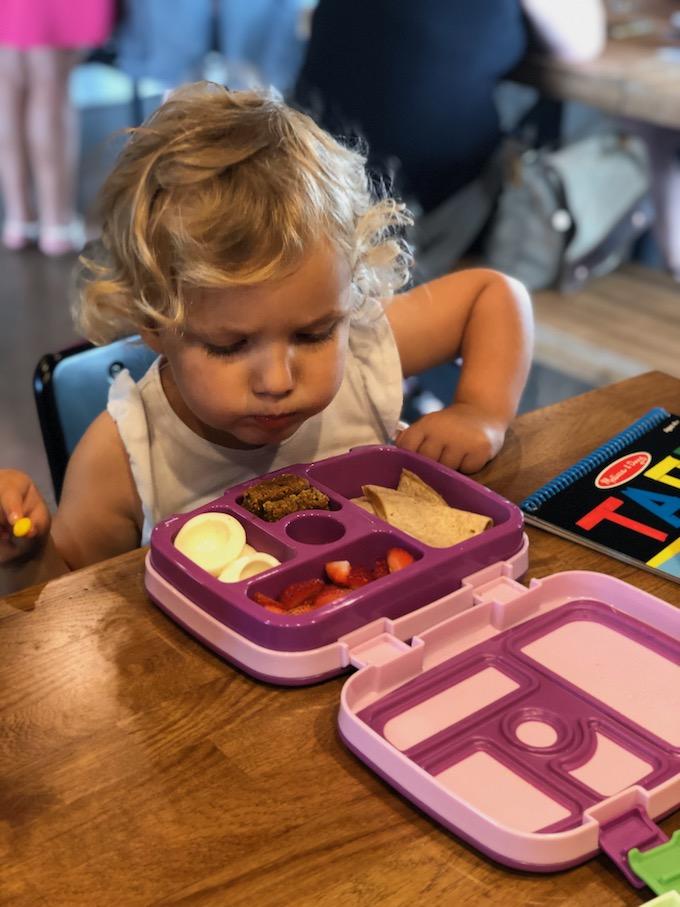
I put this list of low mess snacks for kids together with a few situations in mind. Times when you need snacks but do not need 100 cheerios all over the floor or half a box of goldfish crushed into the carpet. I try to bring our snacks in a Bentgo lunchbox or stasher bags (aff links) So these snacks are good for:

  • In the car – which we’ve already covered…
  • At an appointment or in a store – because sometimes kids NEED a snack in order to survive a quick errand or accompanying mom to a doctor’s appointment, right?
  • While waiting – if you’ve got more than one kid, chances are they’re going to be waiting on their siblings fairly often, whether it’s to pick up from school, at a sports practice, etc and snacks can be helpful and/or necessary depending on the time of day
  • At a brewery or restaurant while the adults enjoy a beverage 🙂
  • Pretty much any time, really…because when do kids not want snacks? Am i right?

toddler eating quesadilla and hard boiled egg out of lunch box

When I make snacks for my kids, I like them to include protein and/or healthy fats, not just carbs. I want them to have some staying power, not just cause a blood sugar spike and crash. We talk about this A LOT at home. They know a bunch of foods that are sources of protein and if they ask me for an apple, i usually say that’s not a complete snack and they know they need to add some peanut butter or a cheese stick or something to pair with the apple! 

Here are some ideas for low mess snack pairings:

  1. Waffle pbj sandwich 
  2. Beef stick+ clementine
  3. Cheese stick + fruit leather/dried fruit
  4. Hard-boiled egg whites + energy ball/bar
  5. Turkey, cheese & avocado rolled in a tortilla
  6. Egg wrap + banana
  7. Slice of pizza or quesadilla
  8. 8oz kefir or yogurt tube + apple slices
  9. Smoothie made with yogurt, fruit and veggies
  10. Rice cakes w/ peanut butter + snack bar

Low Mess Snack for Kids

And here’s a big list of ideas so you can make your own pairings. Note that some of these can be choking hazards for younger kids so do your research! And again, some kids can make a mess with any snack so it may take some trial and error!

Low Mess Snacks for Kids

Fruit/Veggies

  • Freeze-dried fruit 
  • Dried fruit (raisins, mango, apples, peaches, pears etc)
  • Fruit- apples, clementines, bananas
  • That’s it fruit bars or fruit leathers
  • Pouches – Not my favorite, but can be helpful occasionally. Try to find one with some veggies in it. Mama chia is another good option. 
  • Veggie sticks (carrots, celery, peppers, cucumbers)

Dairy

  • Yogurt pouches or tubes – Siggi’s is a favorite and just came out with pouches, Stonyfield tubes are another option. I freeze mine to reduce the mess or only cut a small part of the top off instead of all the way across
  • 8oz drinkable kefir or yogurt – leave the foil seal on and poke a straw through
  • String cheese or cheese slices
  • Smoothie made with yogurt – get a cup that doesn’t leak and that has a straw that can’t be pulled out

Protein

  • Beef jerky, meat sticks – Chomps is my go to. They have a mini size and a full size.
  • Hard-boiled egg whites (the yolks tend to be crumbly and messy)
  • Egg wraps (plain or filled with cheese, turkey, avocado etc)
  • Nuts

Crunchy

  • Dry cereal – Barbara’s puffins are a fave of mine because they’re bigger than something like Cheerios and easier for my kids to grab one at a time instead of a whole handful that spills everywhere
  • Popcorn
  • Annie’s Bunny Grahams
  • Pretzels
  • Rice cakes/pop chips
  • Crackers – wheat thins, Triscuits, Bitsy’s, mini pb sandwich crackers

Other

  • Homemade energy balls or bars
  • Pancakes/French toast sticks
  • Leftover pizza slices
  • Quesadilla wedges
  • Tortilla cream cheese rollups
  • Peanut butter sandwiches (on waffle or bread, can pre-cut into bite-sized pieces)
  • Tortilla with peanut butter wrapped around a banana
  • Think beyond traditional snack food – things like chicken nuggets, tortellini, meatballs, etc can be relatively low mess

Store-bought bars

  • Larabars
  • Clif z bars
  • Nature’s Bakery Fig bars
  • Simple Mills Bars
  • HappyTot Bars
  • Quaker Organic Strawberry Bars
  • Dragon Bars

These are just a few bar ideas. I have a giant list of Healthy Store-Bought Granola Bars for Kids. Some are more crumbly/sticky/messy than others but bars are definitely one of our go-to low mess snacks.

Want more snack ideas?

  • Healthy Amazon Snacks
  • Best Trader Joe’s Snacks
  • Best Healthy Walmart Snacks
  • Healthy Snacks At Costco For The Whole Family
  • Peanut & Tree Nut Free Packaged Snacks
  • 60+ Healthy Packaged Snacks For Kids

Low Mess Snacks for kids to eat in the car, waiting rooms and more!

What are you favorite low-mess snacks?

Enjoy!
–Lindsay–

Filed Under: Snack, Snack Round-Ups

The Dinner Spark Launch

January 17, 2020 by Lindsay Leave a Comment

Hi friends!

Today is launch day for my newest product – The Dinner Spark! 

The Dinner SparkFor the past couple of months, I’ve been hard at work creating this resource for you and I’m so excited fo you to be able to get your hands on it today!

I’ve been sharing some of the details on social media and via email but in case you missed it, here’s what is included:

  • 200+ meal ideas by category – A clickable PDF with recipe ideas broken down into categories like beef, chicken, soups, vegetarian etc.
  • 50 Ideas for Component Food Prep – I share my top 10 weekend food prep items like shredded chicken, rice, beans etc and give you 5 ways to use each prepped item.
  • 20+ No Recipe Meal Ideas – A list of all the meals I keep in my back pocket for weeks when I’m too busy to food prep or feel like I don’t have anything left to eat. They’re simple, flexible and delicious.
  • Ideas to put a spin on some of your family’s favorite meals – If your family likes tacos, pizza, spaghetti etc and eats them every week, this will give you some easy ways to put a spin on staple recipes so you don’t get tired of family favorites!
  • 10+ Sauce ideas to jazz up your favorite protein – Sauces are the easiest way to make a boring meal more exciting.

PLUS you’ll get 3 months of weekly emails. Every Wednesday (starting the Wednesday after you purchase, you’ll get an email that will include:

  • Food Prep Remix outline – I share  2-3 ingredients you can prep or buy and 3 recipes you could use them in. 
  • 3 Simple Meal Ideas – Simple recipes with 5-8 ingredients. I give you general directions but also link to an example recipe.
  • 3 Bonus Recipes Ideas – A few more recipe ideas for inspiration. 
  • Plus I share some ideas for swaps and substitutions and a couple of different ways you could combine these recipe ideas into a meal plan for the week.

Ready to grab your copy?

Loading…


Enjoy!
–Lindsay–

Filed Under: Dinner

Easy Recipes Using Chickpeas

January 14, 2020 by Lindsay 1 Comment

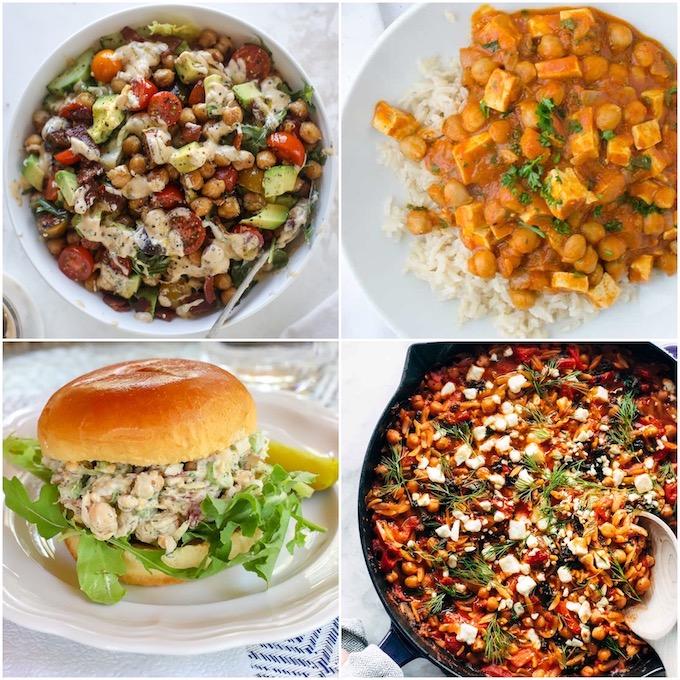
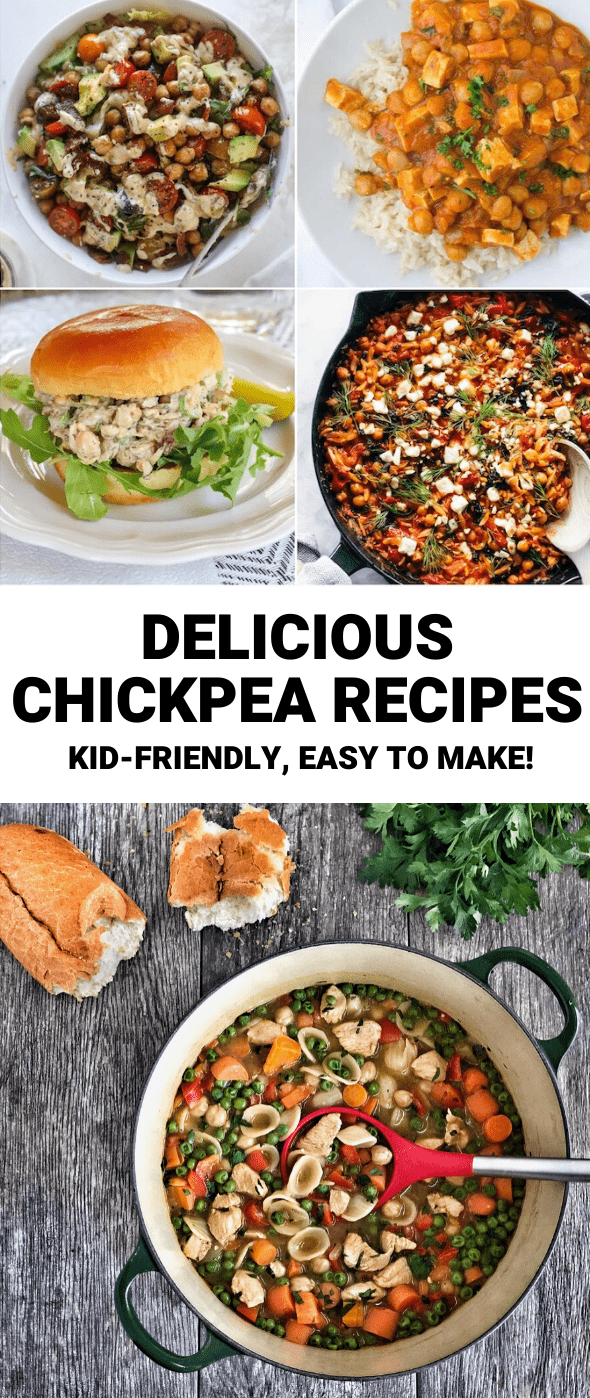
Looking for easy recipes using chickpeas? This list has something for everyone from salad to curry to soup! Add these to your lunch and dinner rotation ASAP.

easy chickpea recipes

Hi friends!

In case you missed it, I’ve declared 2020 the year of helping you guys eat more plants! Recently, I shared this recipe for Peanut Butter White Bean Dip that makes a great after school snack. And I’ve been chatting with my Instagram followers about plant-based meals almost weekly. Yesterday I asked my followers for their favorite ways to eat chickpeas and they came through with a lot of much-loved recipes and I wanted to share them with you.

Remember that if the thought of a completely meatless meal overwhelms you, you don’t have to take an all or nothing approach. The method that has been working well for me is cutting the amount of meat in half. In almost all the meals I’ve been making lately, I’ve been replacing half of the chicken or whatever meat I typically use, with a plant-based protein like chickpeas, lentils, beans or tofu. I believe that stretching one package of chicken into two or three meals is just as valid of an approach as eating one meatless meal and i’ve found it’s a great way to eat less meat without it feeling so overwhelming.

Here are some chickpea recipes to check out:

Easy Recipes Using Chickpeas

  • Chickpea Bacon Ranch Salad via How Sweet Eats
  • Spiced Chickpea Stew with Coconut & Turmeric via Alison Roman (NYT Cooking – you have to have an account to login)
  • Classic Chickpea “Chicken” Salad via A Healthy Slice of Life
  • Chickpea Noodle Soup via Cookie & Kate (or try my Chicken & Chickpea Noodle Soup)
  • Greek Baked Orzo via Pinch of Yum
  • Thai Chickpea Burgers via Peanut Butter Fingers
  • Baked Chickpeas with Pita and Yogurt via Smitten Kitchen
  • Chickpea Tikka Masala via Washington Post
  • Quick Pasta and Chickpeas via Smitten Kitchen
  • Greek Chickpea Salad via Skinnytaste
  • Slow Cooker Butter Chickpeas via Delish Knowledge
  • Chickpea Curry via The Pioneer Woman
  • Spinach and Chickpeas via Smitten Kitchen
  • Vegan Caesar Salad via Oh She Glows
  • Kung Pao Chickpeas via Detoxinista
  • Marinated Chickpeas via How Sweet Eats

Other general ideas:

  • Brownie batter hummus
  • Chickpea Blondies
  • Buffalo Chickpea Wraps
  • Pasta sauce or soup with chickpeas blended in
  • Falafel

And if you haven’t read my post on How To Roast Chickpeas, do it now! They make a great snack! So do my Peanut Butter Chickpea Bars.

Looking for easy recipes using chickpeas? This list has something for everyone from salad to curry to soup! Add these to your lunch and dinner rotation ASAP.

What’s your favorite chickpea recipe?

Enjoy!
–Lindsay–

Filed Under: Dinner, Ingredient Round-Ups Tagged With: Chickpea

How To Roast Chickpeas

January 9, 2020 by Lindsay 85 Comments

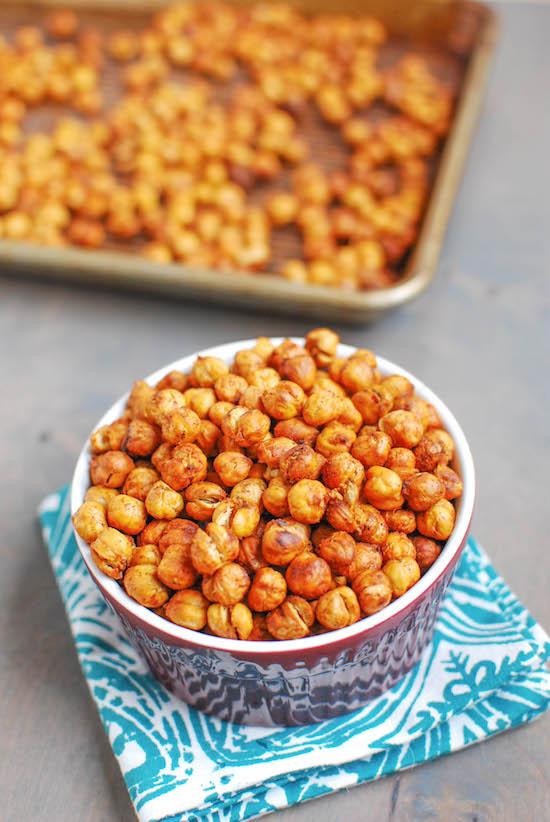
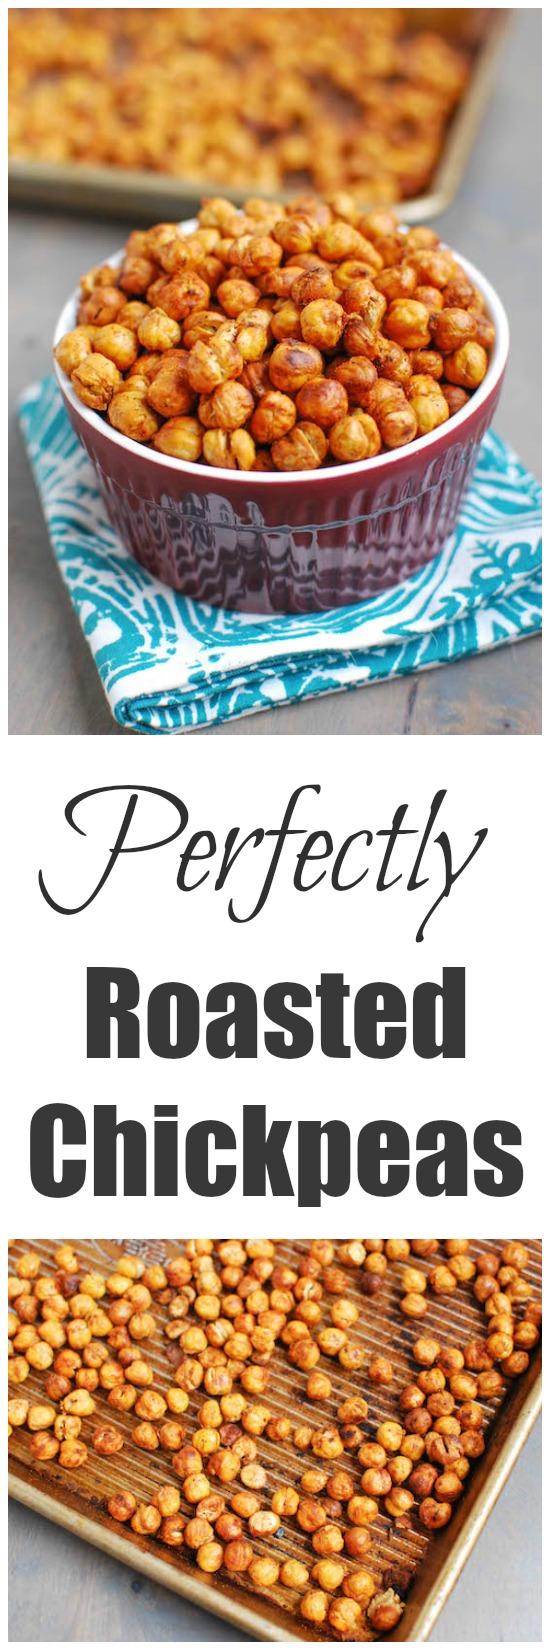
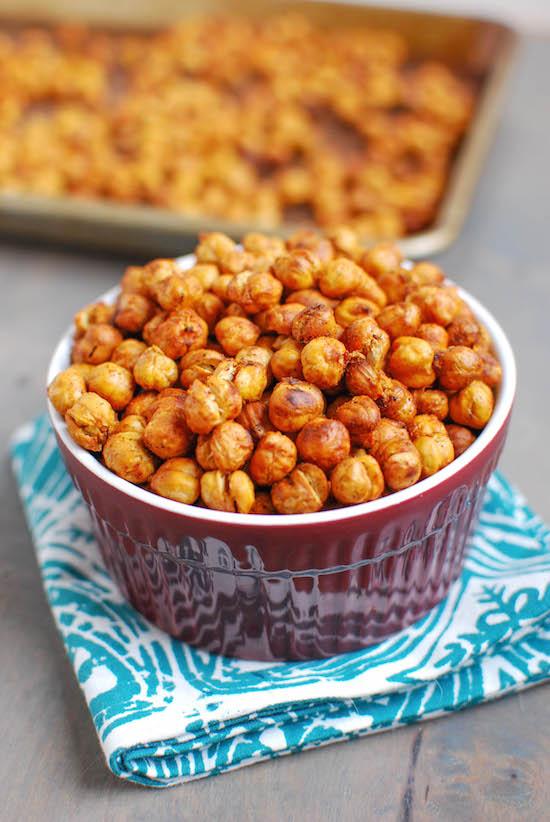
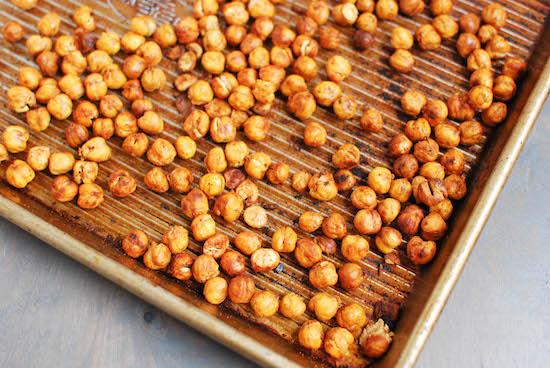
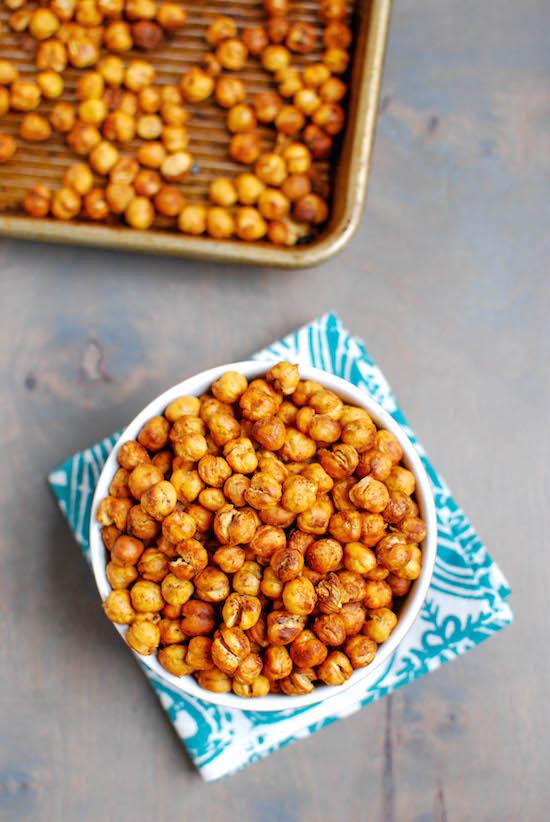
Learn how to roast chickpeas. Crunchy and flavorful, they make a great, healthy snack. This post will teach you how to roast chickpeas perfectly using my foolproof recipe!

Want to know the secret to perfectly roasted chickpeas? Click to find out the recipe!

*Originally published in March 2015*

Hi Friends!

Want to learn how to roast chickpeas? If I’m being totally honest, I’m not crazy about chickpeas just plain. I don’t particularly like them on salads or in a casserole. But grind them up into hummus and you’ve got my attention. Roast them into crunchy little puffs to snack on and it’s likely I could eat a whole can in one sitting.

Roasting chickpeas can be a tricky beast. I’ve had many failed batches. Through trial and error, and a little luck, I’ve figured out a few secrets and I thought I’d share them with you!

How To Roast Chickpeas

Want to know the secret to perfectly roasted chickpeas? Click to find out the recipe for this healthy snack!

Perfectly Roasted Chickpeas

Ready? Three secrets to perfectly roasted chickpeas:

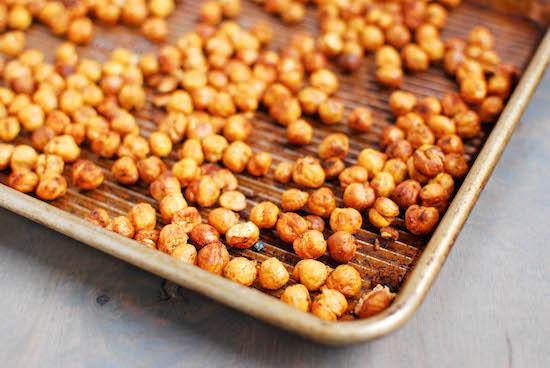
  1. Don’t use too much oil. It will make them soggy and they will never get crispy. I spray mine vs drizzle with oil. If you don’t have a can of spray oil or a Misto, use about 1/2 tsp per can of chickpeas. Just enough to coat so spices can stick!
  2. Don’t crowd the pan. Use a large baking sheet, especially if you’re roasted two cans at once so there’s enough room for air to circulate around them. These are my favorite pans (aff link)
  3. Start them in a cold oven, roast them and then leave them in the oven as it cools back down.

Want to know the secret to perfectly roasted chickpeas? Click to find out the recipe for this healthy snack!

That third one is the one that came about by accident. A few years ago I REALLY wanted roasted chickpeas…but I was running late for a workout. I didn’t have time to let the oven preheat so I threw them in there right when I turned the oven on, let them roast as long as I could and then shut off the oven, left them in there and hoped for the best.

What I got was my best ever batch of roasted chickpeas. 

Roasted Chickpeas Recipe

Here’s how you make them:


Print

How To Roast Chickpeas

roasted chickpeas
Print Recipe

5 Stars 4 Stars 3 Stars 2 Stars 1 Star

5 from 5 reviews

Perfectly roasted chickpeas using a super easy, foolproof method.

  • Author: Lindsay L
  • Yield: approx 6 servings 1x

Ingredients

Scale
  • 2 cans chickpeas (low-sodium or no-salt-added)
  • oil for misting
  • spices (i use paprika and cayenne pepper)

Instructions

  1. Drain and rinse the chickpeas.
  2. Line a baking sheet with paper towels. Pour the chickpeas on top and use more paper towels to dry them off as well as possible.
  3. Remove the paper towels.
  4. Mist the chickpeas with oil, sprinkle with spices and shake pan gently until all the chickpeas are well coated.
  5. Place pan in a cold oven.
  6. Set oven to 425 degrees F and let roast for 25-30 minutes, shaking the pan halfway thru. The timer starts as  soon as you put them in a cold oven and turn it on.
  7. When the timer goes off, stir once more, turn the oven off and leave pan in the oven for 3-4 hours.
  8. Remove and let cool completely before transferring to a storage container.

Notes

The exact roasting time will depend on your oven and you might have to test two batches. 30 minutes is perfect for my oven but leads to some burning in other ovens. Try 25 minutes first and add 5 minutes next time if needed!

Did you make this recipe?

Tag @theleangreenbean on Instagram

So easy and delicious.

Want to know the secret to perfectly roasted chickpeas? Click to find out the recipe for this healthy snack!

Play around to find your favorite spice mix. I usually choose cayenne and paprika but they’re also good with curry powder!

Perfectly roasted chickpeas

It might be a little trial and error with your oven as well depending on how hot it tends to run.

Don’t forget to use a big pan if you do two cans at once! Leave them in the oven for at least 2-3 hours after you turn it up, but really, you can leave them in there until it gets totally cold if you want to.

I like to make a batch right before I go to bed then just shut off the oven and take them out in the morning.

Want to know the secret to perfectly roasted chickpeas? Click to find out the recipe.

Look good?! Don’t forget to share with friends on Pinterest and Facebook!

Healthy snacks like these chickpeas are great to add to your weekly food prep routine so you have them on hand during busy weeks. If you liked this post, you’ll love my ebook – The Ultimate Guide To Food Prep. It dives into even more detail about how to food prep, troubleshoots common problems and provides tons of tips to make it easier! 


Looking for more healthy snack ideas? Try these: 25 Quick and Easy After-Work Snacks or these 10 Healthy Toddler Snacks! You can see all my snack recipes here, including many packed with veggies!

Enjoy!
–Lindsay–

This post contains affiliate links. If you make a purchase from Amazon after clicking on one of them, I will earn a small commission at no additional cost to you.

Filed Under: Food Prep, Snack Tagged With: Chickpea

Red Lentil Chicken Nuggets

January 1, 2020 by Lindsay 2 Comments

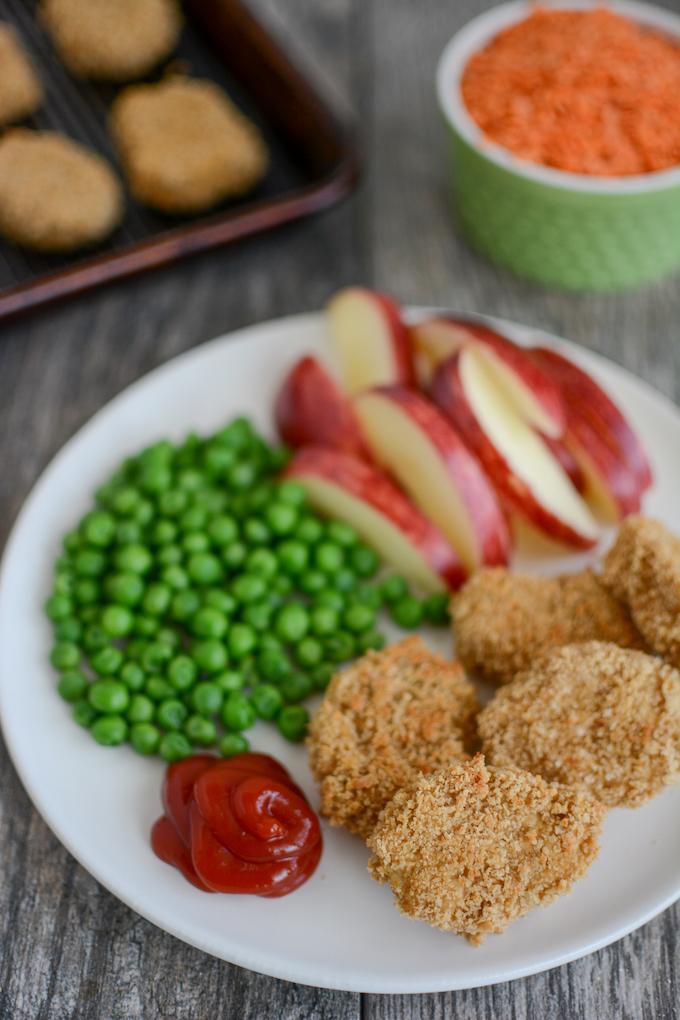
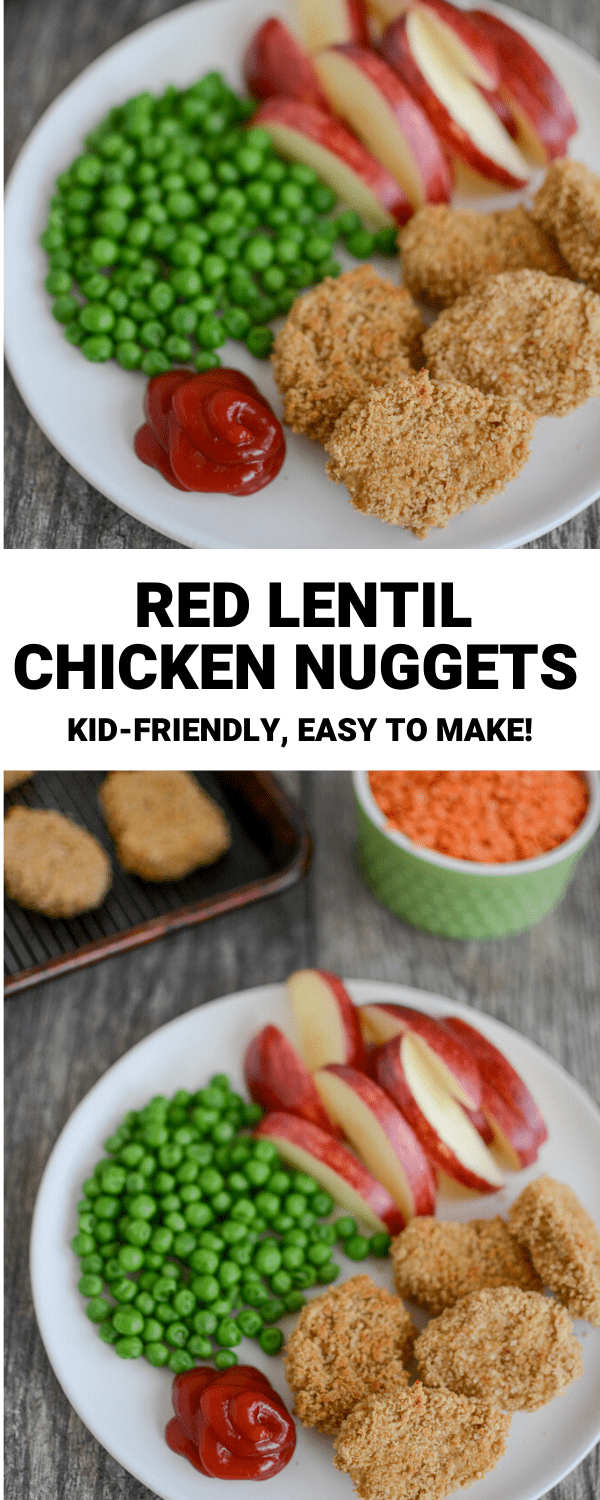
These Red Lentil Chicken Nuggets are made with a combination of red lentils and ground chicken. They’re kid-friendly and easy to make for a weeknight dinner. 

Red Lentil Chicken Nuggets with sliced apples and green beans on a white plate

Hi friends!

I’m excited to share these Red Lentil Chicken Nuggets to kick off the new year. Over the past several weeks I’ve been working to reduce my meat intake. I’m not interested in eliminating it completely but I am cutting back. For me, one of the easiest ways to do this is to make my meals with a combination of plant and animal proteins. 

A perfect example is a recipe I recently shared over on Instagram for Chicken and Chickpea Noodle Soup. Instead of making my standard chicken noodle soup, I replaced half the chicken with a can of chickpeas. This gives me the benefit of adding plant protein to my meal! But it’s less overwhelming than a 100% vegetarian meal. 

I used the same approach with these Red Lentil Chicken Nuggets.  Combining red lentils with ground chicken tastes more like a nugget my kids are used to eating. But combining stretches the chicken into more nuggets thanks to the lentils. It’s an easy way to add another plant-based protein source to my kids’ meal.  

Here’s how you make them:

Print

Red Lentil Chicken Nuggets

Red Lentil Chicken Nuggets made with lentils and ground chicken
Print Recipe

5 Stars 4 Stars 3 Stars 2 Stars 1 Star

No reviews

These Red Lentil Chicken Nuggets are made with a combination of red lentils and ground chicken. They’re kid-friendly and easy to make for a weeknight dinner. 

  • Author: Lindsay
  • Prep Time: 15 min
  • Cook Time: 15 min
  • Total Time: 30 minutes
  • Yield: 25-30 nuggets 1x

Ingredients

Scale

1 pound ground chicken
1/4 cup dry red lentils (about 3/4 cup cooked)
1 egg
1/2 tsp garlic powder
1 tsp paprika
1.5 cups panko breadcrumbs for coating (more if needed)

Instructions

  1. Cook red lentils. (I put mine in a pan with water, cover, bring to a boil, crack the lid and reduce to simmer or 5 min and then drain).
  2. Put the lentils in a food processor and pulse several times.
  3. Add chicken, egg and spices and process until combined.
  4. Place panko breadcrumbs on a plate or in a dish.
  5. Take chicken mixture one tablespoon at a time. Roll in breadcrumbs and form into nugget shape. (Depending on size you should get 25-30 nuggets)
  6. Bake at 400 for 13-15 minutes, flipping halfway, or until thermometer inserted into a stack of nuggets registers 165 degrees F.

Did you make this recipe?

Tag @theleangreenbean on Instagram

Using a food processor makes combining the chicken and lentils a breeze. Even though forming the nuggets takes a little time, it’s easy and perfection isn’t required. To cut down on prep time you could cut the recipe in half. This would make fewer nuggets. Use the other half pound of chicken for something else!

If you’re feeling adventurous, you could add some shredded carrots or zucchini or other veggies to the food processor.

Red Lentil Chicken Nuggets

These Red Lentil Chicken Nuggets are made with a combination of red lentils and ground chicken. They're kid-friendly and easy to make for a weeknight dinner. 

Filed Under: Dinner Tagged With: Egg, Ground Chicken, Lentils, Panko

Peppermint Sweet Potato Brownies

December 11, 2019 by Lindsay 2 Comments

These Peppermint Sweet Potato Brownies are the perfect holiday dessert! They’re gluten-free and sweetened with dates. Add them to a Christmas cookie tray or bring them to a potluck or party.

Peppermint Sweet Potato Brownies - topped with white chocolate drizzle and crushed candy canes

Hi friends!

These Peppermint Sweet Potato Brownies are likely the only new holiday recipe you’ll get from me this year but man are they delicious. They’re basically just a slight twist on my Gluten-Free Sweet Potato Brownies. I made a couple of small changes and BAM! A perfectly festive recipe that would make a fun addition to a holiday cookie tray and would also be perfect at your Christmas party, office potluck, etc.

These beauties are made in the food processor. Have I mentioned I love my Cuisinart food processor (affiliate link). It’s by far my most used kitchen appliance and my absolute fav for baking because it’s so easy to add all sorts of nutrient boosters to baked goods. 

So, using the food processor allows you to sweeten these with dates, which I love. It also lets you blend in a whole medium sweet potato! You don’t even need flour or oats for these. 

Peppermint Sweet Potato Brownies sweetened with dates

My gluten-free sweet potato brownies have been our fav around here for several years…and then every time the holidays roll around, I find myself making my No-Bake Peppermint Chocolate Bites on repeat…because is there really anything more festive than white chocolate and crushed candy canes? I think not.

So this year I decided to do a little mash-up and give my brownies a mint twist. And guys, they turned out so well. I’ve made two batches this week and eaten almost all of them myself.

Here’s the recipe:

Print

Peppermint Sweet Potato Brownies

Peppermint Sweet Potato Brownies with white chocolate drizzle
Print Recipe

5 Stars 4 Stars 3 Stars 2 Stars 1 Star

5 from 1 review

These Peppermint Sweet Potato Brownies are the perfect holiday dessert! They’re gluten-free and sweetened with dates. Add them to a Christmas cookie tray or bring them to a potluck or party.

  • Author: Lindsay
  • Prep Time: 5
  • Cook Time: 20
  • Total Time: 25 minutes
  • Yield: 12 brownies 1x

Ingredients

Scale

3/4 cup chopped medjool dates (pits removed. Soak in hot water for 5 min first if they’re not super soft)
2 eggs
1/2 cup peanut butter
2/3 cup cooked, mashed sweet potato
1/4 cup applesauce
1/4 cup oil
1/3 cup cocoa powder
1/2 tsp baking soda
1 tsp peppermint extract (adjust to more or less depending on how strong you like your mint flavor)
1/2 cup chocolate chips
white chocolate and candy canes for decorating

Instructions

  1. Place dates in a food processor and pulse several times to chop.
  2. Add eggs, peanut butter, sweet potato, applesauce, oil, cocoa powder, baking soda and peppermint and process until smooth.
  3. Add chocolate chips and pulse to mix.
  4. Spread into 9×9 baking pan lined with parchment paper. (Batter will be very thick.
  5. Bake at 375 for 15-20 minutes or until set.
  6. Let cool completely, then drizzle with melted white chocolate and crushed candy canes.

Notes

To cook my sweet potato I just stab it several times with a knife and microwave for 5 minutes.

Did you make this recipe?

Tag @theleangreenbean on Instagram

What do you think? Are you worried they’re going to taste like peanut butter or sweet potato? I promise you they don’t! 

These Peppermint Sweet Potato Brownies are the perfect holiday dessert! They're gluten-free and sweetened with dates. Add them to a Christmas cookie tray or bring them to a potluck or party.

I can’t wait for you to try them! Be sure to let me know what you think!!

Let’s chat:

What staple treats go on your cookie trays every year?

Enjoy!
–Lindsay–

Filed Under: Dessert, Baking Tagged With: Applesauce, Chocolate Chips, Cocoa Powder, Dates, Egg, Oil, Peanut Butter

All-Time Favorite Gifts {For Babies, Toddlers & Mom}

November 26, 2019 by Lindsay 2 Comments

After three kids, here are my all-time favorite gifts for Babies, Toddlers and Moms! These are my most used items for everyday life and would make great choices for gifts, baby registries and more.

all time best gifts for babies, toddlers and moms

Hi friends!

I wanted to share my all-time favorite gifts with you guys. In case you missed any my previous gift guides, you can check them out below:

  • Small Business Gift Guide
  • Kid Gift Ideas {Ages 4-7}
  • Gift Ideas for Babies & New Moms {Baby’s First Year}
  • Toddler Gift Ideas {Ages 1-3}
  • Kitchen Tools For Kids
  • Best Toys for Multiple Ages
  • Gifts For New Moms
  • Gift Ideas for Buys Moms
  • Best Gifts For Husbands
  • Best Gifts For In-Laws (or Parents)

*Originally posted 11/2019. Updated 11/2023.*

Some of you have asked what my absolute favorites are. I tried to make my previous guides very robust with lots of options at different price points but if I was really going to boil it down to my very favorite things, I could pretty easily pick my top 10 favorites in a few categories.

So, I rounded up my favorites for baby’s first year, the toddler years (mostly ages 2-4) and my current mama favs that I use almost daily. So here are my all-time favorite gifts for babies, toddlers and moms.

Some of the links below are affiliate links from Amazon and other places. That means that if you purchase through them, I earn a small amount at no additional cost to you! Thanks for supporting The Lean Green Bean.


All-Time Favorite Gifts

all-time favorites for baby's first year

All-time favorite newborn items

  1. Ergo Adapt – Hands down my favorite baby carrier. I have three of them and used them with all three kids. I love the adapt bc you don’t need an infant insert.
  2. UpSimples Swaddle Blankets – These are THE softest blankets. Great for swaddling, spit up, lovies, cold weather covering, etc.
  3. Lectrofan Sound Machine – A good sound machine is a must-have. I have this one in several rooms.
  4. Newborn to Toddler Rocker – I used the rock and play with all three, but since it was recalled, this is my next most-used chair. It got plenty of use with all three as well.
  5. Boogin’ Head Pacifier Clip & Zutano Booties – If baby takes a pacifier, boogin’ head is a must to keep from loosing them. But only one of mine really took a paci so I’d also recommend the booties. 
  6. Gootensil – The perfect first utensil. Easy to load and great for them to practice with or just chew on when teething.
  7. B’apron Baby – The best bib. It goes over the shoulders and ties in the back so they can’t yank it off their neck.
  8. Summer Infant Popup Playyard – We used this ALL the time when we owned a gym while my oldest was a baby. Even now we use it in our living room to keep the baby away from the big kids when they’re building, doing train tracks etc. They have a newer model with a sun shade which is great for outside.
  9. Laugh and Learn Table – All my kids have loved this. You can put it on the floor without the legs when they’re little and it’s great when they start to stand. Even my big kid still play with it!
  10. Sit to stand walker – Another one that’s been highly used with all three kids when learning to walk!

Check out my Baby’s First Year Gift Guide here.


gift ideas ages 2-4

All-time favorite toddler gifts

  1. Wooden train tracks – My oldest was non-stop trains from ages 1-3. Most of the brands work together so snag them on sale and build your collection.
  2. Anything that encourages open-ended play and has more than one use: trucks/cars +babies/stuffed animals – great for any age. They don’t have to be fancy…the simpler the better so they can use their imagination
  3. Play tools and doctor kit and vet set – our three most used “pretend” sets
  4. Play kitchen – all my kids have loved this from age 1 and it’s still being use by my 9 year old
  5. Duplos – skip the mega blocks big builders and just get Duplos. Big enough for 1-year-olds and my kids used them until they were 4 or 5 before switching to smaller sets.
  6. Nugget – Great pretty much as soon as they start crawling but I’d say 2.5 or so is about the time mine started using on their own without needing parent help to set it up and move it around. Big hit from ages 3-6 and still being used by my older kids as well to make forts, cars and more.
  7. Magnatiles and/or wooden blocks – Blocks are great for any age. Magnatiles are one of my favorite gifts for 2nd birthday because my kids started using them independently around 2.5. My 9 year old still builds castles etc for his army men with them. Get the 100 pack. Several of them. Just trust me
  8. Scooter – Tricycles are great but if you only want to buy one, I’d go with a scooter for ages 2+. My daughter mastered it around 2.5 and with practice probably could have been good at it even younger.
  9. Ultimate fort builder – easy to snap together but if you want to build some of the designs they suggest, you have to position the connectors a certain way so ages 3-4 might be a better age to start if no older siblings
  10. Art supplies/playdough/water table/sensory bins – check this post for a list of our most used supplies

Find all my favorite Toddler Gift Ideas here.


All-time favorite gifts for kids ages 4-7

If your kids are no longer toddlers, I have lots of toy ideas for kids ages 4-7 here:

Kids Gifts Ideas – Ages 4-7


all-time favorite gifts for moms

Mom Favs

  1. Able purse – Hands down my favorite crossbody purse. I have 3 of various sizes and love them all.
  2. Yeti Coffee Mug – To keep your coffee hot and also minimize spills and potential burns from little hands that are grabbing for your mug.
  3. Stitch Fix – Since going shopping is hard! I also love my Lululemon Dance Studio Pants.
  4. Slippers – On my feet every day for fall, winter and spring.
  5. Pop Socket– A must-have for your phone.
  6. Audible or Kindle Unlimited membership- When I have the time and energy to read for fun, this comes in handy for access to a lot of books and Audible makes it easy to listen to books while doing other things.
  7. Food processor – Instant Pot – Air Fryer – Nutribullet : My four most used kitchen appliances.
  8. Heating Pad – For all your mom aches and pains and also to make your bed warm and cozy.
  9. Birkenstock Mayari – My go-to shoe all summer long. Stylish, comfortable and long lasting.
  10. Dumbbells – You can get a great workout, even in your living room, with a good pair of dumbbells. 
  11. Shark Hair Dryer – Saves so much time drying my hair
  12. Airpods – Cannot live without them!

Find all my favorite Gift Ideas For Busy Moms here.


So there you go! I’m sure I forgot something but this should get you started!

After three kids, here are my all-time favorite gifts for Babies, Toddlers and Moms! These are my most used items for every day life and would make great choices for gifts, baby registries and more.

Enjoy!
–Lindsay–

Filed Under: Kids, Gift Guides

Apple Cheddar Turkey Meatballs

November 6, 2019 by Lindsay 5 Comments

These Apple Cheddar Turkey Meatballs are kid-friendly and perfect for food prep! They’re full of flavor and make a great party appetizer or family dinner.

Apple Cheddar Turkey Meatballs with green beans and sweet potatoes

Hi friends!

Whenever I find myself in a dinner rut, meatballs are a go-to of mine! Over the years I’ve come up with quite a few flavor combinations that are on repeat around here. These Apple Cheddar Turkey meatballs are on of our current favorites. After we went apple picking this year, I was looking for new ways to use up some of our apples and the idea for these were born. 

My kids love them because they’re full of cheese and the apples add a little sweetness. I love dipping them in bbq sauce! Since meatballs are so easy to double or triple the recipe, these would perfect for a football tailgate!

overhead shot of apple cheddar turkey meatballs

When I polled my audience on Instagram, the majority preferred shredded cheese mixed into the meatballs but you could also make a stuffed version of these Apple Cheddar Turkey Meatballs by stuffing a cube of cheddar cheese into the middle of them!

I served mine with some roasted veggies so that I could do everything on a couple of baking sheets in the oven for dinner, but you could also serve with pasta, baked sweet potatoes or another favorite side dish of yours!

Here’s how you make them:

Print

Apple Cheddar Turkey Meatballs

plate of apple cheddar turkey meatballs
Print Recipe

5 Stars 4 Stars 3 Stars 2 Stars 1 Star

5 from 2 reviews

These Apple Cheddar Turkey Meatballs are kid-friendly and perfect for food prep! They’re full of flavor and make a great party appetizer or family dinner.

  • Author: Lindsay
  • Prep Time: 5 min
  • Cook Time: 20 min
  • Total Time: 25 minutes
  • Yield: 14–16 meatballs 1x

Ingredients

Scale

1 pound ground turkey (or chicken)
1/2 cup shredded apple (squeeze to remove excess water and roughly chop)
2 Tbsp dijon mustard
1/4 cup sliced green onion
2 oz shredded cheddar cheese

Instructions

  1. Combine all ingredients in a bowl and mix well.
  2. Form into 14-16 meatballs.
  3. Place on a greased, foil-lined baking sheet.
  4. Bake at 400 degrees for 18-20 min, flipping once.

Did you make this recipe?

Tag @theleangreenbean on Instagram

What do you think? We love them!

These Apple Cheddar Turkey Meatballs are kid-friendly and perfect for food prep! They're full of flavor and make a great party appetizer or family dinner.

Looking for other meatball recipes? Try these:

  • Paleo Turkey Sweet Potato Meatballs
  • Carrot Pineapple Turkey Meatballs
  • Thai Chicken Meatballs
  • Pizza Meatballs
  • Slow Cooker or Instant Pot Meatballs
  • Crockpot Meatball Soup with Tortellini

What’s your favorite meatball flavor combo?

Enjoy!
–Lindsay–


Filed Under: Dinner, Food Prep Tagged With: Apple, Cheese, Green Onion, Ground Turkey, Mustard

Dairy-Free Pumpkin Bars

November 1, 2019 by Lindsay 24 Comments

These Dairy-free Pumpkin Bars are so easy to whip up for a snack or dessert! They require just one bowl and one measuring cup! 

Easy Dairy-free pumpkin bars

Hi friends!

We’re knee-deep in pumpkin season over here…although if you’ve been following for any length of time you know that we are team year-round pumpkin! However, I accept the fact that a lot of people only enjoy it in the Fall…which is why I knew I had to share these easy Dairy-free Pumpkin Bars with you guys as soon as possible. They just might become your new favorite dessert. Who knows! Maybe this will be the recipe that converts you to year-round pumpkin loving!

Dairy-free Pumpkin Bars

Overhead shot of dairy-free pumpkin bars with chocolate chips

I’ve been making these bars for several years now and when I shared them over on Instagram a couple of weeks ago, you guys went wild for them! The recipe is so so easy. All you need is one bowl and guess what? You only need one measuring cup as well! My kids love helping me make these and they’ve been a huge hit at football parties, potlucks etc as well!

Here’s how you make them:

Print

Dairy-Free Pumpkin Bars

Easy Pumpkin Bars copy
Print Recipe

5 Stars 4 Stars 3 Stars 2 Stars 1 Star

4.8 from 17 reviews

These Dairy-free Pumpkin Bars are so easy to whip up for a snack or dessert! They require just one bowl and one measuring cup! 

  • Author: Lindsay
  • Prep Time: 5 min
  • Cook Time: 25 min
  • Total Time: 30 minutes
  • Yield: 9x9 pan 1x
  • Category: dessert

Ingredients

Scale

2/3 cup oil (i use avocado oil)
2/3 cup brown sugar
1 cup pumpkin puree
1 egg (or a flax egg)
1 tsp vanilla
1 tsp cinnamon
1 & 1/3 cup flour (i use white whole wheat)
1 tsp baking soda
chocolate chips, to taste

Instructions

  1. Combine oil, brown sugar, pumpkin, egg and vanilla in a bowl and mix well.
  2. Add cinnamon, flour, baking soda and chocolate chips.
  3. Stir until just mixed.
  4. Spoon into 9×9 pan lined with parchment paper and bake at 375 for 20-25 min.

Notes

To make these vegan, use a flax egg.

You can reduce the sugar if desired.

Use dairy-free chocolate chips if needed.

Did you make this recipe?

Tag @theleangreenbean on Instagram

See what I mean? You just grab a 1/3 cup measuring cup and you can make the whole recipe! It doesn’t get any easier. 

These Dairy-free Pumpkin Bars are so easy to whip up for a snack or dessert! They require just one bowl and one measuring cup! 


Looking for more pumpkin recipes? Try these:

  • Pumpkin Apple Lentil Muffins
  • Pumpkin Gingerbread Muffins
  • Easy Pumpkin Bread
  • Pumpkin Energy Balls
  • GF Pumpkin Yogurt Bars
  • Pumpkin Protein Pancakes

What’s your favorite pumpkin dessert?

Enjoy!
–Lindsay–

Filed Under: Dessert, Baking, Snack Tagged With: Brown Sugar, Chocolate Chips, Egg, Oil, Pumpkin, White Whole Wheat Flour

Best Toys for Multiple Ages

October 28, 2019 by Lindsay Leave a Comment

Looking for the best toys for multiple ages? Here’s a roundup of toys that all of my kids have played with for many years. They’re great for entertaining a wide range of ages and perfect for keeping siblings entertained!

best toys for multiple ages

Hi friends!

When you have 3 kids, you find toys they all love out of necessity. No matter how much space you have, there’s simply not room for everyone to have all their own toys. A common question I get from parents who just had their second or third kid is for a list of toys that all of my kids play with.

I put together a list of my favorites. These are forever toys. The ones you can buy when your first kid is one or two and save until your youngest kid is heading to middle school! Some are expensive, but I think the fact that you can keep them around for many years gives them a lot of bang for their buck! 

If you want more gift ideas, check out these posts:

  • Small Business Gift Guide
  • Kid Gift Ideas {Ages 4-7}
  • Gift Ideas for Babies & New Moms {Baby’s First Year}
  • Toddler Gift Ideas {Ages 1-3}
  • Kitchen Tools For Kids
  • Gifts For New Moms
  • Gift Ideas for Buys Moms
  • Best Gifts For Husbands
  • Best Gifts For In-Laws (or Parents)

So, here are my top 10 recommendations.

This post contains affiliate links where noted. That means when you purchase through my link, I receive a small amount of money, at no additional cost to you! Thanks so much for supporting The Lean Green Bean!

*Originally posted 10/2019. Updated 11/2023*


10 Best Toys for Multiple Ages

nugget comfort

Play Cushions

Nugget Comfort

We got this when my older two kids were 4 and 2 and have used it daily since. I even have a whole Instagram highlight of the different ways we’ve used it. It’s great for obstacle courses, forts, watching tv, saving your couch cushions, monster truck ramps, and endless other things!


magnatiles

Magnetic Tiles

Magnatiles are my absolute favorite.

I always recommend people splurge on the name-brand ones because I feel they work the best…and also splurge on the 100 pack because you’re going to want as many pieces as possible. But if you’re on a budget, Picasso Tiles works fine too and they do work with Magna-Tiles – we have some of each kind and use them together.

I also recommend a magnetic board to build on (aff link). If you’re on a budget you can use an old cookie sheet!


duplos

Building Block Toys

Duplos

These really depend on the ages of your kids. I recommend skipping Megablocks and going straight to Duplos. With my kids, Duplos were great for the middle years – ages 2-5 – because they’re easy to stick together.

It can be tricky to move to smaller legos with older siblings while you still have younger ones that they can be a choking hazard for. My oldest was happy playing with these until he was about 5.

Classic Legos

Starting around age 4 or 5, smaller lego sets can be a better choice.

Other options: Playmobil — Erector Set — K’Nex


jumbo cardboard blocks

Blocks

Jumbo Cardboard Blocks – a pain to assemble but once you only have to do it once. They’re sturdy and
kids will love to build with, knock down, crash into, jump over etc!

If you want something smaller, go with standard wooden blocks.


ultimate fort builder

Fort Builder

Ultimate Fort Builder – We love this one from Lakeshore Learning and love it. This one  from Amazon is similar. These are easy to snap together.

The only thing to consider is that to make some of the designs in the booklet that comes with it, the red connectors need to be oriented a certain way (there are arrows on them) so I often need to help my kids (almost 3 & 5) set them up.

If they just want to build a big square or rectangle, or their own design, they can connect them however they want. Just throw a sheet over the top and voila!

If you want something easier, consider an Air Fort.


wooden train tracks

Train Tracks

Wooden Train Tracks – Most of the wooden tracks – Brio, Obrium, Melissa and Doug etc are interchangeable so I’d look for whichever brand you can find the best deal on and you can add more later!

You can set them up in endless patterns and can easily add to your first set to make longer and more complex tracks. They’re also great for traveling. I always pack a ziploc bag full in my suitcase with a few trains because you can set them up anywhere.


play kitchen

Play Kitchen

Step 2 Play Kitchen – There are tons of different models out there so you can browse around and find a design you love, one to fit your decor etc.

We got ours when my oldest turned 1 and all my kids still play with it daily. I highly recommend adding some food,  this shopping cart and cash register to the mix as well.

And then you can save your food and diaper boxes and set up your own grocery store like I did here. 


hape doll house

Doll House

Hape Doll House – I found mine on FB marketplace…a great place to look for any of this stuff, but both my older kids use it.

I’ve found it’s a common thing to have in preschool classrooms and both of my kids started playing with ours at home more after they were introduced to it at school.

Ours was from Plan Toys but this one from Hape is also great.


occupational toys

Occupation Toys & Dress Up Clothes

My kids love their doctor kit, vet set and all of their dress up clothes (order slightly big so they can grow into them and use for multiple years).

They also love their pretend tools, cleaning supplies and explorer set (binoculars, compass, flashlight, etc).


obstacle course

Obstacle Course Equipment

In addition to our Nugget, we also use a balance beam and floor dots to make homemade obstacle courses. You could also add rings, cones and bean bags!

If your kids are slightly older and you have the space, a ninja course can be great for multiple kids.


sensory fine motor toys

Sensory/Fine Motor

  • Playdough – use it by itself, give them some scissors or butter knives to cut it with, use a rolling pin and cookie cutters etc
  • Sensory bins – fill them with kinetic sand, water beads, dried beans or noodles, water, scoops, cups, spoons etc and let them go to town
  • Whiteboard and dry-erase markers
  • Spray bottles
  • Water/Sand table

arts and crafts

Arts and Crafts:

  • Pipe cleaners
  • Clothespins
  • Straws
  • Pom poms
  • Washable paint
  • Balloons
  • Popsicle sticks
  • Paint Brushes  
  • Kwik Stixs Solid Tempera Paints – perfect for when you need something bolder than a marker but want it to dry quicker than regular paint
  • Do A Dot Art! Markers
  • Glue Sticks – I like the disappearing purple ones because they can easily see where they’ve spread the glue
  • Markers
  • Crayons
  • Butcher Paper – for me this is so much easier than single sheets of paper because you can tear off as much or as little as you want each time
  • Construction paper
  • Scissors
  • Hole punches
  • Hot Glue Gun 

physical activity

Physical Activity

  • Mini trampoline
  • Bounce house
  • Roller coaster
  • Scooters

general multi age toys

General

  • Vehicles – dump trucks, cars, construction vehicles, hot wheels…anything with wheels that you can build roads/garages/houses for
  • Puzzles
  • Balls
  • Wooden blocks
  • Dolls and barbies
  • Little people and toy animals/dinos
  • Marble Run (aff link)
  • Board games

Want to save these ideas? Pin this post for later!

Look for the best toys for multiple ages? Here's a roundup of toys that all of my kids have played with for many years. They're great for entertaining a wide range of ages and perfect for keeping siblings entertained!

Enjoy!
–Lindsay–

Need more ideas? Check out these Toddler Gift Ideas geared at ages 1-3, Kids Gift Ideas {ages 4-7} Or my Small Business Gift Guide.


Filed Under: Kids, Gift Guides

Introducing Peanut Butter to Babies

October 23, 2019 by Lindsay 1 Comment

Research shows introducing peanut butter to babies at an early age can help prevent allergies. Here are some simple ways to introduce peanut butter to infants.

Research shows introducing peanut butter to babies at an early age can help prevent allergies. Here are some simple ways to introduce peanut butter to infants.

Hi friends-

Introducing peanut butter to babies is one of my favorite parenting adventures. While it’s fun to start your journey with solids, introducing the top 8 allergens is often a bit scary. It’s been a hot topic in parenting for a while now, likely because the current recommendations are MUCH different than they were even just 5 years ago. The previous recommendation was to introduce the top 8 allergens until a child was at least a year old. That meant avoiding peanuts, tree nuts, fish, shellfish, wheat, milk, soy and eggs for the first year of life. 

However, in early 2015, just as I was getting ready to start feeding my first baby solids, a growing body of research supporting earlier introduction. I started working my way through the top 8 allergens as soon as he started solids at 5.5 months and peanuts were one of the first we introduced. Peanut allergies are on the rise and have definitely gotten the most media attention in recent years. Most schools are peanut-free at this point but the hope is is that people will utilize the new guidelines for introducing peanuts at an earlier age and that the prevalence of peanut allergies will start to decrease.

peanut butter and mashed banana in oatmeal for babies

Current Recommendations

As you get ready to start solids, be aware of the current recommendations for introducing peanut butter to babies:

  • For the highest risk infants, those with severe eczema or egg allergy, peanut allergy testing is recommended. This group should be introduced to peanuts in an infant safe way (under the supervision of a doctor) as early as 4-6 months of age.
  • Babies with mild to moderate eczema, also at increased risk, should be introduced to peanuts around 6 months of age.
  • Infants without eczema or other food allergies, who are not at increased risk, should be introduced to peanuts freely along with all other solid foods around 6 months of age. Ie, no need to do it early, but don’t wait until they’re one. Just start introducing at the same time they start solids, whenever they are developmentally ready.

If an early introduction is needed, before babies are developmentally ready for solids, a small amount of powdered peanut butter can be mixed with formula or breast milk and put it in a bottle. Remember, this would be something you would work closely with your doctor on.

In addition, before introducing any solids to your child, familiarize yourself with the signs of an allergic reaction, watch children closely during and after introduction and seek medical attention if needed. More on food allergies and allergic reactions here.

introducing peanut butter to babies with popsicle

Introducing Peanut Butter to Babies

Here are some simple ideas for introducing peanut butter to babies. Be sure your child is developmentally ready for solids (sitting unassisted, showing interest in food, etc):

  • Make oatmeal or baby cereal and stir in peanut butter or powdered peanut butter.
  • Cut sweet potato into fries and roast until soft. Mix peanut butter with a little bit of water to thin it out and serve as a dip for the fries.
  • Cut a banana into chunks. Warm peanut butter until it’s easy to stir. Dip banana chunks in peanut butter, place on a baking sheet and freeze. Place in a mesh or silicone pouch and let baby suck on it. We like this silicone feeder from Boon (affiliate link)
  • Mix mashed sweet potato, prunes and peanut butter and spoon into small popsicle molds to freeze. We use these Nuby popsicle molds (aff link)
  • Mix applesauce and breast milk or formula with powdered peanut butter and serve with a spoon.
  • Try Bambas or other peanut puffs.
  • Add a little peanut butter to any pureed fruits or veggies.
  • Spread thinly on soft crackers or toast.
  • Mix peanut butter into pancake batter and cut pancakes into strips when serving.
  • Try this recipe for Peanut Butter Teething Biscuits from the National Peanut Board

Since tree nuts are another of the top 8 allergens, you’ll want to expose your babies to a wide variety of nuts. Try these suggestions with almond, walnut or cashew butter too!  You could also use things like pesto, cashew “cheese”, nut-based dipping sauces and African Peanut Stew to introduce peanuts and tree nuts!

As babies continue on their journey with solids, continue to expose them to the top 8 allergens! I love adding peanut butter to my baked goods like muffins and bars for a dose of healthy fats!

Enjoy!
–Lindsay–
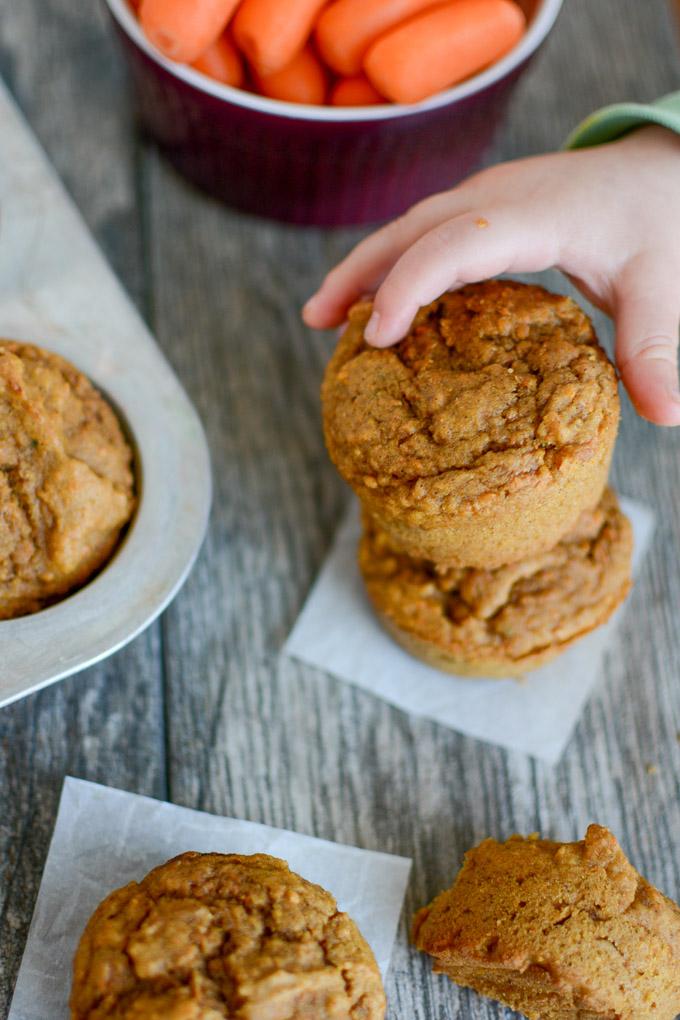
Filed Under: Kids Tagged With: Peanut Butter

Roasted Squash Fall Salad

October 18, 2019 by Lindsay Leave a Comment

This Roasted Squash Fall Salad is perfect for lunch or dinner. Packed with vegetables and protein, it’s full of flavor and easy to customize. A great way to enjoy seasonal produce! Keep it vegetarian or add your favorite meat or fish.

Roasted Squash Fall Salad with hard boiled egg and avocado

Hi friends!

Allow me to present this Roasted Squash Fall Salad to inspired your weekend food prep! I’ve been eating this salad on repeat around here because it’s just so dang good. I think I’ve mentioned before that I’m not a huge fan of lettuce based salads. More likely I’ll take a little salad and then gimme ALL the toppings! They’re the best part…am I right? 

That being said, you can serve this salad with pretty much any combo of greens you like. Regular leaf lettuce works. Massaged kale would be great. Spinach would also work. Or any combo of the above.

As with most of my salad recipes, you don’t really need exact quantities here. I’m just sharing the ingredients because I think it’s a great combo of flavors. 

Roasted Squash Fall Salad

overhead shot of two Roasted Squash Fall Salads

I’m calling this a Roasted Squash Fall Salad but you can see I use both squash and sweet potatoes. I like the combo but you could use one or the other. And choose your favorite squash here. I love delicata but you could also use butternut squash or any of the other many varieties that are in season right now. 

Similarly, pecans scream fall to me, but if you’re not a fan you could use walnuts or almonds, or toss on some pepitas! I added farro because I like my salads with a grain component. You could skip that if you wanted. And I kept it vegetarian with just hard-boiled eggs but you could easily add some grilled chicken or salmon. Both would be delicious with the honey mustard dressing that I highly suggest you use!

Here’s the rundown of ingredients!

Print

Roasted Squash Fall Salad

Fall Chop Salad 1 2 copy
Print Recipe

5 Stars 4 Stars 3 Stars 2 Stars 1 Star

No reviews

This Roasted Squash Fall Salad is perfect for lunch or dinner. Packed with vegetables and protein, it’s full of flavor and easy to customize. A great way to enjoy seasonal produce! Keep it vegetarian or add your favorite meat or fish.

  • Author: Lindsay
  • Prep Time: 5 min
  • Cook Time: 25 min
  • Total Time: 30 minutes
  • Yield: serves 4

Ingredients

Scale

8 cups leafy greens of choice (lettuce, spinach, kale, etc)
2 delicata squash, cut into rings and roasted (or 1 squash, 1 sweet potato)
1 medium avocado, sliced
6 hard boiled eggs, halved
2 medium apples, chopped
2 cups cooked farro
1 cup chopped pecans
3/4 cup sliced red onion
honey mustard dressing

Instructions

  1. Place 2 cups of greens in each bowl.
  2. Divide remaining toppings evenly among bowls.
  3. Top with honey mustard dressing and serve

Notes

  • Quantities are not exact. Make your salads as big or small as you want!
  • Sub your favorite kind of squash or use all sweet potato if desired
  • Add chicken or other meat if desired
  • Use a different dressing if you prefer
  • I roast my squash by slicing, spraying with oil, adding spices if desired and roasting at 400 for 25 minutes or so, flipping halfway through

Did you make this recipe?

Tag @theleangreenbean on Instagram

Salads are my favorite way to highlight seasonal produce while still serving something that’s totally customizable to personal size and ingredient preferences!

This Roasted Squash Fall Salad is perfect for lunch or dinner. Packed with vegetables and protein, it's full of flavor and easy to customize. A great way to enjoy seasonal produce! Keep it vegetarian or add your favorite meat or fish.

Need more salad inspiration? Try these:

  • Loaded Strawberry Spinach Salad
  • Crunchy Kale Salad with Couscous
  • Salmon Nicoise Salad
  • Mediterranean Turkey Spinach Salad
  • Steak Cobb Salad
  • Strawberry Chicken Spinach Power Salad

Enjoy!
–Lindsay–

Filed Under: Dinner, Lunch, Soup & Salad Tagged With: Apple, Avocado, Egg, Farro, Lettuce, Onion, Pecan, Squash, Sweet Potato

Pumpkin Apple Lentil Muffins

October 3, 2019 by Lindsay 32 Comments

These Pumpkin Apple Lentil Muffins are perfect for Fall. They’re lightly sweetened and full of fiber, fruits, vegetables and whole grains. Plus they’re kid-friendly and nut-free, making them perfect for breakfast, snack or school lunch!

Pumpkin Apple Lentil Muffins

Hi friends!

I’m so excited to share these Pumpkin Apple Lentil Muffins with you guys today. They’re my current fall favorite and I just know you guys are gonna love them! ESPECIALLY if you’ve already made and love my Lentil Banana Muffins. As you guys know, I make those weekly for my kids. They’re Squish’s favorite and Lyssie likes them as well. They’re perfect for lunch boxes and snacks and I promise that you can’t taste the lentils at all. 

These Pumpkin Apple Lentil Muffins are very similar, just with a fall twist. We went apple picking last weekend and came home with a gigantic basket of apples so I’m currently on a mission to find ways to use them up. I’ve been craving a batch of pumpkin muffins so that was my starting point. My favorite are my Pumpkin Gingerbread Muffins but the kids don’t like those. I use shredded apples in my Zucchini Apple Carrot Muffins so I thought this might be an easy way to use some up in a healthy pumpkin recipe. I actually prefer shredded apples to chopped apples in most baked goods because you can squeeze out the excess moisture before baking! If you prefer pumpkin bread, try my Easy Pumpkin Bread or this  Gluten-Free Pumpkin Bean Bread.

Pumpkin Apple Lentil Muffins

Pumpkin Apple Lentil Muffins with chocolate chips

So, I took out the banana and added pumpkin and apple to this recipe. I also swapped sugar for maple syrup. These are very lightly sweetened muffins. They’re not overly sweet and that’s just the way I like it. I prefer to sweeten them lightly and then add chocolate chips. If you leave the chocolate chips out and want a sweeter muffin, you’ll need to increase the maple syrup. If you want to make a no sugar added version, you could swap the maple syrup for a mashed banana or you could use dates to sweeten them like I do in my Zucchini Oat Bars.

Like most things I’ve baked recently, I made them in my food processor (aff link). It just makes baking so easy and I can simply throw stuff in, turn it on and everything gets nice and smooth and blended together and you’d never know all the good stuff that was mixed in there! My kids love helping me make muffins and they especially love helping me add everything to the food processor and then watching it “disappear” when they turn it on!

Here’s how you make them:

Print

Pumpkin Apple Lentil Muffins

Pumpkin Apple Lentil Muffins 3 copy
Print Recipe

5 Stars 4 Stars 3 Stars 2 Stars 1 Star

4.8 from 12 reviews

These Pumpkin Apple Lentil Muffins are perfect for Fall. They’re lightly sweetened and full of fiber, fruits, vegetables and whole grains. Plus they’re kid-friendly and nut-free, making them perfect for breakfast, snack or school lunch!

  • Author: Lindsay

Ingredients

Scale

1 cup cooked green lentils (approx 1/3 cup dry)
1 cup shredded apple (approx 2 medium, squeeze to remove excess moisture)
1/4 cup oil (i use avocado oil)
1 egg
2/3 cup pumpkin (I usually increase to 3/4 cup)
1/4 cup maple syrup (increase up to 1/3 or 1/2 cup for sweeter muffin)
1 tsp cinnamon (you can also add 1/2 – 1 tsp ground ginger if you like that flavor)
1 tsp vanilla extract
1 tsp baking soda
2/3 cup rolled oats
2/3 cup white whole wheat flour
1/2 cup chocolate chips, optional

Instructions

  1. In a food processor, combine cooked lentils, apples, oil and egg and process for 1 min.
  2. Add pumpkin, maple syrup, vanilla and cinnamon and process an additional minute.
  3. Add baking soda, oats and flour and process to combine.
  4. Add chocolate chips and pulse a few times.
  5. Spoon into 12 lined or greased muffin tins and bake at 375 for 18 minutes.
  6. Store in the fridge.

Did you make this recipe?

Tag @theleangreenbean on Instagram

Easy right?! Let me know if you try these Pumpkin Apple Lentil Muffins or the banana version!

These Pumpkin Apple Lentil Muffins are perfect for Fall. They're lightly sweetened and full of fiber, fruits, vegetables and whole grains. Plus they're kid-friendly and nut-free, making them perfect for breakfast, snack or school lunch!

Enjoy!
–Lindsay–
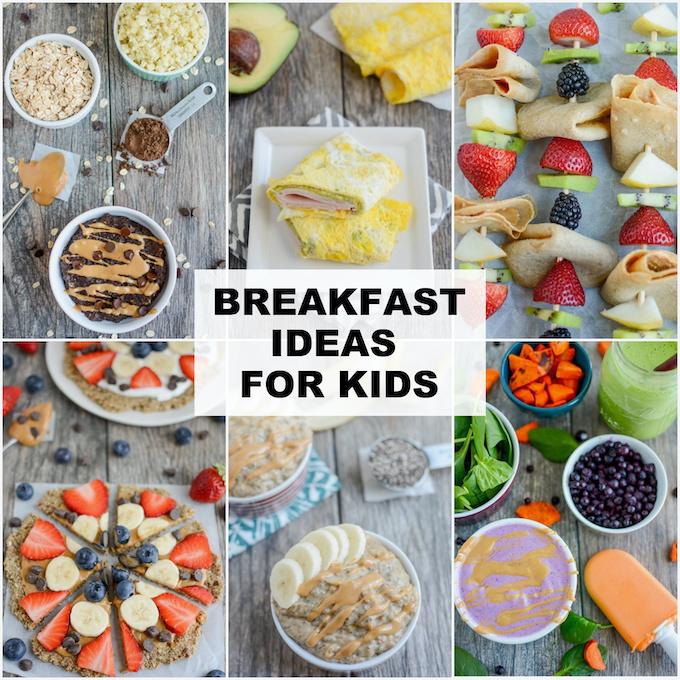
Filed Under: Baking, Breakfast, Food Prep, Healthy Muffins & Bars, Snack Tagged With: Apple, Egg, Lentils, Maple Syrup, Oats, Oil, Pumpkin, White Whole Wheat Flour

Date Sweetened Chocolate Chip Cookies

September 20, 2019 by Lindsay 28 Comments


These Date Sweetened Chocolate Chip Cookies are naturally sweetened with dates and made with just a few simple ingredients! They’re perfect for dessert or an afternoon snack!

Date Sweetened Chocolate Chip Cookies

Hi friends!

I’ve been testing this recipe for date sweetened chocolate chip cookies for you guys for a couple of weeks now. After 5 test batches before I perfected them but I must say they’re pretty darn good. Let’s talk about a few things when it comes to these cookies. 

  1. These cookies contain no added sugar aside from the chocolate chips. (You can find sugar-free chocolate chips if you want them). 
  2. That does not automatically make them healthy. They still contain sugar. Yes, the sugar is naturally occurring in the dates, but it’s still sugar. 

My youngest was actually the inspiration for these cookies. I wanted to develop a no added sugar cookie recipe for him that I could use as a base recipe and these are perfect. Out of all three kids, the youngest actually likes these the best, which works out well for me. I’ll be tweaking the recipe slightly and serving these to him often. 

Date Sweetened Chocolate Chip Cookies

no added sugar, date sweetened chocolate chip cookies

For him, I’ll likely add some ground flax and hemp seeds. I’ll also probably try replacing some of the flour with baby cereal! And I may replace the chocolate chips with finely chopped raisins or chopped dried blueberries. You could also add peanut butter to these for some extra healthy fats!

Here’s how you make them:

Print

Date Sweetened Chocolate Chip Cookies

date sweetened chocolate chip cookies no added sugar
Print Recipe

5 Stars 4 Stars 3 Stars 2 Stars 1 Star

5 from 17 reviews

These Date Sweetened Chocolate Chip Cookies are naturally sweetened with dates and made with just a few simple ingredients! They’re perfect for dessert or an afternoon snack!

  • Author: Lindsay
  • Prep Time: 5 min
  • Cook Time: 10 min
  • Total Time: 15 minutes
  • Yield: 12-14 cookies 1x

Ingredients

Scale

3/4 cup chopped medjool dates (if yours aren’t super soft, soak them in hot water for 5–10 min, then drain)
2 eggs
1/3 cup oil (i use avocado oil)
1 tsp vanilla extract
1 cup old fashioned rolled oats
1 tsp cinnamon
1/2 tsp baking soda
1/3 cup white whole wheat flour
1/3 cup chocolate chips (or dried fruit of choice)

Instructions

  1. Place chopped dates in a food processor and process until finely chopped.
  2. Add eggs oil and vanilla and process for 1 min.
  3. Add oats, cinnamon and baking soda and process until oats are chopped.
  4. Add flour and pulse a few times.
  5. Add chocolate chips and pulse a few more times.
  6. Bake at 350 for 10 minutes.
  7. Makes 12-14 small cookies.

Did you make this recipe?

Tag @theleangreenbean on Instagram

So easy right?! I can’t wait to hear what you guys think of these!

These Date Sweetened Chocolate Chip Cookies are naturally sweetened with dates and made with just a few simple ingredients! They're perfect for dessert or an afternoon snack!

Enjoy!
–Lindsay–
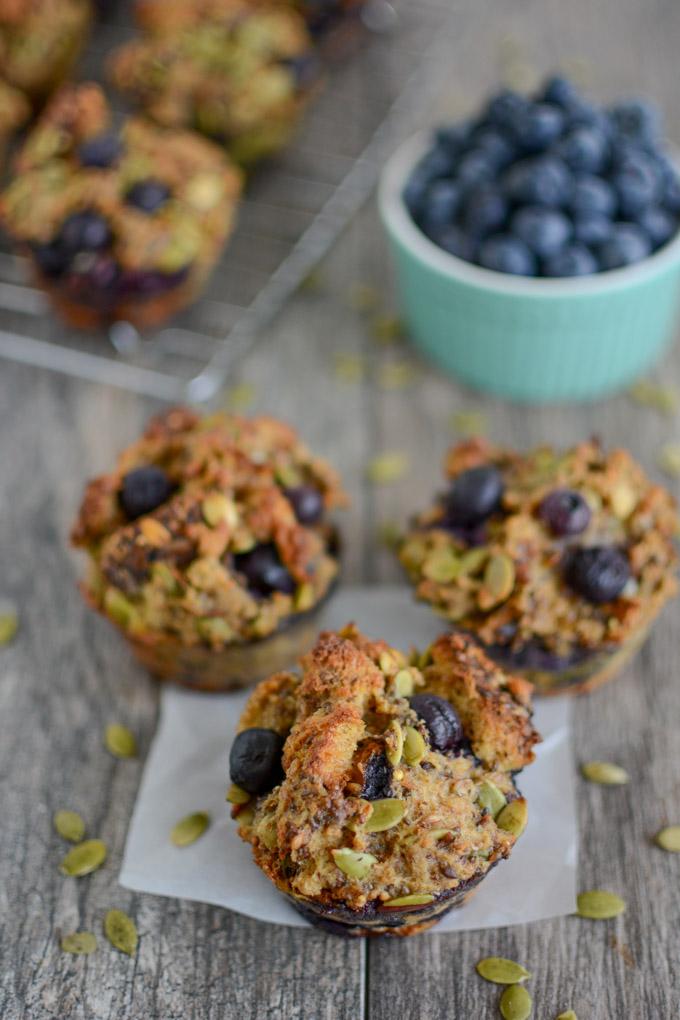
Filed Under: Dessert, Baking, Healthy Muffins & Bars Tagged With: Chocolate Chips, Dates, Egg, Oats, Oil, White Whole Wheat Flour

School Lunch Packing Tips

September 12, 2019 by Lindsay 11 Comments

Looking for some school lunch packing tips? Here are 10 tips and tricks from a Registered Dietitian mama of 3 to help make it a little easier to quickly pack your kids a lunch they’ll love!

Packed lunch with horizon organic shelf stable milk, turkey rollup, apple, barbaras puffins, hard boiled eggs

Thanks to Horizon Organic for sponsoring this post.

Hi friends!

We’ve already been back in school for a couple of weeks here in Ohio, but I know some of you out there are just getting ready to head back so I wanted to pop in today to share a few school lunch packing tips. As you guys know, we have one more year until we start kindergarten over here so I’m not doing daily lunch packing yet, but I did get my fair share of practice this summer running my son around to various camps and activities all day long.

So, I’ve teamed up with my friends over at Horizon Organic and compiled a list of some of my best tips and tricks to help make your lunch-packing life a little easier. Horizon believes “real” is what matters and they’re all about powering up kids with the goodness of protein, vitamins and calcium without artificial colors or flavors. They help make packing protein-packed lunches so easy with their cheese sticks and milk boxes (Psst….both are also great for no-mess car snacks on the way to daycare, soccer practice, etc)

Before we start- a quick reminder about the #HorizonConfiDANCE campaign that’s running until the end of this month. Use the tips below to pack a quick, easy lunch without stressing and then celebrate that little life win with a quick dance. Post it on social media with the hashtag #HorizonConfiDANCE by September 30th and Horizon Organic will donate $5 to Big Brothers Big Sisters of America (up to $200,000). 

The lunchboxes we’re currently using are these Bentgo Boxes (affiliate link) And now here we go! 10 school lunch packing tips:

1) Think beyond sandwiches! Yes, they’re easy to make but kids will get sick of them quickly if you pack one every day. Change things up by occasionally offering things like quesadillas, tacos, deli meat roll-ups, kabobs, snack plate style lunches, or even their favorite breakfast foods like pancakes or waffles.

2 year old making sandwich for school lunch

2) Teach your kids the formula early! When I pack a lunch, I always try to include a carbohydrate, a protein, a fruit, a veggie and a snack/choice item. Bonus points for working a healthy fat into the equation! I always try to pack lunches when my kids are around. When they were younger, they just watched, but now (at ages almost 5 and almost 3) I’m pretty darn proud of their lunch packing abilities. The other day I asked my 2-year-old what she wanted for lunch and she rattled off hard-boiled eggs, blueberries, soft (roasted) carrots, crackers with hummus and skittles. Boom!  Ask for their input early and often. Make lists of foods in each category (use pictures for younger kids) so they can easily follow your formula and choose what they want. And let them help assemble the lunches as well!

bin of healthy packaged snack foods for school lunch packing

3) Make a snack food station- As much as I like to think my kids think seeing carrots in their lunch is fun, I know that’s not always the case. So, I always like to include something they’re genuinely excited about seeing – a granola bar, jerky, cookies, crackers, etc. Keep all of these items in a specific spot in the pantry so kids can easily go to that basket or bin and pick what they want. If the snacks come in bigger boxes, portion out a few servings into reusable bags at the beginning of the week. In case you didn’t know, Horizon Organic milk boxes are shelf-stable, so you can stock up your pantry for easy grab and go, too. They’re made with special packaging that locks in the great taste and nutrition of real organic milk, without artificial ingredients or preservatives.

boy holding cucumber cut outs over eyes like glasses while doing school lunch packing

4) Add some fun but don’t stress daily – We’ve all seen the Pinterest-worthy lunchboxes on social media. As much as I want to be that fun mom that cuts vegetables into flowers and sandwiches into fun shapes every day, I recognize that I likely won’t always have the time or energy. But that doesn’t mean I can’t do it occasionally! Buy a couple of cookie cutters and little food picks. If it’s fun for you, use them daily.  If it stresses you out, aim to use them once a week on a night when you have a little extra time! Those adorable food picks in the picture are by Nutridashe.

5) If packing lunches is a struggle, plan ahead. Some people (like me) don’t stress about throwing lunch together on the fly. I just do it without really thinking too hard. But if it stresses you out, plan out what you’ll pack in lunches every day just like you might plan out dinners for the week. Sit down with your kids and do it together so you can get their input and ideas.

school lunch packing tips - lunch in fridge night before

6) Pack at night- No matter how tired you are, just do it before you go to bed. It’s one less thing to worry about in the morning when things are crazy and you’re rushing out the door. I try to pack mine as I’m cleaning up the kitchen from dinner since things are already a mess anyways! Then all you have to do in the morning is add an ice pack and go.

7) Make a lunch packing area- Choose a drawer, cupboard, bin, cart, etc. to keep all lunch boxes, packing supplies, utensils, reusable bags, and more together. You’ll always have a place to put clean stuff when it comes out of the dishwasher and you’ll always know exactly where to look to grab stuff when you go to pack lunch.

toddler reaching into pretzel jar

8) Take photos. Even if you don’t share them with anyone, snap a photo of each lunch you pack. Then, when you get stuck in a rut in a few months, let the kids revisit the pictures and tell you what they liked!

9) The less packaging the better. Kids don’t get a ton of time to eat so by pre-peeling what you can and partially opening packages, etc, they can spend more time eating and less time fumbling around and getting frustrated. Sometimes I’ll unwrap Horizon cheese sticks – available in Mozzarella and Colby – and cut them into pieces. They’re an easy snack packed with 7g of protein.

10) Add a note! It’s such a simple thing and it literally takes 10 seconds to write a sweet word, a joke or quote, but your kids will love it and look forward to it (even if they would never admit it to you!)

Looking for some school lunch packing tips? Here are 10 tips and tricks from a Registered Dietitian mama of 3 to help make it a little easier to quickly pack your kids a lunch they'll love!

What are your best lunch-packing tips?

Enjoy!
–Lindsay–
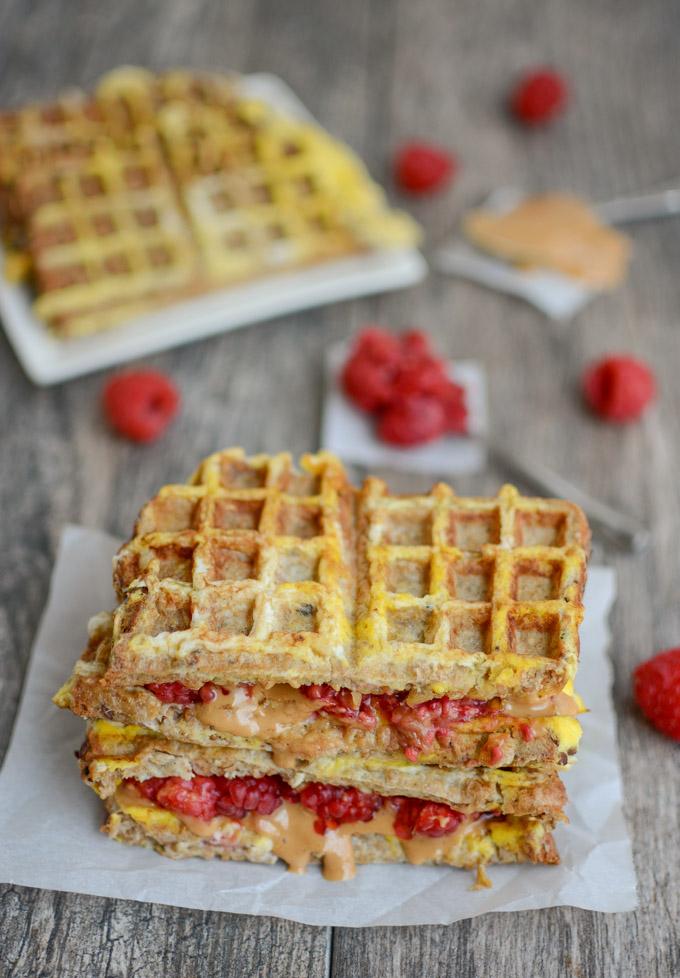
Filed Under: Lunch, Sponsored

  • « Go to Previous Page
  • Page 1
  • Interim pages omitted …
  • Page 13
  • Page 14
  • Page 15
  • Page 16
  • Page 17
  • Interim pages omitted …
  • Page 65
  • Go to Next Page »

Primary Sidebar

Lindsay Livingston The Lean Green Bean Healthy Living Tips and Tricks

I'm a Registered Dietitian and mom of three from Columbus, Ohio. I use this blog to share simple, healthy recipes, nutrition tips, and an honest glimpse of motherhood!

Learn More →

Questions? Comments? Email me: [email protected]

The Lean Green Bean Facebook The Lean Green Bean Instagram The Lean Green Bean Pinterest The Lean Green Bean Twitter The Lean Green Bean Feed
footer-logo
The Lean Green Bean Facebook The Lean Green Bean Instagram The Lean Green Bean Pinterest The Lean Green Bean Twitter The Lean Green Bean Feed
Recipes

Breakfast
Dinner
Snack
Slow Cooker

Kids

Cooking With Kids
Favorite Gifts
Toddler Meals
Indoor Activities

Resources

Easy Packed Lunches for Kids
Dinner Spark
Snack Spark
Ultimate Guide to Food Prep

About

Meet Lindsay
Become an RD
Work with Me

The Lean Green Bean is a participant in the Amazon Services LLC Associates Program, an affiliate advertising program designed to provide a means for sites to earn advertising fees by advertising and linking to amazon.com.
Read the full privacy and disclosure policy here.

Copyright © 2022 · The Lean Green Bean

table talk series

Learn how food affects your body.

Get my free Table Talk email series where I share bite-sized nutrition information about carbs, protein, and fat, plus bonus information about snacks and sugar!

[email protected]