• Skip to main content
  • Skip to primary sidebar

Learn how food affects your body. Get Free Nutrition Info Today

the-lean-green-bean-logo
  • Home
  • Recipes
  • Kids
  • Resources
    • Ebooks
    • Food Prep
    • Videos
    • Snack Round-Ups
    • Gift Guides
  • About
    • Become An RD
    • Work With Me
  • Search
the-lean-green-bean-logo
  • Home
  • Recipes
  • Kids
  • Resources
    • Ebooks
    • Food Prep
    • Videos
    • Snack Round-Ups
    • Gift Guides
  • About
    • Become An RD
    • Work With Me
  • Search

blog

Thursday Things – Lovely Wall Co

December 7, 2017 by Lindsay 3 Comments

Hi friends!

We’re keeping things short and sweet today. It’s been a long week and this mama is tired.

Here are three companies I’ve discovered recently that I think you should check out!

Lovely Wall Co

Lovely Wall Co

I’m obsessed with the reusable & removable adorable wall decals from Lovely Wall Co! I’m trying to decide which ones I want for a wall in each kids’ room.

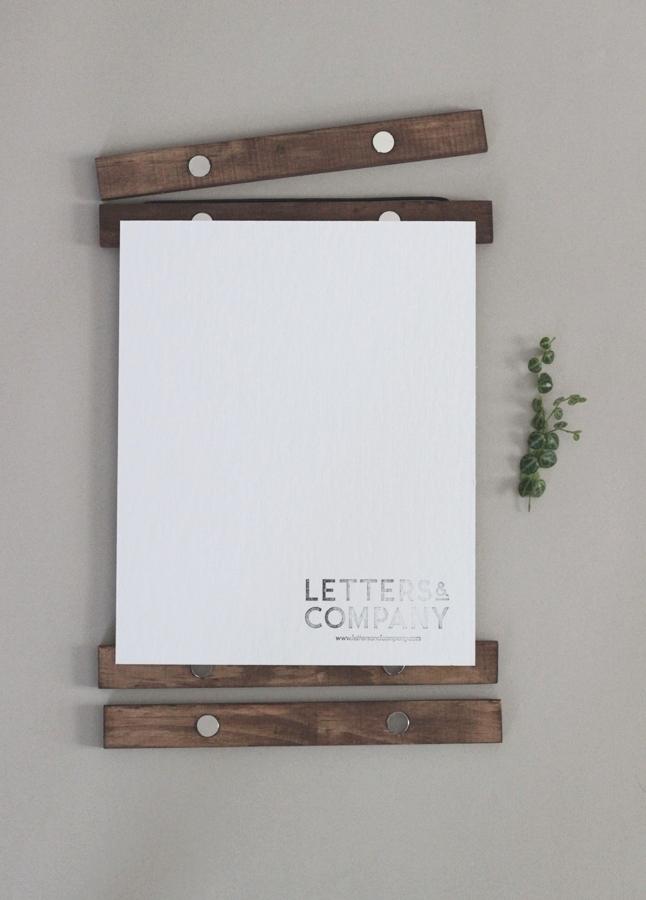
Letters and Company

Letters & Company

I love these magnetic rails from Letters & Company. You can hang them on the wall and use them to display photos, prints, posters, felt etc instead of a traditional picture frame.

Marley's Monsters

Marleys Monsters

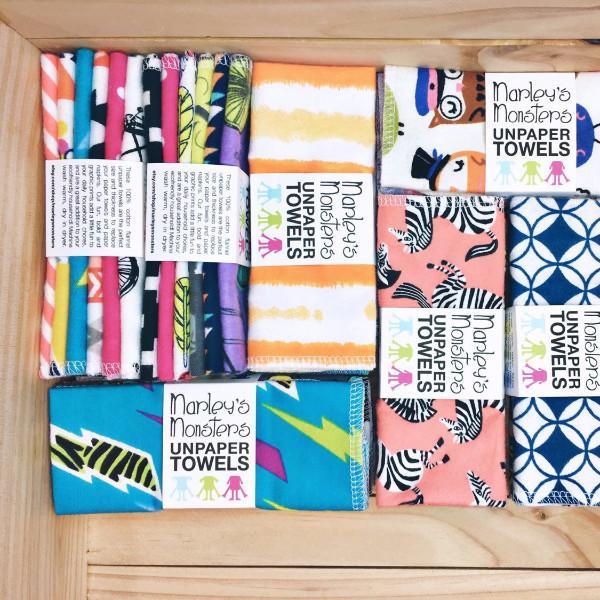
Definitely one of my new favorite websites. Tons of eco-friendly products for the home. I’m still on the hunt for something I love to help me cut down on my paper towel usage so I ordered 6 of their UnPaper Towels and a reusable sponge. I love that you can pick which prints you want or be surprised!

Happy Thursday!

Enjoy!
–Lindsay–
Filed Under: Uncategorized

Butternut Squash Pancakes

December 6, 2017 by Lindsay 27 Comments

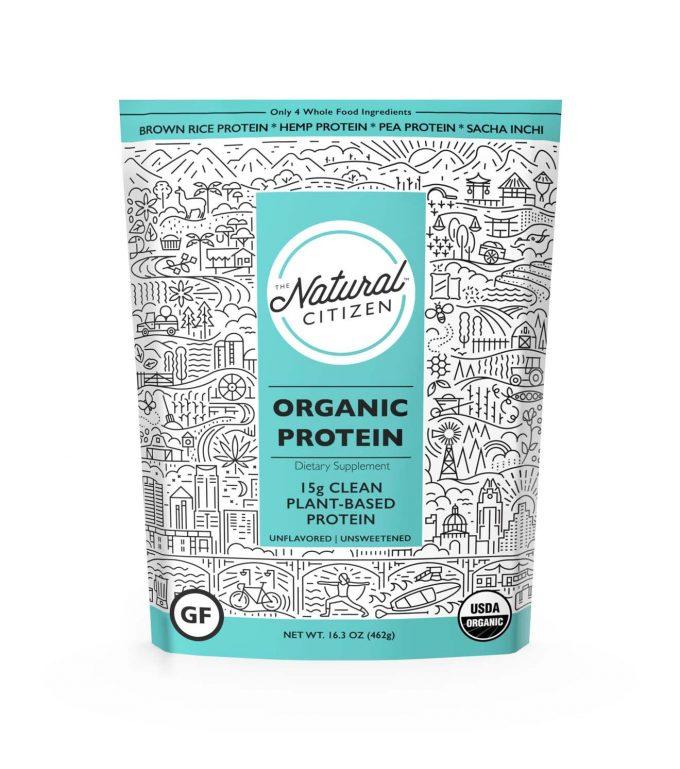
This Butternut Squash Pancakes recipe is an easy way to add some extra vegetables to breakfast! Made with just a few ingredients, they can be made ahead of time and reheated and also make a great, healthy snack!

This Butternut Squash Pancakes recipe is an easy way to add some extra vegetables to breakfast! Made with just a few ingredients, they can be made ahead of time and reheated and also make a great, healthy snack!

*Recipe updated September 2020*

Hi friends!

It’s been a while since I shared a pancake recipe on the blog, hasn’t it? We’re huge pancake fans around here and lately our go-to has been Kodiak Cakes because we can buy it in bulk at Costco. However, we also recently purchased a griddle after not having one for like 5 years.

And man I forgot how easy those things make it to make pancakes. No more crowding 3 little pancakes into a pan. Gimme all the space for flipping! Anyways, I’ve found that the griddle has really renewed my love for making pancakes…not only for breakfast, but also for snack time! And for stocking the freezer during my food prep days!

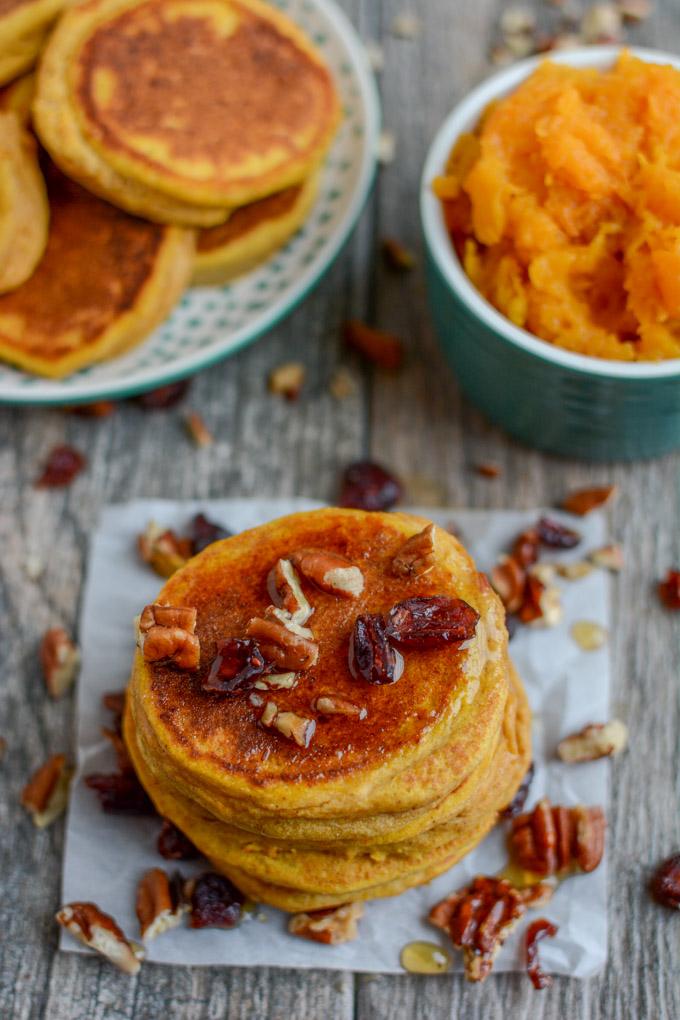
Butternut Squash Pancakes

Since squash is overly abundant right now….and also super cheap…I thought I’d spend some time this fall/winter figuring out some new ways to eat it. My husband is not a squash fan (a fact he recently revealed to my mom after she’s been cooking for him for 10+ years)…but I’ve found that it’s an easy veggie to add into baked goods, pancakes and even sauces!

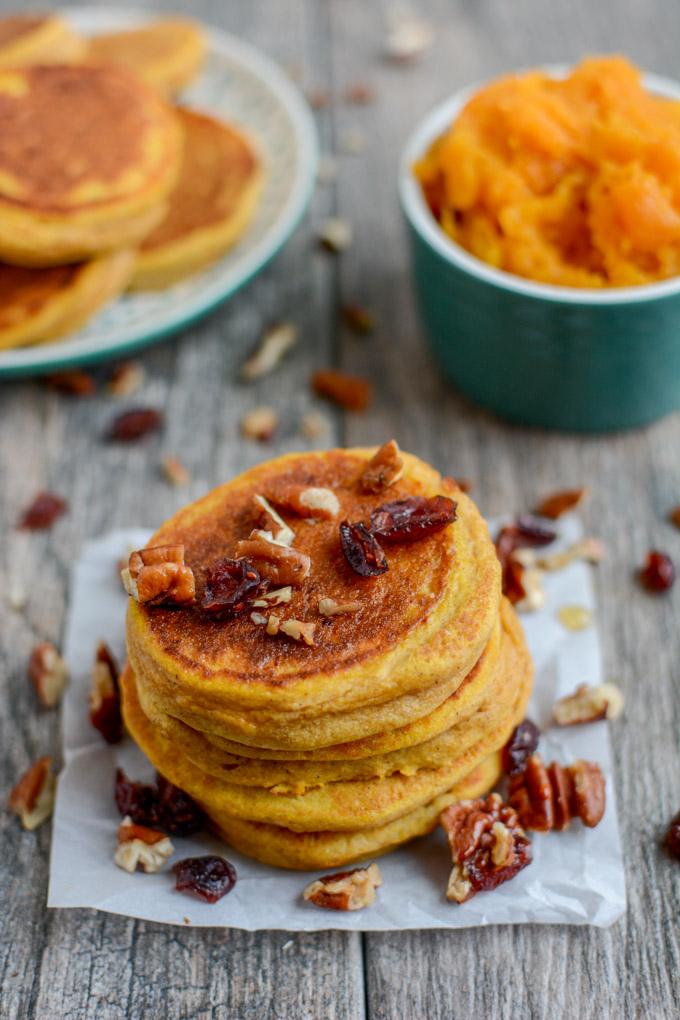
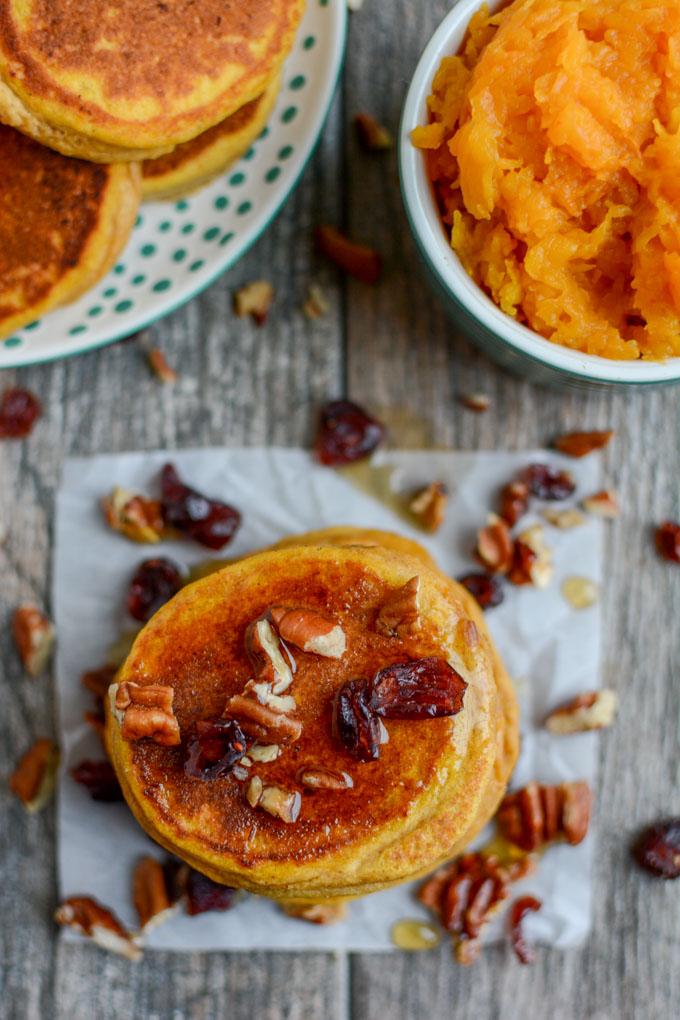
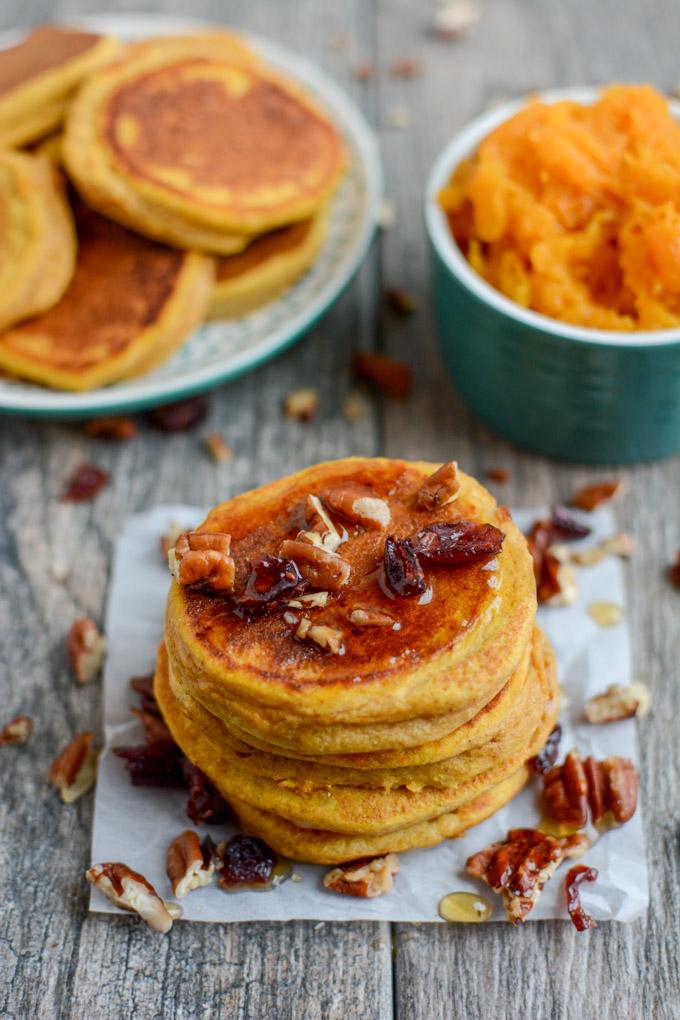
Butternut Squash Pancakes with pecans and craisins

Little Miss loves roasted squash by itself, just like Squish did when he was little, but Squish will no longer eat it plain. Enter pancakes. Both the kids, and the hubby and I, have been gobbling these up!

Here’s how you make them:

Print

Butternut Squash Pancakes

This Butternut Squash Pancakes recipe is an easy way to add some extra vegetables to breakfast! Made with just a few ingredients, they can be made ahead of time and reheated and also make a great, healthy snack!
Print Recipe

5 Stars 4 Stars 3 Stars 2 Stars 1 Star

4.9 from 7 reviews

This Butternut Squash Pancakes recipe is an easy way to add some extra vegetables to breakfast! Made with just a few ingredients, they can be made ahead of time and reheated and also make a great, healthy snack!

  • Author: Lindsay
  • Prep Time: 5 min
  • Cook Time: 15 min
  • Total Time: 20 minutes
  • Yield: Makes 8 pancakes 1x

Ingredients

Scale
  • 1/2 cup mashed roasted butternut squash (you can also use pumpkin)
  • 2 eggs
  • 1 cup milk (cow or plant-based)
  • 1 tsp vanilla extract
  • 1 Tbsp maple syrup
  • 1.5 tsp baking powder
  • 1 tsp cinnamon
  • 1 cup white whole wheat flour

Instructions

Option 1: Add first 5 ingredients to a blender and blend until smooth. Add remaining ingredients and pulse until just mixed.

Option 2: Combine squash, eggs, milk,syrup and vanilla in a small bowl and mix well.

Add baking powder, cinnamon and flour and stir until just combined.

Scoop onto an oiled griddle or pan. Flip once.

Notes

You don’t need a blender for these but it definitely makes a smoother batter.

If you’re not using a blender, be sure your squash is very well roasted and soft and mash well before starting!

I found that smaller pancakes work much better than larger ones for this recipe.

Did you make this recipe?

Tag @theleangreenbean on Instagram

Despite the photos above, we usually eat these plain or topped with some yogurt. But the craisins and chopped pecans make them super fall-like and festive. You could also add those as mix-ins to the pancake batter itself before cooking if you’re feeling a bit more adventurous!

Like I mentioned above, I make these in a blender for a smoother batter but if you don’t have a batter, you can make them in a bowl. I typically roast my squash by cutting in half, scooping out the seeds and baking cut side down on a foil-lined baking sheet at 400 or 425 degrees for 25-30 min depending on the side of the squash.

Squash Pancakes with whole wheat flour. Perfect for fall.

The batter will be thick so you’ll have to scoop it onto the griddle or pan, not pour it. And if you make the pancakes too big, the edges don’t cook as well so I tend to make smaller ones.

This Butternut Squash Pancakes recipe is an easy way to add some extra vegetables to breakfast! Made with just a few ingredients, they can be made ahead of time and reheated and also make a great, healthy snack!

[clickToTweet tweet=”Add some veggies to breakfast with these Butternut Squash Pancakes!” quote=”Add some veggies to breakfast with these Butternut Squash Pancakes!”]

Enjoy!
–Lindsay–
Filed Under: Breakfast Tagged With: Egg, Squash, White Whole Wheat Flour

Chocolate Squash Muffins

November 29, 2017 by Lindsay 26 Comments

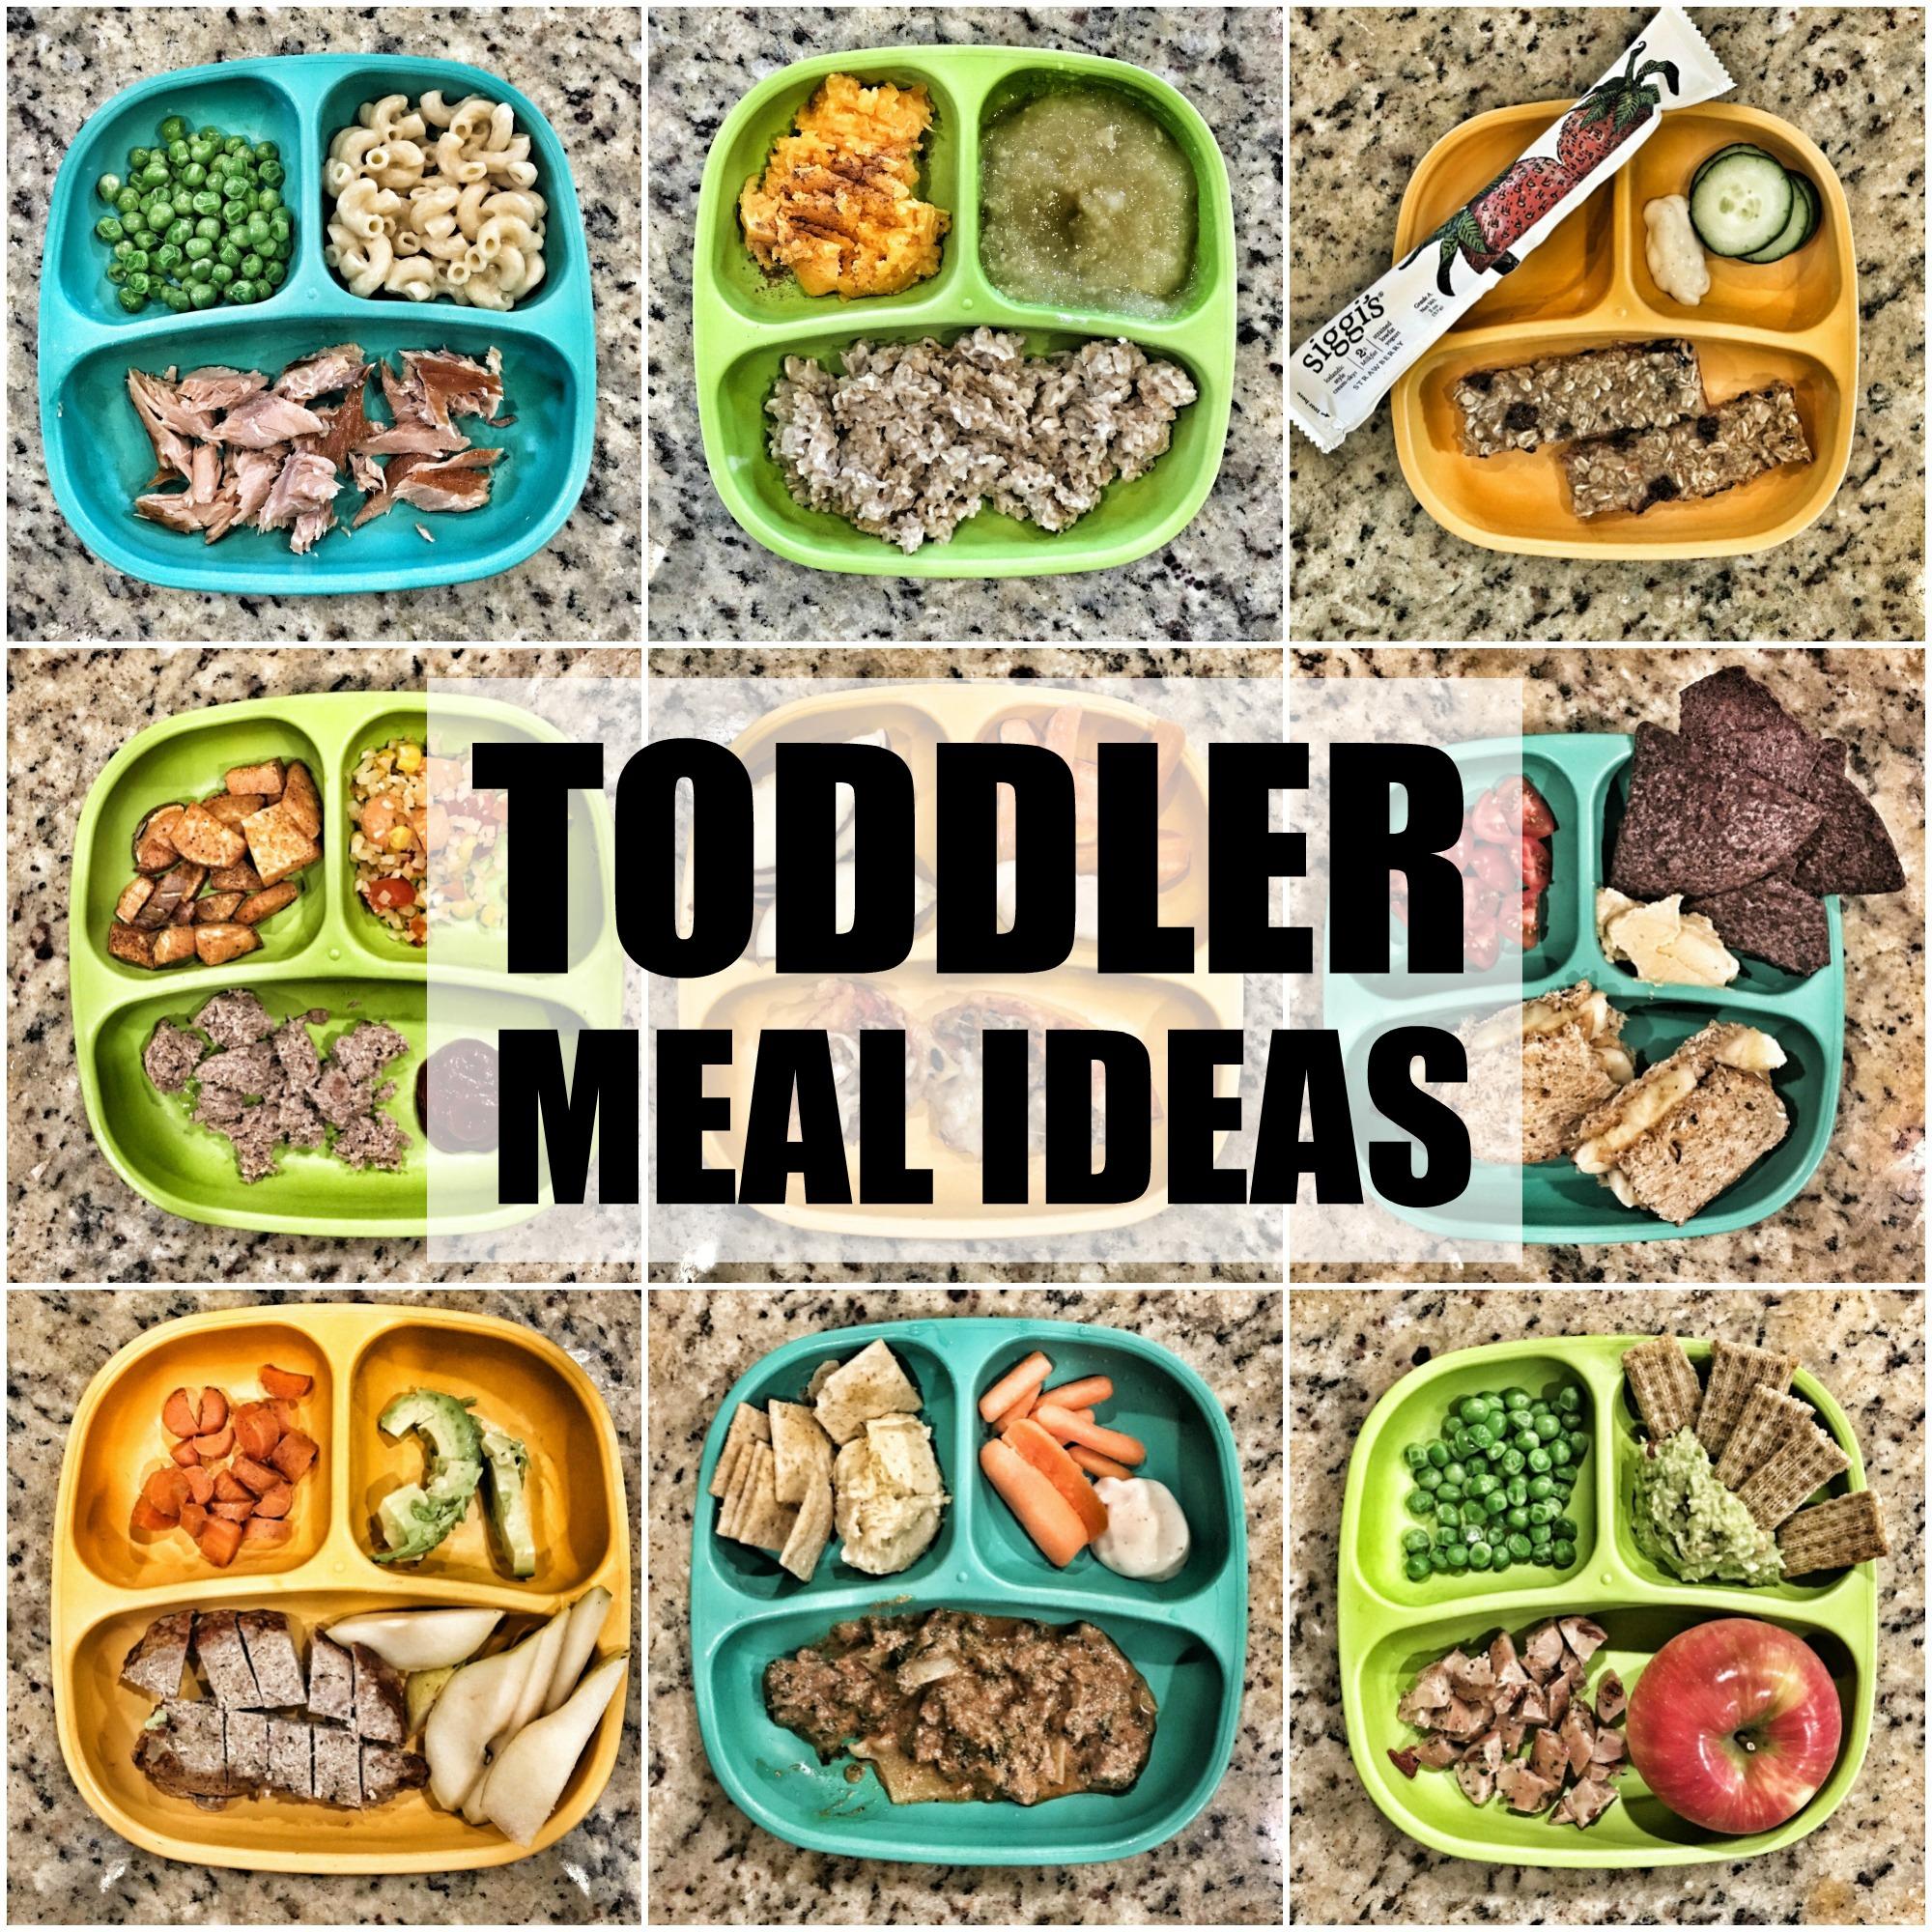
These Chocolate Squash Muffins can be eaten on the run for a grab and go breakfast and also make an easy, kid-friendly snack!

These Chocolate Squash Muffins can be eaten on the run for a grab and go breakfast and also make an easy, kid-friendly snack!

Hi friends!

Allow me to introduce you to the newest muffin recipe obsession in our house. These Chocolate Squash Muffins have been a big hit lately, both with the kiddos and with the husband. We’d gotten into the habit of buying a box of chocolate muffin mix every time we were at the store over the past month, so that Squish and I could “make muffins for daddy”. But honestly, they were pretty high in sugar and really more like a cupcake in my opinion.

So I took it upon myself to give homemade chocolate muffins a try. And they turned out great! This was also part of a quest to 1) get my kids to eat more veggies and 2) create a recipe that included squash that my husband approved of.

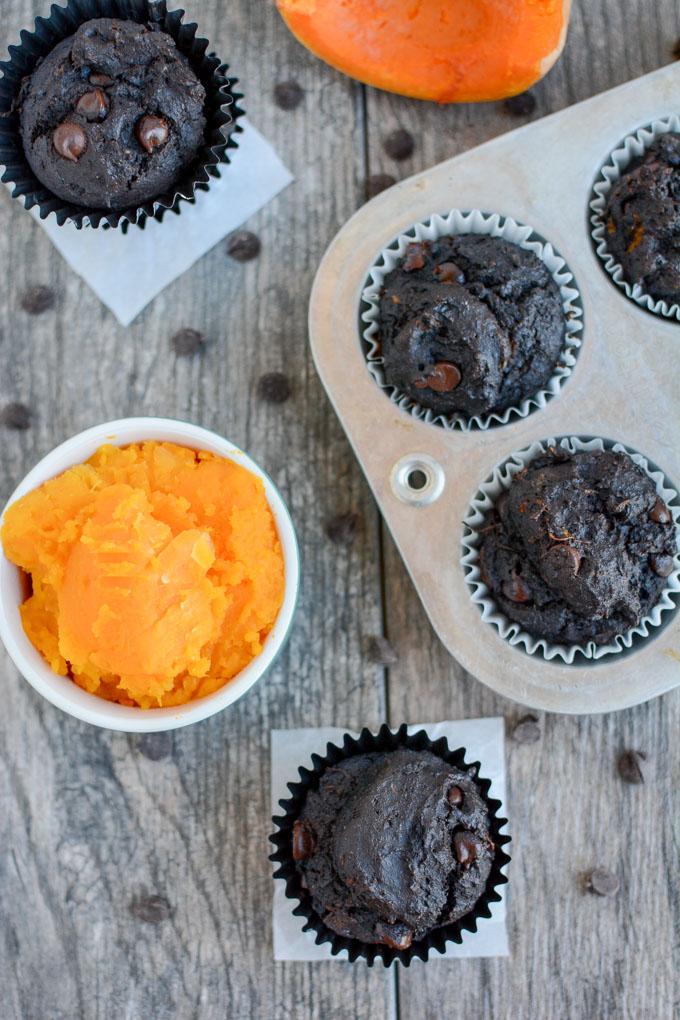
Chocolate Butternut Squash Muffins

These muffins have just a few ingredients and are so easy. They do require a little planning since you need to roast the squash…but that’s super hands-off and can really be done any time. I use butternut squash and just slice it in half, scoop the seeds and roast it cut side down on a foil-lined baking sheet at 400 degrees F for 25-30 minutes or until it’s super soft and easy to pierce with a fork or knife. You could probably steam the squash if you were in a hurry!

I think these work best with squash. Sweet potato would probably also work well. I also tried with pumpkin. They’re slightly more crumbly but still worked fine!

These muffins are not overly sweet. If you want them extra sweet, increase the amount of sugar. I also tried these with both vegetable oil and melted butter and both worked fine.

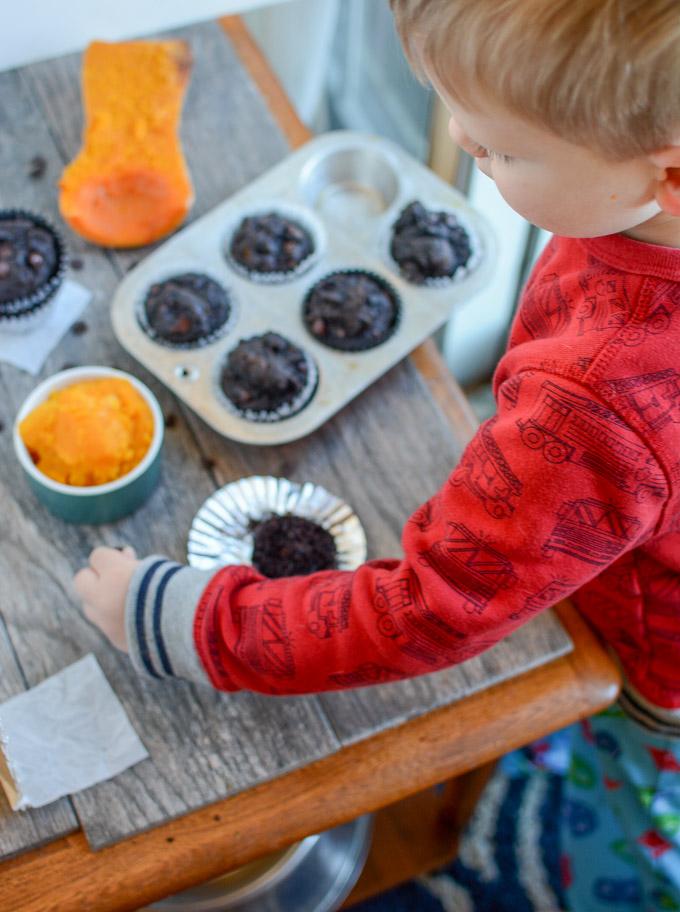
Toddler eating Chocolate Squash Muffin

I make these in a bowl and just mash the squash really well with a fork…but you may still have a few small chunks of squash in your muffins. If you want them totally smooth, you can mix the ingredients up in a blender.

Here’s how you make them:

Print

Chocolate Squash Muffins

These Chocolate Squash Muffins can be eaten on the run for a grab and go breakfast and also make an easy, kid-friendly snack!
Print Recipe

5 Stars 4 Stars 3 Stars 2 Stars 1 Star

4.6 from 8 reviews

These Chocolate Squash Muffins can be eaten on the run for a grab and go breakfast and also make an easy, kid-friendly snack!

  • Author: Lindsay
  • Prep Time: 5 min
  • Cook Time: 20 min
  • Total Time: 25 minutes
  • Yield: Makes approx 10 muffins 1x

Ingredients

Scale
  • 1 cup mashed roasted squash (I use butternut)
  • 1 egg
  • 1/3 cup oil (i use vegetable oil, or you can use 6 Tbsp melted butter)
  • 1/3 cup sugar
  • 1/4 cup cocoa powder
  • 1 tsp baking soda
  • 1 cup white whole wheat flour
  • 2/3 cup chocolate chips

Instructions

Combine squash, egg, oil and sugar in a bowl and mix well. 

Add cocoa powder, baking soda and flour and stir until just combined. 

Mix in chocolate chips. 

Spoon into greased or lined muffin tins and bake at 375 degrees F for 20-22 minutes.

Notes


Did you make this recipe?

Tag @theleangreenbean on Instagram

Pretty easy right? Hope you guys enjoy these!

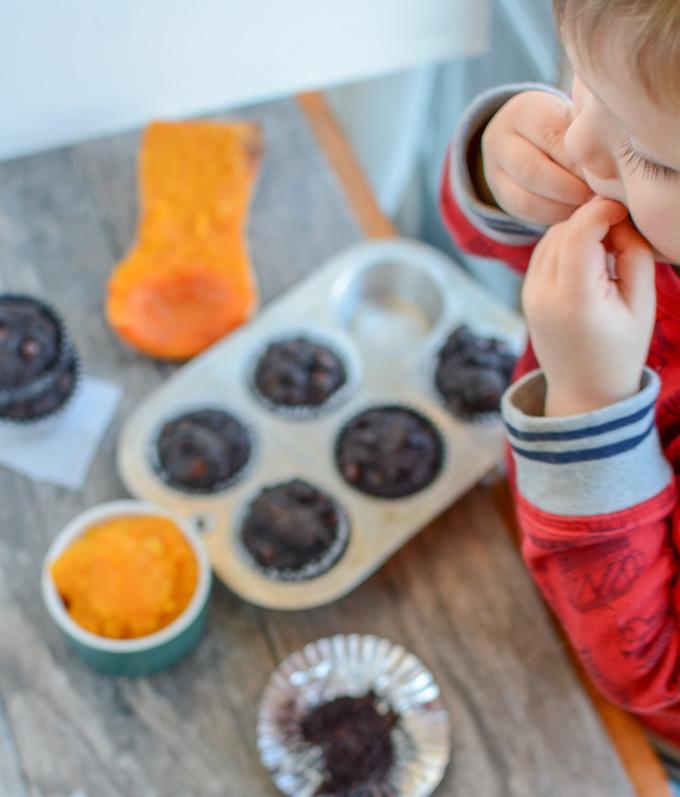
kid eating chocolate butternut squash muffin

Squish had a great time helping me with my photo shoot for these. And I promise you’d never know there’s squash in these!

These Chocolate Squash Muffins can be eaten on the run for a grab and go breakfast and also make an easy, kid-friendly snack!

[clickToTweet tweet=”Pack some extra veggies into snack time with these kid-approved Chocolate Squash Muffins!” quote=”Pack some extra veggies into snack time with these kid-approved Chocolate Squash Muffins!”]

Let’s chat:

Have you ever baked with squash?

Enjoy!
–Lindsay–
 

Filed Under: Baking, Breakfast, Healthy Muffins & Bars, Snack Tagged With: Chocolate Chips, Cocoa Powder, Egg, Oil, Squash, Sugar, White Whole Wheat Flour

Instant Pot Gingerbread Bread Pudding (with oven option)

November 22, 2017 by Lindsay 1 Comment

This Instant Pot Gingerbread Bread Pudding is the perfect dessert for a holiday party or family gathering. It can also be made in the oven!

This Instant Pot Gingerbread Bread Pudding is the perfect dessert for a holiday party or family gathering. It can also be made in the oven!

Hi friends!
Allow me to introduce you to your new favorite holiday dessert! Slowly but surely I’ve been using my Instant Pot for more than just dinner. Last week I shared a breakfast option – Instant Pot Oatmeal with Caramelized Bananas – and this week I’ve got dessert!

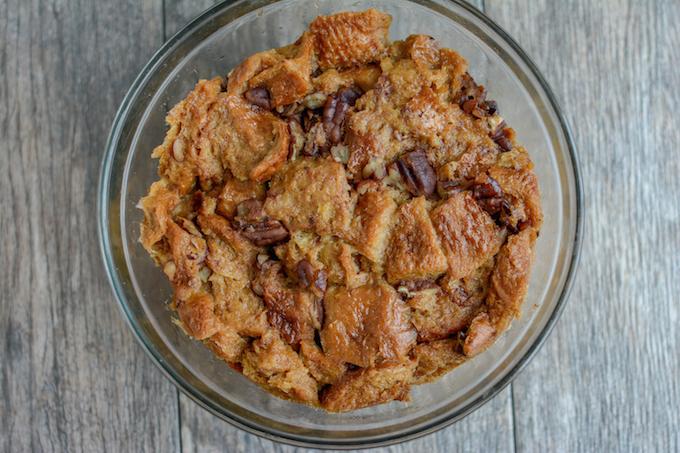
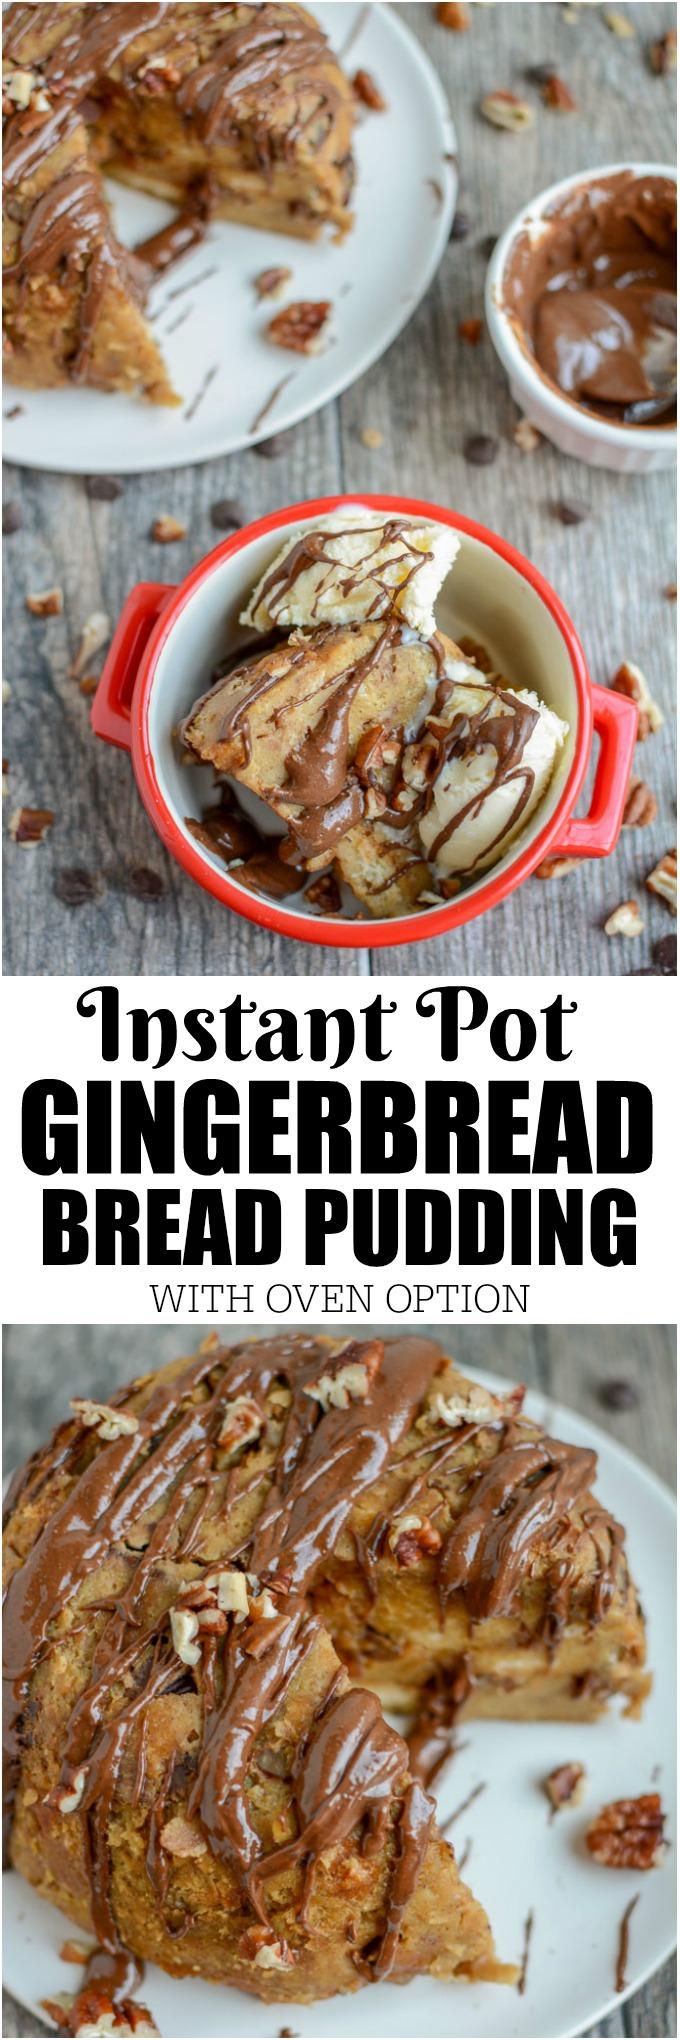
Isn’t it kinda crazy that you can make dessert in a pressure cooker? You actually make this in a bowl within the Instant Pot and a little water on the bottom so it’s kinda like you’re steaming it. Here’s what it looks like after you take it out.

Instant Pot Bread Pudding

Instant Pot Gingerbread Bread Pudding in 1.5 quart bowl

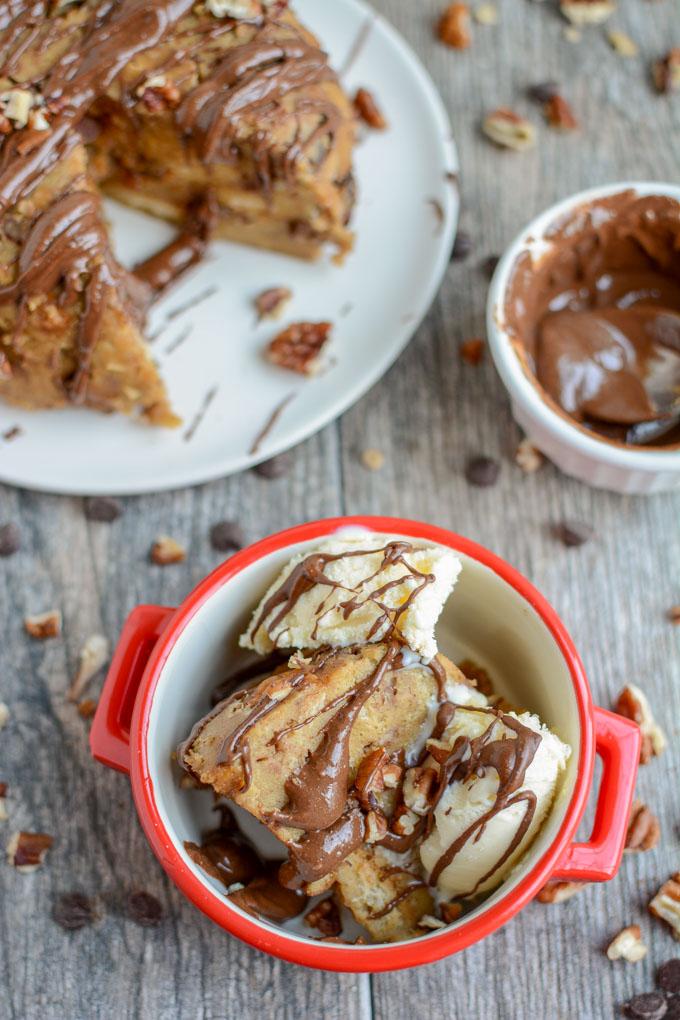
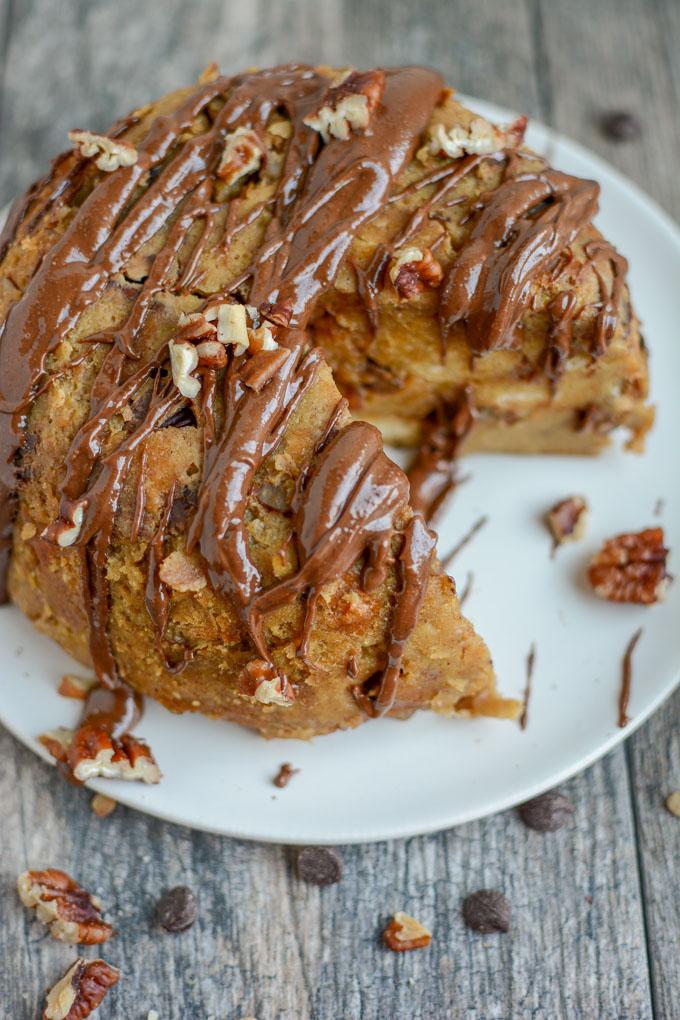
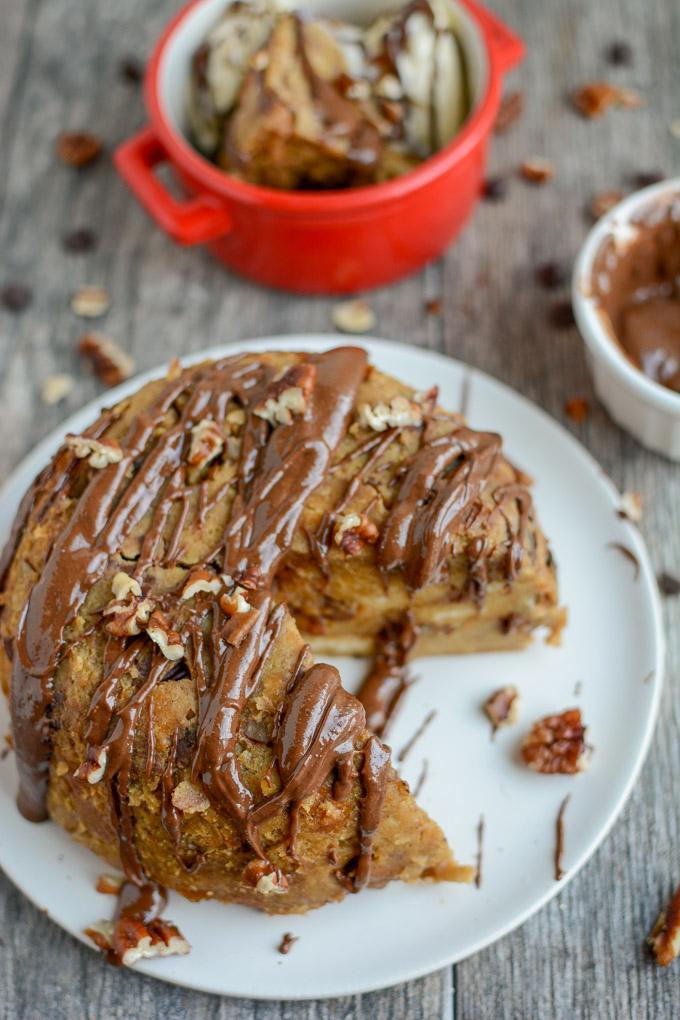
So, you won’t get the traditional crunchy topping like you do with an oven-baked bread pudding, but I didn’t miss it one bit! I actually turned this one upside down and smothered it in a mixture of almond butter and chocolate, which really took it to the next level.

Bread Pudding made in the Instant Pot

That is, of course, totally optional. You could easily just serve this straight out of the bowl. I made this twice while my parents were visiting a couple weeks ago and then made it again in the oven. I wanted to be sure those of you who don’t have an Instant Pot could still enjoy this deliciousness!

Instant Pot Gingerbread Bread Pudding with chocolate almond butter glaze

Before you start, make sure you have a safe bowl to use. I used a glass pyrex-type bowl but you can also use silicone, ceramic, stainless steel, aluminum and even copper!  Just don’t use plastic or any glass that is not tempered.

I have the 6 quart Instant Pot and found that a 1.5 quart bowl was about as big as I could use in it. If you have a larger instant pot you could use a bigger bowl.

Instant Pot Gingerbread Bread Pudding Recipe

So, here’s how you make it!

Print

Instant Pot Gingerbread Bread Pudding

This Instant Pot Gingerbread Bread Pudding is the perfect dessert for a holiday party or family gathering. It can also be made in the oven!
Print Recipe

5 Stars 4 Stars 3 Stars 2 Stars 1 Star

5 from 2 reviews

This Instant Pot Gingerbread Bread Pudding is the perfect dessert for a holiday party or family gathering. It can also be made in the oven!

  • Author: Lindsay
  • Prep Time: 10 min
  • Cook Time: 20 min
  • Total Time: 30 minutes
  • Yield: serves 6-8 1x

Ingredients

Scale
  • 6 cups cubed French bread (slightly stale if possible!)
  • 3 eggs
  • 1.5 cups milk
  • 1/3 cup brown sugar
  • 2 Tbps molasses
  • 1 tsp vanilla extract
  • 1 tsp cinnamon
  • 1 tsp ginger (dried)
  • 1/2 cup chopped pecans
  • 1.5 cups water
  • almond butter, chocolate chips & pecans for topping, optional

Instructions

In a large bowl, combine eggs, milk, brown sugar, molasses, cinnamon, vanilla, ginger and chopped pecans and mix well.

Add cubed bread and stir until well coated.

Let sit 5 minutes.

Transfer to a greased 1.5 quart glass bowl.

Place the steamer rack in your Instant Pot.

Fold aluminum foil in half lengthwise and then in half again to make a sling. You’ll want to lay this across the steamer rack and fold up in a U shape. Then place the bowl on the rack on top of the foil. The goal is to make a sling so you can lift the ends of the aluminum foil to lift out the bowl once it’s done cooking.

Add 1.5 cups water to the bottom of the Instant Pot. Seal the Instant Pot and use manual mode to set the timer for 20 minutes.

Use the quick release and carefully lift the bowl out using the foil sling.

If desired, let cool for 5 minutes, then trace around the edges with a spatula or knife and turn bowl upside down to release onto a plate (like an upside down cake).

Optional: Melt almond butter and chocolate chips, mix together and drizzle on top along with extra chopped pecans. Slice and serve warm topped with ice cream!

Notes

You don’t have to turn this upside down, you can serve it straight out of the bowl if you want.

To make this in the oven, add an extra egg to the ingredient list, mix as directed above and pour into a  9×9 pan (greased or lined with parchment paper. Bake at 400 for 20-25 minutes.

Did you make this recipe?

Tag @theleangreenbean on Instagram

Pretty easy right? The hardest part is probably making sure you have a 1.5 quart bowl that’s safe to put in the Instant Pot. Mine was anchor brand which is similar to pyrex.

This Instant Pot Gingerbread Bread Pudding is the perfect dessert for a holiday party or family gathering. It can also be made in the oven!

Reminder – this is the Instant Pot I have. (Affiliate link) And you can find all my Instant Pot recipes here.

Enjoy!
–Lindsay–

Filed Under: Instant Pot, Dessert Tagged With: Bread, Egg, Milk, Molasses, Pecan

Breakfast Enchilada Casserole

November 19, 2017 by Lindsay 41 Comments

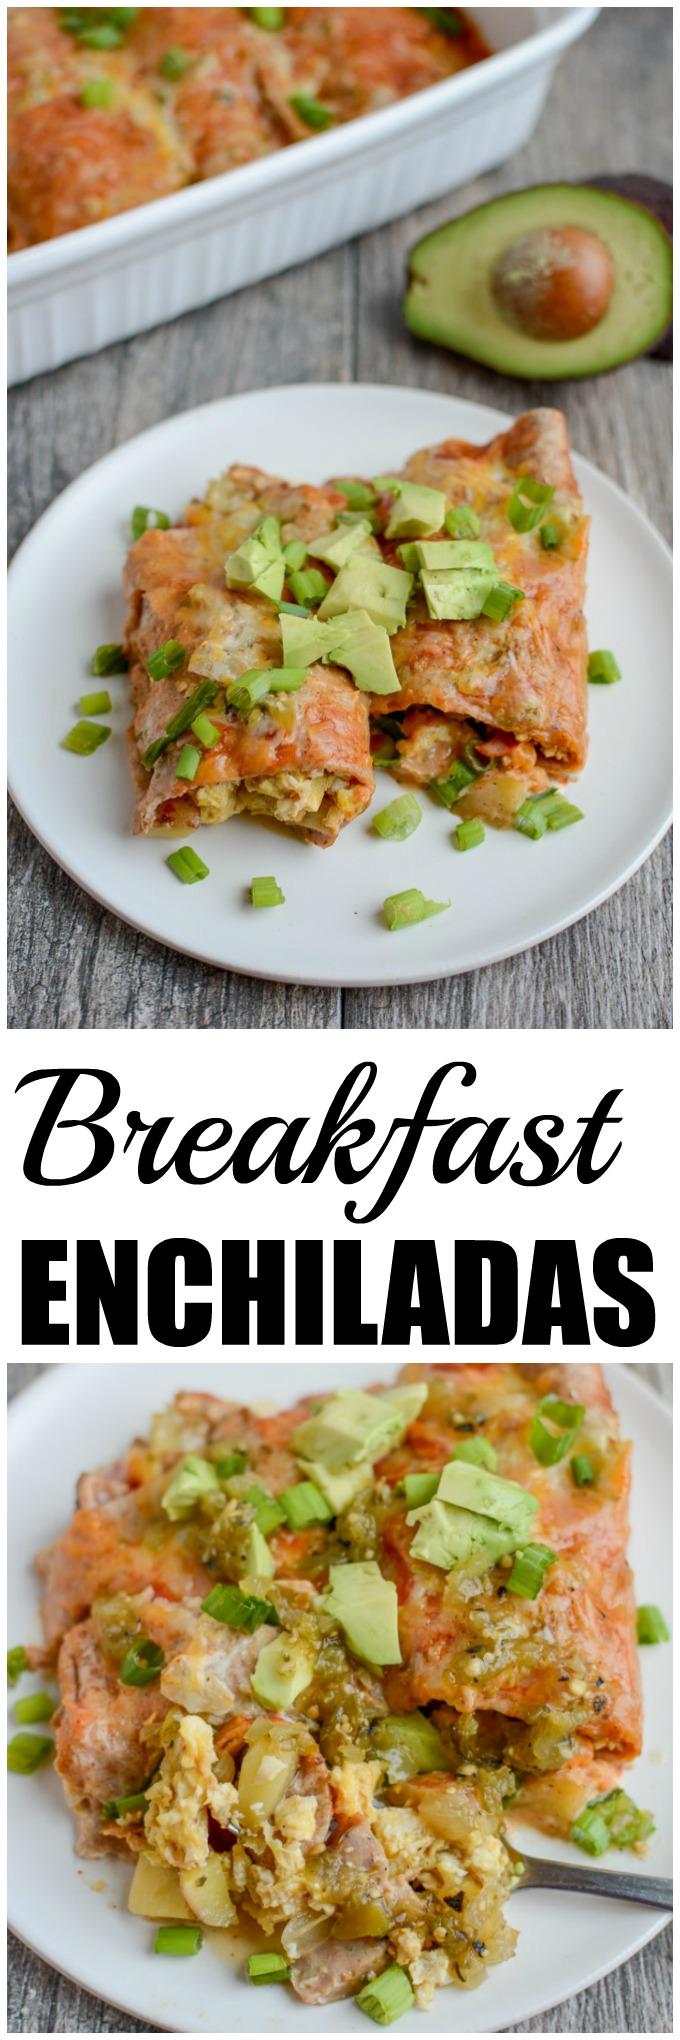
This Breakfast Enchilada Casserole is the perfect brunch dish for when you have company. Prep it the night before and pop it in the oven in the morning.

This Breakfast Enchilada Casserole is the perfect brunch dish for when you have company. Prep it the night before and pop it in the oven in the morning.

*This post was originally published 1/2014. Photos and post updated 11/2017*

Hi Friends!

Almost 4 years ago I first shared this Breakfast Enchilada casserole with you guys after making it with my mom over Christmas break when they were living in NYC. I still vividly remember standing in their kitchen prepping with her on Christmas Eve and then popping it in the oven while we opened presents on Christmas morning. It worked out perfectly as a holiday dish because all we had to do the morning off was pour the sauce on, add the foil and stick it in the oven. And then by the time we were done opening presents, it was hot, bubbly and ready to eat!

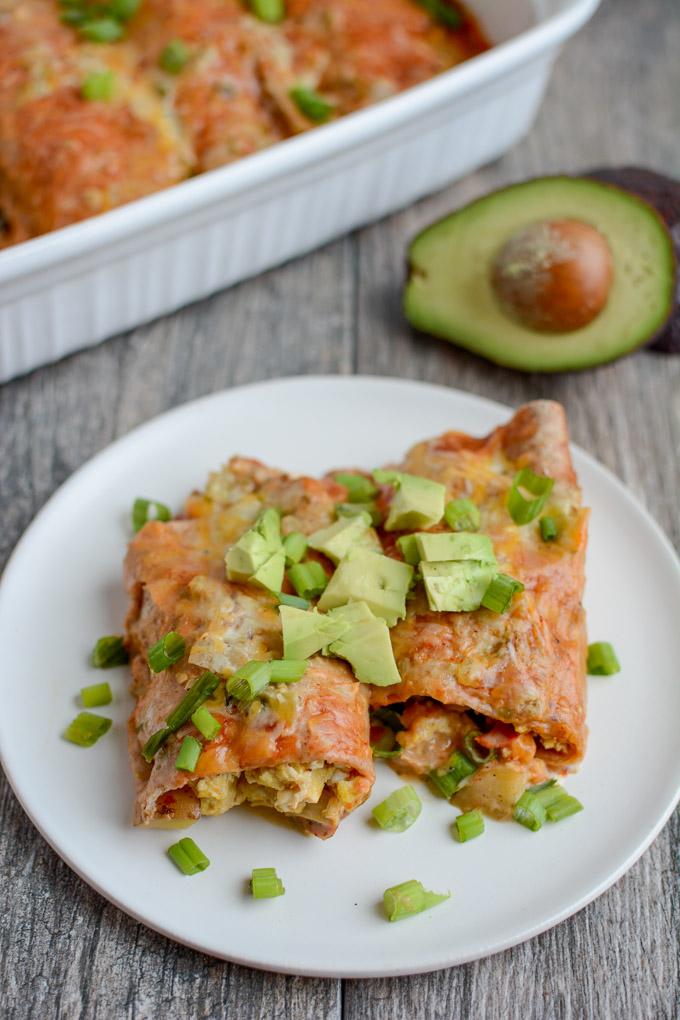
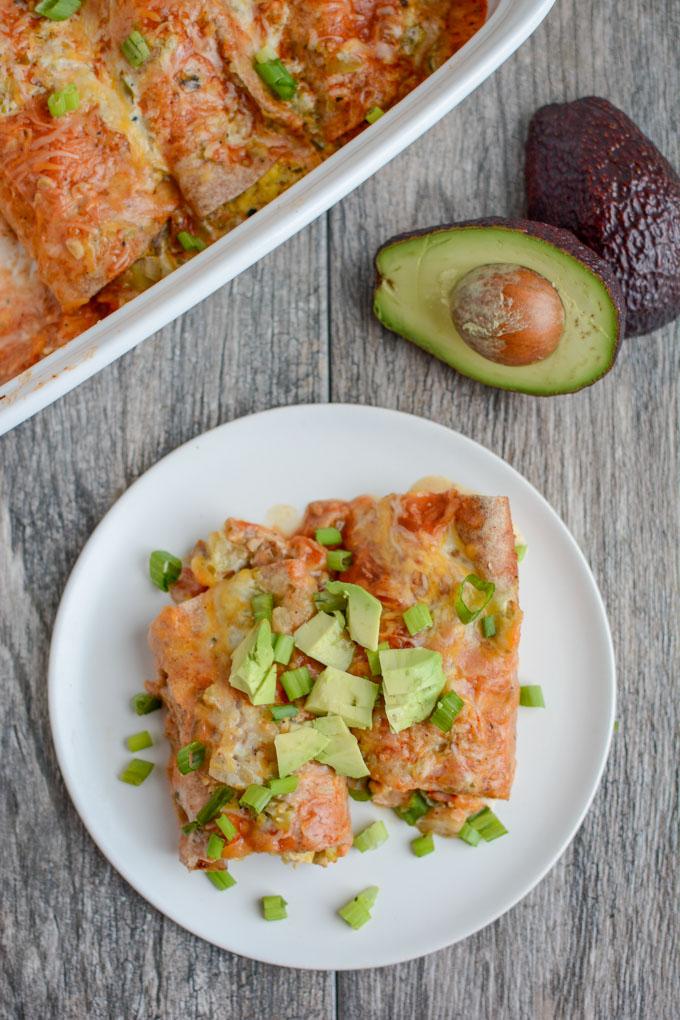
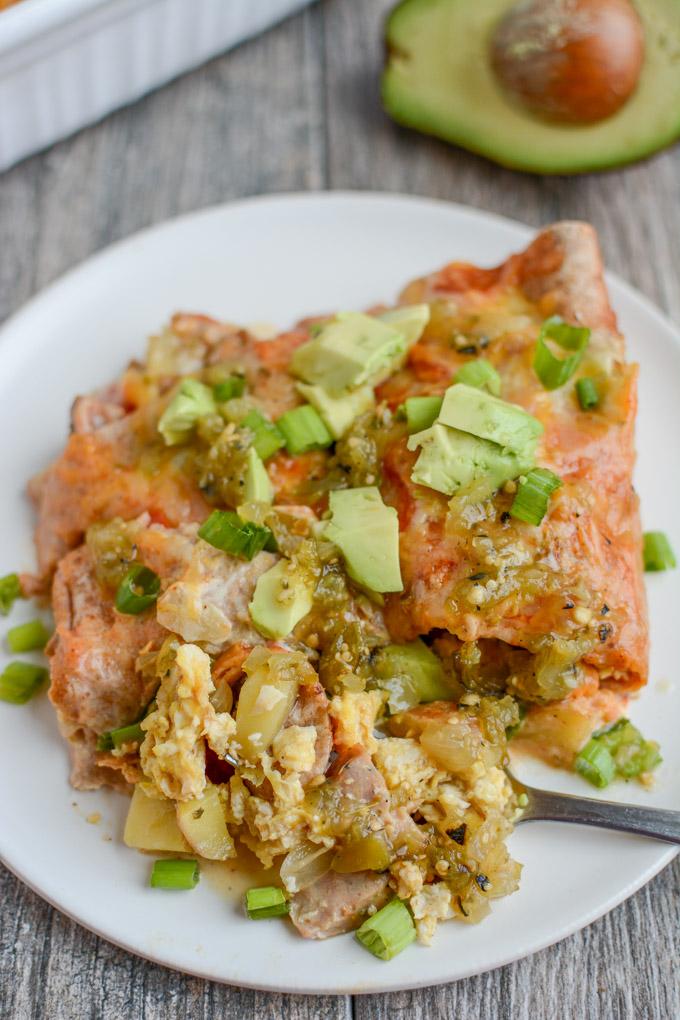
Breakfast Enchilada Casserole with salsa verde

Although this casserole is big, hearty and perfect for a special occasion, there’s also nothing that says you can’t make it for your average weekend brunch, or even just make it on a regular Sunday and enjoy reheating pieces of it throughout the week!

It’s hard to make breakfast casserole look appealing, but I did my best. Just trust me when I say it’s delicious. Packed with potatoes, eggs and chicken sausage, it’ll keep you full and focused all morning long!

Enchiladas with eggs, potatoes and chicken sausage

If you’re not a meat eater, you could easily sub black beans for the chicken sausage or even try it with scrambled tofu instead of eggs.

Here’s how you make it!

Print

Breakfast Enchilada Casserole

Breakfast Enchilada Casserole with salsa verde
Print Recipe

5 Stars 4 Stars 3 Stars 2 Stars 1 Star

5 from 1 review

This Breakfast Enchilada Casserole is perfect for brunch when company is in town. Prep it the night before and bake in the morning!

  • Author: Lindsay
  • Prep Time: 30 min
  • Cook Time: 30 min
  • Total Time: 1 hour

Ingredients

Scale
  • 1.5 cups salsa verde (store bought or homemade)
  • 1/2 cup milk, half and half or cream
  • 1 cup red potatoes, diced fairly small
  • 3 – 4 chicken sausages, chopped
  • 1 red pepper, diced
  • 1/2 cup onion, diced
  • 1 4-oz. can diced green chiles, drained (optional)
  • 6 large eggs
  • 5 whole wheat tortillas (i use the 8 inch size)
  • 1/2 c shredded Mexican cheese (divided)
  • 10 oz can enchilada sauce

Instructions

  1. Preheat oven to 400 degrees F.
  2. Combine salsa verde with milk and set aside.
  3. Saute peppers and onions over medium heat until softened.
  4. Meanwhile, put potatoes in a microwave-safe bowl, drizzle with olive oil and toss to combine. Microwave 2-3 minutes or until soft.
  5. Add potatoes, sausage and chilis to onion mixture.
  6. Crack the eggs into a bowl and whisk to combine. Pour into pan with onion mixture and scramble.
  7. Pour a little enchilada sauce into a 9×13 pan and tilt to coat the bottom.
  8. Spoon egg mixture into tortillas, roll and place seam side down in the pan.
  9. Pour salsa verde mixture over tortillas.
  10. Top with enchilada sauce and cheese.
  11. Cover with foil and bake at 400 degrees for 25-30 min or until heated through.

Notes

You can prep this casserole ahead of time if desired. Put full tortillas in the pan and refrigerate. Just prior to cooking, pour salsa verde mixture and enchilada sauce over top, add cheese and bake as directed!

Did you make this recipe?

Tag @theleangreenbean on Instagram

This is the perfect breakfast for when you have company in town, especially since you can make it ahead of time! I’ve served an extra spicy version to my CrossFit friends after a weekend workout and also served a more mild version to my kiddos.

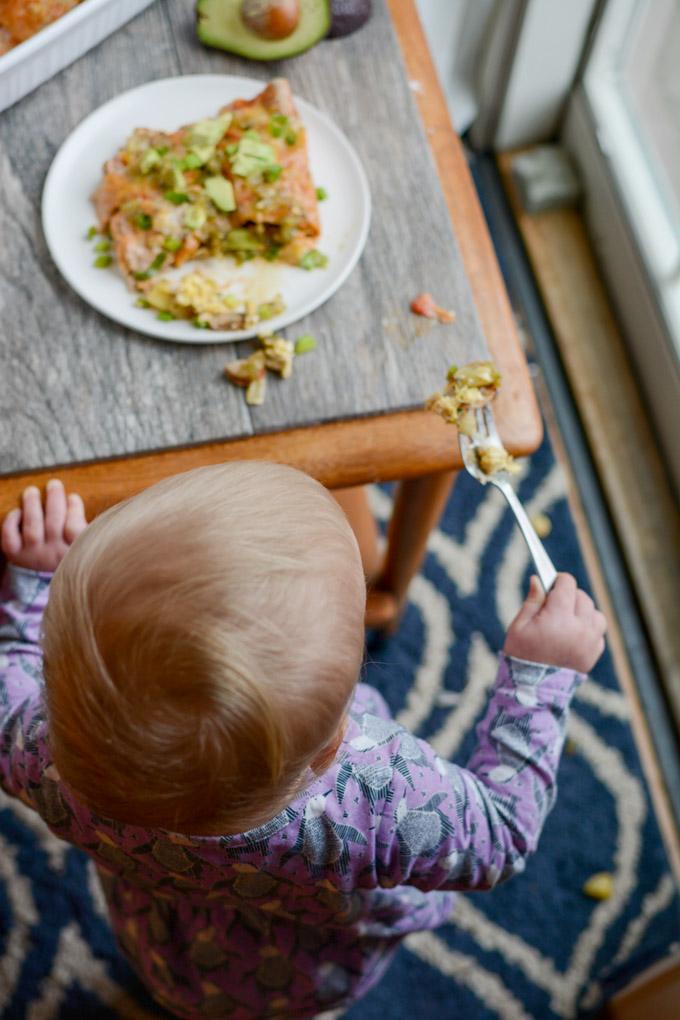
Toddler eating breakfast enchilada casserole

You can easily make it as spicy or mild as you want by adjusting the spice levels of the enchilada sauce and salsa verde. I’ve also made this with red salsa, which works just fine, and both homemade and storebought salsa verde.

This Breakfast Enchilada Casserole is the perfect brunch dish for when you have company. Prep it the night before and pop it in the oven in the morning.

[clickToTweet tweet=”Have company coming? Prep these Breakfast Enchiladas ahead of time for an easy morning meal!” quote=”Have company coming? Prep these Breakfast Echiladas ahead of time for an easy morning meal!”]

Enjoy!
–Lindsay–


Filed Under: Breakfast Tagged With: Bell Pepper, Cheese, Chicken Sausage, Egg, Green Chilis, Milk, Onion, Potato, Salsa Verde, Tortilla

Thursday Things- Magnatiles

November 16, 2017 by Lindsay 1 Comment

Hi friends!
Time to share some fun things I’ve discovered lately. Everything from toys Squish is loving to things I want for Christmas!

mix and match vehicles

Popular Playthings Mix & Match Vehicles (affiliate link)

Squish got these for his birthday and he loves them! They have wheels so you can roll them around and you can rearrange all the parts to make your own types of vehicles.

magntiles

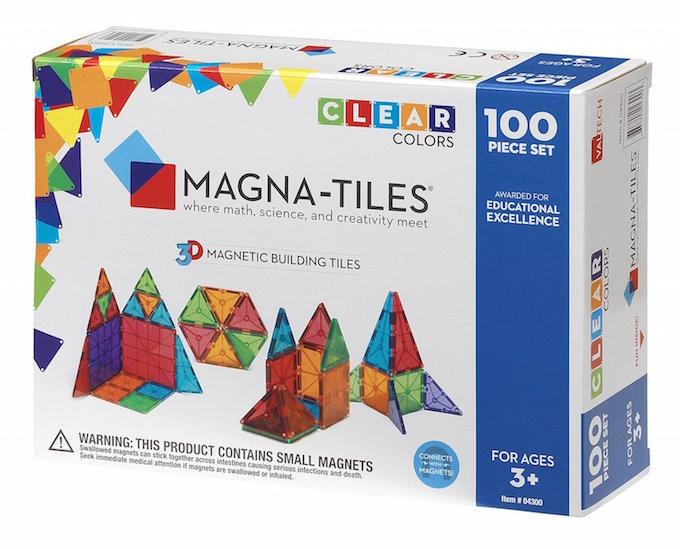
Magna-Tiles (affiliate link)

They have these at our local library and Squish has enjoyed playing with them so I put him on his birthday list and they’ve been a big hit! And not just for him! Little Miss likes stacking up the different shapes, hubby has been known to build with them after the kids go to bed and I find picking them up and organizing them oddly therapeutic 🙂

ooly arts and crafts


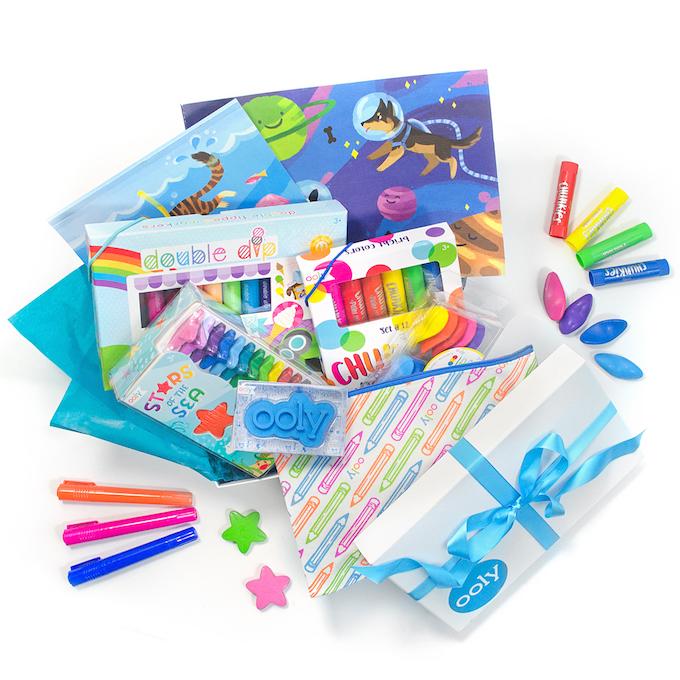
Ooly Arts and Crafts

So I actually found this company last week when I accidentally tagged them in my post when I meant to tag Ooly the Sleep Owl company. Turns out this Ooly company is also fabulous and have all sorts of amazing arts and crafts supplies. They even have these fun gift sets for different ages. I love this Little Artist Gift Set for Toddlers! And the website is not just geared at kids. There are plenty of supplies adults would love as well.

gretchen roehrs

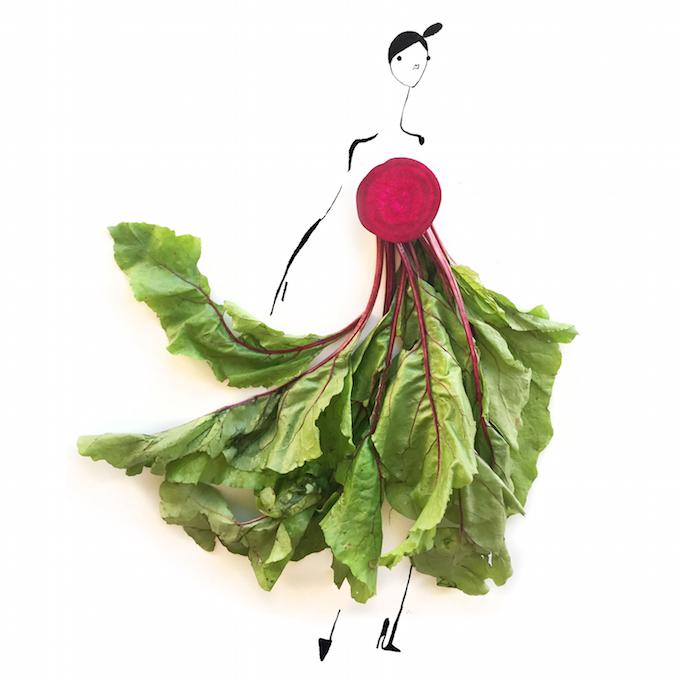
Gretchen Roehrs

I’m so in love with her food art. Her creativity astounds me. Be sure to follow her on Instagram.

linktree


Linktree

If you’re a blogger or entrepreneur who uses Instagram, check out Linktree. It lets you use the link in your profile to bring up a page showing multiple links. So you can link to multiple different recipes, areas of your website etc to allow your followers to easily navigate to them with just a click or two!

ember mug

Ember Mug

I cannot even tell you how much I need this mug. Someone told me about it on IG yesterday after I reheated my coffee for the 3rd time. Apparently, you charge it up overnight and then once you fill it, it keeps your beverage hot (at whatever temperature you choose!) until it’s gone. They also have a travel mug version.


Ok that’s it for today. Tell me something cool you’ve found lately!

Enjoy!
–Lindsay–


Filed Under: Uncategorized

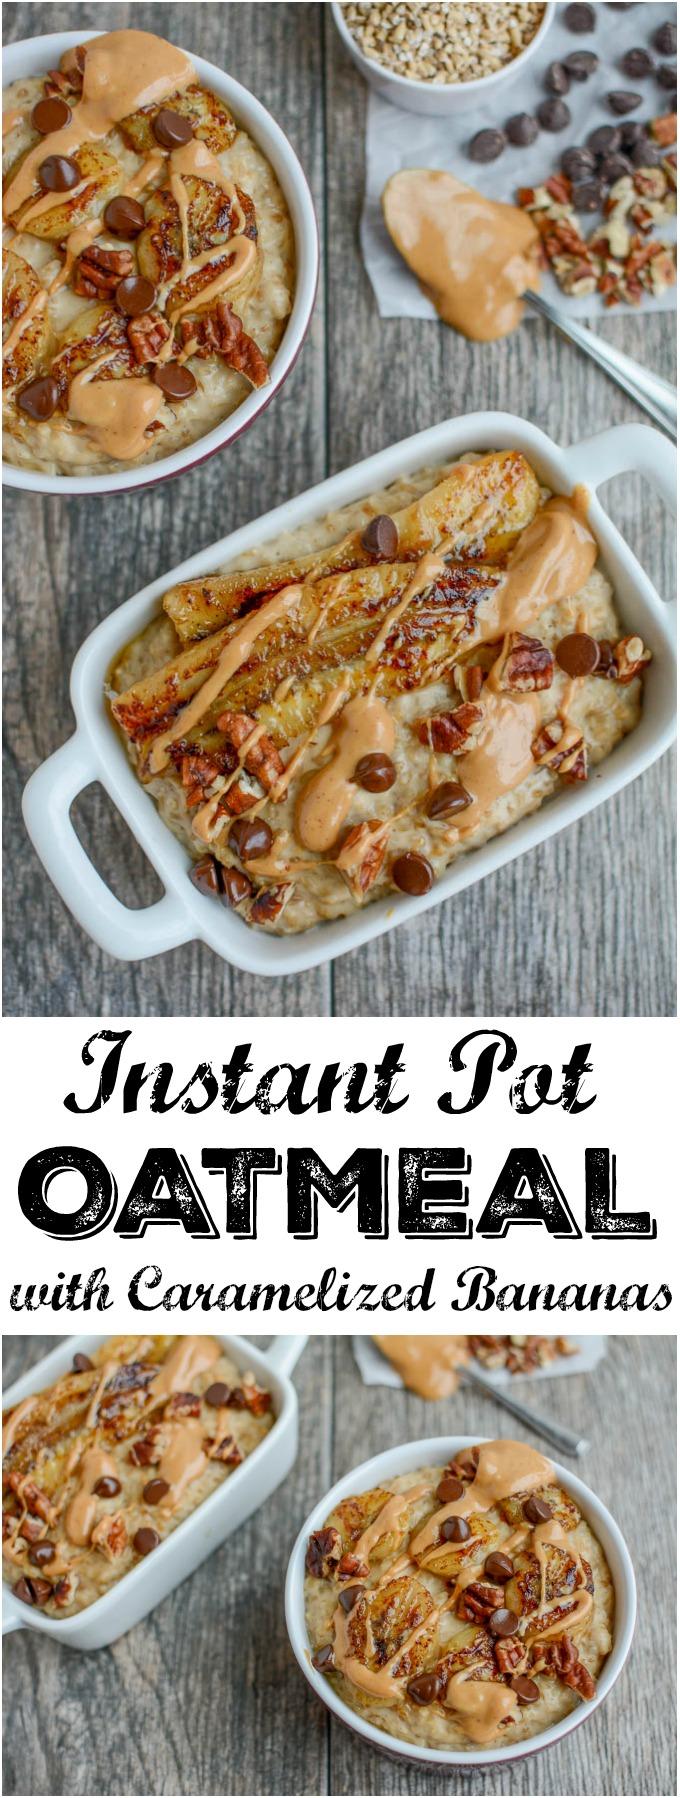
Instant Pot Oatmeal with Caramelized Bananas

November 13, 2017 by Lindsay 1 Comment

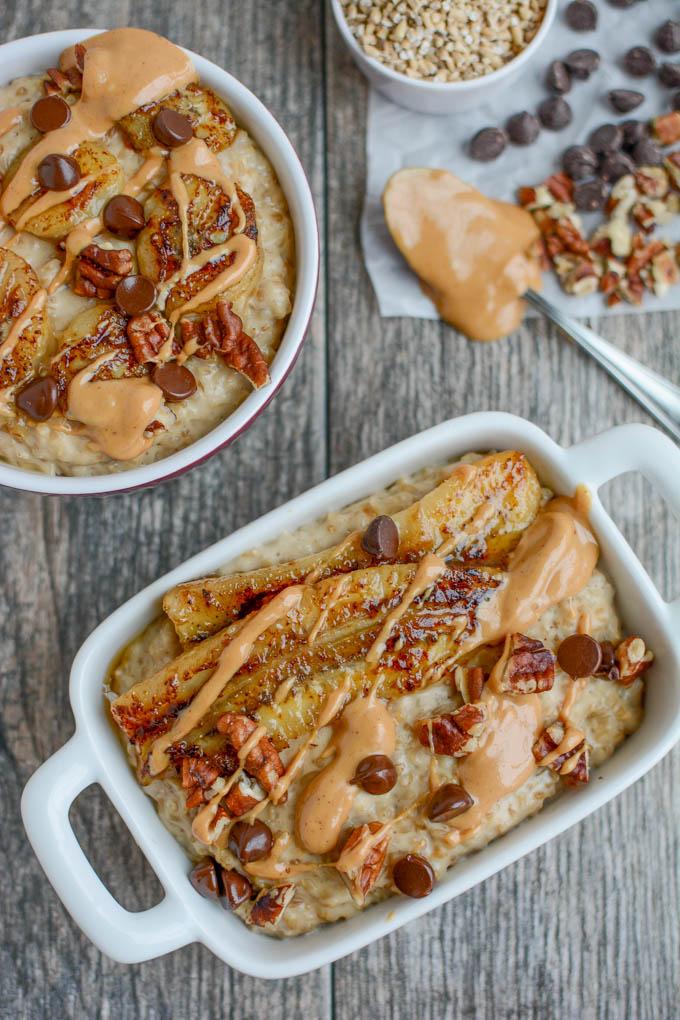
This Instant Pot Oatmeal with Caramelized Bananas is a quick, healthy breakfast option & can also be prepped ahead of time and reheated during a busy week!

This Instant Pot Oatmeal with Caramelized Bananas is a quick, healthy breakfast option during a busy week and is also perfect for prepping ahead of time and reheating during the week!

Hi friends!
Happy Monday. Allow me to introduce you to the breakfast my kids have been jamming on for the past couple weeks. Since I’ve had my Instant Pot for a year now and have only really made dinner recipes, I decided it was time to get a little more adventurous! So last week I made both breakfast and dessert in the Instant Pot!

Since I was feeling extra adventurous, I even tried a new kind of oats! I’m usually partial to rolled oats but I picked up a bag of steel cut oats and we’ve been loving them. They’re chewier than rolled oats and hold up really well in the instant pot.

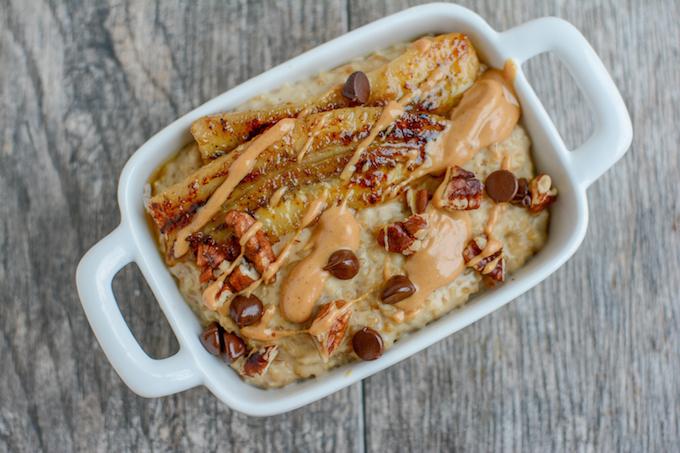
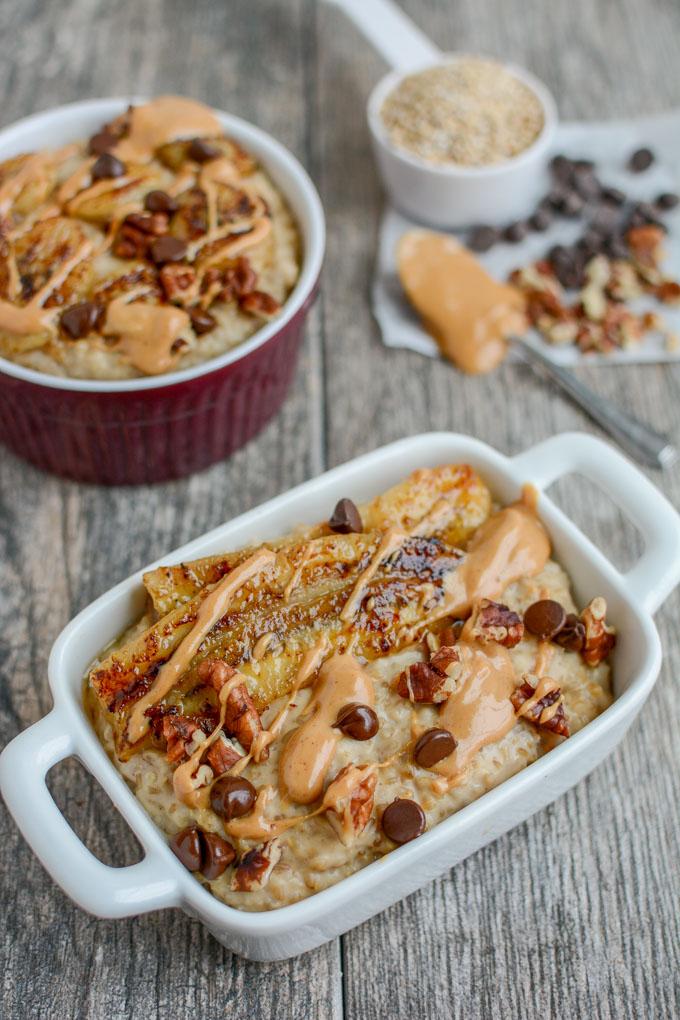
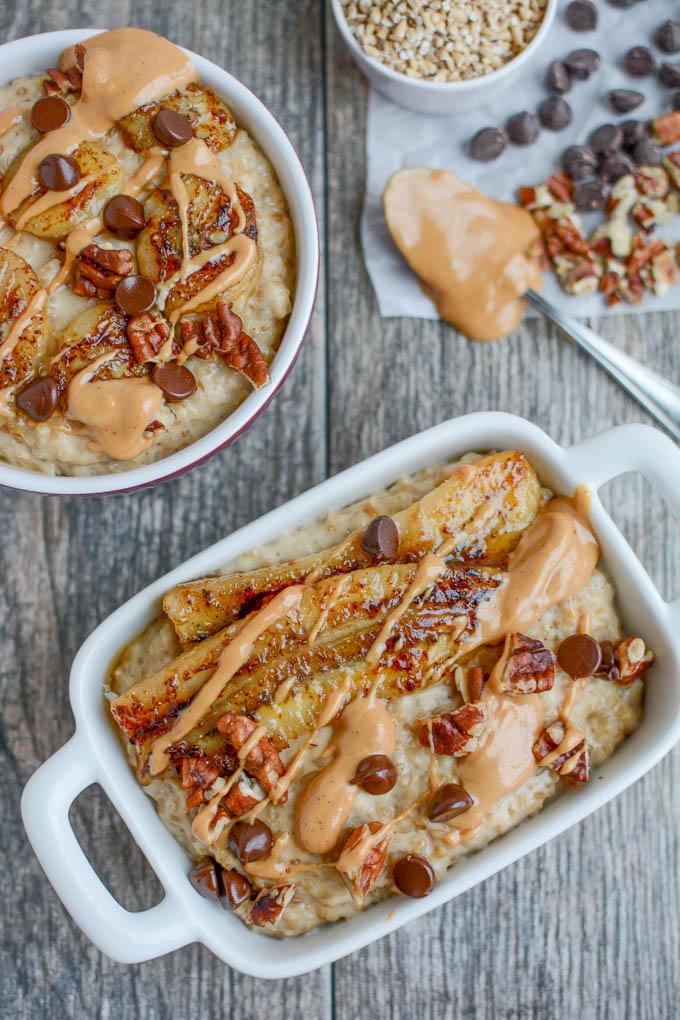
Instant Pot Steel Cut Oats with Caramelized Bananas

There’s really nothing fancy about these oats, but I think the word caramelized makes just about anything sound fancy! In this case, caramelized bananas are literally just bananas sliced and seared in a pan with some melted butter. They cook quickly, get a delicious brown coating and also get nice and soft. So good. And Squish LOVES “ananas”

Instant Pot Steel cut Oats with peanut butter and bananas

So here’s how you make them:

Print

Instant Pot Oatmeal with Caramelized Bananas

Instant Pot Steel Cut Oats with Caramelized Bananas
Print Recipe

5 Stars 4 Stars 3 Stars 2 Stars 1 Star

5 from 1 review

This Instant Pot Oatmeal with Caramelized Bananas is a quick, healthy breakfast option during a busy week and is also perfect for prepping ahead of time and reheating during the week!

  • Author: Lindsay
  • Prep Time: 5 min
  • Cook Time: 15 min
  • Total Time: 20 minutes
  • Yield: serves 4

Ingredients

Scale
  • 1 cup steel cut oats (not quick cooking)
  • 1 cup milk (dairy or non)
  • 1.5 cups water
  • 1/3 cup peanut butter
  • 2 medium bananas
  • 1 Tbsp butter
  • optional chopped pecans and chocolate chips for topping

Instructions

Add the steel cut oats, milk and water to the Instant Pot and stir to combine. 

Use the manual button and set for 8 minutes. 

Meanwhile, cut bananas in half and then slice in half lengthwise. Melt butter over medium-high heat in a skillet. Saute bananas for 1-2 minutes per side until soft and golden brown. 

Use the quick release method. Stir in peanut butter. 

Top with bananas and chopped pecans and chocolate chips if desired. 

Notes

It will look pretty liquidy when you take the lid off but will thicken as you stir in the peanut butter and it cools down. 

I’ve only tried this with all water or 1 cup milk/1.5 cups water. I think it would work with all milk but I haven’t tried it personally. 

This can be made in advance but will thicken when stored in the fridge. You can reheat it with a splash of milk to get it creamy again. 

You can also slice the bananas into circles and saute them the same way…it just means more flipping!

Did you make this recipe?

Tag @theleangreenbean on Instagram

Super easy, right?! Be sure to read the recipe notes for a few of my thoughts! I love that I don’t have to worry about stirring them on the stove or them boiling over in the microwave!

This Instant Pot Oatmeal with Caramelized Bananas is a quick, healthy breakfast option & can also be prepped ahead of time and reheated during a busy week!

[clickToTweet tweet=”Stuck in a breakfast rut? Try this Instant Pot Oatmeal with Caramelized Bananas this week!” quote=”Stuck in a breakfast rut? Try this Instant Pot Oatmeal with Caramelized Bananas this week!”]

Enjoy!
–Lindsay–

Filed Under: Breakfast, Instant Pot Tagged With: Banana, Milk, Oats, Peanut Butter

Thursday Things – Art for Kids Hub

November 9, 2017 by Lindsay Leave a Comment

Hi friends!
Time for another round of Thursday Things but before we get started, I have a favor to ask. I’m working on planning out the content for the blog for the next few months, and I’d love your help. If you have two free minutes to take my super short survey about what you want to see more of on the blog, I’d really appreciate it!

CLICK HERE TO TAKE THE READER SURVEY! 

Thank you!! Now on to this wee’s finds:

dapper snapper


Dapper Snappers 

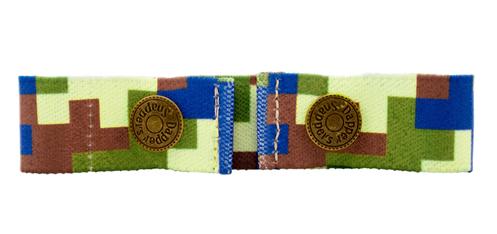
I haven’t tried these but they look cool! They essentially hook through the back three belt loops of toddler pants (or you can buy add on clips if the pants don’t have belt loops) and act as a belt to help hold pants up. I like them because they wouldn’t get in the way for potty training…if we ever start that lol.

art for kids hub

Art For Kids Hub

If your kids are constantly asking you to draw things, or if they like to draw, this site is awesome. They have tons of videos to show you how to draw things. You can also subscribe to their YouTube channel.

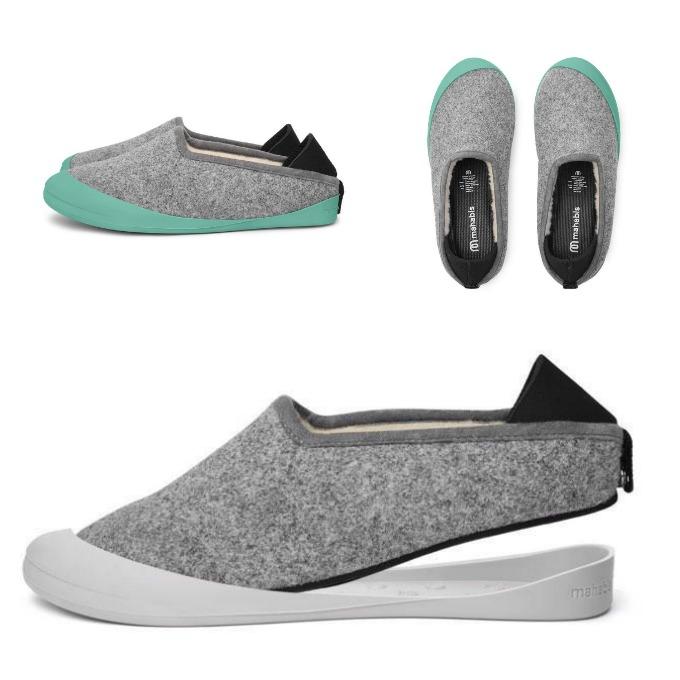
mahabis

Mahabis

Anyone tried these? They’re slippers with removable soles. You can pick the color of your soles when you order and also order additional colors. I’ve almost worn a hole in the sole of my current slippers so i’m intrigued!

ooly

Ooly

This is like a more high tech version of the Ok to Wake clock (aff link) we’re currently using and I kinda love it. It’s the same concept (turns green when it’s ok to get out of bed), but this one connects to an app so you can easily adjust it from your phone, which might be nice after a particularly rough night of sleep and you can also set it to a different color for nap or quiet time. Plus it doesn’t have to be plugged in! It can last for 7 days on one charge. And there are no buttons so a curious toddler can’t mess with your settings!

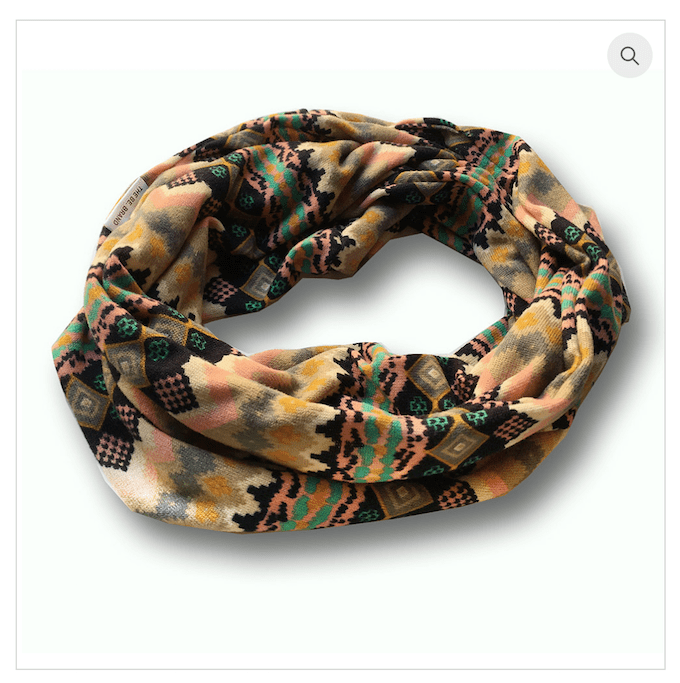
The Be Brand

The Be Brand

I’ve had my eye on the headbands from this company forever, but a few days I happened to see they released some scarves. I fell in love with this one and had to have it! Plus they have tons of cute shirts and tanks! Added bonus? They donate a portion of every sale to I AM THAT GIRL – an organization working to empower and inspire girls everywhere.

Screen Shot 2017 11 08 at 10.03.41 PM

The Adventuring Dress

This one is just for fun, but check out the hashtag #theadventuringdress on Instagram. One of my friends got married and he and his wife went on a two-week honeymoon out west and to Hawaii and they took some amazingly beautiful pictures of her in her wedding dress in all sorts of places. Such a fun idea!

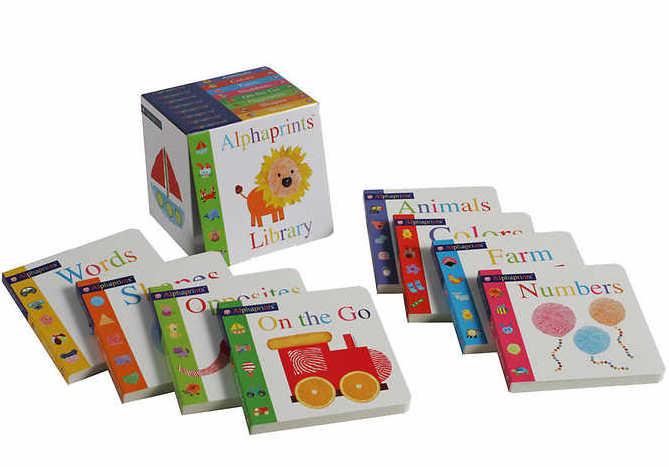
alphaprints

Alphaprints Books

We snagged this set of books at Costco for like $15 for a birthday present for Little Miss and I love them so much! You can also find them individually on Amazon (aff link).

clay factor ceramics

Clay Factor Ceramics

I’m always on the hunt for fun new coffee mugs and this company caught my eye on Instagram. Such pretty mugs and other dishes.

2018 planning party

2018 Planning Party (aff link)

My friend Nicole is hosting a free 2018 planning party the first week of December. If you’re a blogger or entrepreneur that needs some help finding your focus and setting attainable goals, you’ll def want to join in! I’ll be participating. I’ve felt a little scattered this past year and I’m hoping this will help me zone in, do some content planning and get organized to kick off the new year.

That’s all for this week!

Enjoy!
–Lindsay–

Filed Under: Uncategorized

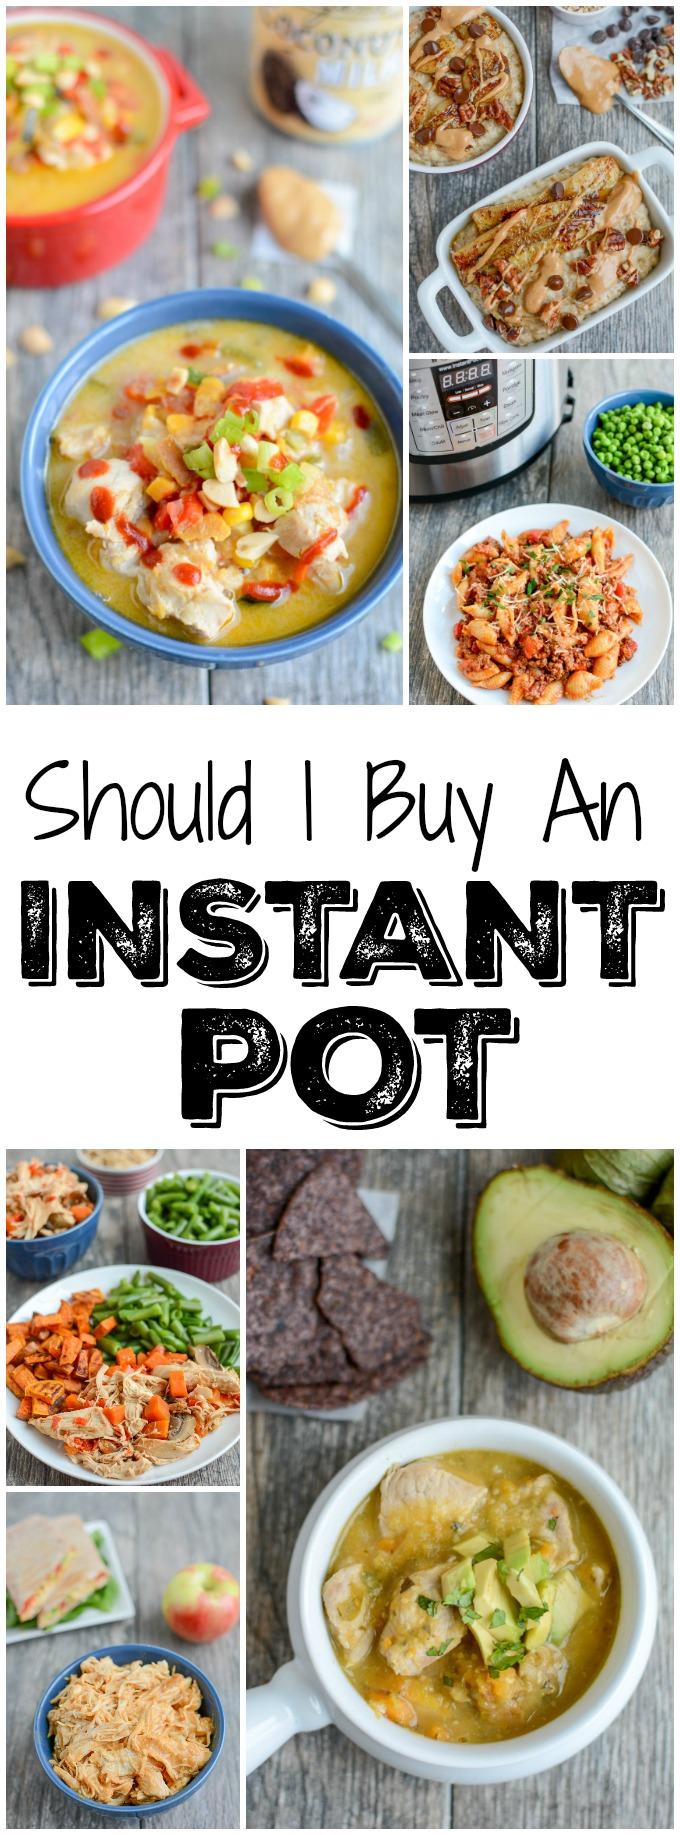
Should I Buy An Instant Pot?

November 6, 2017 by Lindsay 22 Comments

Hi Friends –

If you’ve been following the blog for the past year, you’ve likely noticed that I have a clear love for my Instant Pot (affiliate link). I bought mine last year on Cyber Monday and have used it religiously, at least a couple times a week, since then.

I’ve also shared several Instant Pot recipes on the blog (click the link to browse them all!)

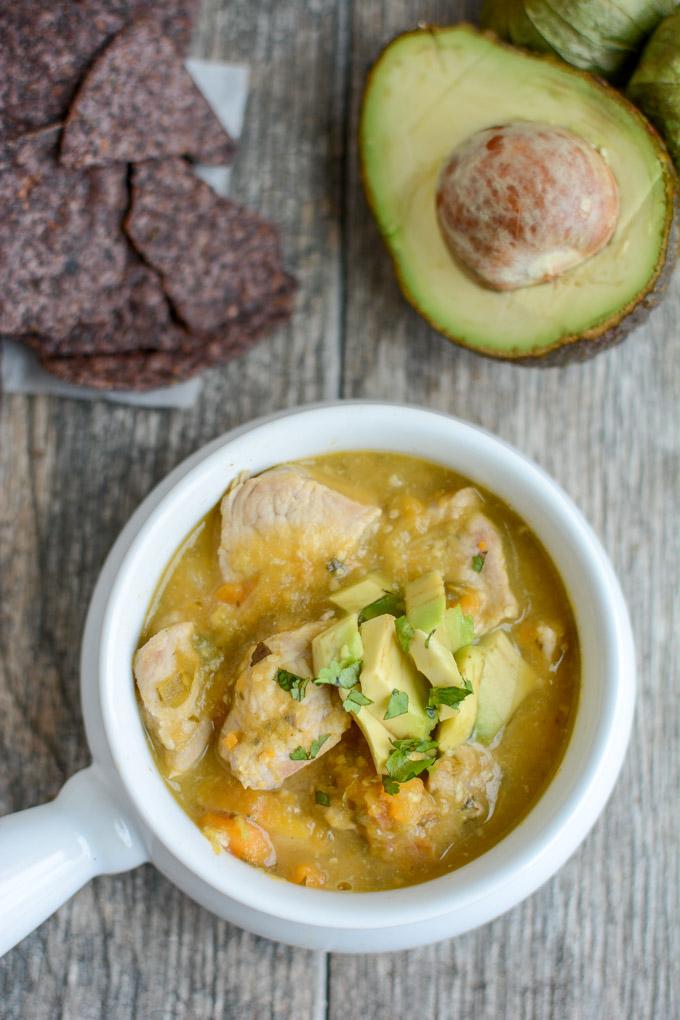
Instant Pot Pork Chili Verde

{Instant Pot Pork Chili Verde}

If you follow me on Instagram, you know I often bring you guys along for the ride when I make things in my Instant Pot. And almost every time I do, someone asks me if they should get one.

My answer is a resounding YES! With the caveat being I think you should wait until Black Friday or Cyber Monday at this point. Or put it on your holiday wish list (and remind the people buying for you that they’ll probably go on sale in a few weeks).

This Instant Pot Thai Peanut Chicken Soup recipe is dairy-free and packed with summer vegetables. Perfect for a healthy lunch or dinner in under 30 minutes.

{Instant Pot Thai Peanut Chicken Soup}

Here are a few more details about the Instant Pot:

It’s fast. I’ve always had a strong love for a crockpot, but the Instant Pot is better. Basically, anything you can make in the slow cooker in 6-8 hours, you can make in the Instant Pot in 30 minutes. That’s ideal for nights when you get home and realize you forgot to put something in the crockpot before you left that morning.

But it’s not instant. Yes it is quick and you can make almost anything in 30 minutes or less of actual cooking time, but it does still take time for the pot to come to pressure and start cooking (usually about 10 minutes). So keep that in mind when you see a recipe for “3 minute XYZ”. It might be 3 minutes of actual cook time, but it’ll still take time for it to get to pressure and start cooking.

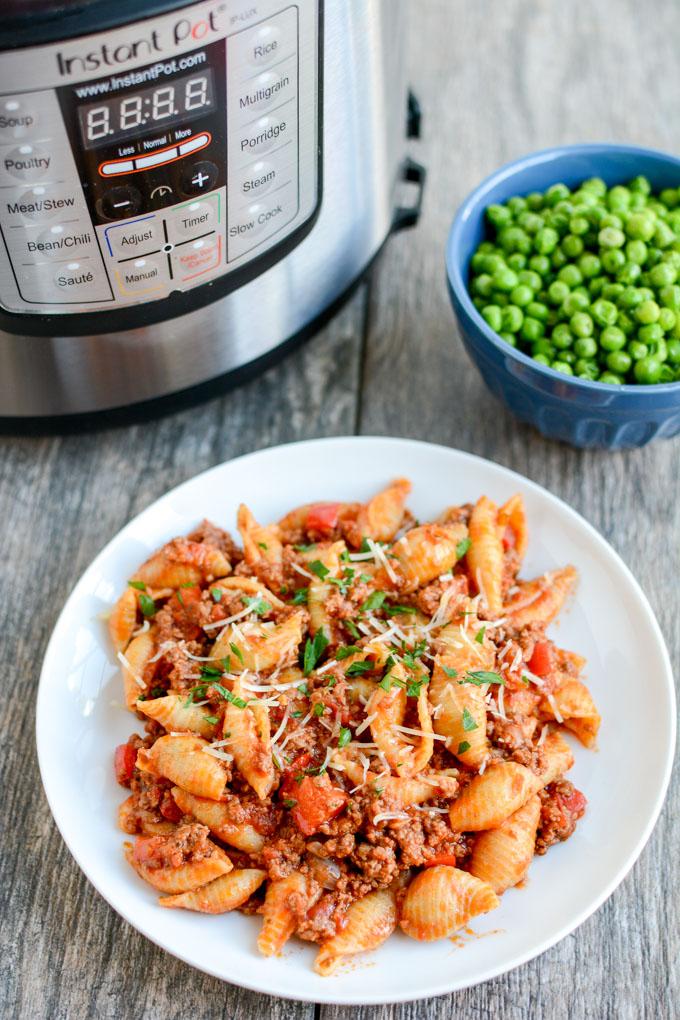
Instant Pot Pasta with Meat Sauce 2

{Instant Pot Pasta with Meat Sauce}

It’s multi-functional. First of all, it sautes. My crockpot didn’t have the saute function so whenever I wanted to brown meat or veggies before cooking, I’d have to do that on the stove, then transfer to the slow cooker. With the Instant Pot I can do everything right in the pot. Second, the Instant Pot can also act as a slow cooker, so if you really do want to cook something low and slow, you still have that option. Third, you can use it as a warmer. If you’re a fan of making homemade bread or pizza dough, you can use the yogurt setting on the Instant Pot to proof the dough.

But it can be a little overwhelming. There are a lot of buttons on the front of the Instant Pot. When you first get it, it can seem overwhelming, and even after having it a year, there are still buttons and functions I haven’t used. However, I still think it’s worth it. You can use manual mode for almost anything and just ignore a lot of the buttons if you want to.

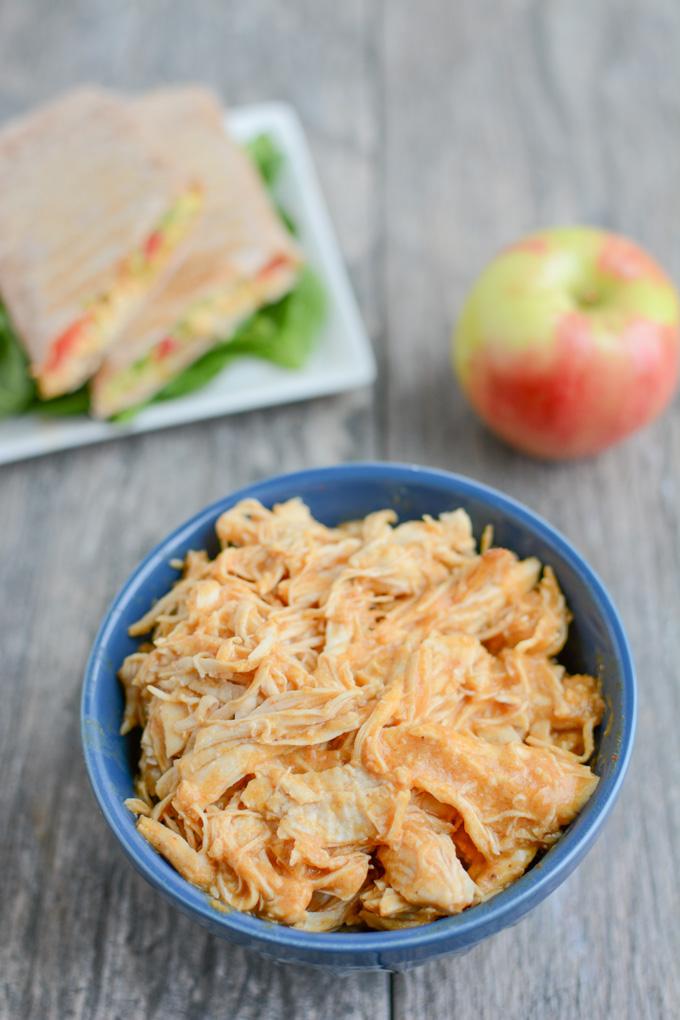
This Instant Pot Shredded Hummus Chicken is a simple, healthy recipe that can be made during food prep and served alone or in a wrap for a quick lunch or dinner.

{Instant Pot Shredded Hummus Chicken}

It’s great for food prep. You can definitely make full recipes in the Instant Pot but it’s also great for food prep. You can make a big batch of pulled pork or chicken, cook some rice, grains or beans to use in dishes throughout the week, use your veggie scraps or chicken bones to make broth, hard boil eggs, or steam vegetables. Prior to having my Instant Pot I actually had just a pressure cooker that I used weekly to “hard boil” eggs and cook dried beans for a couple years before it fell off my radar.

But it might take a little practice. There are more and more Instant Pot recipes being published every day, but it can still take a little while to get the hang of it. I started off overcooking a lot of my recipes because I just didn’t believe they would be done as quickly as they are.

This Instant Pot Asian Chicken can also be made in a slow cooker. It's full of flavor and easy to make. A healthy dinner the whole family will love!

{Instant Pot Asian Chicken}

The possibilities are endless. You can make everything from breakfast to dinner to dessert right in the Instant Pot. You can even place another bowl within the Instant Pot to use the steam to cook things so they won’t get stuck and burned to the bottom of the Instant Pot insert pot. An added bonus is that the pot within the Instant Pot comes out easily and you can even put it in the dishwasher, along with the lid!

But it still requires some effort. If you’re someone who really wants dinner on the table quickly with no effort in the evenings, a crockpot might be the better option. You can have things ready and waiting when you walk in the door. Although you can use the IP as a slow cooker, if you’re using it as a pressure cooker, you still have do a little work to get stuff into the pot and turn it on. I think it works best for people like me who have enough time in the evenings to cook dinner, but like to keep things simple and make things that require only a little effort and are ready fairly quickly.

So, bottom line is, yes I love my Instant Pot and I think a lot of you would like one too!

Instant Pot Steel Cut Oats

And stay tuned for more Instant Pot recipes from me! I have Instant Pot Oatmeal with Caramelized Bananas and Instant Pot Gingerbread Bread Pudding recipes coming your way in the next couple weeks!

UPDATE: A few of you have asked about the size. I have the 6 quart and think it’s fine. I haven’t had any space issues with the things I’ve been making. The only downside is if you’re looking to proof things in it or cook something in a smaller bowl within the pot, about the biggest bowl that fits in there is 1.5 quarts. So the 8 quart Instant Pot would probably be able to fit a bigger bowl within it!

Want a second opinion? My friend Sally shared what she likes and dislikes about her Instant Pot on her blog last week!

Should I Buy An Instant Pot?

Let’s chat!

Do you have one?
Are you going to get one?
What kind of Instant Pot recipes do you want to see next?

Enjoy!
–Lindsay–


Filed Under: Instant Pot

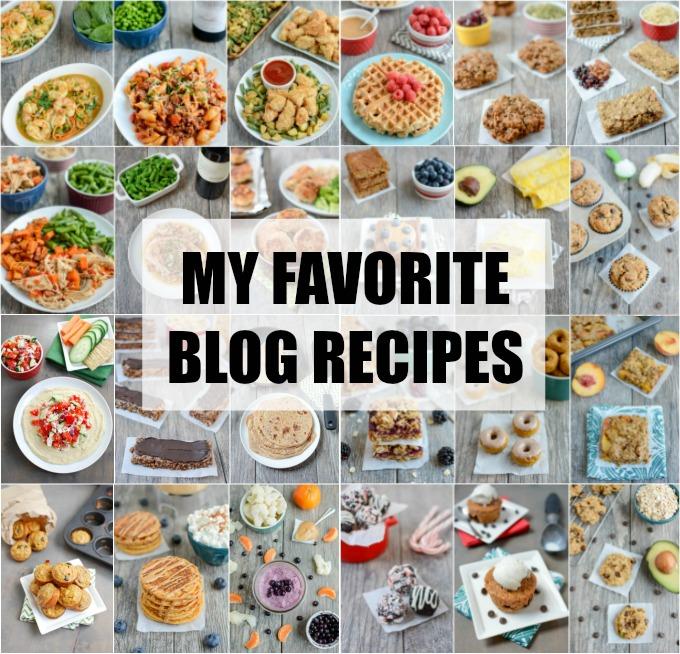
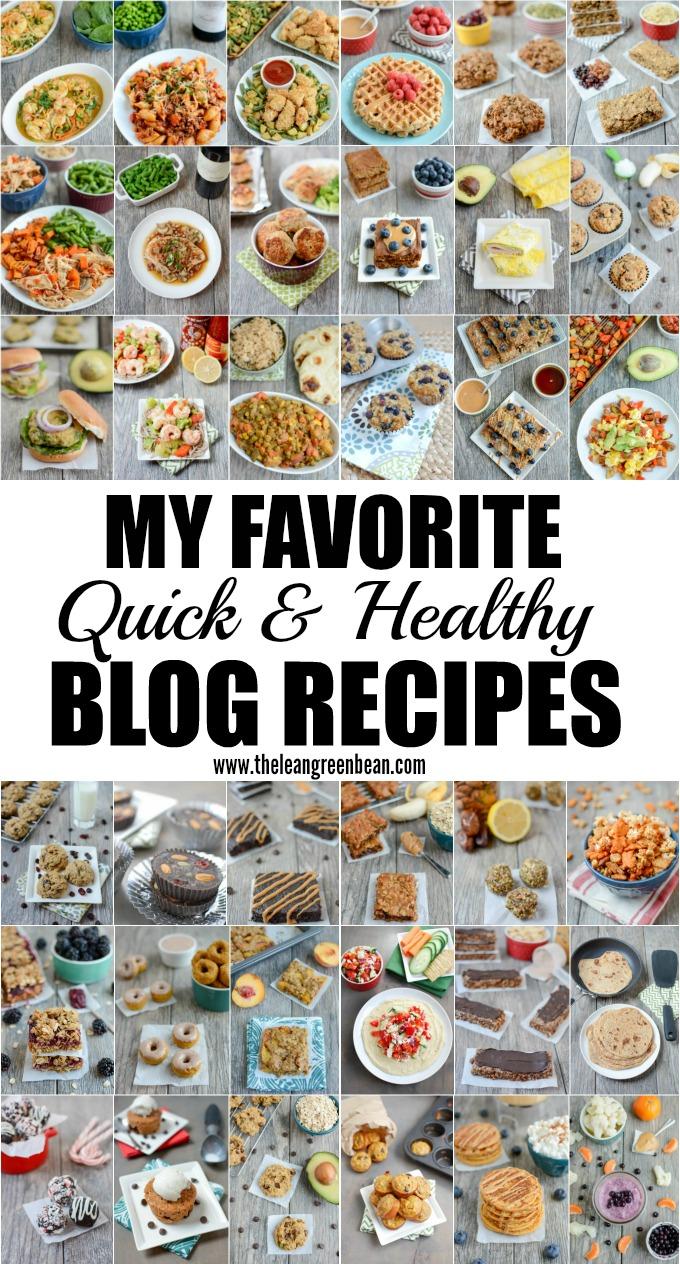
The Blog Recipes I Make Most Often

November 3, 2017 by Lindsay 2 Comments

These quick healthy recipes are simple, family-friendly and made with real food ingredients. They’re the ones I make most frequently on the blog and I know most of them by heart!

My favorite quick and healthy recipes on my blog.

Hi friends!
Sooooo, let’s talk about the fact that I have a lot of recipes on this blog. Turns out sharing a few per week for 8 years really adds up. People often ask me if I actually make recipes from my own blog and the answer is a resounding yes. That’s one of the main reasons I started to blog and continue to do so- to share the things I’m making in my kitchen and the things we’re actually eating.

Although I’ve made every single recipe on my blog, most more than once, there are definitely some that I favor over others. I decided to do a little roundup of the recipes I make most frequently for my family. Some of them are current favorites and some are old staples. Many of them I make almost every single week, or seasonally every single year, and most of them I know by heart.

I split them into five categories: dinners, breakfasts, snacks, sides and desserts. I hope some of these catch your eye! Be sure to let me know if you try one!

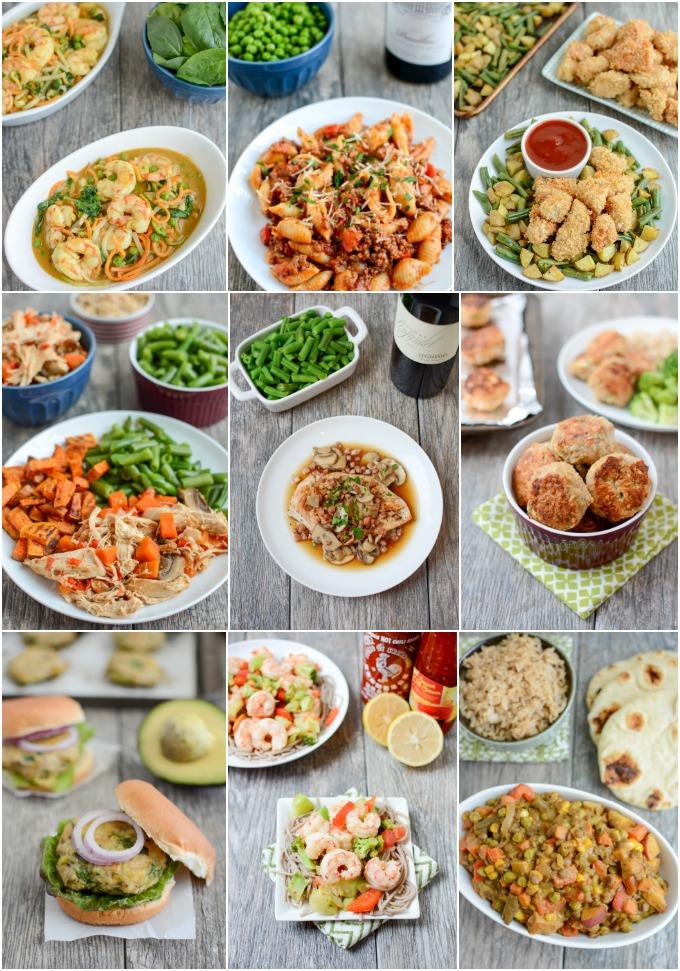
Quick and easy dinner recipes

Dinners

  • Shrimp Curry Noodle Bowls
  • Instant Pot Pasta With Meat Sauce
  • Crispy Chicken Potato Bowls
  • Asian Chicken Instant Pot
  • Chicken Marsala
  • Thai Chicken Meatballs
  • Avocado Chicken Burgers
  • Sweet & Spicy Shrimp with Soba Noodles
  • Lentil Veggie Curry

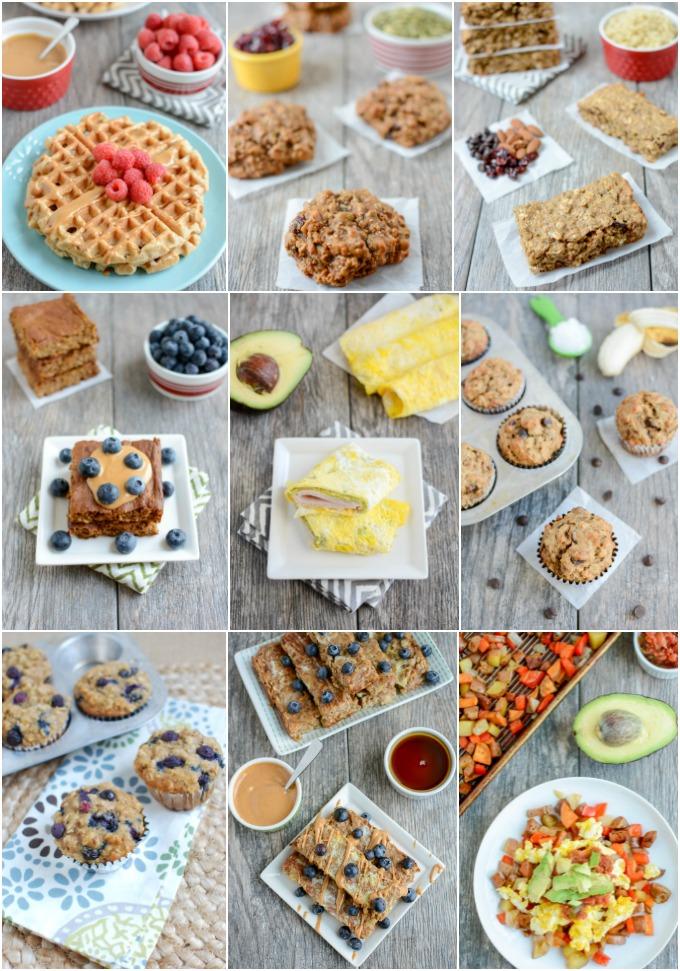
quick, healthy breakfast ideas

Breakfasts

  • Whole Wheat Yogurt Waffles
  • Sweet Potato Protein Cookies
  • Quinoa Breakfast Bars
  • Gluten-Free Pumpkin Yogurt Bars
  • Easy Egg Wraps
  • Coconut Oil Banana Muffins or Peanut Butter Banana Oat Muffins
  • Gluten-Free Pumpkin Yogurt Bars
  • Healthy Blueberry Muffins
  • Baked Oatmeal French Toast Sticks
  • 5 Minute Breakfast Hash

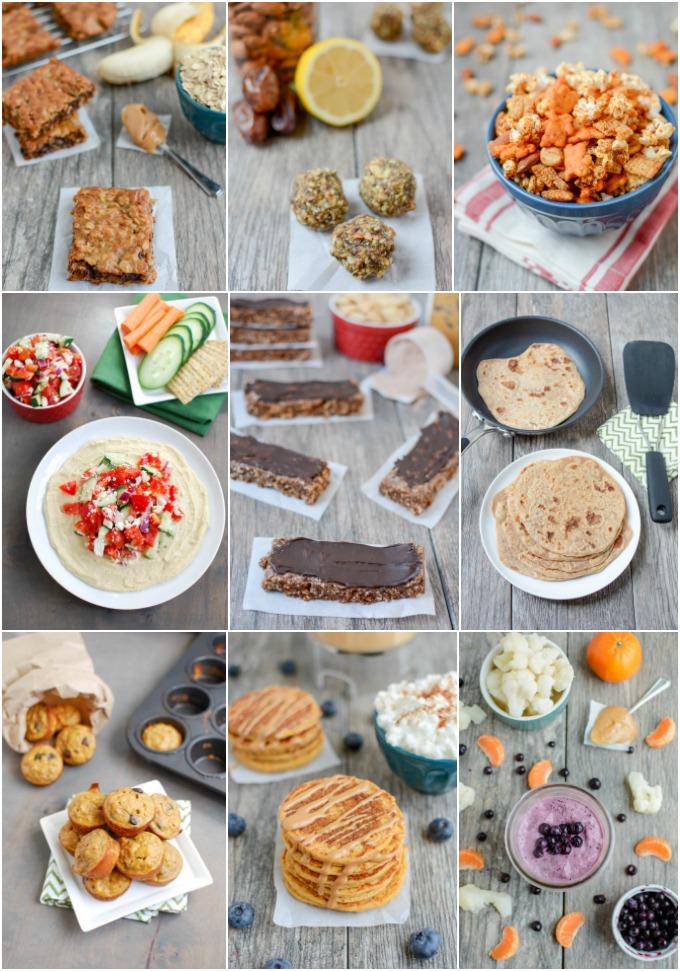
quick and healthy snack recipes

Snacks

  • Easy Banana Oat Bars
  • Lemon Energy Bars
  • Sweet & Spicy Popcorn Snack Mix 
  • Greek Hummus Plate
  • No-Bake Protein Bars
  • Homemade Whole Wheat Tortillas
  • Sweet Potato Banana Bites
  • Sweet Potato Protein Pancakes
  • Blueberry Cauliflower Smoothie

Healthy side dish recipes

Sides

  • Cranberry Corn Muffins
  • Sausage & Wild Rice Stuffing
  • Green Bean Fries
  • Roasted Green Beans with Cranberries
  • Fresh Cranberry Sauce
  • Dutch Oven Bread
  • Curried Sweet Potato Soup
  • Maple Bacon Roasted Carrots
  • Tuna Quinoa Cakes 

easy healthy dessert recipes

Desserts

  • Cranberry Oatmeal Chocolate Chip Cookies
  • Freezer Chocolate PB Cups
  • Gluten-Free Sweet Potato Brownies
  • Blackberry Crumble Bars
  • Baked Pumpkin Donuts
  • Ginger Peach Oat Bars
  • No Bake Peppermint Chocolate Bites
  • Microwave Sweet Potato Mug Cake
  • Peanut Butter Avocado Cookies 

Anything catch your eye?

[clickToTweet tweet=”Looking for new recipes to try? Here are 45 recipes I make often enough to know by heart!” quote=”Looking for new recipes to try? Here are 45 recipes I make often enough to know by heart!”]

These quick healthy recipes are simple, family-friendly and made with real food ingredients. They're the ones I make most frequently on the blog and I know most of them by heart!

Enjoy!
–Lindsay–


Filed Under: Ingredient Round-Ups, Uncategorized

This Is Three

November 2, 2017 by Lindsay 25 Comments

three year old crying

Hi friends.

A few weeks ago I shared this photo on Instagram with the following caption and it resonated with a lot of you…like hundreds of you…

This age, you guys, it’s hard. It’s tantrums and yelling. It’s hitting and kicking. It’s no, no, no and then no some more. More days than one, it will push you past the limits of your patience and leave you questioning where you went wrong as a parent. But when you find yourself having one of those days, remember this: It’s ok to take a mom timeout, hide in your room and just breathe. And it’s ok to cry right along with them. (I’ve done both today) It’s ok to question yourself, but never ever doubt these two things 1) Your little ones love you unconditionally and 2) You’re doing a great job. I promise ❤️

I snapped this picture about halfway through a particularly rough day and I was just about at my wit’s end. I was mostly just writing out the reminder that I really needed to hear…but your responses reminded me of something so important:

I am not alone. There are so many of you out there who have either been here yourselves or are currently in the thick of it with me. 

three year old birthday

Last weekend Squish officially turned 3. I can’t believe it’s been a year since I last wrote a post just about him. To document this birthday, I decided to try to capture a completely honest look at what life with a three-year-old is really like.

So….This is 3.

emotional 3 year old

Three is emotional. It’s mood swings. It’s tears. So many tears. When he hears the word no? Tears. When I have to change his diaper? Tears. When I won’t give him a snack 10 minutes after he finishes lunch? Tears. When we have to leave the playground? Tears.  Every day when he comes in to wake me up, I hold my breath and wait to see what kind of morning it’s going to be. And even when it starts out well, things can change in an instant. Happy. Screaming. Pouting. Happy again….all in a small five-minute window. And repeat. All day. Every day.

Three is frustrating. It’s a constant exercise in patience and trying not to lose it. I consider myself a fairly patient person…but it seems like there is at least one point in every single day lately where I raise my voice, lose my temper or become completely exasperated, no matter how hard I try not it. I do my best to put myself in his shoes and be sympathetic and understanding and calm but sometimes it’s just not possible.

three year old

Three is defiance. It’s pushing boundaries, often with a smirk or a smile because they clearly know it’s wrong and they’re just testing your limits.  It’s hearing the word NO at least 100 times a day, to pretty much every question, often before you’ve even gotten the full question out of your mouth. It’s being forced to pick your battles and learning when to stand firm and when to give in.

Three is repetitive. Don’t hit. Don’t kick. Indoor voice please. Get in your carseat. Leave your sister alone. Calm down. Put your shoes on….All things I say a million times a day.

loud three year old

Three is loud. And fast. It often seems that Squish only has one speed and one volume. Fast and loud. From literally the second he wakes up until the minute he goes to bed.

Three is independent. “My doin’ it” is his number one phrase. Everything from putting the ice cubes in his water bottle to climbing in and out of his car seat. It’s messy and painstakingly slow at times, but his confidence and skills are developing, which is so important.

sad three year old

Three is low expectations. It’s making grand plans, only to have them constantly derailed by a toddler who wakes up on the wrong side of the bed. It’s disappointment, rejection and canceled plans.

Three is hard. And exhausting. At the end of every day, I literally collapse into bed. It’s by far the hardest year so far.  Never have I doubted my ability to be a parent more than I have the last few months. I’ve felt unqualified, embarrassed, scared and defeated. Usually at least one of those emotions every single day. So many times each week I find myself thinking “ok, well how the F am I supposed to handle this?”

But three is also amazing.

three year old preschool

Three is new. It’s new activities, new words, new interests. Since he started talking fairly late, it’s been so fun to watch him learn new words, start communicating more clearly. He also started regularly going to preschool and playgroup so he is interacting with kids his own almost daily.

Three is impressive. The things he remembers and the things he can figure out continue to astound me. He has an amazing memory and sense of direction (def got both of those from daddy) and every day I’m impressed by how smart he is.

three year old in apple orchard

Three is hilarious. The things that come out of his mouth make me laugh SO HARD.

Three is pure. There’s nothing better than seeing the world through the eyes of a child. He’s discovering new things, having fun and loving life without yet being corrupted by the current state of the world. Seeing the pure joy on his face when he does something fun is so amazing.

three year old with mom

Three is unconditional. Squish has always been a mama’s boy and it continues to be oh so humbling to have someone love me so fiercely. No matter how frustrated I get with him, at the end of every day he gives me a hug and says “wuv you mommy” and I know he means it 100%. We are his whole world and I never take that for granted.

Screen Shot 2017 10 30 at 9.40.49 PM

Nothing makes me happier than being his mama. Even if it is the hardest thing I’ve ever done.

So to all my fellow parents out there, if you’re currently in the “this is three” stage as well, hang in there. Remember that this too is just a stage. They’re learning and growing, just like we are as parents, and we’ll all make it out the other side.

Remember that it’s ok to get frustrated and cry right along with them. No matter how it may seem at the end of every day, you’re doing a great job.

I promise.

This is three. Three is hard, frustrating and amazing all rolled into one.

Enjoy!
–Lindsay–


Filed Under: Kids

Instant Pot Pork Chili Verde

October 30, 2017 by Lindsay 14 Comments

This Instant Pot Pork Chili Verde recipe is a quick, healthy dinner that couldn’t be easier! Made with simple ingredients, it’s full of flavor and the leftovers make a great lunch!

This Instant Pot Pork Chili Verde recipe is a quick, healthy dinner that couldn't be easier! Made with simple ingredients, it's full of flavor and the leftovers make a great lunch!

Hi friends!
We’re quickly approaching the one year anniversary of me purchasing my Instant Pot and my love for it has not yet diminished! I have this one (affiliate link) and I snagged it at last year’s Cyber Monday sale on Amazon…which is coming up so be on the lookout if you’re thinking about getting one!

Anyways, if you follow my Instagram stories, you may have seen me make this on a whim a couple weeks ago…and then immediately make it again because according to hubby it was “pretty good for just winging it”.

Instant Pot Pork Chili Verde with Sweet Potatoes

I’ve made pork chili verde in the past, but I usually go all out and make homemade salsa verde with roasted tomatillos, etc. This soup came about on a night where my main thought was “ain’t nobody got time for that”.  I pretty much just threw all the ingredients in the instant pot and hoped for the best! And it worked. My hope was that the tomatillos would break down on their own to be more salsa-like and I also added sweet potatoes that I knew from experience would kinda fall apart to help thicken it up and make it a bit more stew-like.

Pork Chili Verde in the Instant Pot

So here’s how you make it:

Print

Instant Pot Pork Chili Verde

Instant Pot Pork Chili Verde
Print Recipe

5 Stars 4 Stars 3 Stars 2 Stars 1 Star

4.5 from 2 reviews

This Instant Pot Pork Chili Verde recipe is a quick, healthy dinner that couldn’t be easier! Made with simple ingredients, it’s full of flavor and the leftovers make a great lunch!

  • Author: Lindsay
  • Yield: serves 4-6 1x

Ingredients

Scale
  • 1 Tbsp oil
  • 1 pound tomatillos chopped (approximately 3 cups)
  • 3 cloves garlic, minced
  • 3/4 cup diced onion
  • 2.5 cups diced sweet potatoes
  • 2 serrano peppers, minced (optional)
  • 2 pounds pork stew meat (pre cubed)
  • 1/2 cup broth
  • 2–3 Tbsp chopped cilantro

Instructions

Turn Instant Pot to saute. Add all ingredients except the broth and cilantro and saute for 5 minutes, then turn off.

Add broth and cilantro. Set Instant Pot for 20 minutes using manual mode.

Use the quick release method, stir well to help the sweet potatoes and tomatillos break down even further. 

Serve warm! Optional toppings include avocado, salsa, cheese, etc.

Notes

 I buy pork stew meat that is precut into cubes. You could cut a pork shoulder into cubes yourself or put it in there in large chunks but it will take longer to cook!

Did you make this recipe?

Tag @theleangreenbean on Instagram

And that’s it! So easy.

This Instant Pot Pork Chili Verde recipe is a quick, healthy dinner that couldn't be easier! Made with simple ingredients, it's full of flavor and the leftovers make a great lunch!

[clickToTweet tweet=”This quick and easy Pork Chili Verde is made in the Instant Pot for a simple, flavorful dinner.” quote=”This quick and easy Pork Chili Verde is made in the Instant Pot for a simple, flavorful dinner.”]

Note- I think you could make this in the crockpot but I’m not sure that the tomatillos would break down quite as much. And you’d probably need to add some extra broth.

Enjoy!
-Lindsay–

Filed Under: Dinner, Instant Pot, Soup & Salad Tagged With: Onion, Sweet Potato

Gluten-Free Apple Pecan Snack Cookies

October 25, 2017 by Lindsay 3 Comments

These Gluten-Free Apple Pecan Snack Cookies are a healthy, kid-friendly snack, breakfast or dessert. They’re made with coconut and oat flour, full of fresh apples and sweetened with maple syrup.

These gluten-free Apple Pecan Snack Cookies are a healthy, kid-friendly snack, breakfast or dessert. They're made with coconut and oat flour, full of fresh apples and sweetened with maple syrup.

Thanks to Nuts.com for sponsoring this post.

Hi friends!
Meet my newest obsession – these Gluten-Free Apple Pecan Snack Cookies. I’m calling them snack cookies because unlike some cookies that are geared more towards being a sweet dessert treat, these cookies are relatively low in sugar and full of ingredients that add fiber, protein and healthy fats!

As you guys might remember, I’m working with Nuts.com this year to show off some of the great ingredients available on their website (hint- it’s so much more than nuts!) In fact, over the summer, I shared this Nut-Free Toddler Trail Mix that’s perfect for young kiddos. For this post, I wanted to push myself out of my comfort zone a little bit. I picked an ingredient that I’d never ever worked with before – coconut flour.

Healthy Cookie Recipe with coconut flour

While I’d heard a lot about coconut flour and seen a lot of recipes using it, it just wasn’t something I’d tried myself. So I set out to change that with these cookies.

Here’s the deal with coconut flour:

It’s made from ground-up, dried coconut meat. The Organic Coconut Flour from Nuts.com is organic and unsweetened, but it’s actually a somewhat sweet flour thanks to the natural sugars in the coconut. It’s also gluten-free and full of fiber!


There are a couple things to note about coconut flour. Here are a few helpful tips they share on their website:

1) Coconut flour behaves differently than wheat flours. It cannot be used as a one-to-one replacement for wheat flours, and generally works best in combination with other gluten-free flours.

2) Substitute 1/4 to 1/3 cup of coconut flour for every 1 cup of wheat flour as a general rule of thumb in baking.

3) Coconut flour is HIGHLY absorbent. Typically, recipes using coconut flour require more moisture, which can be provided by eggs, oils, and other liquids.

gluten-free Apple Pecan Snack Cookies with coconut flour

I won’t lie. This was one of the hardest recipes I’ve developed in a while. I had to make them SIX times before I got them right. Along the way I discovered that I do not enjoy cookies made solely with coconut flour. Once I mixed it with oat flour though, I started to really like it. It definitely adds a suble sweetness to the cookies and although it does add a unique flavor to the cookies, I don’t think it tastes overtly like coconut. Which is good, because I’m not a fan of strong coconut flavor.

I also learned that even one tablespoon can make a big difference. Once I got the recipe the way I wanted it, I tried adding just one more tablespoon and it was a totally different cookie.

Apple Pecan Snack Cookie with coconut flour

In addition to the coconut flour, I used several other ingredients from Nuts.com for these cookies including this Once Again Creamy Almond Butter. I majorly favor peanut butter over almond butter most days, but I also find peanut butter to be naturally sweeter. I think almond butter works well in these cookies because the coconut flour and maple syrup already add enough sweetness. I also added pecans. I like using pecans in cookies because they’re naturally softer than nuts like almonds so if you’re not going for a super crunchy cookie, they add a nice texture without being over-the-top crunchy. Plus homemade oat flour which you can make by just grinding up rolled oats in your food processor.

Aside from that you just need a few other ingredients and some freshly chopped apples (which we have coming out our ears thanks to a trip to the orchard last weekend) and you’re all set!

Here’s how you make them:

Print

Apple Pecan Snack Cookies

These gluten-free Apple Pecan Snack Cookies are a healthy, kid-friendly snack, breakfast or dessert. They're made with coconut and oat flour, full of fresh apples and sweetened with maple syrup.
Print Recipe

5 Stars 4 Stars 3 Stars 2 Stars 1 Star

5 from 1 review

These Gluten-Free Apple Pecan Snack Cookies are a healthy, kid-friendly snack, breakfast or dessert. They’re made with coconut and oat flour, full of fresh apples and sweetened with maple syrup.

  • Author: Lindsay
  • Prep Time: 8 min
  • Cook Time: 12 min
  • Total Time: 20 minutes
  • Yield: Makes 16 cookies 1x

Ingredients

Scale
  • 2 large eggs
  • 1/4 cup almond butter
  • 1/3 cup maple syrup
  • 1 tsp vanilla extract
  • 1 cup oat flour (grind rolled oats in food processor, then measure)
  • 3 Tbsp coconut flour
  • 1 tsp cinnamon
  • 1/2 tsp baking soda
  • 1 cup finely chopped fresh apples
  • 1/2 cup chopped pecans

Instructions

Preheat oven to 375 degrees F.

Combine eggs, almond butter, maple syrup and vanilla in a large bowl and mix well. 

Add oat flour, coconut flour, cinnamon and baking soda and stir to combine. 

Stir in apples and pecans. 

Use a cookie scoop to scoop onto baking sheet lined with parchement paper.

Bake at 375 degrees F for 12 minutes.

Notes

Be sure your apples are finely chopped. Large chunks can leave the middles slightly underbaked.

Did you make this recipe?

Tag @theleangreenbean on Instagram

There you have it! Super easy to whip up a batch. Like I mentioned in the recipe, I found in my many tests of this recipe that small chunks of apple work best!

These gluten-free Apple Pecan Snack Cookies are a healthy, kid-friendly snack, breakfast or dessert. They're made with coconut and oat flour, full of fresh apples and sweetened with maple syrup.

[clickToTweet tweet=”Try these Gluten-Free Apple Pecan Snack Cookies for breakfast, snack or dessert!” quote=”Try these Gluten-Free Apple Pecan Snack Cookies for breakfast, snack or dessert!”]

Be sure to check out Nuts.com for nuts, fruit, snack, cooking and baking and more!

Enjoy!
–Lindsay–

Filed Under: Baking, Dessert, Healthy Muffins & Bars, Snack, Sponsored Tagged With: Almond, Apple, Egg, Maple Syrup, Oat Flour, Pecan

Thursday Things – PopSockets

October 19, 2017 by Lindsay 3 Comments

Hi friends!
Time for another round of Thursday Things. Sharing some fun things I’ve discovered recently. Not sponsored, just sharing for fun!

revlon one step hair dryer

Revlon One-Step Hair Dryer & Volumizer (affiliate link)

I bought this after my friend Katy raved about it and I love it! It’s taking a little practice but I can have my hair dry and straight (mostly) in under 10 minutes. Way easier than trying to dry it all and then straighten it.

ChevronHashShift YaoChengDesign

Yao Cheng Designs

I feel like I’ve been using a few too many paper towels lately so I want to get some fun new towels for my kitchen to help remind myself to use them instead. I love so many of the watercolor tea towels on this site. There are also prints, pillows and stationery.

Screen Shot 2017 10 18 at 9.33.28 PM

PopSockets 

Just bought one of these to try out! Anyone ever tried one? I’m interested to see if it makes holding your phone more comfortable. I’ll report back!

1 1

EVEREVE

They just opened this store at the mall near me and I can’t wait to check it out. Such cute stuff. Helllllllo Christmas list!

Screen Shot 2017 10 18 at 10.22.02 PM

Ripple

Have you tried this? I love that it’s plant-based and higher in protein than almond and coconut milk. They also have kid-sized cartons. I think Squish might like the chocolate version as a special treat.

photo

Little Baby Bum

A popular kids you tube channel that we’ve been watching lately. Lots of fun nursery rhyme songs that help kids learn their colors, letters, etc. Squish loves it.

wyatt 1000x1000 front

Cuddle + Kind

My friend introduced me to these adorable dolls yesterday. These ethically produced, hand knit dolls come in two sizes and a variety of different animals. AND for every doll sold, the company provides 10 meals to a child in need.

That’s it for this week!

Enjoy!
–Lindsay–

Filed Under: Uncategorized

Frozen Yogurt Pumpkins

October 16, 2017 by Lindsay 3 Comments

These Frozen Yogurt Pumpkins are a healthy, kid-friendly Halloween treat! They’re easy to make and fun to decorate, perfect for a play date or party!

These Frozen Yogurt Pumpkins are a healthy, kid-friendly Halloween treat! They're easy to make and fun to decorate, perfect for a play date or party!

Hi friends!
Just popping in to share a quick Halloween idea with you! Squish and I spent some time in the kitchen on Friday morning making these. It was pretty spontaneous and I wasn’t really planning on sharing them on the blog, but they turned out so cute I just had to share them!

They’re super simple to make and were fun to decorate as well. The base is pretty much just my Pumpkin Yogurt Dip, shaped into pumpkin shapes and then decorated and frozen!

Frozen Yogurt Pumpkins

Pumpkin flavored yogurt shaped into pumpkins and frozen

I took a poll on my InstaStories and the verdict was that whole almonds make a better stem than sliced almonds, but I used a mixture of both. Add a couple pumpkin seeds for the leaves and then decorate. You can make jack-o-lantern faces with kids that are a bit older or just let the little kids go crazy decorating!

Pumpkin Yogurt decorated as jack-o-lanterns and frozen

Since I randomly thought of these at 7am on a Friday, I didn’t make a special trip to the store…so we just used what I had on hand to decorate. Some favorites were chocolate covered sunflower seeds, white and regular chocolate chips, and dried cranberries and blueberries.

If you were feeling extra ambitious, you could even pipe faces within the pumpkins and then fill in around them so you’d have holes for the eyes, mouth etc like real pumpkins. I clearly wasn’t feeling that ambitious.

Yogurt mixed with pumpkin, shaped into pumpkins and decorated with candy

I make mine pretty thin so they would freeze quickly but you could always make them thicker if you wanted to! They were so easy to make that Squish could do most of it by himself.

Here’s the official directions:

Print

Frozen Yogurt Pumpkins

These Frozen Yogurt Pumpkins are a healthy, kid-friendly Halloween treat! They're easy to make and fun to decorate, perfect for a play date or party!
Print Recipe

5 Stars 4 Stars 3 Stars 2 Stars 1 Star

5 from 1 review

These Frozen Yogurt Pumpkins are a healthy, kid-friendly Halloween treat! They’re easy to make and fun to decorate, perfect for a play date or party!

  • Author: Lindsay

Ingredients

Scale
  • 1 cup plain or vanilla full-fat yogurt
  • 1/2 cup 100% pumpkin puree
  • 1 Tbsp maple syrup (or to taste), optional
  • cinnamon, to taste
  • almonds and pumpkin seeds
  • candy, dried fruit and sprinkles to decorate

Instructions

Mix pumpkin and yogurt in a bowl. Add maple syrup and cinnamon if using. 

Scoop into a ziploc bag. 

Cut off the corner and pipe pumpkin shapes onto a tray lined with parchment paper. 

Loosely fill in the outline with yogurt mixture and use a spoon to spread evenly. 

Add one almond and two pepitas to make stem and leaves. 

Decorate as desired. 

Freeze at least one hour or until frozen and eat!

Store in a ziploc bag or tupperware container in the freezer.

Notes


Did you make this recipe?

Tag @theleangreenbean on Instagram

Aren’t they fun?! Be sure to tag me on social media if you make these so I can see your creations!

These Frozen Yogurt Pumpkins are a healthy, kid-friendly Halloween treat! They're easy to make and fun to decorate, perfect for a play date or party!

[clickToTweet tweet=”Looking for a kid-friendly Halloween treat? Try these Frozen Yogurt Pumpkins!” quote=”Looking for a kid-friendly Halloween treat? Try these Frozen Yogurt Pumpkins!”]

Enjoy!
–Lindsay–

Filed Under: Dessert, Snack Tagged With: Maple Syrup, Pumpkin, Yogurt

Confetti Cauliflower Rice

October 11, 2017 by Lindsay 1 Comment

This vegan Confetti Cauliflower Rice is a healthy, gluten-free recipe. Serve it as a side dish or add some protein to turn it into a main dish for lunch or dinner.

This vegan Confetti Cauliflower Rice is a healthy, gluten-free recipe. Serve it as a side dish or add some protein to turn it into a main dish for lunch or dinner.

Hi friends!
Time for a new recipe. This one is super simple. I actually introduced you to it when I served this Ginger Peach Turkey Tenderloin over Confetti Cauliflower Rice back in August. Since then I’ve made it several more times so I thought it deserved a moment in the spotlight with its own post.

I’ve mentioned before that cauliflower isn’t my favorite vegetable…but there’s something about this chili lime flavor combo that I absolutely love. I use it to flavor corn on the cob as well. My current favorite is this Weber Thai Chili Seasoning, but plain chili powder works as well.

Confetti Cauliflower Rice

This vegan Confetti Cauliflower Rice is a healthy, gluten-free recipe. Serve it as a side dish or add some protein to turn it into a main dish for lunch or dinner.

To help this come together quickly, I chose a few quick cooking veggies like zucchini, red pepper, onion, and corn and mixed it with steamed cauliflower rice. Yep, I buy the steamable frozen bags…just look for one with only cauliflower (and maybe a little salt) on the ingredient list. You could make the cauliflower rice yourself if you’re into that…but I can’t tell you how since I’ve never done it.

Add some lime juice and chili powder at the end and BOOM! The perfect dinner side dish. To add a little protein punch, you could mix in some leftover chicken or turkey or keep it vegetarian by adding some steamed edamame or some tofu.

Here’s how you make it:

Print

Confetti Cauliflower Rice

This vegan Confetti Cauliflower Rice is a healthy, gluten-free recipe. Serve it as a side dish or add some protein to turn it into a main dish for lunch or dinner.
Print Recipe

5 Stars 4 Stars 3 Stars 2 Stars 1 Star

No reviews

This vegan Confetti Cauliflower Rice is a healthy, gluten-free recipe. Serve it as a side dish or add some protein to turn it into a main dish for lunch or dinner.

  • Author: Lindsay
  • Prep Time: 5 min
  • Cook Time: 5 min
  • Total Time: 10 minutes

Ingredients

Scale
  • 1 Tbsp oil (or butter if not vegan)
  • 1 cup diced red bell pepper
  • 1.5 cups diced zucchini
  • 1 cup corn (fresh or frozen)
  • 1/2 cup diced onion (white or red)
  • 2 cloves garlic, minced
  • juice from one small lime
  • 1 tsp chili powder (or thai chili seasoning)
  • 1 bag steamable cauliflower rice

Instructions

Heat oil in a large saute pan. 

Cook cauliflower rice according to package directions. 

Add vegetables to pan and saute over medium-high heat for 5 minutes.  

Stir in cauliflower rice, lime juice and chili seasoning. 

Taste and add more lime juice or seasoning if desired. 

Notes


Did you make this recipe?

Tag @theleangreenbean on Instagram

This is a flexible recipe and the measurements don’t have to be exact. Sub your favorite veggies if you don’t like one of the ones listed above!

This vegan Confetti Cauliflower Rice is a healthy, gluten-free recipe seasoned with chili and lime. Serve it as a side dish or add some protein to turn it into a main dish for lunch or dinner.

[clickToTweet tweet=”Need a new dinner side dish? Try this Confetti Cauliflower Rice seasoned with chili and lime!” quote=”Need a new dinner side dish? Try this Confetti Cauliflower Rice seasoned with chili and lime!”]

Enjoy!
–Lindsay–

Filed Under: Dinner, Side Dish Tagged With: Bell Pepper, Cauliflower, Corn, Garlic, Onion, Zucchini

Tips For Flying With Young Kids

October 9, 2017 by Lindsay 8 Comments

Flying with young kids? Toddlers and babies are a lot of work, but a little planning and preparation before the trip can help make your travel day less stressful.

Flying with young kids? Toddlers and babies are a lot of work, but a little planning and preparation before the trip can help make your travel day less stressful.


Hi friends!
Let’s talk plane rides. Specifically plane rides with young kids in tow. Since the middle of September, we’ve flown as a family (2 adults and 2 kids) from Columbus to Minneapolis and back two times, once for a funeral and once for a wedding. While this isn’t the most elaborate travel plan – it’s a fairly simple, 90-minute direct flight, it’s still time, on an airplane, with two kids under the age of 3.

Flying with young kids? Toddlers and babies are a lot of work, but a little planning and preparation before the trip can help make your travel day less stressful.

Before we left on our first trip, I asked for some tips from fellow parents on my InstaStories. I thought it might be helpful to compile those tips, plus several of my own, into a blog post for other parents who may be preparing to fly with kids. There’s no doubt about it…it can be stressful. Especially for people like me who like to plan and be in control.

All you can really do is your best. Plan and prepare, hope for the best and be ready to deal with the worst.

Traveling with baby in Ergo

First, some important things to note:

  • You can wear a baby in a carrier (like an Ergo) through the metal detector.
  • Babies and toddlers don’t have to take their shoes off.
  • Whoever is wearing baby may or may not have to take their shoes off (definitely not with precheck, but one flight I was able to leave them on even in the regular line)
  • You don’t have to take your ipad out of your bag or out of the case.
  • You don’t have to put the ipad away during takeoff and landing.

Traveling with a toddler

And now some tips:

  • Bring empty water bottles with straws. Fill them at the drinking fountain or buy bottled water near the gate. One tip I got was to buy juice to put in it during takeoff and landing to encourage them to drink to help their ears pop. This would definitely be helpful if your kids aren’t huge fans of just drinking plain water on demand.
  • Download movies ahead of time on Netflix so you don’t have to pay for wifi. However, make sure you also have apps/games downloaded that work without wifi…because if you get on the plane and suddenly Netflix won’t let you log into your account, you’re going to want something else to keep them busy (not that we learned that the hard way or anything….)
  • Also, pack headphones if your kids like using the sound.

Toddler on an airplane

  • If you can, ship diapers and wipes directly to wherever you’re staying. We were staying with family friends and I ordered a package of diapers for each kid on Amazon and had them shipped directly there. That way you don’t have to pack enough diapers for multiple kids for multiple days, which can take up a lot of space.
  • Pack a change of clothes for everyone (including yourself) in the diaper bag in Ziploc bags. Use the ziploc bags to store dirty diapers if you do end up having to change one on the plane. If the baby pukes on you or has a blowout while you’re holding them, you’ll probably be glad you have a fresh shirt! And dress everyone in layers.

Nursing Baby On An Airplane

  • If you are nursing a baby older than about 6 months, and it’s in your budget, I’d definitely suggest buying them their own seat. Even if you end up holding them the whole time. Little Miss is 11 months and extremely long. On our second trip we had a seat for her but for the funeral, since tickets were super expensive to buy on short notice, we didn’t buy her a ticket and it was challenging to nurse her without her head hanging out into the aisle or half her body over the armrest on the stranger next to me.
  • Think carefully about using the infant-in-arms. It’s nice to save money, but having the extra seat as space for a squirmy child can be a lifesaver. You know your child best. If they’re for the most part content to sit in your lap, it might be ok. If they’re constantly squirming and wanting to move, it could be a long ride.
  • Wear what you’re most comfortable in, especially if you’re nursing. On the first flight, for some reason I decided to wear a nursing tank and bra, which I haven’t worn in forever. It was awkward and uncomfortable. I much prefer to just wear a looser shirt and a sports bra that I can easily push up, so that’s what I did the rest of the flights and it went much more smoothly.

Kid With Candy On An Airplane

  • Save a big bribe for the end. Bonus points if it’s salty to get them to drink water on the descent. For us it was m&ms, which I saved in my purse until the last possible moment before a meltdown. Squish had a hard time once we landed with wanting to get off the plane immediately (don’t we all?) so feeding him m&ms one at a time for good behavior helped us pass the time.
  • Pack all the snacks. And then pack some more. My kids are both happiest when they’re fed, so I was ready to provide a steady stream of cheerios, crackers, apples, etc to keep them pleasant and moderately well-behaved. Plus, you never know when you’ll get delayed, stuck on the runaway, etc. Better to be safe than sorry!

Toddler Meltdown At Airport

  • Hope they’ll sleep, but don’t count on it. You can do your best to plan around sleep and nap schedules and yes it’s fabulous if they do end up sleeping, but the reality is, they might not. So be as prepared as you can for them to be awake the whole time. Even though we flew close to naptime for all 4 flights, the baby only slept 15 minutes on one flight and the toddler didn’t sleep at all.
  • Prepare for a meltdown. It will likely happen no matter what. For us it was while waiting for our luggage after we landed at home from our longer trip. Squish went 4 days without a nap and it was oh-so-obvious. We used the divide and conquer method. Hubby waited for our luggage while I took the kids and we rode the moving sidewalk down and back 100 times to keep Squish occupied.
  • On that note, do your best to keep your kids from screaming on the plane, but cut yourself a little slack if they do. Little Miss screamed for a little while during the descent of one flight. Her ears were hurting, she didn’t want to nurse, she didn’t want to eat…I did my best to keep her quiet but mostly kept repeating to myself the reminder that you likely won’t see most of the people on your flight ever again. So maybe they’ll go home and complain about you to their friends, but you’ll probably never hear about it 🙂

Toddler with suitcase

  • Remember that you can gate check your car seats and strollers. On the same note, think about the size of both airports. Columbus is a fairly small airport so not having a stroller for Squish wasn’t a huge deal. However,  Minneapolis is a bit larger and it probably would have been nice to have a stroller to get to our gate coming home instead of carrying a 40+ pound 2-year-old.
  • If you’re unable to pick seats together when buying your tickets, email the airline. I did this before our first flight and they were able to move us so that hubby and Squish had two seats and then Little Miss and I had the aisle and middle across from them instead of being a couple rows apart.
  • And finally, pick your battles. Especially with the toddlers! And tell your hosts to have a beer ready and waiting for you 😉
Toddler ipad on plane

As far as what to pack for plane ride entertainment? Honestly, we probably could have gotten away with just an ipad and snacks on our trips. Squish alternated between movies and games, and I mostly entertained Little Miss with items from my purse and the seat pockets. But, for kids who are not quite as fixated on the ipad, here’s what we brought. The links below are affiliate links, which means if you purchase something using them, I get a small percentage, without any additional cost to you!
  • Melissa and Doug Water Wow! pens/pads
  • Reusable sticker books (I just tore a page or two out with some stickers so I could fold them and they would take up less space then the whole book. Also consider window clings/stickers they could play with on the windows!)
  • Coloring books + crayons
  • ipad + headphones with movies and games downloaded
  • Painters tape (they can stick it anywhere and it comes off easily!)
  • Squigz (suction cup toys that can stick to tray tables, arm rests, etc
  • Books
  • binkies/blankies
  • A few new toys they haven’t seen before!
  • Snacks: Annie’s bunny grahams, Annie’s cheddar bunnies, cereal (Cheerios & Love Grown), apples and m&m’s for the kids, trail mix, jerky and KIND bars for the adults.
  • Empty water bottles

I tried to limit things like crayons/markers/toys with wheels (basically anything that could easily roll away when dropped) to just a few since the kids were so young and drop them frequently, but those would be good options as they get a little bit older.

Flying with young kids? Toddlers and babies are a lot of work, but a little planning and preparation before the trip can help make your travel day less stressful.

[clickToTweet tweet=”Flying with young kids? Here are some tips for making your travel day less stressful.” quote=”Flying with young kids? Here are some tips for making your travel day less stressful.”]

That’s all I’ve got. Have you traveled with young kids recently? Leave your tips in the comments!!

Enjoy!
–Lindsay–

Filed Under: Kids

Shrimp Curry Noodle Bowls

October 4, 2017 by Lindsay 4 Comments

This recipe for Shrimp Curry Noodle Bowls is quick, healthy and perfect for dinner on a busy night. Ready in 15 minutes, it’s packed with veggies and full of flavor!

This recipe for Shrimp Curry Noodle Bowls is quick, healthy and perfect for dinner on a busy night. Ready in 15 minutes, it's packed with veggies and full of flavor!

Thanks to the National Fisheries Institute for sponsoring this post.

Hi friends!

Let’s talk dinner today, shall we? Specifically healthy dinners that can be made quickly to avoid dinnertime meltdowns! Because I’m in desperate need of those at my house.

As you may recall, I’ve been working with my friends at the National Fisheries Institute for the past couple of years to share some easy seafood recipes like this Grilled Foil Packet Tilapia with Pesto Veggies, this Sheet Pan Italian Salmon with Green Beans and these Easy Tuna Melts.

Last year, they launched a seafood education initiative called Dish on Fish to help educate Americans about the importance of eating seafood and to encourage seafood consumption so be sure to follow them if you’re looking for easy ways to eat more seafood! You can find them on Pinterest, Twitter and Facebook.

This recipe for Shrimp Curry Noodle Bowls is quick, healthy and perfect for dinner on a busy night. Ready in 15 minutes, it's packed with veggies and full of flavor!

Did you know that the most recent 2015-2020 Dietary Guidelines For Americans recommend all Americans eat at least 2-3 servings (8 ounces) of seafood, which includes fish and shellfish, per week?

I’ve given you a few recipe ideas for fish so today we’re moving on to shrimp! It’s one of my go-to proteins when I need a healthy protein option that cooks in a hurry. Plus shrimp taste good hot and cold!

For this recipe, I decided to put a spin on one of our favorites – curry- by using a noodle base instead of serving it over rice like I usually do. And to make it even more fun, I combined two types of veggie noodles – spiralized zucchini and sweet potato – with rice noodles for a fun way to add extra veggies. Paired with some of my favorite curry staples like spinach, peas and coconut milk, these shrimp curry noodle bowls are a fun twist on traditional curry.

This recipe for Shrimp Curry Noodle Bowls is quick, healthy and perfect for dinner on a busy night. Ready in 15 minutes, it's packed with veggies and full of flavor!

I used mild curry paste since my almost-one-year-old LOVES curry but you could use medium or hot to give it a spicy kick! You could also sub your favorite veggie noodles – squash or carrot would be good! And if you’re not a rice noodle fan, you could leave those out completely!

Here’s how you make it:

Print

Shrimp Curry Noodle Bowls

This recipe for Shrimp Curry Noodle Bowls is quick, healthy and perfect for dinner on a busy night. Ready in 15 minutes, it's packed with veggies and full of flavor!
Print Recipe

5 Stars 4 Stars 3 Stars 2 Stars 1 Star

5 from 1 review

This recipe for Shrimp Curry Noodle Bowls is quick, healthy and perfect for dinner on a busy night. Ready in 15 minutes, it’s packed with veggies and full of flavor!

  • Author: Lindsay
  • Prep Time: 5 min
  • Cook Time: 10 min
  • Total Time: 15 minutes
  • Yield: serves 4

Ingredients

Scale
  • 1 pound shrimp, peeled and deveined
  • 2 cloves garlic
  • 1 tsp fresh ginger, grated (or ginger paste)
  • 2 cups spiralized zucchini
  • 2 cups spiralized sweet potato
  • 3 ounces rice/stirfry noodles
  • 1 cup frozen peas
  • 1 can coconut milk (full fat or reduced fat)
  • 3 Tbsp red curry paste (mild or hot)
  • 2 cups fresh baby spinach
  • optional – dried hot chilis

Instructions

Cook rice noodles according to package directions.
In a large dutch oven, saute garlic, ginger, sweet potato noodles and shrimp for 2 minutes. 

Add zoodles, coconut milk, curry paste and peas. 

Bring to a boil, reduce heat and simmer 10 minutes or until shrimp are cooked and veggie noodles reach desired tenderness. 

Stir in rice noodles and fresh spinach and cook 2 minutes until spinach is wilted. 

Notes


Did you make this recipe?

Tag @theleangreenbean on Instagram

Pretty simple, right? I have the Inspiralizer (affiliate link) and love it to make veggie noodles.


This recipe for Shrimp Curry Noodle Bowls is quick, healthy and perfect for dinner on a busy night. Ready in 15 minutes, it's packed with veggies and full of flavor!


[clickToTweet tweet=”Try these Shrimp Curry Noodle Bowls for a quick dinner ready in 15 minutes!” quote=”Try these Shrimp Curry Noodle Bowls for a quick dinner ready in 15 minutes!”]

Enjoy!
–Lindsay–

This is a sponsored conversation written by me on behalf of Dish on Fish. The opinions and text are all mine.

Filed Under: Dinner, Sponsored Tagged With: Coconut Milk, Ginger, Peas, Red Curry Paste, Rice Noodles, Shrimp, Spinach, Sweet Potato, Zucchini

Sweet Potato Egg Wrap Bites

September 27, 2017 by Lindsay 5 Comments

These Sweet Potato Egg Wrap Bites make an easy, healthy breakfast, lunch or snack. They’re kid-friendly and can be prepped ahead of time so they come together quickly!

These Sweet Potato Egg Wrap Bites make an easy, healthy breakfast, lunch or snack. They're kid-friendly and can be prepped ahead of time so they come together quickly!

Thanks to Handsome Brook Farm for sponsoring this post!

Hi Friends!

If you’ve been following along for a while now, you may remember last year when I shared these Easy Egg Wraps on the blog. They quickly became one of my most popular recipes…and for good reason! They’re so easy and even now, I still make a batch at least once a week.

Most recently, I made a batch with some pasture raised eggs from Handsome Brook Farm and gave them a kid-friendly twist by making them bite-sized and adding some nutritious fillings, making them a perfect option for a breakfast or packing in a lunch box! These bites are packed with healthy fats and protein and will leave kids (and adults) feeling full and satisfied.

These Sweet Potato Egg Wrap Bites make an easy, healthy breakfast, lunch or snack. They're kid-friendly and can be prepped ahead of time so they come together quickly!

So let’s talk about these eggs for a minute, shall we?

Handsome Brook Farm is actually a unique supply network of small organic family farms. All their eggs are American Humane Certified to meet pasture-raised labeling standards.

Handsome Brook Farm Eggs

Here’s a quick terminology review:

  • Cage-free eggs are from hens raised in barns with no access to the outdoors, often with several hens per square foot.
  • Free-range eggs are from hens that live in similar barns, but have limited outdoor access—about 2 sq. ft. per hen (access to grass not guaranteed)
  • Pasture-raised means that the hens do go outdoors to graze and forage, and American Humane certifies that hens have at least 108.9 sq. ft. per hen of room on rotated pasture each (that’s 400 hens to an acre). The hens have plenty of outdoor shade, protection, and water, and protected nests indoors, they are encouraged to spread their wings and wander to their hearts’ content.
  • Organic refers to both the supplemental feed hens receive (regardless of environment) and the land on which they wander (not sprayed with harmful pesticides or herbicides and certified organic).

These Sweet Potato Egg Wrap Bites make an easy, healthy breakfast, lunch or snack. They're kid-friendly and can be prepped ahead of time so they come together quickly!

So, these are eggs you can feel good about buying and about eating! And then you can use them to make these delicious bites for a quick breakfast, lunch or snack the whole family will love!

Here’s how you do it. So easy and you can make as many or as few as you want!

Print

Sweet Potato Egg Wrap Bites

These Sweet Potato Egg Wrap Bites make an easy, healthy breakfast, lunch or snack. They're kid-friendly and can be prepped ahead of time so they come together quickly!
Print Recipe

5 Stars 4 Stars 3 Stars 2 Stars 1 Star

5 from 1 review

These Sweet Potato Egg Wrap Bites make an easy, healthy breakfast, lunch or snack. They’re kid-friendly and can be prepped ahead of time so they come together quickly!

  • Author: Lindsay

Ingredients

  • Handsome Brook Farm eggs
  • sweet potato slices
  • oil + paprika
  • mashed avocado or guacamole
  • chicken sausage (fully cooked)
  • optional: peanut butter & jelly

Instructions

Crack one egg into a bowl and whisk with fork.

Pour into a hot pan greased with oil or butter and tilt pan to spread egg into a circle.  

Let cook for 30 seconds, flip and let cook 30 seconds more. 

Repeat until you’ve made your desired number of wraps.  

Place thinly sliced sweet potatoes on a baking sheet. Brush with oil and sprinkle with paprika. Bake at 400 degrees F for 16-18 minutes, flipping once, or until soft but not crispy.  

Place two sliced of sweet potato down the middle of an egg wrap. Top with avocado.  

Cut horizontally into 4 strips.  

Add two slices of chicken sausage to each section on top of the avocado and then roll up. 

Alternatively: Place two slices of sweet potato in an egg wrap. Top with peanut butter (and jelly if desired). 

Roll up and cut into 4 bite-sized pieces. 

Notes

You can make the egg wraps and sweet potato slices ahead of time. You can also make guacamole and slice the chicken sausages ahead of time to make these quick and easy to assemble. 

Serve warm or cold.

Did you make this recipe?

Tag @theleangreenbean on Instagram

That’s it! Hope you guys enjoy these!

These Sweet Potato Egg Wrap Bites make an easy, healthy breakfast, lunch or snack. They're kid-friendly and can be prepped ahead of time so they come together quickly!

[clickToTweet tweet=”Try these Sweet Potato Egg Wrap Bites for a quick breakfast, lunch or snack for kids or adults!” quote=”Try these Sweet Potato Egg Wrap Bites for a quick breakfast, lunch or snack for kids or adults!”]


Filed Under: Breakfast, Lunch, Snack, Sponsored Tagged With: Avocado, Chicken Sausage, Egg, Sweet Potato

Crispy Chicken Potato Bowls with Sweet and Spicy Ketchup

September 25, 2017 by Lindsay 1 Comment

These Crispy Chicken Potato Bowls with Sweet Sweet and Spicy Ketchup are cooked on a sheet pan for an easy, healthy dinner recipe the whole family will love. 

These Crispy Chicken Potato Bowls with Sweet Sweet and Spicy Ketchup are cooked on a sheet pan for an easy, healthy dinner recipe the whole family will love. 

Hi friends!

I spent way too long trying to figure out what to title this post. It’s so simple…and so delicious….but does not have a nice concise title that can accurately describe it. Good news is, that’s my problem, not yours.

All you really need to know is that you need to make these ASAP. I’ve made them three times in the past two weeks and they were gobbled up by all four of us each time….so that’s a pretty ringing endorsement.

This dinner is so so easy. It involves two sheet pans, very few ingredients and cleanup is a breeze. Plus it’s served with ketchup that has a little extra zing!

These Crispy Chicken Potato Bowls with Sweet Sweet and Spicy Ketchup are cooked on a sheet pan for an easy, healthy dinner recipe the whole family will love. 

Cooking time is pretty quick – it shouldn’t take more than 20 minutes but will vary slightly depending on what size you cut your chicken and potatoes.

Here’s how you make them:

Print

Crispy Chicken Potato Bowls

These Crispy Chicken and Potato Bowls with Sweet Sweet and Spicy Ketchup are cooked on a sheet pan for an easy, healthy dinner recipe the whole family will love. 
Print Recipe

5 Stars 4 Stars 3 Stars 2 Stars 1 Star

No reviews

These Crispy Chicken and Potato Bowls with Sweet Sweet and Spicy Ketchup are cooked on a sheet pan for an easy, healthy dinner recipe the whole family will love. 

  • Author: Lindsay
  • Prep Time: 10
  • Cook Time: 20
  • Total Time: 30 minutes
  • Yield: serves 4-6 1x

Ingredients

Scale
  • 1.5 pounds boneless skinless chicken cut into bite-sized chunks
  • 2 Tbsp flour
  • 1 egg, beaten
  • 1.5 cups panko bread crumbs
  • 1 tsp paprika
  • 1 tsp garlic powder
  • 3 cups diced red or yellow potatoes
  • 3 cups green beans, chopped
  • oil, salt and pepper to coat vegetables
  • 4 Tbsp ketchup
  • 2 Tbsp sweet thai chili sauce
  • 1 Tbsp rice vinegar
  • 2 tsp sriracha

Instructions

Preheat oven to 400 degrees F.

Place bread crumbs, paprika and garlic powder in a pie tin or shallow bowl and mix well. 

Dredge bite-sized pieces of chicken in flour, dip in egg and then place in bread crumb mixture and toss until well coated. 

Place on half a large foil-lined baking sheet that has been lightly coated with oil. Place green beans on the other half of the sheet. Drizzle with oil and sprinkle with salt and pepper. 

On a second foil-lined baking sheet, place chopped potatoes. Drizzle with oil, stir to coat and sprinkle with salt and pepper. 

Place potatoes in the oven for 8 minutes. Remove and stir. Return to oven.

Add baking sheet with chicken and green beans to oven and cook 8 minutes. Flip chicken pieces, stir green beans and cook 4-6 minutes more or until chicken reaches 165 degrees F.

Meanwhile, mix ketchup, sweet chili sauce, rice vinegar and sriracha in a small bowl. 

Place potatoes and green beans in bowls, top with chicken and serve with ketchup for dipping. 

Notes

You may need to double the ketchup recipe if your family does a lot of dipping. 

Did you make this recipe?

Tag @theleangreenbean on Instagram

It might sound a little complicated with all the steps written out like that but it’s really pretty simple. I put the potatoes in first because they take longer to cook.

These Crispy Chicken Potato Bowls with Sweet Sweet and Spicy Ketchup are cooked on a sheet pan for an easy, healthy dinner recipe the whole family will love. 

Depending on the size of your chicken pieces, they should only take 10-12 minutes to cook. If you don’t have large enough baking sheets, you could cook the chicken first and then do the green beans and potatoes after that.

These Crispy Chicken Potato Bowls with Sweet Sweet and Spicy Ketchup are cooked on a sheet pan for an easy, healthy dinner recipe the whole family will love. 

And don’t skip the ketchup! It’s so good!

[clickToTweet tweet=”The whole family will love these Crispy Chicken Potato Bowls with sweet and spicy ketchup!” quote=”The whole family will love these Crispy Chicken Potato Bowls with sweet and spicy ketchup!”]

Enjoy!
–Lindsay–

Filed Under: Dinner Tagged With: Chicken, Egg, Green Beans, Ketchup, Panko, Potato, Sweet Thai Chili Sauce, White Whole Wheat Flour

  • « Go to Previous Page
  • Page 1
  • Interim pages omitted …
  • Page 20
  • Page 21
  • Page 22
  • Page 23
  • Page 24
  • Interim pages omitted …
  • Page 65
  • Go to Next Page »

Primary Sidebar

Lindsay Livingston The Lean Green Bean Healthy Living Tips and Tricks

I'm a Registered Dietitian and mom of three from Columbus, Ohio. I use this blog to share simple, healthy recipes, nutrition tips, and an honest glimpse of motherhood!

Learn More →

Questions? Comments? Email me: [email protected]

The Lean Green Bean Facebook The Lean Green Bean Instagram The Lean Green Bean Pinterest The Lean Green Bean Twitter The Lean Green Bean Feed
footer-logo
The Lean Green Bean Facebook The Lean Green Bean Instagram The Lean Green Bean Pinterest The Lean Green Bean Twitter The Lean Green Bean Feed
Recipes

Breakfast
Dinner
Snack
Slow Cooker

Kids

Cooking With Kids
Favorite Gifts
Toddler Meals
Indoor Activities

Resources

Easy Packed Lunches for Kids
Dinner Spark
Snack Spark
Ultimate Guide to Food Prep

About

Meet Lindsay
Become an RD
Work with Me

The Lean Green Bean is a participant in the Amazon Services LLC Associates Program, an affiliate advertising program designed to provide a means for sites to earn advertising fees by advertising and linking to amazon.com.
Read the full privacy and disclosure policy here.

Copyright © 2022 · The Lean Green Bean

table talk series

Learn how food affects your body.

Get my free Table Talk email series where I share bite-sized nutrition information about carbs, protein, and fat, plus bonus information about snacks and sugar!

[email protected]