• Skip to main content
  • Skip to primary sidebar

Learn how food affects your body. Get Free Nutrition Info Today

the-lean-green-bean-logo
  • Home
  • Recipes
  • Kids
  • Resources
    • Ebooks
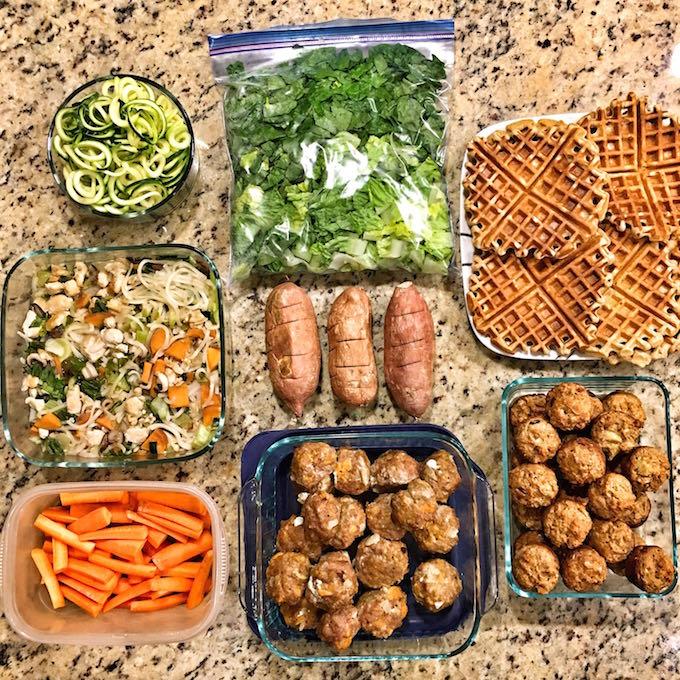
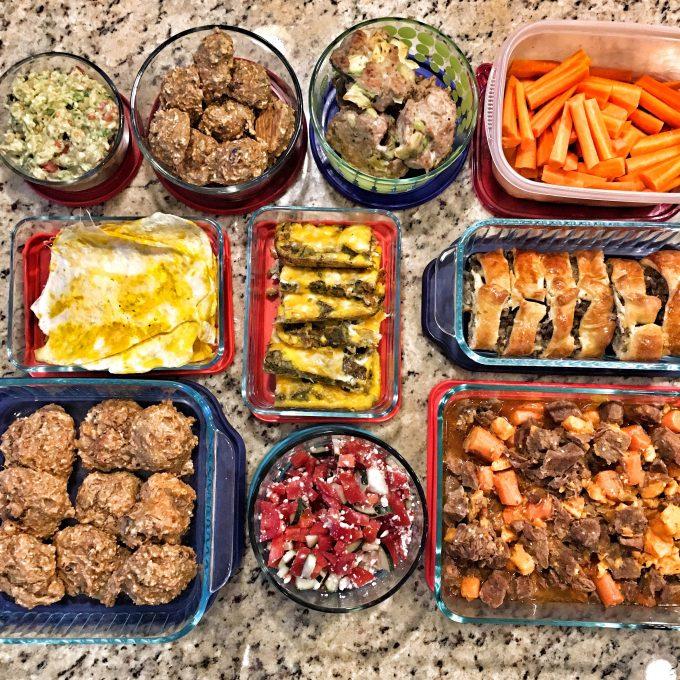
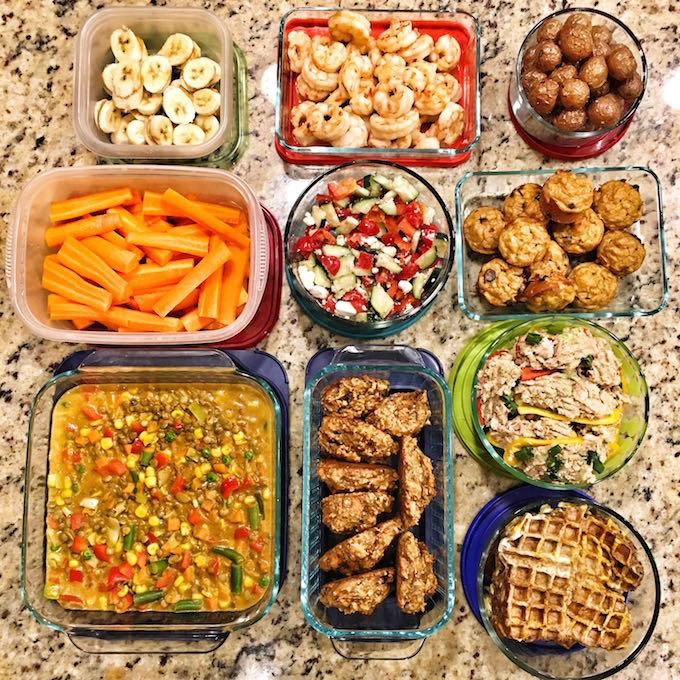
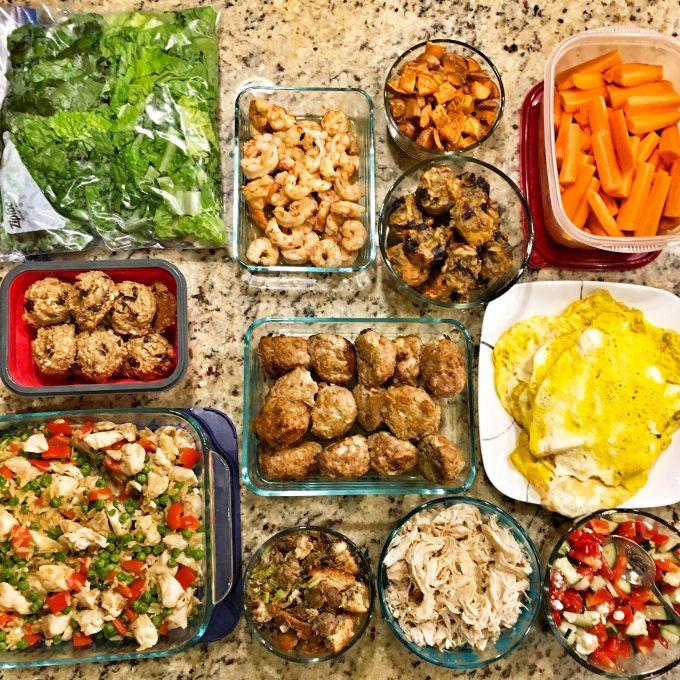
    • Food Prep
    • Videos
    • Snack Round-Ups
    • Gift Guides
  • About
    • Become An RD
    • Work With Me
  • Search
the-lean-green-bean-logo
  • Home
  • Recipes
  • Kids
  • Resources
    • Ebooks
    • Food Prep
    • Videos
    • Snack Round-Ups
    • Gift Guides
  • About
    • Become An RD
    • Work With Me
  • Search

blog

15 Quick Food Prep Dinners

June 16, 2017 by Lindsay 2 Comments

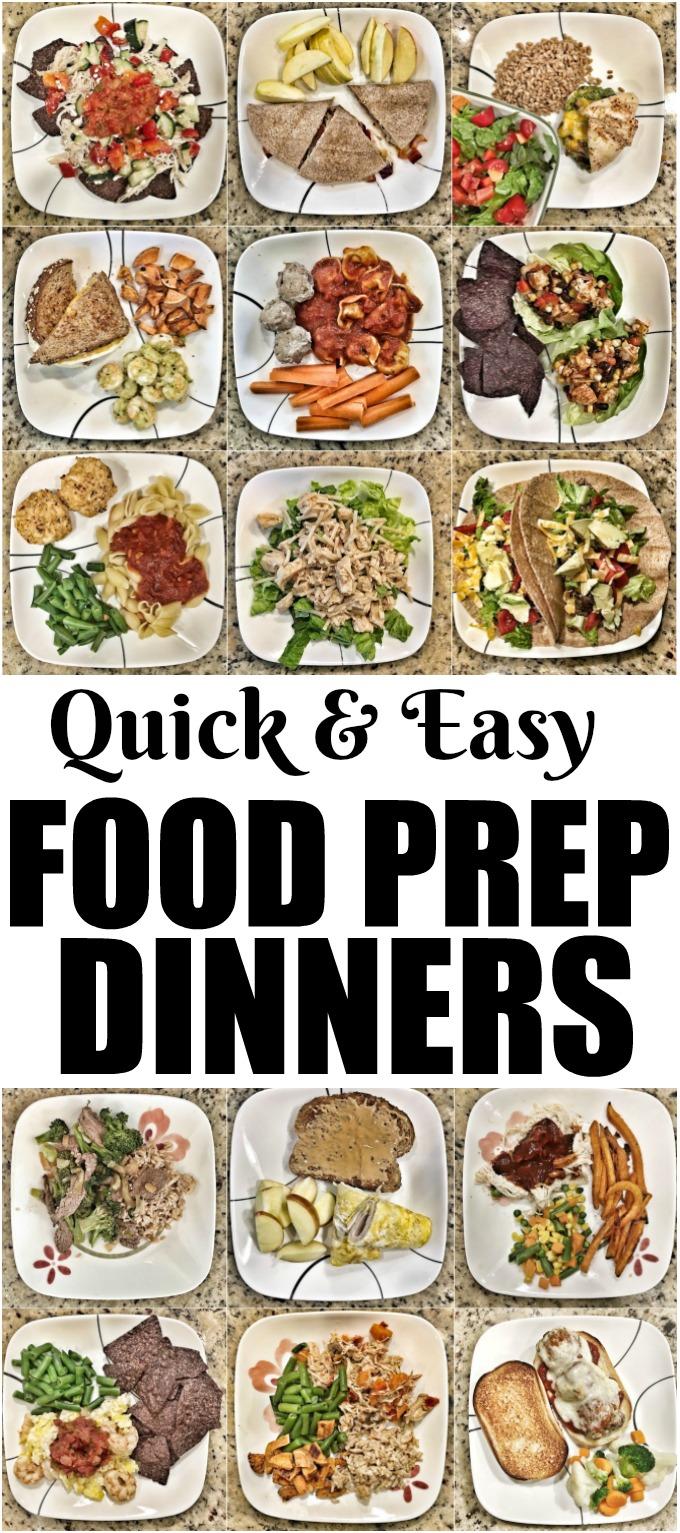
These Quick Food Prep Dinners are perfect for busy nights. Learn what food to prep ahead of time and how to use it to assemble quick and healthy weeknight dinners. 

These Quick Food Prep Dinners are perfect for busy nights. Learn what food to prep ahead of time and how to use it to assemble quick and healthy weeknight dinners.

Hi friends!

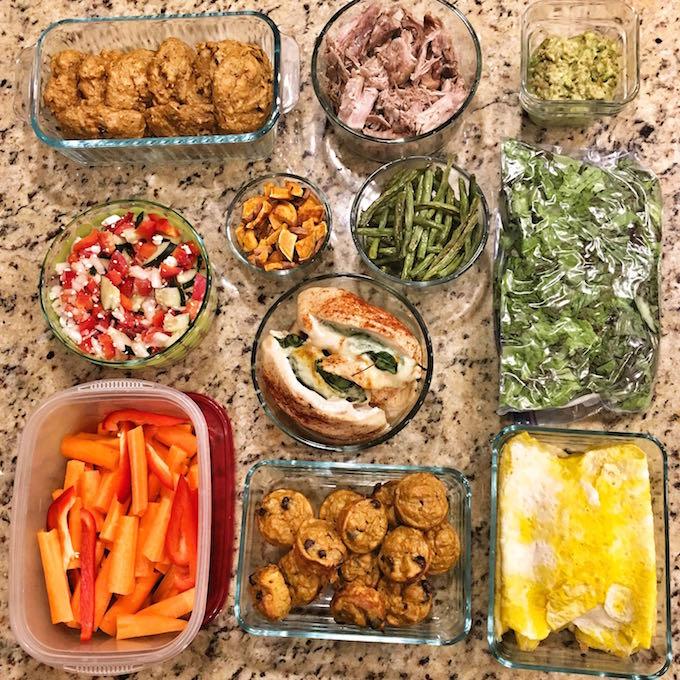
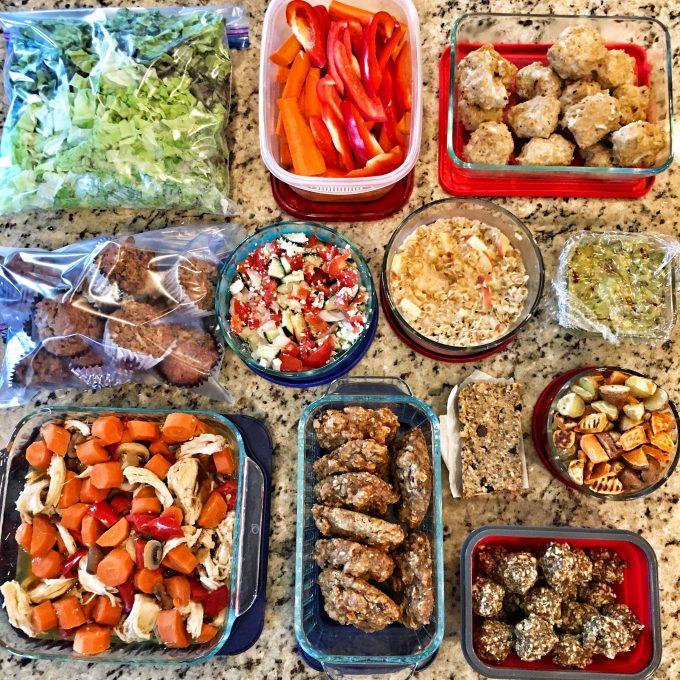
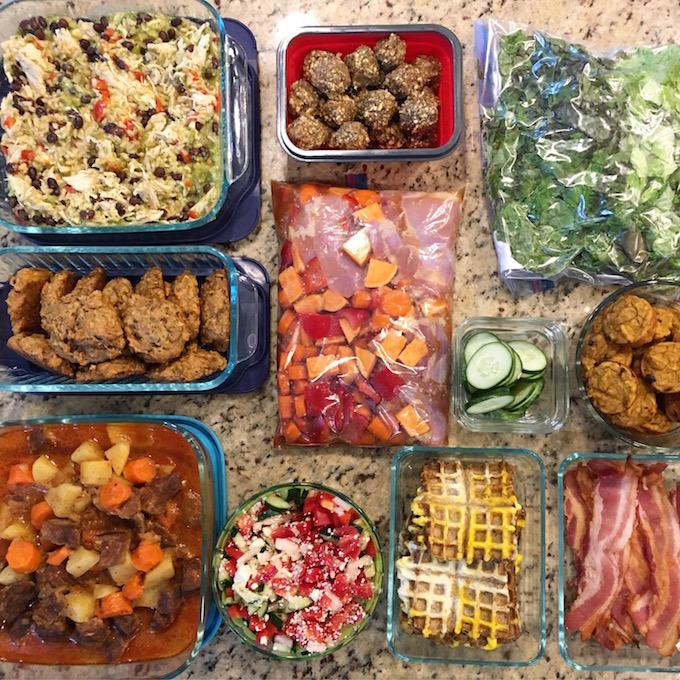
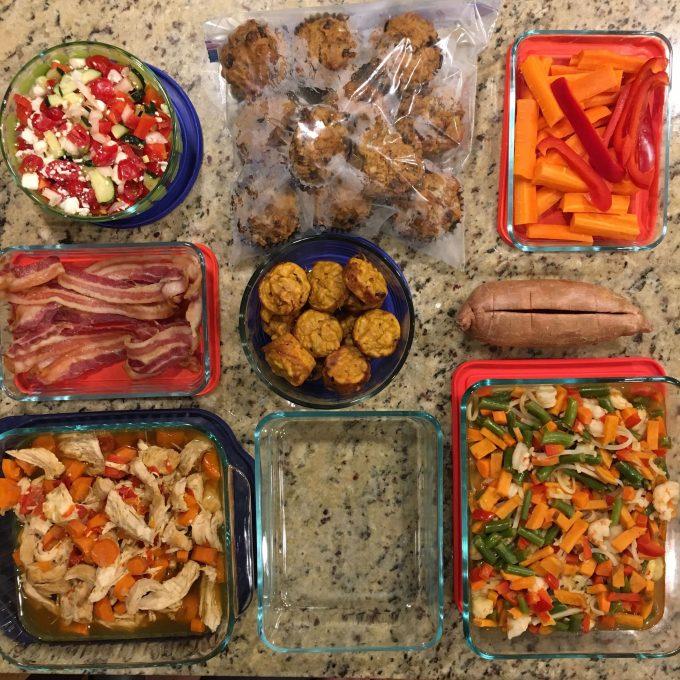
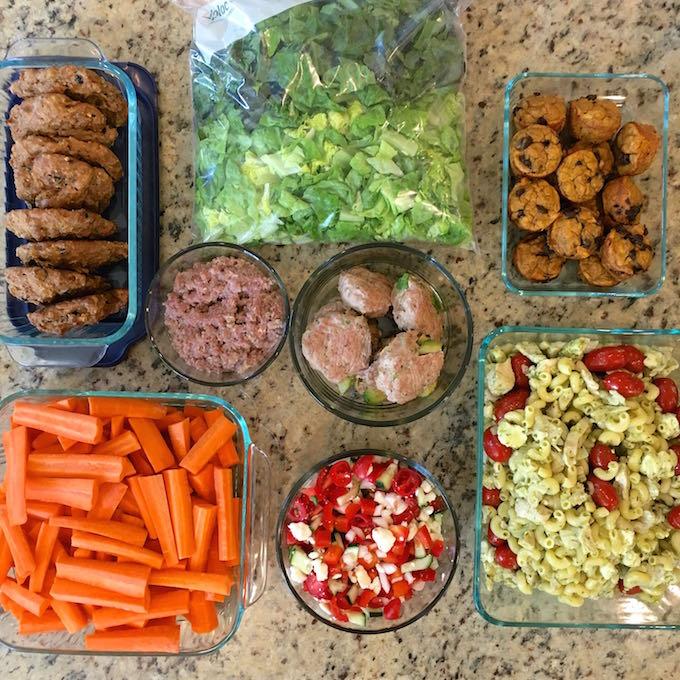
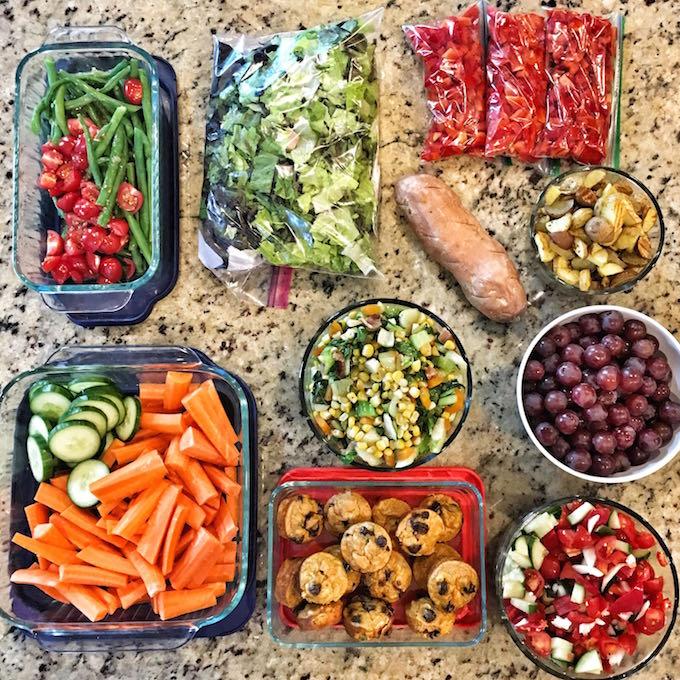
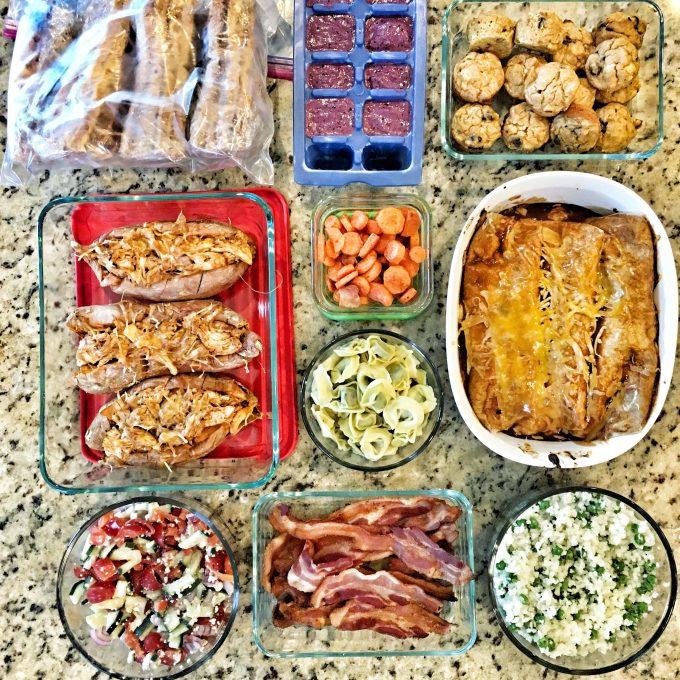
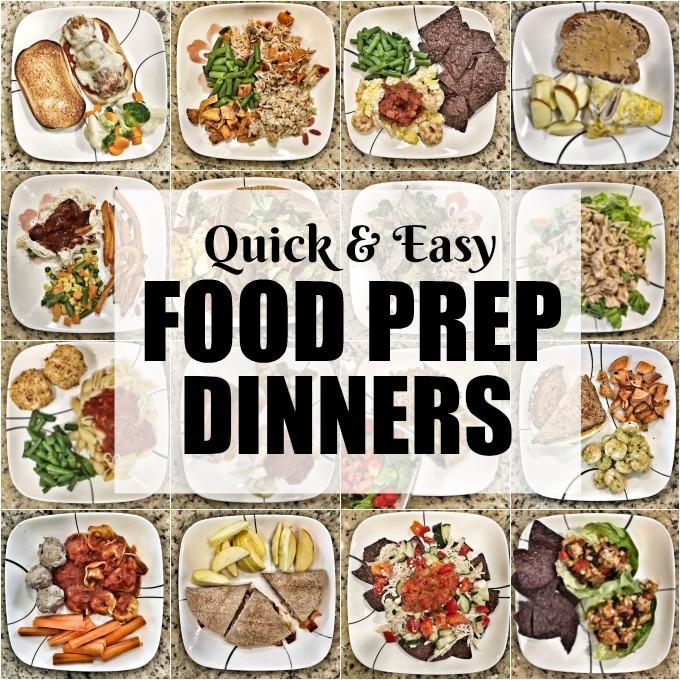
Just popping in with some quick dinner ideas for you. As you know, I tend to focus more on food prepping ingredients during my food prep sessions and then assembling them into quick meals during the week. Some of these use recipes that are on my blog and some are so simple they don’t really require a recipe. So, I rounded up 15 or so of the photos I’ve snapped of our dinner plates over the past few months so I could share them with you guys all in one place.

For each photo I tried to do three things:

  • Tell you what it is
  • Tell you what you can prep ahead of time
  • Tell you how to combine what you prepped with a few other simple steps to make a quick dinner when you’re ready to eat.

There’s no right or wrong way to make these. You could make simple swaps with different kinds of meat or vegetarian proteins based on your preferences or swap in different fruits, vegetables or grains than what’s pictured. My hope is you’ll just use these as a guide to spark some ideas!

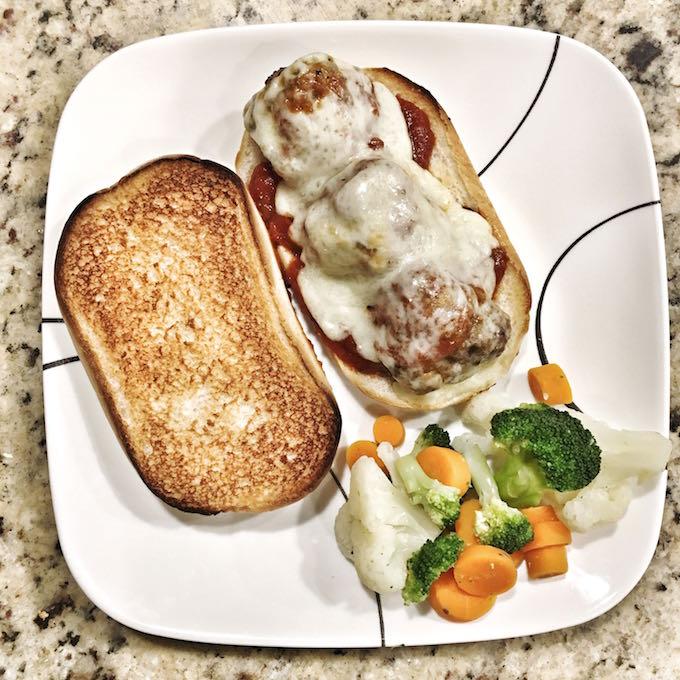
Meatball Subs

Meatball Subs
Prep: Bake meatballs. I often use these Crockpot Meatballs but cook them in the oven at 400 for 20 min, flipping once.
Serve: Add sauce, cheese & broil until warm and melty. Microwave Steamfresh veggies.

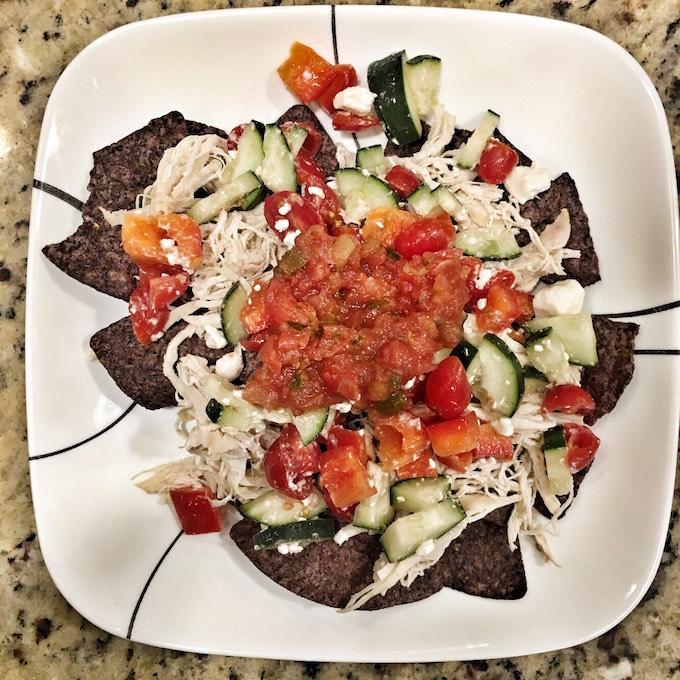
Mediterranean Nachos

Mediterranean Nachos
Prep: Cook plain chicken. I do mine in the crockpot or Instant Pot with some garlic, onions and chicken broth and then shred and store. Chop veggies for Greek Hummus Topping.
Serve: Layer chicken, hummus topping and salsa over chips.

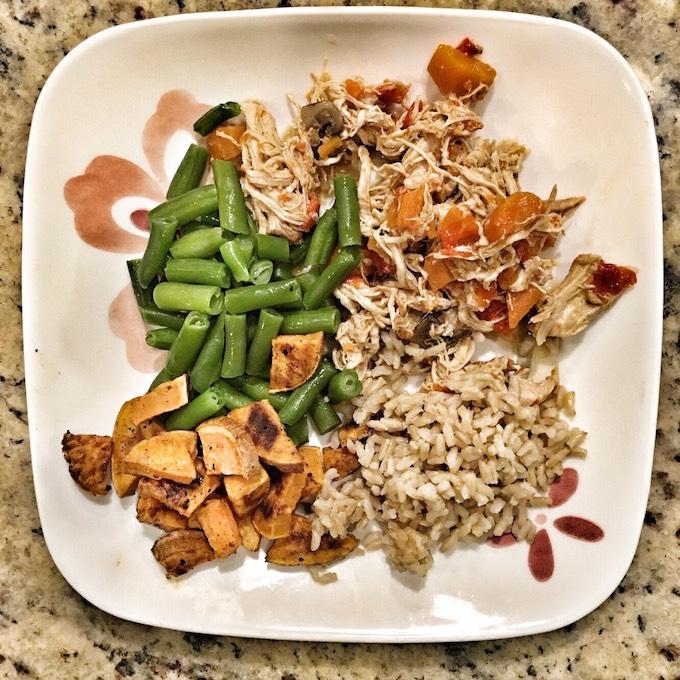
Honey Garlic Chicken Thighs

Honey Garlic Chicken
Prep: Cook Slow Cooker Honey Garlic Chicken Thighs or Instant Pot Asian Chicken and roast sweet potatoes.
Serve: Reheat chicken and sweet potatoes, microwave 90 sec rice and Steamfresh veggies.

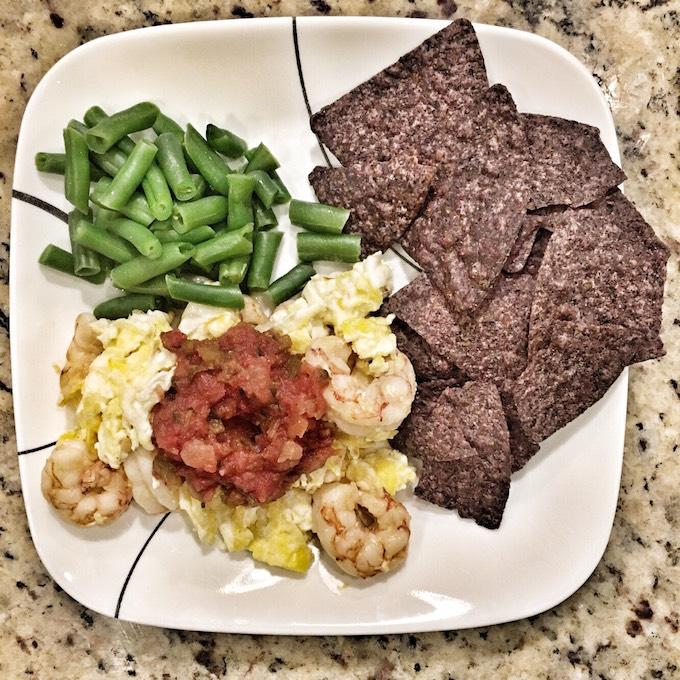
Eggs and shrimp

Shrimp and Eggs
Prep: Saute shrimp with garlic and sweet chili sauce.
Serve: Scramble eggs, add shrimp for last minute to reheat. Top with salsa. Microwave veggies.

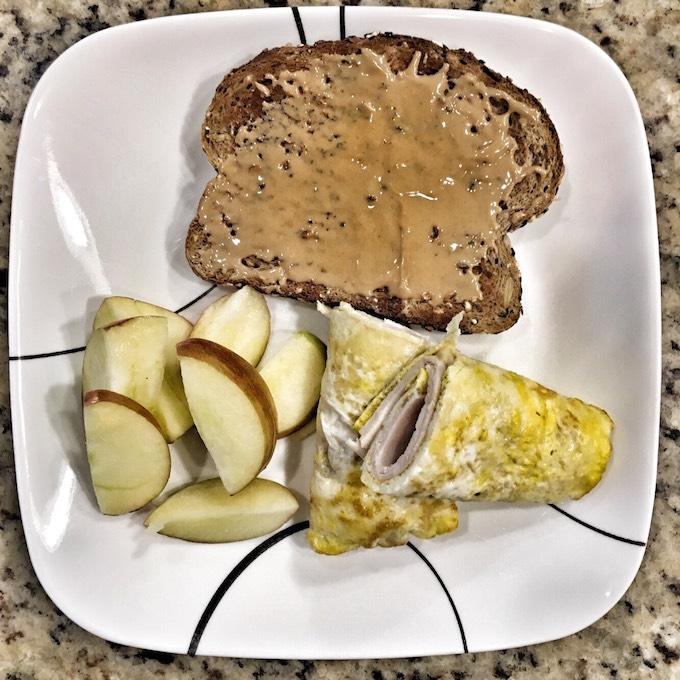
Egg wraps

Turkey & Egg Wraps
Prep: Make egg wraps.
Serve: Add guacamole & turkey to egg wraps, make pb toast & slice apple.

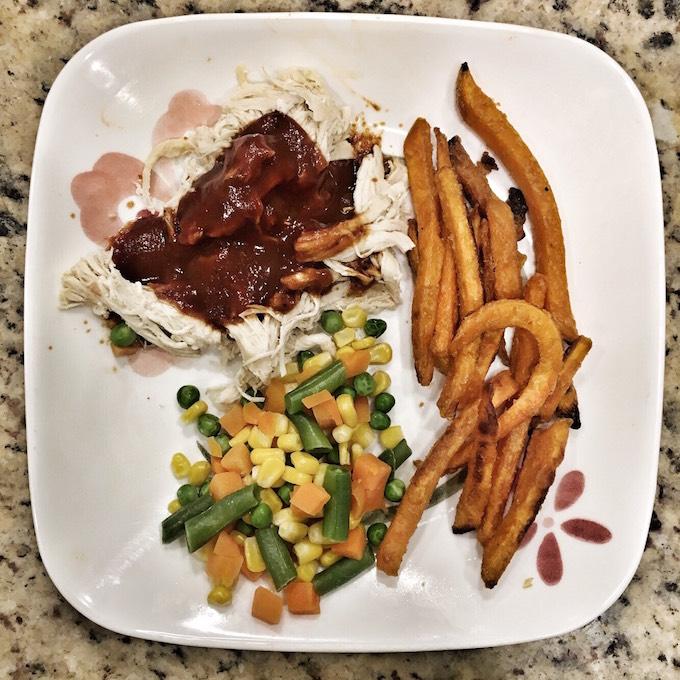
BBQ Chicken

BBQ Chicken with Veggies
Prep: Cook chicken and shred.
Serve: Cook sweet potato fries, add bbq sauce to chicken and microwave veggies.

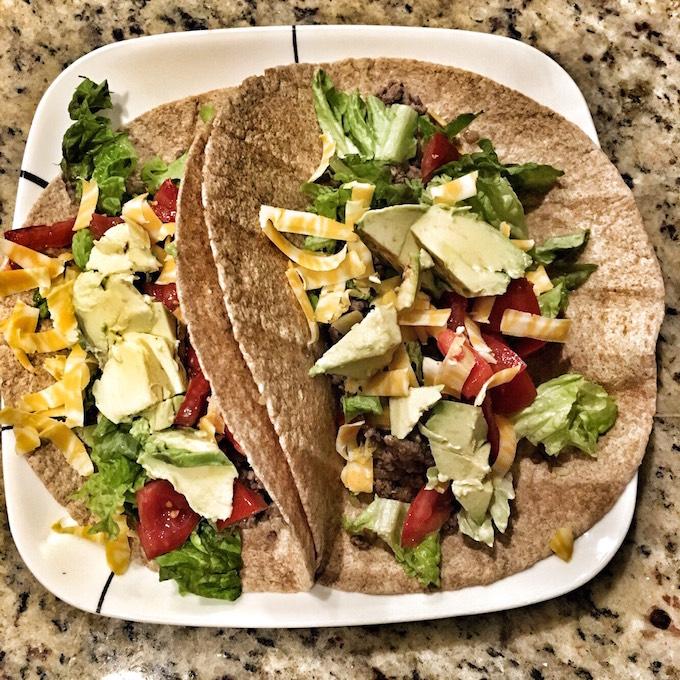
Tacos

Ground Beef or Turkey Tacos
Prep: Cook ground meat and chop lettuce.
Serve: Reheat meat and fill tortillas with meat, lettuce, tomato, cheese and avocado.

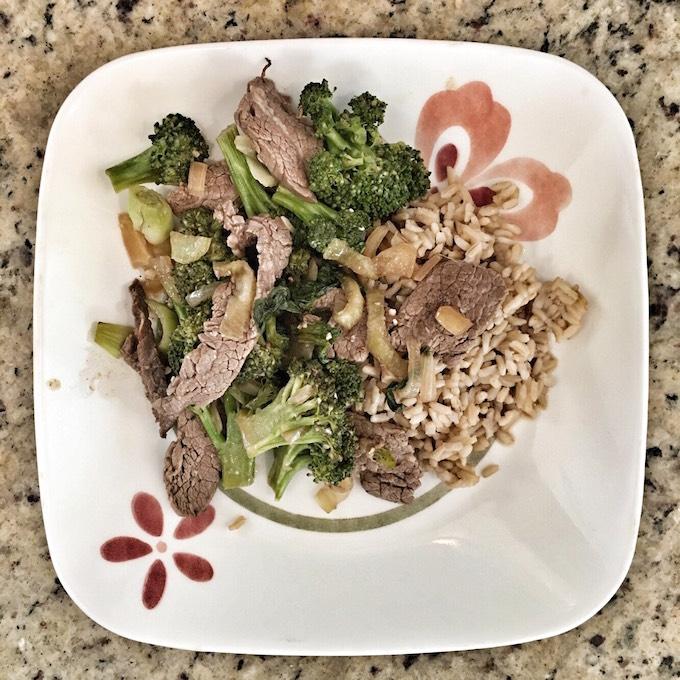
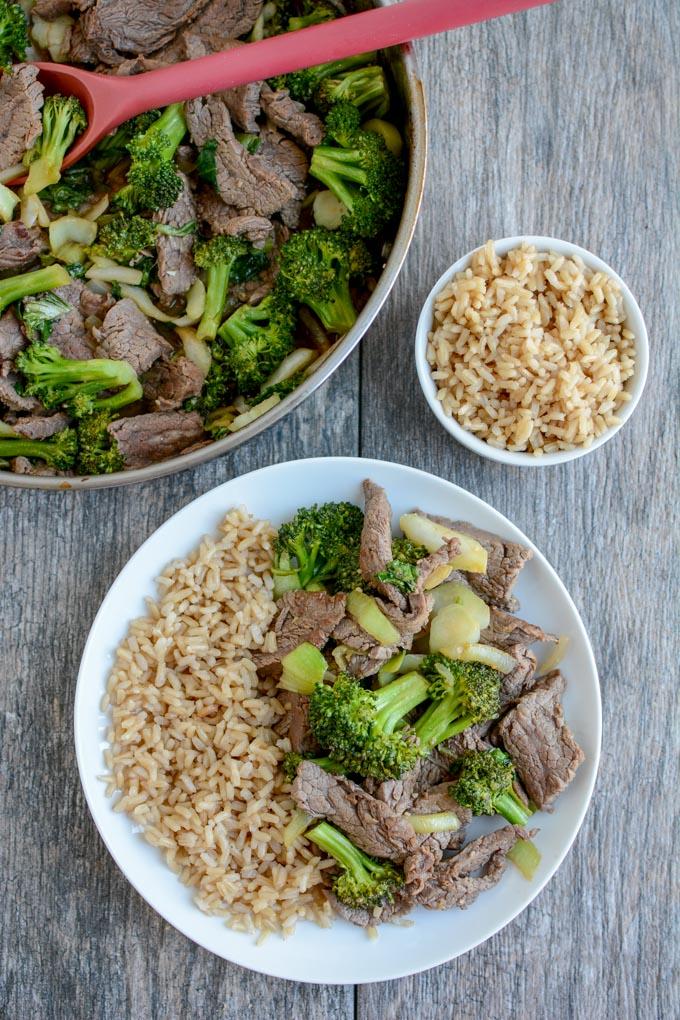
Beef and broccoli

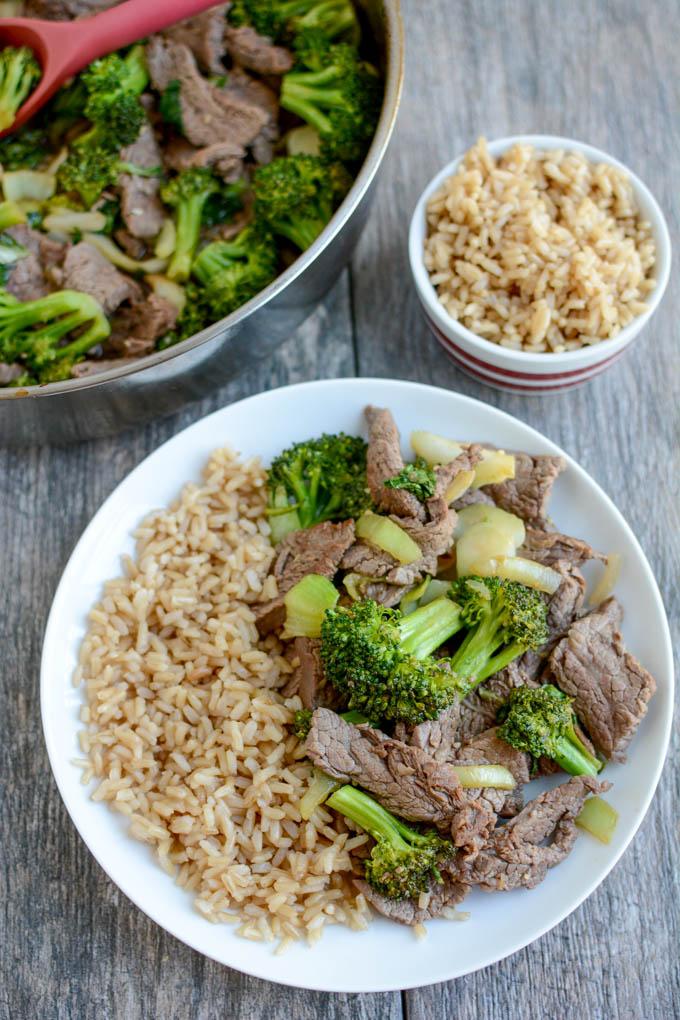
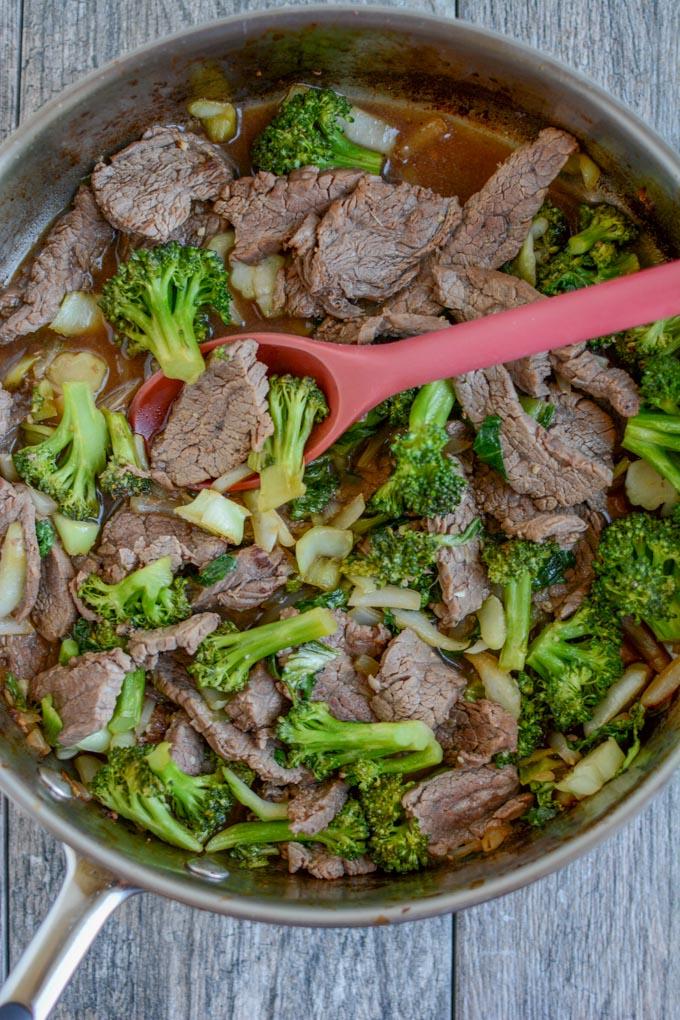
15 Minute Beef & Broccoli
Prep: Assemble Asian Flank Steak Marinade.
Serve: Slice and cook beef, steam broccoli, add sauce and microwave 90-second rice.

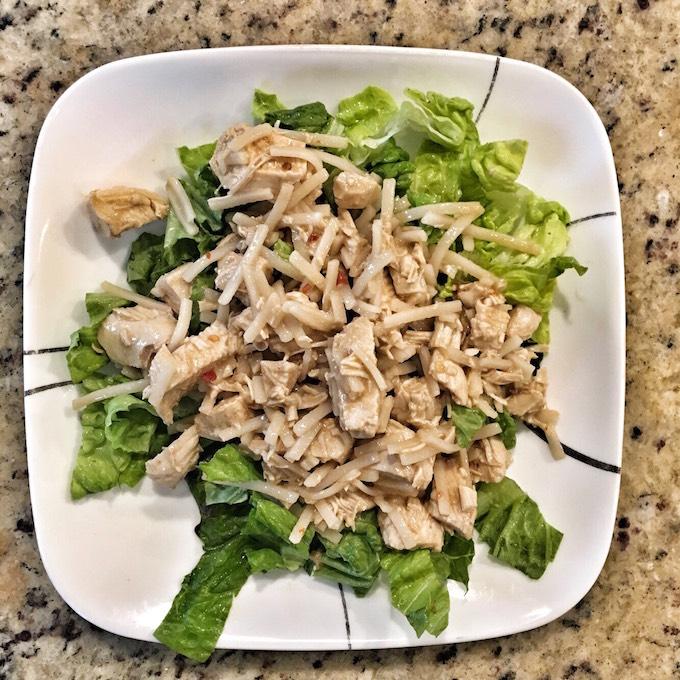
Peanut Chicken

Peanut Chicken Salad
Prep: Cook chicken in the crockpot or oven and prep lettuce.
Serve: Cook rice noodles and make a simple sauce of peanut butter, chicken broth, sweet chili sauce and soy sauce.
Mix sauce with chicken and noodles and serve over lettuce.

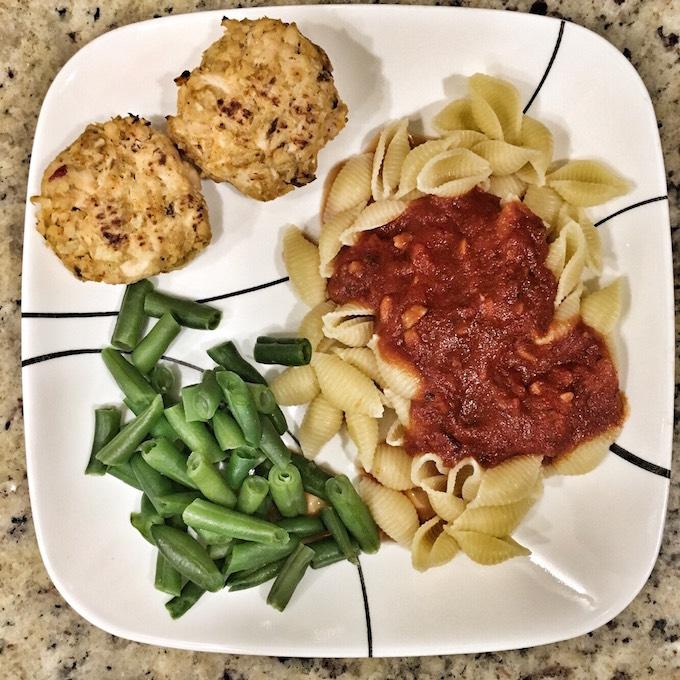
Salmon cakes and pasta

Salmon Cakes & Pasta
Prep: Bake salmon cakes.
Serve: Cook pasta according to package directions, reheat salmon cakes, top pasta with sauce and steam veggies.

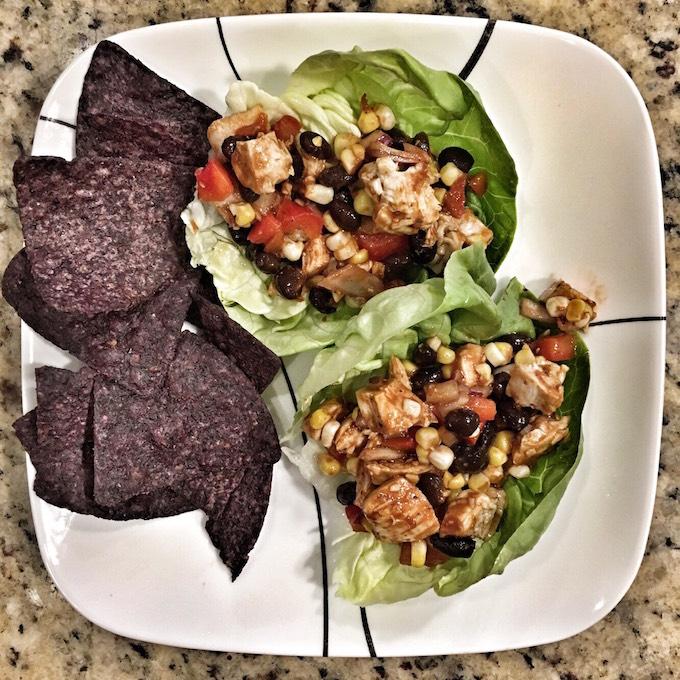
bbq chicken lettuce wraps

BBQ Chicken Lettuce Wraps
Prep: Bake chicken, cube and mix with black beans, corn, peppers, onions and bbq sauce.
Serve: Spoon into lettuce leaves and serve with chips.

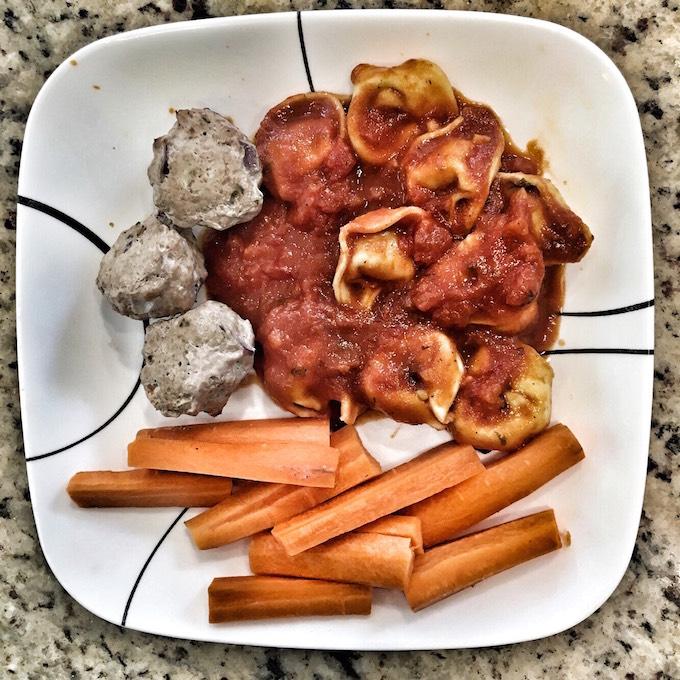
Meatballs and tortellini

Meatballs & Tortellini
Prep: Bake meatballs and chop carrots. (Try these Thai Chicken or Paleo Turkey Sweet Potato Meatballs.
Serve: Cook tortellini, top with sauce, reheat meatballs and add carrots & hummus.

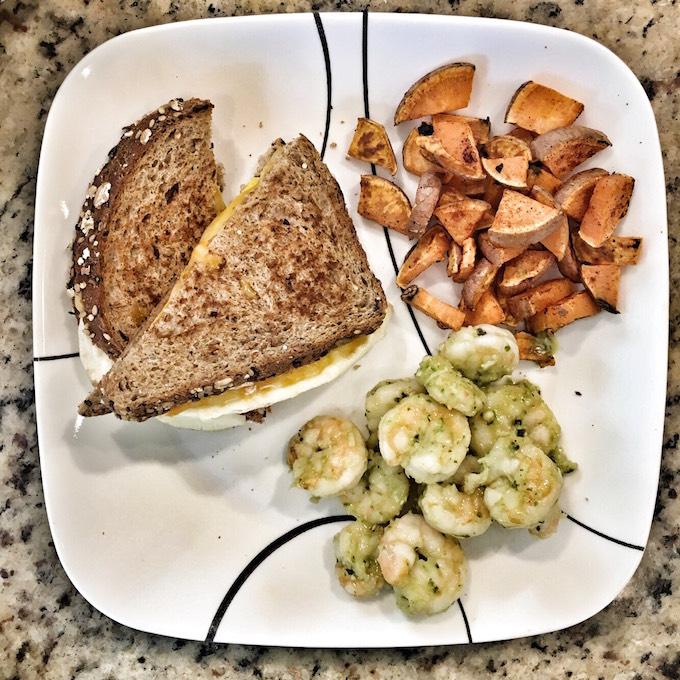
IMG 0162

Pesto Shrimp & Egg Sandwich
Prep: Roast the sweet potatoes and thaw the shrimp.
Serve: Saute shrimp for 5 min and add pesto. Fry an egg, toast bread & top with cheese.

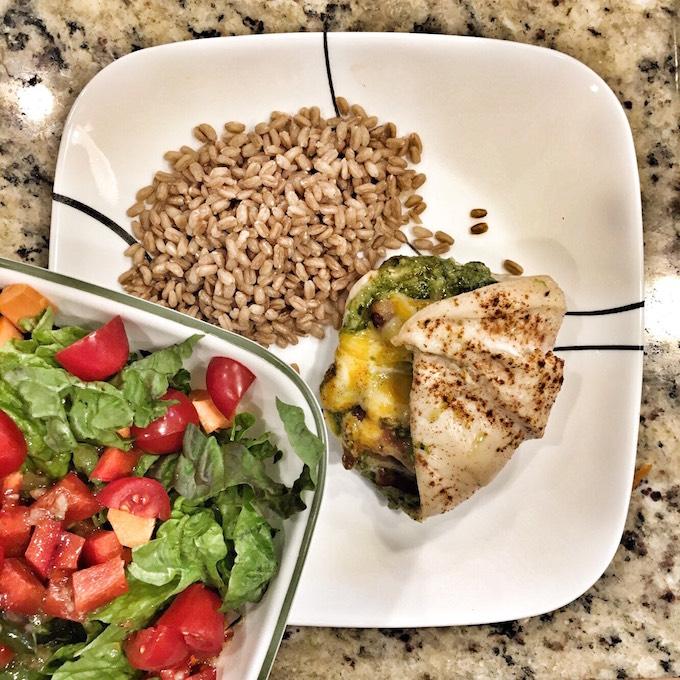
IMG 0163

Pesto & Cheese Stuffed Chicken
Prep: Pound chicken thin, top with pesto & cheese, roll up and bake ahead of time. Cook farro. Chop and wash lettuce.
Serve: Reheat chicken and farro and add toppings to lettuce for a salad.

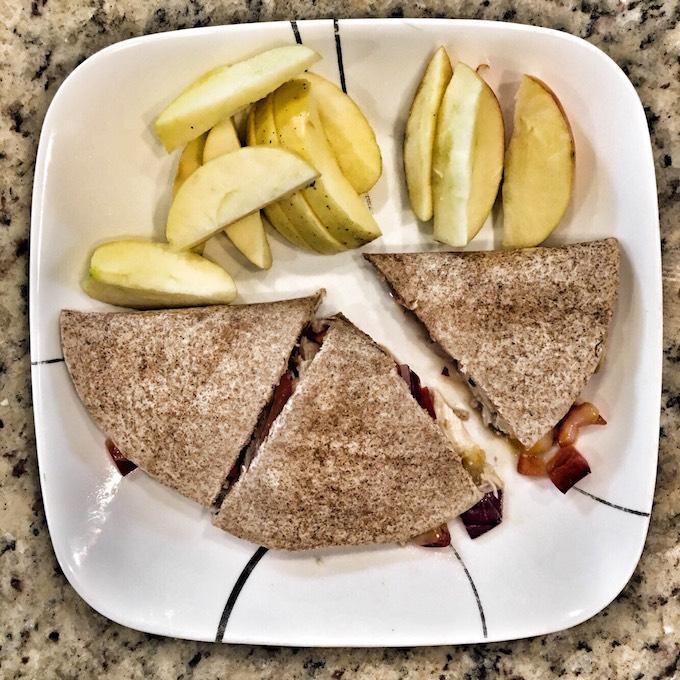
IMG 0164

Chicken & Black Bean Quesadillas
Prep: Cook chicken and chop peppers and onions.
Serve: Put chicken, veggies, black beans and cheese in a tortilla. Microwave or cook in a skillet.

See anything that caught your eye? Pin this post for later!

These Quick Food Prep Dinners are perfect for busy nights. Learn what food to prep ahead of time and how to use it to assemble quick and healthy weeknight dinners.

[clickToTweet tweet=”Try these Quick and Easy Food Prep Dinners. Learn what to prep ahead of time to make easy meals!” quote=”Try these Quick and Easy Food Prep Dinners. Learn what to prep ahead of time to make easy meals!”]

Enjoy!
–Lindsay–

Filed Under: Dinner, Food Prep, Ingredient Round-Ups

A Beginner’s Guide To Food Prep

June 9, 2017 by Lindsay 3 Comments

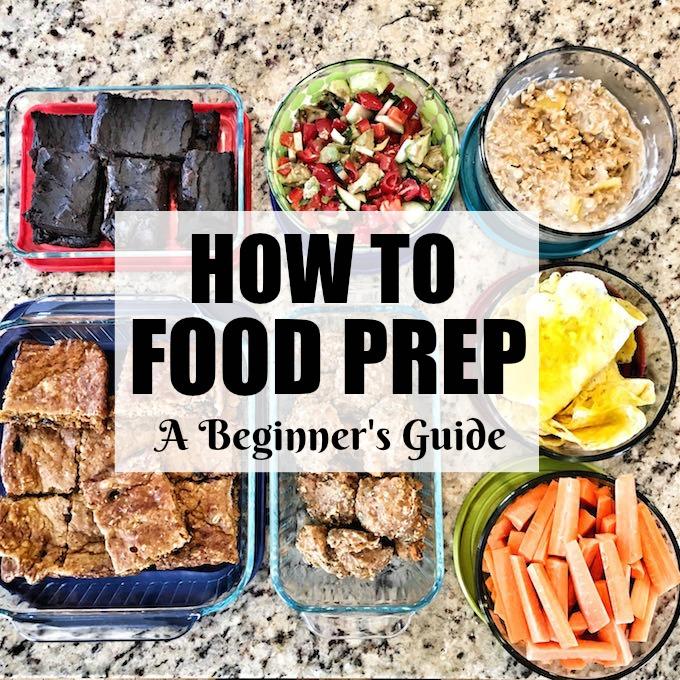
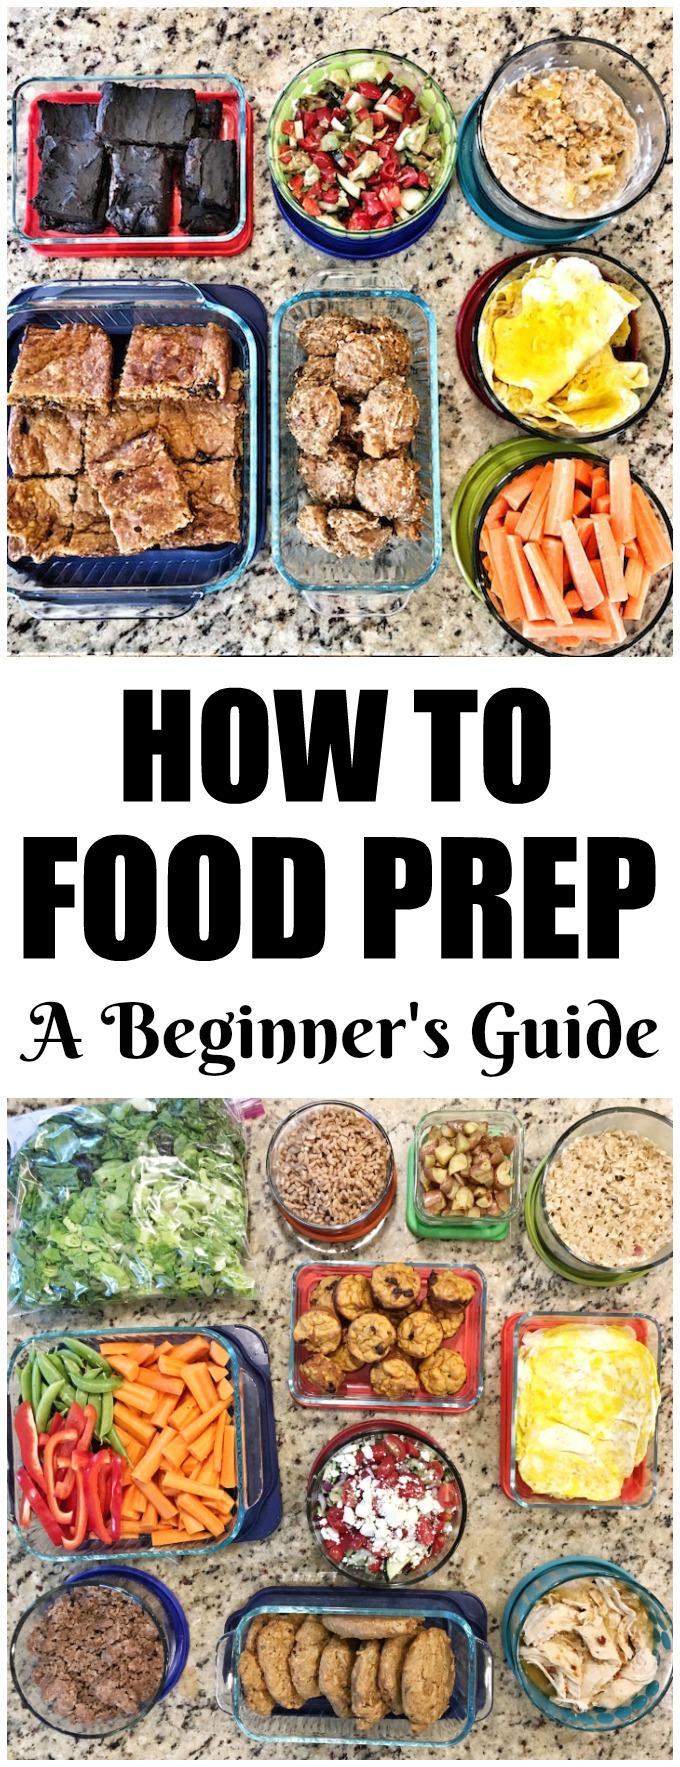
A Beginner’s Guide To Food Prep. Follow these 5 simple steps to learn how to food prep. They will help you get organized and prepared so that your time prepping food is more productive and less stressful. Plus a step-by-step example!

A Beginner's Guide To Food Prep. Follow these 5 simple steps to learn how to food prep. They will help you get organized and prepared so that your time prepping food is more productive and less stressful.

Hi friends!

Just popping in today to share a few quick tips for planning a food prep session, especially for all you beginners out there. A couple weeks ago I taught you guys how to really zone in and figure out what time of day you struggle with the most with eating healthy and I’m hoping some of you did that and are now ready to try food prep! If you’re still feeling a bit overwhelmed, follow these five steps to plan a food prep session that will run smoothly and be productive and organized!

A Beginner’s Guide To Food Prep

Are you ready? Here we go:

  1. Narrow your focus. If you missed it, start by reading my post on how to find your food prep focus area). This is especially important for your first few food prep sessions. The number one reason people give up on food prep is that they try it once, get overwhelmed, spend way too long and get frustrated. And then they never do it again.
  2. Plan it out. Do your research and pick a few recipes you want to make. Be sure to choose recipes that fit your focus area, whether it’s dinner, breakfast, snack time etc. Don’t forget to think about foods that aren’t really recipes but fit into your focus area like chopped veggies, hard boiled eggs etc.
  3. Stock up. Make a list and grocery shop to get everything you need
  4. Get organized. Divide your list into different sections: a) oven b)slow cooker/instant pot etc c) stovetop d) counter. Put everything on your recipe list into a section. Then make a plan about the order you want to do things in (see additional tips below). Be sure to prioritize in order of importance to you.
  5. Get to work. Set a timer to see how long it takes you. If you’ve prioritized your list in order of importance, you can get the most important things done and then stop if it starts taking too long.

how to food prep

A few tips:

  • Don’t go overboard. Most things will probably take you a little longer than you plan for, so don’t be too overzealous.
  • Always focus on the oven first. Start by prepping something so it’s ready to go in as soon as the oven is preheated. As soon as you put something in, prep the next thing while it cooks so it’s ready to go in when the first thing is done. After you’re done prepping things for the oven, move on to things you can start working on the stovetop or in the crockpot or Instant Pot. And finally, fill in any extra time with things you can do on the counter like chopping veggies.
  • Once you start to get the hang of it, you can expand your food prep. Either prep more stuff, or expand from your focus area and try making things for both breakfast AND dinner or lunch AND snack time.

how to food prep

Want an example? Here’s a hypothetical food prep session using these steps!

Step 1: You’ve done your homework and figured out that snack time is your problem area. You decide to do a food prep session to help you prepare some healthy snacks to have on hand for a busy week.

Step 2: After doing some online searching, you decide to prep the following:

  • Lemon Energy Balls
  • Sweet Potato Bites
  • Egg Wraps
  • Green Smoothie Snack Bars
  • Nut-Free Toddler Trail Mix
  • Hummus Topping

Step 3: You make a grocery list which might look something like:

  • Dates
  • Lemon
  • Almonds
  • Pumpkin Seeds
  • Chia Seeds
  • Eggs
  • Peanut Butter
  • Banana
  • Sweet Potatoes
  • Spinach
  • Plain Yogurt
  • Rolled Oats
  • Maple Syrup
  • Cereal
  • Chocolate Covered Sunflower Seeds
  • Red peppers
  • Tomato
  • Cucumber
  • Onion
  • Feta Cheese
  • Hummus

Step 4: You divide your list into areas of the kitchen:

  • Oven – Sweet Potato Bites, Green Smoothie Snack Bars
  • Stove – Egg Wraps
  • Counter – Lemon Energy Balls, Trail Mix, Hummus Topping

And then you plan things out, deciding that the sweet potato bites, snack bars, hummus topping and egg wraps are most important:

  1. Preheat oven, prepare the batter for sweet potato bites. Chop some vegetables for the hummus topping if you have time before the oven is preheated.
  2. Bake Sweet Potato Bites and prep Green Smoothie Bars. Finish chopping vegetables with the remaining time.
  3. Remove Sweet Potato Bites and bake Green Smoothie Bars.
  4. Make Egg Wraps.
  5. Make Lemon Energy Balls
  6. Make Trail Mix if time.

Step 5: Follow your plan! You should have time to make the sweet potato bites, hummus topping, green smoothie bars and egg wraps in an hour. If you have more time, keep going and make the energy balls and then you may or may not decide to skip the trail mix depending on how long you’ve been at it.

A Beginner's Guide To Food Prep. Follow these 5 simple steps to learn how to food prep. They will help you get organized and prepared so that your time prepping food is more productive and less stressful. Plus a step-by-step example!

Make sense? Good! Now hop on the food prep train and go give it a try!

[clickToTweet tweet=”Follow these 5 simple steps to learn how to plan a successful food prep session!” quote=”Follow these 5 simple steps to learn how to plan a successful food prep session!”]

For more tips check out my How To Food Prep – 5 Tips For Beginners post or buy my Ultimate Guide To Food Prep ebook!

Enjoy!
–Lindsay–

Filed Under: Food Prep

Grilled Foil Packet Tilapia with Pesto Veggies

June 7, 2017 by Lindsay 8 Comments

Thanks to the National Fisheries Institute for sponsoring this post.

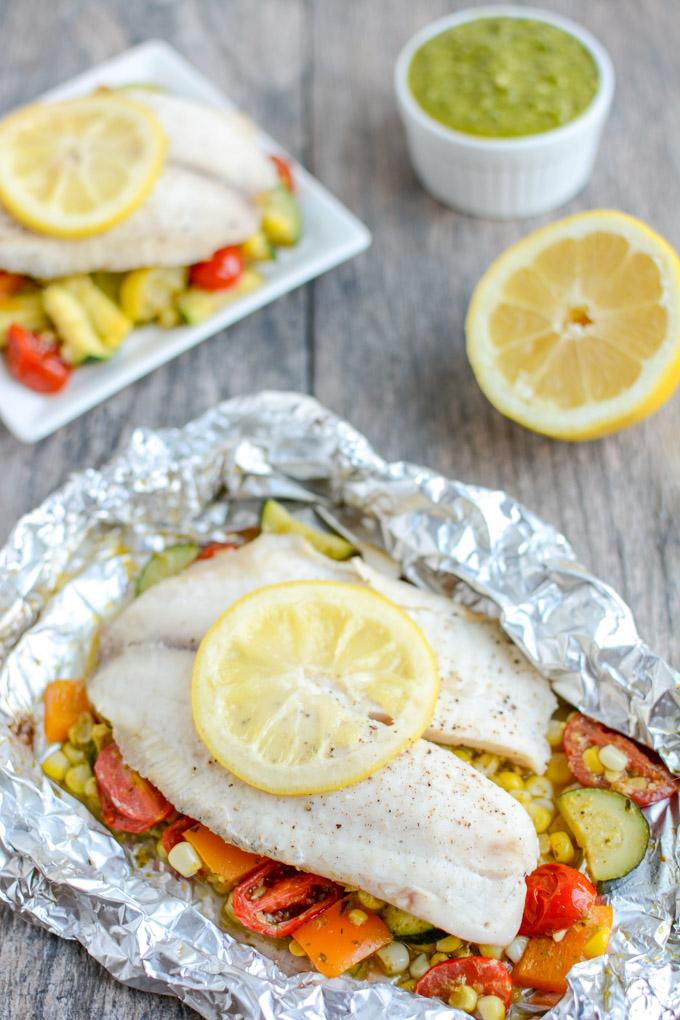
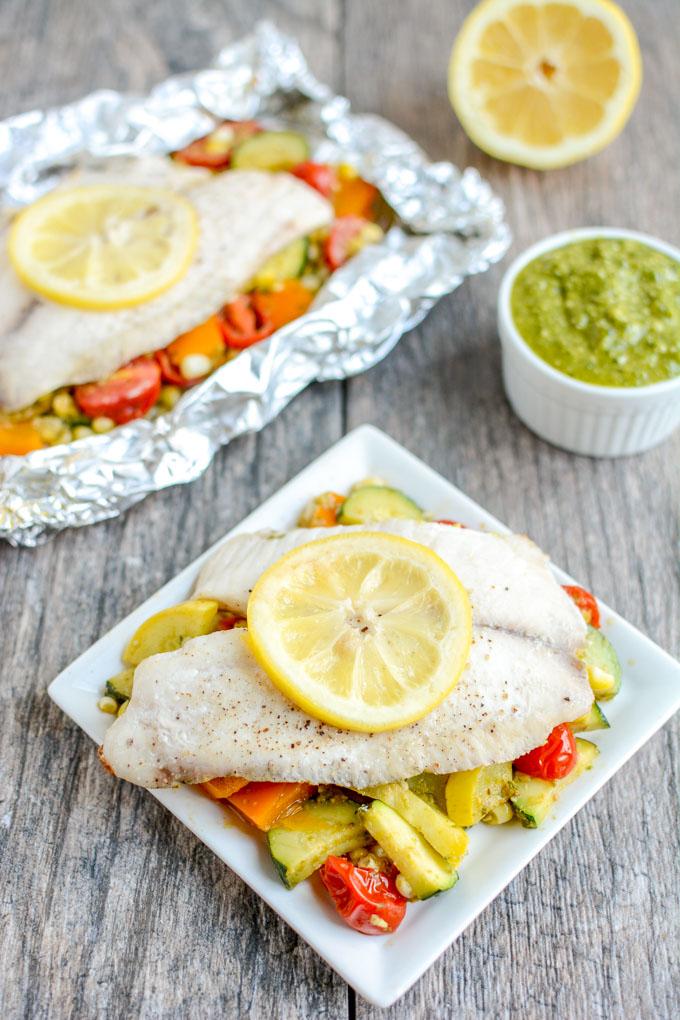
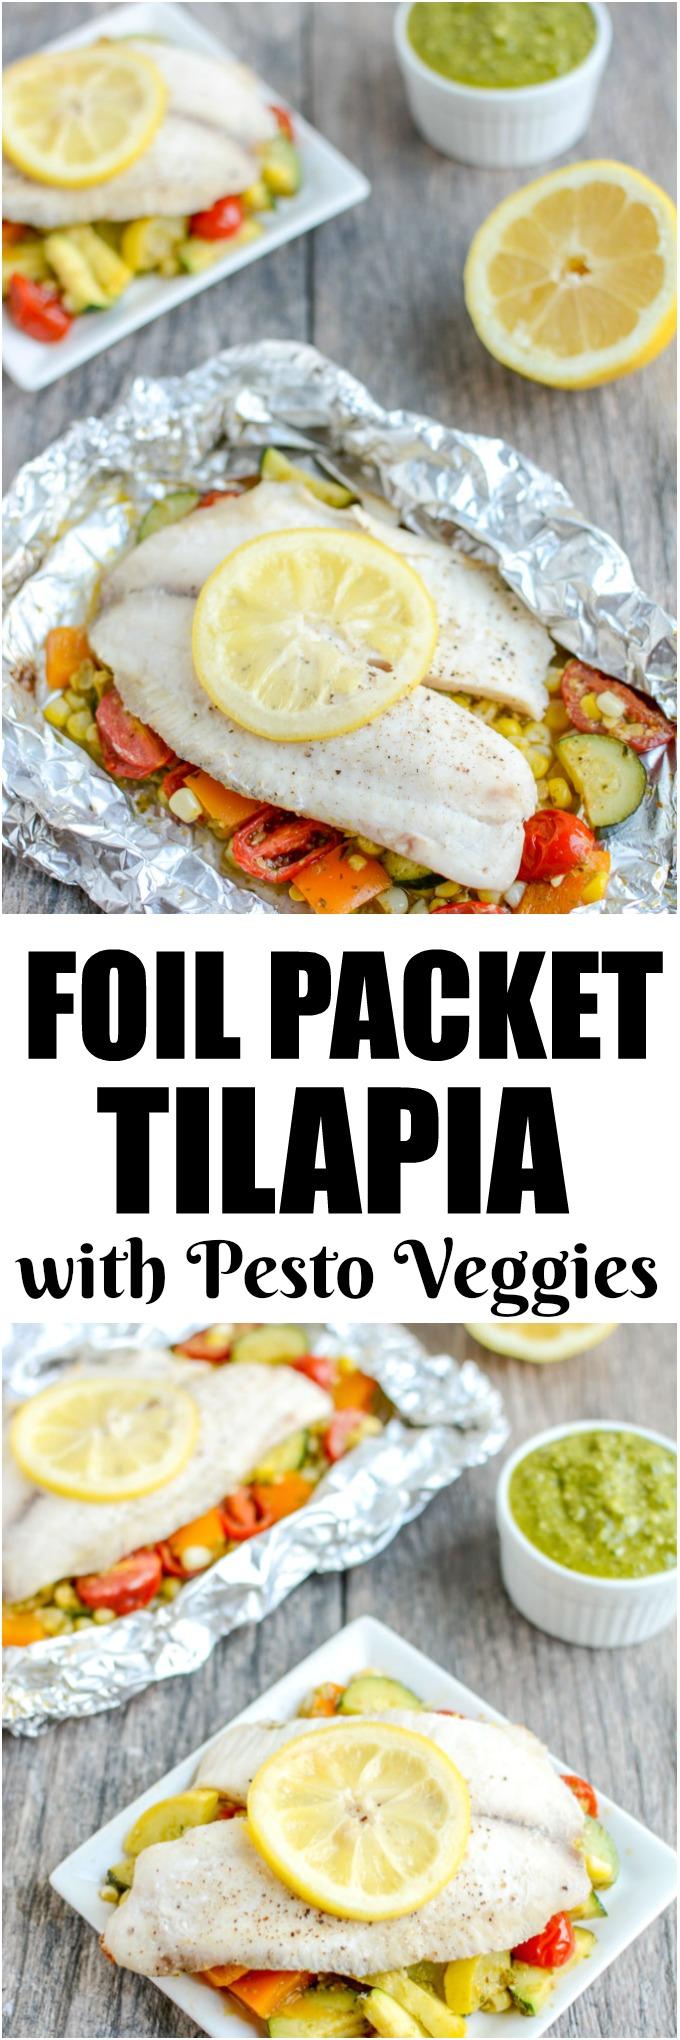
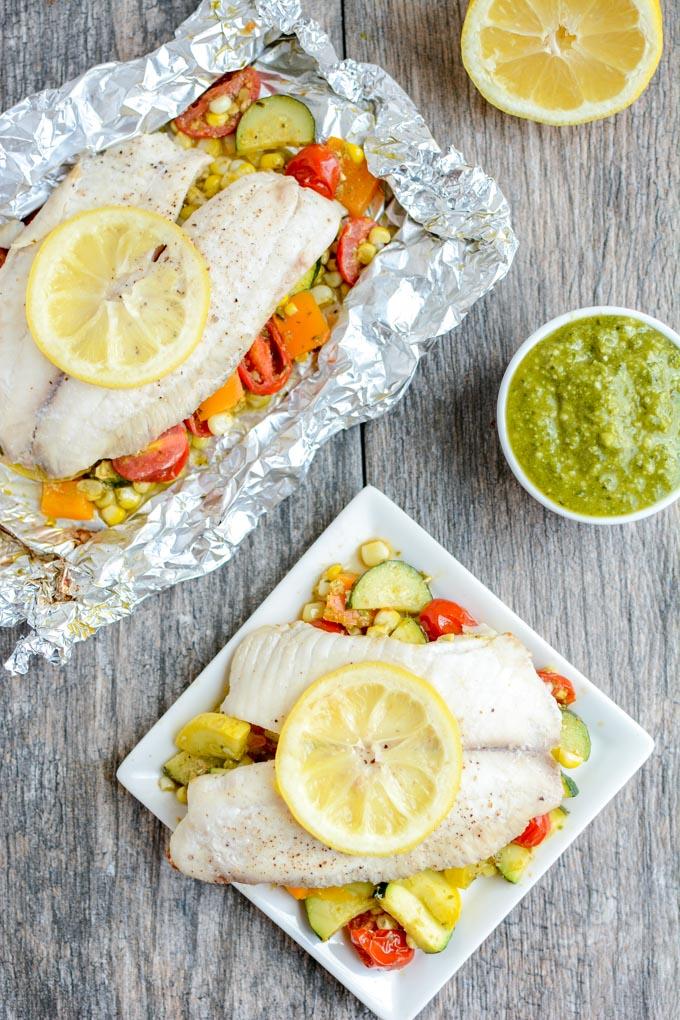
This recipe for Grilled Foil Packet Tilapia with Pesto Veggies is perfect for a summer dinner! It’s quick, easy and healthy, plus cleanup is a breeze!

This recipe for Grilled Foil Packet Tilapia with Pesto Veggies is perfect for a summer dinner! It's quick, easy and healthy, plus cleanup is a breeze!

Hi Friends!

Some of you may remember that over the past year or so I’ve been teaming up with my friends at the National Fisheries Institute to share some recipes. So far I’ve introduced you to these  Quick and Easy Seafood Recipes, this Sheet Pan Italian Salmon and Green Beans and these Easy Tuna Melts! Last year, they launched a seafood education initiative called Dish on Fish to help educate Americans about the importance of eating seafood and to encourage seafood consumption so be sure to follow them if you’re looking for easy ways to eat more seafood!

Today we’re going to talk about grilling! Grilled seafood is the perfect option for summer. It cooks quickly, requires very little prep time and tastes absolutely delicious. If you’re scared about handling the grill, rest assured that these foil packets are so easy that even I can handle them on the grill by myself. Pretty much all you have to know how to do is turn it on!

This recipe for Grilled Foil Packet Tilapia with Pesto Veggies is perfect for a summer dinner! It's quick, easy and healthy, plus cleanup is a breeze!

It’s been so long since I made a foil packet dinner and I forgot just how wonderful they are! Simple to put together, easy to cleanup and this particular one cooks in about 10 minutes. Triple win! All you have to do is chop some veggies, toss them in pesto and scoop them onto foil. Top with tilapia, a simple white fish that cooks quickly, add salt and pepper and lemon, wrap them up and throw them on the grill!

Here’s the recipe:

Print

Grilled Foil Packet Tilapia with Pesto Veggies

This recipe for Grilled Foil Packet Tilapia with Pesto Veggies is perfect for a summer dinner! It's quick, easy and healthy, plus cleanup is a breeze!
Print Recipe

5 Stars 4 Stars 3 Stars 2 Stars 1 Star

5 from 2 reviews

This recipe for Grilled Foil Packet Tilapia with Pesto Veggies is perfect for a summer dinner! It’s quick, easy and healthy, plus cleanup is a breeze!

  • Author: Lindsay
  • Prep Time: 5 minutes
  • Cook Time: 10 minutes
  • Total Time: 15 minutes

Ingredients

Scale
  • 4–6 cups chopped summer vegetables (I used zucchini, peppers, yellow squash, corn, and cherry tomatoes)
  • 1/4 cup pesto (homemade or store bought)
  • 1 pound tilapia filets, fresh or frozen)
  • 4 lemon slices
  • salt and pepper, to taste

Instructions

Preheat grill to medium (about 400 degrees).

In a bowl, combine vegetables and pesto and stir until well coated.

Divide vegetable mixture between 4 large sheets of foil.

Top each pile of veggies with a piece of tilapia.

Add a slice of lemon and sprinkle with salt and pepper.

Fold sides of foil up to meet in the middle and fold closed, then fold in sides to seal foil packets.

Add foil packets to grill and cook for approximately 10 minutes.

Tilapia is done when it is white instead of translucent and flakes easily with a fork.

Drain excess liquid from packets before serving.

Notes

You can use frozen tilapia but you’ll need to cook it a bit longer.

Nutrition

  • Serving Size: serves 4

Did you make this recipe?

Tag @theleangreenbean on Instagram

Pretty simple right? This would also work with other white fish or salmon, you just might need to adjust your cooking time based on the thickness of the fish!

This recipe for Grilled Foil Packet Tilapia with Pesto Veggies is perfect for a summer dinner! It's quick, easy and healthy, plus cleanup is a breeze!

You can serve these directly out of the foil packets or transfer to a plate. Feel free to customize with your favorite summer veggies – just make sure not to use something like potatoes which will take longer to cook.

This recipe for Grilled Foil Packet Tilapia with Pesto Veggies is perfect for a summer dinner! It's quick, easy and healthy, plus cleanup is a breeze!

Enjoy!
–Lindsay–

This is a sponsored conversation written by me on behalf of Dish on Fish. The opinions and text are all mine.

Filed Under: Dinner, Sponsored Tagged With: Bell Pepper, Corn, Pesto, Zucchini

My Weekly Food Prep {By The Minute}

May 31, 2017 by Lindsay 7 Comments

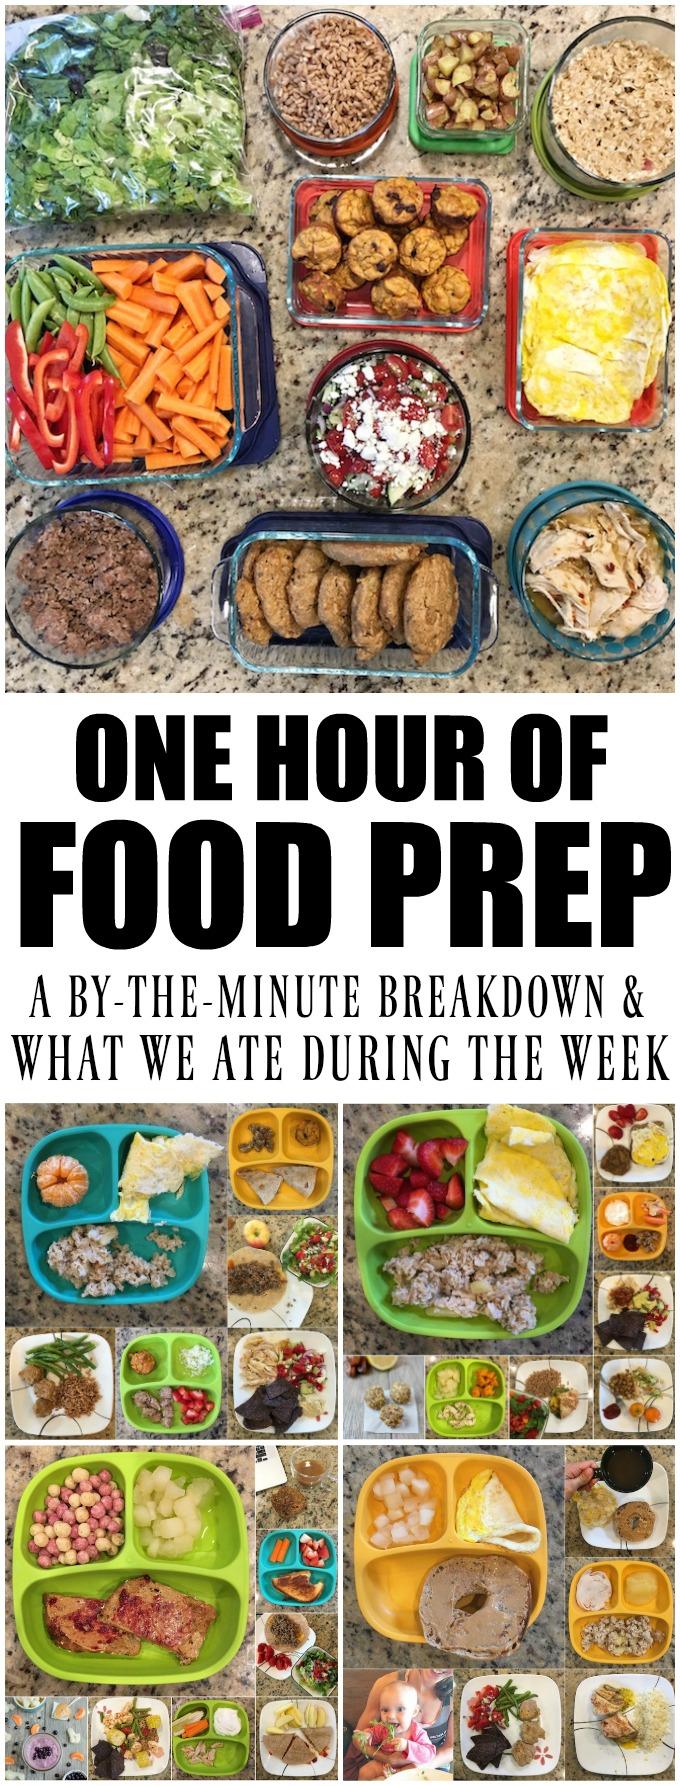
Here’s a food prep session breakdown – An in-depth look at what I prepped, the order I did things in and how I got it all done in one hour! Plus a look at the meals we ate during the week.

Here's a food prep session breakdown: An in-depth look at what I prepped, the order I did things in and how I got it all done in one hour! Plus a look at the meals we ate during the week.


Hi friends!

One of the most frequent questions I get is how I can possibly get so much food prep done every Sunday. Let me start by saying that I’ve had a lot of practice. You shouldn’t look at one of my food prep sessions and think you’ll be able to do as much as I do on your first few tries. Just like anything else, it takes practice. Be sure to check out last week’s post about How To Find Your Food Prep Focus Area and this post with food prep tips for beginners if you’re just getting started.

Anyways, I thought it might be helpful to show you one of my prep sessions and then give you a by-the-minute- breakdown to show you the order I did things in and how long it took me.
[clickToTweet tweet=”Just how much food can you prep in an hour? Here’s a by-the-minute breakdown to show you!” quote=”Just how much food can you prep in an hour? Here’s a by-the-minute breakdown to show you!”]

So, a couple Sundays ago, I turned my camera on and started a timer to show you just how much you can get done in a one hour food prep session, even with toddler interruptions and a fussy baby. Here’s a timelapse of my hour of prep:

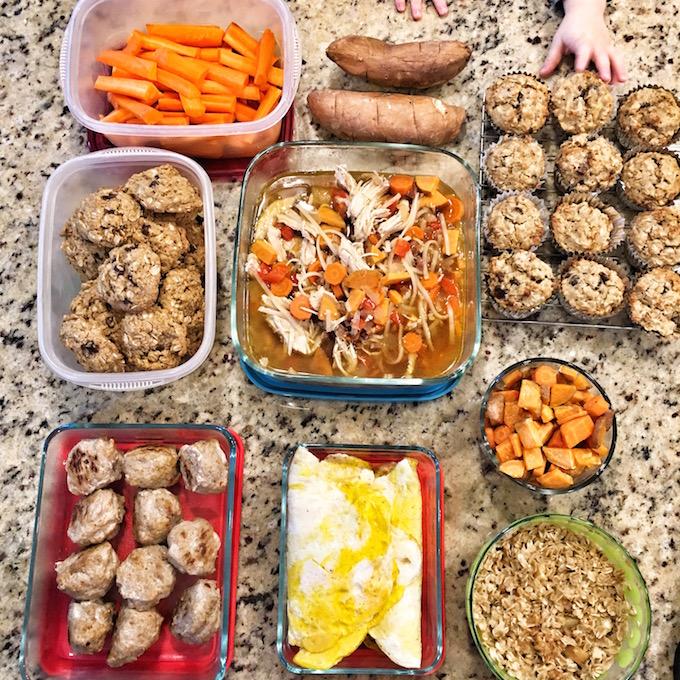
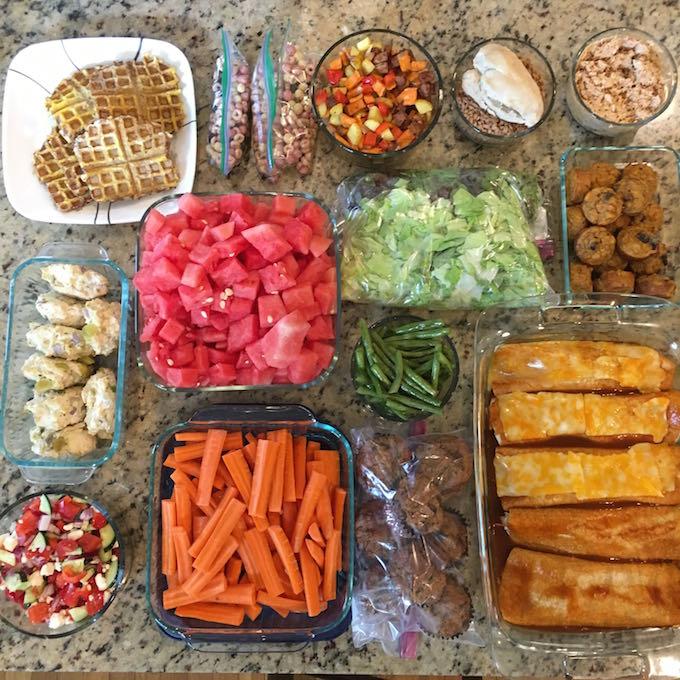
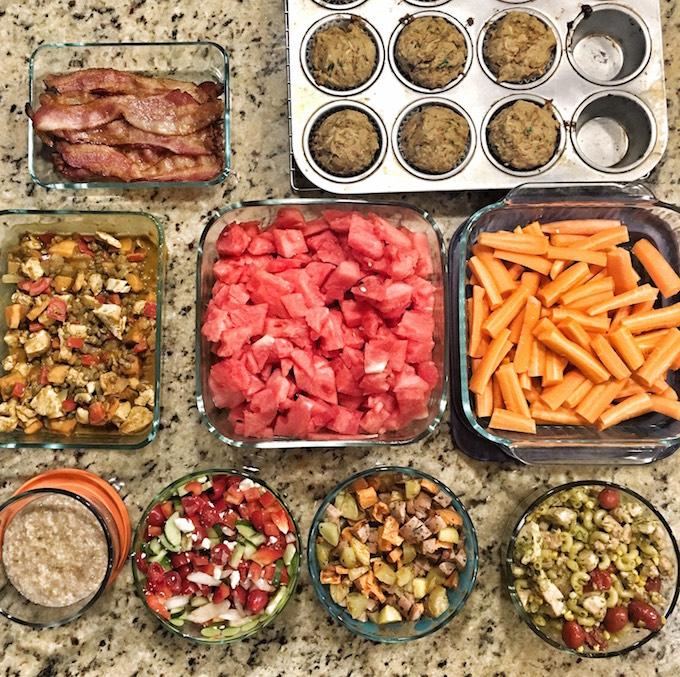
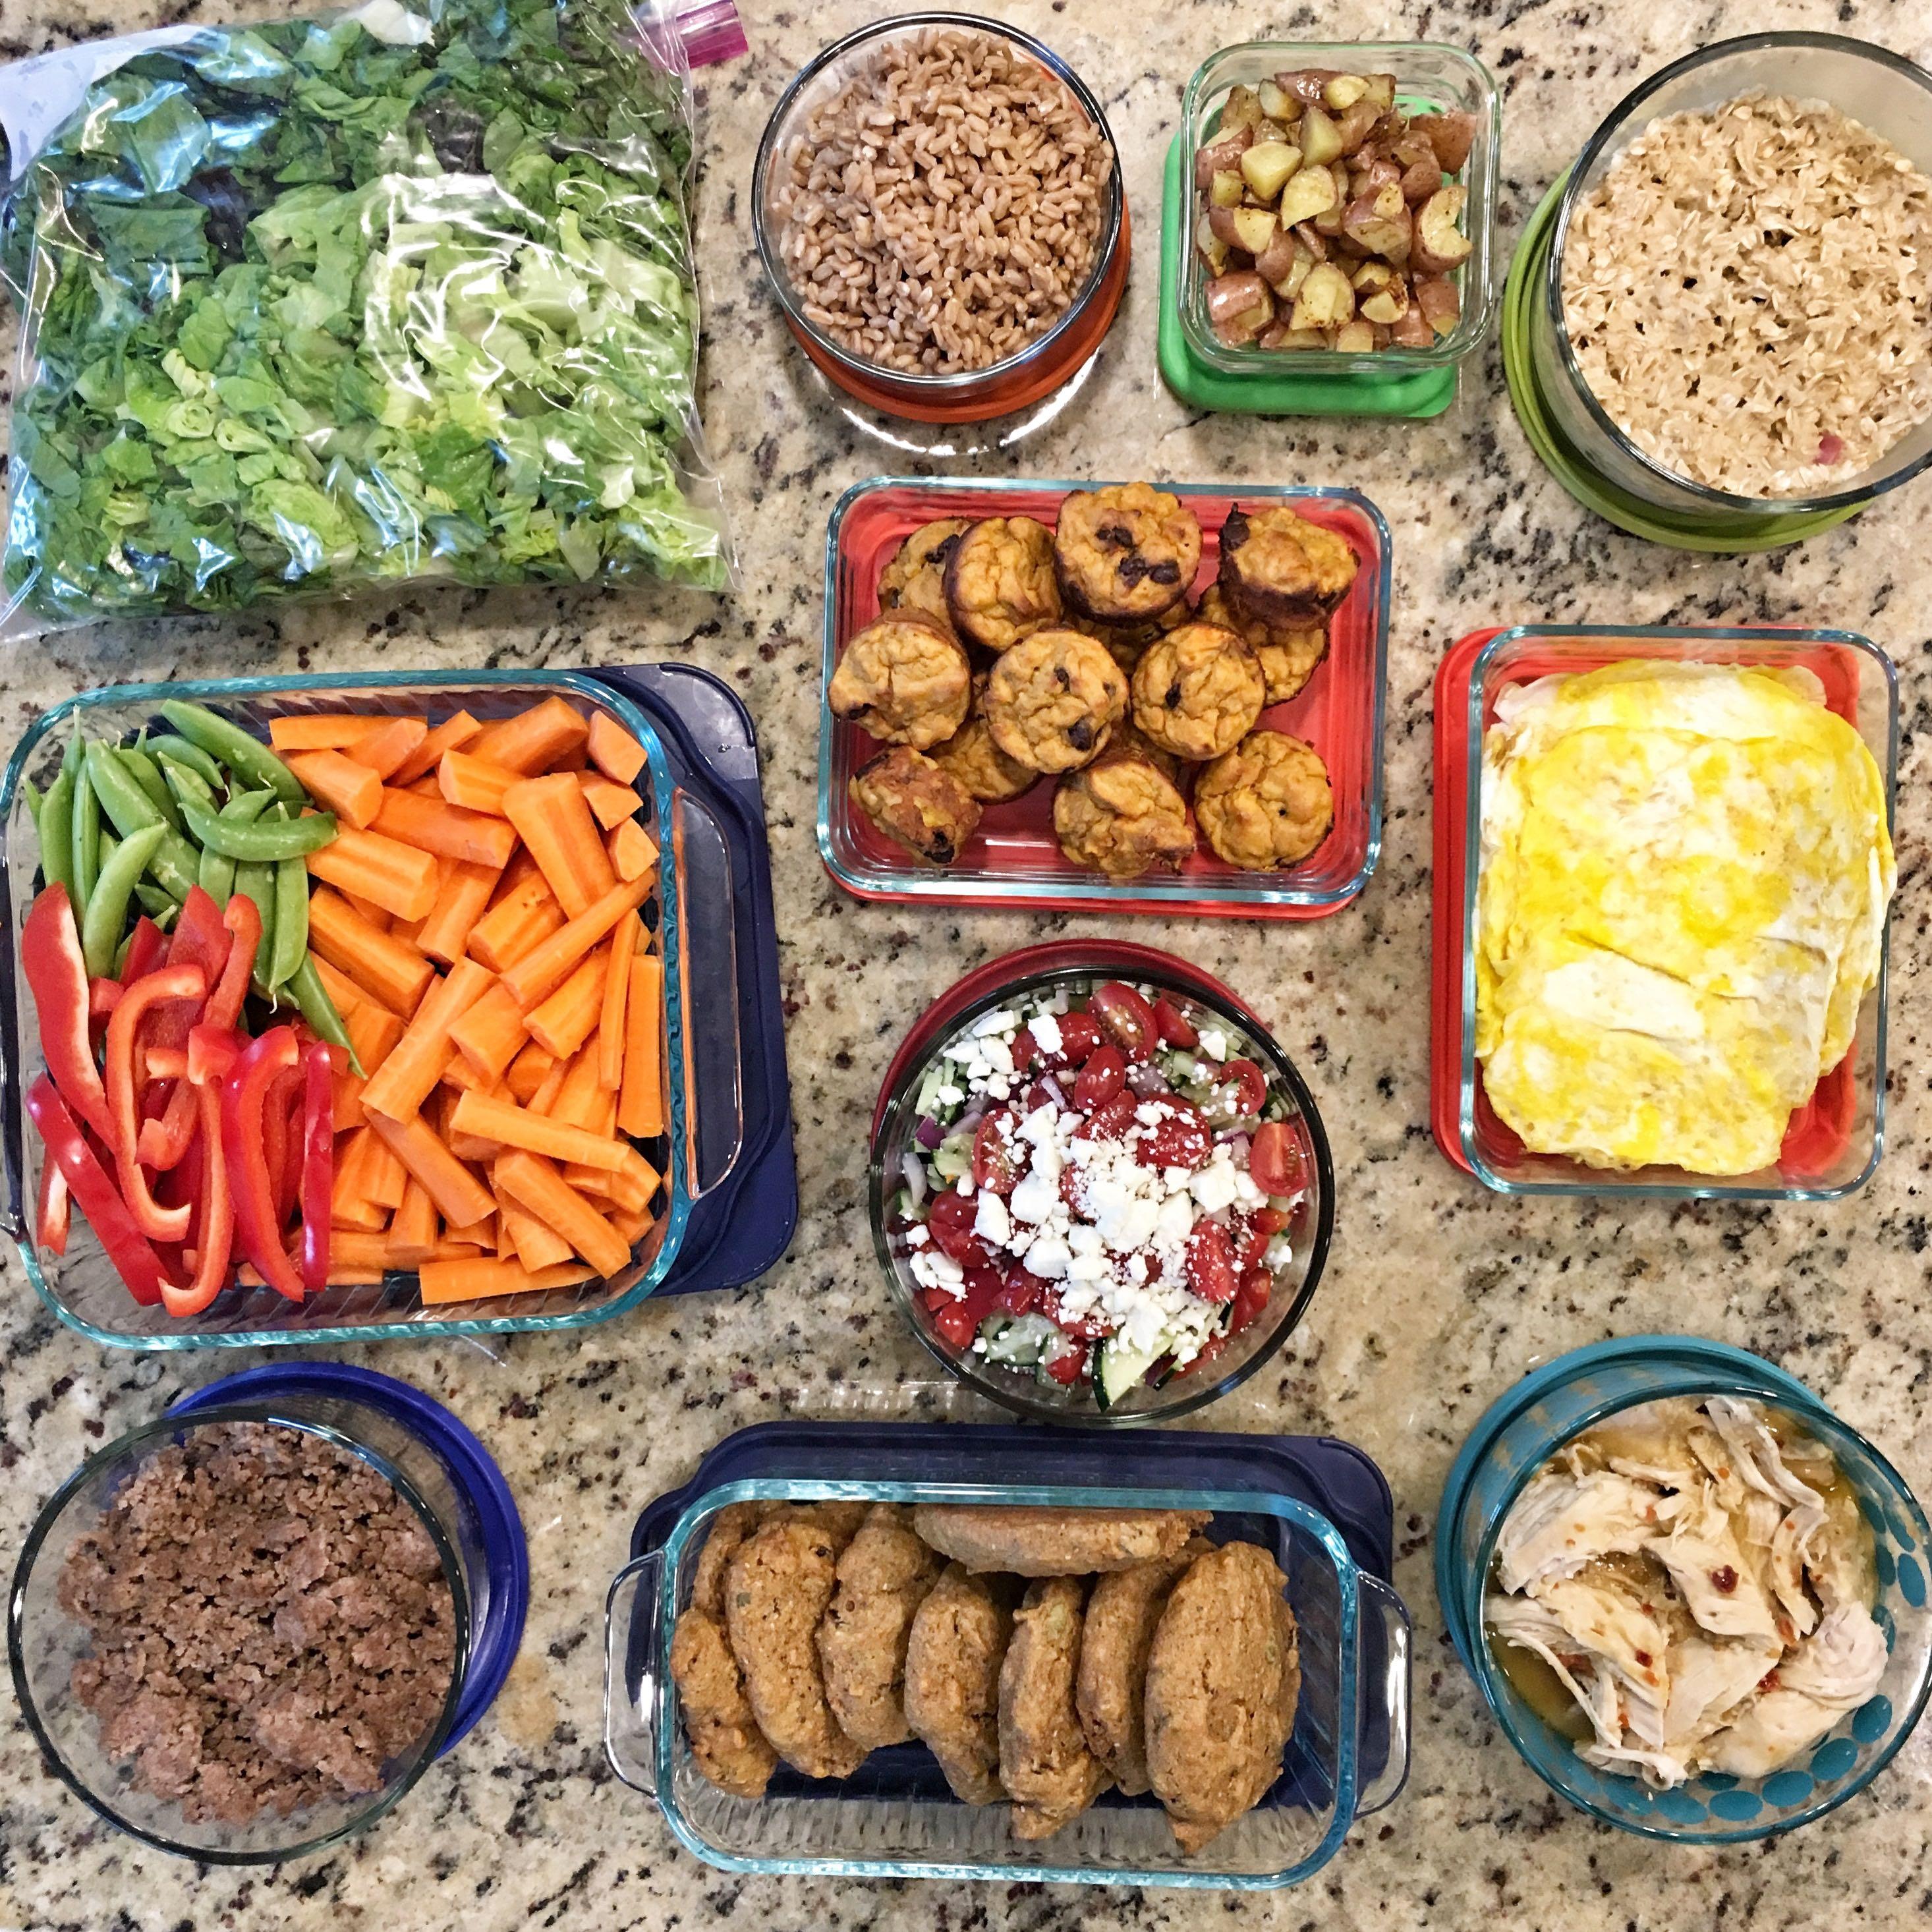
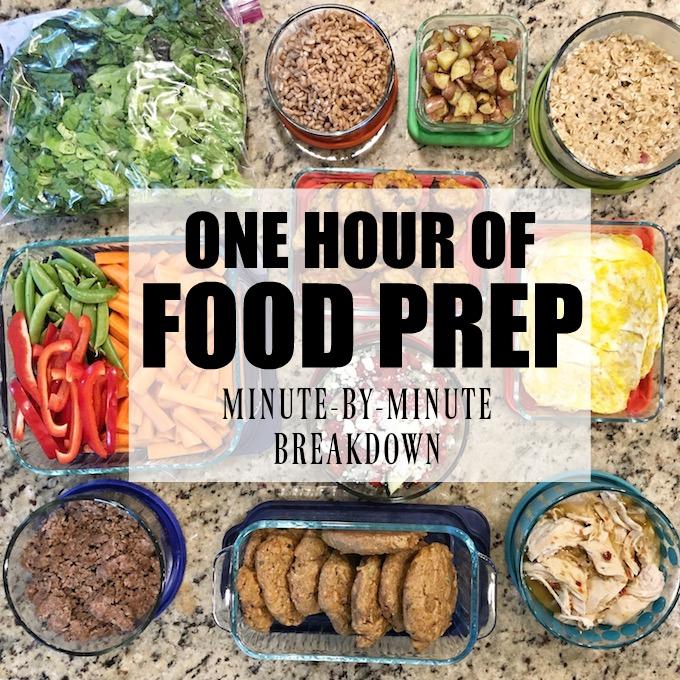
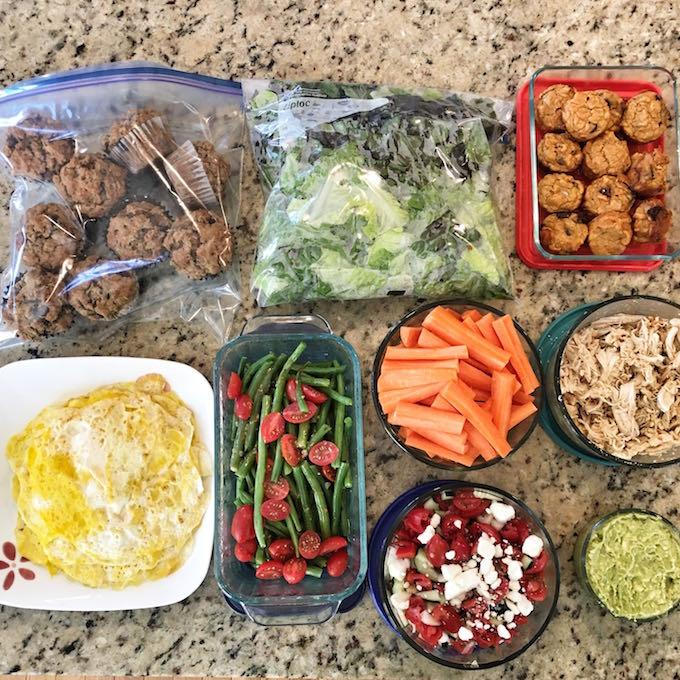
As you can see, you can get a lot done in an hour with a little practice! Here’s what I prepped:

  • Ground Beef
  • Chopped veggies
  • Lettuce
  • Farro
  • Sweet Potato Bites
  • Hummus Topping
  • Sweet Potato Protein Cookies
  • Instant Pot Hummus Chicken
  • Egg Wraps
  • Roasted Potatoes
  • Oatmeal

1 hour of food prep

And here’s the breakdown of how I did things:

Min 1-5: Preheat the oven, microwave sweet potatoes (I slice some slits in mine with a knife and microwave 2 of them at a time for 6 minutes, start the Instant Pot Hummus Chicken (just throw chicken, hummus, garlic and broth into the Instant Pot and start it), start farro on the stove.

Min 5-15: Peel and chop carrots & chop peppers for snacking. Start cooking ground beef in a cast iron skillet on the stove.

Min 15-20: Use one of the sweet potatoes you microwave to make the batter for the Sweet Potato Bites and spoon into mini muffin tins.  Drain the beef, finish cooking it and transfer to storage container. By now your oven should be preheated.

Min 20-30: Bake the sweet potato bites, deal with a fussy baby by putting her in the Ergo, chop veggies for Greek Hummus topping and shred the chicken when it finishes cooking.
Min 30-40: Use the other sweet potato you microwaved to make the batter for the Sweet Potato Protein Cookies and scoop onto a cookie sheet.
Min 40-50: Take the sweet potato bites out and put the sweet potato cookies into the oven, chop the lettuce, wash it and spin it dry and store it in a Ziploc bag. Make the oatmeal by combining oats, milk, chopped apples, cinnamon and peanut butter in a glass container and microwaving for about 3 minutes. Chop potatoes into small pieces, drizzle with oil and sprinkle with salt.
Min 50-60: Take sweet potato cookies out, turn oven to 425 and stick potatoes in to roast. Make egg wraps while potatoes are roasting.

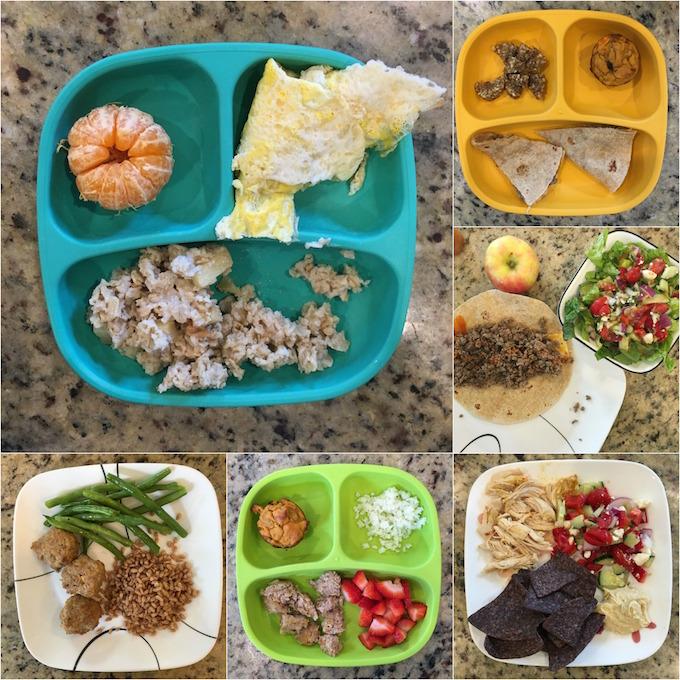
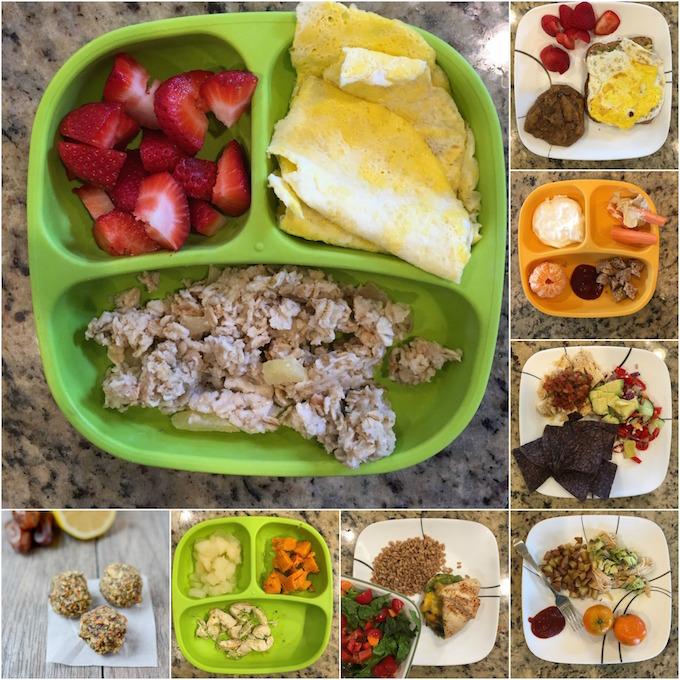
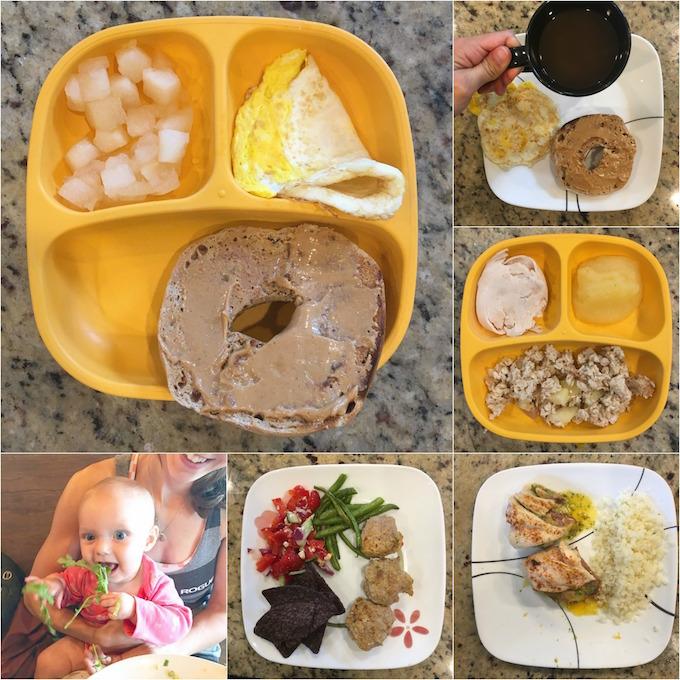
So there you go! Like I’ve mentioned before, I don’t prep every single thing we eat. I still cook during the week and we go out to eat a few times. But, to give you an idea of how we use the prep I do, I tried to take pictures of most of our meals for the following week. I missed a few…but this should give you a pretty good idea of how I use my prep to make life easier!

weekly meals

Monday:
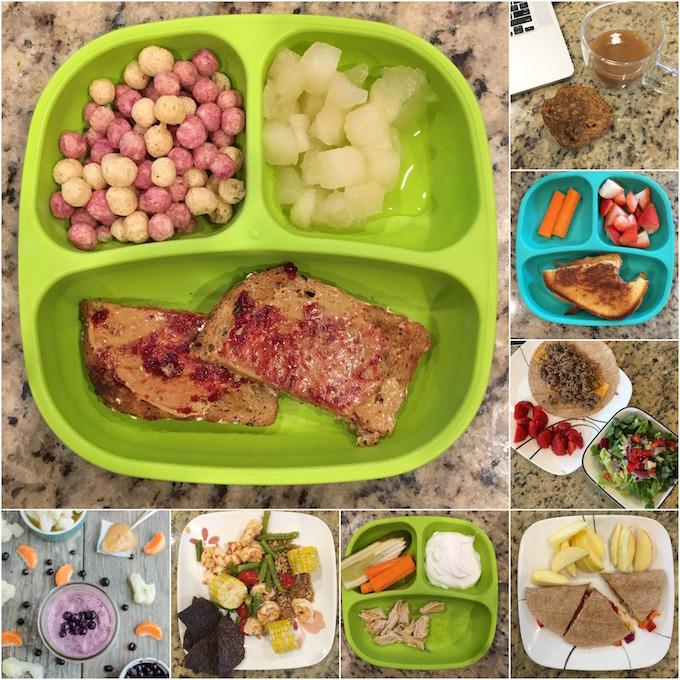
Breakfast: Most weeks lately I’ve been making 5 Minute Breakfast Hash for hubby and I but I didn’t make any this week so we ate a few different things. This day we ate peanut butter toast (Crazy Richard’s Peanut Butter on Dave’s Killer Bread) and fruit, plus coffee (unpictured). Squish eats the oatmeal and eggs  I prep ahead of time cold so all I had to do was scoop some oatmeal onto his plate and add an egg and clementine.

Lunch: Hubby comes home for lunch since he works close by, but we all usually eat different things. I made Squish a quick quesadilla in the microwave with some of the ground beef I prepped and paired it with a lemon energy ball from the freezer (that I made in last week’s prep) and a sweet potato bite I prepped this week.  Hubby made a taco with some of the ground beef and added some of the hummus topping I prepped to the prepped lettuce for a quick salad. I ate some of the hummus chicken, the hummus topping and some Garden of Eatin’ tortilla chips.

Dinner: For dinner, I made a quick batch of Thai Chicken Meatballs after we got home from the gym. They take about 5 minutes to mix up and 20 minutes to bake. I paired it with some Steamfresh cauliflower rice for hubby and some of the farro I prepped for me….plus some roasted green beans that I threw in the oven on another baking sheet while the meatballs were cooking.  Squish got a meatball with some cauliflower rice, a sweet potato bite and some strawberries.

weekly eats

Tuesday:
Breakfast: Squish had a repeat of oatmeal, egg wrap and fruit. Hubby and I had avocado toast topped with a fried egg and fruit, plus one of my prepped sweet potato cookies for me!

Lunch: Hubby had some of the prepped hummus chicken and potatoes topped with avocado and some fruit. Chase had a leftover meatball with ketchup, clementine, Siggis 4% plain  yogurt and carrots with humms.  I had a repeat of Monday’s lunch – chicken, hummus topping and chips and turned them into Mediterranean chicken nachos.

Dinner: For dinner I used some of the thin-sliced chicken we bought, added some pesto, cheese and some bacon leftover from our breakfast for dinner on Sunday night to make Cheesy Pesto Chicken Rollups. Another easy dinner – 5 min to make, 20 min to bake. I paired with a side salad using the prepped lettuce and some cherry tomatoes and some prepped farro. Squish has some chicken, plus pears and a sweet potato that I microwaved while the chicken was cooking.

weekly meals

Wednesday:
Breakfast: All the egg wraps were gone so I changed things up and made him a warm fried egg. My friends at Dave’s Killer Bread started making bagels and they sent me some to try so I also gave him half a cinnmaon raisin bagel with peanut butter and some pears. I ate the other half of his pb bagel, plus an egg for myself and some coffee. Hubby got avocado toast with an egg.

Lunch: For lunch, Squish had the rest of his oatmeal, plus Plainville Farms turkey and applesauce. Hubby ate leftover pesto chicken and cauliflower rice and I ate leftover meatballs and green beans.

Dinner: We often go out to dinner on Thursday nights bc we don’t have to be at the gym but there were schedule changes this week so we decided to go out Wednesday night. I forgot to take pictures but Squish had half a ham and cheese sandwich with mandarin oranges and carrot sticks with ranch. I had a southwest chicken salad and hubby had a Korean hangar steak. Baby girl enjoyed sampling my arugula.

weekly eats

Thursday:
Breakfast: Squish had pears, pb&j toast and Love Grown Foods polar puffs. It was a crazy morning so all I had were 2 prepped sweet potato protein cookies and extra coffee. I quickly made some pb toast for hubby.

Lunch: Squish had the leftover half of his ham and cheese sandwich with strawberries and carrots. Hubby made a taco with the prepped beef and potatoes and a quick salad with the prepped lettuce and hummus topping. I used some of the prepped chicken and hummus topper to make a quesadilla and an apple. Later we shared a Blueberry Cauliflower Smoothie for a snack (I prep and portion these and put them in bags in the freezer so we just have to grab, dump in the blender, add liquid and blend.

Dinner: I tried out a new recipe – sheet pan honey lime shrimp – 2 min to prep and 10 to bake. It was ok but needs some work before sharing. Shrimp is not Squish’s favorite so he got hummus chicken with pickle, carrots and yogurt.

weekly eats

Friday:
Breakfast: Squish ate the last of his oatmeal with yogurt and fruit. Hubby and I had avocado toast with eggs.

Lunch: I have no clue. Hubby was off work and I can’t remember what we ate!

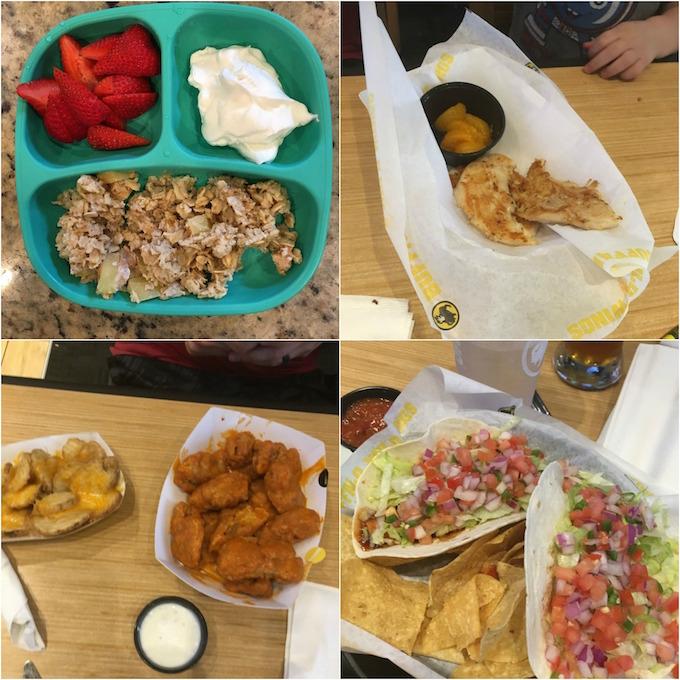
Dinner: We went to Buffalo Wild Wings after the gym. I got chicken tacos, Squish got naked chicken fingers with fruit and carrots and hubby got wings and cheesy potatoes.

weekly eats

Saturday:
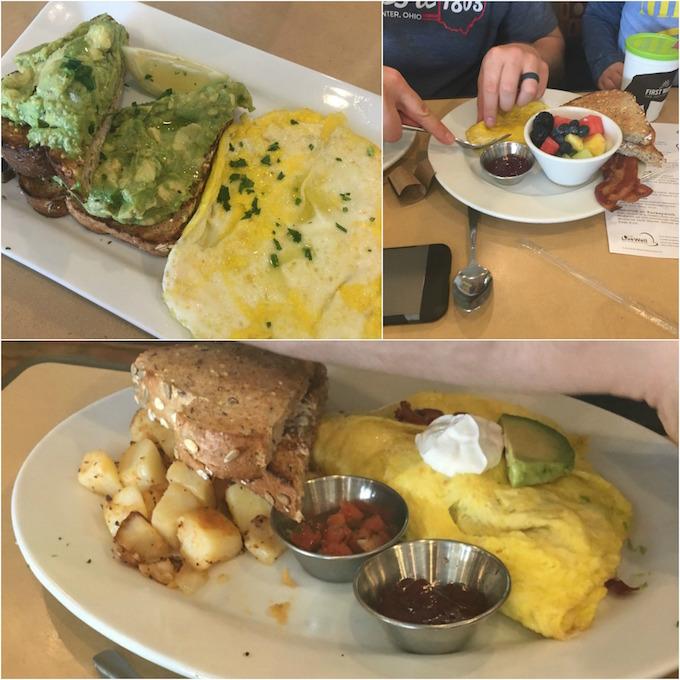
We went out for a post-workout brunch at First Watch. I got avo toast with fried eggs, Squish got a scrambled egg with bacon and fruit and wheat toast and hubby got a bacon avocado omelet with potatoes.

That afternoon we went to a cookout with family and had burgers and brats.

Here's a food prep session breakdown: An in-depth look at what I prepped, the order I did things in and how I got it all done in one hour! Plus a look at the meals we ate during the week.

As you can see, I still cook during the week but the prep helps meals come together more quickly and with less effort. Please also remember this isn’t all we eat. Snacks aren’t pictured and I eat a lot of them!

I hope this inspires you to try doing some food prep. I think sometimes it gets a bad rap because people feel like they have to prep every single thing they’re going to eat all week. Not true! Prepping full meals is great, but prepping components and various parts like I do can be just as helpful! When you get ready to prep, remember to keep multi-tasking in mind. You can have things going on the stove, oven and counter all at once!

Enjoy!
–Lindsay–

Filed Under: Food Prep

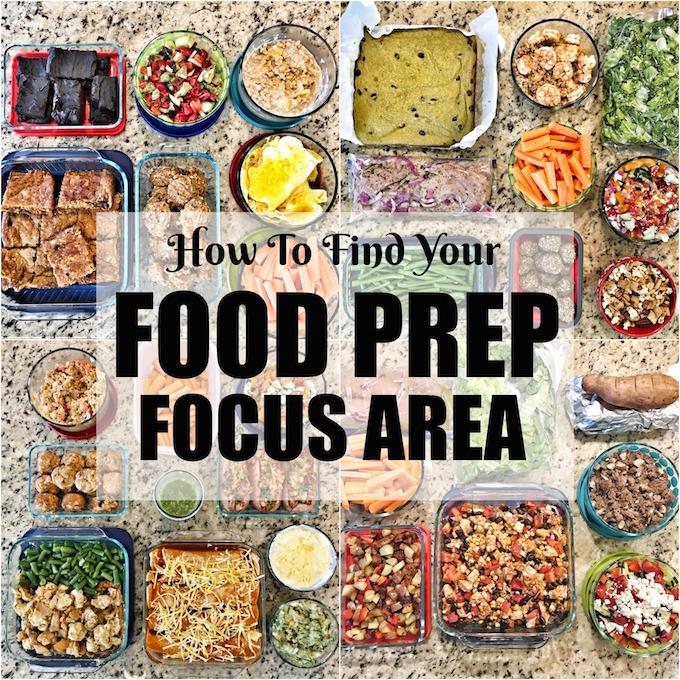
How To Find Your Food Prep Focus Area

May 24, 2017 by Lindsay 5 Comments

Learn how to find your food prep focus area. Are you ready to try meal prep but feel overwhelmed? Use these tips to figure out how to focus your first few food prep sessions.

Learn how to find your food prep focus area. Are you ready to try meal prep but feel overwhelmed? Use these tips to figure out how to focus your first few food prep sessions.

Hi Friends!

By now you guys probably know that I’m a food prep fanatic. I love sharing my weekly prep sessions with you guys but I get a lot of questions from people who have heard about food prep and want to try it, but feel very overwhelmed and aren’t sure where to start.

That’s what today’s post is all about. I want to teach you guys how to really zone in and get ready for a successful food prep session as a beginner.

Let me preface this by saying that I never prep every single thing we’re going to eat for the entire week. I don’t think it’s necessary. I also don’t always use this “focus area” method anymore. I’ve had a lot of practice and it’s not hard for me to prep a wide variety of stuff in a short amount of time. I do keep a few things in mind though: I prefer small meals + snacks vs big meals. I have a toddler that often needs to eat ASAP to avoid a meltdown. There are weeks when we’re at the gym until 7pm multiple nights. So, depending on our schedule, some weeks I focus more on dinner than others and most weeks I always make breakfasts and snacks a priority.

[clickToTweet tweet=”Want to try food prep but feel overwhelmed? Learn how to find your focus area to make it easier!” quote=”Want to try food prep but feel overwhelmed? Learn how to find your focus area to make it easier!”]

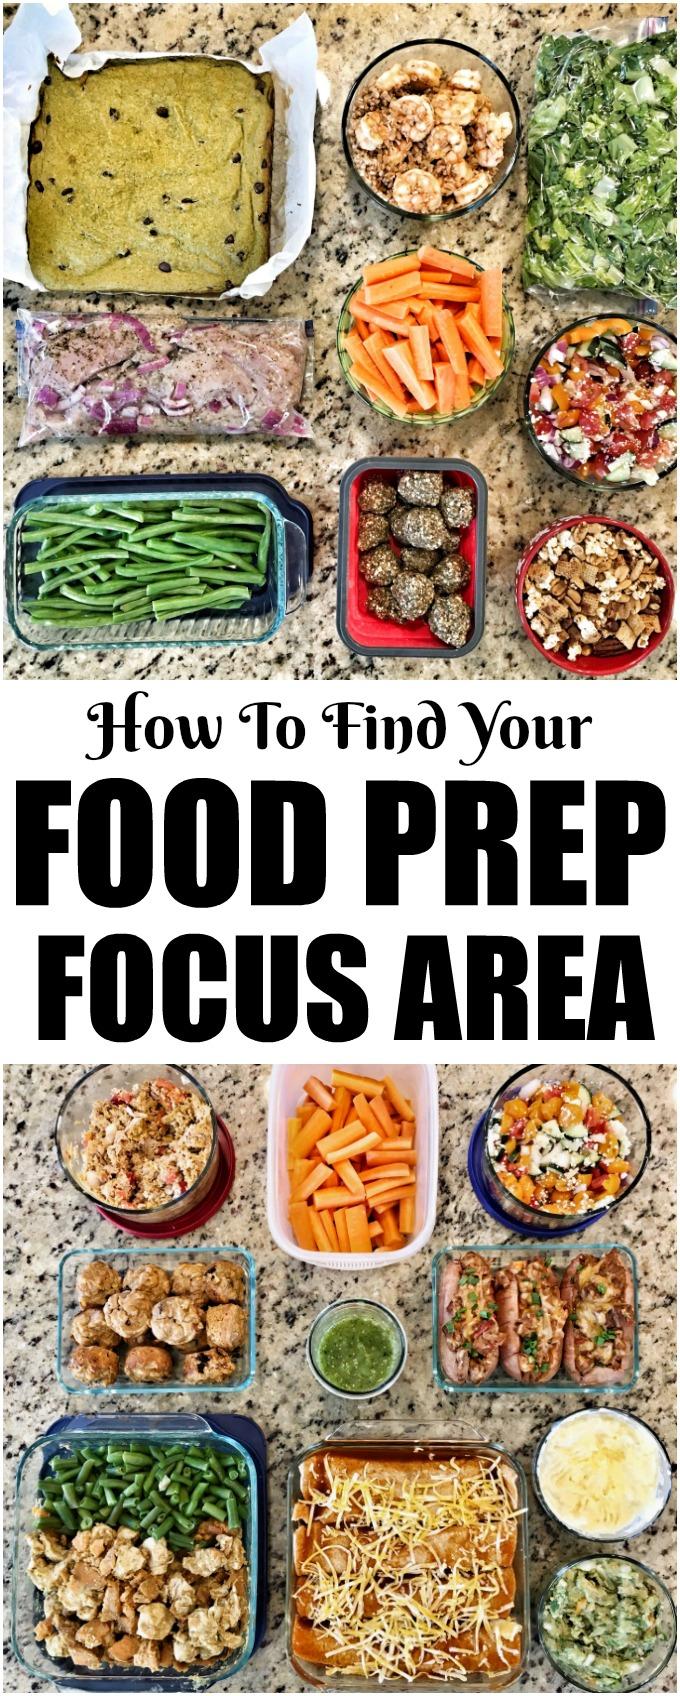
Food Prep Focus Area Dinner

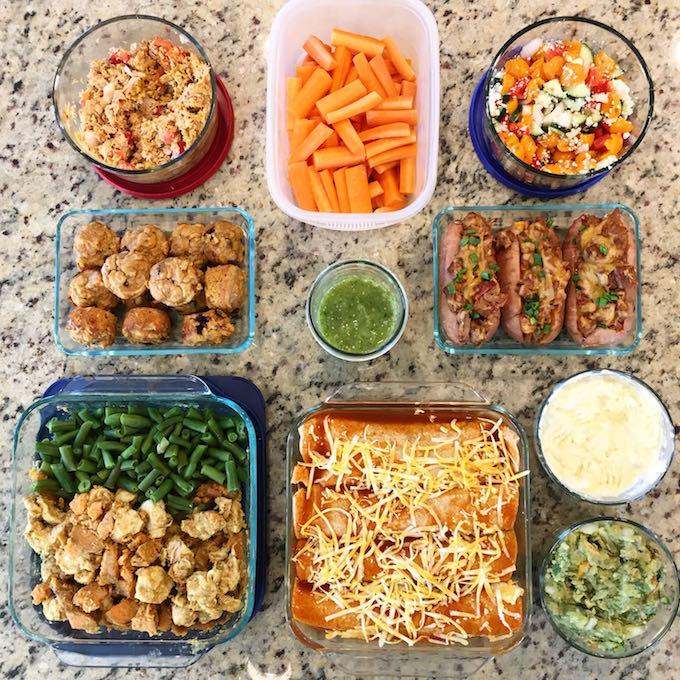
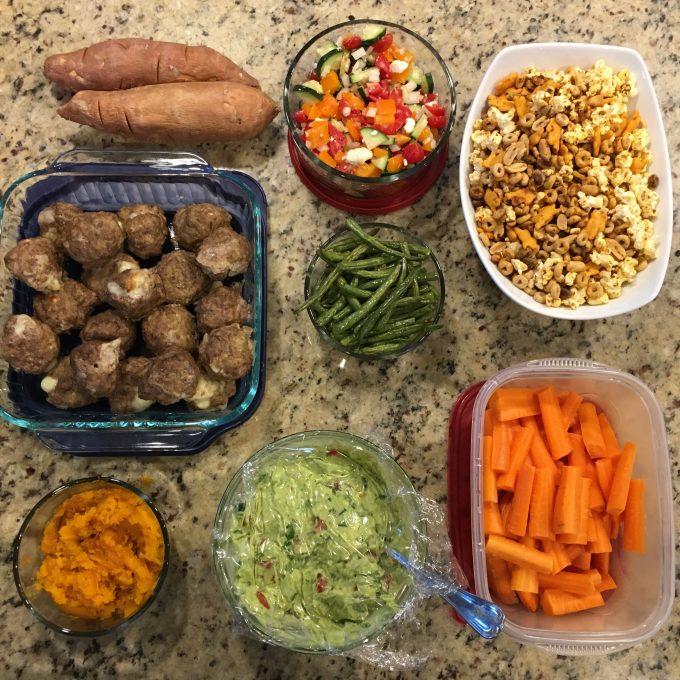
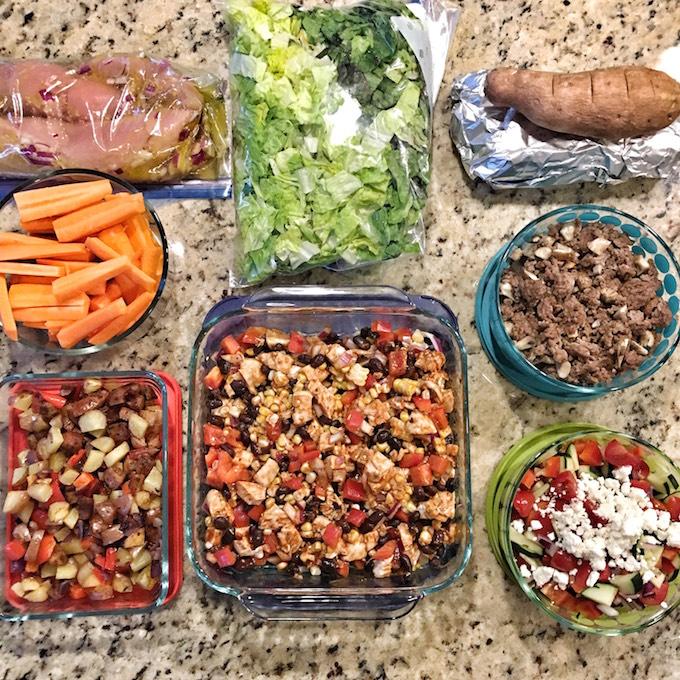
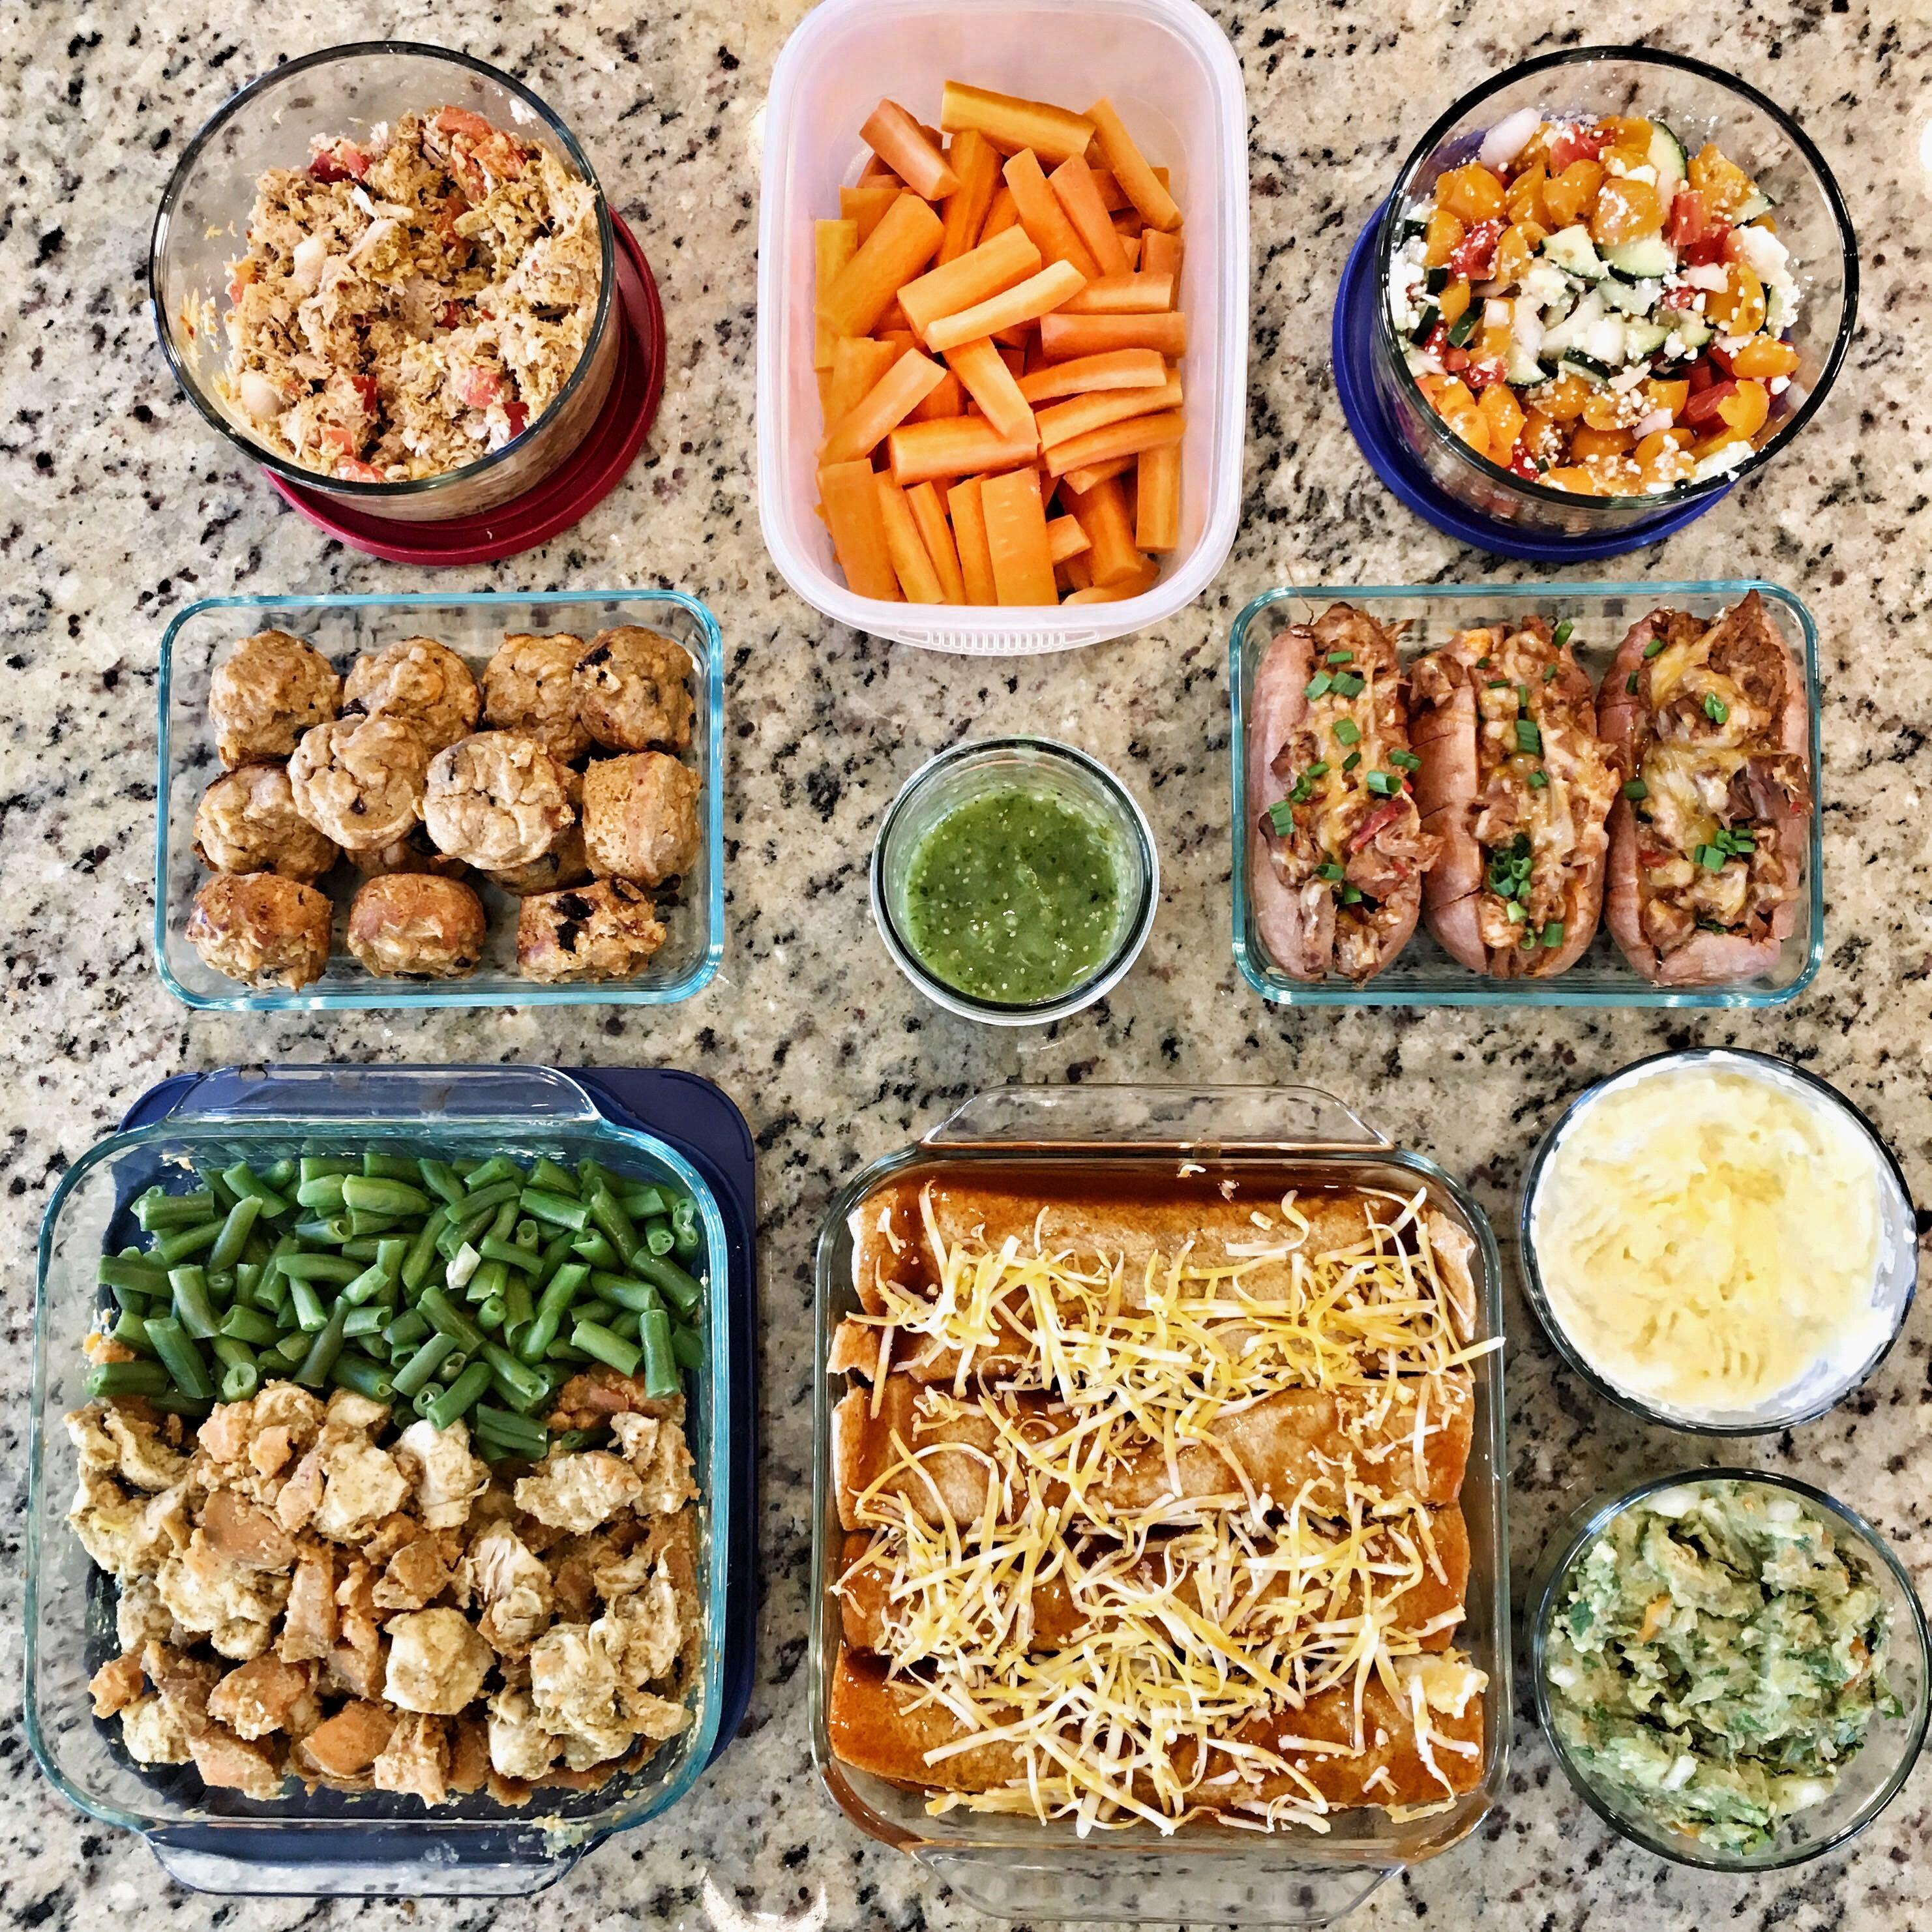
{A dinner-focused food prep of mine where I made a Maple Mustard Chicken Skillet, Chicken and Black Bean Enchiladas, Guacamole, Roasted Squash with yogurt and BBQ Pork Stuffed Sweet Potatoes to reheat for dinners and Sweet Potato Bites, Hummus Topping & Carrots to snack on while getting dinner ready or to pack for snacking if we weren’t getting home until late to eat dinner.}

So here’s my challenge for you:

For the next few days, grab a notebook or your phone and make a note every time you find yourself eating something but wishing you had another option.

For example:

  • You find yourself eating a bag of chips from the vending machine for a snack but you wish you had a protein bar, a hardboiled egg or some trail mix on hand.
  • You’re eating dinner but don’t have any vegetables on your plate and wish you had a side salad.
  • You need dinner in 20 minutes so you swing through the drive thru but wish you were eating at home.
  • You eat a protein bar for breakfast but really wish you had a warm egg breakfast.
  • You go out to lunch because you couldn’t find anything to pack the night before but you wish you had a healthy chicken wrap, some fruit, etc.

After a few days, go back and review the list.

Whatever meal/time of day has the most mentions is probably your biggest problem area and the one that you should choose to focus on in your first few food prep sessions.

Some common focus areas that I’ve helped people hone in on in the past include:

  • Produce
  • Meat
  • Breakfast
  • Snacks
  • Packable Lunches
  • Dinner

Food Prep Focus Area Snacks

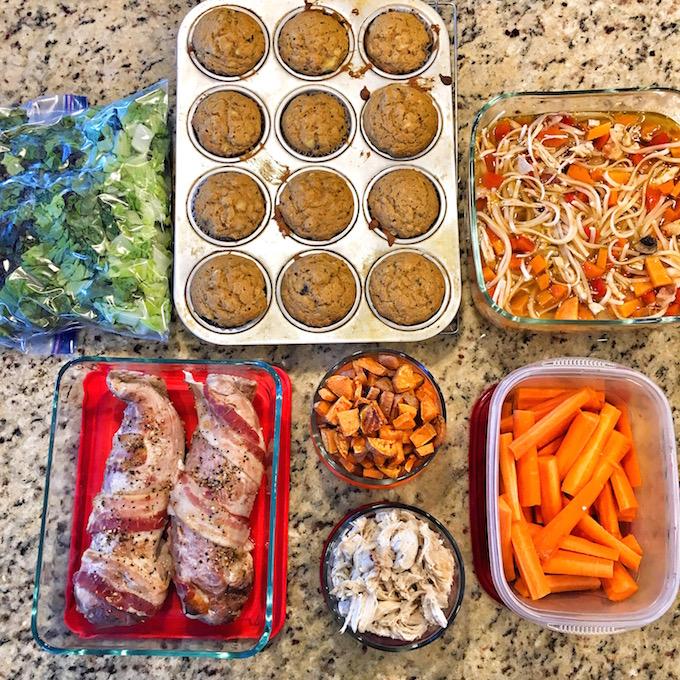
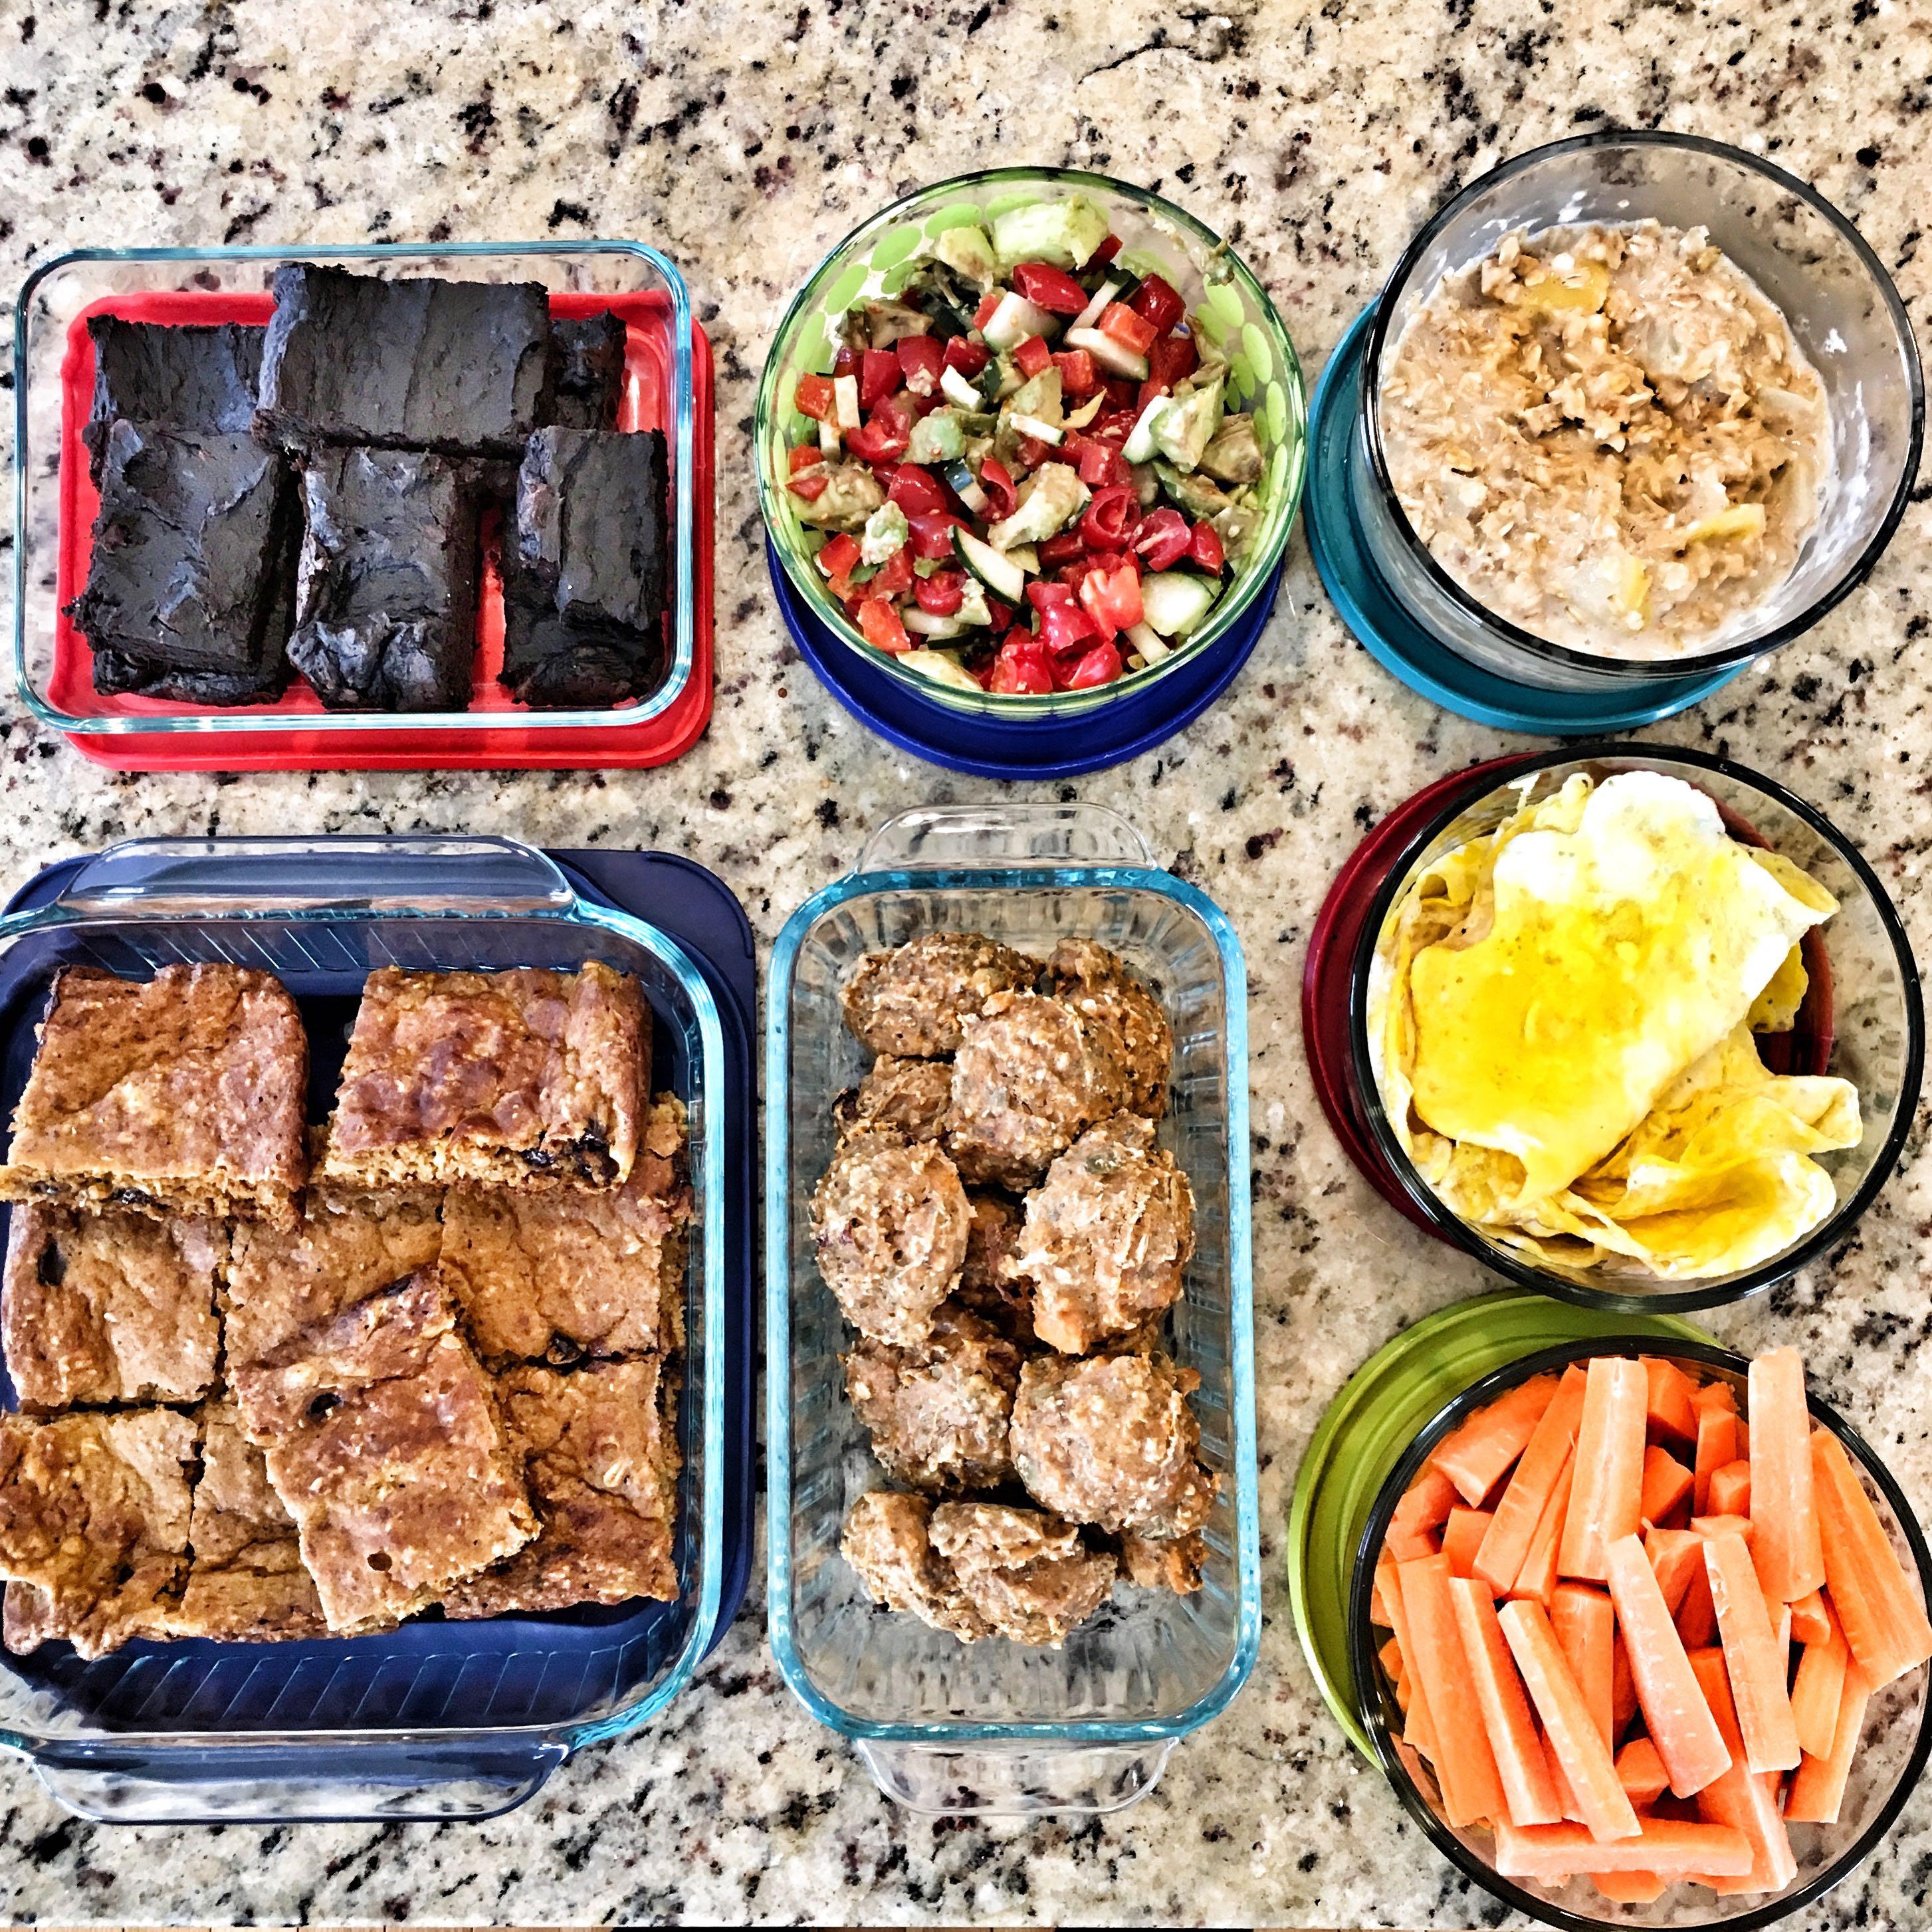
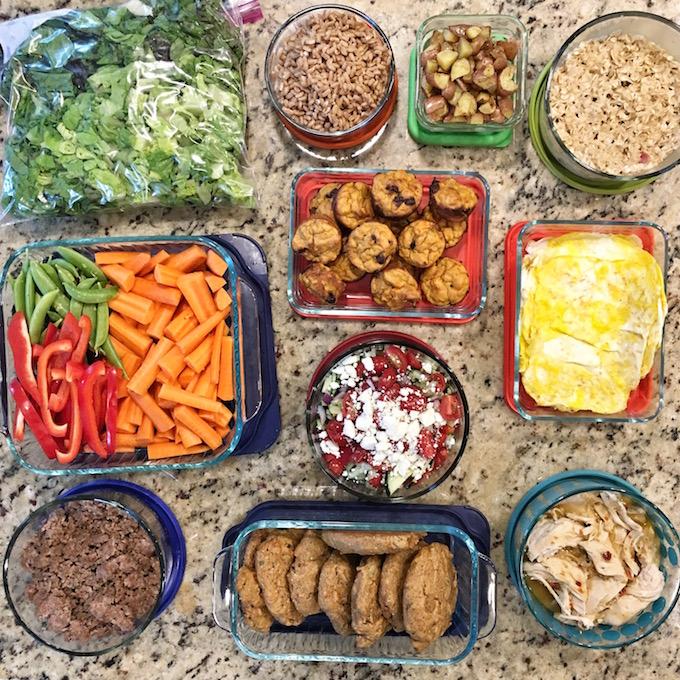
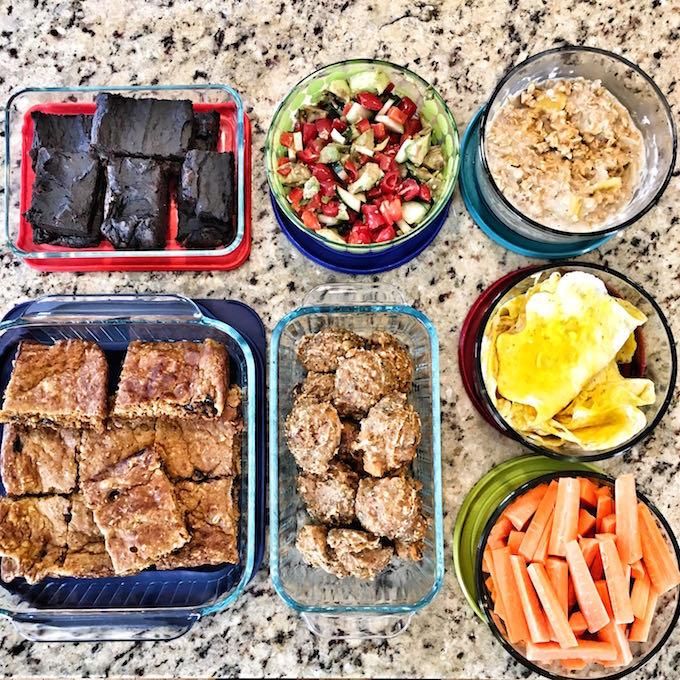
{A snack-focused prep of mine where I made Sweet Potato Brownies, Hummus Topping, Oatmeal, Egg Wraps, Carrots, Sweet Potato Protein Cookies & GF Pumpkin Yogurt Bars.}

Once you’ve found your focus area, make a plan for your food prep session that revolves just around that one area. The goal is to help you feel lazer-focused while prepping and not overwhelmed…and get enough prepped so that you notice how helpful it is during the week and are motivated to try again the next weekend.  Here are a couple hypothetical situations.

Situation #1

If you’ve realized that you really struggle with healthy snacks. You’re either making multiple trips to the vending machine each week, grabbing candy from the dish to snack on, or going hungry until dinner and then over-eating. So, make snacks your food prep focus area and do some research to find a few snack recipes to try. For example, you could plan to set aside an hour to do the following:

  • Hard boil a dozen eggs.
  • Peel and chop some carrots to eat with hummus.
  • Make a batch of trail mix.
  • Make a batch of sweet potato bites.
  • Make a batch of lemon energy balls.

When it comes time to food prep, turn the oven on. Start the eggs on the stove. Make the batter for the sweet potato bites. Peel and chop the carrots. Stick the bites in the oven. While they’re cooking mix up your trail mix and portion it into baggies and make a batch of lemon energy balls in the food processor.

That’s it! It’s your first food prep session so don’t overwhelm yourself by trying to do too much! For the upcoming week, you’ll now have a variety of snacks to choose from when you get hungry late morning or mid-afternoon. Take note of how you feel throughout the week having them on hand! It should inspire you to make time for food prep again next weekend!

Learn how to find your food prep focus area. Are you ready to try meal prep but feel overwhelmed? Use these tips to figure out how to focus your first few food prep sessions.

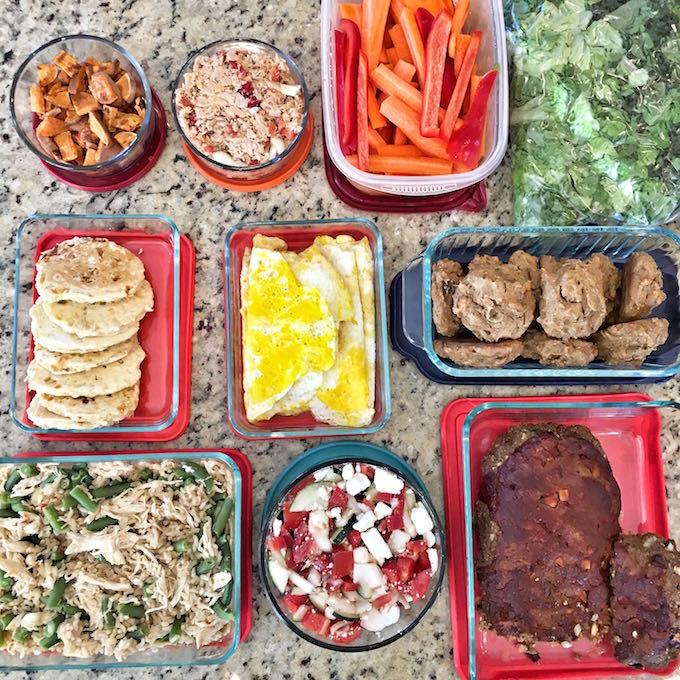
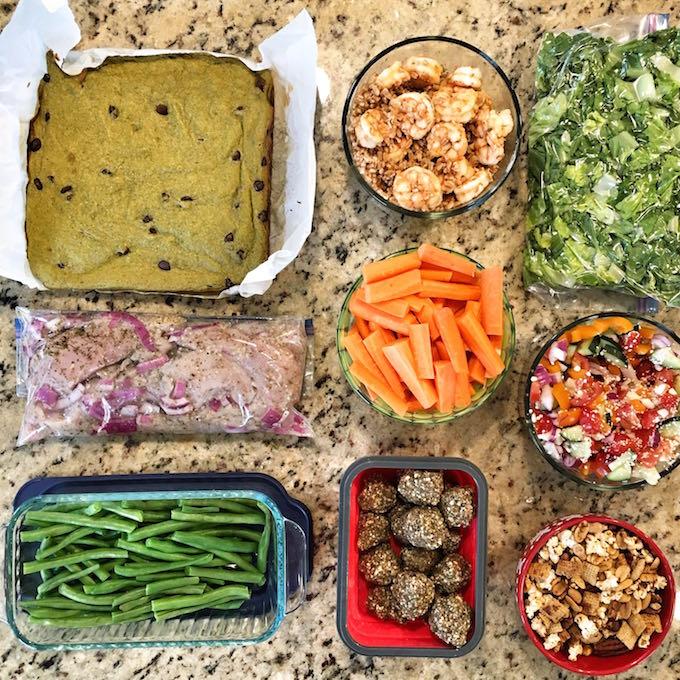
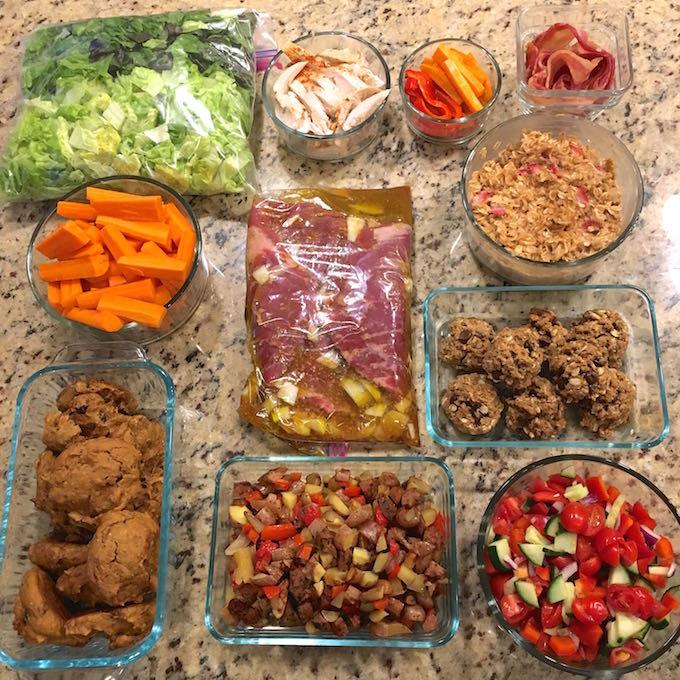
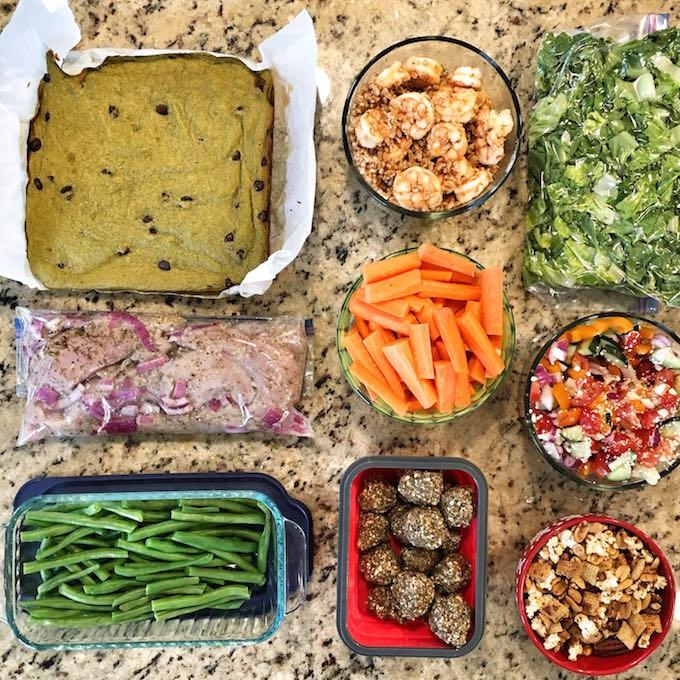
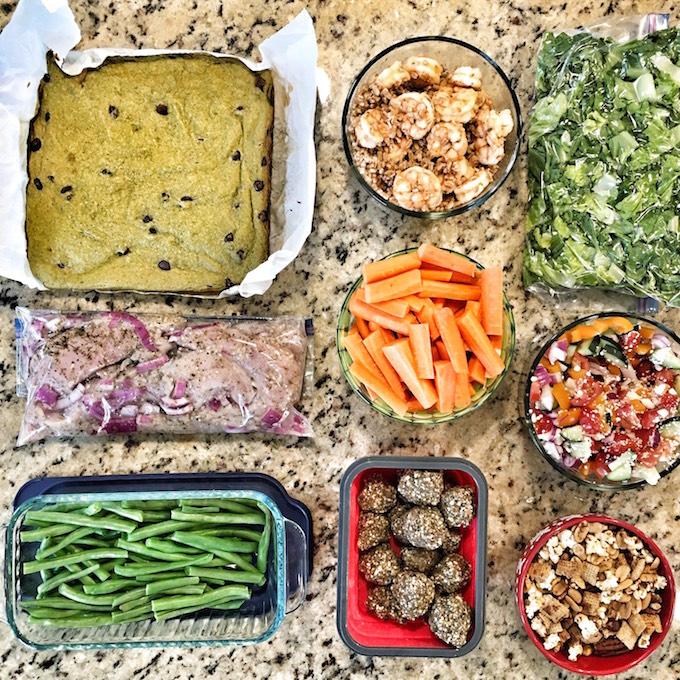
{A lunch-focused food prep session of mine where I made beans, carrots and hummus topping, lemon energy balls, popcorn snack mix, lettuce, shrimp with farro, marinated turkey tenderloins and green smoothie snack bars. I cooked the turkey tenderloin early in the week and ate it over lettuce for salads, mixed the shrimp and farro with the hummus topping, ate slices of turkey tenderloin paired with beans and a snack bar or a couple energy balls, etc.}

Situation #2

You’re pretty good about eating breakfast and packing snacks. You have a few work engagements that require dinner out during the week so you really want to make sure you have healthy lunch options available. You could set aside an hour to prep the following:

  • A batch of Instant Pot Hummus Chicken
  • Some Chicken Avocado Burgers
  • A few salad in a jars
  • Some Pesto Corn Salad

When you’re ready to prep, turn the oven on. Start a batch of hummus chicken. Prep the burgers. Stick them in the oven. While they’re baking, prep a few salads and make the pesto corn salad. Shred the chicken once it’s finished cooking.

Now you have several quick lunch options to pack at night including a wrap made with the hummus chicken, a burger with a side salad and some corn, a salad in a jar.

If you find that it didn’t take you a full hour or you have extra time the next weekend, you can prep stuff for lunches and then move on to adding a dinner or a breakfast option like waffles as a way to change things up in the morning. Also note that if you don’t have an instant pot you can make pulled chicken or pork in the crockpot or oven. It takes longer but doesn’t require any extra active work on your part.

Learn how to find your food prep focus area. Are you ready to try meal prep but feel overwhelmed? Use these tips to figure out how to focus your first few food prep sessions.

So there you have it! I hope some of you guys give this a try! Let me know if focusing in on one specific area to start is helpful for you! Look for a post next week with more details about how to plan your first food prep session once you’ve identified your focus area!

The Ultimate Guide To Food Prep Ebook

If you want more help right away, be sure to check out my Ultimate Guide To Food Prep ebook or check out my resources page for more food prep related posts!

Enjoy!
–Lindsay–

Filed Under: Food Prep

Sparkling Green Tea

May 22, 2017 by Lindsay 5 Comments

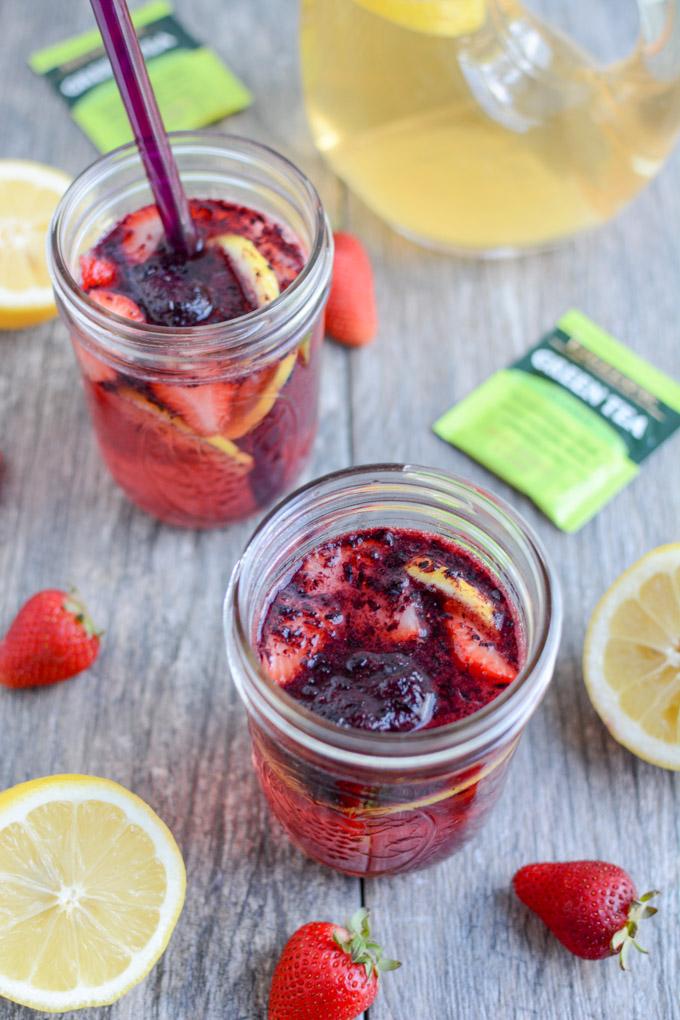
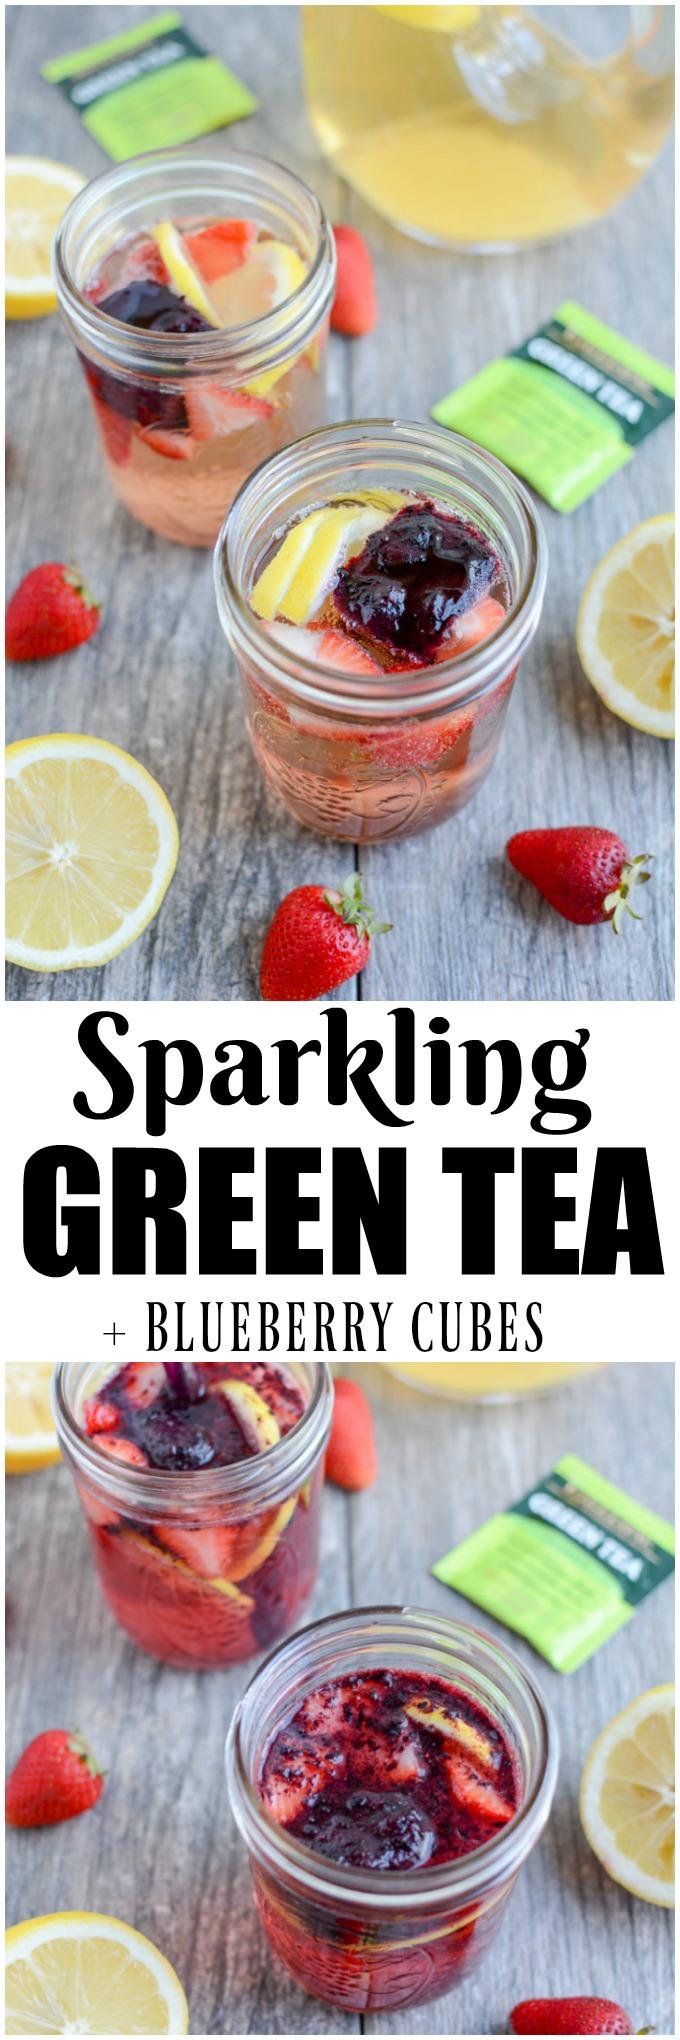
This Sparkling Green Tea is perfect for summer. Add some bubbles to make it more exciting and some frozen fruit cubes to cool it down while adding flavor!

This Sparkling Green Tea is perfect for summer. Add some bubbles to make it more exciting and some frozen fruit cubes to cool it down while adding flavor!

Hi friends!

It’s time for another month of Recipe Redux! This month’s these was Cocktails and Mocktails for May Celebrations. This Sparkling Green Tea is a fun, adult and kid-friendly option for graduation parties, baby showers, bbqs and more! Or just make it on a regular day like I do.

When hubby and I were first out of college, we used to buy packs of the Citrus Liption Green Tea and Costco and we drank a TON of it. Looking at it now, it wasn’t the best beverage choice but I thought it’d be pretty easy to make my own version at home.

This Sparkling Green Tea is perfect for summer. Add some bubbles to make it more exciting and some frozen fruit cubes to cool it down while adding flavor!

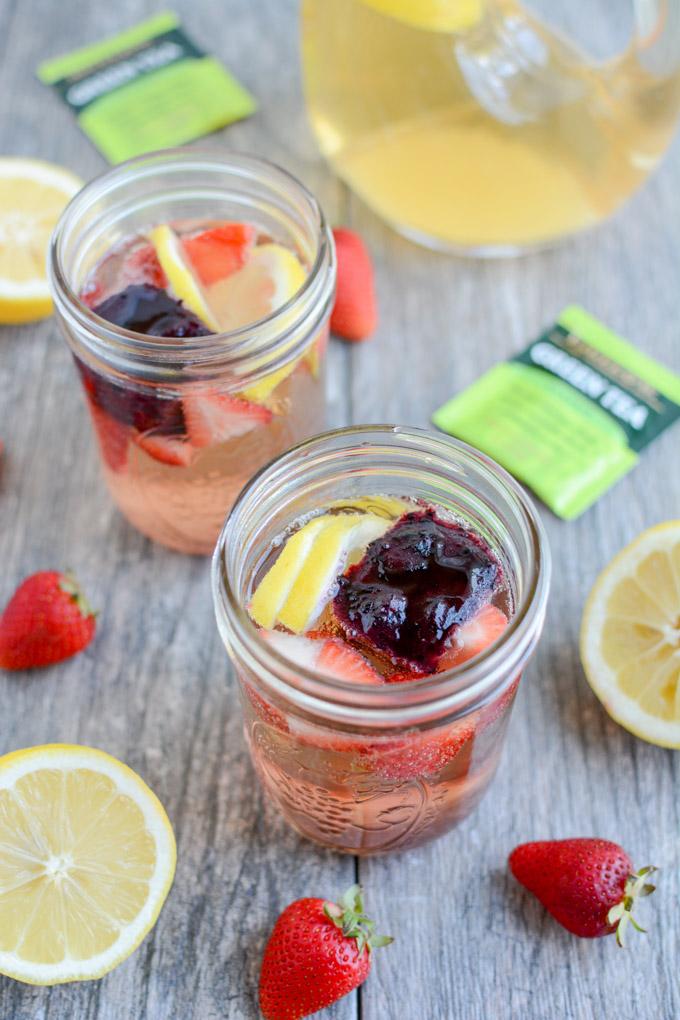
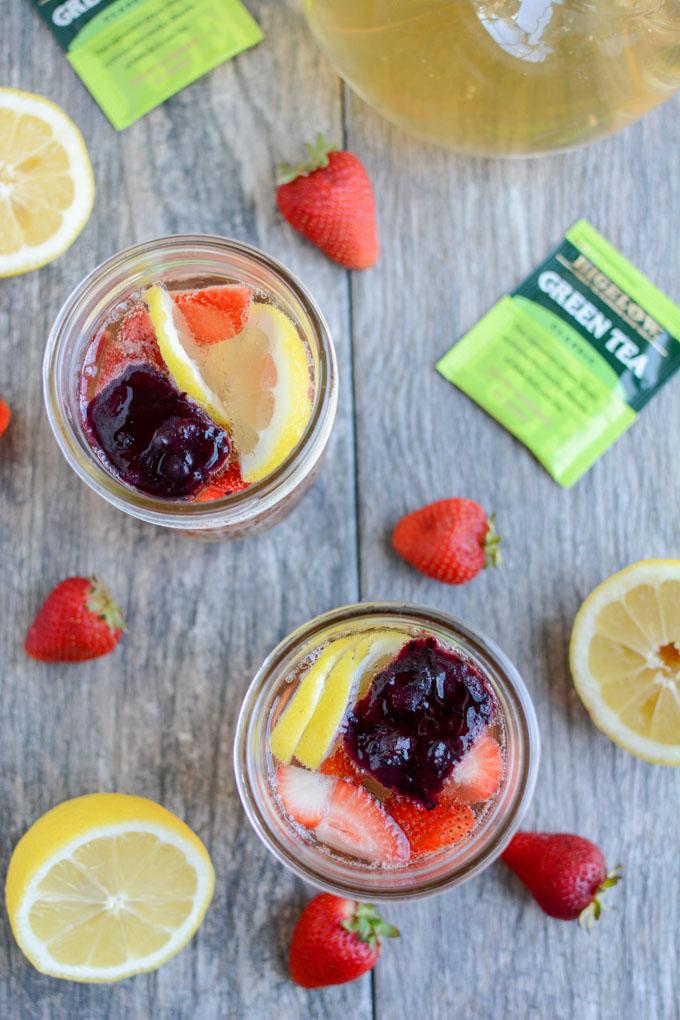
The base is simple. I just steeped a couple green tea bags (you can use regular or decaf) in hot water and let it cool. Then I added lemon-flavored sparkling water. If you’re looking for something a little sweeter, you can either add in some honey when the tea is warm or make a simple syrup and add some. I decided to just use fruit to add some extra flavor so I added some lemon slices, fresh strawberries and blueberry cubes.

To make the cubes I just blended 1 cup frozen wild blueberries with 1 cup water, poured into ice cube trays and froze. Added bonus? As the blueberry cubes melt they turn the drink a pretty color and add natural sweetness.

This Sparkling Green Tea is perfect for summer. Add some bubbles to make it more exciting and some frozen fruit cubes to cool it down while adding flavor!

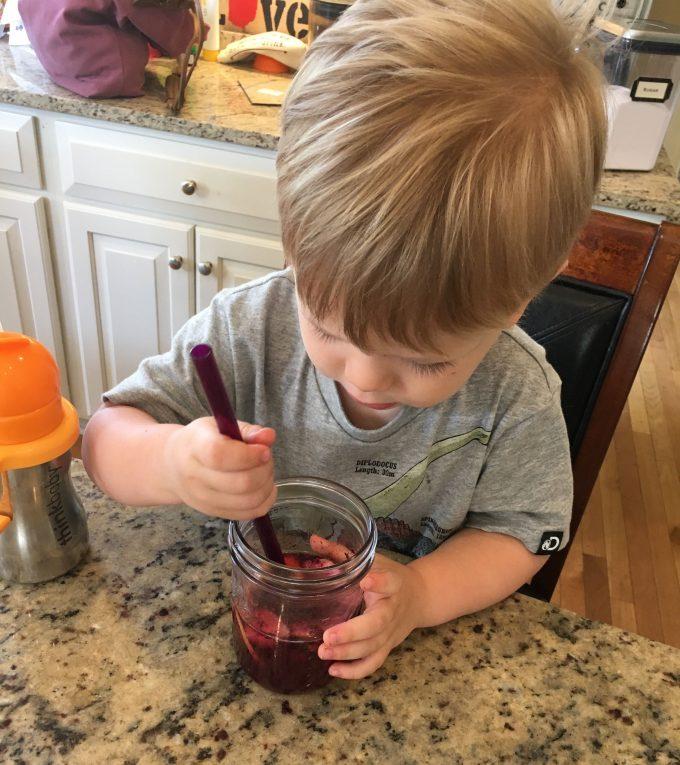
Squish loved having some of this as a treat after he woke up from his nap!

IMG 8781 e1495390267881

You could easily double or triple the amount for a party or try it with a different flavor of sparkling water. Or, like I mentioned above, add a little extra sweetness!

Here are your directions:

Print

Sparkling Green Tea

This Sparkling Green Tea is perfect for summer. Add some bubbles to make it more exciting and some frozen fruit cubes to cool it down while adding flavor!
Print Recipe

5 Stars 4 Stars 3 Stars 2 Stars 1 Star

No reviews

  • Author: Lindsay
  • Prep Time: 5 minutes
  • Cook Time: 0 minutes
  • Total Time: 5 minutes

Ingredients

Scale
  • 16 ounces boiling water
  • 2 green tea bags (decaf or regular)
  • 16 ounces lemon-flavored sparkling water
  • honey or simple syrup, optional
  • fresh berries, lemon slices, berry ice cubes

Instructions

Add tea bags to boiling water and let steep according to package directions (maybe a little longer). Sweeten with honey if desired.
Let cool.
Combine brewed green tea and sparkling water in a large pitcher. (Add simple syrup to sweeten if desired).
Add sliced lemons and strawberries.
Add blueberry cubes after pouring into glasses if desired (simply blend 1 cup frozen berries + 1 cup water and freeze in ice cube trays).

Did you make this recipe?

Tag @theleangreenbean on Instagram

Super easy, right?! I’m all about hot green tea in the winter but this might be my new go-to version for Squish and I to enjoy this summer. For a stronger green tea flavor, brew the tea a bit longer than usual since you’ll be diluting it with extra water- or add an extra tea bag!
This Sparkling Green Tea is perfect for summer. Add some bubbles to make it more exciting and some frozen fruit cubes to cool it down while adding flavor!

[clickToTweet tweet=”Try this Sparkling Green Tea with Blueberry Cubes for a light and fresh summer drink!” quote=”Try this Sparkling Green Tea with Blueberry Cubes for a light and fresh summer drink!”]

Enjoy!
–Lindsay–

For more drink ideas, click the image below and check out this month’s redux!
recipe-redux-linky-logo


Filed Under: Snack

A Day in the Life – 2.5 Years + 6 Months

May 19, 2017 by Lindsay 6 Comments

day in the life

Hi Friends!

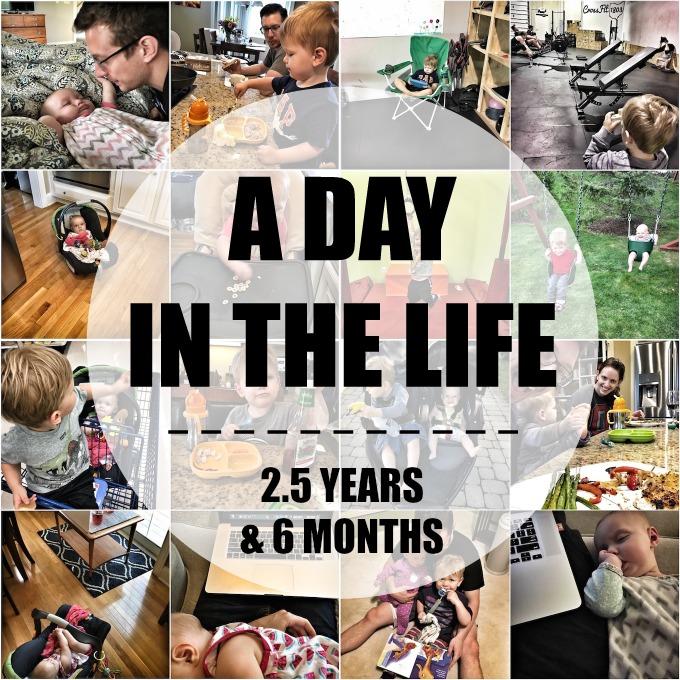
Since the kids have officially hit 2.5 years and 6 months, I figured it was time for another “day in the life” post. I’ve been trying to do these roughly every 3 months since Squish was born. Here are links to my previous posts:

Day in the Life – 26 Months + 2 Months
Day in the Life – 21 Months

Day in the Life – 18 Months

Day in the Life – 15 Months

Day in the Life – 12 Months

Day in the Life – 9 Months

Day in the Life – 6 Months
Day in the Life – 3 Months

It’s taken a while but we’re finally in somewhat of a routine with the two kiddos. No day is the same, but most days follow the same general pattern. I sucked at taking pictures yesterday so I threw in a few pictures from various days lately to help get the point across.

Here’s what most days look like:

IMG 8807

As I’ve mentioned, Little Miss is not the best sleeper. She typically wakes up 3 times per night to nurse. I think part of this is because she’s easily distracted while nursing during the day so she tends to get more of her calories nursing at night when it’s dark and quiet. Luckily her wakeups have gotten a bit better lately in that she’ll just wake up, eat fairly quickly and then go right back to sleep.

She typically wakes up around 1:30, then again around 3:30 and 5:30. Some days I get up after that wakeup and try to get some work done. Other days I try to grab a bit more sleep. She’s typically up for the day by 6:30 at the latest but is usually in good spirits so I can get some stuff done.

Squish wakes up around 7:45 or 8. I get breakfast ready for everyone while hubby gets Squish up. Little Miss either hangs in her carseat, her doorway jumper or as of this past week, her high chair. I’ve started giving her some solids but she doesn’t have much interest in them yet so that typically only lasts a few minutes.

IMG 8808

From 8-9 we finish up breakfast, hubby leaves for work, drink coffee, play and sometimes watch tv. Nature Cat and Curious George are on PBS during that hour. Some mornings I try to sneak in some work during this hour while feeding Little Miss and Squish entertains himself. I’m also usually running around trying to do laundry or clean the kitchen, get everyone dressed, feed the animals, etc.

IMG 8809

Around 9am we usually head out. Tuesdays and Wednesdays I teach our 9:30 class at the gym, Thursdays Squish has Little Gym at 9:30. Mondays and Fridays we don’t have anything scheduled so sometimes we stay home, sometimes we head to the park, play outside, etc.

IMG 8819

Unless we have errands to run, we’re usually home around 10:45. Now that it’s warmer, we usually play outside for a while before lunch. Little Miss rarely naps, but occasionally she falls asleep on the way home and gets a quick snooze while Squish and I play. Lunch is sometime between 11:30 and noon. Hubby comes home for lunch and he typically puts Squish down for a nap while I cleanup/try to get organized. Once Squish is down for his nap around 12:45, I go into work mode.

Some days I nurse the baby while working on the computer, some days I make and shoot recipes. I also tend to schedule calls with clients around this time. I try to catch up on emails, social media, blog post writing, photo editing, etc. A lot depends on what kind of mood Little Miss was in. For the first few months after she was born I didn’t get a whole lot done because she never stopped screaming. Now she typically wants to eat and then is pretty well behaved while I try to get things done.

Some days I have deadlines and I just have to let her cry while I take photos or finish up computer work. Now that she’s a little bigger, I try to work in some play time with just her. We practice sitting up, tummy time, read a few books, stack blocks etc. The 2 – 2.5 hours fly by.

IMG 8820

Squish typically wakes up around 3. We have about an hour to get him up, have a snack, do a little more playing and then I pack everyone up and we head to the gym again. On a good day, the baby will sit semi-quietly in her carseat, Squish runs around for a while and then watches his tablet and I get a workout in. Every so often there are days when my workout gets modified to involve holding a fussy baby. Occasionally she falls asleep, most days she doesn’t.

IMG 8821

The kids and I head home from the gym around 6pm. Hubby comes home between 6:30 and 7:30 depending on his coaching schedule. When we get home we usually have to spend at least 30 minutes outside before I can convince Squish to come in the house. We make and eat dinner and then have more play and tv time. Squish goes to bed around 8 and 8:30pm.

Once he’s in bed, I grab my computer and nurse the baby to sleep while I work. She typically falls asleep by 9:30 and I take her upstairs to bed and come back down and work until 10-11pm. Most nights I’m in bed by 11.

So there you have it. It was interesting to go back and read Squish’s 6 month update. He definitely had a more defined schedule since he was bottle feeding and Little Miss sleeps a lot less but also gets dragged around to a lot more activities. We didn’t have the gym when Squish was 6 months old and obviously he was an only child at that point.

We’re excited that warm weather is here and I’m hoping to cram a lot of local adventures into the summer months!

Enjoy!
–Lindsay–

Filed Under: Uncategorized

{Food Prep Idea} Asian Flank Steak

May 17, 2017 by Lindsay 5 Comments

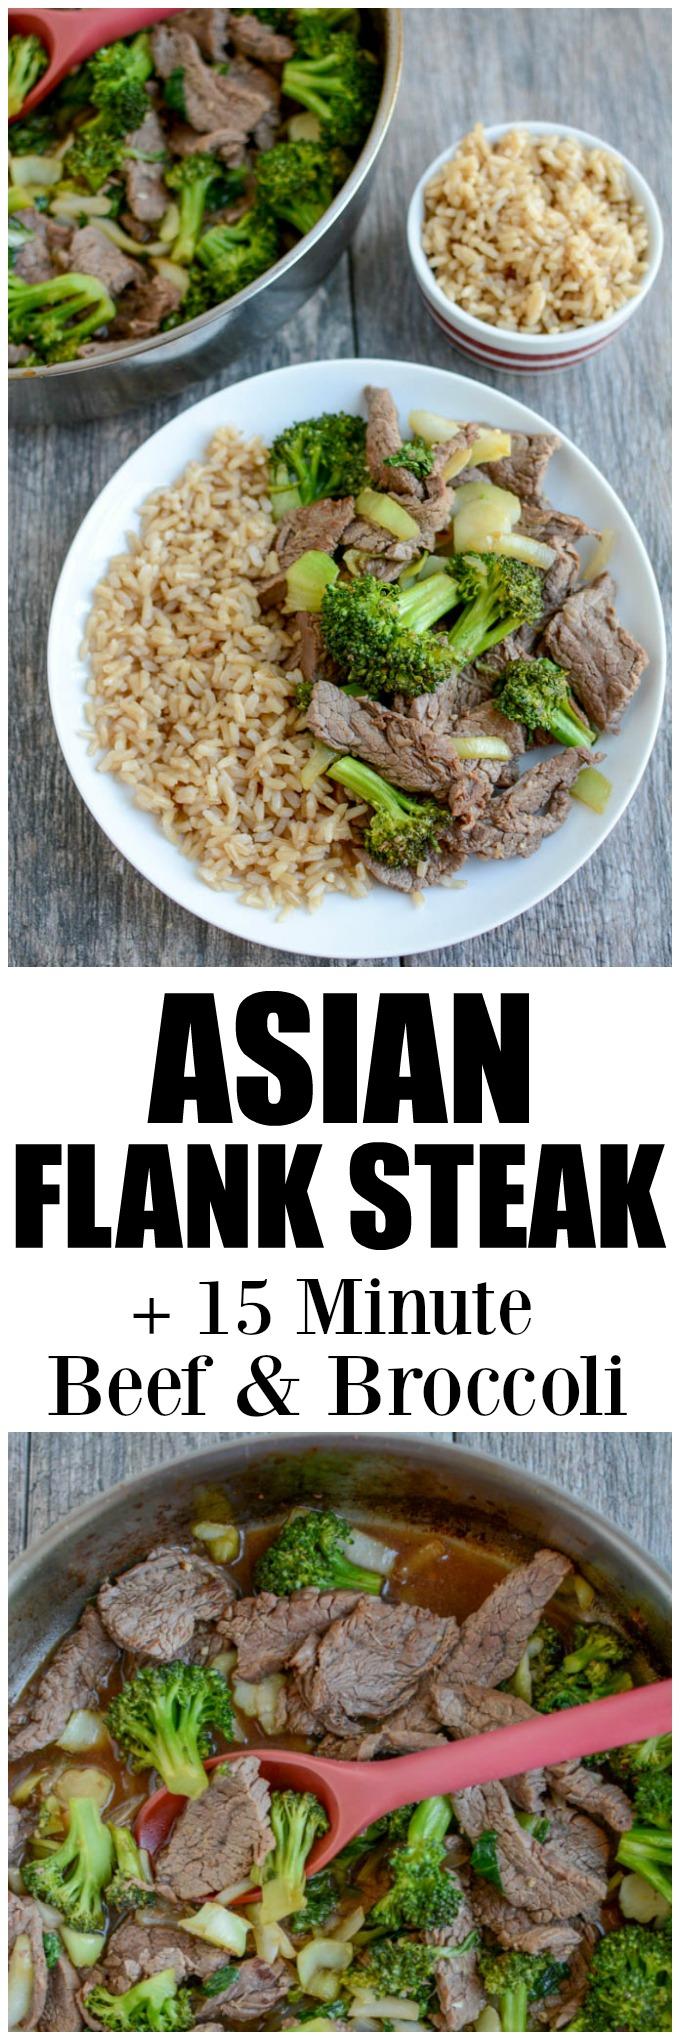
Include this Asian Flank Steak in your next food prep session. Marinate overnight and use it for this 15-minute beef and broccoli dinner or grill it and enjoy the leftovers for lunch.

Include this Asian Flank Steak in your next food prep session. Marinate overnight and use it for this 15-minute beef and broccoli dinner or grill it and enjoy the leftovers for lunch.

Hi friends!

Big news! Since so many of you ask me for tips about food prep, I’ve decided to make it the focus of the next few weeks. I’ll be providing you with some new recipes that are ideal for prepping ahead of time, as well as some more in-depth posts about how to find your food prep focus area, how to plan your first food prep session, a minute-by-minute breakdown of one of my food prep sessions, etc. Get excited! I hope the posts will be helpful.

So, last week I shared a breakfast food prep idea with this 5 Minute Breakfast Hash. This week we’re switching gears to dinner.  Lately, I’ve been loving marinades. They’re easy to throw together and a great way to add flavor to different meats. A couple weeks ago I shared this Mediterranean Turkey Spinach Salad that involves a simple marinade for the turkey tenderloin. Today I’m sharing an easy steak marinade.

You guys know I’m not a huge beef eater, but hubby is…and he’s taught me that the secret to a good flank steak lies in the marinade.

Include this Asian Flank Steak in your next food prep session. Marinate overnight and use it for this 15-minute beef and broccoli dinner or grill it and enjoy the leftovers for lunch.

So, especially in the summer, I often include a flank steak in my food prep so it’s ready for him to throw on the grill during the week. This recipe switches things up and you actually thinly slice the beef and cook it in a pan…but the great thing about this recipe is that you can cook the marinated steak a variety of ways.

Slice it up for a quick stirfry like this, throw it on the grill and enjoy with grilled veggies, slice up the leftovers and add them to a wrap for lunch the next day or toss them on a salad like this Steak Cobb Salad.

Include this Asian Flank Steak in your next food prep session. Marinate overnight and use it for this 15-minute beef and broccoli dinner or grill it and enjoy the leftovers for lunch.

So here’s the marinade recipe, plus how to make this 15-minute beef and broccoli:

Print

Asian Flank Steak

Include this Asian Flank Steak in your next food prep session. Marinate overnight and use it for this 15-minute beef and broccoli dinner or grill it and enjoy the leftovers for lunch.
Print Recipe

5 Stars 4 Stars 3 Stars 2 Stars 1 Star

5 from 1 review

Include this Asian Flank Steak in your next food prep session. Marinate overnight and use it for this 15-minute beef and broccoli dinner or grill it and enjoy the leftovers for lunch.

  • Author: Lindsay
  • Prep Time: 5 minutes
  • Cook Time: 15 minutes
  • Total Time: 20 minutes
  • Yield: serves 4

Ingredients

Scale

For the Marinade:

  • 3 cloves garlic, minced
  • 2 Tbsp fresh ginger (I use the paste from Gourmet Gardens)
  • 1/2 cup onion, diced
  • 1/4 cup honey
  • 3/4 cup oil (i use olive oil)
  • 1/4 cup soy sauce
  • 1/4 cup rice vinegar
  • 1.5 pound flank steak

For the Beef & Broccoli:

  • 1 head broccoli florets
  • marinated steak
  • 2 cloves garlic, minced
  • 1/2 cup onion, diced
  • 2 bunches of baby bok choy, chopped
  • 3 Tbsp soy sauce
  • 1 Tbsp rice vinegar
  • 1 Tbsp honey
  • 1 Tbsp fresh ginger

Instructions

Combine all the marinade ingredient in a large ziploc bag.
Make a few slices against the grain on both sides of the steak.
Place the steak in the bag and toss until well coated.
Marinate 12-24 hours.

For the beef and broccoli:
Place broccoli florets in a pan with a little water. Cover with a tight-fitting lid and steam for 5 minutes or until desired tenderness is reached.
Meanwhile, remove steak from marinade.
Thinly slice against the grain and cut slices in half.
Add beef to a hot pan with some oil and cook for about 3 minutes. It should still be slightly pink.
Remove steak from pan, set aside and dispose of excess liquid.
Add remaining ingredients to the pan.
Saute 3-4 minutes. Add beef and broccoli and stir until well combined.
Serve with rice or cauliflower.

Notes

Not a fan of beef and broccoli? Marinate the steak and then throw it on the grill and enjoy it that way! Use the leftovers in a wrap or on a salad for lunch.

Did you make this recipe?

Tag @theleangreenbean on Instagram

Pretty simple right? The steak gets a lot of flavor from the marinade so you don’t have to add a lot of sauce to the actual dish. But if you’re a sauce-loving kinda person, you could easily double it! If you have more time, you can also save the marinade, pour it into a saucepan, bring it to a boil and boil for 10 minutes, then add a little cornstarch to thicken and use that as the sauce.

Include this Asian Flank Steak in your next food prep session. Marinate overnight and use it for this 15-minute beef and broccoli dinner or grill it and enjoy the leftovers for lunch.

[clickToTweet tweet=”Add this Asian Flank Steak to your next food prep session, then make 15 min beef and broccoli!” quote=”Add this Asian Flank Steak to your next food prep session, then make 15 min beef and broccoli!”]

Enjoy!
–Lindsay–

Filed Under: Dinner Tagged With: Broccoli, Garlic, Ginger, Honey, Onion, Rice Vinegar, Soy Sauce

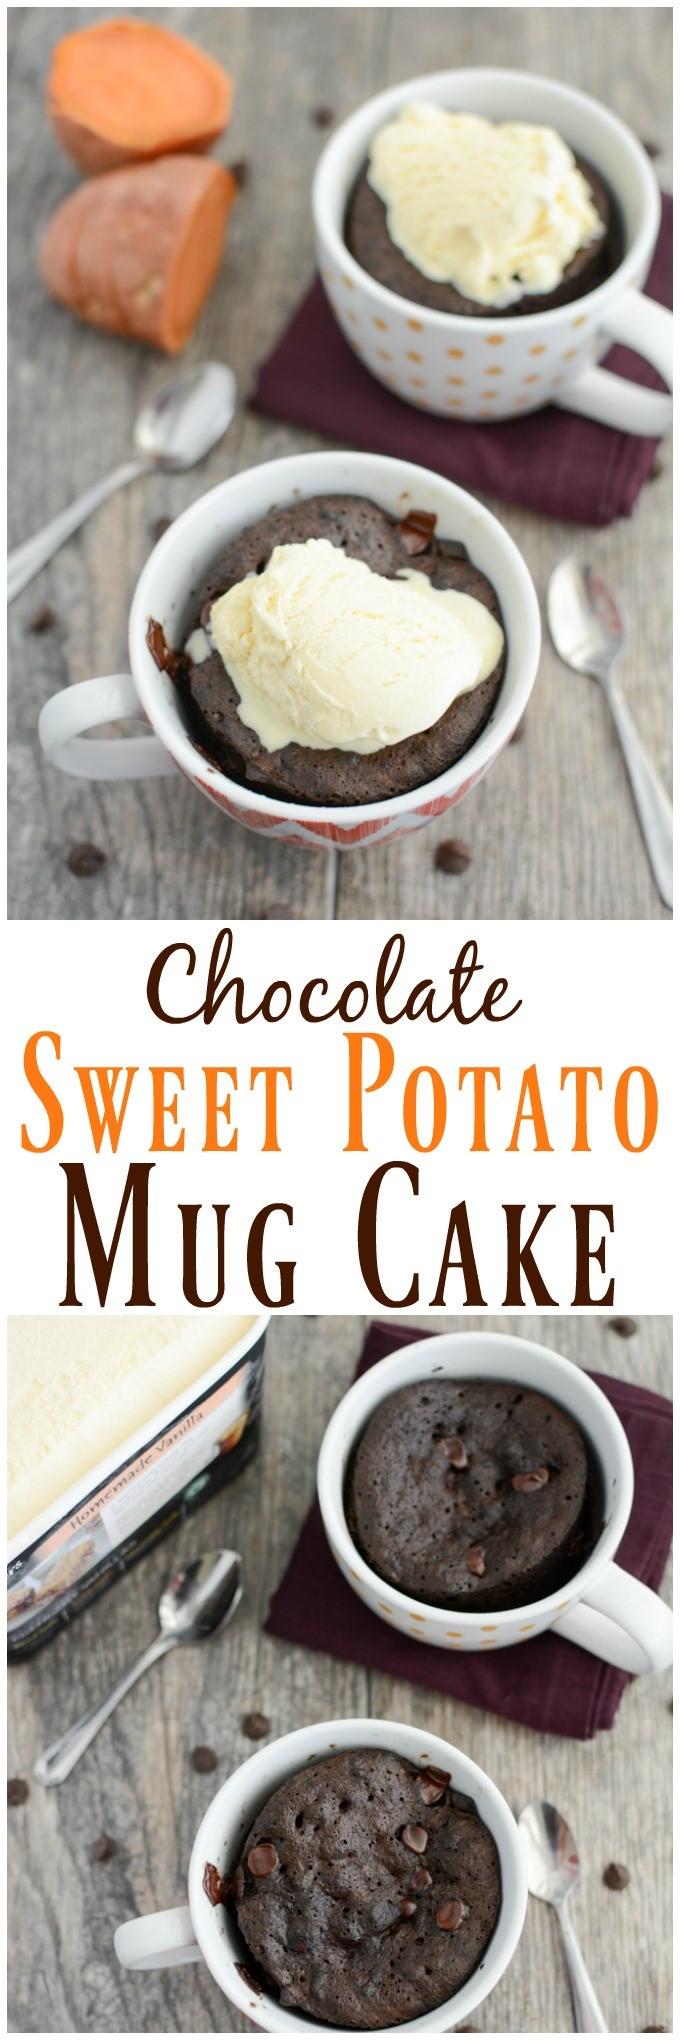
Chocolate Sweet Potato Mug Cake

May 12, 2017 by Lindsay 6 Comments

Disclosure: This is a sponsored post written on behalf of Quitter’s Circle, a collaboration between the American Lung Association and Pfizer. All thoughts and opinions presented in this post are purely my own.

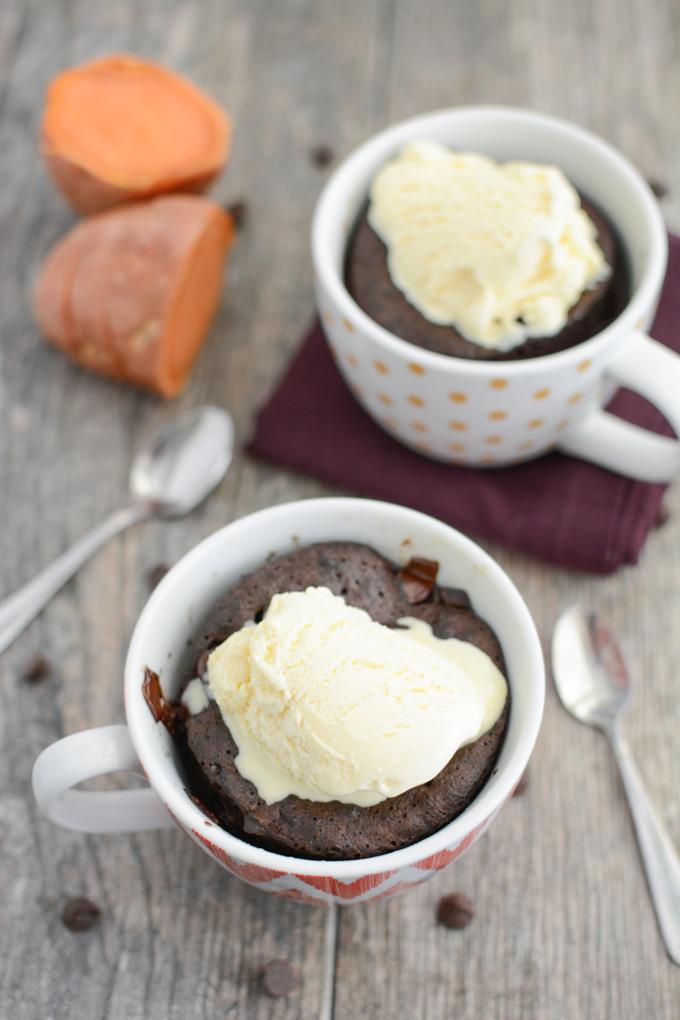
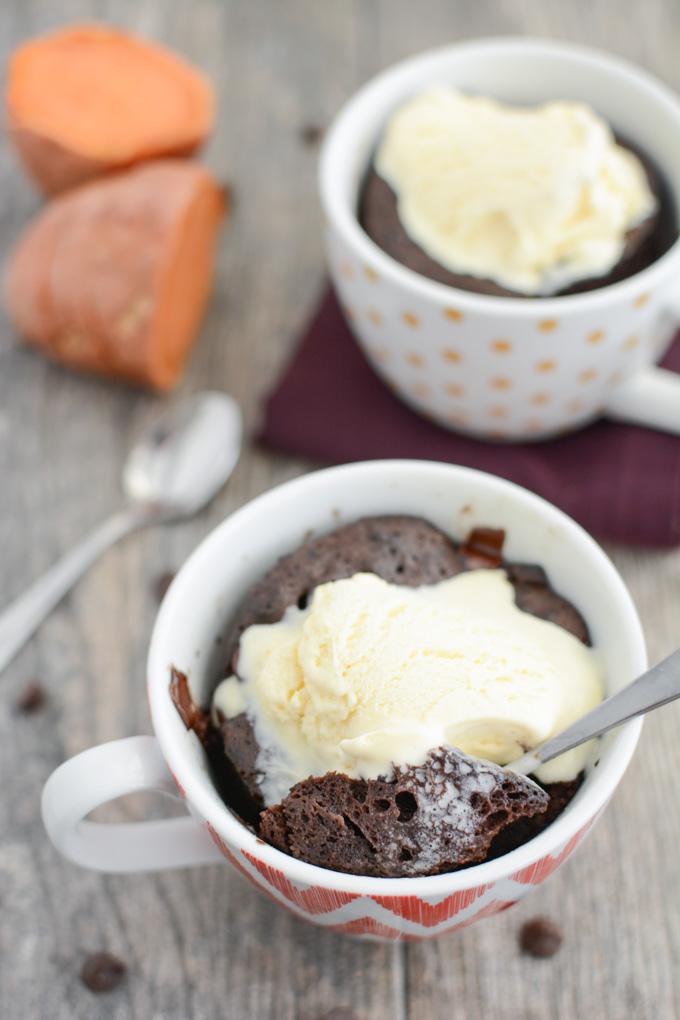
This Chocolate Sweet Potato Mug Cake recipe is a quick and easy way to satisfy your dessert craving!


This Chocolate Sweet Potato Mug Cake recipe is a quick and easy way to satisfy your dessert craving!

Hey friends!

Time for a dessert recipe. As you know, I’ve teamed up with the folks behind Quitter’s Circle this year to share some recipes that could be helpful to those trying to quit smoking, and are delicious enough for everyone to enjoy! So far I’ve shared two snack recipes – Spicy Ranch Popcorn Recipe and Cranberry Ginger Energy Bites – which can help fight off urges to smoke. Today we’re turning our attention to dessert!

While I don’t believe that every success/victory/goal met needs to be celebrated with food, I do believe there’s something to be said for occasionally enjoying a tasty dessert! And while I love making cookies, cakes, pies, etc….I don’t always love having all the extras laying around to tempt me in the following days.

Chocolate Sweet Potato Mug Cake


This Chocolate Sweet Potato Mug Cake recipe is a quick and easy way to satisfy your dessert craving!

Enter this mug cake. It’s chocolatey and delicious, can be made quickly and makes just enough for one serving…so you can enjoy your treat and then move on!

If you’re working on quitting smoking or supporting someone who is, whip one of these up to celebrate meeting one of your quitting goals like going x number of days without smoking or enjoying a night out with friends without taking a smoke break.

And for everyone else, mug cakes are a great way to enjoy a quick dessert with your significant other or treat yourself after a long day or week.

This Chocolate Sweet Potato Mug Cake recipe is a quick and easy way to satisfy your dessert craving!


Here’s how you make it:

Print

Chocolate Sweet Potato Mug Cake

Chocolate Sweet Potato Mug Cake 3
Print Recipe

5 Stars 4 Stars 3 Stars 2 Stars 1 Star

5 from 1 review

This healthy Chocolate Sweet Potato Mug Cake recipe is quick, easy and the perfect way to satisfy your dessert craving!5

  • Prep Time: 5 minutes
  • Cook Time: 2 minutes
  • Total Time: 7 minutes
  • Yield: serves 1

Ingredients

Scale
  • 1/4 cup cooked, mashed sweet potato
  • 2 tsp cocoa powder
  • 1 Tbsp maple syrup (or brown sugar)
  • 1 Tbsp peanut butter (or nut/seed butter of choice)
  • 1/4 tsp baking soda
  • 1 egg
  • chocolate chips, optional
  • ice cream for serving, optional

Instructions

  1. Mix first four ingredients in a bowl.
  2. Add egg and baking soda and stir until well combined.
  3. Mix in chocolate chips if desired.
  4. Pour into greased mug, ramekin or mason jar and microwave for 90 seconds.
  5. Top with ice cream if desired and serve warm.

Did you make this recipe?

Tag @theleangreenbean on Instagram

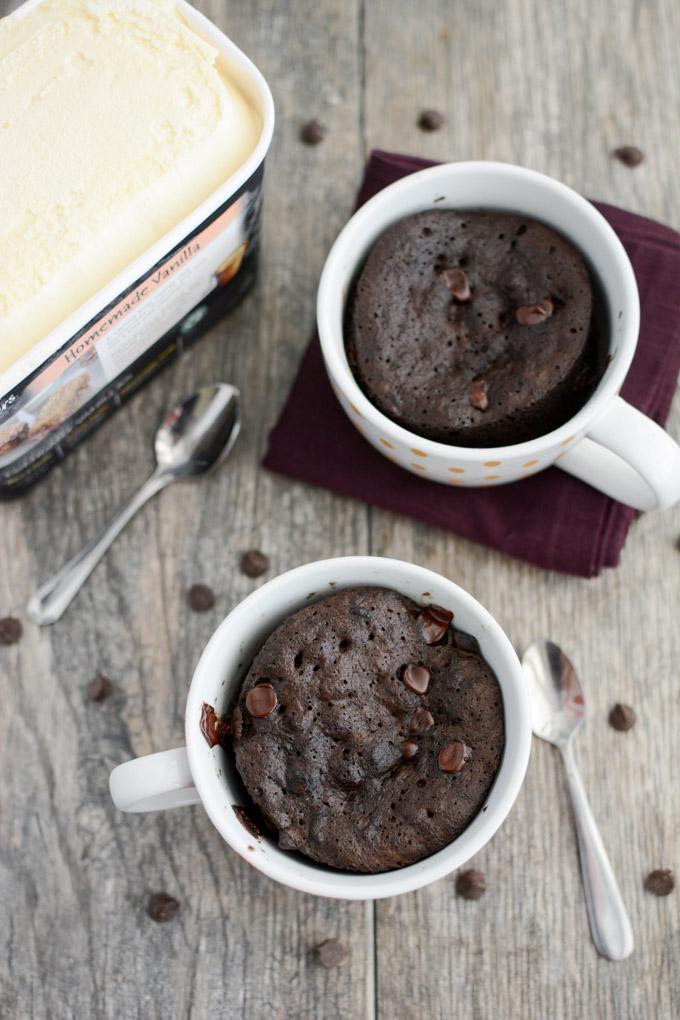
I like to mix a few chocolate chips into mine and definite top with a small scoop of ice cream. You could also top with some vanilla yogurt.

If you don’t have a large coffee mug, use a small glass mason jar or a large ramekin. And if you’re not a chocolate fan, try my regular Sweet Potato Mug Cake!


This Chocolate Sweet Potato Mug Cake recipe is a quick and easy way to satisfy your dessert craving!

Note that while this mug cake certainly contains less calories than sitting down to eat a whole chocolate cake to celebrate, it is still dessert and should be treated as such. Here are some more ideas for celebrating success to inspire and motivate you and some other recipes you can savor with your newly smokefree senses!

Enjoy!
–Lindsay–

Filed Under: Dessert, Sponsored Tagged With: Cocoa Powder, Egg, Maple Syrup, Sweet Potato

{Food Prep Idea} 5 Minute Breakfast Hash

May 10, 2017 by Lindsay 7 Comments

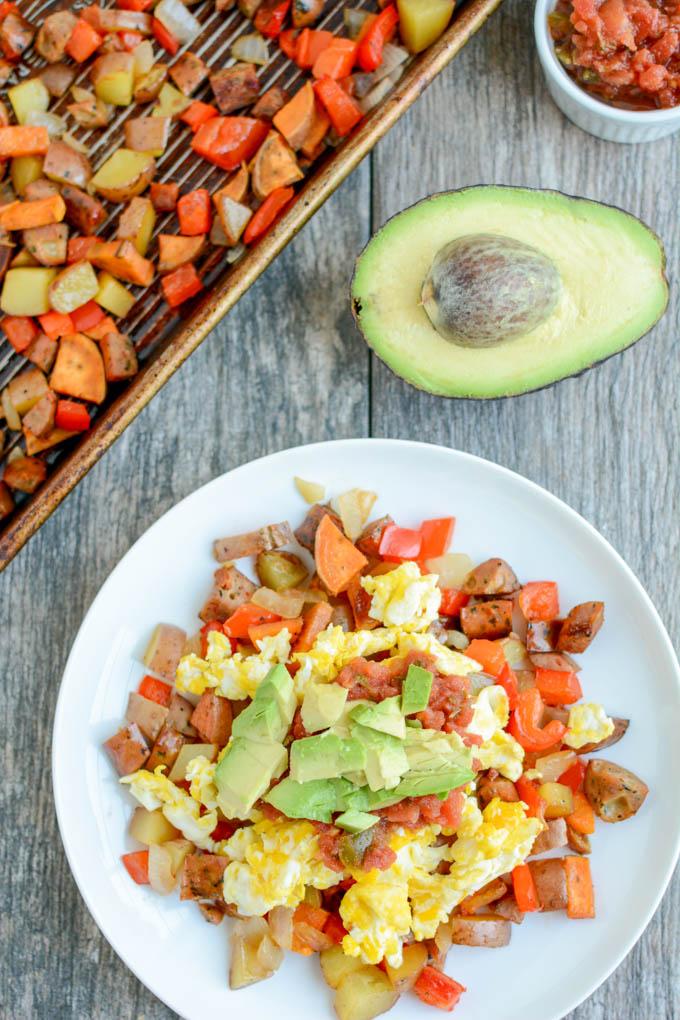
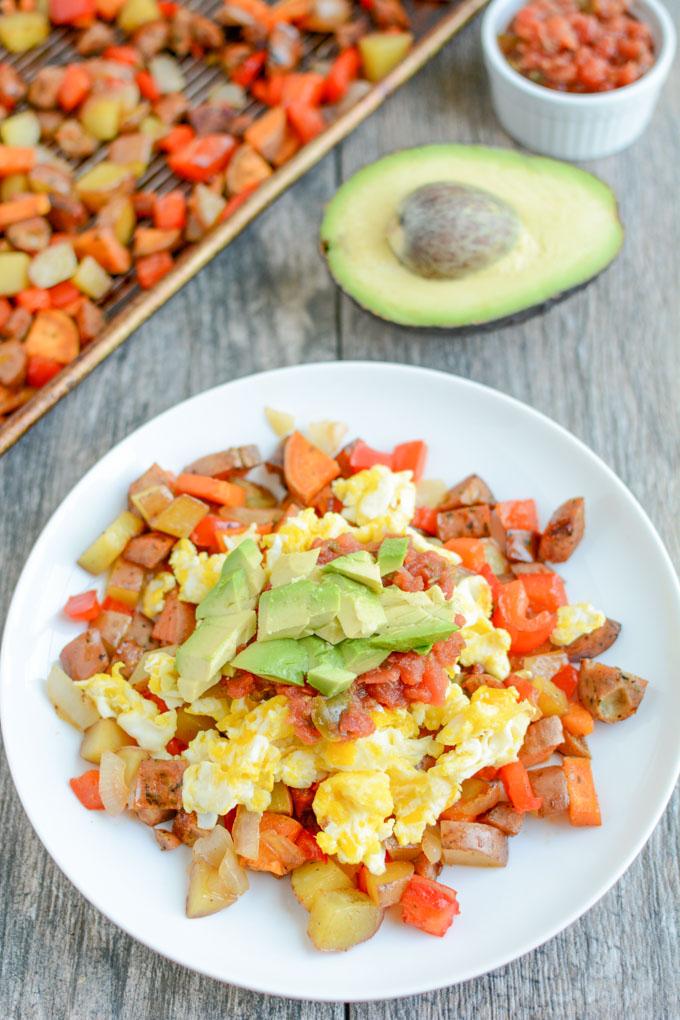
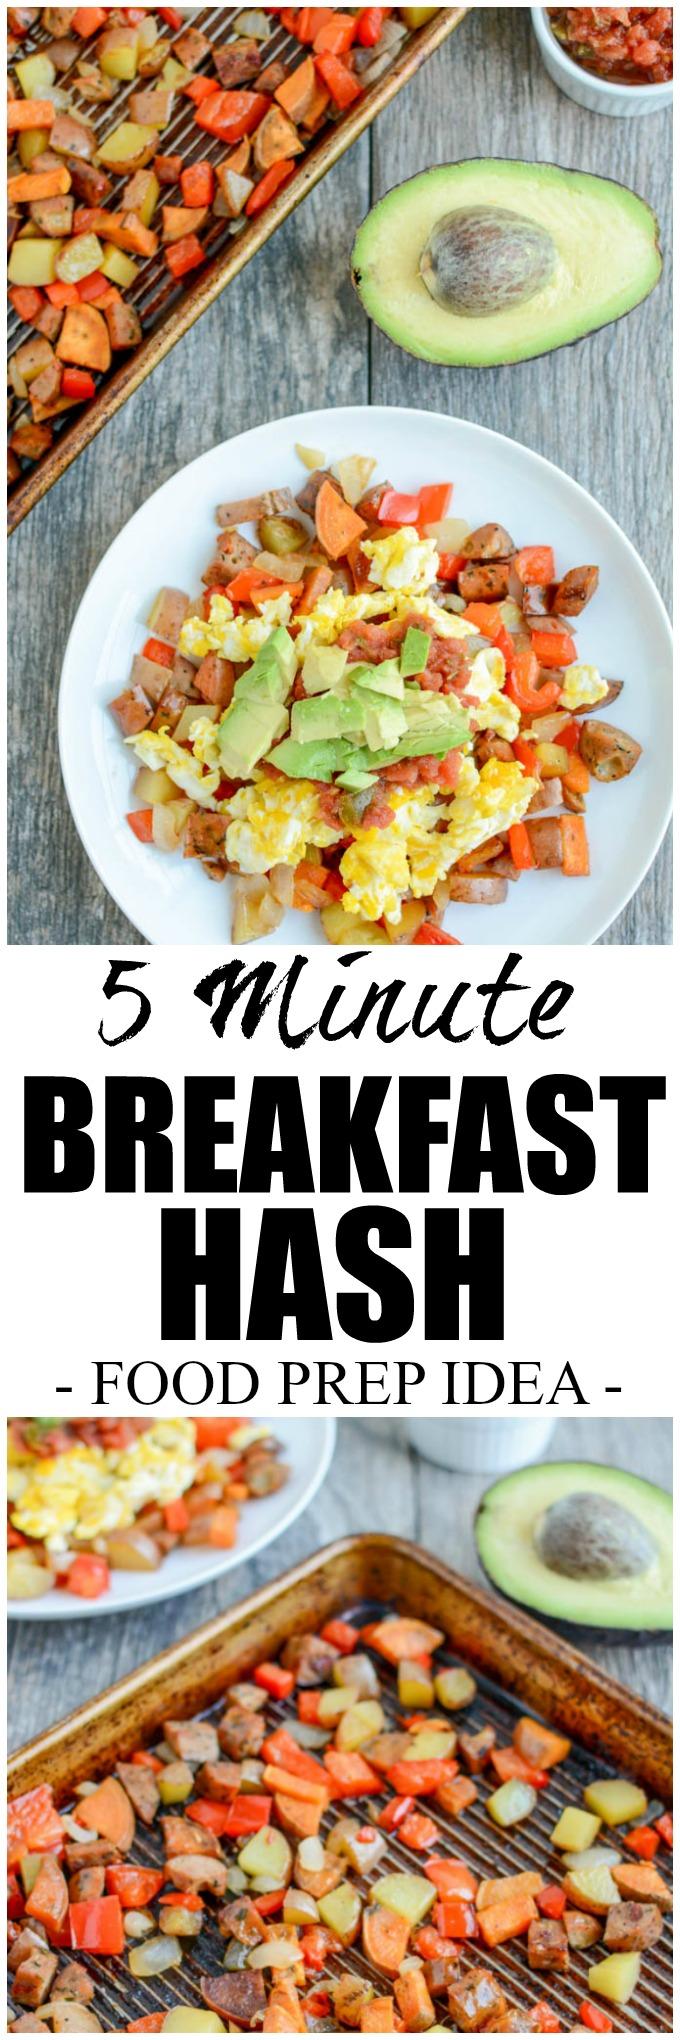
This 5 Minute Breakfast Hash comes together quickly on busy mornings with the help of weekend food prep. It’s full of protein and fiber to keep you full all morning.

This 5 Minute Breakfast Hash comes together quickly on busy mornings with the help of weekend food prep. It's full of protein and fiber to keep you full all morning.

Hi friends!

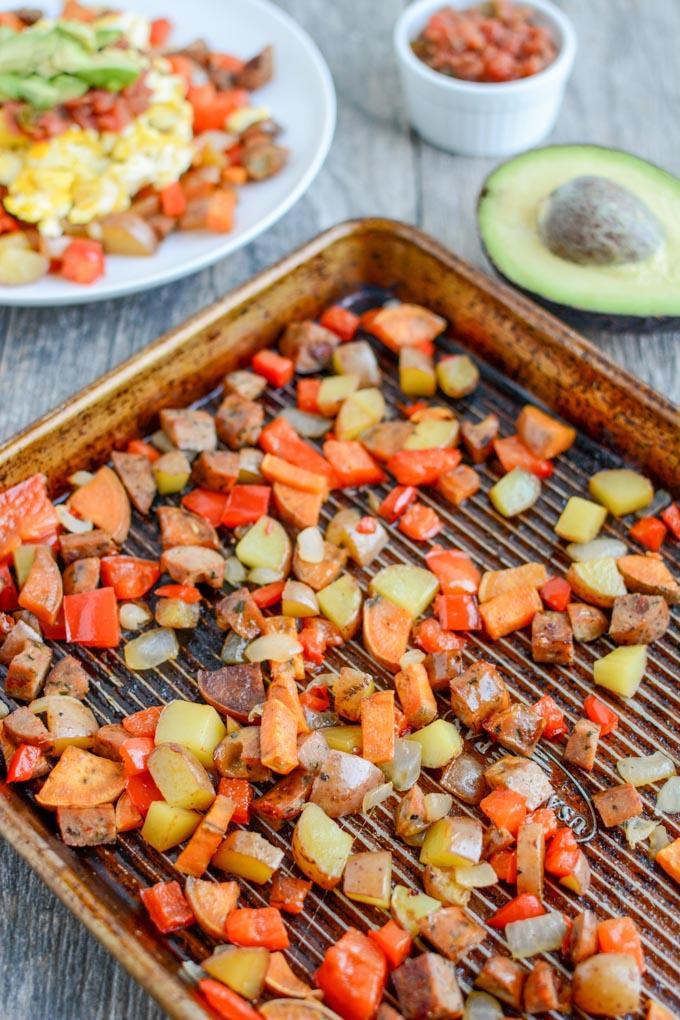
I wanted to pop in today and share an easy and delicious breakfast hubby and I have been enjoying for the past couple of weeks. To clarify the title, this 5 Minute Breakfast Hash takes just 5 minutes to put together during the week, but it does require you to do a little work on the weekend. And by a little work, I mean spend 5 minutes chopping a few things, toss them on a pan and stick them in the oven for 20 minutes. That’s it!

For several weeks, avocado toast with a sprinkle of sea salt and a fried egg was our go-to breakfast but for the past two weeks I’ve made this hash to change it up and we’ve been loving it.

This recipe is so easy it doesn’t even require any quantities. Simply chop up some potatoes (I usually use a mix of white and sweet but use whatever you like best) and put them on a pan with some chopped peppers, onions and chicken sausage. Toss everything with a little oil, salt and pepper and roast until the potatoes are soft. I cut mine pretty small so it only takes 15-20 minutes.

5 Minute Breakfast Hash

This 5 Minute Breakfast Hash comes together quickly on busy mornings with the help of weekend food prep. It's full of protein and fiber to keep you full all morning.

Stick the mixture in the fridge until you’re ready to eat. In the morning, I scoop some into a couple of bowls and stick them in the microwave to reheat for a minute or so. While that’s warming up, I scramble a few eggs, which takes 2-3 minutes. Add the eggs to the bowls and top everything with some salsa and diced avocado and boom! 5-minute breakfast.

This 5 Minute Breakfast Hash comes together quickly on busy mornings with the help of weekend food prep. It's full of protein and fiber to keep you full all morning.

Like I said, I didn’t use quantities because you can make as much or as little as you’d like for the week! Pro tip- want to make this even faster? Add some hard boiled eggs to your food prep and simply peel and chop a couple of those to add to the mix during week instead of using scrambled eggs.

You could also add extra veggies to the pan while roasting if you wanted to – mushrooms or broccoli would be good!

Print

5 Minute Breakfast Hash

This 5 Minute Breakfast Hash comes together quickly on busy mornings with the help of weekend food prep. It's full of protein and fiber to keep you full all morning.
Print Recipe

5 Stars 4 Stars 3 Stars 2 Stars 1 Star

No reviews

This 5 Minute Breakfast Hash comes together quickly on busy mornings with the help of weekend food prep. It’s full of protein and fiber to keep you full all morning.

  • Author: Lindsay
  • Prep Time: 5 minutes
  • Cook Time: 20 minutes
  • Total Time: 25 minutes

Ingredients

  • potatoes (white or sweet), diced
  • red bell pepper, diced
  • onion, diced
  • chicken sausage (fully cooked), diced
  • oil, salt & pepper
  • eggs
  • avocado
  • salsa

Instructions

Add diced potatoes, peppers, onions and chicken sausage to a pan.
Drizzle with oil, sprinkle with salt and pepper and mix well.
Roast at 400 degrees F for 15-20 minutes, stirring once, or until potatoes reach desired tenderness.
Store in a tupperware container in the fridge.
When ready to eat, microwave some of the potato mixture to warm.
Scramble eggs and add to potato mixture.
Top with salsa and avocado and serve warm.

Notes

Add extra vegetables to roasting pan if desired.
Sub hard boiled egg or fried egg for scrambled.

Did you make this recipe?

Tag @theleangreenbean on Instagram

Pretty easy right? Food prep for the win!

This 5 Minute Breakfast Hash comes together quickly on busy mornings with the help of weekend food prep. It's full of protein and fiber to keep you full all morning.

[clickToTweet tweet=”With a little weekend food prep you can enjoy this 5 minute breakfast hash on a busy morning!” quote=”With a little weekend food prep you can enjoy this 5 minute breakfast hash on a busy morning!”]

Filed Under: Breakfast, Food Prep Tagged With: Bell Pepper, Chicken Sausage, Egg, Onion, Potato

Roasted Sweet Potato Yogurt Bowls

May 3, 2017 by Lindsay

These Roasted Sweet Potato Yogurt Bowls are perfect for a healthy post-workout snack! A perfect mix of protein and carbohydrates to fuel your muscles and so easy to make. 

These Roasted Sweet Potato Yogurt Bowls are perfect for a healthy post-workout snack! A perfect mix of protein and carbohydrates to fuel your muscles and so easy to make.

Thanks to siggi’s dairy for sponsoring this post!

Hi friends!

As you guys know, I’m teaming up with my friends at siggi’s dairy this year to share some delicious ways to eat their yogurt. I’ve already shared these Berry Farro Breakfast Bowls and these Small Batch Cinnamon Roll Scones. Go check them out if you missed them! Today I’m back with a simple snack idea for you! It’s perfect for an afternoon pick-me-up OR a post-workout snack.

Roasted Sweet Potato Yogurt Bowl

These Roasted Sweet Potato Yogurt Bowls are perfect for a healthy post-workout snack! A perfect mix of protein and carbohydrates to fuel your muscles and so easy to make.

If you’re wondering about the flavor combo, you’re just gonna have to trust me. Sweet potatoes, blueberries and apples are all great with peanut butter so it works well. But if you’re not a blueberry fan, you could use siggi’s vanilla or coconut flavors!

A few more added bonuses? You can make it right in the yogurt container so you don’t actually have to dirty a bowl. And you can prep the sweet potato and apple mixture ahead of time so it’s super easy to throw together in a hurry.

So let’s talk about why this is a great post-workout snack.

These Roasted Sweet Potato Yogurt Bowls are perfect for a healthy post-workout snack! A perfect mix of protein and carbohydrates to fuel your muscles and so easy to make.

I chose siggi’s yogurt because it’s packed with protein which is important for helping muscles repair themselves. Each container of 4% blueberry has 12 gram of protein! Plus it’s made with simple ingredients and not a lot of sugar (the 4% blueberry contains only 8 grams in each cup, which is much lower than other greek yogurts on the market). Also, dairy products like milk and yogurt also contains leucine, an amino acid that can help with muscle recovery. Side note- I love this little graphic to help show why I love siggi’s:
siggis
So back to our snack: The sweet potatoes and apples are tossed in cinnamon and roasted to make them extra sweet and they provide carbohydrates which are also important post-workout. Top it all off with a drizzle of peanut butter (each teaspoon will add another gram of protein) a few chocolate chips (if desired)! You’ll get another gram of protein per 1/2 cup sweet potato so your snack could easily have 14-15 grams of protein!

Here’s how you make it:

Print

Roasted Sweet Potato Yogurt Bowls

Sweet Potato Yogurt Bowl 1
Print Recipe

5 from 1 review

These Roasted Sweet Potato Yogurt Bowls are perfect for a healthy post-workout snack! A perfect mix of protein and carbohydrates to fuel your muscles and so easy to make.

  • Author: Lindsay
  • Prep Time: 5 minutes
  • Cook Time: 20 minutes
  • Total Time: 25 minutes
  • Yield: serves 2 - 4 1x

Ingredients

Scale
  • 1 cup chopped sweet potatoes
  • 1 cup chopped apples
  • 1 tsp oil
  • 1 tsp cinnamon
  • 2 – 4 containers of 4% siggis blueberry yogurt (or your favorite flavor)
  • peanut butter for drizzling

Instructions

  1. Toss chopped sweet potatoes and apples in oil and cinnamon.
  2. Roast at 400 degrees for 15-20 minutes until sweet potatoes reach desired softness, stirring every 10 minutes.
  3. Push yogurt to sides of container, add 1/2 -1 cup sweet potato mixture to the middle of each one, drizzle with peanut butter and enjoy! (If you’re using 1 cup, you’ll probably need a separate bowl. Depends how hungry you are!)

Did you make this recipe?

Tag @theleangreenbean on Instagram

You could obviously put this in a separate bowl, but added the sweet potatoes right to the yogurt container worked well for me! If you want to add more of the sweet potato mixture – ie more like 1 cup vs half a cup, you’ll probably need a separate bowl. Just depends how hungry you are! This would also be good for breakfast!

These Roasted Sweet Potato Yogurt Bowls are perfect for a healthy post-workout snack! A perfect mix of protein and carbohydrates to fuel your muscles and so easy to make.

[clickToTweet tweet=”Try this Roasted Sweet Potato Yogurt Bowl for an easy post-workout snack!” quote=”Try this Roasted Sweet Potato Yogurt Bowl for an easy post-workout snack!”]

Enjoy!
–Lindsay–

Filed Under: Snack, Breakfast, Sponsored Tagged With: Apple, Peanut Butter, Sweet Potato, Yogurt

Mediterranean Turkey Spinach Salad

May 1, 2017 by Lindsay 15 Comments

This Mediterranean Turkey Spinach Salad recipe is packed with protein and flavor! Prep the components ahead of time and assemble for a quick, healthy lunch or dinner!

This Mediterranean Turkey Spinach Salad recipe is packed with protein and flavor! Prep the components ahead of time and assemble for a quick, healthy lunch or dinner!

Thanks to the National Turkey Federation for sponsoring this post!

Hi Friends!

Let’s talk turkey, shall we? I’m excited to be teaming up with the National Turkey Federation this year to share a couple of recipes and spread the turkey love. I know there are people in the camp that think turkey should only be consumed as a whole bird at Thanksgiving. I’m not one of them and I don’t think you should be either!

Here’s why:
There are tons of turkey products available at the store year round. You can find turkey breasts, tenderloins, thighs and drumsticks, as well as turkey sausage and ground turkey meat. Recently I’ve fallen in love with turkey tenderloin. They’re the perfect size for roasting or grilling in a short amount of time. I’ve also got turkey thighs on my list of things to grill this summer since the dark meat is so full of flavor.

This Mediterranean Turkey Spinach Salad recipe is packed with protein and flavor! Prep the components ahead of time and assemble for a quick, healthy lunch or dinner!

A few more turkey highlights? It’s a lean protein packed with immune-boosting nutrients like iron, zinc and potassium that help keep you fuller longer and it easily soaks up flavors, making it the perfect canvas for marinades and seasonings! A true superfood. If you look at the store, you can even probably find some turkey tenderloins that are pre-marinated and ready to roast or grill! So easy!

This Mediterranean Turkey Spinach Salad recipe is packed with protein and flavor! Prep the components ahead of time and assemble for a quick, healthy lunch or dinner!

So let’s talk about this salad, shall we? I started by marinating my turkey tenderloins in a simple mixture of red wine vinegar, olive oil, onion, garlic and oregano. Then I threw them on the grill to cook them quickly during one of my food prep sessions. If you don’t have access to a grill, you could easily pan sear and roast these in the oven or cook in a cast iron skillet.

This Mediterranean Turkey Spinach Salad recipe is packed with protein and flavor! Prep the components ahead of time and assemble for a quick, healthy lunch or dinner!

That’s what I love about this salad. You can prep the tenderloins, veggie mixture and farro ahead of time so all you have to do is assemble when it’s time to eat! For the dressing, I just mixed some of my favorite spicy hummus with a little water to thin it down enough to pour as a dressing. Easy peasy!

So here’s how you make it:

Print

Mediterranean Turkey Spinach Salad

This Mediterranean Turkey Spinach Salad recipe is packed with protein and flavor! Prep the components ahead of time and assemble for a quick, healthy lunch or dinner!
Print Recipe

5 Stars 4 Stars 3 Stars 2 Stars 1 Star

5 from 1 review

  • Author: Lindsay
  • Prep Time: 10 minutes
  • Cook Time: 15 minutes
  • Total Time: 25 minutes
  • Yield: serves 4

Ingredients

Scale

Marinade:

  • 1/4 cup olive oil
  • 1/4 cup red wine vinegar
  • 3 cloves garlic, minced
  • 1/4 cup onion, diced
  • 1 tsp oregano
  • pinch of salt and pepper (optional)
  • 1 package turkey tenderloins (1.25 pounds)

Salad:

  • 1 cup farro, uncooked
  • 4 cups leaf lettuce, chopped
  • 4 cups baby spinach
  • 3 cups mixed vegetables (bell pepper, cucumber, onion, tomato)
  • 1/4 c crumbled feta

Dressing (optional):

  • 1/4 cup hummus (spicy or regular)
  • 1–2 Tbsp water

Instructions

Combine marinade ingredients in a large ziploc bag and shake well to coat. Refrigerate at least 4 hours or overnight.

Remove tenderloins from marinade and grill over medium heat for 8-10 minutes per side (or until internal temperature reaches 165 degrees F).

Cook farro according to package directions.

Combine chopped vegetables with feta and mix well.

Mix lettuce and spinach together and divide between 4 large bowls. Add 1/4 of the farro to each bowl. Top each bowl with 3/4 cup of vegetable mixture.

Once turkey is cooked, slice and divide among salads.

For the optional dressing, slowly add water to hummus and mix well until hummus reaches a pourable consistency or use your favorite dressing.

Did you make this recipe?

Tag @theleangreenbean on Instagram

That’s all there is to it! Enjoy this salad for lunch or dinner. It’s light and fresh, but still packed with protein from the turkey and farro and the veggies make it so pretty and colorful.

This Mediterranean Turkey Spinach Salad recipe is packed with protein and flavor! Prep the components ahead of time and assemble for a quick, healthy lunch or dinner!

If you’re not a fan of spinach salads you could easily use regular lettuce. I used a mix of half lettuce/half spinach.

This Mediterranean Turkey Spinach Salad recipe is packed with protein and flavor! Prep the components ahead of time and assemble for a quick, healthy lunch or dinner!

[clickToTweet tweet=”This Mediterranean Turkey Spinach Salad is full of protein and perfect for a make-ahead lunch!” quote=”This Mediterranean Turkey Spinach Salad is full of protein and perfect for a make-ahead lunch!”]


Filed Under: Lunch, Dinner, Soup & Salad, Sponsored Tagged With: Chicken, Farro, Garlic, Oil, Onion, Red Wine Vinegar, Spinach

Spicy Salmon Cornmeal Cakes

April 28, 2017 by Lindsay 17 Comments

These Spicy Salmon Cornmeal Cakes are made with just a few simple ingredients and are great for a quick, healthy dinner. Enjoy the leftovers over a salad for lunch!

These Spicy Salmon Cornmeal Cakes are made with just a few simple ingredients and are great for a quick, healthy dinner. Enjoy the leftovers over a salad for lunch!

This post was originally published in February 2011. Photos and text updated April 2017.

Hi Friends!

I originally shared this recipe six years ago (WHAT?!) on the blog! It’s been a favorite of mine ever since and I continue to make them a couple times a year. It’s one of my go-to recipes when I have nothing to make because I always seem to have salmon in the freezer and cornmeal in the pantry.

The first time I made them, I was experimenting with whether the cakes would stick together if I used yogurt and left out the egg (because I was out of them). Turns out they did! Since then I’ve made them with hummus instead of yogurt as well and that works equally well.

I bake these in the oven because it’s hands off and easy…just put them on parchment paper and flip them once during baking. I most recently made these earlier this week and served them over cauliflower rice. I bought the pre-made kind you can just pop in the microwave and mixed it with a little butter, some garlic powder and some peas.

These Spicy Salmon Cornmeal Cakes are made with just a few simple ingredients and are great for a quick, healthy dinner. Enjoy the leftovers over a salad for lunch!

These salmon cakes are great for food prep because they actually taste better the second day. You could also cook the salmon ahead of time and make the cakes the night of. They’re good hot or cold and I love topping them with salsa or guacamole. Here’s how you make them:

Print

Spicy Salmon Cornmeal Cakes

These Spicy Salmon Cornmeal Cakes are made with just a few simple ingredients and are great for a quick, healthy dinner. Enjoy the leftovers over a salad for lunch!
Print Recipe

5 Stars 4 Stars 3 Stars 2 Stars 1 Star

4 from 1 review

  • Author: Lindsay
  • Prep Time: 5 minutes
  • Cook Time: 16 minutes
  • Total Time: 21 minutes
  • Yield: makes 8-10 cakes 1x

Ingredients

Scale
  • 1 pound salmon fillets, cooked
  • 1/4 cup red pepper, diced
  • 1/4 cup onion, diced
  • 2 cloves garlic, minced
  • 1 tsp Old Bay seasoning
  • 2–3 tsp sriracha (optional)
  • 1/3 cup cornmeal
  • 1/3 cup plain yogurt or hummus

Instructions

Place salmon in a large bowl and flake into pieces. Add peppers, onions, garlic, Old Bay and sriracha and stir to combine.

Add peppers, onions, garlic, Old Bay and sriracha and stir to combine.

Add cornmeal and stir well.

Add yogurt or hummus and mix until well combined.

Form into 8-10 small cakes, squeezing firmly to ensure they stick together.

Bake at 400 degrees for 16 minutes, flipping once.

Notes

Serve with a dipping sauce like yogurt mixed with thai chili sauce, guacamole or salsa.

Did you make this recipe?

Tag @theleangreenbean on Instagram

I’ve noticed that the hummus makes these slightly drier than the yogurt, but I always top them with a dipping sauce that takes care of that. Be sure to squeeze these together very tightly when forming the cakes and don’t make them too big or they’ll be hard to flip.

These Spicy Salmon Cornmeal Cakes are made with just a few simple ingredients and are great for a quick, healthy dinner. Enjoy the leftovers over a salad for lunch!

[clickToTweet tweet=”These Spicy Salmon Cornmeal Cakes are perfect for a quick lunch or dinner. ” quote=”These Spicy Salmon Cornmeal Cakes are perfect for a quick lunch or dinner.”]

Enjoy!
–Lindsay–


Filed Under: Dinner, Lunch Tagged With: Bell Pepper, Cornmeal, Garlic, Onion, Salmon, Yogurt

Cinnamon Sugar Sweet Potato Peels

April 21, 2017 by Lindsay 14 Comments

These Cinnamon Sugar Sweet Potato Peels are a fun dessert idea! Eat them as is, crumble over ice cream or yogurt or drizzle with chocolate for a sweet treat! 

These Cinnamon Sugar Sweet Potato Peels are a fun dessert idea! Eat them as is, crumble over ice cream or yogurt or drizzle with chocolate for a sweet treat!

Hi friends!

It’s time for another month of The Recipe Redux! This month’s theme was Easy Ways To Reduce Food Waste and I gotta say I’m pretty pumped about this one! I actually don’t usually peel my sweet potatoes unless I’m using them in a pureed recipe like this Curried Sweet Potato Soup. The skin doesn’t really bother me and it’s full of fiber and nutrients like potassium.

However, I know a lot of people don’t like the texture of the skin so they do peel them. Today’s recipe is a fun way to transform those peels into a sweet, crunchy treat that’s perfect for dessert!

Cinnamon Sugar Sweet Potato Peels

These Cinnamon Sugar Sweet Potato Peels are a fun dessert idea! Eat them as is, crumble over ice cream or yogurt or drizzle with chocolate for a sweet treat!

A couple weeks ago I was looking through the latest issue of Cooking Light and there was a quick tip in there to roast your root vegetable peels and add them to soups and salads for some extra crunch. I was intrigued by the idea so for this month’s theme, I decided to try something similar with a dessert twist!

These really couldn’t be any easier. Just peel your sweet potatoes, toss with a little oil, cinnamon and sugar and stick them in the oven for about 10 minutes. Then enjoy them as is for a crunchy treat, drizzle them with chocolate or add them to your bowl of ice cream or yogurt! I got about 12 long peels per sweet potato and broke them in half before roasting so each sweet potato gives you about 24 crunchy peels.

These Cinnamon Sugar Sweet Potato Peels are a fun dessert idea! Eat them as is, crumble over ice cream or yogurt or drizzle with chocolate for a sweet treat!

I don’t usually measure anything when I make these but here are some measurements to give you a starting point:

Print

Cinnamon Sugar Sweet Potato Peels

These Cinnamon Sugar Sweet Potato Peels are a fun dessert idea! Eat them as is, crumble over ice cream or yogurt or drizzle with chocolate for a sweet treat!
Print Recipe

5 Stars 4 Stars 3 Stars 2 Stars 1 Star

No reviews

These Cinnamon Sugar Sweet Potato Peels are a fun dessert idea! Eat them as is, crumble over ice cream or yogurt or drizzle with chocolate for a sweet treat!

  • Author: Lindsay
  • Prep Time: 3 minutes
  • Cook Time: 10 minutes
  • Total Time: 13 minutes
  • Yield: 48 peels 1x

Ingredients

Scale
  • 2 medium large sweet potatoes
  • 3/4 – 1 tsp oil
  • 1/4 – 1/2 tsp cinnamon
  • 1 tsp brown sugar
  • melted chocolate chips for drizzling (optional)

Instructions

  1. Preheat oven to 400 degrees F.
  2. Wash and scrub sweet potatoes to clean. Dry very well.
  3. Peel sweet potatoes lengthwise (I got about 12 long peels per sweet potato).
  4. Break each peel in half and place on a foil-lined baking sheet.
  5. Drizzle with oil and use hands to toss to coat and ensure all pieces get covered. You want them to be coated but don’t use too much oil or they won’t crisp up!
  6. Sprinkle with cinnamon and sugar and mix with your hands to coat evenly.
  7. Spread into a single layer on the baking sheet and bake for 5 minutes.
  8. Stir and bake 2 min more.
  9. Stir again and continue to bake 1-2 minutes at a time until desired doneness is reached. This will depend on your oven. For mine, 9 minutes was perfect!
  10. Let cool and enjoy! Drizzle with chocolate if desired.

Did you make this recipe?

Tag @theleangreenbean on Instagram

That’s all there is to it!

These Cinnamon Sugar Sweet Potato Peels are a fun dessert idea! Eat them as is, crumble over ice cream or yogurt or drizzle with chocolate for a sweet treat!

You could also try this with white potatoes- skip the cinnamon and sugar, dip half of each peel in chocolate and sprinkle with sea salt! Kinda like a chocolate dipped potato chip I’d imagine…although I haven’t tried that version yet myself.

Like this idea? Pin it for later or share with friends! An easy way to reduce a bit of food waste.

These Cinnamon Sugar Sweet Potato Peels are a fun dessert idea! Eat them as is, crumble over ice cream or yogurt or drizzle with chocolate for a sweet treat!

[clickToTweet tweet=”Don’t toss those sweet potato peels! Add some oil, cinnamon and sugar for a crunchy treat!” quote=”Don’t toss those sweet potato peels! Add some oil, cinnamon and sugar for a crunchy treat!”]

Let’s chat:

How do you reduce food waste in your house?

Enjoy!
–Lindsay–

For more ideas to reduce food waste, click the image below and check out this month’s linkup!

recipe-redux-linky-logo

Filed Under: Dessert Tagged With: Oil, Sugar, Sweet Potato

One Pot Orzo Pasta Salad with Chicken Sausage

April 19, 2017 by Lindsay 3 Comments

This One Pot Orzo Pasta Salad with Chicken Sausage is perfect for BBQs, potlucks, and parties. Serve it as a side dish or a light lunch or dinner.

This one pot Orzo Pasta Salad with Chicken Sausage is perfect for BBQs, potlucks, and parties. Serve it as a side dish or a light lunch or dinner.

Hi friends!

Just popping in to share a quick recipe with you guys.  The weather is warming up here in Ohio and that means we’re spending ALL our free time outside at the water table. We’re also in the awkward temperature zone where it’s uncomfortably hot in the house without a fan, but not hot enough to warrant turning on the air conditioner.

So while Squish spends his time pour water back and forth between various containers, I’ve been spending my time dreaming up easy one pot meals that can be prepped ahead of time and can be eaten cold.

One Pot Orzo Pasta Salad

This one pot Orzo Pasta Salad with Chicken Sausage is perfect for BBQs, potlucks, and parties. Serve it as a side dish or a light lunch or dinner.

Enter this pasta salad. Orzo is one of my favorite pastas for one pot meals because it cooks quickly in a small amount of liquid and it’s just the right size for getting some in every bite. I combined it with lots of veggies and some chicken sausage (because it comes pre-cooked and i’m all about easy these days) and voila! We ate this pasta salad for both lunch and dinner, but it would also make a good side dish.

I amped up the veggies and went light on the chicken sausage but you could easily add more if you wanted to. Or make it vegetarian by replacing it with beans or tofu.


This one pot Orzo Pasta Salad with Chicken Sausage is perfect for BBQs, potlucks, and parties. Serve it as a side dish or a light lunch or dinner.

Here’s how you make it:

Print

One Pot Orzo Pasta Salad with Chicken Sausage

This Orzo Pasta Salad with Chicken Sausage is perfect for BBQs, potlucks, and parties. Serve it as a side dish or a light lunch or dinner.
Print Recipe

5 Stars 4 Stars 3 Stars 2 Stars 1 Star

1 from 1 review

This one pot Orzo Pasta Salad with Chicken Sausage is perfect for BBQs, potlucks, and parties. Serve it as a side dish or a light lunch or dinner.

  • Author: Lindsay
  • Prep Time: 10 minutes
  • Cook Time: 15 minutes
  • Total Time: 25 minutes
  • Yield: serves 4-6 1x

Ingredients

Scale
  • 2 cloves garlic, minced
  • 1/2 cup onion, diced
  • 3/4 cup mushrooms, diced
  • 1 cup bell pepper (red/orange/yellow), diced
  • 3/4 cup corn kernals
  • 1 cup green beans, chopped (fresh or frozen)
  • 1/2 tsp salt
  • 1 tsp paprika
  • 2 chicken sausages, quartered and sliced
  • 1/3 cup orzo, uncooked
  • 1 1/3 cup chicken broth, divided
  • 2 handfuls fresh baby spinach leaves
  • 3/4 cup fresh tomato, chopped
  • 1/4 cup crumbled feta

Instructions

In a large pan or pot, add a little oil and saute garlic, onion, mushroom, peppers, corn, beans and chicken sausage over medium high heat for 5 minutes.
Add uncooked orzo and 1 cup broth. Bring liquid to a boil and cook 3 minutes. Reduce heat to medium and cook 5 more minutes, stirring frequently.
Add spinach and remaining 1/3 cup broth and cook until wilted- about 2 minutes.
Remove from heat and stir in tomatoes and feta.
Serve cold (or warm/room temperature if desired).

Notes

Feel free to add extra vegetables or chicken sausage if you want.
To make it vegetarian, sub beans or tofu for the chicken sausage.

Did you make this recipe?

Tag @theleangreenbean on Instagram

So easy. I used frozen corn and green beans but you could easily use fresh. If you cook this in a cast iron skillet, I’d cook the green beans separately and add them in at the end because the cast iron makes them turn a weird shade of green. (That’s why mine look a little ugly in the pics…bc I forgot.) If you use a regular pot or pan it shouldn’t be an issue.

This one pot Orzo Pasta Salad with Chicken Sausage is perfect for BBQs, potlucks, and parties. Serve it as a side dish or a light lunch or dinner.


[clickToTweet tweet=”This Orzo Pasta Salad with Chicken Sausage is perfect for summer BBQs or a light lunch. ” quote=”This Orzo Pasta Salad with Chicken Sausage is perfect for summer BBQs or a light lunch.”]

Let’s chat:

What’s your favorite pasta salad recipe?

Enjoy!
–Lindsay–

Filed Under: Dinner, Lunch, Side Dish Tagged With: Bell Pepper, Chicken Broth, Chicken Sausage, Corn, Garlic, Onion, Pasta, Spinach

Sweet Potato Waffle Nachos

April 12, 2017 by Lindsay 6 Comments

These easy Sweet Potato Waffle Nachos are a great way to transform leftover pulled pork or chicken into a healthy new lunch or dinner. This recipe would also make a great party appetizer!

These easy Sweet Potato Waffle Nachos are a great way to transform leftover pulled pork or chicken into a healthy new lunch or dinner. This recipe would also make a great party appetizer!

Hi friends!

Just popping in with a quick recipe idea for you. It’s actually more of an idea than an actual recipe….but it’s become a new favorite so I snapped a few pictures to share with you!

Last week while we were at the grocery store, we noticed they were having a sale on pork shoulder. Pulled pork sounded good to both of use so I grabbed one. However, instead of the typical 5 pound size we normally get, the smallest one they had was 9 pounds. Since it was on sale, I was ok with it…but I knew that meant I would have to get creative this week and figure out how to use up all of that pork.

I cooked it all and froze some. We had bbq pulled pork sandwiches and tacos and I still had some leftover so I whipped up these nachos for lunch one day. They’re really not all that different from the loaded sweet potatoes I make as one of my go-to meals, but the mini waffles make them just a little bit more fun to eat!

Sweet Potato Waffle Nachos

These easy Sweet Potato Waffle Nachos are a great way to transform leftover pulled pork or chicken into a healthy new lunch or dinner. This recipe would also make a great party appetizer!

The waffles themselves are actually just the base for my Guacamole Waffle Bites. I just arranged them like chips and topped them like nachos! These are super easy to customize. Top them with whatever you have in the fridge – leftover pulled pork, leftover chicken or leave the meat off and make them vegetarian! I also added onions, peppers, black beans, cheese, avocado and salsa!

Here’s how to make them:

Print

Sweet Potato Waffle Nachos

These easy Sweet Potato Waffle Nachos are a great way to transform leftover pulled pork or chicken into a healthy new lunch or dinner. This recipe would also make a great party appetizer!
Print Recipe

5 Stars 4 Stars 3 Stars 2 Stars 1 Star

No reviews

These easy Sweet Potato Waffle Nachos are a great way to transform leftover pulled pork or chicken into a healthy new lunch or dinner. This recipe would also make a great party appetizer!

  • Author: Lindsay
  • Prep Time: 15 minutes
  • Cook Time: 5 minutes
  • Total Time: 20 minutes
  • Yield: Serves 2

Ingredients

Scale
  • 1 cup cooked, mashed sweet potato
  • 1 egg
  • 1/4 cup shredded cheese
  • chopped bacon and jalapeno, optional
  • cooked pulled pork or chicken
  • chopped red peppers and onions
  • black beans
  • shredded cheese
  • diced avocado
  • salsa or fresh tomatoes
  • minced cilantro, optional

Instructions

In a small bowl, combine mashed sweet potato, egg, cheese and chopped bacon and jalapeno if using.
Drop one tablespoon of batter into each quadrant of a waffle iron, close and cook.
Repeat two more times.
Arrange 12 mini waffles on a foil-lined baking sheet.
Top with pork, peppers, onions, beans and shredded cheese.
Place under broiler for 4-5 minutes.
Add diced avocado and salsa and serve.

Notes

These can be eaten using the mini waffles like chips but can also be eaten with a knife and fork. You can easily double the waffle recipe to make a bigger batch.

Did you make this recipe?

Tag @theleangreenbean on Instagram

Pretty easy, right? Let me know if you guys give these a try! There definitely a fun way to transform your leftovers!

These easy Sweet Potato Waffle Nachos are a great way to transform leftover pulled pork or chicken into a healthy new lunch or dinner. This recipe would also make a great party appetizer!

[clickToTweet tweet=”Transform leftover pork or chicken into a new meal with these Sweet Potato Waffle Nachos!” quote=”Transform leftover pork or chicken into a new meal with these Sweet Potato Waffle Nachos!”]

Let’s chat!

What are you favorite nacho toppings?

Enjoy!
–Lindsay–

Filed Under: Appetizer, Dinner Tagged With: Avocado, Bell Pepper, Black Bean, Cheese, Chicken, Egg, Sweet Potato

Small Batch Cinnamon Roll Scones

April 11, 2017 by Lindsay 15 Comments

These Small Batch Cinnamon Roll Scones are perfect for a weekend breakfast or brunch. They’re bursting with cinnamon flavor and topped with a delicious yogurt drizzle. 

These Small Batch Cinnamon Roll Scones are perfect for a weekend breakfast or brunch. They're bursting with cinnamon flavor and topped with a delicious yogurt drizzle.

Thanks to siggi’s dairy for sponsoring this post!

Hi friends!

Boy do I have a treat for you guys today! As you know, I’m partnering with my friends at siggi’s dairy this year to showcase some delicious healthy ways to use their Icelandic-style yogurt. Remember this Berry Farro Breakfast Bowl I shared a few weeks ago?! It’s perfect for a quick weekday breakfast.

Today’s recipe is perfect for a leisurely weekend breakfast or brunch….or really any morning when you get a craving for cinnamon rolls. Except they’re scones. And they ready in less than 20 minutes – no yeast or kneading required! The scones themselves are bursting with cinnamony goodness and then they’re topped with a simple yogurt drizzle.

Cinnamon Roll Scones

These Small Batch Cinnamon Roll Scones are perfect for a weekend breakfast or brunch. They're bursting with cinnamon flavor and topped with a delicious yogurt drizzle.

And I do mean simple. It’s just siggi’s plain full-fat yogurt with a little powdered sugar. And the scones are made with just 7 simple, real food ingredients as well. I love using siggi’s vanilla yogurt in the scones for a little flavor without a ton of added sugar

If you ask me, these are a pretty good substitute for the tubes of pre-made cinnamon rolls you find in the grocery store that are loaded with sugar and saturated fat and have lord knows how many ingredients. The yogurt gives these scones a protein boost, which is always a bonus, and replaces things like hydrogenated oils and artificial flavors that may be found in pre-packaged cinnamon rolls.

These Small Batch Cinnamon Roll Scones are perfect for a weekend breakfast or brunch. They're bursting with cinnamon flavor and topped with a delicious yogurt drizzle.

The other good thing about this recipe? It’s a small batch. I love scones, but I don’t particularly like eating leftover scones for the next 4 days. This recipe makes just 4 regular or 6 mini scones which is perfect!

Here’s how you make them:

Print

Cinnamon Roll Scones

These Small Batch Cinnamon Roll Scones are perfect for a weekend breakfast or brunch. They're bursting with cinnamon flavor and topped with a delicious yogurt drizzle.
Print Recipe

5 Stars 4 Stars 3 Stars 2 Stars 1 Star

5 from 1 review

These Small Batch Cinnamon Roll Scones are perfect for a weekend breakfast or brunch. They’re bursting with cinnamon flavor and topped with a delicious yogurt drizzle.

  • Author: Lindsay
  • Prep Time: 5 minutes
  • Cook Time: 12 minutes
  • Total Time: 17 minutes
  • Yield: 4 scones or 6 mini scones 1x

Ingredients

Scale
  • 3/4 cup white whole wheat flour
  • 1 tsp baking powder
  • 1/4 tsp baking soda
  • 1 tsp cinnamon
  • 3 Tbsp butter, cubed
  • 1/4 cup siggi’s 4% vanilla yogurt
  • 3 Tbsp milk
  • 1/2 cup siggi’s plain 4% yogurt
  • 1– 2 Tbsp powdered sugar, depending on desired sweetness

Instructions

Preheat oven to 400 degrees F.
In a bowl, combine flour, baking powder, baking soda and cinnamon.
Add butter and cut in using a pastry blender or two knives until mixture resembles a course meal.
Add yogurt and mix until just combined.
Place on a baking sheet lined with parchment paper.
Use the sides of the parchment paper to shape dough into a circle about an inch thick.
Cut into 4-6 wedges and gently separate so there is space between the wedges.
Bake at 400 degrees F for 12-14 minutes.
Remove from oven and let cool.
Mix plain yogurt and powdered sugar until desired sweetness is reached. Scoop into a ziploc bag, cut off the corner and pipe over scones.

Notes

Wait to top with frosting until just prior to serving.
If desired you could spread on the frosting with a knife instead of piping.

Did you make this recipe?

Tag @theleangreenbean on Instagram

Aren’t they cute? I’m a sucker for mini-sized baked goods!

These Small Batch Cinnamon Roll Scones are perfect for a weekend breakfast or brunch. They're bursting with cinnamon flavor and topped with a delicious yogurt drizzle.

[clickToTweet tweet=”These Cinnamon Roll Scones are ready in 20 min and perfect for a weekend breakfast!” quote=”These Cinnamon Roll Scones are ready in 20 min and perfect for a weekend breakfast!”]

Enjoy!
–Lindsay–


Filed Under: Breakfast, Sponsored Tagged With: Butter, Milk, Sugar, White Whole Wheat Flour, Yogurt

Blueberry Cauliflower Smoothie

April 5, 2017 by Lindsay 23 Comments

This Blueberry Cauliflower Smoothie is packed with vegetables, protein and healthy fats. Easy and kid-friendly, it’s perfect for a healthy breakfast or snack!

This Blueberry Cauliflower Smoothie is packed with vegetables, protein and healthy fats. Easy and kid-friendly, it's perfect for a healthy breakfast or snack!

Hi friends!

Let’s talk smoothies. Specifically this smoothie…which Squish is currently asking for on repeat. Before you freak out over the fact that there’s cauliflower in there….let me tell you, I resisted for a while as well, but don’t knock it til you try it!

For years, spinach in smoothies has been all the rage…but move over leafy greens…there’s a new smoothie veggie in town and it’s cauliflower. It works perfectly in smoothies because it doesn’t really have much taste AND it’s white, so you can’t see it once it’s blended in. This is great for people (or kids) who get turned off by the green tint that spinach adds to smoothies- even though you can’t taste it.

If you’re feeling wild, you can actually add spinach to this smoothie as well, for even more veggies. Wild blueberries are the best for making the green less noticeable. I use it in my Blueberry Kefir Smoothie all the time! This smoothie is similar…with a few tweaks.

Blueberry Cauliflower Smoothie

This Blueberry Cauliflower Smoothie is packed with vegetables, protein and healthy fats. Easy and kid-friendly, it's perfect for a healthy breakfast or snack!

I’ve been using this combo for a while now and it’s a big hit at our house. If you’re looking for more options using frozen cauliflower, check out this Strawberry Banana Cauliflower Smoothie from Julie or this Chocolate Gingerbread Protein Smoothie from Alexis!

Per usual, smoothies are super easy to throw together and this one is no exception! I do usually take a minute to chop my cauliflower florets a little smaller before blending just to make sure they get all chopped up, but you don’t have to.

Here’s how you make it:

Print

Blueberry Cauliflower Smoothie

This Blueberry Cauliflower Smoothie is packed with vegetables, protein and healthy fats. Kid-friendly and ready in minutes, it's perfect for a healthy breakfast or snack!
Print Recipe

5 Stars 4 Stars 3 Stars 2 Stars 1 Star

4 from 1 review

This Blueberry Cauliflower Smoothie is packed with vegetables, protein and healthy fats. Easy and kid-friendly, it’s perfect for a healthy breakfast or snack!

  • Author: Lindsay
  • Prep Time: 2 minutes
  • Cook Time: 0 minutes
  • Total Time: 2 minutes

Ingredients

Scale
  • 1 clementine, peeled
  • 3/4 cup frozen cauliflower
  • 1/2 cup frozen wild blueberries
  • 1/2 cup plain, full-fat yogurt
  • 1 Tbsp peanut butter
  • handful of spinach, optional

Instructions

Add all ingredients to a high-powered blender making sure the clementine is at the bottom. Blend until smooth. Add a splash of water or juice if needed to help blend.

Nutrition

  • Serving Size: serves 1

Did you make this recipe?

Tag @theleangreenbean on Instagram

That’s all there is to it! I promise you can’t taste the cauliflower!

This Blueberry Cauliflower Smoothie is packed with vegetables, protein and healthy fats. Easy and kid-friendly, it's perfect for a healthy breakfast or snack!

[clickToTweet tweet=”Tried frozen cauliflower in your smoothie yet? This recipe is an easy way to up your veggies!” quote=”Tried frozen cauliflower in your smoothie yet? This recipe is an easy way to up your veggies!”]

Let’s chat:
What’s your favorite veggie to add to smoothies?

Enjoy!
–Lindsay–

Filed Under: Breakfast, Snack Tagged With: Blueberry, Cauliflower, Yogurt

To The Parents With The Colicky Baby

April 3, 2017 by Lindsay 32 Comments

Learn how to survive colic. Are you a new parent with a baby who won’t stop screaming? Here are my top 5 tips for surviving with a colicky baby.

Learn how to survive colic. Are you a new parent with a baby who won't stop screaming? Here are my top 5 tips for surviving with a colicky baby.

To the mom and dad with the colicky baby:

Hi. Fellow mom here. And not just any fellow mom. One who has survived the past five months with a colicky baby of her own.

I’m not going to ask you how you’re doing because I already know.

You’re tired (and not just the kind of tired that comes with having a newborn- been there, done that with my first baby.) No you’re not just tired. You’re exhausted, you’re irritable and you’re probably feeling a bit desperate.  You’re tired of people asking if baby is doing any better (No), tired of reading useless articles about how to calm a fussy baby (because none of them work on your baby) and most of all tired…oh so tired…of hearing your kid scream.

Before your baby was born, you probably heard about colic, read about it, maybe even knew someone with a colicky baby. But you’re probably realizing now that colic is it’s own beast…and until you deal with it on a personal level, you really have no idea what it means.

By now you’ve probably tried a million different things – diet changes, gas drops, reflux meds, noise machines, music, swings, bouncing, walking, babywearing, driving, singing, running water, swaddling, rocking, darkness….only to discover none of them work. Not a single one. It’s just hour after hour of screaming….day after day and night after night.

Learn how to survive colic. Are you a new parent with a baby who won't stop screaming? Here are my top 5 tips for surviving with a colicky baby.

It’s rough. And hard. And at times you’re probably gonna lose all hope. But don’t give up!

Although I’m not out of the woods yet, I have survived the past 5 months with a colicky baby of my own and I have a few tips for you:

  1. Realize that it will end. I don’t know when and probably not as soon as you’d like it to…but the endless screaming will not last forever. I promise.
  2. Be ok with letting them cry. It took me several weeks to realize this, but it is OK to feed them, put them in a clean diaper and then buckle them into a swing, turn it on and walk away for a while. It doesn’t make you a bad parent. It doesn’t mean you don’t love them. It just means you need a break. And let’s be honest, they’re probably going to cry anyways no matter what you do…so you might as well take a break.
  3. Find the quiet. When you take that break, get away from the crying. Go upstairs and take a shower. Go downstairs and turn the stereo on full blast. Go outside and take a walk. Whatever you have to do to get yourself a few minutes where you can’t hear the baby, do it.
  4. Try everything. Read all those articles and work your way through all the suggestions. Talk to other parents to see what worked for them and try it all. 99 of them won’t work. But when you find one that does, even for just one night…or for just a few minutes…it’s heaven.
  5. Cut yourself some slack. I honestly believe that a tape of a screaming baby could be used as a torture device. Sometimes it’s hard to hear yourself think with a screaming baby, let alone get anything productive done. So if you fall a little behind on pretty much everything, it’s ok.
  6. See #1.

Hang in there, mom and dad. You’re doing great. There’s nothing easy about parenting a newborn and colic only makes it harder. This to shall pass.

Learn how to survive colic. Are you a new parent with a baby who won't stop screaming? Here are my top 5 tips for surviving with a colicky baby.

That happy baby that actually lets you put her down for a few minutes without screaming? She’s coming. The baby that has the occasional day where she smiles a lot, only cries a few times and goes to bed at a decent hour so you can enjoy your evening? You’ll meet her soon.

And it’ll be worth every single hard day and night. I promise.

Learn how to survive colic. Are you a new parent with a baby who won't stop screaming? Here are my top 5 tips for surviving with a colicky baby.

If you’re still reading and you don’t have a colicky baby of your own…but maybe you know someone who does….let me tell you this. The best thing you can do for them is give them a break. Bringing food is great. Visiting is great. But the absolute best thing you can do for them is watch their kid(s) while they get out of the house. Even for an hour. At the end of the day. I’m talking about like 9pm, when the baby is going into its third straight hour of screaming for the 87th night in a row. Send them out the door while you take over.

P2130475

Yes, the baby will probably scream the whole time and it won’t be much fun for you….but trust me when I say they’ll appreciate it…and it will be just a drop in the bucket compared to what every night is like for them.

Parents of colicky babies are an elite group, bonded by an experience I wouldn’t wish on anyone, but we all survived and you will too! Buy yourself some good wine and some ear plugs and take it one day at a time. You’re doing great.

Learn how to survive colic. Are you a new parent with a baby who won't stop screaming? Here are my top 5 tips for surviving with a colicky baby.

And if you’re looking for the silver lining, here’s what I tell myself: Whenever someone apologizes to me because their baby is crying somewhere nearby, I can now honestly tell them that there is literally no amount of crying that offends me anymore. And then I offer to hold their baby, because I have become quite proficient at tuning out baby screams….and not everyone has had a chance to develop that important skill!

How To Survive Colic. My top five tips for new parents with a colicky baby.

Enjoy!
Lindsay

Filed Under: Kids

Puffed Amaranth Granola

March 29, 2017 by Lindsay 8 Comments

This Puffed Amaranth Granola recipe is lightly sweetened, packed with protein and perfect for a healthy, gluten-free breakfast or snack!

This Puffed Amaranth Granola recipe is lightly sweetened, packed with protein and perfect for a healthy, gluten-free breakfast or snack!

Thanks to Nuts.com for sponsoring this post!

Hi friends!

I’m super excited to share this Puffed Amaranth Granola recipe with you guys today because it includes a new-to-me food that had been on my list to try for what seems like forever now: amaranth.

If you haven’t heard of amaranth before, it’s an ancient seed that has a similar look and nutritional value to quinoa. It’s gluten-free, high in protein and fiber and full of vitamins and minerals. My friends over at Nuts.com has been selling it for a while now and when they reached out to me about trying it I jumped at the chance! Don’t be fooled by the name! They offer so much more than nuts! Tons of nuts, seeds, dried fruit, baking products, chocolate, coffee and more! If you haven’t checked out their website, go do so immediately!

Amaranth can be cooked to make porridge-type recipes, but what intrigued me the most was seeing that it can be popped or puffed almost like popcorn! I just knew I had to give it a try.

Puffed Amaranth Granola

Puffed Amaranth

The size after puffing is not quite as impressive as popcorn, but it is kinda fun to throw some in a pan and watch it go crazy…although it does take a bit of practice to keep from burning it.

Luckily, I did several test runs and took a few notes to share with you guys. Then I turned around and used it in a simple granola recipe that tastes great by the handful or over some yogurt!

This Puffed Amaranth Granola recipe is lightly sweetened, packed with protein and perfect for a healthy, gluten-free breakfast or snack!

It adds a nice little crunch to the granola and mixes well with the pumpkin and chia seeds I threw in there, along with some pecans, raisins and lots of cinnamon. You could easily swap in your favorite nuts or dried fruit if you’re not a fan of raisins or pecans….but I really liked this flavor combo.

Here’s the recipe and instructions for puffing:

Print

Puffed Amaranth Granola

This Puffed Amaranth Granola recipe is lightly sweetened, packed with protein and perfect for a healthy breakfast or snack!
Print Recipe

5 Stars 4 Stars 3 Stars 2 Stars 1 Star

4 from 1 review

This Puffed Amaranth Granola recipe is lightly sweetened, packed with protein and perfect for a healthy breakfast or snack!

  • Author: Lindsay
  • Prep Time: 10 minutes
  • Cook Time: 15 minutes
  • Total Time: 25 minutes
  • Yield: Makes approx 5-6 cups 1x

Ingredients

Scale
  • 3/4 cup puffed amaranth (2–3 Tbsp raw)
  • 1 cup rolled oats
  • 3/4 cup pepitas (shelled pumpkin seeds)
  • 3/4 cup chopped pecans
  • 2 Tbsp chia seeds
  • 1 tsp cinnamon
  • 1 tsp vanilla extract
  • 1 Tbsp oil
  • 1/3 cup maple syrup
  • 1/4 cup peanut butter
  • 3/4 cup raisins

Instructions

Heat a saucepan over medium heat. (It’s ready when you sprinkle some water in the bottom and it sizzles and dances around).
Add one tsp amaranth to the pan and put the lid on. It should begin popping immediately. If it doesn’t, dump it out and turn up the heat a little bit.
Let sit 5 seconds, shake the pan. Repeat 2-3 times for a total of no more than 20 seconds. Remove from pan.
If it looks good and didn’t burn, repeat the procedure with 1 Tablespoon at a time until you have 3/4 cup puffed amaranth.

In a large bowl, combine amaranth, oats, pepitas, pecans, chia seeds and cinnamon.
In a small bowl combine vanilla, oil, maple syrup and peanut butter. Microwave 20 seconds and stir until well combined.
Pour wet mixture into bowl with dry ingredients and mix until well coated.
Spread onto a baking sheet lined with parchment paper.
Bake at 350 degrees for 15 minutes, stirring every 5 minutes.
Remove, let cool and stir in raisins.
Store in an airtight container.

Notes

Feel free to use your favorite nut or dried fruit to replace the raisins or pecans.

Did you make this recipe?

Tag @theleangreenbean on Instagram

Sounds delicious, right? Like I said, it might take you a couple tries to get the hang of puffing the amaranth and getting the right pan heat for your stove so practice with just a teaspoon at a time. And don’t worry if all of them don’t pop! Just like popcorn there will be some unpopped kernels.

This Puffed Amaranth Granola recipe is lightly sweetened, packed with protein and perfect for a healthy, gluten-free breakfast or snack!

If you’ve been meaning to try amaranth, this is the perfect recipe to do so! 

This Puffed Amaranth Granola recipe is lightly sweetened, packed with protein and perfect for a healthy, gluten-free breakfast or snack!

[clickToTweet tweet=”Interested in trying amaranth? This Puffed Amaranth Granola is a fun way to do it!” quote=”Interested in trying amaranth? This Puffed Amaranth Granola is a fun way to do it!”]

Filed Under: Breakfast, Snack, Sponsored Tagged With: Maple Syrup, Oats, Peanut Butter, Pecan, Pepitas

  • « Go to Previous Page
  • Page 1
  • Interim pages omitted …
  • Page 22
  • Page 23
  • Page 24
  • Page 25
  • Page 26
  • Interim pages omitted …
  • Page 65
  • Go to Next Page »

Primary Sidebar

Lindsay Livingston The Lean Green Bean Healthy Living Tips and Tricks

I'm a Registered Dietitian and mom of three from Columbus, Ohio. I use this blog to share simple, healthy recipes, nutrition tips, and an honest glimpse of motherhood!

Learn More →

Questions? Comments? Email me: [email protected]

The Lean Green Bean Facebook The Lean Green Bean Instagram The Lean Green Bean Pinterest The Lean Green Bean Twitter The Lean Green Bean Feed
footer-logo
The Lean Green Bean Facebook The Lean Green Bean Instagram The Lean Green Bean Pinterest The Lean Green Bean Twitter The Lean Green Bean Feed
Recipes

Breakfast
Dinner
Snack
Slow Cooker

Kids

Cooking With Kids
Favorite Gifts
Toddler Meals
Indoor Activities

Resources

Easy Packed Lunches for Kids
Dinner Spark
Snack Spark
Ultimate Guide to Food Prep

About

Meet Lindsay
Become an RD
Work with Me

The Lean Green Bean is a participant in the Amazon Services LLC Associates Program, an affiliate advertising program designed to provide a means for sites to earn advertising fees by advertising and linking to amazon.com.
Read the full privacy and disclosure policy here.

Copyright © 2022 · The Lean Green Bean

table talk series

Learn how food affects your body.

Get my free Table Talk email series where I share bite-sized nutrition information about carbs, protein, and fat, plus bonus information about snacks and sugar!

[email protected]