• Skip to main content
  • Skip to primary sidebar

Learn how food affects your body. Get Free Nutrition Info Today

the-lean-green-bean-logo
  • Home
  • Recipes
  • Kids
  • Resources
    • Ebooks
    • Food Prep
    • Videos
    • Snack Round-Ups
    • Gift Guides
  • About
    • Become An RD
    • Work With Me
  • Search
the-lean-green-bean-logo
  • Home
  • Recipes
  • Kids
  • Resources
    • Ebooks
    • Food Prep
    • Videos
    • Snack Round-Ups
    • Gift Guides
  • About
    • Become An RD
    • Work With Me
  • Search

blog

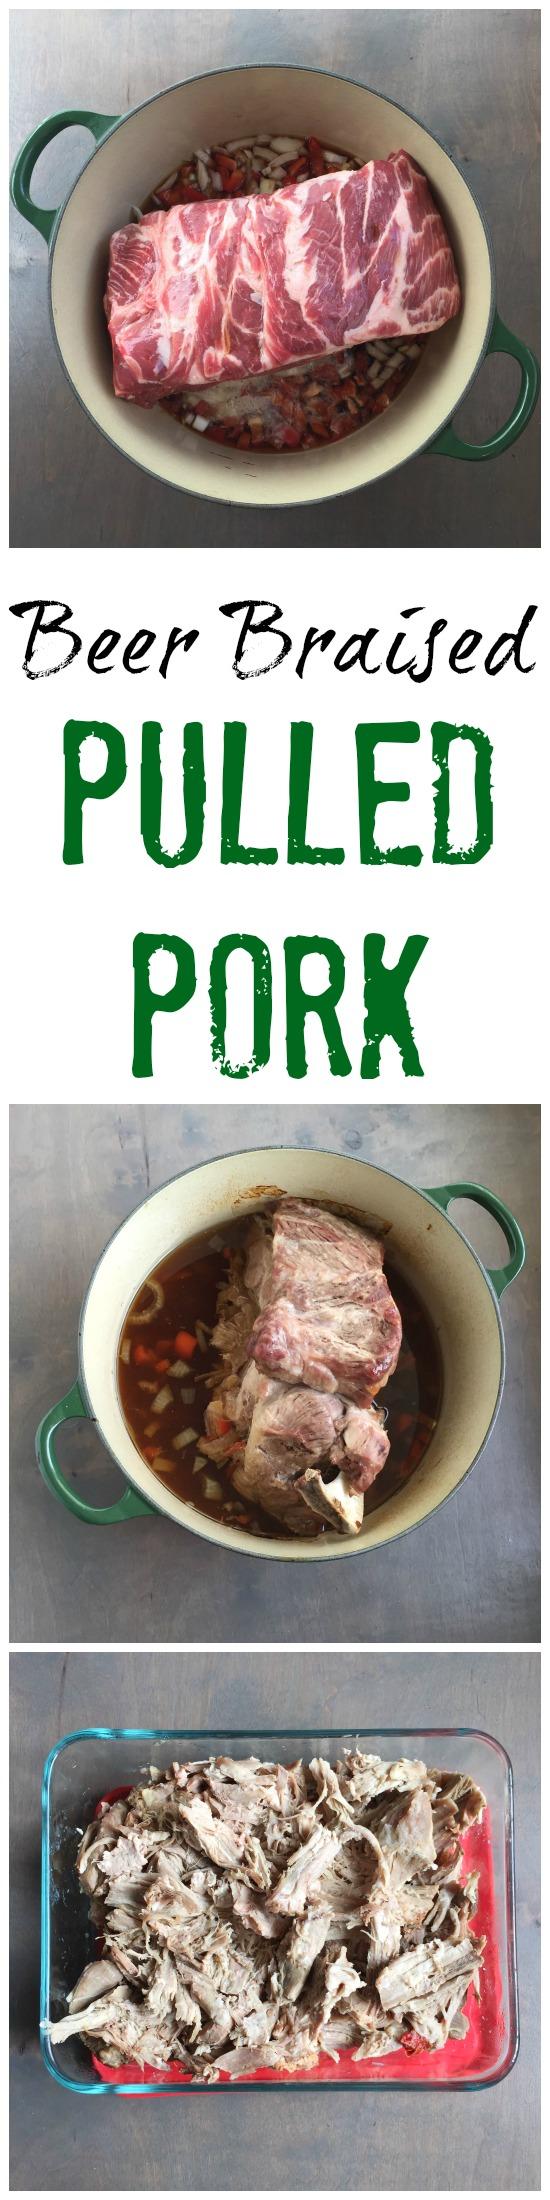
Beer Braised Pulled Pork

February 27, 2015 by Lindsay 30 Comments

Slow cooked in dark beer, this Beer Braised Pulled Pork is tender, juicy and full of flavor! 

Hi Friends!

If you’ve been checking out my food prep posts lately you may have noticed we’ve been eating a lot of pulled pork. That’s because I’ve finally figured out the best way to make it. Believe it or not, it’s not in a crockpot. Don’t get me wrong, I love my crockpot!
Check out all of the slow cooker recipes on my blog!

But when it comes to pulled pork, mine always seems to get more chewy than tender. So, a few months ago when my family was visiting, we decided to try it in my Le Creuset Dutch Oven and turned out great!

Slow cooked in the oven, this beer braised pulled pork is juicy and flavorful!

I’ve made it a few times since then, playing around with the oven temperature and the cooking liquid and I’ve finally figured out what works best for us! After making it a few times using whatever beer I had on hand, hubby suggested trying it with a darker beer like a porter and it actually made a big difference. It seems like flavorful dark beers really lend themselves well to slow cooking — perfect of this beer braised pulled pork!

So here’s how you make it:

Print

Beer Braised Pulled Pork

pulled pork
Print Recipe

5 Stars 4 Stars 3 Stars 2 Stars 1 Star

No reviews

Slow cooked in dark beer, this pulled pork is juicy and full of flavor!

  • Author: Lindsay L
  • Prep Time: 5 minutes
  • Cook Time: 4 hours
  • Total Time: 4 hours 5 minutes

Ingredients

Scale
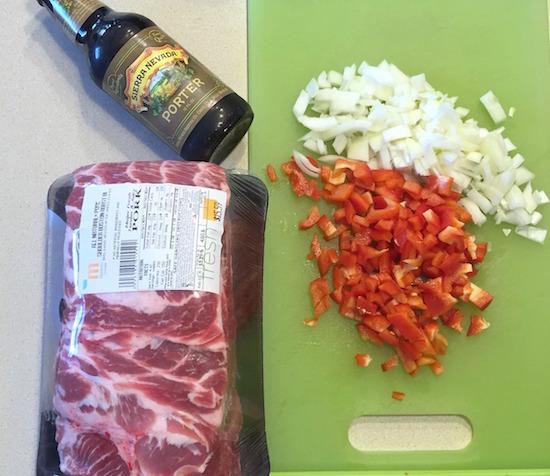
  • 4.5 – 5 pound Pork Shoulder Boston Roast (bone in or boneless)
  • 1 red pepper, diced
  • 1 medium onion, diced
  • 1– 12 oz bottle dark beer (I used Sierra Nevada Porter)

Instructions

  1. Place peppers and onions in a dutch oven.
  2. Add pork shoulder.
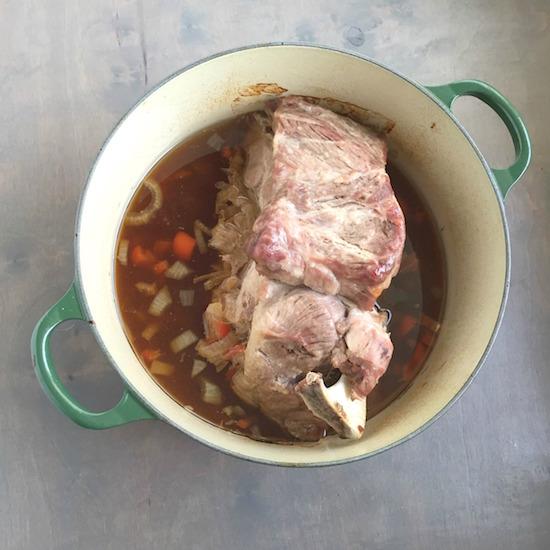
  3. Pour beer over top.
  4. Cover and place in the oven.
  5. Bake at 275 degrees F for 4-5 hours until meat is tender enough to easily shred with fork.
  6. Shred and remove bone if necessary.

Did you make this recipe?

Tag @theleangreenbean on Instagram

I’ve done this with both bone-in and boneless pork shoulder and both have worked great. Note that if you want to make this in the slow cooker you definitely could! I’d recommend trying it on low for about 8 hours!

Slow cooked in dark beer, this pulled pork is juicy and flavorful!

You can shred it in the dutch oven and store it with the peppers, onions and cooking liquid, or you can remove it from the pot, shred and discard the veggies and liquid.

Slow cooked in dark beer, this pulled pork is juicy and flavorful!

[Tweet “Slow cooked in dark beer, this Beer Braised Pulled Pork from @leangrnbeanblog is full of flavor!”]

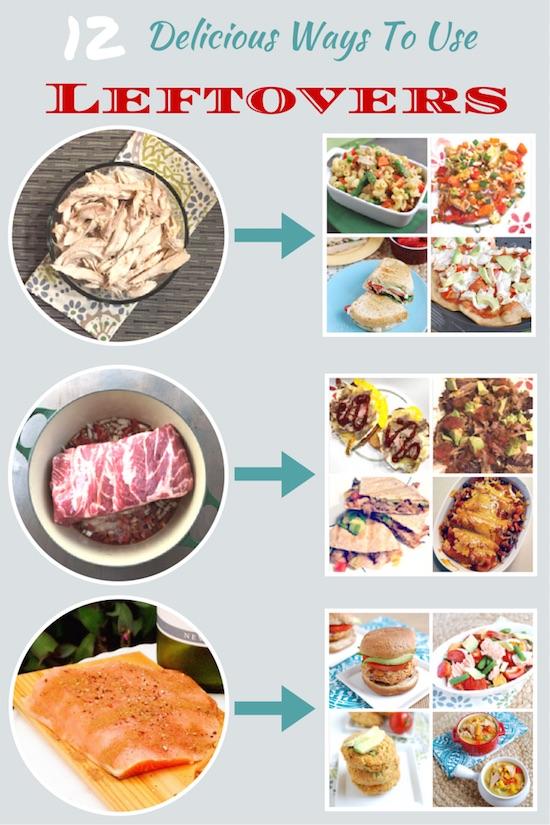
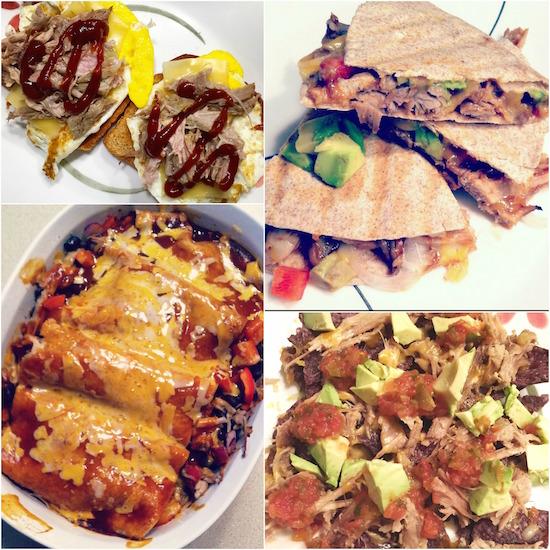
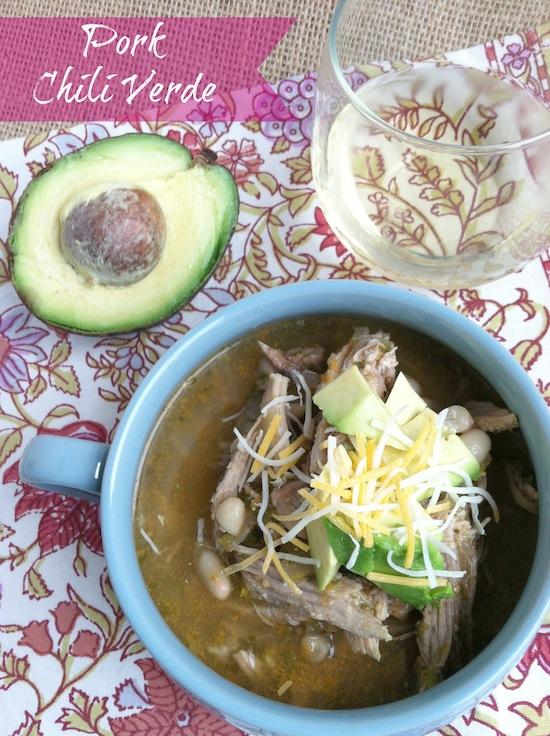
This gives us enough meat for several meals. Here are some of the ways you could use your leftovers.

A great way to use up leftover pork, this soup is full of flavor and super healthy!

Pork Chili Verde

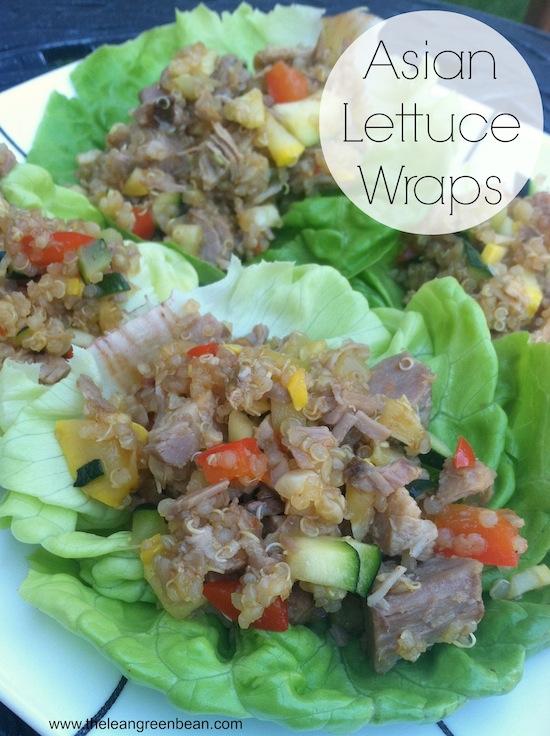
These asian lettuce wraps can be made with left over pulled pork or pork tenderloin and make a great light lunch or dinner

Asian Lettuce Wraps
I’ve made these with pork tenderloin but leftover pulled pork would work well too!

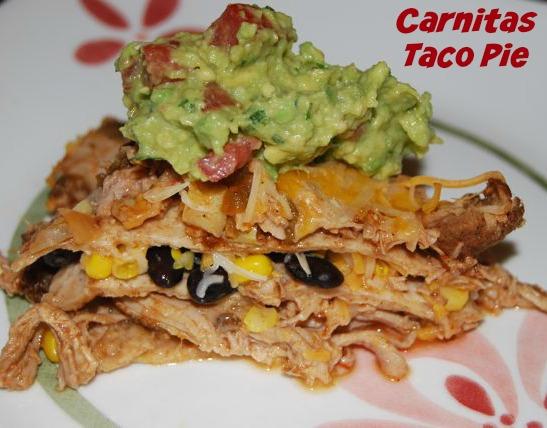
Use the crockpot to cook the pork and this Carnitas Taco Pie comes together in no time!

Carnitas Taco Pie

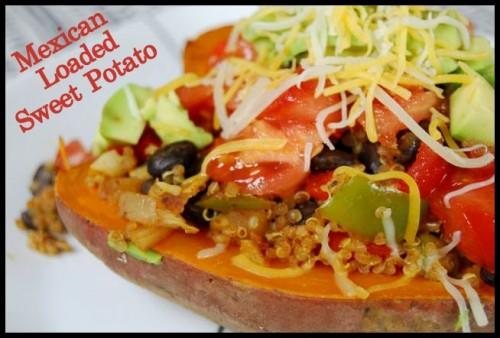
Add your favorite toppings to a sweet potato for a quick dinner!

Mexican Loaded Sweet Potato
The perfect vehicle for leftover pork!

Let’s chat!
What’s your favorite way to use leftover pork?

Enjoy!
–Lindsay

Filed Under: Dinner, Food Prep Tagged With: Bell Pepper, Onion, Pulled Pork

I Want to Freeze Time

February 26, 2015 by Lindsay 83 Comments

If you’re anything like me, you probably spent most of your younger years wanting time to go faster. When I was 10, I wanted to be 13 so I could be a teenager. When I was 13 I wanted to be 16 so I could get my driver’s license. When I was 16 I wanted to be 18 so I could go to college. When I was 18, I wanted to be 21 so I could drink legally.

I always felt like I wanted to be older, move faster, get to the next milestone..but I never really had an end destination in mind. When was I going to find that time when I didn’t want to be older? I imagined I’d come across it at some point. I never thought I’d be 80 years old and really wishing I was 95….so I guess I just figured that somewhere between the ages of 21 and 80 I’d find an age where I wanted time to stop.

As a new mom, there will always be days that overwhelm you. Just a reminder to soak up those little moments.

Well, I’ve found it. And it started the second my baby was born.

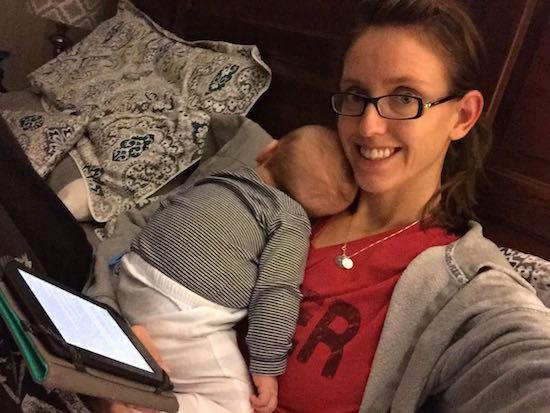
A few weeks ago I snapped this picture:

baby sleeping on chest

I had just carried Squish up to put him to bed. He was completely asleep and the pack and play is literally right next to my bed, but for some reason, I didn’t want to put him down. So I climbed into bed and held him, reading my book and just feeling the weight of him on my chest. And I realized just how much I wanted to freeze time.

I think I could have stayed like that forever and been 100% content. Every day I pick him up and I never want to put him down.

The next day I came across this post on Scary Mommy – In The Nursery, Where Time Stands Still, and I burst into tears for no reason other than I know that same thing is going to happen to me. One day I’m going to be holding him and I’m going to realize that he’s grown up. That he’s not a baby anymore but a toddler, and then a little boy. Just a few nights ago hubby and I were watching him sleep and talking about how much he’s changed already in the 4 short months he’s been alive.

It’s crazy and wonderful to think about, but at the same time it’s hard and scary.

Last week,  I came across this poem- The Last Time and it so perfectly describes life with a baby. There are days when they’re crying and you’re tired and you want nothing more than to just set them down and cry yourself…but you have to remember that there will be a last time. A last time you can hold them in your arms, a last time they want to hold your hand, a last time when you’re the only one who can help them stop crying…so I try to remember that every day.

fussy baby

Lately I’ve been feeling a bit overwhelmed by this blog. I have a to-do list that is literally an entire page long and beyond that I have more lists. A list of things I should be doing every day but don’t have time for. A list of  things I could do behind the scenes to make this blog better. A list of ideas for the ebook I want to write. A list of things that could help me generate more income.

I feel like I finish one thing on a list and immediately add three more things to it. It’s never-ending. Couple that with balancing working from home with spending time with my baby and all the feelings I’ve been having about my baby growing up too fast…and there are days when I’m one overwhelmed new mama – both physically and emotionally.

baby sleeping

And so yesterday, when the internet wasn’t working so work wasn’t getting done and I was trying to deal with a fussy baby and get back in the groove  after having grandparents in town to lend helping hands, I forced myself to take a step back, take a deep breath and focus on the positives.

  • I have an amazing baby that I’m lucky enough to spend time with every day.
  • I have a wonderful husband who helps take care of me, the baby, the house and so much more.
  • I have a job that i LOVE.
  • I have the best family who is always willing to help.
  • And I have this blog, that’s mostly about food, but it’s mine..and that means if I want to use it as a therapeutic writing outlet, I can 🙂

And as I sat there and looked at my finally sleeping baby, I was reminded just how important the little things are.

Because you can’t freeze time…but you can do your best to enjoy every single minute you’ve got!

baby with toys

So this is my new normal. I work hard, but I’m his mommy first. My most important job now is to love him, teach him and raise him to be the best person he can be.

And some days that means spending all day with baby and not crossing a single thing off my to do list. And some days it means staying up late or getting up early to get things done while baby is sleeping.

It means there will be days I’ll feel like I’m rocking at life and I’ll finish everything on my to do list and more…days where I only get the bare minimum done with no time for anything extra and days where I’ll fall behind on work, my lists will grow longer and I’ll feel so tired and overwhelmed that I can’t see straight.

And on those days I’ll tell myself it’s ok.  I’ll focus on the little moments and the memories being made.

IMG_1644

Because work and the blog will always be there.

But he won’t be this little forever.

And I don’t want to miss a thing.

–Lindsay–


Filed Under: Kids

Banana Cream Pie Bars

February 21, 2015 by Lindsay 49 Comments

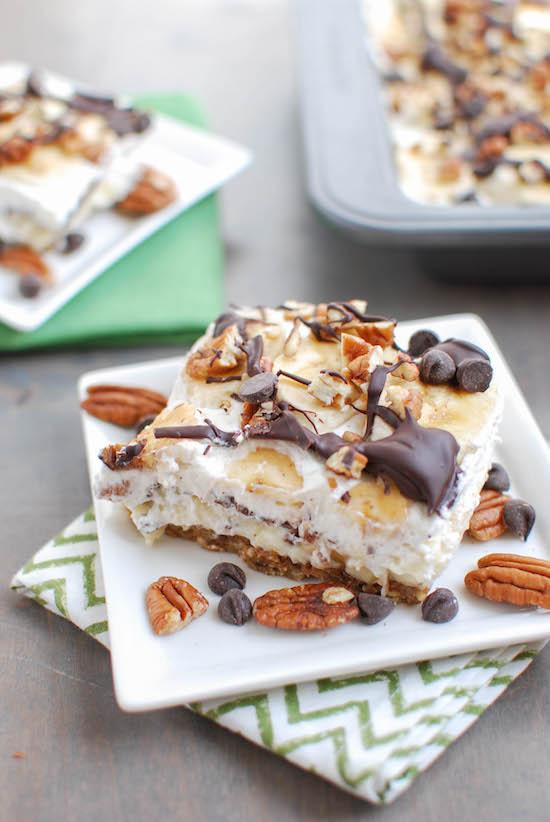
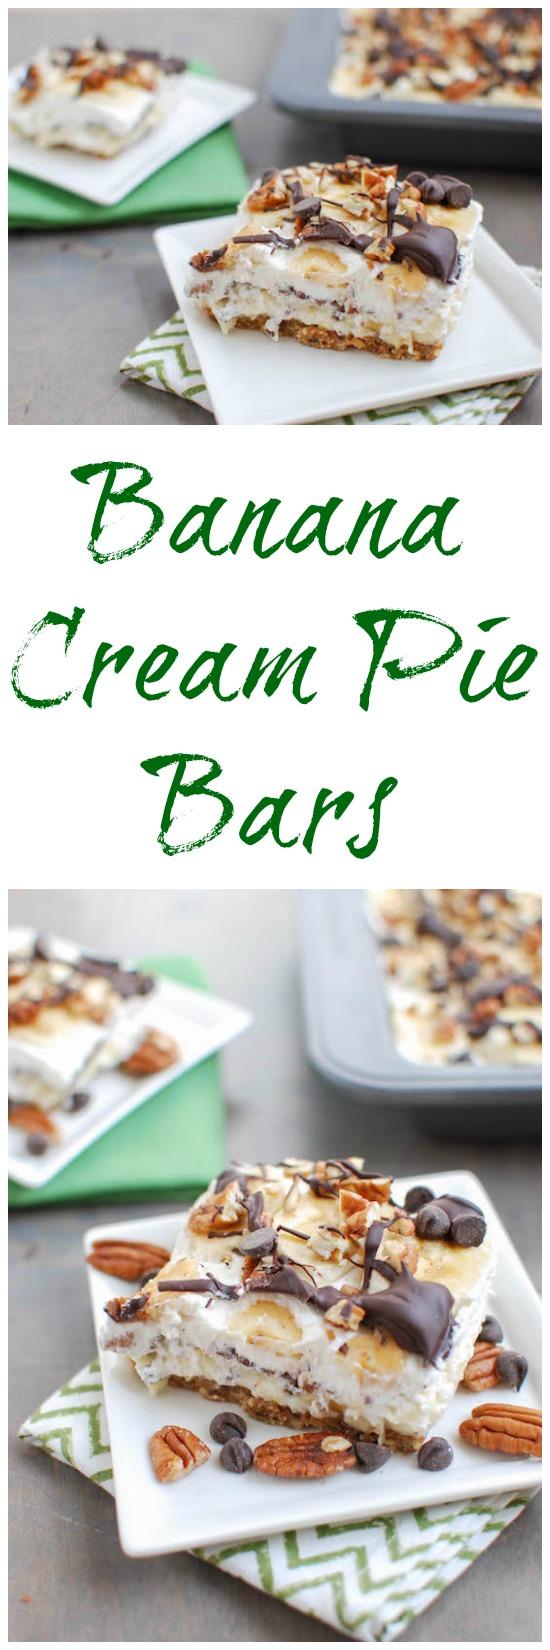
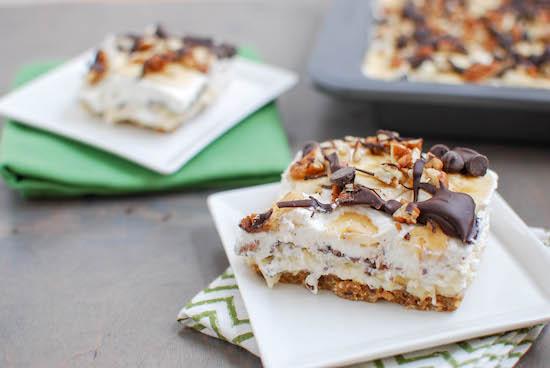
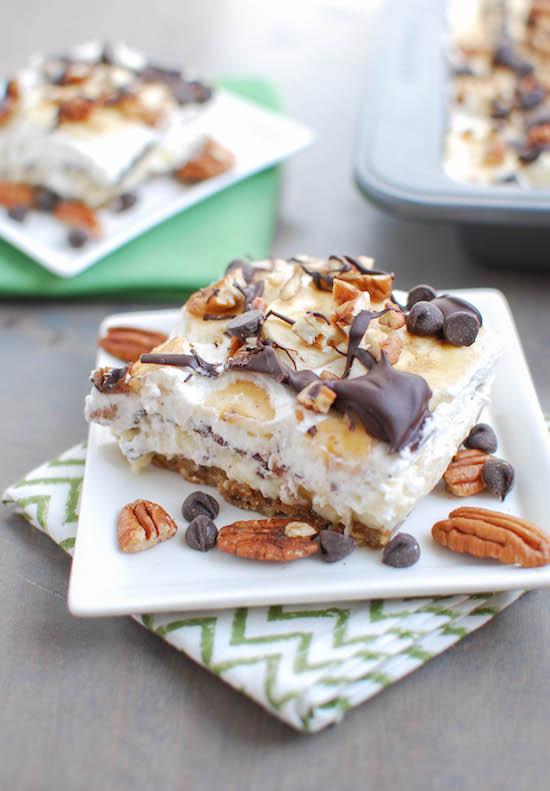
A fun twist on traditional, these Banana Cream Pie Bars are made with homemade vanilla pudding and whipped cream, plus fresh bananas and lots of pecans, peanut butter and chocolate for a delicious dessert.

A fun twist on traditional, these Banana Cream Pie Bars are made with homemade vanilla pudding and whipped cream, plus fresh bananas and lots of pecans, peanut butter and chocolate for a delicious dessert.

Hi Friends!

It’s Recipe Redux day! This month’s theme is as follows:

Favorite Chocolate Matches
Does your chocolate need a friend? This month’s posting will be after Valentine’s Day, so you may have a bit of extra chocolate around. What’s your favorite chocolate match? Be it traditional peanut butter or something more exotic like cayenne + chocolate. Show us your favorite healthy chocolate combo recipe.

I’d have to say chocolate and peanut butter is my all-time favorite combo but chocolate and banana is a close second. How perfect, then, that my parents are here this weekend and I needed to make a dessert to celebrate my dad’s birthday. One of his favorite desserts is Banana Cream Pie, so I decided to get a bit creative and make a homemade version with my own spin.

A fun twist on traditional, these Banana Cream Pie Bars are made with homemade vanilla pudding and whipped cream, plus fresh bananas and lots of pecans, peanut butter and chocolate for a delicious dessert.

Inspired by this recipe, I decided to get a bit adventurous and make my own vanilla pudding and my own whipped cream! Instead of a traditional nilla wafer or graham cracker crust, I made a no-bake crust using some Natural Delights Medjool dates that I had in the pantry, along with some pecans and peanut butter. I love using dates as the base for my energy balls and knew I could make a crust similar to the “sandwich” part of my Healthy Ice Cream Sandwiches. Then, to really add my own spin, and because the flavors go so well together, I added some peanut butter and chocolate!

A fun twist on traditional, these Banana Cream Pie Bars are made with homemade vanilla pudding and whipped cream, plus fresh bananas and lots of pecans, peanut butter and chocolate for a delicious dessert.

In true food blogger fashion, I had to send my dad a picture of the finished product and then cut it up and take my pictures in the good light before he got here. The recipe sounds complicated but really the hardest part is the pudding…and that’s not hard, you just have to plan a little to give it time to cool down and thicken. Don’t worry if it’s lumpy, it doesn’t affect the taste!

So, ready to make it for yourself?  Here’s how you make it:

Print

Banana Cream Pie Bars

Banana Cream Pie Bars 4 368x550
Print Recipe

5 Stars 4 Stars 3 Stars 2 Stars 1 Star

5 from 4 reviews

A fun twist on traditional, these Banana Cream Pie Bars are made with homemade vanilla pudding and whipped cream, plus fresh bananas and lots of pecans, peanut butter and chocolate for a delicious dessert.

  • Author: Lindsay L
  • Yield: 9 1x

Ingredients

Scale
  • ¾ cup half and half
  • 1.5 cups 2% milk
  • ⅓ c sugar
  • 3 Tbsp cornstarch
  • 2 egg yolks
  • 2 tsp vanilla extract
  • 1 Tbsp butter
  • 1 cup chopped medjool dates
  • 2 cups pecans
  • ½ cup peanut butter
  • 1 cup whipping cream, cold
  • ¼ cup powdered sugar
  • ½ tsp vanilla extract
  • 3 medium bananas
  • ½ cup chopped pecans
  • ½ cup chocolate chips, divided
  • 1 Tbsp peanut butter, optional

Instructions

  1. In a saucepan, combine the half and half and milk and bring to a simmer.
  2. In a separate bowl, combine the egg yolks, cornstarch and sugar and stir to combine. It will be lumpy.
  3. Add ½ cup of the warm milk to the egg mixture and whisk to combine.
  4. Add egg mixture to the milk, whisking constantly.
  5. Bring mixture to a boil and whisk constantly for about 5 minutes.
  6. Remove from heat and stir in vanilla and butter.
  7. Transfer to a container and refrigerate for at least an hour to let thicken.
  8. Combine dates, pecans and peanut butter in a food process and process until smooth.
  9. Dump into a 9×9 pan and press to flatten and cover the bottom of the pan.
  10. Combine the whipping cream, powdered sugar and vanilla in a bowl and beat with a mixer until desired consistency is reached and set aside.
  11. Slice 1½ bananas and place a layer of banana slices on top of the crust.
  12. Top with pudding.
  13. Melt 3 Tbsp chocolate chips with 1 Tbsp peanut butter (if desired) and drizzle over pudding layer.
  14. Top with whipped cream.
  15. Slice remaining bananas and place on top of whipped cream layer.
  16. Melt 3 Tbsp chocolate chips and drizzle over the bananas.
  17. Top with remaining chocolate chips and chopped pecans.
  18. Cut into bars and serve or store in the fridge.

Did you make this recipe?

Tag @theleangreenbean on Instagram

Think you can handle it? Be sure to pin the recipe so you can try it soon!

A fun twist on traditional, these Banana Cream Pie Bars are made with homemade vanilla pudding and whipped cream, plus fresh bananas and lots of pecans, peanut butter and chocolate for a delicious dessert.

Be sure to check out the links below to find out what everyone else’s favorite chocolate pairings are! If you have Valentine’s Day chocolate laying around, you could use in instead of chocolate chips

Enjoy!
–Lindsay–

An InLinkz Link-up

Filed Under: Dessert Tagged With: Banana, Chocolate Chips, Dates, Egg, Milk, Peanut Butter, Pecan, Sugar

Frozen Spinach Cubes For Smoothies

February 18, 2015 by Lindsay 62 Comments

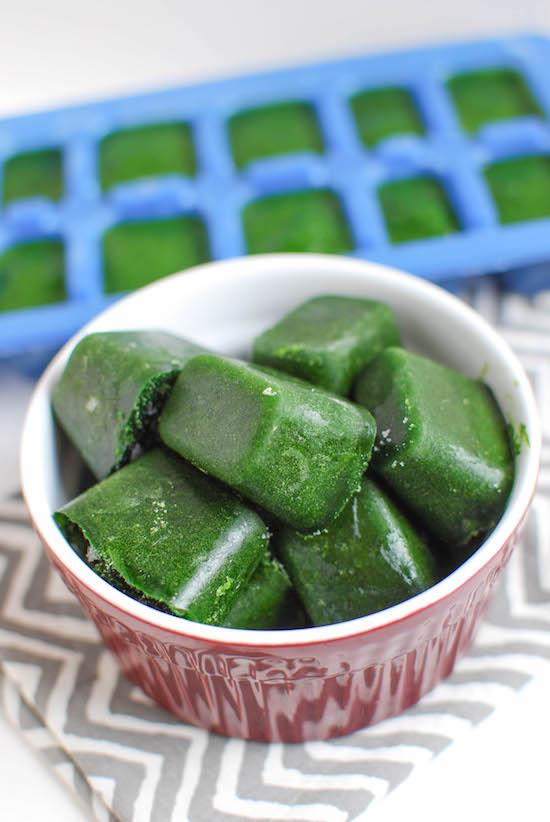
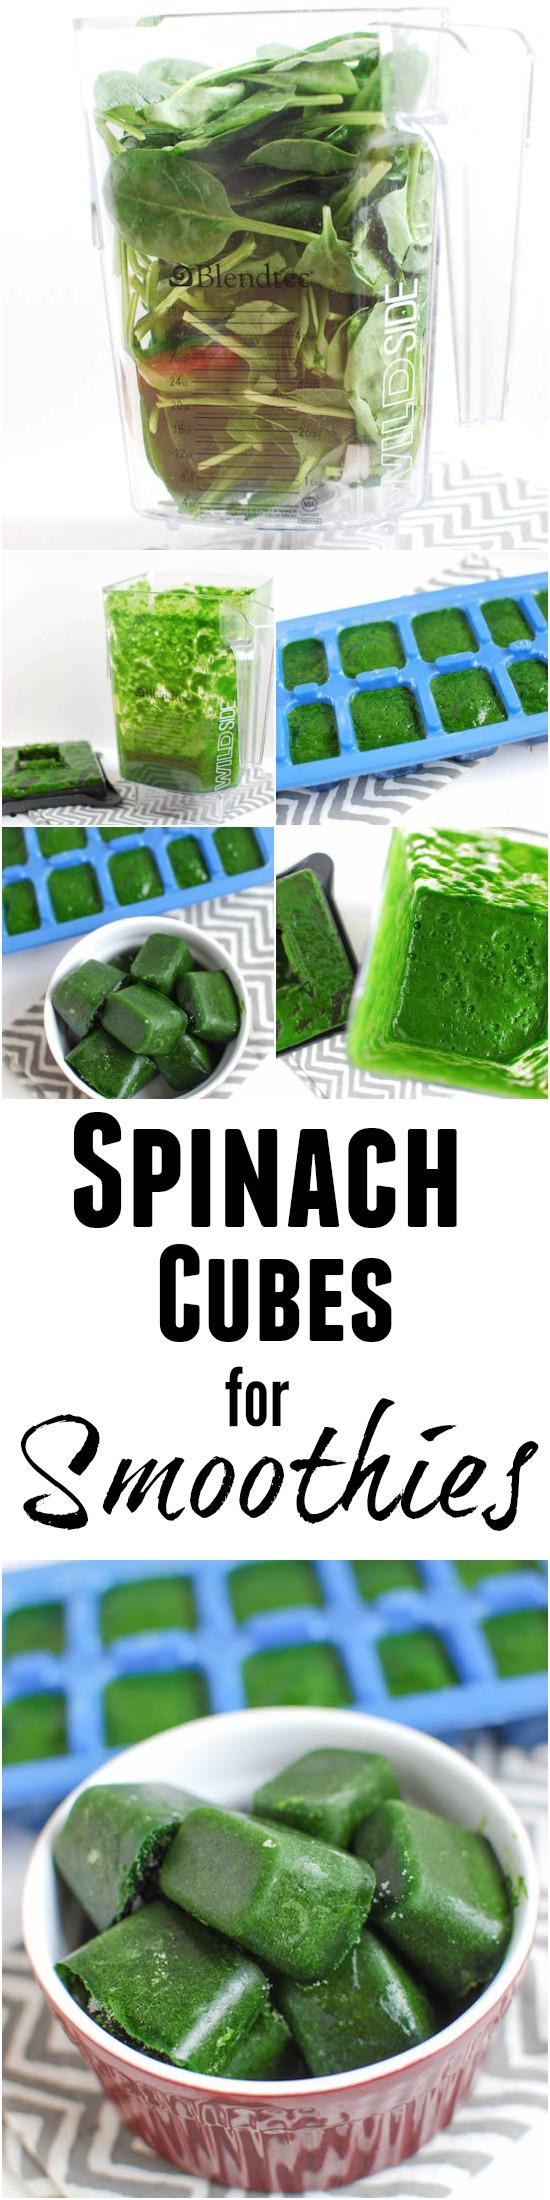
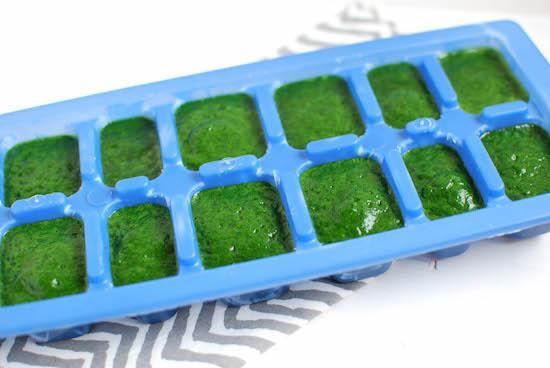
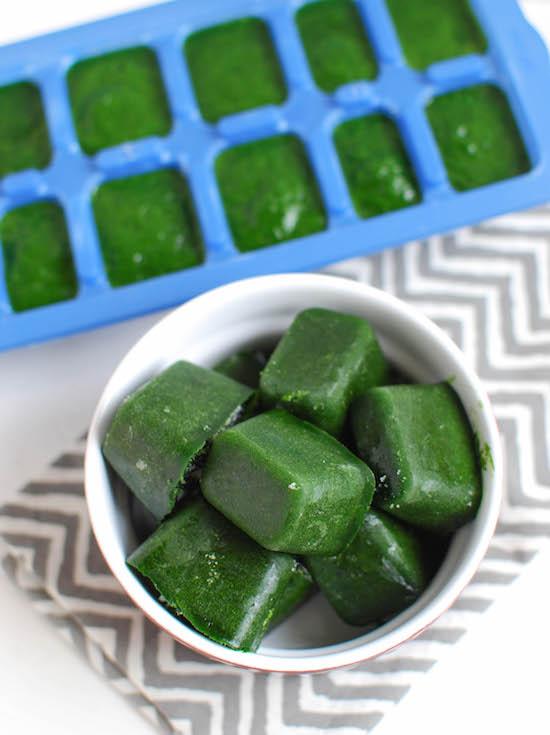
Stock your freezer with these Frozen Spinach Cubes and toss a couple into your next smoothie for a nutritional boost! The perfect way to save spinach or kale that’s about to go bad!

Stock your freezer with these Frozen Spinach Cubes and toss a couple into your next smoothie for a nutritional boost! The perfect way to save spinach or kale that's about to go bad!

Hi Friends!

I have a pretty polarizing relationship with smoothies. I’m either LOVING them, or I want absolutely nothing to do with them. Currently, I’m in a loving phase and I’ve been making one pretty much every day. As I’ve mentioned, lunch can be a bit of a challenge some days around here with Squish running our schedule, so quick, easy smoothies are becoming a go-to lunch. A few weeks ago, I bought some spinach to make a Strawberry Spinach Salad and had some leftover. Right before it went bad, I remembered a little trick for turning it into frozen spinach cubes using a blender. I used my Blendtec.

I shared it on Instagram and Facebook a few years ago and it was a big hit.

I certainly didn’t come up with this myself, but it’s a tip I love to share because a lot of people don’t think of it on their own!

Ready for it?

Blend up spinach (or kale) and freeze it in ice cube trays!
Store them in the freezer add them to your next smoothie. 

————-

Frozen Spinach Cubes for Smoothies

Stock your freezer with these Frozen Spinach Cubes and toss a couple into your next smoothie for a nutritional boost! The perfect way to save spinach or kale that's about to go bad!

Like I mentioned, this is a great way to use up leafy greens before they go bad, but this also makes a great food prep project if you want to just buy it fresh and make a bunch of cubes at once.

I wouldn’t really call this a recipe, but here’s what you do:

Stock your freezer with these Frozen Spinach Cubes so you always have them on hand to give your smoothie a nutritional boost!

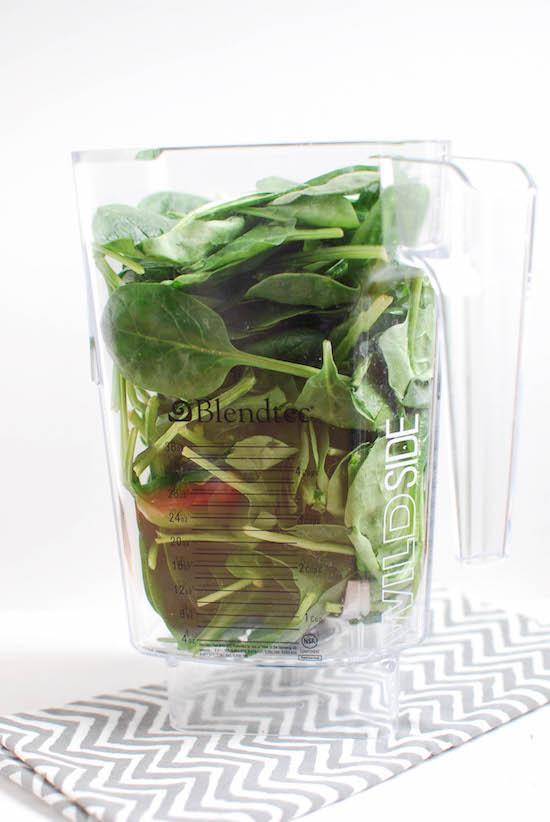
1. Add spinach to your blender.

Stock your freezer with these Frozen Spinach Cubes so you always have them on hand to give your smoothie a nutritional boost!
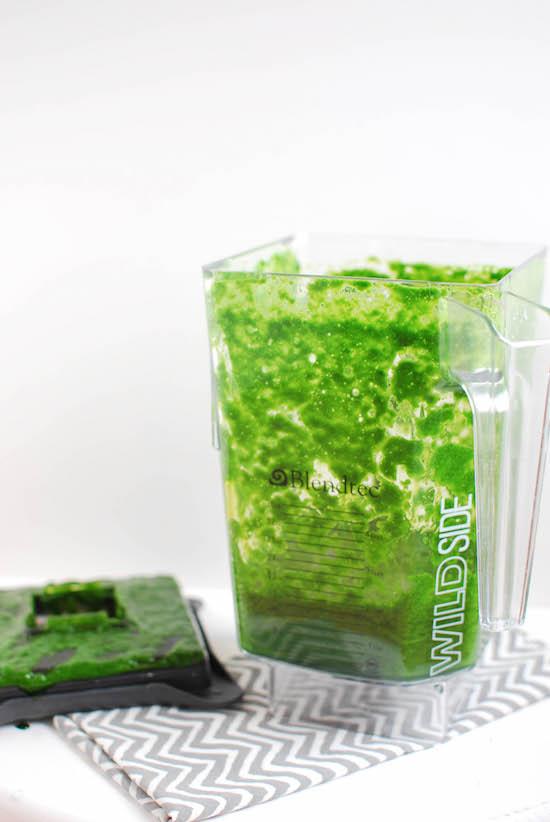
2. Add a little bit of water & blend until smooth.
The amount of water will vary but I usually use 1/4 cup or so.

Stock your freezer with these Frozen Spinach Cubes so you always have them on hand to give your smoothie a nutritional boost!

3. Pour into ice cube trays and freeze.

Stock your freezer with these Frozen Spinach Cubes so you always have them on hand to give your smoothie a nutritional boost!
Voila!
Frozen spinach cubes.
Store in the freezer & add to smoothies.

———-

[Tweet “Stock up on Frozen Spinach Cubes from @LeanGrnBeanBlog and add some to your next smoothie!”]

I use my Blendtec to make these and hit the smoothie button. It takes 30 seconds or so, but once it really ramps up, it pulls down all the spinach and blends it without a problem.

I’ve heard some people make these with no water but I never have much luck with that.

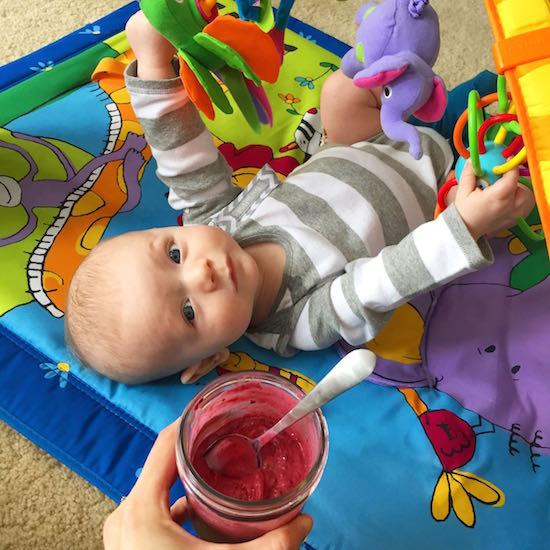
baby and smoothie

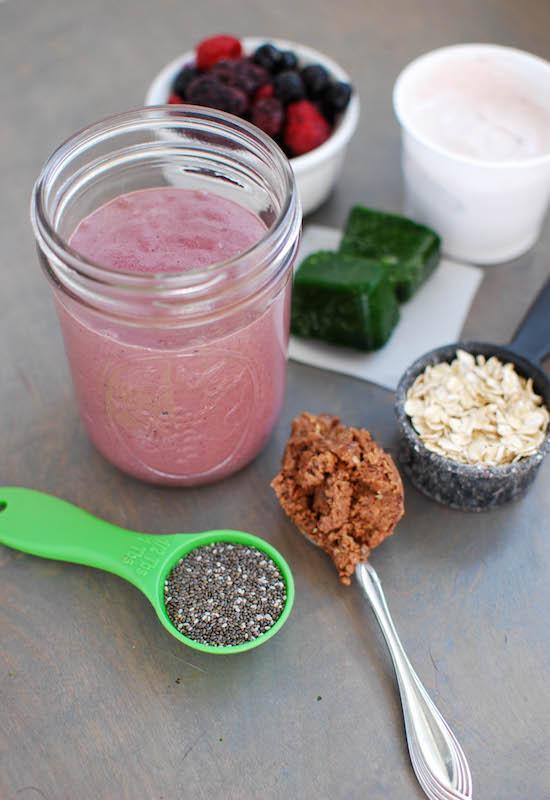
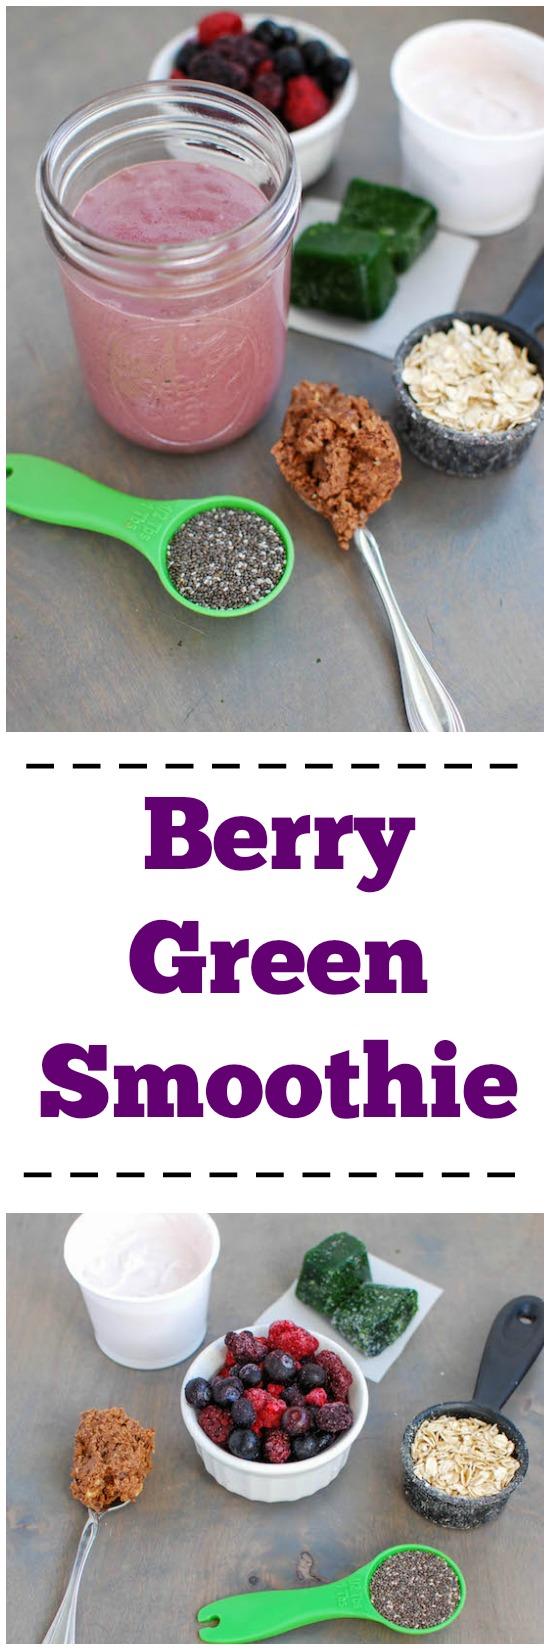
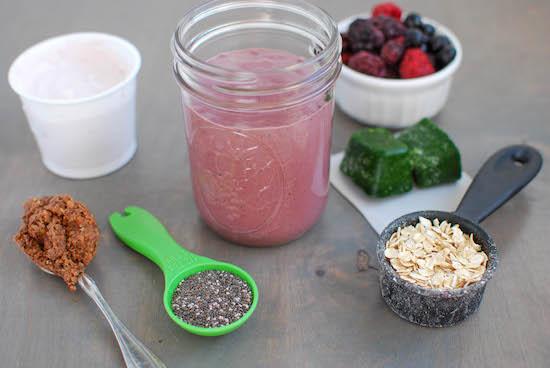
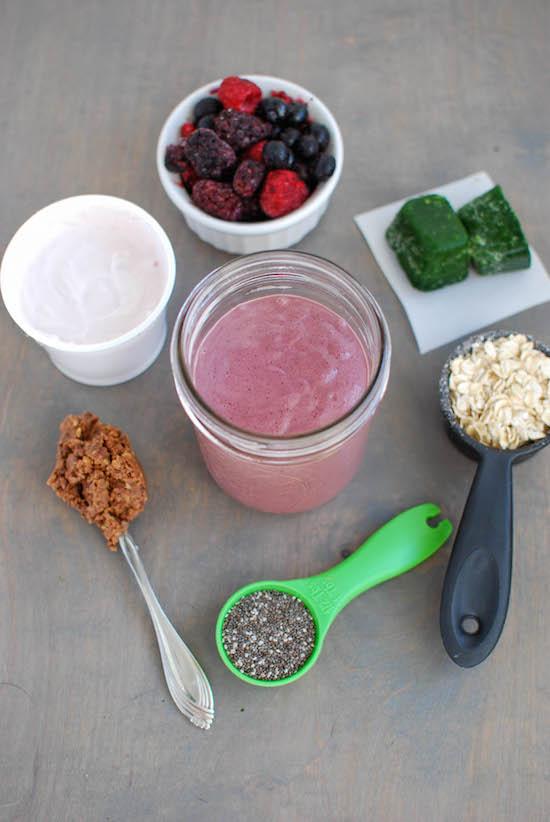
Lately I’ve been loving this smoothie combo:

  • Frozen mixed berries
  • Siggi’s yogurt
  • Crunchy Chocolate Nuttzo
  • A couple spinach cubes
  • Some chia seeds

Let’s chat:
What’s your favorite smoothie combo?

Enjoy!
–Lindsay–

PS. Looking for more ways to use your ice cube trays? Check out this post:

15 Creative Ways To Use Ice Cube Trays

Ice cube trays aren't just for water! Here's 15 Creative Ways To Use Them!

If you purchase an item from Amazon.com using the links in this post,  The Lean Green Bean will receive a small commission for the sale – at no added cost to you. This allows us to cover site-related expenses and helps support the growth of my blog!

Filed Under: Lunch Tagged With: Spinach

Double Chocolate Granola

February 13, 2015 by Lindsay 34 Comments

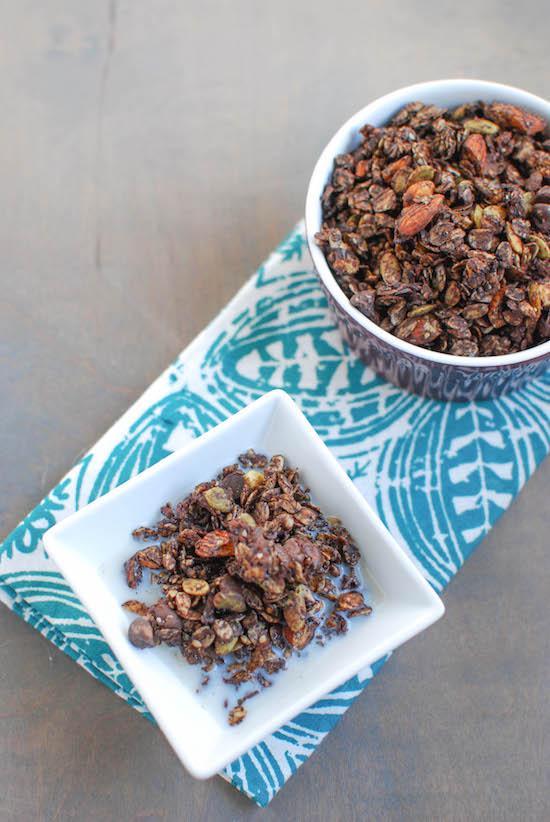
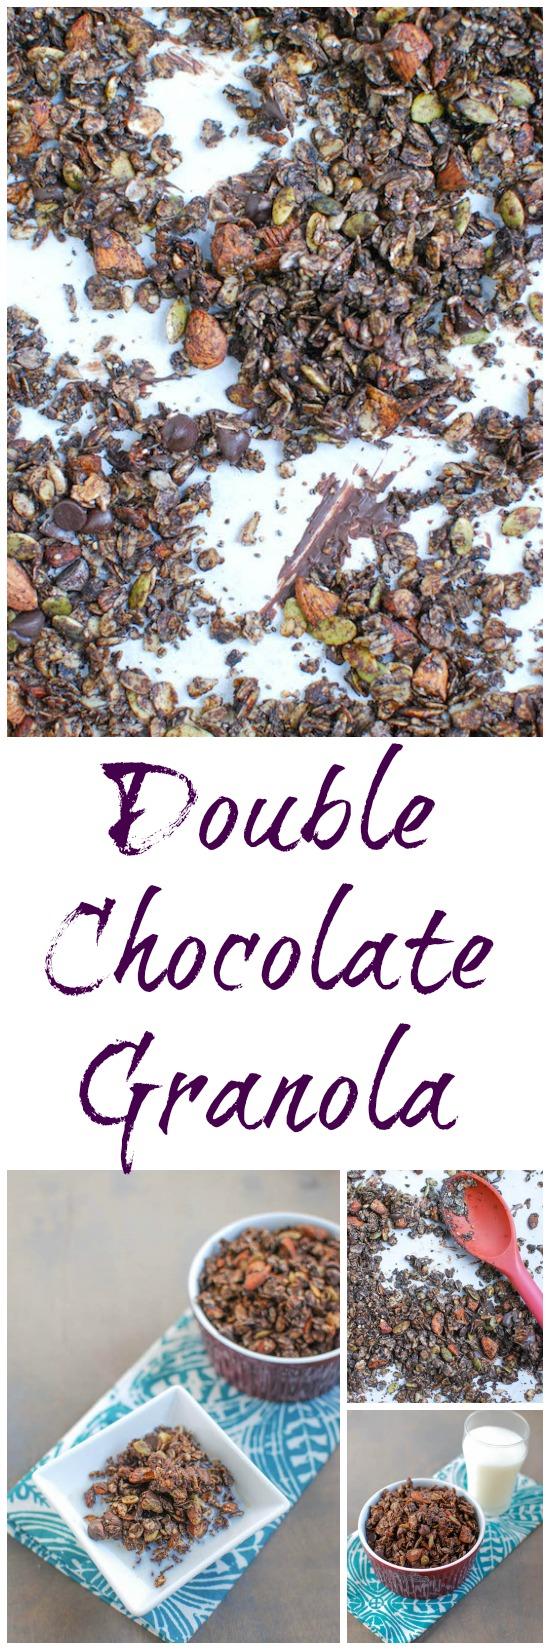
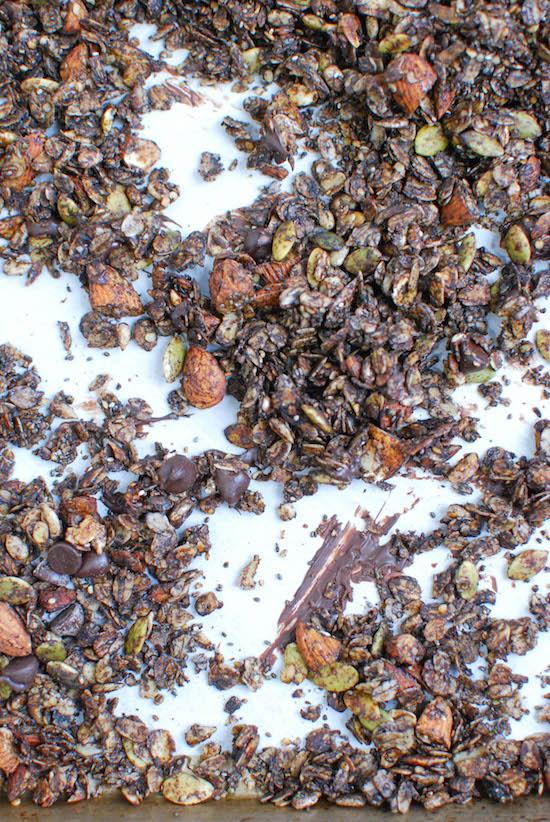
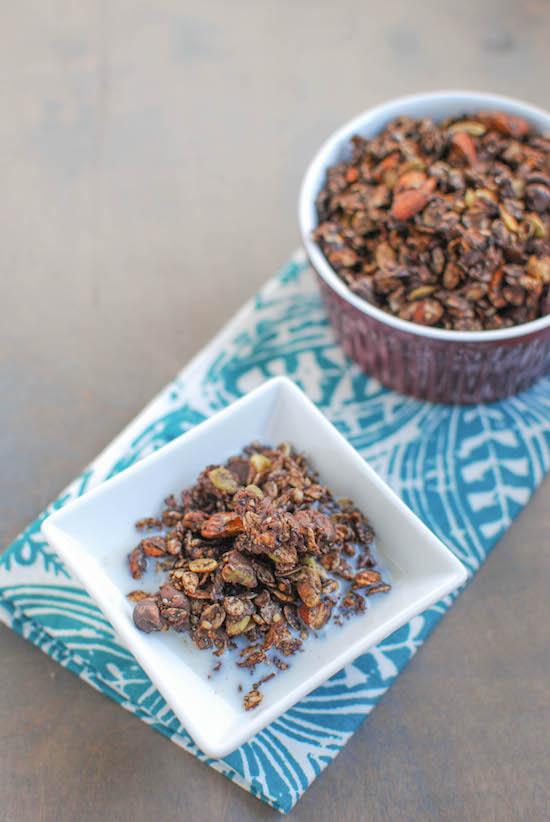
Enjoy this homemade Double Chocolate Granola on yogurt, in a bowl with milk or simply by the handful. Full of chocolate flavor, it’s packed with nuts and seeds and lightly sweetened with honey. 

This Double Chocolate Granola is packed with nuts and seeds, tossed with coconut oil and lightly sweetened with honey.

Hi Friends!

My husband has a certain favorite kind of granola (that we often get for free). He’s not a huge cereal eater like I am, but when we have his granola on hand, he’ll occasionally join me for a bowl as a bedtime snack.

I do my best to keep it on hand for him. Since I’m a love blogger, Love Grown Foods is fabulous about keeping our pantry stocked…but sometimes, poor planning…or a hungry hubby….means we run out. This happened a few weeks ago so I decided to surprise hubby by making him some homemade chocolate granola to tide him over.

Double Chocolate Granola

This Double Chocolate Granola is packed with nuts and seeds, tossed with coconut oil and lightly sweetened with honey.

I added my own spin by throwing in some extra nuts and seeds, using coconut oil and sweetening it with honey for a fun twist on his favorite. I’ve made homemade granola before but I’ve never tried a chocolate version so I wasn’t totally sure how it would turn out.

Turns out, it was a major hit! I’m typically not a huge chocolate lover and I couldn’t stop grabbing a handful of this each time I went into the pantry.

This Double Chocolate Granola is packed with nuts and seeds, tossed with coconut oil and lightly sweetened with honey.


Here’s how you make it:

Print

Double Chocolate Granola

chocolate granola 7
Print Recipe

5 Stars 4 Stars 3 Stars 2 Stars 1 Star

5 from 3 reviews

Packed with nuts and seeds, tossed with coconut oil and sweetened with honey, this granola makes a great snack!

  • Author: Lindsay L
  • Prep Time: 5 minutes
  • Cook Time: 30 minutes
  • Total Time: 35 minutes
  • Yield: 6 1x

Ingredients

Scale
  • 3 cups rolled oats
  • 1/2 cup pumpkin seeds
  • 3 Tbsp hemp hearts
  • 2 Tbsp chia seeds
  • 1/2 cup sunflower seeds
  • 1 cup chopped almonds
  • 3 Tbsp cocoa powder
  • 1/2 cup honey
  • 1/4 c coconut oil (measured when solid)
  • 1 cup chocolate chips

Instructions

  1. Preheat oven to 300 degrees and line a baking sheet with parchment paper.
  2. In a large bowl, combine the first six ingredients.
  3. In a separate microwave-safe bowl, combine the honey and coconut oil and microwave 30-45 seconds.
  4. Stir in cocoa powder and mix well.
  5. Pour over oat mixture and stir until well coated.
  6. Pour granola onto lined baking sheet and bake for 30 minutes, stirring every 10.
  7. Remove from oven and let cool.
  8. Mix in the chocolate chips when almost cool if you want them to melt a bit, or wait until completely cooled before adding them.

Did you make this recipe?

Tag @theleangreenbean on Instagram

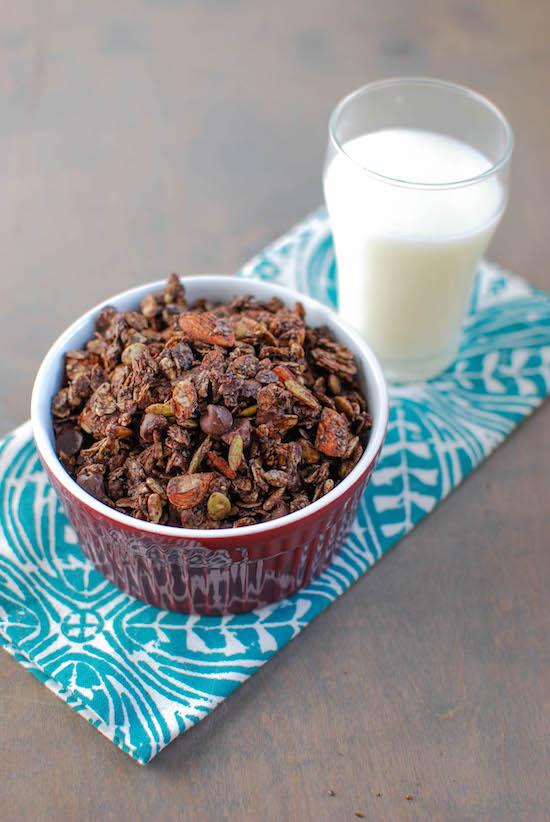
Like I said, I enjoyed this granola by the handful but you could also eat it with some Greek yogurt  or milk for a protein boost!

This Double Chocolate Granola is packed with nuts and seeds, tossed with coconut oil and lightly sweetened with honey.

I’d say hubby still favors his favorite, but this makes a great substitute when you run out or if you’re looking for a DIY recipe!

This Double Chocolate Granola is packed with nuts and seeds, tossed with coconut oil and lightly sweetened with honey.

Let’s chat:
What are your favorite granola mix-ins?


[Tweet “Snack time! Double Chocolate Granola goodness from @LeanGrnBeanBlog!”]

Enjoy!
–Lindsay–

Filed Under: Breakfast, Snack Tagged With: Chia Seed, Cocoa Powder, Coconut Oil, Hemp Seed, Honey, Oats, Pepitas

Spicy Roasted Garlic and Walnut Hummus

February 11, 2015 by Lindsay 59 Comments

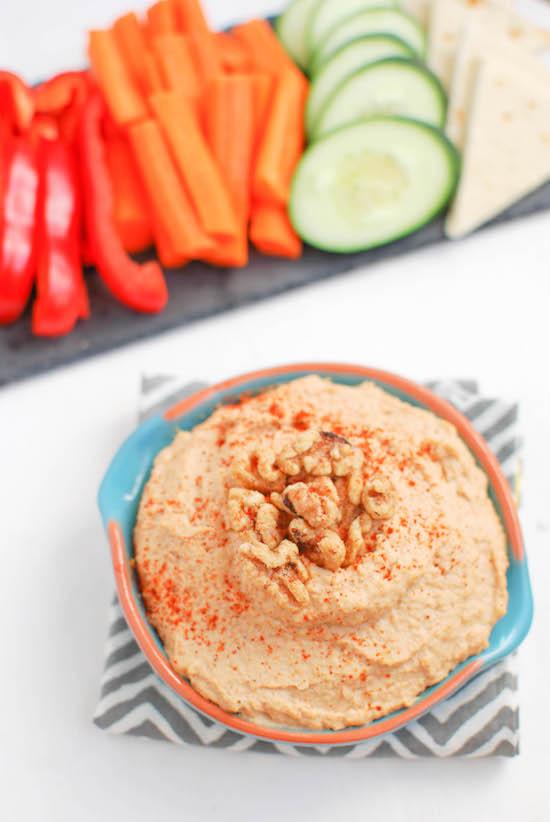
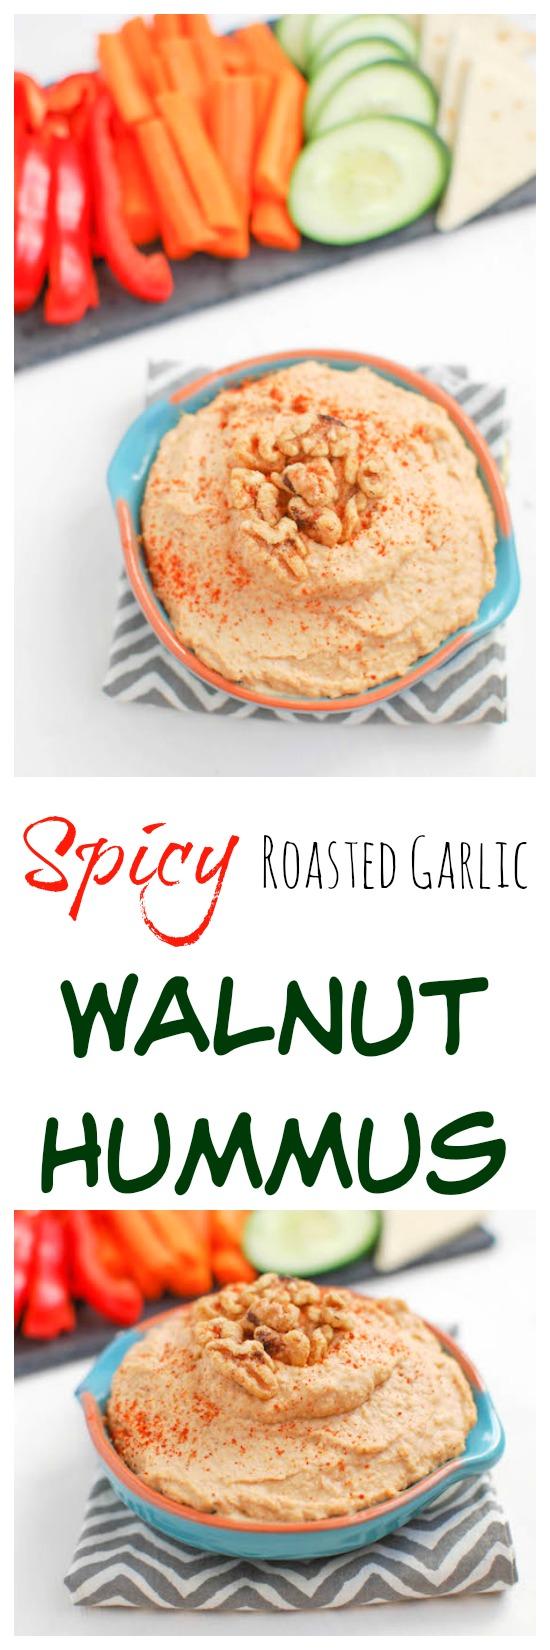
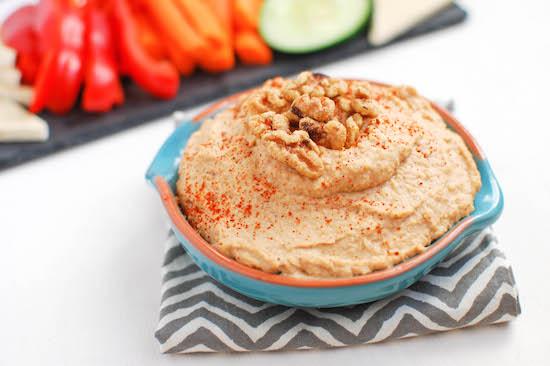
This Spicy Walnut Hummus with Roasted Garlic is made without tahini and the nutty walnut taste is balanced perfectly by the spicy red pepper and mellow garlic flavor. 

**This post was sponsored by California Walnuts. I was compensated for my time. All thoughts & opinions are my own**

This Spicy Roasted Garlic Walnut Hummus is heart-healthy and full of flavor! Makes a great appetizer or snack!

Hi Friends!

In case you didn’t know, February is American Heart Month! Heart disease is the #1 killer of men and women in the United States. While there are some non-controllable factors that put you at increased risk for heart disease (gender, genetics, ethnicity, etc), there are several things you CAN control. Along with being physically active and not smoking, what you eat can have a big impact on your heart health. Making healthy food choices can help you manage your blood pressure, cholesterol and and blood sugar levels, all of which can reduce your risk for heart disease.

As an RD, I love sharing heart-healthy food choices so when California Walnuts reached out to me about partnering with them to spread the word about walnuts and heart health, I jumped at the chance. Did you know walnuts are certified by the American Heart Association as a heart-healthy food? An ounce of walnuts (approx 12-14 halves) gives you 4g of protein and 2g of fiber and they’re only nut to provide a significant source of alpha-linoleic acid (the plant-based omega-3 fatty acid).

More than two decades of research has shown that walnuts may help lower cardiovascular risk factors by decreasing LDL  cholesterol by 9-16%, and diastolic blood pressure by 2-3 mmHg. These two factors are major contributors to heart disease risk, and cutting them is a critical step toward a healthier heart.

Spicy Roasted Garlic Walnut Hummus

This Spicy Roasted Garlic Walnut Hummus is heart-healthy and packed with flavor. Makes the perfect snack or appetizer!

Sounds pretty good, right? Even though California Walnuts has a GREAT recipe section on their website (check it out if you’re looking for some creative ways to add walnuts to your diet), I wanted to share a recipe of my own with you guys today as well!

As you know, hubby and I are big hummus fans. We always have some in the fridge, along with some chopped veggies, for snacking. I’ve made several different varieties of homemade hummus but I’ve never tried adding nuts! Walnuts have a definite nutty flavor so I decided to add a mellow garlic flavor thanks to some roasted garlic to help balance it out and then, as per usual, I kicked things up a notch by making it spicy!

Here’s how you make it:

Print

Spicy Roasted Garlic and Walnut Hummus

Spicy Roasted Garlic Walnut Hummus 2
Print Recipe

5 Stars 4 Stars 3 Stars 2 Stars 1 Star

4.7 from 3 reviews

A simple homemade hummus that’s the perfect balance of nutty and spicy with hints of garlic flavor throughout.

  • Author: Lindsay L
  • Yield: 1 1x

Ingredients

Scale
  • 1 can chickpeas, low-sodium or no salt added (1¾ cups)
  • ¼ cup reserved liquid from can of chickpeas
  • 1 medium bulb roasted garlic (8–9 cloves)
  • ¾ c raw walnuts
  • 1 – 2 tsp cayenne pepper
  • 2 Tablespoons olive oil
  • 1 Tablespoon water or lemon juice

Instructions

  1. Roast garlic and let cool slightly*
  2. In a food processor, combine walnuts and garlic and pulse until well chopped.
  3. Drain and rinse chickpeas, reserving ¼ cup liquid and add both to food processor.
  4. Add remaining ingredients and process until smooth.
  5. Add an additional Tablespoon liquid if you want an even smoother consistency.
  6. Store in an airtight container in the fridge for up to a week.

Did you make this recipe?

Tag @theleangreenbean on Instagram

While I think hubby prefers to keep eating his daily nuts by the handful, this may be my new favorite way to enjoy them. I loved the flavor combo and the fact that you could actually taste the nuts in the hummus!

This Spicy Roasted Garlic Walnut Hummus is heart-healthy and full of flavor. Makes the perfect appetizer or snack!

Let’s chat:
Are you a walnut lover? What’s your favorite way to use them?

Mine’s a three-way tie between toasting them to add to a salad, adding them to a banana muffin or this hummus!

[Tweet “A heart-healthy snack: Spicy Garlic Walnut Hummus from @LeanGrnBeanBlog and @CAwalnuts!”]

Enjoy!
–Lindsay–

Filed Under: Appetizer, Snack, Sponsored Tagged With: Chickpea, Garlic, Walnut

7 Tips To Reduce Your Sugar Intake

February 10, 2015 by Lindsay 45 Comments

Hi Friends!

As a Registered Dietitian, I get asked for diet and nutrition advice quite frequently. When people ask me how to improve their diet, reducing their sugar intake is almost always at the top of my list.

I think that slowly but surely, people are starting to realize that sugar, especially added sugar, can be linked to a lot of the healthy problems people are struggling with today. More and more frequently I’m hearing about about people making an effort to reduce their sugar intake by quitting cold turkey. They’re doing Whole 30, juice cleanses and other sugar-free challenges.

While that approach may work for some people (more power to you!), I know there are lots of people out there who would struggle with a challenge like that – myself included!

Recently, my friend Amanda over at Run to the Finish, reached out to ask my thoughts about ways to reduce your sugar intake without using a sugar-free challenge.

Here’s what I told her:

7 Tips to Reduce Your Sugar Intake

Looking for ways to reduce your sugar intake but don't think you're up to quitting cold turkey? Here are 7 ideas for you from a Registered Dietitian!

1) Start by cutting back. 
In my experience, for many people, completely eliminating something only serves to make you want it more.  When I started really watching my sugar intake after I graduated from college, I did it in small steps. So what does that mean? If you’re eating two sugary snacks a day, cut back to one. If you put three packets of sugar in your coffee each morning, cut back to two, then one. If you like juice, start mixing in sparkling water and reducing the amount of juice. As your tastebuds adjust to lower amounts of sugar, you’ll probably find that if you return to your original eating habits, things will taste overly sweet!

2) Find the hidden culprits.
Sugar is hidden in so many foods. It often replaces fat in low-fat/fat-free foods and you’ll find it in things that can really be made from just a few ingredients like nut butters, breads and salad dressings. For example, there are many brands of peanut butter that are made with added sugar, when in reality all you really need to make peanut butter is one ingredient- peanuts.

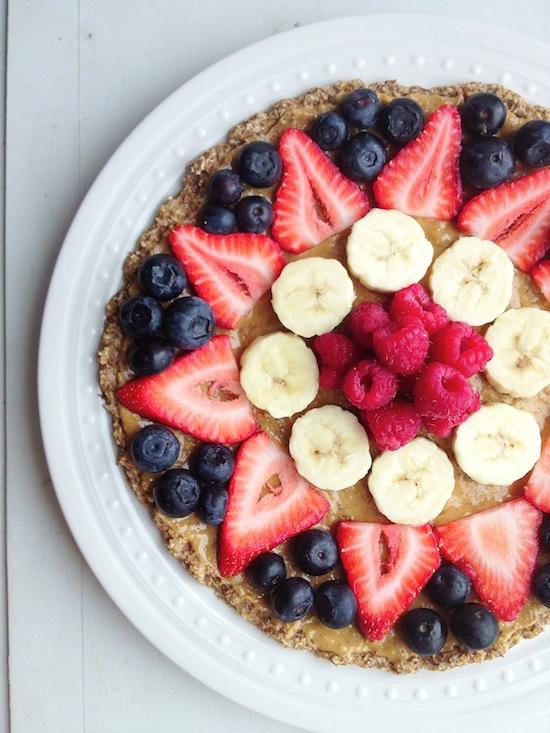
oatmeal flax pizza

{Fruit Pizza w/ Oatmeal Flax Crust}

3) Eat real, whole foods.
If you have a sweet tooth, try satisfying your cravings with sweet foods like fruit. When you do eat packaged foods, check the ingredient list and know the various names for sugar so you can spot it in the foods you’re eating. Remember that low fat/fat-free often means high sugar.

…To read the rest of my tips, check out my guest post over at Run to the Finish!

Let’s chat:

Have you tried to reduce your sugar intake? What worked for you?

[Tweet “Want to eat less sugar without going cold turkey? Here are 7 tips from @Leangrnbeanblog!”]

Enjoy!
–Lindsay–

Filed Under: Uncategorized

Nutrition for Runners

February 5, 2015 by Lindsay 27 Comments

Hi Friends!

One of my favorite parts about being a Registered Dietitian is getting to know all of the other amazing RDs there are out there. Over the years, through school, my dietetic internship, blogging and work I’ve gotten to know some Registered Dietitians that are doing some pretty incredible things. I like nothing more than celebrating and sharing their accomplishments, especially when I think it could benefit you, my readers!

One of my very good RD friends is Anne from Fannetastic Food. She and I went through our internships at similar times and have both been involved in the blogging world for a while now. Plus she’s an entrepreneur as well so she’s been a great resource for me and it’s nice to have someone to chat with about the kind of “non-traditional” dietetics work we’re both doing.

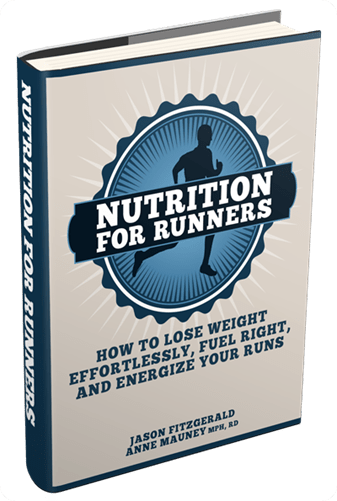
Everything you need to know to become a better runner, including training plans and fueling strategies from an RD .

For the past year, Anne has been working with Jason Fitzgerald from Strength Running to develop a Nutrition For Runners program.

As you guys know, since I’ve found Crossfit, running just isn’t my thing anymore. HOWEVER, I know that lots of you guys are runners!  So I thought I’d share some info about the Nutrition for Runners program with you guys in case any of you think it’d be helpful to you and your training!

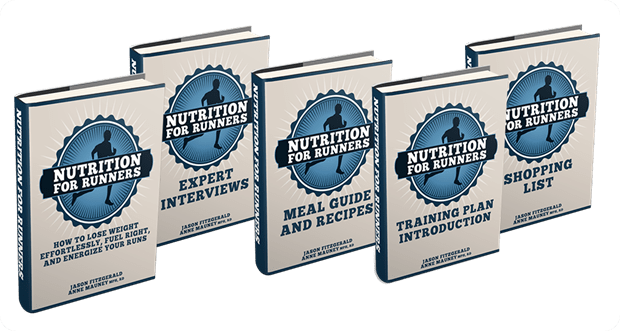
Nutrition for Runners is a comprehensive nutrition and training program for runners. In addition to meal guides, expert interviews, and a full recipe cookbook, it also includes a library of training plans designed for either performance or weight loss. It’s truly a one stop shop for those of you looking to take your running performance to the next level.

Here’s what you will find included in the full program:

  • A full overview book, which includes our “5 Principles of Nutrition for Runners“
  • Fueling strategies for every scenario: 5k, 10k, half marathon & marathon – plus workout fueling for morning, afternoon & evening runners
  • The complete “Ask the Dietitian” series, showing you how to reduce sugar cravings, which supplements are worth it, and more
  • Meal Guide & Runner’s Cookbook with example meal guides based on the time of day you run (!) and recipes sorted into categories for before, during, and after runs
  • Real food recipes for mid-run fuel, if you’re not a gel/gummy fan
  • 30 easy to prepare, quick recipes for runners – plus 49 more ideas for simple snacks and meals
  • 5 expert interviews (over 5 hours of audio!) on food intolerances, mistakes to avoid, race-specific fueling, inflammation & more
  • 15 Training Plans so you can get faster in the 5k, 10k, half marathon & marathon – plus 3 weight loss plans to help you shed pounds easily
  • The “Dietitian Approved” Shopping List, showing you exactly what to buy (and why)

Everything you need to know to become a better runner, including training plans and fueling strategies from an RD .

I had a chance to look through everything included in the program and you guys, it’s fantastic! Some things I like:

  • It uses intuitive eating principles instead of calorie counting (except when fueling for a long run).
  • It focuses on 5 solid nutrition principles that I agree with.
  • The Q&A section covers a lot of questions that I get asked myself as an RD.
  • There are some great meal planning tips and recipe ideas.
  • They offer suggestions based on what time of day you train- another thing I get asked a lot.
  • The expert interviews are jam-packed with info from some very well-respected names.
  • There are tons of different training plans to choose from (15 of them!) – something for runners of every level.

While this is pricier than your average ebook, it’s so much more than just an ebook! It’s like having a running coach and dietitian along with you while you’re training! So I think it’s worth the money.

————-

If you’re interested in reading more details or purchasing the program, click the link below:

Click here to view more details

**Note, these are affiliate links. I make a little money if you purchase the program through my links. As always, I only share and support products that I truly believe in.**

————-

There’s also a second option to purchase a smaller package. If you don’t need the training plans, recipes, meal guides and interviews, you can buy this option which includes the 5 nutrition principles for runners, fueling strategies, the q&a section and a shopping list. Click the link above for more details!

Let’s chat:
Have you seen nutritional changes impact your workouts or training positively or negatively?

Enjoy!

–Lindsay–

Filed Under: Uncategorized

Mexican Skillet Casserole

February 4, 2015 by Lindsay 51 Comments

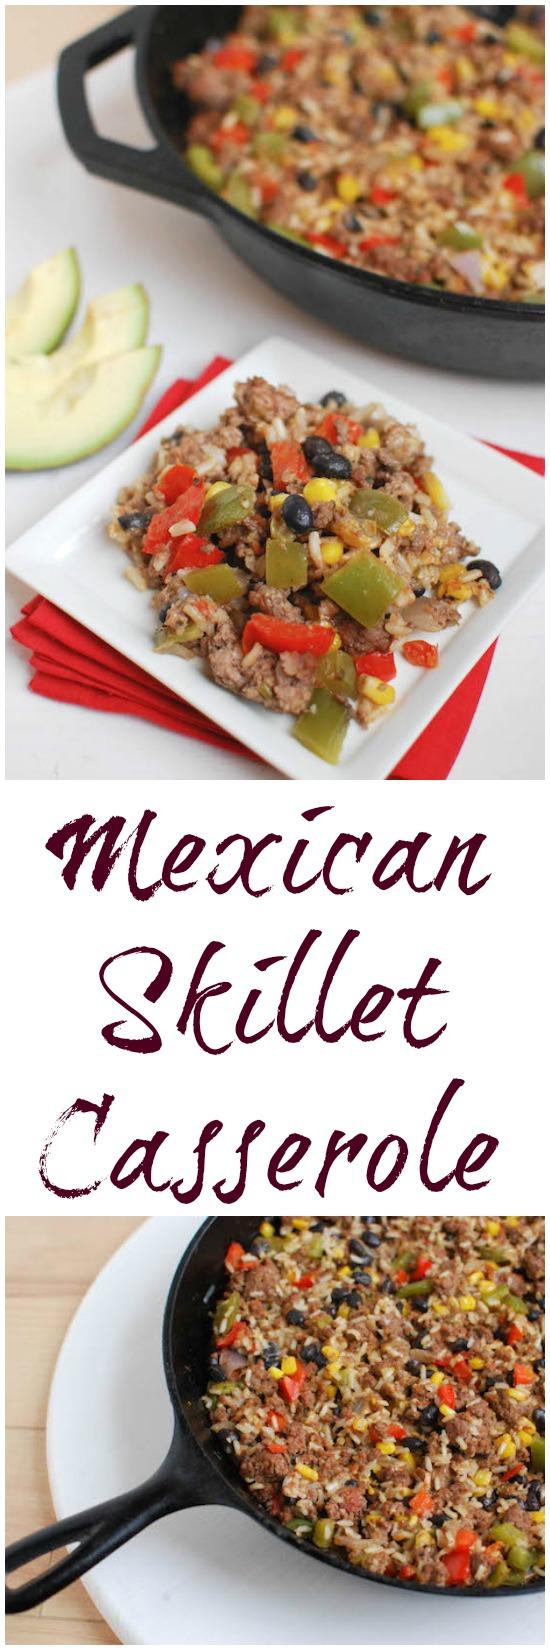
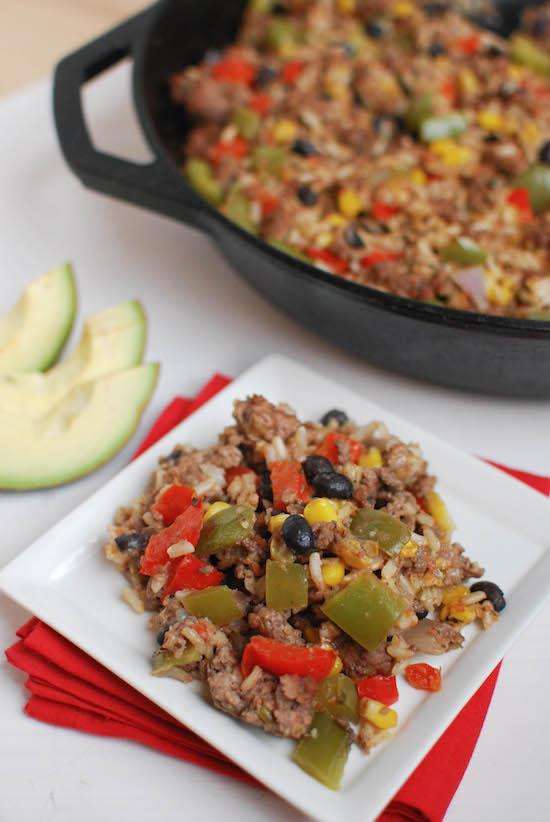
This Mexican Skillet Casserole is the perfect weeknight meal. Full of lean protein, healthy carbs and veggies and topped with healthy fats, it provides a complete meal and means you don’t have to worry about side dishes!

Hi Friends!

Sometimes the thought of making dinner overwhelms me. You have to figure out what you’re going to make, then you have to come up with some side dishes to serve with it so that you’re getting a balanced meal, then you have to actually do the cooking!

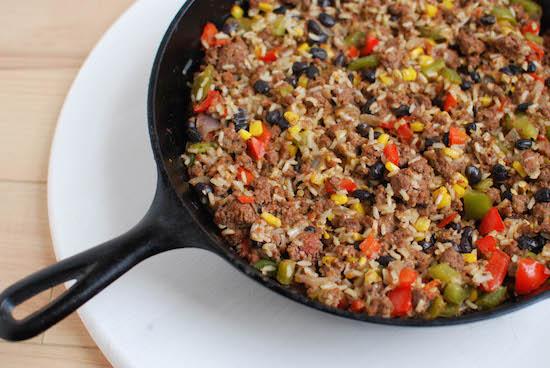
This Mexican Skillet Casserole is the perfect one pan meal for a busy weeknight dinner.

That’s why I love dishes like this. It’s everything you need for a meal all in one pan. You’ve got protein, carbs, lots of veggies and you can throw some avocado on top for healthy fat! I made this mostly for hubby. He’s a red meat lover, while I am not. We buy organic, grass-fed ground beef from Costco and I’m always looking for different ways to cook it for him. We make burgers, meatballs, taco meat, lasagna and meatloaf but I was looking for something new.

You guys know we’re huge Mexican lovers so I thought I’d put a bunch of good stuff all together in one big skillet and call it a day- rice, beans, meat, veggies, cheese, salsa…you name it, in it went!

The end result was a win! Hubby ate it by itself and also used it as a burrito filling. You could also put it over lettuce for a taco salad of sorts.

Here’s how you make it:

Print

Mexican Skillet Casserole

Mexican Skillet Casserole 2
Print Recipe

5 Stars 4 Stars 3 Stars 2 Stars 1 Star

5 from 3 reviews

The perfect weeknight dinner. Everything you need for a complete meal in one big skillet.

  • Author: Author: Lindsay L
  • Prep Time: 10 minutes
  • Cook Time: 20 minutes
  • Total Time: 30 minutes
  • Yield: 4-6 1x

Ingredients

Scale
  • 3/4 cup brown rice, uncooked (sub white rice if desired)
  • 2 teaspoons oil
  • 2 cloves garlic, minced
  • 1 red pepper, diced (I also added a green pepper)
  • 1 cup diced onion
  • 1 jalapeno, minced
  • 1 pound ground beef (sub ground turkey or chicken if desired)
  • 1 – 2 tsp cumin
  • 1 tsp paprika
  • 1 cup corn kernels
  • 1 cup black beans
  • 1 cup shredded Mexican cheese
  • 1 cup salsa (mild, medium or hot)
  • avocado for topping, optional

Instructions

  1. Cook rice according to package directions.
  2. While rice is cooking, heat oil in a skillet over medium heat.
  3. Add garlic, red pepper, onion, jalapeno and ground beef to skillet and cook until beef is no longer pink.
  4. Drain any liquid, then add spices, corn, beans, cheese and salsa and heat through.
  5. Taste and adjust seasonings if desired.
  6. Add rice and stir until combined. Top with avocado if desired and serve warm.

Did you make this recipe?

Tag @theleangreenbean on Instagram

That’s it! Like I mentioned in the recipe, you can use brown or white rice, or you could sub something like quinoa or farro if desired. If you like things spicy, use hot salsa. You could even add some chili powder if you want.

This Mexican Skillet Casserole is the perfect one pan meal for a busy weeknight dinner.

Eat it plain, scoop it up with chips, put it in a burrito…whatever strikes your fancy!

This Mexican Skillet Casserole is the perfect one pan meal for a busy weeknight dinner.

Let’s chat:

Are you a fan of one pot meals or do you prefer a main dish and separate sides?

[Tweet “An easy dinner idea from @leangrnbeanblog- Mexican Skillet Casserole!”]

Enjoy!
–Lindsay–

PS. Nothing says you can’t serve this with sides. Adding another side of veggies or a side salad is always a good idea 🙂

Filed Under: Dinner Tagged With: Bell Pepper, Black Bean, Cheese, Corn, Ground Beef, Onion, Rice

Blog Updates

February 3, 2015 by Lindsay 80 Comments

Hi Friends!

It’s Tuesday. Let’s chat, shall we? I have a few random blog-related things to catch you guys up on that I hope you’re going to enjoy!

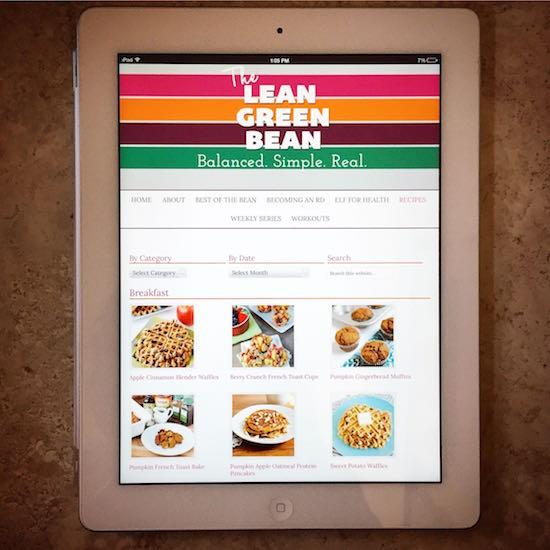
recipe index

Recipe Index

First of all, thanks to the amazing Rita at Blog Genie, I have a beautiful new recipe index for you guys. I know my old one was a pain to navigate so I wanted something that was more visual and easy for you guys to find recipes! It was a major pain…I had to go back and categorize all my recipes. I should have been doing it from the beginning, but I never did, so I had 4.5 years of recipes to go through…but I got it done.

So now, if you hover over the recipe tab at the top of the page you’ll see all the recipe categories. Take a look around! Maybe you’ll find something you haven’t seen before!

You’ll also notice I have a baby tab at the top so you can find all my pregnancy/baby/parenting posts in one place!

———

coschedule

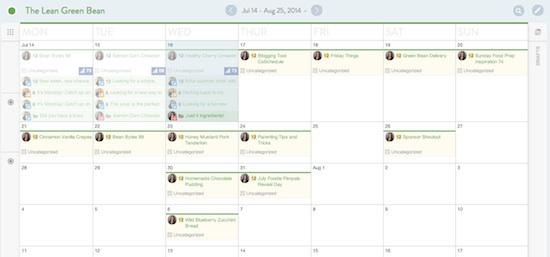
Blogging Schedule

Something else I’ve been meaning to share- my posting schedule. Now that I’m getting back into the grove of things with baby, I’m trying a few things:

1) I’m cutting myself some slack. Being a working parent is hard. If I don’t get a blog post up, it’s ok. I’m doing my best to stay consistent but baby comes first.

2) I’m trying to stick to the following schedule:
– Sunday- Food Prep Inspiration
– Monday – Bean Bytes
– Tuesday – Random
– Wednesday – Recipe
– Thursday – Off
– Friday – Recipe
– Saturday- Off

Obviously this may change some weeks, but my goal is to give you guys food prep, bean bytes and two new recipes each week. Then on Tuesdays (and Thursdays if needed) I’ll fill in with other posts if I have time. If not, I’ll take those days off. It’s been working pretty well for the last few weeks so I’ll do my best to keep it up.

I’m putting CoSchedule to good use and trying to stay on top of my editorial calendar, plan ahead, etc. (Bloggers- if you’re not using CoSchedule yet, you can check out my review here.

———-

pinterest

Pinterest

First of all, are you following me?! If not, CLICK HERE. I’m doing my best to step up my Pinterest game this year. What does that mean? A few things:

1) I’m starting to pin regularly. I used to be really terrible about using Pinterest and could go months without pinning. Now I’m getting into the habit of actually pinning most of the delicious recipe links I share in Bean Bytes and am using Tailwind to regularly schedule great pins!

2) I took on a major project and went back through all my old posts, created pinable images for a lot of my older posts that didn’t have them and made a spreadsheet so I can keep track of what posts I want to update the photos for, when I last shared my own posts on Pinterests etc. It was a huge project but it’s nice to have a list of all my evergreen content so I can re-share it as it makes sense throughout the year (ie seasonal recipes, etc).

3) While I was updating my old posts I also went through and updated my photo titles/alt tags, etc. Cue MAJOR headache. Another thing I should have started doing since I first started blogging but didn’t, so consequently I had hundreds of pictures titled DSC_1908 or whatever. Lame. So, I took the time to go back through and fix most of those so now when you click the ‘pin it’ button on my images in recipe and other pin-worthy posts, it should automatically populate a nice little description for you!

4) I’m cleaning up my Pinterest boards so they can continue to be a great resource for you guys. If you haven’t checked out my boards lately, I have a lot of great ones designed to help you guys with meal planning, recipe inspiration etc. I’ve been pinning lots of healthy breakfasts, lunches, dinners and snack ideas for you guys! You can read more about my thought process behind creating these boards in this post: Pinterest For Meal Planning.

 ————-

Recipe Re-shoots 

Like I mentioned above, I’m slowly working my way through a list of old posts that had crappy pictures and trying to take better ones! Every so often i’ll fill you guys in on posts I’ve updated lately in case you want to read them, pin them, etc.

Here’s the first batch. Links to the original posts are below the photos so you can go check them out!

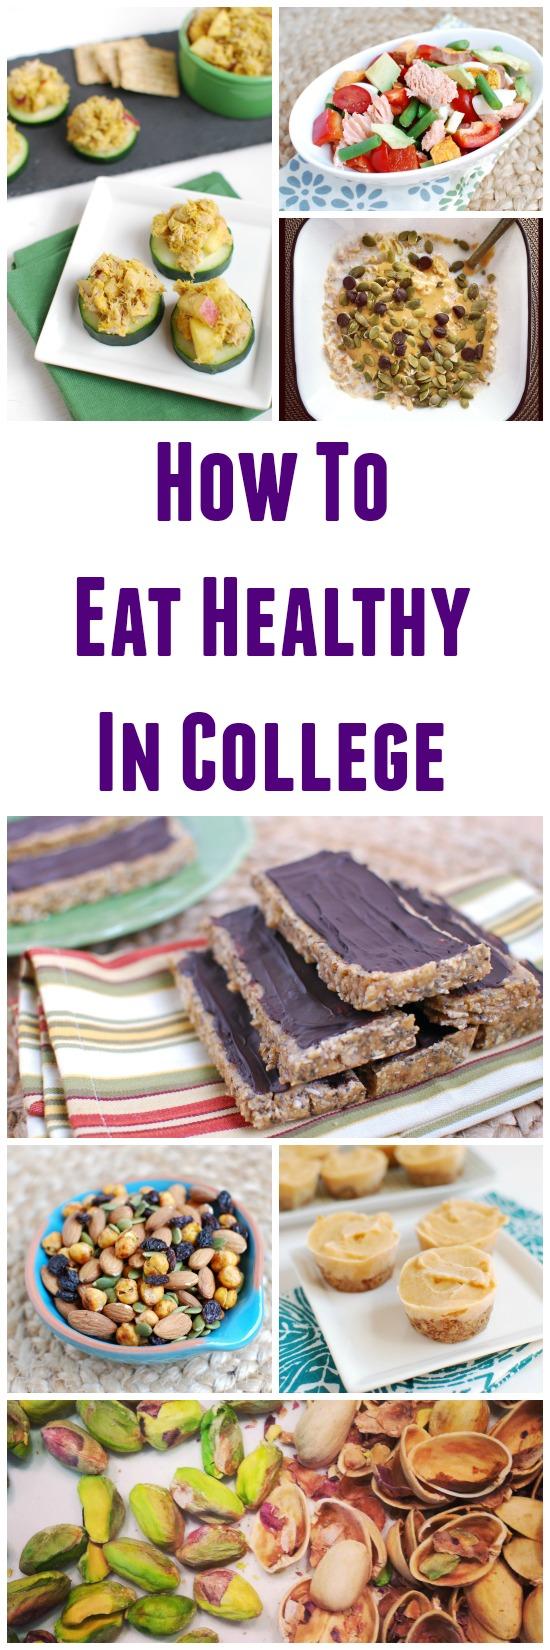
Tips, tricks and advice about how to eat healthy in a college dorm.

How To Eat Healthy In College

How To Hard Boil Eggs In The Oven

How To Hard Boil Eggs In The Oven

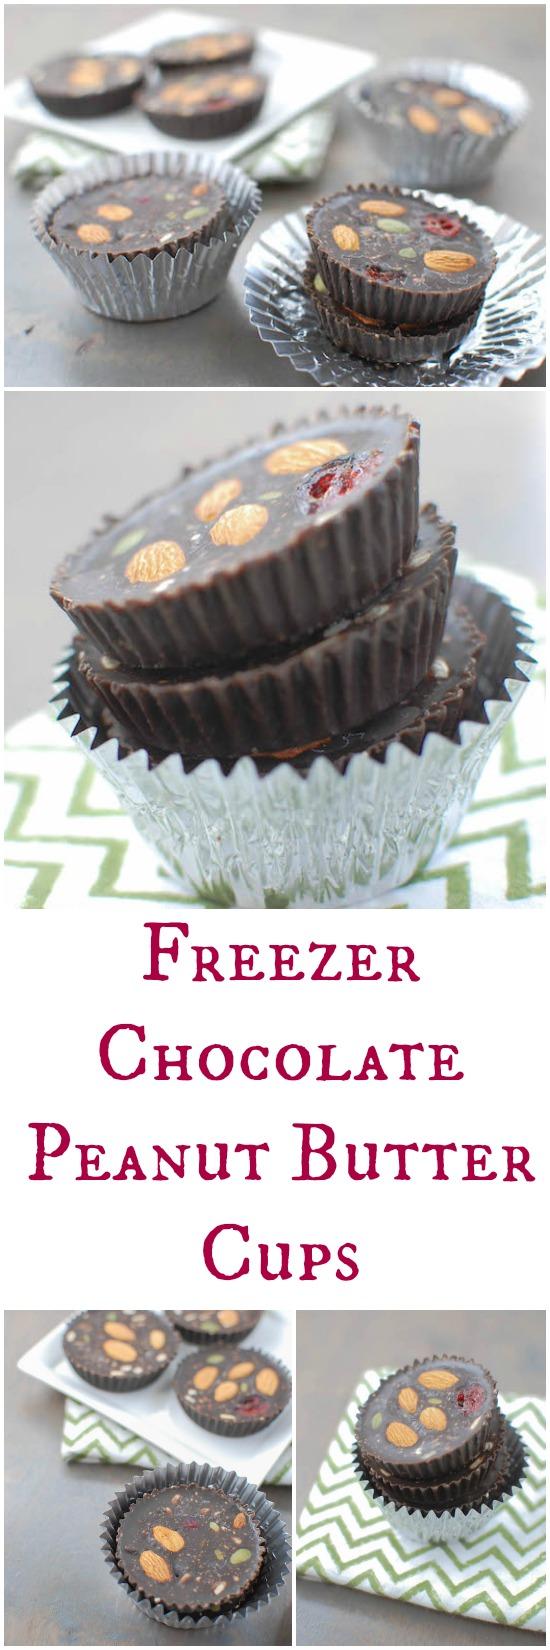
Always have a stash of these Chocolate Peanut Butter Cups in your freezer. Made with coconut oil and cocoa, they're dairy free and easy to customize!

Freezer Chocolate Peanut Butter Cups

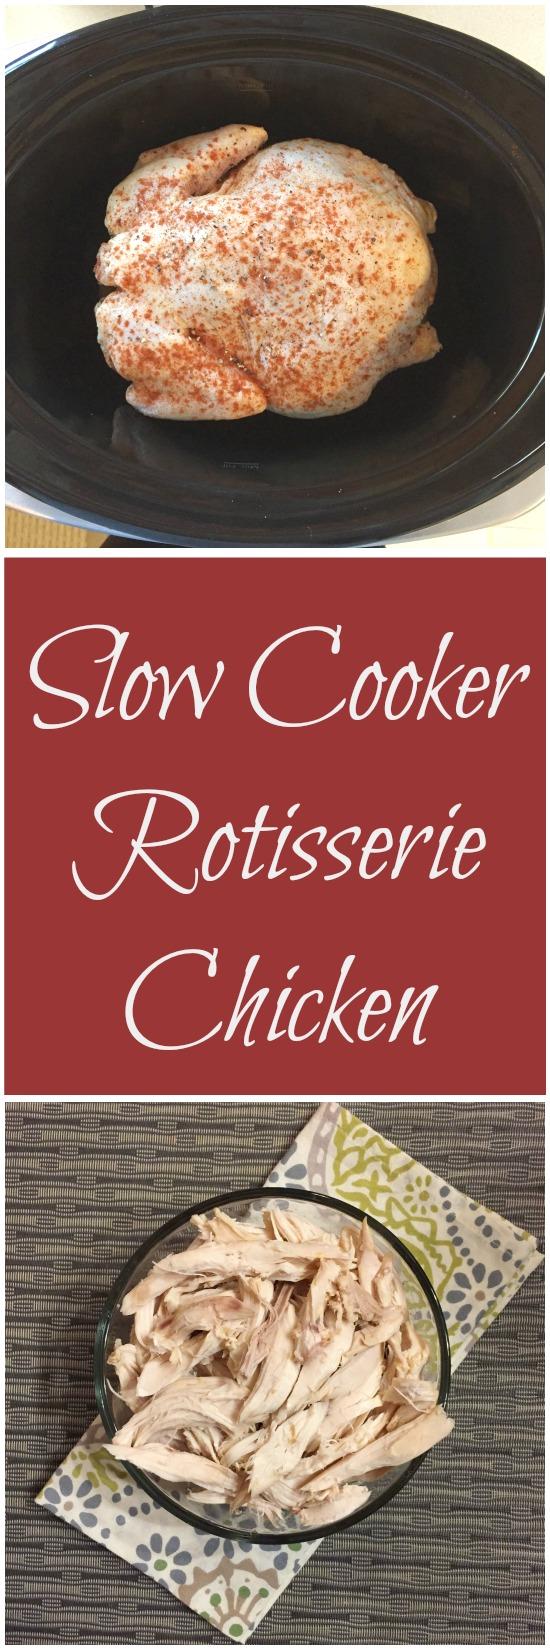
Did you know you can make a rotisserie-style chicken in your crockpot? It's an inexpensive, easy way to prep chicken you can use in a variety of other recipes!

Crockpot Rotisserie-Style Chicken

—————-

Food Blog Academy

Food Blog Academy

And finally, because I’m always trying to make this blog better for you guys, I signed up for Food Blog Academy! It was created by Tessa who blogs over at Handle The Heat and you guys, I can’t say enough good things about it. I’ve been reading Tessa’s blog for years now and have seen it grow into something pretty amazing so when she introduced Food Blog Academy, I had no doubt it would be awesome.

I’m about a week into it and I’m already learning SO MUCH. I’m a firm believer that no matter how successful you are, there’s always more to learn. Even though I’ve been blogging for 4.5 years, I definitely know there are things I could be doing better…which is why I signed up.

Tessa does a great job breaking down the content into manageable segments and giving you actionable goals to encourage you to implement changes. I’ve already made a lot of behind-the-scenes improvements and tackled some tasks I’d been putting off for months now.

If you’re a good blogger, I’d definitely check it out. (PS- that is not an affiliate link. I don’t get anything for sharing this. I just like to spread the word about things I love and believe in!)

————

Whew! I think that’s all for now! Feel free to let me know if there are other changes you’d like to see on the blog and I’ll do my best to make them happen!

Enjoy!
–Lindsay–

Filed Under: Uncategorized

Crossfit After Baby

January 30, 2015 by Lindsay 31 Comments

Hi Friends!

It’s been several months since I did a Fitness Friday post so I’m pretty excited to be back in workout mode! Today we’re talking about Crossfit after baby.

Advice for getting back into Crossfit after having a baby.

If you’ve been reading for a while, you know that I’m a Crossfit lover and that I continued to do Crossfit throughout my entire pregnancy. You can read about how I modified some of my workouts here:

32-38 Weeks Pregnant
23-31 Weeks Pregnant
18 – 22 Weeks Pregnant
13-17 Weeks Pregnant

I was excited to get back into Crossfit after baby. Then I got sick – which you can read about here. I honestly think if I hadn’t gotten sick, I would have been ready to start easing back into Crossfit about 4 weeks after he was born. I recovered well from my delivery and at my 5 week post-partum appointment my OB gave me the ok. However, I ended up being quite sick for several weeks and was even hospitalized for several days. I was sent home from the hospital with a PICC line, which meant no lifting weights until it was removed, even when I started feeling better.

Since I couldn’t lift, I tried to just start being active again by getting back into walking the dogs, etc. It was tiring even just taking them around the block.

I got my PICC line removed on New Year’s Eve. I had planned to wait and do my first workout on New Year’s Day but I was so excited to have it out that I went in for my first official comeback workout on NYE.

Let me just say….if you want a humbling experience, start crossfitting again after having a baby. HOLY HARD! I decided to chronicle my journey with you guys so you can see how I got back into things and I’ll share my honest feelings about how hard it was,

Here we go:

Week 1

IMG_0408

Wednesday: This was my first WOD back. And let me tell you, it was miserable. Everything hurt. Even jumping rope. You don’t really think about how much you use your abs but lemme tell you, when you have none, you notice how you use them for EVERYTHING!

I did 55# clean and jerks and for the T2B, I hung from the bar and lifted my feet about 2 feet off the floor for 2 sets of 3.

Before the wod, I tried a few double unders. I couldn’t get more than 2-3 in a row before messing up. I was frustrated but decided to try the wod. Once the clock started, something clicked and I was able to string  together 20 or so double unders, but it still took me a while. When I moved to the wall balls, I picked up the 14# ball and it felt like it weighed about 45 pounds. The first time I threw it, I didn’t even hit the wall…it went about 4 feet in the air before coming crashing down on me. It took all my strength to get through 30 wall balls, something I could previously do unbroken in about 90 seconds. Then I moved on to the thrusters. I had 55# on the bar. I picked it up and immediately set it back down and stripped the weight. Way too heavy. I did my 10 thrusters with the 35# bar. When I moved back to the double unders for round 2, I literally jumped once and fell to the floor. My quad muscles locked up and I could barely move. I knew there was no way I could finish the wod…so I stopped. It was my first time not finishing a wod.

I left feeling super defeated, yet elated at the same time. I was so happy to be back working out, but frustrated because I knew I had a long ways to go. My quads were so sore I could barely walk for 4 days.

IMG_0458

Thursday: Despite my legs being so sore, I decided I should go back the next day to keep my muscles loose. This was the first wod of 2015. I used a 26# kettlebell, after the 4th round I did inch worms instead of wall walks, I had to stop 4 times to keep from throwing up but I finished all 11 rounds in 33:25. So miserable.

IMG_0509

Friday: I knew I needed to ease back into things so I took an active rest day and took the boys on a 1.5 mile sunset walk and did a few planks.

IMG_0583

Saturday: I headed back to the gym for a workout after I spent some quality time with Squish. I used a 20# db for my snatches and did 35,45,55,35,35# for my thrusters. We finished right at the time cap! Thrusters are SO HARD for me right now. It took everything I had to get through 10 at 55# and then I struggled through the next two sets at 35#. 

Sunday’s are for squats and strict press. 5×5 @ 95# squats & 5×5 @ 45# strict press. And Marcus being ever so helpful as always! #comebackstronger

A video posted by Lindsay L, RD (@theleangreenbean) on Jan 4, 2015 at 11:55am PST


Sunday: I headed to the basement to start building my strength back up. Need to get that butt back! I went all flat on me 🙂 95# squats used to be my warmup. This time it was challenging to get through these 5 sets, but I did it!

IMG_0723

Monday: We did a lot of squats and hand stand pushups for our skill/strength. I worked on handstand holds which were super hard. Then for the wod I did 2 rounds + 10 Rx. It was my first time trying kipping pullups since I was 34 weeks pregnant and they were HARD! But I did 30 of them! I can only string 2 together right now and did a lot of singles. I was able to do 55# push press and 35# kb swings but this workout left me sore for a good 4 days.

Tuesday: Rest

Week 2

IMG_0828

Wednesday: This one was hard. Rowing is usually one of my strength but our strength session was front squats. I did 5×5 at 85# and my legs were gassed. I rowed slowly and did descending weight deadlights (105#, 95#, 85#, 85#). They felt super heavy. I also did hand release pushups instead of handstand pushups. By the end of the week I was feeling sore but pretty good. Things were starting to get a bit easier. I was able to do some good knees to elbow on Tuesday which was a big improvement from barely lifting my legs on my first day back! 

Deadlifts are one of my least favorite lifts. This year I’m making it a goal to focus on my weaknesses so I’m forcing myself to work on them instead of slacking off on them like I usually do. 

IMG_0866

Thursday: If you’re looking for something challenging, do this 20 min EMOM. Double unders and thrusters is one of the worst pairings. For the later rouds, if we weren’t able to get all 10 thrusters in a minute, we were encouraged to keep our starting weight and just do fewer thrusters instead of dropping our weight to get all 10. So I did 55# thrusters the whole time, but I did 3 rounds of 10, 2 rounds of 8, 2 rounds of 6 and 3 rounds of 5 thrusters. It. was. brutal. For the wod I did 21-15-9 box jumps but cut the chest to bar to regular pullups and only did 12-9-6 since I was still sore from the pullups on monday. I finished in 8:05

IMG_0916

Friday: Late night squat session. It’s been forever since I squatted over 100# but I managed to do 5×5 at 105#! Felt good!

IMG_0923

Saturday: Kicked off the day with a partner WOD. This was deceptively hard. The pvc squat jumps made your legs burn like crazy! We used a 35# kb and 20# dumbbells for the last half. Wall walks were never my strength and now they are extremely hard! Again, the lack of core strength makes everything 100 times harder. 

IMG_0997

Sunday: I did some strength in the morning, then hubby & I did a little afternoon cardio after he lifted. My rowing splits were right at 1 min, hubby’s were 10 sec faster. Finished part D in 5 minutes. Squish cheered us on! Rowing sucks…that’s about all I have to say about this one.

IMG_1018

Monday: We started with deadlifts- I worked my way up to 3 sets of 8 at 135#. Then we did benchpress- I did 4 sets of 10 at 55#. Then 13:30 for the wod with 55#. Felt hard but good!

IMG_1110

Tuesday: This EMOTM was tough…but the good news is that I can still do pistols! Bad news is I still don’t have my TTB back..but I’m getting better at knees to elbow. Toes to bar are something I worked really hard on when I first started Crossfit. I remember how excited I was when I finally figured out how to string them together. It’s super frustrating to not even be able to get my toes to the bar anymore but I know they’ll be back as my core strength returns. This was my first time doing snatches since I’ve been back, and they felt surprisingly good. Made it through the snatches of round 7 for the wod with 55#.


Week 3

Wednesday: REST

IMG_1163

Thursday: If you want to smoke your legs, do this EMOTM of wall balls and box jumps. I made it through 16 minutes of unbroken wall balls and rebounding box jumps before I had to start breaking things up. Today was the first day where I didn’t feel like I was dying doing wall balls. It’s like I got my legs back under me and the ball didn’t feel like it weighed 80 pounds like it had for the past two weeks. So that was exciting. Class ran long so I only had time for 3 rounds of the wod but I did 115# deadlifts and pullups and finished in 13:32.


Squats with a side of squish! 8 at 100#, 5×6 at 110#, 8 at 100# #crossfit #comebackstronger #fitfluential #fitcolumbus

A video posted by Lindsay L, RD (@theleangreenbean) on Jan 16, 2015 at 1:52pm PST


 Friday: Squats with a side of Squish.

crossfit
Saturday: Full house at the gym to kick off the weekend. This one was a leg burner!

crossfit

Sunday: Squats. I was feeling proud after this workout. 3 weeks ago I was finally cleared to workout again. I started squatting and struggled through 5×5 at 85#. Tonight I did 5×5 at 115#!

crossfit

Monday: Worked on handstand holds, then squats and ring push-ups. Ring pushups are SO hard for me. Regular pull-ups are hard but adding in the stabilizing factor and they’re even worse! Did 65# thruster and knees to elbow for the wod and finished in 8:55. Then finished the burpees in 2:38. Rough.

crossfit

Tuesday: We redid 14.1 tonight. Last year at the open I got 252 reps. At 25 weeks pregnant I got 225 reps which is 5 rounds. Tonight I got 180 which is 4 rounds. If it had been the open tonight I prob could have gotten thru the doubles of the next round but I’m happy with my score since I’m still getting back into the swing of things!

Week 4

Wednesday: REST

crossfit

Thursday: Everyone has bad workouts. This was my first one since I’ve been back. Crossfit has a way of knocking you back down just when you feel like you’re getting the hang of things. I’m struggling to get back into the mindset of “committing to the lift” when the weights get heavier overhead. Did one round with 75# and then dropped to 65# bc my form was suffering on the jerks. Finished 4 rounds in 19:15.

pullup bar

Friday & Saturday: REST – but hubby did install a pullup bar in our garage which I’m super pumped about!!

crossfit

Sunday: Took a couple rest days but back at it today! I was finally able to string together some sets of 5 pull-ups in a row and my squats felt great!

crossfit

Monday: Snatches. Hit several at 70#! Then I hit a mental block. Finished the wod in 10:25 Rx! I also tried a couple toes to bar and was at least able to get my toes to touch the bar again. Now to start stringing them together again!

crossfit

Tuesday: Dead. Holy legs. When I did 13.3 in the open 2 years ago, I didn’t finished the doubles. I did it again last winter and finished the doubles in 9:30 and then stopped since I can’t do muscle ups. This time I did it  after one month back post-baby and finished the doubles in 11:00! Talk about hard. My lungs were on fire and I collapsed as soon as I was done. The 5x500m rows with one min rest at the end just added to the misery!

—————

So there you have it! A recap of my first month back at Crossfit. There hasn’t been a single day that was easy…but then again, there never really is with Crossfit. It’s been a mental struggle for me to take things slowly and an exercise in patience as well. But I’m amazed at how far I’ve come I just the past month and am excited to continue my comeback! My goal is to be prepared as I can be for The Open, which starts at the end of February!

My advice for you if you’re returning to working out after pregnancy or an injury:

  • Be realistic. As hard as it is to stomach, you’re not going to just head back to the gym and pick up where you left of, no matter how badly you want to. Set a few realistic goals to motivate you, but be honest with yourself about where you’re starting from and how long it will take you to get where you want to be.
  • Take it slow. It’s going to be a long road and it may take longer than you want it to…but going too hard at the beginning and getting injured is only going to make it longer.
  • Don’t be too hard on yourself. Your journey back is going to be tough. Give yourself credit for having the willpower, desire and motivation to get back into working out. There will be bad days and there will be good days. Embrace them both and learn from them.
  • Be grateful. Your physical health and the ability to workout is a privilege. Never take it for granted.

Let’s chat:
Have you ever made an exercise comeback? What was the proudest moment of your return?

Enjoy!
–Lindsay–

Filed Under: Kids, Workouts

Chicken Fried Rice

January 27, 2015 by Lindsay 36 Comments

This Healthy Chicken Fried Rice is perfect for nights when you want a quick, easy dinner that’s both simple and nutritious!Hi Friends!

Hi Friends!

Quick recipe for you today. Chicken Fried Rice.

This Healthy Chicken Fried Rice is perfect for nights when you want a quick, easy dinner that's both simple and nutritious!

It’s nothing new. In fact, it’s probably something you’ve had several times. You’ve probably even made it yourself.

I guess this is more of a reminder. An inspiration of sorts. For those nights when you just can’t figure out what to make for dinner. And you want something that doesn’t require much thought. Or effort. Or creativity.

This Healthy Chicken Fried Rice is perfect for nights when you want a quick dinner that's both simple and nutritious!

Make this. It’s simple. It’s nutritious. It’s easy. And it tastes good.

Print

Chicken Fried Rice

Fried rice 3
Print Recipe

5 Stars 4 Stars 3 Stars 2 Stars 1 Star

No reviews

An easy weeknight dinner that can also be made ahead of time and eaten all week.

  • Author: Lindsay L
  • Prep Time: 10 minutes
  • Cook Time: 30 minutes
  • Total Time: 40 minutes
  • Yield: 4 1x

Ingredients

Scale
  • 1/2 cup brown rice, dry
  • 2 cloves garlic, minced
  • 1 pound chicken, chopped
  • 4 cups mixed vegetables (fresh or frozen)
  • 2 eggs
  • 3 Tbsp soy sauce
  • green onions, to garnish

Instructions

  1. Cook rice according to package directions.
  2. Saute garlic and chicken in a large pan for 5-7 minutes over medium heat.
  3. Add vegetables and saute until chicken is cooked and vegetables reach desired level of tenderness.
  4. Push everything to one side of the pan, add the two eggs and scramble until cooked.
  5. Add rice and soy sauce.
  6. Serve warm, topped with green onions.

Notes

Use whatever veggies you’d like. I typically use carrots, peppers, onions, broccoli and peas.

Did you make this recipe?

Tag @theleangreenbean on Instagram

Feel free to use your favorite veggies. I usually use peppers, onions, carrots, broccoli and peas and often I use a combination of whatever veggies are in my fridge and some frozen ones from the freezer. Serve with extra soy sauce if you want, but you really don’t need much to get the flavor!

This Healthy Chicken Fried Rice is perfect for nights when you want a quick dinner that's both simple and nutritious!

[Tweet “This Chicken Fried Rice from @leangrnbeanblog is healthier than takeout and tastes great!”]

Enjoy!
–Lindsay–

Filed Under: Dinner Tagged With: Chicken, Egg, Rice, Soy Sauce

Homemade Enchilada Sauce

January 21, 2015 by Lindsay 63 Comments

Try this Homemade Enchilada Sauce for your next Mexican night. It’s super simple and made from ingredients you probably already have on hand. Plus it’s WAY better than the canned version & much lower in sodium!

This low-sodium Homemade Enchilada Sauce is healthier and more flavorful than store-bought. Make a batch next time Mexican night is on the dinner menu!

Hi Friends!

Time for another Recipe Redux post! This month’s theme was as follows:

Start Smoking in the New Year

The New Year is heating up with smoke and spiciness. From boldly flavored smoked salts to actual smoking techniques, subtly smoked food is on-trend. The same can be said for spice as we savor heat from harissa, sriracha and smoked paprika. Show us the healthy dish you’re heating up with smoke and/or spiciness.

I’ve been thinking about making my own Enchilada Sauce for a while now. We eat a lot of Mexican food in our house and we like it spicy, but I hate buying the canned version because it’s so high in sodium.

This low-sodium Homemade Enchilada Sauce is healthier and more flavorful than store-bought. Make a batch next time Mexican night is on the dinner menu!

This sauce was inspired by this recipe and this recipe. It’s made with just a few basic ingredients and it’s so good! You can adjust the amounts of cayenne and chili powder to get your desired spice level!

Here’s the recipe:

Print

Homemade Enchilada Sauce

This low-sodium Homemade Enchilada Sauce is healthier and more flavorful than store-bought. Make a batch next time Mexican night is on the dinner menu!
Print Recipe

5 Stars 4 Stars 3 Stars 2 Stars 1 Star

5 from 5 reviews

An easy homemade Enchilada Sauce that’s healthier and more flavorful than store-bought and can be made with just a few ingredients!

  • Author: Lindsay L
  • Prep Time: 2 minutes
  • Cook Time: 10 minutes
  • Total Time: 12 minutes
  • Yield: 4 1x

Ingredients

Scale
  • 2 Tbsp oil
  • 2 Tbsp flour
  • 1 cup crushed tomatoes or no salt added tomato sauce (I use Pomi tomato sauce)
  • 1 cup broth (vegetable or chicken)
  • 3–4 Tbsp chili powder
  • 1/2 – 1 tsp cayenne pepper
  • 1/2 tsp garlic powder
  • 1/2 tsp cumin
  • 2 tsp brown sugar

Instructions

  1. Heat the oil in a small pan over medium heat.
  2. Stir in flour and mix until combined.
  3. Add remaining ingredients, bring to a boil, reduce heat and let simmer for about 10 min.
  4. Taste and adjust spices as needed!

Notes

Look for tomatoes where the only ingredient is “tomatoes”. Tomato sauce will be a little thinner, crushed tomatoes will be a little thicker. [br][br]Start with less spice (chili powder and cayenne), then taste and adjust to your liking. You can also add more sugar for a sweeter sauce.

Did you make this recipe?

Tag @theleangreenbean on Instagram

So easy right? You’ll never want store-bought again!

This low-sodium Homemade Enchilada Sauce is healthier and more flavorful than store-bought. Make a batch next time Mexican night is on the dinner menu!

This makes about 4 cups and you can store it in the fridge for a week or two!

This low-sodium Homemade Enchilada Sauce is healthier and more flavorful than store-bought. Make a batch next time Mexican night is on the dinner menu!

[Tweet “This Homemade Enchilada Sauce from @leangrnbeanblog is WAY better than storebought! “]

Enjoy!
–Lindsay–

An InLinkz Link-up


Filed Under: Dinner Tagged With: Chicken Broth, Tomato

A Day In The Life – 3 Months

January 20, 2015 by Lindsay 58 Comments

Hi Friends!

The last time I did one of these Day In the Life posts was back in September. Now that Squish is almost 3 months old (he’ll be 12 weeks tomorrow, 3 months on the 29th) I thought it’d be fun to do another one! He’s still not exactly on a schedule so every day is different but here’s what yesterday looked like:

day1

10:30pm Sunday – 12:30 am Monday
Work. Sunday’s are hard for me. I get really overwhelmed thinking about everything I need to do on Mondays and since life is a bit unpredictable, I feel like I need to take advantage of time when he’s sleeping to get some things done before the week officially kicks off.

12:45am
Bed. This is a little later than usual. I’m typically in bed sometime between 11 &12.

4:45
Wake up and feed the animals. They drive me crazy since I’m such a light sleeper so it’s easier to just get up, feed them and go back to bed.

6:30
Feed baby. He’s slowly starting to go longer and longer without eating at night. I fed him at 10:30 and he made it until 6:30. I would say 6-8 hours is about his average right now but there are still some nights where he only goes 4 hours.

7:45
Baby wakes up again. This is a bit unusual. Most mornings he’ll sleep until 8:30 or so unless he’s feeling fussy/can’t poop, which was the case today. I pulled him into bed with me, grabbed my phone and started reading blogs/checking social media

8:15
I get up, plop Squish in his chair and make my oatmeal. While I’m eating, I read more blogs, schedule tweets, etc with half my brain and sing and talk to baby with the other half. Hubby wakes up, gets ready for work and heads out.

day2

8:45
Work. As most of you know, I work 15 hours a week for Regan. I do a lot of stuff for Healthy Aperture, various social media tasks, client projects, etc. Squish is usually pretty happy at this hour so we turn on Toddler Radio Pandora and I sing and work while he chatters away, plays with his taggie blanket etc.

9:30
Feed baby and check social media on my phone.

9:45-10:45
Squish usually falls asleep for at least a little while after he’s been up for a couple hours so I work furiously to get things done.

10:45- 11:15
He’s still sleeping so head to the kitchen to make some enchiladas for the blog. This will also double as dinner.

11:15-12:15
I try to plan things out so I can take a lot of my pictures for blog recipes on the weekends when hubby is around because for some reason Squish doesn’t enjoy watching me take pictures and run back and forth from the kitchen a million times. However, Sunday was super cloudy and dark which means terrible lighting, so I had about 4 recipes I needed to shoot today so I get that done while simultaneously trying to keep Squish from having a meltdown.

day3

12:15-12:45
Daddy comes home for lunch. While he eats, Squish and I play on his activity mat and have tummy time (always a treat).

12:45
Feed baby.

1:00-1:15
Inhale lunch

1:15-1:45
More fun on the activity mat and in the bumbo. I also spend a little time responding to blog comments, which I’m terrible about…I always seem to be behind…but I’m working on it.

1:45-2:00
Check in on social media stuff.

2:00-4:00
Squish naps for some of this time so I do some project research for a client project. Then I work on blog stuff/chat with Squish as he wakes up. I’m changing the way my recipe index is displayed and I think it’s going to make it a lot more visual and easier to find recipes, which is great! However, I have to go back through and add category tags to 5 years worth of blog posts….not so great. I should have been doing it from the beginning, but oh well.

4:00
Feed baby.

day4

4:15-4:45
Bundle up baby, pop him in the Ergo, leash up the dogs and head out for a walk. Today was the first day it was warm enough for Squish to actually look around while we were walking instead of my having to shield him from the winter weather and he loved it!

4:45-5:15
Baby finally poops. Major blowout. Get him all cleaned up and we play some more.

5:15-5:25
Daddy comes home. I run and get changed for Crossfit and eat a snack.

day5

5:25-6:40
Crossfit while Squish hangs with daddy.

6:40-7:00
Quick shower and a snack

7:00-8:45
Back on Squish duty while daddy works out. We chat and play and he even entertains himself on the activity mat for a while (this is a new development) while I get a little more blog work done.

8:45
Dinner.

9:00-10:00
Squish falls asleep and I write a blog post and watch some HGTV while hubby plays guitar.

10:00-11:15
Finish categorizing 5 years worth of blog posts. The worst…but it’s done!

11:15 – 12:00
Feed baby, social media stuff, tv watching, chat with hubby….

12:00 – 12:30
Bedtime stuff.

Filed Under: Uncategorized

10 Tips For New Moms

January 13, 2015 by Lindsay 88 Comments

Hi Friends!

Now that squish is almost 3 months old (WHAT?!), I thought I would share some of the tips for new moms that have helped us survive the first few months with a newborn.

Pregnant or know someone who is? Here are 10 Tips For New Moms that helped me survive the first few months!

They might not all work for everyone but hopefully a couple of them will help make someone’s life a little easier.

So here we go:

hair dryer for diaper rash

1. Keep a hair dryer near your diaper changing station. Diaper rash springs up surprisingly fast and can quickly lead to super red, irritated and even bleeding skin. Our pediatrician told us to use the hair dryer on low heat or  the “cool” air setting to dry baby’s bottom during diaper changes. It’s one of the best tips we’ve gotten. It helps clear up the redness quickly and Chase actually loves it! He stops crying the second you start drying. I don’t use it every time I change him but after an especially poopy diaper or if I see redness starting I definitely dry him off.

baby formula

2. Be prepared for things even if they’re not in your plan. Don’t plan on giving baby a pacifier? Great…but buy one or two anyways. When baby is a few days old and you’ve tried EVERYTHING to get him to sleep at night, you may have a change of heart and at 3am you’ll be glad you have one on hand. Same thing for formula. Planning to breastfeed? Wonderful! But buy a small carton of formula or save one of the free samples you get in the mail. When baby is 3 days old and jaundiced and your doctor tells you that you need to start supplementing with formula immediately, you’ll be glad you don’t have to drag baby to the store to find some.

baby bottles

3. If you’re using formula, fill a couple bottles with the right amount of water before you go to bed. When you’re half awake in the middle of the night, it’s just one less thing you have to worry about.

IMG_8900

4. Don’t buy too many diapers until you know what size your baby is and how quickly they grow. Same goes for clothes. If people want to get you diapers, ask for larger sizes that they’ll definitely grow into. My baby only wore newborn diapers for a week or two before hitting the weight limit. He’s also already wearing 6-9 month clothes at 2 months. That being said, make sure you have a few newborn outfits on hand. Many people will actually buy you larger clothes and you may find yourself with nothing for baby to wear right when he’s born.

rock n play

5. Get a rock and play. We have this one. I bought a pack and play with every intention of having baby sleep in it from day one. WRONG. He’s been sleeping and napping in the rock and play since we brought him home. We carried it up and down the stairs every day for the first couple of months so it would be nearby no matter which room we were in. It vibrates gently which is especially great when they’re little and is also at a bit of an incline which can help with reflux. Now that he’s a little older, I think we’ll transition him to the pack and play in a few weeks and then eventually to his crib. If your baby doesn’t like the rock and play, try something else. Many babies love the boppy. I used ours maybe 2 times and that was it.

IMG_8673

6. If you have a boy, point the winkie down in the diaper. If you don’t, when he pees it will go right out the top. Also- always have a clean diaper on hand and ready when changing a dirty one. You never know when he’ll start peeing and give you, himself, the floor, the walls, etc a nice shower.

IMG_9129

7. Sleep when others are there to help you. It’s great if you can sleep when baby sleeps but I personally found that I never really slept very soundly when he was napping during the first few months. I was always half awake keeping an eye on him. However, if a friend or relative wants to do you a favor, ask them to come over and sit with baby for an hour or two while you go upstairs to sleep. You’ll sleep much more deeply knowing someone else is watching him.

Ergo baby carrier

8. Try baby-wearing. Ring slings, woven wraps and other fabric carriers are great when they’re little. I used the Baby K’tan first and then switched to an Ergo. For me personally, the k’tan was great when he was first born, but he was a big baby and he got bigger (and heavier) very quickly. I found that the Ergo works better for us now because it has a waist strap that helps take some of the pressure off my upper back. I put him in there, with the infant insert, whenever he’s super fussy and doesn’t want to sit still, when we’re going to a store and we don’t want to deal with the carseat or even just when I need to get things done the require my hands to be free. It always calms him down and he usually falls asleep in it. I can’t wait to get the Ergo 360 when he’s big enough to face forwards! Keep in mind that some babies don’t like the Ergo so try lots of different carriers to find one that works for you and baby.

baby napping

9. Experiment! Find your baby’s favorite napping position, what makes them happy, what feeding schedule works best, what calms them down, etc…Every baby is different so don’t be afraid to try something new to see if it works for your family!

IMG_0808

10. Break the “rules”! Think you have to swaddle your baby when you put them to bed? WRONG. My baby hated being swaddled so we stopped that after night 2 and he slept much better. Think you have to breastfeed because “breast is best”? WRONG. It’s only best if it’s best for you and your baby. You can read about my experience HERE. Bottom line is, there’s not one right way to do things with a baby. Do what works for you and your family.


diaper change

Bonus: Always keep a change of clothes in the diaper bag. Just trust me.

Good luck! Soak up every minute, good and bad, because it really does go just as fast as everyone says it does.

Let’s chat:
Are you a mom? What tips would you add?!

[Tweet “Pregnant or know someone who is? @Leangrnbeanblog shares 10 Tips For New Moms!”]

Enjoy!
–Lindsay–


Filed Under: Kids

Sweet and Spicy Bacon Wrapped Chicken

January 9, 2015 by Lindsay 22 Comments

This Sweet and Spicy Bacon Wrapped Chicken has the perfect balance of flavors and is sure to be a dinner loved by the whole family.

Hi Friends!

I’ve got a delicious dinner recipe for you today! I made this Sweet & Spicy Bacon Wrapped Chicken a couple weeks ago for dinner one night. It was so good that the next day I made it again with a few tweaks just so I could share it with you!

This Sweet & Spicy Bacon Wrapped Chicken is an easy way to break out of the boring chicken dinner rut!

It’s easy to make AND it involves bacon- so it’s gotta be good, right?! You can adjust the amount of brown sugar and cayenne better depending on how sweet/spicy  you want it!

This Sweet & Spicy Bacon Wrapped Chicken is an easy way to break out of the boring chicken dinner rut!

Here’s how you make it:

Print

Sweet & Spicy Bacon Wrapped Chicken

Sweet and Spicy Bacon Wrapped Chicken 1
Print Recipe

5 Stars 4 Stars 3 Stars 2 Stars 1 Star

5 from 1 review

An easy, flavorful weeknight dinner!

  • Author: Author: Lindsay L
  • Prep Time: 5 minutes
  • Cook Time: 20 minutes
  • Total Time: 25 minutes
  • Yield: 2 1x

Ingredients

Scale
  • 1 pound chicken tenders
  • 1 Tbsp butter, melted
  • 1 tsp paprika
  • 1/2 – 1 tsp cayenne pepper *
  • 1/2 tsp garlic powder
  • 2–3 tsp brown sugar *
  • 3–4 strips bacon

Instructions

  1. Combine melted butter, spices and sugar in a small bowl to make a paste.
  2. Rub spice mixture onto top and bottom of chicken tenders.
  3. Slice bacon strips in half lengthwise.
  4. Wrap half a slice of bacon around each tender.
  5. Place on a baking sheet covered in foil and bake at 400 degrees for 20 min or until tenders reach 165 degrees F.
  6. Switch oven to broil and broil on high for 2-3 minutes, watching carefully so they don’t burn!

Did you make this recipe?

Tag @theleangreenbean on Instagram

The first time I tried it, I used chicken breasts and left the strips of bacon whole. I personally like it better with chicken tenders, but use whatever you have on hand – breasts, thighs, tenders, nuggets, etc! Just cut the bacon to wrap around accordingly!

This Sweet & Spicy Bacon Wrapped Chicken is an easy way to break out of the boring chicken dinner rut!


[Tweet “In a chicken rut? Try this Sweet and Spicy Bacon Wrapped Chicken from @leangrnbeanblog!”]

Enjoy!
–Lindsay–

Filed Under: Dinner Tagged With: Bacon, Chicken

Berry Crunch French Toast Cups

January 7, 2015 by Lindsay 31 Comments

Make these Berry Crunch French Toast Cups for a fun weekend breakfast recipe or bake a batch to reheat and enjoy in the mornings all week!

Hi friends!

Let’s chat breakfast shall we? I made these a couple weeks ago when my family was in town. The idea stemmed, yet again, from a stale Costco baguettte. Yep, the same one I made the Ribollita with! What can I say…those baguettes are big!

I’ve made french toast cups before but I took these to the next level with a bunch of fun mix-ins. The beauty is that they’re totally customizable so play around with the mix-ins to suit your family’s taste. Mix everything together the night before…then scoop into muffin tins and bake in the morning!

These Berry Crunch French Toast Cups are fancy enough for a weekend brunch, yet easy enough for a quick, grab-and-go weekday breakfast!

Here’s how I made mine:

Print

Berry Crunch French Toast Cups

berry french toast cups 6
Print Recipe

5 Stars 4 Stars 3 Stars 2 Stars 1 Star

No reviews

A fun, family-friendly breakfast that’s easy to customize and perfect for making the night before!

  • Author: Author: Lindsay L
  • Yield: 12 1x

Ingredients

Scale
  • 4 cups cubed bread (slightly stale works best)
  • 1 cup milk
  • 5 eggs
  • 1 tsp vanilla
  • 2 cups berries
  • 1/4 cup pumpkin seeds
  • 1/2 cup almonds (chopped or slivered)
  • 1/4 cup sunflower seeds
  • 1 tsp cinnamon
  • Sugar, optional

Instructions

  1. Combine all ingredients in a large bowl.
  2. Cover with saran wrap and refrigerate overnight.
  3. The next morning, scoop into greased muffin tins.
  4. Sprinkle with sugar if desired.
  5. Bake at 350 degrees for 25-30 minutes.
  6. Serve warm!

Did you make this recipe?

Tag @theleangreenbean on Instagram

So there you have it!

I used chopped almonds but my mom suggested slivered almonds might be a better choice.

These Berry Crunch French Toast Cups are fancy enough for a weekend brunch, yet easy enough for a quick, grab-and-go weekday breakfast!

My batch made 12 muffin cups and we each enjoyed 2-3 of them for breakfast! Next time I’m adding chocolate chips.

These Berry Crunch French Toast Cups are fancy enough for a weekend brunch, yet easy enough for a quick, grab-and-go weekday breakfast!

Let’s chat:
What mix-ins would you use?

Enjoy!
–Lindsay–

Filed Under: Breakfast Tagged With: Bread, Egg, Fruit, Milk, Pepitas

Gluten Free Peanut Butter Chocolate Chip Bars

January 5, 2015 by Lindsay 40 Comments

These Gluten Free Peanut Butter Chocolate Chip Bars are an easy dessert for times when you just don’t feel like cookies. 

Hi Friends!

Today’s post is coming at you a little later than usual…and it’s not Bean Bytes…but it’s for good reason! Today we’re celebrating the birthday of a very special lady with these Gluten Free Peanut Butter Chocolate Chip Bars.

These Gluten Free Peanut Butter Chocolate Chip Bars are an easy dessert for times when you just don't feel like cookies.

First, a little back story:

A little over three years ago, I was at at the Food & Nutrition Conference and Expo in Philadelphia. I was a couple of months into my Dietetic Internship and still hadn’t really nailed down what I wanted to do with my career as an RD. I attended a session on Non-Traditional Career Paths in Dietetics led by Janet Helm was the speaker. During the session she introduced a website that she and fellow RD Regan Jones had started (Healthy Aperture) and mentioned they were looking for interns.

Being a food blogger, my attention was piqued and after the session was over, I went up and told Janet I was interested in learning more about the intern opportunity. She connected me with Regan and we met up at the expo. After chatting for a while, I headed home with a plan in place. I would join the Healthy Aperture team and review recipe submissions one day per week for the foreseeable future.

IMG_8452

I reviewed images for Healthy Aperture throughout my whole dietetic internship. During that time Regan became a mentor. As a successful entrepreneur and business owner, she is a wealth of knowledge and she spent countless hours patiently answer question after question from me as I tried to figure what to do with my life.

After I passed my RD exam, Regan got even MORE awesome when she offered me a job! For the past year and a half I’ve been working with her as the Nutrition Communications Coordinator for Regan Miller Jones Inc. And I couldn’t be happier!

Over the past 2 1/2 years Regan has been a boss, a mentor, a confidant and a friend.

  • She’s been my: sounding board, my teacher and my biggest fan.
  • She’s given me: invaluable advice about business, blogging, life and mommyhood.
  • She’s taught me: how valuable my talents are and reminds me constantly how important it is to know your worth.
  • She’s inspired me:  to follow my dreams because I’ve watched her chase her own and become wildly successful.

Today is Regan’s 40th birthday. Gretchen reached out to several of Regan’s friends, fellow RDs, business partners, etc and asked us to help her throw a virtual birthday party for her by creating a gluten-free dessert or cocktail to celebrate.

So this one’s for you, Regan! I hope it helps remind you what a positive impact you’re having on the lives of so many people around you! Happy Birthday!

———-

If you’re a longtime Bean reader, you know that I’m most certainly not gluten-free. I occasionally make things that are gluten-free but it’s definitely not a priority for me. I haven’t really done much gluten-free baking but I’m always up for a challenge! So I headed to the kitchen to see what I could come up with.

These Gluten Free Peanut Butter Chocolate Chip Bars are an easy dessert for times when you just don't feel like cookies.

I created these Peanut Butter Chocolate Chip Bars and they are DELICIOUS! I was inspired by this recipe but made some changes as usual. I made a rookie baking mistake in that I started making these before I had all the ingredients out and when it came time to add the almond flour, I realized that the bag that I thought I had in the pantry had gone bad. I wasn’t about to go to the store…but I also wasn’t about to give up. So I got out my Blendtec blender, poured in some almonds and made my own. I was planning to mix in some chopped almonds anyways, so I ground them up but still left some chunks. If you have finely ground almond flour/meal, I’m sure that’ll work just fine as well.

Here’s how to make them:

Print

Gluten Free Peanut Butter Chocolate Chip Bars

DSC 0526 368x550
Print Recipe

5 Stars 4 Stars 3 Stars 2 Stars 1 Star

5 from 1 review

A delicious gluten-free alternative to cookies.

  • Author: Lindsay L
  • Prep Time: 5 minutes
  • Cook Time: 25 minutes
  • Total Time: 30 minutes

Ingredients

Scale
  • 4 Tbsp butter, melted
  • 2/3 cup brown sugar
  • 2 eggs
  • 1 tsp vanilla
  • 1/2 cup peanut butter
  • 11/2 cups almond meal (home ground or store bought)
  • 1 tsp baking powder
  • 3/4 cup dark chocolate chips
  • chopped almonds, craisins, etc optional for mix-ins

Instructions

  1. Combine the butter, sugar, eggs, peanut butter and vanilla in a large bowl and stir until well combined.
  2. Add almond meal, baking powder, chocolate chips and other mix-ins (if using) and mix well.
  3. Pour into a greased 9×9 pan and bake at 350 for 20 minutes.
  4. Turn oven off and let cook 5 minutes longer.

Notes

If making your own almond meal, grind whole almonds in a high-powered blender or food processor until you have 11/2 cups. If you want, you can leave some chunks of almonds for texture instead of finely grounding.[br] In my experience, things I make with almond meal tend to burn more quickly on the edges, so I baked mine for 20 minutes and then turned off the oven and let them bake a little longer to help cook the middle.

Did you make this recipe?

Tag @theleangreenbean on Instagram

These turned out even better than I’d hoped. They’re flavorful, chewy and all-around delicious! Go make them now!


These Gluten Free Peanut Butter Chocolate Chip Bars are an easy dessert for times when you just don't feel like cookies.


[Tweet “Need a treat? Try these GF Peanut Butter Choc Chip Bars from @leangrnbeanblog!”]

Enjoy!
–Lindsay–

PS. I thought I’d give you a little peek behind the scenes today as well:

One thing you may or may not know about me is that i HATE photographing cookies, bars, etc. Food styling is not my forte. I love looking at beautifully styled food, but usually i’m just too tired or lacking the creativity to put it in my own photos. I thought it’d be fun to show you guys the progression I went through in this photoshoot.

I started out with a terribly boring shot of three bars stacked on a plate and from there just kept rearranging and adding things (see the progression if pics below) until I had something I was somewhat satisfied with (the ones above!). Part of my 2015 plan is to put a little more effort into my photos. We’ll see how it goes!


bars


Want to see more gluten-free desserts and cocktails? Check out the links below:

An InLinkz Link-up

Filed Under: Baking, Dessert Tagged With: Almond Flour, Brown Sugar, Chocolate Chips, Egg, Peanut Butter

Ribollita

January 2, 2015 by Lindsay 44 Comments

Ribolita is a bread soup packed with lentils and vegetables. It’s healthy, comforting and a great way to use up stale bread.

Hi Friends!

First of all, Happy 2015! I’m having a hard time wrapping my head around the fact that we’re  15 years in the 2000’s. Wasn’t it just yesterday we were talking about Y2K and how to abbreviate the year 2000 in conversation? Yikes! I feel old.

Anyways, it’s a new year and to celebrate, I made you soup! The inspiration for this soup came from the giant Costco-sized baguette in my pantry that I shamefully let go stale before I could eat it. I was doing a little googling and came across this soup called Ribollita. I’d never heard of it before, but from what I can determine, all the recipes for it have stale bread in them. Perfect!

Ribollita is a bread soup packed with lentils and vegetables. It's healthy, comforting and a great way to use up stale bread.

As usual, I looked at a few recipes and then did my own thing. Most recipes seem to use white beans, but I went with lentils because that’s what I had. I used bacon, but you could easily make this soup vegan by omitting the bacon.

Ribollita is a bread soup packed with lentils and vegetables. It's healthy, comforting and a great way to use up stale bread.

Here’s how you do it:

Print

Ribollita

ribollita
Print Recipe

5 Stars 4 Stars 3 Stars 2 Stars 1 Star

5 from 3 reviews

A hearty soup packed with veggies and bread that will keep you warm on a cold winter day.

  • Author: Author: Lindsay L
  • Prep Time: 10 minutes
  • Cook Time: 25 minutes
  • Total Time: 35 minutes
  • Yield: 4 1x

Ingredients

Scale
  • 3/4 cup onion, diced
  • 2 cloves garlic, minced
  • 3 strips bacon, diced
  • 1 red pepper, diced
  • 2 stalks celery, sliced
  • 1 cup carrots, sliced
  • 1 (14.5) oz can diced tomatos, undrained
  • 1 quart vegetable broth
  • 5 oz frozen chopped spinach
  • 3 cups stale bread, cubed
  • 2/3 cup lentils, uncooked
  • black pepper & cayenne pepper, to taste
  • parmesan cheese, optional

Instructions

  1. Cook lentils according to package directions.
  2. Meanwhile, in a large pot or dutch oven, saute first six ingredients for 5-7 minutes.
  3. Add tomatoes (with their liquid), broth, spinach, bread and cooked lentils and spices and let simmer until veggies reach desired tenderness.
  4. Serve topped with parmesan cheese if desired.

Did you make this recipe?

Tag @theleangreenbean on Instagram

Like I mentioned in the notes above, I like to cook my lentils separately, but lentils cook fairly quickly so if you want to make this even easier, you can just add the dry lentils when you add the broth, bring the pot to a boil and then reduce the heat and let it simmer until the lentils are cooked. If you do this, I would hold off on adding the bread until after the lentils are cooked. The bread absorbs liquid and you want there to be enough liquid in there to cook the lentils.

Ribollita is a bread soup packed with lentils and vegetables. It's healthy, comforting and a great way to use up stale bread.

Feel free to play around with the protein – use white beans if you prefer, or even use chicken or pork instead of beans or lentils.

[Tweet “Warm up with a hearty bowl of Ribollita from @leangrnbeanblog on a cold day!”]

Enjoy!
–Lindsay–

Filed Under: Appetizer, Dinner, Soup & Salad Tagged With: Bell Pepper, Bread, Carrot, Chicken Broth, Garlic, Lentils, Onion, Spinach, Tomato

5 Last Minute Homemade Gift Ideas

December 23, 2014 by Lindsay 19 Comments

Hi Friends!

Have you finished your shopping? Wrapped your presents? We’re a little behind this year but I still thought we were pretty much done, until last night! As I was making my list and checking it twice, I realized…Whoops! We forgot someone. With only 2 days until Christmas, and a little baby in the house, our chances to run out and get a last minute gift are limited. So what’s a girl to do?

Turn to food, of course! I rounded up 5 delicious homemade gift ideas you can put together quickly if you find yourself in my situation. All of them can be made in 30 minutes or less and 4 of them are no-bake!

Need a last minute gift idea? Here are 5 healthy, homemade gift ideas that can be made in 30 minutes or less. Bonus - Several of them are no bake!

You can find the recipe links below:

1.No Bake Protein Bars

2. Sweet & Spicy Almonds

3. Healthier Puppy Chow

4. Salt-Free Seasoning Mix

5. Blizzard Bites  

 Let’s chat:

Do you give homemade gifts? What’s your favorite thing to make?

[Tweet “Need a last minute holiday gift? Here are 5 ideas from @leangrnbeanblog!”]

Enjoy!
–Lindsay–


Filed Under: Uncategorized

  • « Go to Previous Page
  • Page 1
  • Interim pages omitted …
  • Page 35
  • Page 36
  • Page 37
  • Page 38
  • Page 39
  • Interim pages omitted …
  • Page 65
  • Go to Next Page »

Primary Sidebar

Lindsay Livingston The Lean Green Bean Healthy Living Tips and Tricks

I'm a Registered Dietitian and mom of three from Columbus, Ohio. I use this blog to share simple, healthy recipes, nutrition tips, and an honest glimpse of motherhood!

Learn More →

Questions? Comments? Email me: [email protected]

The Lean Green Bean Facebook The Lean Green Bean Instagram The Lean Green Bean Pinterest The Lean Green Bean Twitter The Lean Green Bean Feed
footer-logo
The Lean Green Bean Facebook The Lean Green Bean Instagram The Lean Green Bean Pinterest The Lean Green Bean Twitter The Lean Green Bean Feed
Recipes

Breakfast
Dinner
Snack
Slow Cooker

Kids

Cooking With Kids
Favorite Gifts
Toddler Meals
Indoor Activities

Resources

Easy Packed Lunches for Kids
Dinner Spark
Snack Spark
Ultimate Guide to Food Prep

About

Meet Lindsay
Become an RD
Work with Me

The Lean Green Bean is a participant in the Amazon Services LLC Associates Program, an affiliate advertising program designed to provide a means for sites to earn advertising fees by advertising and linking to amazon.com.
Read the full privacy and disclosure policy here.

Copyright © 2022 · The Lean Green Bean

table talk series

Learn how food affects your body.

Get my free Table Talk email series where I share bite-sized nutrition information about carbs, protein, and fat, plus bonus information about snacks and sugar!

[email protected]