• Skip to main content
  • Skip to primary sidebar

Learn how food affects your body. Get Free Nutrition Info Today

the-lean-green-bean-logo
  • Home
  • Recipes
  • Kids
  • Resources
    • Ebooks
    • Food Prep
    • Videos
    • Snack Round-Ups
    • Gift Guides
  • About
    • Become An RD
    • Work With Me
  • Search
the-lean-green-bean-logo
  • Home
  • Recipes
  • Kids
  • Resources
    • Ebooks
    • Food Prep
    • Videos
    • Snack Round-Ups
    • Gift Guides
  • About
    • Become An RD
    • Work With Me
  • Search

blog

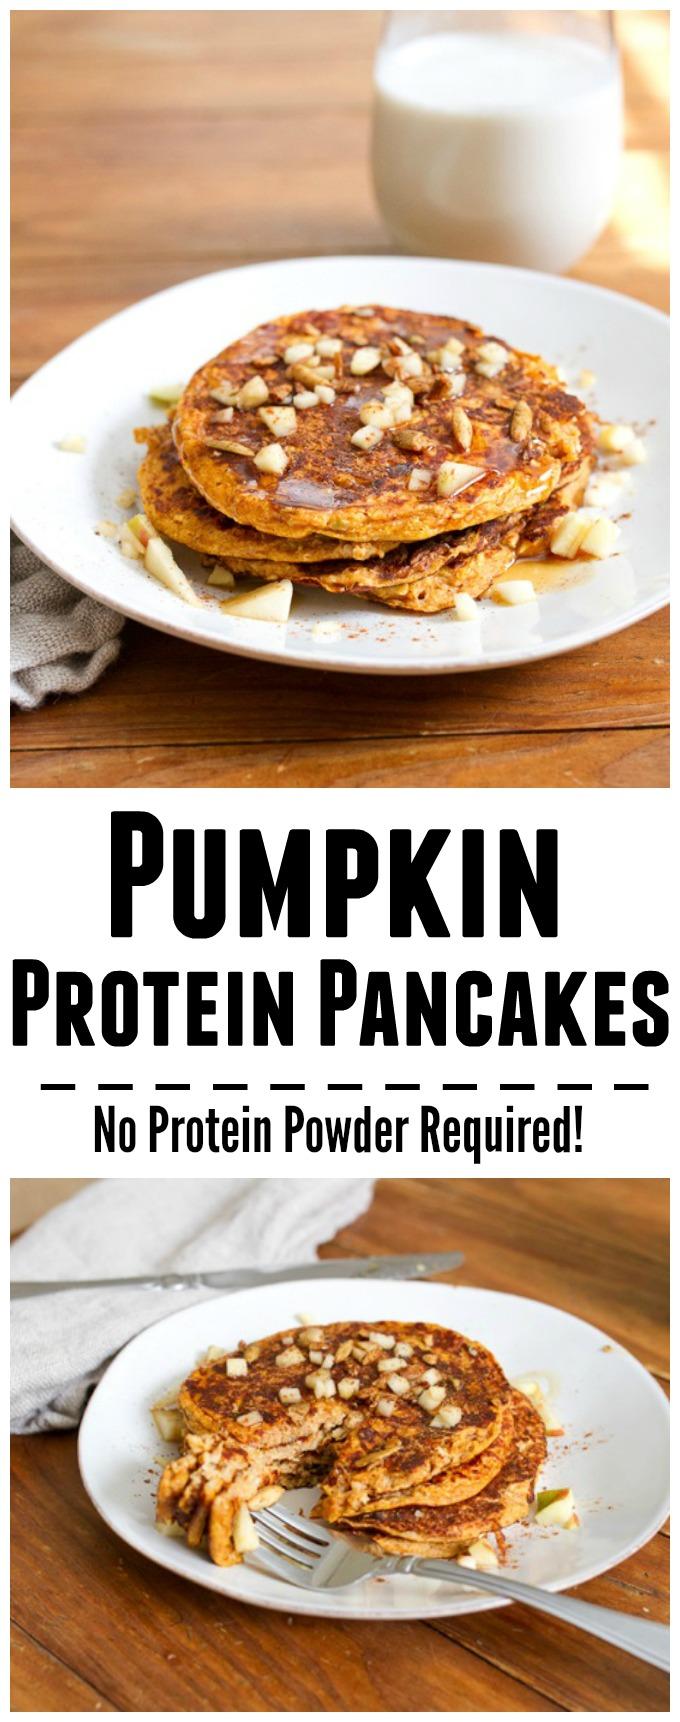
Pumpkin Protein Pancakes

November 4, 2014 by Lindsay 27 Comments

No protein powder needed in this recipe for Pumpkin Protein Pancakes! Enjoy a batch for breakfast or a snack on a busy day!

No protein powder needed in this recipe for Pumpkin Protein Pancakes! Enjoy a batch for breakfast or a snack on a busy day!

Hi Friends!

Time for another delicious recipe- Pumpkin Protein Pancakes. Today I’m super excited because the lovely Brittany from Eating Bird Food is here! I’m sure many of you are already familiar with her blog and the delicious recipes she posts. I’m so honored she agreed to be here today! Brittany and I have really connected in the blog world over the past couple of years. We even had the opportunity to go on a trip together  this year and were emailing excitedly before I realized I wasn’t going to be able to go because of baby. But I have faith that we WILL connect in person sometime soon! Please take a minute to go check out her blog if it’s new to you. It’s guaranteed to make you drool and I love the way her sunshiney personality comes through in all her posts!

—————-

Hi there Lean Green Bean readers! I’m Brittany, the blogger behind the blog Eating Bird Food. I’m an holistic health coach, certified personal trainer and lover of all things food, nutrition and fitness. On my blog I post healthy recipes, workout ideas, inspiration and share a few lifestyle posts here and there.

Although I’ve never met Lindsay in person we’ve been blog friends for quite a while now and I’m beyond honored to be here guest posting while she’s caring for the newest addition to the bean family. I couldn’t be more happy for her and Mr. Bean!! (Side note: Am I the only one that thinks of this guy every time Lindsay mentions Mr. Bean?!? hehe)

Since fall is upon us and I can’t seem to get pumpkin off my brain I thought I’d share a seasonal recipe for pumpkin protein pancakes. The cool part about these pancakes is that they have a ton of protein but you don’t need any protein powder — just egg whites, cottage cheese and a few other ingredients.

The thing about protein pancakes that can be kind of frustrating is that many recipes yield only one pancake. It’s usually a large pancake and plenty filling but sometimes you really just need a full stack. Especially if you’re a volume eater like me.

Well this recipe makes enough batter for four pancakes so you can definitely make a stack. Woo-hoo!

No protein powder needed in this recipe for Pumpkin Protein Pancakes! Enjoy a batch for breakfast or a snack on a busy day!

I love the blend of flavors here — pumpkin, pumpkin pie spice and a hint of sweetness from the apple. The oatmeal and cottage cheese make for a great texture. Overall, these are some of the best protein pancakes I’ve made. I hope you’ll give them a try this fall!

Print

Pumpkin Apple Oatmeal Protein Pancakes

Pumpkin Apple Pancakes
Print Recipe

5 Stars 4 Stars 3 Stars 2 Stars 1 Star

5 from 2 reviews

Pancakes that are full of protein and great flavors. The oatmeal and cottage cheese make for a great texture.

  • Author: Author: Lindsay L

Ingredients

Scale
  • 1/3 cup old fashioned oatmeal
  • 1/4 cup egg whites
  • 1/4 cup cottage cheese
  • 2 Tablespoons canned pumpkin
  • 1/2 teaspoon baking powder
  • 1/2 teaspoon pumpkin pie spice
  • 1/3 cup chopped apples, reserving about 1 Tablespoon for topping
  • maple syrup and pepitas for topping

Instructions

  1. Place all ingredients in a deep bowl or cup. Give the ingredients a good stir to combine everything then blend with a immersion blender (or a food processor) until the batter is well combined and a smooth, thick consistency.
  2. Heat pan or griddle to low-medium heat and spray with non-stick spray.
  3. Scoop out about a quarter cup of batter at a time and pour onto pan. You should be able to make about 4 small pancakes.
  4. Cook until little bubbles form and the edges of the pancakes are solid enough to put a spatula underneath. Flip the pancakes and cook for one to two additional minutes.
  5. Place on a plate, sprinkle chopped apple and pepitas over the pancakes, drizzle with maple syrup and serve.

Did you make this recipe?

Tag @theleangreenbean on Instagram

No protein powder needed in this recipe for Pumpkin Protein Pancakes! Enjoy a batch for breakfast or a snack on a busy day!

[Tweet “Delicious Pumpkin Protein Pancakes w/o the protein powder from @eatingbirdfood and @leangrnbeanblog!”]

Thanks again to Lindsay for having me! If you’re interested in more healthy recipes, feel free to check out Eating Bird Food. I’d love to connect with you.

Let’s chat:
What’s your favorite way to eat pumpkin?!

Enjoy!
–Lindsay–

Filed Under: Breakfast, Snack Tagged With: Apple, Egg, Oats, Pumpkin

Pumpkin Pie Peanut Butter Cups

October 31, 2014 by Lindsay 31 Comments

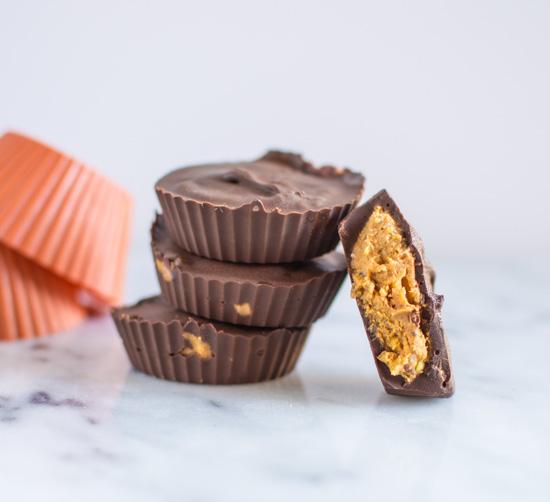
These homemade Pumpkin Pie Peanut Butter Cups are better than Reese’s for dessert and have a fun fall flavor twist!

Hi Friends!

Happy Halloween. Since today is the day for candy, it seemed only appropriate that I line up a guest post that would appeal to your sweet tooth. Lucky for you guys, my friend Lisa came through with a major win! Lisa blogs over at Healthy Nibbles & Bits and is another blogger I’ve gotten to know recently thanks to The Recipe Redux! She takes amazing photos and is constantly coming up with unique, healthy recipes to leave me wanting to immediately board a plane and go visit her so we can stuff our faces! Go check out her blog if you haven’t already!

—————

Hi everyone! I’m Lisa over at Healthy Nibbles & Bits, and I’m excited to share this recipe with you while Lindsay is spending some time with Baby Bean!

When fall comes around, there is one thing I covet: a Reese’s Peanut Butter Cup. You’ll never find one of those packages in my shopping cart under normal circumstances. But come Halloween time (and week of candy sales afterwards), I want nothing but those fun-sized shots of cheap milk chocolate and creamy peanut butter. I will dip my hands into whatever candy jar contains those tiny golden nuggets.

These homemade Pumpkin Pie Peanut Butter Cups are better for dessert than Reese's and have a fun fall flavor twist!

Reese’s has made pretty much every kind of peanut butter cup imaginable. There’s white chocolate, dark chocolate, crunchy cookie, marshmallow, inside out, peanut butter and banana crème, and caramel, just to name a few. Shockingly, there is one kind that they haven’t made yet: PUMPKIN PIE!

As both a chocolate and pumpkin enthusiast, my natural instinct is to swirl those two things together into a creamy delight. This pumpkin + peanut butter + chocolate combination is mind-blowing. It is the new black.

These homemade Pumpkin Pie Peanut Butter Cups are better than Reese's and have a fun fall flavor twist!

Until a few months ago, I didn’t realize how easy it is to make peanut butter cups from scratch. You’re going to want to store the peanut butter cups refrigerated, but I think they make these treats taste better. When eaten chilled, they’re like a nice ice cream bar–crunchy chocolate shell on the outside, rich and creamy on the inside. Except these peanut butter cups are healthier!

Print

Pumpkin Pie Peanut Butter Cups

Pumpkin Pie Peanut Butter Cups Title 2
Print Recipe

5 Stars 4 Stars 3 Stars 2 Stars 1 Star

4.3 from 3 reviews

  • Author: Author: Lindsay L
  • Yield: 10 1x

Ingredients

Scale
  • 4 Tablespoons pumpkin puree (NOT pumpkin pie puree)
  • 4 Tablespoons peanut butter (creamy or chunky)
  • 11/2 Tablespoons maple syrup (or any other liquid sweetener)
  • 1 teaspoon chia seeds
  • pinch of pumpkin pie spice or cinnamon
  • 1 cup semi-sweet chocolate chips, divided (or milk chocolate chips)
  • you’ll also need 10 muffin liners (silicone or paper)

Instructions

  1. In a small bowl, mix all the ingredients except for the chocolate chips.
  2. Line up 5 muffin liners on the counter. I find silicone liners to be easier to use.
  3. Using a microwave-safe bowl, melt 1/2 cup of chocolate chips in the microwave. Set it to 45 seconds and then check the chocolate. You don’t need the chips to be melted, but you do want them to be glistening. Continue microwaving them at 20-second intervals until all the chips are shiny. Take them out of the microwave and stir until the chocolate is thick and creamy.
  4. Spoon just enough chocolate to cover the base of the muffin liners (a 1/2 tablespoon should be enough). Repeat for the other 4 cups.
  5. Scoop up just under a tablespoon of the pumpkin/peanut butter filling and shape it into a small disk. Place it over the chocolate in the muffin tins. Repeat for the other 4 cups.
  6. Spoon the remaining chocolate over the pumpkin/peanut butter fillings.
  7. Repeat steps 2 to 6. I broke up everything into 2 batches because the melted chocolate starts to harden pretty quickly. Prepare the cups in 2 batches to make sure that you’re working with soft chocolate.
  8. Freeze the cups for 30-40 minutes. Store them in the refrigerator.
  9. Enjoy!

Did you make this recipe?

Tag @theleangreenbean on Instagram

Much love and many hugs to Lindsay and her family!

These homemade Pumpkin Pie Peanut Butter Cups are better than Reese's for dessert and have a fun fall flavor twist!

[Tweet “Better than store-bought! Pumpkin Pie Peanut Butter Cups from @healthynibs and @leangrnbeanblog!”]

Are you drooling yet?! I must make these immediately! Huge thanks to Lisa for sharing this delicious treat today!

Filed Under: Dessert Tagged With: Chia Seed, Chocolate Chips, Maple Syrup, Peanut Butter, Pumpkin

Beginner Meditation

October 30, 2014 by Lindsay 19 Comments

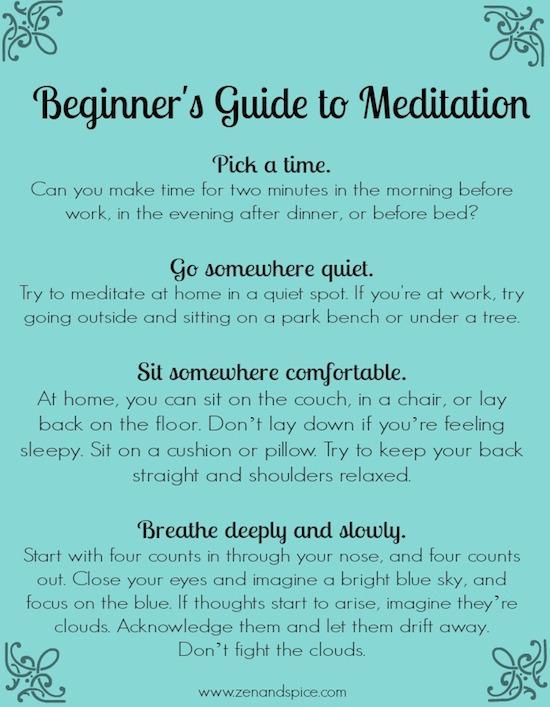
This simple guide to Beginner Meditation will help you add mindfulness to your daily routine.

Hi Friends!

So far we’ve had some amazing recipe guest posts but I thought it’d be fun to change things up a bit and make sure we’re not only keeping our bellies happy, but our minds too! So, I recruited Emily – yep, you guessed it…another fellow RD!…to talk to you guys about beginner meditation and mindfulness and how you can bring them into your life! Emily blogs over at Zen and Spice where she shares delicious recipes of her own, along with posts that cover other important aspects of nutrition and health. Go check it out!

————–

Hey everyone! My name is Emily, and I’m a Registered Dietitian from Dallas, Texas. I blog over at Zen & Spice, a health & wellness blog where I share my favorite recipes, workouts, meditation and mindfulness tips. I’m really excited that Lindsay has invited me here today – thank you so much for having me!

Today I wanted to talk a little bit about mindfulness and meditation. These two practices are so important to help you feel less anxious and more relaxed about life!

What exactly is mindfulness?

Mindfulness is the state of taking things moment-by-moment. It’s an active, open awareness of the present. When you’re mindful, you are observing your thoughts, feelings, sensations and surrounding environment from afar, without judgment. Mindfulness focuses the brain on what is being sensed at each moment, instead of ruminating on the past or future. This lets you see every current moment and appreciate them. Living in the present and not obsessing over the future or past is very important. Appreciate who you are right now and find joy in your current state.

This simple guide to Beginner Meditation will help you add mindfulness to your daily routine.

Starting a Daily Meditation

Starting a daily meditation practice can be very helpful in bringing us into the moment. Meditation is not a religion-specific practice. Anyone from any religious background who wants to learn how to center themselves and become more mindful can meditate!

There are three basic types of meditation. I like to use the sitting meditation the most (I tend to fall asleep if I lay down!).

  • Sitting meditation: Sit in a comfortable position with your back upright. Don’t slouch. Cross your legs, and let your hands fall into your lap. Inhale deeply and exhale. Close your eyes. There are many options here—the two most popular breath counting (count from 1-10, keep your mind clear), or breathing with a mantra (“Here, now”, or my favorite, “I am strong, I am healthy”).
  • Laying down meditation: Relax on your couch or in your bed in a comfortable position. Relax all of your muscles and release any tension you may have in your neck, back, arms or legs. Imagine your favorite spot in nature, and take deep breaths in and out. Try to keep your mind empty by imagining the sun, the wind, the green grass, etc.
  • Walking meditation:  You can either go for a walk outside, or you can just walk through your home. Take a breath at each step, one in and one out, and repeat a mantra such as “I am home”, or “Here, now”.

This simple guide to Beginner Meditation will help you add mindfulness to your daily routine.

Helpful tip: If you’re having trouble keeping your mind clear, imagine you’re leaning up against the wall of a train station. Trains are your thoughts. They’re coming into the station, slowing down, but then continue right through the other end. You are aware of the trains, you can feel them, but you don’t have to pay attention to them.

This simple guide to Beginner Meditation will help you add mindfulness to your daily routine.

Meditation can be such a good way to start your day, deal with stress, and live in the present moment. It’s a very simple practice. Don’t stress about learning how or becoming good at it—that’s the thing meditation is trying to teach you to avoid! Do this every day, and after a while you’ll have formed a great habit.

————–

[Tweet “Looking to start meditating? Here are some beginner tips from @zenandspice and @Leangrnbeanblog!”]

Thanks to Emily for sharing these helpful tips to get started! Let’s chat:

Do you meditate? If not, did this convince you to start?!

Enjoy!
–Lindsay–

Filed Under: Uncategorized

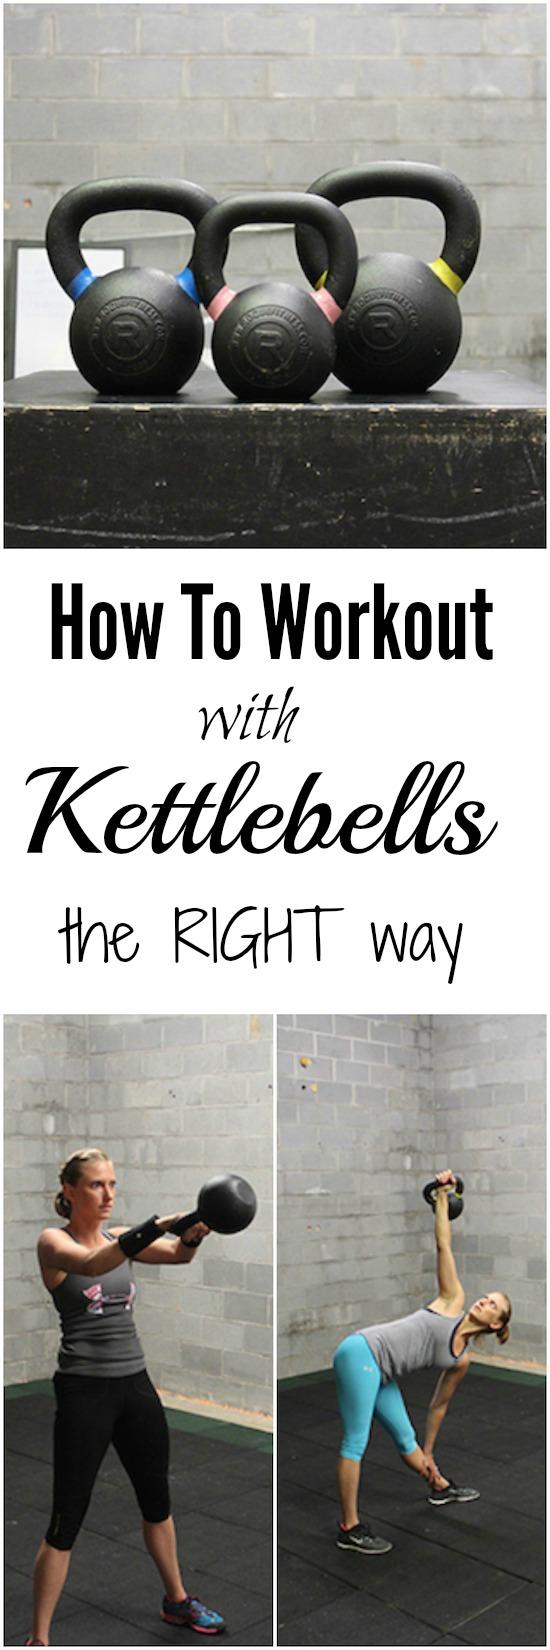
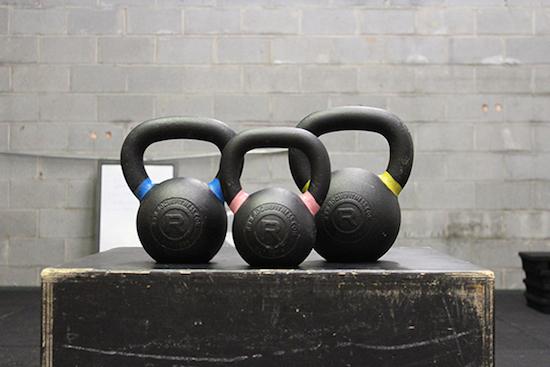
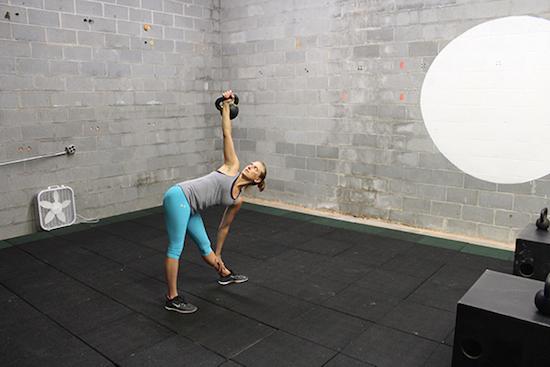
How To Workout With Kettlebells

October 29, 2014 by Lindsay 29 Comments

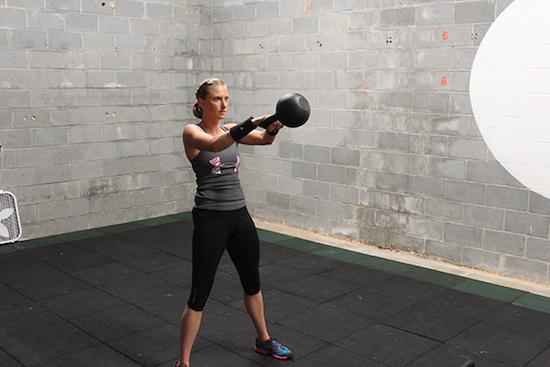
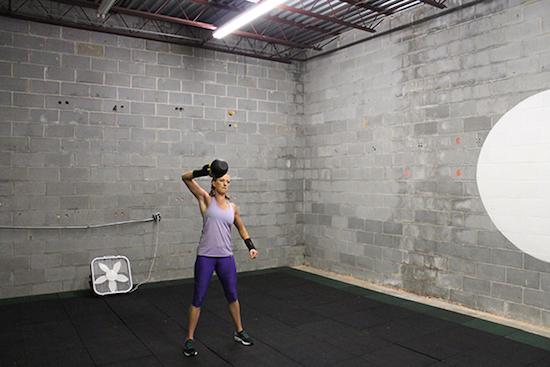
Want to learn how to workout with kettlebells? Make sure you do it right! Learn the fundamentals from a certified instructor.

Hi Friends!

Today my friend Taylor is here to chat fitness! Specifically, how to workout with kettlebells. If you haven’t checked out her blog Lifting Revolution, go do so immediately. I started following her a couple years ago and have been hooked ever since. I follow a lot of food blogs and Taylor is like a breath of fitness fresh air, sharing great workouts, motivational posts, podcasts and more! I met her in person at Blend Retreat a couple years ago and then we connected again this summer in Savannah at Fitbloggin!

Want to learn how to workout with kettlebells? Make sure you do it right! Click here to learn the fundamentals!

So today we’re taking a break from food and talking fitness! Ever since I started Crossfit, I’ve kinda fallen in love with kettlebells. Since I know Taylor loves them too AND that she recently got certified to teach them, I asked her to share some of her knowledge so you guys can start to use them too!

—————

Want to start working out with kettlebells? Make sure you do it right! Click here to learn the fundamentals!

Hello, hello! I can’t tell you how much of an honor it is to be visiting today. Lindsay’s blog was one of the first I found and I immediately was pulled in. The recipes, oh my word… how can anyone not come back regularly to see what she’s cookin’ up?

Then, a couple of years ago, we met face to face at a blog retreat and that’s the end of that. I went from considering her another blog I read to being a friend. Okay, enough corny chit-chat. Let’s get down to business. You see, I love kettlebells. Like really love them.

A few years ago my husband bought me my first kettlebell as a birthday gift. He thought it would be fun for us to learn together and perhaps a new element we could bring into our studio (we own a gym in Charleston, SC).

It became much more than that.

For both of us, kettlebells became a passion and we quickly realized that we wanted to learn everything we could. So that’s what we did. We flew to San Franisco to become kettlebell masters… we got certified. Since then, I’ve spent far too much time studying moves, designing workouts and teaching others how to use these things. And today, I’m going to cover a few of the basics with y’all. I know they can seem intimidating. But they aren’t. They really are for everyone… that is if you go about training the correct way.

What I want to do is go over a few basic training concepts, answer the most common questions I get and finish with a killer, I mean awesome, workout. Sound good? Sweet.

Want to start working out with kettlebells? Make sure you do it right! Click here to learn the fundamentals!

 —————

The Rules

Rule #1: If you’ve never picked up a kettlebell, don’t just watch a YouTube video and begin swinging it around. If you do a YouTube search for “kettlebell swing”, I promise you’ll find people doing them SO many different ways. And yes, there is a right way and a wrong way.

Find someone that knows the fundamentals and can help you master form. The biggest piece of advice I can offer is to find someone certified in kettlebells. Not just a personal trainer. I can’t tell you how many times I have closed my eyes and shuttered while watching trainers do really bad swings, snatches and everything else with a KB.

Rule #2: Sometimes lighter isn’t better. You might assume that when you first get started, a light kettlebell is best. Yes and no.

The lighter weight might help you grasp an understanding for how the kettlebell should move, but at the same time, using a weight that is too light can lead to short cuts and potential injuries. For example, my husband was demonstrating a clean with a weight that was too light for him and he used so much power that he dislocated his shoulder. <— Not cool.

(See below for the best weight for beginners.)

Rule #3: Forgo on the wrist guards when starting out. If you watch my kettlebell workouts or see a picture floating around, chances are you’ll notice wrist guards. No, they aren’t fancy sweat bands.

Wrist guards help keep the kettlebell from pressing into your wrists when doing moves like snatches and presses. Let me tell you, when you’ve got a heavy steal ball digging in, the bruises can get nasty. But for beginners, I don’t recommend them. This way you’re forced to learn the movements correctly. You’ll get tired of having the kettlebell plop onto your wrist so you’ll learn grip and proper rotation real fast.

Once you have the moves down to a T, then it’s a great idea to pick a pair of guards up. Unfortunately when doing presses, nothing helps avoid bruises like kettbleguards.

Rule #4: Have basic body weight moves mastered, along with mobility. If you can’t do a squat without a kettlebell, it’s time to start there. Master body weight moves to ensure proper range of motion and basic skills.

Kettlebells basically just take the basic moves and add to them. What exercises should you have?

  • Squats
  • Push-Ups (basic shoulder mobility)
  • Lunges
  • Deadlifts

If you can do those 4 moves, then you should be ready to get started.

Okay… now you have the 4 rules of kettlebells. Let’s answer just a few of the most common questions I receive!

Want to start working out with kettlebells? Make sure you do it right! Click here to learn the fundamentals!

 ————–

Common Kettlebell Questions From Beginners

What weight should I start out with?

I recommend 2 different kettlebells. Why? Because, especially when you’re starting out, you will likely use a heavier weight for swings, squats and other lower body moves than you will for upper body ones like presses.

Most women do wonderful starting off with an 18-lb (8 Kg) and 26-lb (12 Kg). As you get stronger, a 35-lb will likely be all you will need for amazing results.

How can I make my hands stronger?

Grip is key for kettlebell training. Of course it will get stronger with time but I do recommend using chalk to help keep the handle from getting slippery and love your calluses. You’ll get calluses, learn to love them. They make your hands strong and your grip better.

My back hurts, is that normal?

Yes, it’s normal to feel some back tightness when first mastering the swing. It’s a big range of motion move that targets your entire trunk, not just the abs. However, make sure it’s nothing more serious. Have someone watch your form to make sure the back is straight and hips are hinging properly. It also helps to use your phone to take slow-motion video!

What are the fundamental moves?

Like most fitness, the sky is the limit with what you can do with kettlebells! But, there are a few fundamental moves that need to be mastered in order to do ALL the moves.

Here are the key exercises listed in order of how I teach:

  • Dead lift (hip hinge)
  • Swings
  • Clean
  • Rack
  • Squat
  • Press
  • Snatch
  • Windmill
  • Get-up

Get those moves down and you can do anything.

Want to start working out with kettlebells? Make sure you do it right! Click here to learn the fundamentals!

————–

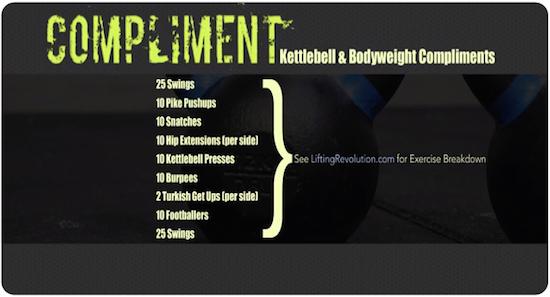
Wow, that’s a lot of information to soak up! I think we should stop here to avoid going overboard. To change things up, I will leave you with a great workout to try (if you’ve mastered the moves).

Want to start working out with kettlebells? Make sure you do it right! Click here to learn the fundamentals!

[Tweet “Want to add kettlebells to your workout? Learn how with @femininemuscle and @leangrnbeanblog!”]


Let’s chat:

Do you use kettlebells? What’s your favorite exercise?

Enjoy!
–Lindsay–

Filed Under: Workouts

Quick Easy Dinners

October 28, 2014 by Lindsay 24 Comments

Hi Friends!

I have another RD friend to introduce you to today, although I bet many of you are already familiar with this amazing lady! Anne from fANNEtastic food and I & took different paths to become RDs, but we both were blogging while we were in school and during our internship which is how we connected initially. Beyond having an amazing blog, Anne has started up her own private practice in DC that is wildly successful (she has a waiting list!!) and is doing great things in the RD world. I asked her to stop by today and share some quick easy dinners to help inspire you to eat healthy on those busy nights!

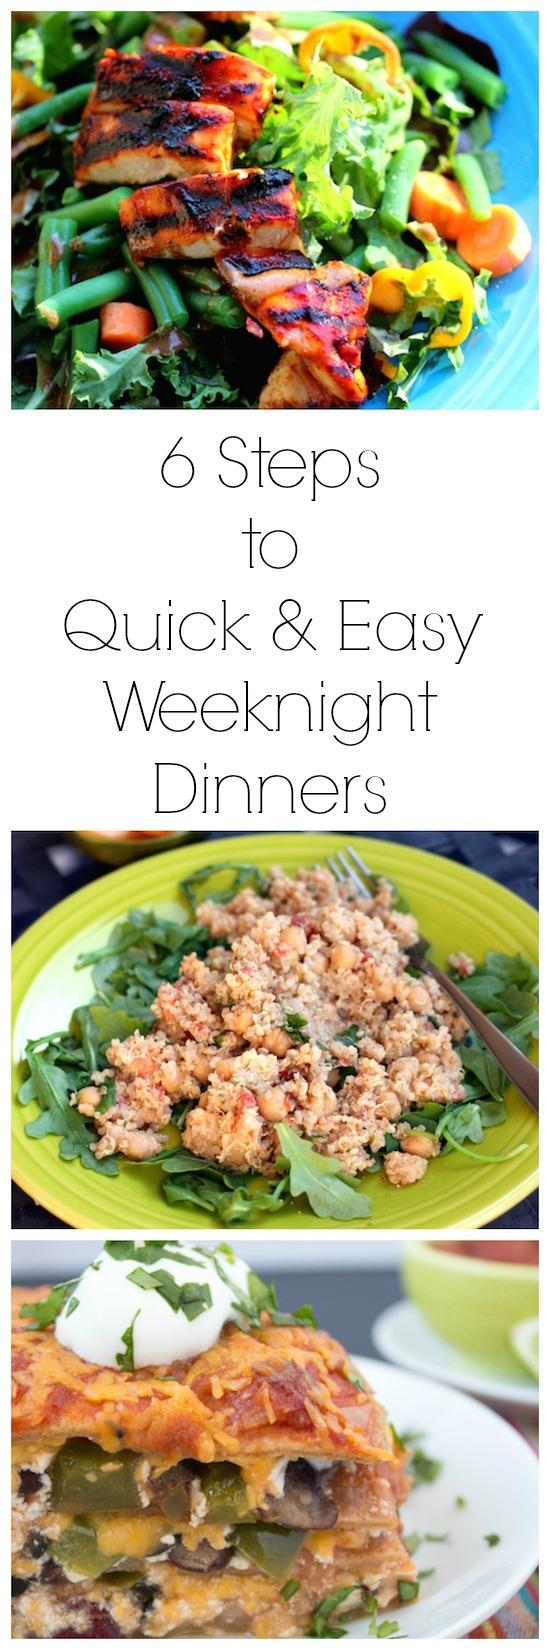
Learn the six steps to quick and easy weeknight dinners from a Registered Dietitian.

Hi there Lean Green Bean readers! I’m Anne, a Washington DC area Registered Dietitian and a food and fitness blogger over at fANNEtastic food. Thank you to Lindsay for having me here today! In honor of Lindsay and her husband becoming new parents, I thought it would be helpful to share some tips for throwing together quick and easy (but still healthy) weeknight dinners. Something we all need, right?

The key to a satisfying dinner is to include a combination of protein (meat, fish, eggs, beans, etc.), healthy fat (nuts/seeds, oil, avocado), and carbs (aim for the least refined version – brown rice or another whole grain, minimally processed whole wheat/grain bread, whole grain or brown rice pasta, whole fruit, starchy veggies like potatoes or corn, etc.). The other key? Lots of volume from veggies to keep you full!

Do you struggle with making healthy dinners during the week? Here's a 6 step plan from a Registered Dietitian to help you quickly put together nutritious meals!

Here is a simple 6 step plan to build a healthy dinner:

  1. Start with some sort of green. For warm meals, 1 huge handful fresh baby spinach – pop it in the microwave for 1 minute on high to wilt it. For cold meals, 1 huge handful of fresh salad greens – any kind. I’m loving arugula lately!
  2. Add a carb – about 1/2 cup per plate. If you’re in a time crunch, try 90 second plain brown rice, or quinoa which only takes about 10 minutes to cook. A piece of toast, a wrap, fruit, or a starchy veg like a potato will work here, too!
  3. Add some protein! My favorite easy protein is canned beans – about 1/2 cup. Other easy options are leftover meat, canned tuna, a fried egg or two, etc.
  4. Toss in veggies – Anything you have lying around – this will add volume and fiber that help to keep you full.
  5. Top with some healthy fat. Nuts, seeds, avocado, whatever you like! Cheese is cool, too – I love me some feta.
  6. Dress it! This could be a vinaigrette, or salsa, or pasta sauce, or pesto, or anything that fits with your theme of the meal.

**Editor’s note from Lindsay- Make this even easier by doing a little sunday food prep! Make a batch of quinoa or rice to use during the week and cook up some hard boiled eggs, grilled chicken, black beans, etc for protein! You can also prechop veggies like carrots, peppers and onions to save even more time!**

Do you struggle with making healthy dinners during the week? Here's a 6 step plan from a Registered Dietitian to help you quickly put together nutritious meals!


To get you started, here are two of my favorite combinations:

Mexican Mess

  • Base of microwave steamed spinach or fresh greens
  • ½ cup cooked brown rice or quinoa
  • ½ cup black beans and/or chicken
  • Chopped peppers and tomato
  • ¼ an avocado
  • 2 Tbsp. shredded sharp cheddar cheese
  • 1/3 cup salsa, any kind

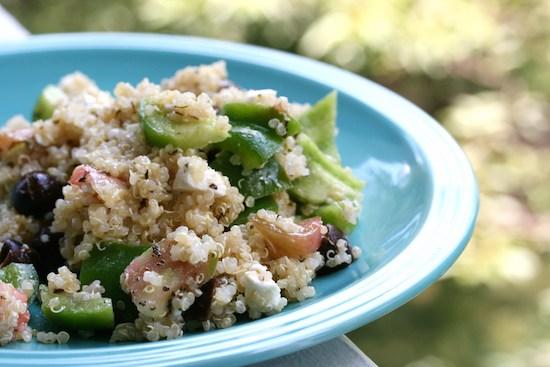
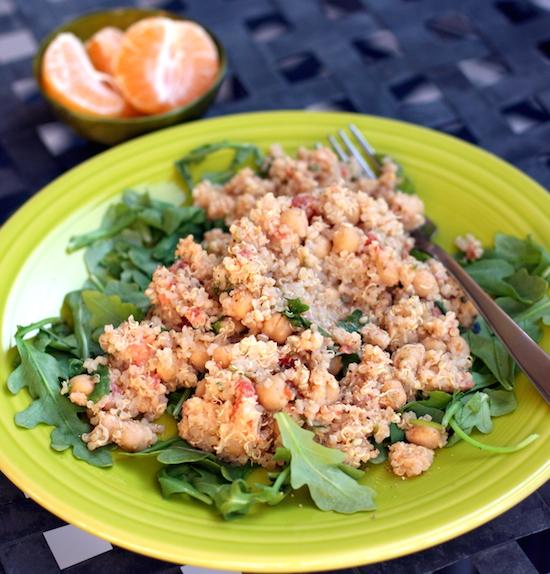
Quinoa Chickpea Salad

  • Base of fresh greens
  • ½ cup cooked quinoa
  • ½ cup chickpeas and/or canned tuna
  • Chopped veggies – peppers, carrots, cucumber, etc.
  • ¼ an avocado
  • 1 Tbsp. feta cheese
  • 2 Tbsp. Balsamic vinaigrette

Want an even easier version of the above quinoa chickpea dish? Try my vegan 4 Ingredient Quinoa Salad!

Do you struggle with making healthy dinners during the week? Here's a 6 step plan from a Registered Dietitian to help you quickly put together nutritious meals!


Another of my favorite easy dinners is simply two fried eggs atop microwave-steamed spinach with a side of sweet potato or toast with nut butter. Try it – the runny yolk is delicious with the steamed spinach.

Want some other dinner ideas that are still quick? Here are a few of my favorite super quick and easy dinner recipes:

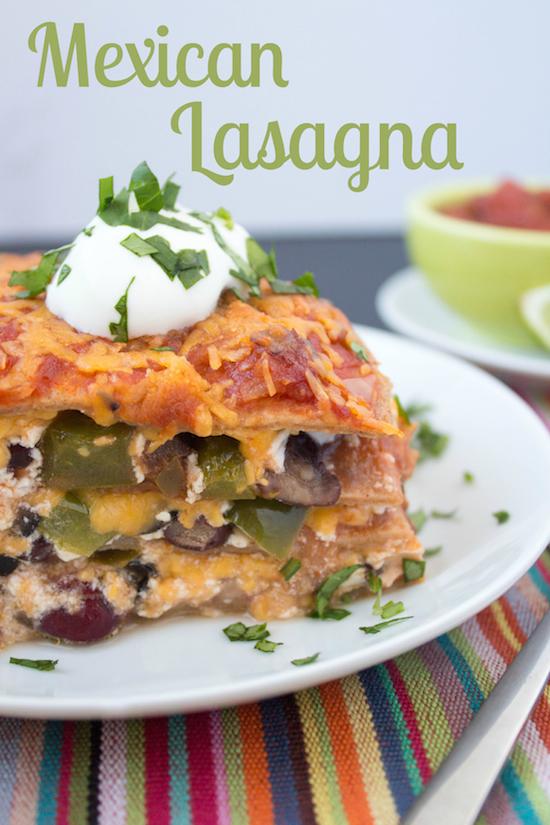
  • Mexican Lasagna (my husband LOVES this)
  • {Ridiculously Easy} Crockpot Curry Chicken
  • Lemon and Herb Fish
  • Pesto Baked Salmon with Veggies
  • Saucy Tomato & Spinach Chicken
  • Sweet Potato & Lentil Coconut Curry
  • Mexican Brown Rice Casserole


Do you struggle with making healthy dinners during the week? Here's a 6 step plan from a Registered Dietitian to help you quickly put together nutritious meals!

I also share a bunch more in this post: Quick and Healthy Dinner Recipes, if you’re interested! And along those lines, here are a few more relevant previous posts of mine that you might find helpful:

    • 10 Healthy On the Go Snack Recipes
    • 4 Healthy, Quick, and Portable Breakfast Ideas
    • How to make time for health when you’re busy
    • How to pack lunch in 5 minutes flat

Thank you again to Lindsay for having me here today!
————-

[Tweet “Check out these quick, easy dinner ideas from @fannetasticfood and @leangrnbeanblog for busy nights!”]

Thanks to Anne for all of these great ideas! Let’s chat:

What are your favorite quick and easy weeknight dinner recipes?

Enjoy!
–Lindsay–

Filed Under: Dinner

Vegan Cauliflower Mash Bowls

October 24, 2014 by Lindsay 31 Comments

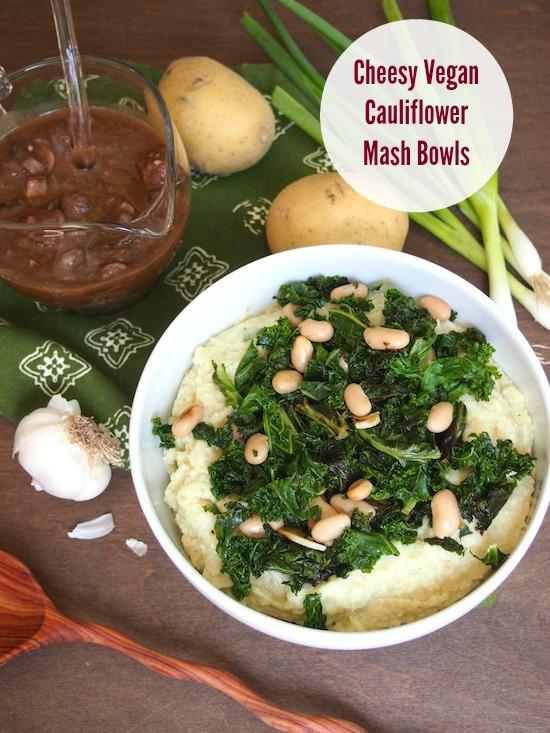
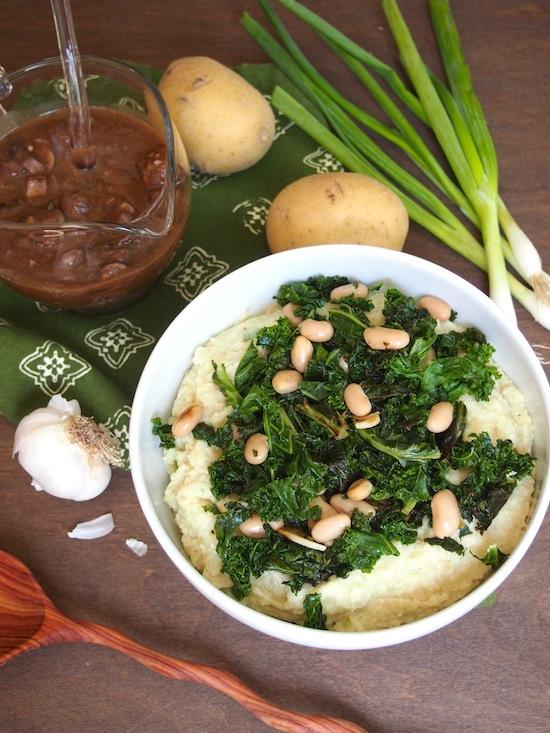
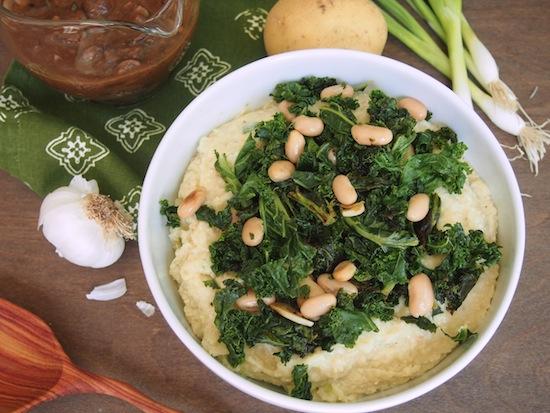
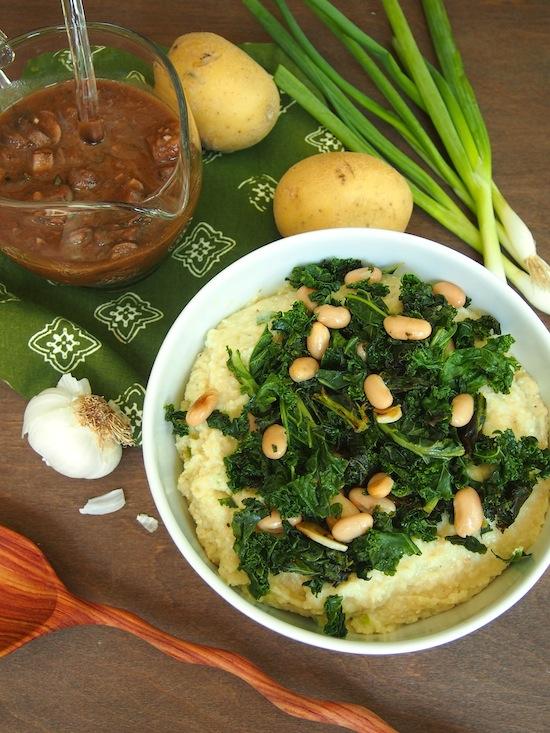
These Cheesy Vegan Cauliflower Mash Bowls are perfect for Meatless Monday and full of vegetarian protein to keep you full all night.

Hi Friends!

Time for another fabulous guest post – Vegan Cauliflower Mash Bowls. Today I’m introducing you to Rachael from An Avocado A Day. She’s a fellow RD who I also met through Recipe Redux and I just love her to pieces. Early this year she took a huge leap of faith to follow her dreams and start her own private practice and I’m so proud of her! Her blog is filled with delicious, plant-centric recipes that always make me drool. Be sure to go check it out!

These Cheesy Vegan Cauliflower Mash Bowls are perfect for Meatless Monday and full of vegetarian protein to keep you full all night.

Hello there! I’m Rachael, a dietitian and blogger who writes about all things delicious and nutritious on my blog, An Avocado A Day. When Lindsay asked me to guest post while she enjoys Baby Bean time, I was thrilled! I’ve been an avid reader since I stumbled upon her blog in the early days of Avocado. She inspires me to be active, cause seriously, if she can do crossfit while pregnant I can squeeze in a jog every now and then. Because of her, I’ve gotten my you-know-what together on Sundays to spend a few hours on food prep. And she brought us the amazingness that is the frozen blueberry cashew bar. So yes Lindsay, I would be more than happy to help you out!

The recipe I’m sharing today is serious comfort food. Like, the kind of dish you need to unbutton your jeans for. If you’ve had a bad day, sit down to a big bowl of this and a Meg Ryan movie and I pinkie swear you’ll feel better. It’s rich, cheesy, creamy and dreamy – all those good comfort food adjectives!

These Cheesy Vegan Cauliflower Mash Bowls are perfect for Meatless Monday and full of vegetarian protein to keep you full all night.

With an intro like that, you may be surprised to learn this dish is vegan and can easily be made gluten free. And you DEFINITELY didn’t expect it to have cauliflower. I mean, when has anyone put the bland white veg in your sad frozen vegetable mix in the same category as macaroni and cheese and ice cream?

As a child, cauliflower was my least favorite vegetable. As I type this, I’m pretty sure 11-year-old Rachael is rolling her eyes and overdramatically gagging, but now, cauliflower is among my favorites. Simply roasted with olive oil, salt and pepper, it’s pretty much perfect. But where cauliflower really shines is with it’s versatility. It can be roasted whole,  frittered and turned into things like grain free rice, pizza crust and even a dairy free cream sauce!

This recipe takes advantage of cauliflower’s transformational ability, turning it into a cheesy vegan mash. Soaked cashews add rich creaminess and nutritional yeast lends a hint of cheesy flavor. I always add a couple potatoes to my cauliflower mash because I think without them, it can get a little gloppy. Feel free to substitute sweet potatoes, which would make a pretty color and slightly sweet flavor.

These Cheesy Vegan Cauliflower Mash Bowls are perfect for Meatless Monday and full of vegetarian protein to keep you full all night.

The cauliflower mash is tasty enough to stand on it’s own as a lower carb, mashed potato substitute. However, as someone believes the sides make the dish, I decided to turn it a complete meal. First, I topped it with a quick sauté of garlicky kale and white beans for green and protein. Then I whipped up a rich mushroom gravy, because, well gravy. Admittedly, it dirties more than a few pans, but let that stop you. Plus, my husband has made the gracious offer to do your dishes if you make a bowl for him!

Print

Vegan Cauliflower Mash Bowls

cauliflower mash 1
Print Recipe

5 Stars 4 Stars 3 Stars 2 Stars 1 Star

5 from 3 reviews

These Cheesy Vegan Cauliflower Mash Bowls are perfect for Meatless Monday and full of vegetarian protein to keep you full all night.

  • Yield: serves 4

Ingredients

Scale

Cauliflower Mash:

  • 2 medium potatoes, in 1-inch cubes
  • 1 head cauliflower, cut in florets
  • ½ cup cashews, soaked at least 2 hours
  • ½ cup unsweetened almond milk, plus more if needed
  • ¼ cup nutritional yeast
  • 4 scallions, chopped (optional)

Gravy:

  • 1 tablespoon extra-virgin olive oil
  • 1 pint baby bella mushrooms, chopped
  • ¼ onion, finely diced
  • 2 cloves garlic, minced
  • 2 tablespoons whole wheat flour (or gluten free flour)
  • ½ cup dry red wine
  • 1 ½ cup vegetable broth
  • 1 teaspoon chopped fresh thyme
  • ½ teaspoon chopped fresh rosemary

Greens n’ beans:

  • 2 tablespoons extra virgin olive oil
  • 10-ounce bag chopped kale
  • 3 cloves garlic, sliced
  • 1 14-ounce can white beans, drained and rinsed

Instructions

  1.  
  2. Instructions
  3. Bring a few inches of water to a boil in a large pot with a steamer basket set over it. Place the potatoes and cauliflower in the basket, cover, and steam 15 minutes until very tender.
  4. While the vegetables are steaming, make the gravy. Head olive oil in a small pot on medium-high heat. Add mushrooms, red onion and garlic and sauté 5 minutes until mushrooms are tender and have released liquid. Add flour, stir to combine and cook 1 minute. Add wine and deglaze the bottom of the pot. Once mostly evaporated, add vegetable broth and herbs. Bring to a boil, reduce heat and simmer 5 minutes until slightly thickened. Season with salt and pepper to taste. Cover and set heat to low until ready to use.
  5. Next, make the greens. Heat olive oil in a large skillet on medium high heat. Add kale and cook until wilted, adding a few tablespoons of water every so often to help steam. When mostly wilted, add garlic and white beans and cook another 2-3 minutes.
  6. Place potatoes, cauliflower in a food processor with cashews, almond milk, nutritional yeast, salt and pepper in a food processor. Blend until creamy, adding more almond milk if needed. Mix in scallions if using.
  7. Serve cauliflower mash topped with greens, beans and mushroom gravy.

Did you make this recipe?

Tag @theleangreenbean on Instagram

These Cheesy Vegan Cauliflower Mash Bowls are perfect for Meatless Monday and full of vegetarian protein to keep you full all night.


[Tweet “A must try! Cheesy Vegan Cauliflower Mash Bowls from @rhartleyRD and @leangrnbeanblog!”]

Huge thanks to Rachael for stopping by today!

Enjoy!
–Lindsay–

Filed Under: Dinner Tagged With: Cashew, Cauliflower, Milk, Potato

Pumpkin Cranberry Oat Bars

October 22, 2014 by Lindsay 34 Comments

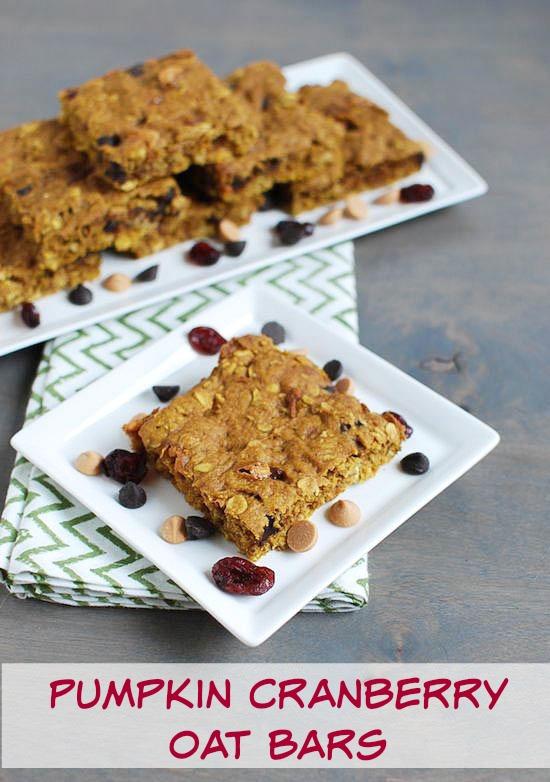
These Pumpkin Cranberry Oat Bars make the perfect Fall dessert. Packed with flavorful mix-ins, they’re made with white whole wheat flour and oats for a boost of fiber.

Hi Friends!

We’re digging into the archives to highlight yet another pumpkin recipe. Are you sick of it yet? If so, I’m sorry. Pumpkin season just makes me go a little crazy…in a good way. Anyways, this is a dessert recipe I posted 3 years ago. If you go back and re-read my original post, you’ll have a pretty clear idea of how much I like these. So good. I think it’s the pumpkin-butterscotch combo that puts them over the edge!

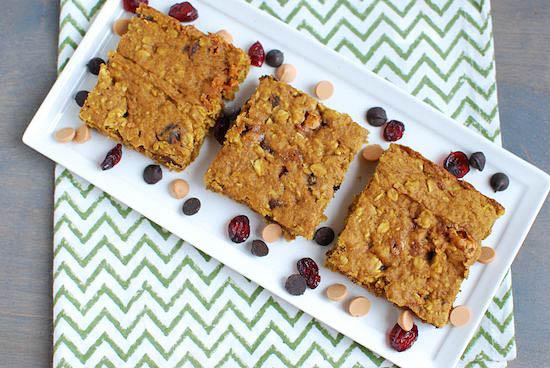
These Pumpkin Cranberry Oat Bars make a healthier dessert option to satisfy your sweet tooth!

I made a batch of these last month and pretty much ate the whole pan myself so…… yeah. They’re good.

Here’s how you make them:

Print

Pumpkin Cranberry Oat Bars

pumpkin cranberry oat bars
Print Recipe

5 Stars 4 Stars 3 Stars 2 Stars 1 Star

5 from 1 review

A lightened-up pumpkin dessert bar packed with delicious add-ins!

  • Author: Author: Lindsay L
  • Prep Time: 5 minutes
  • Cook Time: 25 minutes
  • Total Time: 30 minutes
  • Yield: 12 1x

Ingredients

Scale
  • 11/4 cups white whole wheat flour
  • 1 c oats
  • 1 tsp cinnamon
  • 1/2 teaspoon ginger
  • 1/2 teaspoon baking soda
  • 1/4 teaspoon kosher salt
  • 4 Tbsp unsalted butter, softened
  • 1/3 cup granulated sugar
  • 1/3 cup brown sugar
  • 1 large egg
  • 1 teaspoons vanilla extract
  • 1 c pumpkin
  • 1/2 c dark chocolate chips
  • 1/2 c butterscotch chips
  • 1/2 c Craisins

Instructions

  1. Cream butter and sugars in a medium bowl until light and fluffy.
  2. Add the egg, vanilla and pumpkin and mix well.
  3. Mix in the flour, ginger, cinnamon, baking soda and salt and mix well.
  4. Stir in the oats, chocolate chips, butterscotch chips and Craisins and mix until evenly distributed.
  5. Grease a 9×13 pan (or line with parchment paper) and spread mixture evenly in pan. If you want a thicker bar, use a 9×9 pan.
  6. Bake at 350 degrees for 20-25 minutes or until a toothpick is inserted and comes out clean.
  7. Cool completely in pan. Use a sharp knife to cut into squares.

Did you make this recipe?

Tag @theleangreenbean on Instagram

Of course the mix-ins are optional, but I highly recommend them all!

These Pumpkin Cranberry Oat Bars make a healthier dessert option to satisfy your sweet tooth!

Enjoy!
–Lindsay–

Filed Under: Baking, Dessert Tagged With: Brown Sugar, Chocolate Chips, Egg, Oats, Pumpkin, Sugar, White Whole Wheat Flour

Curry Roasted Acorn Squash

October 21, 2014 by Lindsay 30 Comments

This Curry Roasted Acorn Squash is a simple, flavorful Fall side dish.

Hi Friends!

Today is the first in a series of amazing guest posts I have lined up for you over the next few weeks.  I reached out to some of my fav bloggers to see if they wanted to stop by and introduce themselves to my readers while I take a little break. They have a wide variety of posts to share include recipes, workouts and nutrition info and I couldn’t be more excited!

We’re kicking things off with the lovely Katie from Healthy Seasonal Recipes. I’ve gotten to know Katie over the past several months thanks to Recipe Redux. She posts amazing recipes, takes incredible photos, is a master food-styler and is even working on a cookbook! Plus she’s down to earth, genuinely nice and always upbeat and positive! If you haven’t checked out her blog, be sure to do so immediately! Today she’s sharing a squash recipe that’s right up my alley. I LOVE curry powder!

———————

Hi green bean lovers!

I’m one too (I especially love the especially the lean variety) so I am super glad to meet you all. And I am beyond flattered that Lindsay asked me to be here today. I am sure she is thankful to have a bit of a rest while she is in baby zone these days, so I am happy to help out.

Looking for a healthy, seasonal side dish? This curry Roasted Acorn Squash requires just a few ingredients and makes the perfect compliment to a fall or winter meal!
I have been kind of obsessed with squash this fall. Really, come into my kitchen, and you will think I am a squash loving doomsday prepper of sorts. I’m not, I assure you, I just love me some squash. All kinds, spaghetti squash, pumpkin, butternut and acorn. You name it.

I have always loved acorn squash with a capital L. My mom used to make it, and I’d squeal with delight. She’d roast the halves and then fill the cavity with butter and brown sugar, so how could I not love it? I strategized as I ate my squash half with a spoon, to make sure that I had a little bit of the brown sugar and butter mixture for each bite of squash. For the record that’s also how I ate my apple and peanut butter. Oh wait I still do that.

Looking for a healthy, seasonal side dish? This curry Roasted Acorn Squash requires just a few ingredients and makes the perfect compliment to a fall or winter meal!

When I was dreaming up ideas for what to share here on the Lean Green Bean I thought about that recipe of my mom’s and wanted to do something equally as simple, but healthier. As you probably know when you take away fat you run the risk of taking away flavor, so I added in a big hit of flavor in the form of curry powder. I used coconut oil instead of butter too since I think the flavor of coconut and curry are awesome together.

Here is what I did: I roasted the squash cut-side down on a sheet pan (lined with foil or parchment for the love of not scrubbing dishes.) Then I melted the coconut oil. I did this in the microwave, but you could also do it in a jar in a hot water bath or in a small saucepan. Then I swirled in some curry powder. I used British curry which is not as firey as madras curry, so it is more kid friendly. I only used 1 tablespoon of brown sugar for six servings, but you really won’t miss it. The natural sweetness of the squash is plenty, and the flavor of the coconut and curry really make up for any lack of sugar.

Print

Curry Roasted Acorn Squash

curry roasted acorn squash 019
Print Recipe

5 Stars 4 Stars 3 Stars 2 Stars 1 Star

No reviews

  • Author: Author: Lindsay L
  • Prep Time: 10 minutes
  • Cook Time: 1 hour 15 minutes
  • Total Time: 1 hour 25 minutes
  • Yield: 6 1x

Ingredients

Scale
  • 3 medium acorn squash, cut in half seeds and pulp removed
  • 2 tablespoons coconut oil
  • 1 tablespoon brown sugar
  • 11/2 teaspoon curry powder, hot if desired
  • 1/4 teaspoon salt

Instructions

  1. Preheat oven to 375 degrees F. Line a baking sheet with parchment or foil.
  2. Place squash cut-side down on the baking sheet. Roast until the squash flesh is tender when pierced with a fork, 45 minutes to 1 hour. Flip all the squashes cut side up.
  3. Melt coconut oil and brown sugar in a small dish in the microwave, about 30 seconds. Alternatively heat over medium low heat in a small saucepan until melted. Stir in curry and salt. Brush curry mixture over all the squash flesh and return to the oven until the curry mixture is bubbling and browned, 10 to 15 minutes.

Did you make this recipe?

Tag @theleangreenbean on Instagram

Looking for a healthy, seasonal side dish? This curry Roasted Acorn Squash requires just a few ingredients and makes the perfect compliment to a fall or winter meal!

Thanks so much all. Hope you enjoy the recipe. Please come visit me at Healthy Seasonal Recipes.

Happy Cooking!
~Katie

[Tweet “Need a dinner side dish? Try this Curry Roasted Squash from @healthyseasonal and @leangrnbeanblog!”]

Questions:
Do you stock up on squash?
Did you eat acorn squash when you were a kid?
Do you do the rationing out of the peanutbutter for each slice of apple thing?

Enjoy!
–Lindsay–
Filed Under: Side Dish Tagged With: Brown Sugar, Squash

20 Kitchen Tips and Tricks

October 15, 2014 by Lindsay 91 Comments

Hi Friends!

Let’s talk Kitchen Tips & Tricks shall we? I do a fair amount of cooking and have picked up some useful tidbits over the years. I also did some scouring of the internet to help jog my memory of some shortcuts I may have forgotten and I came up with a nice little list to share with you guys. Some of you may be familiar with most or all of these, but hopefully somebody will find a helpful hint in the list that will make their kitchen life a little easier!

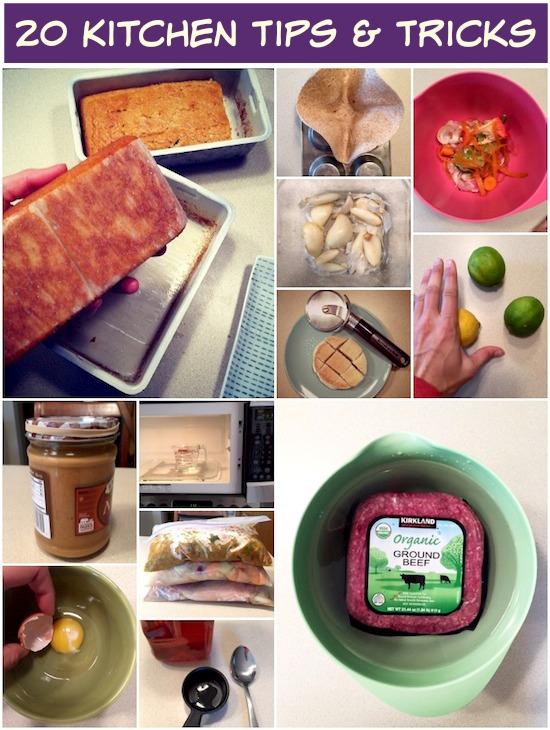
These 20 Kitchen Tips and Tricks will help make life easier for all cooks from beginner to expert! How many have you tried?

So here we go:

These 20 Kitchen Tips and Tricks will help make life easier for all cooks from beginner to expert! How many have you tried?

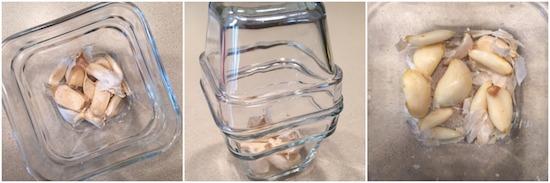
 Want to quickly peel garlic?
Place the cloves in a bowl.
Cover with another bowl of the same size.
Shake vigorously!

These 20 Kitchen Tips and Tricks will help make life easier for all cooks from beginner to expert! How many have you tried?

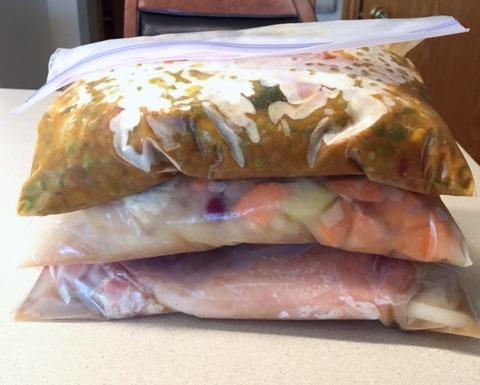
Want to save space in the freezer?
Store leftovers or freezer meals in Ziploc bags!
Stack & freeze flat.

These 20 Kitchen Tips and Tricks will help make life easier for all cooks from beginner to expert! How many have you tried?

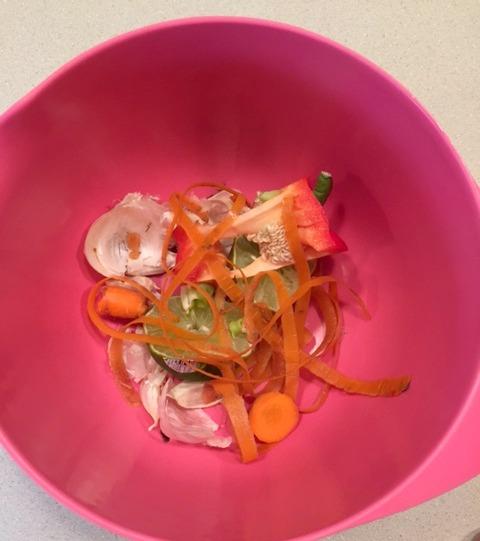
Doing a lot of food prep work?
Designate a garbage bowl for scraps.
Save yourself trips to the trash can.

These 20 Kitchen Tips and Tricks will help make life easier for all cooks from beginner to expert! How many have you tried?

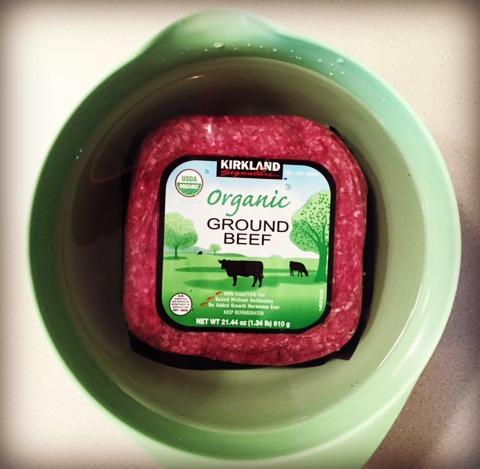
Need to thaw meat to use for dinner?
Place in a bowl of cool water for an hour or two.
Changing the water a few times to move things along.

————

Need to thinly slice meat?
Stick it in the freezer for an hour.
It’s easier to slice when partially frozen.

————–

Making pulled chicken in the crockpot?
Cook.
Add to stand mixer.
Let mixer shred for you.

These 20 Kitchen Tips and Tricks will help make life easier for all cooks from beginner to expert! How many have you tried?

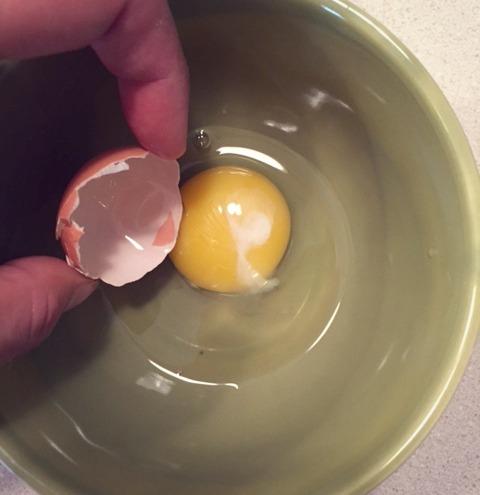
Drop an eggshell in the bowl?
Use another piece of eggshell to scoop it out.

————

Want to make hard boiled eggs that are easy to peel?
Add baking soda or vinegar to the water when boiling.

These 20 Kitchen Tips and Tricks will help make life easier for all cooks from beginner to expert! How many have you tried?

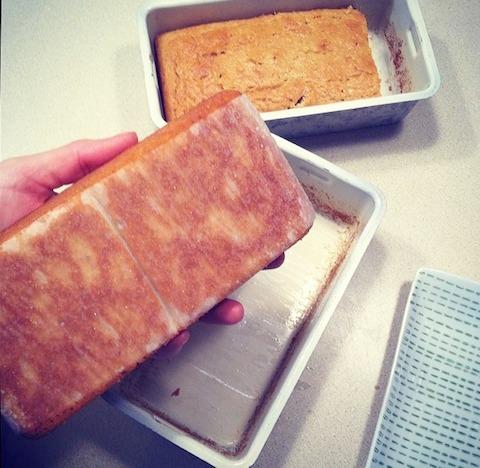
Breads & cookies sticking to pans?
Line them with parchment paper for easy removal.


These 20 Kitchen Tips and Tricks will help make life easier for all cooks from beginner to expert! How many have you tried?

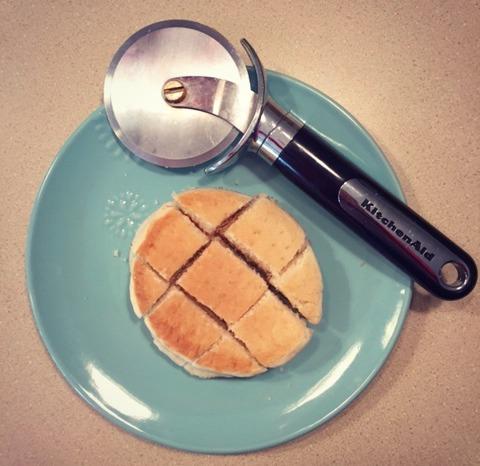
Need an easy method to cut things quickly?
Skip the knife & fork.
Use a pizza cutter for things like pancakes, spaghetti, etc.

These 20 Kitchen Tips and Tricks will help make life easier for all cooks from beginner to expert! How many have you tried?

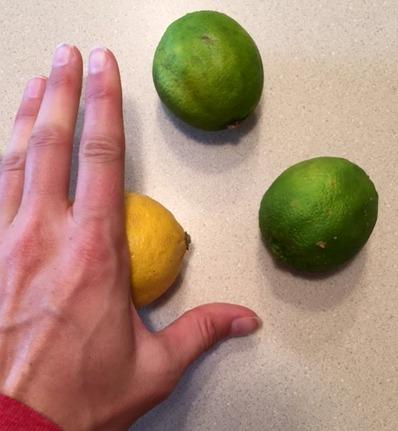
Want to get the maximum amount of juice from citrus?
Roll it around on the counter for a minute, or pop it in the microwave for 20 seconds.
Then cut and squeeze!

These 20 Kitchen Tips and Tricks will help make life easier for all cooks from beginner to expert! How many have you tried?

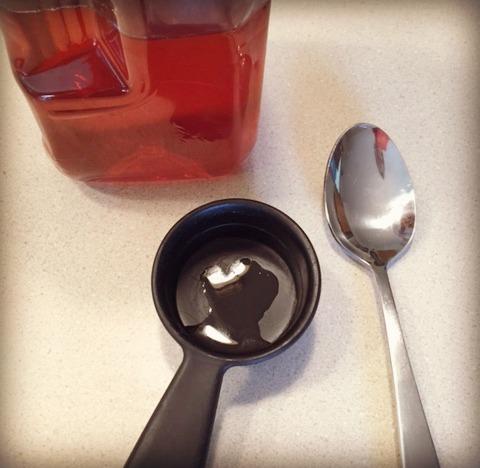
Measuring something sticky?
Spray or wipe your measuring cup with oil first.
Honey and peanut butter slide right out after measuring!

These 20 Kitchen Tips and Tricks will help make life easier for all cooks from beginner to expert! How many have you tried?

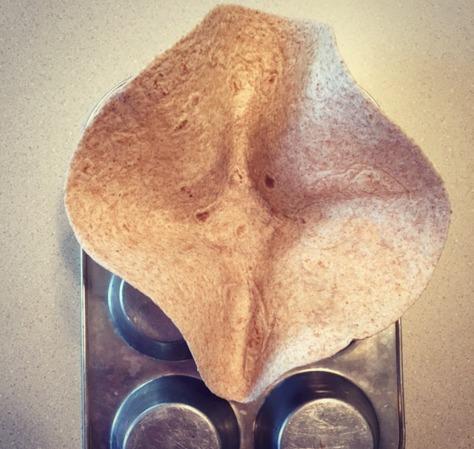
Want to make your own hard taco shells or taco bowls?
Drape tortillas through oven racks and bake for shells,
or use an upside down muffin tin to make bowls.

These 20 Kitchen Tips and Tricks will help make life easier for all cooks from beginner to expert! How many have you tried?

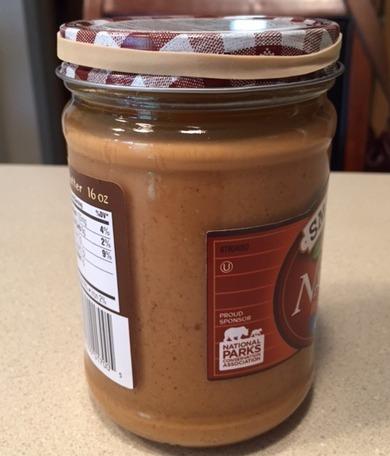
Can’t get a jar open?
Put a rubber band around the lid, then twist!

These 20 Kitchen Tips and Tricks will help make life easier for all cooks from beginner to expert! How many have you tried?

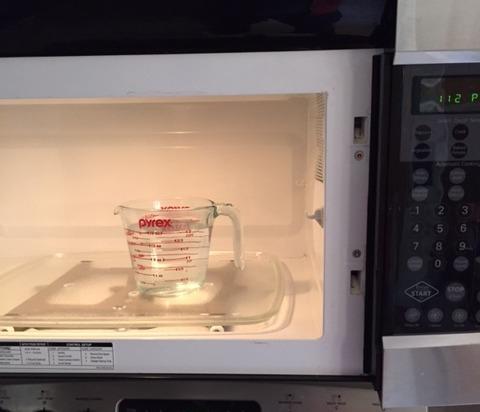
Dirty microwave?
Boil some water in it before cleaning.
The steam will help loosen everything up!


And a few more….

  • Want to aerate your wine? Pour it in the blender and give it a whirl!
  • Need ripe bananas but yours are still green or yellow? Bake them in the oven at 300 degrees for 20 minutes or so!
  • Want to know if an avocado is past its prime? Pull out the nub on the end. If it’s green underneath, the inside is likely green. If it’s brown, you’ll likely find gross brown inside.
  • Are your cookies getting stale? Brown sugar getting hard? Add a piece of bread to the airtight container and they’ll soften back up.

Let’s chat:
What’s your favorite kitchen tip or trick?

Enjoy!
–Lindsay– 


Filed Under: Ingredient Round-Ups, Uncategorized

Fitness Friday 69

October 10, 2014 by Lindsay 17 Comments

Hi Friends!

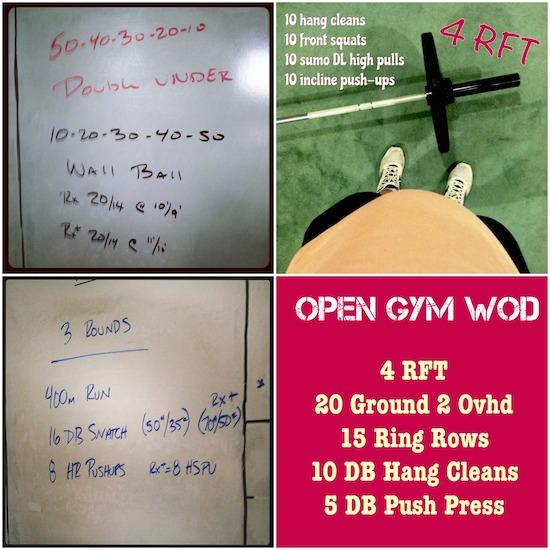
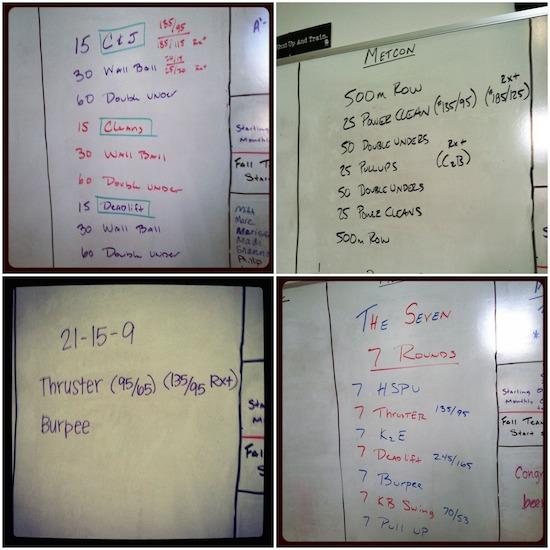
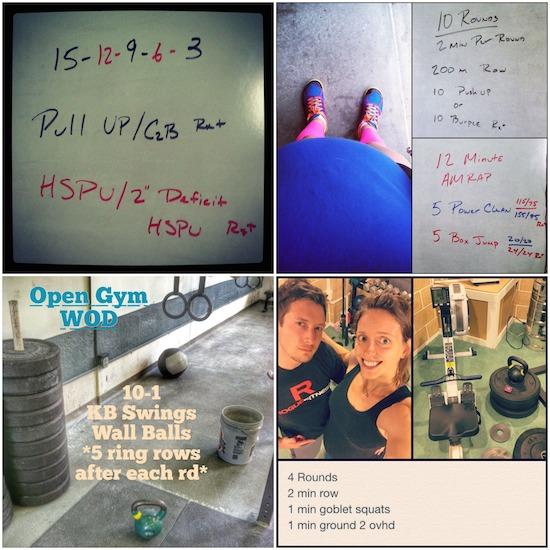
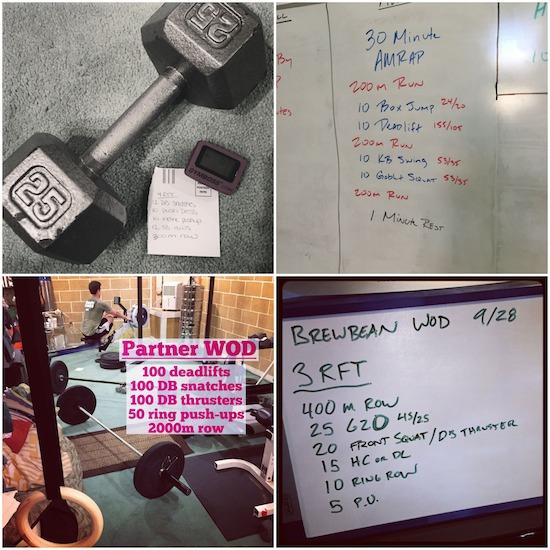
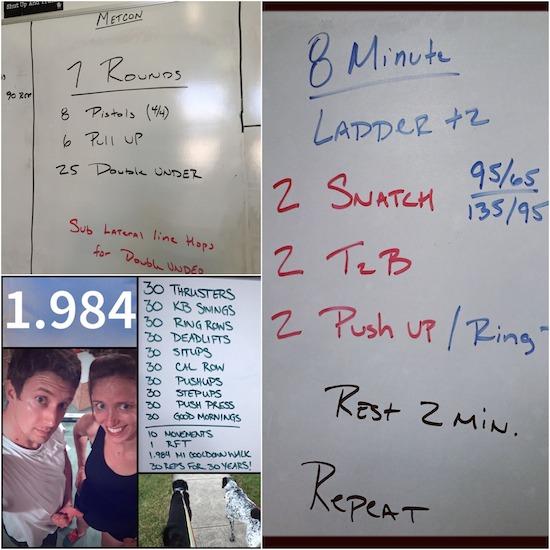
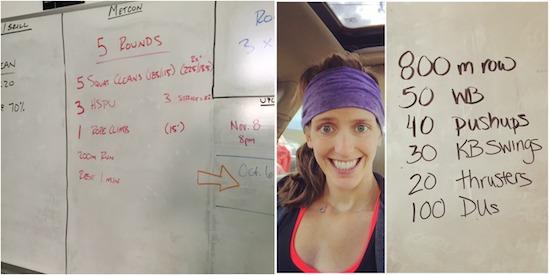
It’s been another couple of months, so I thought I’d update you on my workouts! This post will cover workouts from weeks 32-38. To see my workouts during weeks 23-31 of pregnancy, click here.

ff1

32 Weeks

1. Sweatfest! The ascending wall balls make it all mental. Finished in 10:55 Rx.
2. The bump and I did a quick wod in the basement. Finished in 8:12 with 55#.
3. Rough. Did 25# DB snatches & decline push-ups. Finished in 10:12.
4. Open gym wod. Used a 25# plate & 25# dbs and finished in 12:02

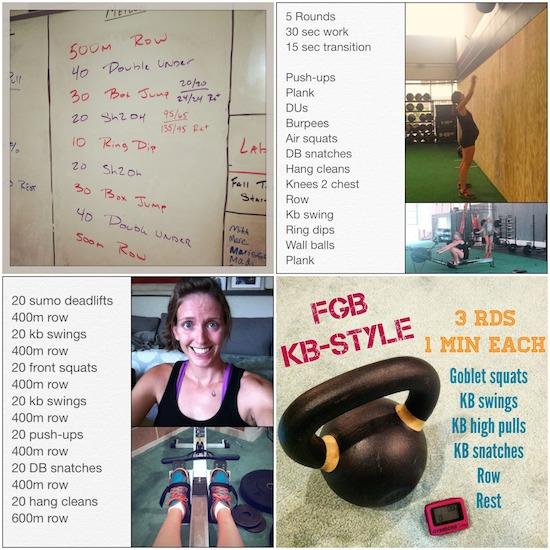
ff2

33 Weeks

1. 1.5 mi walk with the dogs to warmup, then a wod. I subbed kb swings for box jumps, used 55# for sh2o and did banded ring dips. Finished in 12:12.
2. Sunday morning endurance wod
3. I did a pregnant, at-home version of Lumberjack 20 today (google it to see the original workout) Used 55# on the bar, 35# kb and 25# DB. Finished in 22:50!
4. Made up a fight gone bad style wod using kettlebells. I used a 35# kb and a 25# DB for the snatches. Count your reps (cal for row) if you want! I didn’t count but definitely worked up a sweat!

ff3

34 Weeks

1. I used 65# and did hang clean & jerks, hang cleans & sumo deads. Finished in 11:54.
2. Holy terrible. 8 x 300m row, then 11:14 for the wod with 25# DB hang cleans & ring rows. I made it to 34 weeks but I finally can’t do pull-ups anymore.
3. Overhead squats & strict press, then a wod. I did 21-15-9 thrusters (55#) and 75-50-25 double unders instead of burpees. Finished in 6:10.
4. Hero wod for 9/11 – “The 7” – I did push press (60#), thrusters (60#), knees to chest, 7 cal row, wall balls (14#), kb swings (35#), ring rows. Finished in 26:50.

ff4

35 Weeks

1.Today’s wod. I did ring rows and 65# push press and finished in 4:39.
2. Alllll the cardio & allll the colors today. 10 rounds of 200m row + 10 push-ups (I did incline), then a wod – I did 12 minutes of 5 hang cleans (65#) + 20 double unders and finished 17 rounds!
3. No time for class today but still fit in this little open gym wod to get moving! Finished in 8:55.
4. Did a basement #wod with hubby! Used a 35# kb for squats and 25# plate for g2o. If you want to count reps- count calories for rowing! I got 270 reps total, hubby got 263. Finished with a 1 mile cool down walk with the dogs.

ff5

36 Weeks

1.Tonight’s #wod – I used 25# dbs and finished in 15:34.
2. Terrible. I subbed rowing for running, 20 DUs for box jumps and did 65# sumo deadlifts. Finished 5 rounds plus thru the DLs of round 6.
3. Partner wod with @bgliving. One partner works while the other rests. Together you complete the total reps for each movement. Took us 24:30. I used 65# for DL, a 25# DB for snatches and 20# dbs for thrusters.
4. Couldn’t make it to the endurance wod today so@bgliving and i did a modified version at home. I did 55# front squats and hang cleans, he did db thrusters and DL. I finished in 20:37.

ff6

37 Weeks

1. Today’s wod- I did 35# goblet squats, ring rows & DUs and finished in 7:56.
2. Happy birthday wod with hubby! I did a 30 sec plank for the sit-ups and hang cleans instead of stepups. Finished in 16:23! Then we walked exactly 1.984 miles with the boys 🙂
3. Rough one. I did 25# DB snatches (2/2, 4/4 etc) wall balls and box dips. First time I finished the round of 10 + 12/12 snatches, second time I finished the round of 10.

ff8

38 Weeks

1. 65# EMOTM hang cleans, then did 5 RFT- 5 hang squat cleans, 3 push press, 5 ring rows, 200m row, 1 min rest for the wod with 55#. Felt easy. Finished in 11:30.
2. Finished in 14:37. 14# wb, incline push-ups, 35# kb, 45# thrusters.
Below is last night’s workout. It was a good one! Plus overhead squats are my favorite!

Loading

Overhead squats and a wod. I subbed kb swings for box jumps and finished one time through (330 reps) with 6 seconds to spare!

View on Instagram


ff7
In addition to Crossfit, I’ve still been doing lots of walking!

1. On July 4th I started tracking my daily walks. From July 4th- Sept 4th, the pups, baby bean & I (and sometimes hubby!) have walked 140 miles for various charities using the Charity Miles app! I need to tally our miles from Sept 4th – Oct 4th and add those!
2. At 35 weeks pregnant, I like to live dangerously by seeing if I can walk a 5k without peeing my pants
3. Weekend walking! Got up early and walked to the coffee shop. The boys and I waited patiently while hubby got his latte. 2.5 miles to kick off the day!
4. Went on a 5 mile bike ride with a pit stop for a blizzard.

Loading

Still squatting! #crossfit #fitpregnancy #36weeks #frontsquats

View on Instagram

And I’m still squatting!

That’s about all I’ve got. Hoping baby comes soon. Can’t wait to start lifting heavy again 🙂

Enjoy!
–Lindsay–
Filed Under: Workouts

Chicken Pasta Salad with Salsa Hummus Dressing

October 9, 2014 by Lindsay 18 Comments

“By posting this recipe I am entering a recipe contest sponsored by the National Pasta Association and am eligible to win prizes associated with the contest. I was not compensated for my time.”

Hi Friends!

Let’s talk pasta, shall we? Did you know October is National Pasta Month? You guys know i’m definitely not one to shy away from carbs. I’m a huge pasta fan and think it can be a great addition to a healthy diet. Pair it with lots of veggies and some lean protein and BOOM! You’ve got yourself a meal. Plus it’s budget friendly and comes in all sorts of fun shapes!

When I heard that this month The Recipe Redux teamed up with the National Pasta Association to present Redux members with a Pasta Fits contest, I knew I had to enter!  The idea was to create a pasta recipe that fits into your healthy lifestyle.

So, what did I come up with?

Need a healthy lunch option? Make a batch of this Chicken Pasta Salad with Salsa Hummus Dressing and pack it for lunch all week long!

Lately I’ve been struggling a bit with lunches. I’m 38 weeks pregnant. I’m tired all the time. I don’t want to spend a lot of time putting together an elaborate lunch. So I thought i’d come up with something I could make a big batch of ahead of time and then simply pull it out and eat it for lunches during the week.

Need a healthy lunch option? Make a batch of this Chicken Pasta Salad with Salsa Hummus Dressing and pack it for lunch all week long!

I settled on a pasta salad. With pasta as the base, it’s easy to add lots of veggies and protein for a complete meal. The star of this recipe, however, is the “dressing”. It’s just two ingredients, but it’s so delicious.

Here’s how you make it:

Print

Chicken Pasta Salad with Salsa Hummus Dressing

chicken pasta salad
Print Recipe

5 Stars 4 Stars 3 Stars 2 Stars 1 Star

No reviews

Easy to make ahead of time, this pasta salad is great for weekday lunches or a quick dinner.

  • Author: Author: Lindsay L
  • Yield: 3-4 1x

Ingredients

Scale
  • 3 cups vegetables, chopped
  • 2 cups cooked chicken, chopped
  • 1/2 a medium avocado, cubed
  • 1 cup elbow pasta, uncooked
  • 1/3 cup salsa
  • 1/3 cup hummus

Instructions

  1. Prepare pasta according to package directions.
  2. While pasta is cooking, combine vegetables, avocado and chicken in a large bowl.
  3. Mix in pasta.
  4. Add salsa and hummus and stir until well combined.
  5. Refrigerate at least 1 hour to let flavors meld.
  6. Serve cold.

Did you make this recipe?

Tag @theleangreenbean on Instagram


See what I mean about the dressing? So simple…just hummus and salsa. But it adds so much flavor! I used Sabra Supremely Spicy Hummus and Jacks Salsa. Feel free to use your favorites, or a homemade version!

Need a healthy lunch option? Make a batch of this Chicken Pasta Salad with Salsa Hummus Dressing and pack it for lunch all week long!

After you mix everything together, feel free to add more hummus and/or salsa if you want it creamier!

Need a healthy lunch option? Make a batch of this Chicken Pasta Salad with Salsa Hummus Dressing and pack it for lunch all week long!

For the veggies, I used peppers, carrots and green beans to add crunch and then threw in some defrosted peas from the freezer and meant to add some tomato but forgot! For the chicken, I made a Crockpot Rotisserie Chicken and used some of the meat from that!

Enjoy!
—Lindsay–

Filed Under: Lunch, Sponsored Tagged With: Chicken, Hummus, Pasta, Salsa

15 Freezer Meals and Snacks

October 8, 2014 by Lindsay 57 Comments

A well-stocked freezer can make healthy eating easy during busy weeks. Here are 15 Freezer Meals and Snacks that can be made ahead of time for easy lunches, dinners, and snacks. 

Hi Friends!

You guys know I love my food prep, right? Well, today we’re taking that a step further and talking about freezer prep. Over the past few weeks I’ve been making an effort to stock up on some freezer meals and snacks to have on hand for those first few weeks after Baby Bean decides to make an appearance.

A well-stocked freezer can make healthy eating easy during busy weeks. Here are 15 Freezer Meals and Snacks that can be made ahead of time for easy lunches, dinners and snacks.

Here’s the deal. I will share all the freezer meals and snacks I’ve prepped so far but there are a few things you need to keep in mind:

  • Some of these recipes are indeed in my freezer but I haven’t taste-tested them yet. I was going to wait to share them but many of you have been asking so I thought I’d share them now and will update you on how they turn out as I make them. I didn’t make anything that isn’t similar to things that other people have made successfully before, so I’m sure they’ll all turn out fine!
  • Most of these recipes don’t require exact quantities, they’re very forgiving, but I did my best to give you quantity estimates.
  • I chose to store things in ziploc bags so I could freeze them flat and save space. If you have a bigger freezer than me, feel free to store them in whatever containers you want.

Let’s talk briefly about how I approached my freezer prep:

  • I split it up over a few weekends. If you’re ambitious or in the mood you could power through it and really get a lot done in one day.
  • I started by making a Pinterest board for crockpot and freezer meals.
  • Next, I spent a few nights actually clicking through the pins and making a list of possible things I might make. I didn’t copy exact recipes. Some were general enough that I had a good idea of the ingredients I would use. For some, I jotted down some ingredients that were used and decided I would figure out quantities on my own. Keep in mind this approach might not work for everyone. If you want to follow the recipes exactly, by all means go for it. I just prefer to freestyle it in the kitchen.
  • Once I had my list, I went through and decided what I was going to make and split them into 3-4 different groups so that I could tackle them on different days.
  • Then, I started cooking. I picked a few things I wanted to make, added some extra stuff to my grocery list and worked it into my Sunday food prep. Most of these ideas use ingredients I would buy anyway, so it was just a matter of buying a little extra of some things.

So what did I make?

A well-stocked freezer can make healthy eating easy during busy weeks. Here are 15 Freezer Meals and Snacks that can be made ahead of time for easy lunches, dinners and snacks.

Round 1

Lentil Beef Bolognese Sauce (fully cooked, freezer meal)

3 cloves garlic, minced
3 cups vegetables, chopped
1 1/4 pound ground beef (or turkey)
2 cups cooked lentils
2- 17oz cartons of tomato sauce – no salt added
1 tsp basil
1 tsp oregano

Directions:
Cook the beef, vegetables and garlic until beef is cooked through. Add the sauce, spices and lentils and stir to combine. Let cool completely, split into two ziploc bags and freeze.

Notes:
– Adding lentils helps stretch the beef in this recipe and gives you enough for two batches. You can leave them out and use half the sauce and fewer veggies for a simple meat sauce.
– Thaw this sauce out and serve with spaghetti noodles or use it to make lasagna or stuffed shells!

—————-

Lentil Chicken Curry (fully cooked, freezer meal)

1 pound chicken, cubed
4 cups vegetables
2 cloves garlic, minced
1 cup cooked lentils
2 Tbsp red curry paste
1 cup coconut milk

Directions:
Cook the chicken, vegetables, and garlic until cooked through. Add the lentils, curry paste, and coconut milk. Stir to combine. Let cool completely, pour into ziploc bag, and freeze.
Thaw, reheat & serve over rice or with some naan!

Notes:
– This is similar to my Lentil Veggie Curry that I make all the time.

————-

Cranberry Chicken (uncooked, crockpot meal)

1 pound chicken breasts
1 medium onion, diced
1 medium apple, chopped
1 medium sweet potato, chopped
1 cup chicken broth
1 cup apple cider (or another cup of broth)
2 cloves garlic, minced
1 cup fresh cranberries
2 Tbsp mustard
black pepper & paprika to taste

Directions:
Combine all ingredients in a ziploc bag. Freeze.
When ready to serve, thaw overnight, pour into crockpot, and cook on low 4-6 hours until chicken is cooked through. Shred the chicken before serving.

Notes:
-I haven’t tried this yet but have made something with similar ingredients and it had great flavor.
-This could be cooked from frozen in the crockpot for a longer amount of time.

————-

Chicken Fajitas (uncooked, crockpot meal)

1.5 pounds chicken breasts
1 large red pepper, sliced
1 medium onion, sliced
3/4 cup broth
1-2 tsp cumin

Directions:
Combine all ingredients in a Ziploc bag. Freeze.
When ready to serve, thaw overnight, add to crockpot, and cook on low 4-6 hours until chicken is cooked. Shred the chicken and serve with tortillas and other toppings such as tomatoes, lettuce, cheese, avocado, etc.

Notes:
-This could be cooked from frozen in the crockpot for a longer amount of time.

——————

Stuffed Peppers (uncooked, crockpot meal)

1.25 pounds raw ground beef
2 cups vegetables, diced (I used carrots, onion, and mushrooms)
2 cloves garlic, minced
1 tsp McCormick seasoning (or your favoring seasoning)
6 bell peppers, tops and seeds removed

Directions:
Mix everything but the peppers together. Divide evenly between the peppers. Freeze in a ziploc bag.
When ready to serve, thaw, place in crockpot, and cook on low 6-8 hours or until ground beef is cooked. Top with cheese if desired and serve with rice.

Notes:
– To help the peppers stay standing, cut thin slices off the bottom to create flat surfaces.
– I’ve made stuffed peppers before but have not tried them in the crockpot yet.

—————

A well-stocked freezer can make healthy eating easy during busy weeks. Here are 15 Freezer Meals and Snacks that can be made ahead of time for easy lunches, dinners and snacks.

Round 2

I made the following (click the recipe names for the recipe!)

  • Peanut Butter Banana Oat Muffins (wrap 3-4 in plastic wrap inside the ziploc bag) Fully cooked. Just thaw in the fridge or microwave and eat.
  • Freezer Oatmeal Raisin Cookies (double batch, frozen prior to cooking) Just pull out the number you want to cook and bake according to recipe directions.
  • Pumpkin Energy Balls (double batch) Eat straight from the freezer!

—————

A well-stocked freezer can make healthy eating easy during busy weeks. Here are 15 Freezer Meals and Snacks that can be made ahead of time for easy lunches, dinners and snacks.

Round 3

  • Froyo Bites – Click to see the original recipe post. I made a double batch with whole milk yogurt, frozen wild blueberries, almonds, pumpkin seeds and chocolate chips. Freeze in ice cube trays and eat straight from the freezer!
  • Egg McMuffins – Per sandwich: 1 English muffin, 2 eggs, 1-2 strips bacon, cheese. Cook the eggs, top them with cheese and bacon, and let them cool completely. Then, put on an English muffin, wrap individually in plastic wrap and put in a ziploc bag. To eat, remove plastic wrap, wrap in paper towel and microwave 1-2 minutes until heated through. Tip: bake the bacon in the oven while you’re cooking the eggs. If you prefer burrito style, add some beans and veggies, scramble the eggs, wrap in a tortilla, and freeze that way!
  • Meatballs – I used my Crockpot Meatballs recipe, but skipped the sauce and after I browned them, I baked them in the oven at 400 degrees for 20 min or until cooked. Let cool before freezing. Thaw and add sauce and noodles for spaghetti or make a meatball sub!
  • Chicken Fingers – Buy chicken tenderloin strips (or cut your own), dredge in flour, dip in egg, and coat with breadcrumbs (seasoned if desired). Flash freeze raw on a tray or plate, and then transfer to a ziploc bag. Cook from frozen at 350 degrees for 30-35 min or until cooked through. (Edited to add- Tried these and they were delicious. Here’s the full recipe: Freezer Chicken Tenders. 

—————-

Other Ideas

And just in case you want more ideas. Here are some other things that were on my list that I haven’t gotten around to making:

  • Crockpot Cilantro Lime Chicken – I did actually make one batch of this on a random day so I have one in the freezer.
  • Cajun Meatloaf – My mom made us two of these while she was in town, cooked them and then we sliced them and wrapped up still in loaf shape. Just have to thaw and eat!
  • Burgers – form into patties and freeze raw so all you have to do is cook them.
  • Pancakes – Make a couple batches of my Whole Wheat Oatmeal Pancakes and freeze them. Just heat them up in the microwave and enjoy!
  • Chicken Tortilla Soup – Freeze some raw diced chicken, tomatoes, beans, onions, garlic, corn, jalapeños, lime juice, cilantro, cumin and broth. Throw it in the crockpot and cook on low for 4-6 hours.

————–

So, there you have it: lots of easy freezer meal! Hope that helps!

And for those of you that asked: no, I don’t have a giant freezer. We have the kind of fridge that’s a fridge on top, then has a fridge drawer in the middle and then a freezer drawer at the bottom. The freezer drawer has a top drawer within it, which is where I fit all of the stuff I prepped (on the left in the pic below), along with a batch of Curried Sweet Potato Soup and some homemade veggie broth. In the two main freezer compartments (on the right in the pic) I have other things like bread, frozen fruits and veggies, etc.

A well-stocked freezer can make healthy eating easy during busy weeks. Here are 15 Freezer Meals and Snacks that can be made ahead of time for easy lunches, dinners and snacks.

[clickToTweet tweet=”Make these 15 Freezer Meals & Snacks from @leangrnbeanblog to always have healthy food on hand!” quote=”Make these 15 Freezer Meals & Snacks from @leangrnbeanblog to always have healthy food on hand!”]

Let’s chat:
Do you have freezer or crockpot meals you love? Feel free to leave links in the comments!

Enjoy!
–Lindsay–
Filed Under: Dinner, Food Prep, Ingredient Round-Ups, Snack

Baby Bean’s Nursery

October 4, 2014 by Lindsay 23 Comments

Hi Friends!

Just popping in to share a quick tour of Baby Bean’s nursery! We finally got around to taking some pictures last weekend.

Before we get to the big reveal, let’s take a look at where we started. Since we moved into our house 6 years ago, what is now the nursery has pretty much served as our junk room. It was the catch-all for everything we didn’t have a place for. Since we had two additional bedrooms for guest rooms, we really had no reason to keep it organized.

Oh, and did I mention that when the previous owners used it as a nursery, they chose Dr. Seuss characters and bright red and orange paint?

before

Once we cleared everything out of the room (we had a big garage sale back in May), hubby set to work sanding and priming. The murals were globbed on and it took hubby about 20 sheets of sandpaper to make the walls smooth again.

paint

We did a lot of work on the nursery fairly early on because we knew hubby would be having shoulder surgery in June. We chose Benjamin Moore “Gray Owl” for a neutral paint color and we both love it!

progress

Up next, furniture. First we picked out our crib. We may have gone a little overboard on a solid wood, amish-made crib….but it’s from the same place we bought our king-sized bed and the crib converts into a bed as well so we know it will be a solid piece of furniture that we can continue to use as baby grows. We picked out the one we liked pretty early because we knew it would take a couple of months to be built and delivered.

In an effort to save some money after the crib, we turned to Craigslist. We found a great deal on a three-drawer dresser that’s the perfect height for us to place a changing pad on top of and use as a changing table as well.

Then we found a Dutalier Glider and ottoman on Craigslist. It’s the oversized one and the cushions on the back part can pull down to help support baby while feeding. It’s in perfect condition and although it might not have been my first color choice and the ottoman fabric is a slightly different color than the glider itself, we pretty much scored it for half price, which was worth it!

We also found a cute little side table from TJ Maxx and a lamp at World Market.

When we moved into our house, none of the bedrooms had overhead lighting. We’ve been slowly adding lights and ceiling fans to the rooms and the nursery was the last one on the list. Hubby used his handyman skills to wire and install a new light and ceiling fan while the boys and I supervised from the glider.

Finally, we found some solid wood shelves that hubby installed on the wall to make a bookcase of sorts! I’d seen similar things on Pinterest and decided I loved the idea.

Expecting or planning to get pregnant in the future? It's never too early to start designing a nursery for your baby!

Next we started looking for wall art. We found the owls at Target.

The set of 4 prints are from Tessyla on Etsy. You can customize the colors and designs you want to go in your set of 4 and they came out great! We found wooden frames we loved at Hobby Lobby to put them in.

The Love You Forever print is from Dalloway Place on Etsy.

Hubby’s cousin has a company called Pure Token and creates adorable art! She made us the Where the Wild Things Are piece and gave it to me at my baby shower. We love it!

We also hung up a couple more shelves to hold some things!

And now for some shots of it all put together. We tried using the panoramic feature on my phone to give you a good idea of what it looks like.

Expecting or planning to get pregnant in the future? It's never too early to start designing a nursery for your baby!

This is the view to your right when you come in the door. The lamp is from Target, the chevron basket on the floor and the blanket on the crib are from Marshall’s.

Expecting or planning to get pregnant in the future? It's never too early to start designing a nursery for your baby!

This is the corner straight ahead of you when you walk in the door. Curtains and blanket are from Marshall’s, table from TJ Maxx, lamp from World Market and we bought the elephant at the art fair this summer.

The closed door is the closet which is a little hard to get to because of the glider, but you can still get in and out and we’re planning to store extra diapers, etc in there, plus clothes that are too big/too small.

Expecting or planning to get pregnant in the future? It's never too early to start designing a nursery for your baby!

And looking the other direction from the far corner you can see the bookshelf. My grandma gave us that Love wall sign on our wedding day.

And a few more for good measure:

Expecting or planning to get pregnant in the future? It's never too early to start designing a nursery for your baby!

Expecting or planning to get pregnant in the future? It's never too early to start designing a nursery for your baby!


Enjoy!
–Lindsay–
Filed Under: Kids

What Busy Moms Feed Their Kids

October 2, 2014 by Lindsay 17 Comments

Hi Friends!

Since you guys enjoyed the posts I put together about What Registered Dietitians Feed Their Kids (Click to read Part 1 & Part 2), I decided to keep it going for a while and have reached out to a few of my favorite busy moms to share some more insight! Hopefully these posts will spark some ideas for you!

Are you a busy mom looking for new meals and snacks to feed your kids? This post is full of healthy ideas your baby or toddler will love!

This is mostly a toddler edition, with a little info on younger kiddos from parents of multiple kids. Next round covers a few kiddos under 18 months so stay tuned for that!


Are you a busy mom looking for new meals and snacks to feed your kids? This post is full of healthy ideas your baby or toddler will love!

Rachel
The Avid Appetite (theavidappetite.com)
Penelope, 20 months

1. What do your children typically eat for breakfast?
Penelope loves eggs (scrambled or fried, with cheese), yogurt, cream cheese & jam on whole wheat bread, fruit, or some organic dry cereal, and of course, her whole milk.

2. What do they typically eat for lunch?
Soup, mac ‘n cheese or pasta w/mixed vegetables, organic hot dogs, cherry tomatoes, bell peppers, cucumbers. Always with water on the side; I don’t give her juice right now.

3. Do you all sit down as a family for dinner?  
Unfortunately, I don’t arrive home from work until 7pm so Penelope has already eaten dinner by then. On the weekends, we do our best to have family breakfast together. We are typically on-the-go for the remainder of the day, so we eat together when we can.

 4. What happens if they don’t like what you’re making for dinners?
Though we don’t sit together for dinner, we try to give Penelope whatever we are eating. We are lucky that she’s a champ and eats almost anything we will give her. If she doesn’t want it, then we will try something else…but usually if she doesn’t want it, it means she just isn’t hungry and I don’t force her to eat.

5. What are the kids’ favorite snacks? What are some snacks you never leave the house without?
She loves fruit of any kind and that is always a go-to, even at home. For on the go, I like to have bananas or blueberries, which can usually stand being in my bag for a few hours. Applesauce and cheese sticks are great options, too. The reigning champion snack of all time for Penelope is yogurt melts. I always have bags of them everywhere. That would not be my first choice of snacks for her, but she truly loves them so much and they are my secret weapon for meltdowns or to keep her occupied. We also like organic fruit snacks (YumEarth are great and only come with 5 or 6 pieces per pack), and organic, healthy cookies from MySuperFoods, which are packed with whole grains, chia seeds, flax seed and more

6. Are any foods off limits?
No. From the get go, I wanted Penelope to develop a real love of food…all of it. So that means she gets bell peppers to dip in hummus (she LOVES her dip!), but also bites of cake at a party. If I’m eating something that Penelope is interested in (from iced tea or steak to blue cheese or peanut butter on a spoon), she gets to try it.

 7. Any tips for picky eaters?
We are lucky that Penelope is interested in food and so I wouldn’t consider her picky (yet). For those times that she isn’t, I will take her plate and start eating the food on it, ignoring her reaction. She will often come around, want to sit in my lap and try it. And if she doesn’t? I don’t push her. When she is hungry, she will eat.

 8. Do any of your kids have food allergies? How do you deal with that both at home and when in public?
Luckily, no. I really feel for parents who have to deal with this. It’s a scary notion, especially when sending your kids to daycare or school!

Are you a busy mom looking for new meals and snacks to feed your kids? This post is full of healthy ideas your baby or toddler will love!

Kath Younger, RD
Kath Eats Real Food (www.katheats.com)
Mazen, age 2

1. What do your children typically eat for breakfast?
My son’s favorite breakfasts are scrambled eggs with whole wheat toast and sliced fruit or banana oatmeal with a dollop of peanut butter. He takes after his mama : ) We also do smoothies from time to time, and a green smoothie is a great way for me to sneak in some berries and veggies.

 2. What do they typically eat for lunch?
We rely on leftovers a lot for lunch. It’s hard for my 2-year-old to eat raw veggies, and he’s usually too hungry to wait for a whole meal to cook, so I most often re-heat something from the fridge (we plan for this by making extra at dinner). Some of his favorite lunch foods are currently (because they change every day!): mini quiches, carrots and crackers in hummus, noodles of any kind, sweet potato fries, fruit, quesadillas and nut butters.

 3. Do you all sit down as a family for dinner?
We try, but at age 2 this is pretty difficult. Sometimes when he takes a later nap and I’m really organized with dinner we can time it perfectly, but more often than not he’s hungry before dinner is ready. About half the time he eats while I’m cooking and then we eat while he plays, but the other half we all sit down together. I can say without a doubt that he tries more diverse foods when we eat at the same table, so I am working to make this a priority. He is also getting better at waiting a little later to eat, so that is helpful too.

 4. What happens if they don’t like what you’re making for dinners?
I try to go by the recommendation to have a few things we know he likes along with 1-2 new foods. We usually offer him the new food enthusiastically and model eating it ourselves. It’s a toss up if he’ll try it, but sometimes he does! We recently had chicken and pepper kebobs with orzo salad and he decided that night that he loved roasted red peppers but wouldn’t touch the orzo! He always surprises me. J We try to go with the flow as much as we can and keep offering and modeling.

 5. What are the kids’ favorite snacks? What are some snacks you never leave the house without?
One of our favorites this summer was yogurt frozen into a popsicle. I even let him have one for breakfast! I either make a smoothie popsicle with plain yogurt and a little fruit blended together or I buy the Siggi’s kids squeeze pops and freeze those. They are low in sugar, so I think it’s an excellent choice for breakfast, snack or dessert. I’ve also been making homemade whole grain bars (nut free for school) and freezing them so I can put one in the diaper bag and it will have thawed by the time he’s ready to eat it. Mini Larabars are great to keep too – the portion size is good and Mazen thinks they are a cookie!

 6. Are any foods off limits?
I’ve been more laid back about what my son eats than I might have predicted, but we try to avoid anything that is heavily processed or full of artificial ingredients. If another mom feeds it to him (like at a birthday party) I’m not going to freak out, but we don’t buy those kinds of things ourselves.

 7. Any tips for picky eaters?
Mazen has started to want to help me in the kitchen, so we pull up a chair and he helps stir the pancake batter or whisk dressing. The other week I had arugula in the salad spinner (which he loves to spin) and we had made a dressing, and I asked if he wanted to try the salad. He said yes and dipped about 20 arugula leaves in the dressing and eat them up. Let me pause to say: My child does not like salad! So my tip is to just be patient and involve them as much as possible.

8. Do any of your kids have food allergies? How do you deal with that both at home and when in public?
Thankfully no!


Are you a busy mom looking for new meals and snacks to feed your kids? This post is full of healthy ideas your baby or toddler will love!

Brittany Dixon
A Healthy Slice of Life (ahealthysliceoflife.com)
Hailey (3 years old), Kaitlyn (4 months old)

 1. What do your children typically eat for breakfast? 
Kaitlyn is exclusively breastfed and I hope to do baby led weaning with her starting at 6 months, so I’ll just answer these for Hailey!

Hailey breakfast- Plain Greek yogurt topped with honey, fruit and chia seeds (she calls these sprinkles and loves putting them on herself!) is a favorite. She also loves scrambled eggs and cheese toast or pancakes.

 2. What do they typically eat for lunch? 
We are big fans of snack plates around here. I find lots of little options work well for us. Some common players are boiled eggs, olives, grapes, carrot sticks, chickpeas, cheese toast, red pepper slices, hummus, cheese cubes, cherry tomatoes and leftovers.

 3. Do you all sit down as a family for dinner?  
We don’t currently due to my husband’s work schedule. However, I do sit down with Hailey while she eats her dinner.

 4. What happens if they don’t like what you’re making for dinners?
I have a pretty adventurous eater, but she is still a toddler and her tastes change by the day. If she doesn’t like a particular item on her plate, I don’t make a big deal about it. She can eat all the other items on her plate and I’ll try the disliked item again another day.

5. What are the kids’ favorite snacks? What are some snacks you never leave the house without?
We love homemade lara balls , almonds and raisins, banana and peanut butter. I still buy the fruit and veggie pouches to have for a quick option on the go!

 6. Are any foods off limits?
Nope! As far as Hailey is concerned, everything is fine in moderation. However, I do my best to keep foods with artificial colors and flavors out of the house and most of what we eat at home is non- or minimally processed.

 7. Any tips for picky eaters?
Don’t make it a power struggle. Get kids involved with shopping and prepping and don’t be afraid to try foods they “don’t like” prepared in a new way! If all else fails, just keep at it. Consistency is huge!

 8. Do any of your kids have food allergies? How do you deal with that both at home and when in public?
Hailey does not and as far as I know, neither does Kaitlyn. My heart goes out to those that deal with food allergies because I can only imagine how stressful that must be. I gave Hailey her first taste of peanut butter sitting in the car in the parking lot of the hospital because I was so paranoid!

Are you a busy mom looking for new meals and snacks to feed your kids? This post is full of healthy ideas your baby or toddler will love!

Liz Della Croce
The Lemon Bowl (thelemonbowl.com)
Asher, 3 years old and Jacob, 10 months old

1. What do your children typically eat for breakfast?
Both of my boys love whole milk plain yogurt sweetened with a little tart cherry juice, raspberry preserves, or applebutter for added flavor. My older son loves it with muesli cereal and fresh berries and the baby has it with fortified baby cereal. Other days we eat scrambled eggs, homemade frozen pancakes, or oatmeal when the weather gets cooler.

2. What do they typically eat for lunch?
Lunchtime is usually leftovers from dinner the night before. In the fall we love making soups like Lemony Chicken Soup with Spinach and Chickpeas or Italian Sausage and Bean Soup. It’s a great one pot meal full of protein, vitamins and nutrients. Plus, the food is already cut into small, bite-sized pieces, which is easy for the kids to eat.

 3. Do you all sit down as a family for dinner?
We sit down for dinner as a family every single night. We always ate dinner as a family growing up and I hope to always eat as a family as my boys get older. Cooking dinner is my favorite time of the day because all four of us are in the kitchen listening to music, singing, making the boys giggle as we dance, etc. It’s relaxing to unwind away from technology and I like investing the time to create nourishing meals for my family.

 4. What happens if they don’t like what you’re making for dinners?
If they don’t like what we are having for dinner, they simply don’t eat as much. My boys are not starving, I assure you. 😉 Some times they are hungry and eat three portions, other times they don’t eat a lot. I think adults should eat more like kids sometimes and not eat just because of habit or schedule. Kids follow their hunger/stomachs and I think we should all do more of that.

 5. What are the kids’ favorite snacks? What are some snacks you never leave the house without?
My toddler loves dried fruit like figs, tart cherries and raisins. He hasn’t been introduced to candy yet and I’m thinking he is going to have a sweet tooth one day. 😉 He also loves hummus and could eat it by the tub-full! My baby doesn’t really snack much yet because he usually nurses between meals but he really loves everything we are eating so far.

 6. Are any foods off limits?
Since I still create/buy all of the foods my kids eat, it has been pretty easy to control their diets. With that, I’m not buying candy bars, pop, juice, cookies, etc. Can they have ice cream at a party? Of course. Am I going to go out of my way to give them sweets all the time? Definitely not. Since I don’t eat those foods, I’m not going to serve it to my kids but I’m not unrealistic to think that they will never have a candy bar. 😉

 7. Any tips for picky eaters?
I think it’s important to put a little thought into the foods we serve kids. Instead of steaming cauliflower, try Curried Roasted Cauliflower with Coconut Oil. Instead of boiling green beans, try Za’atar Roasted Carrots and Green Beans. Don’t be afraid of using spices and at the very least, be sure to properly season with a good amount of salt and pepper. Remember, no matter what, when you’re cooking foods from scratch at home you will never have as much sodium as you find in processed packaged foods so don’t be afraid of salt.

 8. Do any of your kids have food allergies? How do you deal with that both at home and when in public?
So far no they don’t, knock on wood. Our baby hasn’t had nuts yet but fingers crossed he will be like his toddler and able to eat anything.

 ————

That’s all for today! Stay tuned for part 2 coming in a few weeks!

Enjoy!
–Lindsay–
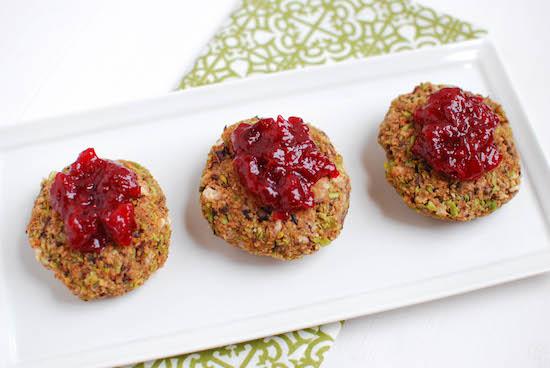
PS. Don’t forget to join us for the PIN IT PARTY tomorrow!!! You can see all the details in the last Pin It Party post (CLICK HERE) if you’re not familiar with how it works!

pin-it-party

Filed Under: Uncategorized

5 Traits I Hope Our Son Gets From His Dad

October 1, 2014 by Lindsay 57 Comments

Hi Friends!

Today is hubby’s birthday! He’s the big 3-0! I’ve had this post written for a couple of months now. I thought of it while walking the dogs one day and rushed home to write it…but I decided to save it for a special day, like today!

Over the past few months I’ve been doing a lot of thinking about baby bean (obviously) and the things he’s going to inherit from his dad and me.

While I was pregnant, I made a list of traits I hope my son inherits from his dad. What's on your list of favorite things about your significant other?

I may be biased, but I think my hubby is pretty much the best, so here are 5 things I hope baby bean gets from his daddy (in no particular order).

handyman skills

1. Handyman Skills

My husband is quite the handyman. There’s not a project he’s afraid to tackle…in fact it seems he always has a to-do list a mile long of improvements he wants to make around the house! He has a huge tool collection (with more on his wish list) and he’s a regular at Lowe’s and Home Depot. Although he can be a bit of a perfectionist, I can’t tell you how many times I’ve been grateful that he knows how to fix a toilet, unclog a drain, paint the walls, remodel the bathroom, etc so that we don’t have to spend the money having someone else do it.  I know he’ll be anxious to teach our son all about tools and DIY skills and I can’t wait to see what sorts of projects they do together.

musical talent

2. Musical talent

Hubby grew up playing drums and guitar and he plays them both very well. He knows immediately when things are out of tune, can recognize almost any song pretty much as soon as it starts playing, and has a great appreciation for a wide range of music genres. We’ve spent many a night just hanging out on the couch or the deck listening to music, singing along, discovering new artists, etc. He’s also a huge fan of making up his own songs and loves to serenade me with silly, yet charming, tunes about everything from pooping to how much he loves me. It never fails to make me smile.

intelligence

3. Intelligence/Creativity

My husband is, hands down, one of the most intelligent people I know. I mean, he has a college degree in Physics! Who does that?! But beyond being school smart, he’s just smart in general. He keeps up on current events, he’s well-spoken and opinionated and he makes intelligent financial decisions. He’s constantly on a quest for new knowledge- always asking “why?” and figuring out how things work or how to make things work. He’s great at thinking outside the box to come up with creative solutions to problems and always does his research to make sure he makes the best decisions possible. Bottom line, he just KNOWS lots of stuff. I hope our son is the same way.

4. Sense of Humor/Lack of Modesty

Mr. Bean has a great sense of humor and is constantly making people laugh, but he’s also not afraid to laugh at himself. He’s 100% comfortable in his own skin and is not afraid to walk around naked, talk about poop, etc. While this isn’t always desirable (namely the constant bodily function discussion and expressions), it’s part of who he is and I love him for it. He’s constantly coming up with ways to keep me entertained and not a day goes by where I don’t appreciate his wonderful personality and all the smiles he brings to my world. I hope our son inherits that same personality.

respect for women

5. Respect for women

The two of us have been together for a long time….like 10+ years. In all those years he’s never once treated me as anything less than his equal. He’s never told he me I couldn’t do something because I was a girl. He respects me, appreciates me, tells me I look beautiful and encourages me to follow my dreams. His parents did a great job raising him and I hope we can instill the same values in our son.

 ————

I could go on and on…but i’ll stop there.  Happy birthday hubby. Baby bean is lucky to have you as his dad.

As far as which traits I hope he gets from me?
My good looks of course 😉

But for real- I hope our son inherits my love of reading, my cooking skills and my multi-tasking abilities!

Let’s chat:
What traits from either parent do you see or hope to see in your kids?

Enjoy!
–Lindsay–
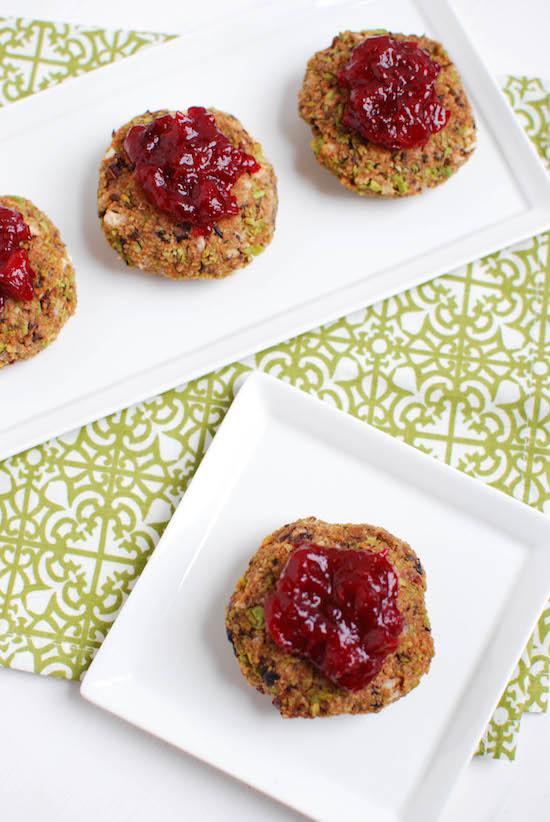
Filed Under: Kids

10 Minute Sweet Potato and Apple Saute

September 30, 2014 by Lindsay 37 Comments

This 10 Minute Sweet Potato and Apple Saute is an easy topping that helps bring fun new flavors to leftover pork or chicken.

This post is sponsored by Pompeian. I was compensated for my time. All thoughts and opinions are my own.

Hi Friends!

Today is the latest in a series of posts as part of my partnership with Pompeian. In case you missed the first few, be sure to check them out:

Broccoli with Olive Oil Cheese Sauce
Sweet & Spicy Sweet Potato Wedges
Strawberry Balsamic Dressing

Today’s recipe uses one of their new OlivExtra Special Blends-

Their OlivExtra California Select is a blend of Safflower Oil and Extra Virgin Olive Oil. It has a super high smokepoint (500 degrees) which makes it great for high-heat cooking.

This recipe came to mind when I was looking for a way to repurpose some leftover pork tenderloin. Hubby and I love to grill pork tenderloin. It’s easy, healthy and makes a lot of leftovers so we can use them throughout the week. I try to get creative with the leftovers so we’re not just eating slices of pork every night.

The Sweet Potato & Apple Saute is ready in 10 minutes and makes a great topping for leftovers to make a quick, healthy dinner.

This time I decided to make use of some of my Fall produce and make a quick saute that I could use as a topping for the pork. Since apples and pork go really well together, I started there…and then I added some leeks and sweet potato that I had on hand, along with some apple cider!

The benefit of being able to heat the oil to high heat means that this comes together quickly and dinner was ready in no-time!

Here’s the recipe:

Print

10 Minute Sweet Potato and Apple Saute

DSC 0616
Print Recipe

5 Stars 4 Stars 3 Stars 2 Stars 1 Star

5 from 1 review

A quick, easy topping to jazz up leftover pork or chicken.

  • Author: Author: Lindsay L
  • Prep Time: 5 minutes
  • Cook Time: 10 minutes
  • Total Time: 15 minutes
  • Yield: 4 1x

Ingredients

Scale
  • 1 Tablespoon Pompeian OlivExtra California Select oil
  • 1/2 cup leeks, thinly sliced
  • 2 cloves garlic, minced
  • 1 cup sweet potato, finely diced
  • 1 medium apple, diced
  • 1 cup apple cider
  • 1 Tablespoon white wine vinegar
  • 1/2 teaspoon paprkia

Instructions

  1. Heat the oil in a saute pan over high heat.
  2. Add the leeks, garlic, sweet potato and apple and saute for 5 minutes.
  3. Reduce heat to medium and add remaining ingredients.
  4. Saute another 5 minutes or until sweet potatoes reach desired tenderness.
  5. Serve over sliced pork or chicken.

Did you make this recipe?

Tag @theleangreenbean on Instagram

The key to this recipe is dicing the sweet potatoes fairly small. You want them to cook quickly so little chunks are best!


This topping would work well on pretty much any protein. It adds some Fall flavor without being super labor intensive. Quick and easy is what it’s all about at 37 weeks pregnant!

The Sweet Potato & Apple Saute is ready in 10 minutes and makes a great topping for leftovers to make a quick, healthy dinner.

Enjoy!
–Lindsay–

Filed Under: Side Dish, Sponsored Tagged With: Apple, Sweet Potato

Foodie Penpals September 2014

September 30, 2014 by Lindsay 1 Comment

Hi Friends!

It’s time for another foodie penpals reveal day!

fpp

I took the month off- trying to focus on getting ready for baby, but if you want to participate next month, here are the details:

-On the 5th of every month, you will receive your penpal pairing via email. It will be your responsibility to contact your penpal and get their mailing address and any other information you might need like allergies or dietary restrictions.
-You will have until the 15th of the month to put your box of goodies in the mail. On the last day of the month, you will post about the goodies you received from your penpal! 
-The boxes are to be filled with fun foodie things, local food items or even homemade treats! The spending limit is $15. The box must also include something written. 
-Foodie Penpals is open to blog readers as well as bloggers. 
-Foodie Penplas is open to US, Canadian & European residents.  Please note, Canadian Residents will be paired with other Canadians only. Same with Europeans.  

If you’re from the US or Canada and are in participating for October, please CLICK HERE to fill out the participation form and read the terms and conditions. 

You must submit your information by October 4th as pairings will be emailed on October 5th!

If you participated this month, link up below and go check out a few other posts to see what they got!

Enjoy!
–Lindsay–


Filed Under: Uncategorized

5 Ways To Make Sandwiches More Fun

September 24, 2014 by Lindsay 24 Comments

Tired of eating the same sandwich every day? Here are five creative ways to make sandwiches more fun to eat for lunch. Perfect for both kids and adults!

Hi Friends!

Just popping in to share a few ideas with you. When I originally thought of this post idea, it was geared towards kids, since it’s back to school season and lunches have to be packed again in many households. But, by the time I was done, I realized that these ideas aren’t just fun for kids, but adults, too!

If packing a plain old sandwich is getting boring, here are 5 ways to make your sandwich more fun!

Tired of eating the same sandwich every day? Here are five creative ways to make sandwiches more fun to eat for lunch. Perfect for kids and adults.

Instead of a sandwich, try:

Cutouts

This one is mostly geared towards kids. Use cookie cutters or just freehand with a knife. Cut into fun shapes, animals, etc to make the sandwich more appealing. Hint- this also works with other things like fruit slices, cheese, etc. Fun shapes make everything more exciting!

Rollups

Instead of making your sandwich on two pieces of bread, put your choice of fillings into a tortilla, roll it up and slice into segments. It works great for things like tuna or salmon salad, but also works well for a deli meat and cheese combo. Add a spread of hummus to the tortilla to help it all stick together!

Stackups

Kids and adults alike will enjoy making these mini sandwiches. Use crackers, pita bread etc as the outsides and pack with slices of meat, cheese and veggies. When it’s time to eat, assemble like lunchables!

Quesadillas

This is a great way to use up leftovers. If you serve chicken or pork for dinner, cut some up while you’re putting the extras in the fridge and throw them in a quesadilla with some cheese, beans and veggies. Cook on a panini press or simply microwave to melt the cheese. Once they cool, pack them for lunch! They can be eaten cold or easily reheated in the microwave.

Sliders

Let’s face it, mini-sized things are more fun to eat! Slider buns make the perfect portion size for kiddos and adults can easily pack two or three for a full lunch. Get creative and make three different sliders for the same lunch if you have lots of leftovers to use up, or make them all the same!

[clickToTweet tweet=”Try one of these creative ideas from @leangrnbeanblog to make sandwiches more fun!” quote=”Try one of these creative ideas from @leangrnbeanblog to make sandwiches more fun!”]

Let’s chat:
Are you a sandwich lover? Do you ever get bored with them?

Enjoy!
–Lindsay–
Filed Under: Lunch

Easy Dehydrated Mushrooms

September 21, 2014 by Lindsay 9 Comments

These Dehydrated Mushrooms are easy to make and great to have on hand to add to homemade broths and stocks for flavor!

Hi Friends!

We had to switch things up a little this weekend. Be sure to check out yesterday’s post if you’re looking for food prep inspiration. Today is Recipe Redux day!

This month’s theme was:

Get Your Dehydrator On

Whether it’s extra garden bounty or a sale at the supermarket – dehydrating food is a budget-friendly way to stock up for later. You can use a food dehydrator, a low slow oven, or natural sunshine to preserve natural healthfulness. Show us how you like to dehydrate, or a healthy recipe for how you enjoy using dehydrated fruits, veggies or other bounty.

Some of you may remember when I found a dehydrator at Costco last year. I gave it a little break these past few months but was excited to bust it out again for this challenge. I’ve made my fair share of fruit chips in the past so this time I wanted to tackle vegetables. I debated trying some hot peppers, but I read that they give off some fumes while they’re drying and didn’t want to risk doing anything crazy while pregnant and sensitive to smells.

Make your own dehydrated mushrooms in a dehydrator or oven. They're great for adding flavor to stocks and broths.

So, I started thinking about what other dried veggies I’ve used in the past and I landed on mushrooms. Someone gave me a package of dehydrated mushrooms last year and although I’ve never rehydrated them to use in an actual dish, I did discover that I LOVE adding them to my homemade veggie broth! I tend to make a lot of homemade broth in the fall and winter so I thought it would be fun to dry some mushrooms of my own to have on hand!

You can do this with any kind of mushroom…I chose to use baby portobellos.

The process is super simple:

  • Buy mushrooms
  • Clean them gently with a damp paper towel
  • Slice to desired thinness (You could cheat and buy pre-sliced if you wanted, or you can simply cut them in half, or dry them whole! Just adjust drying times as needed)
  • Place on dehydrator trays and dry on low for about 6 hours, until all moisture is gone, rotating the trays occasionally for even drying.
  • Store in a sealed glass jar.

If you don’t have a dehydrator, this could easily be done in the oven using low heat. I haven’t tried it myself but I’ve read that about 150 degrees F would be a good temperature.

Make your own dehydrated mushrooms in a dehydrator or oven. They're great for adding flavor to stocks and broths.

When you’re ready to use them, you can either place them in a bowl of warm water to rehydrate them and use in things like stirfrys or do what I do and just add a handful to the pot while making broth to add additional flavor.

If you choose to rehydrate and use them, be sure to save the soaking liquid. You can add that to your homemade stocks, broths and soups for added flavor!

Make your own dehydrated mushrooms in a dehydrator or oven. They're great for adding flavor to stocks and broths.

Enjoy!
–Lindsay–
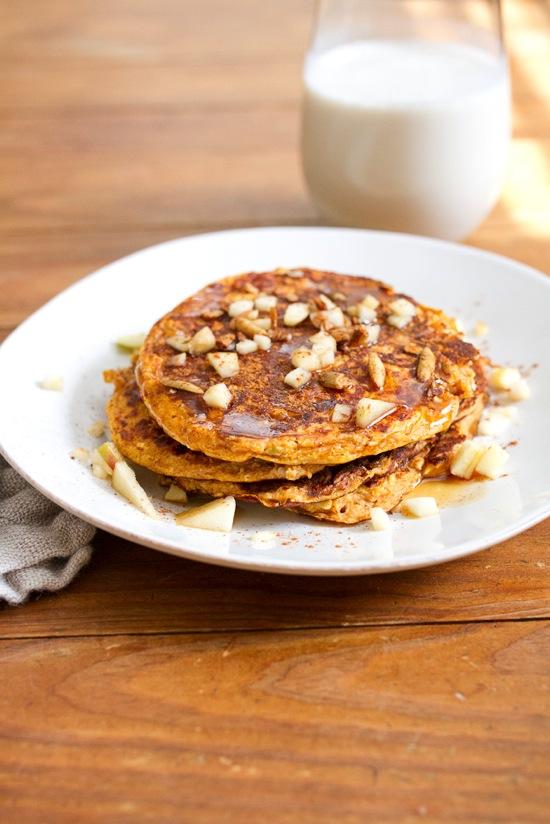
Filed Under: Uncategorized

Homemade Raisin Newtons

September 17, 2014 by Lindsay 52 Comments

Like Fig Newtons? These homemade Raisin Newtons are made with real ingredients and taste even better than store bought. They make the perfect afternoon snack and your kids will love them.

This post is sponsored by California Raisins. I was compensated for my time and received free samples of the California Raisins used in this post. All thoughts and opinions are my own.

Hi Friends!

I am SUPER excited to share today’s recipe with you guys!

As part of the Healthy Aperture Blogger Network, I was selected to have the opportunity to work on a campaign with California Raisins! We were asked to develop a recipe using raisins and as a life-long fan of this little fruit, I knew I wouldn’t have any trouble coming up with something delicious. Plus, you all said you wanted to see more snack recipes. So….I decided to tackle a homemade version of one of my favorite childhood snacks!

Like Fig Newtons? These homemade Raisin Newtons are made with real ingredients and taste even better than store bought. They make the perfect afternoon snack and your kids will love them.

First, a few fun facts about California Raisins:

  • They’re are an all-natural, dried-by-the-sun fruit you can feel good about sending with your kids as they head back to school, as an after-school snack, or to beat that 3pm craving. The ingredient list says it all: Raisins.
  • They come by their sweetness naturally and the nutrition label rocks: Zero fat, no cholesterol and no added sugar. Plus, raisins offer 9% of your daily fiber and potassium, and 6% of your daily iron. (per quarter cup serving)
  • They are a great value! According to the USDA, raisins are the most economical dried fruit.  

And now, the recipe! If I’m being honest, this recipe is a little tedious. You need to plan ahead to make sure you have time for the dough to chill and rolling/shaping the actual cookies takes a bit of time…but I think the end result is worth it! I actually had to make two batches of these because when I went to write up this post, I could barely decipher my own chicken scratch so I thought I should re-test to make sure I got it right for you guys 🙂

Like Fig Newtons? These homemade Raisin Newtons are made with real ingredients and taste even better than store bought. They make the perfect afternoon snack and your kids will love them.

Anyways, the second batch was a success as well. I actually increased the amount of raisins from 1 cup to 1.5 cups so that I could get a little more filling in each one and I liked it better that way.

So here’s what you do:

Print

Homemade Raisin Newtons

homemade raisin newtons
Print Recipe

5 Stars 4 Stars 3 Stars 2 Stars 1 Star

5 from 1 review

A homemade version of a favorite childhood snack!

  • Author: Author: Lindsay L
  • Cook Time: 12 minutes
  • Total Time: 12 minutes
  • Yield: 16-18 1x

Ingredients

Scale
  • 4 Tablespoons butter, melted
  • 1/4 cup nut butter
  • 1/4 cup honey
  • 1/2 teaspoon vanilla extract
  • 1 egg
  • 1/2 teaspoon cinnamon
  • 1/4 teaspoon baking soda
  • 1 cup white whole wheat flour
  • 1.5 cups California Raisins
  • 1.5 cups hot water

Instructions

  1. Preheat oven to 350 degrees F
  2. In a large bowl, combine the butter, nut butter, honey, vanilla and egg and mix well.
  3. Stir in the cinnamon, baking soda and flour and stir until combined.
  4. Freeze for 45 minutes or refrigerate for 2 hours until dough is well chilled.
  5. Put California Raisins in a small bowl and cover with hot water.
  6. Let sit for 20 minutes, drain water and transfer to a blender or food processor. Puree until smooth and set aside.
  7. Divide dough in half, leaving one half to chill while you work with the other half.
  8. On a piece of parchment paper, roll into a long rectangle, approximately 5 inches wide, using additional flour as necessary to prevent sticking to the rolling pin.
  9. Trim the edges so you have a neat rectangle.
  10. Spoon half the raisin paste down the middle of the rectangle.
  11. Lift one side of the parchment paper and fold dough in towards the middle, using your fingers to gently peel the edge of the dough off the paper.
  12. Repeat with the other side.
  13. Transfer dough log to the fridge to chill while you repeat these steps with the other half of the dough.
  14. Cut into newton-sized pieces (I got about 8 per log).
  15. Flip onto baking sheet so the seam is face down and peel off parchment paper off the top. Separate newtons slightly to bake.
  16. Bake at 350 degrees for 10-12 minutes.
  17. Let cool completely.
  18. Bake

Did you make this recipe?

Tag @theleangreenbean on Instagram

I know the directions sound a bit complicated. Hopefully these pictures will help:

Like Fig Newtons? These homemade Raisin Newtons are made with real ingredients and taste even better than store bought. They make the perfect afternoon snack and your kids will love them.

If you have a lot of extra scraps after trimming, let them chill for a bit then re-roll and make a few extra!

Like Fig Newtons? These homemade Raisin Newtons are made with real ingredients and taste even better than store bought. They make the perfect afternoon snack and your kids will love them.

I stored these in a ziploc bag. They stay nice and soft but they’re also kinda moist so after a few days I just left the bag open so they wouldn’t get moldy.

Like Fig Newtons? These homemade Raisin Newtons are made with real ingredients and taste even better than store bought. They make the perfect afternoon snack and your kids will love them.


PS…I made these a few weeks ago and when I shared them on Instagram you guys went CRAZY! Here’s to hoping you enjoy them!


Enjoy!
–Lindsay–
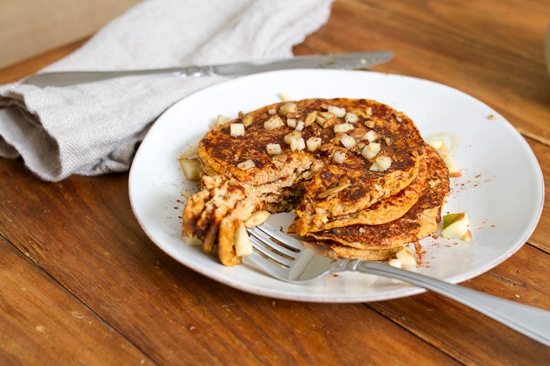
Filed Under: Baking, Snack, Sponsored Tagged With: Butter, Egg, Honey, Peanut Butter, White Whole Wheat Flour

  • « Go to Previous Page
  • Page 1
  • Interim pages omitted …
  • Page 37
  • Page 38
  • Page 39
  • Page 40
  • Page 41
  • Interim pages omitted …
  • Page 65
  • Go to Next Page »

Primary Sidebar

Lindsay Livingston The Lean Green Bean Healthy Living Tips and Tricks

I'm a Registered Dietitian and mom of three from Columbus, Ohio. I use this blog to share simple, healthy recipes, nutrition tips, and an honest glimpse of motherhood!

Learn More →

Questions? Comments? Email me: [email protected]

The Lean Green Bean Facebook The Lean Green Bean Instagram The Lean Green Bean Pinterest The Lean Green Bean Twitter The Lean Green Bean Feed
footer-logo
The Lean Green Bean Facebook The Lean Green Bean Instagram The Lean Green Bean Pinterest The Lean Green Bean Twitter The Lean Green Bean Feed
Recipes

Breakfast
Dinner
Snack
Slow Cooker

Kids

Cooking With Kids
Favorite Gifts
Toddler Meals
Indoor Activities

Resources

Easy Packed Lunches for Kids
Dinner Spark
Snack Spark
Ultimate Guide to Food Prep

About

Meet Lindsay
Become an RD
Work with Me

The Lean Green Bean is a participant in the Amazon Services LLC Associates Program, an affiliate advertising program designed to provide a means for sites to earn advertising fees by advertising and linking to amazon.com.
Read the full privacy and disclosure policy here.

Copyright © 2022 · The Lean Green Bean

table talk series

Learn how food affects your body.

Get my free Table Talk email series where I share bite-sized nutrition information about carbs, protein, and fat, plus bonus information about snacks and sugar!

[email protected]