• Skip to main content
  • Skip to primary sidebar

Learn how food affects your body. Get Free Nutrition Info Today

the-lean-green-bean-logo
  • Home
  • Recipes
  • Kids
  • Resources
    • Ebooks
    • Food Prep
    • Videos
    • Snack Round-Ups
    • Gift Guides
  • About
    • Become An RD
    • Work With Me
  • Search
the-lean-green-bean-logo
  • Home
  • Recipes
  • Kids
  • Resources
    • Ebooks
    • Food Prep
    • Videos
    • Snack Round-Ups
    • Gift Guides
  • About
    • Become An RD
    • Work With Me
  • Search

blog

Elf4Health Sponsor Shoutout – Manitoba Harvest

December 20, 2014 by Lindsay 3 Comments

This post was sponsored by some of our Elf4Health sponsors. I was compensated for my time. All opinions are my own. 

Hi Friends!

Elf 4 Health is drawing to a close and it’s been another awesome year. As we wrap things up, we just want to give a shoutout to some of our amazing sponsors! The purpose of these shoutouts is to introduce you to some of the amazing companies we work with by sharing our experiences with them and highlighting some of their products!

So here we go:

Manitoba Harvest

MANITOBA HARVEST Logo

Manitoba Harvest is one of the largest manufacturers of hemp foods.

From their website:

When it comes to hemp foods, we want to know as much as possible and be involved at every level – from seed to shelf. Luckily we are! We are tremendously proud to be the world’s largest hemp food manufacturer to grow, make and sell our own line of hemp foods.

We make virtually everything on-site at our world class manufacturing facility. Our manufacturing plant has achieved the highest level of global certification in food safety and quality (BRC Grade A).

They’re committed to quality and making an environmental difference which makes them one of my favorite companies:

Not every seed is created equal, we are the first, and only, hemp food manufacturer to have a comprehensive in-house quality control lab. Seed entering the Manitoba Harvest facility goes through a series of tests at various stages of production before being released to you.

Our facility has been refitted with reusable materials, energy saving utilities, and low-flow water taps. We offset carbon omissions by partnering with renewable choice and purchasing renewable energy credits (REC). By purchasing RECs, we are trying to balance energy used with renewable energy sources. Our REC purchase is equivalent to planting 1,009 mature trees and saving 272,449 miles driven in a car.

Manitoba Harvest partners with like-minded companies. We evaluate our suppliers not just on price, but also on their commitment to social and environmental responsibility. For example, when recently re-evaluating our flavored protein powder sweetener we chose to upgrade to coconut sugar. Coconut sugar is a low glycemic index sweetner AND it is sustainability sourced from small farmers. Coconut sugar may cost a little more but the quality and how the ingredient is sourced is important to us.

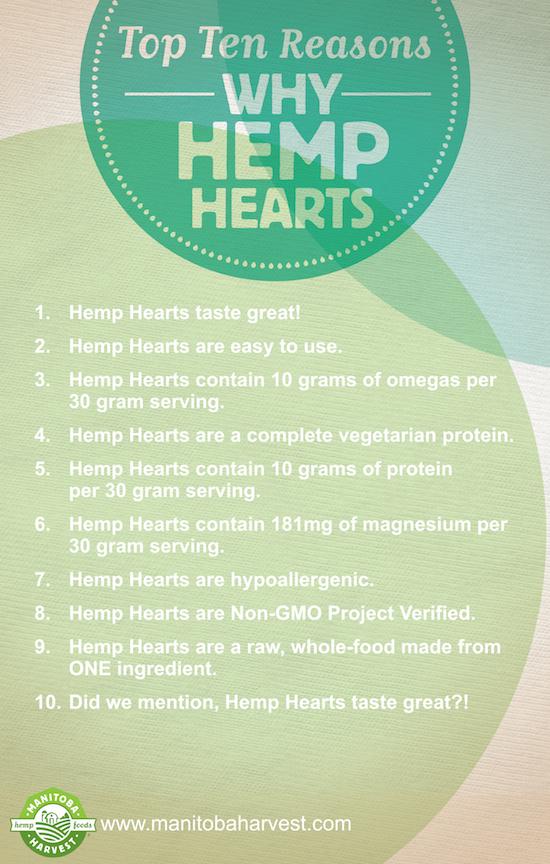
Wanna know more about hemp? Here are some fun facts:

mh
So, how can you eat them?

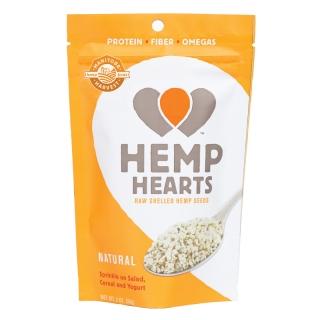
Try hemp hearts:

  • Great tasting – Hemp Hearts have a slightly nutty taste, similar to a sunflower seed or pine nut.
  • Easy to use – Simply sprinkle Hemp Hearts on salad, cereal & yogurt, add to smoothies and recipes, or eat them straight from the package!
  • Nutritious – per 30 gram serving, Hemp Hearts contain 10 grams of plant-based protein and 10 grams of Omegas.

2013111813503794903_sml

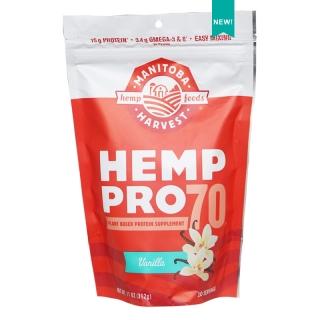
Or check out their Hemp Protein powder:

  1. HempPro 70 – It’s water soluble and has a smooth texture! It’s also our higher protein option (the Original flavour has 20 grams of protein per 30 gram serving). We love this protein in a post run smoothie or yoga shake (yes, you can literally shake it with your favourite beverage and you’re good to go). Comes in three delicious flavours; Chocolate, Vanilla and Original.

You can also mix it into baked goods and I love using it in my homemade protein bars! Plus they have a few other varieties of protein powder you can check out here.

2014060309364531928_sml

And if you need more recipe inspiration, check out all the delicious recipes on their site.

————-

CookSmarts-e1417207005707

Cook Smarts is another company I love and support wholeheartedly. Their mission is to empower home cooks by inspiring and educating them. They create tons of educational resources and develop weekly meal plans that you can purchase.

 They provide a meal plan- which you can customize to be gluten-free, vegetarian or paleo if necessary to fit your dietary needs, compile a grocery list for you and even tells you what you can prep ahead of time over the weekend. It also provides you with notes about ingredients, ideas for leftovers and cooking videos. Plus they have a great blog!

cs1

For more detailed info about how Cook Smarts works, check out THIS POST.

—————

2928-sb_main

Sweaty Betty is a fitness apparel company whose purpose is to “inspire women to find empowerment through fitness”. They sell workout, yoga and running gear, plus underwear, swimwear and accessories.

I got the opportunity to try out several pieces of their clothing and I’m totally in love.  They’re expensive, but the material is high quality and durable and well worth the price in my opinion!

sweaty-betty

Check out THIS POST for more a more detailed review of the pieces I got and be sure to check out their website and pick out something pretty for yourself!

————–

We’d also like to thank the rest of our Elf4Health sponsors for being so awesome.  Be sure to check them all out!

The 3 winners of Elf4Health will receive the following:

  • 3 months of meal planning from Cook Smarts
  • Beautiful workout gear from Sweaty Betty
  • Chocolate & Vanilla hemp seed protein powder from Manitoba Harvest
  • Swanson Health
  • A mixed prize pack from Love Grown Foods
  • Dark chocolate Nuttzo  + to go packets!
  • A Legacy Cheese Gift Box from Cabot Cheese
  • A Sampler Pack from Sizzlefish.

Enjoy!
–Lindsay–

Filed Under: Uncategorized

Breastfeeding Is Hard

December 19, 2014 by Lindsay 263 Comments

Breastfeeding is challenging for any new mom. This is a reminder that it may not be the best choice for everyone, and that’s ok. Hi Friends!

Hi Friends!

Let’s get real today. Breastfeeding is hard. We’re going to talk about it. If that’s not your thing, you might want to skip this post and come back tomorrow. As you may know, I’ve been fairly sick ever since baby was born seven weeks ago. What you may not know is that all of the problems I’ve had so far have stemmed from breastfeeding. I wasn’t planning to document my experience, but i’ve decided to do so in hopes that it may help someone else in the future.

Breastfeeding is challenging for any new mom. This is a reminder that it may not be the best choice for everyone, and that's ok.

So here we go….

From the moment I found out I was pregnant, there was no doubt in my mind that I would breastfeed my baby. It wasn’t something I gave much thought to. I was familiar with the benefits for baby and mom and I didn’t really have any reasons NOT to do it. With that mindset, Hubby and I attended a breastfeeding class at the hospital. After getting a pretty comprehensive overview,  I expected a few challenges, like there typically are when you try something new, but I was not at all prepared for how hard it would be for me- both physically and emotionally.


While we were in the hospital, I nursed exclusively. Things got off to a poor start right away because baby had a bad latch. Even with the class under my belt, I didn’t really know what a good latch was and by the time I saw the lactation consultant, he’d already done some damage to my nipples.

He was born early Wednesday morning, we left the hospital on Thursday, and on Saturday morning we headed to the pediatrician for his first appointment. I was still exclusively nursing but my milk hadn’t come in yet. We learned that baby was jaundiced. I had to start pumping to try to get my milk to come in and we had to supplement with formula to get him to start peeing and pooping more to help the jaundice. I pumped all day Saturday and Sunday, and by Sunday afternoon my milk had come in. I continued to nurse but was still in severe pain due to the nipple trauma.

IMG_8570

I went to see a lactation consultant again on Tuesday. I was pretty sure i’d fixed his bad latch but wanted to make sure I was doing things right. By this time, the lactation consultant said the damage was some of the worst she’d seen and we tried using a nipple shield, but Chase didn’t like it and wasn’t sucking hard enough to get much out when we used it. She sent over a recommendation for Jack Newman’s Nipple Ointment to my OB so I could get the prescription and help them heal.

At this point I wasn’t feeling well at all and Wednesday afternoon (one week after he was born), I took a nap and woke up with a fever of 102 degrees. I was pretty sure I had mastitis, an infection caused by plugged milk ducts. It was too late in the day to go to my OB so I went to urgent care.  Due to a drug allergy I have, I was given a z pack instead of the typical drug they treat mastitis with. The next week or so was a blur. I remember crying in the shower because I was so miserable. I had a high fever for several days and had to pump because my nipples still hurt too much to nurse. My supply was low from the beginning and got even lower since I was feverish and had no appetite. I resorted to eating lots of oreos, snack crackers and m&ms just to try to get the calories I needed.

IMG_8699

Week 2: A few days after I started the zpack I started having symptoms of yeast. I was giving medicine to treat that and luckily baby didn’t get thrush. Two days after I finished the zpack, my fever came back. I went back to the OB and they started me on Cipro, another antibiotic, for 7 days to make sure the mastitis was cleared up. I switched back to nursing as soon as my nipples healed enough to make it less painful.

Week 3: I still wasn’t feeling well at all. I spent almost all of my time on the couch. I continued to nurse Chase but we also continued to supplement with formula. I finished the Cipro the day before Thanksgiving.

IMG_9246

Week 4: The Friday after Thanksgiving, my fever came back again. It was lower grade- 99.5- but of course it came back after hours. I called the OB on call for the weekend and she prescribed me Keflex, the antibiotic I probably should have gotten in the first place. It’s partially reactive with a drug I’m allergic to, but since my reaction isn’t super severe, she said it was worth a try. At this point, the lump where the mastitis infection was originally flared up again on one breast and I’d developed a super painful lump on the other breast as well. I went back to the OB yet again, where I was told I had plugged ducts and I need to try to unplug them. I tried everything- including standing in the shower and letting hot water run over it while pressing and pushing as hard as I could from the outer edge, over the lump and towards the center of the breast. It’s one of the most painful things I’ve ever done and I did it on both breasts 4 days in a row, while crying from the pain. Each day I was able to get milk to express, but I was never sure if I was unplugging them or if I was expressing another duct in the same area. The lumps didn’t get any better and I was referred to a breast specialist.

IMG_9481

Week 5: I went to OB for my post-partum checkup on Tuesday. Everything looked good except the problems I was already having. The OB helped me get in sooner with the specialist and she determined that I had two abscesses that needed to be drained. She numbed the area and then used a needle and syringe to remove a bunch of pus from each one. It helped a little bit with the pain initially. Abscesses are one of the most serious breastfeeding problems that can happen to a woman who gets mastitis- lucky me. Before I left the specialist, I made an appointment to come back Friday and get them rechecked.

It’s not uncommon for them to refill, which mine did. In that case, you have to get them surgically drained. I had to move up my appointment to Thursday because one hurt so bad I couldn’t sleep. I got it drained again and after they cultured it, found out it contained non-resistant staph. The two antibiotics it was most sensitive to are the same ones I’m allergic to,  so I was put back on Keflex and given pain meds. I was told that if the antibiotics didn’t work this time i’d likely have to stay at the hospital a day or two to get IV antibiotics. The pain got worse and worse, and since this was the second time it had been drained, I had a bit of a breakdown Thursday night because it still hurt so bad. I started pumping to give my boobs a break… plus baby kept jostling and hitting the infected area which was super painful.

IMG_9509

Friday I woke up feeling terrible. The infected area was red hot, I had body aches and chills and felt like I had a fever, but I didn’t. I even broke down and took Percocet that they had prescribed me. I have a pretty high pain tolerance and really don’t like taking meds so this was a pretty big deal. That afternoon I went back to the specialist. Hubby came along to this appointment, because he was already worried and I hadn’t been improving. We talked through our options with the doc, which included either going to the hospital or having her make a 1 inch incision and try to drain out as much of the infection as possible. Hubby had a dental procedure done that morning that involved grafting some skin from the roof of his mouth and attaching it to his receding gum line, so he was miserable as well, and I wanted to try to avoid going to the hospital. She said the incision would likely be the quickest way to start feeling better anyway, so we decided to try the incision to drain it.

She numbed me up, made the cut and started draining…and draining…and draining. SO much nasty stuff came out. Hubby (with Chase in his arms) watched and said that it was several ounces at least. The doctor just kept saying she couldn’t believe how much was coming out and told us it was probably about the size of a lemon.. I left with instructions to care for the incision which involved removing the “packing” (a gauze like string) it was packed with, pressing and squeezing around the incision to get more pus out, pouring hydrogen peroxide in it and then re-packing the incision each day for the next three days. I was terrified about how much that would hurt. The doctor told us there was still a chance i’d need the IV antibiotics, but that she felt good that so much stuff came out when she made the cut. She would have been more worried if she’d cut and very little had come out.

IMG_9547

Saturday morning  I woke up, took some pain killers, gave them an hour or so to kick in and then we tended to the incision. Hubby pulled out the packing, I took a shower, squeezed more junk out, poured hydrogen peroxide in it and then hubby carefully packed it again (oh the joys of marriage!) The point of the packing is to keep it from closing up too soon so it can keep draining. It was painful, but manageable and besides the pain of the incision I felt a lot better than I had the previous day. We spent the day laying around not doing much of anything.

Sunday afternoon I started to feel crappy again and by evening my fever was back. I called the breast specialist who told me I needed to go to the hospital for iv antibiotics but that I could wait until morning unless my fever spiked. We didn’t know what to do with the baby, so I called my parents for help, and bless their hearts, they drove through the night to get here as fast as possible.

Monday morning I called my OB’s office to try to get set up to direct admit me to the hospital and they had me come in to their office. After seeing me, they decided to only increase the dose of antibiotics I was on instead of sending me to the hospital because things seemed to be healing.

IMG_9643

Tuesday morning I felt even worse but I toughed it out because I had an appointment with the specialist that afternoon. My mom drove me and the doctor checked the abscess and ended up draining it again. By this point, we decided enough was enough and I needed to go to the hospital. So we headed home, I packed a bag, hubby left work, and came home to drive me to the hospital. The doctor told me I’d probably be there 24 hours, no more than 48. After I was admitted, they started the IV. I ended up having an allergic reaction to vancomycin, the first drug they tried, so they stopped the meds while the doctors consulted about what to try next.

Week 6: Wednesday morning I talked to the infectious disease doctor. After getting up to speed on everything that had been going on, he decided on the next iv med to try – Daptomycin. I got one dose around lunchtime and then it was basically a waiting game to see if it worked. Meanwhile, I had to keep draining the incision (pus continued to come out) and pump every few hours. They also cultured the incision to check for bacteria. Hubby was wonderful and came to keep me company before work, at lunch and every night after work.

IMG_9669

Thursday morning I was given another dose of the antibiotics and I squeezed more junk out. The ID doctor came back to check on me. He told me nothing was growing in the culture yet, which was good. In addition, the hard area of the abscess around the incision had decreased in size from the previous day, so the antibiotics seemed to be working. He told me that I could probably go home, but that I would need a PICC (peripherally inserted central catheter) line so that I could continue IV meds at home over the weekend. OR, I could stay one more night, get another dose via IV in the morning and then potentially go home and switch to pill antibiotics. Even though I really wanted to go home, I opted to stay one more night and see how things looked in the morning.

Friday morning I saw my OB at the hospital and she ordered an ultrasound to make sure there were no more pockets of fluid that needed to be drained. I saw the infectious disease doctor who told me there was no chance I was going home on pill antibiotics, but that I could go home with a PICC line.

Squish had his six week doctor’s appointment and I was heartbroken that I couldn’t be there, especially since he was getting shots…so hubby face-timed me in once he got to the office.

IMG_9686

Technology is awesome. Baby is growing like a champ. He’s in the 98th percentile for height – 24 1/4 inches and the 95th percentile for weight – 13 pounds, 6 ounces. The rest of the day seemed to take forever but they finally came and put the PICC line in that afternoon.

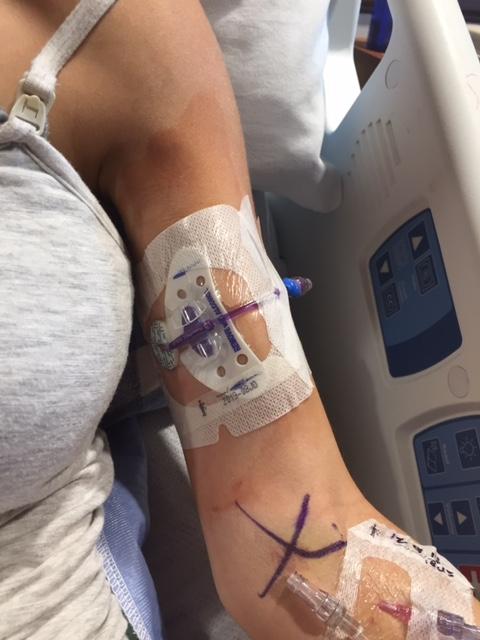
IMG_9697

The top one is the PICC line that stays in at home and the bottom one is the one they used in the hospital and took out that afternoon. They didn’t take me to get my ultrasound until around 4:00pm and then by the time the results were read, the case management workers were gone for the day so I couldn’t be discharged. I needed to be set up with a home health nurse who could give us all the supplies we needed and show us how to administer the meds. I had a little breakdown and cried for a while because I missed my baby so badly and then started counting the hours until I could get out of there. We face-timed with squish to make me feel better.

IMG_9693

Saturday, after a few hold-ups, we were FINALLY able to go home. They weren’t able to verify our insurance on a weekend, so we had to agree to pay for a day of home healthcare if it ended up not being covered. They also found another abscess on the ultrasound on Friday that needed to be drained, but luckily they were able to do it with a needle before we left and didn’t have to make another incision. It was SO good to be home.

Sunday I still wasn’t feeling well. Luckily my parents stuck around for a few more days so I was able to sleep in and take a 4 hour nap. We also had the home health nurse come out and teach hubby how to give the IV meds.

Monday I woke up feeling a TINY bit better. I saw my OB again and she said she thought that the recent draining of the second abscess would help alot and I should be feeling a little better each day. Tuesday I improved a little more. Wednesday I went back to the breast specialist who told me I could stop packing the incision so it could heal faster.

So here we are in week 7. I finally feel like I’m on the mend. I’m feeling a tiny bit better each day but still far from good. I lost all my pregnancy weight by the end of the first week after baby was born but over the next six weeks, I lost 15 more pounds because I felt so sick and miserable and had no appetite…so now I’m trying to regain strength and gain some weight back. Hubby has to give me my IV antibiotics via my PICC line for another 2 weeks before I can get it removed.

IMG_9515

————

So what about breastfeeding? When I was admitted to the hospital, I made the decision to stop. I was so tired of being sick, feeling crappy, having a fever and dreading every feeding. So after much deliberation, lots of tears and some long talks with doctors, hubby and close friends and family,  I made my decision.

The point of me telling you all of this isn’t to make you feel bad for me. It’s to help you realize that breastfeeding is really hard. Sure there are many women who are able to breastfeed without major issues- the baby latches from the get go, it’s not painful, they have few problems…they just enjoy bonding with their baby…and are able to breastfeed for as long as they desire. And I think that’s wonderful for them. I thought I would BE one of them. There are also women who have significant struggles and still stick it out. More power to them- that’s great as well.

There are also women like me who have significant struggles and decide to stop.

The thing is, we don’t often hear the stories of women who struggle. Before I got pregnant I felt like all I really knew were women who breastfed their babies. I was SHOCKED when I started talking to some of my close friends and realized how many of them had struggled as well. That’s the reason I’m sharing my story. So that if you’re reading this and struggling, you know that you’re not alone.  There are tons of women out there who struggled, are struggling or will struggle as well. And if breastfeeding doesn’t work out for you, it doesn’t make you a bad mom. It doesn’t make you any less of a woman. It’s ok.

I’m sure there are people out there who will judge me. Who will tell me I could have done something differently or that I shouldn’t have given up. But that’s ok. I’m proud of myself for sticking with it as long as I did, and I’d much rather feed with formula and enjoy time with my baby then continue to breastfeed and be sick and miserable, just because society makes me feel like I should. At a certain point, I decided that being healthy for my baby is far more important than where his calories are coming from.

I still struggle a little with the fact that I’m no longer breastfeeding. It makes me sad because I believe it is such a wonderful, natural thing. But, as a mom, we always want to do what’s best for our baby and in my case that means forgoing breastfeeding so that I can be happy and healthy and the best mom possible.

And there’s nothing wrong with that.

–Lindsay–

PS. I appreciate that many people have strong opinions about this topic and I’m in no way saying my decision is right for everyone, just that it’s right for me.  I’m all for respectful discussion, but please keep the rude/mean/hateful comments to yourself.

Filed Under: Kids

Cassoulet from Eating Well Magazine

December 18, 2014 by Lindsay 13 Comments

Hi friends!

Quick post today! I know as a food blogger I usually post my own recipes…but sometimes, when things get busy, it’s nice to rely on other people. And by people I mean cookbooks, magazines, online recipe sites and blogs. You know, the ones full of recipes that have already been tested and approved?

I have a huge collection of cookbooks and cooking magazines…and we all know I read a lot of blogs….but I’m pretty terrible about actually trying out all the recipes I collect. My mom, on the other hand, is great at it. Sure she has her favorite recipes that she makes time and time again, but she also reads a lot of cookings magazines and she actually tries out the recipes that sound good!

While she was here helping us out with baby while I was in the hospital, she did all the cooking. And before she left earlier this week, she cooked a couple of meals to feed us for the rest of the week.

IMG_9769

We tried one of the meals the night she left and it was a huge hit with both hubby and me. I asked her where she got the recipe and she pointed me to Eating Well. I decided it might be fun to challenge myself to start cooking some of the meals I find and occasionally share a quick review with you guys!

So we’ll start with this one, even though I didn’t make it!

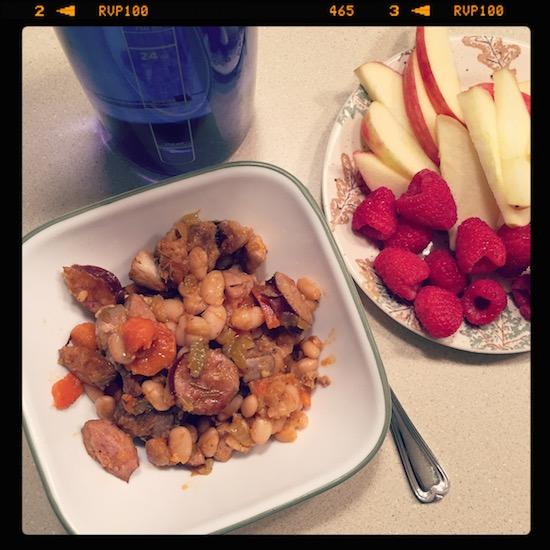
It was called a Cassoulet. Or, as hubby affectionately dubbed it- a meat pot.

The term meat pot is pretty accurate actually. It’s made with 3 different meats- chicken, pork and kielbasa sausage, plus beans and veggies. Hubby and I loved having a variety of meats all in one dish. I said if I were to make it again, I’d leave out the chicken. Hubby disagreed- saying the chicken was like a nice surprise after a few bites of sausage. We both agreed the pork was the best.

You cook it in a dutch oven and put it in the oven for a couple of hours so the flavors really develop. It’d be a great meal to make and let cook while you’re getting things done around the house on a weekend. Overall, the dish has great flavor and it makes a big batch so we were able to enjoy the leftovers for a couple of days. My mom had some extra meat, so we put it in the freezer and I can use it to make something else in the future OR repeat this recipe and already have a good head start!

If you’re interested in checking out the recipe you can find it here:

Eating Well: Cassoulet 

Enjoy!
–Lindsay–

Filed Under: Uncategorized

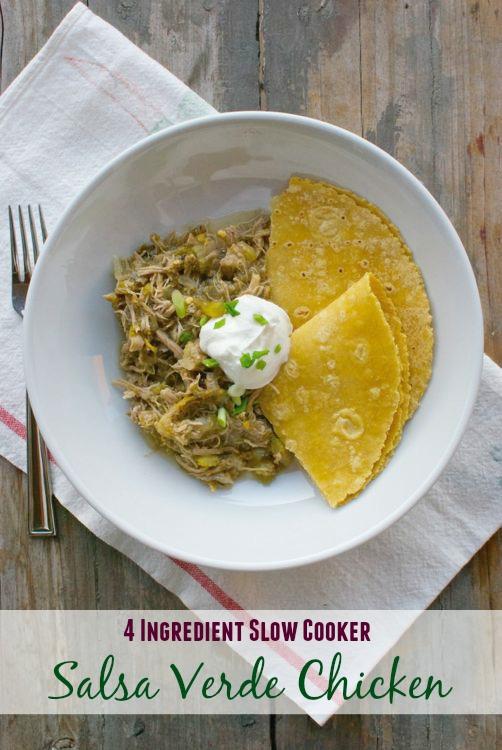
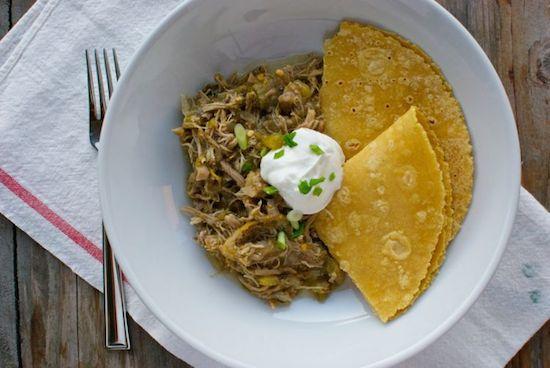
4 Ingredient Slow Cooker Salsa Verde Chicken

December 17, 2014 by Lindsay 20 Comments

This four ingredient Slow Cooker Salsa Verde Chicken gets its flavor from the salsa verde, comes together quickly and makes a great weeknight dinner. 

Hi Friends –

Today I’m introducing you to another bloggy friend of mine! Amelia is a mom-of-2 who blogs over at Eating Made Easy. She shares delicious, simple recipes and we share a similar philosophy on food and life. As a fellow mom, she knows how crazy newborn life is and she offered to share one of her favorite quick & easy recipes with you guys. I can’t wait to try it myself! Doesn’t get any better than 4 ingredients 🙂

————

This Slow Cooker Salsa Verde Chicken requires just four ingredients. Throw everything in the crockpot before work and dinner will be waiting when you come home!

There was a time, I’m embarrassed to admit, when I wondered why anyone even owned a slow cooker. “Cooking is fun!” I naively said to myself, “and making soups and braises in a pot on the stove is so easy!” Well friends, it’s payback time.

Here I am now, a working mom of two, who despite being a nutritionist and food blogger, can barely get dinner on the table most nights.

photo

If it weren’t for make-ahead meals, my Dutch oven, and the occasional box of macaroni & cheese, we’d probably never eat at home. Luckily, I have kind blogger friends like Lindsay, who forgive me for my past foolishness and allow me to share one of my favorite slow-cooking recipes with you!

Busy moms and overwhelmed home cooks, meet my latest love:

Salsa Verde Braised Chicken

Just 4 ingredients + a couple hours on a low burner or in the slow cooker and you’ve got a dinner. You can serve this over rice or another grain, or with corn tortillas as a make-your-own chicken taco bar. Both ways are delicious!

This Slow Cooker Salsa Verde Chicken requires just four ingredients. Throw everything in the crockpot before work and dinner will be waiting when you come home!

Happy (slow) cooking!

Print

4 Ingredient Slow Cooker Salsa Verde Chicken

slow cooker salsa verde chicken
Print Recipe

5 Stars 4 Stars 3 Stars 2 Stars 1 Star

No reviews

This Slow Cooker Salsa Verde Chicken requires just four ingredients. Throw everything in the crockpot before work and dinner will be waiting when you come home!

  • Yield: serves 6-8 1x

Ingredients

Scale
  • 1 medium onion, finely chopped
  • 2.5 lbs boneless skinless chicken thighs
  • 1 28 oz jar salsa verde (I like the Whole Foods brand)
  • 2 cups frozen corn kernels
  • Tortillas or cooked rice, for serving
  • Other optional toppings: shredded lettuce, Greek yogurt or sour cream, avocado, shredded cheese, black beans, etc.

Instructions

  1. Cooking Option 1:
  2. Add 1 Tbsp oil to a large Dutch oven and heat over medium-low heat for 3 minutes.
  3. Add chicken and brown for 3-4 minutes on each side (you may need to do this in two batches to avoid overcrowding the pot). Remove chicken to a plate and set aside.
  4. Add chopped onion and cook until it begins to soften.
  5. Add chicken back to the pot along with the salsa and corn and cook over low heat for about two hours.
  6. Remove chicken from pot and pull apart with a fork, then add back to the pot to reincorporate with the sauce.
  7. Serve with tortillas or rice, plus dollops of Greek yogurt and/or guacamole.
  8. Cooking Option 2:
  9. Place first four ingredients in a slow cooker and cook on low for 4-5 hours.
  10. Use a fork to shred the chicken, then mix chicken back in with the sauce. Serve as mentioned above.
  11. **Note: This chicken dish can be frozen and enjoyed up to 3 months later**

Did you make this recipe?

Tag @theleangreenbean on Instagram

———–

Huge thanks to Amelia for stopping by to share this delicious recipe! Be sure to check out her site for more great recipes!

[Tweet “4 Ingredient Slow Cooker Salsa Verde Chicken from @eatingmadeeasy and @leangrnbeanblog!”]

Enjoy!
–Lindsay–

Filed Under: Dinner, Slow Cooker Tagged With: Chicken, Corn, Onion, Salsa Verde

Butternut and Arugula Salad

December 12, 2014 by Lindsay 19 Comments

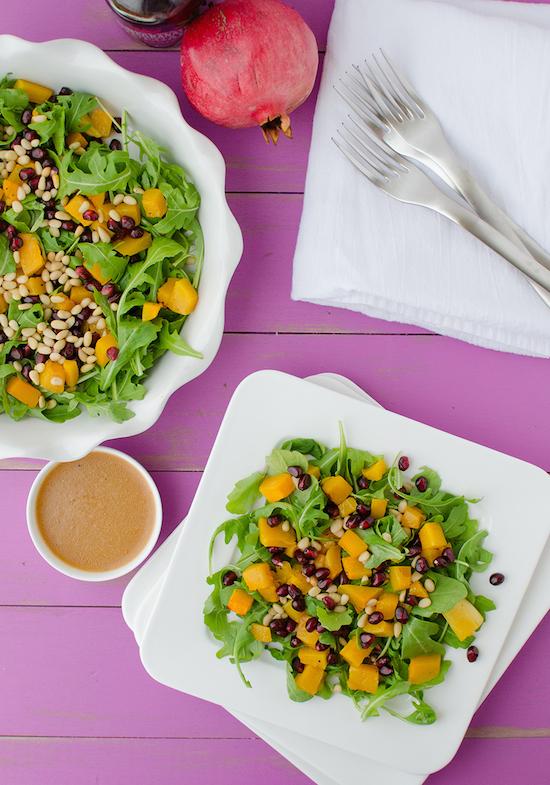
This Butternut Squash Salad is full of flavor and is also an easy way to increase your daily fiber intake thanks to the vegetables and beans.

Hi Friends!

First of all, thanks for all the sweet well wishes over social media while I’m in the hospital! It means the world to me and helps so much to know that so many people are thinking positive thoughts for you! For those of you that don’t know, I’ve been in the hospital since Tuesday getting iv antibiotics for a breast abscess. I’m hoping to be heading home today if all goes well!

Anyways, as usual I have wonderful friends willing to help me out with the blog while I’m dealing with life! Today it’s time to introduce you to another RD friend of mine. Alex is the amazing blogger behind the blog Delish Knowledge. She takes gorgeous photos and for those of you looking for more meatless meal ideas, you’ll definitely want to check out her blog! She has so many great vegetarian recipes! Today she’s sharing a yummy fall salad with you guys.

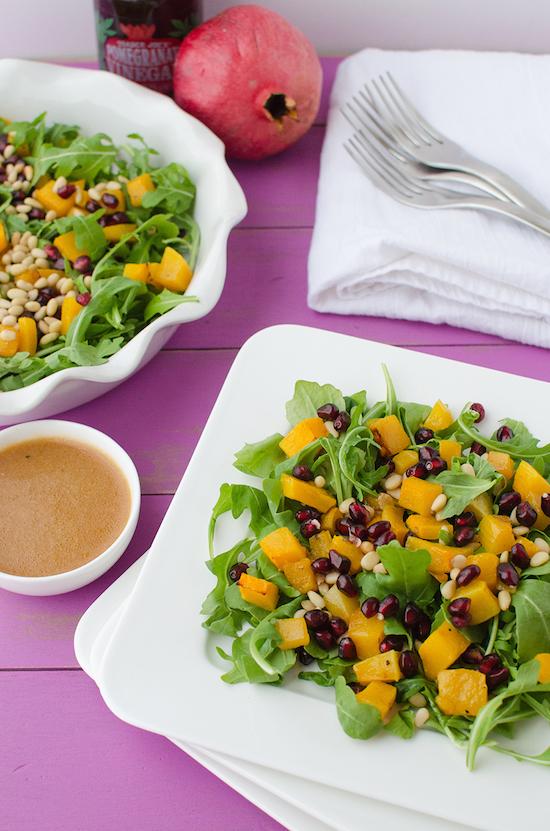
This Butternut Squash Salad is full of flavor and is also an easy way to increase your daily fiber intake thanks to the vegetables and beans.

————

Hi! I’m Alex over at Delish Knowledge and am so excited to be guest posting at the Lean Green Bean today! I’ve been a fan of Lindsay’s work for years; she is such an inspiration for leading a healthy and fit lifestyle. Seeing Lindsay’s instagramed Cross-fit workouts at 39 weeks pregnant was exactly the push I needed some days to get my own workout on.

At Delish Knowledge, I focus on healthy, whole food recipes that don’t require a lot of cooking experience. As a Registered Dietitian, I find that most of my clients want to eat healthy but various excuses stand in their way. Time limitations and inability to cook usually top the list. I get it. Days that fly by too quickly and endless to-do lists can often trump even the best of intentions.

That’s why I created my blog. It’s a place to show healthy recipes that taste good and don’t require an advanced cooking skill set. I also like to focus on un-dieting, taking the emphasis away from calories and fat grams, and putting it back on food satisfaction and nourishment. I find that when my clients restrict their caloric intake by reducing portion size or skipping snacks, they do okay for a while… until they don’t. Until they overeat at lunch one day and find that they can’t stop. Or they give up, because counting calories is too tedious and clients would rather feel liberated with food, not burdened. I understand all of these normal feelings associated with dieting and the best part is, there’s an easier way.

This Butternut Squash Salad is full of flavor and is also an easy way to increase your daily fiber intake thanks to the vegetables and beans.

Enter the principle of nutrient dense eating. Or, as I like to call it, “the biggest bang for your calorie buck”. Nutrient density examines the quantity of nutrients you receive from a food given the number of calories it contains. It’s a simple way to balance nutrients with calories. Simply stated, we should emphasize foods in our diet that are rich in vitamins, minerals, phytochemicals and antioxidants. Examples include fresh fruit, vegetables, and whole grains. The best part is that almost all foods can fit into this plan. Craving a bowl of fettuccini? Me too! Add in some nutrient dense vegetables and a side salad. You still get to enjoy the flavor, texture, and comfort of pasta while filling up on fiber & water-rich vegetables.

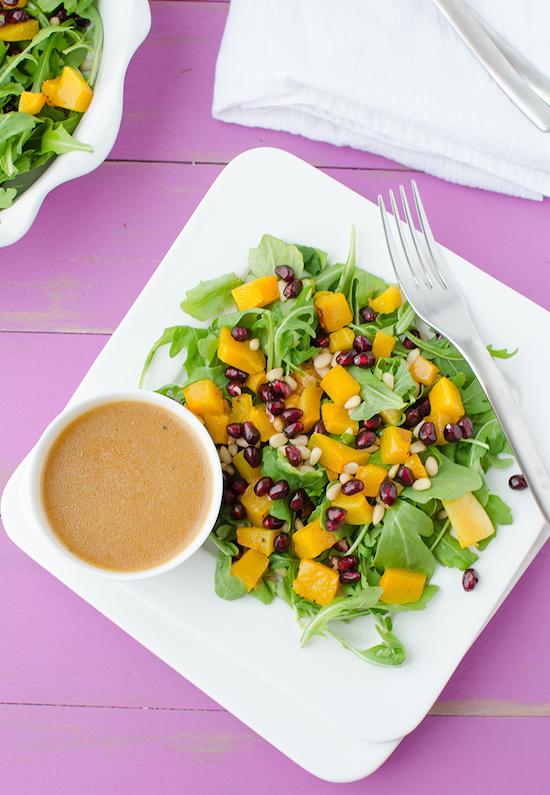
This Butternut and Arugula salad is the perfect example of a nutrient-dense meal. Just look at all those colors! Creamy vitamin A-packed butternut squash is roasted to perfection. To cut down on prep time, you can purchase butternut already peeled and cubed. While it tends to be a little more expensive than the whole squash, sometimes the extra dollar or two is worth it if it saves you from unwanted stress in the kitchen.

Arugula is hands down my favorite winter salad ingredient. I cannot get enough of its peppery bite, and its heartiness prevents it from getting lost in the sea of other winter flavors. I used pomegranate seeds in this salad but if you don’t want to go through the prep work or cannot find the arils on their own, you can sub in dried cranberries or cherries.

This Butternut Squash Salad is full of flavor and is also an easy way to increase your daily fiber intake thanks to the vegetables and beans.

To make this lunch-time ready, I tend to prep all the ingredients ahead of time (on Sunday, right Lindsay?) to bring with me to work in small containers. Then, when I’m ready to eat, I pile them all in a large bowl, dress and toss! If I need a bit more, I will add in some additional protein. Canned white beans are an easy, no-fuss protein source that tastes great in this salad.

Print

Butternut and Arugula Salad

butternutsalad3
Print Recipe

5 Stars 4 Stars 3 Stars 2 Stars 1 Star

No reviews

This Butternut Squash Salad is full of flavor and is also an easy way to increase your daily fiber intake thanks to the vegetables and beans.

  • Yield: serves 4

Ingredients

Scale
  • 2 1/2 cups cubed butternut squash
  • 1 tsp. extra virgin olive oil
  • 8 cups arugula
  • 1 pomegranate, seeded
  • 1/3 cup pine nuts
  • 1/4 cup pomegranate vinegar
  • 1/2 tsp. maple syrup
  • 1 small garlic clove, minced
  • 3/4 cup extra virgin olive oil

Instructions

  1. Preheat oven to 400 degrees F. Toss cubed butternut squash with 1 tsp. olive oil and pinch of salt/pepper. Roast butternut squash for 40 minutes until soft and golden. Set aside.
  2. Heat a skillet over medium heat. Add the pine nuts and tossing often, toast until golden brown and fragrant, about 3-4 minutes.
  3. Toss together the arugula, pomegranate seeds, roasted butternut squash and pine nuts.
  4. Whisk together the pomegranate vinegar, maple syrup, garlic clove and pinch salt/pepper. Slowly whisk in the olive oil until an emulsion forms.
  5. To serve, divide salad into 4 bowls. Drizzle 1/3 cup of dressing and toss well. Use remaining dressing or save for later. Will keep for up to 1 week in the fridge.

Did you make this recipe?

Tag @theleangreenbean on Instagram


Serves 4.

[Tweet “Check out this gorgeous, hearty salad from @delishknowledge and @leangrnbeanblog!”]

Enjoy!
–Lindsay–


Filed Under: Appetizer, Soup & Salad Tagged With: Maple Syrup, Oil, Squash

Blue Apron Meals

December 11, 2014 by Lindsay 23 Comments

This post is sponsored by Blue Apron. I was compensated for my time. All thoughts and opinions are my own. 

Hi Friends!

You know when something happens in life and the timing is just so perfect that you can’t help but feel a huge sense of relief? That’s exactly how I felt when I opened an email from Blue Apron a few weeks ago. I was just home from the hospital with a new baby and getting dinner on the table was a bit of a struggle. Getting to the grocery store was even more of a challenge. So when Blue Apron offered to let me test out their meal delivery service, I jumped at the chance!

blue apron

In case you’re unfamiliar, Blue Apron basically take meal planning to the next level. They deliver fresh ingredients right to your door (in a refrigerated box) so you can skip your weekly trip to the grocery store, and all the ingredients are pre-measured for you in exactly the right proportions- which makes preparation a cinch! They ship to over 80% of the country  and all meals can be made in under 40 minutes.  When you sign up, you get three meals per week- for two or four people for the price of $9.99 per person with free shipping and there’s no commitment – you can skip or cancel the service at any time.

I was excited when I saw the menu that I’d be getting to test out. All three meals sounded delicious.

Here’s what I made:

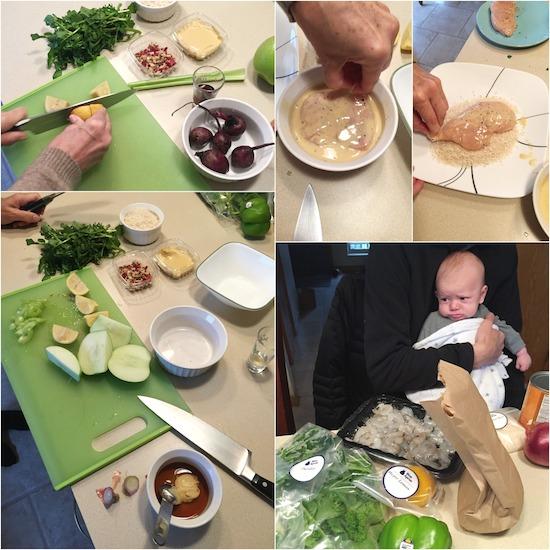
Chicken Schnitzel with Watercress, Apple & Beet Salad
{
click here for the recipe}

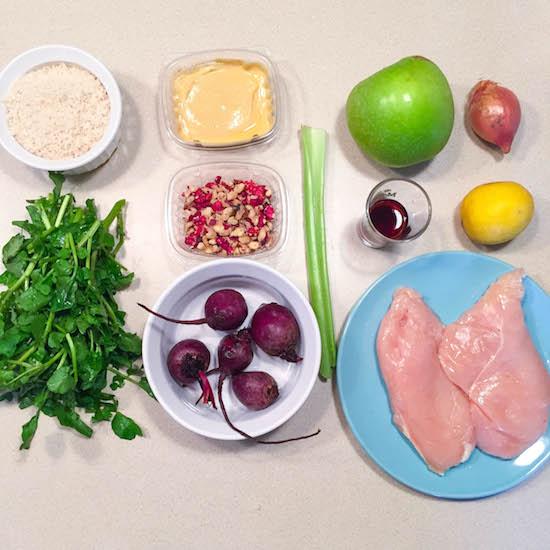
chicken ingredients

One of the things I liked most about Blue Apron was how it exposed me to new ingredients. I eat a lot of chicken prepped a lot of different ways, but schnitzel is not something I’ve made before! I’ve also never tried watercress, and although I like beets, I rarely cook with them.

chicken prep

I loved having the ingredients pre-measured for me so all I had to do was wash, chop and mix. Baby was moderately unimpressed with my cooking efforts.

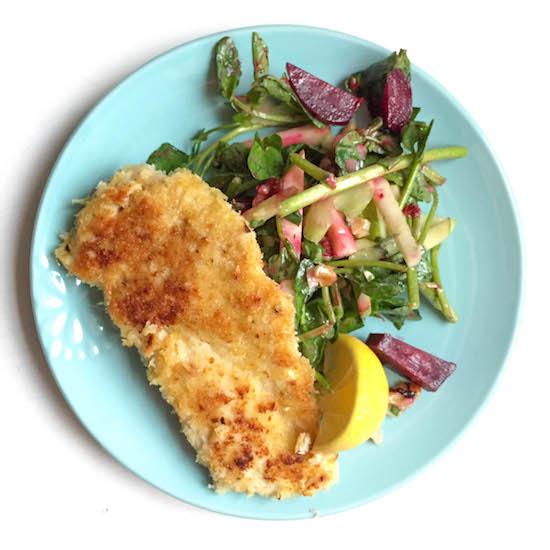
chicken final

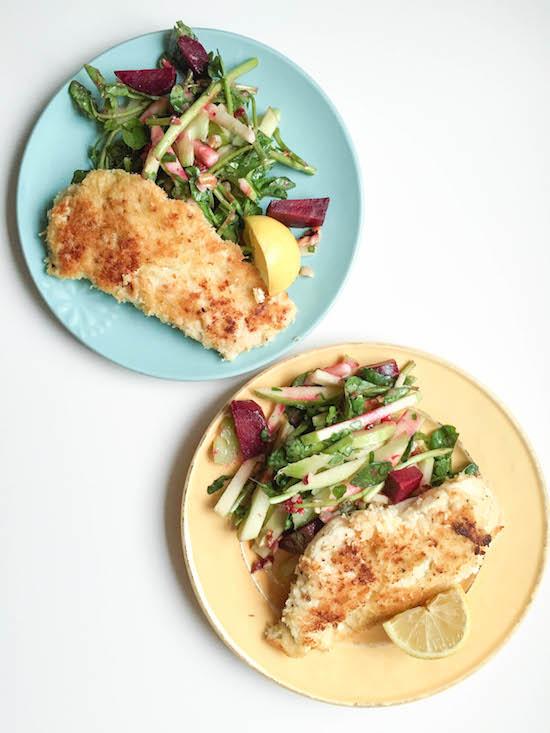
The end result was great! The chicken was flavorful and the salad was such a unique combination of flavors! I loved the apples and beets together and the dressing had a nice tang to it!

chicken two (1 of 1)

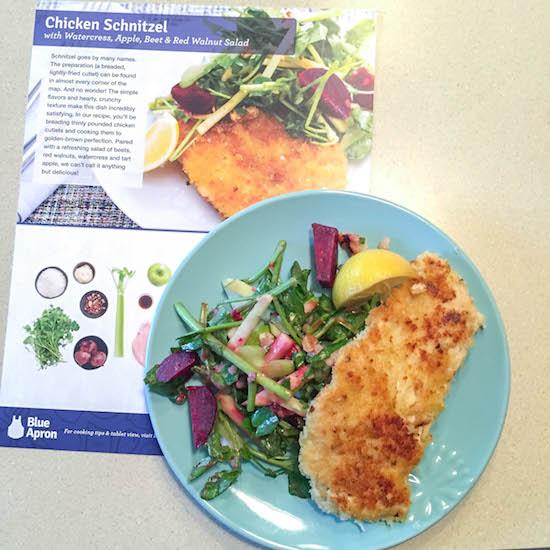
Another highlight- the recipe cards. They came with very clear, easy to follow directions and ingredient lists and a nice description of the dish.

chicken card (1 of 1)

Up next:

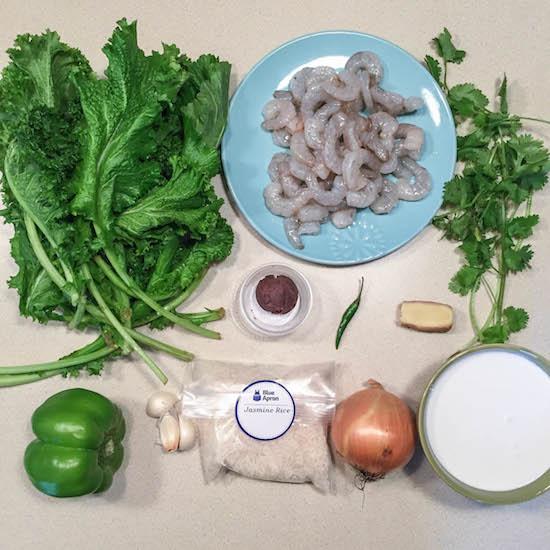
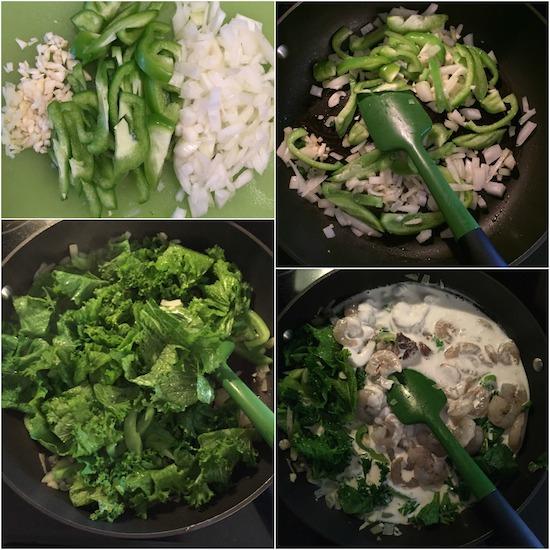
Shrimp & Mustard Green Laing with Jasmine Rice
{
click here for the recipe}

shimp ingredients (1 of 1)

Mustard greens were another new-to-me ingredient!

greens

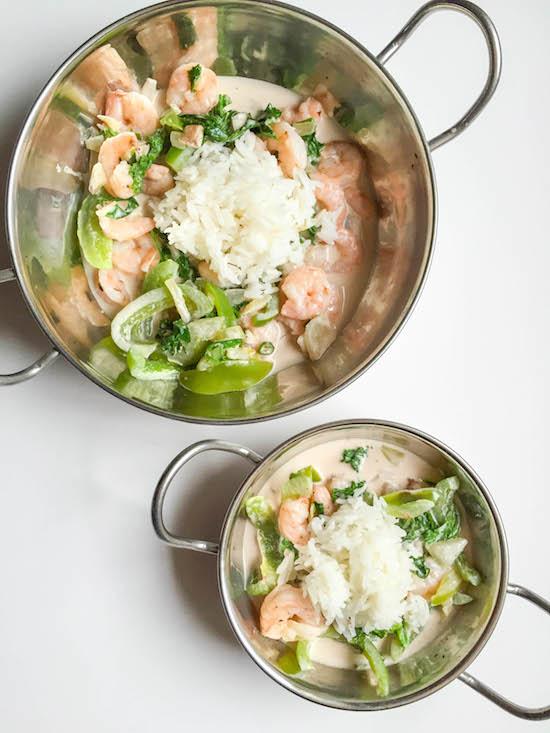
Here’s the final product:

shimp final 1 (1 of 1)

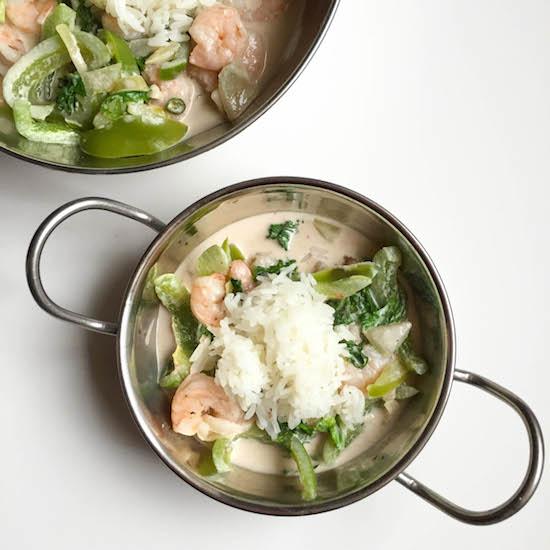
I loved that all their meals had great visual appeal and could be made easily but look super fancy. This meal had great flavor and was a fun change from the typical curry that I usually make.

 shimp final (1 of 1)

And finally:

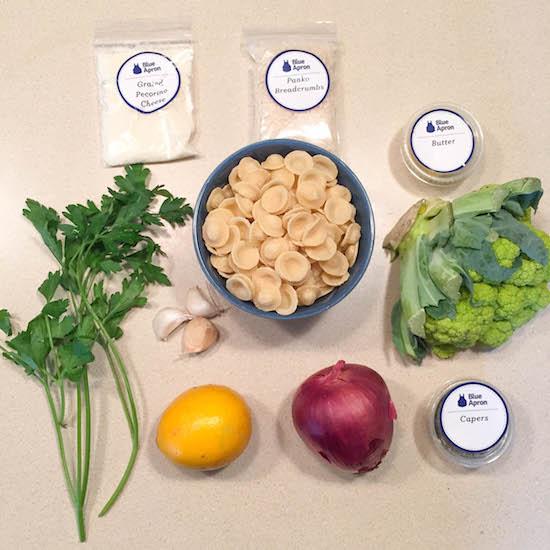
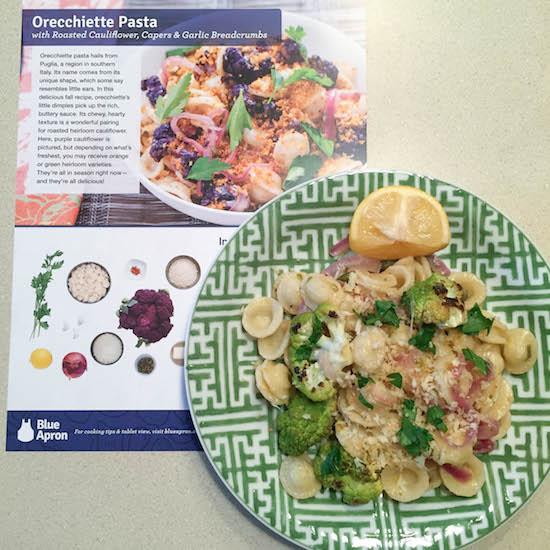
Orecchiette Pasta with Roasted Cauliflower & Capers
{
click here for the recipe}

veg 2 (1 of 1)

I was a little unsure about this meal because I’m not a huge fan of capers…but I am a huge pasta fan.

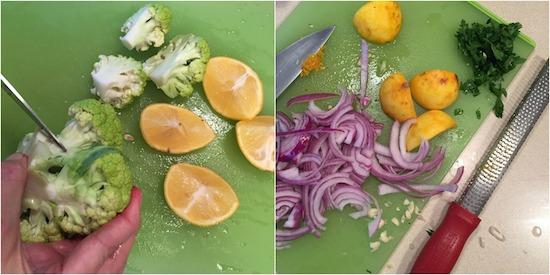
veg

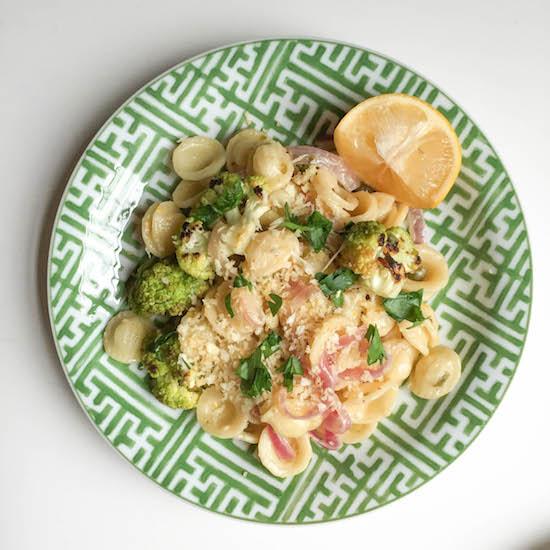
Cauliflower is another veggie I don’t buy often but I really enjoyed it roasted in this dish.

veg (1 of 1)

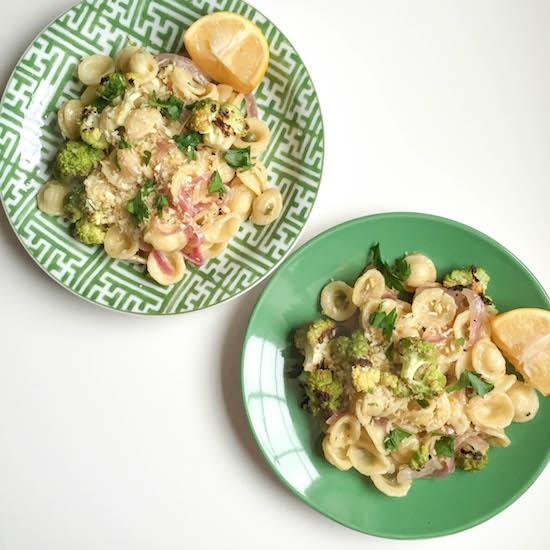
I shared this dish with my dad and he really liked the combination of flavors.

shimp card (1 of 1)

I like fun colored veggies so I was a little bummed they sent green cauliflower instead of the purple variety in the picture on the recipe card…but that didn’t affect the flavor 🙂

veg 1 (1 of 1)

Side note – don’t I just have the cutest kitchen assistant?!

assistant

Anyways… now for the big question- would I use Blue Apron myself?

Yes, but mostly for special occasions.  Here are some situations where I think it would be great:

  • Date night! How fun would it be to use a Blue Apron box for date night- even a couples date night! You could order three 2-person meals and invite another couple over for dinner. All of you could have fun together cooking in the kitchen and there would be enough food for everyone to have a taste of 3 different meals.
  • Treat yourself! Have a particularly busy week coming up? Schedule a Blue Apron order to make dinner time easier at the end of a busy day.
  • Presents! Know a family who has a new baby or is caring for a sick family member? Send them a Blue Apron order to make their lives easier. Or simply treat a friend or family member for a Christmas present!

CLICK HERE for more details about gifting Blue Apron meals.

 —————

So there you have it! Want to check out more Blue Apron Recipes? CLICK HERE.


Enjoy!
–Lindsay–

Filed Under: Sponsored

Brussels Sprouts with Pomegranate Seeds

December 9, 2014 by Lindsay 27 Comments

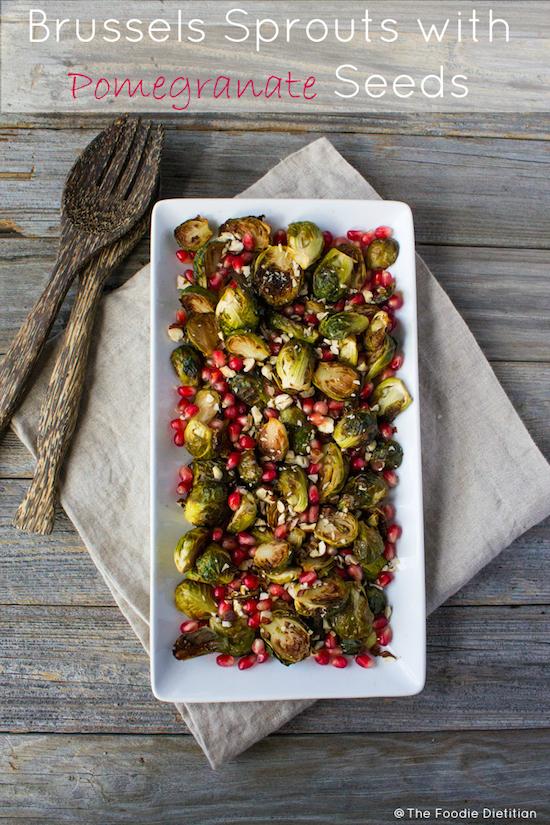
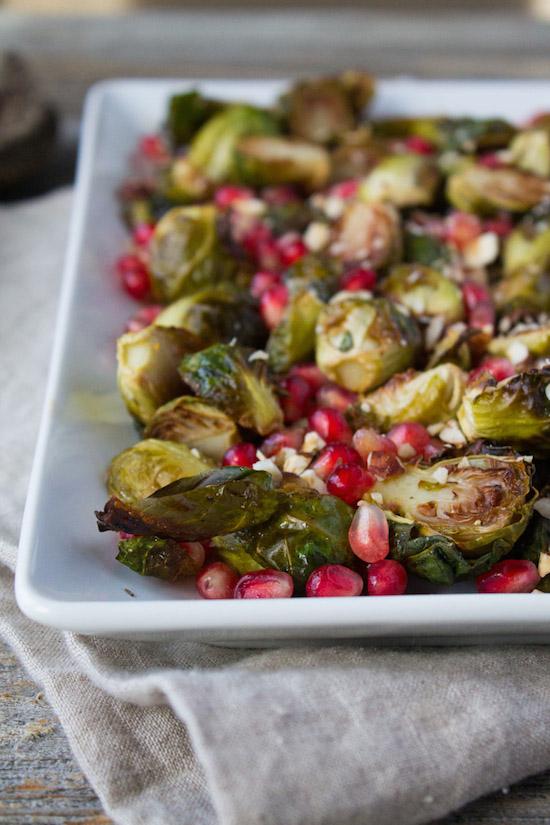
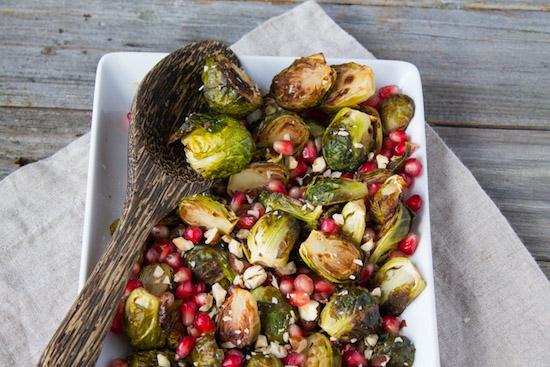
Brussels Sprouts with Pomegranate Seeds make beautiful holiday side dish. Bright red pomegranate seeds make these delicious, crispy caramelized Brussels sprouts pop with festive flair. 

Hi Friends!

Time to introduce you to another lovely RD friend of mine! Kara blogs over at The Foodie Dietitian where she shares delicious recipes and great posts on mindfulness, yoga and more! Check out her blog if  you’re not already familiar with it- she runs her own business and also recently became a yoga instructor! She’s here today to share a quick, delicious recipe with you guys!

————–

Brussels Sprouts with Pomegranate Seeds make beautiful holiday side dish. Bright red pomegranate seeds make these delicious, crispy caramelized Brussels sprouts pop with festive flair.

Hey ya’ll! I’m Kara, a dietitian nutritionist and yoga teacher who believes that the secret to being holistically happy is nourishing the mind, body, and spirit. I blog over at The Foodie Dietitian where I share delicious, seasonal, vegetarian recipes and simple strategies to bring more mindfulness and yoga into your life. I’m so psyched to share a deliciously simple holiday side dish with you today and grateful to my pal Lindsay for letting me hang out over here. J

Is anyone else still at square one for holiday menu planning or is it just me? I mean, helloooooo, did we not just finish planning our Thanksgiving menus? I’m still hanging onto that cranberry sauce in the fridge! It’s just too hard to say goodbye. Plus, I love topping my morning oatmeal with it 🙂

But really, I think we all deserve a little day of R&R to take a breather, reset, and recharge to move onto the next holiday. So go, get your R&R on. Do a little deep breathing, maybe some meditation, take a yoga class, go for a walk in nature, practice gratitude journaling. Whatever it takes. #treatyoself

Ok. Wonderful. Now that you’ve recharged the old batteries, I’m here to help make your holiday menu planning a wee bit easier. With a side dish that’s so beautiful, your guests will be saying caroling “Martha, who?”

Brussels Sprouts with Pomegranate Seeds make beautiful holiday side dish. Bright red pomegranate seeds make these delicious, crispy caramelized Brussels sprouts pop with festive flair.

Do you like Brussels sprouts? If the answer is no, have you tried roasting them? Many of my nutrition clients come to me saying they hate vegetables, especially Brussels sprouts. Brussels get a bad rep. But the rep is not justified. After a little digging, I find out that my clients are preparing these guys all wrong. They’re boiling them. YUCK! I would hate vegetables too if I could only eat them boiled. But I haven’t eaten a boiled veggie since the 90’s and neither should you. I always recommend to my clients to roast their veggies in the oven (hint: you can roast fruits too!) to bring out a delicious nutty, caramelized flavor. Brussels sprouts are transformed when you roast them. And when they’re all browned and crispy, some (or maybe just me) might even go so far to call these sprouts sexy.

Okay, maybe sexy is a stretch, but these guys are a nutritional powerhouse. I just wrote an article in my latest monthly newsletter about Brassicas – the type of vegetable category that our friends, the Brussels, belong to. Also known as cruciferous vegetables, Brassicas are packed with vitamin C, fiber, and cancer-fighting antioxidants.

Brussels Sprouts with Pomegranate Seeds-2

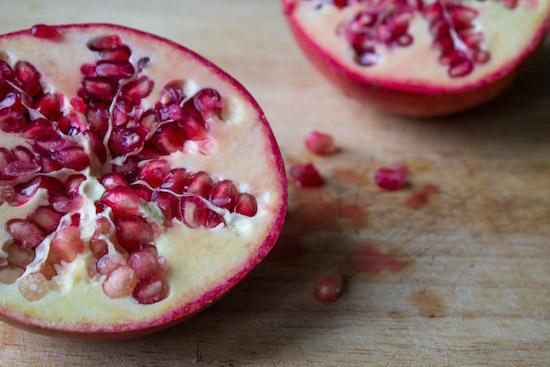
I always try to cook with the seasons, making recipes that highlight the produce that is abundant that time of the year. During winter (and especially during the holidays), I love using pomegranate seeds. Not only are they deliciously juicy and packed with antioxidants, they’re so bright and festive, adding flair to any holiday dinner table.

Brussels Sprouts with Pomegranate Seeds make beautiful holiday side dish. Bright red pomegranate seeds make these delicious, crispy caramelized Brussels sprouts pop with festive flair.

Print

Brussels Sprouts with Pomegranate Seeds

Brussels Sprouts with Pomegranate Seeds FG 8
Print Recipe

5 Stars 4 Stars 3 Stars 2 Stars 1 Star

4 from 1 review

Brussels Sprouts with Pomegranate Seeds make beautiful holiday side dish. Bright red pomegranate seeds make these delicious, crispy caramelized Brussels sprouts pop with festive flair.

  • Yield: serves 6-8 1x

Ingredients

Scale
  • 2 lbs Brussels sprouts, trimmed and halved
  • 1 1/2 tsp apple cider vinegar
  • 1 tbsp maple syrup
  • 1/2 tbsp olive oil
  • 1/8 tsp salt
  • 3/4 of a large pomegranate (about 1 cup pomegranate seeds)
  • 1/2 cup chopped hazelnuts
  • Salt and pepper to taste

Instructions

  1. Directions:
  2. Preheat oven to 375 degrees. Line two baking sheets with parchment paper.
  3. In a medium bowl, add Brussels sprouts and toss with apple cider vinegar, maple syrup, olive oil and salt.
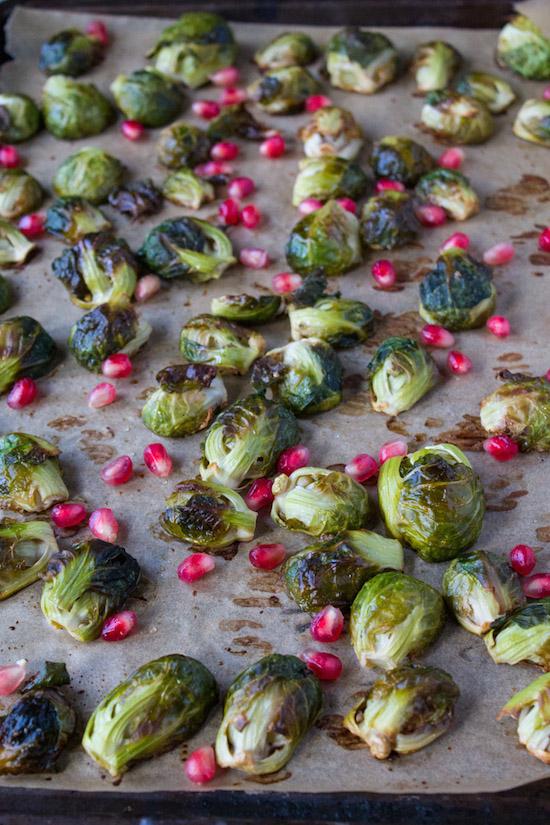
  4. Transfer Brussels sprouts to the baking sheet, in a single layer, cut halves facing down. Bake for 25-30 minutes, or until tender and browned.
  5. In the meantime, toast hazelnuts in small frying pan over low to medium heat, for about 5 minutes or until lightly browned and fragrant.
  6. Toss Brussels sprouts with pomegranate seeds, hazelnuts and season with salt and pepper to taste.

Notes

Note: Pomegranates are easy to de-seed under water. The skins float to the top and the seeds stay at the bottom of the bowl. You can pick off the pieces of skin that floated to the top and then drain out the water using a colander.

Did you make this recipe?

Tag @theleangreenbean on Instagram


Brussels Sprouts with Pomegranate Seeds make beautiful holiday side dish. Bright red pomegranate seeds make these delicious, crispy caramelized Brussels sprouts pop with festive flair.

I hope you all have a nourishing holiday season. For more holiday recipe inspiration, follow my blog.

————-

[Tweet “So festive! Brussels Sprouts with Pomegranate Seeds from @karalydonRD and @leangrnbeanblog!”]

Enjoy!
–Lindsay–

Filed Under: Side Dish Tagged With: Brussels Sprouts, Maple Syrup

Elf4Health Sponsor: Sweaty Betty

December 6, 2014 by Lindsay 6 Comments

This post was sponsored by Sweaty Betty. I was compensated for my time. All thoughts and opinions are my own.

Hi Friends!

It’s time to introduce you to another Elf for Health Sponsor. Elle and I developed this challenge to help people have a healthy holiday season and we wanted to cover all aspects of health- healthy eating, physical health and mental health. Sweaty Betty is one of our sponsors in the fitness area. They’re a fitness apparel company whose purpose is to “inspire women to find empowerment through fitness”. They sell workout, yoga and running gear, plus underwear, swimwear and accessories.

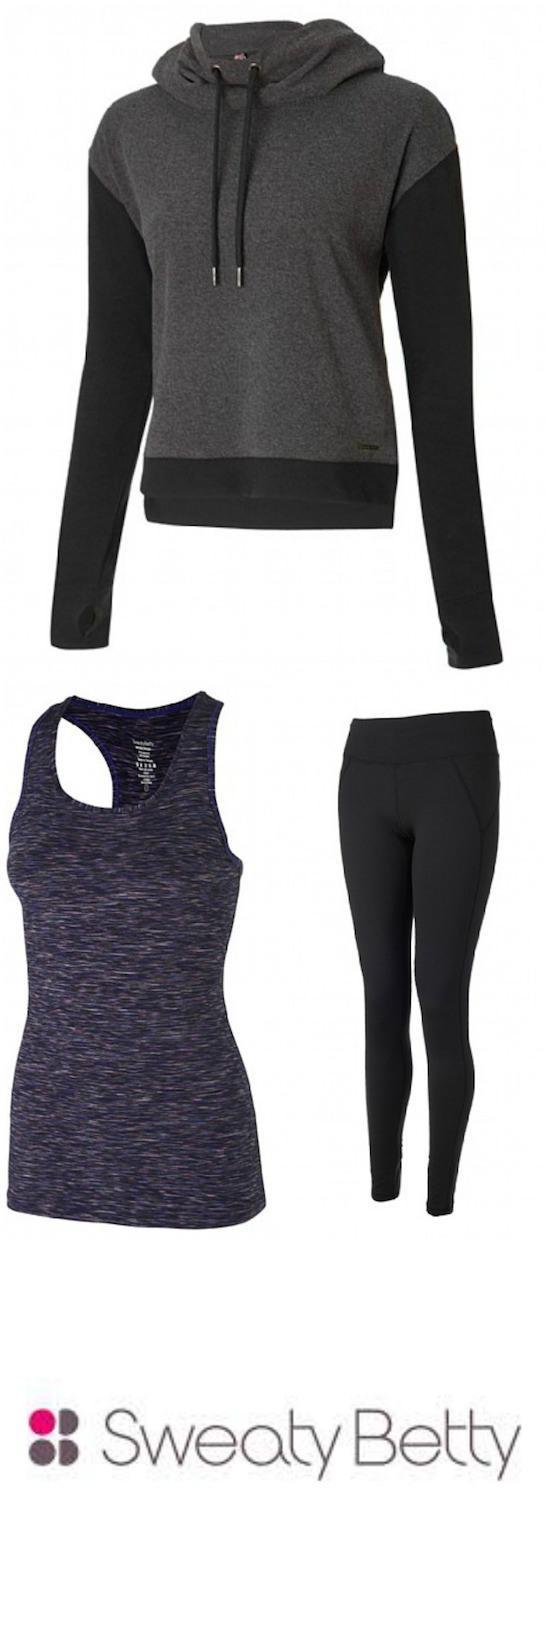
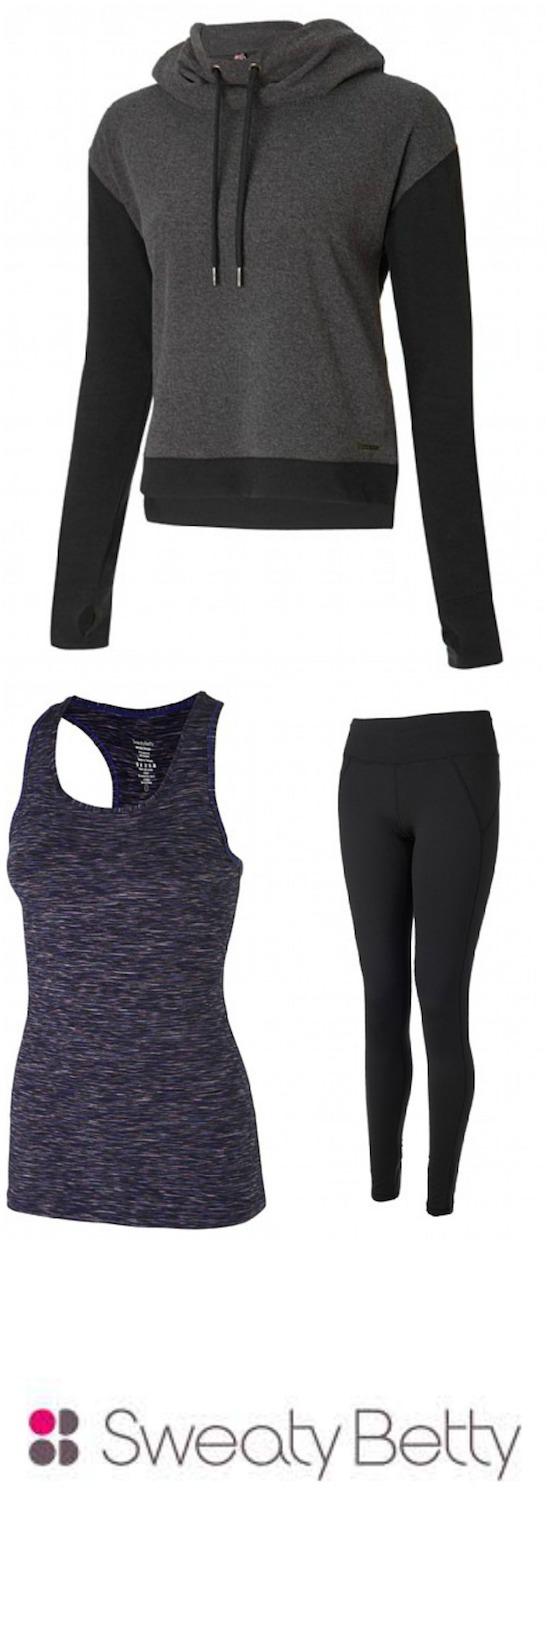
They have SO many cute things on their site that I struggled to pick out an outfit to try. Here’s what I ended up choosing:

sweaty betty


Athlete Workout Vest 

Level Workout Leggings

Escape Luxe Jumper

———–

You guys, I love these clothes! I usually have trouble finding workout leggings that are long enough and fit at the waist so they’re not constantly falling down. These are perfect! Not too tight, but they definitely stay in place when squatting, etc. Plus they have a little zipper pocket in the back!

The tank top is so comfortable. It wicks away sweat AND it’s long enough to fit my torso and stay in place when I’m moving around.

The jumper might be my favorite. It’s SO soft and it has thumbholes – my favorite! I love how it looks like there’s a hood, but it’s just some extra fabric around the neck. It doesn’t get all bunched up under a jacket like a hood. It’s a little bit shorter style which I don’t typically go for, but I really like the way it looks with a tank top underneath!

———-

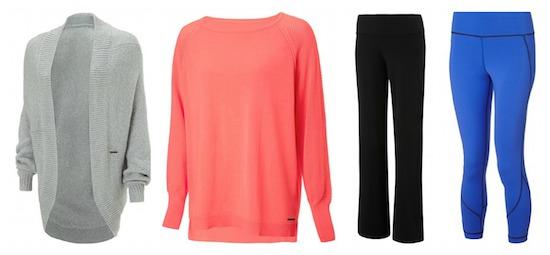
If I was putting a few things on my Christmas wish list, I’d pick:

sweatybetty

Allegro Knit Dance Jumper 

Embrace Luxe Knit Shawl

Balasana Yoga Pants 

Visama Reversible Yoga Leggings 

——————

The only downside, in my opinion, is the price…but the high quality material makes it worth it. I think these are pieces that will hold up well over time, allowing you to get your money’s worth!

Huge thanks to Sweaty Betty for being an Elf for Health sponsor this year! All the elves are looking forward to their sponsored challenge on Monday- run or walk a mile as fast as you can!

If you’re in the market for some new fitness clothes, be sure to check out Sweaty Betty’s website! I mean, new clothes are pretty much guaranteed to improve your workouts right?!

Enjoy!
–Lindsay–

Filed Under: Uncategorized

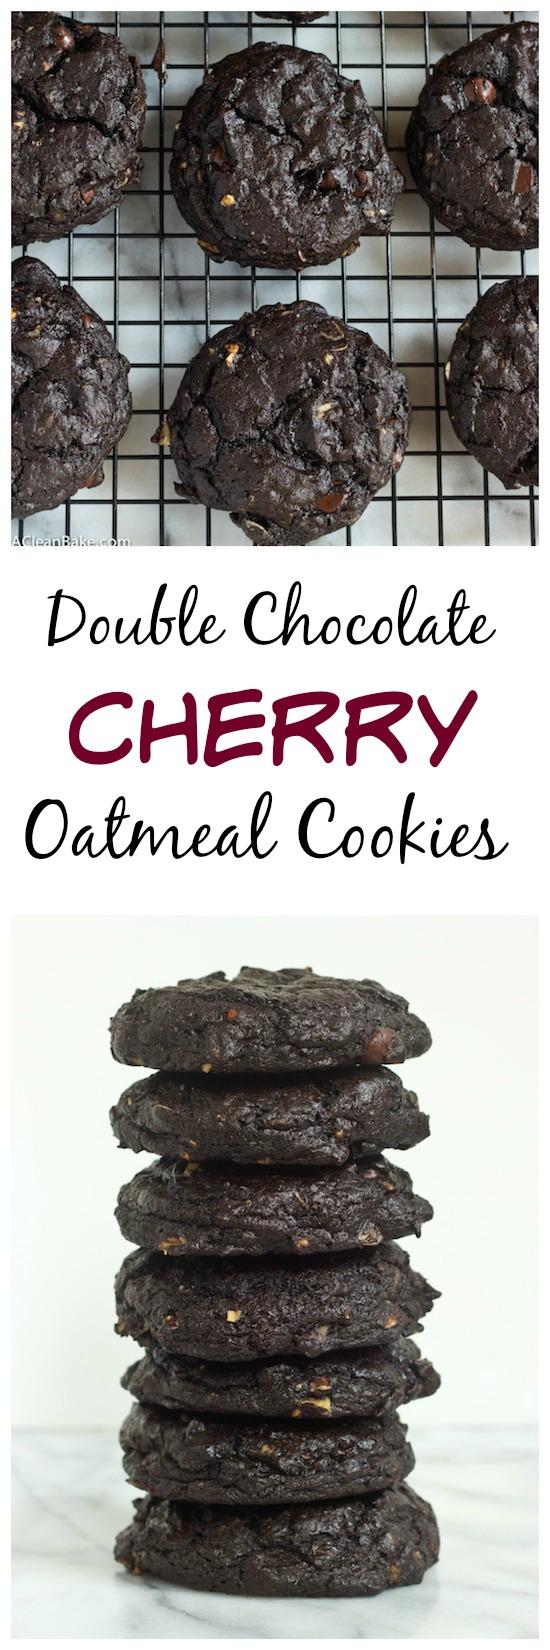
Double Chocolate Cherry Oatmeal Cookies

December 4, 2014 by Lindsay 35 Comments

These Chocolate Cherry Oatmeal Cookies give you a double dose of chocolate and make the perfect dessert

Hi Friends!

I’m not sure if I’ve mentioned it or not, but this is the first week I’ve started working again. I knew it might be a little crazy trying to transition back into things, so when my friend Nora offered to share a recipe with you guys to lighten my load, I immediately took her up on the offer! Nora blogs over at A Clean Bake and I’ve gotten to know her over the past few months as she’s a regular submitter to my Sunday Food Prep posts!

Her blog is full of great recipes that always leave me wanting to run to the kitchen and turn on the oven!

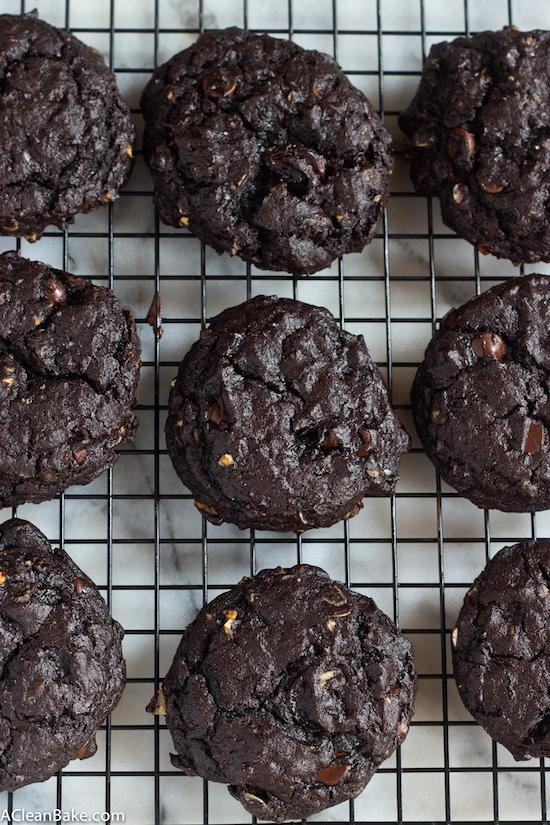
Get your chocolate fix with this Double Chocolate Cherry Oatmeal Cookies. They're gluten-free and can easily be made vegan.


Hi Lean Green Bean readers! My name is Nora and I am a fellow blogger over at www.acleanbake.com and an avid reader of Lindsay’s page. Her recipes always inspire me and her weekly meal prep roundup motivates me to think ahead and prepare for the week. Needless to say, I’m a fan!

Since Lindsay is heading back to work this week and needed some time to get back into the swing of things, I volunteered to step in so that she didn’t have to worry so much about the blog, and you guys wouldn’t go hungry. And I brought cookies!

Get your chocolate fix with this Double Chocolate Cherry Oatmeal Cookies. They're gluten-free and can easily be made vegan.


Hooray for Christmas Cookie Season! The holiday season is great and all, but cookies are the real reason for my excitement this time of year. It’s what gets me out of a warm bed to face a cold day. If there were some sort of cookie-centric holiday in February (Valentine’s Day cookies aren’t enough of a thing, don’t you think?), I wouldn’t mind the winter so much. Maybe. Probably not.

More and more every year, I suspect, the hardest part of hosting holiday meals is the increasingly convoluted list of guests’ food allergies and intolerances to keep track of. Cookies, and dessert in general, are an absolute minefield. They’re full of gluten and dairy and sugar (oh my), and there’s bound to be a guest or guests who can’t eat one or more of those ingredients at just about any holiday gathering.

That’s where you come in: be their white knight. Or, actually, their double chocolate cherry knight. These cookies  taste as decadent and rich as you would expect a cookie with “double chocolate” in the name to taste.

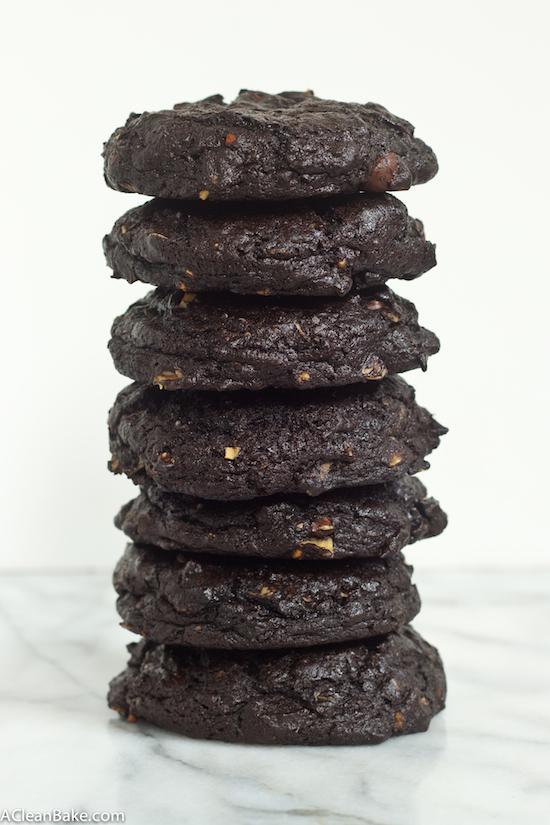
Get your chocolate fix with this Double Chocolate Cherry Oatmeal Cookies. They're gluten-free and can easily be made vegan.

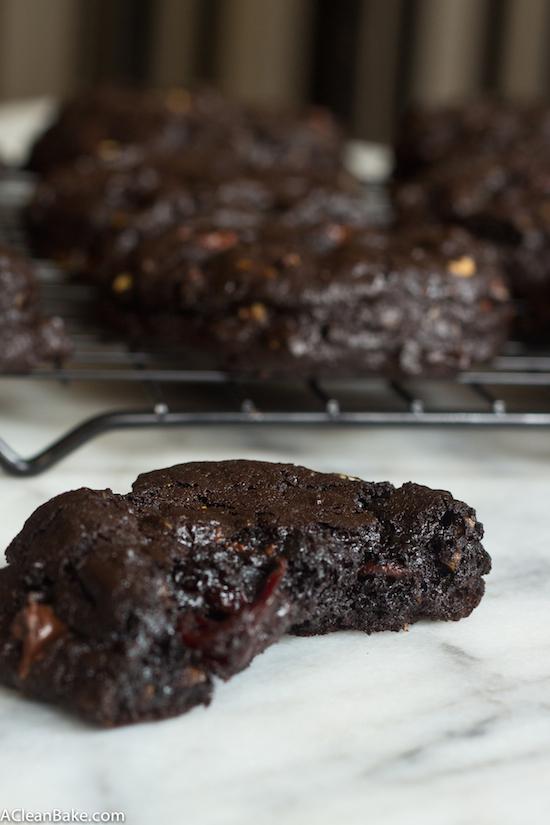
They have a crisp outer shell that is SO satisfying to bite into, and contain a soft and gooey center that melts in your mouth. The chocolate chips are creamy and the dried cherries and oats are chewy; the sweetness of the chocolate chips and cherries balances out the super dark chocolate flavor of the cookie dough itself. These cookies are, in sum, everything you need this time of year.

Thanks again to Lindsay for having me, and I hope this post enabled you to have a little bit of extra snuggle time with your handsome son!

Get your chocolate fix with this Double Chocolate Cherry Oatmeal Cookies. They're gluten-free and can easily be made vegan.

Print

Double Chocolate Cherry Oatmeal Cookies

IMG 3781
Print Recipe

5 Stars 4 Stars 3 Stars 2 Stars 1 Star

No reviews

  • Author: Lindsay L
  • Category: Dessert

Ingredients

Scale
  • 2/3 cup almond butter (creamy, sweetened)
  • 3 Tablespoons butter, vegan butter or coconut oil
  • ½ cup honey
  • 1 large egg
  • ½ teaspoon vanilla extract
  • pinch of salt
  • ½ teaspoon baking soda
  • ½ cup cocoa powder
  • ½ cup rolled oats
  • ¼ cup chocolate chips
  • ¼ cup dried cherries

Instructions

  1. Preheat the oven to 350F. Cover 2 cookie sheets with parchment paper or nonstick pads and set aside.
  2. In a large, microwave-safe mixing bowl, combine the almond butter, regular butter (or oil) and honey and heat on high for 30 seconds until the honey is very runny and the butter is about half melted. Use an electric mixer to mix until the butter is completely melted and ingredients are combined.
  3. When the butter is melted and the mixture has cooled slightly, beat in the egg and vanilla, followed by the salt and baking soda.
  4. Slowly incorporate the cocoa powder.
  5. Mix in the oats.
  6. Put away the electric mixer and use a spatula to fold in the chocolate chips and cherries.
  7. Use a spoon or cookie scoop to divide the dough into 10 2-Tablespoon balls. Space them evenly on the prepared cookie sheets.
  8. Bake for 15 minutes or until tops are crisp. Cool cookies on sheets for 10 minutes before transferring to a wire rack to cool completely.

Notes

If your almond butter is unsweetened, you may want to add an additional Tablespoon of honey.

For a lactose-intolerant variation, use vegan butter (e.g. Smart Balance or similar product), shortening or coconut oil as the fat and a dairy-free brand of chocolate chips.

For a gluten-free variation, make sure you are using oats that specifically say “certified gluten-free” on the package.

For a vegan option, use the lactose-intolerant ingredients above, plus an egg replacement such as EnerG or flax eggs. You may need to increase your baking time to compensate for the added moisture that egg replacements usually contain.

If you are not serving these immediately after baking, store them in an airtight container at room temperature for up to 4 days, or in the freezer for up to 3 months.

Did you make this recipe?

Tag @theleangreenbean on Instagram

———–

[Tweet “Cookie time! Chocolate Cherry Oatmeal Cookies from @acleanbake and @leangrnbeanblog!”]

Thanks to Nora for stopping by!

Let’s chat:
What’s your favorite Christmas cookie?

Enjoy!
–Lindsay–

Filed Under: Baking, Dessert Tagged With: Almond Butter, Butter, Chocolate Chips, Cocoa Powder, Egg, Honey

All About Apple Cider Vinegar

December 3, 2014 by Lindsay 21 Comments

Hi Friends!

Today I’m introducing you to a fellow Ohioan who has been helping me out behind the scenes on the blog for the past few months! She’s a soon-to-be RD and after receiving your responses to the survey I put out a few months ago, I asked her to do a little research about some of the topics you guys were most interested in. One of those was Apple Cider Vinegar!

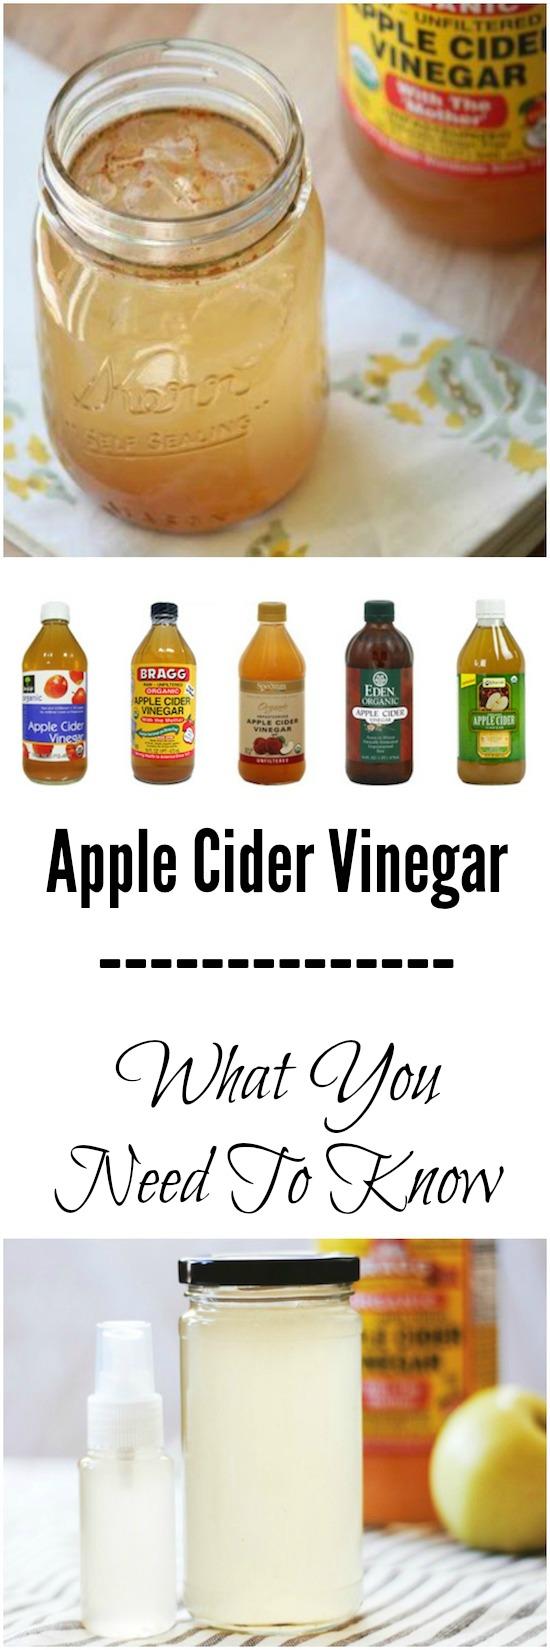
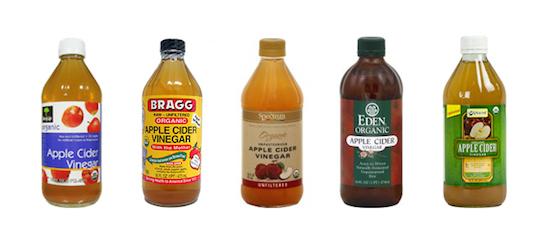
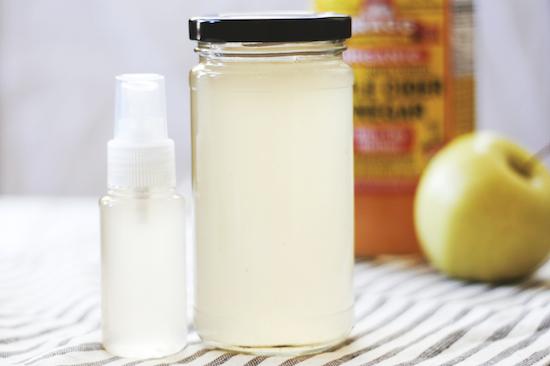
Heard all the buzz about apple cider vinegar? Should you be using it? Click to learn more from a Registered Dietitian - to - be!

Hi, Everyone!  My name is Meagan and I’m so excited to be with you today!  I am a graduate student in the Medical Dietetics program at Ohio State University which means in one more semester, I will be elegible to sit for the Register Dietitian exam and become an RD like Lindsay.  I’ve been working a little bit behind the scences with her this past Fall to learn about the planning and work that goes into creating an interesting, fun, and helpful nutrition blog.  What I’ve learned: it’s certainly a full time job and Lindsay definitely deserves some “maternity leave” for a few posts!

Heard all the buzz about apple cider vinegar? Should you be using it? Click to learn more from a Registered Dietitian - to - be!

{Source}

Today’s post is about a topic that many of you who took the Reader Survey Lindsay put out back in September were interested in learning more about: vinegar! Specifically apple cider vinegar. It really seems to be having a moment right now with health endorsements from running the gamut from Dr. Oz to Katy Perry. I’ve done a lot of research on the topic and wanted to talk about the health benefits that have been scientifically proven to be true—not just the old wives’ tales!

First off, vinegar has been in use in nearly every field from medicine to homekeeping for thousands of years. Hippocrates (c. 420 BC), the Father of Medicine used vinegar as a wound treatment. It is rumored that Cleopatra used vinegar to dissolve pearls into a love potion for Marc Antony. Sung Tse, Father of Forensic Medicine, supported washing hands in vinegar to avoid infection during autopsies. And even today, vinegar is commonly used as a household cleaner.

Heard all the buzz about apple cider vinegar? Should you be using it? Click to learn more from a Registered Dietitian - to - be!

{Source}

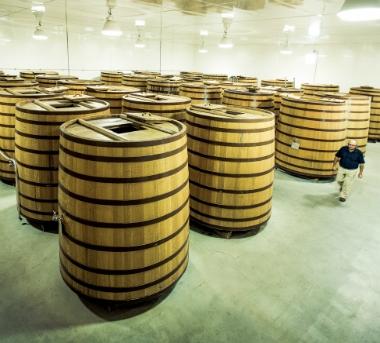
The word vinegar comes from the French vin aigre which means sour wine. It can be made from nearly any fermentable carbohydrate source including fruit, wine, beer, dates, grains, or potatoes. To make apple cider vinegar, apples are crushed and their juice is added to barrels or casks along with yeasts which ferment the natural sugars. The result is alcohol. Next, Acetobacter bacteria are added to convert the alcohol to acetic acid. Finally, the mixture is allowed to ferment for weeks or months, depending on the maker. During this time, nontoxic goo made up of yeast and acetic acid bacteria forms within the mixture; similar to kombucha, this is known as the mother. This part is usually filtered out and the remaining liquid pasteurized before selling. However, some people claim that the mother has health benefits and certain brands sell their vinegar including bits of the mother. At this time health claims regarding any benefit from ingesting the mother are unsubstantiated. On the other hand, I couldn’t find any research that claimed ingesting bits of the mother were harmful either.

Heard all the buzz about apple cider vinegar? Should you be using it? Click to learn more from a Registered Dietitian - to - be!

{Source}

Medical Uses

There are many ways in which vinegar has been used to promote health. One of the oldest is to fight infections. This idea is based in science as vinegar is proven to have antimicrobial properties. However, today most experts advise against putting vinegar directly on wounds, as there are many other more effective treatments to kill bacteria and reduce infection.

There is ambiguous evidence that vinegar can improve blood pressure and cholesterol. It is speculated that vinegar ingestion improves calcium absorption, which through a complex chain of events involving hormonal regulation, can help to regulate blood pressure. This has been shown in animal studies BUT trials have not been done in humans. Further, a 2006 study in the British Journal of Nutrition found that acetic acid, the main acid in vinegar, reduced total cholesterol in rats when taken regularly with food.

Vinegar is equivocally associated with cancer fighting. It is a dietary source of polyphenols, which are synthesized by plants to defend against oxidative stress. In humans, polyphenols have been shown to enhance antioxidant protection and reduce cancer risk.

Finally, a 2004 study conducted by Arizona State University study suggested that vinegar consumption may influence blood sugars. The study had some people drink apple cider vinegar mixed with water while some participants drank a placebo. Then both groups ate a carbohydrate rich breakfast. Afterward the group who ingested the vinegar drink had a smaller rise in blood glucose than the group who drank the placebo. In fact, in insulin-resistant subjects (the early phase of Type 2 diabetes), vinegar ingested with a meal has been demonstrated to reduce post-meal blood sugar levels up to 64%. But even in those with Type 2 diabetes, vinegar consumption prior to the meal was associated with a slight improvement in post-meal insulin sensitivity.

Heard all the buzz about apple cider vinegar? Should you be using it? Click to learn more from a Registered Dietitian - to - be!

{Source}

Unsubstantiated Claims

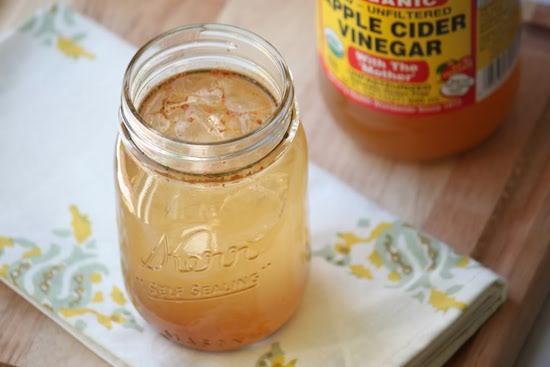
There are several health applications for apple cider vinegar that have been used for many years, but are not backed up by science. The first is using apple cider vinegar to treat acne. The acid in the liquid is thought to act as a natural toner thus improving skin texture while the antimicrobial properties aid in acne treatment.   Similarly, it has been used to as a dandruff remedy. Spray a mixture of 1 part apple cider vinegar to 1 part water on your scalp and put your hair in a towel for 15 minutes. Then wash as usual. It is claimed that the apple cider vinegar changes your scalp pH level making it inhospitable to the yeast that causes dandruff.  Finally, apple cider vinegar has been long used in Eastern medicine to treat an upset stomach. Adding 2T apple cider vinegar and a dash of honey to a cup of water and drinking is said to ease a rumbly tummy.

Safety

Vinegar has been used in in the diet for thousands of years and so may be labeled safe in that capacity: as a dietary flavoring agent. However, researchers are just beginning to take on vinegar as a natural medical remedy and more studies should be conducted before calling it “safe” outside of its normal dietary uses. Acids can cause tooth decay so you should be sure to rinse your mouth after drinking apple cider vinegar. And it should be noted that in a small number of cases, overconsumption of apple cider vinegar (drinking it daily) has been linked to lowered potassium levels and weakened bones.

The bottom line is that apple cider vinegar is not a magic bullet for any condition, but is a yummy and nutritious dietary flavor when added to a healthy lifestyle that includes a balanced diet and exercise.

——–

Thanks to Meagan for sharing some of her knowledge today! Hope you learned something!

Let’s chat:
What’s your favorite way to use Apple Cider Vinegar?

Enjoy!
–Lindsay–

Filed Under: Uncategorized

Crockpot Chicken Alfredo

December 2, 2014 by Lindsay 23 Comments

This Crockpot Chicken Alfredo is a lightened up version of a classic recipe and the slow cooker does all the work for you!

Hi Friends!

Allow me to introduce you to one of my favorite foodies- Ari from Ari’s Menu! Her blog is amazing- I want to make pretty much every recipe she posts…and her pictures are incredible. She even took the time to give me some photography tips when I bought Lightroom and was totally lost. Today she’s stopping by to share an easy crockpot recipe with you guys that’s perfect for the upcoming cold winter nights!

—————–

Rich and creamy chicken alfredo with ultra tender shredded chicken made in your slow cooker! This is a lightened-up version of your favorite comfort food that will leave your body and your taste buds happy!

This lightened up version of one of your favorite Italian meals gets even better because the slow cooker does all the work! Crockpot Chicken Alfredo

Hi guys! My name is Ari and I blog over at Ari’s Menu sharing (mostly) healthy recipes, especially healthy comfort foods. I’m so grateful to Lindsay for the opportunity to share with you guys today! I’ve been a huge fan of Lindsay’s blog for a long time, and I’m glad I get to hang out and chat in her space today. 😉


Back in the day, one of my favorite foods was fettuccine alfredo. My family went out for a lot of Italian food, and rich, creamy sauce with carby pasta was a staple in my diet, and one of the biggest things I missed when I started living a healthier life.

This lightened up version of one of your favorite Italian meals gets even better because the slow cooker does all the work! Crockpot Chicken Alfredo

A couple of years ago, I set out to develop my own alfredo sauce that kept all of the taste without all of the calories. I remember the first time my husband and I sat down to dinner to eat this “Fettuccine” Alfredo (<— it uses spaghetti squash for the noodles, and it’s still one of my all time favorite recipes!), and I about flipped my lid because it tasted like real alfredo sauce! I mean, I guess that’s the point, but I was super stoked.

This lightened up version of one of your favorite Italian meals gets even better because the slow cooker does all the work! Crockpot Chicken Alfredo

You see, I haven’t always been a cook. In fact, for most of my life, my diet consisted of Taco Bell and Kraft macaroni and cheese. I learned to cook because I wanted to eat healthier, and I’ve always been a creative person, so I just kind of accidentally fell in love with creating recipes, but I still expect them to fail 90% of the time. And they do. A lot. So when something comes out right the first time, it is definitely a pleasant surprise!

Anyway, this sauce has become a comfort staple in my life, and when I wanted some comfort food waiting in the crockpot for me when I came home during a long week, I threw this together in the crockpot, added a little Greek yogurt to it once I got home, along with some steamed broccoli (and by steamed, I mean the kind in the bag that you put in the microwave, because crockpot = I ain’t doin’ no cooking!) and voila! Perfectly tender chicken, rich creamy sauce, and green with practically no work on my part!

Print

Crockpot Alfredo Chicken

Crockpot Chicken Alfredo
Print Recipe

5 Stars 4 Stars 3 Stars 2 Stars 1 Star

5 from 2 reviews

Perfectly tender chicken, rich creamy sauce, and green with practically no work on your part

  • Author: Author: Lindsay L

Ingredients

Scale
  • 2 teaspoons olive oil
  • 3–4 large cloves garlic, minced
  • 8 oz reduced fat cream cheese
  • 3/4 cup unsweetened almond milk
  • 1/3 cup white wine (optional, otherwise sub more almond milk)
  • 1/3 cup freshly grated parmesan cheese (+ extra for serving, if desired)
  • salt & pepper
  • 3 large chicken breasts
  • 1/2 cup nonfat plain Greek yogurt
  • 1 tablespoon cornstarch
  • steamed broccoli, for serving
  • freshly chopped parsley, for serving

Instructions

  1. To make the alfredo sauce, coat a medium sauce pan with olive oil over medium heat. Add garlic and cook until fragrant, about 3 minutes. Add cream cheese, milk, wine, and parmesan cheese. Whisk constantly until well combined. Add a pinch each salt and pepper.
  2. Place chicken at the bottom of your slow cooker. Cover with sauce. Cook on low for 5-6 hours.
  3. In a small bowl, whisk together Greek yogurt and cornstarch. Let stand for 5 minutes. Remove chicken and shred. Return shredded chicken to sauce. Add Greek yogurt / cornstarch mixture and stir to combine. Serve immediately with steamed broccoli, fresh parsley and extra parmesan cheese if desired. Leftovers can be stored in an airtight container in the refrigerator for 5-7 days.

Did you make this recipe?

Tag @theleangreenbean on Instagram

Thanks for hanging out with me today! If you’d like some more healthy comfort food, please come say hi.

———

[Tweet “Dinner is served! Crockpot Chicken Alfredo from @arismenu and @leangrnbeanblog!”]

Huge thanks to Ari for sharing her brilliance with us today! I can’t wait to give this recipe a try!

Enjoy!
–Lindsay–

Filed Under: Dinner, Slow Cooker Tagged With: Chicken, Cream Cheese, Garlic, Milk, Pasta, Yogurt

Elf4Health Sponsor: CookSmarts

November 30, 2014 by Lindsay 3 Comments

This post was sponsored by CookSmarts. All thoughts and opinions are my own.

Hi Friends-

Today I want to introduce you to one of our Elf For Health Sponsors- A meal planning service called Cook Smarts! If you’ve been reading The Bean for a while, you may remember that I introduced you to them about a year ago when I reviewed them for the first time. Well guess what? I like them so much we’re going to talk about them again!

CookSmarts

Our Elf4Health challenge for today is to plan and prep some healthy meals for the week and Cook Smarts is the perfect tool to help you do that! This year they’re giving our Elf  For Health winners a 3 month subscription to their meal planning service,  however, I think a lot of you could benefit from their services so I thought I’d tell you about them again in case you’re not familiar with them.

Cook Smarts was created by an amazing woman named Jess who was diagnosed with Hepetitis C in high school and decided while she was going through treatment that if she survived, she would dedicate her life to doing something that would help people!

From their website:

WHAT EXACTLY IS COOK SMARTS?

Cook Smarts’ mission is to empower home cooks with the inspiration and education needed to live their healthiest and happiest life in the kitchen. We do this by creating lots of practical cooking resources (think the Home Ec class you never got to take), free recipes that work for your busy life, and weekly meal plans that also teach you how to cook. I’ve been lucky to find a great team of kitchen cheerleaders to help me slowly expand the content, products, and services we offer.

WHY DID YOU START COOK SMARTS?

As I mentioned above, the need to start Cook Smarts was motivated by a personal promise. However, when I quit my job in October of 2011, I honestly had no clue what Cook Smarts was going to be when it grew up. All I had was a strong belief that the ability to cook simple and real food could contribute to a healthier and happier world. As someone who has always valued the power of education, I wanted to create a company that focused on giving people the smarts and tools they needed to succeed in the kitchen and take control of their health.

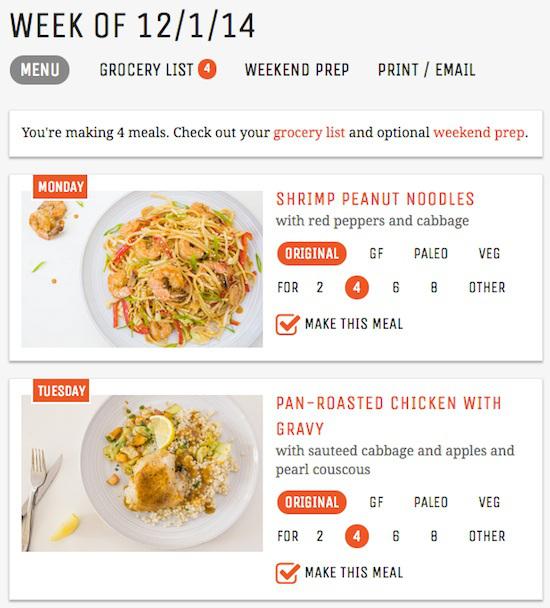
As a dietitian, there is SO much I love about this company. While I’m usually able to just wing it in the kitchen, I know there are lots of people out there who benefit from planning out their meals for the week. But let’s be honest, that can be a lot of work! Cook Smarts does that work for you! It provides a meal plan- which you can customize to be gluten-free, vegetarian or paleo if necessary to fit your dietary needs, compiles a grocery list for you and even tells you what you can prep ahead of time over the weekend. It also provides you with notes about ingredients, ideas for leftovers and cooking videos. Plus they have a great blog!

Here’s what it looks like:

When you sign up, they share several meal ideas each week. Here’s what’s on tap for next week:

cs1

cs2

You choose which meals you want to make and the ingredients are added to a grocery list:

cs3

The colored letters indicate which meal the ingredient is for and you can remove items you already have on hand at home.

You can also check out your instructions for things you can prep ahead of time over the weekend:

cs5

And when you’re ready to make a meal, they give you complete directions, along with links to instructional videos!

cs6

If you don’t like what’s on the menu for the week you can search their meals to add different ones to your meal plan:

cs7

Cook Smarts offers gift subscriptions that would be perfect for the holidays! You can give 3 months of meal plans for $21, 6 months for $42 or one whole year for $72. PLUS through Dec 3rd all subscriptions and gift subscriptions are 40% off!  If you’re reading this from Dec 3 – Dec 21st, use the code ELF4HLTH14 for 20% off subscriptions!

They have an awesome website with a great Resources section and you can check out their past meal plans to get an idea of what their recipes are like! And the best part? If you think this sounds good but you’re not ready to commit, they let you try 3 meal plans for free!

I made this Open Faced Turkey Pesto Avocado Melt last week and it was a delicious combo of flavors!

cs8

And next time my hubby asks for chicken tenders, I’m trying this version:

cs9

So, if you’re interested in learning more about Cook Smarts, check out their website! If you’re ready to give them a try, sign up HERE!

Enjoy!
–Lindsay–
Filed Under: Uncategorized

What Busy Moms Feed Their Kids – Part 2

November 26, 2014 by Lindsay 17 Comments

Hi Friends!

This whole week pretty much revolves around food since it’s Thanksgiving tomorrow, right? So I thought it’d be a good time to share another roundup of what some of my favorite busy moms feed their kids!

Are you a busy mom? Could you use some more ideas for healthy, kid-friendly foods? Click to find out what some of my favorite busy moms feed their children.

If you like this post, be sure to check out What Registered Dietitians Feed Their Kids and What Busy Moms Feed Their Kids – Part 1! Hope this gives you moms out there some new food ideas!


2014-09-10 18.20.14

Brittany
Delights and Delectables (delightsanddelectables.com)
“Baby Delight” 8 months

1. What do your children typically eat for breakfast?
Right now, he is still mainly on formula.  However, about 1 hour after his morning bottle he has some form of “big kid” food.  That is when I introduce new foods every 4 days.

2. What do they typically eat for lunch?
Formula.  We pretend it is filet mignon though.  😉

3. Do you all sit down as a family for dinner?
Yes!  We want to institute that early in life.  We do the best we can with him.  Dinner is usually his “witching hour” so it can get interesting.

4. What happens if they don’t like what you’re making for dinners?
We try, try again.  I am dealing with trying to decide if he has a food allergy or intolerance to certain foods, or if he just doesn’t like them.  Right now, he despises bananas.  I plan to reintroduce them in a couple of weeks.  The key is patience…. Sometimes it takes several introductions to a new food before they like it.

5. What are the kids’ favorite snacks? What are some snacks you never leave the house without?
His favorite foods right now are sweet potato and avocado.  We aren’t really doing portable snacks right now, but I always make sure to have extra formula with me!

6.  Are any foods off limits?
We aren’t doing any gluten or grains until he is older.  Our doctor told us of some new research that suggests this keeps babies from developing food allergies.  Since I have a ton of allergies, I want to keep Baby D allergy free if possible!  Plus, we aren’t sure if there are food allergies in his family history.

7. Any tips for picky eaters?
Keep trying and be patient.  Sometimes it can be a sensory or texture issue.  Someone told me it could take up to 30 times before a child accepts the food.

8. Do any of your kids have food allergies? How do you deal with that both at home and when in public?
Not yet!! Fingers crossed!!

——————

 Are you a busy mom? Could you use some more ideas for healthy, kid-friendly foods? Click to find out what some of my favorite busy moms feed their children.

Courtney
Sweet Tooth, Sweet Life (www.sweettoothsweetlife.com)
Lucas, 13 months

1. What do your children typically eat for breakfast?
Full fat yogurt, banana, and a pancake

2. What do they typically eat for lunch?
PB&J on whole wheat bread, homemade chicken meatballs with peas and carrots, homemade spinach mac & cheese, and deli turkey with string cheese are a few favorites these days.

3. Do you all sit down as a family for dinner?
We try really hard to all sit together, but 90% of the time, it’s usually Lucas eating while at least one of us sits with him. As hard as we try, we aren’t always able to get his food AND our food on the table at the same time.

4. What happens if they don’t like what you’re making for dinners?
We might attempt to feed it to him a different way (sometimes he won’t want to pick it up himself, but he’ll eat it with a fork, etc.) but if he’s really not into it, we’ll usually go to one of his typical lunch favorites. And some nights, all he wants is blueberries and Cheerios. It happens.

5. What are the kids’ favorite snacks? What are some snacks you never leave the house without?
Cheerios are a MUST for us right now. Fruit and veggie food pouches are also great for on-the-go snacks (although we need to watch him with them now because he likes to squirt them anywhere but in his mouth).

6. Are any foods off limits?
Not really at this point, but limit the added sugars/sweets to special occasions.

7. Any tips for picky eaters?
Sometimes, adding a little butter or cheese and extra spices to veggies has made a huge difference for Lucas.

—————

 Are you a busy mom? Could you use some more ideas for healthy, kid-friendly foods? Click to find out what some of my favorite busy moms feed their children.

Jess Allen
Blonde Ponytail (blondeponytail.com)
Jada, 15 months

1. What do your children typically eat for breakfast?
Fruit (usually a banana), cheerios, sometimes pancakes if I can get my act together and cook! Things she can feed herself, as she is Miss Independent now! 😉

2. What do they typically eat for lunch?
Chicken & peas (she love these), or if we are on-the-go, a Sunbutter & jelly sandwich on whole wheat with raspberries on the side. We also do whole milk with added DHA.

3. Do you all sit down as a family for dinner?
We try to, but my husband is a baseball coach, so his hours can get late! For dinner, she loves turkey burgers and Amy’s organic veggie bowls, so I try to play into her veggie interest as much as possible.

4. What happens if they don’t like what you’re making for dinners?
I usually default to a pre-made pouch from Happy Tots or Plum. Right now, she is teething, so soft foods seem to be preferable.

5. What are the kids’ favorite snacks?
What are some snacks you never leave the house without? Again, the pre-made pouches, Cheerios or puffs, and usually a cereal bar. Plus, her water bottle!

6. Are any foods off limits?
Because Jada is only 15 months, no choking hazards like hot dogs, raw veggies, chips, candy, etc. Otherwise, I let her try sweets, not too many, but she’s a big fan of ice cream like her mama. 😉

7. Any tips for picky eaters?
Make it fun by encouraging independence. I let her feed herself as much as she can. I also always try to sit down and eat with her, so it’s a family experience.

8. Do any of your kids have food allergies?
She had a reaction to peanut butter early on, so we stick with almond butter and Sunbutter. Usually, people are really good about asking what she can & can’t have, especially since she is so young.

—————-

 Are you a busy mom? Could you use some more ideas for healthy, kid-friendly foods? Click to find out what some of my favorite busy moms feed their children.

Melanie Flinn
Nutritious Eats (nutritiouseats.com)
Lucas 7, Sage 5, Roman 2, and Evangeline 9 months

1. What do your children typically eat for breakfast?
They rotate between scrambled eggs and toast, cereal, oatmeal, pancakes, breakfast tacos, and bagels with cream cheese. In addition, they have yogurt every single morning- they are obsessed, and often fruit.

2. What do they typically eat for lunch?

Main entree is usually one of the following:

  • Homemade “lunchables” with cheese, crackers, and uncured, nitrate-free ham or turkey
  • Sandwiches: egg and cheese, uncured ham or turkey and cheese or peanut butter and jelly
  • Leftover pasta-either pesto, marinara or mac n’ cheese
  • Soup
  • Breakfast tacos-usually potato and egg made in the morning before school

Sides (I give them 2 or 3 sides depending on the day):

  • Hummus and crackers
  • Tortilla chips or pretzels
  • Fruit (they eat every type)
  • Nuts
  • Granola bars- both homemade and store-bought
  • Snack balls
  • Carrots sticks or cherry tomatoes

The baby is eating mostly finger food with the addition of a little pureed baby food. She eats all the soft table food we eat like avocado, pita bread, hummus, potato, chicken, pesto pasta, cheese pizza, fruits and tons of veggies—she loves them all!

3. Do you all sit down as a family for dinner?
Yes, every night. Since the baby has to go to bed the earliest we aim to eat at 5:45pm so that we can all sit together.

4. What happens if they don’t like what you’re making for dinners?
It doesn’t happen often because I usually cook things I know they like. However, if it’s something new and they don’t think they like it, I encourage (or rather make) them try at least one bite. If I am cooking something that isn’t their favorite, I always include at least one food item I know they like. For example, if I make a seafood and pasta dish with marinara, I know they don’t like seafood but they love pasta so I’d simply set aside some plain marinara. I always have frozen veggies on hand if they don’t like the fresh veggies I am cooking with and I have no problem defrosting what they like. That’s about as far as I cater to them.

5. What are the kids’ favorite snacks? What are some snacks you never leave the house without?
They love crunchy stuff like Pirate Booty, pretzels, gold fish, or Annie’s brand snacks. They also love any kind of fruit and nuts (mostly cashews and pistachios), granola bars (typically homemade Lara bars), homemade fruit or nut snack balls.

6. Are any foods off limits?
Not really. I refuse to buy highly processed foods or things with artificial dyes. However, if they are offered those sorts of things at school parties, birthday parties, soccer games, etc. they are allowed to eat them. Obviously we aim to keep those as very occasional foods.

7. Any tips for picky eaters?
If they are under 2 years old, just be patient. Food tastes change all the time. Plus, everyone has different preferences so you can’t force them to like something just because you like it. If they are 2+ years and old enough to help you in the kitchen, absolutely get them involved. This always helps my kids to be more open to trying new foods.

8. Do any of your kids have food allergies? How do you deal with that both at home and when in public?
My 2 year old has an egg allergy. It’s not very serious, but as he continues to test positive, I avoid giving him whole eggs and I often bake with flax as an egg substitute. He can tolerate eggs in baked goods in small amounts so it hasn’t been a huge issue thus far.

—————

Enjoy!
–Lindsay–
Filed Under: Uncategorized

Pumpkin French Toast Bake

November 25, 2014 by Lindsay 28 Comments

This Pumpkin French Toast Bake is a yummy, seasonal breakfast casserole that has all the deliciousness of french toast, but it’s incredibly easy to make and feeds a crowd.

Hi Friends!

Today one of my favorite blogger friends is back with another delicious recipe for you guys! Remember when Meme from Living Well Kitchen shared this Peanut Butter Cookie Dough Dip back in July? It was a HUGE hit with you guys so I asked her to come back and this time she has a flavorful Fall breakfast to share! Be sure to go check out her blog for more delicious recipes!

———-

If we meet on the street any time soon, you’ll probably be thinking Wow, that girl is kinda orange. I wonder why…

Having people over for brunch? Make this Pumpkin French Toast Bake! Bursting with pumpkin flavor and perfectly spiced, this overnight casserole is sure to be a hit!

Well, it’s because I’ve been consuming pumpkin like it’s my job – my job to share healthy pumpkin recipes that are still really delicious.

People go crazy for pumpkin the second it gets even remotely cool outside Starbucks starts pumping out Pumpkin Spiced Lattes {pumping pumpkin pun intended, obviously}.

And I’ve been on a pumpkin recipe creating rampage… In fact, I did pumpkin week on my blog including Pumpkin Pie Smoothies, Pumpkin Chili, Pumpkin Cornbread, and more. But I saved my favorite recipe for this guest post.Do you realize how hard it was to keep this recipe in my folder without posting it? It was really tough.

You see, I have this condition where I am incapable of keeping trivial things a secret. {Don’t worry, I can keep a real secret if I need to}.

For example, if I buy someone a Christmas present the first of October, you can guarantee that I’ll be telling them about it by Halloween. A really delicious new recipe falls in this category as well.

Luckily, I have family and friends who “listen” as I discuss my neverending stream of recipe ideas and creations. They are the people I tell all my recipe adventures about before I post them on the blog. I’m sure they tune me out as I describe what I’ve made, what I want to try, and what failed.

This Pumpkin French Toast Bake is a yummy, seasonal breakfast casserole that has all the deliciousness of french toast, but it's incredibly easy to make and feeds a crowd.

Speaking of failed, the first two attempts of this recipe were quite the disasters.

When I mentioned to Lindsay that I wanted my guest post to be for a Pumpkin French Toast Casserole, I knew it’d be a good one. What I didn’t know is that my first {and second} attempt would not be.

Having people over for brunch? Make this Pumpkin French Toast Bake! Bursting with pumpkin flavor and perfectly spiced, this overnight casserole is sure to be a hit!

I’m the first one to admit when a recipe is not blog worthy, but it pains me to throw away food. So I ate the not-perfect versions of this breakfast casserole that I knew would be a hit, if only I could get the proportions of ingredients correct. Eventually, my persistence paid off. And with each day, I’m pretty sure I turned just a little more orange.

Curious as to how many cans of pumpkin I’ve gone through in the past two weeks? Nine. I know right?! No wonder I’m looking incredibly seasonable {read: orange} 😉

Print

Pumpkin French Toast Bake

Pumpkin French Toast Casserole3
Print Recipe

5 Stars 4 Stars 3 Stars 2 Stars 1 Star

No reviews

Having people over for brunch? Make this Pumpkin French Toast Bake! Bursting with pumpkin flavor and perfectly spiced, this overnight casserole is sure to be a hit!

  • Prep Time: 10 minutes
  • Cook Time: 35 minutes
  • Total Time: 45 minutes
  • Yield: serves 6-8 1x

Ingredients

Scale
  • 1 tsp coconut oil or butter
  • 8 oz. whole wheat bread {about 8–9 slices}, torn
  • 8 eggs
  • 1 1/4 cups milk {I used 1%}
  • 1/4 cup no sugar added applesauce
  • 1/4 cup maple syrup
  • 1 cup pumpkin puree
  • 1 TBSP vanilla extract
  • 2 tsp ground cinnamon
  • 1/8 tsp ground cloves
  • 1/8 tsp ground nutmeg
  • 1/4 tsp salt

Instructions

  1. Spread coconut oil or butter in a 9×13 inch baking dish. Put the torn bread in an even layer in the prepared baking dish. Set aside.
  2. Whisk together eggs, milk, applesauce, maple syrup, pumpkin puree, vanilla extract, cinnamon, cloves, nutmeg, and salt. Pour mixture over the bread in the baking dish. Cover and refrigerate overnight or at least 4 hours.
  3. When ready to eat, remove casserole dish from refrigerator. Preheat oven to 350°F. Bake the Pumpkin French Toast Casserole in the preheated oven for 35-40 minutes, until cooked through {If it starts to get too brown, just cover lightly with foil and bake until done}. Serve with extra maple syrup if desired.

Did you make this recipe?

Tag @theleangreenbean on Instagram

———-

Huge thanks to Meme for another great recipe!

Enjoy!
–Lindsay–
Filed Under: Breakfast Tagged With: Bread, Egg, Milk, Pumpkin

Cinnamon and Sugar Sweet Potato Chips

November 19, 2014 by Lindsay 45 Comments

This post is sponsored by Pompeian. I was compensated for my time. All thoughts and opinions are my own.

Hi Friends!

Just popping in with a quick little snack idea for you! Sweet potato chips. I know these are nothing new. If fact, I make them all the time. However this time, I put a bit of a dessert spin on them!

These Cinnamon and Sugar Sweet Potato Chips are easy to make and perfect for dipping into a bowl of vanilla yogurt!

This month, as part of Pompeian’s Pantry Insider Program, I was sent some of their new Coconut Oil Spray. It’s just coconut oil, in a handy spray bottle. It has a high smoke point which makes it perfect for baking and also for using in things like marinating.

a
Spraying the sweet potato slices with oil gives them a perfectly light coating, adds a subtle hint of coconut flavor and helps them crisp up nicely in the oven! Instead of just eating them plain, I sprinkled with cinnamon and sugar for a bit of added sweetness and to kick things up another notch, I dipped them in vanilla yogurt!

These Cinnamon and Sugar Sweet Potato Chips are easy to make and perfect for dipping into a bowl of vanilla yogurt!

These are so easy they can hardly be considered a recipe, but here’s what I did:

Print

Cinnamon and Sugar Sweet Potato Chips

cinnamon and sugar sweet potato chips
Print Recipe

5 Stars 4 Stars 3 Stars 2 Stars 1 Star

5 from 2 reviews

A lightly sweetened homemade chip that makes a great dessert or snack!

  • Author: Author: Lindsay L

Ingredients

Scale
  • 1 medium sweet potato
  • cinnamon & sugar for sprinkling
  • Pompeian Coconut Oil spray
  • Vanilla yogurt for dipping (optional)

Instructions

  1. Thinly slice the sweet potato using a mandolin or sharp knife.
  2. Place on a baking sheet and spray with coconut oil.
  3. Sprinkle with cinnamon and sugar.
  4. Bake at 400 degrees for 10 minutes.
  5. Flip the chips over, spray with oil and sprinkle with cinnamon and sugar.
  6. Reduce oven temperature to 350 degrees and cook 5-10 minutes more, checking often to avoid burning.
  7. Serve with vanilla yogurt for dipping if desired.

Did you make this recipe?

Tag @theleangreenbean on Instagram

Enjoy!
–Lindsay–
Filed Under: Dessert, Side Dish, Sponsored Tagged With: Sweet Potato

Elf4Health 2014

November 17, 2014 by Lindsay 39 Comments

Hi Friends!

Elf For Health is back for another year and it’s time to kick things off!

Three years ago Elle of  According to Elle (formerly Nutritionella) and I started this challenge to promote health and wellness during the holidays, a time when healthy habits tend to fall to the wayside. In years past, all challenge participants were paired up as elves to support and encourage each other during the holidays.

We recognize this is an especially busy time of year and not everyone can commit to having an elf, so this year you’ll have the option of having an elf assigned to you, or participating solo. Regardless of whether you want your very own elf or choose the solo route, all elves are welcome to join our awesome community on Facebook, as well as by using the #elf4health hashtag on Twitter and Instagram.

Here are all the details about what the challenge entails and how to sign up!

elf4health headerY2


Introducing the Elf for Health Holiday Challenge! This is a four week challenge that will run from the Monday November 24th thru December 21, 2013. The challenges fall into 4 different categories: Food, Fitness, For You & For Others. There will be daily tasks, daily winners, prizes, weekly newsletters, and a Facebook group for support.

And are you ready for the best part? You’ll have an elf to support and encourage you! When you sign up, you will also be committing to be an elf for someone in return. Over the course of the challenge, you will have two different elves.

Sounds like a great way to stay motivated and meet new people over the holidays doesn’t it?! Since this challenge is internet based, anyone can participate… no matter where you’re located! All you need is access to the internet and an email address.

So what does an Elf do?

Elf Duties

As an Elf, you are expected to support your assigned buddy with their holiday health goals and the daily challenges. Elves & buddies will be reassigned after 2 weeks so that hopefully you get to meet 2 new people! You are only asked to email your buddy 2 times per week:

  • Monday: Send your buddy an email to help them with the challenges for that week. Ideas of things to include/attach: your own personal tips & tricks, inspiring words and/or images, a new, healthy recipe or workout to try.
  • Thursday – Saturday: Any time during these days, check in with your buddy! For example, ask them if they tried a new recipe, workout, or had fun with any certain challenges. Feel free to tell them how you did with your challenges, too!

Anything more than those 2 emails is up to you but feel free to go above and beyond this to show your support! Just a few ideas: send your buddy Tweets, shout outs on our Facebook Page, email a fun workout you liked or send a hand written recipe or note.

Important Dates

  • *Friday, November 21st at 11:59pm EST: sign up deadline
  • Sunday, November 23rd: Round 1 Elf assignments emailed
  • Monday, November 254h – Sunday, December 7th: Round 1
  • Sunday, December 7th: Round 2 Elf assignments emailed; Round 1 “Best Elf” winners chosen
  • Monday, December 8th – Sunday, December 21st: Round 2
  • Sunday, December 21st: Round 1 “Best Elf” & participant grand prize winners chosen

*If you missed the initial sign up deadline, you can still participate:

  • Sign up before December 5th for Round 2

Not clear about something? Email Elle or Lindsay!

Prizes

We have some fabulous prizes from some of our favorite companies to give to the winners.

  • 2 prizes for “Best Elf”, one awarded at the end of each round
  • 1 grand prize for best participant awarded at the end of the challenge determined by participation, hashtagging and being an awesome Elf.

There will be a daily challenge winner chosen each day. Daily winners will be entered for a chance to win the grand prize!

Best elf prizes will given based on participation and nomination. If you love your elf, let us know so we can consider them for a Best Elf prize. Best Elf prizes will be awarded at the end of each round.

Prizes will be provided by our 2014 Challenge Sponsors:
elf4healthsponsorgraphic2014

Prize packs will include 3 months of meal planning from Cook Smarts, beautiful workout gear from Sweaty Betty, hemp seed protein powder from Manitoba Harvest, and more from Swanson Health, Love Grown Foods, Nuttzo, Cabot Cheese, and Sizzlefish.

** Unfortunately, due to shipping costs, only USA residents are eligible to win prizes. But we’d still love to have you participate, even if you’re from somewhere else!**

Still with me?

Challenge Calendar

If so, you’re probably wondering what the daily challenges are, right? Here’s a nice square image that you can save on the lock screen of your phone to remind you of the challenges!

challengesquare2014

You can see more detailed descriptions on the calendar below and we’ll expand even more on the challenges in each weekly newsletter. See below for a printable list! Print it out and hang it somewhere to remind you participate, or add it to your Google calendar!

Sign Up

Want to sign up?! Fill out the form below.

We will be sending out a weekly newsletter reminding you of the weekly challenges so look out for a confirmation email to confirm your participation & newsletter subscription. If you don’t receive a confirmation email, check your spam box. If you still can’t find a confirmation email, let one of us (Elle or Lindsay) know ASAP and we’ll add you to the list.

Elf4Health Sign Up Form

* indicates required


Do you want to be paired with another elf?


Buttons

Did you sign up? If you’re a blogger, grab a button:

The Lean Green Bean
According to Elle

Follow

Make sure you’re following us for the latest updates, daily challenge reminders and winner announcements by social media.

      • Elle: Twitter, Facebook, Instagram & Pinterest
      • Lindsay: Twitter, Facebook, Instagram & Pinterest
Don’t forget to join the Elf for Health Facebook group, too! We’ll be posting pictures and updates there too.
 
[Tweet “Check out this fun, free holiday challenge from @LeanGrnBeanBlog and @EllePennerRD! “]


Info Pages

We’ll both have Elf for Health info pages up and running on our blogs if you’re looking for the calendar of daily challenges, the sign up form, important dates etc…
Whew! I think that’s everything! Let me know if you have questions! We’re excited to have lots of you join us for a happy, healthy holiday season!
Enjoy!
–Lindsay–
Filed Under: Uncategorized

Bowtie Pasta with Sausage, White Beans and Kale

November 13, 2014 by Lindsay 20 Comments

Hi Friends!

Today’s recipe comes to you courtesy of my talented friend Liz who blogs over at The Lemon Bowl. If you’ve been on Pinterest at all lately, you’ve probably seen some of her amazing photos and recipes floating around. She’s mom to two adorable boys and has an amazing blog that’s jam-packed with quick, healthy recipes. If you follow me on social media, you’ve probably noticed that I share pretty much every recipe she publishes. I can’t help it. They all sound so darn good. Go check out her blog, then come back to read about this quick, easy dinner idea that she’s sharing over over today!

—————

Hi Friends!! My name is Liz and I’m the food blogger over at The Lemon Bowl where I have shared over 600 healthy recipes that have helped me maintain a 65 pound weight loss for over 7 years.

I’m so excited to be guest posting for my friend Lindsay while she enjoys this special time with her new baby. As a busy mom of a 3 year old and 10 month old, I know first-hand how hectic it can be to juggle a busy blog with a new baby so I’m honored to be here today.

bowtie pasta with sausage and kale

This flavor-packed Bowtie Pasta with Sausage, White Beans and Kale is not only easy to make but is ideal for a new mom because it is a one-pot meal that requires minimal prep work and clean up. An excellent source of calcium and iron, it is packed with vitamins and nutrients for mommy, baby and the whole family. Heck, it even tastes good at 3am during a middle-of-the-night feeding. I speak from experience.

Print

Bowtie Pasta with Sausage, White Beans and Kale

lemon bowl pasta
Print Recipe

5 Stars 4 Stars 3 Stars 2 Stars 1 Star

5 from 1 review

A one-pot meal that requires minimal prep work and clean up, it’s an excellent source of calcium and iron and is packed with vitamins and nutrients.

  • Author: Author: Lindsay L
  • Yield: 4 1x

Ingredients

Scale
  • 8 ounces whole wheat bowties (or short pasta of choice)
  • 1 tablespoon olive oil
  • 2 Italian turkey sausage links- sweet or spicy
  • 2 cloves garlic,minced
  • 1 teaspoon dried oregano
  • 1 teaspoon fennel seed
  • 1/2 teaspoon red chili flakes – optional
  • 4 cups kale, roughly chopped
  • 15 ounce can cannellini beans, drained and rinsed
  • 1/2 cup parmesan cheese, grated
  • salt and pepper to taste
  • minced parsley to garnish

Instructions

  1. Cook pasta according to package directions reserving 1 cup of the starchy cooking liquid before draining. *For al dente, cook for 1 minute less than instructed. I also suggest cooking the pasta in salty water- your only opportunity to season the pasta.
  2. In a deep pan, heat olive oil over medium-high heat. Remove sausage from casings and add to the pan. Use a wooden spoon to break up the sausage meat as it browns, 7-9 minutes.
  3. When sausage is almost completely browned, add garlic, oregano, fennel and chili flakes. Stir and cook for 30 seconds to release flavors.
  4. Deglaze the pan by adding the reserved starchy cooking water and scraping up all of the brown bits with the wooden spoon.
  5. Add kale to the pan along with a pinch of salt and black pepper. Toss until wilted, 3-4 minutes.
  6. Stir in beans, parmesan cheese and reserved bowties. Heat until warmed through, 4-5 minutes. Garnish minced parsley before serving.

Did you make this recipe?

Tag @theleangreenbean on Instagram

Congratulations Lindsay! I’m so happy for you and your family! Thank you so much for having me here today!

[Tweet “A quick & easy nutrient-packed dinner idea from @thelemonbowl and @leangrnbeanblog!”]


Let’s chat:
What’s your favorite one-pot meal?

Enjoy!
–Lindsay–
Filed Under: Dinner Tagged With: Chicken, Great Northern Beans, Kale, Pasta

Edamame Sliders

November 11, 2014 by Lindsay 18 Comments

I developed the recipe for these Edamame Sliders as part of the “#SoyInspired for Thanksgiving” campaign as a member of the Healthy Aperture Blogger Network. I was compensated for my time.

Hi Friends!

I’ve got a new recipe of my own for you today! I actually was totally on my game and made these a couple weeks before baby arrived. I even teased you with a pic or two on IG…but today’s the day I finally get to share them with you. With Thanksgiving rapidly approaching, I’ve reached the point I seem to reach every year, where I start to crave all of those traditional Thanksgiving foods from my childhood. However, I’ve noticed over the past few years that I’ve also started embracing Thanksgiving as a chance to try some new recipes on occasion!

This is one of those times. I’ve teamed up with The Soyfoods Council to create a recipe for Edamame Sliders.  We were asked to use our choice of soy products to help our Thanksgiving guests get #soyinspired this year. When I did my reader survey a few months ago, a lot of you asked for more meatless recipes so I thought this partnership was very timely! I chose edamame because I knew hubby liked it- we eat it as an appetizer occasionally both at home and in restaurants. It’s a great source of protein and doesn’t have a super dominating flavor so I knew I’d be able to get creative with my recipe.

Looking for a vegetarian burger option? Try these meatless Edamame Sliders. They're packed with plant protein and perfect for an appetizer of meatless main dish!

Originally I was going to use the edamame in grain-based salad that you could add to your Thanksgiving table as a side dish, but then I started thinking about leftovers. I get that for most people, Thanksgiving means turkey. If you have a non meat-eater in your family they can probably get by for one day on sides and other meatless options…but if you’re anything like my family, you spend the next week or so after Thanksgiving eating leftovers. Turkey soup, turkey sandwiches, turkey omlettes…you get the idea. So I thought, why not give the vegetarians something of their own that they could enjoy, either on Thanksgiving day, or while all the leftovers are being consumed?

Looking for a vegetarian burger option? Try these meatless Edamame Sliders. They're packed with plant protein and perfect for an appetizer of meatless main dish!

Thus, these sliders were created. Here’s the recipe:

Print

Edamame Sliders

edamame sliders
Print Recipe

5 Stars 4 Stars 3 Stars 2 Stars 1 Star

No reviews

Protein-packed sliders that can be served as an appetizer or a main dish! Top with cranberry sauce for even more Fall flavor!

  • Author: Author: Lindsay L
  • Prep Time: 5 minutes
  • Cook Time: 20 minutes
  • Total Time: 25 minutes
  • Yield: 6-8 1x

Ingredients

Scale
  • 1/3 c onion, diced
  • 2 cloves garlic, minced
  • 1 c black beans
  • 1 c edamame (shelled and cooked)
  • 3/4 c breadcrumbs
  • 1 tsp paprika
  • 1/2 tsp cayenne pepper
  • 1 egg
  • 1/2 c feta cheese
  • 1/4 c craisins
  • Cranberry sauce
  • , optional for topping

Instructions

  1. Place all ingredients except the feta and craisins in a food processor and process until well combined.
  2. Add the cheese and craisins and pulse a few times to mix.
  3. Form into patties and place on a greased baking sheet.
  4. Baked at 400 degrees F for 18 minutes, flipping once.
  5. Top with cranberry sauce if desired.

Did you make this recipe?

Tag @theleangreenbean on Instagram

These turned out great! They stuck together well and as long as you put them on a greased baking sheet (or try lining with parchment paper or aluminum foil sprayed with oil), they should be pretty easy to flip.

Looking for a vegetarian burger option? Try these meatless Edamame Sliders. They're packed with plant protein and perfect for an appetizer of meatless main dish!

I served them topped with my homemade cranberry sauce and the flavors pair really well together, but feel free to top them however you choose!

Enjoy!
–Lindsay–
Filed Under: Appetizer, Dinner, Side Dish, Sponsored Tagged With: Black Bean, Breadcrumbs, Garlic, Onion

The 20 Minute Workout For Moms

November 7, 2014 by Lindsay 17 Comments

Hi Friends!

It’s Friday. Time for some Fitness. More specifically, a 20 Minute Workout designed for moms! I’ve got my friend Kasey from Veva filling in for me today to share it with you! She’s a huge fitness inspiration, a personal trainer and a new mom herself.  Check out her blog for lots of great workouts, recipes and more! Today she’s sharing a great workout for moms…or anyone really! Give it a try!

————-

I am SO excited to be writing on the Lean Green Bean! I’ve been a Bean fan for quite a few years, and Lindsay has been a huge blogging inspiration for me. Now, onto the post!

Whatever motherhood stage you might be in, you need to stay on top of your fitness game. Not only for yourself, but for all your mom duties! I am a personal trainer, but have never had a job more physically demanding than being a mom. So obviously after giving birth, I was not ready to jump into Body Pump right away, but I found that I really needed to be able to do things like lifting the baby in and out of the crib, walking around and bouncing her (maybe for hours) until she calmed down, lifting that cumbersome but oh so handy car seat in and out of the middle of the car, and then there’s the hefting your fragile body in and out of the bed several times a night.

In addition to having pretty severe ab separation postpartum, I also had very weak pelvic floor muscles from the weight of the baby the past 9 months and from the stresses of labor. I learned that during pregnancy, my body was preparing to push the baby down and out, but the whole postpartum period relies on your body pulling everything up and in.

So for the new mom who needs to get stronger to carry a baby around, for the mom who needs more energy to chase after the squealing toddler, and for any mom who wants to feel strong and confident in her own skin, she needs a workout that is quick, efficient, and that she can do anywhere. She needs to focus on her squats to strengthen her pelvic floor and legs for picking up toys, work on her core for holding babies and constantly lugging stuff everywhere, her chest for supporting her back, and her triceps and biceps for waving “bye bye baby” without her arms flapping in the wind. She needs cardio to outrun her 6 year old when he runs away in Wal-Mart, but she doesn’t have time or the emotional energy to train for a marathon.

She needs the 20 Minute Workout for Moms.

If you’re a mom, or if you aren’t, these are full body workouts that I would recommend doing 3-5x/week. If your little one wakes up halfway through, have them do it with you or do the rest later in the day! Since they are broken into 5 minute segments, you have several good stopping points. But remember, give yourself grace! You carried and gave birth to a baby (or maybe several!), and it takes time to get back in shape, lose weight, feel more confident and get stronger! And you have a great community of women who want you to succeed too. Tag your workouts with #WOHmoves or #momercise to post your progress and encourage others!

The Workout

How To:

Warm-up by doing a few squats, wall push-ups, marching, etc. Do the following exercises for 50 seconds, then use 10 seconds to transition to the next one. Repeat 4x for a total of 20 minutes, and then stretch and shake it out! Go at your own pace, but it’s way more fun to go to the beat of your favorite workout playlist. Focus on good form, pull your belly button to your spine and squeeze your pelvic floor up, listen to your body, and challenge yourself!

Equipment:

You will need your body weight for the beginner workout and a set of medium-heavy weights for the intermediate and advanced workouts.

BEGINNER

This workout is great once you have been cleared by your physician to exercise. It’s low impact, you can just use your body weight, and you go at your own pace. Good for helping to strengthen the pelvic floor and healing diastasis recti.

  1. Sit down, stand up: Sit down on a surface with your knees at 90 degrees, and stand straight up without moving your feet.
  2. Step side-to-side: Step side to side as fast as you can while squeezing your pelvic floor.
  3. Wall push-ups: You can do these on a wall or other inclined surface like a chair. Squeeze your belly button to your spine and lower your body with your arms, keeping your body straight as a board.
  4. Knee-ups: Keeping your hands at your waist, bring a knee up to your hand and switch, going as fast as you can. Keep this low-impact.
  5. Reach up, squeeze back: Reach up at an angle so you can see your hands in front of you, then squeeze your elbows to your sides, pretending like you are squeezing a pencil between your shoulder blades.

INTERMEDIATE

If you’re ready to add some weights and more of a challenge, try the intermediate workout! Always start with bodyweight or light weights, then move up in weights as you feel comfortable. The cardio portions (high knees and butt kickers) are meant to be high impact, but you can always go slower if you need to.

  1. Weighted squats: Use optional weights of choice and squat down as far as you can then back up. The target is to get your butt to knee level. Don’t let your knees extend over your toes!
  2. High knees: Keeping hands at waist level, bring a knee to your hand and switch feet. Then run run run as fast as you can!
  3. Bent over rows: Using medium weights, tilt at the hips, keep your back flat, and drag the weights from your knees up to your hips, squeezing your shoulder blades together.
  4. Butt kickers: Kick your booty as fast as you can!
  5. Chest Press + Leg Lower: With arms out at 90 degrees and weights at chest level, drop your legs as low as you can without touching the floor or letting your lower back come off the floor. Then as you press the weights overhead, bring your legs back up.

ADVANCED

Move aside, extra baby weight, this advanced workout is here to kick you to the curb! Add weights to the strength portions and do your best for the cardio plyometric exercises. If you need to take a break from jumping, modify the exercise and keep your body moving! In order to get the full benefits of this workout, you need to move for the full 20 minutes.

  1. Weighted Walking Lunges: With heavy weights in hand, lunge forward, step together, then lunge forward with the other leg.
  2. Jumping Sumo Squats: Start with feet wider than hips and toes pointed out at 45 degree angle to target inner thighs. Jump up, point toes, and land with soft joints, using your muscles to cushion your landing and going straight back into starting position.
  3. Renegade Row + Push-up: With medium weights in hand and in wide plank position, pull your elbow up to your ribs. Push-up while holding weights, and row on the other side. If this hurts your wrists, put them down during the push-up.
  4. Quick feet: Get low, move your feet as fast as you can, and stay low!
  5. Weighted roman twists: Sit back, lift your legs, and with a medium-heavy weight in hand twist from hip to hip.

Disclaimer

Exercise at your own risk! Please consult with a qualified medical professional before beginning any exercise program. Always start at a beginner level and then move up to something that challenges you, but don’t push yourself beyond your own limits.

What are your favorite quick workouts?


Enjoy!
–Lindsay–

Filed Under: Workouts

How Does Water Affect Your Mood

November 6, 2014 by Lindsay 31 Comments

Hi Friends!

We’re changing things up here today and chatting a little bit about water. How does water affect your mood, you might ask? My friend and fellow RD Jenna from Fresh Food Perspectives is here to offer some info on its’ impact. I think it’s super interesting and I hope you will too! Jenna is mom to two little boys and she’s been a great source of information and support during my pregnancy/new mom journey, which I really appreciate! Check out her blog for healthy recipes and nutrition tips!

—————–
Hey everyone! It’s so nice to meet you via this wonderful blog. I am a fellow RD blogger over at Fresh Food Perspectives where I like to share a fresh perspective on real-life healthy living. I’m a wife to a football coach, a mom to two little boys, and a working girl at both the University of North Florida and in my private nutrition practice/blog.. Join in by adding ideas, articles, recipes, tips, workouts or anything that makes healthy living easier for you by using the hashtag #MakeHealthyEasy. Read more about it at this blog post.

Today I’d like to talk to you about what you’re drinking and how it makes you feel. And no, I’m not referring to sugary drinks or alcohol. I’m talking about your water intake. How does water affect your mood?

Watermood2

Please stick with me. This is isn’t your same old drink more water information.

I typically think of water intake as like a “Behavior Change 101” step. When I teach healthy living classes, this is one of the first things I start with: drink more water! We all probably know that this is an important step for being healthy.

But, have you checked in on this habit in a while? Do you really know that you’re drinking enough? Did you know that your water intake could be directly impacting your mood and brain power?

OK, that was a lot of questions, but hopefully you really thought about them.

I recently had to ask myself all these questions about my water intake because I just assume that I drink enough. What I found out though, was that I was not drinking as much as I thought and it was negatively affecting my mood, energy level and emotions.

What got me thinking about my water was a very interesting study I came across recently that looked at the connection between water intake, emotions, energy, and mental performance.

{Bear with me as I geek out on the science here for just a second…}

The study tracked changes in people’s mood when they went from either a restricted intake of water (1 Liter/day) to a high water intake (2.5 Liters/day) or vice versa. For a frame of reference, 1 Liter is about 4 ¼ cups and 2.5 Liters is about 10 ½ cups.

When participants went from a time of restricted intake (1 Liter) to elevated water intake (2.5 Liters), they experienced significantly less fatigue and sleepiness with improved brain power (less confusion). On the flip side, when participants went from a high water intake to a restricted intake, participants experienced a drop in “vigor”, contentedness, ability to stay calm and overall positive feelings.

{Geek out session is now over.}

IMG_5403

**Editor’s note: If you’re a longtime reader you probably know that I (Lindsay) am a huge water lover. My giant water bottle makes an appearance in many of my meal pics!**

After doing a quick self assessment, I realized a few things: I am getting headaches more frequently, I am a lot more tired, I’d say my brain is running on about 50% these days, some days I feel more overwhelmed by motherhood than I am proud to admit, and yes, I’m not drinking enough water due to a variety of reasons. Hmmm. Maybe water intake isn’t so “101” level afterall.

In the past week, I have really put forth effort in drinking more water. (Yes, this is happening to me like right now). As I sit here typing, I am realizing I have had less headaches, my brain feels a touch sharper and I’m in a much better mood-place this week.

You and I both know that water is an important component to good health. But, as I’ve personally found, it’s easy to forget and easy to neglect in our day to day minutiae. In fact, let me take a brief moment to remind us all of something important about healthy living in general: It’s always good to do a check-in on your day to day behaviors, even if you think you’re OK.

When working with clients over the years, I have found that when life changes (in big or small ways) it’s important take a moment to make sure your normal healthy habits are still working for you. It can be frustrating when your typical strategies aren’t producing the same results anymore. But you know what, that’s pretty normal. I suggest pulling out a pen and paper and jotting down a few new strategies for accomplishing your goal. Being deliberate is the only way to make a change.

And sometimes, you just need a fresh plan of attack.

IMG_3319

**Editor’s note: One of my favorite ways to keep my water intake up in the colder months- hot water with lemon and fresh ginger**

I’ve needed a new plan of attack for drinking more water. One of my ideas is to add dehydrated lemon slices to my water because it makes it just a little more delicious and fun. (You can read my blog post on how to dehydrate at home to do the same.)

So take a quick moment to really think about how you’re feeling these days, and how much water you’re really drinking. Maybe you’re need a little water check up and it could make a really big difference in how you feel too.

Wouldn’t it be nice for us all to feel better and have more brain power just by drinking more water? That’s certainly a way to #MakeHealthyEasy.

[Tweet “Come learn how water intake can impact your mood from @JbraddockRD and @leangrnbeanblog”]

You can also connect with Jenna via the social media links below:

Facebook
Twitter
Instagram
Pinterest

————

Let’s chat:
Do you have any tips or strategies you have for drinking enough water?

Filed Under: Uncategorized

  • « Go to Previous Page
  • Page 1
  • Interim pages omitted …
  • Page 36
  • Page 37
  • Page 38
  • Page 39
  • Page 40
  • Interim pages omitted …
  • Page 65
  • Go to Next Page »

Primary Sidebar

Lindsay Livingston The Lean Green Bean Healthy Living Tips and Tricks

I'm a Registered Dietitian and mom of three from Columbus, Ohio. I use this blog to share simple, healthy recipes, nutrition tips, and an honest glimpse of motherhood!

Learn More →

Questions? Comments? Email me: [email protected]

The Lean Green Bean Facebook The Lean Green Bean Instagram The Lean Green Bean Pinterest The Lean Green Bean Twitter The Lean Green Bean Feed
footer-logo
The Lean Green Bean Facebook The Lean Green Bean Instagram The Lean Green Bean Pinterest The Lean Green Bean Twitter The Lean Green Bean Feed
Recipes

Breakfast
Dinner
Snack
Slow Cooker

Kids

Cooking With Kids
Favorite Gifts
Toddler Meals
Indoor Activities

Resources

Easy Packed Lunches for Kids
Dinner Spark
Snack Spark
Ultimate Guide to Food Prep

About

Meet Lindsay
Become an RD
Work with Me

The Lean Green Bean is a participant in the Amazon Services LLC Associates Program, an affiliate advertising program designed to provide a means for sites to earn advertising fees by advertising and linking to amazon.com.
Read the full privacy and disclosure policy here.

Copyright © 2022 · The Lean Green Bean

table talk series

Learn how food affects your body.

Get my free Table Talk email series where I share bite-sized nutrition information about carbs, protein, and fat, plus bonus information about snacks and sugar!

[email protected]