• Skip to main content
  • Skip to primary sidebar

Learn how food affects your body. Get Free Nutrition Info Today

the-lean-green-bean-logo
  • Home
  • Recipes
  • Kids
  • Resources
    • Ebooks
    • Food Prep
    • Videos
    • Snack Round-Ups
    • Gift Guides
  • About
    • Become An RD
    • Work With Me
  • Search
the-lean-green-bean-logo
  • Home
  • Recipes
  • Kids
  • Resources
    • Ebooks
    • Food Prep
    • Videos
    • Snack Round-Ups
    • Gift Guides
  • About
    • Become An RD
    • Work With Me
  • Search

blog

Fitness Friday 65

April 18, 2014 by Lindsay 29 Comments

Hi Friends!

It’s been a hot minute since we had a Fitness Friday post so let’s catch up shall we? When we left off, I’d just completed the second workout of the Crossfit Open….so here’s how the next three weeks of Open workouts went down:

ff1.jpg

14.3 was the only Open workout where I was a little bit worried about how heavy the weights were. At this point I was still pretty early in my first trimester so I was being careful but still lifting some heavier weights. I knew i’d be fine up to 155 but I didn’t really want to do many at 185…so I took it slow and when I got to the 185# deadlifts I just did 5 of them. Just enough to get me ahead of the people who couldn’t physically lift the weight…but not enough to really tax myself.

14.4 was terribly hard. Getting off the rower means your legs are jello and then having to go straight into toes to bar, which are one of my weaknesses was super rough. I actually put this one off until about 3 hours before the submission deadline because i was dreading it so much. I finished 160 reps which was through 10 of the power cleans I think.

14.5 was just miserable. Burpees and thrusters are on no one’s list of favorite movements…and there was a lot of them. To make it worse, there was no time cap…so you had to do every single rep or you couldn’t submit a score. I just took this one slow and steady. The thruster weight wasn’t super heavy but I was pretty much crawling through the burpees. But I finished! Took me 20:52.

I think I ended up in the top 40% when the open was over!

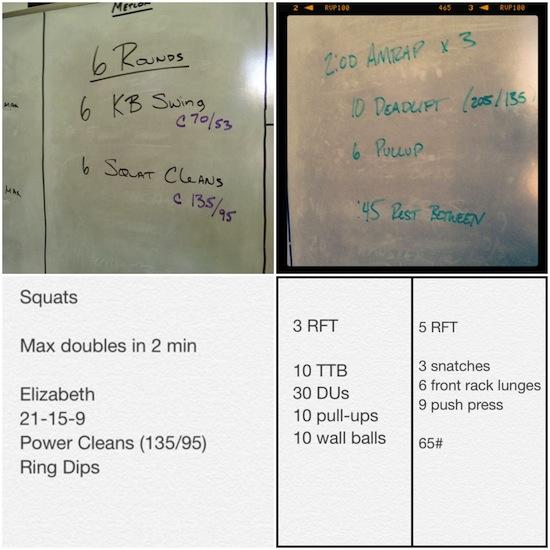
I love the Open, but I was really glad to get back to regular workouts this year. Here are some of the workouts I’ve been doing over the past several weeks:

ff2.jpg

1. I scaled this one to 75# squat cleans and used a 35# kettlebell. Finished in 7:32.
2. 5 min row – 1230 meters, 3/3 pistols 10 min EMOM, then the wod. I paced myself terribly so my rounds were not consistent at all and I ended up getting a ton the first round and hardly any by the last round.
3. 131 doubles. 6:31 for the wod with a red band for ring dips and 95# for cleans.
4. Left: Class was doing some wod I can’t remember but that wouldn’t have been good for me so I did this one instead in  7:54
Right: Made up my own wod for a quick Friday workout.

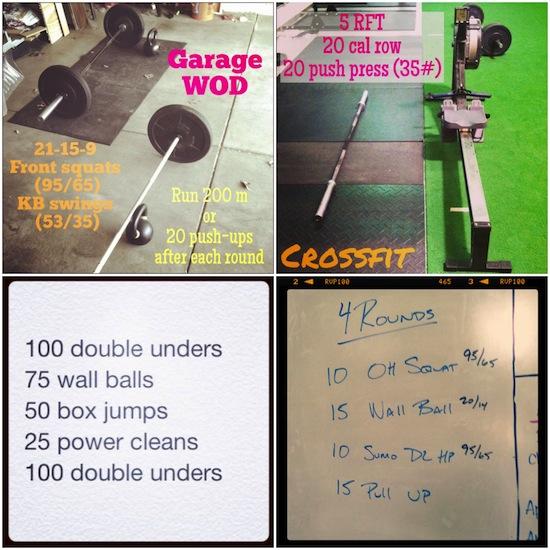
ff3.jpg

1. Hubby & I did a garage wod- I did push-ups and they took me FOREVER…can tell I haven’t been doing them much lately. Finished in 8:42. Hubby ran and finished in 11:45.
2. Class was doing 20 burpees, 20 TTB with a 15 minute cap. Last time I did TTB they didn’t feel great so I skipped those and did 20 cal row to get my heartrate up and then 20 pushpress for 5 rounds. Finished in 11:54.
3. I did step ups instead of box jumps and scaled my power cleans from 95# to 75#. Finished in 12:27.
4. Wasn’t feeling well but was hoping moving around would help. Did 10 reps of each movement for 4 rounds and used 55#.. Finished in 11:41 

ff4.jpg

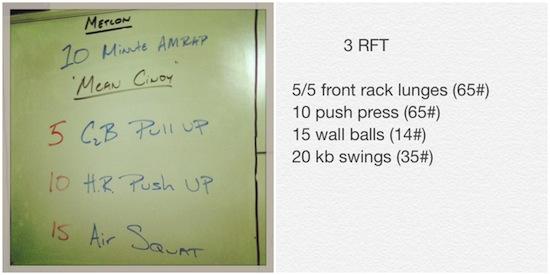
This week so far:
1. 25 min descending EMOTM clean ladder, then mean Cindy. 7+2 Rx. Pumped I was able to do all chest to bar pullups
2. Class was doing a wod with lots of heavy deadlifts and ring dips so I made up my own and squeezed it in before a night of pricing garage sale items. Finished in 9:55.

As you can see, I’m just taking it day by day, workout by workout. If there are things in the programmed wod that don’t feel great or are to heavy, I just modify to make them work for me!

Let’s chat:

How have your workouts been lately?

Enjoy!
–Lindsay–

Filed Under: Workouts

Birthdays and Babies

April 15, 2014 by Lindsay 116 Comments

Hi Friends!

Today is my 29th birthday! If you need me, i’ll be busy pretending that this past weekend’s weather (70 and sunny) was meant for my bday…since Mother Nature has decided it should only be 38 degrees today. WHAT?!

I’ll also be eating my last little birthday ice cream cupcake and treating myself to a nap!

IMG_4316

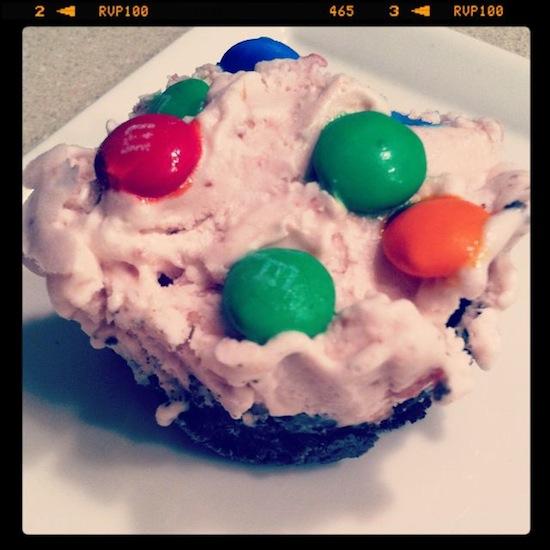
When I was younger, the only “birthday cake” I ever requested was actually more like an ice cream pie. It was an oreo crust filled with strawberry ice cream and topped with m&ms. I found this pic from one of my earlier bdays to show you one my mom made:

IMG_4368.jpg

It’s been forever since I had my favorite cake….so this year I decided to treat myself. I made little individual ice cream cupcakes because they’re easier to deal with…the big pie can be hard to cut and this way they’re already pre-portioned. All you have to do is mix together some crushed oreos and a little melted butter and press into the bottoms of the muffin tins, top with strawberry ice cream and then add a few m&ms and store in the freezer. I think I made 8 of them so I’ve been enjoying them for dessert for the past week and a half! Delish.

————

In unrelated news, it’s time to ask for some advice from you guys. Now that you know baby bean is on the way….we need all the help we can get and we’d love your opinions. Here are some questions to get you started:

  • What are the baby must-haves, products, etc? (For baby AND for parents!)
  • What are some things you thought you’d need but ended up not being that important?
  • Have you written a post or read a good article on baby must-haves? Leave me a link!
  • Tips for getting pets ready for babies?
  • Any great websites to score deals on baby stuff?

Let’s hear it!

Enjoy!
–Lindsay–

Filed Under: Uncategorized

Balsamic Roasted Asparagus

April 9, 2014 by Lindsay 22 Comments

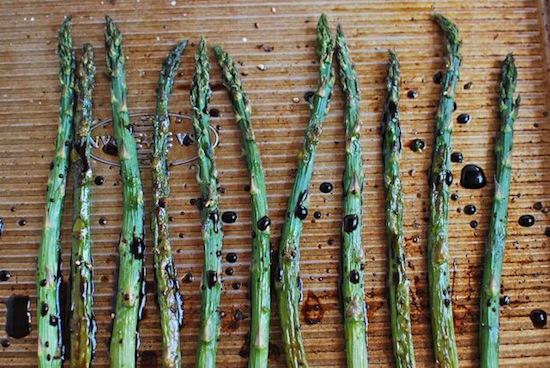
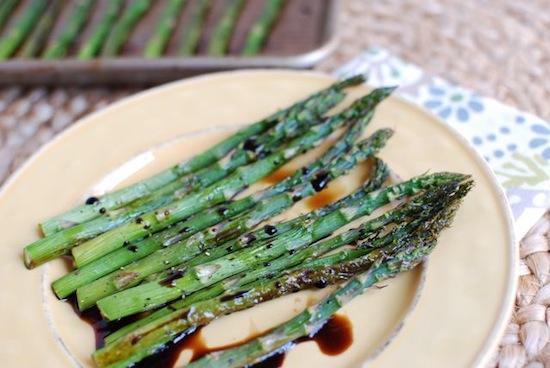
An easy dinner side dish – Balsamic Roasted Asparagus.

Hi Friends!

We’re talking vegetables again today! I hesitate to even call this a recipe- it’s that simple….but it is one of my family’s favorite side dishes. My mom taught me to make it…and now I make it all the time for Mr. Bean.

An easy dinner side dish - Balsamic Roasted Asparagus.

Really this is just another post encouraging you to eat more veggies 🙂

Here’s what you need:

Print

Balsamic Roasted Asparagus

asparagus4
Print Recipe

5 Stars 4 Stars 3 Stars 2 Stars 1 Star

5 from 1 review

An easy side dish the whole family will love.

  • Author: Author: Lindsay L

Ingredients

  • asparagus
  • olive oil
  • salt
  • pepper
  • balsamic vinegar

Instructions

  1. Cut the tough ends off the asparagus spears and lay them on a baking sheet.
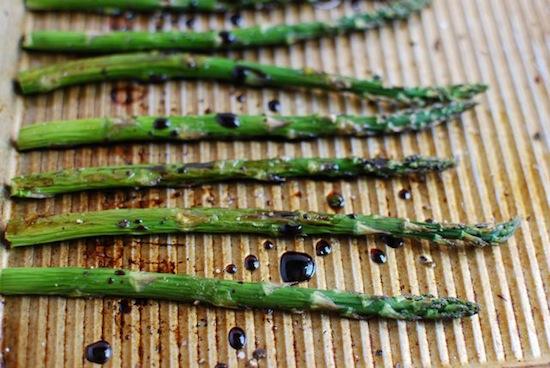
  2. Drizzle with olive oil and sprinkle with salt and freshly ground pepper.
  3. Bake at 425 degrees for 10-15 minutes depending on thickness of spears.
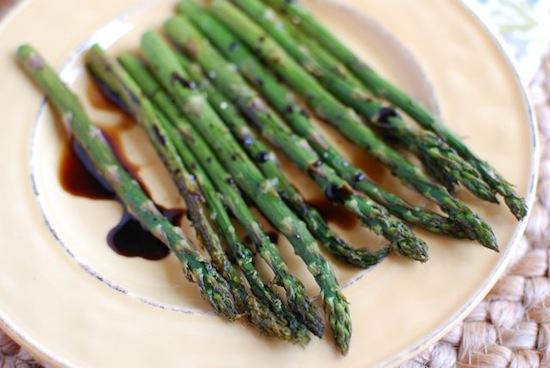
  4. Drizzle with balsamic vinegar and serve!

Did you make this recipe?

Tag @theleangreenbean on Instagram

I mean, really, it doesn’t get any easier than that!

An easy dinner side dish - Balsamic Roasted Asparagus.

Aren’t veggies pretty?!

An easy dinner side dish - Balsamic Roasted Asparagus.

Don’t like asparagus? Try the same thing with carrots!

An easy dinner side dish - Balsamic Roasted Asparagus.

Happy eating!

Enjoy!
–Lindsay–

PS. Wishing my mom a very happy birthday today! Hope you have a great day. See you soon!

Filed Under: Side Dish

Broccoli Slaw with Peanut Sauce

April 8, 2014 by Lindsay 34 Comments

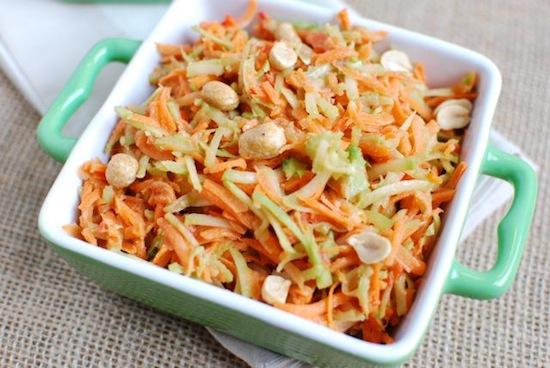
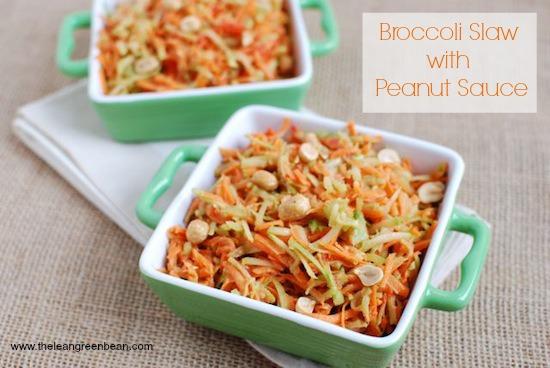
This Broccoli Slaw with Peanut Sauce is so easy to make! Don’t throw away those broccoli stems! Turn them into this easy dinner side dish.

Hi Friends!

Today I have a super simple recipe to share with you guys to encourage you to eat your broccoli! And not just the fun little trees at the top. Did you know you can also eat the stems?

Don't throw away those broccoli stems! Turn them into slaw and top with a peanut dressing!

So stop throwing away those broccoli stems and start using them to make this simple slaw! A food processor with a shredding attachment comes in quite handy here. You can use whatever combination of veggies you want- I chose broccoli stems, carrots and red peppers. I also added a simple peanut sauce because everything tastes better with peanut butter…am I right?

Here’s the recipe:

Print

Broccoli Slaw with Peanut Sauce

broccoli slaw 1
Print Recipe

5 Stars 4 Stars 3 Stars 2 Stars 1 Star

4.5 from 2 reviews

A fun way to use up those broccoli stems instead of throwing them away!

  • Author: Lindsay L
  • Yield: 4-6 1x

Ingredients

Scale
  • 4 broccoli stems
  • 2 large carrots, peeled
  • 1 red pepper
  • 2 Tablespoons peanut butter
  • 1 Tablespoon sweet thai chili sauce
  • 2 teaspoons rice wine vinegar
  • 1 Tablespoon olive oil
  • 2–3 Tablespoons water, to thin
  • chopped peanuts, optional

Instructions

  1. Shred the broccoli, carrots and red pepper using a food processor or grater.
  2. Place in a paper towel and squeeze to remove moisture then transfer to a bowl.
  3. In a small bowl, mix together peanut butter, chili sauce, vinegar and olive oil. Add water as needed until desired consistency is reached. (It’s ok if it’s still pretty thick.)
  4. Add sauce to veggies and mix until well combined. *See note
  5. Sprinkle with chopped peanuts before serving.

Notes

You can start with half the sauce and then add more as you mix depending on how much sauce you like…or you can plate the veggies plain and serve the sauce on the side so people can add their own.[br]Feel free to use your own combination of veggies.

Did you make this recipe?

Tag @theleangreenbean on Instagram

Like I said in the notes above…the sauce is thicker than a traditional liquid sauce. Since it’s thicker, you may want to start by adding half the sauce and mixing until the veggies are coated and then decide if you want to add more. Or, serve them plate and let everyone top with their own sauce!

Don't throw away those broccoli stems! Turn them into slaw and top with a peanut dressing!

Enjoy!
–Lindsay–

Filed Under: Side Dish Tagged With: Peanut Butter

You Made It 3.0

April 5, 2014 by Lindsay 13 Comments

1.jpg

2.jpg

3.jpg

4.jpg

5.jpg

6.jpg

7.jpg

8.jpg

9.jpg

10.jpg

11.jpg

12.jpg

13.jpg

14.jpg

15.jpg

burgers

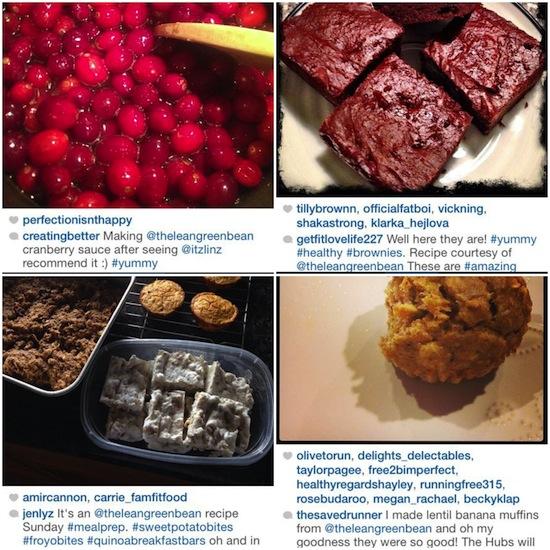
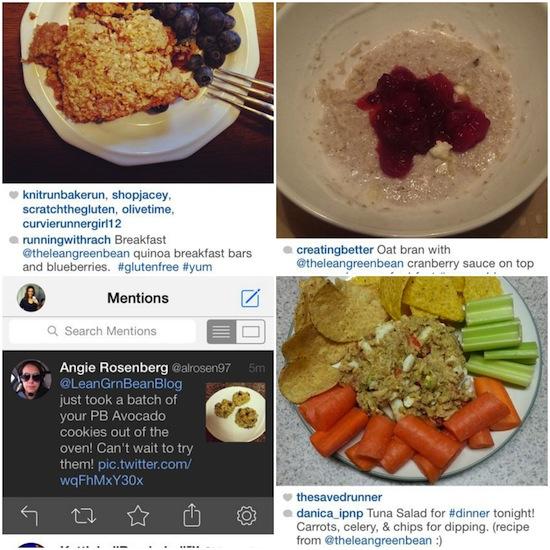
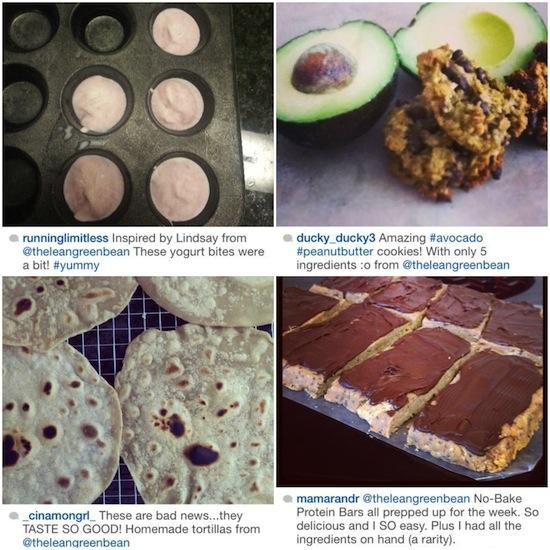
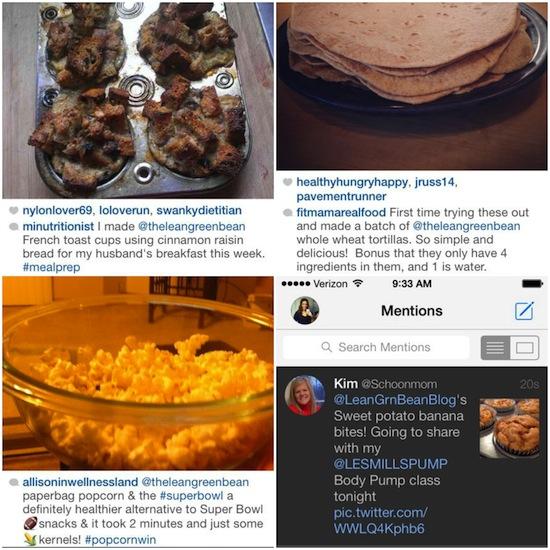
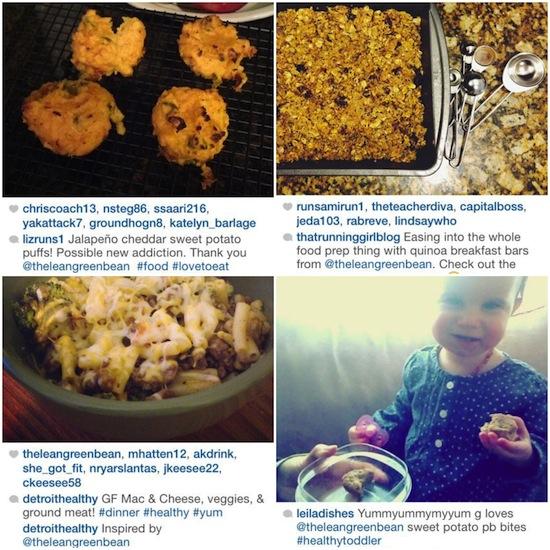
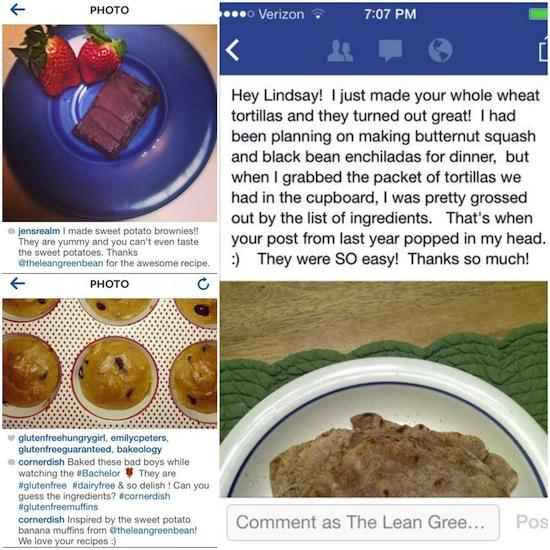
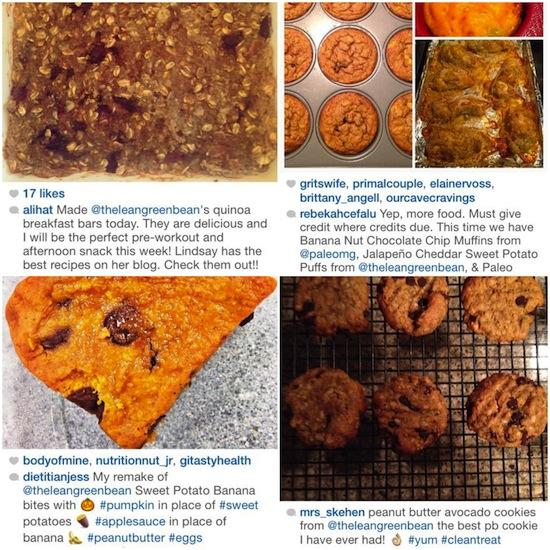
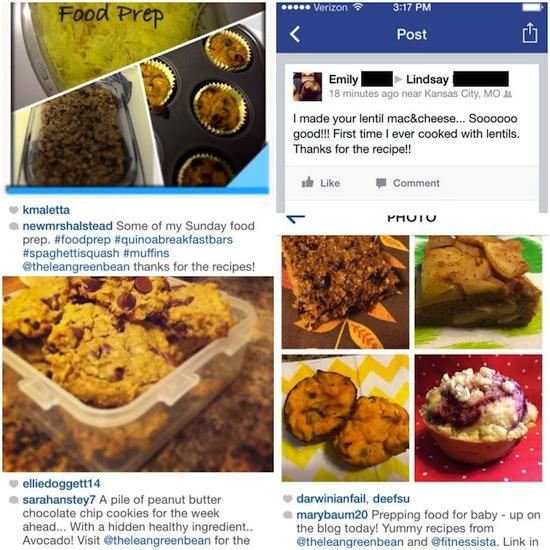
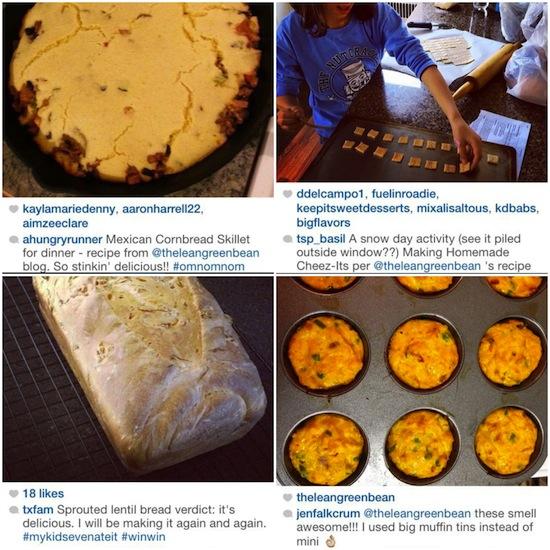
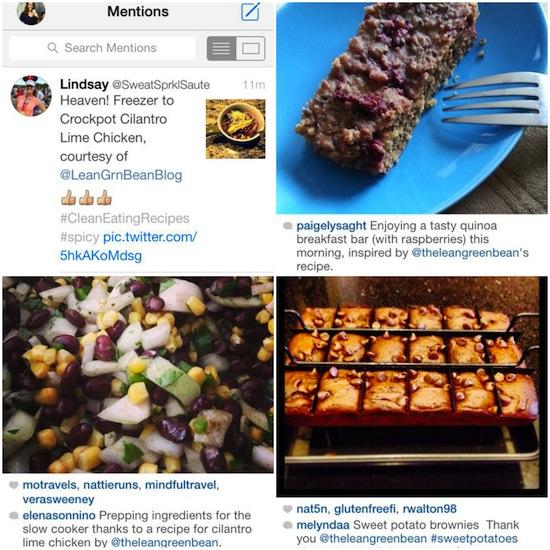
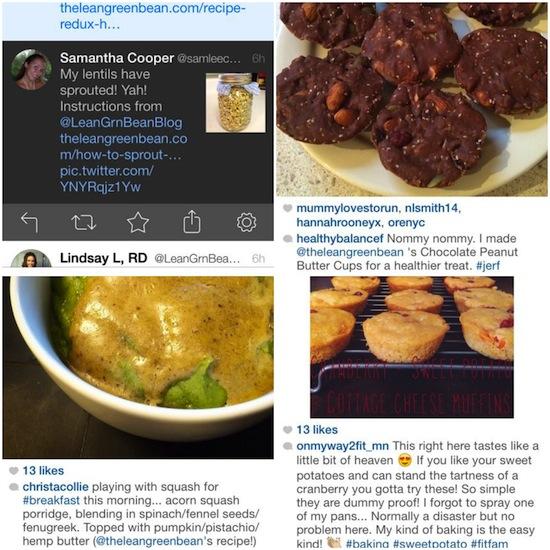
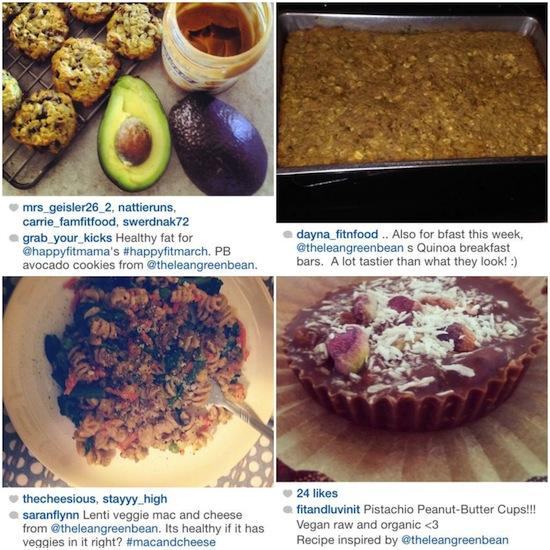
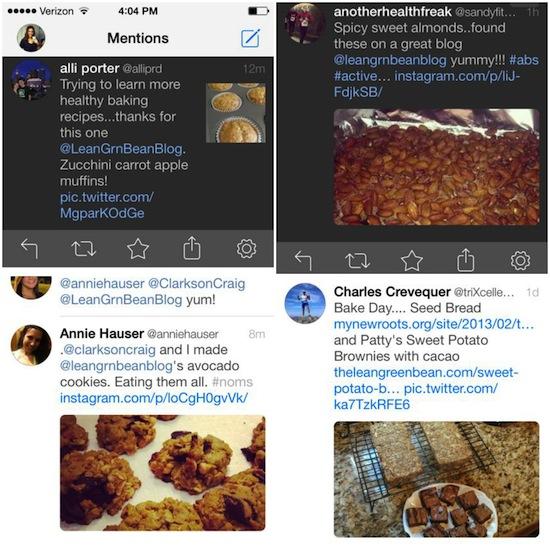
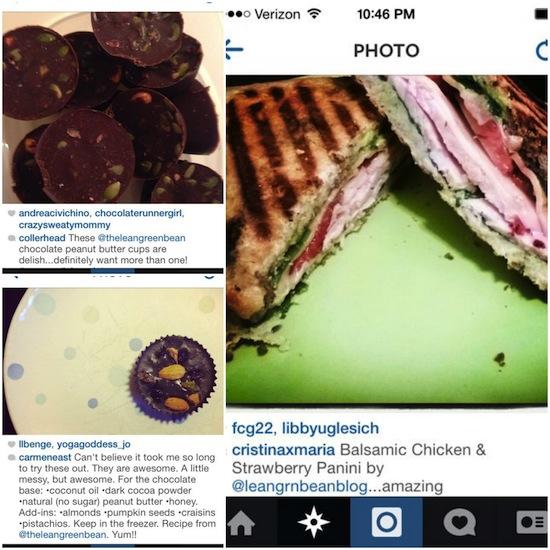
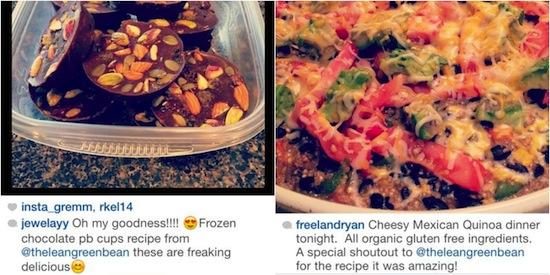
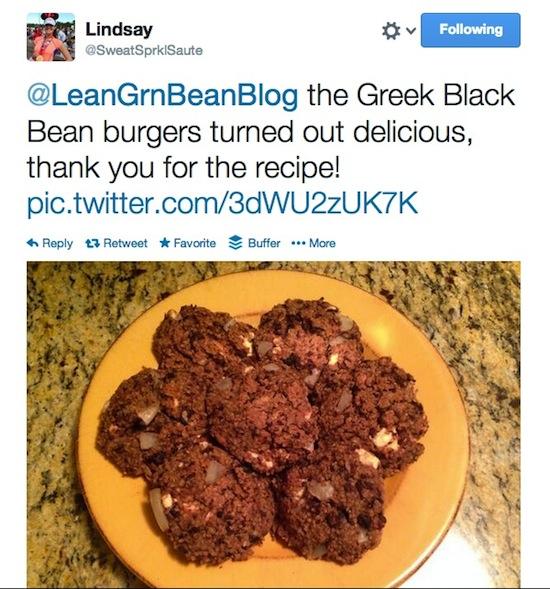
As a blogger, nothing makes me happier than seeing my readers make and enjoy the recipes I’ve created! It’s been a few months since I did a “You Made It” showcase, so I wanted to share some of the recipes you’ve been making and loving. It’s always nice to have a second opinion before you try a new recipe…so here are the links to some of the recipes of mine that others have made and enjoyed:

Here are the links to the recipes mentioned above in case you want to check them out:

Breakfasts
Quinoa Breakfast Bars
Lentil Banana Muffins
French Toast Cups

Main Meals
Mexican Cornbread Skillet
Lentil Veggie Mac & Cheese 
Tuna Salad with Avocado 
Crockpot Cilantro Lime Chicken
Cheesy Mexican Quinoa
Balsamic Chicken & Strawberry Panini
Greek Black Bean Burgers

Snacks
Freezer Chocolate PB Cups
Sweet Potato Bites
No Bake Protein Bars
FroYo Bites
Healthy Microwave Popcorn 
Jalapeno Cheddar Sweet Potato Puffs 
Homemade Cheez-Its 
Pistachio Pumpkin Seed Butter 
Zucchini Carrot Apple Muffins
Sweet & Spicy Almonds

Desserts
Sweet Potato Brownies 
Peanut Butter Avocado Cookies

Sides
Fresh Cranberry Sauce
Homemade Whole Wheat Tortillas
How To Sprout Lentils/ Sprouted Lentil Bread

Thanks so much to all of you for reading, sharing your creations with me and inspiring me every day!

Enjoy!
–Lindsay–

Filed Under: Uncategorized

Tips for Starting Yoga as a Beginner

April 4, 2014 by Lindsay 67 Comments

Yoga 101: Are you thinking about starting yoga? Here are some beginner tips and information on the different styles to help you choose what’s best for you.

Hi Friends!

In lieu of a typical Fitness Friday post from me, I thought we’d do something a little different today. I’m a huge advocate of stepping outside of your comfort zone in all areas of life- work, home, fitness, etc. So, I invited one of my good friends, Christine, to teach us a little bit about an area of fitness that is totally outside my comfort zone – yoga.

I’ll be honest…I’ve only tried yoga once or twice and I wasn’t crazy about it…but I do think that could be because I really know nothing about it. Christine is giving us Yoga 101…a great beginners guide for people like me who are looking to start practicing yoga but are feeling a little overwhelmed!

Thinking about starting yoga? Here are some beginner tips and information on the different styles.

————–

Hey everyone! I’m so excited to be over here at Lindsay’s place today. Lindsay is one of my favorite bloggers (and people!) and I’m honored that she invited me here to share something I love with you – yoga.

I know. I know. Yoga’s just stretching, right? It’s supposed to relax you and it’s good for cross-training. Yoga’s something you think you should do, but it’s so hard to fit it into your already packed schedule.

While most of us are most familiar with the physical practice of yoga that we see in magazines and on Instagram, there are actually 8 limbs or branches of yoga – mental, physical and spiritual practices and disciplines. The physical practice is just one of those branches.

In Sanskrit, yoga means to join or unite. It’s through the practice of all 8 limbs of yoga that we join the body, mind and breath that ultimately lead to enlightenment. Not enlightenment in the sense of, “I am all knowing,” but more in the sense of knowing your true self.

It can be intimidating to try yoga if you’re not familiar with it. I used to be that super stiff and tight runner in the back of the room who was just trying to stretch a lit tie more. Since then, my yoga practice has cracked open more than just my hamstrings but it’s been a process that has taken time.

Thinking about starting yoga? Here are some beginner tips and information on the different styles.

If you’re curious about yoga or interested in starting a practice, here are 5 tips I wish someone had told me when I first started.

1. Try different styles of yoga.
There are so many different types of yoga being marketed today – Hatha, vinyasa, power yoga, hot yoga, bikram, restorative – Gah! There isn’t a one-size-fits-all with yoga. It’s very much a personal practice and you need to find something that resonates with you, just like you would with any other type of exercise.

Here’s a breakdown of some popular styles of yoga:
• Hatha: Generally, Hatha yoga classes offer a great introduction to basic yoga postures. You tend to hold postures for a few breaths so you can explore the pose a bit more.
• Iyengar: The Iyengar method emphasizes the precise alignment of the body, using different props like blocks, straps, chairs and even a ropes wall (which I LOVE!), so that you are structurally sound in your practice.
• Vinyasa: Vinyasa-style of yoga is probably one of the most popular styles. It’s a practice in which movement and breath are linked, creating a dynamic flow from posture to posture. There are a number of different Vinyasa-style yoga classes including Ashtanga, Power Yoga, Jivamukti, etc.
• Restorative: Restorative classes are a great way to relax and restore your body. You use props to help support your body in various yoga poses so that you do not have to exert any effort but are able to experience the effects of the practice.
• Bikram: Bikram yoga was created by Bikram Choudhury. You move through a series of 26 poses in a heated room and each Bikram class always follows the same sequence so you know what to expect when you walk into a studio.

2. Start with a workshop
If you have the chance, I would highly suggest starting with a Beginners Workshop. Rather than trying to keep up in an open level class, risk hurting yourself and leaving not having enjoyed the class, workshops give you a chance to really learn. Teachers will break down the poses and the practice and give you a bit more individual attention.

3. Pay attention to alignment.
Yoga can be great for your body but it can also not be so great if you don’t pay attention to your alignment. As with running, lifting, cross fit and any other sport, proper form is critical to healthy joints and muscles.

4. Ask questions.
That’s what the teacher is there for – ask questions about things you don’t understand or are curious about. Ask about alignment. Ask if something feels off during your practice.

5. Practice within your own body.
This might be the hardest in practice. When you’re in a class surrounded by others, it’s hard not to compare yourself or try to keep up with others. But your yoga practice is just that – YOURS. And your practice (and body) is different every time that you show up on the mat.

Check in with yourself throughout your practice and modify if you’re not feeling it that day and take child’s pose when you need to. The practice of yoga is about being in touch with your own body and mind and giving yourself what you need in that moment.

Thinking about starting yoga? Here are some beginner tips and information on the different styles.

Fundamental Yoga Postures

Here are some great poses for beginners and advanced practitioners alike. These are fundamental poses that will help to lay a solid foundation for your practice. Click the names for more details on each pose.
• Cat-Cow: This is a great way to warm up your spine and begin to move your body.
• Mountain pose: This pose will teach you how to stand well and bring awareness to your posture.
• Tree pose: This pose teaches you balance, which is key as you move on to more advanced balancing poses.
• Wide-Legged Forward Fold: This pose works the lateral aspect of the legs, strengthening and stretching the inner and back of the legs. It also prepares you for poses like Warrior II, Triangle and Extended Side Angle.
• Child’s Pose: This is an amazing resting pose. With the torso on the thighs, you also get the benefits of a deep forward bend, which helps to calm the nervous system.
• Legs up the wall: This pose gives you many of the benefits of an inversion without completely turning yourself upside-down. It’s also a great pose to relieve tired or cramped legs i.e. after a long run.

Do you practice yoga? I have a monthly series on my blog – Ask a Yogini – which answers questions about yoga. Please let me know if there’s anything you’re curious about!

————

Christine is a freelance writer, yoga instructor, runner and wannabe surfer. She’s the author of the blog Love, Life, Surf where she shares her love of fitness and stories about her experiences as a mom of two young boys trying to balance, work, family, fitness and healthy living. You can also find her on Twitter, Facebook, Instagram and Pinterest.

————-

Huge thanks to Christine for stopping by today!

Let’s chat:
Are you a yogi? Or are you looking to learn like I am?

Enjoy!
–Lindsay–

Filed Under: Workouts

Baked Oatmeal

April 3, 2014 by Lindsay 69 Comments

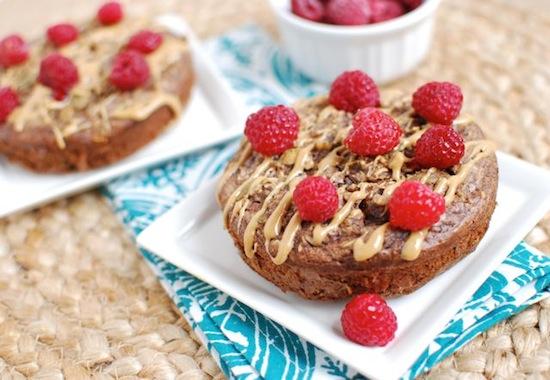
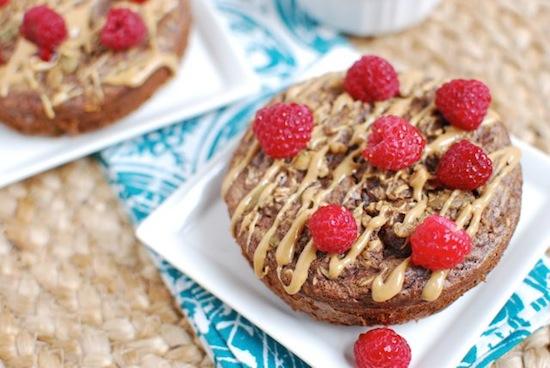
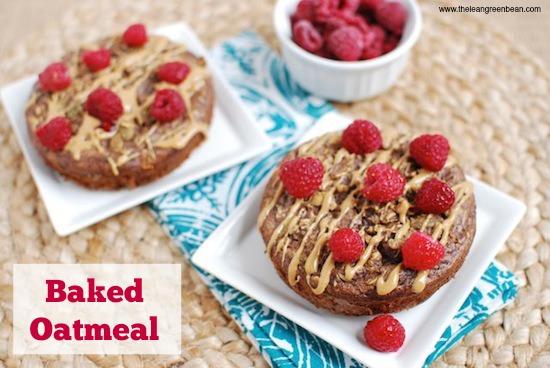
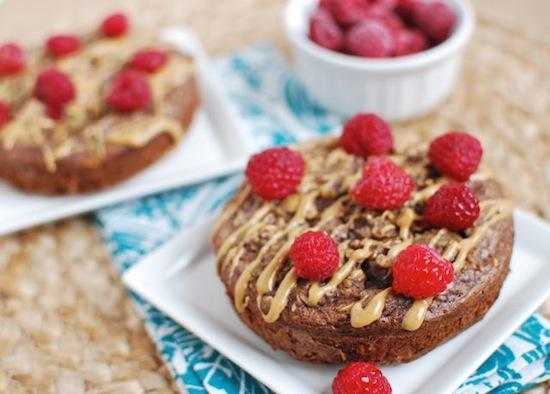
Baked Oatmeal makes a hearty and filling breakfast. Full of fiber and healthy fats, it’s sure to keep you full. Make a double batch and reheat all week long.

Hi Friends!

Just popping in with a quick new recipe to share today! As you probably know, I eat oatmeal pretty much every morning for breakfast. I usually just make it in the microwave, but yesterday I thought it might be fun to change things up and make a baked version.

Baked Oatmeal makes a hearty and filling breakfast. Full of fiber and healthy fats, it's sure to keep you full. Make a double batch and reheat all week long.

This is a twist on my favorite morning oatmeal combo, with a few adjustments to make it more suitable for baking! Keep in mind that this is not very sweet. It works for me with just the sweetness from the banana and milk and then the fruit and peanut butter drizzle on top. If you like things sweeter, you may want to add a little honey or sugar to yours.

Here’s the recipe:

Print

Baked Oatmeal

2
Print Recipe

5 Stars 4 Stars 3 Stars 2 Stars 1 Star

5 from 2 reviews

Perfect for a lazy morning breakfast OR double the recipe and make enough for the whole week…then just reheat in the morning.

  • Author: Author: Lindsay L
  • Prep Time: 5 minutes
  • Cook Time: 25 minutes
  • Total Time: 30 minutes
  • Yield: 2 1x

Ingredients

Scale
  • 1 cup rolled oats
  • 3/4 cup milk
  • 1 egg
  • 1/4 cup Dark Chocolate Nuttzo (or your favorite nut butter)
  • 1/4 cup mashed banana
  • 1/4 cup raw pumpkin seeds
  • 1/2 teaspoon baking soda
  • 1 teaspoon cinnamon
  • Toppings: additional nut butter & fruit

Instructions

  1. Mash the banana and Nuttzo (or nut butter) together in a small bowl.
  2. Add the oats, milk and egg and mix well.
  3. Stir in the baking soda, cinnamon and pumpkin seeds.
  4. Pour into large, greased ramekins (or whatever pan you want to use) and bake at 400 degrees for 25 minutes.
  5. Top with a drizzle of nut butter and some fresh fruit if desired.

Did you make this recipe?

Tag @theleangreenbean on Instagram

I don’t know why it took me so many years to discover parchment paper but it really makes getting stuff out of pans a whole heck of a lot easier!

Baked Oatmeal makes a hearty and filling breakfast. Full of fiber and healthy fats, it's sure to keep you full. Make a double batch and reheat all week long.

Feel free to customize this to your liking. Use your favorite fruit, try applesauce if you don’t like banana, or even drizzle with chocolate if you wanna get crazy!

Baked Oatmeal makes a hearty and filling breakfast. Full of fiber and healthy fats, it's sure to keep you full. Make a double batch and reheat all week long.

And don’t feel the need to make yours pretty like mine. That was just for the pictures 🙂

Baked Oatmeal makes a hearty and filling breakfast. Full of fiber and healthy fats, it's sure to keep you full. Make a double batch and reheat all week long.

[clickToTweet tweet=”Try Baked Oatmeal from @leangrnbeanblog for a hearty and filling breakfast you can eat all week!” quote=”Try Baked Oatmeal from @leangrnbeanblog for a hearty and filling breakfast you can eat all week!”]

Let’s chat:

Are you an oatmeal lover?
What your favorite oatmeal combo?

Enjoy!
–Lindsay–

Filed Under: Baking, Breakfast Tagged With: Banana, Egg, Milk, Oats, Peanut Butter, Pepitas

10 Foods That Freeze Well

April 1, 2014 by Lindsay 50 Comments

Hi Friends!

I didn’t have time to do my food prep this weekend (gasp!)…i know, i know! Oh well, it happens. It did, however, get me thinking about how important the freezer is for weeks like this when I’m too busy to prep food. So, I thought I’d make a list of some foods that freeze well.

Having a well-stocked freezer makes it easy to eat healthy during the week. Here are 10 foods that freeze well. Do some food prep now for easy meals later.

These are things you can make ahead of time, make double batches of, etc and stick in the freezer until you need them!

Here are some ideas for you:

greek black bean burgers

1. Burgers – Whether they’re meat or veggies, burgers freezer really well. You can cook them ahead of time and then let them cool, wrap in plastic wrap and freeze in ziploc bags…then just reheat when you’re ready to eat. Or, you can just form into patties and freeze raw so all you have to do is thaw and cook them.

Try It:  Greek Black Bean Burgers

lasagna{Photo Credit}
2. Casseroles – Not all casseroles are ideal for freezing, but there are definitely plenty of recipes out there that are freezer-friendly! Things like lasagna are great to make ahead of time, freeze and then just warm in the oven on a busy night.

Try It: Healthy Casseroles To Freeze via Eating Well

whole wheat oatmeal pancakes

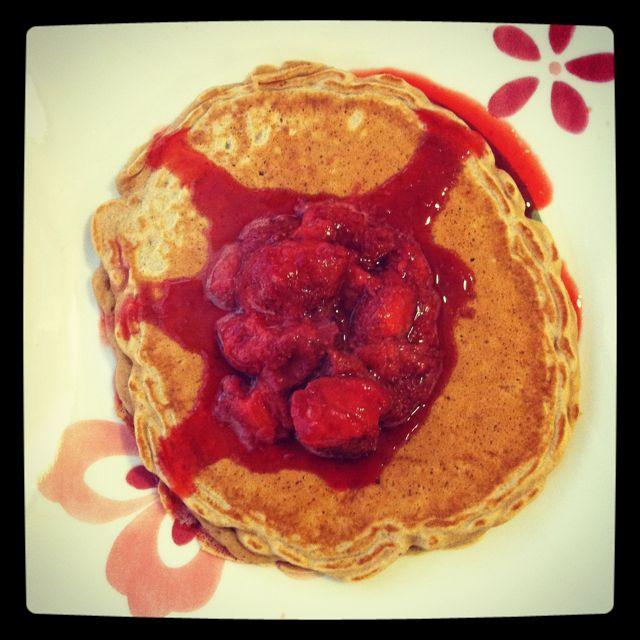
3. Pancakes & Waffles – These are great to have on hand for busy mornings. Wrap 3-4 pancakes (or however many you want for an individual serving) in saran wrap and freeze in Ziploc bags. In the morning, unwrap and pop them in the toaster or microwave to heat through.

Try it: Whole Wheat Oatmeal Pancakes

sausage lentil & kale soup

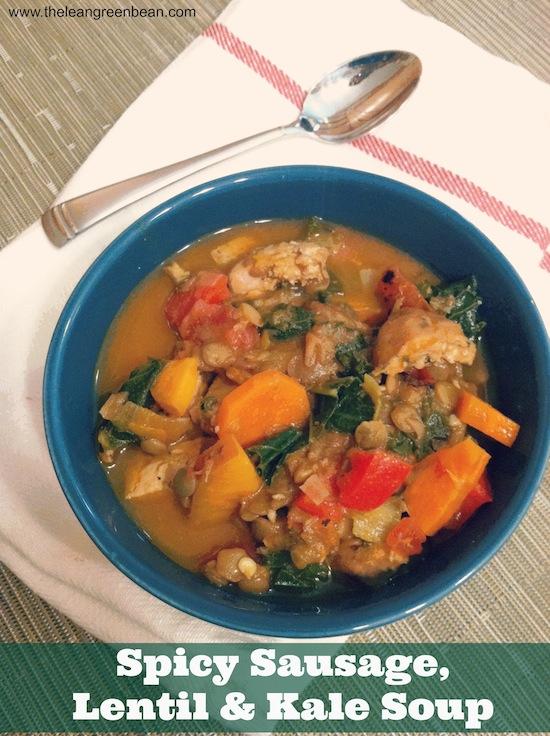
4. Soups – Most soups freeze extremely well! Make a double batch of your favorite, let cool completely, then transfer half to a gallon-sized Ziploc bag. Store flat to save space in the freezer!

Try it: Spicy Sausage, Lentil & Kale Soup

roasted vegetable sauce

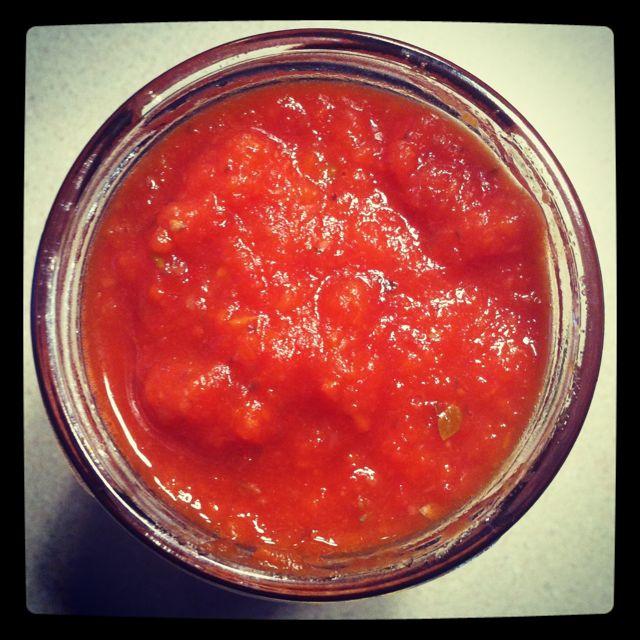
5. Broths & Sauces – Instead of throwing away your veggie scrap, use them to make a batch of veggie broth. Then freeze in 2-4 cup containers and thaw when needed! Got extra tomatoes in the summer? Make some homemade tomato sauce and freeze to use throughout the winter. Add some meat or lentils to make a bolognese or some extra veggies for added nutrients and then all you have to do is cook up some pasta on a busy night, defrost the sauce and dinner is served!

Try it: Crockpot Roasted Vegetable Sauce

pizza dough{Photo Credit}

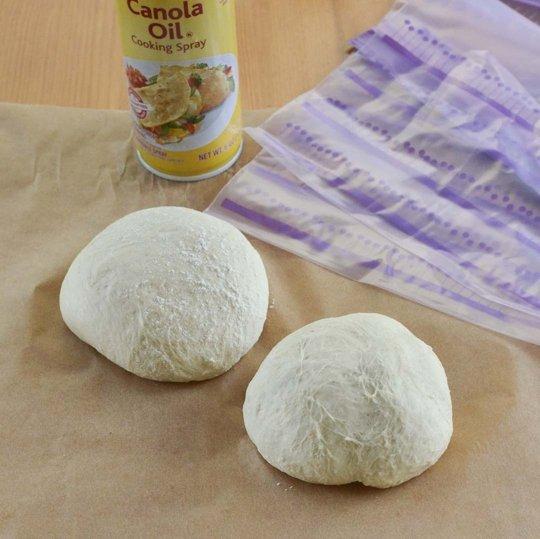
6. Muffins/Breads/Doughs – Muffins can make a great grab-and-go breakfast or snack- just be sure to choose ones that have some protein and fiber for staying power. Homemade bread is great because you can avoid the long ingredient lists of store-bought breads. Make a couple extra loaves and stick them in the freezer to use in the following weeks. You can also make things like pizza dough ahead of time..then just transfer to the fridge to thaw before homemade pizza night!

Try it: How To Freeze Pizza Dough via The Kitchn

1

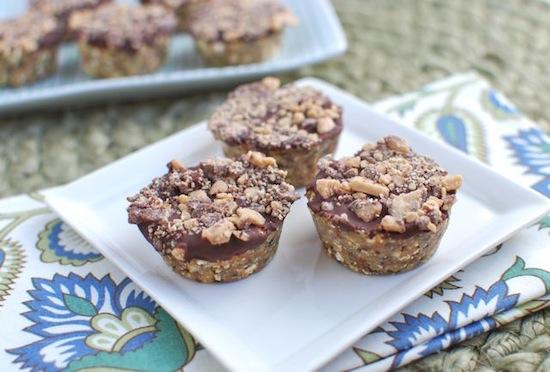
7. Energy Balls – These make the perfect snack, and I love keeping them in the freezer. They stay cold and tasty but don’t freeze all the way through so you can’t eat them. My personal favorite combo is 2 cups chopped, pitted dates, 1 1/2 cups almonds, 1/2 cup peanut butter…plus some chia seeds and pumpkin seeds. There are endless combinations out there.

Try it: Chocolate Dipped Peanut Butter Popcorn Cups

burritos

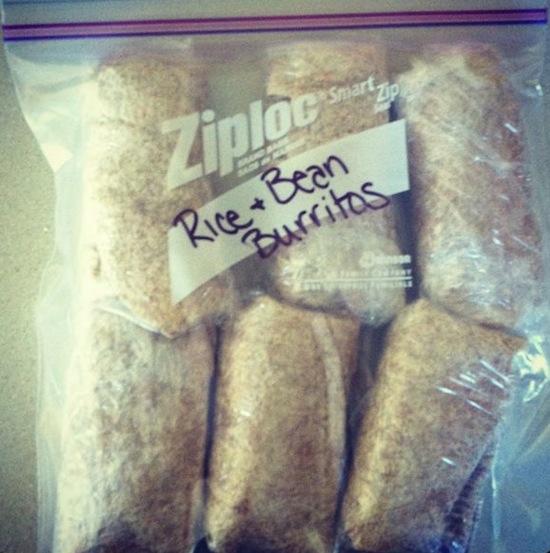
8. Burritos – You can customize these to be breakfast burritos or more traditional burritos for lunch or dinner. Wrap them individually, then defrost in the microwave for a quick meal!

Try It: Freezer Burritos

herbs{Photo Credit}

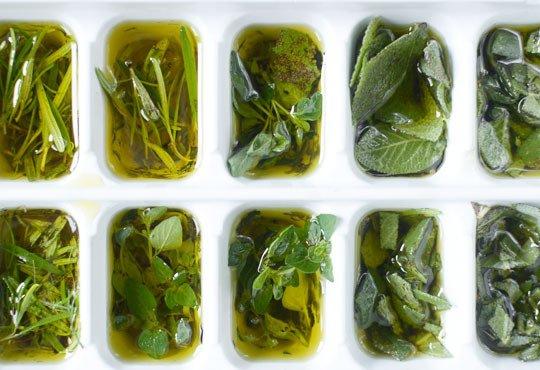
9. Fresh herbs – Whether you get fancy and make pesto or simply just need to store a surplus of fresh herbs from the Farmer’s market, ice cube trays make a great vehicle for storing fresh herbs. Spoon the pesto straight into the trays, freeze, then remove and store in an airtight container. For plain herbs, chop well and place a couple tablespoons in each tray. Fill with olive oil or broth and freeze…then just throw the herb cubes into the pan when you’re making a dish that calls for them!

Try it: How To Freeze Herbs in Olive Oil via The Kitchn

beans

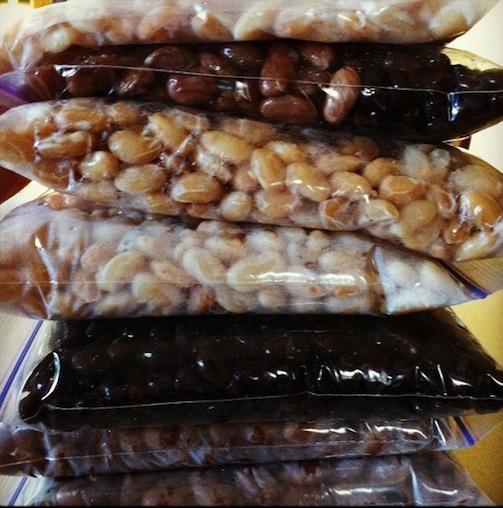
10. Beans & Lentils – You can make a whole bag of dried beans or lentils at once, let them cool and then divide them into ziploc bags and store them in the freezer. When you’re ready to use them, smack the bag on the counter a few times to loosen and add directly to whatever you’re making. For best results, undercook them slightly initially and they’ll cook a little more in whatever dish you add them to:

Try it: How To Cook & Freeze Beans 

————

Edited to add: One more that I forgot to include but is certainly worthy of inclusion…COOKIE DOUGH! Whip up a batch of cookie dough, use a cookie scoop and scoop dough onto a baking sheet. Place in the freezer, then store the scoops of dough in an airtight container. When you’re craving cookies, just bake up 3-4 at a time!

Obviously this is not an all-inclusive list. There are LOTS of other things that freeze well and can help you stock your freezer for busy weeks- like meat, veggies etc!

Let’s chat:
What are you favorite food items to freeze? Leave us links!

Enjoy!
–Lindsay–

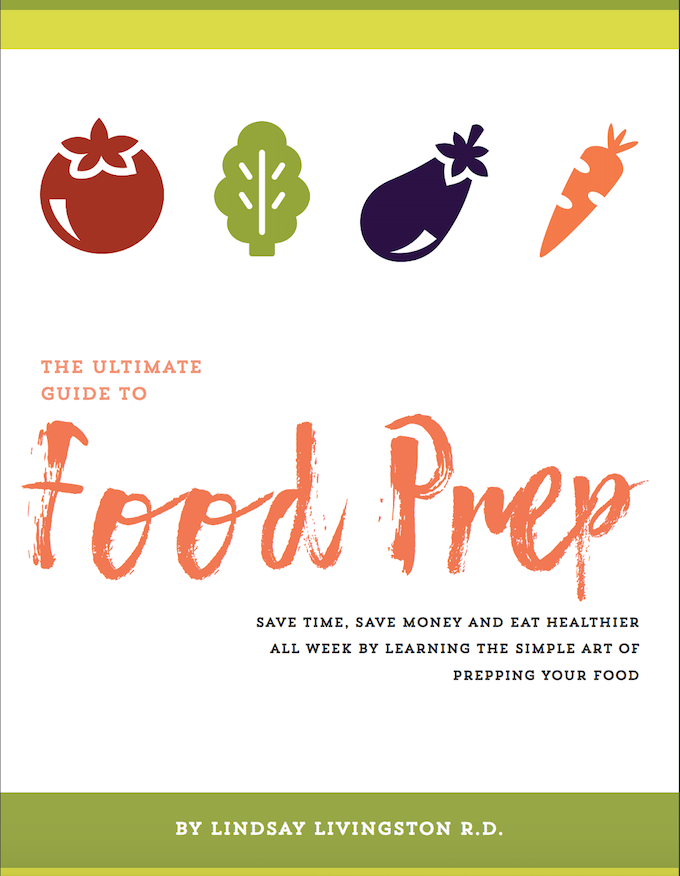
If you liked this post, you’ll love my ebook – The Ultimate Guide To Food Prep. It dives into even more detail about how to food prep, troubleshoots common problems and provides tons of tips to make it easier! Click the image below for more details.

The Ultimate Guide To Food Prep Ebook

Filed Under: Food Prep

Foodie Penpals Reveal Day with Shera

March 31, 2014 by Lindsay 5 Comments

Hi Friends!

Time for another Foodie Penpals Reveal Day!

FPP-post

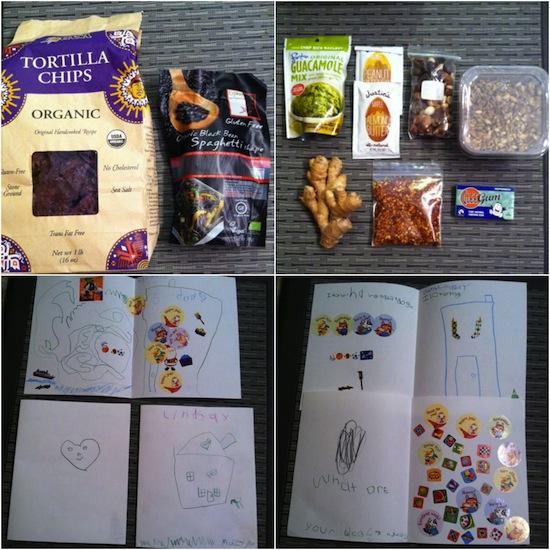
This month I exchanged boxes with reader Shera! She runs a daycare out of her home and it made this box extra fun. She even sent me an adorable photo of the kiddos getting ready to mail my box! I loved it.

So here’s what she sent me:

fpp.jpg

  • Tortilla chips- WIN! You guys know I love those.
  • Black bean noodles – I actually got some of these for Christmas from my mom. They’re so fun!
  • Guacamole mix – I think we all know how I feel about guac 🙂
  • Ginger- LOVE.
  • Nut butter- delish.
  • Trailmix – so good.
  • Spicy pumpkin seeds – amazing
  • chili flakes – we like it spicy around here!
  • Gum- haven’t tried it yet but i’m intrigued.
  • Plus ADORABLE cards from the kids! I loved them 🙂

Thanks so much for an amazing package Shera!

———–

Here’s some details about FPP in case you want to join in for March:

-On the 5th of every month, you will receive your penpal pairing via email. It will be your responsibility to contact your penpal and get their mailing address and any other information you might need like allergies or dietary restrictions.
-You will have until the 15th of the month to put your box of goodies in the mail. On the last day of the month, you will post about the goodies you received from your penpal! 
-The boxes are to be filled with fun foodie things, local food items or even homemade treats! The spending limit is $15. The box must also include something written. 
-Foodie Penpals is open to blog readers as well as bloggers. 
-Foodie Penplas is open to US, Canadian & European residents.  Please note, Canadian Residents will be paired with other Canadians only. Same with Europeans.  

If you’re from the US or Canada and are in participating for March, please CLICK HERE to fill out the participation form and read the terms and conditions. 

You must submit your information by April 4th as pairings will be emailed on April 5th!

If you participated this month, link up below and go check out a few other posts to see what they got!

Enjoy!
–Lindsay–

Filed Under: Uncategorized

Apple Cinnamon Dutch Baby

March 26, 2014 by Lindsay 39 Comments

A German pancake that’s lightly sweetened and puffs up when you bake it – the apple cinnamon flavor makes it a treat you won’t want to miss out on!

Hi Friends!

This isn’t the post I was planning to share today…but the other night I got this craving for a dutch baby and I couldn’t get it out of my head…so I made one for lunch yesterday, snapped a few pics and thought I’d share it with you today. If you’ve never heard of a dutch baby…it’s also known as a German pancake. At a basic level, there’s really not much too it…it’s just some eggs, milk, a little flour and a little sugar. I remember eating them as a little kid but for some reason I rarely make them now.

Make this Apple Cinnamon Dutch Baby for a family breakfast on the weekend. Also known as a german pancake, you can easily customize with your favorite add-ins!

The thing that really makes dutch babies so awesome is the toppings and mix-ins you choose. There’s not a ton of flavor in the “pancake” part…but I view it mainly as a vehicle for the toppings. They’re great with fresh fruit and yogurt in the summertime (or anytime, really…) – I especially love them with peaches! This time, I decided to go the apple cinnamon route.

Here’s what you need:

Print

Apple Cinnamon Dutch Baby

dutch baby 1
Print Recipe

5 Stars 4 Stars 3 Stars 2 Stars 1 Star

5 from 1 review

A German pancake that’s lightly sweetened and puffs up when you bake it!

  • Author: Author: Lindsay L
  • Cook Time: 20 minutes
  • Total Time: 20 minutes
  • Yield: 2-3 1x

Ingredients

Scale
  • 3 eggs
  • 1/2 cup milk
  • 1/2 cup flour (I use bread flour)
  • 1/2 teaspoon vanilla
  • 1/2 teaspoon cinnamon
  • 1 Tablespoon sugar
  • 2 Tablespoons butter
  • 1 small apple, diced
  • 2 Tablespoons peanut butter
  • handful of chocolate chips

Instructions

  1. Place a cast iron skillet or other oven-safe pan in the oven and preheat to 425 degrees F.
  2. In a small bowl, whisk together the eggs, milk and vanilla until frothy.
  3. Add the flour and cinnamon and whisk for 2-3 minutes until well mixed.
  4. Dice apple and set aside.
  5. Once oven is preheated, carefully remove the hot pan, add butter and swirl around pan until bottom and sides are coated.
  6. Add apples to the bottom of the pan.
  7. Pour batter into pan, tilt until whole pan is covered and return to oven.
  8. Bake for 18-20 minutes, watching carefully at the end so the edges don’t burn.
  9. Remove from oven, top with peanut butter and chocolate chips and serve warm.

Did you make this recipe?

Tag @theleangreenbean on Instagram

Here’s a look at it just out of the oven. It will be puffy when it comes out and then deflate slightly. I used bread flour because I read somewhere that it makes them the puffiest, but you could also try with AP flour…or even whole wheat flour but it might not puff as much.

Make this Apple Cinnamon Dutch Baby for a family breakfast on the weekend. Also known as a german pancake, you can easily customize with your favorite add-ins!

Like I said, it’s the toppings that really make this…so get creative! Pretty much any fruit is delicious, add more cinnamon or vanilla if you like it, drizzle with syrup, fruit sauce, etc.

Make this Apple Cinnamon Dutch Baby for a family breakfast on the weekend. Also known as a german pancake, you can easily customize with your favorite add-ins!

These make the perfect treat for a weekend breakfast. If you want to serve more people, you could try doubling the recipe so it’s a bit thicker. (I haven’t tried that personally though, so no promises!)

Make this Apple Cinnamon Dutch Baby for a family breakfast on the weekend. Also known as a german pancake, you can easily customize with your favorite add-ins!

Enjoy!
–Lindsay–

Filed Under: Breakfast Tagged With: Apple, Egg, Milk, White Whole Wheat Flour

Gluten-Free Corn Cakes

March 25, 2014 by Lindsay 32 Comments

A gluten-free corn cake that’s savory and tastes great topped with everything from chicken, to eggs, to roasted veggies!

Hi Friends!

Today I have a quick little recipe to share with you guys. I made these like a month and a half ago…and then forgot to share them! So here they are:

Gluten-Free Corn Cakes

These gluten free corn cakes can go sweet or savory. Top with fruit or syrup like a pancake or make them savory for a fun twist on cornbread.

I will confess that these were supposed to be more of a sweet breakfast pancake…but I forgot the sweetener when I was making them. No worries though, I like a good savory cake! These are great with some leftover chicken and an egg on top for breakfast and I bet they’d also be good topped with roasted veggies!

These gluten free corn cakes can go sweet or savory. Top with fruit or syrup like a pancake or make them savory for a fun twist on cornbread.

This photo shoot took forever because SOMEBODY thought these smelled delightful:

DSC_0588

So here’s the recipe:

Print

Gluten-Free Corn Cakes

corn cake 5
Print Recipe

5 Stars 4 Stars 3 Stars 2 Stars 1 Star

4.5 from 4 reviews

A gluten-free, savory corn cake that’s great topped with everything from chicken, to eggs, to roasted veggies!

  • Author: Lindsay L

Ingredients

Scale
  • 1 egg
  • 1/4 teaspoon baking soda
  • 1/2 cup almond meal
  • 1/2 cup plain greek yogurt
  • 2 teaspoons vinegar
  • 1/4 cup cornmeal

Instructions

  1. Combine egg, yogurt and vinegar in a small bowl.
  2. Stir in baking soda, almond meal and cornmeal until just combined.
  3. Let sit for 5 minutes while you heat the pan/griddle.
  4. Pour or scoop batter onto griddle, let sit until bubbles form and flip carefully.

Notes

Optional: If you want to give these a little more flavor, add in some of your favorite spices!

Did you make this recipe?

Tag @theleangreenbean on Instagram

Pretty easy, right?

These gluten free corn cakes can go sweet or savory. Top with fruit or syrup like a pancake or make them savory for a fun twist on cornbread.

Full disclosure, I added salsa to mine and ate them with a fried egg that was all the way cooked through. I hate runny eggs…but over easy certainly looks prettier in pictures!

These gluten free corn cakes can go sweet or savory. Top with fruit or syrup like a pancake or make them savory for a fun twist on cornbread.

Enjoy!
–Lindsay–

 

Filed Under: Breakfast, Dinner Tagged With: Almond, Cornmeal, Egg, Yogurt

Thai Peanut Salmon Burgers

March 21, 2014 by Lindsay 25 Comments

These Thai Peanut Salmon Burgers are a fun change from meat-based burgers. Make them for dinner and pack the leftovers for lunch. Serve them on a bun, over a salad or in a lettuce wrap!

Thai Peanut Salmon Burgers

*Originally published March 2014. Recipe, post and photos updated March 2018*

Hi Friends!

It’s been over 4 years since I originally published these Thai Peanut Salmon Burgers and I thought it was about time to revisit the recipe. I had actually forgotten about how much I love these burgers until a couple weeks ago when I remade them for the first time in a while.

I’m not a huge burger fan in general…but I do love burger-type things made with seafood. I order crab cakes pretty much any time they’re on the menu and regularly make salmon burgers and salmon cakes (is there really a difference?) at home.

Thai Peanut Salmon Burger in lettuce wrap with avocado

These are great on a bun but I actually like them even more on salads or in a big bowl with roasted veggies. They’re great the night you make them but they’re even better later in the week, making them perfect for food prep. Plus you can eat them warm or cold so they’re great for packed lunches. I make them with fresh or thawed-from-frozen salmon but you could also use canned salmon.

I top them with a simple mixture of peanut butter and sweet chili sauce, thinned out with veggie broth to reach desired consistency. They’re also great topped with guacamole!

Here’s what you need:

Print

{Refreshed} Thai Peanut Salmon Burgers

Thai Peanut Salmon Burgers
Print Recipe

5 Stars 4 Stars 3 Stars 2 Stars 1 Star

4.5 from 2 reviews

An twist on the traditional burger, packed with delicious asian flavors.

  • Author: Lindsay
  • Prep Time: 30 min

  • Cook Time: 18 min
  • Total Time: 48 minutes
  • Yield: 4 1x

Ingredients

Scale
  • 1 lb fresh salmon
  • 1/2 c sliced green onion, optional
  • 2 Tbsp low sodium teryaki or soy sauce
  • 2 Tbsp sweet chili sauce
  • 1 Tbsp natural peanut butter
  • 1 tsp fresh ground ginger
  • 1/4 c lightly salted peanuts, roughly chopped
  • 1/3 c panko breadcrumbs

Instructions

  1. Cook salmon in a hot pan until cooked through. Flake with a fork and let cool slightly.
  2. In a medium-sized bowl, combine all ingredients and stir until well-mixed.
  3. Form into four patties, squeezing tightly to form and place in the freezer for 30 minutes.
  4. Place on a well-greased baking sheet (or try a silpat or parchment paper).
  5. Bake at 400 degrees for 18 minutes, flipping once.

Notes

Top with a homemade peanut sauce if desired!

Did you make this recipe?

Tag @theleangreenbean on Instagram

That’s it! I love the flavors and it’s fun to change it up from a traditional burger.


These Thai Peanut Salmon Burgers are a fun change from a traditional meat-based burgers. They're full of flavor or great on a bun, in a lettuce wrap or on a salad.


[clickToTweet tweet=”Try these Thai Peanut Salmon Burgers for a quick and easy dinner and pack the leftovers for lunch!” quote=”Try these Thai Peanut Salmon Burgers for a quick and easy dinner and pack the leftovers for lunch!”]

Enjoy!
–Lindsay–

Filed Under: Dinner, Lunch Tagged With: Ginger, Green Onion, Panko, Peanut Butter, Salmon, Sweet Thai Chili Sauce

Dark Chocolate Bark – 3 Ways

March 20, 2014 by Lindsay 41 Comments

Here is an easy recipe for dark chocolate bark that you can customize three different ways for dessert!

Hi Friends!

Today I have another RD friend to introduce you to! Caroline from Sweet Foodie & I connected on twitter a couple of years ago…and then we were able to meet in person last year at FNCE, which was awesome! She’s always been a huge supporter of my blog and she’s doing big things of her own in the nutrition world…so I wanted to make sure you guys met her! I asked her to share a recipe with you guys and here’s what she came up with. Prepare to drool!

Make this dark chocolate bark for an after dinner treat. Here are three versions to make this dessert a hit with everyone!

Hi Lean Green Bean fans! I’m Caroline, the Registered Dietitian Nutritionist and blogger at Sweet Foodie, where I share recipes and tips on how to eat healthfully and feel your best. I believe that good nutrition should be guilt-free: cook from scratch when you can, shop smart, move more, eat well, and enjoy indulgences. I’m a big fan of Lindsay’s blog and the positive, supportive community that she’s fostered here.

Make this dark chocolate bark for an after dinner treat. Here are three versions to make this dessert a hit with everyone!

As I mentioned, I’m pro-indulgences. So, I took some inspiration from popular candy bars and transformed them into healthier, but still totally decadent, chocolate bark. I love bark because it satisfies a chocolate craving without needing to eat very much, and I make it with whole ingredients like bittersweet chocolate, nuts, brown rice cereal and dried fruit, so I feel good about sharing it with my friends and family. Sprinkled with dried fruit and nuts, it’s a beautiful dessert served alongside hot tea or coffee or gift wrapped in cellophane. My parents and husband love the Krackel style bark the most. Actually, my parents call it “baaahk” with an emphasis on the Boston accent – go Sox!

Ok, so let’s get to the recipes already, right? The Chunky and Krackel bark use slightly different ingredients, but the first three steps are the same.

Make this dark chocolate bark for an after dinner treat. Here are three versions to make this dessert a hit with everyone!

Chunky Bark

Ingredients:

10 ounces bittersweet chocolate
1/3 cup of raisins
1/3 cup of dry roasted peanuts, roughly chopped

Directions:

1. Roughly chop the chocolate
2. Cover a sheet pan or jellyroll pan with parchment paper
3. In a microwave safe bowl, microwave the chocolate at 15-second intervals, stirring in between, until melted (about 1 minute 15 seconds total) [my preferred method!]. Alternatively, add water to the bottom part of a double boiler so the water is about 1/2 inch away from the top pot. Melt the chocolate slowly in over low heat, stirring frequently.
4. Pour chocolate mixture onto sheet pan and spread with an offset spatula (a regular spatula works fine too – offset makes it easier) to desired thinness.
5. Sprinkle raisins and peanuts on top. Press them gently into the chocolate to set.
6. Let chocolate harden for 2 hours on the countertop or in the refrigerator. Cut or break into pieces and store in the refrigerator.

Make this dark chocolate bark for an after dinner treat. Here are three versions to make this dessert a hit with everyone!

Krackel Bark

Ingredients:

10 ounces bittersweet chocolate
2 ounces milk chocolate
1 1/2 cups crispy brown rice cereal
1/3 cup reduced sugar Craisins (optional)

Directions:

1. Roughly chop the chocolate
2. Cover a sheet pan or jellyroll pan with parchment paper
3. In a microwave safe bowl, microwave the chocolate at 15-second intervals, stirring in between, until melted (about 1 minute 15 seconds total) [my preferred method!]. Alternatively, add water to the bottom part of a double boiler so the water is about 1/2 inch away from the top pot. Melt the chocolate slowly in over low heat, stirring frequently.
4. Stir the crispy brown rice cereal and Craisins into the bowl of melted chocolate
5.  Pour chocolate mixture onto sheet pan and spread with an offset spatula (a regular spatula works fine too – offset makes it easier).
6. Let chocolate harden for 2 hours on the countertop or in the refrigerator. Cut or break into pieces and store in the refrigerator.

Make this dark chocolate bark for an after dinner treat. Here are three versions to make this dessert a hit with everyone!

Reese’s Peanut Butter Cup Bark

Ingredients:

4 ounces bittersweet chocolate
4 ounces semisweet chocolate
1/4 cup all natural creamy peanut butter
1/4 cup peanuts, chopped (optional)

Directions:

1. Roughly chop the chocolate
2. Cover a sheet pan or jellyroll pan with parchment paper
3. In a microwave safe bowl, microwave the bittersweet chocolate at 15-second intervals, stirring in between, until melted (about 1 minute 15 seconds total) [my preferred method!]. Alternatively, add water to the bottom part of a double boiler so the water is about 1/2 inch away from the top pot. Melt the chocolate slowly in over low heat, stirring frequently.
4.  Pour the bittersweet chocolate onto sheet pan and spread with an offset spatula (a regular spatula works fine too – offset makes it easier)
5. Using the same melting method, melt the semisweet chocolate and peanut butter
6. Pour the semisweet chocolate and peanut butter mixture on top of the dark chocolate and swirl to mix using a toothpick or chopstick.
7. If desired, sprinkle with chopped peanuts. Gently press the peanuts into the chocolate to set.
8. Let chocolate harden for 2 hours in the refrigerator. Cut into pieces with a sharp knife or break apart. Store in a sealed container in the refrigerator for best results.

5

YUM right?! Huge thanks to Caroline for stopping by today!

Let’s chat: Which bark are you going to make first?!

Enjoy!
–Lindsay–

Filed Under: Dessert

{Refreshed} Black Bean Guacamole

March 18, 2014 by Lindsay 44 Comments

This Black Bean Guacamole is a twist on traditional guacamole. With added black beans and Greek yogurt, you get a full dose of healthy fats, fiber and protein…all in one great dip!

Hi Friends!

Just popping in a with a quick recipe to share with you guys. Yes, I realize it’s green and the appropriate day to post a green recipe would have been yesterday, or even last week before St. Patrick’s Day….but you guys know me- always behind!

So, recently I spent some time going back through all my posts from my first year of blogging. Considering I’ve been doing this for almost 4 years…it’s safe to say there are some recipe buried in the archives that many of you have never seen. I picked out some of my favorites and over the next few months, I’ve tasked myself with remaking them, taking better pictures and highlighting them for you guys!

This is the first one- you can see the original post here!

Black Bean Guacamole

Add some extra protein and fiber to your guacamole thanks to the addition of Greek yogurt and black beans! Serve it as an appetizer and your guests won't know the difference!

This is basically your average guacamole, just taken to a new level. I added black beans (which you can’t even taste) for protein and fiber and also mixed in some Greek yogurt for a protein boost!

Here’s how you make it:

Print

{Refreshed} Black Bean Guacamole

black bean guacamole.jpg
Print Recipe

5 Stars 4 Stars 3 Stars 2 Stars 1 Star

5 from 1 review

A twist on traditional guacamole. With added black beans and Greek yogurt, you get a full dose of healthy fats, fiber and protein…all in one great dip!

  • Author: Lindsay L
  • Prep Time: 5 minutes
  • Total Time: 5 minutes

Ingredients

Scale
  • 2 medium avocados
  • 1 c black beans, cooked
  • ⅓ c plain Greek yogurt
  • juice from one lemon
  • ½ c red onion, diced
  • 1 medium tomato, diced
  • 1 jalapeno, minced
  • 2–4 Tbsp fresh cilantro, minced

Instructions

  1. Place the black beans in a small food processor and pulse several times.
  2. Add one of the avocados and the lemon juice and pulse until well mixed.
  3. In a small bowl, smash the remaining avocado with a fork.
  4. Stir in the greek yogurt.
  5. Add the black bean mixture, along with the onion, tomato, jalapeno and cilantro.
  6. Mix well and serve with tortilla chips.

Did you make this recipe?

Tag @theleangreenbean on Instagram

Pretty simple, friends!

Add some extra protein and fiber to your guacamole thanks to the addition of Greek yogurt and black beans! Serve it as an appetizer and your guests won't know the difference!

Enjoy!
–Lindsay–

Filed Under: Appetizer, Snack Tagged With: Avocado, Black Bean, Tomato, Yogurt

Fitness Friday 64

March 14, 2014 by Lindsay 11 Comments

Hi Friends!

Let’s talk workouts today, shall we? Here’s are some of the WODs I’ve done the past few weeks!

ff1.jpg

1. Holy workout! 13 thrusters, 6 rounds burpee/pull-ups, 115# 3 rep max clean and jerk, four TTB short of 7 rounds for the AMRAP
2. Jackie- one of the worst benchmarks in my opinion…
3. Strict press, bench press, pull-ups and squat cleans…then a quick wod with hubby- 6:50 for me, 7:40 for him
4. Back squats…then 11:12 Rx for the wod

Post by The Lean Green Bean.

Workin on those butterfly pullups!

ff2.jpg

1. There’s nothing good about 20 minute AMRAPS.
2. At home WOD
3. Feel the burn! 11:10 Rx
4. As bad as it sounds. 8:20 Rx

ff3.jpg

1. Good one! Front squats, then 6:27 for the #wod with 75# snatches.
2. 6:51 for the second part, forgot to count my rounds for the first part.
3. Lots of walks with the boys, as usual.

————–

Then, for those of you who know a little about Crossfit….The Open started a few weeks ago. Basically they release a new workout each week for 5 weeks and thousands of people all over the world do the same WOD and submit their scores. At the end of the five weeks, the top scores go to Regionals for a chance to qualify to go to the Crossfit Games. Obviously, that’s not my intention, but it’s still super fun to compete in the Open.

Here’s how the first two weeks went for me:

IMG_3545

You had 10 minutes to get as many rounds as you could of 30 double unders and 15 snatches (55 pounds for women). I like double unders, I don’t like snatches. Luckily, the weight was light enough that it was manageable for me. I ended up completing 5 full rounds + 27 of the double unders for round 6 for a total of 252 reps. I did the workout on Friday (they’re announced Thursday night and you can do it  as many times as you want from Thursday night – Monday night). I had planned to redo it on Monday to see if I could improve…but ended up not feeling well that day. It worked out though…I was happy with my score!

142

14.2 was TOUGH. I love overhead squats so I was happy to see them, but chest to bar pullups are HARD. Basically, for this one, you had 3 minutes to do 20 overhead squats and 20 chest to bar pullups. If you finished under 3 minutes, you rested the remainder of the time. If you finished round 1, you started again at the 3 minute mark and had another 3 minutes to do 24 overhead squats and 24 chest to bar pullups…and so on. You kept going every time you successfully finished a round, adding reps to each round. I went into it unsure if I could even finish the first round. My goal was to finish round 1 and then just get as far as I could in round 2.

IMG_3713

I ended up finished with 66 reps on Friday. I felt like I could have done a little better….so I redid this workout on Monday and improved by 11 reps, finishing with 77 reps for my final score!

So how am I doing?

rank.jpg

After the first two wods I’m in 11,680th place 🙂 Doesn’t sound too impressive…but hey! That’s top 20%! I’ll take it!

IMG_3754

Wednesday I did the Filthy Fifty. It was brutal as always! Finished in 24:47. I rested Thursday and today I’ll be doing 14.3! Wish me luck!!

Enjoy!
–Lindsay–

Filed Under: Workouts

Registered Dietitians Who Blog {Part 2}

March 12, 2014 by Lindsay 65 Comments

Hi Friends!

Happy Registered Dietitian Day! As you may remember, last year on this day, I wasn’t even an RD yet! I was in the last month of my internship. Pretty crazy to think about.

Looking for accurate nutrition advice and healthy recipes? Here's a list of Registered Dietitians who blog!

Anyways, I did a post last year rounding up a list of Registered Dietitians Who Blog. You can check out the original post here. Here’s an updated list as some of them aren’t blogging anymore.

1
elle
fanne
3
healthy
5
6
7
8
9
real life
nutrition
12
13

  • Alysa at Inspired RD
  • Elle at According To Elle (formerly Nutritionella)
  • Anne at Fannetastic Food
  • Lauren at Foodtrainers
  • Katie at Healthy Heddleston
  • Nicole at Prevention RD
  • Sally at Real Mom Nutrition
  • Melanie at Nutritious Eats
  • Kristen at Swanky Dietitian
  • Deanna & Serena at Teaspoon of Spice
  • Robyn at The Real Life RD
  • Janet at Nutrition Unplugged
  • Carlene at Healthfully Ever After
  • Heather at Side of Sneakers (she also blogs regularly at Babble)

I also gave special shoutouts to Alexis at Hummusapien and Carissa at Fit2Flex who were dietetic students like me at the time. Carissa is now officially an RD and Alexis is just 2 months away from getting her masters and taking her exam!

hummus
fit2flex

Since last year I’ve continued to add RD blogs to my Feedly so here are some new-to-me-this-year RD blogs that I didn’t include last year! They inspire me daily. I love reading their blogs because they post great recipes, tackle interesting nutrition topics and provide great tips to help people lead healthy, active lifestyles. Here they are, in no particular order (there are clickable links at the bottom):

foodcoach

avocado

delicious knowledge

dietitian duo

energywebring

nonsense

foodpleasure

gypsy

wendy

kath

livingwell

zest

awareness

sweetfoodie

fueled

spicy

valentine

debbie

nourish

meal

foodconfidence

nics

real food
cassie
freshfood
soundbites
nutrilicious
mohr
sharon
HA
stone soup


And here’s the clickable links to their blogs. Go check them out!

  • Steph at Food Coach Me
  • Rachael at An Avocado A Day
  • Alex at Delicious Knowledge
  • Beth and Mandy at Dietitian Duo
  • Francesca at Energy We Bring
  • Helen at Food & Nonsense
  • Dixya at Food, Pleasure & Health
  • Ashley at The Gypsy Dietitian
  • Wendy at Just Wendy Jo
  • Kath at Kath Eats Real Food
  • Meme at Living Well Kitchen
  • Kristina at Love & Zest
  • Megan at Nutrition Awareness
  • Caroline at Sweet Foodie
  • Christina at The Fueled Athlete
  • EA at The Spicy RD
  • Melissa at The Valentine RD
  • Debbie at Dietitian Debbie Dishes
  • Lisa & McKenzie at NourishRDs
  • Janice & Liz at Meal Makeover Moms
  • Danielle at Food Confidence
  • Nic at Nic’s Nutrition
  • Kristen at Real Food For Fuel
  • Cassie at Dietitian Cassie
  • Jenna at Fresh Food Perspectives
  • Melissa at Sound Bites
  • Jessica at Nutritioulicious
  • Chris at Mohr Results
  • Sharon at Sharon Palmer, RD
  • Regan at Healthy Aperture – *various RD blog authors, plus a gallery to submit recipes to
  • Stone Soup – the blog for Food & Nutrition Magazine written by a variety of RDs

Plus a special shoutout to two future RDs who aren’t quite there yet but well on their way!

mj
immaeat

  • Kylie at Yeah…Imma Eat That –
  • Min at The Adventures of MJ & Hungryman –


Still want more? Find 660+ more RD Blogs at Nutrition Blogs Network!

I’m sure I’ve missed some great ones, but this roundup of 50 blogs should give you a good start if you’re looking for some new reading!

I also can’t let this day pass without giving a huge thank you to every single RD who has helped me on my own personal journey. Special thanks to my mentor and boss Regan, who has believed in me from the day we met…every step of the way…She gives me the opportunity to do what I love every single day and I couldn’t be more grateful.

Let’s chat: Do you have a favorite RD blogger that’s not on the list? Leave me a link!

**Updated: Here are more RD blog suggestions from the comments section of this post:
The Vegan RD
Foodess
Flavor RD
Have Your Cake And…
Sinful Nutrition
Beautifully Nutty
Meals For Miles
Zen & Spice
Rebel Dietitian
Cape Fear Nutrition
Zest & Zeal
Down To Earth Dietitian
Hevil’s Healthy Devil – RD student

Enjoy!
–Lindsay–

Filed Under: Uncategorized

You Might Be Married To A Dietitian If…

March 11, 2014 by Lindsay 48 Comments

Hi Friends!

In case you didn’t know, tomorrow is National Registered Dietitian Day. I’ll be back to share my second annual round-up of RDs who blog, but for today, in honor of my first National Registered Dietitian Day, Mr. Bean is here to share some of things he’s noticed about being married to an RD. Perhaps some of you can relate?

————–

Since Lindsay became an RD, I’ve noticed some changes to my lifestyle – some conscious, others not. They have largely been positive and healthy, but I’m occasionally shocked with some of the behavioral changes I catch myself making. I thought I’d take the opportunity to channel my inner “Jeff Foxworthy” and share some of my revelations.

Ever wondered what it's like to be married to a Registered Dietitian? Here's a sneak peek thanks to my husband!

You might be married to an RD if….

  1. You’re appalled at the amount of salt in things and most restaurant food tastes like you’re a white-tailed deer licking a block of salt. Soup used to be something I could eat in a restaurant, now I have to eat homemade to make sure I don’t explode from water retention.
  2. You read nutrition labels, and now do it without a second thought. This kind of goes with along with the salt one; ignorance was bliss. Now I have to get bummed out when something tasty I used to love ends up looking like a health disaster.
  3. You have a favorite dessert that has sweet potatoes or avacados in it. It’s good, can’t lie. Suck it up men, try these sweet potato brownies – they rock.
  4. You know it’s spelled “dietitian” and not “dietician” and have corrected people. Yeah, for real. It is. Look it up. Shocking, I know.
  5. You tell the doctor you’re married to a dietitian to gain potential bonus points during your physical. “How’s you’re diet?” “Well doc, my wife’s a dietitian SO…you know, I do alright.”
  6. Occasional lunches out with the guys at work are a safe haven for giant burritos and platters of buffalo wings. I’m human. Buffalo wings and Burritos are from heaven.
  7. You judge other peoples’ grocery carts- ‘Did you see that dude’s cart!? Four cases of mountain dew, three boxes of twinkies, and Dinty Moore Beef Stew!!” You know you do it.
  8. Ingredient lists have become frightening. The fewer the better. The ingredient list for a potato chip or cracker shouldn’t look like a team of scientists reached a breakthrough.
  9. Friends ask you very abstract nutrition questions to pass along to your wife. “Can you ask Lindsay what she thinks about this cleanse?- I’m only going to eat tabasco and green tea for a week”  …paleo this….detox that….ugh, just eat good food regularly for crying outloud.
  10. Friends constantly tease “does your wife know you’re eating that?” Hardy har har… That may actually apply to all married guys- not sure. Health initiatives seem to be female driven more often than not.
  11. Fast food restaurants have become odd, mysterious places that make you uncomfortable. I feel like I shouldn’t be in here…

————–

So what do you think? Even if you’re not an RD, but a healthy living blogger, or just someone who loves to eat healthy….do you think there are people in your life that you’ve influenced like this?! What would they say about life with you?

Enjoy!
–Lindsay


Filed Under: Uncategorized

12 Things You Should Clean More Often

March 6, 2014 by Lindsay 46 Comments

Hi Friends!

Quick post today. Just popping in with a little cleaning reminder for you. As spring approaches an we get ready for our big once a year purges for spring cleaning, it’s also important remember some of the smaller things that we should be cleaning quite frequently….probably much more often than we are currently (at least if you’re anything like me!)

How often do you clean? Here are 12 household items you should probably clean more often and info on how to do it!

Some of these are obvious…but some are things I never really think about and as such, rarely clean!

Here’s my list:

1) Contact Case – Don’t reuse your solution. Empty the case each time you put your contacts in and refill with fresh solution when taking them out. You can also rinse the case with solution and wipe dry between uses. Replace your case every 3 months or so. Read this article for more info. 

2) Phone – We’re on our phones all the time, making them one of our dirtiest accessories. Wipe them clean with a  disinfectant wipe or use cotton swabs with rubbing alcohol to clean around buttons, phone cases, etc.

3) Trashcan – You’re putting trash into it…and it doesn’t all always make it into the bag. Germs can spill over the side, splash onto the lid, etc. Wipe it clean every time you take out the trash!

4) Keyboard – Americans spend hours and hours on their computers, often wearing away the letters on our keyboards from such frequent use. We also tend to eat near our keyboards. As a result, they collect dirt and germs at an alarming rate. Wipe clean as often as possible.

5) Loofah – This is more of a reminder to replace frequently. Aim to replace them every month or two otherwise they’re probably doing nothing but spreading germs around your body instead of helping you clean.

6) Coffeemaker – It’s a damp environment that can breed bacteria. Follow these steps once a month to clean.

7) Sheets – You sleep on them, you sweat on them, your animals sleep on them…they get gross and they get gross quickly. Wash them weekly!

8) Knobs, handles & light switches – The handles to the fridge/oven/microwave/faucet, cabinet knobs and handles, door knobs, light switches…they’re all touched multiple times per day and often when our hands are not the cleanest. Wipe with a disinfectant cloth to remove the germs and the dirt and grime.

9) Remote – We handle them everyday but rarely clean them. Use a disinfectant wipe or put some rubbing alcohol on a q tip and clean around the buttons. Same thing goes for xbox controllers, etc.

10) Laundry baskets – You put your dirty, sweaty clothes in them. They collect germs. And then sometimes you turn around and put clean clothes back in them. Designate some baskets for clean and some for dirty. Wipe the dirty ones out regularly with disinfectant wipes if they’re plastic or try washing them if they’re mesh!

11) Reusable Water Bottle – Clean it at least once a week (every few days is better) by running it through the dishwasher or cleaning with hot soapy water.

12) Towels & bathmats – Even though you use them when you’re clean, they still get wet, stay damp and collect germs. Try to wash them once a week.

There are MANY other things that we should be cleaning more often…these are just a few to get you started.

[Tweet “Time for Spring cleaning. Here are 12 things to clean more often via @leangrnbeanblog!”]

Check out these articles for more ideas:
15 Things To Clean More Often
10 Things In Your Home You Should Clean More Often
21 Germiest Places You’re Not Cleaning

Enjoy!
–Lindsay–

Filed Under: Uncategorized

Roasted Cabbage Wedge Salad

March 5, 2014 by Lindsay 19 Comments

This Roasted Cabbage Wedge Salad encourages you to skip the iceberg lettuce and make your next wedge salad with cabbage. Roasting it adds extra flavor!

Hi Friends!

I have a fun little guest post for you guys today courtesy of my friends and fellow RDs Deanna & Serena who blog over at Teaspoon of Spice! I had the pleasure of meeting Serena last year at FNCE and am looking forward to hopefully meeting Deanna this year! They are bloggers, business partners and wonderful ladies that inspire me every day to be a better dietitian!

Today they’re sharing a fun twist on a classic recipe. I can’t wait to make it for the hubby!

Check it out:

This Roasted Cabbage Wedge Salad encourages you to skip the iceberg lettuce and make your next wedge salad with cabbage. Roasting it adds extra flavor!

Hi Lindsay’s Friends –

I’m super honored Lindsay asked us to guest-post today! She’s been such a wealth of info for Deanna and I, not to mention, her recipes rock!

So…you know how it goes when you’re out to eat: You’re waffling between two items on the menu…you choose the first one and your friend chooses the second.

The waiter brings out the dishes and based on appearances alone, it’s completely obvious you made the WRONG choice.

That’s exactly what happened to me recently when I ordered the Mediterranean Salad, and my friend ordered the Iceberg Wedge Salad. Once we were served, I immediately had “order envy” over her salad blissfully covered with bacon, large crumbles of blue cheese, a thick creamy dressing and fresh green chopped chives. Totally splurge worthy, in my book.

So, having missed out on all but a bite or two of that wonderful Wedge Salad, I set about to recreate it with a timely ingredient for March: Cabbage.

The traditional Wedge Salad begins with a sliced wedge of iceberg lettuce. The common perception is that iceberg lettuce has no nutritional value whatsoever. But as a dietitian, while I know iceberg is lean on nutrients, I tend to think of it as a ‘vehicle’ food: A food upon which other more nutritious foods/veggies can be sprinkled – and then it is happily eaten by my kids.

Cabbage, on the other hand, packs quite a nutrient punch. 1 cup of chopped cabbage has:

  • 2 grams of fiber
  • Half the recommended amount of vitamin C
  • 150 grams of potassium
  • Only 22 calories

I keep it in the fridge almost all winter long; my kids like it shredded with carrots, apples and Maple Apple dressing  – or in soup.

And have you noticed the price of cabbage this time of year with St. Patrick’s Day around the corner? Supermarkets try to outdo each other with sales on this cruciferous veggie. So I thought I’d try pumping up the nutrition of the classic Wedge Salad – by roasting cabbage wedges instead – and bumping down the calorie count by creating a healthier dressing.

This Roasted Cabbage Wedge Salad encourages you to skip the iceberg lettuce and make your next wedge salad with cabbage. Roasting it adds extra flavor!

The result?

A tender-crisp wedge of slightly sweet roasted cabbage with a super creamy yogurt-based blue cheese dressing. Bacon is still boldly sprinkled on top – along with chives or green onions. Deanna also tested this recipe (she took the photos, too) – and she reported back that she’s a cabbage convert after tasting the salad.

Since making this, I’ve roasted more cabbage wedges and topped them with a simple vinaigrette, chick peas, olives and sundried tomatoes.

I don’t think I’ll have salad envy again for awhile.

Print

Roasted Cabbage Wedge Salad

Roasted Cabbage Wedge Salad pin.jpg
Print Recipe

5 Stars 4 Stars 3 Stars 2 Stars 1 Star

4.5 from 2 reviews

A tender-crisp wedge of slightly sweet roasted cabbage with a super creamy yogurt-based blue cheese dressing.

  • Author: Lindsay L
  • Yield: 5-6 1x

Ingredients

Scale
  • Half of a 2 1/2 pound head of cabbage
  • Canola or olive oil
  • Salt and pepper, divided
  • ¼ cup low-fat mayonnaise
  • ⅓ cup plain fat-free Greek (or regular) yogurt
  • ¼ cup low-fat buttermilk
  • ¼ cup (1 ounce) blue cheese, preferably from a wedge and then crumbled
  • 1 slice cooked bacon, crumbled
  • 2 tablespoons chopped chives or green onions

Instructions

  1. Preheat oven to 400°F. Line a roasting sheet with parchment paper or grease with oil.
  2. For the cabbage, slice wedges so that the base of each wedge is about 1 1/2-inches thick. If you start with a 2 1/2 pound full head of cabbage, and use half of it for this recipe, you will have 5 or 6 wedges.
  3. Brush each wedge with oil and sprinkle with pepper. Disassemble each wedge in half (you will reassemble after roasting so place matching pieces together!)
  4. Roast 30-35 minutes for tender-crisp.
  5. Reassemble cabbage wedges and cool or chill in the refrigerator.
  6. Meanwhile, whisk together mayonnaise, yogurt and buttermilk. Stir in nearly all the blue cheese and nearly all the bacon; reserving a few crumbles of blue cheese and bacon for topping.
  7. To assemble salad, place wedges on individual salad plates and divide dressing among salads.
  8. Top each salad with a few crumbles of reserved blue cheese and bacon and with chives.

Did you make this recipe?

Tag @theleangreenbean on Instagram

How beautiful is that?!

This Roasted Cabbage Wedge Salad encourages you to skip the iceberg lettuce and make your next wedge salad with cabbage. Roasting it adds extra flavor!
Big thanks to Serena & Deanna for filling in for me today! Be sure to check out their blog for more great recipes.

Let’s chat: Are you a cabbage fan? Yay or nay?

Enjoy!
–Lindsay–

Filed Under: Appetizer, Side Dish, Soup & Salad

Foodie Penpals Reveal Day with Salted Plate

February 28, 2014 by Lindsay 6 Comments

Hi Friends!

Time for another Foodie Penpals Reveal Day.

FPP-post

This month I had the pleasure of exchanging boxes with Casey at Salted Plates!

Here’s a look at what she sent me:

photo (86)

Everything came from her local co-op! Very cool. Here’s the breakdown:

  • Apple Butter- So good on toast
  • Chocolate- In her words…”because, duh!” – Couldn’t agree more!
  • Carob Super Green Chunks- I was skeptical of these, but they’re pretty tasty! The perfect afternoon treat.
  • Sesame Rye Crispbreads- I’ve been eyeing something similar in the store but never bought them for myself. Love that they’re made with just three ingredients- rye flour, sesame seeds and salt.
  • Mung Bean Noodles- SO excited about these. I haven’t tried them yet but I just recently fell in love with mung beans because they’re delish and so high in protein!

Thanks so much Casey for a great package!

Here’s some details about FPP in case you want to join in for March:

-On the 5th of every month, you will receive your penpal pairing via email. It will be your responsibility to contact your penpal and get their mailing address and any other information you might need like allergies or dietary restrictions.
-You will have until the 15th of the month to put your box of goodies in the mail. On the last day of the month, you will post about the goodies you received from your penpal! 
-The boxes are to be filled with fun foodie things, local food items or even homemade treats! The spending limit is $15. The box must also include something written. 
-Foodie Penpals is open to blog readers as well as bloggers. 
-Foodie Penplas is open to US, Canadian & European residents.  Please note, Canadian Residents will be paired with other Canadians only. Same with Europeans.  

If you’re from the US or Canada and are in participating for March, please CLICK HERE to fill out the participation form and read the terms and conditions. 

You must submit your information by March 4th as pairings will be emailed on March 5th!

Enjoy!
–Lindsay–

Filed Under: Uncategorized

  • « Go to Previous Page
  • Page 1
  • Interim pages omitted …
  • Page 41
  • Page 42
  • Page 43
  • Page 44
  • Page 45
  • Interim pages omitted …
  • Page 65
  • Go to Next Page »

Primary Sidebar

Lindsay Livingston The Lean Green Bean Healthy Living Tips and Tricks

I'm a Registered Dietitian and mom of three from Columbus, Ohio. I use this blog to share simple, healthy recipes, nutrition tips, and an honest glimpse of motherhood!

Learn More →

Questions? Comments? Email me: [email protected]

The Lean Green Bean Facebook The Lean Green Bean Instagram The Lean Green Bean Pinterest The Lean Green Bean Twitter The Lean Green Bean Feed
footer-logo
The Lean Green Bean Facebook The Lean Green Bean Instagram The Lean Green Bean Pinterest The Lean Green Bean Twitter The Lean Green Bean Feed
Recipes

Breakfast
Dinner
Snack
Slow Cooker

Kids

Cooking With Kids
Favorite Gifts
Toddler Meals
Indoor Activities

Resources

Easy Packed Lunches for Kids
Dinner Spark
Snack Spark
Ultimate Guide to Food Prep

About

Meet Lindsay
Become an RD
Work with Me

The Lean Green Bean is a participant in the Amazon Services LLC Associates Program, an affiliate advertising program designed to provide a means for sites to earn advertising fees by advertising and linking to amazon.com.
Read the full privacy and disclosure policy here.

Copyright © 2022 · The Lean Green Bean

table talk series

Learn how food affects your body.

Get my free Table Talk email series where I share bite-sized nutrition information about carbs, protein, and fat, plus bonus information about snacks and sugar!

[email protected]