• Skip to main content
  • Skip to primary sidebar

Learn how food affects your body. Get Free Nutrition Info Today

the-lean-green-bean-logo
  • Home
  • Recipes
  • Kids
  • Resources
    • Ebooks
    • Food Prep
    • Videos
    • Snack Round-Ups
    • Gift Guides
  • About
    • Become An RD
    • Work With Me
  • Search
the-lean-green-bean-logo
  • Home
  • Recipes
  • Kids
  • Resources
    • Ebooks
    • Food Prep
    • Videos
    • Snack Round-Ups
    • Gift Guides
  • About
    • Become An RD
    • Work With Me
  • Search

blog

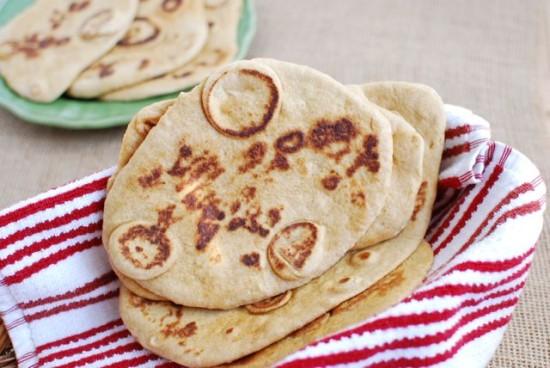
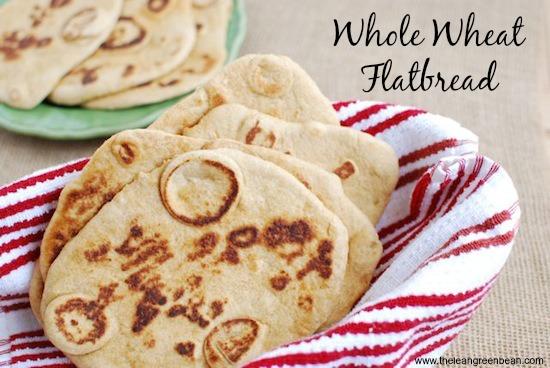
Whole Wheat Flatbread

February 27, 2014 by Lindsay 52 Comments

Make with whole wheat flour and yogurt, this flatbread makes the perfect dinner side dish!

Hi Friends!

Time for another recipe. This Whole Wheat Flatbread actually came about when I was trying to make some Whole Wheat Naan. I looked at this recipe from Tasty Kitchen and made a few adjustments…and mine came out less naan-like and more flatbread-like, so that’s what I went with for the name.

This Whole Wheat Flatbread is the perfect dinner side dish!

Here’s how you make them!

Print

Whole Wheat Flatbread

DSC 0502 e1393439340168
Print Recipe

5 Stars 4 Stars 3 Stars 2 Stars 1 Star

4.3 from 3 reviews

An easy, homemade flatbread that makes a great base for pizza or side dish for stews and curries!

  • Author: Lindsay L
  • Prep Time: 1 hour 5 minutes
  • Cook Time: 10 minutes
  • Total Time: 1 hour 15 minutes
  • Yield: 6-8 1x

Ingredients

Scale
  • 2 cups white whole wheat flour
  • ¼ cup water
  • ¾ cup whole milk yogurt
  • ½ tsp baking powder
  • ½ tsp baking soda
  • 2 tsp sugar
  • 1 Tbsp oil
  • ½ tsp salt
  • Melted butter for brushing

Instructions

  1. In the bowl of a stand mixer, combine all ingredients and use the dough hook to mix just until a rough ball has formed. Dough should be very soft.
  2. Let rest 1 hour.
  3. Knead by hand or using the mixer for about 3 minutes, then divide dough into 6-8 balls.
  4. Roll each ball into an oval that’s about ¼ inch thick
  5. Spread melted butter on one side and place butter side up in hot pan.
  6. Cover pan with lid for 30-45 seconds until bubbles start to form.
  7. Remove lid, flip over and cook 30-45 seconds more.

Did you make this recipe?

Tag @theleangreenbean on Instagram

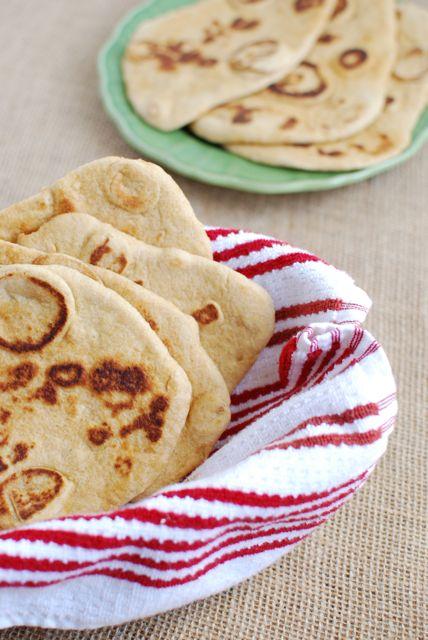
Aren’t they pretty?!

This Whole Wheat Flatbread is the perfect dinner side dish!

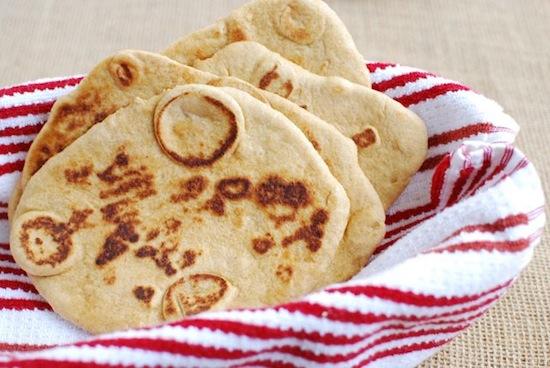
Even though it’s not quite naan, it’d still be good with things like curry! It’s also great with nut butter.

This Whole Wheat Flatbread is the perfect dinner side dish!

And it makes a great pizza crust! Perfect for personal-sized pizzas. Like this one that I topped with hummus, guac, chicken and cheese.

flatbread pizza.jpg

Any way you use them…they’re delicious!

This Whole Wheat Flatbread is the perfect dinner side dish!

One word of caution. These are best eaten right after making or within a day or so. Since they’re brushed with butter, if you’re going to keep them longer, I’d probably keep them in the fridge and reheat them before eating as opposed to keeping them in the pantry.

Enjoy!
–Lindsay–

Filed Under: Baking, Side Dish

Grapefruit Yogurt Cake

February 25, 2014 by Lindsay 40 Comments

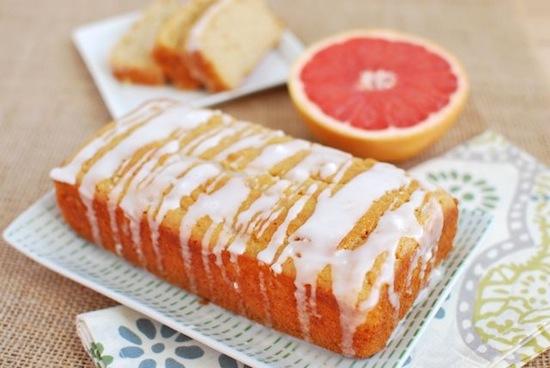
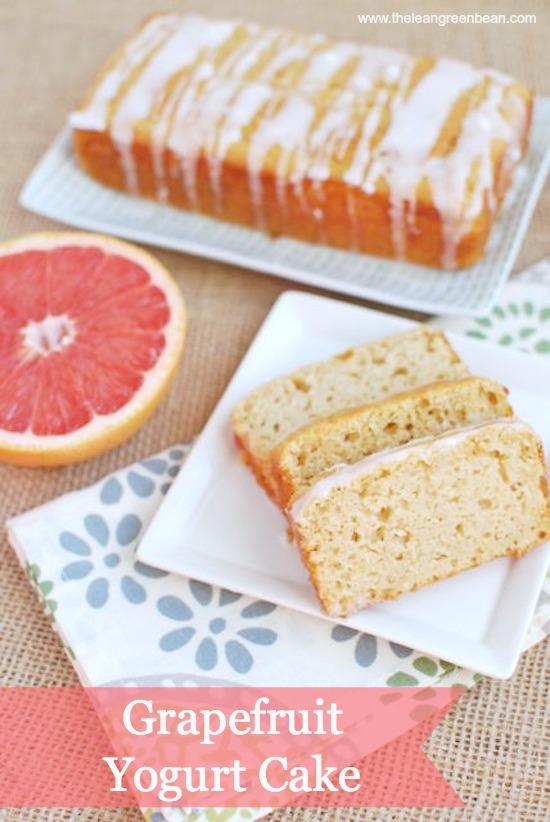
Is citrus in season? Make this light and refreshing Grapefruit Yogurt Cake to snack on at brunch or dessert!

Hi Friends!

As I mentioned yesterday, I have a bunch of  recipes to share with you guys. Hubby and I tallied up all the votes from Instagram and Facebook on Sunday night and the clear winner was this Grapefruit Yogurt Cake.

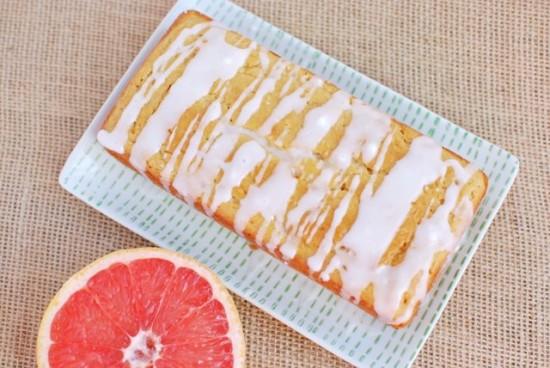
Is citrus in season? Make this light and refreshing Grapefruit Yogurt Cake to snack on at brunch or dessert!

So, your wish is my command! I bought a couple of grapefruits the other week thinking I would use them to make a cocktail for my Recipe Redux post. Instead, I ended up making Homemade Gingerale,  which is fine, but it left me with two grapefruits. I don’t really mind eating grapefruit just plain with a spoon, but I thought this would be a good opportunity to get a little more creative. I did some googling and came across this recipe from Smitten Kitchen.  It sounded pretty delightful, so I made some modifications and hoped for the best.

Here’s my version:

Print

Grapefruit Yogurt Cake

grapefruit yogurt cake.jpg
Print Recipe

5 Stars 4 Stars 3 Stars 2 Stars 1 Star

4.5 from 2 reviews

A light, fresh loaf cake that’s perfect for snacktime and also fancy enough for dessert!

  • Author: Lindsay L
  • Prep Time: 5 minutes
  • Cook Time: 50 minutes
  • Total Time: 55 minutes

Ingredients

Scale
  • 1 cup whole milk plain yogurt
  • ¾ cup sugar
  • 2 eggs
  • ¼ cup butter, melted
  • ⅓ cup grapefruit juice, fresh squeezed
  • ¼ cup applesauce
  • 1 Tbsp grapefruit zest
  • 1½ cups white whole wheat flour
  • 2 tsp baking powder
  • Glaze: ¾ cup powdered sugar + 2 Tbsp grapefruit juice

Instructions

  1. Combine the liquid ingredients in a large bowl.
  2. Add the flour and baking powder and stir until just mixed.
  3. Pour into greased pan/pans and bake at 350 degrees for 45-50 minutes.
  4. Let cool completely.
  5. Combine the powdered sugar and grapefruit juice in a small bowl and drizzle over cake just before serving.

Did you make this recipe?

Tag @theleangreenbean on Instagram

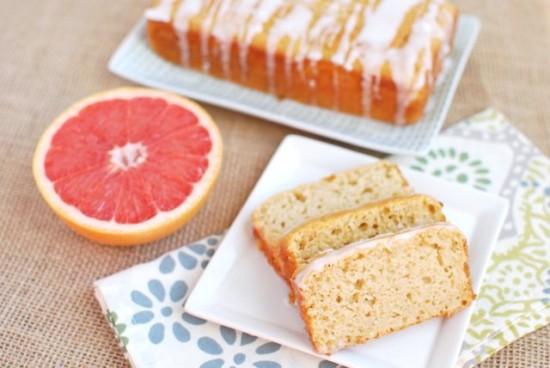
Like I noted in the recipe above, I made mine in two mini loaf pans and it worked out perfectly!

Is citrus in season? Make this light and refreshing Grapefruit Yogurt Cake to snack on at brunch or dessert!
Isn’t it just so pretty?!

Is citrus in season? Make this light and refreshing Grapefruit Yogurt Cake to snack on at brunch or dessert!

Have a slice. Or 3.

Is citrus in season? Make this light and refreshing Grapefruit Yogurt Cake to snack on at brunch or dessert!

Enjoy!
–Lindsay–

Filed Under: Dessert Tagged With: Butter, Egg, Sugar, White Whole Wheat Flour, Yogurt

{Recipe Redux} Homemade Gingerale

February 21, 2014 by Lindsay 68 Comments

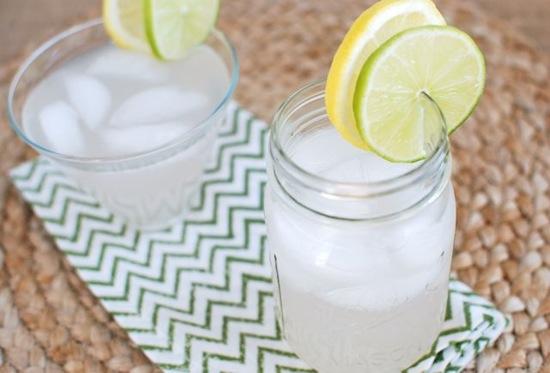
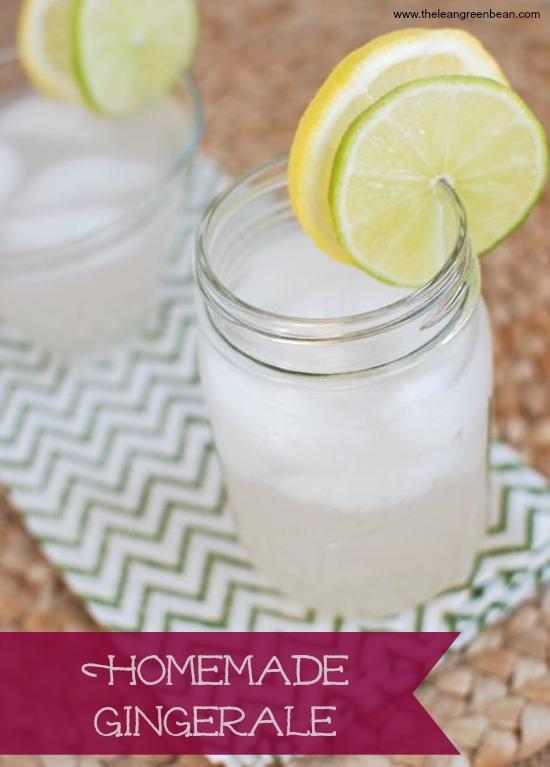
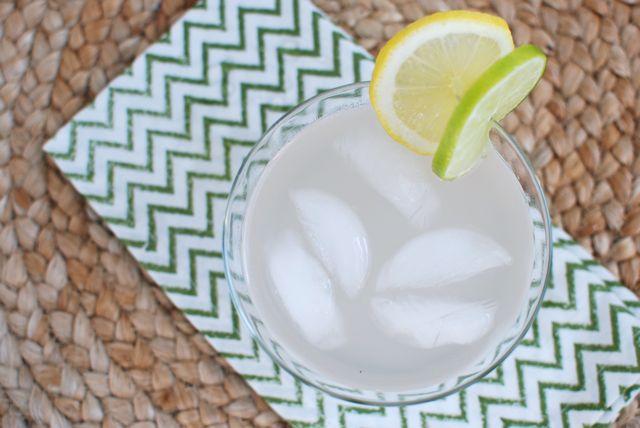
Skip the store-bought soda and make this low-sugar Homemade Gingerale to sip on!

Hi Friends!

Time for another month of Recipe Redux. This month the challenge was beverages. Here’s the prompt:

Beverages Are Hot – That which is served in a mug, glass, or stein is becoming just as interesting as what’s on the plate. New cocktail-only blogs are emerging. Pinners are cooking with their Keurig K-cups. Hot beverages have gone way beyond hot cocoa. Beverages are in! Whether you’re serving something hot or cool, kid-friendly or happy hour worthy, show us your healthier drink.

I’m not a soda drinker. Even when I was little, it wasn’t something I was allowed to have often…and when I did have it, all I really liked was  Sprite + Pink Lemonade and Gingerale. No Coke, Dr. Pepper or Root Beer for me. Now that I’m older, pretty much the only soda I drink is Gingerale…and pretty much the only time I drink it is on the airplane. There’s something about airplanes and Gingerale that just go together for me….

Hubby, on the other hand, used to be a big time soda drinker. Eventually my non-soda drinking ways rubbed off on him and he rarely drinks it anymore…but lately, thanks to one of our friends, he has acquired a taste for Captain Morgan. And his favorite thing to mix it with is Gingerale.

So…when I started thinking about this month’s challenge, I thought it might be cool if I could make a homemade Gingerale…something I wouldn’t mind taste-testing…something I could try making lower in sugar than the canned version…something hubby could potentially use in his mixed drinks!

Skip the store-bought soda and make this low-sugar Homemade Gingerale to sip on!

Turns out, homemade gingerale is about as easy as it gets. It requires very few ingredients and you can adjust the ratios to suit your tastebuds.

Here’s what you do:

Print

{Recipe Redux} Homemade Gingerale

DSC 0418
Print Recipe

5 Stars 4 Stars 3 Stars 2 Stars 1 Star

5 from 1 review

A simple, homemade recipe for Gingerale that’s lower in sugar and can be customized to your taste.

  • Author: Lindsay L

Ingredients

Scale
  • 1 cup fresh ginger, peeled and sliced
  • 2 cups water
  • lemon & lime slices, optional
  • ½ cup sugar
  • 1 cup water
  • seltzer water

Instructions

  1. In a small saucepan, combine the ginger and 2 cups of water (and the lemon and lime if desired).
  2. Bring to a boil, then reduce heat and simmer for 15-20 minutes.
  3. Strain through a strainer or cheesecloth and let liquid cool.
  4. Clean the saucepan, then combine 1 cup water and ½ cup sugar.
  5. Bring to a boil and stir until sugar dissolves. Remove simple syrup from heat and let cool.
  6. In a glass, combine ½ cup seltzer water with ½ cup ginger water.
  7. Add 3 Tbsp simple syrup, stir and taste. Add an additional Tbsp if needed.
  8. Serve over ice!

Did you make this recipe?

Tag @theleangreenbean on Instagram

Some notes:

  • I made my ginger water with 3 slices of lemon and 3 slices of lime. If you want to make it with just ginger, go for it…or you can add more lemon or more lime to your preference.
  • You can also make just plain ginger water and then squeeze in a bit of lemon or lime juice to the mixed drink.
  • Most recipes for simple syrup call for a 1:1 ratio of sugar to water but I think it’s plenty sweet with only 1/2 the sugar.
  • Most homemade recipes called for 6 Tbsp of traditional simple syrup. I cut that in half and used a lower-sugar simple syrup and it’s just sweet enough for me!

Skip the store-bought soda and make this low-sugar Homemade Gingerale to sip on!

Next up is having hubby put this to the test in his mixed drink and replicating my holiday favorite Cranberry Gingerale! Stay tuned!

Skip the store-bought soda and make this low-sugar Homemade Gingerale to sip on!

Enjoy!
–Lindsay–

An InLinkz Link-up

Filed Under: Snack

SEO 101: How to Increase Organic Search Traffic for Blog Posts

February 20, 2014 by Lindsay 45 Comments

Hi Friends!

I have a very special guest post for you guys today. For the past few months, my friend Danielle has been helping me improve SEO for my blog. She’s phenomenal to work with and a wealth of knowledge so I asked her if she’d be willing to share some of her top tips with you guys since I know a lot of my readers have blogs of their own! Danielle is also a business coach, so if you need help with business strategy, social media management, SEO or blogging, definitely go check out her services on her website Danielle Zeigler!

So, are you ready to learn? Here we go:

Want to learn more about optimizing your blog posts for organic search traffic? Check out these SEO tips!

What is Search Engine Optimization? This means optimizing your posts for search engines like Google and Bing so they can better understand what the post is about and what questions it will answer for readers. A nicely optimized post will rank better and reach a wider audience. “Organic search traffic” means visitors who find your blog through typing a query into a search engine.

When you’re thinking of optimizing your posts, you should be thinking of how to help your target audience, not just how to rank better or reach more people in general. Start thinking like your audience. What do they want to know? What questions are they asking?

How to optimize your posts:

First, let me stress that shareable, engaging content is more important than keywords. However, following a few easy steps can help increase your organic traffic and reach more relevant readers.

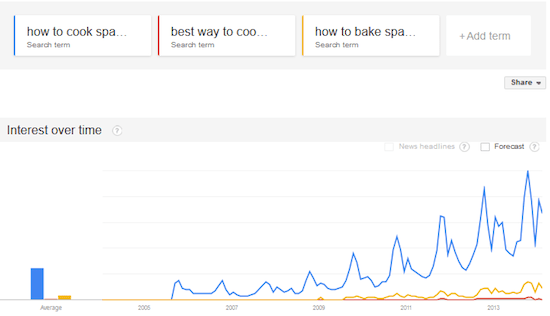
1.  Keywords: Choose a keyword phrase or two that best represents your post idea.  Ex: “How to cook spaghetti squash”

a. Use Google Keyword Planner and Google Trends to find the most popular (most searched) way to phrase your keywords. Compare multiple phrases to see which has the highest traffic (low-medium competition is best). There are tons of keyword tools out there, but these are quick, easy and free, so start here.  For the example above, other search phrases might include “best way to cook spaghetti squash” and “how to bake spaghetti squash”

spaghetti squash example

2.  Title: Your post title is possibly the most important aspect of your blog post. This will entice people to click, shows up in social media sharing, is usually your H1 tag for SEO, etc. Titles with the most clicks often include: “How-to”, “Mistakes,” “Secrets,” Questions (people are typing full questions into Google more often now) and lists. Examples include: “3 Ways to Cook Spaghetti Squash,” “The secret to cooking perfect spaghetti squash,” or “4 mistakes people make while cooking spaghetti squash.”  Keep your title under 60 characters and be sure to include your keyword phrase. This will most likely be used for your title tag.

3.  Title Tags: Google will show about 60 characters. Include keyword phrase(s), but don’t overdo it.

4.  URL: Include your keyword phrase(s) — you can shorten it to use just the main keywords, use dashes rather than underscores, and use all lower case letters.

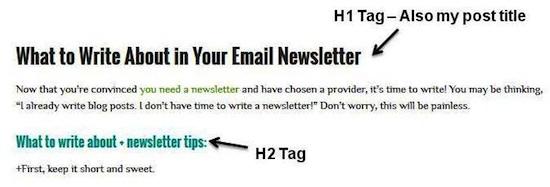
5.  H1 tags & Header tags: The H1 tag is usually your post title. Make it engaging and include your keyword phrase(s). Secondary headers are a great way to break up the content. They also cue readers (and search engines) in on what your post is about if they quickly scan it. Use closely related keywords in the header tags.

Header Tags

6.  Meta-description: Google shows about 160 characters. The meta-description is not used for ranking in search engines, but what you put here will encourage people to click on your link. Use an alluring snippet from your post, a call to action, or write a short introduction to the post, such as, what problem will reading your post solve for readers? Google won’t always use what you enter. Sometimes it will pull text related to the search query, but it can still be a good idea as a backup.

7.  Content: I mentioned having engaging content. Make sure you also use your keyword phrases within your blog post. You only need to use a few related phrases once or twice. Focus on your writing and don’t keyword stuff*.

Bonus Tip: Use phrases to link to other posts you’ve written, too. This will keep the reader engaged in your blog longer and will signal to search engines that your blog is cohesive and organized. Make sure to have the link open in a new window.

8.  SEO Plugins: If using WordPress, grab a free SEO plugin. Yoast All-In-One is highly recommended.

Visual Example:

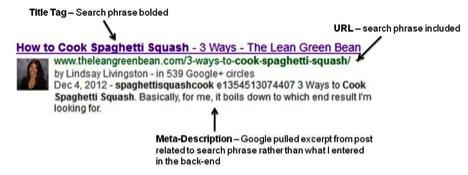
When searching for “how to cook spaghetti squash,” this is what the post looks like in Google. Lindsay appears on the first page for this search.

lindsay

In no time you’ll get the hang of optimizing your posts and be able to draw more organic traffic to your blog!

*A note on keyword stuffing: Keyword stuffing is when you use your keyword phrase as much as you can. Not a good idea! Google has evolved and it’s now recommended to use similar phrases so Google can get an idea of what your post is about.

————–

Huge thanks to Danielle for sharing her expertise today!

Enjoy!
–Lindsay–

 

Filed Under: Uncategorized

Blendtec Blender Review

February 18, 2014 by Lindsay 28 Comments

Hi Friends!

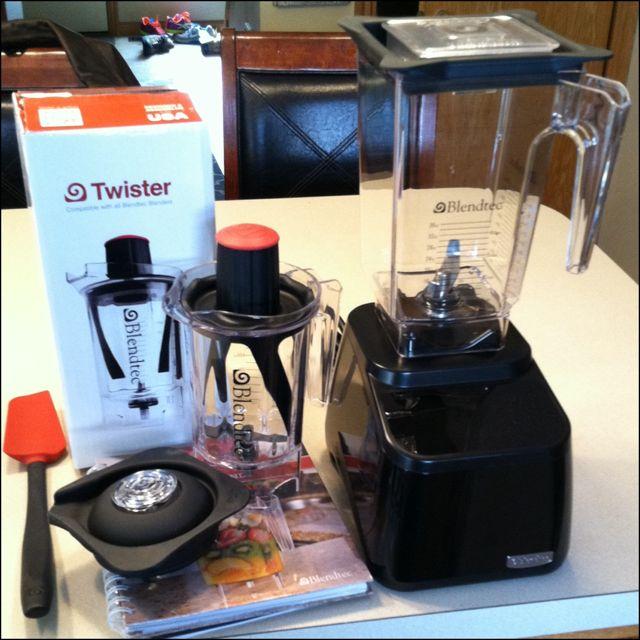
If you follow me on social media or have been reading the blog lately, you’re probably familiar with my newest kitchen toy:

IMG_2856

That’s right! A (FREE) new blender! The amazing folks at Blendtec were kind enough to send me one of their amazing blenders (free of charge) to review and now that I’ve had some time to play with it, I’ve gathered my thoughts to share with you!

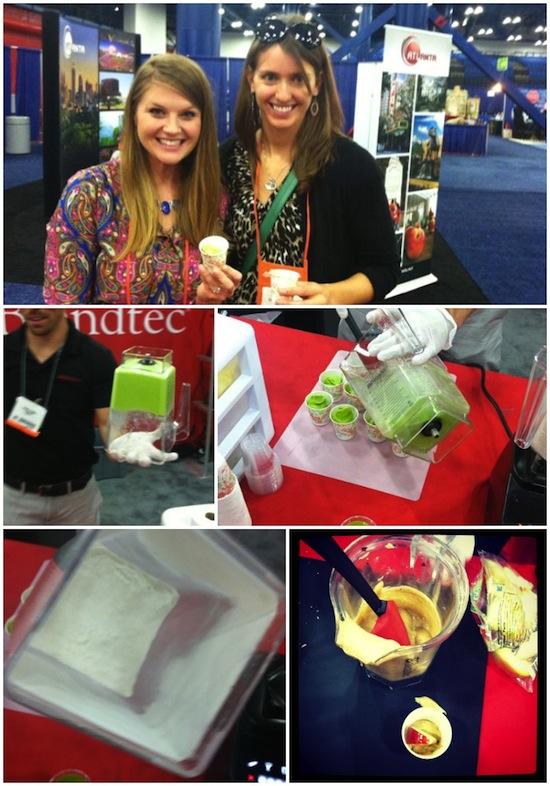
You may recall that I first came across Blendtec back in October when I went to FNCE- The Food & Nutrition Conference & Expo! Kristina and I spent about an hour at their both learning all of the cool things it could do. (I wrote about it here).

blend1

We devoured the nut butter they made, were totally amazed that you could make ICE CREAM and also saw them make rice flour, soup and a few other things!

I was sent the Designer Series Wildside with the touch screen display to review, along with the Twister Jar.

A few things I was initially impressed by:

  • The touch screen- Easy to use, easy to keep clean and pretty to look at!
  • The dull blades- I’ve cut myself on blender blades before and it’s amazing that these are dull to the touch but blend so well.
  • The handy cleaning tips- ie, just put a little dishsoap and water in the blender and blend to clean, then rinse!
  • The recipe books it included- TONS of great recipes and inspiration.
  • The blender itself- love that the jar is BPA free, it’s the perfect height to fit under a kitchen cabinet and considering how powerful it is, it’s fairly lightweight!

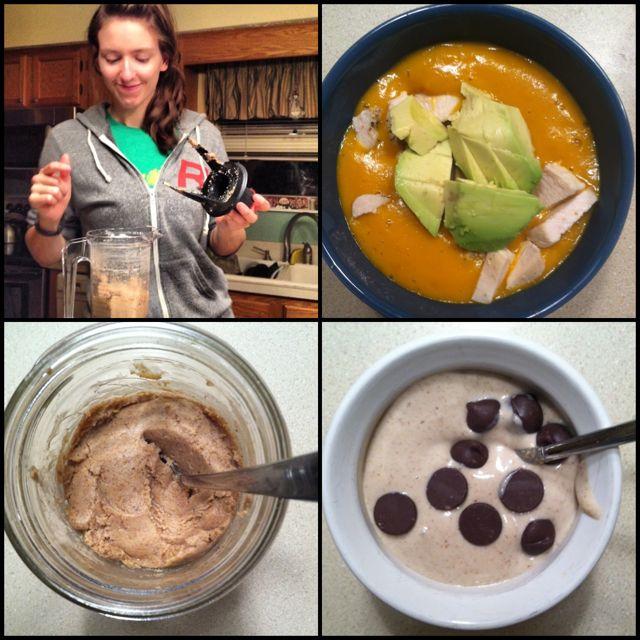
Some of the first things I made:

  • A smoothie- It blended up the ice, yogurt and frozen fruit mixture with no problem.
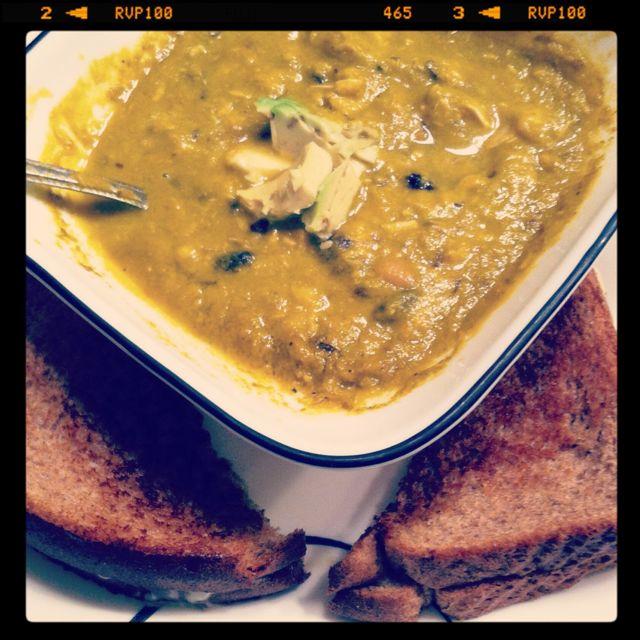
  • Soup- This is probably my favorite feature. No more cooking a huge pot of soup on the stove if I don’t want to….just throw a bunch of veggies into the blendtec, select the soup option and voila! I made Sweet Potato Bisque first and then later made Chicken Tortilla Soup.
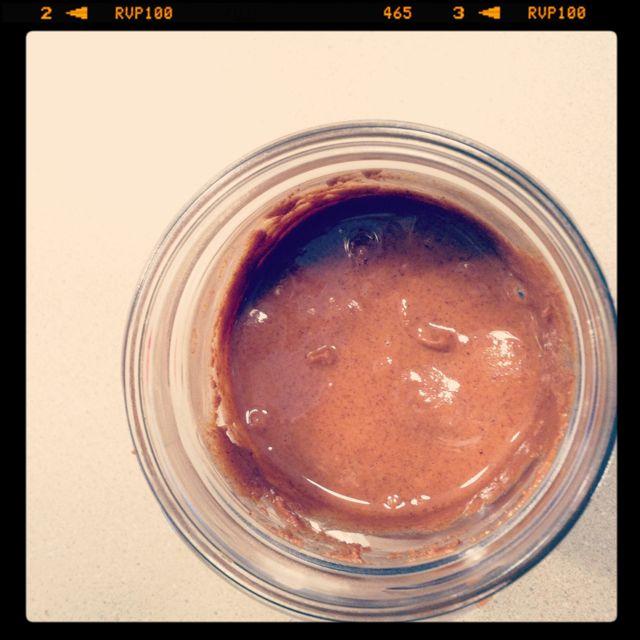
  • Nut butter- A no brainer! I was so excited to try out the twister jar to make some homemade almond butter.
  • Banana froyo – delish
  • Brownie batter!

IMG_2923

A few things I didn’t like:

  • When I made the first batch of almond butter, I used raw almonds and although it blended, it didn’t get nice and creamy like it did when I watched at FNCE.  However, the second time I made it, I roasted the almonds first and ran through the 50 second blender cycle 4 times instead of the recommended 2 and it came out perfectly.
  • It’s loud…but that’s to be expected for a blender.
  • When you make nut butter, the jar gets HOT. Not a huge deal but definitely need to be careful when touching it.
  • The wildside jar is easy to clean. The mixer jar is a little more challenging. If you make nut butter, it’s a little hard to clean under the blades. It can be done by cleaning and then sliding a paper towel underneath the blades…it just takes a little while.

IMG_3089

IMG_3076

Still on my to-make list:

  • Hummus
  • Pizza dough
  • Their famous Popeye’s ice cream
  • Salsa
  • So.Much.More

My overall impression:

This Blendtec is definitely worth the money. It’s easy to use, well made, powerful and extremely versatile. There are so many different things you can use it for that it can replace the mixer and food processor in many situations. I can’t wait to try out a few more recipes and let you know how they turn out…and of course develop some of my own!!

And the best news…I get to give one of you guys coming up here in a couple of months so stay tuned! Can’t wait until then? Buy one now by clicking here. (affiliate link).

Let’s chat: What’s your favorite thing to make in your blender besides smoothies or nut butter?

Enjoy!
–Lindsay–

I received this product free of charge. I was not compensated for my time. All thoughts and opinions are my own. 

Filed Under: Sponsored

Fitness Friday 63

February 14, 2014 by Lindsay 19 Comments

Hi Friends!

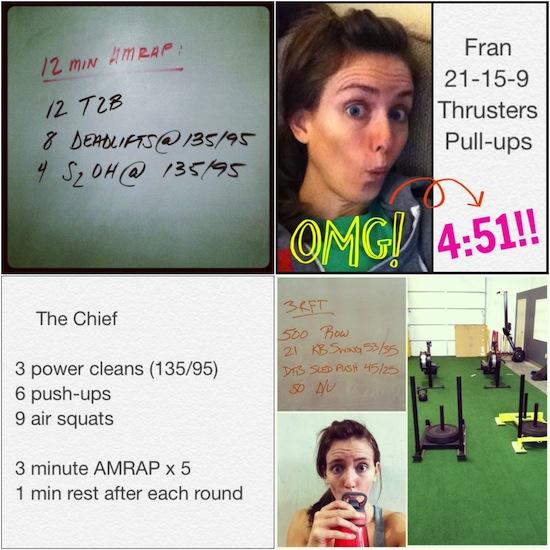
It’s been about a month since my last Fitness Friday, so let’s catch up shall we? As I like to do every so often, I took a couple of weeks to rest and reset my body, did some lighter weights during the wods, took a few extra rest days and did lots stretching and mobility to work out some kinks that have been building up after a few months of heavy lifting…I feel rested and refreshed now that I’m back at it and ready for the Open!

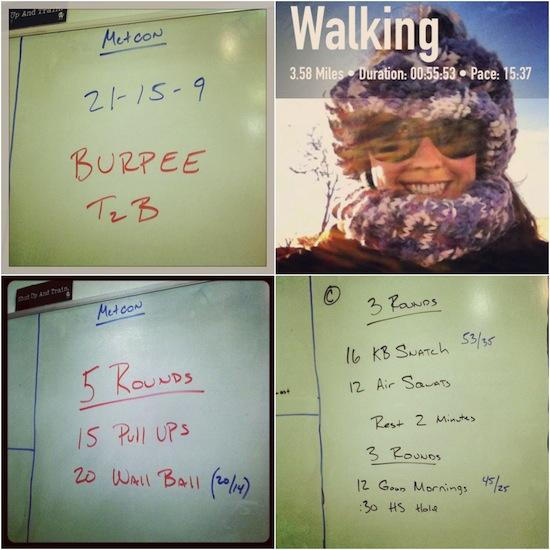
FF1

1. Miserable. 6:50 Rx
2. Probably the coldest walk of my life. My forehead was getting frostbite so I had to get creative with my scarf!
3. Tough one. 9:05 Rx
4.  8:16 with a 26# kb

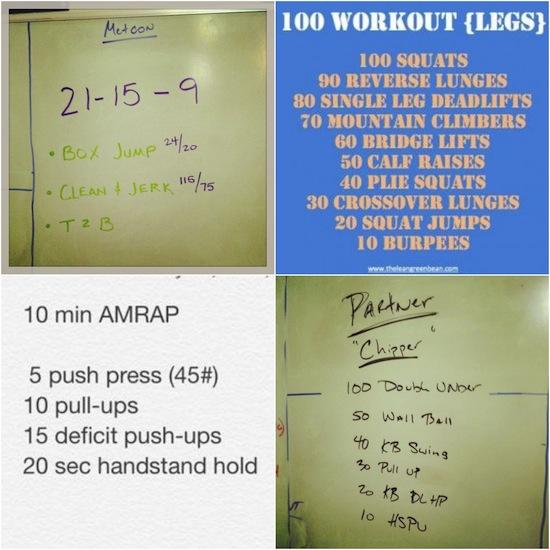
ff2

1. Wod + max reps in 2 minutes of: double unders (154), push-ups (41) & sit-ups (70)
2. Opted for an at home workout tonight. Still one of my favs!
3.  Shoulder burner
4. Partner wod. Both do the reps but can’t move on to the next movement until both partners finish.

ff3

1. Front squats and a wod! 7+5 with 85#
2. BOOM! Finally hit a sub-5 minute Fran!!! I’ve been chasing that for months!
3. The Chief. Partial rounds don’t count except the last round. 5-5-4-4-5+1 Rx
4. Sunday funday. Holy effing legs! 15:47 Rx

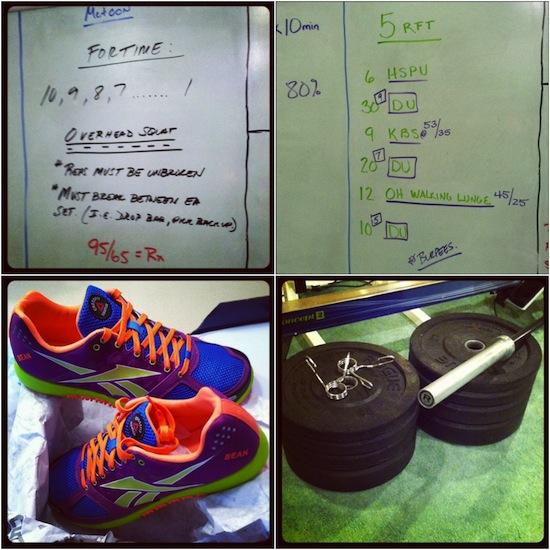
ff4

1. Legs on fire! 3:41 Rx
2. EMOM push jerks, then the #wod. 12:19 with pull-ups instead of hspu. If you couldn’t do double unders, you had to do burpees and lemme just say, I’m glad I can do doubles 🙂
3. So in love with my custom nanos!
4. Our home gym is growing thanks to @bgliving – the Craigslist guru. He got us a brand new @roguefitness bar, plus a full set of bumper plates (230#) for 25% cheaper than retail!!

And some videos of hubby and I for your enjoyment:

Post by The Lean Green Bean.

Post by The Lean Green Bean.

Post by The Lean Green Bean.


Let’s Chat: How have your workouts been lately?

Enjoy!
–Lindsay–

Filed Under: Workouts

Chocolate Dipped Peanut Butter Popcorn Cups

February 13, 2014 by Lindsay 34 Comments

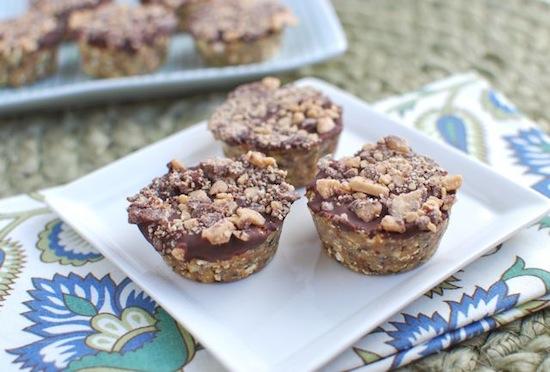
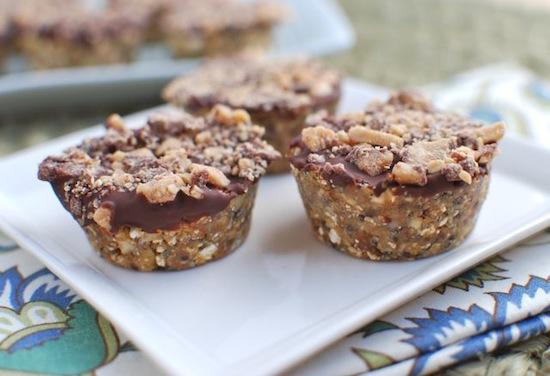
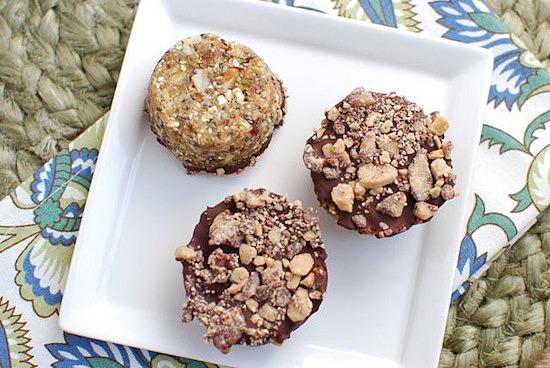
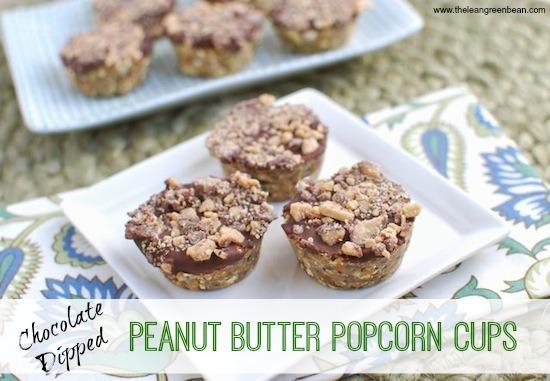
These Chocolate Dipped Peanut Butter Popcorn Cups are a great snack to have on hand for movie night!

Hi Friends!

How’s that for a title? In all honesty, I had no idea what to call these things. I just know they’re my new favorite tasty treat!

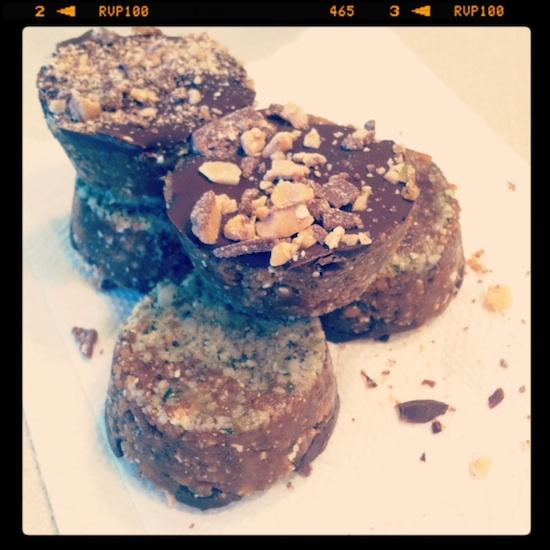
Chocolate Dipped Peanut Butter Popcorn Cups

These Chocolate Dipped Peanut Butter Popcorn Cups are a great snack to have on hand for movie night!

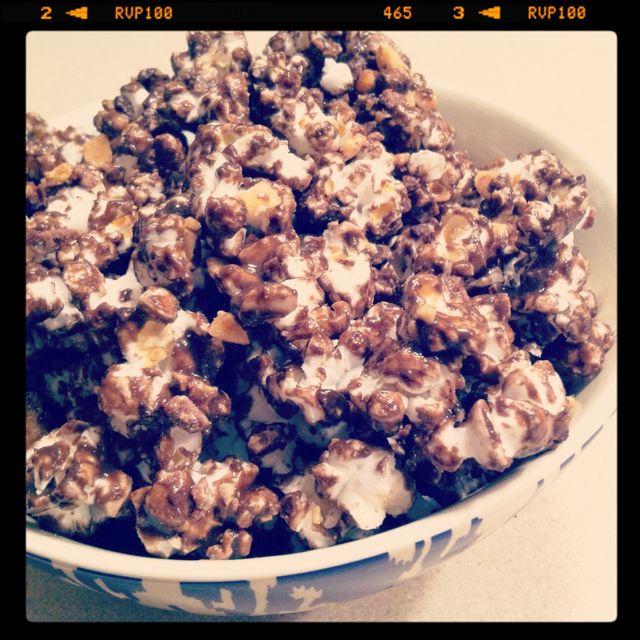
Getting this end result was a process. It all started when I saw this post from Melissa about peanut butter popcorn. I thought that sounded pretty good…so I played around with my own version…and added chocolate. The end result, while delicious, was EXTREMELY messy.

IMG_3045

Instead of using chocolate, I used cocoa powder and coconut oil, just like I do in my Freezer Chocolate PB Cups… but even after letting it cool in the fridge, the coating just never quite set so it was a mess to eat. Here’s the recipe I used in case you’re up for the mess:

1/4 cup peanut butter + 2 T coconut oil + 1 T cocoa powder + 2 tsp honey + 1/2 tsp vanilla + 1/2 tsp cinnamon

Melt the pb and coconut oil in the microwave, stir in the rest of the stuff and pour over popcorn, stirring to coat.

Since I couldn’t get that to work…I moved on to option number 2. I found this recipe from Kristy for Chocolate Covered Peanut Butter Popcorn Truffles and decided to switch gears. I pulled in some ingredients from my go-to energy ball recipe, added some other things like popcorn to my Blendtec and hoped for the best. The end result was tasty, but my mistake was in the execution. Using the blender caused everything to get super ground up…which was tasty, but I wanted a bit more texture. I decided to make “cups” using mini muffin tins, but added the chocolate while they were still in the tin, so the chocolate tops cracked when I tried to remove them.

photo (81)

These were pretty darn good though, so I knew I was close! After a few more adjustments, I made batch #3 and voila! These little cups are jam packed with healthy nuts and seeds, sweetened with a few medjool dates, have popcorn added for fiber & whole grains AND they’re dipped in chocolate and toffee bits to make them more dessert-like. Win, win, win.

These Chocolate Dipped Peanut Butter Popcorn Cups are a great snack to have on hand for movie night!

Here’s how you make them:

Print

Chocolate Dipped Peanut Butter Popcorn Cups

1
Print Recipe

5 Stars 4 Stars 3 Stars 2 Stars 1 Star

No reviews

Packed with healthy fats and fiber, these are sweet enough for dessert and fun to eat for kids and adults!

  • Author: Lindsay L

Ingredients

Scale
  • ½ cup peanut butter
  • ⅓ cup chopped dates, tightly packed
  • ½ cup almonds
  • ¼ cup pumpkin seeds
  • 2 Tbsp hemp seeds
  • 2 Tbsp chia seeds
  • 1 tsp vanilla extract
  • ½ tsp cinnamon
  • 2 Tbsp milk
  • 2 cups popped popcorn
  • ⅓ cup dark chocolate chips
  • toffee bits or chopped nuts for dipping, optional

Instructions

  1. In a food processor, processes the peanut butter and dates until well combined. Add the nuts, seeds, vanilla and cinnamon and pulse several times to chop and combine.
  2. Add popcorn and milk and pulse 5-6 times or until desired consistency is reached- I wanted mine pretty chunky.
  3. Press firmly into mini muffin tins, filling about ¾ of the way full (You should fill 12-14 cups).
  4. Freeze for 20-30 minutes.
  5. Using a knife, gently remove cups from tins and place on a plate.
  6. Melt chocolate and spread toffee bits or chopped nuts on a small plate.
  7. Dip the top of each cup in chocolate and then press into toffee.
  8. Place chocolate side up on a plate and freeze until chocolate hardens.
  9. Store in the fridge or freezer.

Did you make this recipe?

Tag @theleangreenbean on Instagram

A few notes:

  • I used peanut butter. You could use your favorite nut butter.
  • If you don’t have hemp seeds or chia seeds, you could probably leave them out.
  • Instead of milk, you could try using water or melted coconut oil….you just need some liquid to help them stick together and not be too dry and crumbly.
  • If you want, you can process them for longer to get a smoother texture…or use a high powered blender…I just wanted mine to be chunky and have some texture so the food processor worked better for me.
  • If you don’t like toffee, just dip them in chocolate, or dip them in your fav nuts or graham crackers.
  • I like these best straight out of the freezer.

These Chocolate Dipped Peanut Butter Popcorn Cups are a great snack to have on hand for movie night!

Ta-da! The perfect bite-sized treat!

These Chocolate Dipped Peanut Butter Popcorn Cups are a great snack to have on hand for movie night!

Enjoy!
–Lindsay–

Filed Under: Dessert, Snack Tagged With: Peanut Butter, Popcorn

There’s A Tampon In My Pocket

February 7, 2014 by Lindsay 38 Comments

Hi Friends!

Time for a little entertainment to brighten up your Friday. Mr. Bean (aka Hubby aka Brett) is back to share the rather humorous tale of how he found a tampon in is coat pocket last week. Enjoy 🙂

————–

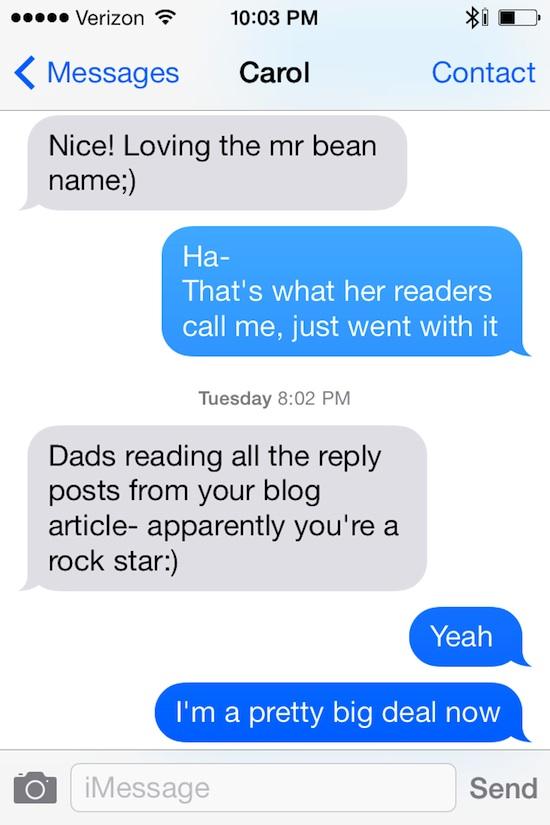
First of all- WOW. I mean I’ve always thought I was pretty funny, but all of this validation from my previous post has really grown my ego exponentially. I’ve basically told all of my friends I’m famous now and don’t have time to hang out with them. You know you’re a big deal when your mom texts you:

IMG_5012

Anyways, the story.

There’s a Tampon in my Pocket:
A tale of mystery, lies, and deceit.

I’ll cut to the chase: Last week, I found a tampon in my pocket [Unopened!]…

More specifically, I was walking through the parking lot of my office building, minding my own business, noticed an odd bulge in my pocket, and discovered that it was a tampon— This is not normal.

Let me break it down. I had just exited the building for lunch and was about halfway to my car. My left arm seemed to be getting some excessive friction while it swung back and forth. A quick visual assessment revealed a weird bulge in my coat. I checked my side pockets (empty), realized my coat had an inner pocket (nifty), patted the contents down, and felt a cylindrical object. My mind immediately jumped to “is that a cigar?”(I don’t smoke cigars- weird initial judgment). So then it happened… I reached into the inner pocket, felt something wrapped in plastic, pulled it out, quickly realized I was holding a feminine hygiene product in my hand (in the middle of a parking lot), briefly froze in complete shock, quickly glanced side to side while jamming it back into aforementioned pocket, and then walked the rest of the way to my car.

A Reenactment

brett1

I sat there with both hands on the wheel trying to process the madness.  Everything was momentarily distorted, like that scene in “Elf” where Buddy figures out he’s a human. After running some scenarios through my head, I started the car to head home for lunch. [Side Note:  We live close to my office, so I eat lunch at home with the Bean]

QUICK BREAK:
CONTEXT FOR MALES & TAMPONS

Few innocuous objects can leave a man more uncomfortable and shaken than a tampon. It’s completely irrational, but nonetheless, an undeniable truth. Its component parts (plastic, string, cotton) have no noticeable effect on a man, but put them together and it’s like kryptonite. We cringe at the name- Tampon (shudder).   I liken my fear of tampons to my fear of clowns: I know they are harmless and won’t hurt me, but I stay the hell away from them.  My best guess is that the fear is rooted in an unintended conditioning of our species; I’ll use the transitive property to explain:

Tampons=Periods

Periods= Cranky Woman

Cranky Woman= Terrifying

Therefore,

Tampons= Terrifying

OK, back to the story.

I’m now driving home and posed with the question “Why do I have a tampon in my inner coat pocket?” This naturally leads to “Who put a tampon in my pocket?” “How long have I had a tampon in my pocket?” “Who does this tampon belong to?” “Did anyone see me holding a tampon in the parking lot?”

I pull in the driveway having constructed the most plausible scenario. MAN PURSE! Now when I say “man purse,” I don’t mean it like a dude’s satchel. I’m talking about the all too common act of a woman using her man as a purse when she doesn’t want to carry one. Clearly this had been the work of the Bean. She has been known to use me as her man purse, putting things in my pants and/or coat when she wants to travel light. This results in me carrying her things around (knowingly or unknowingly) like her ID or keys.  Clearly, this is what had happened. We were going somewhere, she didn’t want to tote around a tampon, knew I wouldn’t be agreeable to carrying it, so she popped it in my coat. How dare she. This time she had gone too far.

Now having filled in the blanks, I arrived home, marched in the kitchen and said “Well, thanks a lot for using me as a purse!” and I slammed the tampon down on the kitchen island for effect.

brett2

Bean was silent.

Figuring she was not up to speed, I elaborated – “Obviously, you snuck this bad boy in pocket one night, and now I’ve been walking around with a tampon like an idiot!”

Bean glanced at the island, opened her mouth, and started to speak words that made the situation even more dreadful than I ever could have imagined. “That’s not my tampon. I don’t use that kind.”

My well thought out, airtight theory now had a MAJOR hole in it…No…A prank… Who? Why? Who could have had the window, the motive.  I didn’t even want to think it, but now I knew it was an inside job at the office. I’d have to deal with that after lunch.

Now that things were becoming clearer, I settled down and we began to resume lunch preparation as normal. As I often do after arriving home, I squatted down to give the Tuck Man (our blacklabesque dog) some love. To add insult to injury…

R-r-r-r-r-i-i-i-i-i-pppppppp!!!!!!!!!!!!!!!!!

ripped pants

{source}

My eyes widened. I looked at Bean. She began laughing hysterically. I looked down. And I swear to you all, I split the entire crotch/butt region of my pants. Things had gone from bad to worse. Within about a 30 minute window, I had found a tampon in my pocket and split my pants.

———

Now back on the job, with a fresh pair of pants, I was on high alert. I went quickly to my pal and confidant’s office – we’ll call him “Mandrew” for anonymity- to tell him what happened. No sooner had I told him what I found, he cut me off – “ I was just telling this exact story to a group of people the other day. It had to be one of them.” (Knowledge I could have used earlier BEFORE I slammed the tampon down on the counter and accused the Bean) Apparently this had been a reoccurring gag that the women had pulled at Mandrew’s previous employer.

…Sick…

My personal feelings aside, we had momentum- a list of potential suspects. We started our interrogations, but to no avail. People thought it was hilarious, yes, but nobody was giving any “tells” to indicate that they were involved, or even had any knowledge. Was it a lone gunman? Had to be. Offices are notorious for chatter, so for it to have remained so contained had to mean it was some monster acting alone. Somebody in close proximity, somebody who enjoyed watching office pranks, maybe enjoyed them so much she had heard a story about a prank and thought “now’s my chance to shine”, maybe somebody who sat 10 feet away….. We’ll call her “Adminnie” the Administrative Assistant.

Now we all love “Adminnie”. She is the glue that holds the department together. Scheduling, Travel, it all goes through her.  Adminnie is also the cheerleader of pranking in the office. She loves to hear a good prank story, but until now had always been a spectator. Could this have been her moment? The student becoming the master? I had my suspicions, but knew we wouldn’t have any trouble getting the information out of her. She has an Achilles heel- the worst poker face known to mankind. Picture Kristen Wiig’s SNL character “Sue” who always ruins surprises.

182822282_640

{Source}

She has tried to pull face to face pranks before at the urging of others. She will typically bust out laughing before getting three words out during the attempt. Something like “Hey. The Pres-BAHAHAHAHAHA-ident of the Comp-HAHHAHAHAHA-any wants to see you in his office.” This tampon prank would be right up her alley; she could have busted out laughing while doing it with nobody around to hear it. I could practically see her planting it in my coat like a black and white Dateline reenactment.

The interrogation went down just like I would have expected. Mandrew started out with “..hey guess what, Adminnie, Brett(Mr.Bean) found something strange in his pocket at lunch”. She immediately interjected “Oh yeah, (giggle) what did he (giggle) find(giggle).” She literally had tears running down her face before we ever mentioned the specifics of the tampon.  Busted.

Well played, Adminnie, but you’re in the big leagues now. I’m not going to retaliate immediatedly. (By the way, she found the ripped pants part exceedingly hilarious after I described my lunch hour). I’m going to let this simmer for awhile before I get even. I told her I was going to write about this- and Adminnie-  rest assured that sweet, sweet revenge is headed your way. It might be a month from now (exactly a month would be pretty funny), maybe a year, but it will be done, and if I pick my prank-level right, I’ll probably regret it for a day or two before thinking it’s hilarious again….(Insert a lengthy maniacal evil genius laugh here).

Now that I’ve written this, I’m fearful that this post may result in rogue tampons plaguing the belongings of men the world over. Sorry guys.

Any good prank suggestions to get back at Adminnie?

What’s the best office prank you’ve taken part in or witnessed?

PS. In case you’re new here, you can catch Mr. Bean’s previous appearances here:

Help, I’m Married To A Blogger
It’s Not Easy For Everyone (Our Infertility Story)

Enjoy!
–Bean & Mr. Bean–

Filed Under: Uncategorized

Homemade Cheez-Its

February 6, 2014 by Lindsay 48 Comments

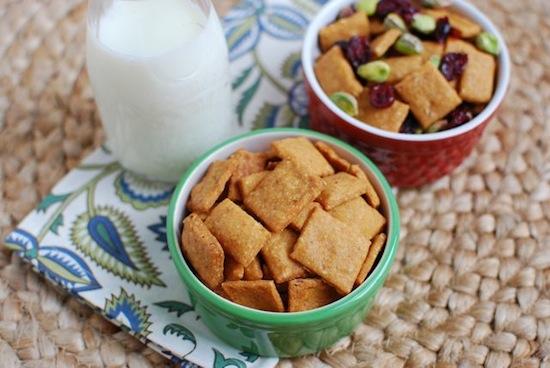
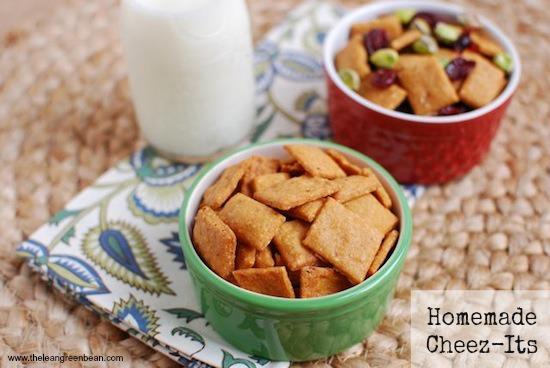
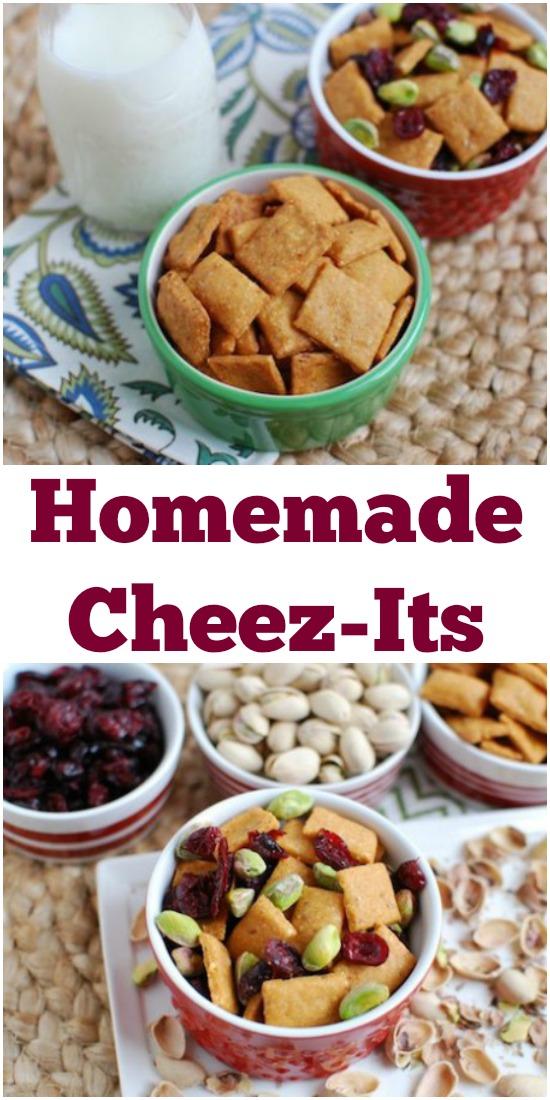
Like Cheez-Its but hate the ingredient list? Make this homemade version with real, simple ingredients and snack on them all week long!

Hi Friends!

As promised, here is the recipe for the Homemade Cheez-Its I talked about in my Pistachio Pairings Challenge post for Recipe Redux!

Like Cheez-Its but hate the ingredient list? Make this homemade version with real, simple ingredients and snack on them all week long!

I’m not actually a huge fan of Cheez-Its but I love making homemade versions of storebought crackers!

This recipe is a little bit tedious, but the ingredients are simple and with a little effort, you can have your very own cheesy crackers to snack on! This recipe was adapted from these Easy Whole Wheat Cheddar Crackers. It’s not uber healthy, but now that I have a base recipe I like, I can always experiment to put a healthier twist on them later 🙂

Here’s how you make them:

Print

Homemade Cheez-Its

homemade cheezits
Print Recipe

5 Stars 4 Stars 3 Stars 2 Stars 1 Star

No reviews

A simple, homemade version of your favorite store-bought Cheddar crackers.

  • Author: Lindsay L
  • Prep Time: 10 minutes
  • Cook Time: 10 minutes
  • Total Time: 20 minutes

Ingredients

Scale
  • 1 cup white whole wheat flour
  • 4 Tbsp butter, cut into small cubes
  • 1¾ cup shredded cheddar cheese
  • 1 tsp paprika
  • ½ – 1 tsp cayenne pepper (optional)
  • 2 strips of cooked bacon (optional)

Instructions

  1. Place the butter and flour in a food processor and pulse to combine.
  2. Add the remaining ingredients and process until a ball of dough forms.
  3. Transfer to a flat surface, cover with parchment paper and roll the dough out.
  4. Cut into desired sized crackers and transfer to a baking sheet.
  5. Gather scraps and edges and re-roll and cut remaining crackers.
  6. Bake at 400 degrees for 6-10 minutes depending on the size and thickness of your crackers.

Did you make this recipe?

Tag @theleangreenbean on Instagram

The notes listed in the recipe above are important so I’m going to list them here for you too:

  • For the cheese you can use white or yellow cheddar, or you could use half cheddar/half pepperjack, or colby jack. Pick your favorite! Just remember if you use white cheddar that they won’t look like cheez-its.
  • I made mine with bacon. I assume you could leave it out. You might want to add an extra Tbsp of butter if you do.
  • The dough is very soft and sticky. It might roll better if you chill it for a little bit first but I didn’t try that. Putting the parchment paper on top will keep it from sticking to the rolling pin.

Like Cheez-Its but hate the ingredient list? Make this homemade version with real, simple ingredients and snack on them all week long!

I made our extra spicy and used half spicy colby jack/half Cheddar. Watch them carefully while they cook. I cut mine pretty small and the first batch got a little crispy when I left them in for 10 minutes, so the second batch I only cooked for 6-7 minutes.

Like Cheez-Its but hate the ingredient list? Make this homemade version with real, simple ingredients and snack on them all week long!

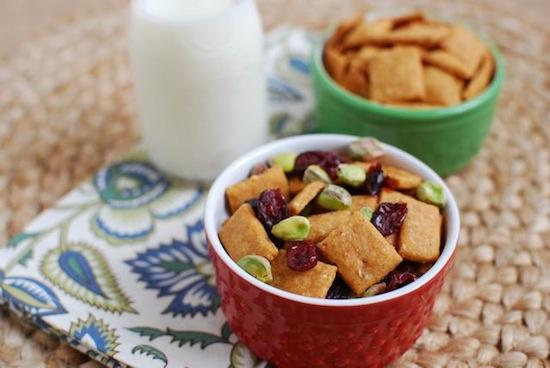
With a few simple ingredients and not too much effort you can have a homemade version of your favorite store-bought Cheez-Its to snack on!

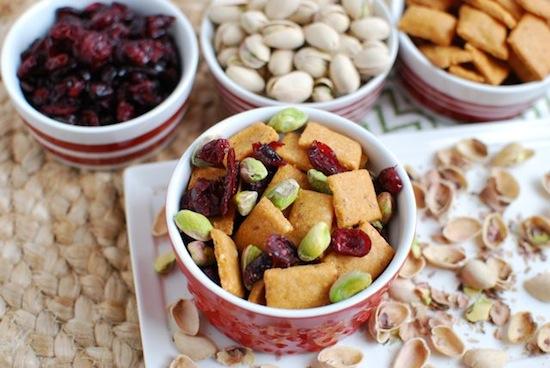
They’re the perfect addition to my trailmix!

Like Cheez-Its but hate the ingredient list? Make this homemade version with real, simple ingredients and snack on them all week long!

Have you ever made a homemade version of your favorite crackers?

Enjoy!
–Lindsay–

Filed Under: Snack Tagged With: Butter, Cheese, White Whole Wheat Flour

Pistachio Pairings Challenge

February 5, 2014 by Lindsay 31 Comments

“I received free pistachio samples from the Pistachio Health Institute mentioned in this post. By posting this pairing I am entering a contest sponsored by Pistachio Health Institute and am eligible to win prizes associated with the contest. I was not compensated for my time.”

Hi Friends!

It’s time for another Recipe Redux challenge! This month, we had the option of participating in a contest sponsored by The Pistachio Health Institute. Since pistachios are one of my favorite nuts, I jumped at the chance! This wasn’t your typical recipe contest…it was actually a pairings challenge.

We were tasked with coming up with a winning combination of food and drink that would pair well with in-shell pistachios.

pairings1

Let’s talk about in-shell pistachios for a minute, shall we?

They’re a great healthy snack option, especially for people who like to snack in volume. A one-ounce serving of pistachios equals approximately 49 nuts, which is more nuts per serving than any other snack nut, and a reduced serving of about 30 pistachios is just about 100 calories.

In addition, empty pistachio shells may serve as a “visual cue” of how many pistachios you’ve consumed, so don’t discard the shells after you’ve enjoyed the treat inside. Studies have shown that people who left the shells on their desk reduced their calorie consumption by 18 percent compared to participants who discarded shells immediately after consumption.

————

So, the prompt we were given for this challenge was as follows:

In-shell Pistachios + food A + food B + drink c = yummmmmmmm

—————–

They’re picking winners in the following categories:

  • Mediterranean
  • Skinny Nut/Reduced Calorie
  • Kid Friendly
  • Indulgent

For my entry, I decided to go with Kid-Friendly (with an adult option!)

My pairing is as follows:

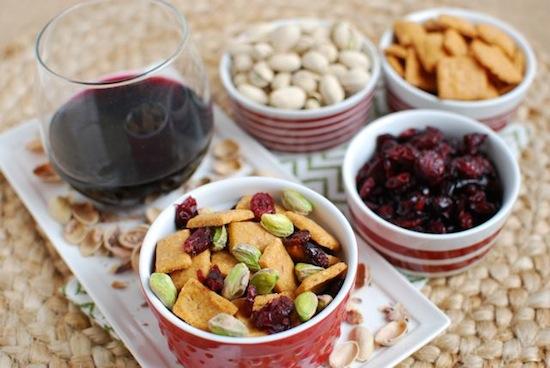
Deconstructed Trail Mix

In-Shell Pistachios + Craisins + Cheddar Crackers + Milk = YUM!

It’s basically like deconstructed trailmix, just waiting to be assembled…which is perfect for kids!

kid friendly

I took things to the next level and made my own cheddar crackers  and I’ll be sharing that recipe with you tomorrow, but store bought Annie’s Cheddar bunnies or Cheez-Its would work great as well! If your kiddo has a different favorite dried fruit, simply swap out the Craisins to make them happy.

AND if you’re looking for a more adult version, swap the milk for wine and add some spice to your crackers. You’ll be left with a wonderful combination of salty nuts, sweet fruit & savory/spicy crackers that pair wonderfully with red wine!

pairings2

Now it’s your turn! What would you pair with your pistachios?

Enjoy!
–Lindsay–

Filed Under: Snack, Sponsored

Jalapeno Cheddar Sweet Potato Puffs

February 4, 2014 by Lindsay 56 Comments

These Jalapeno Cheddar Sweet Potato Puffs are the perfect finger food! Make them as an appetizer for your next party, a snack for the big game or as a side dish for dinner!

Hi Friends!

If I had my act together, I would have posted these little puffs in time for you to make them for the Super Bowl. But I don’t, and I didn’t…so I’m posting them now. Luckily for me, I just found out that February is, in fact, National Sweet Potato Month! How perfect for me, right? I’ll share this recipe with you…and then at the bottom of this post I’ll round up some of my favorite sweet potato recipes for you to check out if you need more sweet potatoes in your life. And trust me- you do 🙂

These Jalapeno Cheddar Sweet Potato Puffs are a savory spin on my Sweet Potato Banana Bites that I make weekly for a pre-workout snack! They’re simple to make and require only a few ingredients!

These Jalapeno Cheddar Sweet Potato Puffs are the perfect finger food! Make them as an appetizer for your next party, a snack for the big game or as a side dish for dinner!

Here’s what you do:

Print

Jalapeno Cheddar Sweet Potato Puffs

DSC 0256 e1391452892293
Print Recipe

5 Stars 4 Stars 3 Stars 2 Stars 1 Star

5 from 4 reviews

An easy to make appetizer idea that’s packed with flavor and requires just a few ingredients!

  • Author: Lindsay L
  • Prep Time: 10 minutes
  • Cook Time: 20 minutes
  • Total Time: 30 minutes

Ingredients

Scale
  • 1½ cups cooked,mashed sweet potato
  • 2 eggs
  • ¾ cup cheddar cheese (I use Cabot sharp cheddar but pepperjack would also be good)
  • 3 Tbsp plain Greek yogurt
  • 2–3 strips of bacon, cooked and chopped
  • 1–2 jalapenos, minced (1 used 1 jalapeno & 1 serrano)

Instructions

  1. Combine the ingredients in a bowl.
  2. Scoop into greased mini muffin tins.
  3. Bake at 400 degrees for 20-25 minutes.
  4. Makes about 18 puffs.

Did you make this recipe?

Tag @theleangreenbean on Instagram

Pretty easy, right? Like I said in the recipe, you don’t have to use cheddar cheese….I think pepperjack would be great as well. If you like spice, use serrano peppers instead of jalapenos, or a combination of the two.

These Jalapeno Cheddar Sweet Potato Puffs are the perfect finger food! Make them as an appetizer for your next party, a snack for the big game or as a side dish for dinner!

These are best served warm but they can be made ahead of time and reheated in the microwave if needed.

These Jalapeno Cheddar Sweet Potato Puffs are the perfect finger food! Make them as an appetizer for your next party, a snack for the big game or as a side dish for dinner!

I brought these over for my in laws to taste test and they gave them a thumbs up. Hubby and I have also eaten two batches since last Friday, so that’s a good sign!

Let me know if you give them a try!

And here’s a roundup image in case you want to pin something so you have the links to all my favorite sweet potato recipes in one place!

Love sweet potatoes? Here are 10 amazing recipes that cover everything from breakfast to dessert!

Cranberry Sweet Potato Cottage Cheese Muffins
Sweet Potato Brownies
Sweet Potato Egg Boats
Sweet Potato Falafel
Microwave Sweet Potato Muffin
Mexican Loaded Sweet Potatoes
Sweet Potato Puffs
Sweet Potato Banana Bites
Gluten-Free Blueberry Muffins
Jalapeno Cheddar Sweet Potato Puffs

Enjoy!
–Lindsay–

Filed Under: Appetizer, Side Dish, Snack Tagged With: Cheese, Egg, Sweet Potato, Yogurt

Personal Planner Giveaway

February 1, 2014 by Lindsay 244 Comments

Hi Friends!

Remember last week when I posted a picture of my new planner?! Check it out:

IMG_2482

Last month, Lisa at Personal Planners reached out to me to see if I’d be interested in creating a customizable planner from their site. You guys know i LOVE paper planners….I’ve tried to switch to using just my phone and computer and it just doesn’t work for me…I gotta write stuff down. SO, I immediately jumped at the chance.

Here’s some of the information she gave me about their planners:

Outside
– Upload personal pictures for front and back cover from desktop and Instagram
– Change background, size, font, lining, images
 
Inside
– Pick what month you want your planner to start
– Design writing space details; “work”, “graphs”, “daily training” “exam schedules”, “to-do lists”, “goals”
– Include personal calendar dates as birthdays and holidays
– Add extra pages in the back for addresses, lined pages, coloring pages 


Sounds pretty awesome, right? I headed over to their site immediately to design mine! When I came, I loved it so much that Lisa & I decided to let you guys have a chance to create one as well. AND, since you guys gave such a positive response when I asked if you’d be interested on Instagram and Facebook, we’re giving away TWO planners!


I absolutely love mine. It’s well made, the photos I chose from my covers look great, the colors are bright and I loved how there were so many things you can customize! My only word of caution is to pay attention when you look at the sizes. The measurements are listed in centimeters first, with inches in parentheses. I wasn’t paying attention so I chose the smallest size thinking it would be the same as the one I have now. It ended up being a bit smaller, but that works fine for me because I wanted to downsize anyways 🙂 SO, just make sure you look at the numbers in parentheses to figure out what size you want!


Check out the Personal Planners website. They also offer wall calen
 
Enter the rafflecopter giveaway below and I’ll pick two winners on Tuesday! Giveaway is open to EVERYONE worldwide!

a Rafflecopter giveaway

Good luck!
–Lindsay–

I was given a coupon code to design my planner free of charge. All thoughts and opinions are my own. 

Filed Under: Uncategorized

Foodie Penpals Reveal Day – Eat Hard Work Hard

January 31, 2014 by Lindsay 3 Comments

Hi Friends!

Time for another Foodie Penpals Reveal Day!

fpp

This month I exchanged boxes with Amanda from Eat Hard Work Hard. Check out her blog if you haven’t already. She rocks!

Here’s what she sent me:

janfpp

  • Homemade Cookies 🙂 She knows the way to my heart
  • Granola bars- delicious
  • Treats for the dogs! They love her!
  • Peanuts- such a good snack
  • Candy- who can say no to that?
  • Nut and seed mix- addicting!

Thank you so much Amanda! I loved everything and it’s pretty much all gone 🙂

Want to participate in next month’s Foodie Penpals? Here’s some more info

-On the 5th of every month, you will receive your penpal pairing via email. It will be your responsibility to contact your penpal and get their mailing address and any other information you might need like allergies or dietary restrictions.
-You will have until the 15th of the month to put your box of goodies in the mail. On the last day of the month, you will post about the goodies you received from your penpal! 
-The boxes are to be filled with fun foodie things, local food items or even homemade treats! The spending limit is $15. The box must also include something written. 
-Foodie Penpals is open to blog readers as well as bloggers. 
-Foodie Penplas is open to US, Canadian & European residents.  Please note, Canadian Residents will be paired with other Canadians only. Same with Europeans.  

If you’re from the US or Canada and are in participating for February, please CLICK HERE to fill out the participation form and read the terms and conditions. 

You must submit your information by February 4th as pairings will be emailed on February 5th!

Enjoy!
–Lindsay–

Filed Under: Uncategorized

Garden Fresh Salsa

January 29, 2014 by Lindsay 27 Comments

Put those summer tomatoes to good use and make some Garden Fresh Salsa! Bonus points if you’re into canning and make extra to eat year-round!

Hi Friends!

I’m glad you all enjoyed Mr. Bean’s guest past so much yesterday. You’ve successfully inflated his ego, increased his twitter following and given him blog post fever all in one day. He’s already plotting his next post.

Until then, you’re stuck with me 🙂 And I have a new recipe to share with you guys! Let’s talk salsa.

If you follow me on Instagram or read my Weekly Eats posts, you’ve probably noticed that I’m mildly obsessed with salsa. And not just any salsa- Jack’s Hot Salsa.  I put it on pretty much everything. So good.

I’ve been meaning to try to replicate said salsa for a while now. I actually love their ingredient list and don’t mind buying it…but it’s always fun to be able to make something yourself.

Put those summer tomatoes to good use and make some Garden Fresh Salsa! Bonus points if you're into canning and make extra to eat year-round!

I was also looking to test out my new Ball FreshTECH Automatica Canner. I was sent this canner by Food & Nutrition Magazine (FOR FREE) to review independently of the blog, but I loved it so much I thought I’d share a little bit about it with you guys. Lemme tell ya, it is awesome. I’ve always been afraid of canning but this machine literally does all the work for you. You put the jars in, press a button and it preheats them. Then take them out one at a time, fill with whatever you’re canning, stick them back in, press another button and voila! Just take them out when they’re done and that’s it.

Anyways, I’m fully aware that February isn’t exactly tomato season here in Ohio…but I love salsa so much that I figured this would be the perfect opportunity to test out my canner AND test out a salsa recipe.

So I adjusted one of the basic salsa recipes that came with my canner and here’s what I came up with:

Print

Garden Fresh Salsa

garden fresh salsa
Print Recipe

5 Stars 4 Stars 3 Stars 2 Stars 1 Star

No reviews

A close imitation of Jack’s Hot Garden Fresh Salsa

  • Author: Lindsay L
  • Prep Time: 5 minutes
  • Total Time: 5 minutes
  • Yield: 4 1x

Ingredients

Scale
  • 3 pounds tomatoes, peeled, cored, seeded and diced (approx 5 cups)
  • 1 cup onion, chopped
  • 3 cloves garlic, minced
  • ⅓ – ½ cup white vinegar
  • 2–4 hot peppers (i used 2 serrano & 2 jalapeno)
  • ½ cup chopped cilantro
  • 1 tsp kosher salt

Instructions

  1. Place all ingredients in a food processor and pulse until desired consistency is reached.
  2. Taste and add more vinegar if desired.

Did you make this recipe?

Tag @theleangreenbean on Instagram

A few things. The canning recipe called for you to add all the ingredients to a pot, bring to a boil and simmer for 15 minutes. So that’s what I did since I was testing out the canner…You can do that if you want, however, I don’t think it’s necessary and I won’t be doing it for the next batch of salsa I make.

Put those summer tomatoes to good use and make some Garden Fresh Salsa! Bonus points if you're into canning and make extra to eat year-round!

I cannot wait to try this during tomato season with some fresh, juicy farmer’s market tomatoes! Oh, and here’s a shot of the canner in action:

Put those summer tomatoes to good use and make some Garden Fresh Salsa! Bonus points if you're into canning and make extra to eat year-round!

Happy scooping!

Put those summer tomatoes to good use and make some Garden Fresh Salsa! Bonus points if you're into canning and make extra to eat year-round!

Enjoy!
–Lindsay–

Filed Under: Appetizer, Snack, Sponsored

It’s Not Easy For Everyone

January 22, 2014 by Lindsay 333 Comments

Hi Friends!

I wrote this post about six months ago….after I’d been trying to get pregnant for over six months. I wrote it mostly for myself after a particularly hard day…and I thought I might share it with you guys at some point…but I wasn’t sure when. A couple weeks ago, Colleen wrote this post (please read it if you haven’t already) and I decided now was as good a time as any.

Trying to get pregnant? Having trouble? You're not alone. Infertility is a problem that's not talked about enough. I share my experience in hopes it will help someone else realize they're not alone.

This post is simply intended to bring awareness to something I never gave a second thought to before I started trying to have kids. My hope is that, if nothing else, it will make you more aware of something you may not think about…and my greater hope is that it will help someone out there going through the same struggles feel a little less alone. I hope it also helps remind you that bloggers are real people too…with real struggles, triumphs and disappointments. Life is not perfect for anyone. Focus on the good.

Trying to get pregnant? Having trouble? You're not alone. Infertility is a problem that's not talked about enough. I share my experience in hopes it will help someone else realize they're not alone.

So here you go:

I’m just gonna lay it all out there,  friends: Having kids is not easy for everyone. I want to take a minute to fill you in on some things I wish you knew when you ask that seemingly simple question, “When are you guys going to have kids?”  

I want you to know that every time someone asks me that question, it feels like a knife stabbing me in the heart.
That sometimes I just want to scream or cry or run away after you ask me.
But that I know you’re not trying to hurt me.

I want you to know that it doesn’t happen after only one or two months of trying for everyone.
That just because we don’t have kids yet doesn’t mean we don’t want kids or that we’re not trying.
But that maybe it’s none of your business when I’m going to have kids.

I want you to know how hard it is to be immersed in social media day after day, to see dozens of photos of adorable kids and read pregnancy announcement after pregnancy announcement.
That I’m genuinely happy for all of you out there that are pregnant or already have kids…I think it’s something everyone should be able to experience if they’d like to.
But that it still hurts on the inside.

I want you to know that every month it doesn’t happen for us, my heart breaks a little bit more.
That the tests, exercise restrictions, pills and the lack of explanation are frustrating, gut-wrenching and something I wouldn’t wish on anyone else.
But that we still have hope.

I want you to know that this journey is taking an emotional toll on me.
That my heart aches and I cry and that I never thought it would be this hard.
But that we’re not giving up.

Mostly, I just want you to take a second to consider what others might be going through. I want you to think about it for a second before you ask someone “When are you having kids?” Because someday, someone might just give you a brutally honest answer…and it might be more than you bargained for.

————

A few notes:

  • This is not in any way directed at anyone specifically. If you’ve asked me about kids in the past, please don’t feel like I was writing this about you/toward you. These are general statements about my experience.
  • This is not a stab at anyone who is pregnant or has kids. I’m simply sharing another side of the story. In no way do I think you should stop posting pregnancy updates, stop posting about your kids, etc. I’m sure i’ll do the same someday.
  • I’m eternally grateful to have my hubby as a support system on this journey.

——————

us

I shared this post with hubby while I was still deciding whether or not to post it and he offered to give his insight as well. Here’s what he has to say:

Bean had me read this. She shared it shortly after I came home to find her inconsolable and tried my best to cheer her up- that’s been the hardest part so far. It’s a really personal topic and something we don’t really even talk about with our friends. Quite frankly, I don’t hear many people talk about it all. For us, it’s not because we don’t love and trust our friends, but its kind of a downer and not good dinner conversation. “Hey, can you pass the wine? Also, we can’t seem to get this pregnancy thing nailed down.” However, I know the disappointment we both feel every month when I say “well?” and Bean shakes her head “no”, so I thought I’d offer the male perspective since its getting put out in the open.

First of all, I’m sure I’m not the first to chuckle at the intense irony that you spend most of your life trying NOT to get anybody pregnant, and then after all precautions are thrown out the window, there’s no result. Health class made you feel like even looking at a girl wrong would get her pregnant. But alas, Bean and I made it! We did the right thing! We fell in love, got married, waited until we felt we were well suited to do what we’ve been engineering our lives to finally accomplish, STARTING. A. FAMILY.

Now that we’ve made it this far, I promise you that not having a baby unexpectedly wasn’t hard- pretty darn straightforward in fact. So enter part two:  In light of our experiences to date, accidental pregnancies piss. me. off. “Whoops, guess we’ll get married.” How much does it suck to be envious of someone else’s mistake?

Then it gets slightly awkward. What’s missing? Why isn’t this working? Whose fault is it? Is it me? Welp, got to go get tested. Talk about an awkward experience. I’ve never paid $90 to do THAT before. Results look normal- Ok, so what’s next!?

I stay positive. I’m sure I talk about it more than Bean does. I have friends that I mention it to. They say positive things. Share their thoughts. Say things like “relax” and “don’t think about it”. I look at each month as a new opportunity. I reset the clock. I have faith that it’s going to happen. I know we’re not the only ones who have had issues. I know there still may be a long road ahead. I know people have struggled much longer than we have to date.

But it still sucks.

Bean mentioned social media. I talked to my mom the other night about that, and it’s certainly a game changer. It took my parents awhile to have me, but they didn’t have compact digital devices flooding their faces with pictures of their friends accomplishing the one thing they’d been focused on for over a year. That’s a new curve ball for our generation. It’s also a strenuous mental exercise to simultaneously be genuinely excited for friends while suppressing envy that you wish you didn’t have.

I guess when I take stock today, I keep thinking about that Einstein quote that insanity is doing the same thing over and over and expecting different results. I don’t know what’s next, but we’ll keep hanging tough, get this thing figured out, and I know we’ll eventually get what we want.

 ————-

I appreciate hubby sharing his thoughts. This is an issue that doesn’t get talked about very often from a female perspective, and even less from a male perspective. I’m a pretty private person…and this isn’t something I would normally share, but I realize that I have a unique position as a blogger to reach more people than others do and sometimes that can be used for good.

So please know this, most importantly of all: If you are struggling as well,  you are not alone. There are other people out there who understand what you’re going through. Don’t be afraid to talk about it. We’ll all get through it together.

Much love,

–Lindsay–

Filed Under: Kids

5 Steps To A Healthier Pizza

January 21, 2014 by Lindsay 48 Comments

Hi Friends!

It’s time for another Recipe Redux post! Here’s the prompt they gave us for this month:

Pizza Party! Give the delivery guy a day off; whether it is for Friday Fun Night with the kids, a pizza chef competition among friends, or for Super Bowl Sunday (February 2). Share your healthy pizza recipe that we can all look forward to after a long week…or a long day.

I’m a huge fan of pizza…and I’m a firm believer that there’s nothing wrong with faceplanting into a good old fashioned greasy pepperoni pizza every once and a while.

Healthy- no? Tasty- you betcha!

healthy pizza 1

HOWEVER, I’m also a firm believer that pizza CAN be part of a healthy diet. So I thought I’d take a minute to give you my top 5 tips for a healthier {homemade} pizza…because we all know I love homemade everything because YOU control the ingredients. So- here we go:

1) Make your own crust. I’m not sure people realize just how easy it is to make your own pizza crust. Traditional pizza dough involves a minimal number of ingredients and it’s perfect for making ahead of time. With a little planning, you can spend 5 minutes putting together the dough one night and enjoy homemade pizza in a jiffy the following night!

  • If you’re going for traditional crust, spice it up by adding herbs or hot red pepper flakes and opt to roll the dough thin instead of leaving it super thick.
  • If you want to be non-traditional, try a socca crust (made with chickpea flour), cauliflower crust or even a homemade whole wheat tortilla!

2) Make your own sauce. Instead of buying pre-made sauce that tends to be loaded with sodium, opt for no-salt added plain tomatoes. I love Pomi Strained Tomatoes because they have just one ingredient- tomatoes.

From there, you jazz up the sauce with your own seasonings!

  • Add oregano, basil, garlic and just a pinch of salt and let simmer.
  • Plan ahead and make a batch of Crockpot Roasted Veggie Sauce. Freeze in batches and defrost when needed.
  • Take it a step further and puree some white beans into your sauce. It will add protein and fiber and no one will even notice!

3) Load up on healthy toppings. Think beyond just traditional pepperoni or sausage. There are all sorts of healthy toppings you can add to your pizza:

  • Grilled Chicken
  • Peppers
  • Onions
  • Eggs
  • Mushrooms
  • Spinach
  • Broccoli
  • Pineapple
  • Avocado
  • Pumpkin
  • Eggplant
  • Sweet Potatoes
  • Kale
  • Asparagus
  • Tempeh
  • Artichokes

Rule of thumb- add your veggies, then add an extra handful or two 🙂

4. Go light on the cheese. To me, cheese is what makes pizza pizza. I know that’s not true for everyone…but in my world, almost every pizza needs some cheese. However, that doesn’t mean it needs a whole bag of cheese. Go for a flavorful cheese where a little goes a long way and learn to rely on the flavors you’ve incorporated into your homemade crust and sauce, plus the flavors of the toppings.

  • Try fresh mozzarella, goat cheese or parmesan!

5. Add veggies as a side. I always make an effort not to just eat pizza by itself.

  • Try serving it with a side of raw or roasted veggies, a slaw or a big salad!

—————–

So, now that I’ve given you my favorite tips to healthify a pizza, here’s one of my favorite combos:

Grilled Chicken, Avocado & Fresh Mozzarella Pizza

DSC_0188

Crust (makes 2 pizzas): 

1 1/2 cups warm water
2 teaspoons active dry yeast
3/4 teaspoon kosher salt
2 3/4 cups white whole wheat flour
1 teaspoon oregano
1 teaspoon garlic powder
1-2 teaspoons crushed hot red pepper flakes

1. Combine the water and yeast in a large bowl and let sit for 2 minutes.
2. Add the remaining ingredients and stir until combined. Add a bit more water if necessary. If you can’t get it all to combine with a spoon, dump it on the counter and knead 5-6 times. That’s it. 
3. Let rise for 2 hours on the counter (or overnight in the fridge).
4. When ready to eat, divide dough in half and use a rolling pin to roll into a thin crust. 
5. Add sauce and toppings and bake at 425 for 7-10 minutes.

DSC_0181

Sauce:

13 oz Pomi strained tomatoes (or other no-salt added tomato sauce)
2-3cloves garlic
2 tsp oregano
1 tsp basil
1/2 – 1 cup white beans
pinch of salt

1. Combine ingredients in a blender or food processor and puree until smooth.
2. Pour into a small pot and let simmer for 15 minutes. 
(I don’t like a lot of sauce. If you’re a heavy saucer, you might need the whole 26 oz box)

DSC_0187

Toppings:
Diced chicken
Red peppers
Onion
Fresh Mozzarella
Avocado

1. Put the chicken, peppers and onions on the pizza.
2. Top with slices of fresh mozz.
3. Bake until cheese is melty and crust is golden brown. 
4. Top with avocado after removing from the oven. 

Enjoy!
–Lindsay–

Filed Under: Dinner

You Made It 2.0

January 18, 2014 by Lindsay 7 Comments

made1

made2

made3

made it 5

made4

made6

made7

made8

made9

made10

made11

made12

made13

Have I mentioned lately that my readers are the best?! Just wanted to take a few minutes today to do another edition of You Made It!

I LOVE seeing you guys making my recipes. Nothing makes me happier than hearing that someone tried a recipe and loved it. You guys are doing so much to help me spread the message that healthy eating doesn’t have to be gross, boring or complicated!

Here are the links to the recipes mentioned above in case you want to check them out:

Breakfasts
Cranberry Sweet Potato Cottage Cheese  Muffins
Healthy Blueberry Scones
Quinoa Breakfast Bars
Crockpot Pumpkin Steelcut Oats
Apple Cinnamon Breakfast Bars
Whole Wheat Pumpkin Muffins


Main Meals
Spicy Lentil Sausage & Kale Soup
Black Bean Meatless Meatballs
Cheesy Mexican Quinoa
Greek Yogurt Chicken
Cheesy Mexican Chicken Skillet
Tuna Quinoa Cakes


Snacks

Freezer Chocolate PB Cups
Pumpkin Pie Balls
Sweet Potato Bites
No Bake Protein Bars
FroYo Bites
Homemade Soft Pretzel Bites
No Bake PB Chocolate Oatmeal Balls


Sides

Cranberry Corn Muffins
Fresh Cranberry Sauce
Homemade Whole Wheat Tortillas


Desserts
Sweet Potato Brownies
Peanut Butter Cookies with Fresh Cranberries
Peanut Butter Avocado Cookies


Other
How to Cook & Freeze Beans
How to Cook Spaghetti Squash

Thank you a million times to each and every one of you for reading, cooking, baking, tasting and supporting The Lean Green Bean! I couldn’t do it without you guys 🙂

–Lindsay–

Filed Under: Uncategorized

Fitness Friday 62

January 17, 2014 by Lindsay 21 Comments

Hi Friends!

Time for the first Fitness Friday of 2014! The last workout I shared when we left off was my drop-in WOD at Crossfit Dumbo while we were visiting my parents. Here’s what I’ve been up to since then:

ff1

1. Adjusting to wodding again after a little break due to xmas and traveling
2. Sunday Funday- This ended up being much harder than it sounded when we made it up- 3+17
3. Worst combo for your wrists is heavy overhead squats and pushups- 7 + 2 Rx
4. New Year’s Day WOD – 2 + 38 Rx+ (I did 75# thrusters and 20# wall balls)

ff2

I suffered my first box jump injury. I was working out by myself, wasn’t focusing on what I was doing and totally missed the box. The picture doesn’t do it justice…this bruise was gnarly. And it didn’t go away for over two weeks. I even had pants on when I did this. Painful.

ff3

1. Good one! Lots of hang cleans & squat cleans at 115#, then 8+7 Rx for the #wod
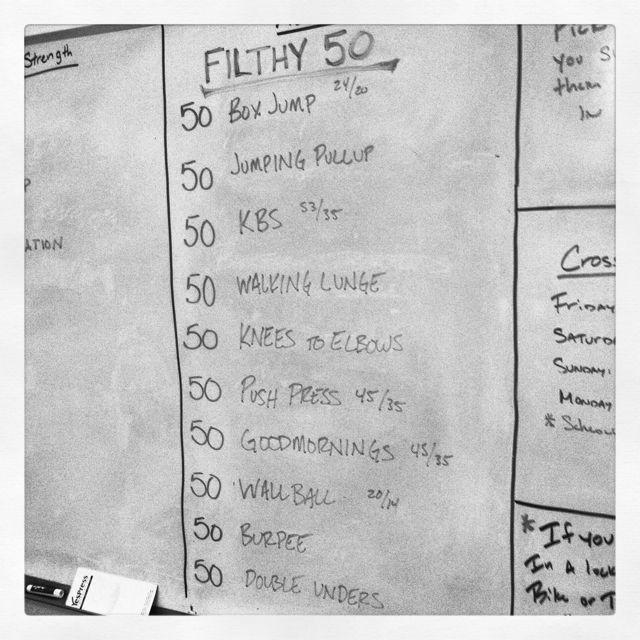
2. A slightly modified version of the filthy 50 to kick off Saturday! 32:28
3. Sunday Funday – 16:02 with banded ring dips
4. Overhead squats- got 3 @ 115#, then conditioning test- did scale 1 (5 thrusters, 5 pullups and 5 burpees every minute on the minute for as long as you can)  and finished 11 rounds with all butterfly pull-ups!

ff4

1. Woof. Finished 6 + 2 rounds and let me just say, doing 62 chest to bar pullups is NOT fun.
2. Loved this #wod – 7:34 Rx
3. Tore my hand doing chest to bar earlier this week so had to skip today’s wod and do something that didn’t involve pull-ups or holding a barbell! Finished this one in just over 8 min with a 20# wall ball and 25# plate for the lunges.
4. This is what I was doing when I got my boxjump injury.

IMG_2050

It’s fun to flex your muscles every once and a while 🙂

IMG_2078

Friends & I tried something new last weekend! Church &#crossfit combo. An inspiring message about how we’re all fighting for something in our lives…and then a tough #wod. I did the middle option with pull-ups, TTB and goblet squats.

ff5

1. Best #wod we’ve done in a while! 7+3 Rx
2. Rough. 5:09 Rx
3. 7:10 Rx
4. Still patiently waiting for my custom nanos to get here! Can’t wait!

IMG_2201

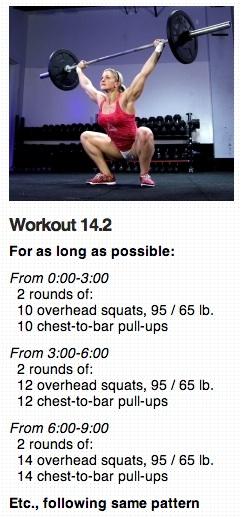
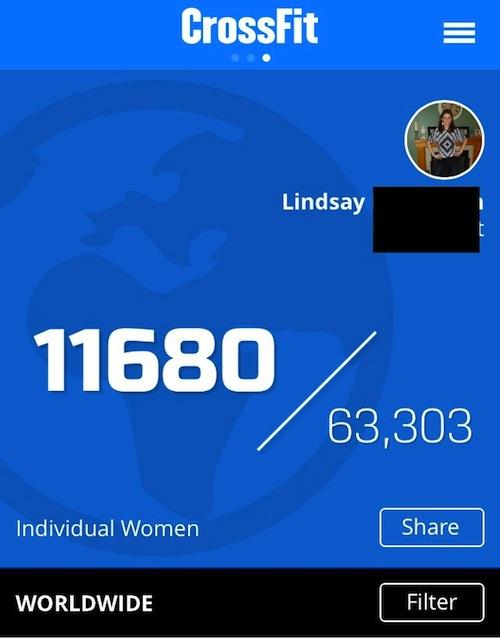
In other news, it’s almost time for the Open! This is basically the beginning of the road to the Crossfit Games. Anyone can participate in the Open. It’s five weeks long and they announce a new workout each week. Once the workout is announced, you have 4 days to either go to a crossfit affiliate and do the workout or videotape yourself doing it. Everyone does the same workout, with the same weight and you submit your scores. Then after 5 weeks, the top 45-60 competitors in each region go on to regionals and the top finishers at regionals go to the crossfit games.

Last year I’d only been doing Crossfit for about 3 months when it started. I was nervous, the weights were heavy, the skills were hard. This year I’m excited. I’m stronger and more skilled…but that doesn’t mean it will be easier. That’s what I love about Crossfit…you can always make it harder. You can always push yourself more. You can always go faster, get more reps…I can’t wait to see what the workouts are for this year!

That’s all for today! Happy Friday!

Enjoy!
–Lindsay–

Filed Under: Workouts

Pistachio Pumpkin Seed Butter

January 16, 2014 by Lindsay 40 Comments

A nutrient packed nut and seed butter that tastes WAY better than it looks!

Hi Friends!

Here’s the deal today. Today’s recipe is…..unfortunate looking.

Remember last week when I was complaining about how hard it was to make Breakfast Enchiladas look good? Friends, those were a cakewalk compared to trying to make this Pistachio Pumpkin Seed Butter look appetizing.

Hubby even went so far as to tell me not to post this because it looks so gross. Clearly I’m ignoring him (but with good reason- I turned to Instagram and you guys told me to post it!) Anyways, if poop grosses you out, you may want to stop reading this post. If you can get past the appearance, this stuff is darn tasty.

Tired of peanut butter? This Pistachio Pumpkin Seed Butter is a delicious homemade nut butter alternative!
I had good intentions when I started. I bought a giant bag of pistachios at Costco a few months ago and I noticed the other day that they were kind of getting buried in the back of the pantry. Since I enjoy making my own nut butter, but don’t do it nearly enough, I thought that would be the perfect way to use some of them up. Pistachos themselves, without the shells or skins are a lovely green color. Problem is that I’m lazy. I bought pre-shelled pistachios and I wasn’t about to sit there and try to get the skins off before making my nut butter…so I decided to throw in some pumpkin seeds (which I’m obsessed with & eat on my oatmeal every morning) thinking hey- they’re green…maybe they’ll brighten things  up. 

WRONG.

It just ends up this unfortunate brown color. Oh well. You guys will just have to close your eyes and enjoy this tasty treat!

Here’s how you make it:

Print

Pistachio Pumpkin Seed Butter

pistachio pumpkin seed butter
Print Recipe

5 Stars 4 Stars 3 Stars 2 Stars 1 Star

5 from 2 reviews

A nutrient packed nut and seed butter that tastes WAY better than it looks!

  • Author: Lindsay L

Ingredients

Scale
  • 1½ cups pistachios (shelled)
  • ¾ cup raw pumpkin seeds (shelled)
  • ¼ cup hemp hearts (optional)
  • 1 tsp vanilla extract
  • 1 tsp cinnamon
  • 1–2 tsp honey, optional

Instructions

  1. Preheat the oven to 350 degrees and spread the pistachios and pumpkin seeds on a baking sheet.
  2. Bake for 6-8 minutes (don’t let them burn!)
  3. Put the warm nuts, seeds and remaining ingredients in a food processor and let process for 10 minutes, scraping the sides occasionally, or until desired consistency is reached.

Did you make this recipe?

Tag @theleangreenbean on Instagram

This is a taste as you go kinda recipe. I added a little more cinnamon to mine because I’m a cinnamon addict. If you want it sweeter, add more honey. If you use unsalted nuts, feel free to add a little salt. If you want to add a bit of oil, go for it!

Tired of peanut butter? This Pistachio Pumpkin Seed Butter is a delicious homemade nut butter alternative!

It’s delicious on toast with banana on top. Also delicious in my morning oatmeal bowls!

You’re gonna have to have a little faith that this is actually gonna work when you first start. For the first 5-7 minutes, it doesn’t look like there’s any way it’s actually going to turn into nut butter. Just be patient. Keep scraping down the sides every few minutes…you can even bang on the sides of the food processor bowl while it’s running like I did to knock some of the mixture back down towards the blade.

Tired of peanut butter? This Pistachio Pumpkin Seed Butter is a delicious homemade nut butter alternative!

Eventually it will start to ball up and then it will smooth out. Be aware that if you taste and then decide to add more honey, it will probably ball up again when you turn the processor back on, but it will smooth out again.

Let’s chat:
What’s your favorite nut/seed butter?

Enjoy!
–Lindsay–

Filed Under: Snack Tagged With: Pumpkin

Overnight Baked French Toast Cups

January 15, 2014 by Lindsay 24 Comments

A delicious french toast recipe developed for the Healthy Aperture blog.

Hi Friends!

Remember about six weeks ago when I posted this photo for these delightful little Overnight Baked French Toast Cups?!

These Overnight French Toast Cups can be whipped up the night before and then thrown in the oven when you wake up for a perfectly portioned breakfast!

And then I proceeded to bombard you with IG photos of me eating them at pretty much every meal for the next week or so?

IMG_1344

But I couldn’t share the recipe because it was for a client?

Well, good news! The recipe is now live on the Healthy Aperture blog!

These Overnight French Toast Cups are the perfect weekend breakfast. Mix them up before you go to bed and bake them when you wake up to start your morning off right!

{Photo credit: Regan Jones}

CLICK HERE to head over to Healthy Aperture and get the recipe!

Let’s chat: French toast or pancakes?

Enjoy!
–Lindsay–

Filed Under: Breakfast, Sponsored

  • « Go to Previous Page
  • Page 1
  • Interim pages omitted …
  • Page 42
  • Page 43
  • Page 44
  • Page 45
  • Page 46
  • Interim pages omitted …
  • Page 65
  • Go to Next Page »

Primary Sidebar

Lindsay Livingston The Lean Green Bean Healthy Living Tips and Tricks

I'm a Registered Dietitian and mom of three from Columbus, Ohio. I use this blog to share simple, healthy recipes, nutrition tips, and an honest glimpse of motherhood!

Learn More →

Questions? Comments? Email me: [email protected]

The Lean Green Bean Facebook The Lean Green Bean Instagram The Lean Green Bean Pinterest The Lean Green Bean Twitter The Lean Green Bean Feed
footer-logo
The Lean Green Bean Facebook The Lean Green Bean Instagram The Lean Green Bean Pinterest The Lean Green Bean Twitter The Lean Green Bean Feed
Recipes

Breakfast
Dinner
Snack
Slow Cooker

Kids

Cooking With Kids
Favorite Gifts
Toddler Meals
Indoor Activities

Resources

Easy Packed Lunches for Kids
Dinner Spark
Snack Spark
Ultimate Guide to Food Prep

About

Meet Lindsay
Become an RD
Work with Me

The Lean Green Bean is a participant in the Amazon Services LLC Associates Program, an affiliate advertising program designed to provide a means for sites to earn advertising fees by advertising and linking to amazon.com.
Read the full privacy and disclosure policy here.

Copyright © 2022 · The Lean Green Bean

table talk series

Learn how food affects your body.

Get my free Table Talk email series where I share bite-sized nutrition information about carbs, protein, and fat, plus bonus information about snacks and sugar!

[email protected]