• Skip to main content
  • Skip to primary sidebar

Learn how food affects your body. Get Free Nutrition Info Today

the-lean-green-bean-logo
  • Home
  • Recipes
  • Kids
  • Resources
    • Ebooks
    • Food Prep
    • Videos
    • Snack Round-Ups
    • Gift Guides
  • About
    • Become An RD
    • Work With Me
  • Search
the-lean-green-bean-logo
  • Home
  • Recipes
  • Kids
  • Resources
    • Ebooks
    • Food Prep
    • Videos
    • Snack Round-Ups
    • Gift Guides
  • About
    • Become An RD
    • Work With Me
  • Search

blog

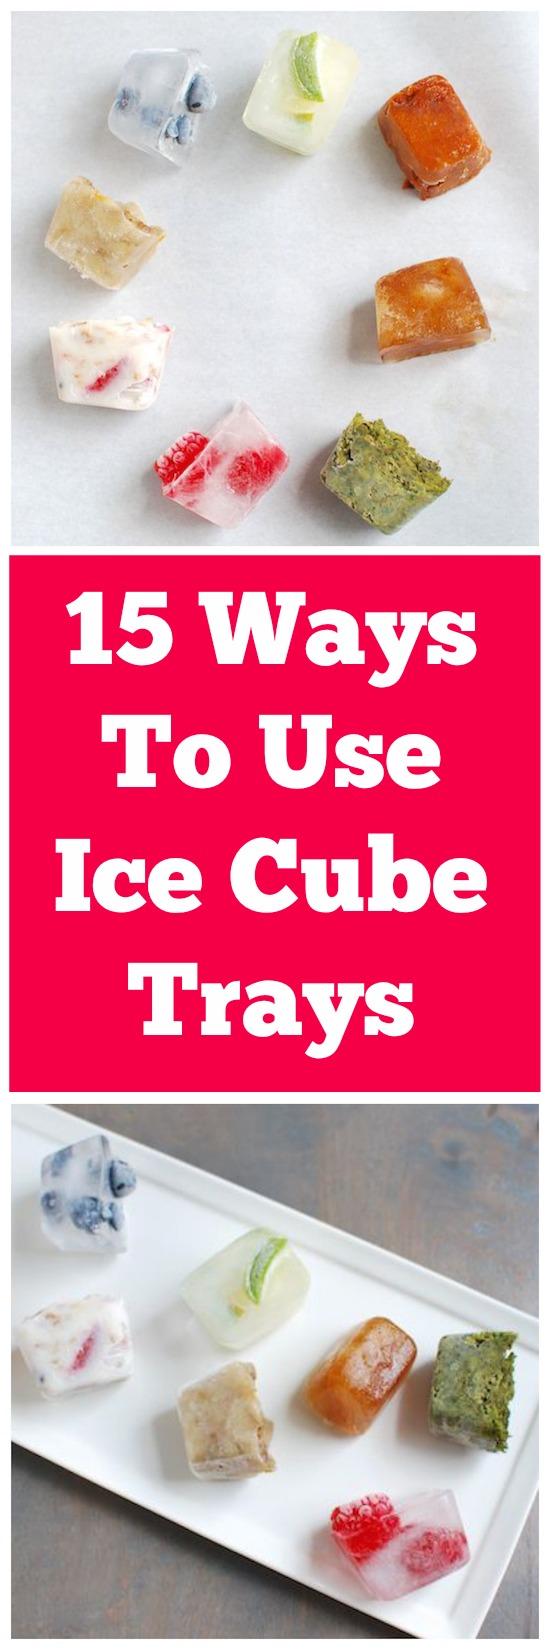
15 Ways To Use Ice Cube Trays

July 30, 2014 by Lindsay 68 Comments

Here are 15 Ways To Use Ice Cube Trays that go above and beyond frozen water.

Hi Friends!

Just popping in with a little inspiration for you. If you follow my food prep series, you may have noticed that I often freeze yogurt with mix-ins to make one of my favorite snacks: froyo bites. The other week, I was making a batch and I started thinking about my ice cube trays and about other ways I could use them.

Get creative and think outside the cube. Here are 15 ways to use ice cube trays in the kitchen to make life easier, store extra food, portion ingredients and more.

After a short brainstorming session, I came up with 15 ways to use ice cube trays, so I thought I’d share them with you guys!

  1. Coffee cubes – Freeze your leftover coffee and use in your iced coffees to keep them from getting watered-down, or add to smoothies for a caffeine boost!
  2. Smoothie cubes – Blend spinach or other greens with water until smooth. Freeze in trays and add to blender when making smoothies. You can also mash up ripe bananas and freeze into cubes for an easy smoothie addition.
  3. Yogurt bites – Add your favorite mix-ins to yogurt and freeze into cubes for a bite-sized snack. Find my favorite combo here: Frozen Yogurt Trail Mix Bars/Bites.
  4. Fruit cubes – Add fresh fruit and water to ice cube trays to add some color to your ice water.
  5. Pesto – Make a batch of pesto, spoon into trays and freeze. Store in the freezer and use in recipes when called for or to add some extra flavor to sauces, etc.
  6. Tomato paste – Recipes almost never call for the whole can of tomato paste. Freeze the extra in cubes to use in future recipes.
  7. Lemon/lime juice – Freeze the juice from fresh lemons and limes to add to blended frozen drinks or add to the pan when cooking dishes for some extra flavor!
  8. Cookie dough – Make a batch of cookie dough and freeze in cubes. When a cookie craving strikes, bake as many as you’d like.
  9. Baby food – Make your own baby food purees and stock the freezer with cubes. Simply defrost when needed.
  10. Chocolate cubes – Freeze melted chocolate in ice cube trays to make chocolate cubes. Add to regular milk or iced coffee for a little treat!
  11. Toddler meals – Place a variety of different bite-sized options in an ice cube tray for toddler meals or snacks and let them pick what they want to eat!
  12. Jewelry organizer – Store your earrings, rings and other jewelry in ice cube trays to avoid a messy jewelry drawer.
  13. Garbage disposal cleaner – Freeze vinegar and lemon pieces in ice cube trays. Every few weeks, toss a couple down the garbage disposal to freshen things up.
  14. Paint tray – Pour different paint colors into ice cube trays and let the kiddos go to town!
  15. Seedling Tray – Drill a drainage hole in the bottom of each cube, fill with dirt, and plant seeds for the garden so they can start growing indoors.

Get creative and think outside the cube. Here are 15 ways to use ice cube trays in the kitchen to make life easier, store extra food, portion ingredients and more.

Obviously these aren’t the only ways to use ice cube trays. This list is just to get the wheels turning for you! Once you start thinking about it, I bet you’ll come up with even more fun ways to use them! I’ve also use them to make frozen treats for my dogs, freeze leftover wine for cooking, etc. The possibilities are endless! For the food-related ones, I’d recommend removing from the ice cube trays after they’re frozen and storing in a tupperware container or ziploc bag to avoid freezer burn.

[Tweet “Think beyond water. Here are 15 Creative Ways To Use Ice Cube Trays from @leangrnbeanblog!”]

Get creative and think outside the cube. Here are 15 ways to use ice cube trays in the kitchen to make life easier, store extra food, portion ingredients and more.

Let’s chat:

What’s your favorite way to use ice cube trays?

Leave your ideas below to inspire others!

Filed Under: Ingredient Round-Ups, Uncategorized

Peanut Butter Cookie Dough Dip

July 29, 2014 by Lindsay 43 Comments

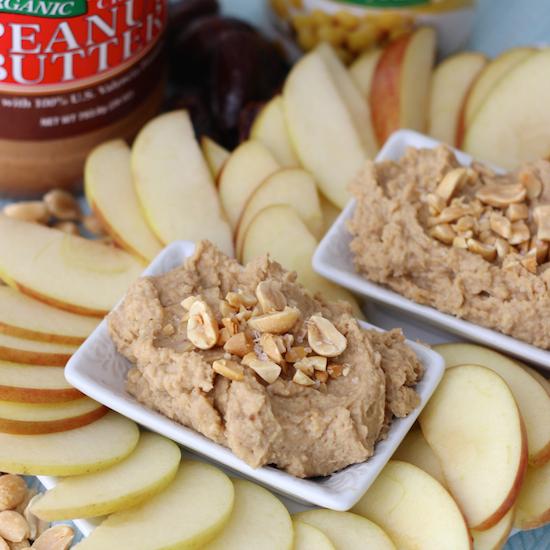
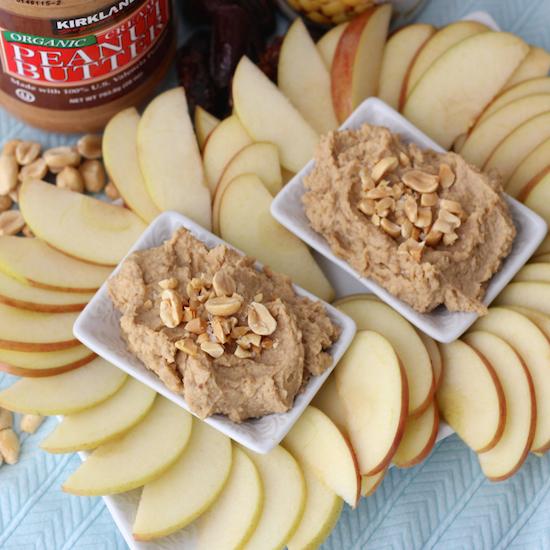
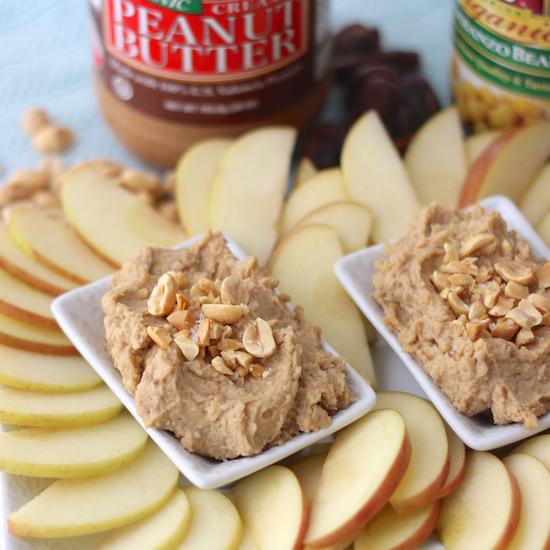
This Peanut Butter Cookie Dough Dip is made with chickpeas and lightly sweetened with dates. The perfect snack when served with a side of apples!

Hi Friends!

I have a special treat for you today. Well, two treats actually. First, my good friend Meme from Living Well Kitchen is here to take over the blog! Second, the recipe she’s sharing is a treat for sure! Meme is a fellow RD who shares delicious recipes on her blog so if you haven’t check it out yet, be sure to head over now and add her to your reader!

———-

This Peanut Butter Cookie Dough Dip is made with chickpeas and lightly sweetened with dates. The perfect snack when served with a side of apples!

Hi there, Lean Green Bean readers!

Despite the fact that we’ve never actually met, I feel like Lindsay is an old friend because I’ve been a long-term reader and love all her tips, recipes, Bean Bytes, etc.

My self-imposed life goal as a registered dietitian/food blogger/human being with taste buds is to help people realize that healthy food can be really tasty and it doesn’t have to be difficult to live a healthy lifestyle. I feel like Lindsay does a really good job promoting that on the Lean Green Bean. Needless to say, I was super excited when she asked me to do a guest post on her blog!

Guest posting can be one of those daunting tasks because you feel like you really need to bring your A-game. And in my opinion, desserts are always A-game.

So I set out to create a few recipes based on what I had in my kitchen. Considering the amount that it rains in New Orleans and that I like to “walk” my errands, I needed to use what I had at home because you never know when you’re going to leave your house with the sun out and 5 minutes later the heavens open and you’re drenched head to toe. Not to mention that the city is below sea level so it floods in a hot minute. I’ve come home from many a grocery trips looking like a wet dog…

Luckily, I’m well prepared and always have peanut butter, chickpeas, oats, and dates in my kitchen.

Since I’m currently on a cookie dough dip making rampage {Sugar Cookie and Coconut Almond Cookie}, I decided I needed to make a peanut butter version. I mean, peanut butter is one of my all-time favorite foods.

This Peanut Butter Cookie Dough Dip has a secret ingredient that makes it a very nutritious snack. It's vegan, gluten free and kid friendly.

Y’all… not to toot my own horn, but I’ve hit a home run with this peanut butter cookie dough dip! The peanut-butter-loving, cookie-dough-dip-making freak in me is doing cartwheels as we speak. This stuff is sweet {thanks to the dates and almond & vanilla extracts} and salty {I sprinkle mine with a touch of sea or kosher salt}.

Basically, it’s salty-sweet goodness in a bowl that you can feel good about serving to friends and family.

[Tweet “Need a new snack? Try this Healthy PB Cookie Dough Dip from @leangrnbeanblog and @memeinge!”]

Chickpeas make the base of the dip so there is no need for butter, sugar, or flour like most cookie dough dips require, and it boosts the fiber & protein content. It’s also entirely sweetened with dates, which do contain sugar but they are full of fiber and vitamins & minerals.
I prefer to enjoy this right from the food processor served in a bowl with some sliced apples.

Print

Peanut Butter Cookie Dough Dip

Peanut Butter Cookie Dough Dip3
Print Recipe

5 Stars 4 Stars 3 Stars 2 Stars 1 Star

5 from 2 reviews

Lightly sweetened with dates and full of fiber from the chickpeas, this dip is sure to be a hit with the whole family!

  • Author: Author: Lindsay L
  • Yield: 2 1x

Ingredients

Scale
  • 1 cup pitted dates {about 10 whole dates}
  • 1 cup very hot water
  • 1 (15 oz) can chickpeas, washed & drained {about 1.5 cups}
  • 3 TBSP peanut butter
  • 1 TBSP vanilla extract
  • 1/8 tsp almond extract
  • 1/2 tsp salt
  • 1/8 tsp baking powder
  • 1/4 cup oats {regular or quick}
  • 1 TBSP chopped peanuts, optional

Instructions

  1. Add the dates to a bowl and cover with very hot water. Let sit for 15 minutes.
  2. Remove dates from the water, reserving the date-soaking water. Add the dates and two tablespoons of water to the bowl of a food processor. Blend until very smooth {once you add the other ingredients, it will not get any smoother}.
  3. Add the chickpeas, peanut butter, vanilla extract, almond extract, salt, and baking powder. Blend until completely smooth.
  4. Add in oats. Blend until smooth {adding an additional teaspoon or two of water if needed to help blend}.
  5. Transfer to a bowl and serve immediately or refrigerate for up to 5 days. Sprinkle with a little extra salt and/or chopped peanuts before serving, if desired.
  6. Serve with fruit slices {or just eat with a spoon}

Did you make this recipe?

Tag @theleangreenbean on Instagram

This Peanut Butter Cookie Dough Dip has a secret ingredient that makes it a very nutritious snack. It's vegan, gluten free and kid friendly.

Nutrition Facts per 1/4 cup serving:
142 calories, 4.6g fat (0.6 saturated), 20.7g carbohydrates, 4.1g fiber, 4.7g protein

—————-

Huge thanks to Meme for stopping by today!

Let’s chat:

What’s your all-time favorite dip…healthy or not?

Enjoy!
–Lindsay–


Filed Under: Dessert, Snack Tagged With: Peanut Butter

100 Posts on Pregnancy, Motherhood and Parenting

July 25, 2014 by Lindsay 37 Comments

A collection on blog posts and articles to help pregnant women, new moms, breastfeeding moms and parents in general

Hi Friends!

You guys know I love my round-up posts and today I’ve got a big one for you. Ever since I found out I was pregnant, I’ve started paying more attention to blog posts and articles I come across that have to do with pregnancy, motherhood and parenting in general. I’ve shared some of them in Bean Bytes over the past few months, but I’ve also been bookmarking them with the intention of doing a big roundup because I’m a big fan of having everything in one place!

Are you pregnant? A new mom? Raising a child of any age? Here's a great roundup of 100 posts on a variety of parenting and pregnancy topics!

So, here you go! 100+ posts on everything from newborns, to breastfeeding to toddlers & kids. I did my best to categorize them! This is by no means and end-all, be-all list…just a collection of posts I’ve come across recently.

Are you pregnant? A new mom? Raising a child of any age? Here's a great roundup of 100 posts on a variety of parenting and pregnancy topics!

Things To Do Before Baby 

Baby Registry Must-Haves via The Workout Mama
Baby Registry Items via Enjoy Your Healthy Life
Packing My Hospital Bag via The Small Things Blog
Baby Registry Suggestions via Carrots & Cake –> Read the comments
What To Pack In A Hospital Bag via A Healthy Slice of Life
Stocking The Freezer With Meals Before Baby via A Healthy Slice of Life
The Best Baby Websites via Keep Calm & Carry On
Third Trimester Checklist via Coffee Cake & Cardio
Placenta Pills via Running With Diapers
Best Places To Shop For Maternity Clothes via Life With My Littles
15 Things To Do Before Baby Arrives via I Heart Arts & Crafts
25 Things To Do Before Baby Is Born via Life With My Littles
DIY Baby Projects via Mother’s Niche

 Are you pregnant? A new mom? Raising a child of any age? Here's a great roundup of 100 posts on a variety of parenting and pregnancy topics!
{Photo credit: My friend Linz & her handsome man William}

All About Newborns

Favorite Baby Products: Newborn Edition- Part II via My Life As A Mrs. – also check out part 1
Baby Gear- The First 6 Months via …Take The Day Off
Three Month Favorites For Baby via The Baloney Bug
5 Newborn Must-Haves via Kate Moving Forward
Baby Must-Haves via Delights & Delectables
Baby Feeding Cheat Sheet via Today’s Parent
Tips For Traveling With A Baby via Delights & Delectables
Baby Bites via Peas & Crayons
No Nonsense Baby Essentials List via Clarks Condensed
Most Useful Baby Advice via The Stir
6 Natural Ways To Treat Infant Gas via The Stir
First Weeks With A Newborn via B Inspired Mama
10 Tips For Visitors After Baby via Pregnant Chicken
What You Need To Know About Newborns via Pregnant Chicken
My Baby Nutrition Wish List via Jill Castle

Are you pregnant? A new mom? Raising a child of any age? Here's a great roundup of 100 posts on a variety of parenting and pregnancy topics!

{Photo Credit: My friend Cassie & her beautiful baby Juniper}

For the New Mamas

New Mom 101 via New Leaf Wellness – roundup of lots of great posts!
New Mom Must Haves via Fitnessista
10 Mommy Must-Haves via Delights & Delectables
How To Do Pelvic Floor Exercises via Inspired RD
My First Week of Motherhood via Back To Her Roots
Post Pregnancy Weight Loss- The Pressure Women Face via Dietitian Without Borders
Best Gifts For Second Time Moms via New Leaf Wellness
Sample Stroller Fitness Routine via Blonde Ponytail
Returning To Exercise After A C-Section via Girls Gone Strong
Keep Grounded When Flying Through Mornings As A New Mom via Best Kept Self
Healthy Freezer Meals For Busy Moms via Thriving Home
Stay At Home Mom Survival Guide via Fit Mama Love
Finding & Hosting Play Groups via A Healthy Slice of Life
10 Tips For New Moms via Cloudy With A Chance Of Wine
Why You’re Not Failing As A Mother via Pregnant Chicken
Happily After Giving Birth – 10 Things They Don’t Tell You via Pregnant Chicken
New Dad Survival Guide- 8 Tips via Pregnant Chicken
11 Ways Dads Can Bond Early With Babies via Giving Birth With Confidence

Are you pregnant? A new mom? Raising a child of any age? Here's a great roundup of 100 posts on a variety of parenting and pregnancy topics!

{Photo Credit: My friend Lindsay and her cutie pie baby Porter}

Breastfeeding Questions, Tips & Tricks

The three “C’s” For Successfully Nursing In Public via New Leaf Wellness
Breastfeeding Essentials Kit via New Leaf Wellness
Breastfeeding Q & A via Lindsay’s List
Breastfeeding Q&A via Food Fitness & Family
Tips For Breastfeeding A Newborn via A Healthy Slice of Life
Breastfeeding Tips via Fit Pregnancy
15 Things I Wish I Knew About Weaning via Tiny Sneakers
Tips For Pumping At Work via Food Fitness & Family
350 Days via Sweet Tooth Sweet Life

Are you pregnant? A new mom? Raising a child of any age? Here's a great roundup of 100 posts on a variety of parenting and pregnancy topics!

{Photo Credit: My friend Nicole and her adorable daughter Olivia}

As They Get Older:  Toddlers & Kids

The Science of Picky Eating via Meal Makeover Moms
Picky Eating Series via Raising Healthy Eaters
Raising Nia Naturally via Char Eats Greens
Adventures in Baby Sleep Training via Healthy Tipping Point
5 Tips For Easing Meal Time Stress via Real Mom Nutrition
5 Things I’ve Learned From Potty Training 4 Boys via Discover Explore Learn
10 Best Finger Foods For Toddlers via Raising Healthy Eaters
6 Ways To Save Money On Things For Your Children via Linkouture
6 Essentials In The Toddler Survival Kit via Babble
Healthy Kid Parties via Cheryl Meyer
Child-Proofing Your Home’s Outdoor Space via Uplifting Families
Why You Should Not Use Food As A Parenting Tool via Yummy Mummy Club
I Taught My Daughter Some Things Are OK To Hate via Mom.me
5 Simple Chores For Kids via My Life and Kids
How To Fly Happily With A Toddler via Our Freaking Budget
Why It’s Ok To Say No To Your Child About Food via Raise Healthy Eaters
How To Make Behavior Charts That Actually Work via Dr. Kristi Wolf
How To Cut Down On Your Kids’ Screen Time via Babble
56 Sensory Play Ideas via Growing A Jeweled Rose
What I Want For Olivia’s Relationship With Food via Making Good Choices
6 Simple Manners To Teach Your Toddler via Babble
A Dietitian Who Won’t Oversell Nutrition To Her Kids via NYTimes

 OTHER

Round-up Pages (collections of baby-related links)

Pregnancy & Parenting via Mom’s Little Running Buddies
Mrs. & Mama via The Workout Mama
All Kinds of Baby Stuff via Tiny Sneakers
40 Fitfluential Posts For Moms via Fitfluential

Articles Worth Reading

All Joy & No Fun, The Paradox Of Modern Parenthood via ErgoBaby Blog
Mommy Somebody Needs You via Your Best Nest
My Baby Is Perfect Just The Way She Is via Enjoy Your Healthy Life
Moms, Put On That Swimsuit via The Huffington Post
10 True Things About The First Year of Parenting via Girl of Cardigan
I Choose Love via Fit Mama Real Food
In Defense of the Indispensable Dad via New York Times


Let’s chat!
Have you written or read a great post on any of these topics?
Leave links in the comments so everyone can check them out!!

Enjoy!
–Lindsay–
 

Filed Under: Kids

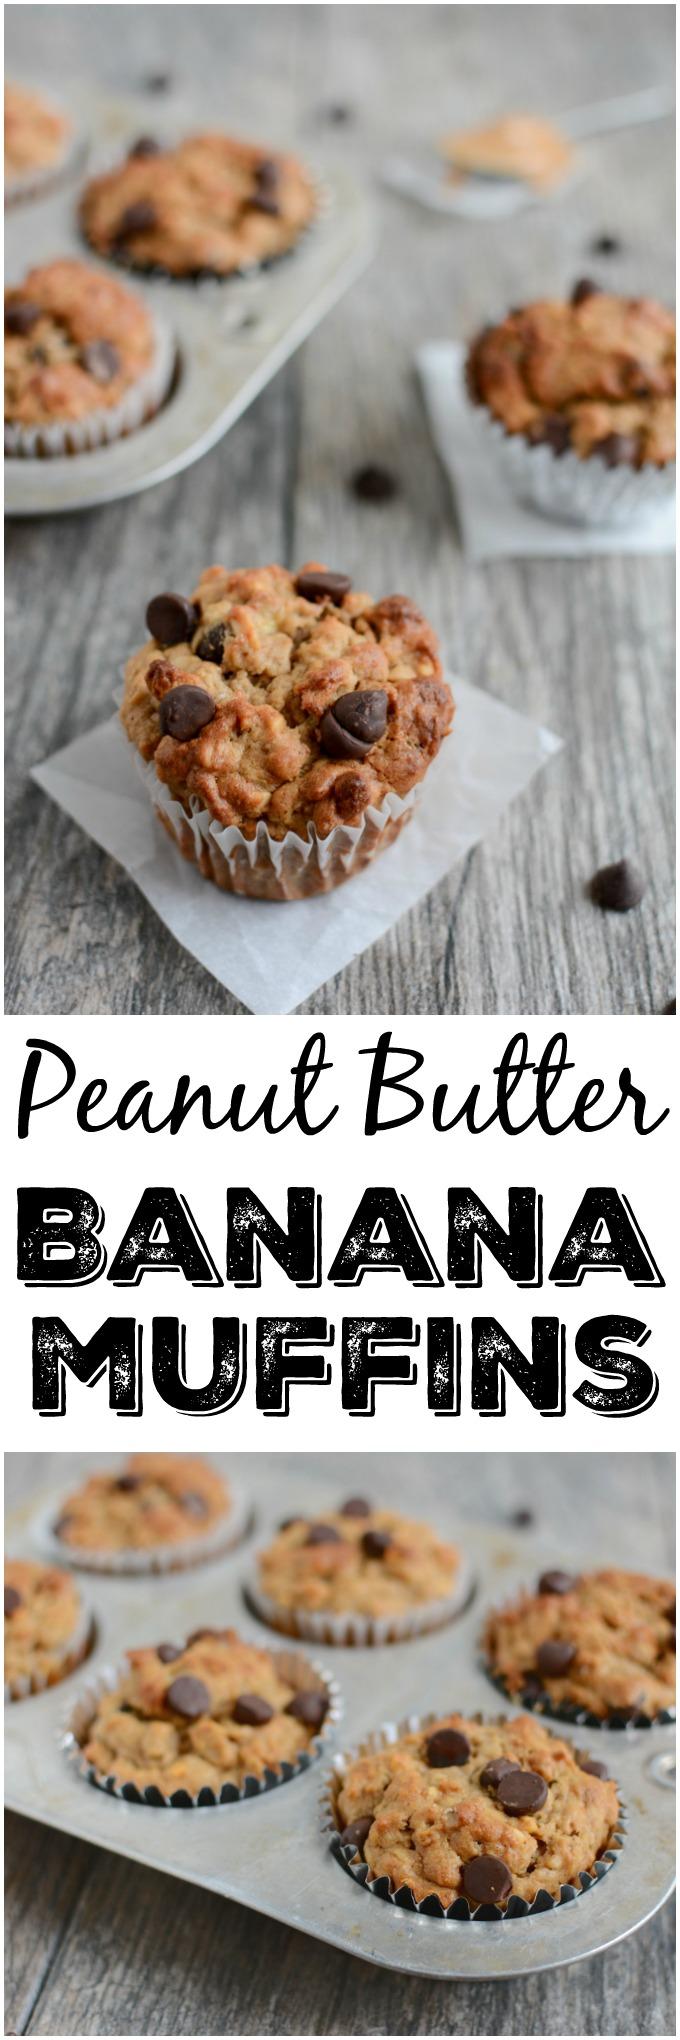
Peanut Butter Banana Oat Muffins

July 23, 2014 by Lindsay 86 Comments

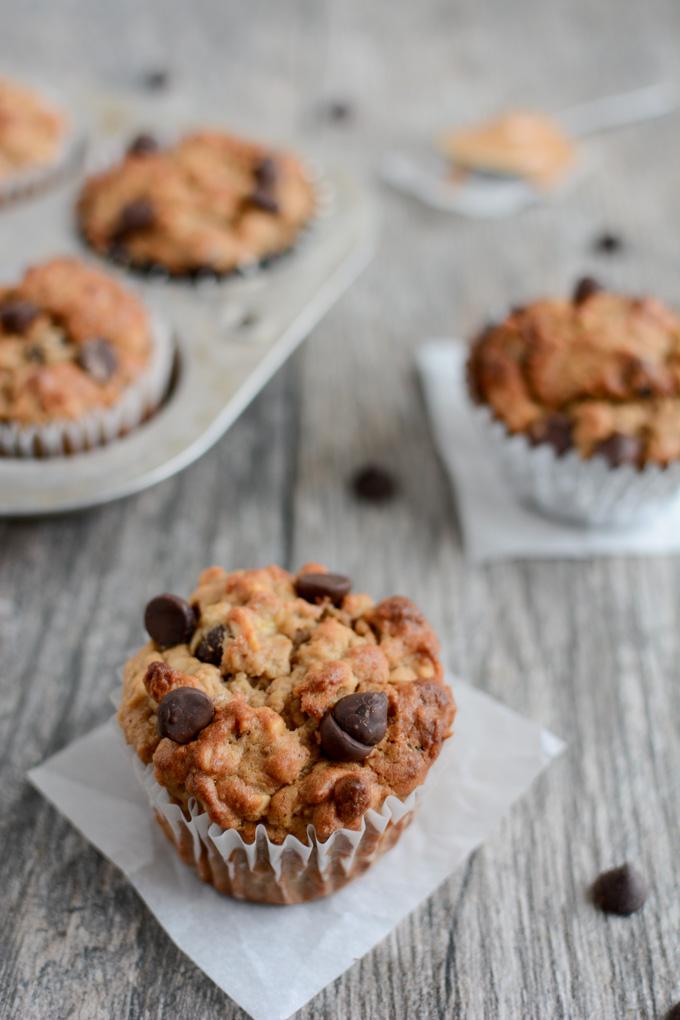
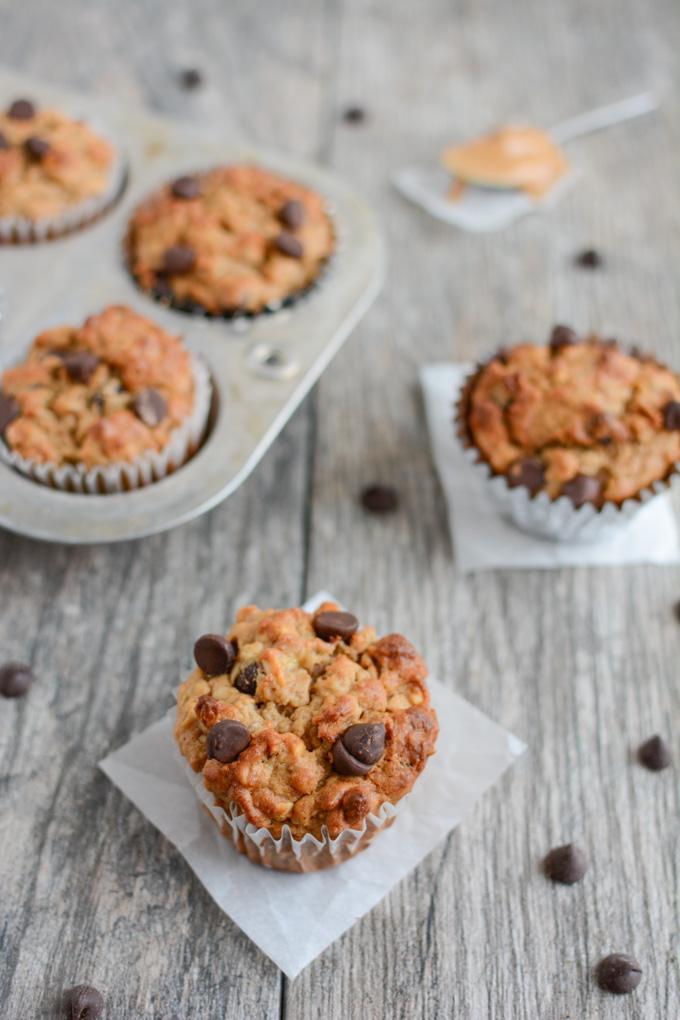
These Peanut Butter Banana Oat Muffins are low in added sugar and high in fiber and flavor, making them the perfect healthy snack on a busy day!

These Peanut Butter Banana Oat Muffins are low in added sugar and high in fiber and flavor, making them the perfect healthy snack on a busy day!

**Photos updated June 2016**

Hi Friends!

These muffins. I am obsessed. I am not exaggerating when I say I’ve eaten at least one of these Peanut Butter Banana Oat Muffins every single day for the past month or so.

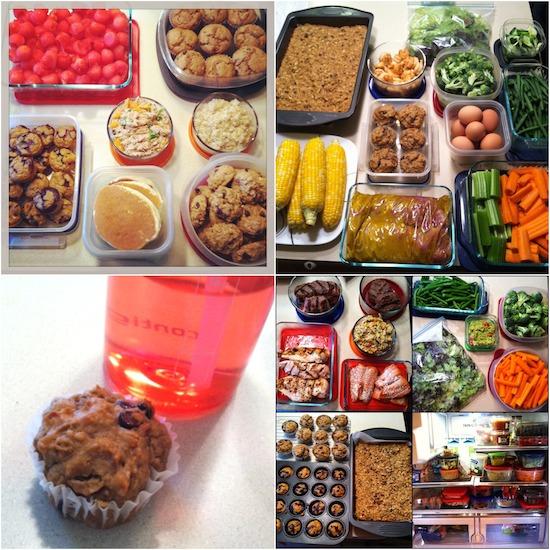
If you’ve been paying attention to my Sunday food prep, you may have noticed these little guys making repeat appearances. I’ve been making a batch of them every weekend and tweaking the recipe a little bit each time with the goal of reducing the amount of added sugar without losing flavor.

muffins.jpg

Since pregnancy has made breakfast a little bit of a challenge, I’ve been sticking to cereal and milk when I first wake up, but mid-morning I tend to get hungry. So, I’ve been eating a muffin for my snack, along with lots of water!

Peanut Butter Banana Oat Muffins

These Peanut Butter Banana Oat Muffins are low in added sugar and high in fiber and flavor, making them the perfect healthy snack on a busy day!

I’ve finally adjusted the recipe enough and gotten it to a point where I’m super happy with the ingredients so I’m ready to share with you guys!

Here’s the recipe:

Print

Peanut Butter Banana Oat Muffins

banana oat muffins
Print Recipe

5 Stars 4 Stars 3 Stars 2 Stars 1 Star

4.6 from 9 reviews

Low in added sugar and full of fiber and flavor, these make a great snack.

  • Author: Author: Lindsay L
  • Prep Time: 5 minutes
  • Cook Time: 30 minutes
  • Total Time: 35 minutes
  • Yield: 10 1x

Ingredients

Scale
  • 1/2 cup mashed bananas (approximately 2 medium)
  • 4 Tablespoons butter, melted
  • 1/4 cup plain yogurt – i use full fat. 2% would also work. Greek or regular should be fine.
  • 1/2 cup peanut butter
  • 1 egg
  • 1 teaspoon vanilla extract
  • 2 Tablespoons brown sugar
  • 1 teaspoon cinnamon
  • 1/2 teaspoon baking powder
  • 1/2 teaspoon baking soda
  • 3/4 cup white whole wheat flour
  • 3/4 cup rolled oats
  • 1/2 cup chocoalte chips

Instructions

  1. Preheat oven to 350 degrees F.
  2. Combine bananas, butter, yogurt, peanut butter, egg, vanilla and sugar in a large bowl and mix well.
  3. Add dry ingredients and stir until just combined.
  4. Stir in chocolate chips.
  5. Scoop into muffin liners and bake for 25-30 minutes or until toothpick inserted into center comes out clean.

Did you make this recipe?

Tag @theleangreenbean on Instagram

Like I mentioned in the notes above, I made these several times, reducing the amount of sugar from 1/4 cup to 2 Tablespoons and increasing the peanut butter from 1/4 cup to 1/2 cup. If you like your muffins sweeter, feel free to add a couple extra Tbsp of sugar.

Also, if you want to leave out the chocolate chips, feel free, although I’ll probably call you crazy 😉 I store mine in the fridge in a tupperware container.

These Peanut Butter Banana Oat Muffins are low in added sugar and high in fiber and flavor, making them the perfect healthy snack on a busy day!

[clickToTweet tweet=”Peanut Butter Banana Oat Muffins from @leangrnbeanblog are a delicious low-sugar snack!” quote=”Peanut Butter Banana Oat Muffins from @leangrnbeanblog are a delicious low-sugar snack!”]

Muffins are one of my favorite things to make during food prep! If you liked this post, you’ll love my ebook – The Ultimate Guide To Food Prep – set to release June 27, 2016. It dives into even more detail about how to food prep, troubleshoots common problems and provides tons of tips to make it easier! Click the image below for more details.

The Ultimate Guide To Food Prep Ebook

Enjoy!
–Lindsay–
 

Filed Under: Baking, Breakfast, Healthy Muffins & Bars, Snack Tagged With: Banana, Butter, Chocolate Chips, Oats, Peanut Butter, White Whole Wheat Flour, Yogurt

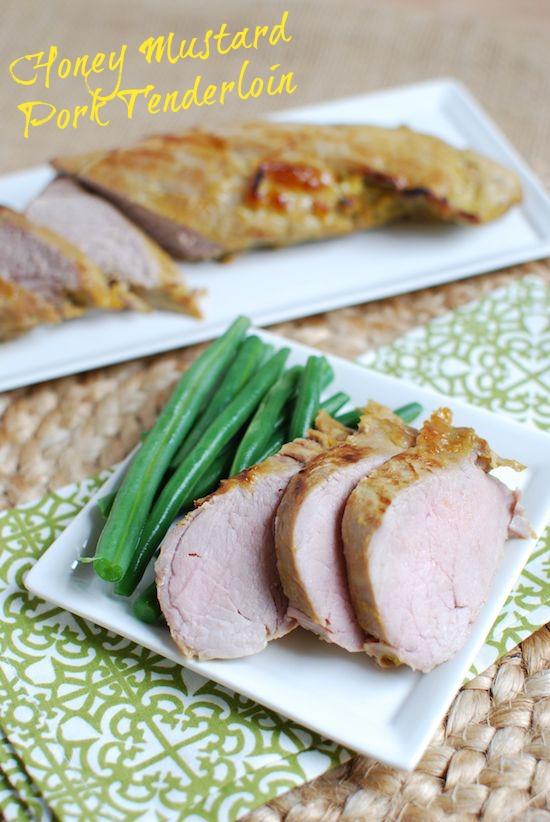
Honey Mustard Pork Tenderloin

July 23, 2014 by Lindsay 34 Comments

This Honey Mustard Pork Tenderloin is made with a simple marinade that adds tons of flavor! Perfect for a quick, healthy dinner.

This post was sponsored by French’s Yellow Mustard. I was compensated for my time. All thoughts and opinions are 100% my own.

Hi Friends!

I feel like there are two kinds of people in this world- those who love all condiments and use them regularly and those who tend to focus more on the food and less on what goes on top. For most of my life, I’ve fallen into category number two. Growing up I ate my hot dogs plain, didn’t need anything to dip my fries into, hated having anything smeared on the bun of my sandwich, etc. It’s only been in the past few years that I’ve come to appreciate what a good condiment can add to a meal.

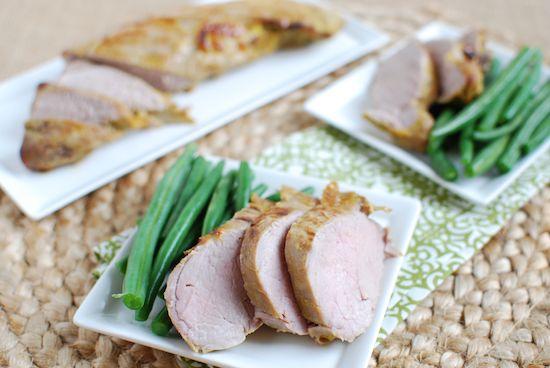
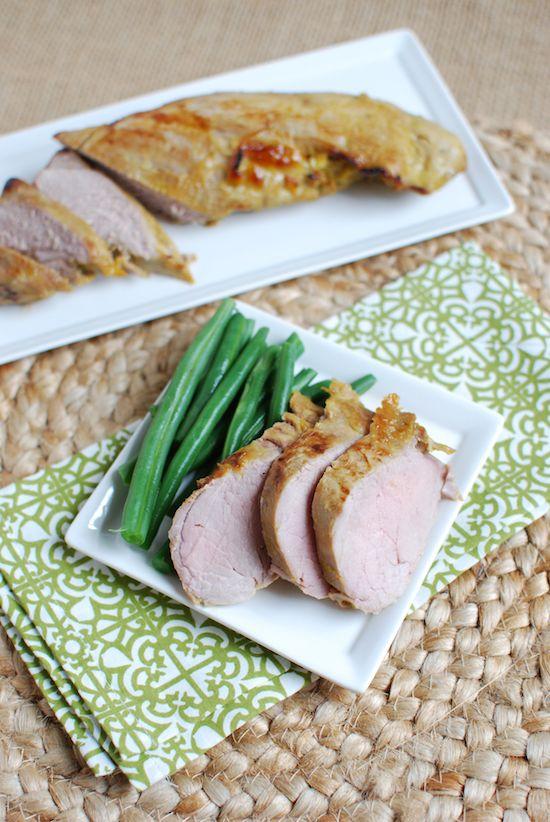
This Honey Mustard marinade makes pork tenderloin a moist and flavorful dinner option.

The problem I have with a lot of condiments, however, is that many are loaded with unhealthy and unnecessary ingredients like salt and sugar. I prefer homemade versions of most condiments for this reason. But, when French’s reached out to me about creating a recipe using their #naturallyamazing mustard, all it took was a quick check of the ingredients to get me on board.

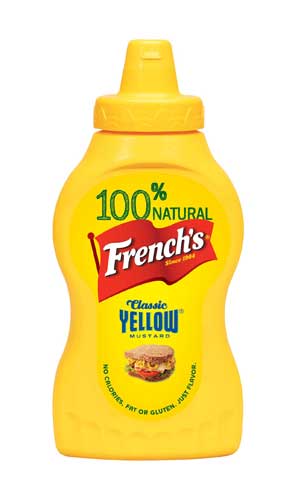
Here are the ingredients in their Classic Yellow Mustard:

Distilled vinegar, water, no. 1 grade mustard seed, salt, tumeric, paprika, spice, natural flavors and garlic powder.

That’s an ingredient list I can get on board with! Mustard is great year round, but it’s especially great for adding flavor to summer foods. With all the grilling we’ve been doing, I can think of tons of dishes I’ll be adding mustard to in the future for a pop of flavor!

8oz Classic Yellow (Sandwich)
Plus, my hubby loves mustard and it’s not something I do a lot of cooking with, so I thought it would be a fun challenge to create a recipe using it! Hubby and I have been talking a lot this summer about how we need to start marinating our meats before we cook them for some added flavor and that got me thinking about using mustard in a marinade!

I developed this marinade to use on pork tenderloin and it turned out really well!

Here’s the recipe:

Print

Honey Mustard Pork Tenderloin

honey mustard pork tenderloin.jpg
Print Recipe

5 Stars 4 Stars 3 Stars 2 Stars 1 Star

No reviews

A simple, flavorful marinade to use on pork or chicken prior to roasting or grilling.

  • Author: Author: Lindsay L

Ingredients

Scale
  • 1/4 cup olive oil
  • 1/4 cup honey
  • 1/4 cup French’s Classic Yellow Mustard
  • 2 cloves garlic, minced
  • 1 Tablespoon worchestershire sauce
  • Juice from one lemon
  • 2 pounds pork tenderloin

Instructions

  1. Combine first six ingredients in a large ziploc bag.
  2. Add pork tenderloin and squeeze to remove excess air from the bag.
  3. Marinate pork at least 4 hours or overnight, turning the bag occasionally to ensure all meat is coated in the marinade.
  4. When ready to cook either 1) remove pork from bag and cook on the grill or 2) remove pork from bag and sear on all sides in a hot pan, then transfer to a baking sheet and bake at 400 degrees for 20 minutes or until pork reaches a temperature of at least 145 degrees.

Did you make this recipe?

Tag @theleangreenbean on Instagram

We’re both big fans of this recipe. It made the meat super tender and added a wonderful flavor to the pork, which is something we usually eat pretty plain.

This Honey Mustard marinade makes pork tenderloin a moist and flavorful dinner option.

Plus it was delicious with some crunchy summer green beans! I cooked this one in the oven but it would also be super easy to do on the grill.

This Honey Mustard marinade makes pork tenderloin a moist and flavorful dinner option.


Oh, and one more thing before I go. I know how many of us are Pinterest fans so good news!  French’s is on Pinterest!

Follow French’s for delicious summer recipes, backyard BBQ ideas, kitchen hacks, cooking tips and all things mustard.

Let’s chat:

What’s your favorite way to use mustard?!

Enjoy!
–Lindsay–



Filed Under: Dinner, Sponsored

Cinnamon Vanilla Crepes

July 21, 2014 by Lindsay 54 Comments

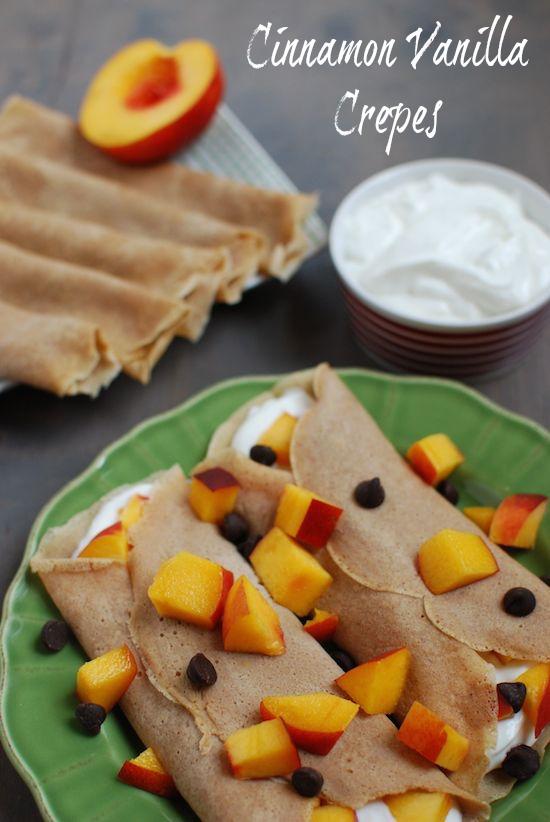
These Cinnamon Vanilla Crepes are the perfect vehicle for yogurt and fresh fruit for a well-balanced breakfast! Or try them with nut butter for a quick energy boost.

Hi Friends!

Don’t panic. I know it’s Monday and Monday is Bean Bytes day…but this particular Monday also happens to be my Recipe Redux posting day. So we’re doing a little switcheroo. Recipe today. Bean Bytes tomorrow!

These Cinnamon Vanilla Crepes are the perfect vehicle for yogurt and fresh fruit for a well-balanced breakfast! Or try them with nut butter for a quick energy boost.

So, this month’s Redux theme was:

A Spirited ReDux

From plain Jane vanilla extract to fancy-pants elderflower liqueur, we like to keep a little liquor in the kitchen. Show us how you like to cook, bake or mix-it-up with spirits, extracts and other alcohols. A splash of vodka makes summer sauces shine – and liqueurs brighten desserts: What’s your healthy recipe with spirit?

Being that alcohol isn’t really my thing right now…I went the plain jane route with vanilla extract. But it’s actually one of my favorite pantry staples so it worked out well for me. I knew I wanted to do something breakfast-related but didn’t want traditional pancakes or waffles, so I decided on crepes! A few years ago I posted a recipe for Buckwheat Crepes which were delicious, so this time I decided to play up the flavors a little more and add lots of cinnamon and vanilla.

These Cinnamon Vanilla Crepes are the perfect vehicle for yogurt and fresh fruit for a well-balanced breakfast! Or try them with nut butter for a quick energy boost.

The result? Super simple to make and full of flavor!

Here’s the recipe:

Print

Cinnamon Vanilla Crepes

DSC 0035
Print Recipe

5 Stars 4 Stars 3 Stars 2 Stars 1 Star

No reviews

Packed with flavor and simple to make, fill these with anything your heart desires for a tasty breakfast or snack!

  • Author: Author: Lindsay L
  • Prep Time: 2 minutes
  • Cook Time: 10 minutes
  • Total Time: 12 minutes
  • Yield: 8-10 1x

Ingredients

Scale
  • 1 cup white whole wheat flour
  • 11/4 cup milk
  • 2 eggs
  • 2 teaspoons sugar
  • 1 teaspoon cinnamon
  • 2 – 3 teaspoons vanilla extract (depending on flavor preference)
  • Butter or oil for greasing pan
  • Optional fillings: yogurt, fruit, chocolate chips, etc

Instructions

  1. Combine all ingredients in a blender and blend until well mixed.
  2. Grease pan.
  3. Pour a small amount of batter (I used 3-4 Tablespoons at a time) into a saute pan over medium heat.
  4. Pick up the pan and swirl batter so it reaches the edges of the pan and forms a thin circle.
  5. After 30 seconds, gently use a spatula to lift up one edge and flip over.
  6. Cook another 30 seconds and remove from pan.
  7. Repeat with remaining batter.
  8. Roll or fold crepes on a plate until all are made.

Did you make this recipe?

Tag @theleangreenbean on Instagram

Crepes sounds fancy but they’re actually really simple to make. Play around with the amount of batter you use to get them as thick or thin as you want. If they start to stick to the pan, just regrease it!
These Cinnamon Vanilla Crepes are the perfect vehicle for yogurt and fresh fruit for a well-balanced breakfast! Or try them with nut butter for a quick energy boost.

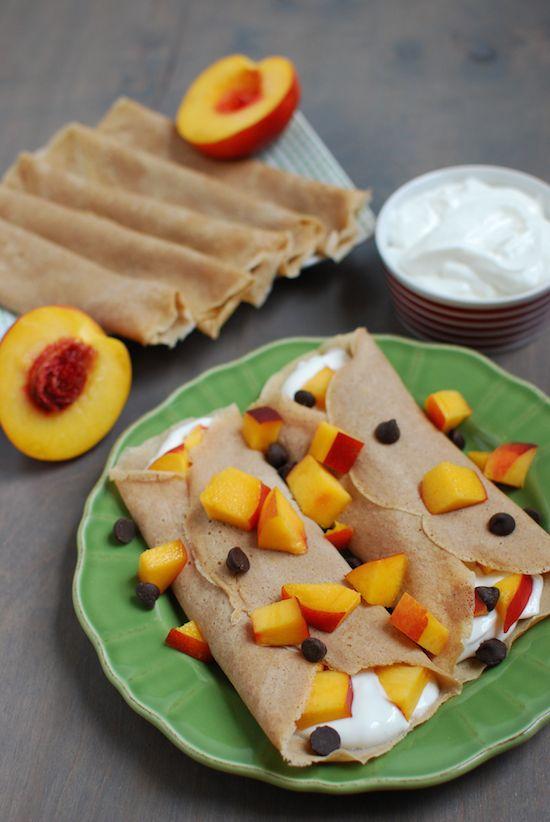
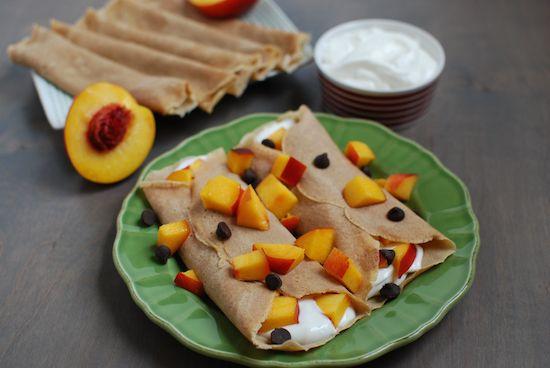
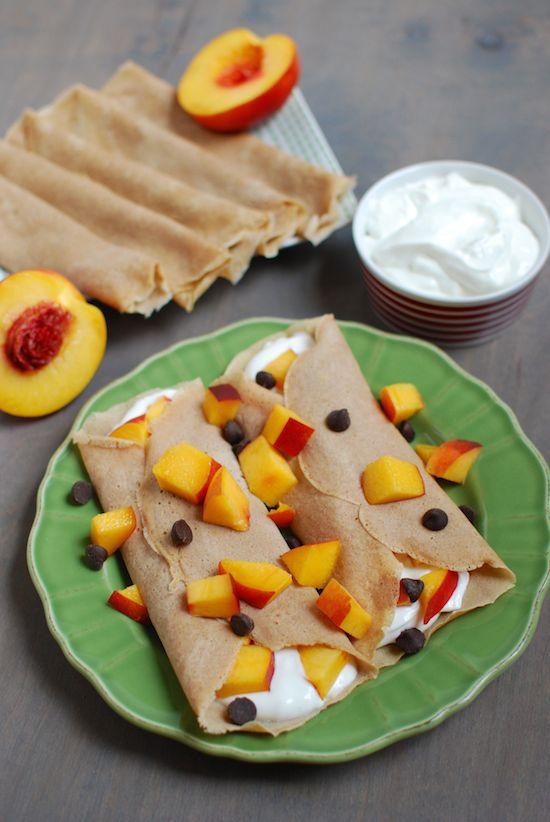
Once you’ve got your crepes all ready to go, you’re ready for the fun part- filling them! Choose whatever fillings you like best. I went with plain yogurt, fresh nectarines and chocolate chips the first day and then went the pb&j route the next day!

The possibilities are endless my friends!

[Tweet “These Cinnamon Vanilla Crepes are easy to make and sure to impress! via @leangrnbeanblog”]

These Cinnamon Vanilla Crepes are the perfect vehicle for yogurt and fresh fruit for a well-balanced breakfast! Or try them with nut butter for a quick energy boost.

Let’s chat: What’s your favorite filling for crepes?

Enjoy! –Lindsay–
Filed Under: Breakfast Tagged With: Egg, Milk, White Whole Wheat Flour

Green Bean Delivery

July 19, 2014 by Lindsay 2 Comments

In exchange for this post, Green Bean Delivery provided me with 4 complimentary produce bins. As always, all thoughts and opinions are 100% my own. 

Hi Friends!

Let’s talk veggies, shall we? Over the past few weeks, you may have noticed me getting a few produce deliveries if you follow me on social media. Today I thought I’d give you my thoughts.

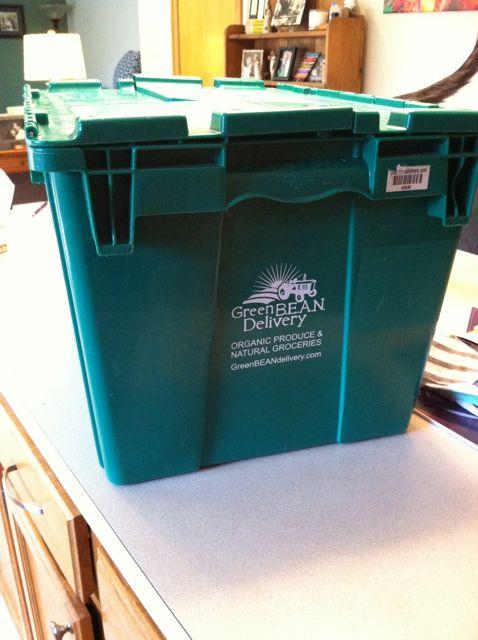
Last month, Green Bean Delivery contacted me to see if I was interested in reviewing their services. Let’s see- fresh fruits and veggies delivered right to my doorstep? Yes please! A few years ago, hubby and I split a CSA share with some friends and I loved it…but after we missed signups the following year, I never really got back into it.

green bean delivery

So what’s Green Bean Delivery all about? From their website:

Our year-round food delivery service brings the freshest local & organic produce and natural groceries right to your doorstep. Membership is easy, flexible, and risk-free. Customize your orders online to get exactly what you want. It’s an affordable, convenient, and fun way for the whole family to eat healthy!

If you live in Indiana, Ohio, Kentucky or Missouri, you might live in an area they deliver to! Look for a discount code on your first order at the bottom of this post.

green bean 1
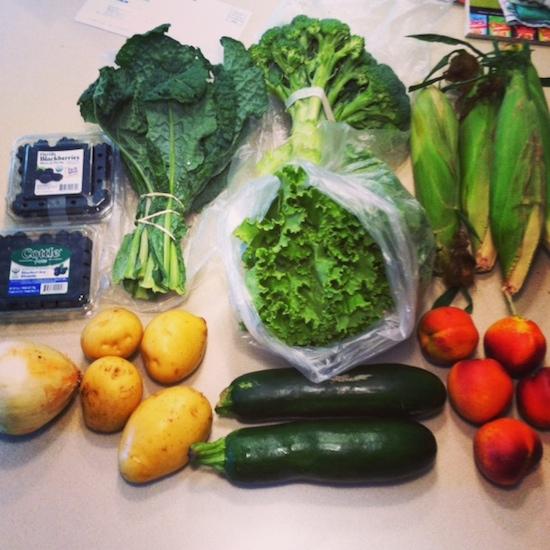
{Week 1 Delivery}

Blueberries, blackberries, onion, potatoes, kale,
broccoli, lettuce, zucchini, peaches, corn

All organic except the corn & the zucchini, lettuce & kale were local

How it works:

  • You can sign up for weekly or bi-weekly delivers with a minimum order of $35. If you’re going to be out of town, you can cancel your order for that week or if you need to put your membership on hold for a few weeks, you can do that too.
  • Orders are delivered on a specific day depending on where you live (mine came Thursdays) and arrive in an insulated bin packed with ice packs. You don’t have to be home to accept your delivery. You have from Thursday afternoon- Monday to customize your order and deliveries are made Tuesday-Friday.
  • The week before your order, you log into the Green Bean store and customize your order. For example, if you have a standing order for a small produce bin (which is what I received), you’ll log in and see what’s in the bin for that week. From there, you can customize your bin by removing items you don’t want and adding those you do. You can also add other grocery items from their store including eggs, meats, cheeses, frozen foods, bulk products etc.

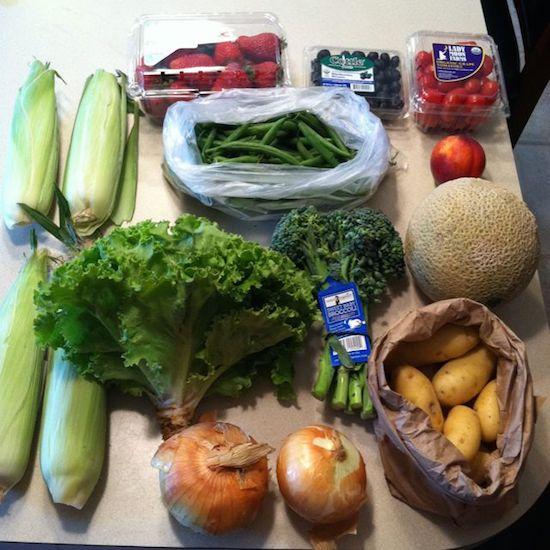
green bean 2

{Week 2 Delivery}

Corn, onions, lettuce, broccoli, potatoes, cantaloupe, green beans, strawberries, blueberries, grape tomatoes and a nectarine. 

All organic except the corn and green beans. The lettuce was local. 

A few other notes:

  • Green Bean Delivery offers mostly organic options, with seasonal local options. There are five different box size options available.
  • You can also order a break room bin for your office!
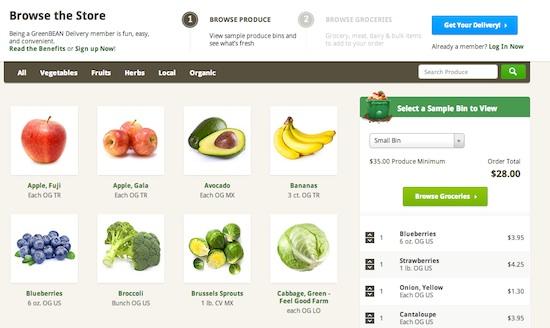
  • They recently redesigned and launched a new store which makes it super easy to order!

store

Each item is labeled Organic, Conventional, Local, etc.

So, what did I think about it? 

  • I really enjoyed the service. It’s super convenient for people who are busy and don’t have a lot of time to get to the grocery store or farmer’s market.
  • The items we received were high quality. Everything was very fresh and tasted great!
  • They were easy to work with and I like the flexibility of being able to customize and add to your order.
  • I loved all the organic options.

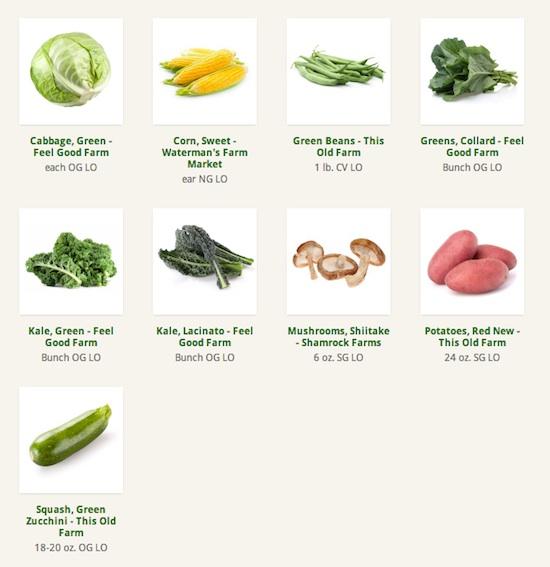
local

{the local options in my area right now}

Any negatives?

  • Their selection of local produce wasn’t as large as I would have liked. I love buying local, especially in the summer months so I’d still be inclined to visit the farmer’s market for additional local options. However, I could see myself using the bi-weekly option since I often don’t make it to the farmer’s market every week.

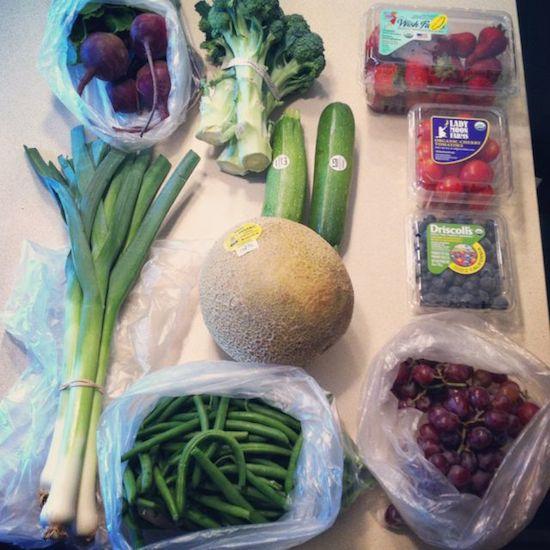
green bean 3

{Week 3 Delivery}

Leeks, green beans, cantaloupe, grapes, blueberries, zucchini,
beets, broccoli and grape tomatoes.

All organic except the green beans.
The leeks, beets, zucchini and green beans were local.


So what do you think? Are you interested in trying it out?

Let’s chat:
Do you have a similar service in your area? Or belong to a CSA? Or do you prefer going to the farmer’s market yourself?

Enjoy!
–Lindsay–

 

*Green BEAN Delivery is available in Ohio (Columbus, Cincinnati, and Dayton), Indiana (Indianapolis, Anderson, Fort Wayne, and Muncie), Kentucky (Louisville and Lexington), and in St. Louis, Missouri.


Filed Under: Uncategorized

Blogging Tool: CoSchedule

July 17, 2014 by Lindsay 47 Comments

This post contains referral links. I was not compensated for this review but I will receive credit to my account if you sign up using my referral link. As always, all thoughts and opinions are 100% honest and my own.

Hi Friends!

Just wanted to pop in a share a little bit about a blogging tool I recently started using! It’s called CoSchedule and it has replaced the previous editorial calendar plug-in I used.

I’ve been aware of CoSchedule for several months now, but since it is a paid service, I’ve been hesitant to take the plunge. I finally signed up for the two week trial and I was hooked even before the trial ended.

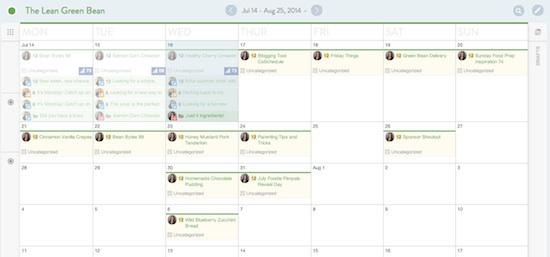
Here’s a look at what CoSchedule looks like:

coschedule1


It’s basically a calendar you can use to help plan your blog posts. You can start a draft on one day and then if you decide you want to publish it on a different day, simply drag and drop to the preferred publishing day. I’ve been using an editorial calendar for my blog for a while now and it’s helped me tremendously with planning ahead and keeping track of various post deadlines, etc.

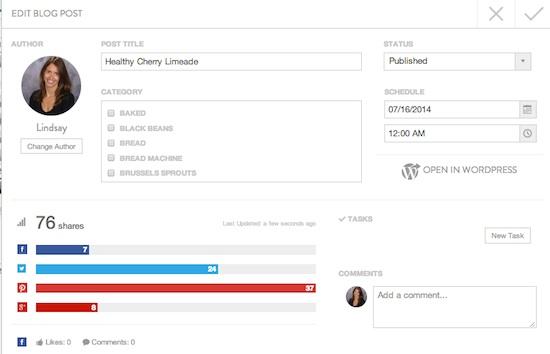
coschedule2

The cool thing about CoSchedule is that it does a great job of integrating social media. My previous calendar was just a calendar and that’s it. This tracks your shares once the post is published and it also lets you connect various social media accounts like your blog’s Facebook page, your Twitter account, your Pinterest boards, etc. Once they’re connected, you can pre-schedule posts to these various social media sites and CoSchedule will publish them for you at the desired times.

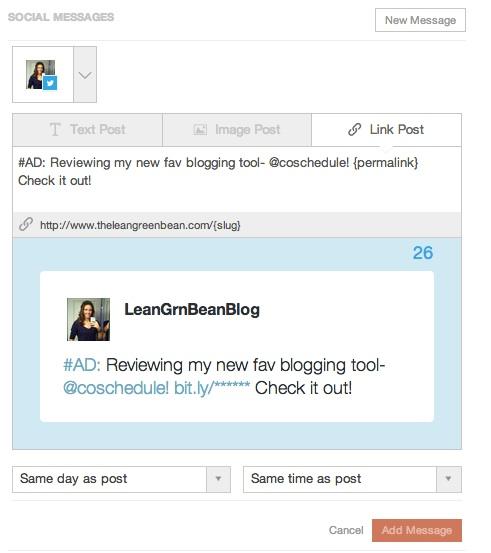
coschedule3

You can preview what your social media posts will look like, choose if you want to include a link or an image and then specify what date and time you want the tweet or FB post to be scheduled.

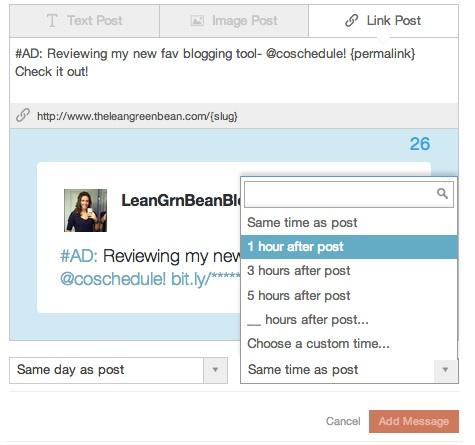
coschedule4

The social media aspect is really what sold me on CoSchedule. Now, when I write a post, I also pre-schedule several tweets, a Facebook post and a pin for the day the post is to be published. You can also easily pre-schedule social media posts for a week, month, etc after posting to give your post a little refresher after it’s been published for a while, or if say you wanted to schedule a Pinterest post for the weekend instead of the day the post is published.

While I still use free programs like Hootsuite and Buffer to preschedule tweets, I really like the convenience of being able to pre-schedule a lot of my social media stuff for my own posts from one central location.

coschedule5

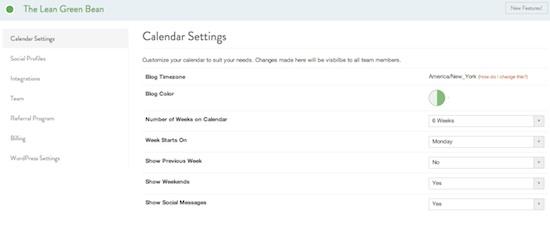
In addition, you can personalize the calendar colors, the number of weeks shown on your calendar at one time, what day you calendar starts on etc. You can also integrate bit.ly, google analytics and google calendar with CoSchedule, as well as the Click to Tweet program you may have soon people using that puts a pre-composed tweet into your blog post so all people have to do is click to share.

Interested yet?

I’d definitely encourage you to sign up for the two week trial to check it out. CLICK HERE to get started. If you like it after the trial, it’s $10/month, or save $20 by signing up for an annual plan. (*Disclosure* If you share a review of your thoughts you save 50% on your subscription)

Although I was doubtful it was worth the money before I checked it out myself, after trying it out, it’s definitely worth the money for me and I think it would be a great tool for a lot of my fellow bloggers as well!

Enjoy!
–Lindsay–

 

Filed Under: Uncategorized

Healthy Cherry Limeade

July 16, 2014 by Lindsay 40 Comments

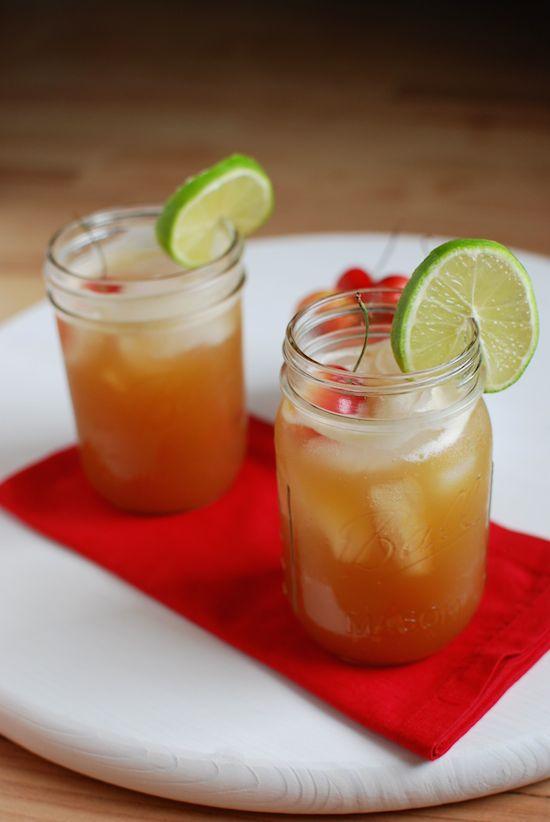
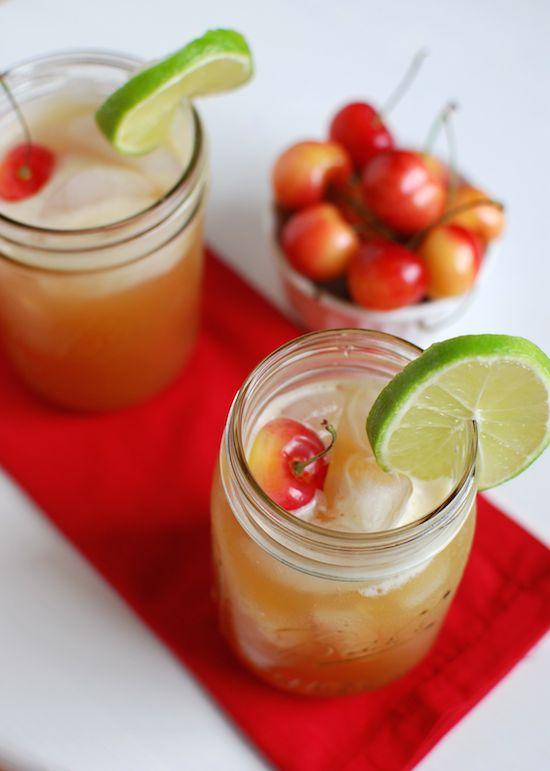
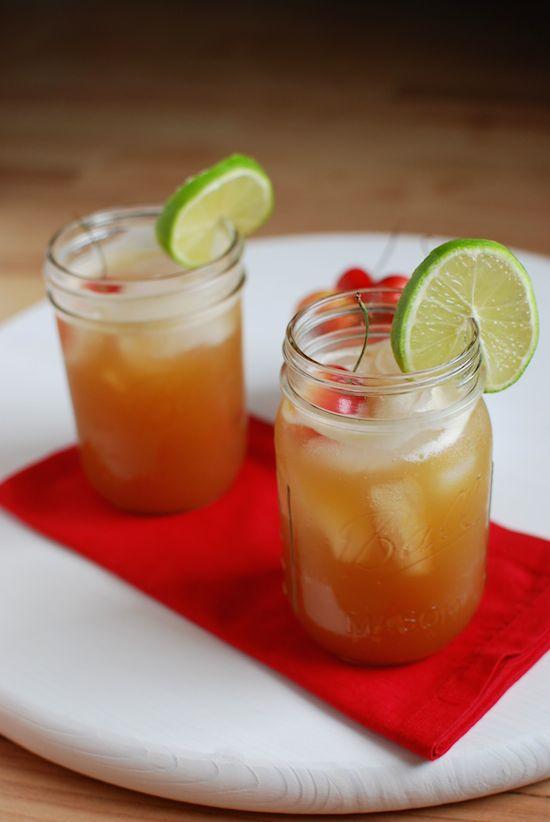
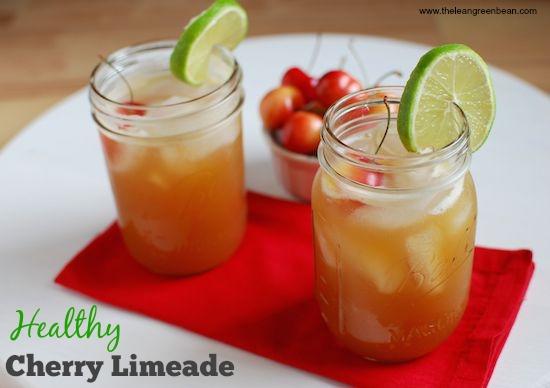
This Healthy Cherry Limeade is a refreshing summer drink with just 4 ingredients! Cherries, lime juice, sparkling water and a touch of sugar.

Hi Friends!

Let’s have a drink together, shall we? A non-alcoholic one for me of course!

When I was younger, I was on the swim team for a country club near our house. I loved it. In fact, one of my biggest regrets is not doing high school swim team. But anyways, summer was our swimming season and after almost every swim meet, we would stop at Sonic to eat. I always got the same thing- a plain footlong hotdog and a cherry limeade.

The other day I saw a commercial for Sonic and their cherry limeade and it sparked a craving. I tried to ignore it, but it just wouldn’t go away…so I did some research. Most homemade recipes call for frozen limeade concentrate, Sprite, or tons of added sugar. I wanted something simpler.

Make yourself a homemade Healthy Cherry Limeade on a hot summer day. This drink is refreshing and lower in sugar than the famous Sonic version.

Here’s what I came up with. Just 4 ingredients. It’s not an exact replica…but it’s a heck of a lot healthier and it did the trick to cure my craving! I could taste the lime and cherry flavors and I got the bubbles from the sparkling water. Best of all, it wasn’t overly sweet!

Print

Healthy Cherry Limeade

DSC 0823
Print Recipe

5 Stars 4 Stars 3 Stars 2 Stars 1 Star

5 from 3 reviews

A simple, 4-ingredient recipe for a refreshing summer drink!

  • Author: Author: Lindsay L
  • Prep Time: 10 minutes
  • Total Time: 10 minutes
  • Yield: 2 1x

Ingredients

Scale
  • 11/2 cups Rainier cherries (pitted)
  • 1/4 cup freshly squeezed lime juice
  • 2 teaspoons sugar (more if desired)
  • 2 cups sparkling water

Instructions

  1. In a blender, puree the cherries, lime juice and sugar.
  2. Taste and add more sugar if needed.
  3. In batches, pour puree into a large piece of cheesecloth, pull corners into a bundle and squeeze the bottom gently to get the juice out and leave the cherry skins in the cheesecloth. In between batches you can rinse the cheesecloth to get rid of the skins, squeeze out the excess water and repeat.
  4. When you’re done you should have about 1 cup of cherry lime juice.
  5. Mix with 2 cups sparkling water and pour into glasses with lots of ice.
  6. Garnish with slices of lime and cherries if desired.

Did you make this recipe?

Tag @theleangreenbean on Instagram

A few notes:

  • I know virtually nothing about cherries…I bought the Rainier cherries because the sign said they were super sweet, which I equated to being able to use less sugar. However, they’re kinda yellowish red, so this drink won’t come out bright red like that traditional cherry color you may be expecting.
  • You could probably use other kinds of cherries but if they’re more tart, you may need to add more sugar.
  • The straining through the cheesecloth is a little annoying, but worth it I think. If you’re lazy, or don’t care how it looks visually, you could skip that step!

Make yourself a homemade Healthy Cherry Limeade on a hot summer day. This drink is refreshing and lower in sugar than the famous Sonic version.

I’m definitely bringing one of these to our next cookout so I can feel fancy!

Make yourself a homemade Healthy Cherry Limeade on a hot summer day. This drink is refreshing and lower in sugar than the famous Sonic version.

Let’s chat:

What’s your favorite summer drink?

Enjoy!
–Lindsay–

Filed Under: Snack

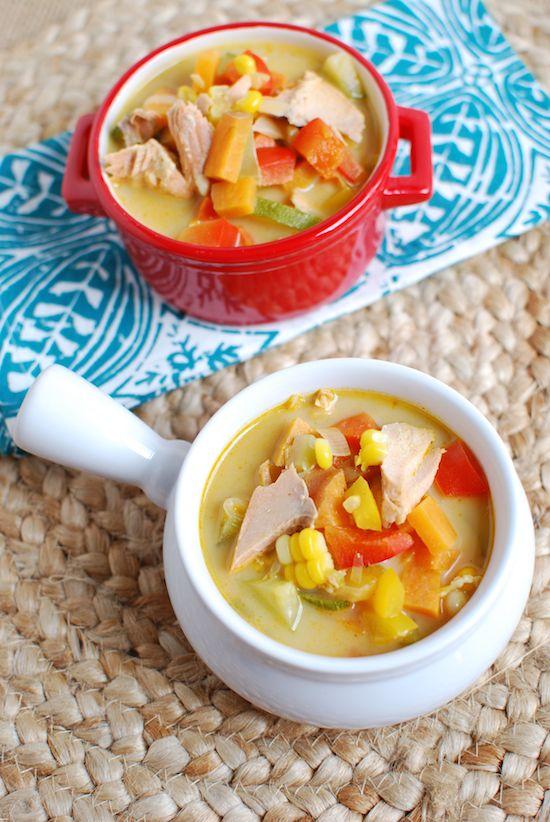
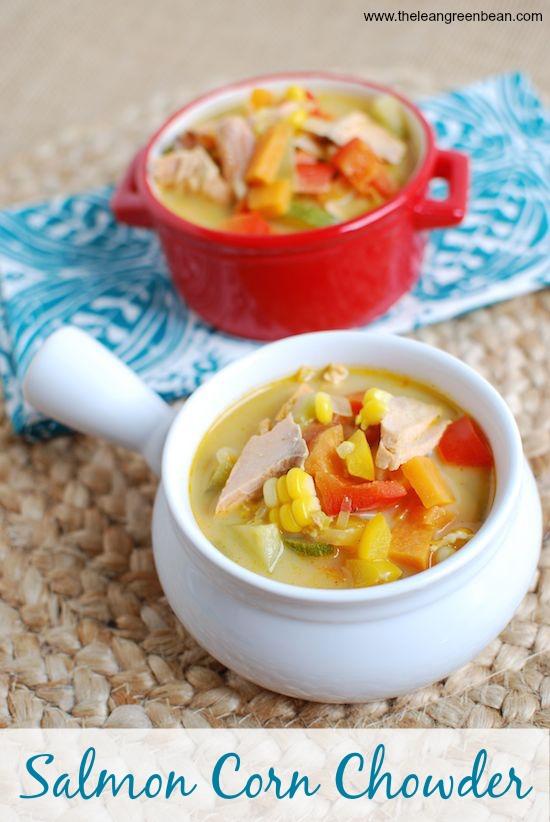
Salmon Corn Chowder

July 15, 2014 by Lindsay 28 Comments

This Salmon Corn Chowder is a light, simple soup that’s packed with vegetables. Enjoy it for lunch or dinner even on a hot summer day.

Hi Friends!

Time for another recipe refresher! This Salmon Corn Chowder was literally one of the very first recipes I published on my blog when I started it almost 4 years ago. That was way back before I knew the importance of post titles and I thought I was being so clever titling it “Doing The Chowder Cha Cha”. Yeah…kinda embarrassing 🙂

Anyways, I love making this recipe in the summer and when I noticed yesterday that I just so happened to have some salmon thawing in the fridge, plus lots of corn, I knew we were due for another batch.

This Salmon Corn Chowder is a light, simple soup that's packed with vegetables. Enjoy it for lunch or dinner even on a hot summer day.

This recipe is the perfect way to use up all your favorite summer produce! I tend to use zucchini, carrots, peppers, celery, potatoes and corn but feel free to use whatever you have on hand!

Here’s the recipe:

Print

Salmon Corn Chowder

DSC 0932
Print Recipe

5 Stars 4 Stars 3 Stars 2 Stars 1 Star

5 from 2 reviews

A light chowder that’s perfect for all your summer vegetables

  • Author: Author: Lindsay L
  • Prep Time: 10 minutes
  • Cook Time: 30 minutes
  • Total Time: 40 minutes
  • Yield: 6 1x

Ingredients

Scale
  • 4 cups mixed vegetables (peppers, potatoes, carrots, zucchini, celery, etc)
  • 1 cup corn kernals
  • 1 pound salmon, cooked and flaked
  • 1 quart broth (chicken or vegetable)
  • 2 cups milk
  • 1 teaspoon Old Bay seasoning
  • fresh black pepper

Instructions

  1. In a large Dutch oven, saute the vegetable (except the corn and zucchini if you’re using it) for 5-7 minutes.
  2. Add the broth, bring to a boil, then reduce heat and simmer until veggies reach desired tenderness.
  3. Stir in milk, salmon, corn & zucchini and heat through.
  4. Add seasonings, taste and adjust accordingly.

Did you make this recipe?

Tag @theleangreenbean on Instagram

So simple, right?

This Salmon Corn Chowder is a light, simple soup that's packed with vegetables. Enjoy it for lunch or dinner even on a hot summer day.

Typically I used white potatoes, but sweet potato was all I had on hand this time.


I use skim milk for this recipe, but if you want it to be more chowder-like, try 2% or whole. You can also add a little less broth and more milk to play with the ratio until you’re satisfied.


I don’t put a ton of Old Bay in the large pot since it’s pretty high in sodium, but I do love to add a little sprinkle to each bowl as it’s served for more flavor!

Enjoy!
–Lindsay–

Filed Under: Appetizer, Dinner, Soup & Salad Tagged With: Bell Pepper, Chicken Broth, Corn, Milk, Potato, Salmon, Zucchini

Blueberry Cashew Bars

July 11, 2014 by Lindsay 55 Comments

These Blueberry Cashew Bars are a simple, frozen summer treat that are packed with healthy fats and antioxidants!

Hi Friends!

I have a confession. I made these Blueberry Cashew Bars a few weeks ago, photographed them and then stuck them in the freezer and promptly forgot about them! Whoops! The good news is, I was cleaning out the freezer the other day and I found them…then- lightbulb!- realized I never shared them on the blog. So here we are.

blueberry cashew bars

Then, I almost couldn’t share them today because I upgraded my computer software yesterday (scariest thing ever) and I had to work out some kinks with iphoto (all the while patiently not freaking out!).

But, I got all that taken care of and I’m here to share this little frozen treat with you today!

I came up with these while looking for a way to use a random bag of cashews I bought a couple of months ago. I like cashews but don’t typically eat them just by themselves. I also had some extra wild blueberries after making these Wild Blueberry Ice Cream Sandwiches, so I did some googling and came across these and decided to try my own spin.

This was my first time soaking cashews to make any sort of filling, although I know it’s quite common. I’ll definitely be doing it again, though, because it worked quite well!  Hubby thought I was crazy, but I persevered!

Here’s how you make them:

Print

Blueberry Cashew Bars

blueberry cashew bars
Print Recipe

5 Stars 4 Stars 3 Stars 2 Stars 1 Star

5 from 2 reviews

A fun, frozen treat for summer!

  • Author: Author: Lindsay L
  • Yield: 9 1x

Ingredients

Scale
  • 11/2 cups raw cashews
  • 1/3 cup nut butter
  • 1/2 teaspoon vanilla extract
  • 1–2 Tablespoons honey (depending on sweetness preference)
  • 1/4 cup milk (cow, almond, soy, etc)
  • 2 cups raw almonds
  • 1 cup dates, pitted and chopped
  • 2 cups frozen wild blueberries
  • 2 Tablespoons honey
  • 2 Tablespons chia seeds

Instructions

  1. Place cashews in a bowl, cover with water and soak at least 4 hours or overnight.
  2. Drain water from cashews and place in a high powered blender or food processor with nut butter, vanilla, honey and milk.
  3. Blend until smooth and set aside.
  4. Place the almonds and dates in the food processor or blender and process until well combined.
  5. Press the date mixture into the bottom of a 9×9 pan.
  6. Top with cashew mixture and spread to make an even layer.
  7. Place in the freezer for 30 min.
  8. Meanwhile, combine blueberries, honey and chia seeds in a small saucepan.
  9. Bring to a boil, then reduce heat and let simmer for 10 minutes, using a fork or spatula to smash blueberries.
  10. Let mixture cool.
  11. Remove bars from freezer, spread blueberry layer on top and refreeze until solid.
  12. To serve, remove from freezer and let sit 10-15 minutes before cutting into squares.
  13. Store in the freezer.

Did you make this recipe?

Tag @theleangreenbean on Instagram

I think you could use regular blueberries to make these, you just might have to do a bit more smashing of the chia jam mixture for the top layer. Other fruits like blackberries, strawberries and raspberries would work well too!

blueberry cashew bars 2

This is kind of a taste as you go along recipe. For the cashew layer, start with 1 tablespoon of honey and taste after blending. If it’s not sweet enough for you, add a little more! I used peanut butter because I love the taste of blueberries and pb together. If you want a more subtle peanut butter flavor, decrease to 1/4 cup instead of 1/3.

blueberry cashew bars 4

Happy weekend!

Enjoy!
–Lindsay–

Filed Under: Dessert, Snack

ACE Brand Elastic Bandage

July 10, 2014 by Lindsay 22 Comments

This post was sponsored by ACE™ Brand. I was compensated for my time. All thoughts and opinions are 100% my own.

Hi Friends!

Let’s talk fitness today, shall we? More specifically, fitness injuries. I’ve been an athlete my whole life and I know that I’m quite lucky to be able to say I haven’t suffered a lot of major injuries. Sure, I’ve had my fair share of pulled muscles, shin splits, sprained ankles, etc…but as far as season-ending injuries, torn ligaments, broken bones and the like…they’ve been avoided.

That’s not to say I don’t have my fair share of aches and pains though. I have some shoulder issues from years of playing volleyball. I have a loose tendon in my wrist…so I always wear wrist wraps and I’ve had lower back/hip alignment issues for years which tend to flare up at inconvenient times. Plus, when I was front squatting about six months ago, it got too heavy and when I tried to bail out, I didn’t push the bar far enough forward, causing it to land on my knee and crush my ankle beneath it.

Serious enough for the doctor? Probably not. A nagging injury that has flared up occasionally over the past few months, requiring ice and rest? Yes.

ACE Brand
So, when ACE™ Brand reached out to me about trying their new ACE™ Brand Elastic Bandage with ACE Brand Clip, I jumped at the chance. Like I mentioned, I’m no stranger to sprained ankles. I think my count is at 5 or 6 between the two ankles, so I spent a fair amount of time in high school with my ankle wrapped and a big bag of ice. With the wraps I’ve used previously, you either tuck the end in to your wrap job or use those annoying little clips that I was constantly losing. With this new wrap, the clip is built in! And it’s strong enough that you can use the wrap to actually hold the bag of ice on the injury! My previous method was a) wrap the ankle b) apply the ice c) wrap with saran wrap to hold the bag in place. Not the most convenient.

Another reason I agreed to try this product is because the offer came right before hubby had his second shoulder surgery. Being that I’m somewhat of a pro now after having been through the same surgery with him last summer, I knew we’d be spending a lot of time with bags of ice on the shoulder, so I knew we’d be able to use the new wrap for that as well!

ACE Brand 1.jpg

Here are some product details:

  • The ACE™ Brand Clip can be adjusted on the fly and won’t snag your clothes. It also snaps in place easily and holds securely.
  • It provides customized support and compression and the bandage retains its elasticity after repeated use and washings.

————–

So, how did it work? Great! I tried it out on my ankle first. The instructions were easy to follow and I wrapped my ankle and wore it both around the house and while walking the dogs. I also put it to the test and wore it during a Crossfit workout. The clip stayed in place every time and never loosened.

I also wrapped it around a bag of ice and it was strong enough to hold it in place.

Finally, we tested it on hubby’s shoulder, using it to hold his bag of ice in place and again, it worked like a charm!

ACE2.jpg.jpg

If you’re looking for something to help with strains, sprains or just everyday aches and pains, I definitely recommend this product.


Let’s chat:

What’s the worst injury you’ve ever had?

For me? A pulled hip flexor. OMG so painful!

Enjoy!
–Lindsay—

Filed Under: Uncategorized

Summer Salsa

July 8, 2014 by Lindsay 43 Comments

This salsa is a delicious mix of fruits, vegetables and beans that’s delicious on chips, burgers, grilled meats and more!

Hi Friends!

Recipe time. Today I thought I’d share a fun little salsa recipe that I’ve been enjoying the past few weeks. When I hear salsa, I usually think tomatoes…but in the summer, with so much fresh produce around, sometimes it’s fun to think outside the box and push the limits of the term “salsa” a little bit!

This summer salsa combines fruits, veggies and beans and it’s fabulous with chips, on burgers or served over grilled chicken or pork!

This light, refreshing Summer Salsa is a delicious combination of fruit, avocado and beans and makes the perfect topping for grilled meat!

It’s basically a combination of all my favorite things about summer and I’m fairly certain I could eat it all day, every day!

Here’s how you make it:

Print

Summer Salsa

salsa 2
Print Recipe

5 Stars 4 Stars 3 Stars 2 Stars 1 Star

5 from 2 reviews

A fun summer twist on salsa that combines fruits, veggies and beans. Delicious over grilled meat or with chips!

  • Author: Author: Lindsay L
  • Prep Time: 5 minutes
  • Total Time: 5 minutes
  • Yield: 4 1x

Ingredients

Scale
  • 1 nectarine, diced
  • 1/2 cup strawberries, diced
  • 1/2 cup bell peppers, diced
  • 1/4 cup onion, diced
  • 1/2 cup avocado, diced
  • 1/2 cup corn (grilled is best!)
  • 1 cup black beans
  • juice from one lime
  • optional: jalapeno, cilantro

Instructions

  1. Combine all ingredients in a bowl and serve.
  2. Flavor deepens the longer it sits.

Did you make this recipe?

Tag @theleangreenbean on Instagram

Adding jalapeno is a great option if you want to add a little kick. Sub lemon juice for lime juice if you want!

This light, refreshing Summer Salsa is a delicious combination of fruit, avocado and beans and makes the perfect topping for grilled meat!
Feel free to sub in your fav fruits and veggies. Pineapple would be a delicious addition!

This light, refreshing Summer Salsa is a delicious combination of fruit, avocado and beans and makes the perfect topping for grilled meat!

Don’t you just wanna dive right in?!
This light, refreshing Summer Salsa is a delicious combination of fruit, avocado and beans and makes the perfect topping for grilled meat!

Enjoy!
–Lindsay–

Filed Under: Appetizer, Side Dish Tagged With: Avocado, Bell Pepper, Black Bean, Corn, Fruit

Wild Blueberry Ice Cream Sandwich

July 3, 2014 by Lindsay 28 Comments

Perfect for the 4th of July, these Wild Blueberry Ice Cream  Sandwiches require a few ingredients and are sure to be a hit at your holiday get-together!

This post is sponsored by The Wild Blueberry Association of North America. I was compensated for my time. All thoughts and opinions are my own. 

Hi Friends!

It’s time for another Wild Blueberry recipe! As you may recall, I’m working with Wild Blueberries this summer to develop some delicious recipes to share with you guys!

These red, white and wild blueberry ice cream sandwiches are the perfect 4th of July treat!

In case you missed my first post (Wild Blueberry Turkey Burgers), let’s recap some things you should know about Wild Blueberries. You can easily identify them because they’re smaller than regular blueberries and if you haven’t tried them yet, you should definitely look for them in the freezer section of your local grocery store!

Here are some things you should know about them:

  • Wild Blueberries have twice the antioxidants of regular blueberries.
  • Most are frozen right after picking, which helps lock in important nutrients and phytochemicals.
  • They’re Mother Nature’s original blueberry. They haven’t been modified to increase size or make them easier to ship.
  • Compared to regular blueberries, they have a more intense taste and color and they contain less water so they freeze better and are great for baking!
  • Research has shown potential benefits to humans in the areas of brain health, anti-aging, heart health, diabetes prevention, preventing UTIs and eye health.

These red, white and wild blueberry ice cream sandwiches are the perfect 4th of July treat!

So, if you haven’t picked up on it by now, I went with a 4th of July theme for this recipe. Growing up, 4th of July was always one of my favorite holidays. I loved it for several reasons:

  • It’s during the summer. Summer is my favorite.
  • There are fireworks. I’ve always loved watching the colors light up the sky.
  • Ice cream. It goes with 4th of July like cookies go with Christmas.

As you guys know, I haven’t felt the best during this pregnancy, but ice cream always sounds good! I wanted to give you guys an easy idea that you could make for your 4th of July gathering. These require just a few ingredients and they’re super fun and festive!

Here’s how you make them:

Print

Wild Blueberry Ice Cream Sandwich

wild blueberry ice cream sandwiches .jpg
Print Recipe

5 Stars 4 Stars 3 Stars 2 Stars 1 Star

No reviews

Perfect for the 4th of July but just as delicious any time of year!

  • Author: Author: Lindsay L
  • Yield: 12 1x

Ingredients

Scale
  • 1 box red velvet cake mix
  • 1/2 cup plain yogurt
  • 2 eggs
  • 3 cups vanilla ice cream (approximately)
  • 1 cup frozen Wild Blueberries (approximately)

Instructions

  1. Combine the cake mix, eggs and yogurt in a bowl, mixing well until all cake mix is moistened.
  2. Freeze for 30 minutes.
  3. Scoop onto greased cookie sheets and bake at 375 for 10 minutes (you should get 24 cookies.)
  4. Let cookies cool completely.
  5. Let ice cream soften slightly, then spread about 2 Tablespoons of ice cream on the bottom of a cookie.
  6. Top with about 1 Tablespoon of frozen Wild Blueberries.
  7. Add another 1-2 Tablespoons of ice cream on top of blueberries and top with another cookie (bottom side down).
  8. Repeat with remaining cookies until you have 12 ice cream sandwiches.
  9. Store in the freezer, let thaw for 5-10 minute before serving.

Did you make this recipe?

Tag @theleangreenbean on Instagram

Aren’t they pretty?!

These red, white and wild blueberry ice cream sandwiches are the perfect 4th of July treat!

Like I mentioned in the recipe, you could go above and beyond and make your own red velvet cookies from scratch if you wanted to. Or you could take the even easier route and serve them open faced for easier assembly.

These red, white and wild blueberry ice cream sandwiches are the perfect 4th of July treat!

If you’re reading this and it’s not the 4th of July, don’t feel like you have to use red velvet cookies. Choose your favorite cookie recipe and go to town. Wild Blueberries go great with pretty much anything 🙂

Let’s chat:

What are your plans for the 4th?

Enjoy!
–Lindsay–
PS. Can I just say that trying to photograph RED cookies, Wild BLUEberries and WHITE ice cream is one of the hardest things I’ve ever done?! The photo shoot may or may not have taken me all afternoon 🙂

Filed Under: Dessert, Sponsored

17 Recipes for Summer Fruits and Vegetables

July 1, 2014 by Lindsay 15 Comments


Hi Friends!

This month, the theme I chose was “Fresh Recipes for Summer Fruits & Vegetables”. Pretty much right up my alley, right?! As an RD I’m constantly encouraging people to eat more fruits and veggies and summer is one of the best times to take advantage of local produce. The problem is, sometimes you might go a little crazy at the farmer’s market or get something in your CSA that you’re just not quite sure what to do with.

This is a roundup of 17 delicious ways you can prepare those summer fruits and vegetables! What do you think? See anything that caught your eye?

Have a surplus of summer produce from your garden or the farmer's market? Here are 17 Recipes for Summer Fruits + Veggies

Let’s chat: What’s your fav summer recipe?! Leave me a link!

Enjoy!
–Lindsay–

Filed Under: Sponsored, Uncategorized

Foodie Penpals Reveal Day with From Everyday to Gourmet

June 30, 2014 by Lindsay 16 Comments

Hi Friends!

Time for another Foodie Penpals Reveal day!

FPP-post

After taking a few months off myself, I rejoined this month and am so glad I did. I was matched with Lauren at From Everyday to Gourmet, an awesome foodie blogger from Texas. She sent me an amazing package and she seriously put my packaging skills to shame. Everything was wrapped up so nicely. I loved it!

Here’s what I got:

junefpp1.jpg

She told me not to laugh at all the stamps on the box, but I had to chuckle 🙂 Apparently she found a bunch of stamps she bought several years ago and is trying to use them up.

Let’s take a closer look at the goodies:

junefpp.jpg

1. Treats for the boys
2. Flavored nuts! So delicious.
3. Apple Bourbon Cinnamon Jam – doesn’t that name just leave you drooling?!
4. Homemade toffee cookies. OMG. So good. Inhaled them.
5. Beanitos – a fun change from regular chips
6. Salsa – always a hit in our house!

Thanks so much for the amazing package Lauren!

Here’s some details about FPP in case you want to join in for July:

-On the 5th of every month, you will receive your penpal pairing via email. It will be your responsibility to contact your penpal and get their mailing address and any other information you might need like allergies or dietary restrictions.
-You will have until the 15th of the month to put your box of goodies in the mail. On the last day of the month, you will post about the goodies you received from your penpal! 
-The boxes are to be filled with fun foodie things, local food items or even homemade treats! The spending limit is $15. The box must also include something written. 
-Foodie Penpals is open to blog readers as well as bloggers. 
-Foodie Penplas is open to US, Canadian & European residents.  Please note, Canadian Residents will be paired with other Canadians only. Same with Europeans.  

If you’re from the US or Canada and are in participating for March, please CLICK HERE to fill out the participation form and read the terms and conditions. 

You must submit your information by July 4th as pairings will be emailed on July 5th!

If you participated this month, link up below and go check out a few other posts to see what they got!

Enjoy!
–Lindsay–



Filed Under: Uncategorized

Grilled Stuffed Mushrooms

June 26, 2014 by Lindsay 22 Comments

These Grilled Stuffed Mushrooms are the perfect appetizer!

Hi Friends!

When I was in Chicago last weekend, my mom told me she never thought she’d see the day that my hubby would buy a gas grill…but that she thought it was probably one of the best investments we could have made, especially with the baby coming.

My in-laws are total charcoal grillers…and that’s what my hubby grew up with. I grew up with a gas grill but never really used it myself. When we moved into our house, we found someone giving away a charcoal grill for free in our neighborhood and that was that. We definitely got some use out of it…but probably not as much as we could have.

Now that we’ve had our gas grill for a couple of weeks now, I’m realizing that even you don’t get quite the same grill flavor, it was definitely worth the money. I rarely lit the charcoal grill because it was such a hassle…but this one is so easy! We’re finding ourselves using it several times a week. It’s just as easy as turning on the oven…and more fun in my opinion 🙂

These Grilled Stuffed Mushrooms make a fun summer appetizer!

So far this week we’ve made cedar plank salmon, chicken and stuffed mushrooms on the grill! Today we’re going to talk about the mushrooms. These little guys were all Mr. Bean’s idea! We actually made them on a cedar plank, but we didn’t soak it very long so they picked up a pretty strong cedar flavor. If you’re not into that, soak the board longer or just buy the larger “stuffer” portobello mushrooms like we did and you can put them right on the grill racks!

Here’s the recipe:

Print

Grilled Stuffed Mushrooms

mushroom1
Print Recipe

5 Stars 4 Stars 3 Stars 2 Stars 1 Star

5 from 2 reviews

An easy weeknight dinner on the grill!

  • Author: Author: Lindsay L
  • Prep Time: 10 minutes
  • Cook Time: 20 minutes
  • Total Time: 30 minutes
  • Yield: 3-4 1x

Ingredients

Scale
  • 1 pound grass-fed ground beef (turkey or chicken would also work!)
  • 1/3 cup panko breadcrumbs
  • 2 cloves garlic, minced
  • 1/2 cup onion, diced
  • 1 tsp paprika
  • 1 Tbsp brown mustard
  • 1 Tbsp worcesterchire sauce
  • black pepper to taste
  • 12 “stuffer” sized portobello mushrooms (or more small mushrooms)
  • gouda cheese for topping, optional

Instructions

  1. Combine all ingredients except the mushrooms in a bowl and mix well to combine.
  2. Remove the stems from the mushrooms and scoop out some of the innards to make a nice mushroom cup.
  3. Spoon beef mixture into mushrooms, pressing it firmly into place.
  4. Cook on the grill over medium heat for 20 minutes or beef is cooked through.
  5. A few minutes before they’re done, top each with a small square of Gouda cheese if desired.

Did you make this recipe?

Tag @theleangreenbean on Instagram


You can customize this recipe if you’d like by adding different spices, extra veggies, etc.

These Grilled Stuffed Mushrooms make a fun summer appetizer!

Feel free to use ground turkey or chicken if beef isn’t your thing!

These Grilled Stuffed Mushrooms make a fun summer appetizer!

Let’s chat: Are you a gas grill or charcoal grill lover?

Enjoy!
–Lindsay–

Filed Under: Appetizer, Dinner, Side Dish Tagged With: Egg, Ground Beef, Ground Turkey, Mushroom, Panko

My Favorite Ways To Eat Almonds

June 24, 2014 by Lindsay 43 Comments

This post is sponsored by The Almond Board of California. They are sponsoring my travel to Fitbloggin. All thoughts and opinions are my own.

Hi Friends!

As some of you may know, Fitbloggin is coming up this weekend! Fitbloggin is a blogging conference for those interested in fitness, wellness and an overall healthy lifestyle. I’ve never been and I’m excited to be able to go this year! I’m actually only going to be there for the second day of the conference since we weren’t sure what hubby’s shoulder surgery situation was going to be when I made my travel arrangements and I didn’t want to leave him to fend for himself for too long. BUT it will still be a great experience. My trip is being sponsored by The Almond Board of California and I’m so grateful for their support! I actually get to hang out in their booth on Saturday during the expo and chat nutrition with all the attendees (so make sure to stop by if you’re going to be there!) and then Saturday night I’m part of a pro-blogger speaking panel where we’ll be talking a little bit about blogging and then answering lots of audience questions which will be fun! I’m speaking with Katy, Shannon & Leah and Erica is moderating.

Today I thought I’d spend a little time spreading the almond love by sharing some of my favorite ways to eat almonds, in all their various forms!

Looking to add more healthy fats to your diet? Try Almonds- one of my favorite nuts! Here are several ways you can eat them including for a snack, dinner or in your gluten free baked goods

But first, let’s recap why almonds are so awesome! In one serving of almonds (1 oz), which amounts to 23 whole almonds, there is:

  • 6g protein
  • 4g fiber
  • 9g monounsaturated fat –*One serving of almonds contain 13g of unsaturated fat and 1g of saturated fat. 
  • Vitamin E (35% DV) – important antioxidant that helps protect cells from damage & promote healthy skin and hair
  • Riboflavin (20% DV) – important for red blood cell production
  • Magnesium (20% DV) – helps regulate muscle & nerve function, blood sugar levels and blood pressure
  • Phosphorus (15% DV) – helps build strong bones & teeth
  • Plus calcium, potassium, niacin and iron

That’s a whole lot of goodness packed into these little nuts!

So, how can you add more almonds to your diet? Here are some of my favorite ways to eat them:

Whole Almonds

Looking to add more healthy fats to your diet? Try Almonds- one of my favorite nuts! Here are several ways you can eat them including for a snack, dinner or in your gluten free baked goods

Homemade Trailmix

Current fav flavor combo:
Raw almonds + pumpkin seeds + roasted chickpeas +raisins

Looking to add more healthy fats to your diet? Try Almonds- one of my favorite nuts! Here are several ways you can eat them including for a snack, dinner or in your gluten free baked goods

Sweet & Spicy Almonds

This lightened up version is perfect for snacking,
but also sweet enough to work as a dessert!
They’re also HIGHLY addictive.
I posted this recipe at the beginning of the year-
CLICK HERE to check it out.

—————-

Almond Butter

Looking to add more healthy fats to your diet? Try Almonds- one of my favorite nuts! Here are several ways you can eat them including for a snack, dinner or in your gluten free baked goods

Current fav flavor combo:
Homemade Honey Vanilla Cinnamon

2 cups raw almonds +1 tsp honey + 1/2 tsp cinnamon + 1/2 tsp vanilla
Place in high powered blender or food processor.
Process until smooth.
Taste and add more honey, cinnamon or vanilla if desired.


Looking to add more healthy fats to your diet? Try Almonds- one of my favorite nuts! Here are several ways you can eat them including for a snack, dinner or in your gluten free baked goods

No-Bake Granola Bars

Combine 1 cups rolled oats + 1 cup cereal + 1/4 cup pumpkin seeds + 1/4 cup chopped almonds + 1/4 cup chocolate chips + 2 Tbsp chia seeds in a large bowl.
Melt 1/2 cup almond butter + 1/3 cup honey and mix well.
Add wet to dry, mix until well coated (use your hands if you have to).
Dump into a 9×9 inch pan, press to flatten and cover bottom.
Freeze for 30 minutes, cut into bars and enjoy.
Store in the fridge.

—————

Almond Milk

Looking to add more healthy fats to your diet? Try Almonds- one of my favorite nuts! Here are several ways you can eat them including for a snack, dinner or in your gluten free baked goods

{Photo Source}

Homemade Almond Milk

It’s SO easy to make yourself…
and then you don’t have to worry about any funky additives.
CLICK HERE for the super simple recipe.
Try adding it to your cereal, coffee, smoothies, etc.

Looking to add more healthy fats to your diet? Try Almonds- one of my favorite nuts! Here are several ways you can eat them including for a snack, dinner or in your gluten free baked goods

{Photo source}

Peach Blackberry Smoothie

The Almond Board has tons of great recipes on their website.
I made this smoothie the other day.
It’s basically everything good about summer in one glass.
CLICK HERE for the recipe.
Bonus- it uses almond milk AND almond butter!

——————

Almond Meal

Looking to add more healthy fats to your diet? Try Almonds- one of my favorite nuts! Here are several ways you can eat them including for a snack, dinner or in your gluten free baked goods

Gluten-Free Blueberry Muffins

These are made with sweet potatoes, almond meal and lots of blueberries!
They make a great pre-workout snack.
I posted this recipe back in December-
CLICK HERE to check it out!

 Looking to add more healthy fats to your diet? Try Almonds- one of my favorite nuts! Here are several ways you can eat them including for a snack, dinner or in your gluten free baked goods

Almond-Crusted Chicken Tenders

Mix 1 cup almond meal with your favorite spices.
I used paprika, garlic powder, black pepper & cayenne.
*Tip- make your own by simply pulsing
whole almonds in the blender or food processor*
Cut 1 pound of chicken breasts into tenders (or use store bought).
Dip tenders in egg wash, then press into almond meal mixture.
Set a wire cooling rack on a baking sheet.
Place the chicken tenders on the rack.
Bake at 400 degrees F for 20 minutes.

 —————

A few other suggestions:

  • Add some sliced almonds to your next batch of muffins.
  • Toast some slivered almonds and sprinkle them on your salad.
  • Enjoy an apple with a side of almond butter for an afternoon snack.

Let’s chat:

What’s your favorite way to enjoy almonds?

Enjoy!
–Lindsay–
Filed Under: Snack, Sponsored

Sweet and Spicy Sweet Potato Wedges

June 19, 2014 by Lindsay 26 Comments

These Sewet and Spicy Sweet Potato Wedges are dusted with a mix of cinnamon, cayenne pepper and a little sugar. They’re sure to be a hit with your family!

This post is sponsored by Pompeian. I was compensated for my time. All thoughts and opinions are my own. 

Hi Friends!

As you guys know, I’m part of the Pompeian Insider Program and am creating some recipes using their products (like this Strawberry Balsamic Dressing!) This month, as part of the program, we got to do something kinda cool – we attended a virtual olive oil tasting and then we got to choose one of the oils to use in our next recipe.

Sweet & Spicy Sweet Potato Wedges

Pompeian sent us this little tasting kit…which I took some nice pictures of and then accidentally deleted. But I borrowed one from Christine so you can get the idea:

Olive-Oil-Tasting-2-edit-tall-600px

{Photo Source}

For the tasting itself, we Google Hangout/webcast with Dr. Luisito Cercaci. He took us through each of the six different oils and taught us a little bit about what makes them unique, what they’re best used for and how to taste them/what we should be tasting for. Basically, we poured a little bit into a tasting cup and then swirled the cup around in our hands to help warm the oil a little bit and activate the flavor compounds. Then we smelled it and then tasted it, before spitting it back out. 

Olive oil has to undergo rigorous chemical tests for quality and flavor…and did you know that the color of the oil is fairly insignificant? That’s why they gave us blue cups…because color should impact judgment.

First we tried 3 more traditional varieties and then 3 Extra Virgin Premium Varieties. It was interesting to taste the differences between them. Some were very mild, typically used in more delicate dishes that include vegetables or fish…and some were more pungent and are better used with meats and in sauces where a stronger flavor is desired.

I decided to use the Arbequina variety, which was very mild, sweet and fresh. It wasn’t super bitter or pungent and even had a bit of a green almond flavor. I decided I wanted my recipe to be vegetable based so I thought this would be perfect because it would allow other flavors to come through and not be overpowering.

Sweet & Spicy Sweet Potato Wedges

I’m typically a french fry kinda girl and I tend to stay away from wedges, but these were SO good. Plus, cutting them into wedges is much easier and quicker than cutting into small little fries. I keep hearing about how people toss their sweet potato fries in cornstarch to get them crispier. I did that with the first batch of these and honestly didn’t like it. It left a bit of a weird coating on the outside, so for batch #2 I just used the seasonings themselves and they tasted great!

These wedges are not crispy, but you get the nice roasted outside to give you a little crunch and then a perfectly soft inside!

Here’s how you make them:

Print

Sweet and Spicy Sweet Potato Wedges

sweet potato wedges 1.jpg
Print Recipe

5 Stars 4 Stars 3 Stars 2 Stars 1 Star

No reviews

The perfect balance of sweet and spicy, these wedges make a great dinner side dish!

  • Author: Author: Lindsay L
  • Prep Time: 5 minutes
  • Cook Time: 40 minutes
  • Total Time: 45 minutes
  • Yield: 4 1x

Ingredients

Scale
  • 1 pound sweet potatoes (approximately 2 medium)
  • 1 Tablespoon Pompeian Arbequina Olive Oil
  • 1 teaspoon cinnamon
  • 1 teaspoon sugar (more if desired)
  • 1/4 – 1/2 teaspoon cayenne pepper

Instructions

  1. Preheat oven to 425 degrees F.
  2. Cut each sweet potato in half crosswise and lengthwise.
  3. Cut each section into 4-5 wedges.
  4. Place wedges in a large bowl, add oil and toss to coat.
  5. Mix cinnamon, sugar and pepper together in a small bowl.
  6. Add half the spice mixture to the potatoes and toss to coat.
  7. Add remaining spice mixture and toss again.
  8. Place wedges on a baking sheet and bake for 35-40 minutes, flipping every 10 minutes.

Did you make this recipe?

Tag @theleangreenbean on Instagram

Feel free to adjust the spices to your liking, making them spicier or sweeter if you want to. The sugar starts to caramelize a little bit, which is delicious and then you get hit with a hint of spice. So good.

Sweet & Spicy Sweet Potato Wedges

Serve these plain, or with ketchup (or your favorite dipping sauce!).

Enjoy!
–Lindsay–
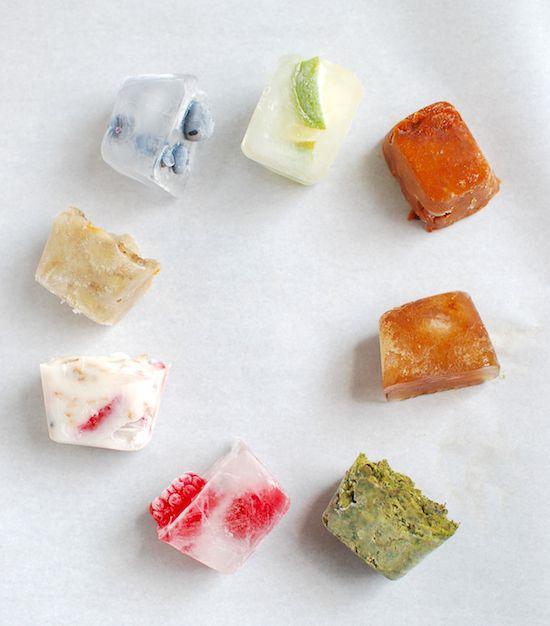
Filed Under: Side Dish, Sponsored Tagged With: Sweet Potato

Enchilada Cups

June 17, 2014 by Lindsay 32 Comments

A fun twist on the traditional enchilada. These would make the perfect appetizer and are also kid-friendly.

Hi Friends!

Last week I saw these Mini Tortilla Crust Pizzas on Healthy Aperture and I absolutely could not get them out of my head. Seriously, I thought about them all weekend…and then finally, yesterday, I decided to make my own version for lunch. Since you guys know we’re crazy about Mexican food around here, I opted for an enchilada version instead. Holy delicious!

enchilada cups

These Enchilada Cups are all the deliciousness of an enchilada, but in miniature form. They’d be a perfect party appetizer because they can be eaten in just a few bites. I’d also venture a guess they’d be a hit with the kiddos.

enchilada cups

You have a couple of options here. You can do what I did and bake the filling in the cups. This will result in a softer shell, but they’re fine as long as you eat them right after you make them. If you’re looking for a bit of a crisper shell, you could bake the shells first, then warm the filling separately and just stick them under the broiler for a minute or two to melt the cheese. Totally up to you!

Here’s what you do:

Print

Enchilada Cups

enchilada cups .jpg
Print Recipe

5 Stars 4 Stars 3 Stars 2 Stars 1 Star

No reviews

A simple appetizer or an easy weeknight meal that the kids will love!

  • Author: Author: Lindsay L
  • Prep Time: 10 minutes
  • Cook Time: 10 minutes
  • Total Time: 20 minutes
  • Yield: 2 1x

Ingredients

Scale
  • 2 whole wheat tortillas (8 or 9 inch), storebought or
  • make your own
  • 1/4 cup onion, diced
  • 1/4 cup bell pepper, diced
  • 1/2 cup (heaping) black beans, cooked
  • 1/2 cup (heaping) cooked chicken, diced
  • 2 Tablespoons fresh cilantro, minced
  • 1/3 cup enchilada sauce
  • 1/4 cup shredded cheese
  • -optional toppings: avocado, tomato, etc.

Instructions

  1. Preheat oven to 400 degrees.
  2. Place the tortillas on a flat surface.
  3. Press a pint glass into the tortilla to make a circle imprint, then use the tip of a knife to cut out the circle. Repeat 8 times, 4 per tortilla. (You could also use a cookie cutter)
  4. Microwave the circles for 7-10 seconds then press into greased muffin tins.
  5. In a small bowl, combine remaining ingredients.
  6. Spoon mixture into tortilla cups and top with cheese.
  7. Bake for 10 minutes.
  8. Carefully remove from muffin tins and serve warm.

Did you make this recipe?

Tag @theleangreenbean on Instagram

This is a fairly simple recipe. I gave you quantities, but they are not exact. You could easily double or triple the recipe, sub things in and out, etc. The number of cups you make will depend on how full you fill them.

enchilada cups

I’m pretty sure I had 8 inch tortillas and I used a pint glass as my circle tracer. If you’re very careful, you can get 4 cups per tortilla. You could also use larger tortillas and obviously get more circles out of each one.

tortilla

To use up the tortilla scraps, I just cut them up and threw them in the empty muffin tins with a little olive oil and bam- tortilla chip type things!

chips

Feel free to top with avocado, salsa, etc if you desire!

enchilada cupsenchilada cups

Enjoy!
–Lindsay–
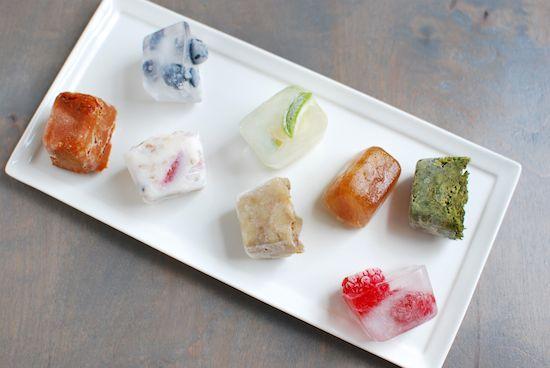
 

Filed Under: Appetizer, Dinner Tagged With: Bell Pepper, Black Bean, Cheese, Chicken, Onion, Tortilla

  • « Go to Previous Page
  • Page 1
  • Interim pages omitted …
  • Page 39
  • Page 40
  • Page 41
  • Page 42
  • Page 43
  • Interim pages omitted …
  • Page 65
  • Go to Next Page »

Primary Sidebar

Lindsay Livingston The Lean Green Bean Healthy Living Tips and Tricks

I'm a Registered Dietitian and mom of three from Columbus, Ohio. I use this blog to share simple, healthy recipes, nutrition tips, and an honest glimpse of motherhood!

Learn More →

Questions? Comments? Email me: [email protected]

The Lean Green Bean Facebook The Lean Green Bean Instagram The Lean Green Bean Pinterest The Lean Green Bean Twitter The Lean Green Bean Feed
footer-logo
The Lean Green Bean Facebook The Lean Green Bean Instagram The Lean Green Bean Pinterest The Lean Green Bean Twitter The Lean Green Bean Feed
Recipes

Breakfast
Dinner
Snack
Slow Cooker

Kids

Cooking With Kids
Favorite Gifts
Toddler Meals
Indoor Activities

Resources

Easy Packed Lunches for Kids
Dinner Spark
Snack Spark
Ultimate Guide to Food Prep

About

Meet Lindsay
Become an RD
Work with Me

The Lean Green Bean is a participant in the Amazon Services LLC Associates Program, an affiliate advertising program designed to provide a means for sites to earn advertising fees by advertising and linking to amazon.com.
Read the full privacy and disclosure policy here.

Copyright © 2022 · The Lean Green Bean

table talk series

Learn how food affects your body.

Get my free Table Talk email series where I share bite-sized nutrition information about carbs, protein, and fat, plus bonus information about snacks and sugar!

[email protected]