• Skip to main content
  • Skip to primary sidebar

Learn how food affects your body. Get Free Nutrition Info Today

the-lean-green-bean-logo
  • Home
  • Recipes
  • Kids
  • Resources
    • Ebooks
    • Food Prep
    • Videos
    • Snack Round-Ups
    • Gift Guides
  • About
    • Become An RD
    • Work With Me
  • Search
the-lean-green-bean-logo
  • Home
  • Recipes
  • Kids
  • Resources
    • Ebooks
    • Food Prep
    • Videos
    • Snack Round-Ups
    • Gift Guides
  • About
    • Become An RD
    • Work With Me
  • Search

blog

Wild Blueberry Turkey Burgers

June 12, 2014 by Lindsay 42 Comments

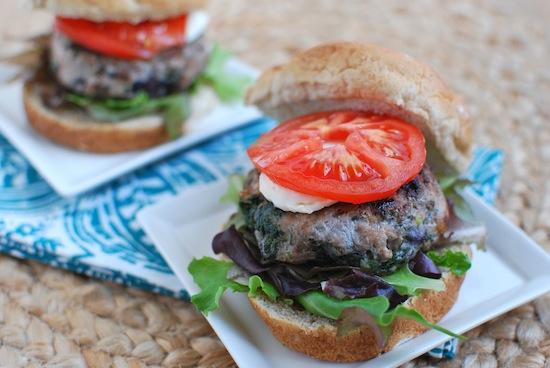
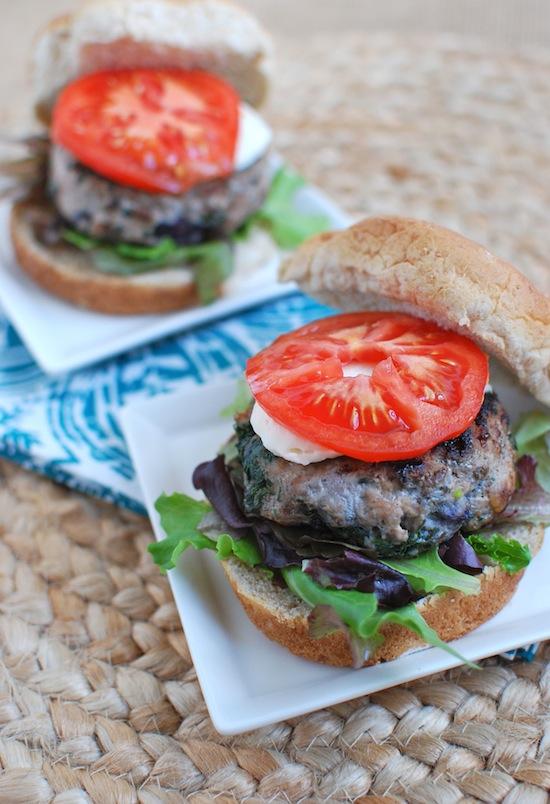
These Wild Blueberry Turkey Burgers are lower fat than traditional beef burgers & perfect for summer grilling. These burgers are the perfect balance of salty and sweet and full of flavor in each bite!

This post is sponsored by the Wild Blueberry Association of North America. I was compensated for my time. All thoughts and opinions are my own.

Hi Friends!

Happy Thursday. Today I’m excited to announce that I’m teaming up with the Wild Blueberry Association of North America this summer as an ambassador to bring you some delicious recipes using Wild Blueberries!

Take your summer grilling to the next level with these Wild Blueberry Turkey Burgers. These healthy burgers are packed with antioxidants and flavor!

Let’s chat a little bit about Wild Blueberries shall we? Did you know that they’re different from regular blueberries? You can easily identify them by their smaller size and if you haven’t tried them yet, you should definitely look for them in the freezer section of your local grocery store!

Here are some things you should know about them:

  • They’re antioxidant superstars! Wild Blueberries have twice the antioxidants of regular blueberries.
  • They’re frozen right after picking to lock in important nutrients and phytochemicals.
  • They grow naturally in fields in Maine, eastern Canada and Quebec.
  • They’re Mother Nature’s original blueberry. They haven’t been modified to increase size or make them easier to ship.
  • Compared to regular blueberries, they have a more intense taste and color and they contain less water so they freeze better and are great for baking!
  • They’re packed with antioxidants include anthocyanin which has anti-inflammatory properties.
  • Research has shown potential benefits to humans in the areas of brain health, anti-aging, heart health, diabetes prevention, preventing UTIs and eye health.

Over the next few months I’m going to share several recipes with you that use Wild Blueberries. This month we’re kicking things off with a recipe that’s perfect for the grill! I shared this recipe on the Wild Blueberry Association blog yesterday, and now I’m excited to share it with you guys!

Take your summer grilling to the next level with these Wild Blueberry Turkey Burgers. These healthy burgers are packed with antioxidants and flavor!

It’s been a long winter, but summer is finally here and in my family, warm weather means grilling season. Our summers are filled with lots of family gatherings, outdoor activities and delicious food.

Aside from Memorial Day, which tends to always be a little iffy weather-wise here in Ohio, Father’s Day is typically the first holiday where families can get together and celebrate both the wonderful men in their lives AND the start of summer weather!

I don’t know about you guys, but when we get together as a family, we almost always light up the grill! Plain old burgers and brats are cookout staples, but in my opinion they can get a little boring. So, I’m always looking for fun ways to jazz things up on the grill.

These turkey burgers are far from boring. They’re moist and juicy thanks to the spinach and the sweet Wild Blueberries perfectly complement the salty bacon and feta, while also adding a dose of powerful antioxidants!

So this Father’s Day, give your dad a break. Let him sit back and relax while you take over the grill and make him a burger he’ll never forget!

Print

Wild Blueberry Turkey Burgers

wild blueberry turkey burgers.jpg e1402535269968
Print Recipe

5 Stars 4 Stars 3 Stars 2 Stars 1 Star

4.5 from 2 reviews

A healthy, juicy burger that’s the perfect combination of sweet and salty!

  • Author: Author: Lindsay L
  • Prep Time: 10 minutes
  • Cook Time: 10 minutes
  • Total Time: 20 minutes
  • Yield: 4 1x

Ingredients

Scale
  • 1 pound ground turkey
  • 2 cloves garlic, minced
  • 1/2 cup Wild Blueberries (frozen is fine)
  • 5 ounces frozen, chopped spinach (defrosted and squeezed to remove water)
  • 2 strips bacon, cooked and chopped
  • 1/4 cup crumbled feta cheese, optional (can omit & top with cheese)
  • freshly ground black pepper, to taste

Instructions

  1. Combine all ingredients in a large bowl, mixing with your hands until combined.
  2. Form into 4 patties, making sure to form an indent in the top with your thumbs.
  3. Cook in a hot pan or on a grill until internal temperature reaches 165 degrees, flipping occasionally.
  4. Top with lettuce, tomato, cheese, mustard or other toppings as desired.

Did you make this recipe?

Tag @theleangreenbean on Instagram

Aren’t they pretty? I didn’t have feta when I made these so I topped them with fresh mozzarella…but next time I make them, I’m definitely adding the feta.

Take your summer grilling to the next level with these Wild Blueberry Turkey Burgers. These healthy burgers are packed with antioxidants and flavor!

Enjoy!

–Lindsay–
Filed Under: Dinner, Sponsored Tagged With: Blueberry, Feta, Garlic, Ground Turkey, Spinach

Peach Cobbler Smoothie

June 11, 2014 by Lindsay 24 Comments

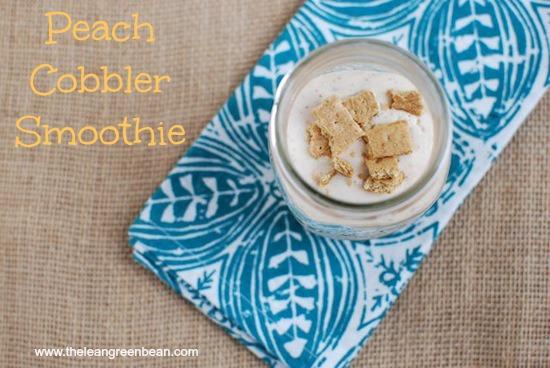
This Peach Cobbler Smoothie is packed with protein thanks to the cottage cheese. It’s sweet enough for dessert and healthy enough for breakfast or a snack!

Hi Friends!

Just popping in with a quick, simple recipe for you guys. As you may recall, I’m not much of a cottage cheese eater. It’s a texture thing…like I’m sure it is for a lot of people. However, when I made my Sweet Potato Protein Pancakes last month, I couldn’t help but notice how nicely all the little chunks disappear when you put it it in a blender! Since then I’ve been meaning to try it in a smoothie for a protein boost, but just haven’t gotten around to it.

Yesterday I needed a quick snack. I’ve been thinking about peaches pretty much non-stop ever since Kylie posted this recipe and I got my first peaches of the season at the store the other day, so I decided to put a dessert spin on my smoothie.

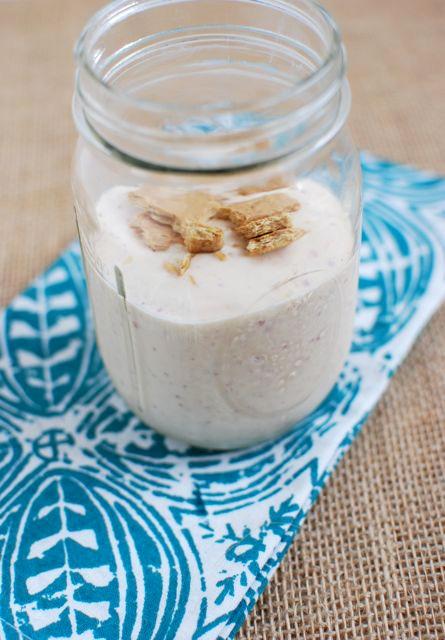
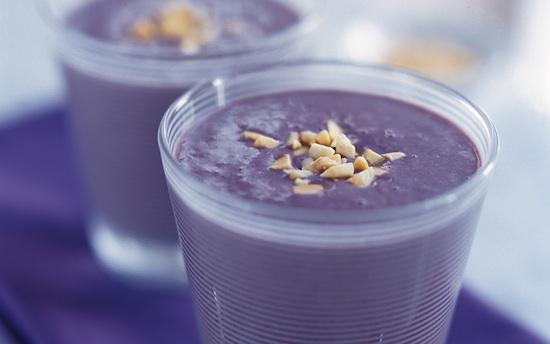
This Peach Cobbler Smoothie is like dessert in a glass. Packed with protein thanks to the cottage cheese, you're just 4 ingredients away from a delicious snack!

And just like that, the Peach Cobbler Smoothie was born.

Here’s what you do:

Print

Peach Cobbler Smoothie

peach cobbler smoothie.jpg
Print Recipe

5 Stars 4 Stars 3 Stars 2 Stars 1 Star

5 from 1 review

A drinkable dessert that’s healthy enough for breakfast or a snack!

  • Author: Author: Lindsay L
  • Prep Time: 2 minutes
  • Total Time: 2 minutes
  • Yield: 1 1x

Ingredients

Scale
  • 1/2 cup cottage cheese
  • 1 peach, fresh or frozen
  • 2 graham crackers
  • Ice

Instructions

  1. Put the ingredients in a blender and run until smoothie. You’ll need more ice if you’re using fresh peaches.
  2. It’s up to you whether to put both graham crackers in the smoothie or save one to crumble on top.

Did you make this recipe?

Tag @theleangreenbean on Instagram

I like to eat my smoothies with a spoon, so I put one graham cracker in the blender and crumbled the other into the smoothie so I could scoop up smoothie and crumbles in every bite.

This Peach Cobbler Smoothie is like dessert in a glass. Packed with protein thanks to the cottage cheese, you're just 4 ingredients away from a delicious snack!

If you’re just not a cottage cheese fan, try this with Greek yogurt! I had this for an afternoon snack, but you could also add it to your breakfast menu or whip one up for dessert!

Enjoy!
–Lindsay–
Filed Under: Breakfast, Dessert, Snack

Healthy Peanut Butter Oatmeal Cookies

June 10, 2014 by Lindsay 49 Comments

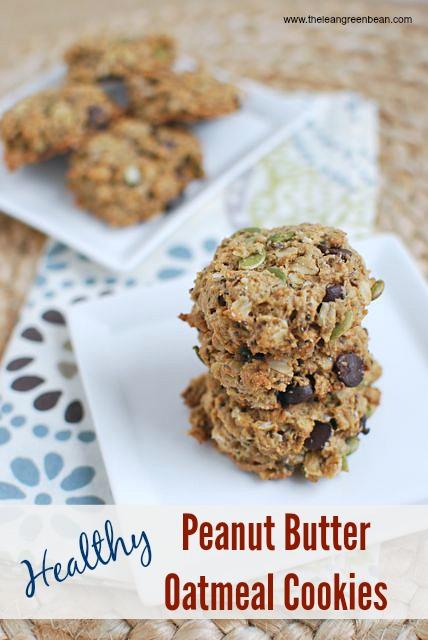
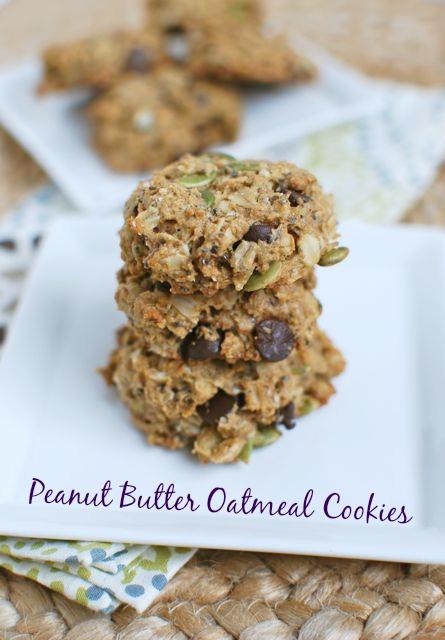
These Healthy Peanut Butter Oatmeal Cookies are packed with healthy fats from nuts and seeds and fiber from oats and whole wheat flour. The perfect way to satisfy your dessert craving!

Hi Friends!

Let’s talk cookies today, shall we? Sometimes you just need a good cookie…am I right?! I’m all for indulging in more “traditional” cookies every once and while. But I also like playing around with recipes and trying to make them healthier.

With the big surgery tomorrow, a batch of cookies seemed pretty much necessary to me. Yes- I am a stress-baker.

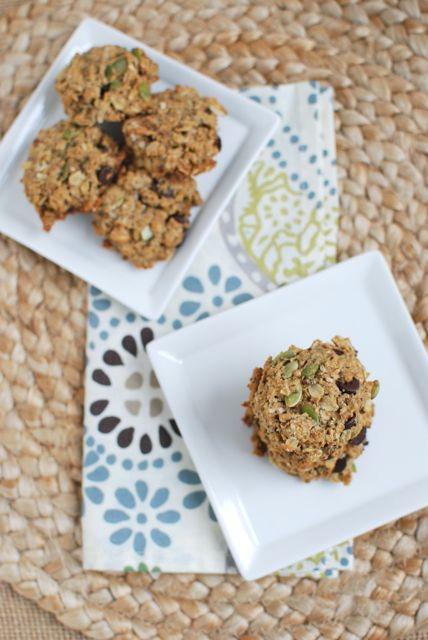
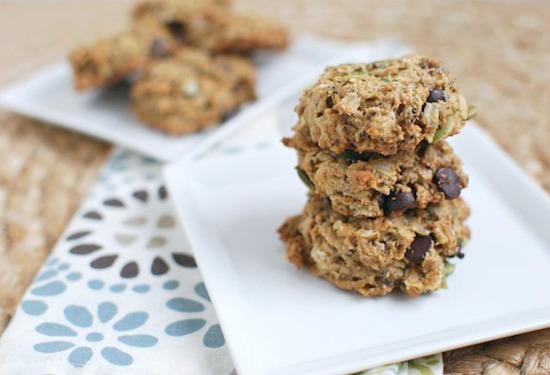
These Healthy Peanut Butter Oatmeal Cookies are packed with healthy fats from nuts and seeds and fiber from oats and whole wheat flour. The perfect way to satisfy your dessert craving!
A few weeks ago I was in the mood for an oatmeal cookie. I love adding peanut butter to cookies and since I’m a huge fan of mix-ins….I had some fun with those as well. I’ve made several batches of these and finally got what I was looking for. They’re not super sweet…but they’re packed with healthy ingredients and still feel like a treat.

These Healthy Peanut Butter Oatmeal Cookies are packed with healthy fats from nuts and seeds and fiber from oats and whole wheat flour. The perfect way to satisfy your dessert craving!

I’ve also made these with Greek yogurt instead of butter. It’s pretty amazing how differently they turn out- the yogurt batch is much more moist and cake-like. I stored my yogurt batch in a tupperware with the lid not sealed- otherwise they’re too moist and they’ll get moldy. You could also store them in the fridge. With the butter version you don’t have to worry about it.

Here’s the recipe:

Print

Healthy Peanut Butter Oatmeal Cookies

healthy peanut butter oatmeal cookies.jpg
Print Recipe

5 Stars 4 Stars 3 Stars 2 Stars 1 Star

4.3 from 6 reviews

A tasty oatmeal cookie that’s lower in sugar and full of healthy add-ins!

  • Author: Author: Lindsay L
  • Prep Time: 5 minutes
  • Cook Time: 10 minutes
  • Total Time: 15 minutes
  • Yield: 2 1x

Ingredients

Scale
  • 4 Tablespoons unsalted butter *
  • 1/2 cup peanut butter
  • 1/4 cup brown sugar, loosely packed
  • 1 teaspoon vanilla extract
  • 2 large eggs
  • 3/4 cup white whole wheat flour
  • 11/2 cups rolled oats
  • 1/2 teaspoon baking soda
  • 1 teaspoon cinnamon
  • 2 Tablespoons chia seeds
  • 1/3 cup pumpkin seeds
  • 1/3 cup dark chocolate chips

Instructions

  1. Preheat oven to 375 degrees.
  2. In a large bowl, melt the butter and peanut butter. Stir well to combine.
  3. Add the sugar, vanilla and eggs and mix well.
  4. Add remaining ingredients and stir until just mixed.
  5. Drop onto greased cookie sheet and flatten with fork (if desired).
  6. Bake for 9-10 minutes.

Did you make this recipe?

Tag @theleangreenbean on Instagram

Like I mentioned in the notes, this recipe makes about 2 dozen cookies. If you make them mini, you’ll get about 3 dozen. That’s what I did here.

peanut butter oatmeal cookies

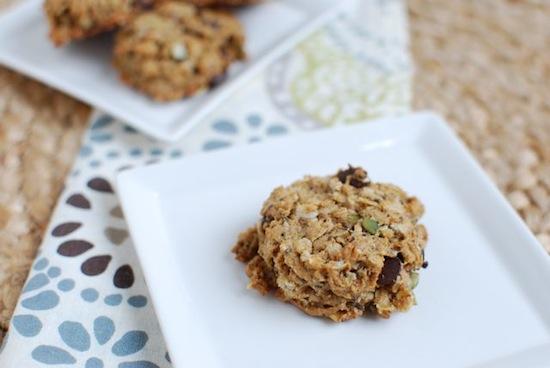
The batch pictured above used Greek yogurt. Can you see the texture difference?! This is also the batch I made mini…because FACT- if you make cookies mini, you can eat more of them.

If you don’t smash them with a fork before baking, they’ll just be very tall and rounded. I typically prefer them flatter so I like to smash them. Plus it’s fun!

These Healthy Peanut Butter Oatmeal Cookies are packed with healthy fats from nuts and seeds and fiber from oats and whole wheat flour. The perfect way to satisfy your dessert craving!
If you don’t have pumpkin seeds, you could try adding some chopped nuts! If they’re not sweet enough for you, add another 1/4 cup sugar or some dried fruit!

These Healthy Peanut Butter Oatmeal Cookies are packed with healthy fats from nuts and seeds and fiber from oats and whole wheat flour. The perfect way to satisfy your dessert craving!

That’s pretty much all I have to say about these. You guys know how I feel about photographing cookies- less picture taking- more eating!

These Healthy Peanut Butter Oatmeal Cookies are packed with healthy fats from nuts and seeds and fiber from oats and whole wheat flour. The perfect way to satisfy your dessert craving!
Enjoy!
–Lindsay–
 

Filed Under: Baking, Dessert, Snack Tagged With: Peanut Butter

Blendtec Blender Giveaway

June 3, 2014 by Lindsay 537 Comments

Hi Friends!

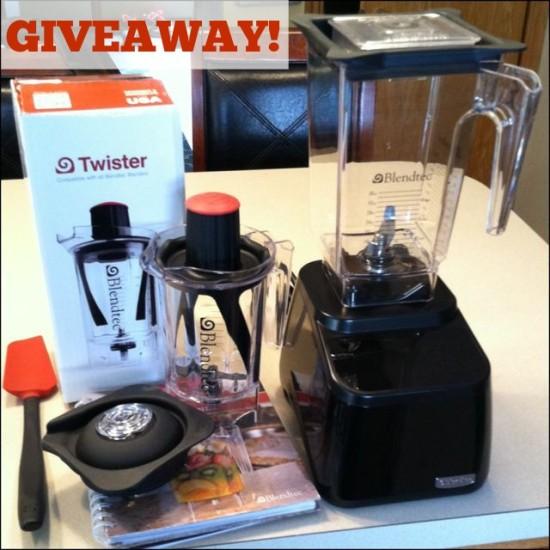
It’s been a while since we had a fun giveaway around here and I’ve been waiting for this one for MONTHS! Remember in February when I wrote this Blendtec Blender review? In that post, I promised to give one away just in time for summer. Well friends, that time is now!

blendtec blender.jpg

One lucky winner will win a Blendtec Blender, plus a twister jar! (Open to US & Canadian residents!)

Let’s recap just a few of the reasons why I love my Blendtec:

  • The touch screen- Easy to use, easy to keep clean and pretty to look at!
  • The dull blades- I’ve cut myself on blender blades before and it’s amazing that these are dull to the touch but blend so well.
  • The handy cleaning tips- ie, just put a little dishsoap and water in the blender and blend to clean, then rinse!
  • The recipe books it included- TONS of great recipes and inspiration.
  • The blender itself- love that the jar is BPA free, it’s the perfect height to fit under a kitchen cabinet and considering how powerful it is, it’s fairly lightweight!

Some things I’ve made lately:

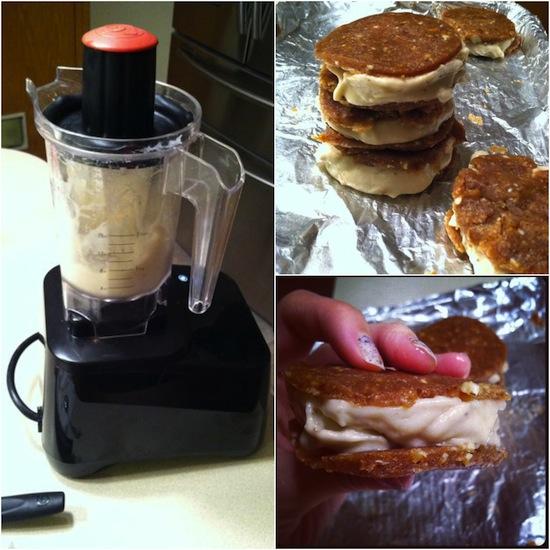
blendtec1.jpg

It’s perfect for making my Healthy Ice Cream Sandwiches!

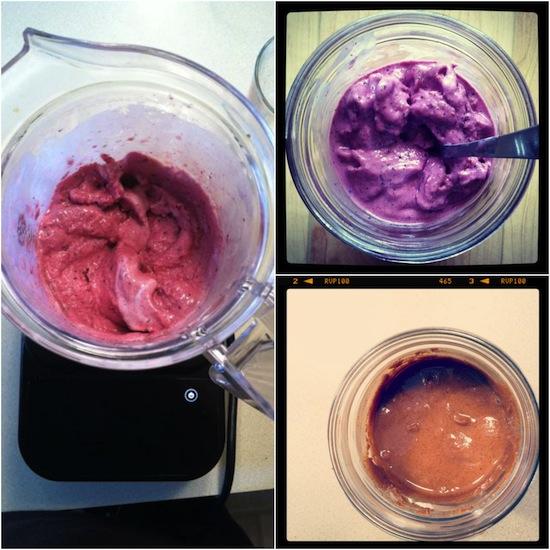
blendtec2.jpg

ALL the smoothies…especially now that it’s getting warmer.
Try frozen berries, Greek yogurt, a splash of juice & some peanut butter!
Speaking of peanut butter (& almond butter)-
the twister jar works perfectly for making homemade batches!!

Just in case you’re wondering what else you can make in your Blendtec, check out their blender recipes. They have recipes for everything from desserts to soups to dressings…everything from breads to dips to smoothies!

And now for the giveaway. This giveaway is open to US & Canadian residents and will run through June 9th, 2014. Winner will be chosen randomly using Rafflecopter. a Rafflecopter giveaway

Enjoy!
–Lindsay–
Filed Under: Sponsored

14 Frozen Desserts for Summer

May 31, 2014 by Lindsay 8 Comments

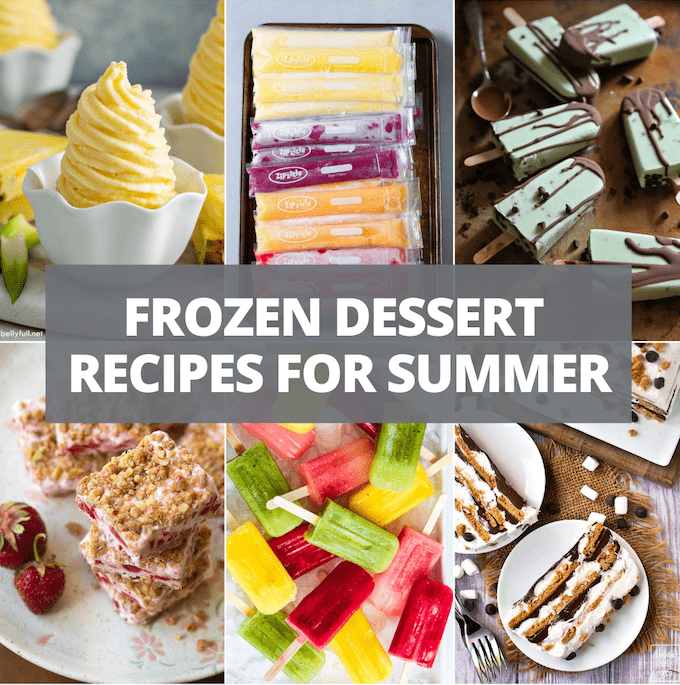
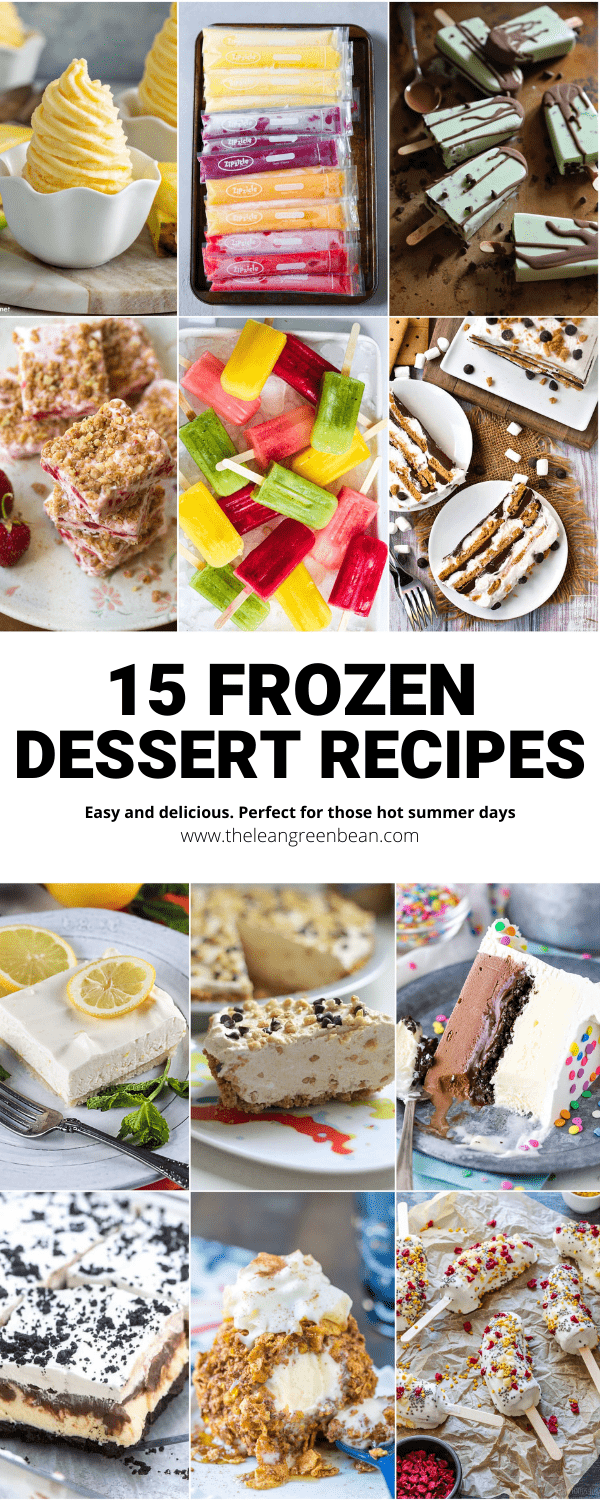
Cool off on a hot day with these Frozen Desserts for Summer! With recipes for everything from ice cream cake to fruit popsicles, there’s something for everyone!

frozen dessert recipes for summer

Hi Friends!

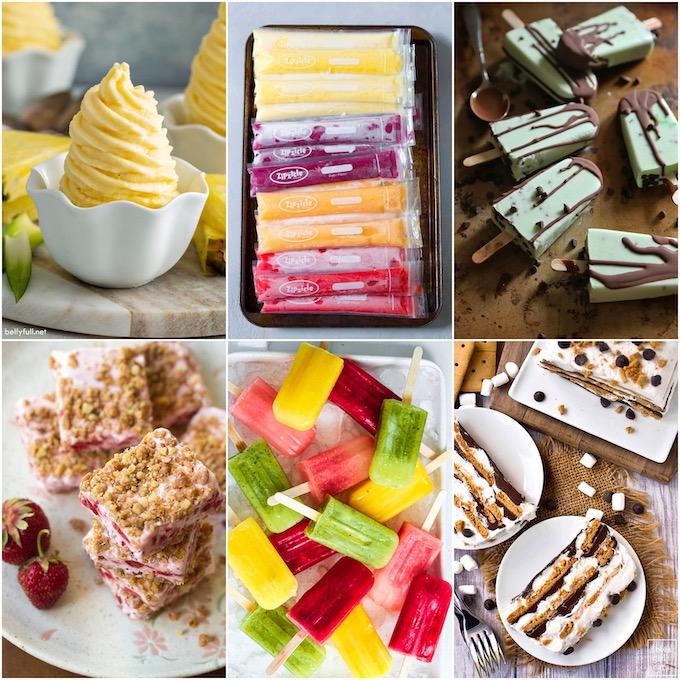
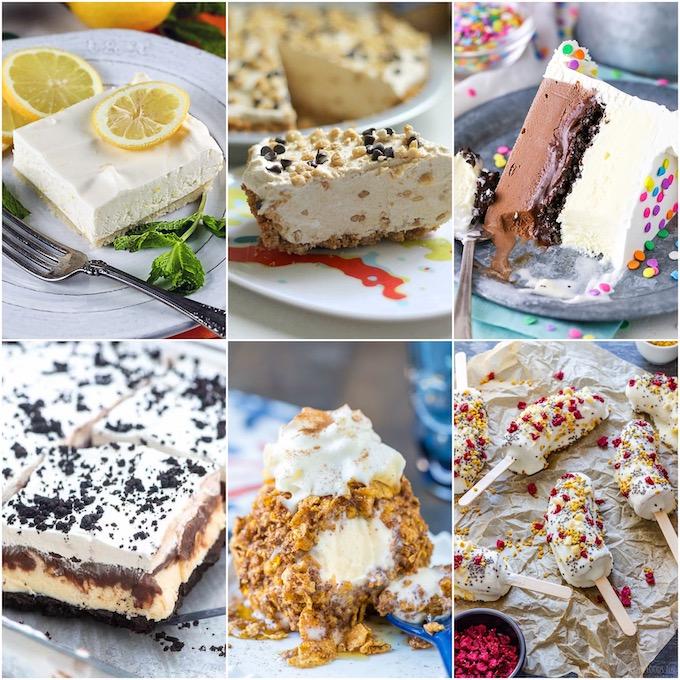
It was a long winter, but the weather is finally heating up here in Ohio. Warm weather pretty much automatically equals cravings for frozen treats in my book. So, just in case you’re anything like me, I rounded up 14 delicious frozen summer treats that you should definitely check out!

With everything from yogurt pops to peanut butter pie, there’s sure to be something that catches your eye in this roundup!

Frozen Desserts For Summer

six frozen desserts for summer

  • Dole Whip via BellyFull – Recreate a Disney favorite at home!
  • Homemade Ice Pops via Cookin’ Canuk – Easy to customize with everyone’s favorite flavors
  • Chocolate Chip Mint Yogurt Pops via Country Cleaver – A classic combo that’s always a hit!
  • Frozen Strawberry Shortcake Bars via Crumb – A childhood favorite of mine from the ice cream truck.
  • Mexican Paletas via Budget Delicious – So colorful and delicious!
  • No-Bake S’mores Ice Cream Cake via Iowa Girl Eats – S’mores aren’t just for campfires!

six frozen dessert recipes

  • Frozen Lemon Bars via The Heritage Cook – Can’t go wrong with lemon! So refreshing.
  • Frozen Peanut Butter Pie via Persnickety Plates – Always a crowd-pleaser!
  • Copycat Dairy Queen Ice Cream Cake via Life Love and Sugar – A classic that can easily be recreated at home.
  • Buster Bar Ice Cream Dessert via Valerie’s Kitchen – Another DQ favorite you can make in your own kitchen.
  • No Fry Fried Ice Cream via I Heart Eating – Impress your guests with this easy summer dessert.
  • Frozen Banana Pops via Healthy Foods Tube – Healthy enough for snack time, sweet enough for dessert.

More ideas:

  • Homemade Ice Cream Sandwiches via Savory Experiments – Taste way better than store-bought!
  • Raspberry Frozen Yogurt via Dizzy Busy and Hungry – Choose your favorite summer fruit if you don’t have raspberries on hand!
  • Frozen Strawberry Brownie Bottom Cupcakes via Flavor the Moments – Almost too pretty to eat!

Cool off on a hot day with these Frozen Desserts for Summer! With recipes for everything from ice cream cake to fruit popsicles, there's something for everyone!

Let’s chat: What’s your favorite frozen dessert?!

Enjoy!
–Lindsay–
Filed Under: Dessert, Ingredient Round-Ups

Foodie Penpals Reveal Day May Exchange 2014

May 30, 2014 by Lindsay 4 Comments

Hi Friends!

Time for another Foodie Penpals Reveal Day.

FPP-post


I skipped out again this month, but a couple hundred others didn’t! In case you’re interested in joining for June, here are the details:

-On the 5th of every month, you will receive your penpal pairing via email. It will be your responsibility to contact your penpal and get their mailing address and any other information you might need like allergies or dietary restrictions.
-You will have until the 15th of the month to put your box of goodies in the mail. On the last day of the month, you will post about the goodies you received from your penpal! 
-The boxes are to be filled with fun foodie things, local food items or even homemade treats! The spending limit is $15. The box must also include something written. 
-Foodie Penpals is open to blog readers as well as bloggers. 
-Foodie Penplas is open to US, Canadian & European residents.  Please note, Canadian Residents will be paired with other Canadians only. Same with Europeans.  

If you’re from the US or Canada and are in participating for June, please CLICK HERE to fill out the participation form and read the terms and conditions. 

You must submit your information by June 4th as pairings will be emailed on June 5th!

If you participated this month, link up below and go check out a few other posts to see what they got!

Enjoy!
–Lindsay–
 

An InLinkz Link-up


Filed Under: Uncategorized

Rice Krispie Chicken Tenders

May 28, 2014 by Lindsay 28 Comments

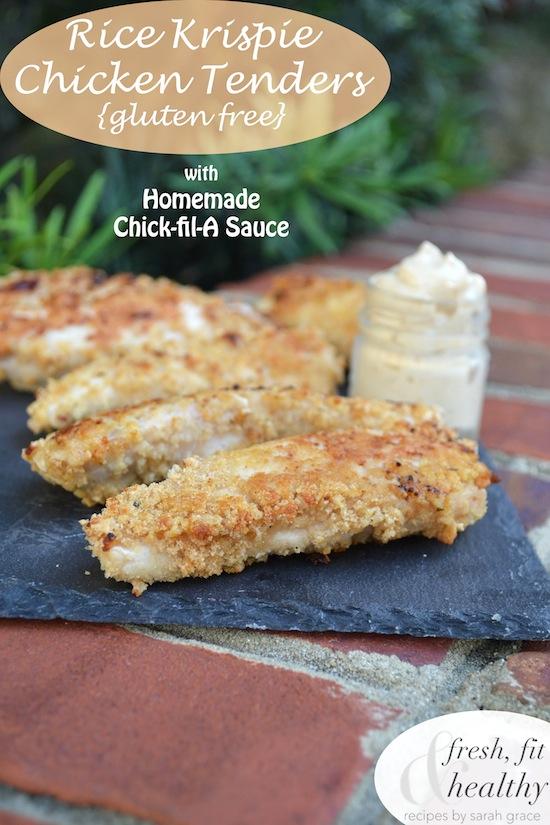
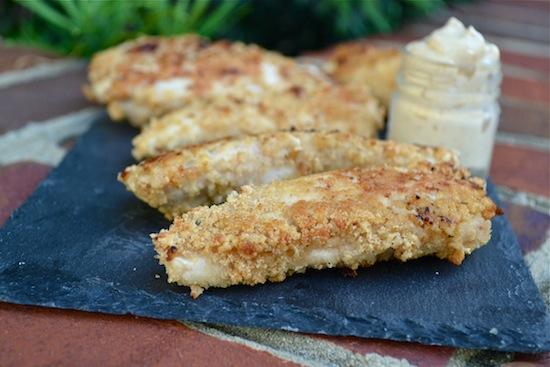
Make these Rice Krispie Chicken Tenders for an easy dinner. Plus a homemade Chick-fil-a sauce for dipping.

Hi Friends!

Time for another guest post. Today Sarah from Fresh Fit N Healthy is stopping by with a chicken tenders recipe the whole family will love! She’s a dietetics student down in Florida with a very successful blog of her own where she shares lots of delicious recipes! Go check it out if you haven’t already!

————–

Hi everyone! I’m Sarah Grace, a Dietetics student entering her senior year at the University of Florida. I created Fresh Fit N Healthy just about one year ago, and today I’m stopping in to bring you a delicious, easy, and healthy recipe! As that is where my passion is, healthy recipe development and in living a fit life!
Thank you Lindsay for having me stop in today on the LeanGreenBean!

This recipe is great. Why? Because it can cater to the entire family, kids, adults, and every one in between!

Who said chicken tenders were only for kids?! When you make a delicious, gluten free, healthier version, you’re kids will never know, and the adults will be happy to devour.

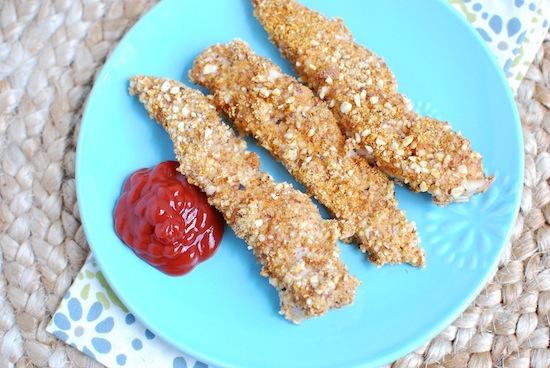
These Gluten Free Rice Krispie Chicken Tenders are an easy weeknight dinner and the homemade Chick-fil-A dipping sauce mean they're sure to be a hit! for dinner

Rice Krispy Chicken Tenders? Yep! Using brown rice krispies, I made this recipe gluten free.  And of course, no frying here. Simply baked for simplicity and to avoid all that unneeded oil and fat.

And what is that dipping sauce? Who loves Chick-fil-A sauce?! Well here is a healthier alternative that tastes great on these tenders!

For children, you can simply serve this chicken tenders recipe with the homemade Chick-fil-A sauce I also am sharing in today’s post to them as dinner, or even make a chicken tenders sandwich for their lunch! And for us older folks (yeah, I’m an oldie 21 year old now ☺ ), you can serve these delicious chicken tenders on top of a salad, or make a side of veggies to go along with the tenders!

A meal that is simple, healthy, yummy, and can please everyone? That is the kind of recipe I love as a busy college student living on a hectic schedule.

Print

Rice Krispie Chicken TendersHealthier Homemade Chick-Fil-A Sauce

RiceKrispieChicken
Print Recipe

5 Stars 4 Stars 3 Stars 2 Stars 1 Star

4.5 from 2 reviews

  • Author: Author: Lindsay L

Ingredients

Scale
  • 1 lb raw Chicken, cut into long thin slices
  • 2 cups GF Brown Rice Krispies (or regular if you desire)
  • 1/3 cup Egg Whites
  • 1/2 teaspoon each: Garlic Powder, Onion Powder, Sa Salt
  • Dash of Cayenne Pepper
  • -1/2 cup Plain Greek Yogurt
  • -2 tablespoons Mustard
  • -2 tablespoons BBQ Sauce
  • -2 teaspoons Honey
  • -Sea Salt, Pepper, and Cayenne Pepper to taste

Instructions

  1. Preheat oven to 425 degrees Fahrenheit.
  2. Place egg whites in shallow bowl.
  3. In a separate bowl, add rice krispies and smash with the bottom of a cup until it is a crumb like texture (some will be almost a flour consistency, but don’t smash long enough for all of the krispies to be completely crushed). Add seasonings in bowl.
  4. Dip each slice of chicken into egg whites, then coat completely on both sides, and place on a baking sheet sprayed with nonstick spray.
  5. When all are on baking tray, lightly sprinkle a little more sea salt onto tenders, and place in oven.
  6. Bake for 10 minutes, remove and flip, and bake for 10 more minutes.
  7. Combine yogurt, mustard, bbq sauce, honey and seasonings in small bowl.
  8. Serve with chicken tenders for dipping.

Did you make this recipe?

Tag @theleangreenbean on Instagram

These Gluten Free Rice Krispie Chicken Tenders are an easy weeknight dinner and the homemade Chick-fil-A dipping sauce mean they're sure to be a hit! for dinner


Come stop by and say hi over at Fresh Fit N Healthy for more recipes like this, and never hesitate to reach out to me by email with any questions you may have!

Thank you again Lindsay for having me, The Lean Green Bean is a blog I followed even before I created my own ☺

xoxo Sarah Grace, Fresh Fit N Healthy.

Thanks to Sarah for sharing this recipe! Can’t wait to give it a try.

Enjoy!
–Lindsay–
Filed Under: Dinner Tagged With: Chicken, Yogurt

Freedom Isn’t Free

May 26, 2014 by Lindsay Leave a Comment

Hi Friends-

Happy Memorial Day.

photo

As you head off to your cookouts and enjoy your day off, take a few minutes to thank the men and women who have paid the ultimate price to make it possible for us to enjoy the freedoms that many of us take for granted every day.

They’re gone….but will not be forgotten.

———–

I’m disconnecting to reconnect today. Bean Bytes will be back tomorrow.

Enjoy!

–Lindsay–
Filed Under: Uncategorized

{Recipe Redux} Green Tea Rice

May 21, 2014 by Lindsay 47 Comments

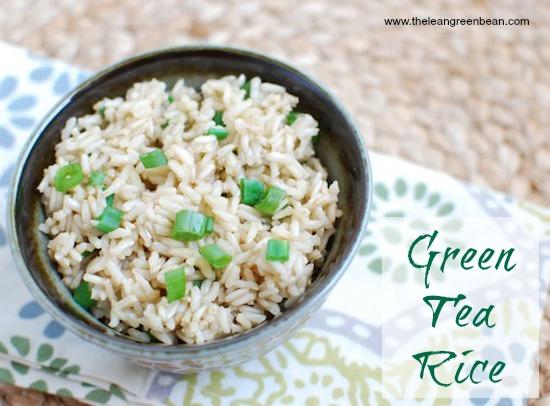
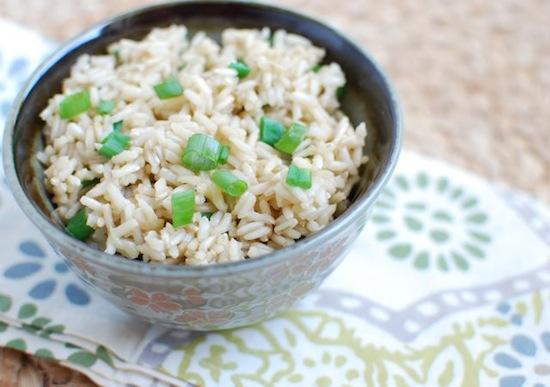
Add some flavor to your next batch of rice by cooking it in green tea!

Hi Friends!

It’s time for another Recipe Redux post. Look at me go, I’m posting on time, on the right day and everything! Anyways, here’s the prompt for this month:

Cooking with Tea

Tea cups around the world are bubbling up with bold new flavors: From cardamom chai and sencha green to bubble teas and veggie teas. We wish we could attend the World Tea Expo the end of this month – but in lieu of a plane ticket, we’ll be cooking and baking and stirring up tea-inspired healthy dishes.

Try cooking your rice with green tea to add extra flavor!

I’m not a very adventurous tea drinker. I basically drink peppermint tea when I’m sick and then several years ago I got on a green tea kick. Before I even started trying to get pregnant, I switched from the small amount of coffee I was drinking, to decaf green tea. That was my go-to for a while…and then I switched to just drinking hot water with grated ginger and a slice of lemon if I wanted something hot to drink.

Now I mostly just drink water, but I still had a stash of green tea in the cupboard so I decided to use that for my recipe. I went the simple route this month. This recipe is nothing fancy. It popped in my head while I was cooking some brown rice for food prep a few weeks ago. Typically I just cook my grains in water, but I have occasionally cooked them in chicken or veggie broth for some extra flavor. I decided to try cooking my next batch of rice in some green tea to impart a subtle flavor and it worked perfectly!

Print

{Recipe Redux} Green Tea Rice

green tea rice 5.jpg
Print Recipe

5 Stars 4 Stars 3 Stars 2 Stars 1 Star

No reviews

A simple side dish that’s lightly flavored with green tea.

  • Author: Lindsay L
  • Prep Time: 5 minutes
  • Cook Time: 30 minutes
  • Total Time: 35 minutes
  • Yield: 4 1x

Ingredients

Scale
  • 1 cup rice
  • 2 cups brewed green tea
  • 1/4 cup sliced green onions

Instructions

  1. Brew the tea according to package directions.
  2. Add rice and brewed tea to a saucepan.
  3. Cook rice according to package directions.
  4. Stir in scallions and serve.

Did you make this recipe?

Tag @theleangreenbean on Instagram

Try cooking your rice with green tea to add extra flavor!

This rice is great by itself as a side dish. You could also use it in a stir fry or a curry….pretty much anywhere you normally use rice!

Enjoy!
–Lindsay–
An InLinkz Link-up


Filed Under: Side Dish

Daily Eats of a Registered Dietitian

May 20, 2014 by Lindsay 58 Comments

Hi Friends!

If you’re a longtime reader, you’ll know that although I used to participate in the ever-popular What I Ate Wednesday (WIAW) blogland trend, I stopped several years ago. I stopped for my own personal reasons, the main one being that I prefer my Weekly Eats posts where I can share a larger variety of my eats with you guys.

However, I do still get requests to share what I eat on a daily basis…and it just so happens that there’s currently a fun little version of WIAW going around among my fellow Registered Dietitians and I’ve been asked several times (by Kristina, Anne & Kara) to participate, so here I am!

Side note- I realize today is Tuesday, not Wednesday, but I have a Recipe Redux post scheduled for tomorrow, so I bumped my post up to today.

So, here’s a look at what I ate yesterday. As always, please remember that nutrition is individual and what works for me may not be best for you.

———-

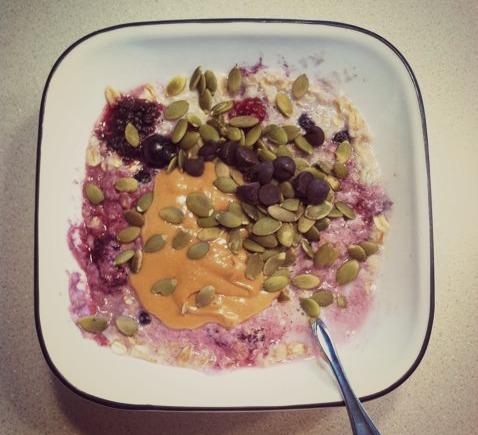
breakfast.jpg

Breakfast – 8AM

Rolled oats + 2% milk + frozen berries microwaved for 2 and a half minutes, topped with peanut butter, pumpkin seeds and a few chocolate chips
Water to drink

This is what I eat pretty much every M-F and some weekends. Sometimes we go out to breakfast on the weekends, or I’ll make eggs occasionally.  I prefer to top my oats with crunchy chocolate Nuttzo but I’m fresh out!

lunch.jpg

lunch1.jpg

Lunch – 12PM

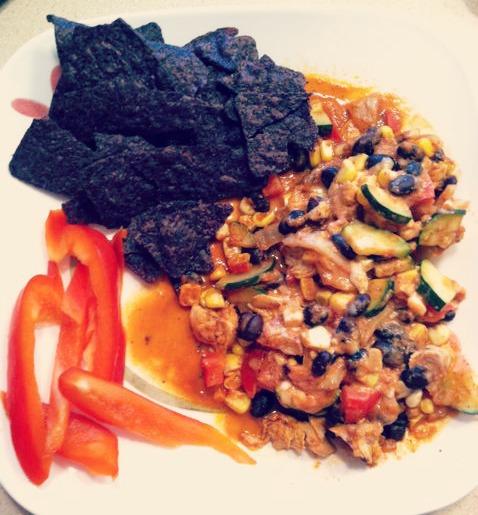
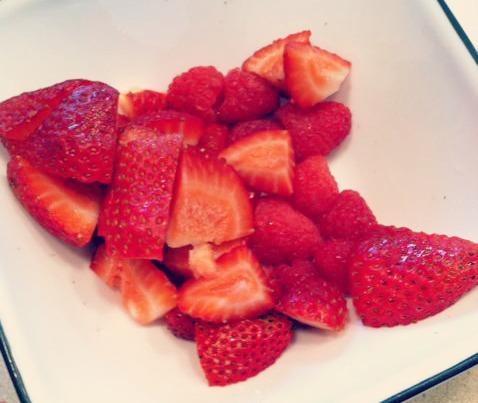
Mexican Enchilada Casserole + Garden of Eatin’ Blue Corn Tortilla Chips + bell pepper strips + fruit bowl shared with hubby.
Water to drink

To make the casserole I combined chopped zucchini, peppers, onions, corn, black beans and cooked, diced chicken in a casserole dish. I added some shredded Cabot Cheese and mixed it all together. For the sauce I made 1/2 a batch of this homemade enchilada sauce and used half of it mixed with a few spoonfuls of plain Greek yogurt. I poured the sauce over everything, mixed it together and baked it at 375 for 30 min. For lunch I just reheated in the microwave.

Side note- I usually would have topped this with avocado…but pregnancy has been messing with my tastebuds and I don’t crave it as often as I used to. Hopefully that’s just temporary!

Sometimes I eat a morning snack but most mornings I’m just busy working through the morning and don’t really get all that hungry until lunch.

snack1.jpg

Snack #1 – 2:30PM

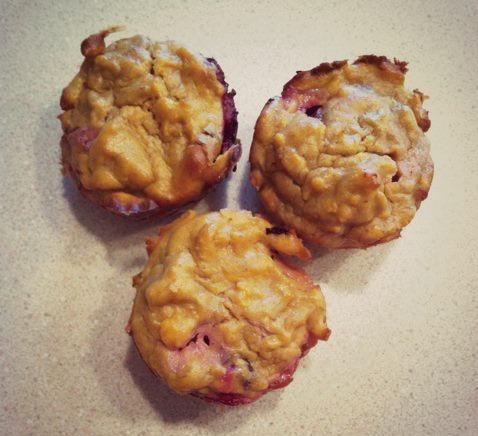
Some Sweet Potato Bites. I made this batch with fresh cranberries mixed in instead of chocolate chips.

snack2.jpg

Snack #2 – Pre-workout fuel – 4:00PM

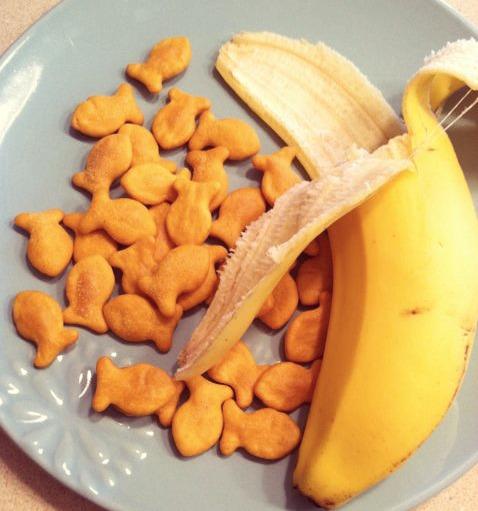
A handful of goldfish + half a banana (I usually split my bananas with Tucker.)
Plus water.

Then I walked the dogs 2 miles + did this workout in the garage. Typically when I workout, I go to Crossfit at either 4:30 or 5:30 but yesterday’s class wasn’t the best for a pregnant lady so I modified one of the workouts they did last week on one of my rest days so I could do it at home.

IMG_4972

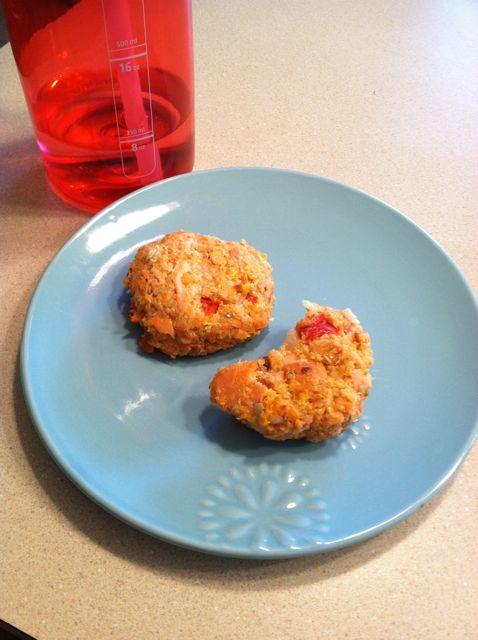
Snack #3- Post-workout refuel – 5:30PM

Salmon Sweet Potato Quinoa Cakes + allll the water

The salmon cakes are similar to this recipe for my Tuna Quinoa Cakes, except I used frozen salmon that I cooked & flaked instead of canned tuna, left out the yogurt and didn’t really measure anything.

snack4.jpg

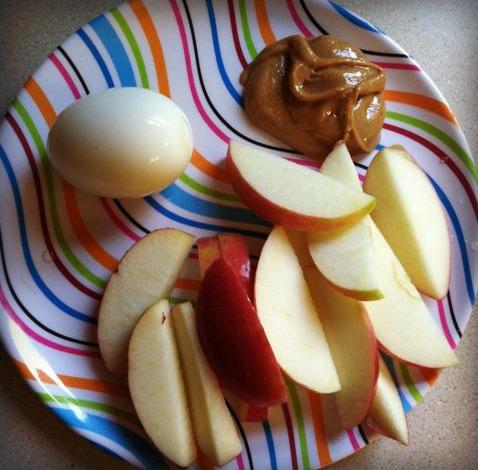
Snack #4 – 7:30 PM

Hard boiled egg + peanut butter + a small apple

After my workout I played with the dogs, took a shower, read for a while and took a short nap. When I woke up, hubby was mowing the lawn, but I was hungry so I ate. I only ended up eating about half the apple.

dinner.jpg

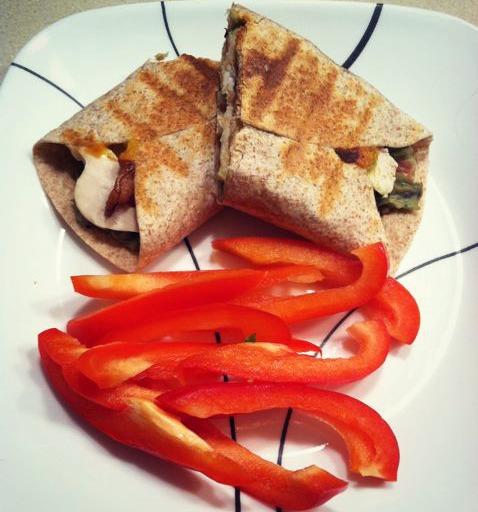
Dinner – 9:00 PM

Whole wheat tortilla + black bean guacamole + chicken + bacon + cheese and a side of peppers

Eating this late is not unusual for us. We typically eat dinner around 8:30 or 9.

snack6.jpg

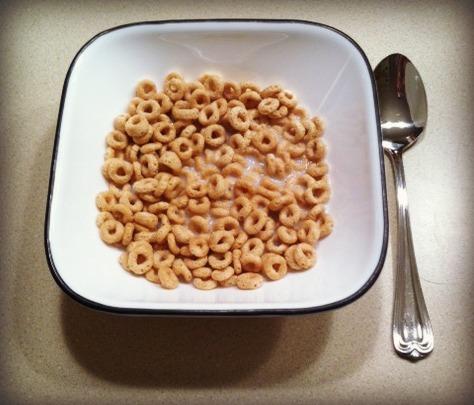
Snack #5 – Bedtime snack – 11:30 PM

Cheerios + skim milk

I hate going to bed hungry so I almost always eat something before I go to bed. If I don’t, I’ll wake up in the middle of the night absolutely starving!

 ———–

So there you have it! A full day of eats. For the record….I really wanted to get ice cream but it just got too late. Hubby promised it to me yesterday and then the day got away from us and we didn’t get it then either. I WILL get some before the week is over 🙂

 ————–

The WIAW Dietitian Tag! #WIAWRD

This blog post is a part of a ‘dietitian tag’ to see what other registered dietitians from around the world really eat!

To carry on this tag all you need to do is:

1) Copy and paste this section to the bottom of your WIAW blog post.

2) Tweet/Facebook the link using the hashtag #WIAWRD (What I Ate Wednesday Registered Dietitian).

3) Add your blog post link into the section below.

4) ‘Tag’ 2-3 other dietitians to carry on the tag via email!

————–

I’m tagging Elle at According to Elle, Lauren at Whole Living Lauren and Christina at The Fueled Athlete.

Enjoy!
–Lindsay–
Filed Under: Uncategorized

Banana Bread Truffles

May 15, 2014 by Lindsay 36 Comments

A super simple recipe and a great way to repurpose leftover banana bread into a rocking snack or dessert!

Hi Friends!

This is not a recipe.

This is just a good idea.

There are no fancy photographs.

There are no exact measurements.

Just some snack time inspiration for you.

A fun way to use up leftover banana bread! Peanut butter, chocolate and bananas are a winning combination!


Leftover banana bread
+ nut butter
+ dark chocolate
=
Banana Bread Truffles.

Do it. 

Best guess: I used about 2 cups of crumbled banana bread, 2/3 cup of peanut butter and 1/2 a cup of melted dark chocolate chips.

Mix the crumbles and the nut butter together.
Form into balls.
Freeze for 30 minutes.
Dip in melted chocolate.
Store in the freezer.

Use your favorite banana bread recipe and your favorite nut butter. If your bread is drier, you may want to try adding a splash of milk when you’re forming the balls.

Enjoy!
–Lindsay–
 

Filed Under: Dessert

Strawberry Balsamic Dressing

May 14, 2014 by Lindsay 26 Comments

Make your own salad dressing to avoid added sugar and other crazy ingredients! This Strawberry Balsamic Dressing pairs well with almost any salad toppings! This post is sponsored by Pompeian. I was compensated for my time. All thoughts and opinions are my own.

Hi Friends!

So, as promised. I’m back to share a salad dressing recipe today! First, a few things to discuss. As noted above, this is a sponsored post. This year I’m excited to be teaming up with Pompeian to bring you some delicious new recipes. I’m a member of their Pompeian Pantry Insider program, so over the next few months you’ll see a few posts showcasing some of their products.

Did you know that May is actually National Vinegar Month? It’s true. In honor of that, Pompeian asked us to create a spring or summer salad dressing using one of their vinegars. Right up my alley since I’m always looking or new dressings to put on my salads (both traditional and non-traditional). 

Make your own salad dressing to avoid added sugar and other crazy ingredients! This Strawberry Balsamic Dressing pairs well with almost any salad toppings!

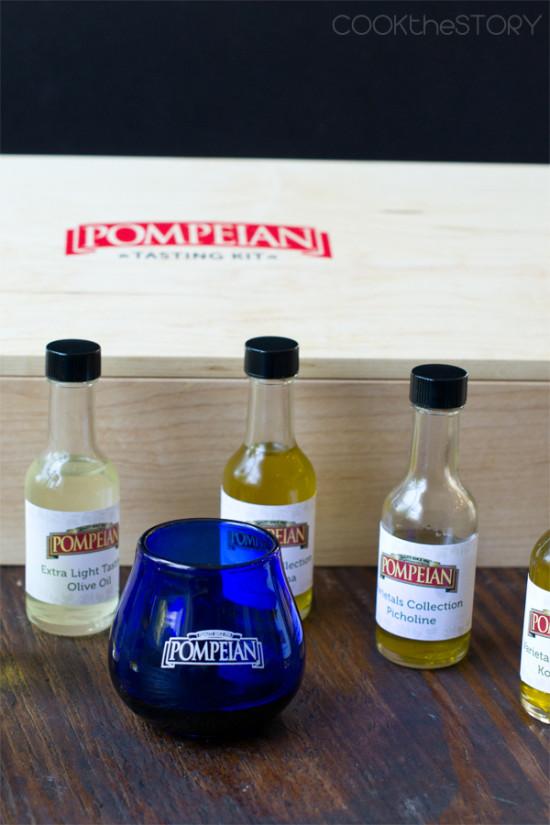
Pompeian has a huge selection of vinegars, from balsamic to wine. I used several of their wine vinegars before I started working with them- especially the white wine vinegar, which is perfect in my Fresh Cranberry Sauce.  Here’s the full list of their vinegars:

  • Red Wine Vinegar
  • Roasted Garlic Infused Red Wine Vinegar 
  • Pomegranate Infused Red Wine Vinegar 
  • Blueberry Pomegranate Infused Red Wine Vinegar 
  • Açai Pomegranate Infused Red Wine Vinegar
  • White Wine Vinegar 
  • Sherry Aged Wine Vinegar 
  • Balsamic Vinegar
  • White Balsamic Vinegar 
  • Pomegranate Infused Balsamic Vinegar 

Ok, so for this dressing….I immediately knew I wanted to incorporate some fresh fruit into the dressing. Lately I’ve been on this kick of making avocado salad dressings, but I wanted to change things up. After considering all of the ingredients in my Salmon Chop Salad, I knew that fresh strawberries would be perfect. I almost included them in the salad itself, but decided it might be fun to put them in the dressing instead.

I opted to use Pompeian’s traditional balsamic vinegar in this dressing, but the pomegranate infused balsamic would have been awesome as well.

Print

Strawberry Balsamic Dressing

strawberry balsamic dressing.jpg
Print Recipe

5 Stars 4 Stars 3 Stars 2 Stars 1 Star

No reviews

A fresh, light salad dressing that’s perfect for the warmer months!

  • Author: Author: Lindsay L
  • Prep Time: 5 minutes
  • Total Time: 5 minutes
  • Yield: 2 1x

Ingredients

Scale
  • 1/2 cup Pompeian olive oil
  • 3–4 Tablespoons Pompeian balsamic vinegar
  • 1–2 tsp dijon mustard
  • 1/2 cup fresh strawberries, chopped

Instructions

  1. Combine all ingredients in a blender and process until smooth.
  2. Taste and adjust flavors as needed.

Did you make this recipe?

Tag @theleangreenbean on Instagram

Some of the ingredient amounts are a bit variable because they will depend on your tastebuds. I’d start with 3 Tbsp vinegar and 1 tsp mustard and then add more after tasting if you want to.

Make your own salad dressing to avoid added sugar and other crazy ingredients! This Strawberry Balsamic Dressing pairs well with almost any salad toppings!

This dressing is light and refreshing. It would be great over a leafy green salad (especially one with spinach I think) or a non-traditional, lettuce-free salad.

Make your own salad dressing to avoid added sugar and other crazy ingredients! This Strawberry Balsamic Dressing pairs well with almost any salad toppings!

I love how you can see the little strawberry seeds floating around. So good! Heck, I might even pour some of this over grilled chicken and see how it tastes!

Make your own salad dressing to avoid added sugar and other crazy ingredients! This Strawberry Balsamic Dressing pairs well with almost any salad toppings!


Let’s chat:
Do you ever put fresh fruit in your dressings?

Enjoy!
–Lindsay–


Filed Under: Side Dish, Soup & Salad, Sponsored Tagged With: Mustard, Oil, Strawberry

Salmon Chop Salad

May 13, 2014 by Lindsay 30 Comments

This Salmon Chop Salad is a protein packed salad full of veggies, without the need for leafy lettuce.

Hi Friends!

So remember last week when I was talking about non-traditional salads, and I was saying that hubby can be totally happy eating just a giant bowl of lettuce with a few broccoli stems on top and calling it a salad? Well, in that post I also mentioned that I’m not actually the biggest fan of lettuce. Give me ALL THE TOPPINGS though! Who’s with me?

Well, if you are with me…then you’ll probably like this Salmon Chop Salad. It’s basically lots of goodies that I would top a traditional salad with….sans lettuce.

This Salmon Chop Salad is sure to be a hit with those who aren't crazy about lettuce but still want to get their vegetables in!

Here’s my recipe. Lucky for you, this “recipe” is about as lax as it gets. So if you see something you don’t like (including the salmon), feel free to swap it out for one of your favs!

Print

Salmon Chop Salad

DSC 0138
Print Recipe

5 Stars 4 Stars 3 Stars 2 Stars 1 Star

5 from 1 review

A salad with all the delicious toppings and none of the boring lettuce!

  • Author: Author: Lindsay L
  • Yield: 2 1x

Ingredients

Scale
  • 6 oz salmon, cooked and flaked
  • 1 cup green beans, cut and cooked
  • 1 cup red peppers
  • 2 eggs, hard boiled & chopped
  • 1 cup sweet potatoes, diced and cooked
  • 1/2 medium avocado, diced
  • 1/2 cup cherry tomatoes, halved
  • Feta cheese, crumbled (optional)

Instructions

  1. Split ingredients equally into two bowls.
  2. Top with dressing of your choice.

Did you make this recipe?

Tag @theleangreenbean on Instagram

Feel free to prepare the veggies however you want. I microwaved my green beans and sweet potatoes but next time I’ll definitely grill or roast them! If I could eat feta right now, I definitely would have included it…but if you don’t like it, leave it out or add your personal favorite cheese. Cubes of fresh mozzarella would be great!

This Salmon Chop Salad is sure to be a hit with those who aren't crazy about lettuce but still want to get their vegetables in!

Another good thing about this salad – you can pretty much top it with any dressing and it will be delicious. So I’m leaving that up to you. HOWEVER, I have a recipe brewing in my head for a new salad dressing I want to try…and I think it’d go particularly well with this salad…so later this week I’m going to remake this and try out my idea. If it turns out, I’ll share it with you guys!

This Salmon Chop Salad is sure to be a hit with those who aren't crazy about lettuce but still want to get their vegetables in!

Enjoy!
–Lindsay–
Filed Under: Lunch Tagged With: Avocado, Bell Pepper, Egg, Green Beans, Salmon, Tomato

15 Minor Life Annoyances

May 2, 2014 by Lindsay 107 Comments

Hi Friends!

Totally random post today. I noticed something was annoying me the other day and for some reason it got me thinking. It was a little thing…something that most people probably wouldn’t even notice…but it was driving me crazy. I thought it might be fun to make a list of other such things that annoy me. Perhaps some of you can relate to them.

I was originally going to title this post “Things I Hate”…but hate is a strong word…and that’s not really what these are. Just funny little things that drive me crazy, just because I’m me!

15 minor things in life that are just frustrating enough to be annoying.

{I imagine Marcus finds it annoying when he just can’t get his head
quite far enough into the glass to get the milk he wants}

So here we go:

1) Seeing the alarm symbol in the corner of my phone. I’m not one of those people who can leave their alarm set all day every day. Seeing that little symbol drives me crazy. I set it right before I go to bed and turn it off right when I get up. Side note- I also have to set my alarm for a time that ends in a 0 or 5. None of this waking up at 7:23 business for me. 7:20 or 7:25 please.

2) Listening to people chew. Can.NOT.stand.it. The sound of other people chewing drives me crazy/makes me want to cover my ears and run away screaming.

3) Pimples that haven’t been popped. I know it goes against everything they tell you…but I HAVE to pop my pimples. I can’t stand seeing those little whiteheads on my face that haven’t been popped.

4) Having a full inbox. This one is a constant struggle…but having a full inbox drives me crazy. Although I almost never get to empty anymore…I do my best to keep the number of emails in my inbox low. Coming back to my computer after a weekend of ignoring emails…cue mini panic attack until I get it under control.

5) People saying they can’t find something...when they haven’t even really looked. My husband, to a T.
Him- “Where are the chips?”
Me- “In the pantry.”
Him- Cursory 5 second look around the pantry and then “I can’t find them.”
Me- Walk to the pantry and pull them out 3 seconds later.  Sigh.

6) Drinking water without ice. No thank you. I love cold water…room temp grosses me out. Plus I love chewing on ice.

7) Wearing shoes…or socks….or when the blankets are tucked into the end of the bed too tightly and I can’t get my feet out. Drives me nuts! My feet need to breathe.

8) Pants that are too short. Story of my 5’11 life…but really. There is nothing worse than finding a pair of pants you love, trying them on and having them look like high-waters.

9) Choosing paint colors. Have you done this lately? It is THE WORST. The color on the wall never looks anything like the paint chip…and there are just too many to choose from!

10) The Facebook app on my phone. It shows me three posts, and then I scroll down and it literally shows me the exact three same posts again. Stop wasting my time that I’m already wasting!

11) Bad lighting...Like when your pet is doing something adorable…and it’s too dark to take a good picture. Or they look really cute, you take a picture…and then they just look grumpy and angry in the pic.

12) Getting nothing but junk in the mail. I’ve always loved getting the mail…but now it seems like all we get is junk. Makes it not even worth walking to the mailbox! Send me some good snail mail!

13) Non-athletic shorts. Ugh. Give me a pair of lightweight leggings, a long skirt or a maxi dress over a pair of regular shorts any day.

14) Slideshow articles. You know the kind. You see an article headline online that sounds really interesting…and then it’s one of those where you have to click through a million pages of a slide show to see the whole thing.  Just put it all on one page please!

15) Slow walkers. Hubby and I have long legs. We walk fast. Getting stuck behind a slow walker on the sidewalk/stairs/grocery store aisle, etc. is excruciatingly painful.

———–

So there you go. 15 things that annoy me.

Let’s chat:
Tell me some of your minor life annoyances!

Enjoy!
–Lindsay–
Filed Under: Uncategorized

Pineapple Chicken with Bok Choy

May 1, 2014 by Lindsay 22 Comments

A simple, 30 minute meal that is full of wholesome ingredients and flavor.

Hi Friends!

Time for another quick recipe. I skipped out on food prep this weekend because my parents were in town until Sunday afternoon and by then I was too tired from the weekend to do it. So, this week I’ve been throwing stuff together  and making it work since we didn’t go to the grocery store either.

This dinner comes together in under 20 minutes and requires very few ingredients. I made it even easier on myself by pre-chopping the chicken and veggies before I left for Crossfit so that all I had to do when I got home was dump things in a pan.

This Pineapple Chicken with Bok Choy is a healthy one pot meal full of vegetables and asian flavors

Here’s what you need:

Print

Pineapple Chicken with Bok Choy

Print Recipe

5 Stars 4 Stars 3 Stars 2 Stars 1 Star

4 from 2 reviews

An easy weeknight dinner that can be on the table in under 20 minutes

  • Author: Lindsay L
  • Prep Time: 5 minutes
  • Cook Time: 15 minutes
  • Total Time: 20 minutes
  • Yield: 3-4 1x

Ingredients

Scale
  • 1 pound chicken breasts, cubed
  • 2 cloves garlic, minced
  • 1/4 cup onion, diced
  • 1 tsp paprika
  • black pepper, to taste
  • 1 bell pepper, diced
  • 2 heads of baby bok choy, chopped
  • 1 cup fresh pineapple, chopped
  • 2 teaspoons grated fresh ginger
  • 1 Tablespoon low sodium teriyaki sauce
  • 1/4 cup water
  • 1–2 teaspoons Sriracha, optional

Instructions

  1. In a large pan, saute the chicken, garlic, onion and spices for 5-7 minutes over medium-high heat.
  2. While chicken is cooking, combine the pineapple, ginger, teriyaki sauce, water and sriracha in a blender or food processor and process until smooth. Taste and add more ginger or sriracha if desired.
  3. Add the peppers, bok choy and half the sauce to the pan and cook until chicken is cooked through.
  4. Serve with rice, quinoa or sweet potato noodles and remaining sauce on the side.

Notes

This can be served over rice or quinoa or you can spiralize a sweet potato, saute the noodles for a few minutes and add them to the pan before serving. [br]You can add all the sauce to the pan if you want to…or just add a little for flavor and then let people add more if desired.

Did you make this recipe?

Tag @theleangreenbean on Instagram


I served mine with sweet potato noodles because I wanted to try out my new spiralizer. I just sauteed them lightly for a few minutes before I started cooking the chicken, set them aside and then added them back in at the very end. This would also be good served over brown rice or quinoa. Don’t like bok choy? Choose another favorite veggie like green beans or broccoli!

This Pineapple Chicken with Bok Choy is a healthy one pot meal full of vegetables and asian flavors

Enjoy!
–Lindsay–
Filed Under: Dinner Tagged With: Chicken

Foodie Penpals Reveal Day No Match

April 30, 2014 by Lindsay Leave a Comment

Hi Friends!

It’s Foodie Penpals reveal day. This is actually the first month since I started the program that I didn’t participate. What can I say? Everyone needs a break every once and a while.

But, I still wanted to give you guys the info in case you want to join for next month!

fpp

Here’s some details about FPP in case you want to join in for May:

-On the 5th of every month, you will receive your penpal pairing via email. It will be your responsibility to contact your penpal and get their mailing address and any other information you might need like allergies or dietary restrictions.
-You will have until the 15th of the month to put your box of goodies in the mail. On the last day of the month, you will post about the goodies you received from your penpal! 
-The boxes are to be filled with fun foodie things, local food items or even homemade treats! The spending limit is $15. The box must also include something written. 
-Foodie Penpals is open to blog readers as well as bloggers. 
-Foodie Penplas is open to US, Canadian & European residents.  Please note, Canadian Residents will be paired with other Canadians only. Same with Europeans.  

If you’re from the US or Canada and are in participating for May, please CLICK HERE to fill out the participation form and read the terms and conditions. 

You must submit your information by May 4th as pairings will be emailed on May 5th!

Enjoy!
–Lindsay–
Filed Under: Uncategorized

15 Healthy Recipes For The Grill

April 29, 2014 by Lindsay 15 Comments

Here are 15 healthy recipes for the grill. You can whip up quick, healthy and flavorful meals in no time – everything from meat and fish to vegetables and dessert! 

healthy recipes for the grill

Hi Friends!

As we head into spring and warmer weather begins to stick around, it’s time to fire up the grill! Grilling is a great way to enjoy the outdoors in the spring and fall, and an easy way to keep your kitchen cool on a hot summer day. Depending on where you live, you may even be able to gril in the winter!

I wanted to round up some healthy grilling recipes for you if you’re ready to dust off the grill but not quite sure where to start.  This roundup includes all sorts of meal ideas. Everything from vegetarian recipes, to seafood, to chicken & pork!

15 Healthy Recipes for the Grill

collage of six healthy grilling recipes

  • Grilled Pork Tenderloin via Iowa Girl Eats – So juicy and delicious and perfect with grilled veggies.
  • Grilled Pineapple Shrimp Kabobs via Homemade in the Kitchen – Taste the tropics at dinner with this winning combo. 
  • Grilled Peruvian Chicken via Wannabe Country Cleaver – Add some new flavors to this palate with this easy chicken recipe.
  • Grilled Tandoori Chicken Kebabs via Culinary Ginger – Serve with rice for a quick, easy dinner the family will love.
  • Brown Sugar Pork Chops via Out Grilling – Kid-friendly and easy for a busy weeknight dinner.
  • Grilled Steak and Potato Kabobs via The Lean Green Bean – Meat and veggies in one! Grab the kids to help you prep them!

six healthy recipes for the grill

  • Caprese Chicken Foil Packets via Cookin’ Canuk – Simple, flavorful and delicious!
  • 4 Ingredient Chicken Marinade via The Lean Green Bean – This marinade is PERFECT for grilled chicken. Pair with an sides you want!
  • Grilled Peaches with Caramel Sauce via Grandbaby Cakes – Serve these for dessert this summer to impress a crowd! 
  • Honey Lime Chicken with Grilled Peach Corn Salsa via Fannetastic Food – So light and refreshing but packed with flavor.
  • Easy Grilled Vegetables via Flavor the Moments – Serve these with your favorite grilled meat or add some chickpeas to keep it vegetarian.
  • Shish Tawook Chicken Thighs via A Cedar Spoon – Pairs with an eggplant side that makes a healthy balanced meal.


More healthy recipes for the grill:

  • Grilled Foil Packet Tilapia with Pesto Veggies via The Lean Green Bean – Try it with cod or other white fish as well.
  • Spicy Grilled Salmon with Avocado Salsa via Yummy Healthy Easy – Add a little heat to the dinner table with this easy recipe!
  • Grilled Salmon in Foil with Garlic Butter via Rachel Cooks – So easy and the foil makes cleanup a breeze!


Happy grilling!

Enjoy!
–Lindsay–
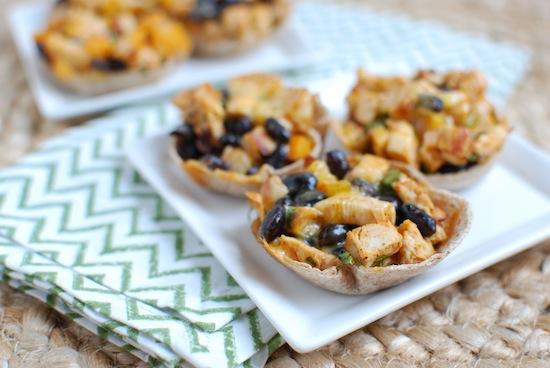
 

Filed Under: Dinner, Ingredient Round-Ups, Side Dish

Tomato Basil Mozzarella Quinoa Muffins

April 24, 2014 by Lindsay 26 Comments

These Tomato Basil Mozzarella Quinoa Muffins are gluten-free, savory and loaded with fresh tomato and basil for the perfect party appetizer or nutritious snack!

Hi Friends!

Today I have another fabulous guest post for you! Alexis from Hummusapien is sharing a delish recipe with you. Alexis and I are Columbus locals and we graduated from Ohio State the same year. I went on to do one internship at OSU while she chose a route that took a little longer, but she’ll finish (so soon!!!!) with a Master’s degree and be eligible to take the RD exam! I’m so proud of how hard she’s worked these past couple of years and can’t wait for her to officially become an RD as well! If you haven’t checked out her blog, go do so immediately!

These Tomato Basil Mozzarella Quinoa Muffins are gluten-free, savory and loaded with fresh tomato and basil for the perfect party appetizer or nutritious snack!

————-

Whadduppppp my beany beauties? I’m pretty stoked to be guest posting today for Da Bean AKA the meal planning master AKA the crossfit queen AKA the social media maven. I mean lezbehonest, what does this girl NOT do? Can’t.even.handle the fabulousness. I call first dibs on babysitting #babybean. I’m Alexis, a soon to be RD with a soon to be master’s in nutrition (I’m graduating in ten days, but who’s counting) otherwise known as Hummusapien. But you can just call me hummus. I kid. I blog about healthy eats and treats that more often than not involve chickpeas, avocado, dark chocolate, or some bizarre combination of all three. I’m a big believer in eating real wholesome foods and counting ingredients, not calories. Lettuce eat all the plants! I like to think that your body will thank you when you fuel it up with lots of nutrient-dense goodies, including copious amounts of peanut butter banana chickpea cookies followed by a swig of almond milk directly from the carton.

I may or may not have been referred to as the chickpea whisperer. Maybe it’s because I turn chickpeas into chocolate hummus against their will. Maybe it’s because I roast them and put them on like every salad, ever. Maybe it’s because I whisper to them.

Have no fear–I actually cook with things other than chickpeas, too. Like quinoa! But enough about me. I called these tomato, basil and mozzarella quinoa thangs “muffins” only because I baked them in a muffin tin and had no idea what else to call them. Quinoa cups? Quinoa yums? Quinoa getinmahbellies?

Whatever the hell they are or aren’t, I love these muffies because they’re one of those recipes where you totally forget that you’re eating healthy food. While quinoa has gained legit superfood status over the past couple years, eating it plain is no treat for your taste buds. Jazz it up with fresh basil, juicy tomatoes and grated Parmesan and you’ll be all shut-the-front-door-there’s-no-way-this-is-keen-wa.

Way.

If you’re looking for an adorable bite-sized party app, you can also bake these in a mini muffin tin for about 20 minutes. Then you’ll have 24 babies instead of 12 mamas, which is amazing because eating more than one is always more fun, right?

Right.

Print

Tomato, Basil and Mozzarella Quinoa Muffins

Tomato Basil Mozzarella Quinoa Muffins4
Print Recipe

5 Stars 4 Stars 3 Stars 2 Stars 1 Star

No reviews

These gluten-free, savory cheesy quinoa muffins are loaded with fresh tomato and basil for the perfect party appetizer or nutritious snack!

  • Author: Author: Alexis
  • Prep Time: 30 minutes
  • Cook Time: 20 minutes
  • Total Time: 50 minutes
  • Yield: 12 1x

Ingredients

Scale
  • 1/2 cup quinoa, rinsed
  • 1 cup vegetable broth (or water*)
  • 2 eggs, beaten
  • 2 tbsp almond meal
  • 1/4 cup shredded mozzarella cheese
  • 1/4 cup grated Parmesan cheese
  • 2–3 cloves garlic, minced
  • 1/4 tsp salt
  • 1 cup diced tomatoes (about 2 medium Roma tomatoes)
  • 1/4 cup chopped fresh basil

Instructions

  1. Preheat oven to 350F. Spray a 12-cup muffin tin liberally with cooking spray. You could also use a mini muffin tin and adjust the cooking time to 20 minutes.
  2. In a medium pot, bring vegetable broth and quinoa to a boil. Once boiling, reduce heat to low and simmer, covered, for about 15 minutes (or until all the liquid is absorbed).
  3. Dump cooked quinoa into a bowl and set aside to cool.
  4. In a large bowl, stir together beaten eggs, almond meal, cheeses, garlic and salt. Add in cooled quinoa and stir to combine. Fold in tomatoes and basil.
  5. Spoon batter evenly into muffin tin. Bake for about 25 minutes. Allow muffins to cool in pan for at least 20 minutes before carefully removing them from tin.
  6. Serve warm.

Did you make this recipe?

Tag @theleangreenbean on Instagram

Are you drooling yet?!

Thanks to Alexis for stopping by today!

Enjoy!
–Lindsay–
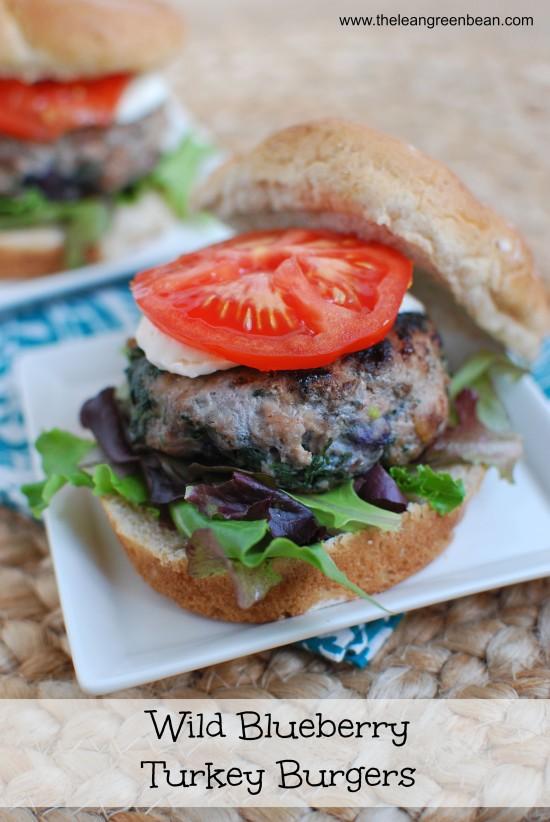
Filed Under: Appetizer, Dinner, Lunch, Side Dish Tagged With: Cheese, Egg, Quinoa, Tomato

Cinnamon Roasted Sweet Potato Parfait

April 23, 2014 by Lindsay 38 Comments

This cinnamon roasted sweet potato parfait is healthy enough for breakfast and sweet enough for dessert!

Hi Friends!

Let’s talk sweet potatoes. I have a bit of a problem when it comes to them. The problem is that for some reason I feel compelled to buy some every single time I go to the grocery store. Even if I already have some at home.

Consequently, I’m constantly having to come up with new ways to eat them. So here’s my latest creation:

Cinnamon Roasted Sweet Potato Parfait

These Cinnamon Roasted Sweet Potato Parfaits are the perfect gluten-free snack or dessert! Customize them with your favorite toppings!

Side note- Parfaits are extremely hard to photograph, it turns out, especially when in clear glasses. But you get the idea!

Here’s how you make them:

Print

Cinnamon Roasted Sweet Potato Parfait

sweet potato 1
Print Recipe

5 Stars 4 Stars 3 Stars 2 Stars 1 Star

4.8 from 4 reviews

Healthy enough for breakfast, sweet enough for dessert

  • Author: Author: Lindsay L

Ingredients

Scale
  • 2 cups diced sweet potatoes (1 medium)
  • 1 Tablespoon coconut oil, melted
  • 1/2 teaspoon vanilla extract
  • cinnamon, to taste
  • Greek yogurt (vanilla or plain)
  • pumpkin seeds, optional

Instructions

  1. Spread the sweet potatoes out on a foil-lined baking sheet.
  2. Mix melted coconut oil and vanilla in a small dish and pour over potatoes.
  3. Stir until well coated, then sprinkle with cinnamon.
  4. Roast at 425 degrees F for 15-20 minutes, stirring occasionally, until sweet potatoes reach desired doneness.
  5. Layer sweet potatoes and greek yogurt in a bowl and top with pumpkin seeds.

Did you make this recipe?

Tag @theleangreenbean on Instagram

Pretty simple, right?

These Cinnamon Roasted Sweet Potato Parfaits are the perfect gluten-free snack or dessert! Customize them with your favorite toppings!

If you don’t like pumpkin seeds, sprinkle with your favorite chopped nut. If you want to make this more dessert-like, you could sprinkle with sugar before roasting or add a drizzle of honey to your parfait.

These Cinnamon Roasted Sweet Potato Parfaits are the perfect gluten-free snack or dessert! Customize them with your favorite toppings!

Or top with ice cream instead of Greek yogurt. Just sayin….

These Cinnamon Roasted Sweet Potato Parfaits are the perfect gluten-free snack or dessert! Customize them with your favorite toppings!

Enjoy!
–Lindsay–

Filed Under: Dessert, Snack Tagged With: Coconut Oil, Sweet Potato, Yogurt

{Recipe Redux} Potstickers

April 22, 2014 by Lindsay 31 Comments

These homemade Potstickers are healthier than your favorite Asian takeout!

Hi Friends!

Time for another Recipe Redux post. I was actually supposed to post yesterday…but pregnancy brain is getting the best of me and I scheduled it for the wrong day. Anyways…I took last month off because I wasn’t doing much cooking but I’m trying to get back into the swing of things.

These homemade Potstickers are healthier than your favorite Asian takeout!

This month’s theme was:

Treasured Cookware – Share a story of classic cookware – and a healthy recipe to go with it. Some of us will be celebrating Mother’s Day next month (May 11,) but it’s more than once a year that many of us cook with a pan, a wooden spoon or another piece of cookware passed on to us from the kitchens of our favorite relatives. Let’s see what you can cook up with your treasured kitchen tool!

I spent a lot of time in the kitchen with my mom while I was growing up. She taught me a lot of what I know about cooking and baking and I have a lot of great memories of our kitchen time together. There was a time, when I first moved out…to go to college and then into my first apartment, that I had a lot of hand-me-downs from my mom’s kitchen. Over the past 10 years or so, as hubby and I moved into our first house, got married etc…I’ve slowly been replacing a lot of the old, with new.

Of course there are a few things I have held onto for sentimental reasons. The kitchen tool I picked for today’s post is a bit non-traditional. It’s not a pot or pan or baking gadget. It’s a wonton press.

61Yge584HBL._SL1500_

It probably only cost a few dollars…but it’s something I always remember being in my mom’s kitchen. When my parents sold their house a few years ago, it was one of the first things I snatched up to take to my own kitchen.

So, when I saw this prompt, I immediately thought of it sitting buried in my drawer and decided to make some potstickers since hubby and I both love them! Potstickers are usually made with ground pork…but honestly, I didn’t want to have to worry about it getting cooked all the way, so I chose to use some leftover pork tenderloin I had already cooked.

Here’s the recipe I used:


Print

{Recipe Redux} Potstickers

potsticker1.jpg
Print Recipe

5 Stars 4 Stars 3 Stars 2 Stars 1 Star

5 from 1 review

A slight twist on traditional potstickers

  • Author: Author: Lindsay L
  • Prep Time: 15 minutes
  • Cook Time: 10 minutes
  • Total Time: 25 minutes
  • Yield: 36 1x

Ingredients

Scale
  • 1.5 cups cooked pork tenderloin, minced
  • 1/4 cup green onions, diced
  • 1/2 cup red pepper, diced
  • 2 teaspoons low-sodium soy sauce
  • 2 teaspoons rice wine vinegar
  • 1 Tablespoon fresh ginger, grated
  • 2 cloves garlic, minced
  • 1/3 cup mashed avocado
  • shredded cabbage (optional)
  • wonton wrappers
  • 1–2 Tablespoons vegetable oil
  • 3/4 cup chicken broth
  • Soy sauce for dipping (optional)

Instructions

  1. Combine all ingredients except the wonton wrappers in a bowl and mix well.
  2. Place a wonton wrapper on the wonton press and add a small scoop of the mixture.
  3. Dip your finger in water and run it along the edges of the wonton wrapper.
  4. Close the wonton press to seal the edges.
  5. Once all your potstickers are made, heat a little oil in a large pan over medium high heat.
  6. Add 10-12 potstickers to the bottom of the pan and let cook for 1 minute.
  7. Flip potstickers using a spatula, add 1/4 cup broth to the pan and cover with the lid.
  8. Let steam for 1 minute, then remove from pan.
  9. Repeat until all the potstickers have been cooked.
  10. Serve with soy sauce for dipping, if desired.

Did you make this recipe?

Tag @theleangreenbean on Instagram

Make potstickers can be a bit tedious..but they’re so delicious that I’d say it’s worth it every once and a while. These homemade Potstickers are healthier than your favorite Asian takeout! Like I mentioned in the notes above:

  • I would have included some shredded cabbage if I had some.
  • Since the wontons are so small, make sure you either dice your pork very finely, or pulse in the food processor a few times to help your filling come together.
  • Don’t overfill the wontons. You really can’t fit very much in each one without causing them to rip.
  • You can skip the pan frying step if you want but you won’t get the nice brown color. I really didn’t use that much oil…just enough so there was a thin layer on the bottom of the pan each time


These homemade Potstickers are healthier than your favorite Asian takeout!

Enjoy! –Lindsay–

Filed Under: Dinner

  • « Go to Previous Page
  • Page 1
  • Interim pages omitted …
  • Page 40
  • Page 41
  • Page 42
  • Page 43
  • Page 44
  • Interim pages omitted …
  • Page 65
  • Go to Next Page »

Primary Sidebar

Lindsay Livingston The Lean Green Bean Healthy Living Tips and Tricks

I'm a Registered Dietitian and mom of three from Columbus, Ohio. I use this blog to share simple, healthy recipes, nutrition tips, and an honest glimpse of motherhood!

Learn More →

Questions? Comments? Email me: [email protected]

The Lean Green Bean Facebook The Lean Green Bean Instagram The Lean Green Bean Pinterest The Lean Green Bean Twitter The Lean Green Bean Feed
footer-logo
The Lean Green Bean Facebook The Lean Green Bean Instagram The Lean Green Bean Pinterest The Lean Green Bean Twitter The Lean Green Bean Feed
Recipes

Breakfast
Dinner
Snack
Slow Cooker

Kids

Cooking With Kids
Favorite Gifts
Toddler Meals
Indoor Activities

Resources

Easy Packed Lunches for Kids
Dinner Spark
Snack Spark
Ultimate Guide to Food Prep

About

Meet Lindsay
Become an RD
Work with Me

The Lean Green Bean is a participant in the Amazon Services LLC Associates Program, an affiliate advertising program designed to provide a means for sites to earn advertising fees by advertising and linking to amazon.com.
Read the full privacy and disclosure policy here.

Copyright © 2022 · The Lean Green Bean

table talk series

Learn how food affects your body.

Get my free Table Talk email series where I share bite-sized nutrition information about carbs, protein, and fat, plus bonus information about snacks and sugar!

[email protected]