• Skip to main content
  • Skip to primary sidebar

Learn how food affects your body. Get Free Nutrition Info Today

the-lean-green-bean-logo
  • Home
  • Recipes
  • Kids
  • Resources
    • Ebooks
    • Food Prep
    • Videos
    • Snack Round-Ups
    • Gift Guides
  • About
    • Become An RD
    • Work With Me
  • Search
the-lean-green-bean-logo
  • Home
  • Recipes
  • Kids
  • Resources
    • Ebooks
    • Food Prep
    • Videos
    • Snack Round-Ups
    • Gift Guides
  • About
    • Become An RD
    • Work With Me
  • Search

blog

RDs Who Blog

March 10, 2016 by Lindsay 2 Comments

Hi Friends!

Just popping in with a quick post today. Turns out yesterday was National Registered Dietitian Day. For the past several years I’ve published a post to celebrate and highlight some of the amazing RDs out there who are doing great things in the blogging world.

This year I kinda dropped the ball. I had grand plans, but I thought RD Day was tomorrow….not yesterday. SO, I just wanted to take a second to direct you to last year’s post:

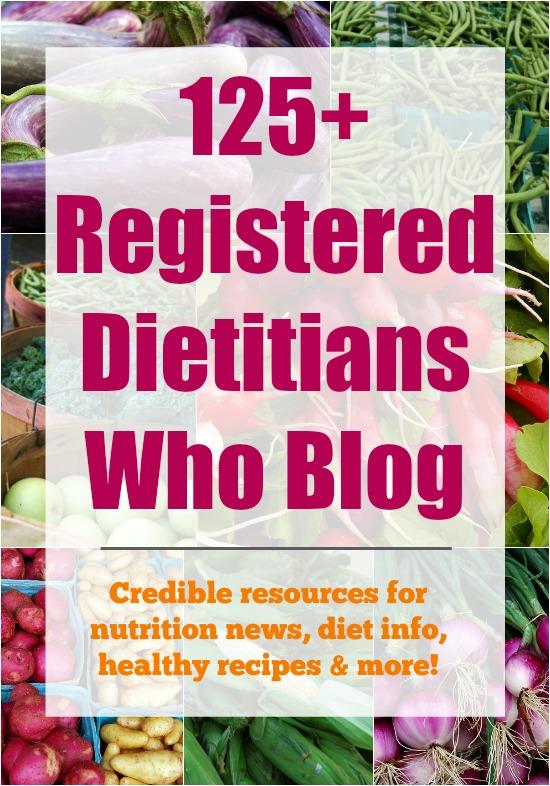
Have nutrition questions? Here are 125 Registered Dietitians who blog - great CREDIBLE resources in the online world!

Registered Dietitians Who Blog

If you’re looking for some new blogs to follow, click the link or image above and check out some of the great blogs my friends and fellow RDs are writing. Tons of great, healthy recipes, nutrition information etc from reputable sources! And be sure to read the comments on last year’s post as well for links to even more RD blogs!

Enjoy!
–Lindsay–


Filed Under: Uncategorized

Skillet Chicken and Dumplings

March 9, 2016 by Lindsay 8 Comments

This recipe for Skillet Chicken and Dumplings makes an easy weeknight dinner. Ready in 30 minutes, it’s healthy comfort food packed with protein and vegetables! 

This recipe for Skillet Chicken and Dumplings makes an easy weeknight dinner. Ready in 30 minutes, it's healthy comfort food packed with protein and vegetables!

Hi friends!

Just popping in with another quick and easy dinner idea for you! This is kinda like chicken pot pie, without the hassle of the pie part. Also, I debated calling this Chicken and Biscuits because the dumplings are a bit more biscuit-like in my opinion….but either way, they’re delicious. The dumplings cook right in the skillet so you don’t even have to worry about turning on the oven.

Basically, this is comfort food made easy. You just plop everything in a pan and let it simmer for a while. You can handle that, right? For my version, I made homemade dumplings. They’re fairly simple, but if you’re looking for a shortcut you could make an even easier version using something like Bisquick!

This recipe for Skillet Chicken and Dumplings makes an easy weeknight dinner. Ready in 30 minutes, it's healthy comfort food packed with protein and vegetables!

So here’s how you make it:

Print

Skillet Chicken and Dumplings

Skillet Chicken and Dumplings 3
Print Recipe

5 Stars 4 Stars 3 Stars 2 Stars 1 Star

No reviews

This recipe for Skillet Chicken and Dumplings makes an easy weeknight dinner. Ready in 30 minutes, it’s healthy comfort food packed with protein and vegetables!

  • Prep Time: 5 minutes
  • Cook Time: 25 minutes
  • Total Time: 30 minutes
  • Yield: serves 4-6 1x

Ingredients

Scale
  • 2 Tbsp butter
  • 2 cloves garlic, minced
  • 1/2 cup onion, diced
  • 1.5 pounds chicken, diced
  • 1.5 cups frozen peas
  • 1 cup chopped carrots
  • 1 tsp paprika
  • salt and pepper to taste
  • 1 cup + 1 Tbsp flour, divided
  • 2 cups chicken broth
  • 1 cup + 1/2 cup milk, divided (i used 2%)
  • 1 egg
  • 2 tsp baking powder
  • 1/2 tsp salt

Instructions

  1. In a large skillet, melt butter over medium heat.
  2. Add garlic, onion, chicken, vegetables, 1 Tbsp flour and seasonings.
  3. Saute over medium high heat for 10 minutes.
  4. Add broth and 1 cup milk and bring to a boil.
  5. Meanwhile, combine 1 cup flour, 1/2 cup milk, 2 tsp baking powder, 1 egg and 1/2 tsp salt in a bowl and stir until just combined.
  6. Drop by rounded tablespoons into simmering chicken mixture. (You should get 12-14 dumplings)
  7. Reduce heat to simmer, cover skillet and let simmer for 10-15 minutes or until dumplings are cooked through.
  8. Taste, adjust seasonings as desired and serve.

Notes

Feel free to used mixed veggies or your favorite veggies instead of just peas and carrots.
If you don’t have a lid for your skillet, use a large baking sheet to cover the top.

Did you make this recipe?

Tag @theleangreenbean on Instagram

That’s all there is to it! Feel free to add some cayenne pepper or extra spices if you desire! I didn’t have a lid for my cast iron skillet so I just laid a large baking sheet across the top of it!

This recipe for Skillet Chicken and Dumplings makes an easy weeknight dinner. Ready in 30 minutes, it's healthy comfort food packed with protein and vegetables!

[Tweet “This Skillet Chicken and Dumplings from @leangrnbeanblog is the perfect weeknight dinner!”]

Enjoy!
–Lindsay–
Filed Under: Dinner Tagged With: Chicken

Cinnamon Raisin Bagels + 6 Brunch Recipes

February 25, 2016 by Lindsay 19 Comments

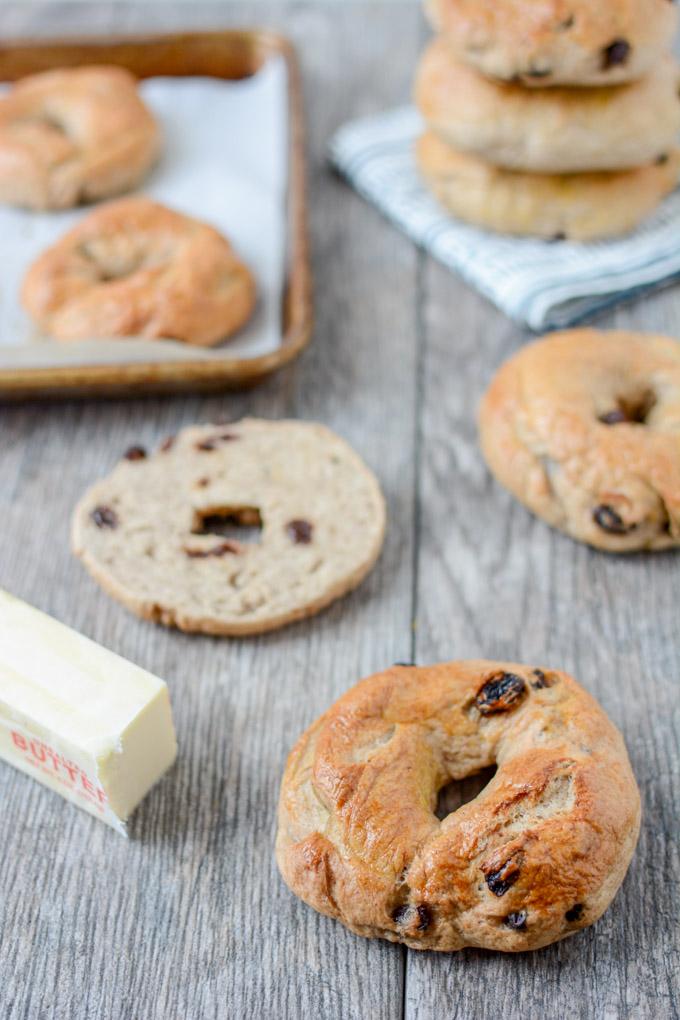
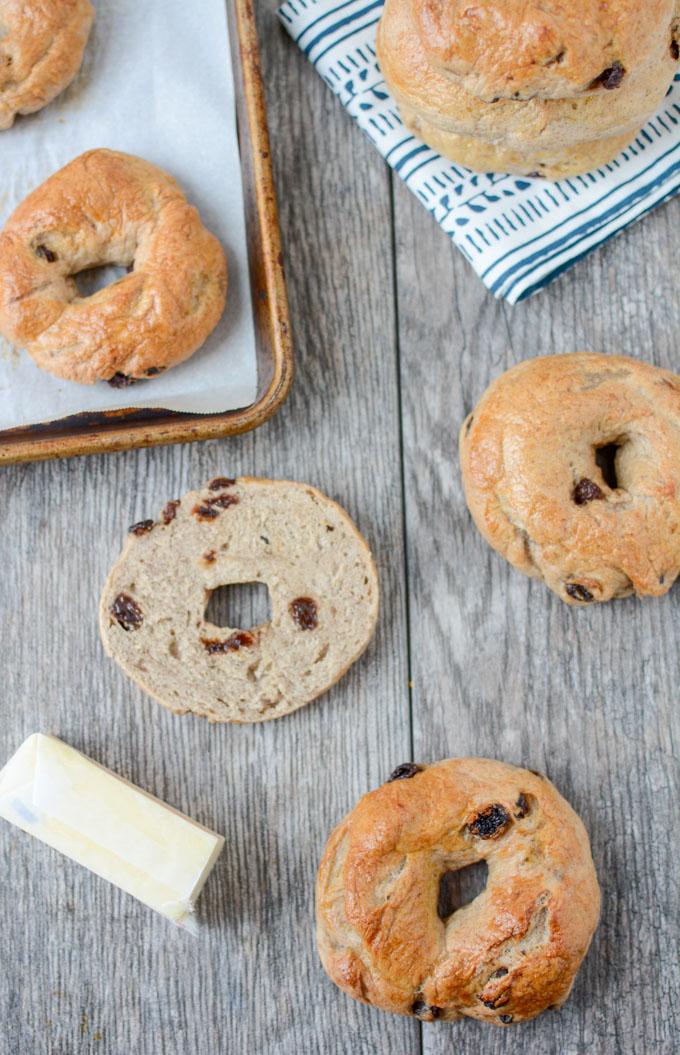
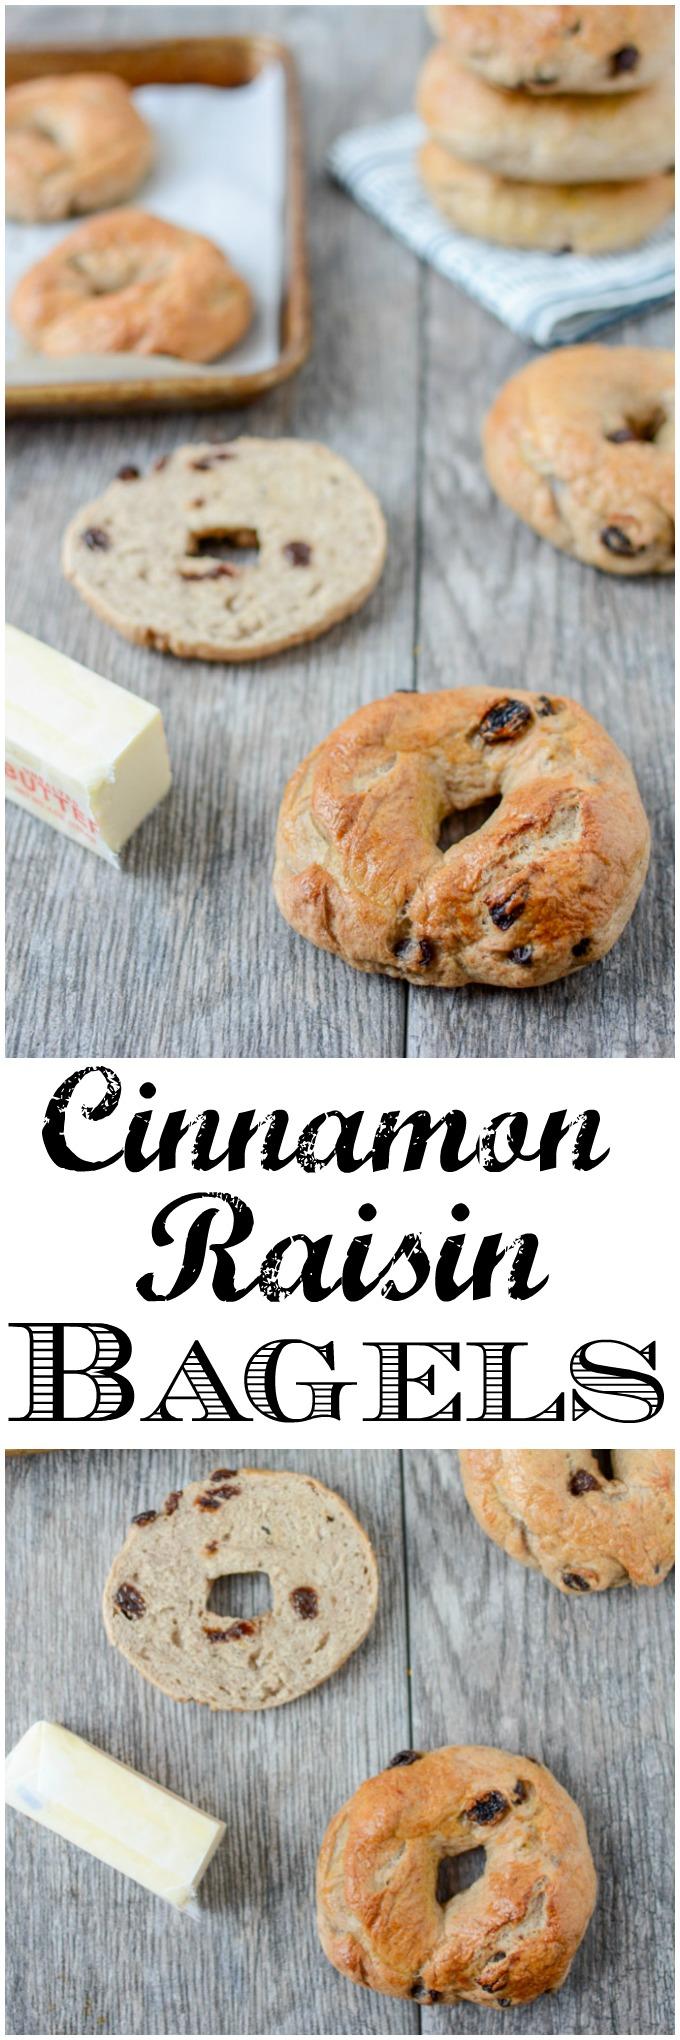
These Cinnamon Raisin Bagels are easy to make at home and taste way better than store-bought! Perfect with peanut butter for an afternoon snack!

These Cinnamon Raisin Bagels are easy to make at home and taste way better than store-bought! Perfect with peanut butter for an afternoon snack!

Hi Friends!

Today it’s time for another recipe group round-up! This month we’re focusing on brunch! In case you missed any of our past round-ups, be sure to check them our themes and links to my recipes below:

6 Healthy Ways To Eat:

  • Cranberries (Cranberry Clementine Salsa)
  • Sweet Potatoes (Sweet Potato Protein Bars)
  • Apples (Caramel Apple Bread)
  • Pumpkin (Pumpkin Yogurt Dip)
  • Zucchini (Grilled Zucchini Rollups)
  • Almond Flour (Small Batch Chocolate Chip Cookies)
  • Black Beans (Mexican Layer Dip)
  • Citrus (Small Batch Raspberry Lemon Bars)

Ok, so back to this month’s recipe. I made you bagels. And you guys, they’re really not hard at all to make! I even made them twice in one week. After round 1, I made a few tweaks to the recipe and made them even more delicious.

These Cinnamon Raisin Bagels are easy to make at home and taste way better than store-bought! Perfect with peanut butter for an afternoon snack!

If you’ve been holding off on making homemade bread, bagels, etc because you’re afraid of yeast, I encourage you to give it a try. It’s a simple process and the results are so much better than store-bought, without any crazy ingredients!

So here’s how you make these bagels:

Print

Cinnamon Raisin Bagels

Print Recipe

5 Stars 4 Stars 3 Stars 2 Stars 1 Star

No reviews

These Cinnamon Raisin Bagels are easy to make at home and taste way better than store-bought! Perfect with peanut butter for an afternoon snack!

  • Yield: 8 small-medium bagels 1x

Ingredients

Scale
  • 3/4 cup warm water
  • 1.5 teaspoons active dry yeast
  • 1 Tablespoon maple syrup
  • 1/2 cup white whole wheat flour
  • 1.25 cups bread flour (plus up to 1/2 cup more)
  • 2 teaspoons cinnamon
  • 2 Tablespoons butter, melted
  • 3/4 teaspoon salt
  • 3/4 cup raisins
  • 1 egg yolk
  • 8 cups water
  • 3 Tablespoons maple syrup

Instructions

  1. In a liquid measuring cup, combine warm water and 1 Tablespoon maple syrup. Sprinkle yeast on top and let sit for 5 minutes. In a small bowl, cover raisins with water water and let sit.
  2. Meanwhile, in the bowl of a stand mixer (or a large bowl) combine white whole wheat flour, 1.25 cups bread flour, cinnamon, salt and melted butter.
  3. Add yeast/water mixture and turn on stand mixer (with dough hook). If you don’t have a stand mixer, add liquid to bowl and stir with a spatula.
  4. Slowly add more bread flour (a couple tablespoons at a time) until dough because tacky but not sticky. If you’re using a stand mixer, add slowly until the dough no longer sticks to the side and bottom of the bowl. If you’re doing it by hand, turn the dough out onto the counter and start kneading, adding flour until the dough no longer sticks to your hands.
  5. Knead, by hand or by mixer for 5 minutes. Then, if using a stand mixer, remove dough from bowl.
  6. Drain water from raisins and slowly add some of the raisins to the ball of dough, continue to knead, then add more raisins so that they distribute evenly throughout the dough.
  7. Oil the sides and bottom of a clean bowl, place the dough in the bowl, cover with a towel and let rise in a warm place for 1 hour.
  8. Preheat oven to 450 degrees.
  9. Remove dough from bowl, punch it down and divide into 8 equal balls. and use your thumbs to make a hole in the middle of each ball (ie form a bagel!)
  10. Bring 8 cups of water to a boil. Add 3 Tablespoons of maple syrup.
  11. Place 2-3 bagels at a time in the water. Let them boil for one minute, flip over and let boil another minute. Remove with a slotted spoon at let drain on a paper towel.
  12. Transfer bagels to a baking sheet lined with parchment paper.
  13. Mix egg yolk with 1 Tablespoon of water and brush on tops and sides of bagels.
  14. Drop oven temperature to 400 degrees and bake for 25 minutes.

Nutrition

  • Serving Size: 1 bagel

Did you make this recipe?

Tag @theleangreenbean on Instagram

This recipe makes 8 small-medium sized bagels. You could also choose to make 4-6 larger bagels or 10-12 mini bagels! If you make them smaller, you may need to adjust the baking time accordingly.

They’d be perfect for brunch. Put them in a cute little basket and let people top their bagel with peanut butter, cream cheese or whatever floats their boat!

These Cinnamon Raisin Bagels are easy to make at home and taste way better than store-bought! Perfect with peanut butter for an afternoon snack!

[Tweet “These Homemade Cinnamon Raisin Bagels from @leangrnbeanblog are way better than store-bought!”]


Now, let’s see what my lovely friends are bringing to the brunch party!

6 Delicious Recipes To Make For Your Next Brunch

So much deliciousness for you to go check out:

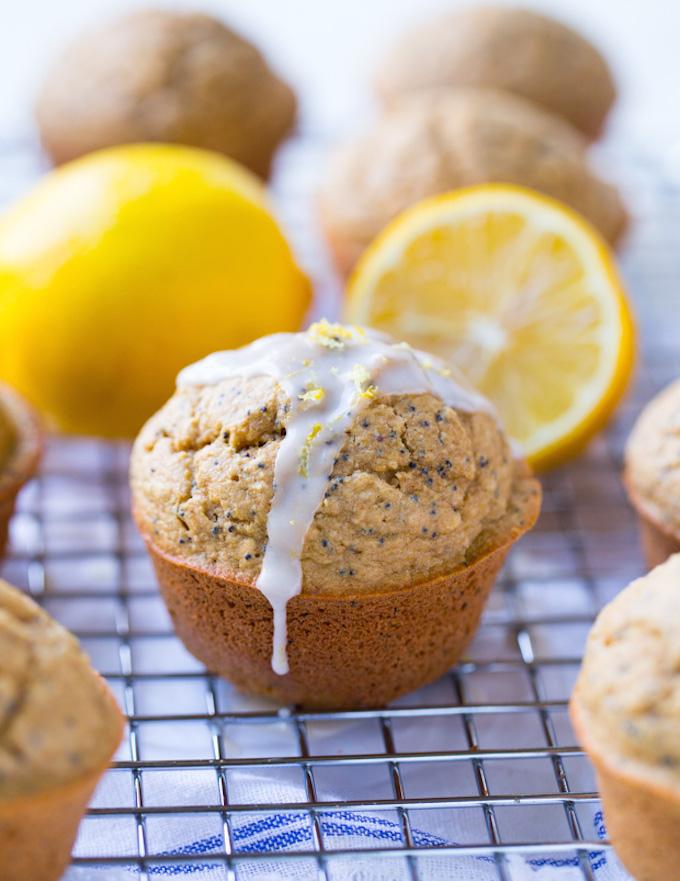
Flourless Lemon Poppyseed Muffins

These are getting me in the mood for spring:
Flourless Lemon Poppyseed Muffins

via Sarah at Making Thyme For Health

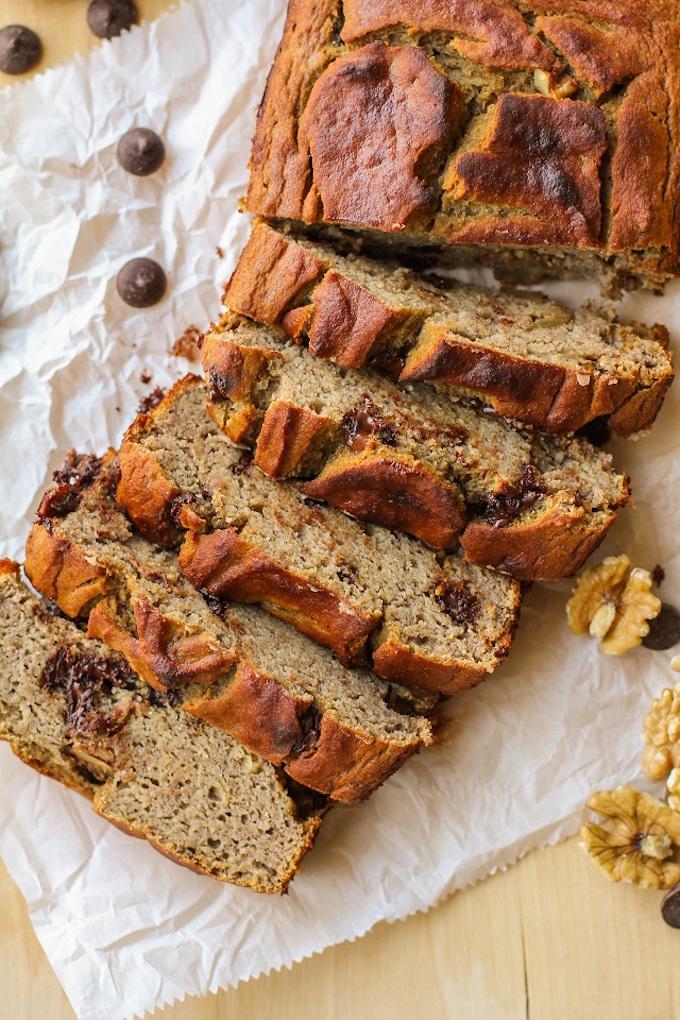
Grain-Free Chocolate Chip Banana Bread

Can never go wrong with a classic!
Grain-Free Chocolate Chip Banana Bread

via Julia at The Roasted Root

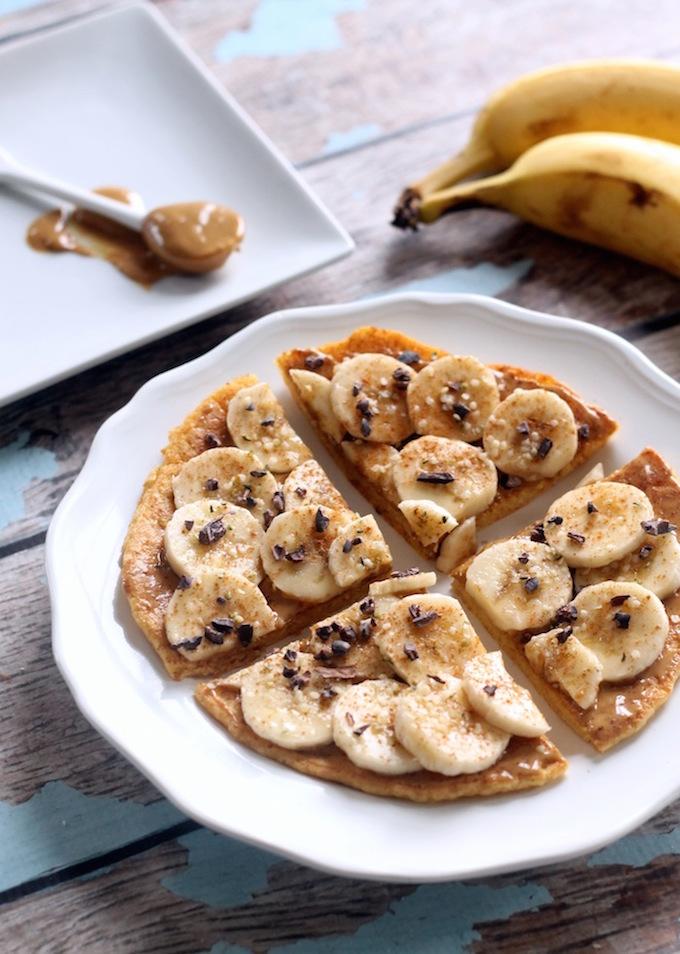
Peanut Butter Banana Breakfast Pizza

Who says pizza is just for dinner?
Peanut Butter Banana Breakfast Pizza

via Alexis at Hummusapien

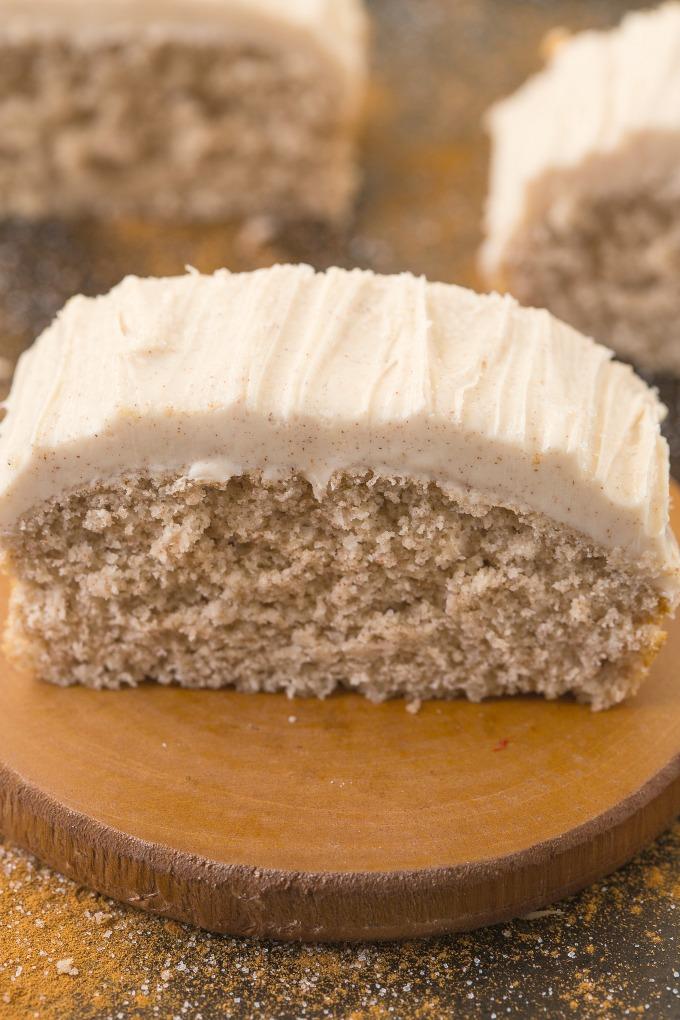
Cinnamon Bun Breakfast Cake

I’d venture a guess this is better than cinnamon rolls:
Healthy Flourless Cinnamon Bun Breakfast Cake

via Arman at The Big Man’s World

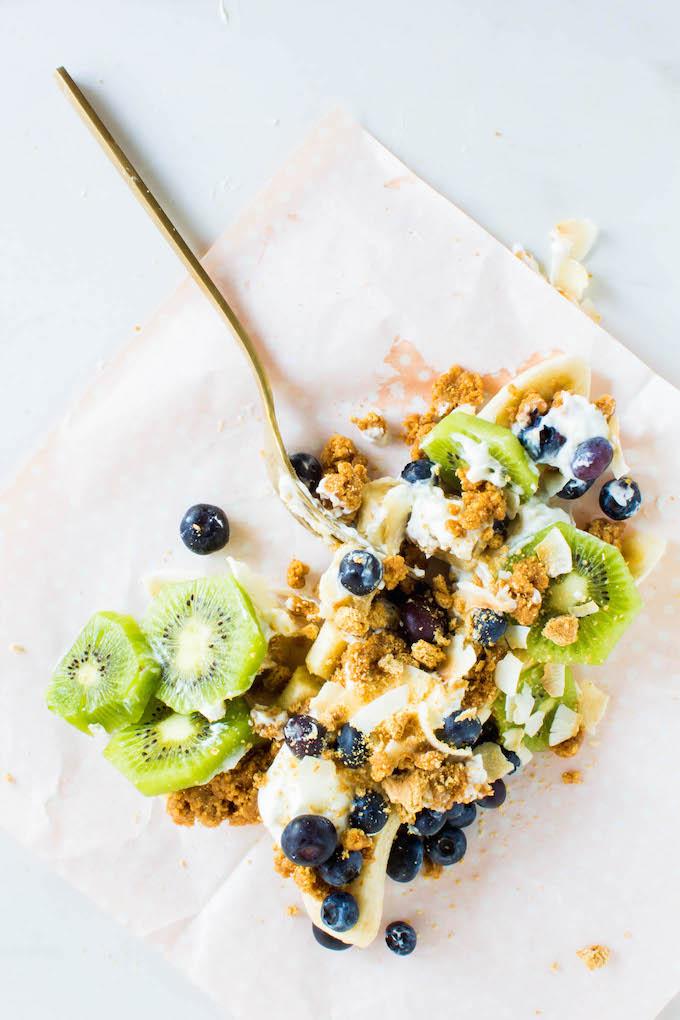
Breakfast Banana Splits

Let people go crazy topping these:
Breakfast Banana Splits

via Kylie at Imma Eat That

Pretty much I want to eat them ALL immediately.

Let’s chat:
Breakfast, brunch or lunch? Which do you prefer?

Enjoy!
–Lindsay–

Filed Under: Baking, Breakfast, Snack Tagged With: White Whole Wheat Flour

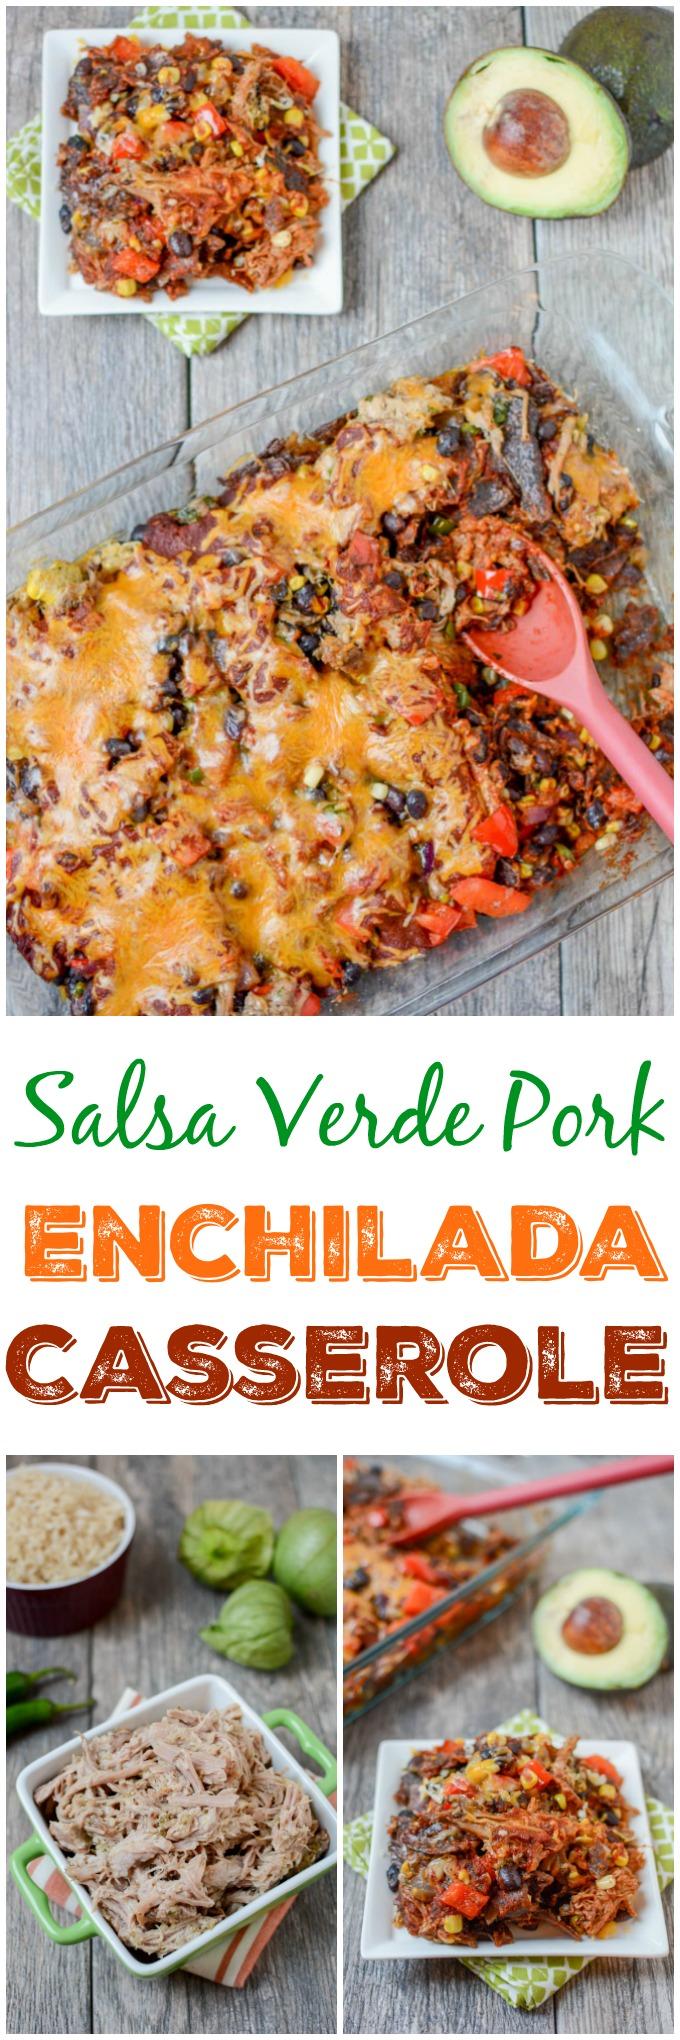
Salsa Verde Pork Enchilada Casserole

February 24, 2016 by Lindsay 10 Comments

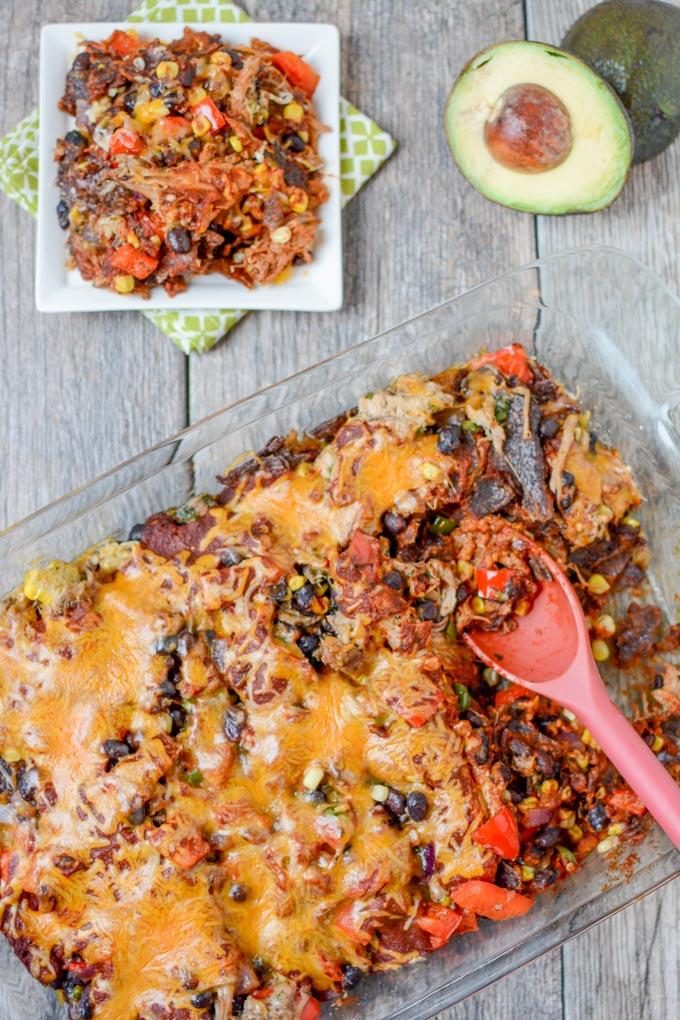
This recipe for Salsa Verde Pork Enchilada Casserole is gluten-free and easily makes two dinners. Serve the slow cooker salsa verde pork with rice one night and turn the leftovers into enchilada casserole later in the week. 

This recipe for Salsa Verde Pork Enchilada Casserole is gluten-free and easily makes two dinners. Serve the slow cooker salsa verde pork with rice one night and turn the leftovers into enchilada casserole later in the week.

Hi friends!

Here’s a quick and easy two for one dinner idea for you! I’m always looking for ways to transform leftovers and this Salsa Verde Pork Enchilada Casserole certainly fits the bill.

But before we get to that, let’s first make the pork:

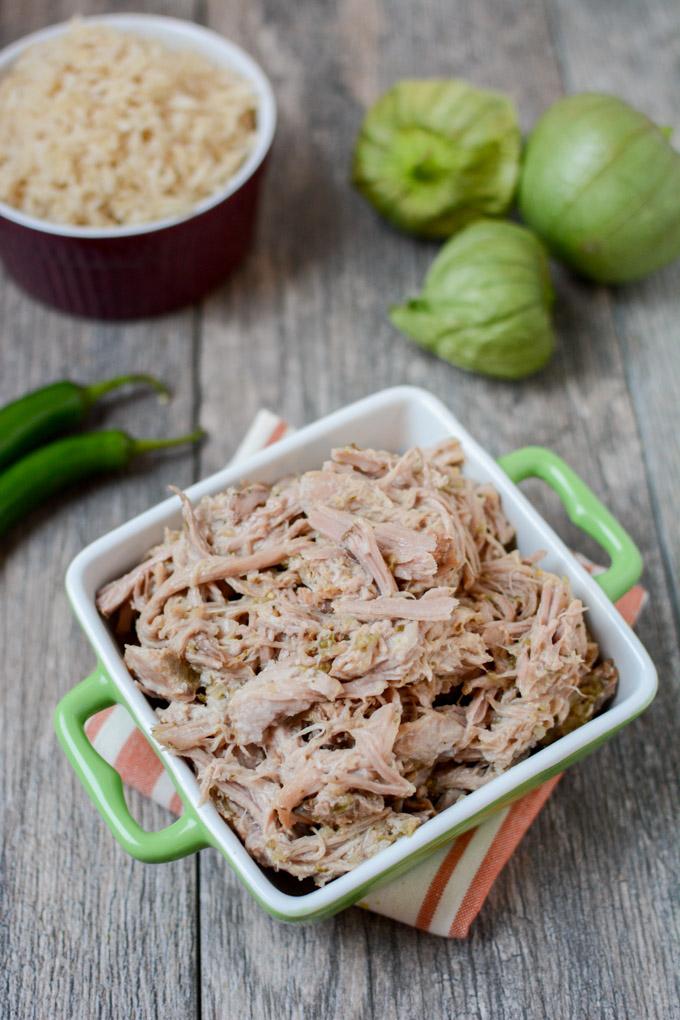
Slow Cooker Salsa Verde Pork

This super easy slow cooker pork is full of flavor and can easily be served on its own with rice.


Salsa Verde Pulled Pork

1 cup chopped onion
2 cups tomatillos (roughly chopped)
3 serrano peppers
2 Tbsp garlic, chopped
1/2 cup cilantro leaves
1/2 cup orange juice
juice from 1 lime
5-6 pound pork roast (i usually use boneless boston butt)

Directions:

  1. Combine all ingredients except pork in a high powered blender or food processor and process well.
  2. Place pork in a slow cooker and pour sauce over top.
  3. Cook on low for 8-10 hours.
  4. Shred with forks and serve with rice.

So there you have it! Easy dinner idea #1. Now,  if you’re not a fan of eating the same dinner a few nights in a row, here’s how you transform your leftover pork into something new and equally tasty:

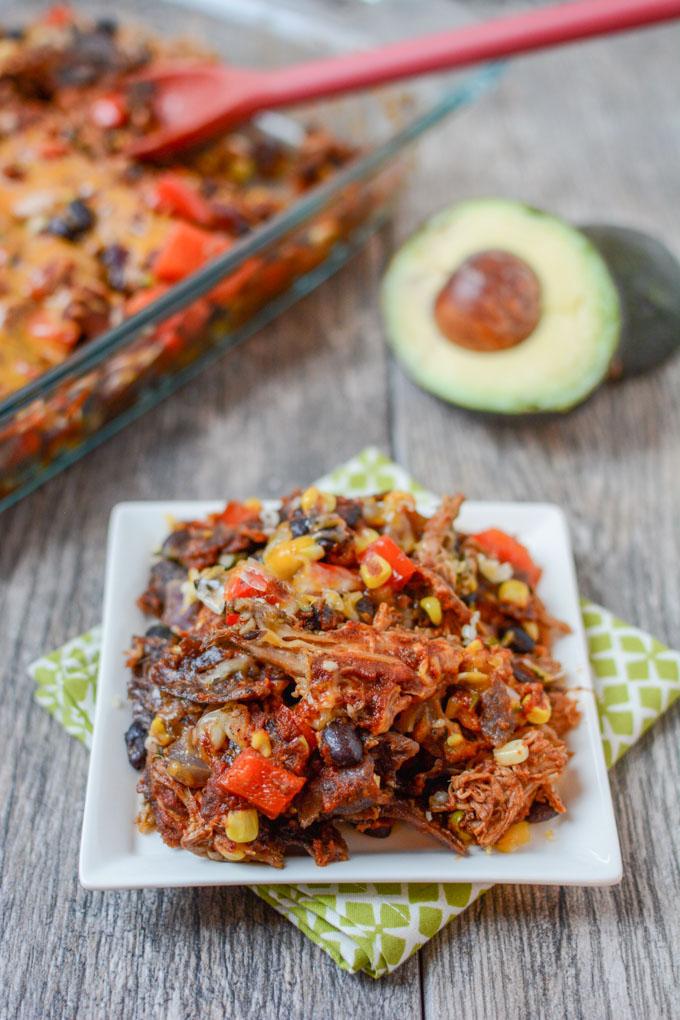
This recipe for Salsa Verde Pork Enchilada Casserole is gluten-free and easily makes two dinners. Serve the slow cooker salsa verde pork with rice one night and turn the leftovers into enchilada casserole later in the week.

This enchilada casserole satisfies my seemingly endless craving for Mexican food for at least a few days!

Here’s how you make it:

Print

Salsa Verde Pork Enchilada Casserole

This recipe for Salsa Verde Pork Enchilada Casserole easily makes two dinners. Serve the slow cooker salsa verde pork with rice one night and turn the leftovers into enchilada casserole later in the week.
Print Recipe

5 Stars 4 Stars 3 Stars 2 Stars 1 Star

No reviews

This recipe for Salsa Verde Pork Enchilada Casserole easily makes two dinners. Serve the slow cooker salsa verde pork with rice one night and turn the leftovers into enchilada casserole later in the week.

  • Prep Time: 10 minutes
  • Cook Time: 20 minutes
  • Total Time: 30 minutes

Ingredients

Scale
  • 2 cups black beans
  • 1 cup corn kernels
  • 1/2 cup onion, diced
  • 1 red pepper, diced
  • 2 serrano peppers, minced
  • 3 cups salsa verde pork
  • 1/2 cup chopped cilantro
  • 2 cups tortilla chips, crumbled
  • 2 cups enchilada sauce
  • 1–2 cups shredded cheese
  • Optional: avocado and salsa for topping

Instructions

  1. In a large skillet, saute beans, corn, onion and peppers over medium heat for 5 minutes. Add pork and cilantro and mix well.
  2. In a 9×13 baking dish, place 1/2 the pork mixture. Top with half the crumbled chips and drizzle with half the enchilada sauce. Top with cheese.
  3. Repeat layers with remaining ingredients.
  4. Cover with foil and bake at 375 degrees for 20 minutes.
  5. Top with avocado and salsa if desired.

Did you make this recipe?

Tag @theleangreenbean on Instagram

If you have a few extra minutes, I’d recommend making a batch of homemade enchilada sauce to cut down on the sodium!

This recipe for Salsa Verde Pork Enchilada Casserole is gluten-free and easily makes two dinners. Serve the slow cooker salsa verde pork with rice one night and turn the leftovers into enchilada casserole later in the week.

So there you go! Two easy dinner ideas that are full of flavor. Make one or make both and enjoy them for lunch or dinner! Or even breakfast! Some leftover pork would be great on a sandwich for lunch or in an omelet for breakfast.

[Tweet “Transform your leftover pork into this Salsa Verde Pork Enchilada Casserole from @Leangrnbeanblog!”]

Enjoy!
–Lindsay–
Filed Under: Dinner Tagged With: Bell Pepper, Black Bean, Cheese, Corn, Onion, Pulled Pork, Salsa Verde

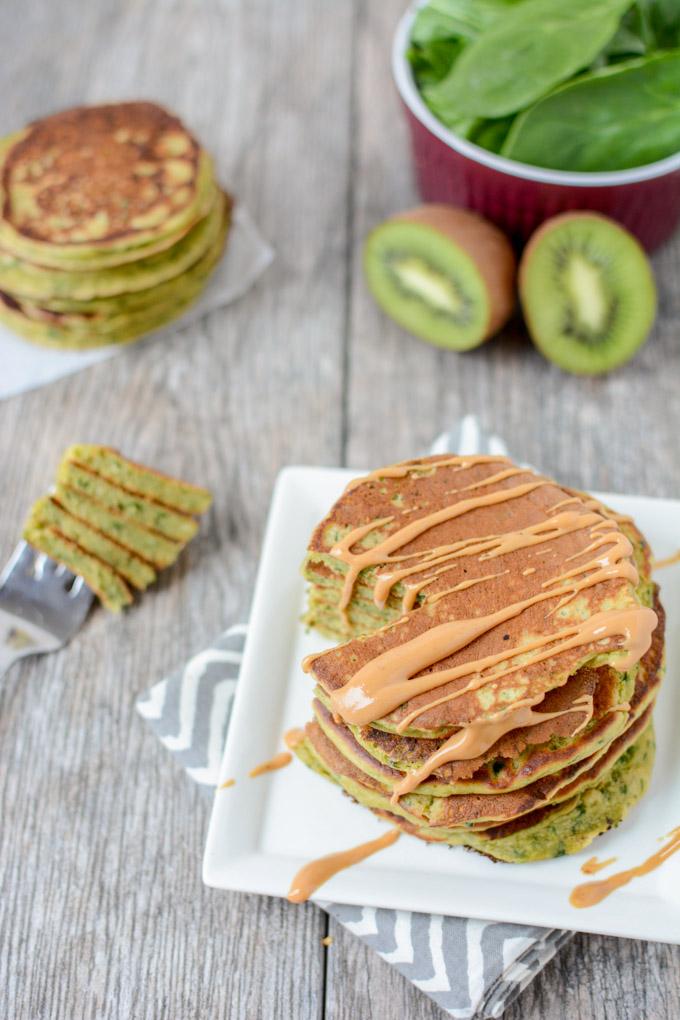
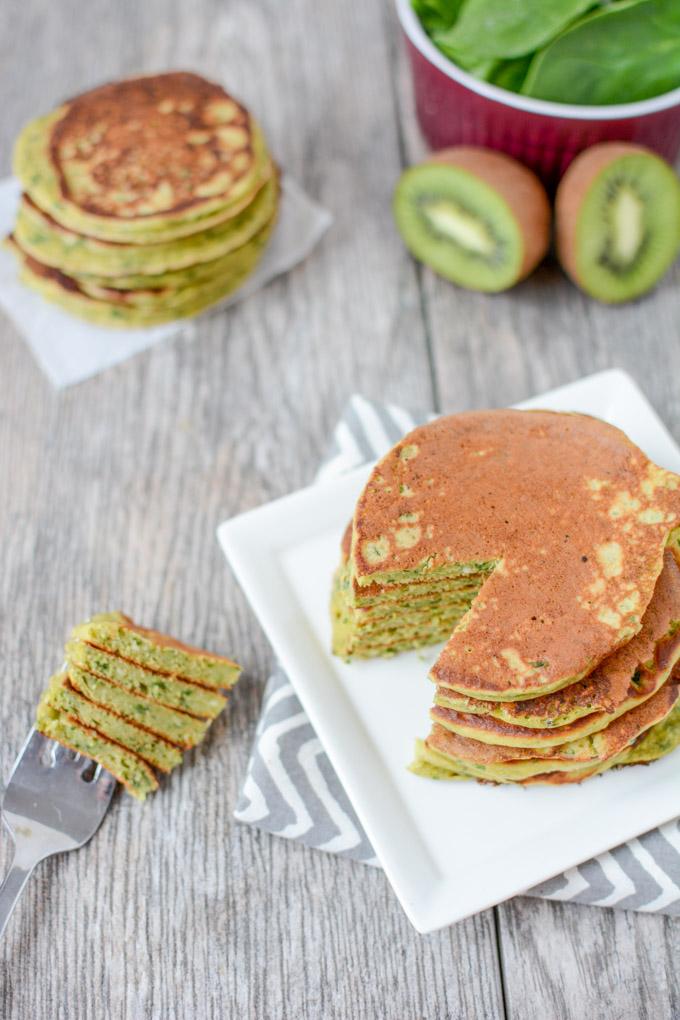
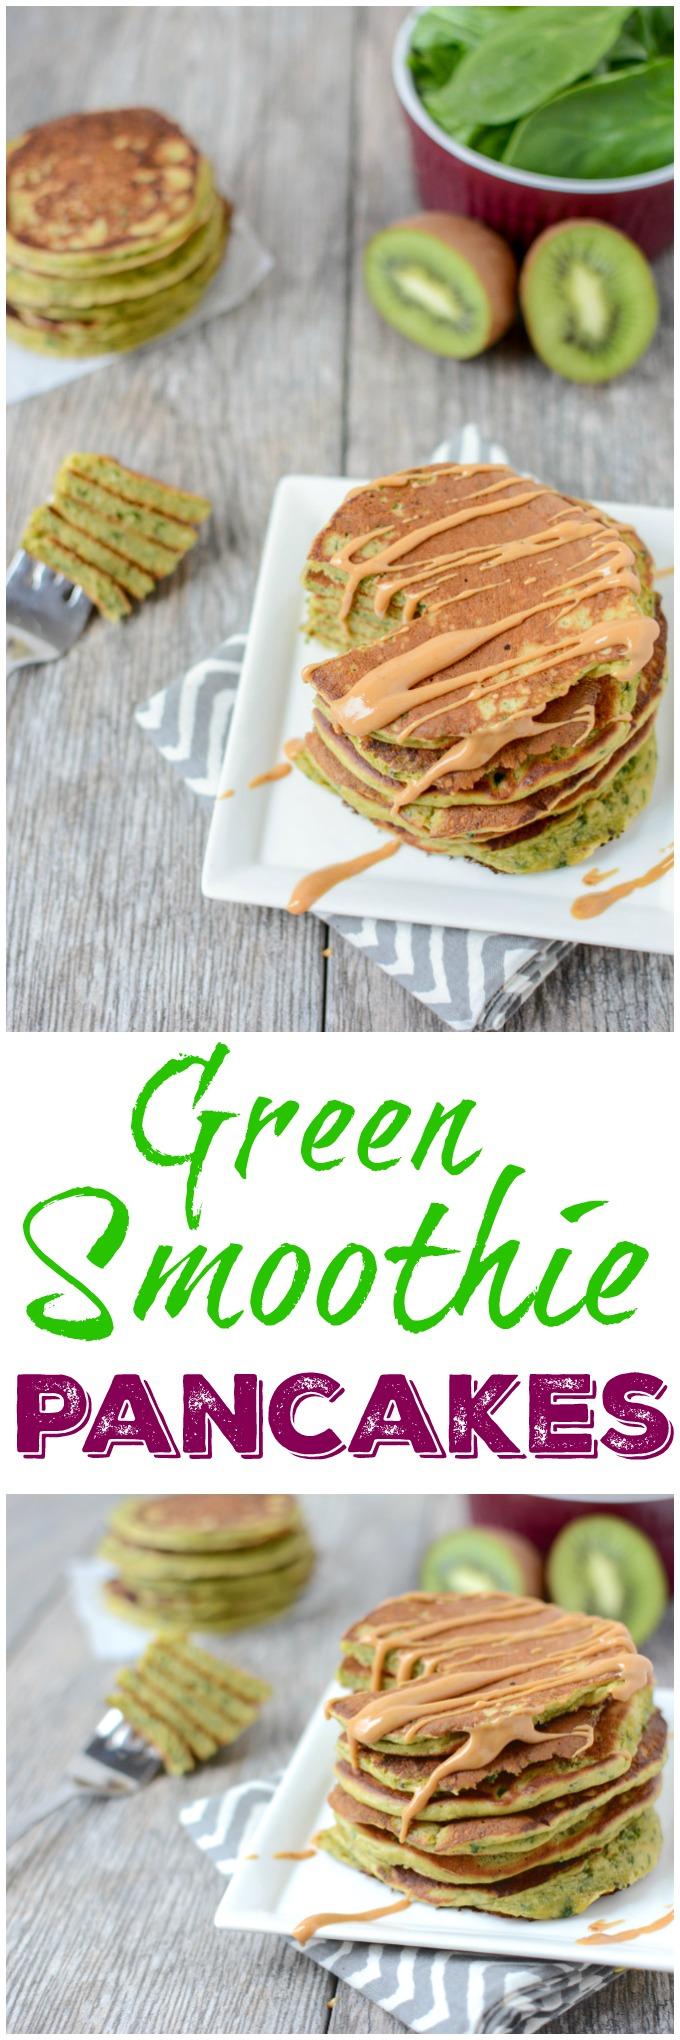
Green Smoothie Pancakes

February 21, 2016 by Lindsay 24 Comments

This recipe for Green Smoothie Pancakes has all the healthy ingredients from your favorite smoothie in pancake form so you can prep them ahead of time and reheating for breakfast during the week!

This recipe for Green Smoothie Pancakes has all the healthy ingredients from your favorite smoothie in pancake form so you can prep them ahead of time and reheating for breakfast during the week!

Hi Friends!

It’s time for another month of Recipe Redux! This month the theme was breakfast – my favorite meal of the day!

Break Out of Breakfast Boredom

Cooks aren’t always pressed for time in the mornings – they just need new ideas. Think mug cakes, smoothie bowls, breakfast cookies and more. Show us the healthy way you wake up your breakfast – or wake up just for breakfast!

While I’m fairly happy eating the same thing for breakfast every day, I’m doing my best to expose Squish to a variety of new foods so I’m always looking for new breakfast ideas for him.

This recipe for Green Smoothie Pancakes has all the healthy ingredients from your favorite smoothie in pancake form so you can prep them ahead of time and reheating for breakfast during the week!

I like simple recipes that are packed with nutritious ingredients and I especially like breakfasts that can be prepped ahead of time so I can get breakfast ready quickly in the morning.

These Green Smoothie Pancakes fit the bill. We’ve been enjoying them for breakfast AND lunch. I actually like them even better the second day and even sometimes prefer them cold, straight out of the fridge! Squish likes them smothered with peanut butter.

Here’s how you make them:

Print

Green Smoothie Pancakes

green smoothie pancakes 5
Print Recipe

5 Stars 4 Stars 3 Stars 2 Stars 1 Star

No reviews

This recipe for Green Smoothie Pancakes has all the healthy ingredients from your favorite smoothie in pancake form so you can prep them ahead of time and reheating for breakfast during the week!

  • Prep Time: 5 minutes
  • Cook Time: 15 minutes
  • Total Time: 20 minutes
  • Yield: 8 - 10 pancakes 1x

Ingredients

Scale
  • 1 cup baby spinach (more if desired)
  • 3/4 cup vanilla yogurt (I use whole milk Greek)
  • 2 eggs
  • 3 Tbsp hemp hearts (hemp seeds)
  • 1/4 cup peanut butter (or other nut butter)
  • 2 kiwis, peeled and roughly chopped
  • 2 Tbsp maple syrup
  • 1 tsp vanilla extract
  • 1 tsp cinnamon
  • 2 tsp baking powder
  • 1 cup white whole wheat flour

Instructions

  1. Add first 8 ingredients to a blender and blend until well combined.
  2. Add cinnamon, baking powder and flour and blend until just mixed
  3. Cook pancakes in a skillet or griddle over medium heat.
  4. Serve topped with more peanut butter, yogurt or syrup!

Did you make this recipe?

Tag @theleangreenbean on Instagram

These pancakes are packed with healthy green ingredients like spinach and kiwis, plus hemp hearts, nut butter and greek yogurt for added protein and healthy fats! We’ve been loving smoothies as a snack lately, but I just can never seem to get into them for breakfast. I think I just like chewing my breakfast. Green Smoothie Pancakes are the perfect compromise! All the delicious smoothie ingredients in a form you can eat with a fork!

This recipe for Green Smoothie Pancakes has all the healthy ingredients from your favorite smoothie in pancake form so you can prep them ahead of time and reheating for breakfast during the week!

Plus the green color makes them fun to eat and all the flavors covering the spinach makes them kid-friendly! One thing I did notice is that if you eat them hot straight out of the pan, you can taste the spinach a little more than when you let them cool down a bit or eat them cold!

[Tweet “Make these Green Smoothie Pancakes from @leangrnbeanblog to enjoy for breakfast all week!”]

Enjoy!
–Lindsay–
For more creative breakfast ideas, check out the links below:

An InLinkz Link-up


Filed Under: Breakfast Tagged With: Egg, Hemp Seed, Maple Syrup, Peanut Butter, Spinach, White Whole Wheat Flour, Yogurt

Screenshots

February 19, 2016 by Lindsay 8 Comments

Hi Friends!

Just popping in with a little bit of Friday randomness. Today we’re talking screenshots!

First of all, I’m kinda addicted to taking them. I’m constantly screenshotting stuff on my phone that I like/what/need to remember.

Second – did you know if you have an iphone there’s a screenshots album in your photos? Only took me like 4 years of having in iphone to discover this, but it’s nice to be able to go there and look through all my screenshots without other pictures in between.

Third- My girl Courtney has done some fun posts where she shares some of the fun stuff she’s taken screen shots of lately, so I thought I’d jump on board and do the same. I tried to organize/group them at least a little bit for you! Enjoy!

Quotes

IMG_0122


IMG 0483 e1455827918492

Yessssss.


 IMG 1139 e1455827960294

AMEN.


IMG 1042 e1455827995237

[Read more…] about Screenshots

Filed Under: Uncategorized

Baked Scotch Eggs

February 17, 2016 by Lindsay 24 Comments

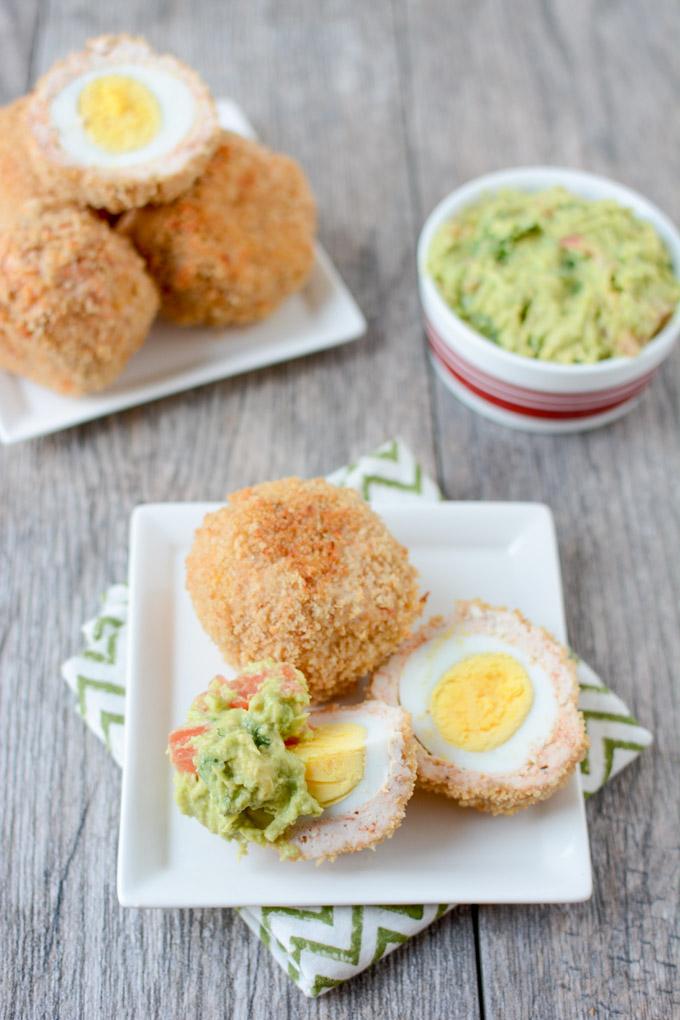
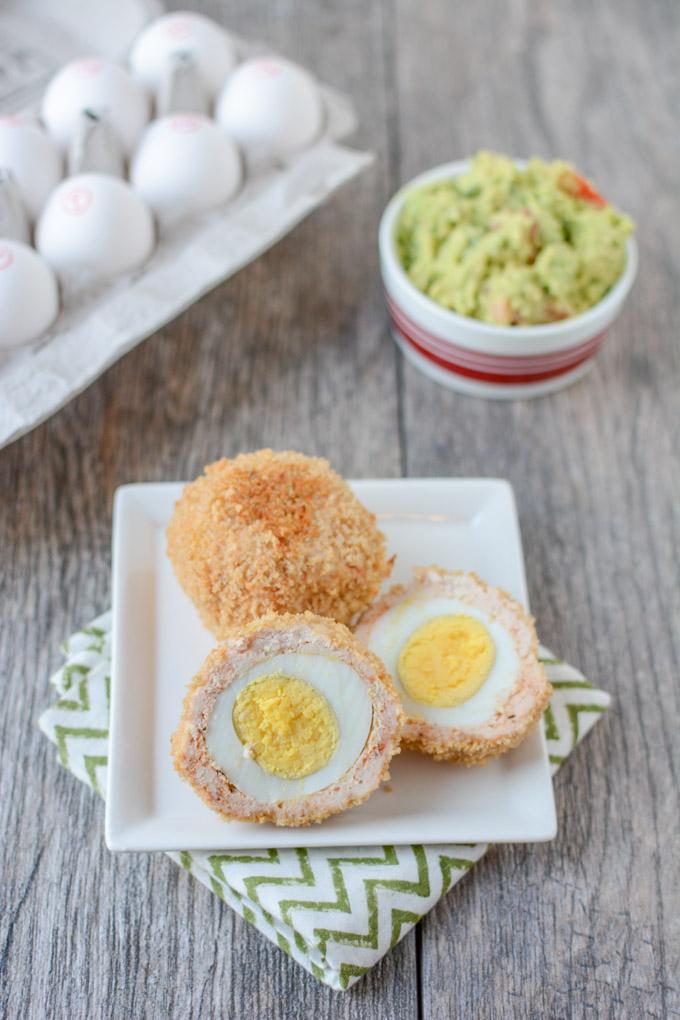
This recipe for Baked Scotch Eggs makes a great high protein breakfast. Enjoy them warm or cold and serve with guacamole for some added healthy fats! 

This recipe for Baked Scotch Eggs makes a great high protein breakfast. Enjoy them warm or cold and serve with guacamole for some added healthy fats!

This post was sponsored by Davidson’s Safest Choice Eggs. All thoughts and opinions are my own. 

Hi Friends!

Today we’re talking about one of my all-time favorite foods- eggs! If you follow me on any form of social media, you’re probably well aware that I eat eggs pretty much every single day. They’re healthy, versatile and I just never seem to get sick of them!


This recipe for Baked Scotch Eggs makes a great high protein breakfast. Enjoy them warm or cold and serve with guacamole for some added healthy fats!

So the first recipe I cooked up for you guys are these Baked Scotch Eggs.

Eggs are one of my go-to breakfasts and snacks for Squish. He’s a fan of them pretty much any way I cook them but I’m always looking for new ideas. He’s also a growing boy. And he eats a lot. It actually truly baffles me how much he can eat for such a little person. But I’m doing my best to feed him real, well-balanced meals and snacks. Lately, I’ve been focusing a lot on breakfast and making sure to give him a protein-packed plate to kick off the day.

This recipe definitely fits the bill and it’s fairly simple to make.

Here’s how you do it:

Print

Baked Scotch Eggs

This recipe for Baked Scotch Eggs makes a great high protein breakfast. Enjoy them warm or cold and serve with guacamole for some added healthy fats!
Print Recipe

5 Stars 4 Stars 3 Stars 2 Stars 1 Star

No reviews


  • Author: Lindsay
  • Yield: makes 6 eggs 1x

Ingredients

Scale
  • 6 hard cooked eggs
  • 1 raw egg
  • 1 pound ground chicken (you could also use ground sausage)
  • 2 cloves garlic
  • 1/2 tsp paprika
  • 1/2 tsp cayenne pepper
  • 1 cup panko breadcrumbs
  • 1/4 cup flour
  • guacamole for dipping (optional)

Instructions

In a large bowl, combine chicken, garlic and spices and mix to combine.

Divide chicken mixture into 6 parts. Dip hands in flour, then mold 1/6 of the chicken mixture around each hard boiled egg.

Set up dredging station – put flour on a plate, egg in a bowl and breadcrumbs on another plate.

Roll each meat-covered egg in flour until lightly coated. Dip in egg, turning to coat and then roll in panko breadcrumbs.

Place eggs on a greased or foil-lined baking sheet.

Bake at 400 degrees for 25 minutes, flipping/rotating once.

Notes


Did you make this recipe?

Tag @theleangreenbean on Instagram

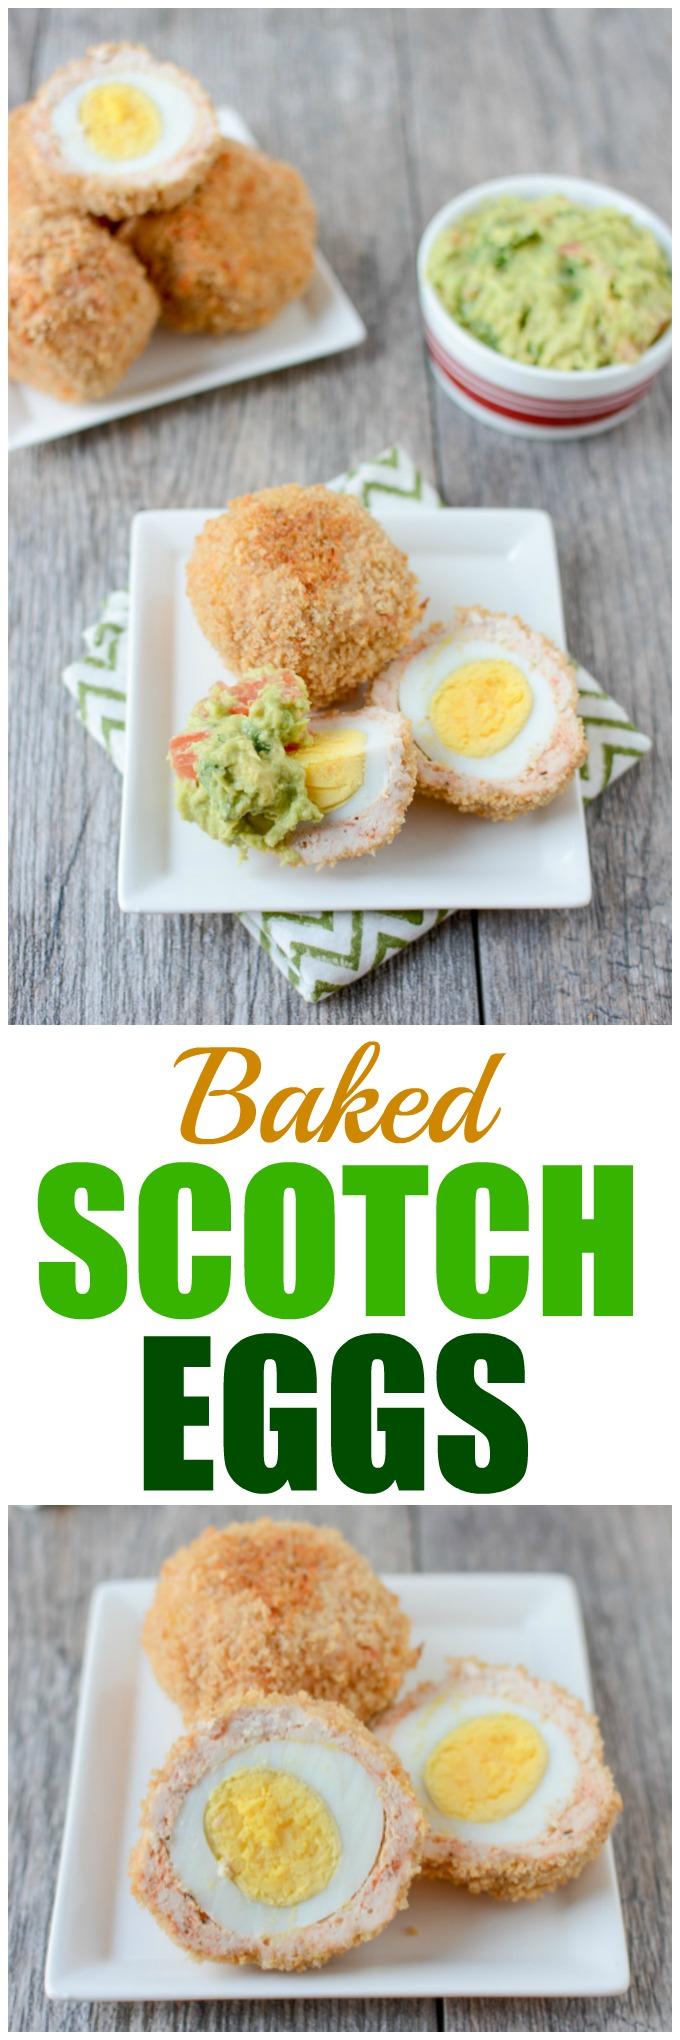
Pin this post so you can give it a try later!

This recipe for Baked Scotch Eggs makes a great high protein breakfast. Enjoy them warm or cold and serve with guacamole for some added healthy fats! 


Enjoy!
–Lindsay–
Filed Under: Breakfast, Sponsored Tagged With: Egg, Ground Chicken, Panko

Savory Vegetable Pancakes

February 15, 2016 by Lindsay 10 Comments

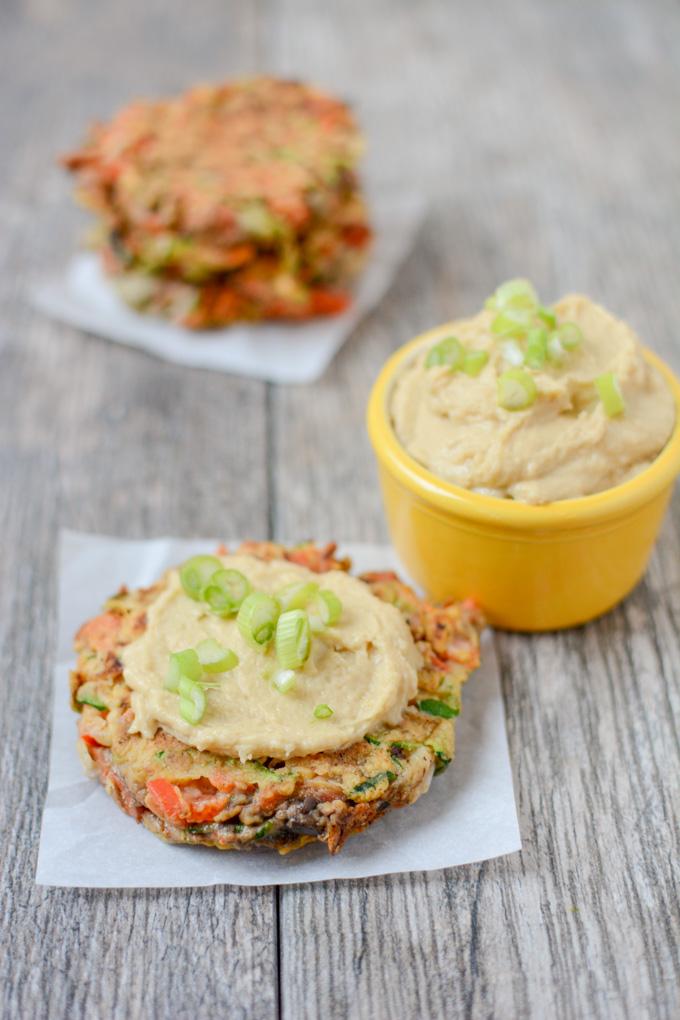
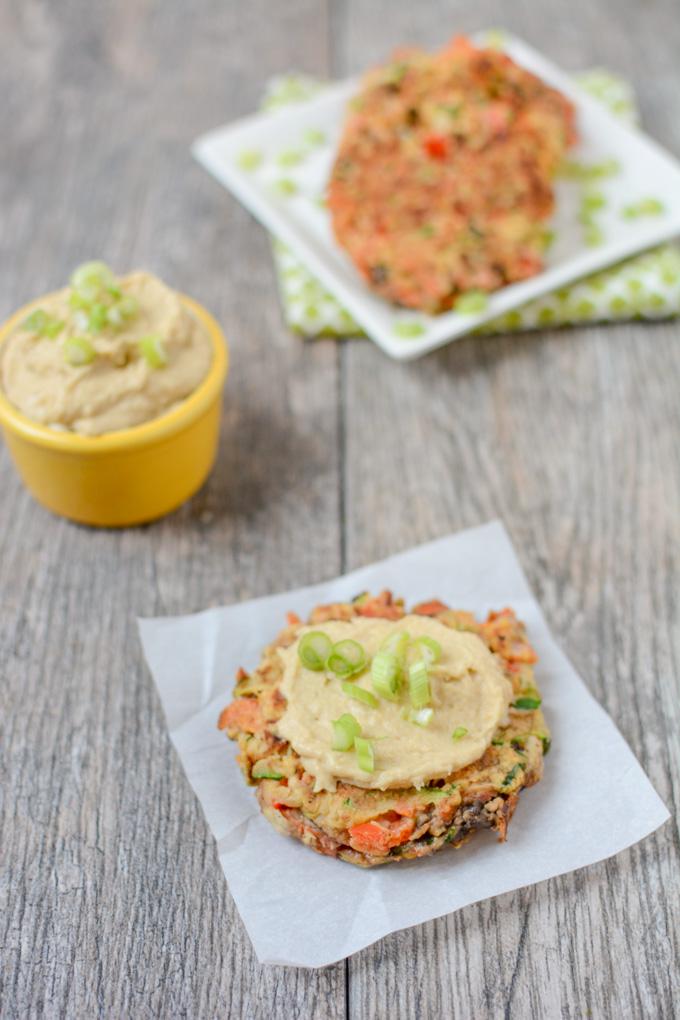
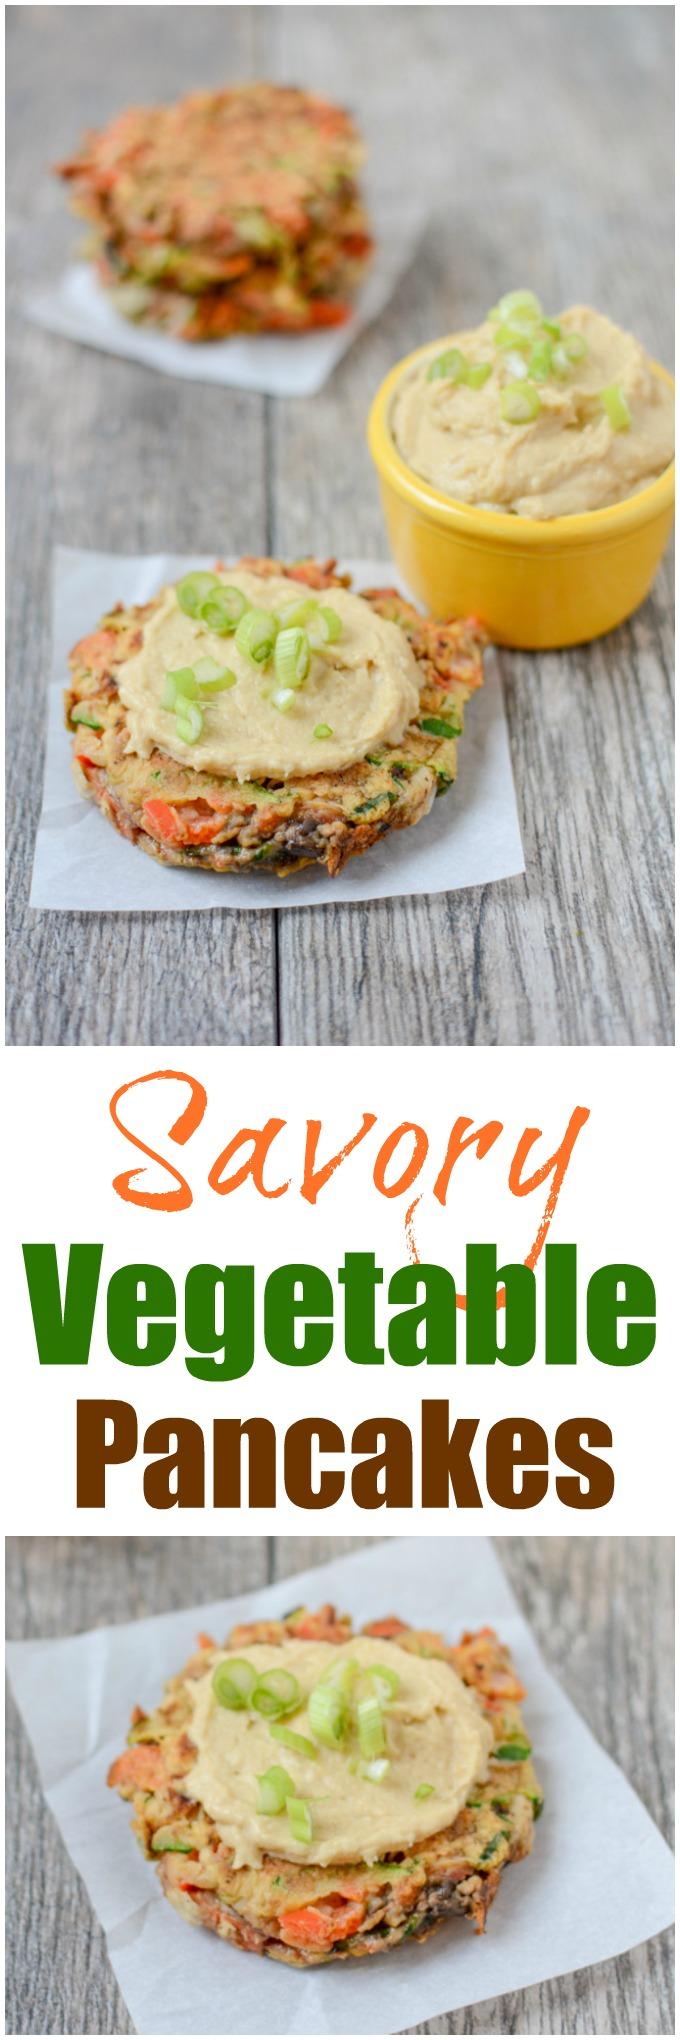
This recipe for Savory Vegetable Pancakes is an easy, kid-friendly way to add more vegetables to lunch or dinner!

This recipe for Savory Vegetable Pancakes is an easy, kid-friendly way to add more vegetables to lunch or dinner!

Hi friends!

It’s been so long since I made these little veggie cakes that I almost forgot to share them with you! That would have been tragic because they were actually quite good. I had a tough time deciding what to call these – they’re kinda like cakes, kinda like pancakes, kinda like fritters…you get the idea. I went with pancakes because they’re a little more fluffy than crispy…but they’re not the kind of pancakes you’d want to top with syrup.

Basically, these were an attempt to create a healthy vehicle that could be used to transport hummus into Squish’s mouth. I think I’ve mentioned before that Squish will eat pretty much ANYTHING that’s covered in hummus. Right now that’s the easiest way to get some veggies into him…but steamfresh veggies dipped in hummus gets a little old, even for me.

This recipe for Savory Vegetable Pancakes is an easy, kid-friendly way to add more vegetables to lunch or dinner!

So, I set out to create a pancake-type thing that I could top with hummus, cut into pieces and let him go to town on, while still getting some veggies at meal time. If you or your kiddos aren’t fans of hummus you could try a different sauce like tzatziki!

Here’s how you make them:

Print

Savory Vegetable Pancakes

Savory Vegettable Pancakes 3
Print Recipe

5 Stars 4 Stars 3 Stars 2 Stars 1 Star

No reviews

This recipe for Savory Vegetable Pancakes is an easy, kid-friendly way to add more vegetables to lunch or dinner!

  • Prep Time: 5 minutes
  • Cook Time: 10 minutes
  • Total Time: 15 minutes
  • Yield: 8-10 cakes 1x

Ingredients

Scale
  • 3 cup veggies, shredded or finely diced (I used zucchini, red peppers, mushrooms and carrots)
  • 1 egg
  • 1/4 cup plain yogurt (greek or regular)
  • 3/4 cup white whole wheat flour
  • 1/2 teaspoon garlic powder
  • 1 teaspoon baking powder
  • 2 Tbsp parmesan cheese
  • Optional: hummus for topping

Instructions

  1. If you’re using veggies that you’ve grated, be sure to wrap in a towel and squeeze to remove excess moisture before starting!
  2. Combine all ingredients in a bowl and stir until well combined.
  3. Drop by 1/4 cup scoops onto a greased, heated skillet.
  4. Let cook over medium heat for 3-5 minutes, flip once, press gently to flatten and cook another 3-5 minutes.
  5. Serve warm or cold, topped with hummus.

Did you make this recipe?

Tag @theleangreenbean on Instagram

Pretty easy right? Be sure to finely dice any veggies you’re using and if you shred veggies like carrots and zucchini, wrap them up and give them a good squeeze to remove excess moisture!

Thanks to all the veggies, these won’t be completely fluffy and dry inside like a traditional breakfast pancake but leave them in the skillet long enough to brown nicely on both sides and cook through the middle. We enjoyed these both warm and cold. Take your pick!

This recipe for Savory Vegetable Pancakes is an easy, kid-friendly way to add more vegetables to lunch or dinner!

[Tweet “Serve these Savory Vegetable Pancakes from @leangrnbeanblog topped with hummus at lunch or dinner!”]

Enjoy!
–Lindsay–
Filed Under: Dinner, Lunch, Side Dish Tagged With: Carrot, Egg, White Whole Wheat Flour, Yogurt, Zucchini

$250 Minted Giveaway

February 12, 2016 by Lindsay 6 Comments

Screen Shot 2016-02-04 at 9.23.09 PM

This post was sponsored by my friends at Minted and contains affiliate links. As always, all thoughts and opinions are 100% my own.

Hi friends!

Just popping in today to share a little bit about a fun website I was recently introduced to! You guys know I love photos…as evidenced by the fact that I take about a million a day of Squish! I store them all on my phone and computer but I’m absolutely terrible about printing them all out and updated our framed photos. When the lovely folks at Minted reached out to see if I’d be interested in ordering a few things from their site, I jumped at the chance!

What I love about Minted is that it’s a community of independent artists. Here’s how it works. Independent artists submit designs. People vote on their favorites. Minted sells the winning designs on their website!

[Read more…] about $250 Minted Giveaway

Filed Under: Uncategorized

A Day In The Life – 15 Months

February 11, 2016 by Lindsay 24 Comments

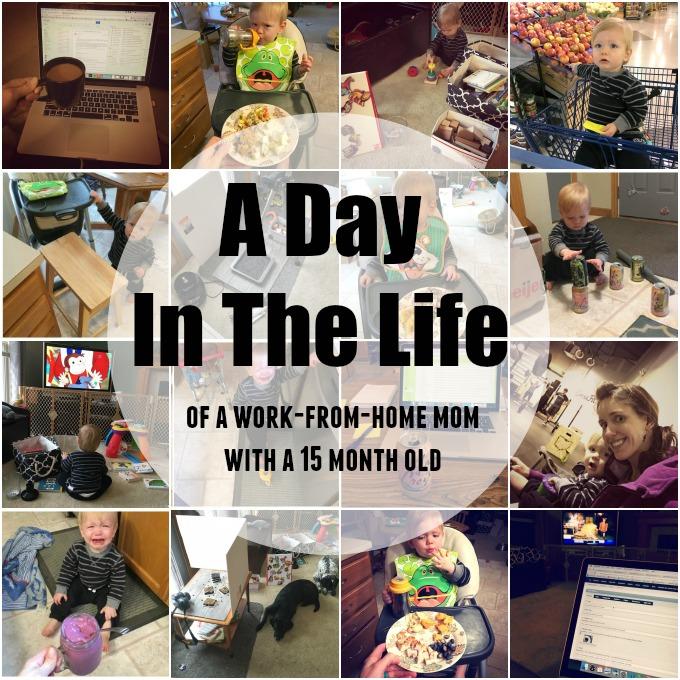
A Day in the Life of a work-from-home mom with a 15 month old

Hi Friends!

Somehow as I sit here and write this, I have a 15 month old baby. Not quite sure how that happened but excuse me while I go cry! As promised, I’m doing my best to write one of these posts every 3 months. I just went back and read my 12 month post and it’s crazy how much things have changed!

In case you missed the past posts, here they are:

Day in the Life – 12 Months
Day in the Life – 9 Months

Day in the Life – 6 Months
Day in the Life – 3 Months

So here’s how our day looked yesterday. I tried to link to some of the things in the pictures people might ask about. Some of the links are affiliate links:

4 AM – Wake up and feed the animals.

5 AM – Wake up to make sure hubby is up. Like I mentioned the other day, there have been some changes at the gym and he’s currently coaching the 5:30am classes during the week before he goes to work. He’s doing great, but it’s been an adjustment to get used to waking up at 4:45 instead of 7:45 like he was previously. So, we both set alarms to make sure he gets up and out the door.

15 months old

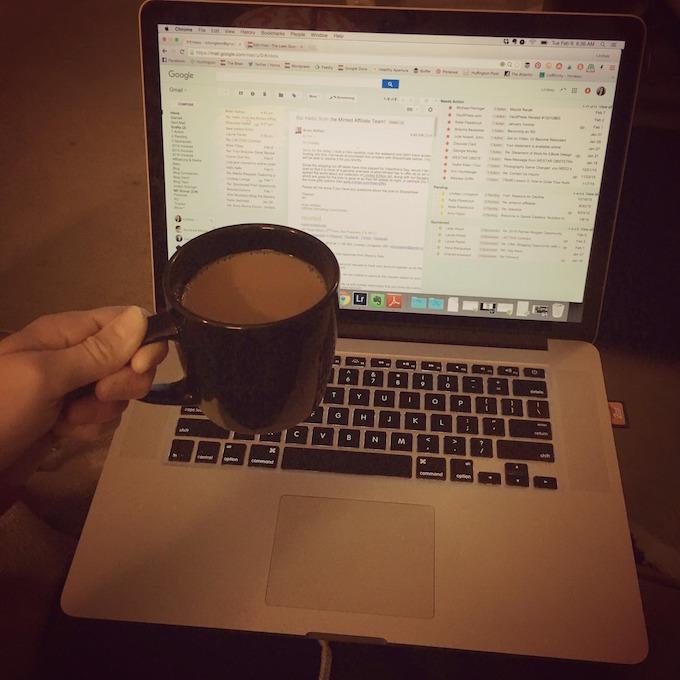
6 AM – Up and at ’em. Squish’s wake up and nap schedules have been less than predictable lately, which means it has been increasingly hard for me to get work done during the day. He typically wakes up around 7 so I try to get up by 6 to get a solid hour of work in before that. This is typically when I do a lot of social media stuff, as well as a lot of my daily tasks for Healthy Aperture, etc. I do my best to focus on Squish when he’s awake but I do occasionally need to answer work emails throughout the day.

15 months old

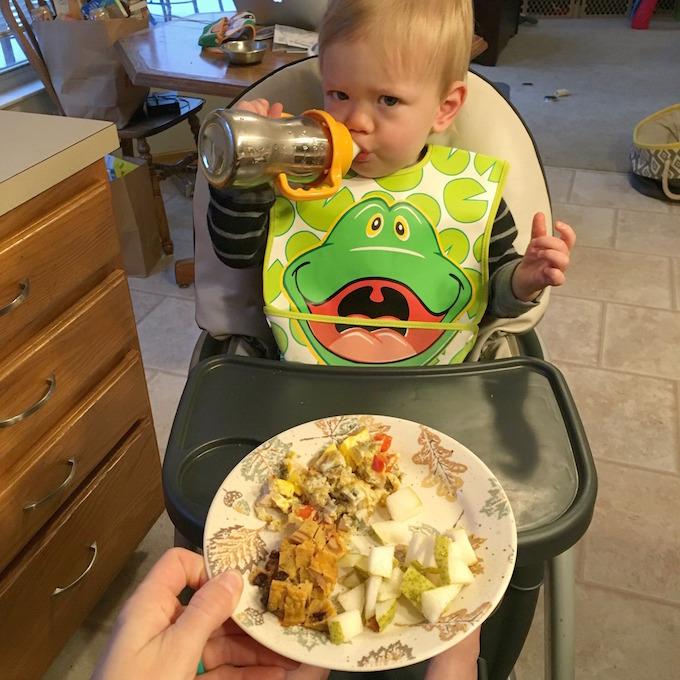
7:30 AM – Hubby gets home around 7:15 and Squish wakes up around 7:30. He gets him up while I get breakfast ready. If Squish wakes up earlier, I get him up myself and breakfast gets delayed a bit…but this morning it was nice to have a few minutes to get his breakfast together in peace. He doesn’t always need to eat right when he wakes up…but when he decides it’s time to eat, food better be ready in about 30 seconds or total meltdown ensues. My go-to breakfast for him is a baked egg muffin, a sweet potato bite and some fruit. Plus Cheerios and a glass of milk. (This is the cup he uses and these bibs are dishwasher safe!). I cram down a fried egg and some Cheerios myself while feeding him.

15 months old

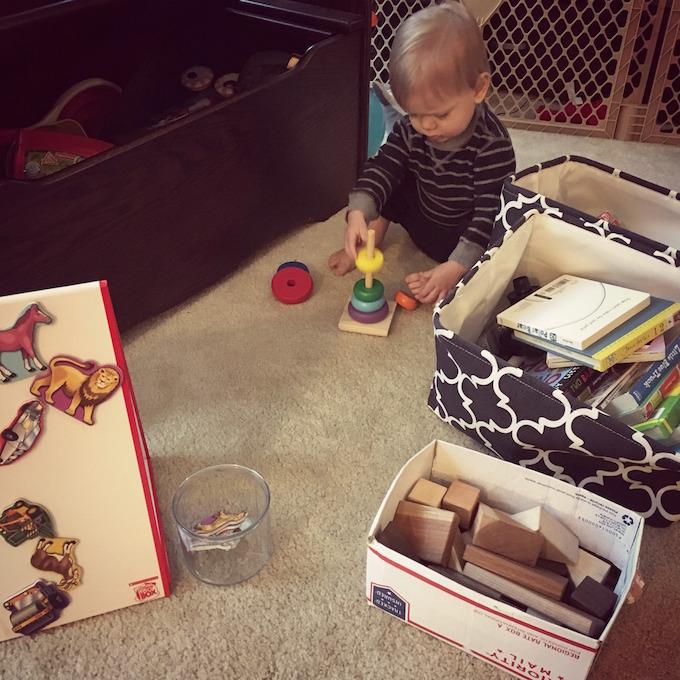
7:45 – 9 AM – Playtime. Hubby heads to work and Squish and I play. He watches some PBS, plays in his kitchen, we read books, etc. (Rainbow Stacker, Magnet board + magnets, wooden blocks)

[Read more…] about A Day In The Life – 15 Months

Filed Under: Uncategorized

Peanut Butter Bread Pudding with Smashed Raspberries

February 10, 2016 by Lindsay 25 Comments

This recipe for a small batch of Peanut Butter Bread Pudding is perfect for dessert! Top with smashed raspberries for added sweetness.

This recipe for a small batch of Peanut Butter Bread Pudding is perfect for dessert! Top with smashed raspberries for added sweetness.

This post was sponsored by LACTAID®. All thoughts and opinions are my own.

Hi Friends! File this under things you might not know about me: When I was in high school and college, I struggled with lactose intolerance. I went from eating several bowls of cereal a day without a second thought, to not being able to have any milk without serious stomach consequences. Since I’m stubborn and refused to give up my daily cereal, I spent a lot of years taking a daily pill just so I could enjoy it with minimal discomfort.

File this under things you might not know about me: When I was in high school and college, I struggled with lactose intolerance. I went from eating several bowls of cereal a day without a second thought, to not being able to have any milk without serious stomach consequences. Since I’m stubborn and refused to give up my daily cereal, I spent a lot of years taking a daily pill just so I could enjoy it with minimal discomfort.

Luckily for me, I seem to have outgrown this issue but I know there are other people out there who still deal with lactose intolerance or dairy sensitivity on a daily basis.

Luckily for you, I’m here to tell you about some products I wish I had known about 15 years ago: LACTAID® Dairy Products.

They’re 100% real dairy products like milk, ice cream and cottage cheese, just without the lactose, so they are easy to digest with no discomfort. So people can enjoy the creamy, delicious taste of dairy that they love without worrying that the milk is going to mess with them.

This recipe for a small batch of Peanut Butter Bread Pudding is perfect for dessert! Top with smashed raspberries for added sweetness.

Pretty cool, right? When the lovely folks at LACTAID® reached out to tell me about their current No More #DairyEnvy campaign, I immediately jumped at the chance to partner with them. 

The No More #DairyEnvy campaign is committed to helping those with dairy sensitivity savor the full joy of dairy without unwanted discomfort. To help combat Dairy Envy in 2016, LACTAID® is partnering with Milk Bar – the dessert empire founded by James Beard award-winning pastry chef, Christina Tosi – to create treats made with LACTAID® so that those who are sensitive to dairy can enjoy their signature sweets.

This recipe for a small batch of Peanut Butter Bread Pudding is perfect for dessert! Top with smashed raspberries for added sweetness.

This is the first in a series of 4 recipes I’ll be sharing with you guys over the next several months that are made with LACTAID® products! Do you have to be lactose-intolerant to enjoy these recipes? Nope! But they might make it a little easier to enjoy dessert with a friend or loved one who is dairy sensitive.

This recipe for a small batch of Peanut Butter Bread Pudding is perfect for dessert! Top with smashed raspberries for added sweetness.

Valentine’s Day is fast approaching and we all know dessert is pretty much necessary for our love day celebrations, right? But choosing that dessert is always the hardest part!

A lot of people go the chocolate route, but milk chocolate can cause tummy troubles for dairy-sensitive folks as well, so I went a different route.

I made you bread pudding.
And I added peanut butter.
And then I topped it pretty red raspberries.
It’s like pb&j in dessert form.
And it’s delicious.

Here’s how you make it:

Print

Peanut Butter Bread Pudding with Smashed Raspberries

Peanut Butter Bread Pudding 5
Print Recipe

5 Stars 4 Stars 3 Stars 2 Stars 1 Star

No reviews

Made with just a few simple ingredients, this Peanut Butter Bread Pudding is not overly sweet, full of flavor and makes just enough to feed 3-4 people for dessert!

  • Prep Time: 10 minutes
  • Cook Time: 30 minutes
  • Total Time: 40 minutes
  • Yield: serves 4

Ingredients

Scale
  • 4 cups cubed bread (I used French bread cut into fairly small cubes)
  • 1.5 cups LACTAID® 2% Milk
  • 1/2 cup brown sugar
  • 1/2 cup peanut butter
  • 2 eggs
  • 2 tsp vanilla extract
  • 1 tsp cinnamon
  • 1.5 cups frozen rasberries

Instructions

  1. In a large bowl, combine bread, 2 eggs and 1 cup LACTAID® Milk and mix until well combined.
  2. In a small saucepan, combine remaining milk, brown sugar, peanut butter, vanilla and cinnamon.
  3. Stir over medium heat until sugar is dissolved.
  4. Pour over bread mixture and stir well.
  5. Scoop into loaf pan lined with parchment paper.
  6. Bake at 350 degrees F for 30 minutes.
  7. In same saucepan, heat raspberries, smashing with a fork until thawed. (Or place in a microwave-safe bowl and defrost, then smash with fork to make sauce).
  8. Serve warm, topped with smashed raspberries.

Did you make this recipe?

Tag @theleangreenbean on Instagram

That’s all there is to it! This makes the perfect amount to for two to enjoy on Valentine’s day and then again the next night 🙂

This recipe for a small batch of Peanut Butter Bread Pudding is perfect for dessert! Top with smashed raspberries for added sweetness.

Enjoy!
–Lindsay–
I have received information and materials from JOHNSON & JOHNSON CONSUMER, Inc., McNeil Nutritionals, LLC Subsidiary the makers of LACTAID®. The opinions stated are my own. This is a sponsored post.


Filed Under: Dessert, Sponsored Tagged With: Bread, Brown Sugar, Egg, Milk, Peanut Butter

Braciole – Stuffed Flank Steak

February 4, 2016 by Lindsay 10 Comments

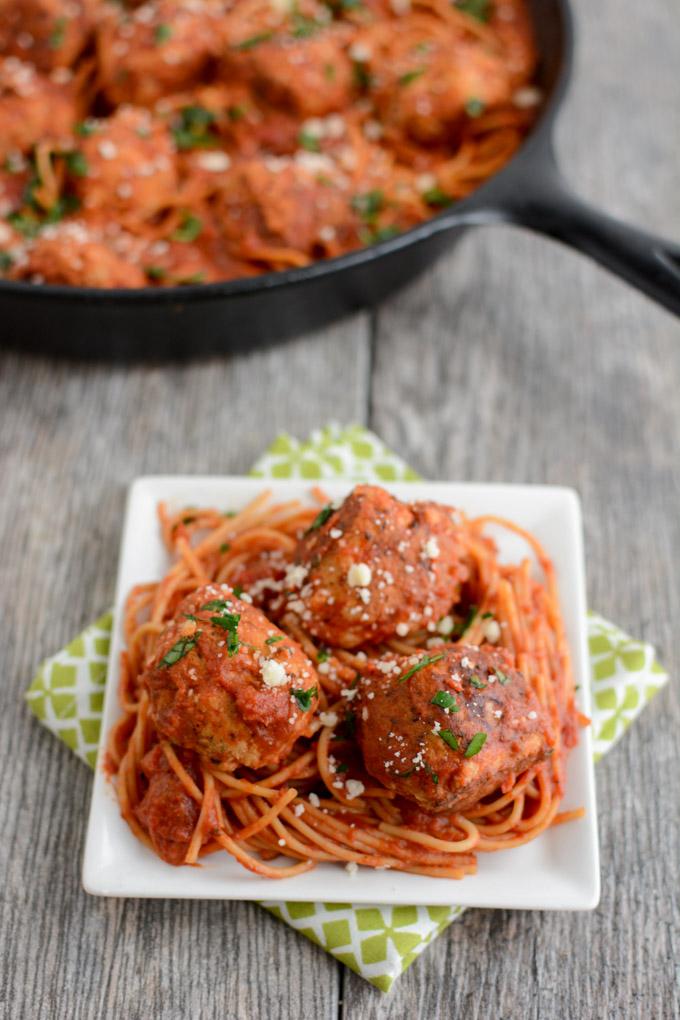
This recipe for Braciole is thinly sliced flank steak stuffed with sausage and simmered in tomato sauce until tender. Eat it solo or pair with pasta for a more traditional Italian dinner. 

This recipe for Braciole is thinly sliced flank steak stuffed with sausage and simmered in tomato sauce until tender. Eat it solo or pair with pasta for a more traditional Italian dinner.

Hi friends!

So today’s recipe is a Mr. Bean special. I was planning to ask him to write a guest post about it for you guys but we’ve had a stressful weeks at the gym…which ended in us buying out our business partner…and has resulted in some super long days for both of us…so I’m just gonna give you the basic details and hopefully Mr. Bean will make an appearance on the blog again soon. Remember when he wrote about what it’s like to be married to a blogger?  Funny stuff.

Anyways, when we were in Chicago for Christmas this year, we went to dinner at Volare (highly recommend!) and hubby ordered the braciole. FYI- it’s pronounced Bra-Joel. If I’m being honest, I’d never even heard of it until he ordered it…but considering I don’t really eat red meat, that’s not surprising. Apparently my mother-in-law used to make it fairly often and hubby had some fond food memories of it so he gave it a try. He was blown away!

So much so, that when we came home, he decided he needed to recreate it for himself. Hubby doesn’t cook often, but when he does, it’s always good. After a few internet searches and a conversation with his mom, we headed to the store to gather up the necessary ingredients.

He’s made two batches of braciole since Christmas and they’ve both turned out really well. Here’s how you make it:

Print

Braciole

This recipe for Braciole is thinly sliced flank steak stuffed with sausage and simmered in tomato sauce until tender. Eat it solo or pair with pasta for a more traditional Italian dinner.
Print Recipe

5 Stars 4 Stars 3 Stars 2 Stars 1 Star

No reviews

This recipe for Braciole is thinly sliced flank steak stuffed with sausage and simmered in tomato sauce until tender. Eat it solo or pair with pasta for a more traditional Italian dinner.

  • Prep Time: 15 minutes
  • Cook Time: 3 hours
  • Total Time: 3 hours 15 minutes

Ingredients

Scale
  • 2 pounds flank steak
  • 1 pound sausage
  • 1/2 cup breadcrumbs
  • 1/2 cup parmesan cheese
  • 2 eggs
  • 1/4 cup fresh parsley
  • 3 clove garlic, minced
  • salt and pepper
  • 24 oz jar tomato sauce

Instructions

  1. Thinly slice flank steak. Use a very sharp knife and try to cut it into thirds horizontally. (Tip- freezing flat for 30-45 min will make it easier to slice).
  2. In a small bowl, combine remaining ingredients (except sauce) and mix well.
  3. Spread sausage mixture onto strips of flank steak and then roll them up.
  4. In a pan over medium-high heat, brown flank steak rolls on all sides.
  5. Pour a little sauce in a dutch oven to cover the bottom.
  6. Place browned flank steak rolls in the dutch oven.
  7. Cover with remaining sauce and cover the dutch oven.
  8. Bake at 325 degrees for 2 hours covered, then remove cover and cook for an additional hour.
  9. Remove rolls from sauce, slice and serve by themselves or over pasta.

Did you make this recipe?

Tag @theleangreenbean on Instagram

This recipe for Braciole is thinly sliced flank steak stuffed with sausage and simmered in tomato sauce until tender. Eat it solo or pair with pasta for a more traditional Italian dinner.

This may sound a little labor intensive, but don’t let it intimidate you! The hardest part is slicing the steak. After that it’s just mix, roll, brown and simmer. Plus it’s easy to make enough to feed a crowd….or yourself for an entire week.

This recipe for Braciole is thinly sliced flank steak stuffed with sausage and simmered in tomato sauce until tender. Eat it solo or pair with pasta for a more traditional Italian dinner.

We usually don’t even bother with the pasta and just serve it with some steamed veggies. Squish loves it and I love that hubby cooks it 🙂

[Tweet “Need an easy meal to impress dinner guests? Try this Braciole (stuffed flank steak) from @leangrnbeanblog!”]

Enjoy!
–Lindsay–
Filed Under: Dinner Tagged With: Beef, Breadcrumbs, Tomato Sauce

Peanut Butter and Chia Jam Oat Bites

February 1, 2016 by Lindsay 20 Comments

This gluten-free recipe for Peanut Butter and Chia Jam Oat Bites is a fun twist on your favorite childhood sandwich! Perfect for breakfast or a grab-and-go snack. 

This gluten-free recipe for Peanut Butter and Chia Jam Oat Bites is a fun twist on your favorite childhood sandwich! Perfect for breakfast or a grab-and-go snack.

Hi Friends!

Just popping in to share a simple, kid-friendly breakfast or snack idea! These Peanut Butter and Chia Jam Oat Bites are bite-sized, easy to make ahead of time and absolutely delicious.

You may recall from my How To Make Chia Jam post that I love using chia jam as a sub for store-bought jelly! It’s so quick to make and only requires two ingredients! I’ve always been a big pb&J fan so I thought it would be fun to come up with something that holds up well as a make-ahead snack so I can grab them for Squish (or myself) when I’m short on time or when he’s heading towards a total meltdown about it taking me too long to get his breakfast ready.

So here’s how you make them:

Print

Peanut Butter and Chia Jam Oat Bites

PB J Snack Bites 5
Print Recipe

5 Stars 4 Stars 3 Stars 2 Stars 1 Star

No reviews

This gluten-free recipe for Peanut Butter and Chia Jam Oat Bites is a fun twist on your favorite childhood sandwich! Perfect for breakfast or a grab-and-go snack.

  • Prep Time: 15 minutes
  • Cook Time: 12 minutes
  • Total Time: 27 minutes
  • Yield: 18 mini muffins 1x

Ingredients

Scale
  • 1 cup strawberries (frozen or fresh)
  • 2 Tbsp chia seeds
  • 1/2 cup mashed banana
  • 1/2 cup peanut butter
  • 1 cup oats
  • 1 egg
  • 3 Tbsp maple syrup
  • 3 Tbsp sunflower seeds, optional
  • 1/2 tsp baking soda
  • 1/2 tsp cinnamon

Instructions

  1. Place strawberries in a small saucepan over medium heat. As they head, mash with a fork until no chunks remain.
  2. Add chia seeds and stir until well combined.
  3. Remove from heat, transfer to a small bowl and place in the freezer to cool for 15 minutes.
  4. In another bowl, combine remaining ingredients.
  5. Spoon mixture into greased mini muffin tins. Fill each tin just under halfway.
  6. Top with a little chia jam and then top with another small spoonful of the peanut butter mixture.
  7. Bake at 350 for 12-14 minutes. (I was able to make 18 mini muffins)

Did you make this recipe?

Tag @theleangreenbean on Instagram

If you’ve never made it before, check out this post to see a visual tutorial of How To Make Chia Jam.

This gluten-free recipe for Peanut Butter and Chia Jam Oat Bites is a fun twist on your favorite childhood sandwich! Perfect for breakfast or a grab-and-go snack.

Feel free to use your favorite fruit to make your chia jam. Raspberry is next on my list. Like I mentioned in the recipe, the sunflower seeds are optional, but I liked the little bit of  crunch they added. You could also use crunchy peanut butter! And as usual, you could sub  your favorite nut butter for the pb.

This gluten-free recipe for Peanut Butter and Chia Jam Oat Bites is a fun twist on your favorite childhood sandwich! Perfect for breakfast or a grab-and-go snack.

[Tweet “These PB and Chia Jam Oat Bites from @leangrnbeanblog are a great gluten-free snack!”]

Enjoy!
–Lindsay–
Filed Under: Breakfast, Snack Tagged With: Banana, Chia Seed, Egg, Maple Syrup, Oats, Peanut Butter, Strawberry

Small Batch Raspberry Lemon Bars + 6 Ways To Eat Citrus

January 28, 2016 by Lindsay 19 Comments

These Small Batch Raspberry Lemon Bars are the perfect dessert. Bursting with flavor, they’re easy to make and a small batch means there’s just enough to enjoy, without going overboard!

These Small Batch Raspberry Lemon Bars are the perfect dessert. Bursting with flavor, they're easy to make and a small batch means there's just enough to enjoy, without going overboard!

Hi Friends!

It’s time for another recipe round-up with some of my fav bloggers! This month our theme was citrus and I made these absolutely delicious Small Batch Raspberry Lemon Bars. They’re pretty & pink & perfect for Valentine’s day! It’s hard to believe this is our 8th month doing these round-ups. In case you’ve missed any, be sure to check out the links below to see 6 delicious recipes using each featured ingredient.

6 Healthy Ways To Eat:

  • Cranberries (Cranberry Clementine Salsa)
  • Sweet Potatoes (Sweet Potato Protein Bars)
  • Apples (Caramel Apple Bread)
  • Pumpkin (Pumpkin Yogurt Dip)
  • Zucchini (Grilled Zucchini Rollups)
  • Almond Flour (Small Batch Chocolate Chip Cookies)
  • Black Beans (Mexican Layer Dip)

So anyways….back to these Raspberry Lemon Bars. I purposely did a few things with these. First of all, I made them pink- which means they’re pretty year round….but it also makes them extra fitting for the lovey-dovey Valentine’s Day holiday that’s quickly approaching. Secondly, I made just a small batch. I’m all for having treats around, but sometimes it’s nice to just have a few pieces to enjoy and then be done and not have to deal with being tempted by them for a couple weeks straight.

[Read more…] about Small Batch Raspberry Lemon Bars + 6 Ways To Eat Citrus

Filed Under: Dessert Tagged With: Egg, Fruit, Lemon, Maple Syrup, Sugar, White Whole Wheat Flour

Easy Spinach Balls

January 25, 2016 by Lindsay 23 Comments

These Easy Spinach Balls are a perfect party appetizer. Prep the recipe ahead of time for easy entertaining or serve them as a kid-friendly vegetable option at dinner!

These Easy Spinach Balls are a perfect party appetizer. Prep the recipe ahead of time for easy entertaining or serve them as a kid-friendly vegetable option at dinner!

Hi friends!

As I’m sure all you football fans out there know, The Super Bowl is coming up in a couple weeks! And that means one thing – party time! And the best part about parties is food! Specifically, finger food! Enter these Easy Spinach Balls.

These are one of my dad’s all-time favorite foods. My mom has been making these for years but my dad always complains that she doesn’t make them often enough. While we were visiting them for Christmas, she made some and would you believe that Squish literally gobbled them up? He thought they were the greatest!!

[Read more…] about Easy Spinach Balls

Filed Under: Appetizer, Side Dish Tagged With: Breadcrumbs, Egg, Green Onion, Spinach, Yogurt

5 Ingredient Frozen Turtle Bars

January 21, 2016 by Lindsay 55 Comments

These five-ingredient Frozen Turtle Bars are a simple, easy to make dessert and are perfect to have on hand for an after dinner treat!  

These five-ingredient Frozen Turtle Bars are a simple, easy to make dessert and are perfect to have on hand for an after dinner treat!

Hi friends!

As I promised yesterday when I shared a tutorial about How To Make Date Paste, I’m back with a delicious recipe for you to make after you whip up your first batch!

These are my new favorite post-dinner treat and I love having a batch on hand in the freezer! They also got the seal of approval from the hubby, who isn’t a big dessert person…so that’s how you know they’re good!

[Read more…] about 5 Ingredient Frozen Turtle Bars

Filed Under: Dessert Tagged With: Chocolate Chips, Dates, Peanut Butter, Pecan, Rice Chex

How To Make Date Paste

January 20, 2016 by Lindsay 22 Comments

Learn how to make Date Paste (also known as date caramel) with just dates and water and use it to add natural sweetness and flavor to desserts and baked goods. 

Learn how to make Date Paste (also known as date caramel) with just dates and water and use it to add natural sweetness and flavor to desserts and baked goods.


Hi Friends!

Just popping in with a quick tutorial for you guys in preparation for tomorrow’s recipe. Have you heard of date paste? Or date caramel? It’s literally just dates….but you soak them up overnight, blend them up and then you have this delicious paste that takes a whole lot like caramel sauce. To take things a step further, you could add a splash of vanilla or some sea salt for extra flavor.

[Read more…] about How To Make Date Paste

Filed Under: Dessert Tagged With: Dates

Gluten-Free Chicken Marsala

January 18, 2016 by Lindsay 8 Comments

This recipe for Gluten-Free Chicken Marsala is quick, easy and full of flavor. Simple enough for a weeknight dinner or fancy enough for date night in!

This recipe for Gluten-Free Chicken Marsala is quick, easy and full of flavor. Simple enough for a weeknight dinner or fancy enough for date night in!

Hi Friends!

Let’s kick off this week with a fun fact: I learned about a month ago, that my husband loves mushrooms. We’ve been married 7.5 years. I’m honestly not sure if I knew about his love for mushrooms at one point and forgot…or that I somehow just never knew this important little tidbit until this year at Christmas when he made a comment about how he loves my mom’s cooking because she uses a lot of mushrooms!

Anyways, now that I’m aware, I’m making an effort to cook with them more. Another fun fact: this year I’ve made it a goal to re-try some things I think I don’t like just to see if my opinion has changed. So far, I’ve determined that I still don’t like coleslaw or pickles, and although cooked mushrooms aren’t my favorite…they’re pretty darn good in this dish.

[Read more…] about Gluten-Free Chicken Marsala

Filed Under: Dinner Tagged With: Butter, Chicken, Chicken Broth, Mushroom

Ranch Chicken Tenders

January 13, 2016 by Lindsay 11 Comments

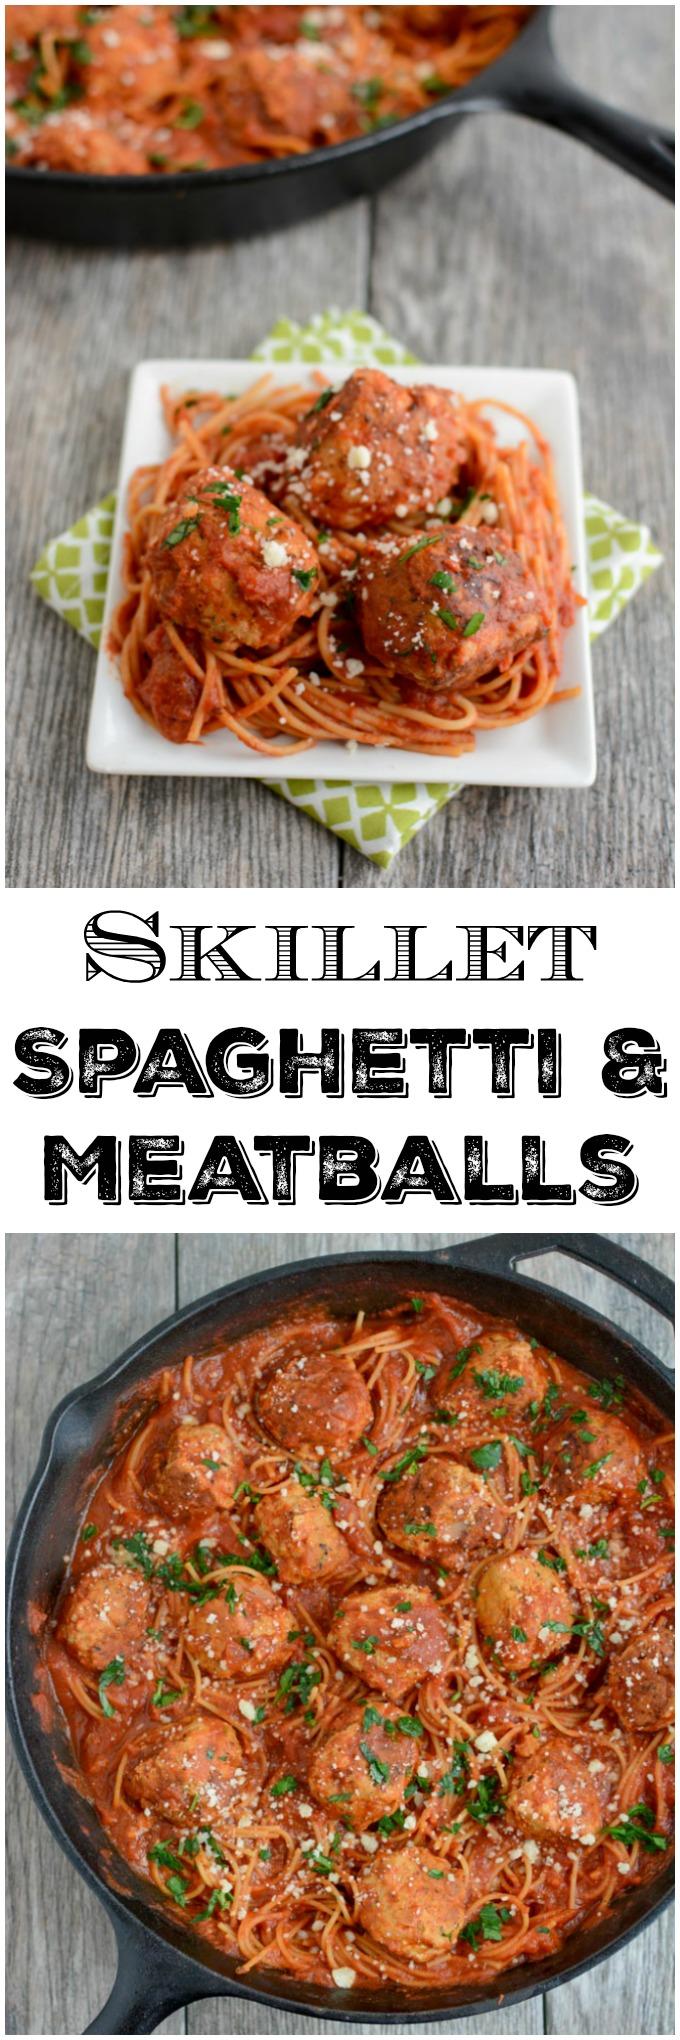
Let these Ranch Chicken Tenders sit in a homemade ranch marinade overnight, then simply roll in breadcrumbs and bake for a quick weeknight dinner!

Let these Ranch Chicken Tenders sit in a homemade ranch marinade overnight, then simply roll in breadcrumbs and bake for a quick weeknight dinner!

Hi friends!

Today I have another quick and easy chicken dinner to share with you guys. The title may be a little misleading because you might think you’d use ranch dressing or even one of those powdered ranch packets to make it, but you’d be wrong. Have you checked out the ingredient list on one of those ranch packets lately? Too long.

This recipe uses plain yogurt plus a few spices to give you that ranch flavor you love without all the other junk. I coated mine in whole wheat panko breadcrumbs but if you’re looking for a gluten-free option you could try crushed Chex, almond meal or gluten-free breadcrumbs!

Let these Ranch Chicken Tenders sit in a homemade ranch marinade overnight, then simply roll in breadcrumbs and bake for a quick weeknight dinner!

I let my chicken marinate overnight, which I would suggest in order to get the most flavor, but if you’re in a pinch you could probably get away with just letting them sit for 45 minutes or so.

Here’s how you make them:

Print

Ranch Chicken Tenders

Ranch Chicken Tenders 8
Print Recipe

5 Stars 4 Stars 3 Stars 2 Stars 1 Star

No reviews

Let these Ranch Chicken Tenders sit in a homemade ranch marinade overnight, then simply roll in breadcrumbs and bake for a quick weeknight dinner!

Ingredients

Scale
  • 1 pound chicken tenders, or breasts cut into strips
  • 1 cup plain yogurt (regular or Greek)
  • 1/4 cup milk
  • juice from 1 lemon
  • 2 teaspoons onion powder
  • 2 teaspoons garlic powder
  • 2 teaspoons dijon mustard
  • 1/2 teaspoon black pepper
  • 2 cups panko breadcrumbs (i used whole wheat)
  • seasonings for breadcrumbs: cayenne pepper, black pepper, grated parmesan (optional)

Instructions

  1. Combine milk and lemon juice in a small bowl and let sit 5 minutes.
  2. Cut chicken breasts into tenders if necessary.
  3. In a large ziploc bag, combine chicken, yogurt, milk and spices.
  4. Seal and squeeze to mix and coat all of the chicken.
  5. Let marinate at least 45 minutes, or overnight.
  6. Remove tenders from marinade. You can hold each one at the top and run between two fingers to remove a bit of the excess yogurt, but some will remain on there which is what the breadcrumbs will stick to.
  7. Pour breadcrumbs on a plate, add additional seasonings or cheese if desired, press each tender into breadcrumbs, turning to coat, and place on a greased or foil-lined baking sheet.
  8. Bake at 400 degrees F for 15-25 minutes, depending on how thick your tenders are (until they reach a temp of 165 degrees F).

Did you make this recipe?

Tag @theleangreenbean on Instagram

Ta da! Dinner is served. Serve them with your favorite dipping sauce. We tried them with ketchup and bbq sauce and both were great. These were a hit with both hubby and Squish so hopefully your family will like them too!

Let these Ranch Chicken Tenders sit in a homemade ranch marinade overnight, then simply roll in breadcrumbs and bake for a quick weeknight dinner!

[Tweet “The whole family will love these Ranch Chicken Tenders from @leangrnbeanblog!”]

Enjoy!
–Lindsay–
Filed Under: Dinner Tagged With: Chicken, Panko, Yogurt

Lemon Energy Balls

January 6, 2016 by Lindsay 55 Comments

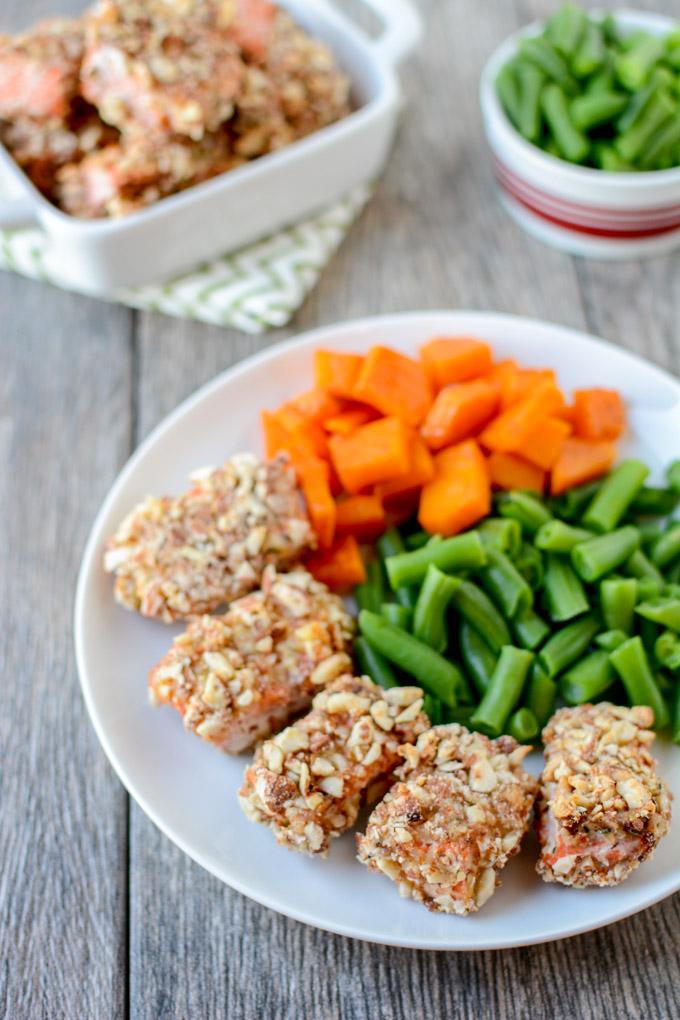
Bursting with citrus flavor, these Lemon Energy Balls make the perfect snack. Made with just 5 ingredients, they’re gluten-free, paleo-friendly and perfect for stashing in the fridge or freezer!

Bursting with citrus flavor, these Lemon Energy balls make the perfect snack. Made with just 5 ingredients, they're gluten-free, paleo-friendly and perfect for stashing in the fridge or freezer!

Hi Friends!

Lately I’ve been loving energy balls for an afternoon snack. I was on a chocolate kick for a while…pretty sure I ate at least 4 entire batches of these No-Bake Peppermint Chocolate Bites (sans candy cane) all by myself in December. To kick off the new year, I decided it was time to change things up. These lemon balls are about as far from chocolate as you can get while still being considered the same kind of snack.

Sometimes I forget how much I love lemon-flavored things! They’re so light and refreshing. These little bites of lemony goodness are made with just a few simple ingredients but they’re packed with lemon flavor! If you’re looking for some extra protein, I bet some vanilla protein powder would make a great addition.

Here’s how you make them:

Print

Lemon Energy Balls

Lemon Energy Balls made with dates and pepitas
Print Recipe

5 Stars 4 Stars 3 Stars 2 Stars 1 Star

5 from 2 reviews

Bursting with citrus flavor, these Lemon Energy balls make the perfect snack. Made with just 5 ingredients, they’re gluten-free, paleo-friendly and perfect for stashing in the fridge or freezer!

  • Prep Time: 5 minutes
  • Total Time: 5 minutes
  • Yield: 14 balls 1x

Ingredients

Scale
  • 1 cup medjool dates, pitted and chopped
  • 1 cup almonds
  • 1/2 cup pepitas (shelled pumpkin seeds)
  • 2 Tbsp chia seeds
  • zest and juice from a medium lemon
  • 1/2 tsp vanilla extract, optional

Instructions

  1. Put dates, nuts and seeds in a food processor and pulse several times to chop.
  2. Add the lemon juice, zest and vanilla and process until mixture comes together.
  3. Form into balls and store in the fridge or freezer. (I made 14 balls).

Did you make this recipe?

Tag @theleangreenbean on Instagram


Bursting with citrus flavor, these Lemon Energy balls make the perfect snack. Made with just 5 ingredients, they're gluten-free, paleo-friendly and perfect for stashing in the fridge or freezer!

Doesn’t get much easier than that does it? I store mine in the freezer. They don’t get super hard, so you don’t have to wait for them to thaw before eating, but it keeps them nice and cold. I’m sure they’d also be fine if you stored them in the fridge.

Bursting with citrus flavor, these Lemon Energy balls make the perfect snack. Made with just 5 ingredients, they're gluten-free, paleo-friendly and perfect for stashing in the fridge or freezer!

[Tweet “Stock your freezer with these Lemon Energy Balls from @leangrnbeanblog for snack time!”]

Enjoy!
–Lindsay–
Filed Under: Snack Tagged With: Almond, Chia Seed, Dates, Lemon, Pepitas

  • « Go to Previous Page
  • Page 1
  • Interim pages omitted …
  • Page 28
  • Page 29
  • Page 30
  • Page 31
  • Page 32
  • Interim pages omitted …
  • Page 65
  • Go to Next Page »

Primary Sidebar

Lindsay Livingston The Lean Green Bean Healthy Living Tips and Tricks

I'm a Registered Dietitian and mom of three from Columbus, Ohio. I use this blog to share simple, healthy recipes, nutrition tips, and an honest glimpse of motherhood!

Learn More →

Questions? Comments? Email me: [email protected]

The Lean Green Bean Facebook The Lean Green Bean Instagram The Lean Green Bean Pinterest The Lean Green Bean Twitter The Lean Green Bean Feed
footer-logo
The Lean Green Bean Facebook The Lean Green Bean Instagram The Lean Green Bean Pinterest The Lean Green Bean Twitter The Lean Green Bean Feed
Recipes

Breakfast
Dinner
Snack
Slow Cooker

Kids

Cooking With Kids
Favorite Gifts
Toddler Meals
Indoor Activities

Resources

Easy Packed Lunches for Kids
Dinner Spark
Snack Spark
Ultimate Guide to Food Prep

About

Meet Lindsay
Become an RD
Work with Me

The Lean Green Bean is a participant in the Amazon Services LLC Associates Program, an affiliate advertising program designed to provide a means for sites to earn advertising fees by advertising and linking to amazon.com.
Read the full privacy and disclosure policy here.

Copyright © 2022 · The Lean Green Bean

table talk series

Learn how food affects your body.

Get my free Table Talk email series where I share bite-sized nutrition information about carbs, protein, and fat, plus bonus information about snacks and sugar!

[email protected]