• Skip to main content
  • Skip to primary sidebar

Learn how food affects your body. Get Free Nutrition Info Today

the-lean-green-bean-logo
  • Home
  • Recipes
  • Kids
  • Resources
    • Ebooks
    • Food Prep
    • Videos
    • Snack Round-Ups
    • Gift Guides
  • About
    • Become An RD
    • Work With Me
  • Search
the-lean-green-bean-logo
  • Home
  • Recipes
  • Kids
  • Resources
    • Ebooks
    • Food Prep
    • Videos
    • Snack Round-Ups
    • Gift Guides
  • About
    • Become An RD
    • Work With Me
  • Search

blog

No Bake Cereal Bites

May 21, 2016 by Lindsay 12 Comments

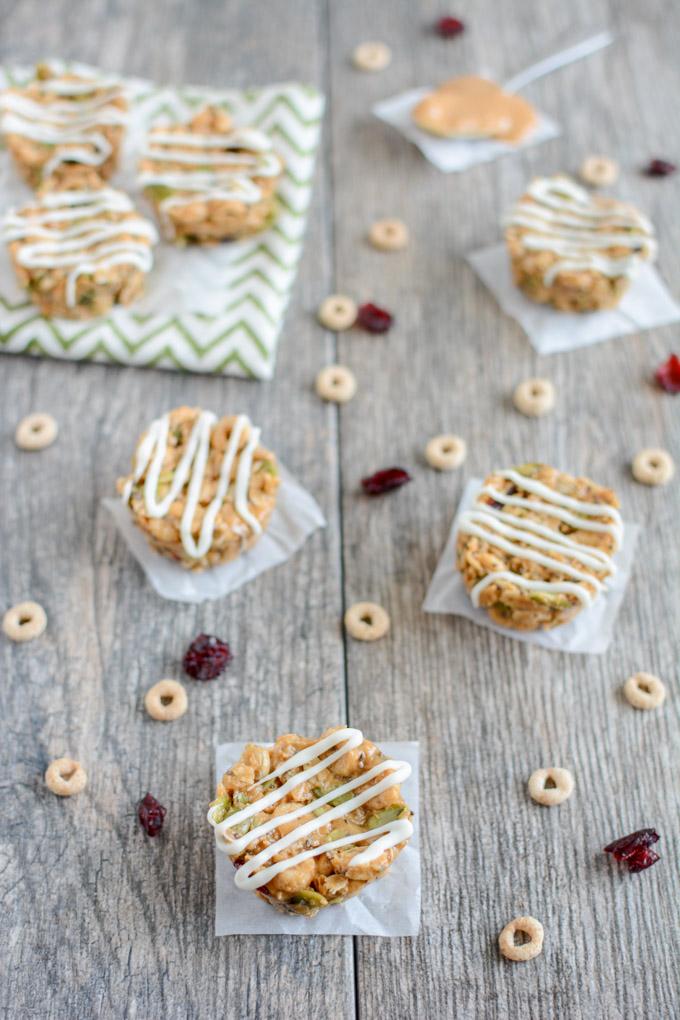
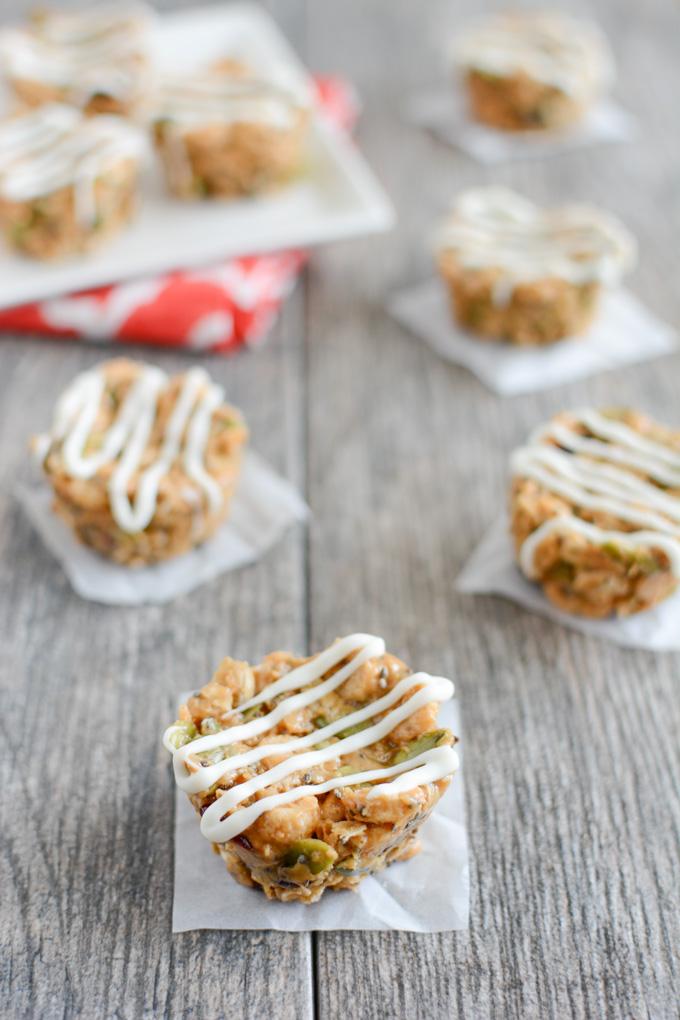
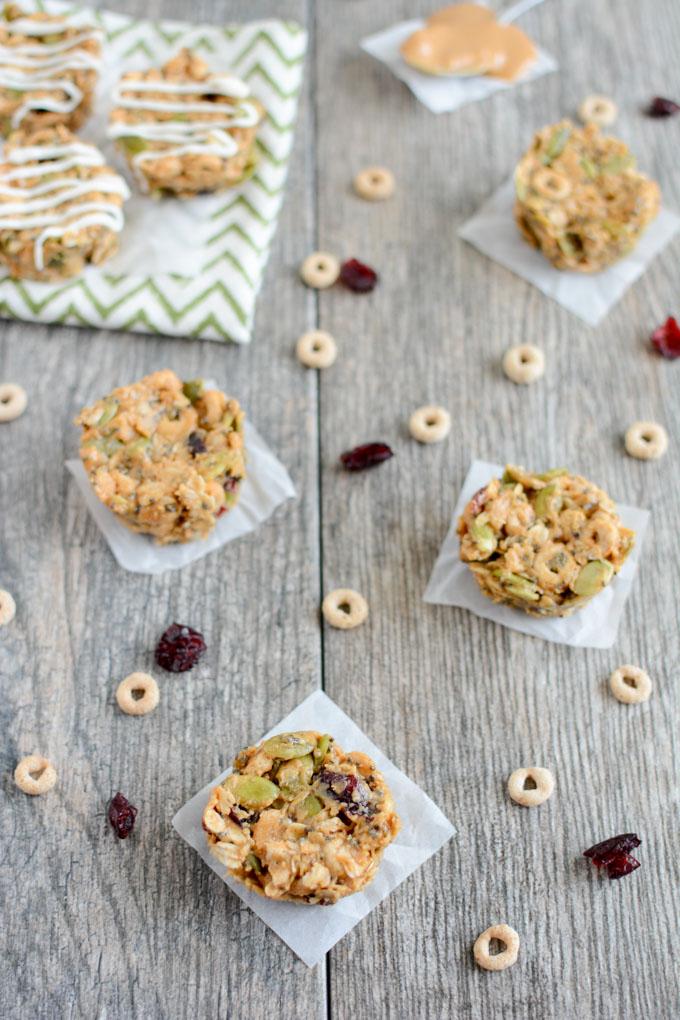
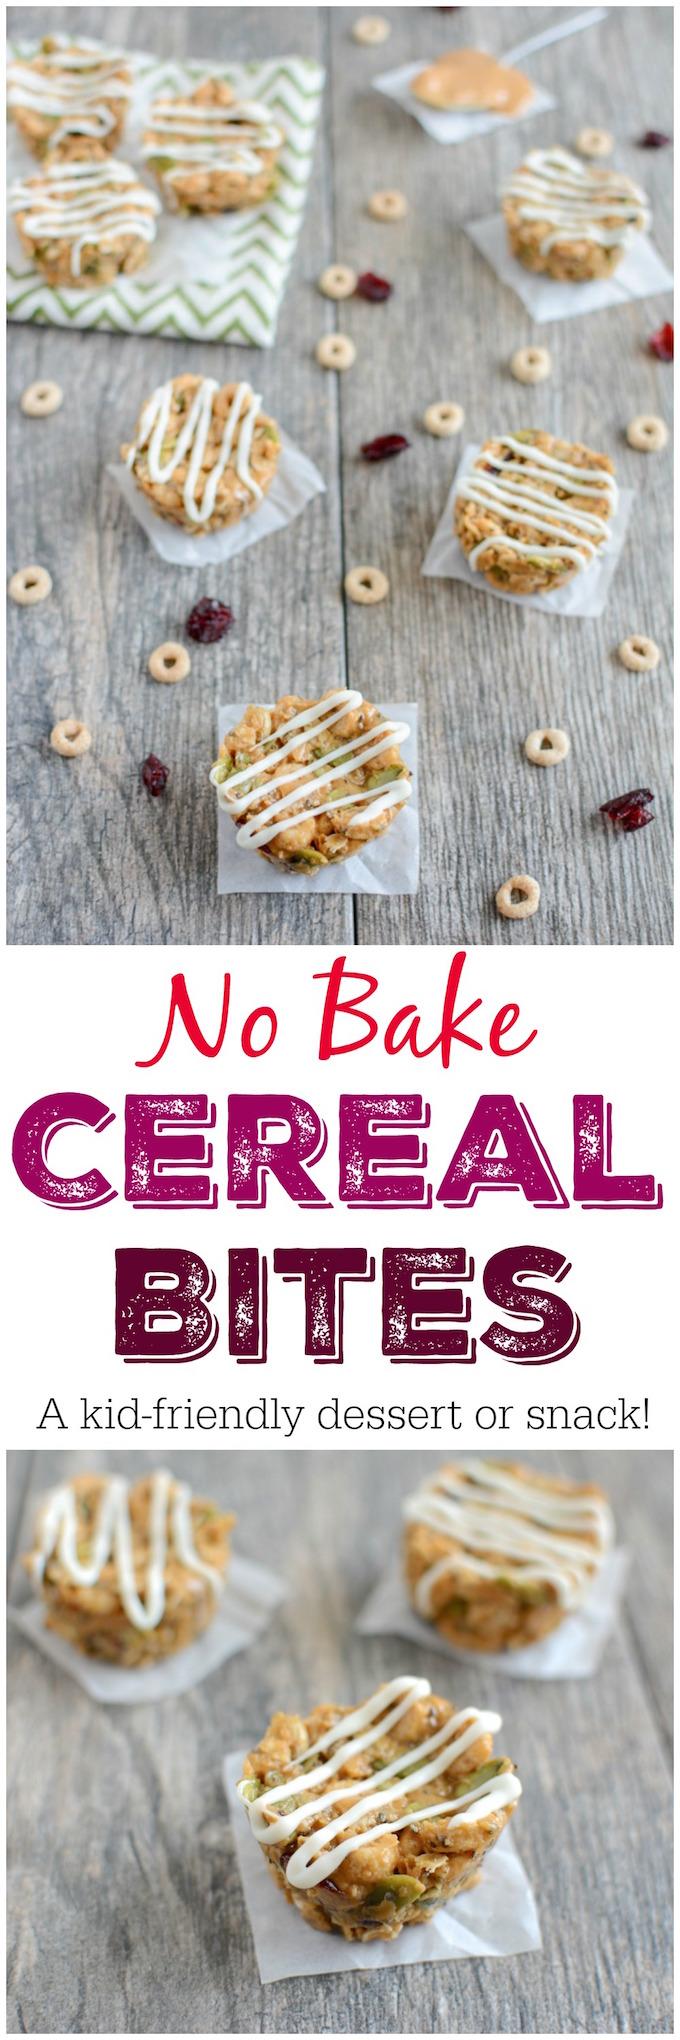
This easy recipe for No Bake Cereal Bites is simple enough that the kids can help you make it! Keep them on hand for a quick snack or dessert or serve them as a kid-friendly option at your next party.

This easy recipe for No Bake Cereal Bites is simple enough that the kids can help you make it! Keep them on hand for a quick snack or dessert or serve them as a kid-friendly option at your next party.

Hi Friends!

I hope you’ve enjoyed meeting all of my guest-posters so far and perhaps found a few new blogs to follow. Things are still a bit crazy around here. I’m still feeling sick, but hanging in there. We moved a couple truckloads of stuff to the new house last weekend and this past week was filled with various appointments to get internet set up, locks changed, carpets cleaned, etc. We’re hoping to finish up the last few repairs at our current house next week and then it’ll be ready to hit the market and *hopefully* sell quickly!

Anyways, today I’m popping in to share a quick recipe of my own for this month’s Recipe Redux. The theme was:

Small Plates For Sunny Days
 
Small bites are perfect for trying many different tastes. Take tapas style eating outside for al fresco dining or a simple picnic. Or maybe you’re serving small bites at a bridal or baby shower or a graduation party. Show us your healthy take on small plates and finger foods.

No Bake Cereal Bites

This easy recipe for No Bake Cereal Bites is simple enough that the kids can help you make it! Keep them on hand for a quick snack or dessert or serve them as a kid-friendly option at your next party.
 I actually first made these no bake bites as bars and they were kind of a fail. They didn’t really stick together and I just had a delicious, but crumbly mess on my hands. When I saw this month’s theme, I thought I might be able to tweak the recipe and make them into small bites.


They’re made with simple ingredients, healthy enough for a snack but definitely sweet enough for dessert. You could easily serve them as a kid-friendly, finger food dessert option at a shower, party or cookout.


The only downside is that they’re a bit sticky so they’re best stored in the fridge. If you were going to serve them at a party I would either leave them in the fridge until right before serving, or possibly even throw them in the freezer for an hour or so before serving.


The white chocolate drizzle is fun and makes them pretty, but it’s totally optional.


This easy recipe for No Bake Cereal Bites is simple enough that the kids can help you make it! Keep them on hand for a quick snack or dessert or serve them as a kid-friendly option at your next party.
Here’s how you make them:


Print

No Bake Cereal Bites

No Bake Cereal Bites 1
Print Recipe

5 Stars 4 Stars 3 Stars 2 Stars 1 Star

No reviews

This easy recipe for No Bake Cereal Bites is simple enough that the kids can help you make it! Keep them on hand for a quick snack or dessert or serve them as a kid-friendly option at your next party

  • Prep Time: 5 minutes
  • Total Time: 5 minutes
  • Yield: 22-24 bites 1x

Ingredients

Scale
  • 1 cup peanut butter (or your favorite nut butter)
  • 1/2 cup honey
  • 1 1/2 cup Cheerios or other low-sugar cereal (Rice Kripsies would probably work well!)
  • 2/3 cup pepitas (shelled pumpkin seeds)
  • 1/2 cup reduced-sugar craisins
  • 3 Tbsp chia seeds
  • 1 cup oats
  • 1/2 cup white chocolate chips, optional

Instructions

  1. Combine peanut butter and honey in a large bowl. Microwave if needed for about 30 seconds if your peanut butter isn’t super runny.
  2. Add remaining ingredients and stir to combine.
  3. Press into mini muffin tins (recipe should make 22-24 bites)
  4. Refrigerate for at least an hour.
  5. Remove from muffin tins and put on a plate.
  6. Melt white chocolate chips, spoon into ziploc bag, cut off the corner and drizzle over bites if desired.
  7. Store in the fridge.

Did you make this recipe?

Tag @theleangreenbean on Instagram


Think you can handle it? They’re definitely worth a try!
This easy recipe for No Bake Cereal Bites is simple enough that the kids can help you make it! Keep them on hand for a quick snack or dessert or serve them as a kid-friendly option at your next party.
For more small plate ideas, be sure to check out the link-up below!
Enjoy!
–Lindsay–

An InLinkz Link-up


Filed Under: Dessert, Snack Tagged With: Cranberry, Honey, Oats, Peanut Butter, Pepitas

Joyful Eating, Nourished Life

May 20, 2016 by Lindsay 5 Comments

Hi friends!

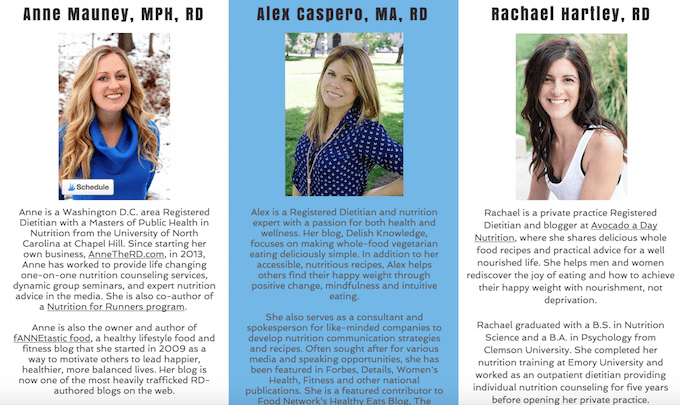
Just popping in to share a little bit about a very special program a few of my friends created. Three of my favorite Registered Dietitians (Anne from Fannetastic Food, Alex from Delish Knowledge and Rachael from Avocado A Day Nutrition) have been working hard for the past 6 months to put together an amazing program called Joyful Eating, Nourished Life.

Joyful Eating, Nourished LIfe

From their website:

Get ready to go on an un-diet.

Created by three Registered Dietitians who specialize in intuitive and mindful eating, Joyful Eating, Nourished Life is a virtual 6-week group program that teaches you how to get healthy without deprivation, calorie counting, or stress about food or exercise. Rather than introducing restrictions into your life, we’ll instead challenge the way you interact with food and exercise and create awareness of the emotions behind those decisions.  

If you are:

  • Overwhelmed by conflicting diet advice
  • Feeling extreme guilt when eating certain foods
  • Struggling with lack of energy despite trying to eat healthy and exercise
  • Experiencing periods of uncontrolled or binge eating
  • Feeling uncomfortable in your own body
  • Turning to food in times of stress or sadness
  • Out of touch with your body’s hunger and fullness cues
  • Sick and tired of calorie counting and following rigid diets that leave you feeling exhausted, depleted and like a failure because they just don’t work!

This is the program for you. It’s PACKED with the best science-backed strategies and tools for nutrition, intuitive and mindful eating, fitness and habit building.

Here’s a look at what’s included in the 6-week program:

  • A 50+ page starter guide, including 10 principles of joyful eating, 15 no-recipe formula meals and snacks, finding your happy weight and additional resources.
  • Bi-weekly emails with in-depth, written lesson plans packed with action steps, learning activities, strategies and support.
  • Access to a private facebook group during the program for support, encouragement and sharing with other participants, and access to Q&A with Anne, Alex and Rachael. (You’ll transition to a private alumni facebook group after the program concludes!)
  • Weekly challenges provided on a handy tracking worksheet to monitor your progress and success.
  • A guided weekly meditation series in audio format.
  • Weekly thought-provoking journaling exercises.
  • Four audio lectures for listening and learning on the go.

 Each week tackles a specific topic including meal planning, social eating situations, emotional eating, body confidence and self-compassion.


I’m so proud of these ladies for the amazing program they’ve put together. What I love about it is that it’s not just your average weight-loss program. Instead of focusing on the scale, it focuses on developing healthy habits that you can carry with you beyond the program. It’s also designed to work for anyone, no matter what type of diet you follow, because it focuses on patterns of eating, not a specific diet. I can already tell you that so many people are going to benefit from this program so if you or someone you know might benefit from it, be sure to help them spread the word!

Joyful Eating, Nourished Life

Their first program launches June 20th so if you’re interested,  sign up now and claim your spot! Below is a link that will take you to their website where you can find more details and signup! (I’m an affiliate for this program because I truly believe it has the potential to change lives! That means I receive a small amount of money if you sign up using the link below, at no additional cost to you.)

Click here to visit the Joyful Eating, Nourished Life website.

Enjoy!
–Lindsay–

Filed Under: Uncategorized

Paleo Chocolate Chip Banana Bread

May 16, 2016 by Lindsay 13 Comments

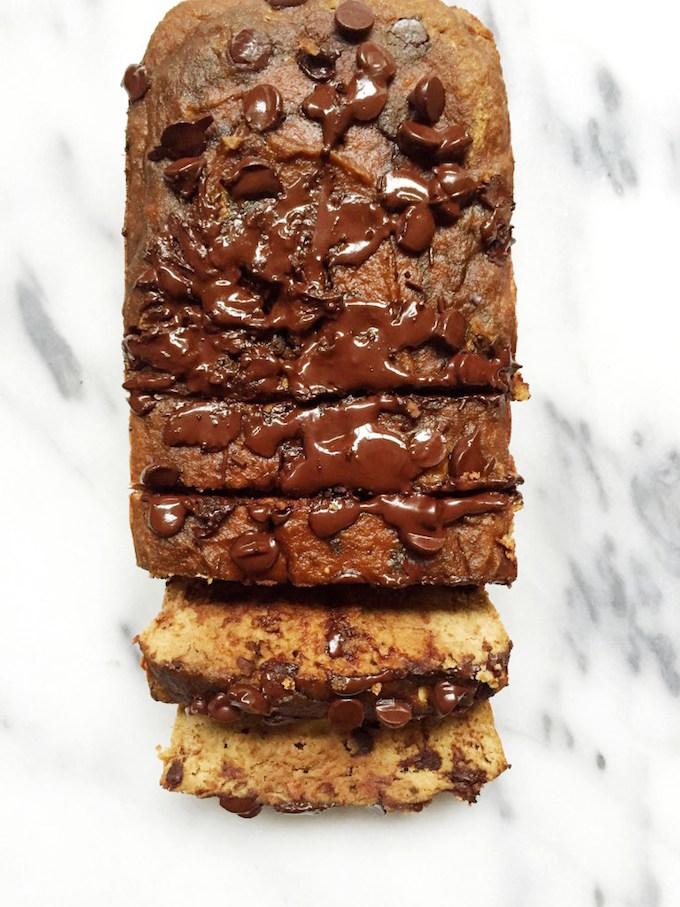
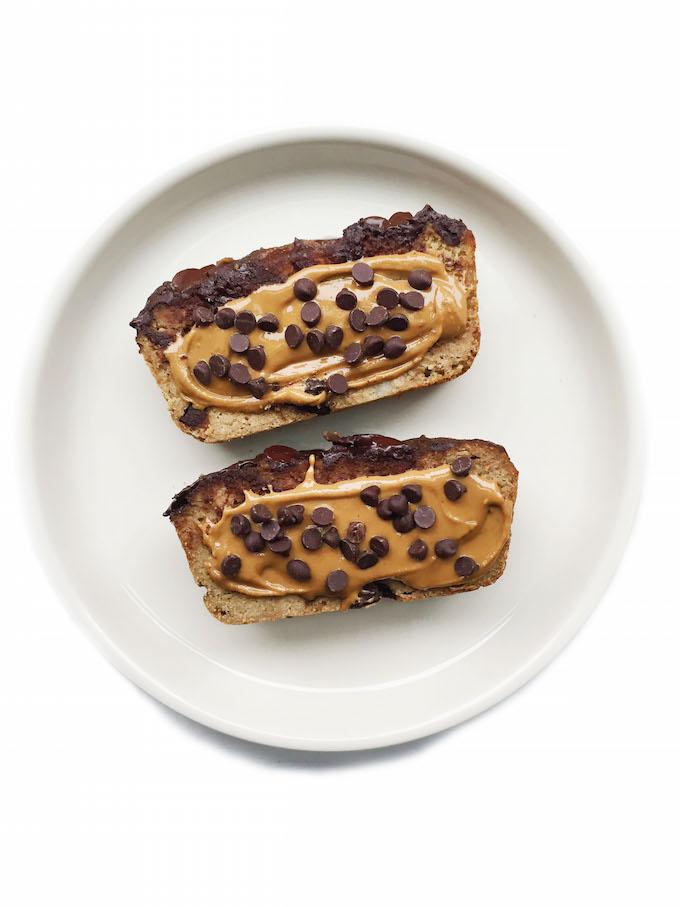
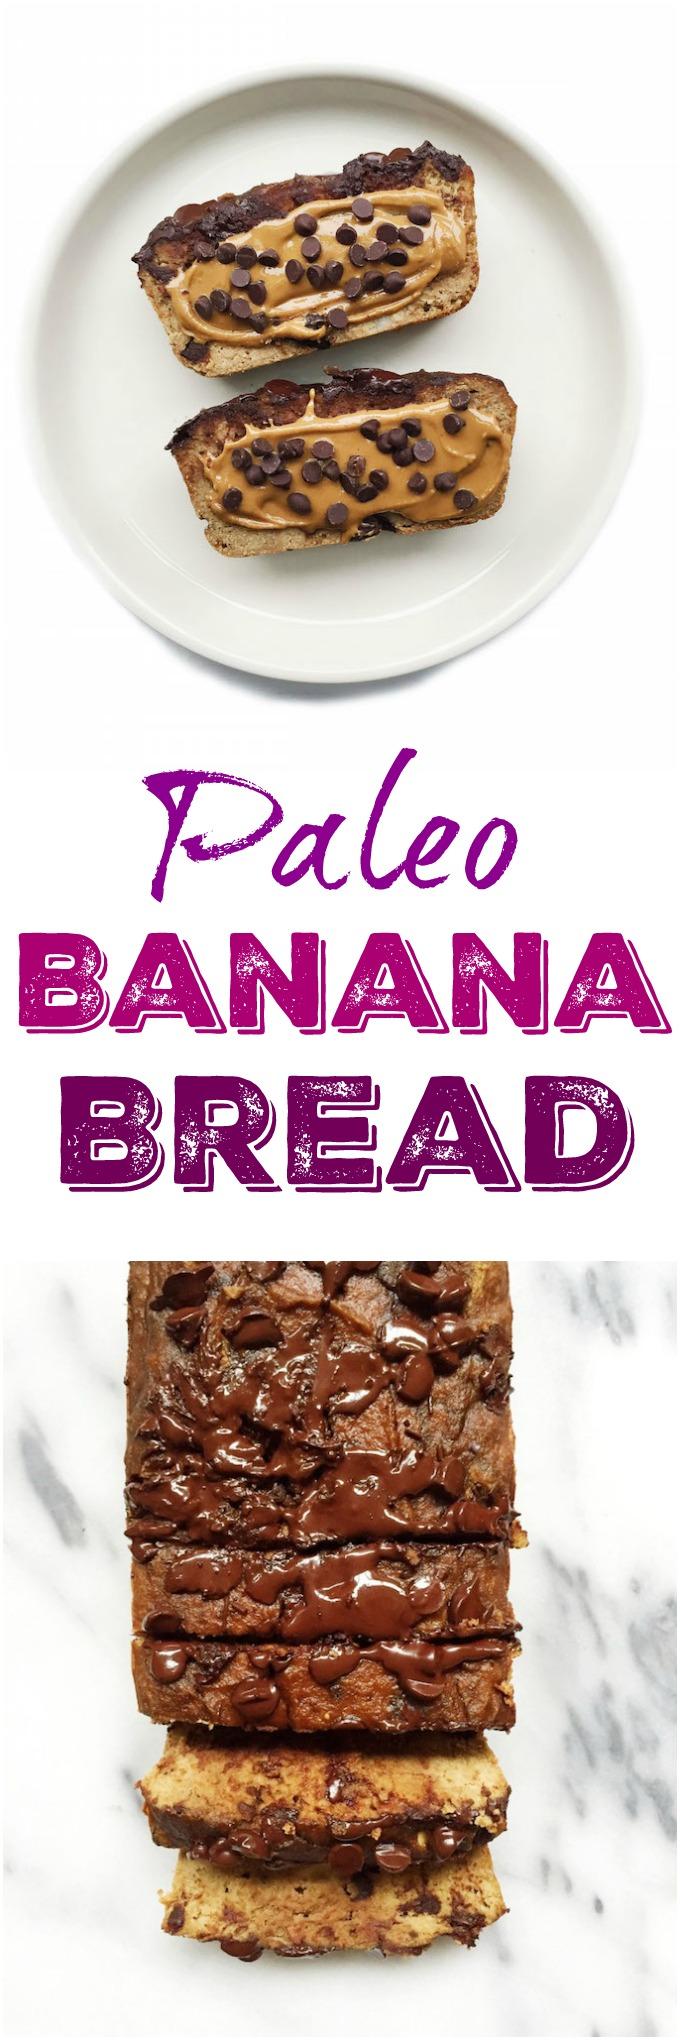
This Paleo Chocolate Chip Banana Bread is gluten-free and makes a great breakfast or snack. Top it with your favorite nut butter to make it extra delicious!

This Paleo Chocolate Chip Banana Bread is gluten-free and makes a great breakfast or snack. Top it with your favorite nut butter to make it extra delicious!

Hi Friends!

Today, meet Rachel! If you’re looking for someone who is killing it on Instagram, she’s it. Hellooooo 81,000 followers! In fact, I think that’s where I first came across her. But she also just so happens to have a rockin’ blog where she shares delicious recipes like these Quinoa Chocolate Crunch Bars, these Crispy Baked Avocado Tacos or this 5-Minute Cinnamon Rawnola. Go visit her blog for more drool-worthy recipes. I am so excited to have her here today to share this banana bread recipe with you guys!


Hi babes! My name is Rachel and I’m the blogger behind rachLmansfield. I have a passion for sharing deliciously easy recipes made with simple ingredients that taste amazing and make you feel amazing. I don’t believe that anyone should have to drink green juice every day to feel good about themselves. Plus life is too short without chocolate, right? When I’m not blogging and Instagramming, you can find me at a barre3 class, trying some new NYC eats with my husband or soaking in a bubble bath for longer than I care to admit 🙂

I’m not someone who is keen on the idea of “titles” in the food space, but recently I have been very into the paleo lifestyle. Particularly paleo desserts. There is a paleo restaurant near my apartment in NYC called Hu Kitchen. Their mission is to get us “back to human” by eating simple and whole foods with no processed ingredients. Everything is a-m-a-z-i-n-g in there. Paleo desserts are by far my favorite because they don’t have any flour or refined sugar, which is how I typically bake anyways.

Banana bread is one of my favorite foods in the entire world, both to bake and to eat. It is so soft, moist and sweet plus it is nutritious and made with good-for-you ingredients.

Paleo Chocolate Chip Banana Bread

This Paleo Chocolate Chip Banana Bread is gluten-free and makes a great breakfast or snack. Top it with your favorite nut butter to make it extra delicious!

I am so excited to share my Paleo Chocolate Chip Banana Bread with you today on Lindsay’s blog. I have been reading The Lean Green Bean for so so long. Way before I ever even considered starting my own blog. Lindsay is so real and such an inspiration. Not to mention you can learn a ton from her about the blogging space since she is an expert.

Not only is this Paleo Chocolate Chip Banana Bread paleo, but it is also nut free, gluten free and grain free. You can also sub the eggs for chia or flax egg if you want to make it vegan. I personally haven’t tried this but a few of my readers have.  I love making some and having it for breakfast in the morning with some fresh fruit and a smear or nut butter or for an after dinner sweet treat (I do not go a day without dessert, ever).

Print

Paleo Chocolate Chip Banana Bread

palechocolatechipbananabread4
Print Recipe

5 Stars 4 Stars 3 Stars 2 Stars 1 Star

No reviews

This Paleo Chocolate Chip Banana Bread is gluten-free and makes a great breakfast or snack. Top it with your favorite nut butter to make it extra delicious!

  • Prep Time: 5 minutes
  • Cook Time: 40 minutes
  • Total Time: 45 minutes
  • Yield: Makes 8-10 slices 1x

Ingredients

Scale
  • Wet ingredients:
  • 3 medium/large ripe bananas mashed
  • ½ cup SunButter (or your nut butter of choice)
  • 3 eggs at room temperature
  • 1 tablespoon maple syrup
  • 1 tablespoon melted & cooled coconut oil
  • Splash of vanilla extract
  • Dry ingredients:
  • ⅓ cup + 2 tablespoons coconut flour
  • ½ teaspoon of baking powder
  • Sprinkle of cinnamon
  • Topping:
  • ½ cup of dark chocolate chips

Instructions

  1. Preheat oven to 350 and line or spray a loaf pan with parchment paper (I used 8.5 x 4.5 x 2.5)
  2. Place wet ingredients in a medium mixing bowl and mix with kitchen aid
  3. Once mixed well, add dry ingredients to wet ingredients and continue to mix with kitchen aid
  4. Fold in dark chocolate chips once everything is mixed well (I also saved some to sprinkle on top)
  5. Bake in oven for 35-45 minutes (or until ends are golden)
  6. Enjoy with your toppings of choice or deliciously as is
  7. You can keep in fridge for about 7 days or freeze for longer!

Did you make this recipe?

Tag @theleangreenbean on Instagram

Hope you babes enjoy! I have a few more banana bread recipes up my sleeve so follow along so you don’t miss out!

xx, Rach

This Paleo Chocolate Chip Banana Bread is gluten-free and makes a great breakfast or snack. Top it with your favorite nut butter to make it extra delicious!
Big thanks to Rachel for stopping by today. I can’t wait to try this recipe. Banana bread was one of the first things I learned to bake when I was little! Be sure to stop by and check out her blog and follow her on social media for more great recipes: Facebook, Instagram, Twitter & Pinterest.

Enjoy!
–Lindsay–

Filed Under: Dessert, Baking, Snack Tagged With: Banana, Chocolate Chips, Coconut Oil, Egg, Maple Syrup, Peanut Butter

Chocolate Almond Butter Popcorn

May 13, 2016 by Lindsay 14 Comments

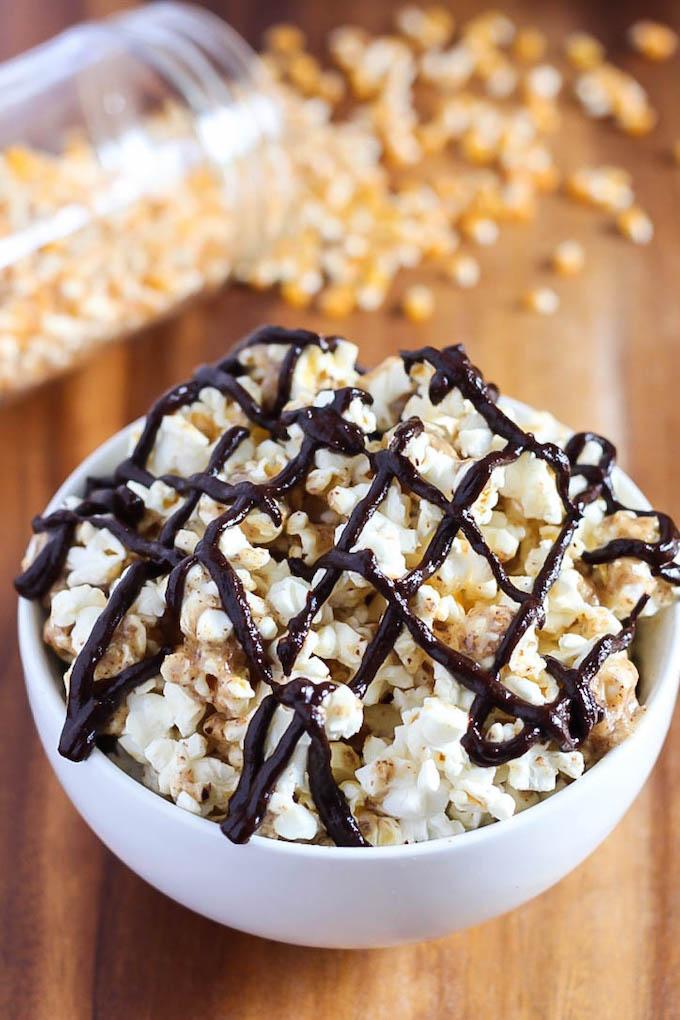
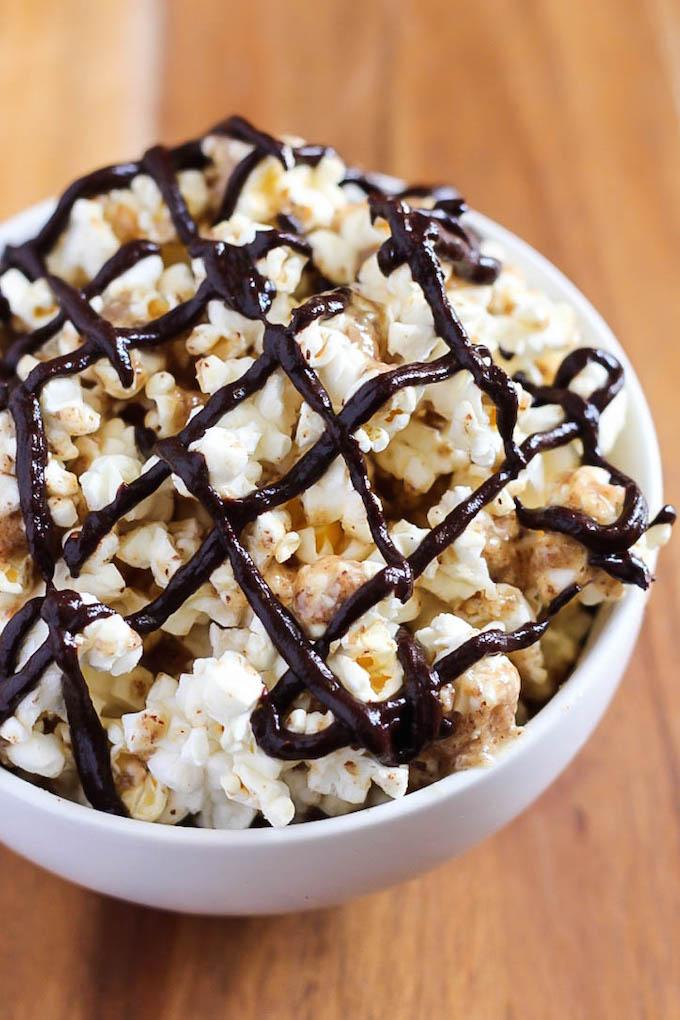
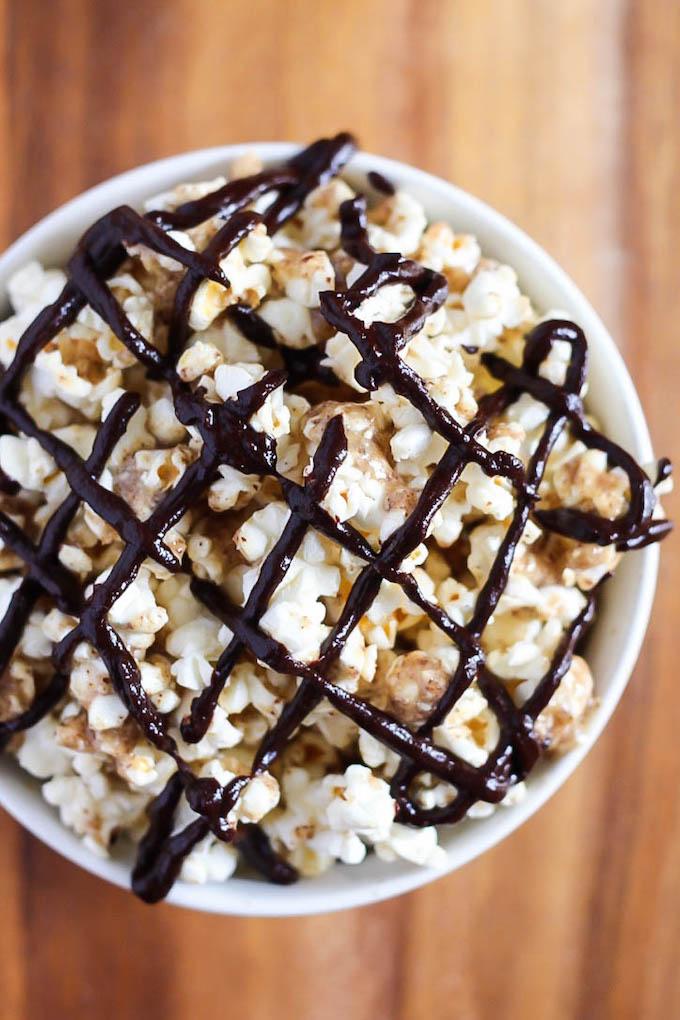
This recipe for vegan, gluten-free Chocolate Almond Butter Popcorn is so easy and makes a perfect healthy movie night dessert! You could even eat it for a snack!

This recipe for vegan, gluten-free Chocolate Almond Butter Popcorn is so easy and makes a perfect healthy movie night dessert! You could even eat it for a snack!

Hi friends!

Today I’m introducing you to another fabulous blogger – Emilie from Emilie Eats. I’m a relatively new follower to her blog but I’m SO impressed by the high-quality recipes and photos she manages from a tiny apartment while balancing school, pageants, and other college activities! You guys know I’m not a vegan myself, but that doesn’t mean I’m not obsessed with her recipes – like this Avocado Caprese Pasta Salad, these BBQ Lentil Stuffed Sweet Potatoes or these Chocolate Chip Almond Butter Bars! Do yourself a favor and go check out her blog!


Hey everyone! I’m Emilie, the blogger (and eater) over at Emilie Eats, where I share the healthy, plant-based recipes I enjoy cooking in my tiny college apartment. Thanks so much to Lindsay for letting me guest post on The Lean Green Bean! I met Lindsay through the amazing BGB Community, and I love her dedication to her family and health.

Lindsay wanted me to make something simple for all of you, so I’m bringing you one of my favorite late-night snacks perfect for movie night – chocolate almond butter popcorn!

Chocolate Almond Butter Popcorn

This recipe for vegan, gluten-free Chocolate Almond Butter Popcorn is so easy and makes a perfect healthy movie night dessert! You could even eat it for a snack!

Like most other college students, I enjoy a good Netflix binge-watching session after a long week of school and work. We just finished all 7 seasons of Breaking Bad in 1 month – the obsession is real!

Of course, you have to enjoy some delicious snacks while you’re watching your favorite movies and shows. What goes better with movie night than fresh-popped popcorn? This recipe is a twist on classic popcorn that will definitely satisfy your after-dinner sweet tooth.

You’ll need to air pop some popcorn, and I have good news: all you need are popcorn kernels and a brown paper lunch bag! Simply put the kernels in the bag and microwave them until most of the kernels are popped.

Next, prepare your almond butter drizzle! You can also use peanut butter (Reese’s popcorn, anyone?) or any other nut or seed butter. Pour your almond butter mixture over the popcorn and let it cool for a couple minutes. The mixture will harden and form irresistible popcorn clusters!

This recipe for vegan, gluten-free Chocolate Almond Butter Popcorn is so easy and makes a perfect healthy movie night dessert! You could even eat it for a snack!

Of course, don’t forget the chocolate! All you need are 3 simple ingredients to make the chocolate sauce. Drizzle some on top of your bowl of popcorn, and voilà! Movie night snacking just got a whole lot tastier. Enjoy!

Print

Chocolate Almond Butter Popcorn

Chocolate almond butter popcorn TLGB 2
Print Recipe

5 Stars 4 Stars 3 Stars 2 Stars 1 Star

No reviews

This recipe for vegan, gluten-free Chocolate Almond Butter Popcorn is so easy and makes a perfect healthy movie night dessert! You could even eat it for a snack!

  • Cook Time: 5 minutes
  • Total Time: 5 minutes
  • Yield: serves 3

Ingredients

Scale
  • 1/4 cup popcorn kernels
  • 1 tablespoon coconut oil
  • 1/4 cup almond butter
  • 2 tablespoons maple syrup or agave nectar
  • 1/2 teaspoon salt
  • Chocolate drizzle:
  • 1 1/2 tablespoons coconut oil
  • 3 tablespoons cocoa powder
  • 1 tablespoon maple syrup or agave nectar

Instructions

  1. Place the popcorn kernels in a brown paper bag. Microwave until most kernels are popped, about 3 minutes. Keep an ear out for the popping to make sure it doesn’t burn!
  2. On a baking sheet, spread the popcorn into a single layer.
  3. In a small bowl, add coconut oil; place in the microwave until melted. Add almond butter, maple syrup, and salt; whisk to combine. Place in the microwave for 30 seconds. Remove and whisk again.
  4. Pour the almond butter mixture over the popcorn. With a wooden spoon, stir the popcorn to evenly coat it with the mixture. Let it cool for 4-5 minutes.
  5. Divide into desired amount of bowls.
  6. For the chocolate drizzle, add coconut oil to a small bowl; place in the microwave until melted. Add cocoa powder and maple syrup; whisk to combine. Drizzle over the bowls of popcorn.

Did you make this recipe?

Tag @theleangreenbean on Instagram

Are you guys drooling yet??

This recipe for vegan, gluten-free Chocolate Almond Butter Popcorn is so easy and makes a perfect healthy movie night dessert! You could even eat it for a snack!

I can’t wait to try this recipe myself because I actually tried to make something similar about a year ago and it was a miserable fail! Huge thanks to Emilie for stopping by today. Be sure to go check out her blog and follow her on Facebook, Twitter, Instagram & Pinterest.

Enjoy!
–Lindsay–

Filed Under: Dessert, Snack Tagged With: Almond Butter, Chocolate Chips, Maple Syrup, Popcorn

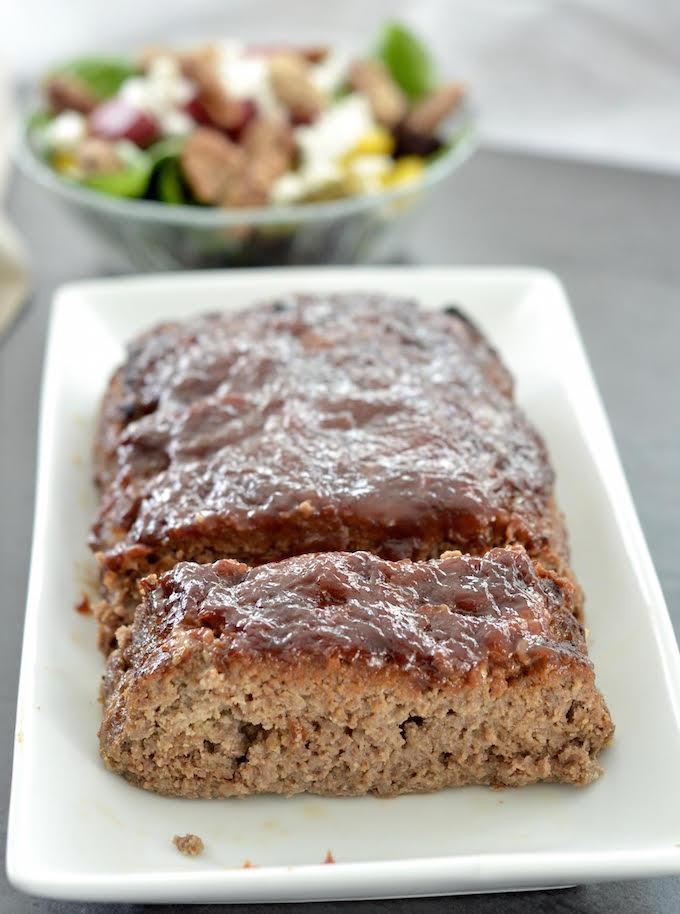
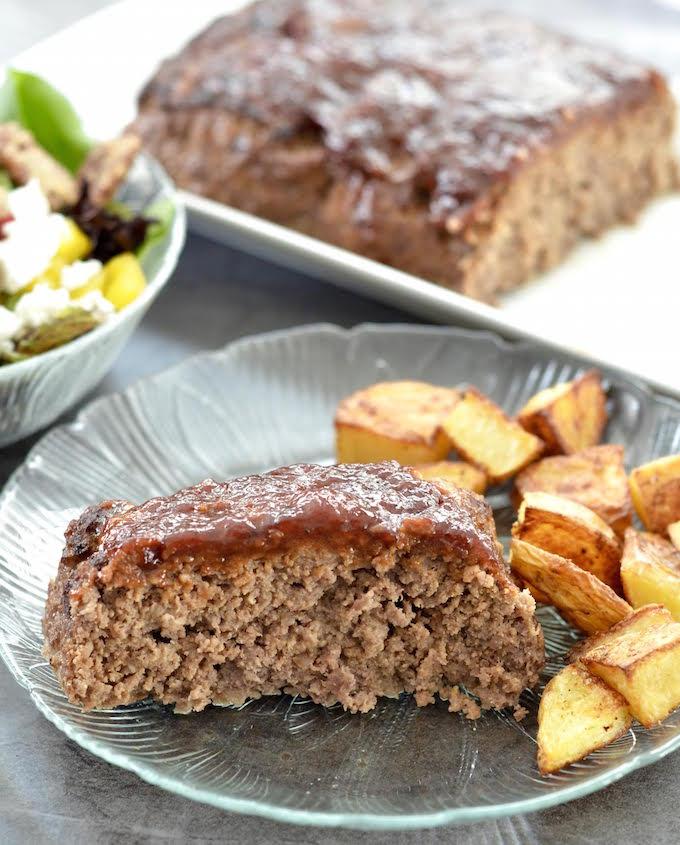
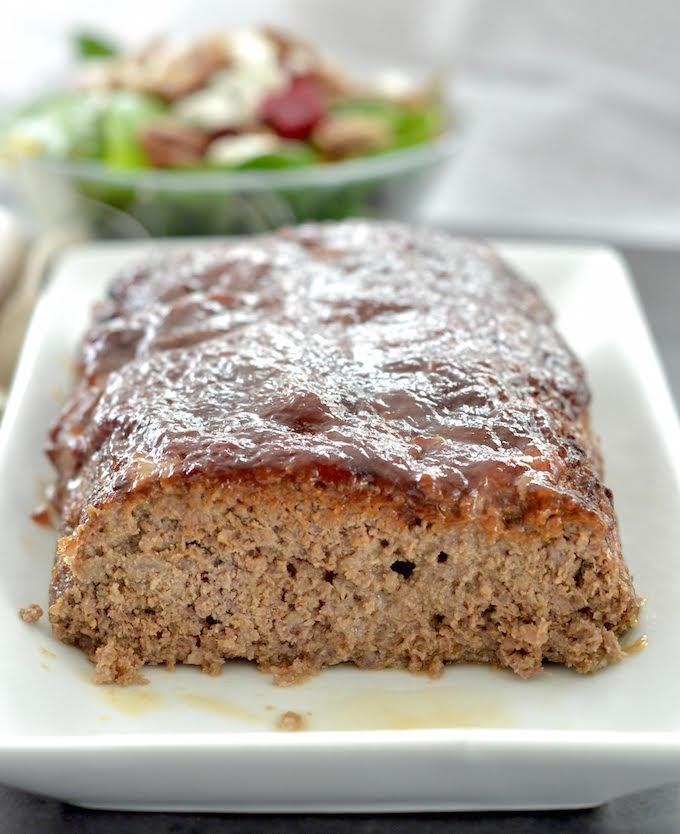
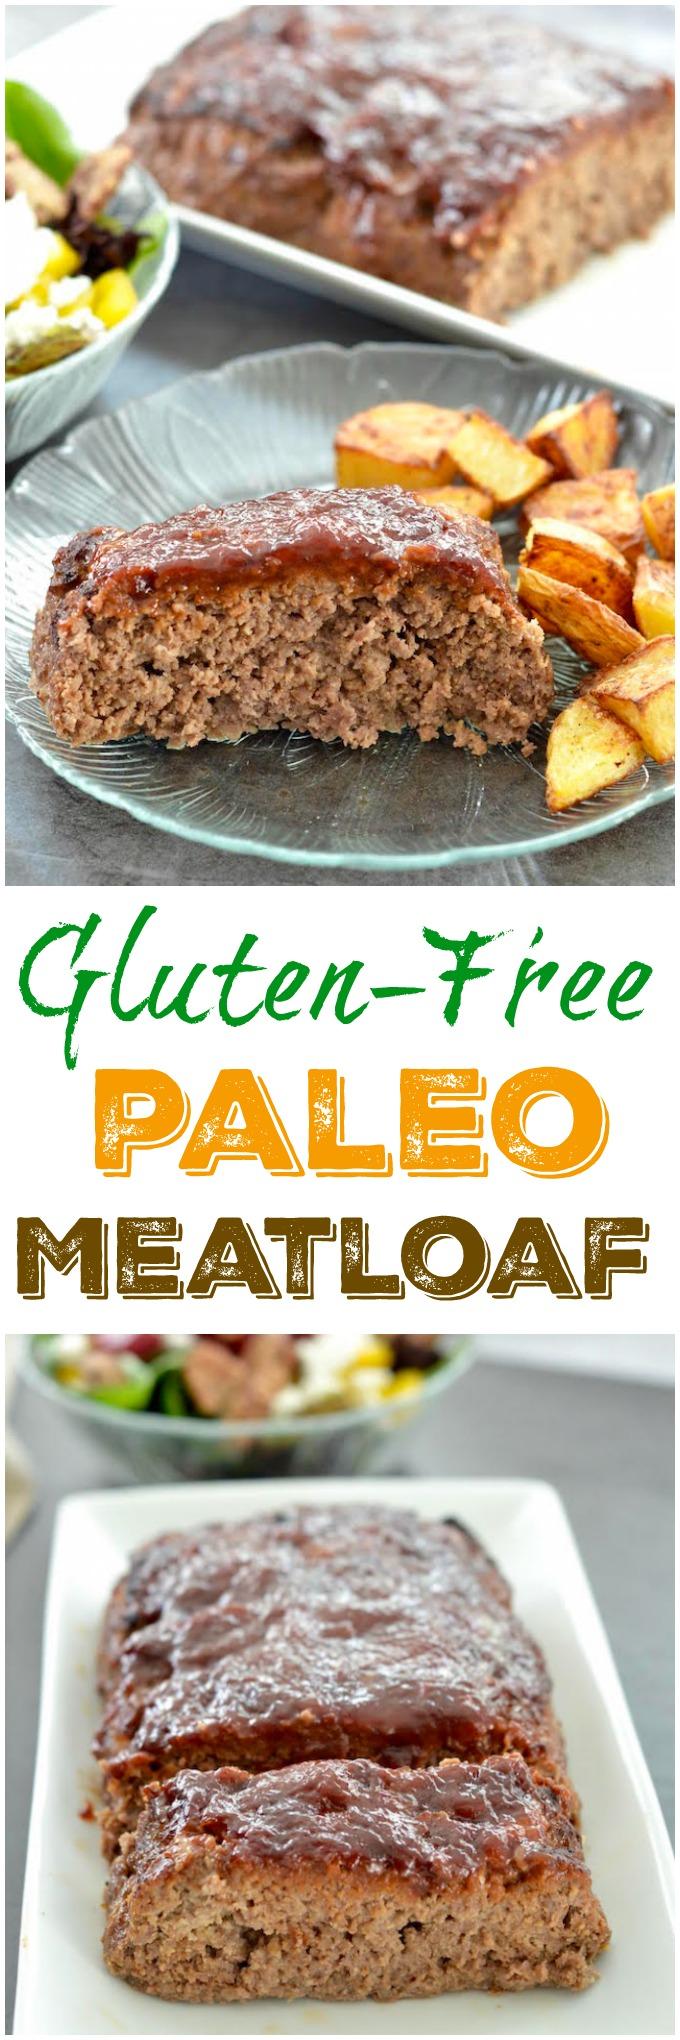
Gluten-Free Paleo Meatloaf

May 11, 2016 by Lindsay 33 Comments

This Gluten-Free Paleo Meatloaf recipe is the perfect family dinner. Make it ahead of time and reheat on a busy night.

This Gluten-Free Paleo Meatloaf recipe is the perfect family dinner. Make it ahead of time and reheat on a busy night.

Hi friends!

Like I mentioned yesterday, today is the first in a series of guest posts coming up on the blog. I’m so excited to introduce you to a few fabulous ladies you may not be familiar with! Today you’ll meet Laura! She’s the recipe genius behind recipes like these Paleo Zucchini Breakfast Cookies which Squish would love, this Honey Oatmeal Bread that would be perfect for sandwiches, these Asian Chicken Lettuce Wraps that I’m putting on my dinner menu for next week and these Paleo Chocolate Chip Cookie Bars that have me drooling. Take it away, Laura!


Hello! My name is Laura and I’m the lady behind the blog JoyFoodSunshine! I am so excited to be with you today at The Lean Green Bean! I met Lindsay through an amazing community of bloggers and I’m so grateful for the chance to be part of her corner of the internet! I admire her openness, her creativity, and her dedication to her family! Looking through Lindsay’s recipes makes me want to run to the kitchen and get cooking! On my “must make ASAP” list are these cookies, and…hello! She made a healthier version of one of my favorite desserts ever. Yes!

This Gluten-Free Paleo Meatloaf recipe is the perfect family dinner. Make it ahead of time and reheat on a busy night.

I love taking old favorites and giving them a makeover. This gluten-free & paleo-friendly meatloaf is just that. Instead of your usual breadcrumbs, crackers, etc.…this recipe uses wholesome, healthy ingredients! To all my wives & momma’s out there (I have three little ones ages 5, 3 and almost 1) this dinner is sure to please your entire tribe! Young kids sometimes have a hard time eating meat (especially if they only have two adorable, half-way-grown-in teeth like my sweet baby). Meatloaf is a great way to get some protein into their little bodies because it’s easy to chew! Plus, it’s packed full of flavor so they keep coming back for more!

This Gluten-Free Paleo Meatloaf recipe is the perfect family dinner. Make it ahead of time and reheat on a busy night.

A few notes about this recipe:

  • Since coconut flour absorbs so much liquid you don’t need a large amount to hold this meatloaf together.
  • You can decide how you’d like to bake your meatloaf. You can bake it directly in a loaf pan…or you can shape your mixture into a loaf and bake it on a larger pan. I prefer this method because it browns the entire meatloaf and ensures that the fat and liquid drain off during baking.
  • I like to broil the meatloaf for 2-5 minutes to crystalize the sauce on top! YUM! Baking time varies and depends on the thickness of your meatloaf!
Print

Paleo Meatloaf {Gluten-Free}

This Gluten-Free, Paleo Meatloaf recipe is the perfect family dinner. Make it ahead of time and reheat on a busy night.
Print Recipe

5 Stars 4 Stars 3 Stars 2 Stars 1 Star

4.5 from 2 reviews

This Gluten-Free, Paleo Meatloaf is the perfect family dinner. Make it ahead of time and reheat on a busy night.

  • Prep Time: 5 minutes
  • Cook Time: 50 minutes
  • Total Time: 55 minutes
  • Yield: 1 loaf 1x

Ingredients

Scale
  • 2 lbs grass-fed 93% lean ground beef
  • 2 TBS almond flour
  • 2 TBS coconut flour
  • 1 tsp garlic powder
  • 1 tsp onion powder
  • 1 tsp salt
  • ¼ tsp pepper
  • 1 egg, lightly beaten
  • 1 TBS Worcestershire sauce (coconut aminos for paleo)
  • 1 TBS milk (regular, almond & coconut all work)
  • ½ cup BBQ sauce (paleo approved if needed)
  • Topping:
  • ½ cup BBQ sauce

Instructions

  1. Preheat oven to 350oF Prepare your pan for baking. You can use either a 9×5” loaf pan or shape into a loaf and place on a rack in a large baking sheet (I prefer the latter because it allows any excess juices and fats to drain)
  2. In a small bowl, mix together almond flour, coconut flour, garlic powder, onion powder salt & pepper. Set aside.
  3. In a large bowl mix together ground beef, egg, Worcestershire sauce, milk of choice & BBQ sauce until combined.
  4. Add dry ingredients to meat mixture and stir well until completely combined.
  5. Put your mixture into your prepared baking pan.
  6. Bake at 350oF for 45-65 minutes (time varies depending on the thickness of your loaf).
  7. After 20 minutes (about halfway through baking) spread BBQ sauce on the top of your meatloaf & return it to the oven to continue cooking until the internal temperature is 155o
  8. Remove from oven and let sit for 5 minutes before serving.

Nutrition

  • Serving Size: Serves 6

Did you make this recipe?

Tag @theleangreenbean on Instagram

Easy enough, right?

This Gluten-Free Paleo Meatloaf recipe is the perfect family dinner. Make it ahead of time and reheat on a busy night.

I’m so glad to meet you! If you’d like to join my adventures I’d love for you to follow me on Instagram or come visit me at JoyFoodSunshine!


Thanks so much to Laura for sharing this delicious recipe. We can’t wait to try! Squish loves meatloaf! Be sure to go check out her blog and show her some love!

Enjoy!
–Lindsay–

Filed Under: Dinner Tagged With: Ground Beef

Party of Four

May 9, 2016 by Lindsay 36 Comments

Hi Friends!

Happy Monday. Hope all you moms out there had a great Mother’s Day! It was an extra special mom’s day over here because….

pregnancy announcement

Baby Bean #2
Coming November 2016

–Lindsay–

Filed Under: Uncategorized

5 Articles That Made Me A Better Mom

May 6, 2016 by Lindsay 10 Comments

18 months

Hi friends!

I’m sitting here just feeling a little emotional about the fact that Sunday is Mother’s Day and my little baby is already 18 months old. It’s hard to believe how fast the last year and a half has gone and even harder to remember what life was like before Squish was around. Becoming a mom has a steep learning curve and comes with a roller coaster of emotions and constant questioning about whether you’re being the best mom you can be.

I read a lot more parenting articles now that I’m a mom myself and while I tend to just gloss over some of them, there have been a few that have really stuck with me and made me stop, shift my mindset and think about my actions.

In honor of Mother’s Day, I thought I’d share 5 articles with you guys that I’ve read since Squish was born that have had the biggest impact on my role as a mom.  Side note- photo credit for the amazing pics in this post goes to Alisha Skeel Photography.

18 months

It’s Hard For Them, Too – This one is a doozy. I literally haven’t stopped thinking about it since I read it. I’ve shared it with pretty much every mom I know. I think it struck such a chord because it was a perspective I had never thought about. At all. There have been plenty of times in the past 18 months when I’ve thought about how hard it is to be a mom. I’ve complained about my baby being crabby, tired, not sleeping, screaming for hours. I’ve complained about not having enough time to work, not getting enough sleep, not getting any sick days.

But on those hard days, I’ve never once thought about how hard it is for him. About how many things he probably wishes he could tell me but he doesn’t have the words. About how tired he is of me telling him to stop doing things when he doesn’t understand why. After reading this article, I shifted my mindset. When I get impatient or angry, I try to put myself in his shoes…and then do what I can to help him fix the situation. If nothing else, it’s taught me to be a little more sympathetic when things don’t go as planned for either of us.

The article ends: “They greet their days with smiles, enthusiasm, and excitement. They forgive our mistakes, our flashes of fiery, unfair anger. They meet our impatience with patience (at least sometimes), they laugh and live and love with reckless abandon. So when they push us to the edge of our limits, let’s try to remember that we’re doing the same thing to them.”

18 months

This Stage of Life, It’s Hard – This is another article that eloquently puts into words what so many moms my age are going through. “You don’t know the answers to ANYTHING, but you feel constant pressure to figure out EVERYTHING.”  So much yes.  “It’s a stage where you are on a constant quest for balance, and can never find it.”  –> So accurate.

This article beautifully describes the daily struggles that I deal with…but it’s the part where it goes on and tackles what you need to do to survive it all that really hit home. Because I think every mom needs to read that list. And give themselves a little bit of a break. You can’t do it all….and that’s ok. There are things that you THINK you need to do…like clean the house, squeeze in an extra hour of work, etc and then there are things that you ACTUALLY need to do…like accept help when it’s offered, simplify, take time for you. Because raising a kid is hard…but you’re not doing it alone!

18 months

To Be A Mother  – One of the most accurate descriptions of what it means to be a mom that I’ve ever read. I remember sharing this on Facebook a couple months ago and getting overwhelming agreement from many of my mom friends. “To be a mother is to always feel like you’re never giving enough and like you couldn’t possibly give anything more.”  –> How I feel every single day.   

“And to be a mother is to finally understand that love that people talk about, that soul-crushing, all-encompassing love for your child that nothing could prepare you for and nothing compares to.”  –> The exact truth. It’s an article I’ll send to all of my friends as they start to have babies of their own and it’s one I’ll continue to re-read because it’s a great reminder that even though motherhood is different for everyone, there are people out there who understand. It’s a reminder that when you’re a mom, you develop a whole new level of empathy for other moms. And it’s a reminder that all those thoughts you’re struggling with, decisions you’re trying to make and fears you have are ok, acceptable and totally normal.

18 months

The Last Time – I read this when Squish was probably 3 or 4 months old. I remember sitting in the dark reading it over and over and just sobbing. “The thing is, you won’t even know it’s the last time. Until there are no more times.”

I know that no matter what I do, this is still going to happen. There will be plenty of those “last times” that I don’t realize until later. And I’ll probably cry about them down the road. But I saved this post and every so often I go back and read it…and it reminds me just how important the little things are. It helps me be just a little more present. Reminds me to put my phone down and soak up these precious moments before they’re gone.

“So when you are living these times, remember there are only so many of them and when they are gone, you will yearn for just one more day of them.” 

18 months

Let Them Climb Trees (and Fall)  – This was something I was working hard at before I read this article and it simply confirmed that I needed to continue. I want to raise a brave, independent child. I want him to feel free to explore what he finds interesting. I want him to take risks. And I do my best to make sure he gets those opportunities, even when it’s not the most convenient for me.  “She had stopped herself from racing in to save and help (when he hadn’t even asked). Her boy had done something he didn’t think he could do. What was on the other side? A big load of confidence.”

I let him play in the sprinklers even though I know he’ll get wet and then cry because he doesn’t like how his wet shirt feels. I let him climb up and down things that are maybe just a little “too high” by conventional standards, even though he might fall. I let him run full speed down the driveway even though I know it’s likely that he’ll trip and bang his head. And I do it because I know it’s helping him learn. He’s developing his independence and learning that not every action has a desirable result. Sometimes he’ll fall. Sometimes he’ll get hurt. And sometimes he’ll fail. “But what could be better than watching your child try something he or she  never thought possible? Sure, falls and scraped knees are inevitable. But they get up. They climb again.”

But my hope is that he’s learning to get right back up and either rethink things and make a smarter choice next time….or push through with determination and try again. “And fueled by new-found confidence, they start searching for the next mountain that has morphed from obstacle to opportunity. You can try to help, but if you’ve done your job right, they’ll be brushing your hands away.”

(This is another great article on this topic- Why It’s Ok To Let Kids Fail).

5 Articles That Made Me A Better Mom


So Happy Mother’s Day to all you moms out there. Wishing you a day filled with love and happiness.

Enjoy!
–Lindsay–

Filed Under: Kids

Whole Wheat Yogurt Waffles {Freezer-Friendly}

May 5, 2016 by Lindsay 23 Comments

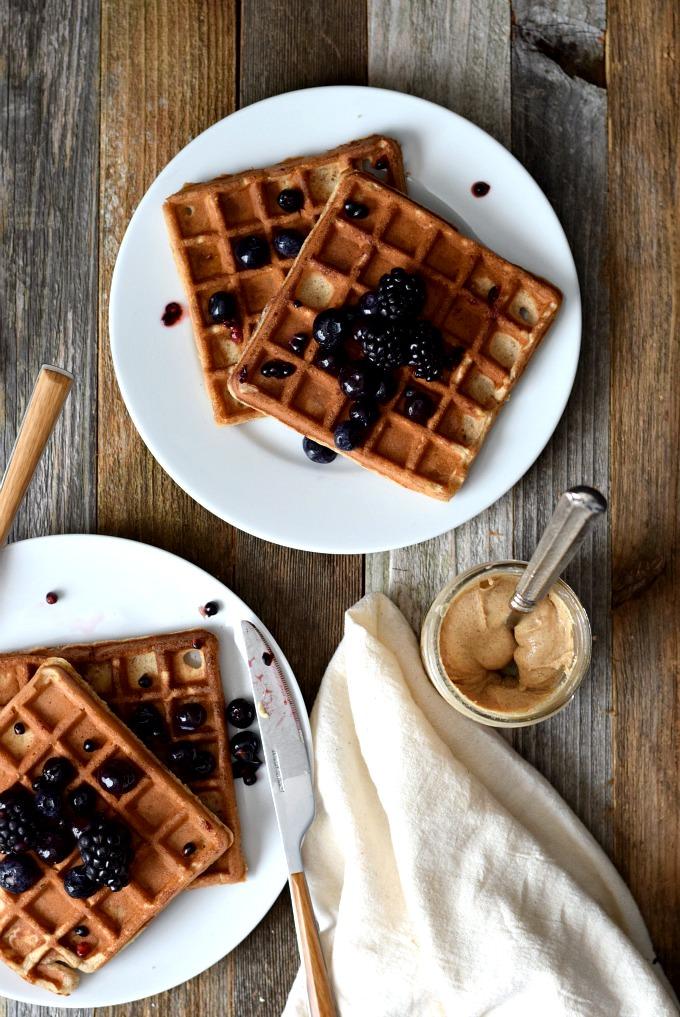
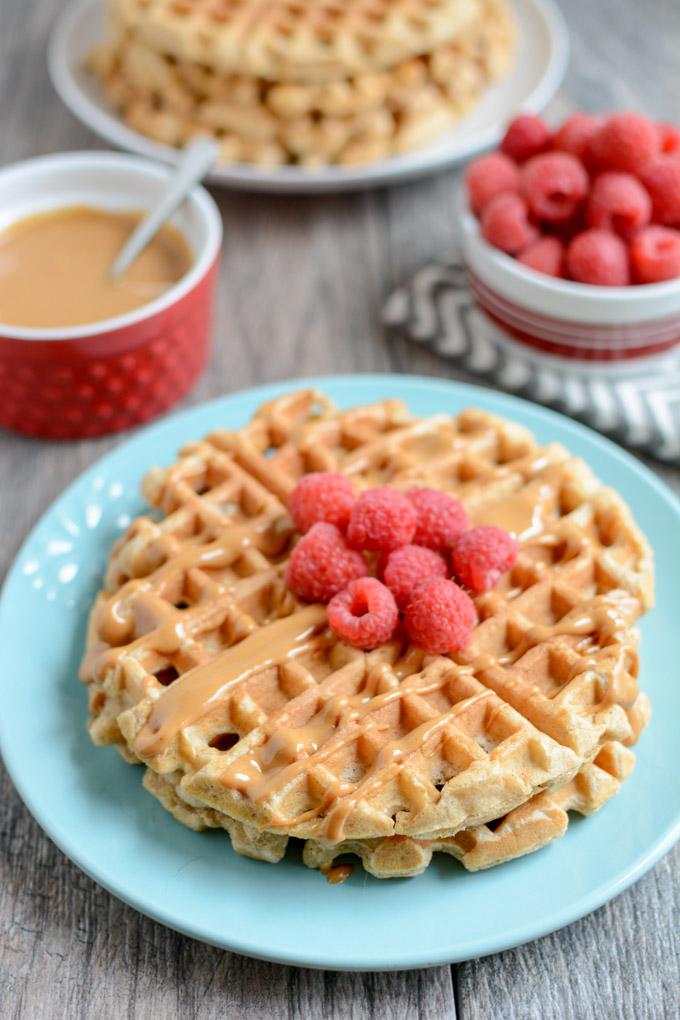
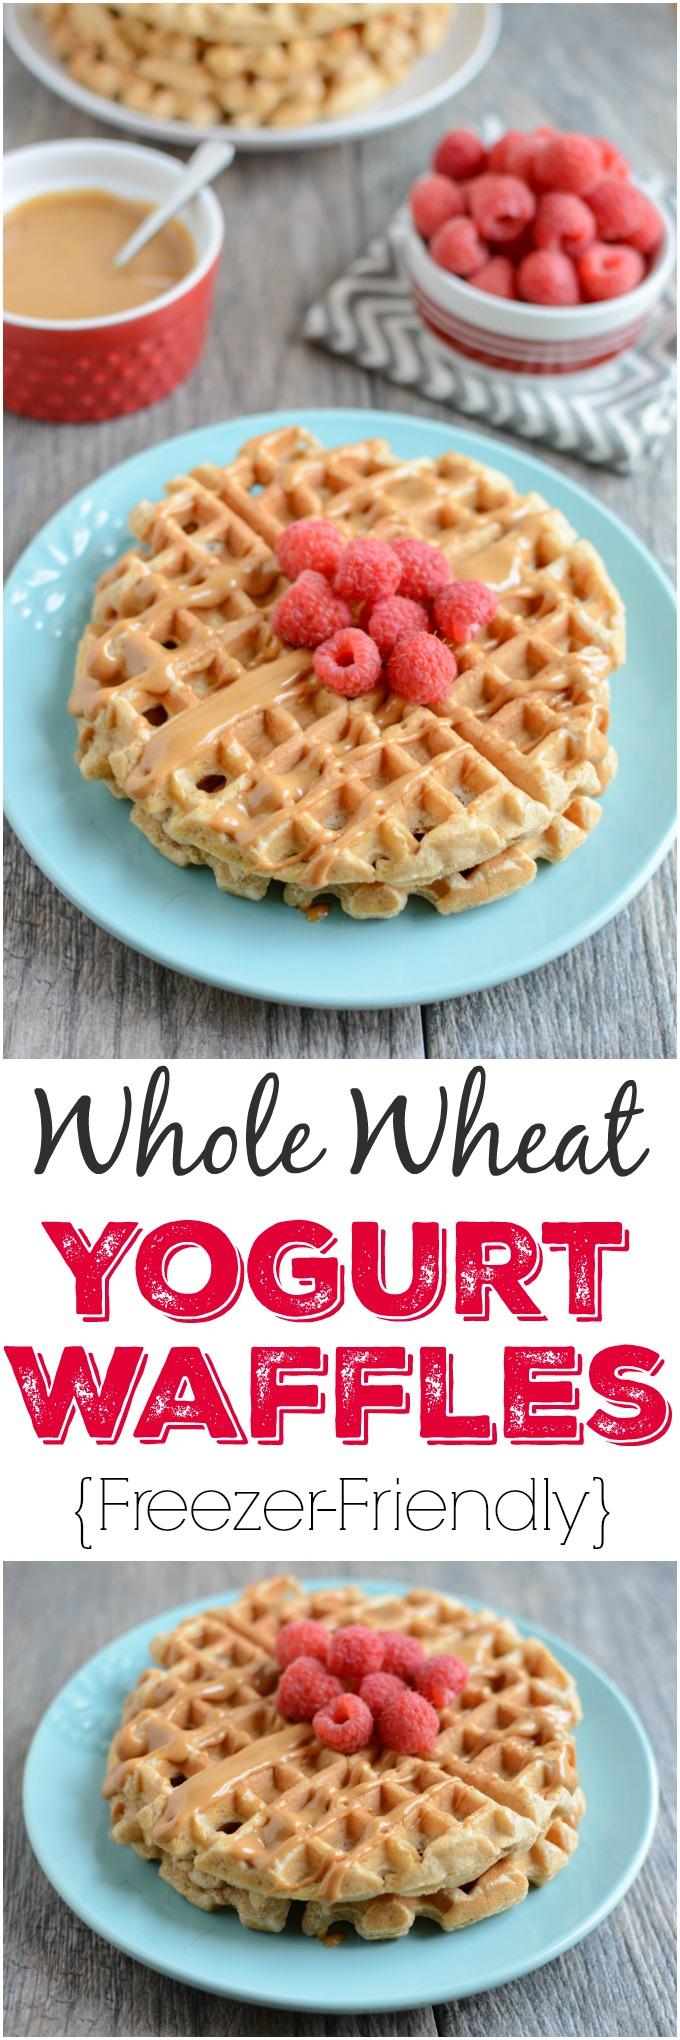
These Whole Wheat Yogurt Waffles are easy to make and packed with protein and fiber. Make a batch ahead of time to stock your freezer and reheat them for a quick breakfast or snack.

These Whole Wheat Yogurt Waffles are easy to make and packed with protein and fiber. Make a batch ahead of time to stock your freezer and reheat them for a quick breakfast or snack.

Hi friends!

Let me start off by saying a few things:
1) I’ve made two batches of these waffles in the past two days to stock my freezer. They are my jam…and Squish and hubby both love them as well.
2) These waffles don’t fit many of the current popular dietary trends. They’re not vegan, they’re not paleo and they’re not gluten-free….so if you’re looking for any of those things, you’ve come to the wrong place today. They’re just good old fashioned waffles made with whole wheat flour, eggs, yogurt and milk – all things I love and eat regularly…which means I’ll probably almost always have the ingredients on hand to make these. #winning

I was cleaning out my pantry the other day when I came across my waffle maker. Even though I have a few waffle recipes already on the blog, like these Sweet Potato Waffles or these Apple Cinnamon Blender Waffles, my waffle maker often gets neglected and I’m not really sure why. Quite honestly, waffles are a whole lot easier than pancakes in my opinion. You just make the batter, pour it in and boom – perfect waffle. No worrying about waiting until the exact right time to flip them over like pancakes. I think that whole thought process stems from a certain recipe for pumpkin pancakes I’ve been working on lately. My first few batches were SO good but you had to wait FOREVER to flip them, had to flip them multiple times, etc etc…it was just a whole thing that I didn’t want to deal with so I ended up turning them into baked pancakes 🙂

Whole Wheat Yogurt Waffles

These Whole Wheat Yogurt Waffles are easy to make and packed with protein and fiber. Make a batch ahead of time to stock your freezer and reheat them for a quick breakfast or snack.

ANYWAYS, back to the waffles. I’m always looking for new breakfast ideas for Squish and I when I stumbled upon my waffle iron and realized he’d probably never even had a waffle, I decided it was time to change that!

This recipe actually turned out almost perfectly on the first try. The only thing I changed for the second batch was decreasing the sugar by 1 Tbsp and they were still just as good! You could also try using vanilla yogurt instead of plain and using even less white sugar. Or try adding some lemon juice and zest and some fresh berries!

Here’s the recipe:

Print

Whole Wheat Yogurt Waffles {Freezer-Friendly}

yogurt waffles
Print Recipe

5 Stars 4 Stars 3 Stars 2 Stars 1 Star

5 from 4 reviews

These Whole Wheat Yogurt Waffles are easy to make and packed with protein and fiber. Make a batch ahead of time to stock your freezer and reheat them for a quick breakfast or snack.

  • Prep Time: 5 minutes
  • Cook Time: 10 minutes
  • Total Time: 15 minutes
  • Yield: 8 waffles 1x

Ingredients

Scale
  • 2 cups white whole wheat flour
  • 1 Tbsp baking powder
  • 1 tsp cinnamon (or more if you’re like me!)
  • 2 Tbsp sugar
  • 1 cup plain yogurt (I use full fat but any kind should work, including flavored or Greek)
  • 1 cup milk
  • 2 eggs
  • 1 tsp vanilla extract

Instructions

  1. Combine dry ingredients in a large bowl.
  2. In a smaller bowl, combine wet ingredients and stir to combine.
  3. Add wet ingredients to dry ingredients and stir until just mixed.
  4. Heat waffle iron and grease well with oil or butter.
  5. Scoop about 1/3 cup batter onto waffle iron.
  6. Cook and repeat. You should be able to make 8 waffles.

Notes

Make sure to grease waffle iron well between each waffle.

Did you make this recipe?

Tag @theleangreenbean on Instagram

To freeze these, I first let them cool completely on a baking sheet. Then I broke them in half, stacked two halves on top of each other and wrapped each pair in saran wrap. I placed everything in a ziploc bag and stored them in the freezer.

These Whole Wheat Yogurt Waffles are easy to make and packed with protein and fiber. Make a batch ahead of time to stock your freezer and reheat them for a quick breakfast or snack.

To reheat, just pop them in the toaster!

These Whole Wheat Yogurt Waffles are easy to make and packed with protein and fiber. Make a batch ahead of time to stock your freezer and reheat them for a quick breakfast or snack.

[Tweet “Make a batch of these Whole Wheat Yogurt Waffles from @leangrnbeanblog for a quick breakfast!”]

Enjoy!
–Lindsay–

Filed Under: Breakfast, Snack Tagged With: Egg, Milk, White Whole Wheat Flour, Yogurt

What My 18 Month Old Eats in a Day

May 1, 2016 by Lindsay 11 Comments

Hi friends!

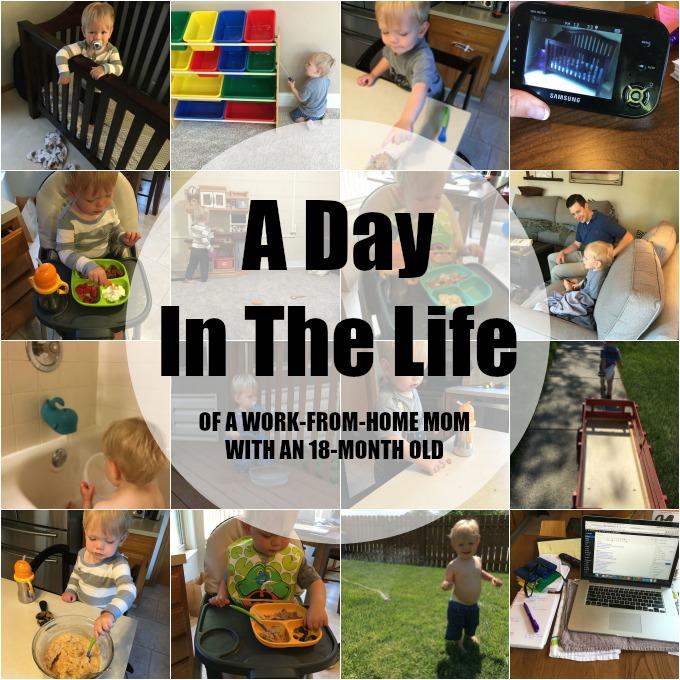
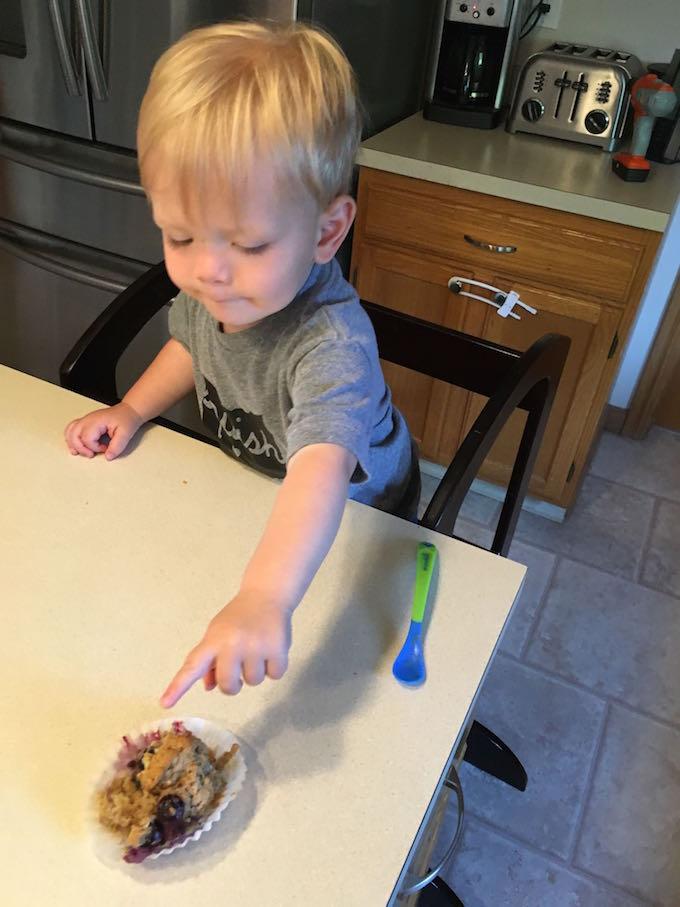
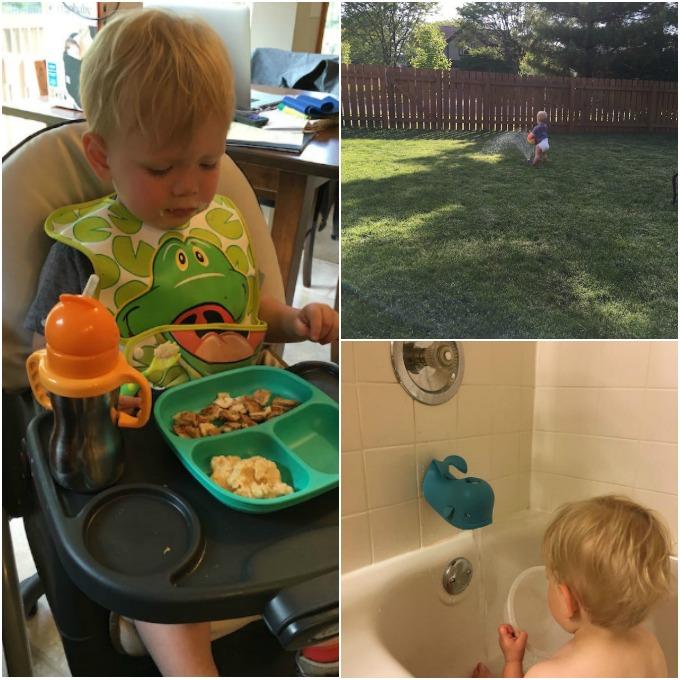
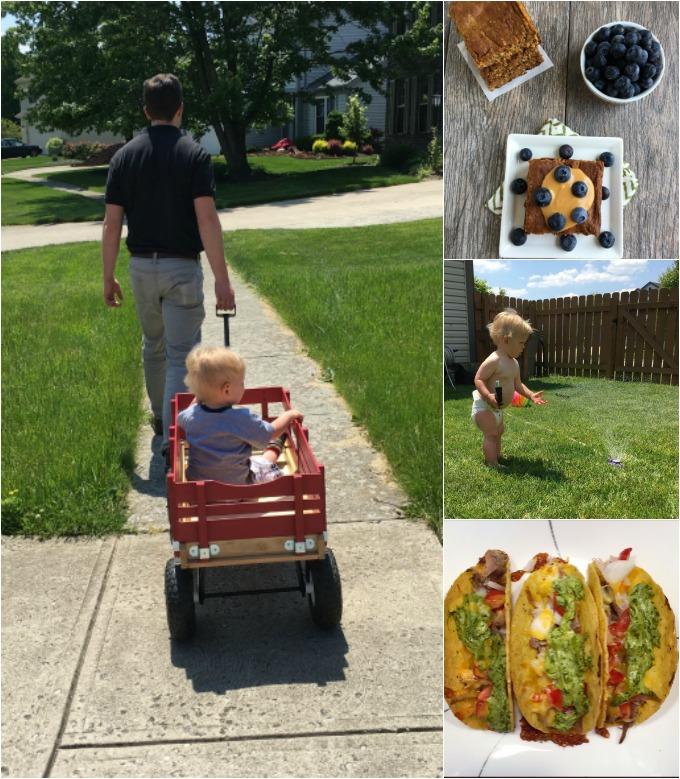
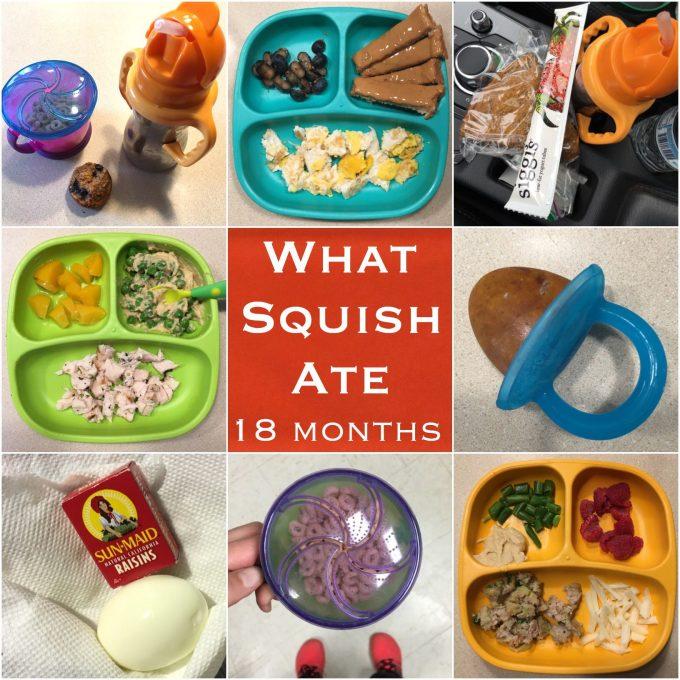
I don’t have any food prep to share today, but I finally did something I’ve been meaning to do for a while now – capture a full day of Squish eats. As you guys know, Squish is a big kid. He’s 18 months old, weighs 31 pounds and is 34 1/4 inches tall, putting him in the 98th percentile for height and weight. In fact, he’s been above the 95th percentile in all areas since he was born.

The kid LOVES to eat and I do my best to keep him fed and happy, while at the same time giving him foods that are healthy, not overly processed, full of nutrients and still taste great. I mentioned some of his favorite snacks in this kid-friendly energy ball roundup last week, and I often share snaps of his breakfast, lunch and dinner on snapchat (username: LeanGreenBean1) but I wanted to document a full day of eats to share with you guys as well.

18 month old eats

So here we go:

IMG_3558

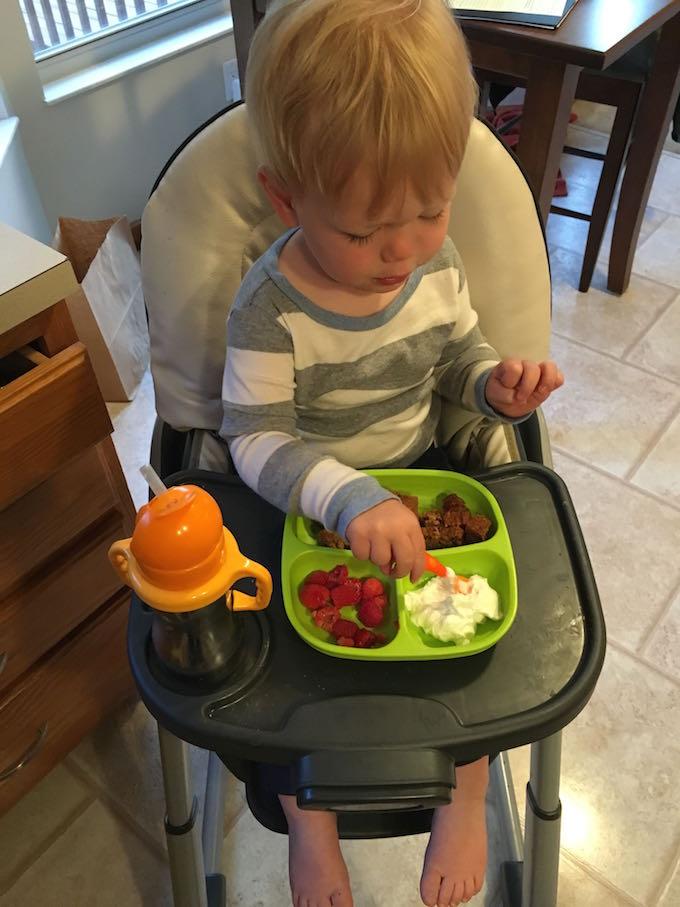
6:45am: Squish wakes up. I give him about 5 ounces of milk (although after his doctor’s appointment we’re going to try eliminating milk for a month or two and see if it helps with his pooping issues…so this will be water from now on). He also gets one Sweet Potato Bite and about 1/2 a cup of Cheerios. We watch PBS and play for a while. **EDITED TO ADD: Several of you have asked about the plates. I tried a few brands and these are my favorite. They’re Re-Play Divided Plates. (aff link)

IMG_3538

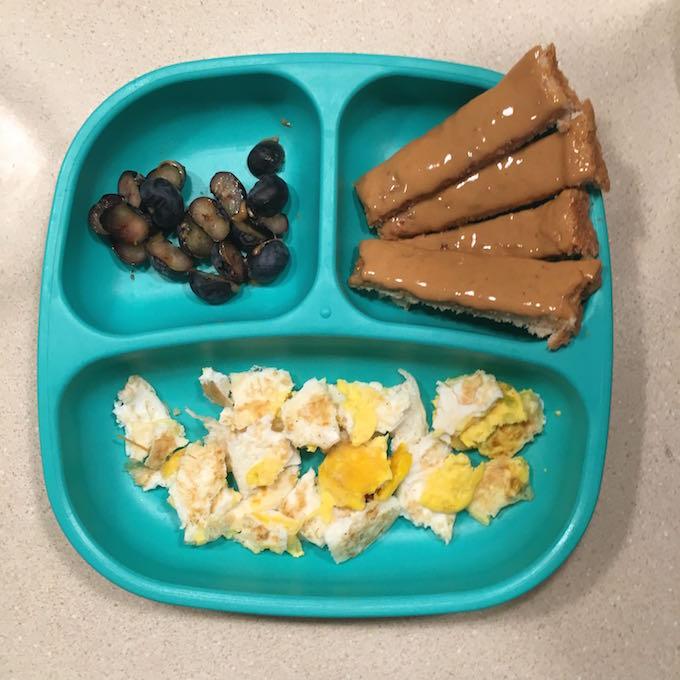
7:30am – Breakfast. A leftover fried egg from dinner the night before (he’ll eat them warm or cold), a slice of peanut butter toast and some blueberries.

IMG_3547

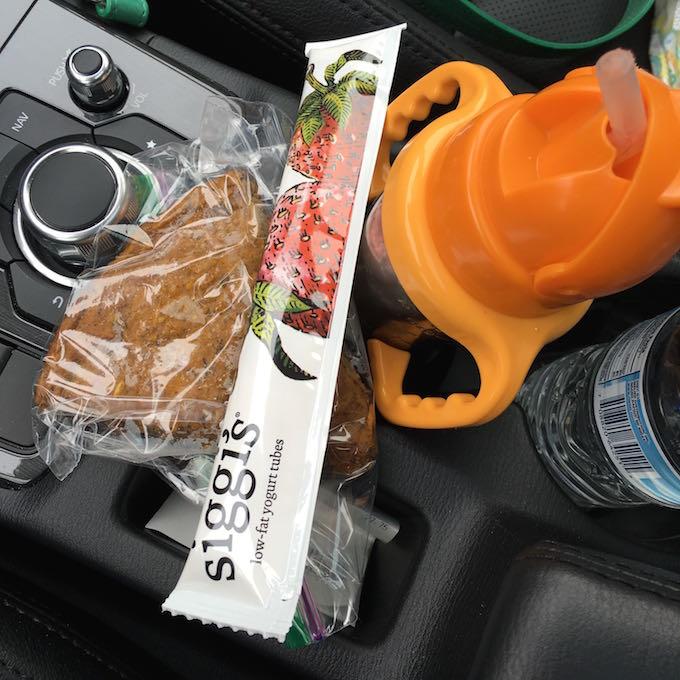
10:30am – Snack. This snack is a little bigger than usual because we had to go straight from Little Gym to his doctor’s appointment. I gave him a bigger snack because I was hoping that he would fall asleep on the way home from his appointment and have a later lunch. No such luck.

Siggi’s yogurt tube and a piece of baked pumpkin banana pancake (I ate about 1/3 of the pancake).

IMG_3557

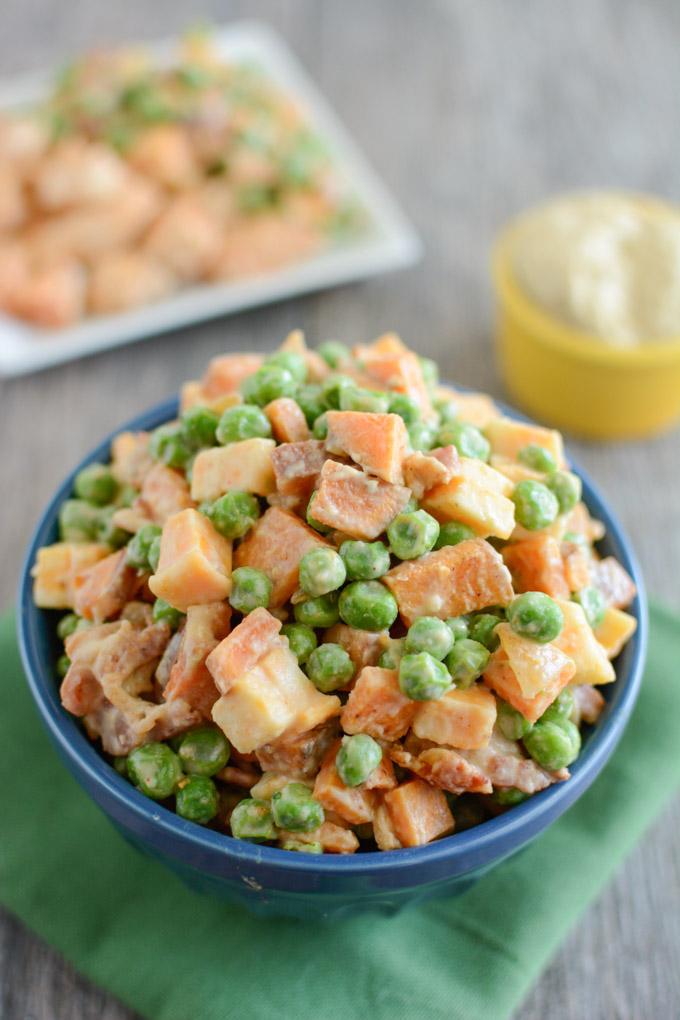
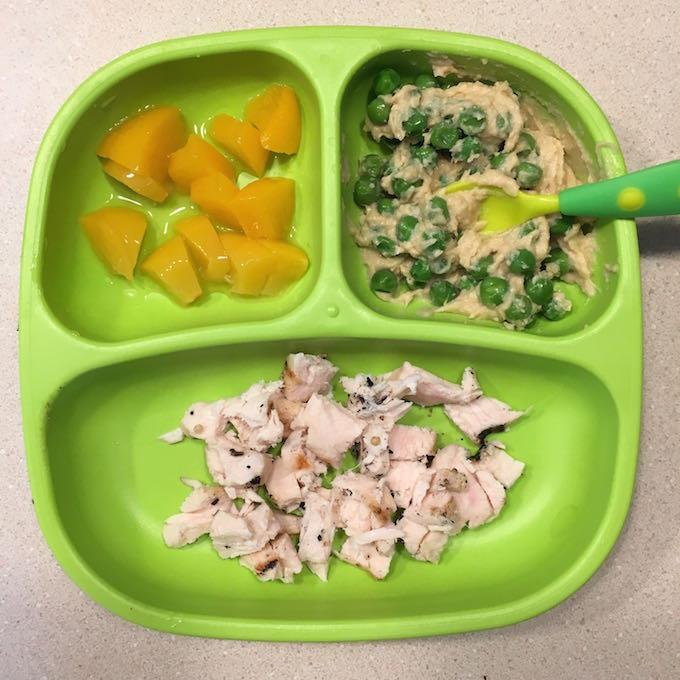
12:00pm – Lunch. Peaches, peas with hummus and grilled chicken. He’ll eat some of the chicken plain and the rest he dips in the hummus or leftover juice from the peaches because he ALWAYS eats the fruit first.

IMG_3561

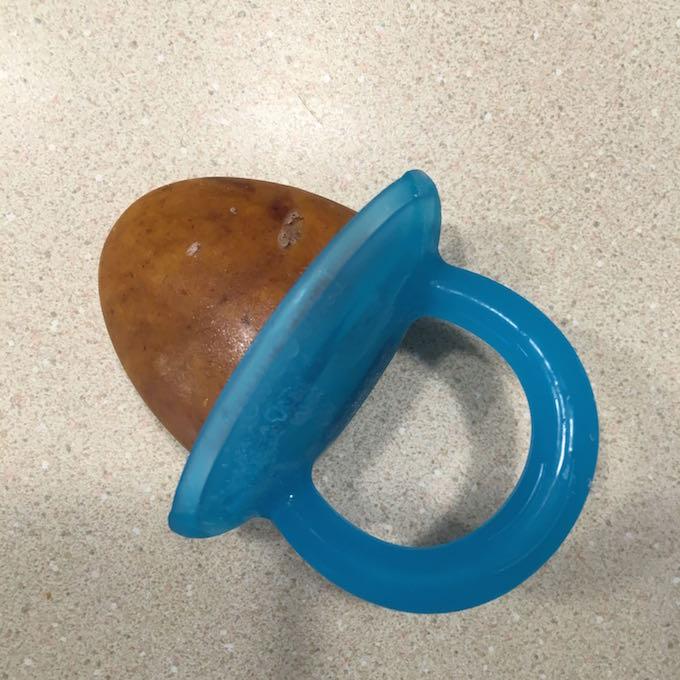
2:30pm – Post-nap snack. Popsicle made with mashed sweet potato, prunes and peanut butter. The popsicle molds are these Munchkin Click ‘n Lock and I love them! (aff link)

1

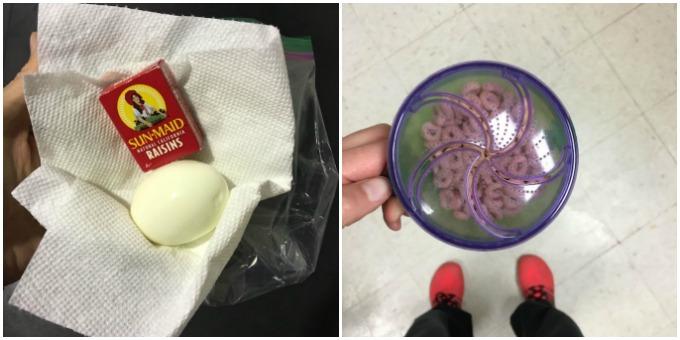
4:00 – 6:00pm  Snacks at the gym. This is his daily snack routine at the gym. We  usually get there around 4pm and he eats a hard boiled egg. When he goes into his playpen during the actual workout, he gets some Cheerios. He usually eats about 1/2 of them and the other half end up on the gym floor. After my workout is done, if we’re sticking around for a while, he eats a small box of raisins (the really small mini box). If we leave pretty quickly after my workout is over, he doesn’t usually eat the raisins.

IMG_3573

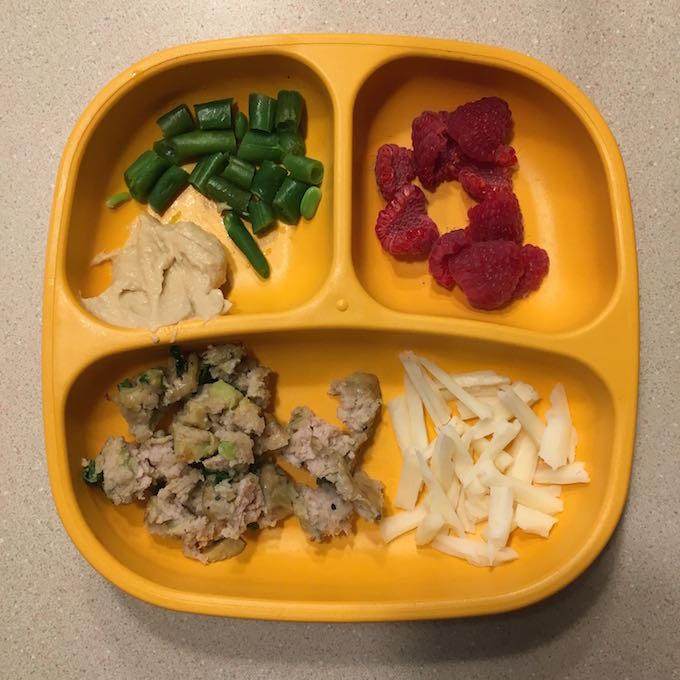
7:00pm – Dinner. Half an Avocado Chicken Burger, half a string cheese, some raspberries and green beans with hummus. If he wants to eat while I’m making dinner, he gets veggies. If he’s hungry enough he’ll eat them. If not, he’ll sit and cry and then usually eventually go entertain himself for a little while until it’s time to eat.

So there you have it. Not every day is exactly like this, but it’s a pretty accurate representation of how much he currently eats!

Enjoy!
–Lindsay–

Filed Under: Kids

Pesto Chicken Pizza Rolls

April 21, 2016 by Lindsay 20 Comments

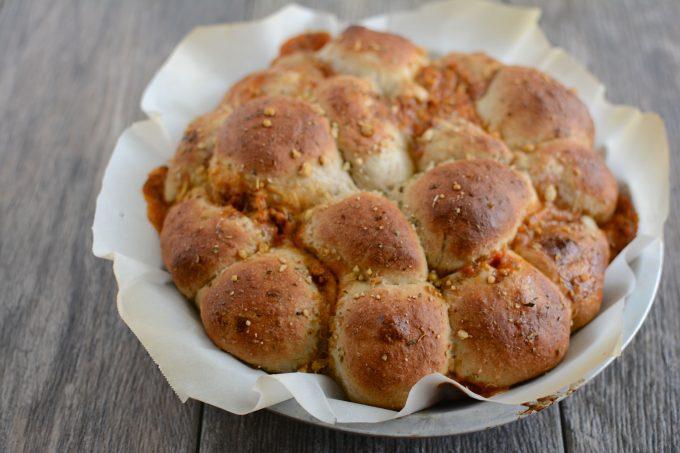
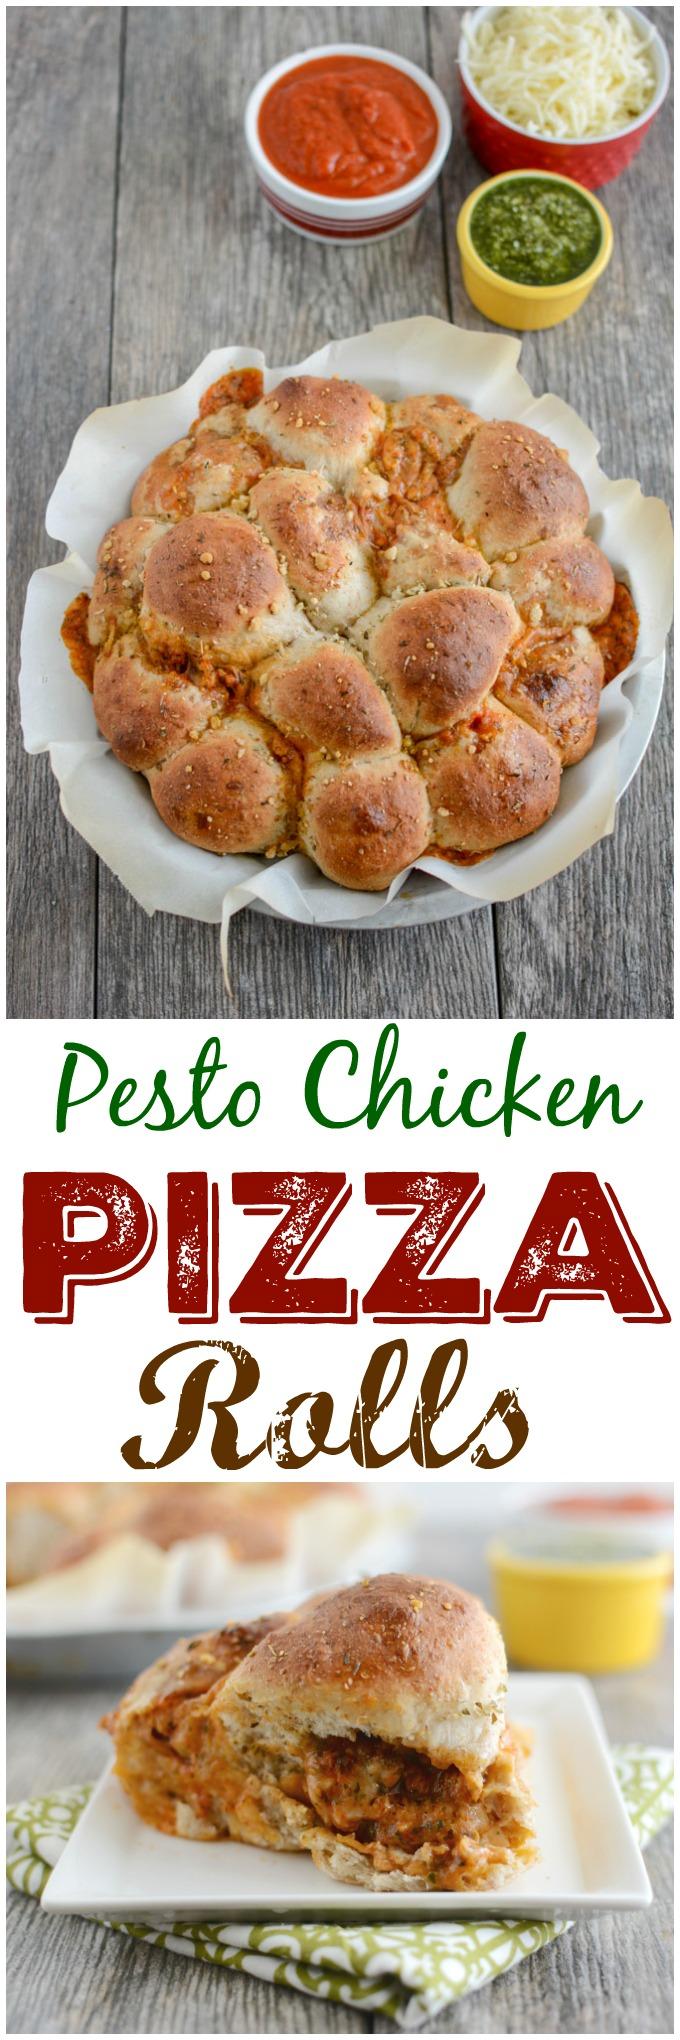
This recipe for Pesto Chicken Pizza Rolls is a fun way to change things up from traditional pizza. Serve them warm or cold, for lunch or dinner. They’re easy to make and kid-friendly as well!

This recipe for Pesto Chicken Pizza Rolls is a fun way to change things up from traditional pizza. Serve them warm or cold for lunch or for an easy appetizer. They're easy to make and kid-friendly as well!

Hi friends!

It’s time for another month of Recipe Redux! This month the theme was packable lunch ideas. I don’t currently have to pack my lunch…but that doesn’t mean I haven’t done my fair share of packing in the past….or that I won’t have to again in the future. So I was totally on board for this prompt.

I wanted to make something kid-friendly since I now share my lunches with Squish and also wanted something that tasted good hot or cold. Some people have microwaves to reheat stuff at lunchtime and some don’t.

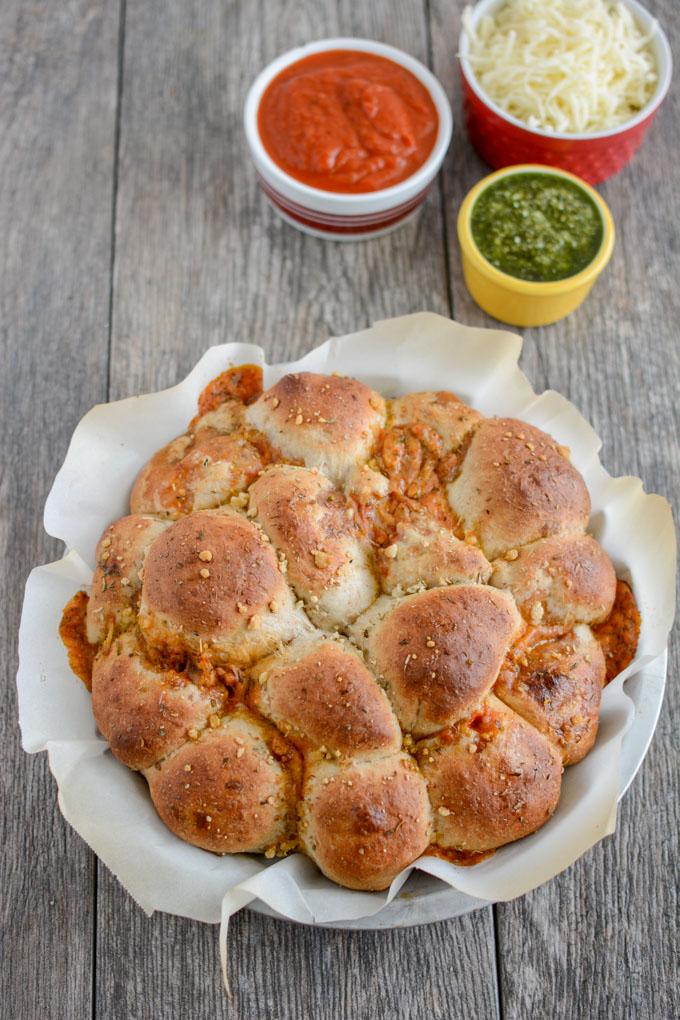
Pizza immediately came to mind as something that’s equally good hot or cold…but regular pizza was just a little too boring. I remembered scrolling by something similar to these on Pinterest a couple months ago and they stuck in my mind visually. Since I didn’t have a recipe to work with, I decided to just wing it.

This recipe for Pesto Chicken Pizza Rolls is a fun way to change things up from traditional pizza. Serve them warm or cold for lunch or for an easy appetizer. They're easy to make and kid-friendly as well!

I used a few shortcuts, including picking up some freshly made pesto and pizza dough at the store and after consulting my fridge, I realized I had plenty of cooked chicken thighs from my Sunday food prep that I could use as well. So, although the rolls themselves are a bit time-consuming to assemble, the filling came together in a jiffy and it all balanced out.

These are basically all the goodness of pizza toppings wrapped up in a ball of pizza dough!

Here’s how you make them:

Print

Pesto Chicken Pizza Rolls

Pesto Chicken Pizza Rolls 1
Print Recipe

5 Stars 4 Stars 3 Stars 2 Stars 1 Star

No reviews

This recipe for Pesto Chicken Pizza Rolls is a fun way to change things up from traditional pizza. Serve them warm or cold, for lunch or dinner. They’re easy to make and kid-friendly as well!

  • Prep Time: 15 minutes
  • Cook Time: 25 minutes
  • Total Time: 40 minutes
  • Yield: 16 pizza rolls 1x

Ingredients

Scale
  • 1 cup cooked chicken, finely diced
  • 1 cup shredded mozzarella cheese
  • 2/3 cup pizza sauce
  • 3 Tbsp pesto
  • 1 batch of pre-made pizza dough (homemade or store-bought)
  • Olive oil
  • oregano & parmesan cheese for sprinkling on top

Instructions

  1. Combine chicken, mozzarella, pesto and pizza sauce in a small bowl.
  2. Divide pizza dough into 16 equal balls.
  3. Stretch each dough ball with your hands into a circle that’s 3-4 inches across.
  4. Add one tablespoon of chicken mixture to dough circle. Pinch sides together to seal and form a ball.
  5. Place seam side down in a pie tin lined with parchment paper.
  6. Repeat with all dough balls.
  7. Brush tops of dough with olive oil and sprinkle with parmesan cheese and oregano.
  8. Bake at 425 degrees for 25 minutes.
  9. Serve with extra pizza sauce for dipping.

Did you make this recipe?

Tag @theleangreenbean on Instagram

Next time I make these I’d probably add a bit more chicken, but that’s just me 🙂

This recipe for Pesto Chicken Pizza Rolls is a fun way to change things up from traditional pizza. Serve them warm or cold for lunch or for an easy appetizer. They're easy to make and kid-friendly as well!

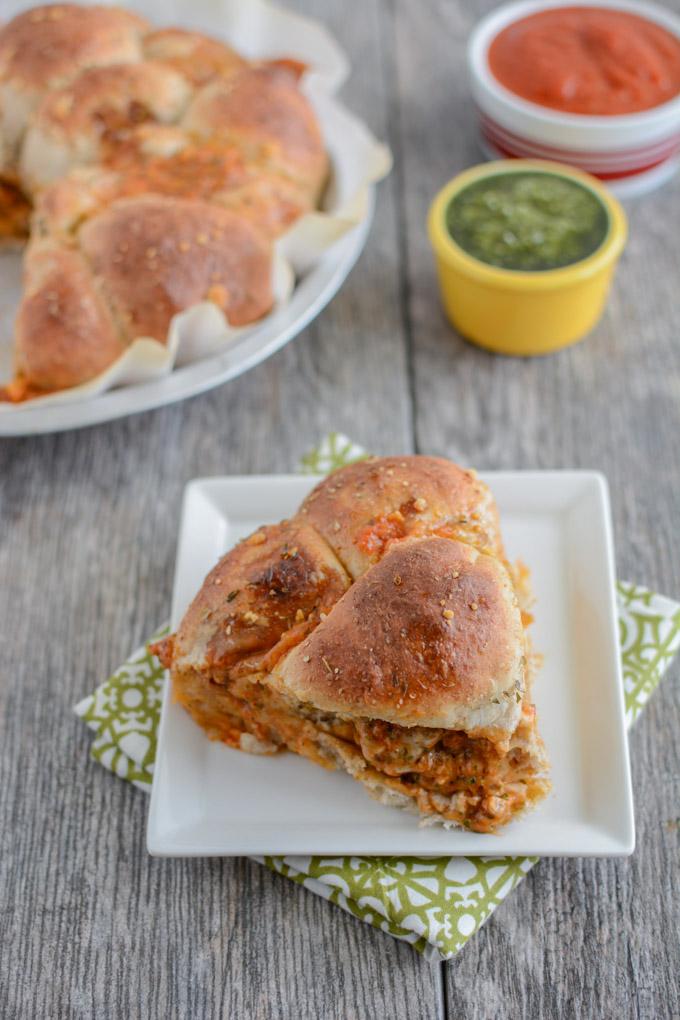
They’d be a great party appetizer and I also enjoyed them both reheated and cold for lunch over the next few days.

This recipe for Pesto Chicken Pizza Rolls is a fun way to change things up from traditional pizza. Serve them warm or cold for lunch or for an easy appetizer. They're easy to make and kid-friendly as well!

[Tweet “Serve these Pesto Chicken Pizza Balls from @leangrnbeanblog for lunch or an easy appetizer!”]

For more packable lunch ideas, check out the link-up below!

Enjoy!
–Lindsay–

An InLinkz Link-up


Filed Under: Appetizer, Lunch Tagged With: Cheese, Chicken, Pesto, Tomato Sauce

Spring Breakfast Salad

April 20, 2016 by Lindsay 6 Comments

Loaded with spring vegetables and topped with over-easy eggs, this paleo, gluten-free Spring Breakfast Salad is an easy and delicious way to start your day with more veggies!

Loaded with spring vegetables and topped with over-easy eggs, this paleo, gluten-free Spring Breakfast Salad is an easy and delicious way to start your day with more veggies!

Thanks to Davidson”s Safest Choice Eggs for sponsoring this post.

Hi friends!

A couple months ago I shared these Baked Scotch Eggs! They’re great for breakfast, dinner or snacks. This month, we’re switching gears a little bit and talking about how to get more veggies at breakfast!

Before you go running for the hills at the thought of eating a salad for breakfast, give me a chance to make my case for this one!

Loaded with spring vegetables and topped with over-easy eggs, this paleo, gluten-free Spring Breakfast Salad is an easy and delicious way to start your day with more veggies!

First of all, I used fresh spring veggies which are currently in-season right now and tasting their best.
Second of all, if you like runny eggs, this is definitely a recipe you need to try. We’re basically using these egg yolks as a nice little salad dressing. If you have the option to buy pasteurized eggs, I’d definitely recommend it!

Here’s how you make it:

Print

Spring Breakfast Salad

Loaded with spring vegetables and topped with over-easy eggs, this paleo, gluten-free Spring Breakfast Salad is an easy and delicious way to start your day with more veggies!
Print Recipe

5 Stars 4 Stars 3 Stars 2 Stars 1 Star

5 from 1 review

Loaded with spring vegetables and topped with over-easy eggs, this paleo, gluten-free Spring Breakfast Salad is an easy and delicious way to start your day with more veggies!

  • Author: Lindsay
  • Yield: serves 2

Ingredients

Scale
  • 1 cup diced sweet potatoes
  • 3/4 cup diced radishes
  • 1 cup asparagus spears
  • 1/2 cup frozen peas, steamed
  • 3 strips bacon, cooked and chopped
  • 4 cups mixed leafy greens
  • avocado slices
  • 2 eggs

Instructions

Place sweet potatoes and radishes on a foil lined baking sheet and roast at 400 degrees for 10 minutes. 
Stir, add asparagus and roast for 10 minutes more. 
Fry two eggs, leaving yolk runny. 
Divide lettuce between two bowls. Top each with sweet potatoes and radishes, steamed peas, bacon, avocado and a fried egg! 
Serve warm.

Notes


Did you make this recipe?

Tag @theleangreenbean on Instagram

Feel free to change things up and add your favorite veggies!

Loaded with spring vegetables and topped with over-easy eggs, this paleo, gluten-free Spring Breakfast Salad is an easy and delicious way to start your day with more veggies!

[Tweet “This Spring Breakfast Salad from @leangrnbeanblog is packed with seasonal veggies!”]

Enjoy!
–Lindsay–

Filed Under: Breakfast, Soup & Salad, Sponsored Tagged With: Bacon, Egg, Peas, Sweet Potato

Spring Vegetable Frittata

April 11, 2016 by Lindsay 11 Comments

This recipe for a Spring Vegetable Frittata is packed with seasonal veggies like asparagus and peas and is perfect for breakfast, lunch or dinner!

This recipe for a Spring Vegetable Frittata is packed with seasonal veggies like asparagus and peas and is perfect for breakfast, lunch or dinner!

Hi Friends!

Just popping in with a quick spring recipe for you today! This year I set a goal to do a better job of embracing seasonal vegetables and so far I’m doing a pretty good job. Squish and I ate a fair amount of squash this winter and this spring I’ve been whole-heartedly embracing things like peas, asparagus, radishes and more!

This simple frittata is one that I made last time my parents were in town. You guys know I love making egg bakes as part of my weekly food prep for Squish to eat for breakfast. Most often I make some variety of this Paleo Breakfast Casserole with Chicken (either in a pan or in muffin form), but this was a fun way to change things up. Just look at all that green goodness stuffed in there!

This recipe for a Spring Vegetable Frittata is packed with seasonal veggies like asparagus and peas and is perfect for breakfast, lunch or dinner!

As with most frittatas, this is totally customizable…but I’d highly suggest you grab some seasonal veggies and give it a try. I added some spiralized sweet potatoes to mine as well. I prefer spiralizing to chunks for dishes like this because they cook faster and more evenly.

So here’s how you make it:

Print

Spring Vegetable Frittata

Spring Frittata 3
Print Recipe

5 Stars 4 Stars 3 Stars 2 Stars 1 Star

No reviews

This recipe for a Spring Vegetable Frittata is packed with seasonal veggies like asparagus and peas and is perfect for breakfast, lunch or dinner!

  • Prep Time: 5 minutes
  • Cook Time: 10 minutes
  • Total Time: 15 minutes

Ingredients

Scale
  • 1 cup spiralized sweet potato noodles (or finely diced)
  • 1/2 cup diced onion
  • 1 cup chopped asparagus (tough stems removed)
  • 1 cup green peas (fresh or frozen)
  • 1/4 cup crumbled feta
  • 1/2 tsp garlic powder
  • 1 tsp paprika
  • black pepper to taste
  • 7 eggs
  • optional: diced chicken sausage

Instructions

  1. Add all ingredients except eggs to a large skillet.
  2. Saute over medium heat for 5 minutes.
  3. Crack eggs into a bowl and whisk to combine.
  4. Pour eggs evenly over over vegetables.
  5. Cover with a lid (or a large baking sheet) and let cook for 5-10 minutes. Check occasionally to determine when eggs are cooked to desired doneness on the top.

Did you make this recipe?

Tag @theleangreenbean on Instagram

That’s all there is too it! Make sure you have your heat set to medium or medium low, otherwise the bottom will get too crispy while the top cooks. If you’re a cheese fan, feel free to sprinkle with some additional shredded cheese once it’s cooked and like I mentioned in the recipe, you could also throw in some chicken sausage if you want to.

Spring Vegetable Frittata

[Tweet “Up your seasonal veggie intake with this Spring Veggie Frittata from @leangrnbeanblog!”]

Let’s chat:
What’s your favorite spring veggie?

Enjoy!
–Lindsay–

Filed Under: Uncategorized Tagged With: Egg, Feta, Onion, Peas, Sweet Potato

Easy Slow Cooker Dinner Recipes For A Single Guy

April 6, 2016 by Lindsay 11 Comments

These Easy Slow Cooker Dinner Recipes For A Single Guy are hearty, nutritious and easy enough for even men (or women) who don’t like to cook.

These Easy Slow Cooker Dinner Recipes For A Single Guy are hearty, nutritious and easy enough for even men who don't like to cook.

Hi Friends!

Today’s post is inspired by my friend Jordan. We get along well because he shares my affinity for many things including Crossfit, dogs, tacos and craft beer. We also enjoy working out to boy band playlists and telling corny jokes. Jordan also happens to be single. He doesn’t particularly enjoy cooking but still wants to eat healthy. A few months ago, he bought himself a crockpot and since then I’ve been passing along various super-easy crockpot recipes like pulled pork with beer and pot roast. He’s a fan of any slow cooker recipes that require minimal prep work and effort but still taste good. None of this taking an extra minute to brown the meat nonsense. Just dump and go.

Last week I told him about a recipe I saw that involved just putting a pork roast in the crockpot along with some garlic and a jar of pickles (juice and all!) and he said it turned out well!
These Easy Slow Cooker Dinner Recipes For A Single Guy are hearty, nutritious and easy enough for even men who don't like to cook.

Since I figure Jordan can’t be the only single guy out there looking for easy, relatively healthy crockpot recipes, I decided to round up several for this post. They’re not all dump and go…but they’re fairly easy!
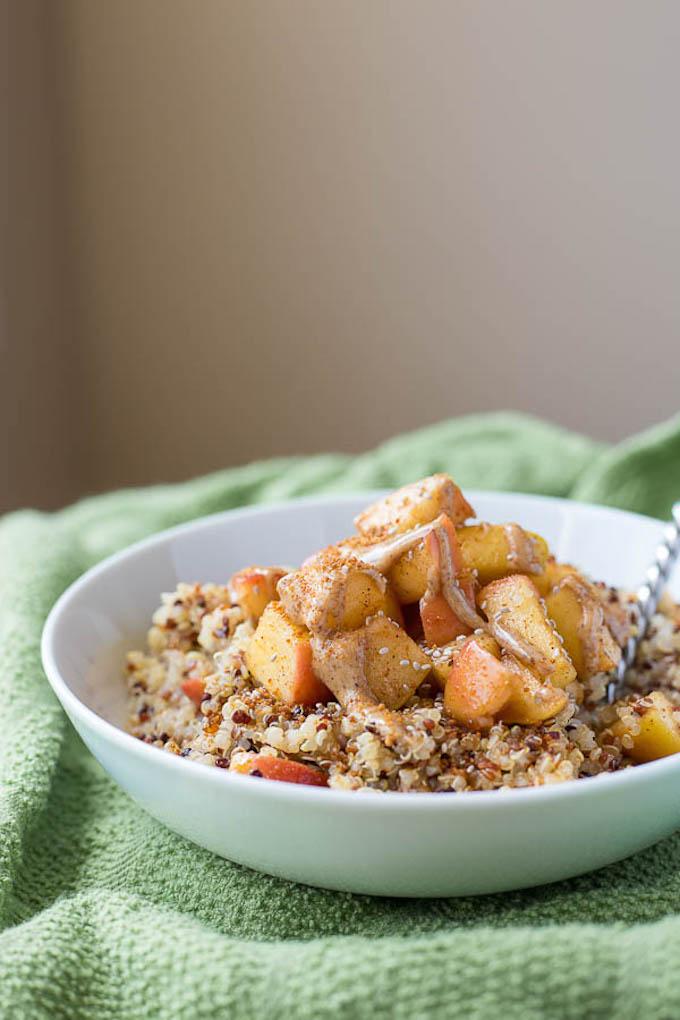
For several of them, I’ve provided tips to simplify the recipes even further. This is not in any way meant to insult the original recipe, as I know they’re all phenomenal. I just know some people, like Jordan, might not feel like spending time chopping veggies and may not have a fully-stocked spice cabinet so I provided a few tips on how to still make the recipes work!
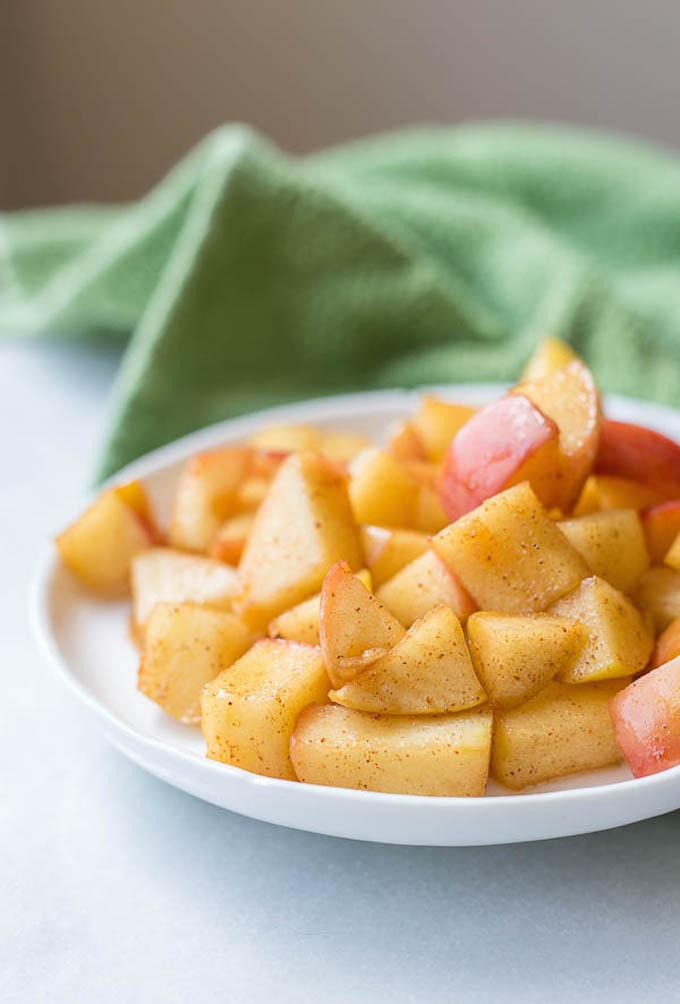
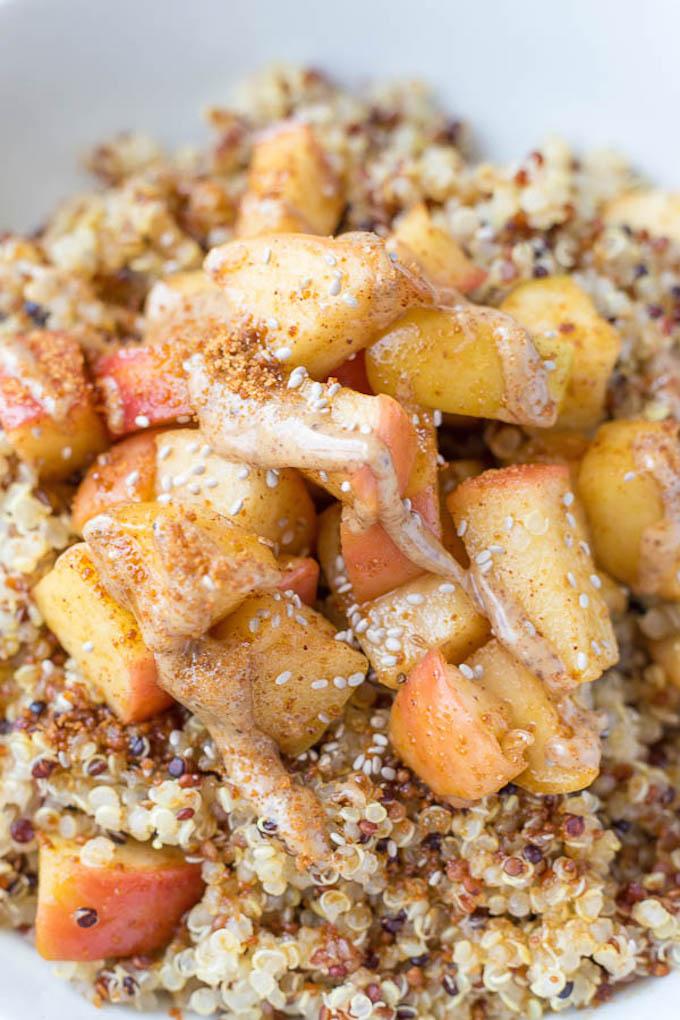
Easy Slow Cooker Dinner Recipes For A Single Guy

This recipe for Slow Cooker Cheesy Chicken and Potatoes is a perfect weeknight dinner. Let the crockpot do all the work and enjoy a flavorful meal after a busy day.

Slow Cooker Cheesy Chicken and Potatoes via The Lean Green Bean

To simplify: Look for the super small baby potatoes so you don’t have to chop them up and skip chopping the chicken- just put the breasts in whole.

Featuring canned tomato sauce that's packed with lycopene, these Crockpot Meatballs are an easy dinner option.

Crockpot Meatballs via The Lean Green Bean

To simplify: Skip the hemp seeds if you don’t have them or can’t find them and use a jar of sauce instead of making your own. Use a measuring cup to scoop the meat and don’t worry about forming into balls.

Slow Cooker Beef and Bean Chili

Beef and Bean Chili via Baked By Rachel

To simplify: Check the freezer section for pre-chopped frozen onions and peppers and buy a packet of chili seasoning to replace the spices.

Slow Cooker Shredded Beef Tacos

4 Ingredient Shredded Beef Tacos via A Cedar Spoon

Note: You can also make these with chicken. Look for the salsa verde with the lowest amount of sodium to keep them healthy!

Let the crockpot do all the work with these Slow Cooker Loaded Sweet Potatoes. Individual foil packets make them easy to serve and cleanup is a breeze!

Slow Cooker Loaded Sweet Potatoes via The Lean Green Bean

To simplify: use leftover meat that’s already cooked or a pre-cooked chicken sausage and use 90-second rice you can cook in the microwave.

Crockpot Pizza Quinoa

Crockpot Pizza Quinoa via Food Faith Fitness

To simplify: Leave the pepperonis whole and use frozen, pre-cut peppers

Slow Cooker Apple Pork Loin

Slow Cooker Apple Pork Loin via The Kitchen is my Playground

To simplify: Skip the part where you make slits and stuff the apples inside- just put the apples and onions on the top and bottom with the pork in the middle!

Sesame Ginger Turkey Wraps

Sesame Ginger Turkey Wraps via Better Homes & Gardens

Note: You could also eat this in lettuce wraps for a lower-carb option or just with a side of steamed veggies. You could also make these with chicken thighs.

Easy Crockpot Pot Roast

Easy Crockpot Pot Roast via My Natural Family

To simplify: Replace seasonings with a packet of dry onion soup mix.

Slow Cooker Sausage and Peppers

Slow Cooker Sausage and Peppers via Everday Maven

To simplify: Use prechopped garlic and skip the bay leaf.

Slow Cooker Stuffed Peppers

Slow Cooker Stuffed Peppers via The Recipe Critic

To simplify: Use 90-second rice and pre-chopped onions.

Slow Cooker Meatloaf

Slow Cooker Meatloaf via Healthy Aperture

To simplify: Skip the chia seeds and throw in some breadcrumbs instead.

Honey Soy Pork Tenderloin

Honey Soy Pork Tenderloin via Add A Pinch

To simplify: Skip the ginger and red pepper flakes and just top with a little hot sauce before eating.

Crockpot Beef Stew

Crockpot Beef Stew via The Roasted Root

To simplify: Skip the thickening step at the end and it’ll just be a little more soup-like vs stew-like. You can also leave out the peas if you don’t like them.

Slow Cooker Beef Stroganoff

Slow Cooker Beef Stroganoff via Frugal Foodie Mama

To simplify: You could probably sub soy sauce for Worcestershire sauce if you don’t have it.


Ok, so that was 15 recipes. I was gonna stop at 13 but I just kept finding good ones! Pass this list along to all your single guy friends (or girlfriends!) who might need some kitchen inspiration!

[Tweet “Easy Slow Cooker Recipes for the Single Guy who doesn’t like to cook! via @leangrnbeanblog!”]

Let’s chat:

Do you have an easy slow cooker recipe Jordan would love? Leave a link in the comments so we can check it out!

Enjoy!
–Lindsay–

Filed Under: Dinner, Ingredient Round-Ups, Slow Cooker

Maple Apple Breakfast Sausage

March 31, 2016 by Lindsay 7 Comments

This recipe for Maple Apple Breakfast Sausage is the perfect addition to your weekend breakfast or brunch! Made with ground chicken, it’s simple, lean and flavorful!

This recipe for Maple Apple Breakfast Sausage is the perfect addition to your weekend breakfast or brunch! Made with ground chicken, it's simple, lean and flavorful!

Hi friends!

Let’s talk breakfast today, shall we? My favorite meal of the day! If I’m being honest, I’ve always been more of a bacon lover. Breakfast sausage is not usually my jam. But I like the idea of it. It just seems like the flavor is never quite right.

Since I’m always up for a challenge, I thought I’d try my hand at making my own! Since I’m partial to sweet breakfasts, I made these a little more sweet than savory, but the sweetness isn’t overwhelming. And since I’ve been loving ground chicken lately (see these Thai Chicken Meatballs that are on repeat around here), I used that instead of something a bit more traditional like ground pork. You could probably use whatever ground meat you want!

This recipe for Maple Apple Breakfast Sausage is the perfect addition to your weekend breakfast or brunch! Made with ground chicken, it's simple, lean and flavorful!

So, are you craving breakfast yet? These are perfect with some eggs and roasted potatoes!  Here’s how you make them:

Print

Maple Apple Breakfast Sausage

Maple Apple Breakfast Sausage 2
Print Recipe

5 Stars 4 Stars 3 Stars 2 Stars 1 Star

No reviews

This recipe for Maple Apple Breakfast Sausage is the perfect addition to your weekend breakfast or brunch! Made with ground chicken, it’s simple, lean and flavorful!

  • Prep Time: 5 minutes
  • Cook Time: 10 minutes
  • Total Time: 15 minutes
  • Yield: 12-14 patties 1x

Ingredients

Scale
  • 1 pound ground chicken
  • 1/4 cup minced onion
  • 1/4 cup finely diced apple
  • 2–3 Tbsp maple syrup (depending on desired level of sweetness)
  • 1/2 tsp salt
  • 1/2 tsp thyme
  • 1/2 tsp pepper

Instructions

  1. Combine all ingredients in a bowl and mix until just combined.
  2. Form and flatten into 12-14 patties.
  3. Heat oil in a skillet over medium high heat.
  4. Place 6 patties in skillet and cook, flipping occasionally until temperature reaches 165 degrees F. Repeat with remaining patties.

Notes

You could add more thyme if you like the flavor, or sub sage if desired. You could also add some cayenne pepper for a little kick!
You could use grated apple instead of diced, if desired.
I like these with 3 Tbsp maple syrup but 2 is better if you want just a hint of sweetness.

Did you make this recipe?

Tag @theleangreenbean on Instagram

These would also be good on a breakfast sandwich…just saying….if you have leftovers, that’d be a good way to use them up!

This recipe for Maple Apple Breakfast Sausage is the perfect addition to your weekend breakfast or brunch! Made with ground chicken, it's simple, lean and flavorful!

[Tweet “These Maple Apple Bfast Sausages from @leangrnbeanblog are perfect with eggs and potatoes!”]

Enjoy!
–Lindsay–

Filed Under: Breakfast Tagged With: Apple, Ground Chicken, Maple Syrup

Healthy Brownie Bites

March 28, 2016 by Lindsay 44 Comments

These Healthy Brownie Bites require just seven ingredients, are healthy enough for a snack and also make a great dessert recipe!

These Healthy Brownie Bites require just six ingredients, are healthy enough for a snack and also make a great dessert recipe!

Hi friends!

Super quick and easy recipe to share with you today because it’s Monday…and who doesn’t need a little chocolate on a Monday? These Healthy Brownie Bites are actually just a twist on one of the most popular recipes on the blog – my Sweet Potato Banana Bites. If you’ve made that recipe before, you know it requires just four basic ingredients!

This recipe adds just three more ingredients and voila! You’ve got dessert. These bite-sized treats are a healthy way to satisfy your sweet tooth and in my opinion, they’re still healthy enough for Squish to eat as the occasional snack! So that’s a win-win in my book.


I enjoyed them topped with a little extra nut butter but it’s not necessary! Like I mention about the Sweet Potato Bites, these aren’t super sweet. If you’re looking for a dessert that’s a bit more indulgent, but still healthy, you might like these Gluten-Free Sweet Potato Brownies.

Anyways, here’s how you make them:

Print

Healthy Brownie Bites

Healthy Brownie Bites 3
Print Recipe

5 Stars 4 Stars 3 Stars 2 Stars 1 Star

5 from 2 reviews

These Healthy Brownie Bites require just six ingredients, are healthy enough for a snack and also make a great dessert recipe!

  • Prep Time: 5 minutes
  • Cook Time: 20 minutes
  • Total Time: 25 minutes
  • Yield: 18 mini muffins 1x

Ingredients

Scale
  • 1/2 cup mashed sweet potato (1 medium)
  • 1/2 cup mashed banana (1 medium)
  • 1/4 cup peanut butter (or other nut or seed butter)
  • 2 eggs
  • 3 Tbsp cocoa powder
  • 3 – 4 Tbsp maple syrup (depending on desired sweetness)
  • optional: chocolate chips

Instructions

  1. Combine first 3 ingredients in a bowl and mix well.
  2. Add remaining ingredients and stir to combine.
  3. Mix in chocolate chips if desired.
  4. Pour into greased mini muffin tins.
  5. Bake at 375 degrees F for 16-18 minutes.

Did you make this recipe?

Tag @theleangreenbean on Instagram

So there you have it! I definitely add the chocolate chips to mine and just use 3 T maple syrup. You could also use honey instead of maple syrup.

These Healthy Brownie Bites require just seven ingredients, are healthy enough for a snack and also make a great dessert recipe!

[Tweet “These Healthy Brownie Bites are a simple way to satisfy your sweet tooth! via @leangrnbeanblog”]

Enjoy!
–Lindsay–

Filed Under: Baking, Healthy Muffins & Bars Tagged With: Banana, Cocoa Powder, Egg, Maple Syrup, Peanut Butter, Sweet Potato

Skillet Spaghetti and Meatballs

March 23, 2016 by Lindsay 13 Comments

You only need one pan to make this recipe for Skillet Spaghetti and Meatballs because the spaghetti cooks right in the sauce! Your weeknight dinner just got even easier!

You only need one pan to make this recipe for Skillet Spaghetti and Meatballs because the spaghetti cooks right in the sauce! Your weeknight dinner just got even easier!

Hi friends!

Are you totally shocked that I’m back with another skillet dinner? In reality, I actually made this back in December, took pictures, the whole shebang. But for some reason I thought it was a good idea to sprinkle shredded mozzarella cheese all over the skillet when it was done. Bad idea. Tasted good. Looked terrible.

In any event, it took me until last weekend but I finally remade it. This time, I opted to garnish with parmesan and parsley and the photos turned out much better 🙂 So now I can finally share it with  you guys!

You only need one pan to make this recipe for Skillet Spaghetti and Meatballs because the spaghetti cooks right in the sauce! Your weeknight dinner just got even easier!

I know spaghetti and meatballs is not an original recipe…but it is a favorite. And this is the first time I’ve tried cooking the spaghetti noodles right in the pan and I gotta say, I love it! It’s super easy and I think it helps the sauce stick to the noodles better which is a bonus in my opinion.

So here’s what you do:

Print

Skillet Spaghetti and Meatballs

Skillet Spaghetti and Meatballs 5
Print Recipe

5 Stars 4 Stars 3 Stars 2 Stars 1 Star

No reviews

You only need one pan to make this recipe for Skillet Spaghetti and Meatballs because the spaghetti cooks right in the sauce! Your weeknight dinner just got even easier!

  • Prep Time: 5 minutes
  • Cook Time: 20 minutes
  • Total Time: 25 minutes
  • Yield: serves 4

Ingredients

Scale
  • 1 pound ground chicken or turkey
  • 1/2 cup diced onion
  • 2 cloves garlic, minced
  • 1 egg
  • 1/3 cup breadcrumbs
  • 1 tsp dried basil
  • 1 tsp dried oregano
  • 25 ounce jar spaghetti sauce
  • 2 cups water
  • 4 ounces uncooked spaghetti noodles
  • optional: grated parmesan and fresh herbs for topping

Instructions

  1. Combine first 7 ingredients in a bowl and mix until just combined.
  2. Form into 14-16 meatballs.
  3. Heat a skillet over medium-high heat.
  4. Sear meatballs, rotating every minute.
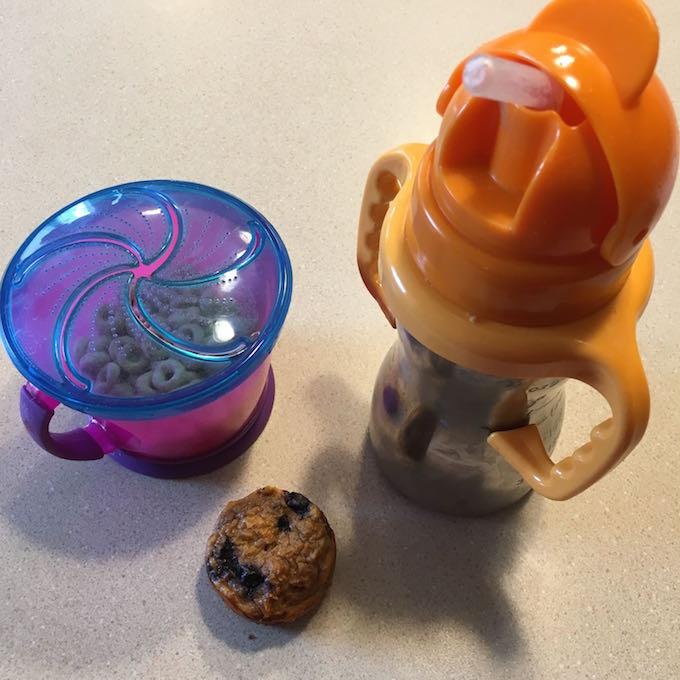
  5. Add sauce to pan. Fill jar 2/3 full with water. Shake the jar and add liquid to the pan. (If you’re using homemade sauce, just add 2 cups water).
  6. Clear space in the middle of the pan between the meatballs. Break noodles in half and add to the pan. Cover and let simmer for 8 minutes.
  7. Stir, cover and cook 8-10 minutes more or until pasta reaches desired doneness.
  8. Top with cheese and fresh herbs before serving.

Did you make this recipe?

Tag @theleangreenbean on Instagram

So what do you think?! Can you handle it? As usual, if you don’t have a lid for your skillet, just cover it with a big baking sheet! Works like a charm.
You only need one pan to make this recipe for Skillet Spaghetti and Meatballs because the spaghetti cooks right in the sauce! Your weeknight dinner just got even easier!

This meal is fancy enough for dinner guests and simple enough for a weeknight family meal! Feel free to sub your own favorite meatball recipe….just make them all similar sized so they cook evenly.

[Tweet “Only one pan required for this Skillet Spaghetti and Meatballs from @leangrnbeanblog!”]

Enjoy!
–Lindsay–


Filed Under: Dinner Tagged With: Breadcrumbs, Garlic, Ground Turkey, Onion, Pasta, Tomato Sauce

Almond Crusted Salmon Nuggets

March 21, 2016 by Lindsay 20 Comments

These gluten-free Hemp and Almond Crusted Salmon Nuggets are a great recipe for getting your family to eat more fish. Made with just six ingredients, they’re simple enough for a quick dinner and they’re kid-friendly too! 
These gluten-free Hemp and Almond Crusted Salmon Nuggets are a great recipe for getting your family to eat more fish. Made with just six ingredients, they're simple enough for a quick dinner and they're kid-friendly too!

Hi friends!

It’s time for another month of Recipe Redux. This month the theme was 7-Ingredient (or less) recipes. This recipe is just six ingredients and two of them are spices! Can’t beat that. I’m always looking for easy ways to add more fish to our weekly meals and although I haven’t quite gotten Squish on board with salmon (yet!) this was a fun way to change things up for hubby and I!

I used pre-cut filets and cut them into roughly 4 nuggets each but you could easily get a large piece and cut into several nuggets yourself. Mine also had skin on one side and although I was able to get it off relatively easily, it would definitely save you some time to buy some that already had the skin removed!

These gluten-free Hemp and Almond Crusted Salmon Nuggets are a great recipe for getting your family to eat more fish. Made with just six ingredients, they're simple enough for a quick dinner and they're kid-friendly too!

And finally, if you’re not into nuggets, you could just use this coating on salmon filets of whatever size you desire! I used hemp hearts instead of flour in the dredging process to keep them gluten-free…but you could easily use regular flour, or even almond flour if you’d like.

Here’s how you make it:

Print

Almond Crusted Salmon Nuggets

Almond Crusted Salmon Nuggets 1
Print Recipe

5 Stars 4 Stars 3 Stars 2 Stars 1 Star

No reviews

These gluten-free Hemp and Almond Crusted Salmon Nuggets are a great recipe for getting your family to eat more fish. Made with just six ingredients, they’re simple enough for a quick dinner and they’re kid-friendly too!

  • Prep Time: 5 minutes
  • Cook Time: 15 minutes
  • Total Time: 20 minutes
  • Yield: serves 4

Ingredients

Scale
  • 3 Tbsp hemp hearts
  • 1 tsp garlic powder
  • 1 tsp paprika
  • 1 egg
  • 1 cup almonds
  • 1 – 1.5 pounds salmon, boneless/skinless
  • optional: your fav dipping sauce – i like bbq sauce!

Instructions

  1. Combine hemp hearts and spices on a small plate.
  2. Crack egg in a small bowl and stir.
  3. Finely chop almonds in a food processor or with a knife (or pound with a meat mallet) and place on a plate.
  4. Cut salmon into nuggets, approximately 1 ounce each
  5. Dredge nuggets in hemp and spice mixture.
  6. Dip in egg.
  7. Roll in crushed almonds.
  8. Place on greased, foil-lined baking tray.
  9. Bake at 400 degrees for 13-15 minutes, flipping once.

Nutrition

  • Serving Size: 4-5 nuggets

Did you make this recipe?

Tag @theleangreenbean on Instagram

There you have it! Don’t worry if the not much of the hemp mixture sticks…it’s mostly just to give the egg something to grab onto. And like I said, feel free to use flour instead.

These gluten-free Hemp and Almond Crusted Salmon Nuggets are a great recipe for getting your family to eat more fish. Made with just six ingredients, they're simple enough for a quick dinner and they're kid-friendly too!

[Tweet “Eat more fish! Try these Almond-Crusted Salmon Nuggets from @leangrnbeanblog!”]

Enjoy!
–Lindsay–

An InLinkz Link-up


Filed Under: Dinner Tagged With: Almond, Egg, Hemp Seed, Salmon

Creamy Chicken and Wild Rice Skillet

March 16, 2016 by Lindsay 9 Comments

This gluten-free Creamy Chicken and Wild Rice Skillet recipe is the perfect dinner for a busy night. It’s quick, healthy and packed with protein and vegetables. 

This gluten-free Creamy Chicken and Wild Rice Skillet recipe is the perfect dinner for a busy night. It's quick, healthy and packed with protein and vegetables.

Thanks to USA Rice for sponsoring this post. I was asked to participate in the “#ThinkRice ” campaign as a member of the Healthy Aperture Blogger Network. 

Hi Friends!

Are you getting tired of my skillet recipes? I hope not. My cast iron skillet is pretty much my favorite thing in my kitchen right now. I just can’t seem to stop using it! But enough about the skillet. For this post we’re actually focusing on the lovely wild rice you see mixed in there! As you may know, March is National Nutrition Month and rice is a nutritional powerhouse! U.S.-grown rice is full of essential vitamins and minerals, including folic acid, B vitamins, potassium, magnesium, selenium, fiber, iron and zinc. Added bonus- it’s super affordable!

Have you ever wondered what kind of rice you should choose? Long grain rice is great for pilafs, salads, casseroles, stir-fry and jumbos. Medium and short grain rice are perfect for creamier dishes like risotto and rice puddings, as well as sushi!

This gluten-free Creamy Chicken and Wild Rice Skillet recipe is the perfect dinner for a busy night. It's quick, healthy and packed with protein and vegetables.

I chose to use wild rice for this project because I feel like it’s often overlooked, but I love it! It adds a bit of chewy texture to dishes, as well as a protein punch! I combined it with chicken because that’s a weeknight staple in our house and threw in some veggies as well. The sauce is yogurt-based and super easy to make!

So let’s get cooking!

Print

Creamy Chicken and Wild Rice Skillet

Creamy Chicken Wild Rice 3
Print Recipe

5 Stars 4 Stars 3 Stars 2 Stars 1 Star

No reviews

This gluten-free Creamy Chicken and Wild Rice Skillet recipe is the perfect dinner for a busy night. It’s quick, healthy and packed with protein and vegetables.

  • Cook Time: 30 minutes
  • Total Time: 40 minutes
  • Yield: serves 4

Ingredients

Scale
  • 2 Tbsp butter
  • 1 pound boneless, skinless chicken breasts, diced
  • 4 ounces U.S. grown wild rice, uncooked
  • 2 cups mushrooms, thinly sliced (I used baby portobello)
  • 2 cups fresh or frozen green beans, chopped
  • 1/2 cup onion, diced
  • 2 teaspoons garlic, minced
  • 1 cup chicken broth (no salt added or low sodium)
  • 1 Tbsp cornstarch mixed with a little water
  • 1/2 cup 2% milk
  • 1/2 cup grated Parmesan cheese
  • 1 teaspoon black pepper
  • 1 teaspoon paprika
  • 3/4 cup plain whole milk yogurt

Instructions

  1. Cook rice according to package directions.
  2. Meanwhile, melt butter in a large skillet. Saute garlic, onion, chicken, mushrooms and green beans for 5 minutes over medium high heat.
  3. Add broth and cook until chicken is cooked through.
  4. Add cornstarch/water mixture and bring mixture to a boil.
  5. Reduce heat to simmer and add milk, yogurt, parmesan and spices. Stir until well combined.
  6. Add cooked rice and let simmer another 5 minutes.

Did you make this recipe?

Tag @theleangreenbean on Instagram

If you’re not a fan of mushrooms or green beans, feel free to swap in some of your favorite veggies. When cooking your wild rice, do a taste test every so often. I’ve found that when I cook it, it usually doesn’t take as long as the package says. You could also cook the rice ahead of time to help cut down on prep time.

This gluten-free Creamy Chicken and Wild Rice Skillet recipe is the perfect dinner for a busy night. It's quick, healthy and packed with protein and vegetables.

So next time you’re at the grocery store, look for the “Grown in the USA Rice” logo on packages of 100% domestically-grown rice. It’s an easy way to boost the nutritional value of a dish and reduce food miles!

This gluten-free Creamy Chicken and Wild Rice Skillet recipe is the perfect dinner for a busy night. It's quick, healthy and packed with protein and vegetables.

[Tweet “This Creamy Chicken and Wild Rice Skillet from @leangrnbeanblog is a must-try!”]

For more delicious USA Rice recipes, follow them on Facebook, Twitter, Instagram & Pinterest.

Enjoy!
–Lindsay–

Filed Under: Dinner, Sponsored Tagged With: Chicken, Chicken Broth, Green Beans, Milk, Mushroom, Rice, Yogurt

Easy Chicken Pad Thai

March 14, 2016 by Lindsay 13 Comments

This quick and easy Chicken Pad Thai makes a great weeknight dinner. Full of Asian flavors, this recipe is gluten-free and ready in 20 minutes.  

This quick and easy Chicken Pad Thai makes a great weeknight dinner. Full of Asian flavors, this recipe is gluten-free and ready in 20 minutes.

Hi friends!

Hope your week is off to a great start! This recipe for Chicken Pad Thai is quickly becoming a weeknight favorite. I’ve made it a couple times in the past couple weeks, including over the weekend while my sister was in town! It tastes great warm, but in my opinion, it tastes just as good cold…which makes it ideal for leftovers.

You could easily make this vegetarian by using tofu instead of chicken and using tamari instead of soy sauce keeps it gluten-free! It would also be great with shrimp! Make it spicier by adding some sriracha like I do, or leave it out if that doesn’t float your boat.

Here’s how you make it:

Print

Easy Chicken Pad Thai

Chicken Pad Thai 5
Print Recipe

5 Stars 4 Stars 3 Stars 2 Stars 1 Star

No reviews

This quick and easy Chicken Pad Thai makes a great weeknight dinner. Full of Asian flavors, this recipe is gluten-free and ready in 20 minutes.

  • Prep Time: 5 minutes
  • Cook Time: 15 minutes
  • Total Time: 20 minutes
  • Yield: serves 4-6 1x

Ingredients

Scale
  • 1.5 pounds boneless, skinless chicken breasts, diced
  • Juice from one lime
  • 3 Tbsp tamari (or soy sauce)
  • 2 Tbsp rice wine vinegar
  • 2 Tbsp sweet thai chili sauce
  • 2 tsp grated fresh ginger
  • 2 cloves garlic, minced
  • 2 Tbsp brown sugar
  • 2 tsp sriracha (optional)
  • 1 cup carrots, diced
  • 1 red pepper, diced
  • 2 eggs
  • 1 (4 oz) package pad thai rice noodles
  • optional garnishes: cilantro, peanuts, green onion

Instructions

  1. Cook pad thai noodles according to package directions.
  2. In a large skillet over medium high heat, add all ingredients except the eggs and cook for 10-15 minutes until chicken is cooked.
  3. Move ingredients to one side of pan and crack and scramble eggs on open side of pan.
  4. Add pad thai noodles and stir until everything is well combined.
  5. Top with sliced green onions, minced cilantro and chopped peanuts if desired.

Did you make this recipe?

Tag @theleangreenbean on Instagram

Feel free to add extra veggies if you want! And if the noodles aren’t your favorite part, you could just use half the package!

This quick and easy Chicken Pad Thai makes a great weeknight dinner. Full of Asian flavors, this recipe is gluten-free and ready in 20 minutes.

Let’s chat: Are you a fan of Asian flavors? What’s your favorite dish?

This quick and easy Chicken Pad Thai makes a great weeknight dinner. Full of Asian flavors, this recipe is gluten-free and ready in 20 minutes.

[Tweet “Add this Easy Chicken Pad Thai from @leangrnbeanblog to your dinner menu this week!”]

Enjoy!
–Lindsay–

Filed Under: Dinner Tagged With: Bell Pepper, Carrot, Chicken, Egg, Garlic, Ginger, Rice Noodles, Rice Vinegar, Soy Sauce, Sweet Thai Chili Sauce

Wild Blueberry Kefir Smoothie

March 11, 2016 by Lindsay 21 Comments

This Wild Blueberry Kefir Smoothie is packed with protein, greens and probiotics and makes a great breakfast or afternoon snack. 

This Wild Blueberry Kefir Smoothie is packed with protein, greens and probiotics and makes a great breakfast or afternoon snack.

Hi friends!

Allow me to introduce you to Squish’s favorite snack. We’ve been enjoying afternoon smoothies for a while now, but a few weeks ago he finally learned how to drink through a straw and lemme tell you, that was a game changer!

When it comes to smoothies, I’m a creature of habit. If I find a combo I like, I stick with it. So I’m not exaggerating when I say that this is the exact smoothie I’ve been making for weeks now. Well pretty much. I never actually measure anything when I make it…but I took some measurements for you guys. Just keep in mind that it’s very forgiving. There’s really no need to bust out the measuring cups.

This Wild Blueberry Kefir Smoothie is packed with protein, greens and probiotics and makes a great breakfast or afternoon snack.

You guys may remember I’ve done some sponsored recipe series with Wild Blueberries the past couple of summers (These Wild Blueberry Energy Bars are one of my favorite recipes!). But this isn’t a sponsored post. I just happen to really love them and they sell a giant bag at Costco that I can’t seem to resist buying.

Let’s talk about the other flavors in this smoothie. In my never-ending quest to get my child to eat more veggies, I always through a few Frozen Spinach Cubes into my smoothies. Since I’m not a huge fan of actually drinking green stuff, wild blueberries are perfect for hiding the green color. I also always try to add some healthy fats to my smoothies. In this combo, I chose peanut butter. Blueberry and peanut butter is actually one of my favorite combos ever!

As far as liquid, I opted for kefir. I’m sure you guys have heard about the growing popularity of probiotics and fermented foods. I’m trying really hard to get onboard because I’m well aware of the benefits…the problem is a lot of fermented stuff just doesn’t agree with my tastebuds- think sauerkraut, kimchi, etc. But give me this drinkable yogurt-type thing that’s loaded with probiotics and I can handle that in a smoothie! And finally, I threw some whole milk yogurt in there. I usually use a mix of plain and vanilla and alternate between regular and greek based on what I have on hand.

If I’m feeling like going a step above and beyond, I’ll throw in some chia or hemp seeds. But that’s pretty much it!

So here’s how you make this smoothie:

Print

Wild Blueberry Kefir Smoothie

Wild Blueberry Kefir Smoothie 5
Print Recipe

5 Stars 4 Stars 3 Stars 2 Stars 1 Star

No reviews

Frozen Spinach Cubes For Smoothies

  • Prep Time: 3 minutes
  • Total Time: 3 minutes
  • Yield: serves 2

Ingredients

Scale
  • 1.5 cups frozen wild blueberries
  • 3/4 cup plain kefir
  • 3/4 cup whole milk yogurt (vanilla or a mix of plain and vanilla – Greek or regular)
  • 2 Tbsp peanut butter
  • 4 frozen spinach cubes (or 2 handfuls fresh baby spinach)
  • optional: chia or hemp seeds

Instructions

  1. Combine all ingredients in a blender and process until smooth.
  2. Add a little bit of water if needed to reach desired consistency.

Did you make this recipe?

Tag @theleangreenbean on Instagram

Ta da! It’s smoothie time. I like mine thick enough to eat with a spoon but I just add a little water to Squish’s to thin it out enough that he can drink it through a straw.

This Wild Blueberry Kefir Smoothie is packed with protein, greens and probiotics and makes a great breakfast or afternoon snack.

Now let me let you in on a little secret. I HATE getting out the blender. I understand it’s really not a big deal but when you have an impatient toddler, it’s really just a big hassle all around. So here’s what I’ve been doing lately:

Doubling or tripling my smoothie recipe on Sundays and pouring it into ice cube trays to freeze. Then, in the morning during the week, I just put a few smoothie cubes in a glass and stick it in the fridge. By the time snack time rolls around in the afternoon, I just have to pop that glass in the microwave, defrost for 10-15 seconds and BAM! Smoothie is ready. It’s almost fast enough to satisfy Squish…and there’s no clean-up for me! Win win!

Double your smoothie recipe, freeze some in ice cube trays, thaw in the fridge for a quick smoothie with no blender to clean!

So there you go friends! I know there are tons of smoothie flavor combos out there but I think this one is worth a try! It’s certainly a big hit in our house!

This Wild Blueberry Kefir Smoothie is packed with protein, greens and probiotics and makes a great breakfast or afternoon snack.

[Tweet “This Wild Blueberry Kefir Smoothie from @leangrnbeanblog is packed with protein, greens and probiotics!”]

Enjoy!
–Lindsay–

Filed Under: Snack, Breakfast Tagged With: Blueberry, Milk, Peanut Butter, Spinach, Yogurt

  • « Go to Previous Page
  • Page 1
  • Interim pages omitted …
  • Page 27
  • Page 28
  • Page 29
  • Page 30
  • Page 31
  • Interim pages omitted …
  • Page 65
  • Go to Next Page »

Primary Sidebar

Lindsay Livingston The Lean Green Bean Healthy Living Tips and Tricks

I'm a Registered Dietitian and mom of three from Columbus, Ohio. I use this blog to share simple, healthy recipes, nutrition tips, and an honest glimpse of motherhood!

Learn More →

Questions? Comments? Email me: [email protected]

The Lean Green Bean Facebook The Lean Green Bean Instagram The Lean Green Bean Pinterest The Lean Green Bean Twitter The Lean Green Bean Feed
footer-logo
The Lean Green Bean Facebook The Lean Green Bean Instagram The Lean Green Bean Pinterest The Lean Green Bean Twitter The Lean Green Bean Feed
Recipes

Breakfast
Dinner
Snack
Slow Cooker

Kids

Cooking With Kids
Favorite Gifts
Toddler Meals
Indoor Activities

Resources

Easy Packed Lunches for Kids
Dinner Spark
Snack Spark
Ultimate Guide to Food Prep

About

Meet Lindsay
Become an RD
Work with Me

The Lean Green Bean is a participant in the Amazon Services LLC Associates Program, an affiliate advertising program designed to provide a means for sites to earn advertising fees by advertising and linking to amazon.com.
Read the full privacy and disclosure policy here.

Copyright © 2022 · The Lean Green Bean

table talk series

Learn how food affects your body.

Get my free Table Talk email series where I share bite-sized nutrition information about carbs, protein, and fat, plus bonus information about snacks and sugar!

[email protected]