• Skip to main content
  • Skip to primary sidebar

Learn how food affects your body. Get Free Nutrition Info Today

the-lean-green-bean-logo
  • Home
  • Recipes
  • Kids
  • Resources
    • Ebooks
    • Food Prep
    • Videos
    • Snack Round-Ups
    • Gift Guides
  • About
    • Become An RD
    • Work With Me
  • Search
the-lean-green-bean-logo
  • Home
  • Recipes
  • Kids
  • Resources
    • Ebooks
    • Food Prep
    • Videos
    • Snack Round-Ups
    • Gift Guides
  • About
    • Become An RD
    • Work With Me
  • Search

blog

March Foodie Penpals Reveal

March 30, 2012 by Lindsay 74 Comments

Hi Friends!

Can you believe it’s the end of March already? This week we’re trading Fitness Friday for our monthly reveal for Foodie Penpals!!

The Lean Green Bean
 

This month, I received my box from Halley @ Blunder Construction! Halley is one of my favorite blends. Her blog is amazing and hilarious, especially when she writes about her cat, the escape artist. I knew she’d hook me up with a good box!

Let’s take a look at what she sent!

fpp2

Ok, first of all…wrapped in tissue paper?! She puts my boxes to shame. They’re not nearly this pretty!

fpp3

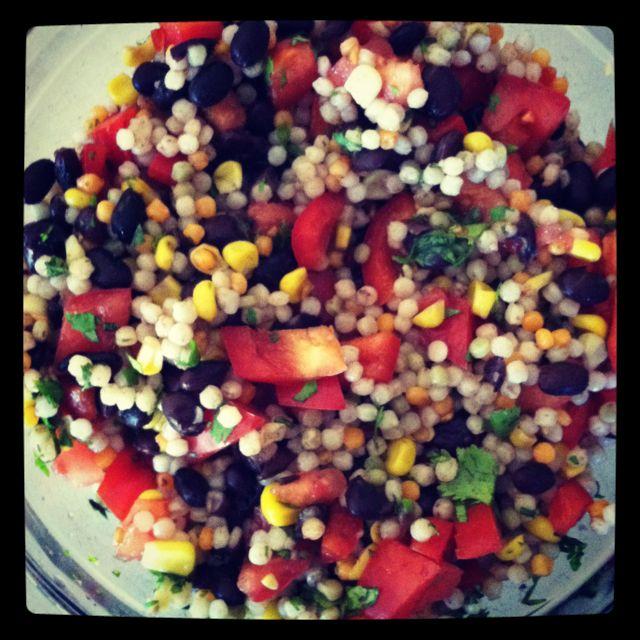
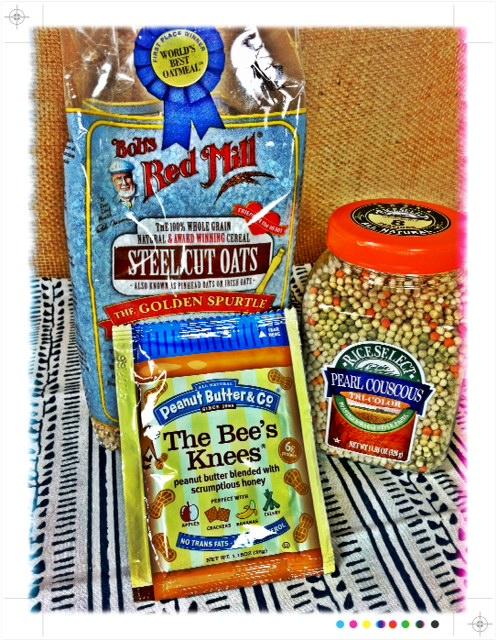
That couscous is my all-time fav! How did she know?! I found it on clearance one time and now i’m hooked! I’ve never tried that PB but i’ve yet to make a PB I don’t like 🙂 And as for steel cut oats, never had those…but lucky for me, literally the day after my box showed up, Janeetha posted Slow Cooker Steel Cut Oats! Perfection!

fpp1


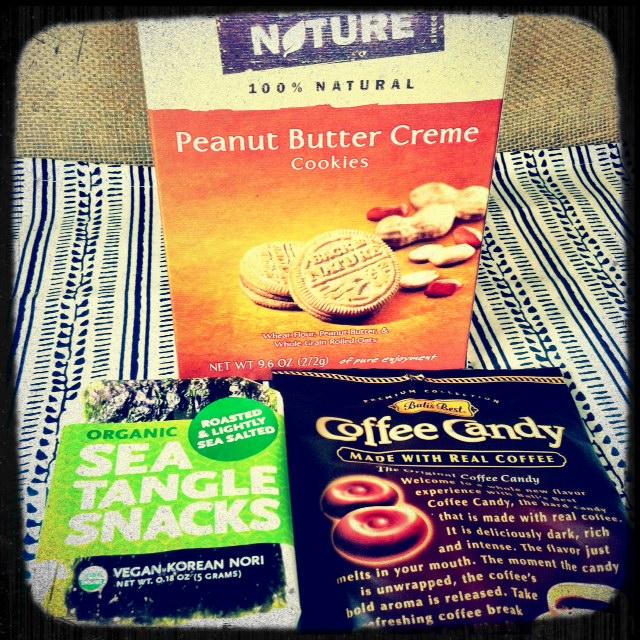
See those peanut butter crackers? The girl is allergic to them but still sent them to be because she knew I would love them! And I do! Taste just like the pb sandwich girl scout cookies! The coffee candy is pretty cool. It REALLY tastes like coffe so if you like coffee, you’ll love these little gems. The coffee taste is a little strong for me by itself. But I’m thinking if I smashed them up and used them as a topping on some bars, with some toffee, it would be phenomenal! As for the seaweed snacks…I’m saving those for a day when I’m feeling my bravest 🙂

HUGE thanks to Halley for an amazing Foodie Penpals box! It was the highlight of my week for sure!

—————————————

And now it’s time for some details about Foodie Penpals.  In case you’re a new reader, here’s a reminder of what the program is all about:

-On the 5th of every month, you will receive your penpal pairing via email. It will be your responsibility to contact your penpal and get their mailing address and any other information you might need like allergies or dietary restrictions.
-You will have until the 15th of the month to put your box of goodies in the mail. On the last day of the month, you will post about the goodies you received from your penpal! 
-The boxes are to be filled with fun foodie things, local food items or even homemade treats! The spending limit is $15. The box must also include something written. This can be anything from a note explaining what’s in the box, to a fun recipe…use your imagination!
-You are responsible for figuring out the best way to ship your items depending on their size and how fragile they are. (Don’t forget about flat rate boxes!)
–Foodie Penpals is open to blog readers as well as bloggers. If you’re a reader and you get paired with a blogger, you are to write a short guest post for your penpal to post on their blog about what you received. If two readers are paired together, neither needs to worry about writing a post for that month.
-Foodie Penplas is open to US & Canadian residents.  Please note, Canadian Residents will be paired with other Canadians only. We’ve determined things might get too slow and backed up if we’re trying to send foods through customs across the border from US to Canada and vice versa. So, I’m going to keep two separate lists and match US w/ US and Canada w/ Canada!

If you’re interested in participating for April, please CLICK HERE to fill out the participation form and read the terms and conditions. You will also find contact information on that page for the UK branch of Foodie Penpals if you’re a blogger across the pond!

You must submit your information by April 4th as pairings will be emailed on April 5th!

**Sidenote: My birthday is April 15th so whoever gets me this month better send me a kick-ass package 😉 KIDDING!!!!!!!!

–Lindsay–

Filed Under: Uncategorized

All-time Favorite Workouts

March 29, 2012 by Lindsay 45 Comments

Hi Guys!

Tomorrow is Foodie Penpals reveal day for March, so I had to bump Fitness Friday up a day! I’ve been feeling less than inspired this week so I haven’t been putting together too many new workouts…I’ve mostly been resting and doing some odds and ends. BUT, I didn’t want to leave you guys hanging, so I turned to my fellow Fitfluential Ambassadors to put together a list of some of our all-time favorite workouts!

You guys know this is mine, since I talk about it ALL THE TIME. If you haven’t tried it yet, DO IT!!

100legs11
Now take some time to click some of the links below if any of these sound like fun to you. I pretty much want to do all of them!

Fitfluential All-Time Favorite Workouts

Looking for a new workout? I asked some of my favorite bloggers and personal trainers for their all-time favorite workouts and shared them all in one post!

HIIT/Tabata/Cardio Circuits

From Jess @ Blonde Ponytail:
A HIIT workout w/ thrusters, squats & burpees! CLICK HERE.

From Maddy @ Food Fitness & Family:
An upper body blast that uses dumbbells and a jump rope! CLICK HERE.

From Heather @ Just a Colorado Gal:
A tabata workout that includes kb swings, plank jacks, burpees! CLICK HERE.

From Julie @ Peanut Butter Fingers:
A cardio circuit workout with no burpees! CLICK HERE.

From Mellissa@ A Fit & Spicy Life:
A full body circuit workout! CLICK HERE.

From Lee @ Fit Foodie Finds:
An at-home circuit workout! CLICK HERE.

———————————————–

Treadmill & Elliptical

From Lindsay @ In Sweetness & In Health:
A pyramid style treadmill workout! CLICK HERE.

From Kate @ I Run on PB and K:
A 30 Min never bored elliptical workout! CLICK HERE.

From Miriam @ Bellaspire:
A 40 minute treadmill & weights combo workout! CLICK HERE.

From Courtney @ Sweet Tooth, Sweet Life:
A 40 minute mixed interval walking workout! CLICK HERE.

From Annette at Fitness Perks:
Need for speed treadmill workout! CLICK HERE.

————————————————

Weights/Abs/Other

From Monika @ Fit Foodies. Healthy Life:
An abs and shoulders workout! CLICK HERE.

From Carissa @ Fit2Flex:
Get Great Glutes– five moves to get your booty burning! CLICK HERE.

From Alexandra & Kimberly @ Fun and Fit:
Some advanced plank moves! CLICK HERE.

From Lindsay @ Lindsay’s List:
A Tuesday Trainer- Go-to time saver moves! CLICK HERE.

From Clare @ Fitting It All In:
Her all-time favorite ab exercise! CLICK HERE.

———————————————–

———————————————–

So there you go! I hope you were able to find a few new workouts to add to your routine. Now if you’ll excuse me, I have a mile-long list of new workouts to try so I’ve got to get to work!

–Lindsay–


Filed Under: Workouts

NatureBox & Healthy No Bakes

March 27, 2012 by Lindsay 24 Comments

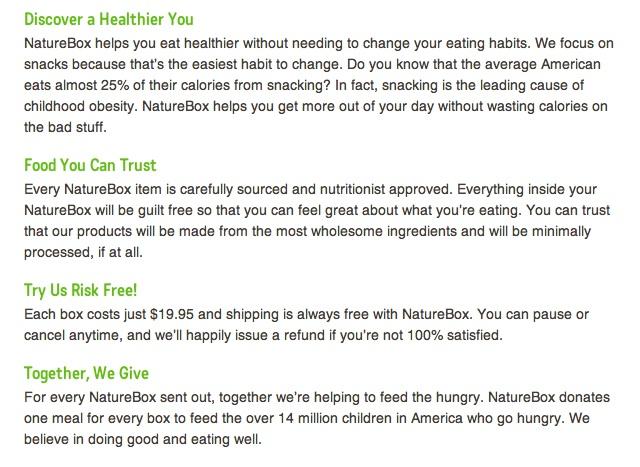
Recently I was contacted by a super cool company called NatureBox. For $19.95 per month, you can subscribe to NatureBox and receive a box jam-packed with healthy snacks, delivered right to your doorstep!

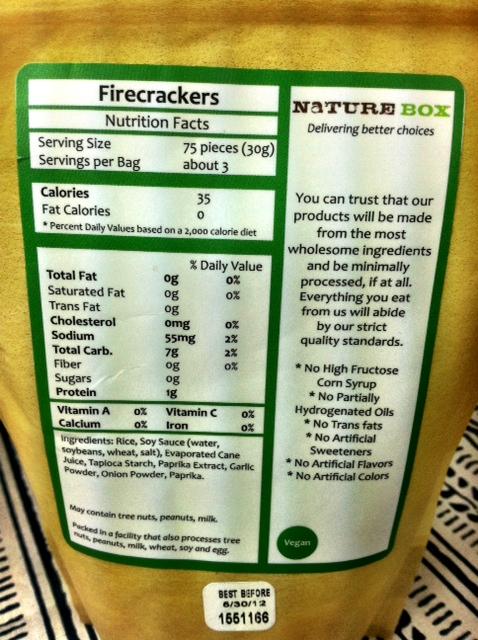
NatureBox products contain no high fructose corn syrup, trans fats, artificial sweeteners, flavors or colors. Each box has a theme such as healthy alternatives, heart-healthy fats, etc. From their website:

116

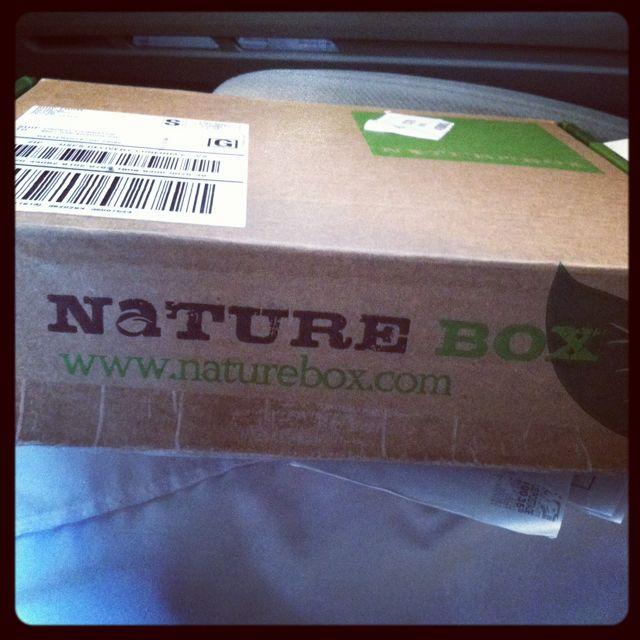
I was lucky enough to receive the March Box and was super impressed by the snacks inside.

It showed up on my doorstep right before I had to go to work one afternoon so I threw it in the car and when I got to work, I took a quick peak to see if there was anything in there that could tide me over until dinner time!

IMG 2620
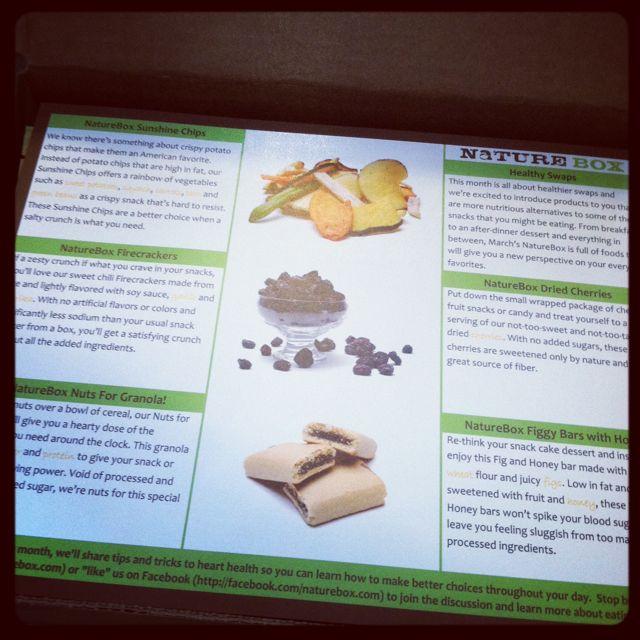
The first thing I found, after opening the box, was an info sheet that gave me a little information about each of the snacks included, a recipe using some of the products and some suggestions as to how I  could enjoy a few of the snacks.

IMG 2621

IMG 2622
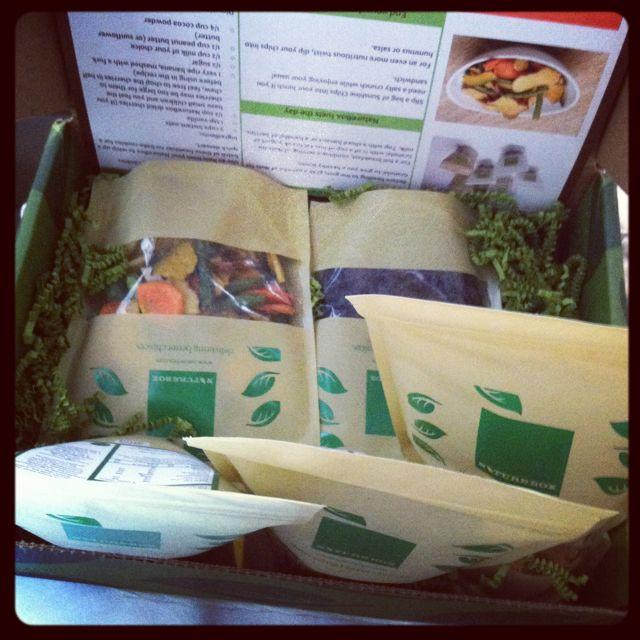
The March box included the following:

  • Figgy Bars
  • Dried Cherries
  • Granola
  • Firecrackers
  • Sunshine Chips

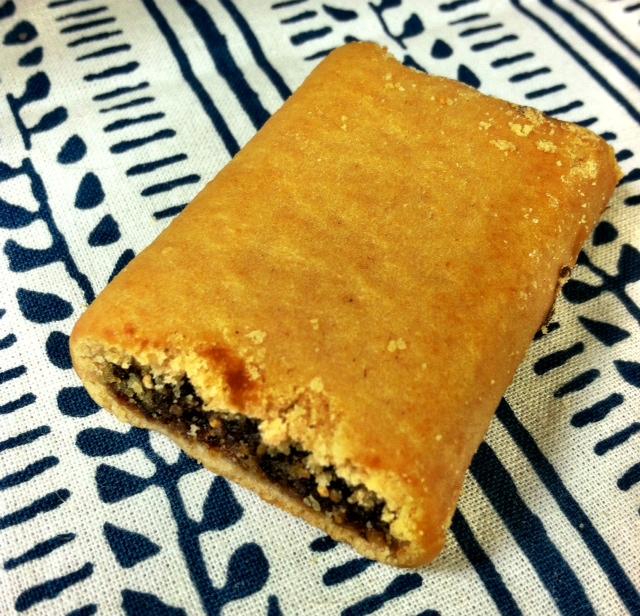
I immediately dug into the figgy bars. I used to LOVE fig newtons when I was little. These were similar, but larger and more substantial. Yummm….

photo 185

I’m pretty familiar with granola and cherries so I saved those for later, but when I got home I checked out the other two snacks I wasn’t familiar with.

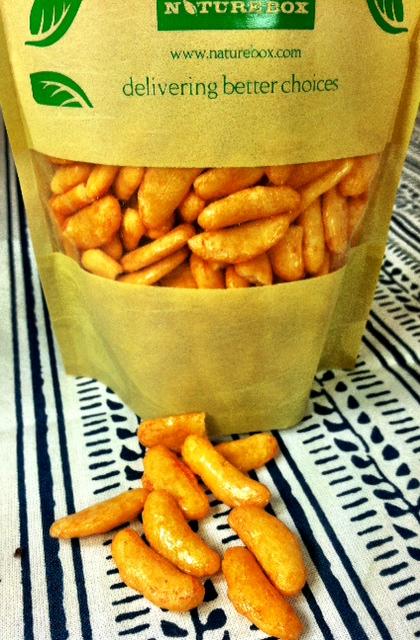
The firecrackers were fun to snack on. The best way I can describe them is like giant flavorful rice puffs with a subtle spice. They would be great in trail mix!

photo 184

photo 182

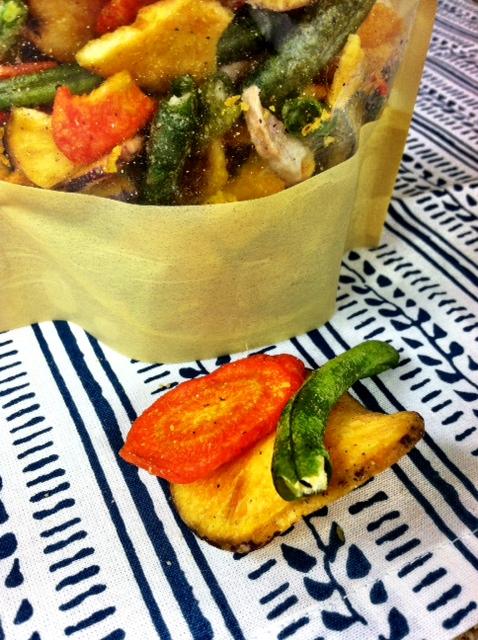
I was a little scared to try the sunshine chips because I wasn’t sure what to expect. They weren’t my absolute favorite, but I enjoyed the crunchiness! The carrots were actually my favorite. They were even better than the sweet potatoes and green beans!  I probably would have never have chosen to try theses on my own so it was fun to give them a try!

photo 186
I added some of the granola to my daily yogurt mess and it was delicious as well! It wasn’t overly sweet and had great flavor. I never buy cherries myself…I’m usually more of a Craisins kinda girl, but since I had these on hand, I decided to make some quick no-bake cookies!

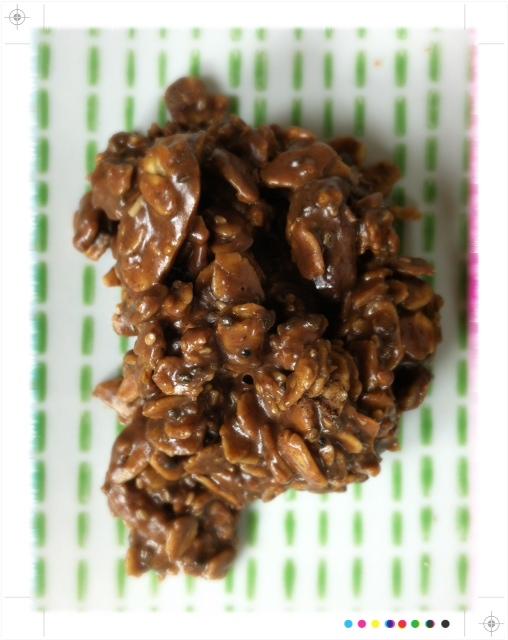
Here’s what mine looked like:

Chocolate Cherry No Bakes

1 1/2c granola (you could also use oats)
1/2 c cherries, chopped
1/2 c almond butter
1/4 c dark chocolate chips
2 Tbsp chia seeds

Combine granola, cherries and chia seeds in a small bowl.
Melt the chocolate chips, and almond butter if necessary.
Add the melted almond butter and chocolate to the bowl.
Stir to combine.
Drop by spoonful onto a baking sheet.
Refrigerate until set.

cherry

These are much healthier than a lot of the no-bake recipes I found that had tons of added sugar and butter. They’re a little crumbly but if you keep them in the fridge they hold together pretty well! You could easily sub your favorite kind of nut butter for the almond butter, try a different kind of dried fruit or leave out/add more chocolate if desired!

photo 188


—————————————-

Overall, I was very impressed with NatureBox. A few more tidbits:


212

I love that you can decide month-to-month whether you want to get another box. That makes it super easy to send these as gifts to others! Or to purchase a box for yourself as a treat a few months a year 🙂

As a future RD, I’m all about making healthy choices and Nature’s Box makes it easy by providing you with fun, healthy snacks to enjoy

AND, as a bonus for you guys, NatureBox is offering you 25% off your first month of a month-to-month subscription! Just enter the promo code HEALTHY when checking out to get your discount! If you want to commit to a number of consecutive months, you can pay for 6 months and get 1 month free or pay for 12 months and get 3 months free!

Enjoy!
–Lindsay–

*Disclaimer- I was provided with this box for free. All thoughts and opinions are my own.

Filed Under: Snack

Tuna Quinoa Cakes

March 26, 2012 by Lindsay 57 Comments

Hi Friends!

Another Monday, another day spent wishing the weekend comes quickly! I have a delicious recipe to share with you today!

Let’s talk about quinoa for a minute. I have kind of a love-hate relationship with quinoa. I WANT to love it. I love the nutrition side of it. I’m just not 100% crazy about the taste of it. Lately, however, I’ve been working on incorporating it into my diet more frequently and I threw together these cakes in hopes that they would taste mostly like tuna, with the added bonus of quinoa. Mission accomplished!

tuna1

These are super simple to make, packed with protein and they taste great!

Tuna Quinoa Cakes

by Lindsay L

Prep Time: 5 min

Cook Time: 20 min

Keywords: bake pan sear appetizer burger entree salad healthy tuna

6020929


Ingredients (6 cakes)

  • ½ c sweet potato, cooked and mashed
  • 2 cans tuna, drained
  • ¾ cup cooked quinoa
  • ¼ c green onion, chopped
  • 2 cloves garlic, minced
  • 1 Tbsp lemon juice
  • 1 egg
  • ¼ c plain yogurt
  • 1 Tbsp mustard
  • 1/2 tsp cayenne pepper
  • 1 tsp paprika
  • ½ c breadcrumbs

Instructions

1. In a small bowl, combine the tuna and sweet potato and mix well.
2. Add remaining ingredients and stir until well combined.
3. Using your hands, form into 6 cakes.
4. Place on a greased baking sheet and bake at 400 degrees for 20 min, flipping once.

*These could also be made with salmon.

Powered by Recipage


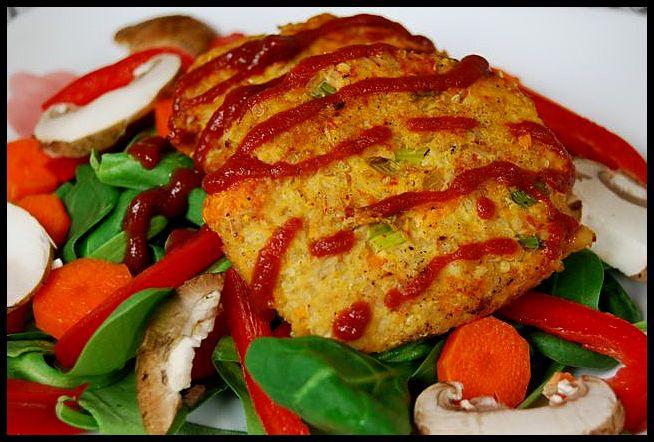
These could be drizzled with sriracha and enjoyed on top of a salad to take it from bland to  amazing.


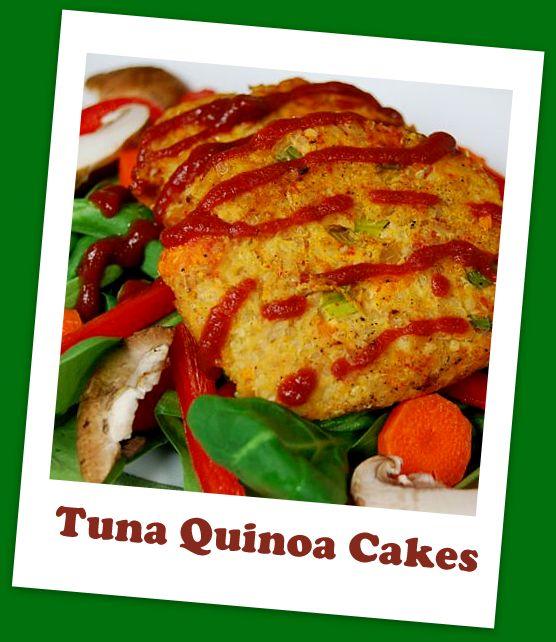
These Tuna Quinoa Cakes are protein packed and make a great salad topper!


These Tuna Quinoa Cakes are protein packed and make a great salad topper!

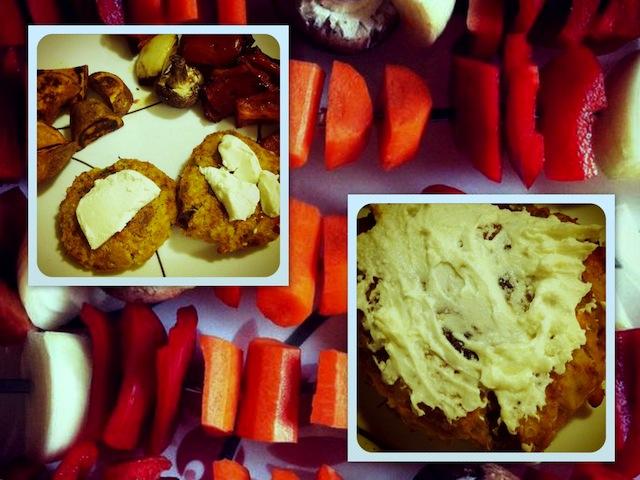
The first night we ate these, we grilled up some veggie kabobs and some sweet potatoes and ate the cakes topped with goat cheese. AMAZING.

tuna2

The next night, I ate the leftovers in a whole wheat tortilla topped with avocado and a little bit of cheese. Equally as good!

Whatever way you choose to enjoy them, I hope you make them soon 🙂

So tell me: quinoa- love it or hate it?

Enjoy!
–Lindsay–

 

Filed Under: Uncategorized

Fitness Friday 15

March 23, 2012 by Lindsay 27 Comments

Hi Friends!

This week has literally flown by, most likely because I’ve been on vacation and those weeks always go by the fastest. It wasn’t my best week of workouts, but I did manage a few good ones!

And finally, because Rita is SO AWESOME, she figured out a way to get the whole name of my blog to show up if you’re reading my posts on your phone! weeeeeee!!!! gosh i love her 🙂

Still working on updating my blog roll!

fitnessfriday4

So let’s take a look at the workouts shall we?

March 16th

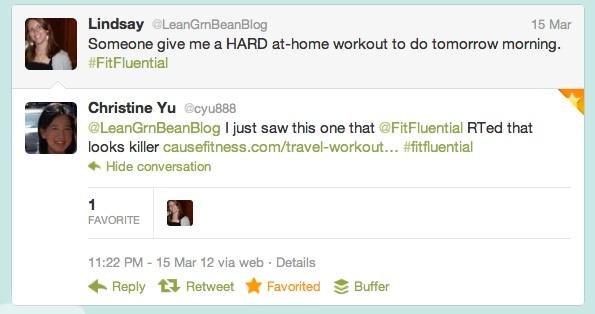
I turned to twitter late Thursday night looking for a HARD workout that I could get up and do Friday morning. Christine hooked me up!

worktweet

Here’s the link to the workout. It’s a good one!

 —————————————–

March 17th
Rest day. My parents and I walked the dogs 3 miles (to get coffee!)

 —————————————-

March 18th
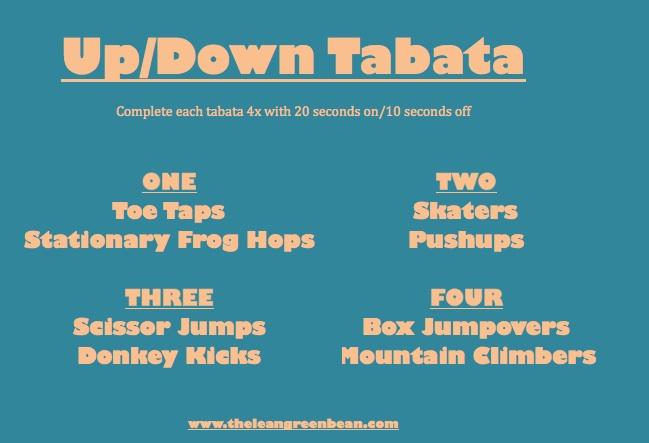
I had a busy weekend, dropped my parents off at the airport and then went straight to work. When I got home, I wanted a workout that would get the job done quickly! I put together this 16 min tabata. Each tabata has one exercise standing up and one down on the ground:


mar18 1


A couple of videos for you:

Toe Taps
Stationary Frog Hops

—————————————

March 19th

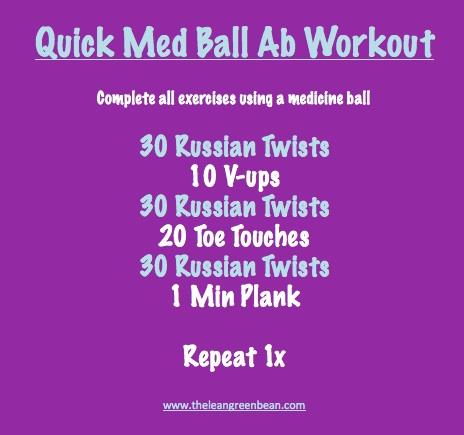
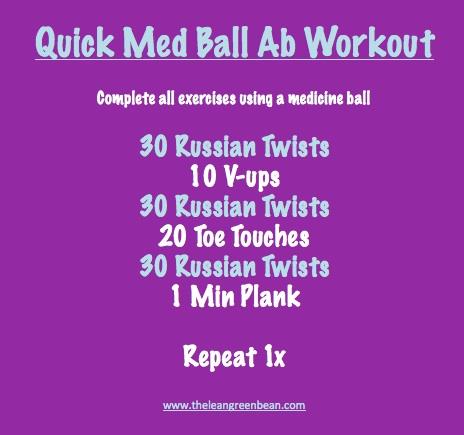
Needed another quick workout so I ran a mile on the treadmill and then did this quick med ball ab workout. Something is always better than nothing!


mar19

The ab workout goes by quick but I was feelin’ it by the end!

—————————————–

March 20th
Rest day. My back hurt, my knee hurt and I was exhausted. Listen to your body!

—————————————-

March 21st
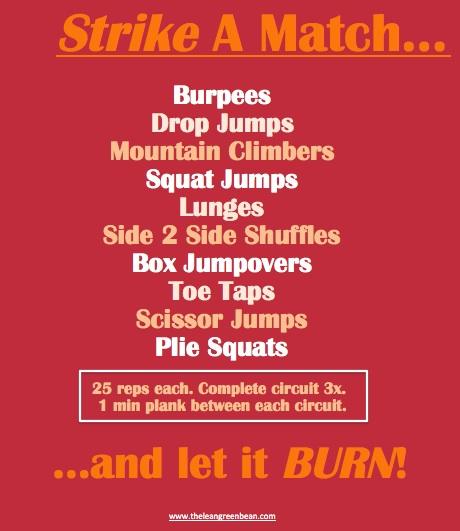
Hubby and I headed to the basement to workout after he got home from work. I updated one of my older workouts and let me tell you, it BURNS!

mar21


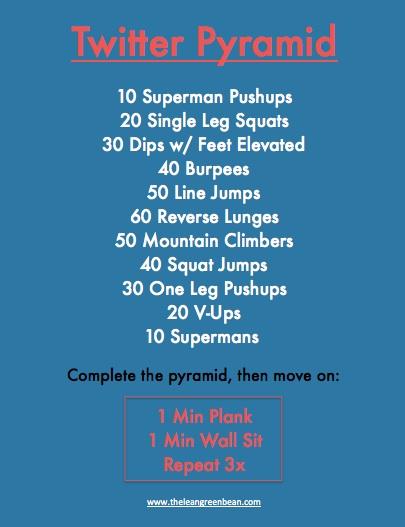
Mar 22nd: I wasn’t in the mood to come up with my own workout so I decided to let Twitter do the work for me! I sent out a tweet asking people to tell me their favorite bodyweight exercise and once I had enough responses, I turned them into a workout!

Here’s what it looked like:

mar22


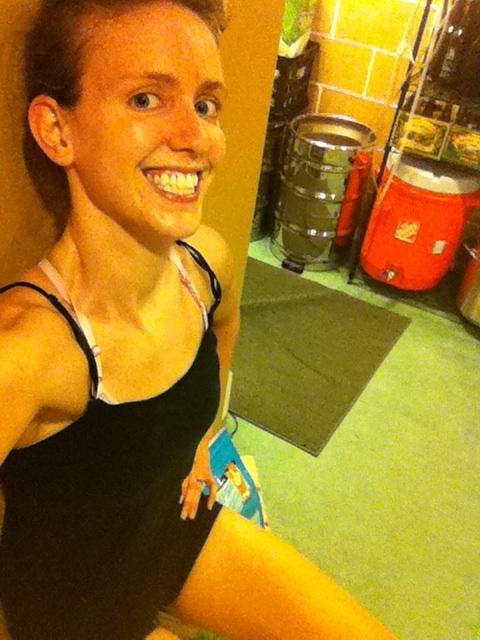
I was pretty much dead (but still smiling!) by that last wall sit:

photo 175

Annnnnnd, I think I have chia seed stuck in my teeth. Whoops! Also, please excuse the cat litter and brewing supplies in the background 🙂


And that’s all I’ve got for today!

Happy Friday!
–Lindsay–


Filed Under: Workouts

Sweet Potato Egg Boats

March 22, 2012 by Lindsay 65 Comments

Hi Friends!

First things first! The Lean Green Bean got a facelift!

Out with the old…

old

In with the new…

new


If you’re reading in a reader right now, be sure to click over to my homepage, check out the new look and let me know what you think! I’m completely and totally in love with it. I’ve been thinking about doing a redesign for a while now and finally took the plunge. I worked with Rita at Blog Genie who is nothing short of AMAZING. Seriously…if you’ve been thinking about redesigning your blog, getting a new header, switching from blogger to wordpress…pretty much anything blog related, I would HIGHLY recommend her. She has the patience of a saint. I had NO IDEA what I wanted my new header to look like and we went through about 10 drafts that were all drastically different before I was happy. She never complained, always answered my emails promptly and with smiley faces to boot 🙂

The only thing that isn’t done yet is drop down menus, which i’ll be working on for the new few days! So stay tuned for that 🙂

SO, just in case that wasn’t enough excitement for you for one day, I’ve got an amazing recipe to share with you also!

I’ve been on spring break this week, which means hubby and I have gotten to eat lunch together a few times! On Monday, I did a little sweet potato experiment that turned out WONDERFULLY!

Let’s take a look shall we?

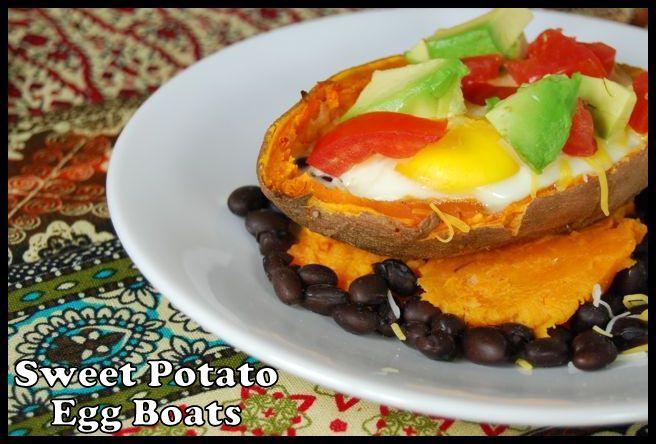
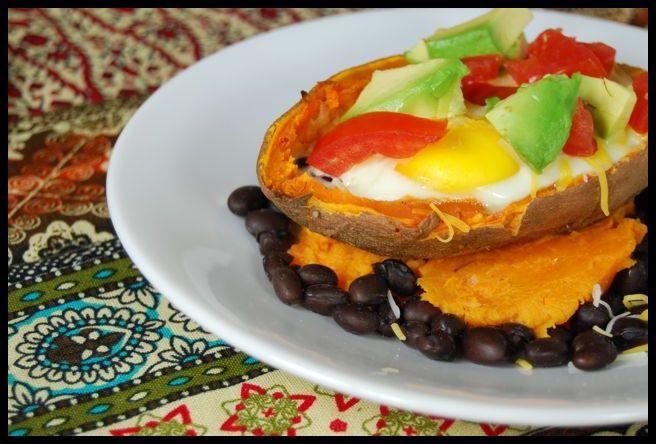
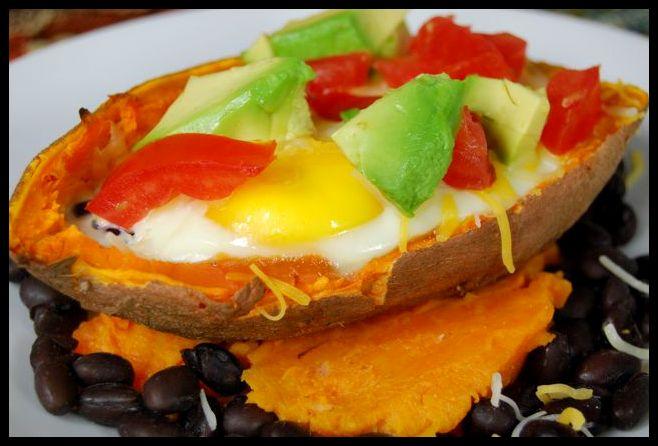
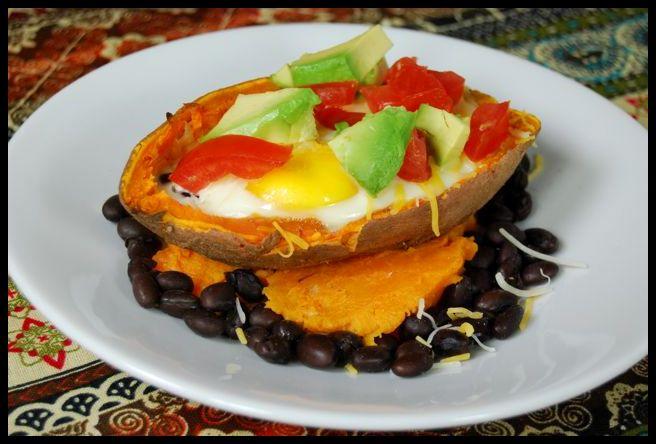
egg8

What is that, you may ask?

Deliciousness in a sweet potato shell.

Sweet Potato Egg Boats


by Lindsay L

Prep Time: 10 min

Cook Time: 20 min

Keywords: bake microwave entree breakfast healthy vegetarian low-sodium black beans avocado feta sweet potato

6020399


Ingredients (4 boats)

  • 2 large sweet potatoes
  • 4 eggs
  • 1 can no-salt-added black beans, rinsed
  • 1/4 c feta, crumbled
  • 1/4 c salsa
  • 1 medium tomato, diced
  • 1/2 an avocado, diced
  • shredded mexican cheese for sprinkling

Instructions

1. Preheat oven to 400 degrees F.
2. Poke the sweet potatoes with a fork and microwave 4 to 5 minutes, flipping once.
3. Slice in half length-wise and let cool slightly.
4. Scoop out the middle of each sweet potato boat and set aside.
5. Add 2 Tbsp black beans, 1 Tbsp feta and 1 Tbsp salsa to each boat.
6. Place the boats on a baking sheet.
7. Carefully crack an egg on top of each boat.
8. Bake for 10-20 minutes, depending on how well done you want your egg.
9. Top with a sprinkle of cheese, tomato and avocado.
10. Serve over the sweet potato innards that were scooped out and the remaning black beans.

Powered by Recipage


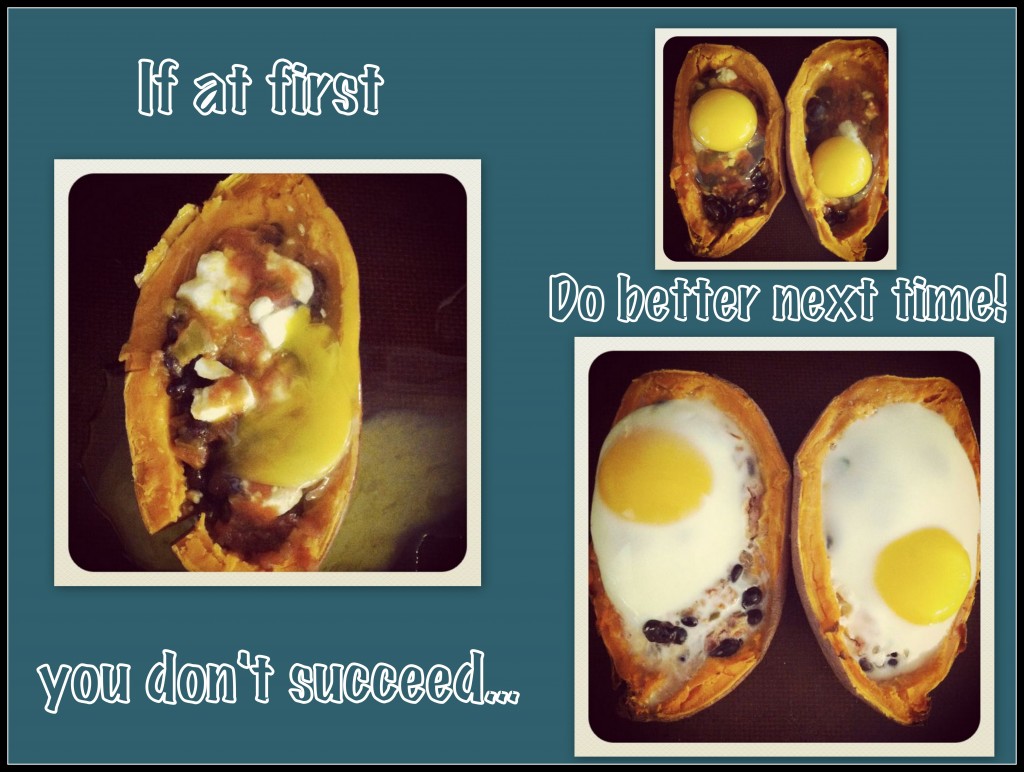
If your egg spills over the side, don’t worry. It happens to the best of us!

egg1

Enjoy 🙂

egg3

egg5

egg6
Happy Thursday!

–Lindsay–

Filed Under: Breakfast Tagged With: Sweet Potato

The Evolution of a Smoothie

March 20, 2012 by Lindsay 55 Comments

Hi Friends!

Happy Tuesday! If you’re a long-time reader of my blog, you’re probably quite aware of how much I love smoothies. I LOVE them. Always have. I love the endless combinations, I love how quick and easy they are and most recently, I love how healthy you can make them.

Confession: In December of 2010, I posted about making my first green monster. Then I promptly forgot about them and reverted back to my normal fruit-filled smoothies.

smoothie12

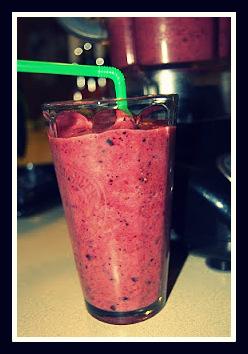
If you looked at my smoothies from last summer, they would look something like this:

smoothie14

Packed with fruit, fruit juice and ice…and that’s about it.

—————————————-

Sometime during the summer of 2011, I decided I needed to get a little more serious about boosting the nutritional value of my smoothies. But I’m a creature of habit, so I wanted to ease into it!

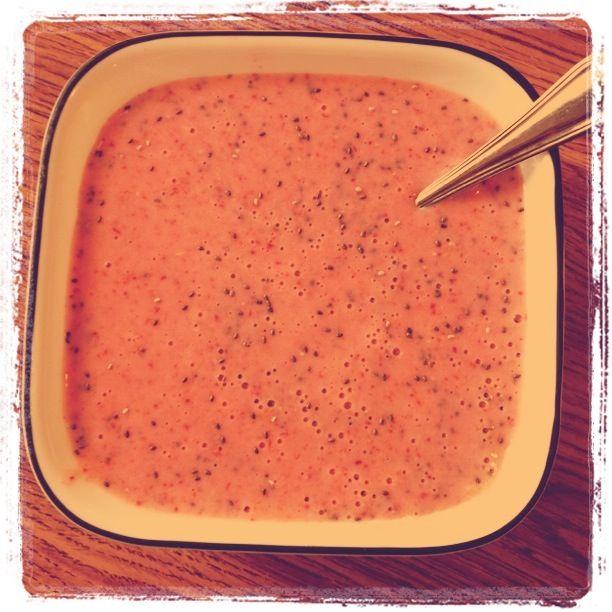
In August, I added chia seeds to my smoothie for the first time and ate it out of a bowl because I loved how thick they made it!

smoothie10

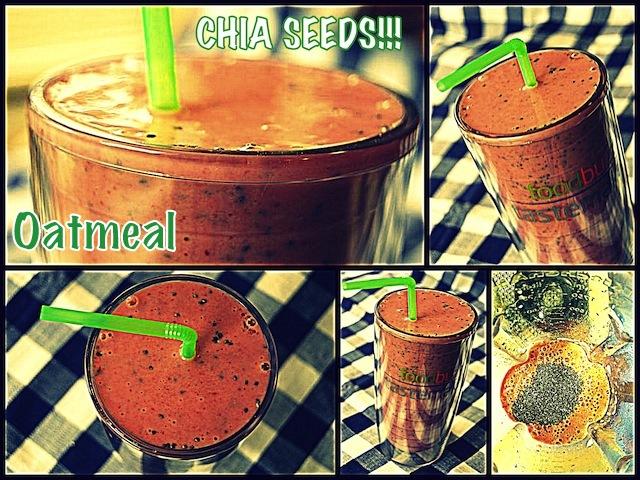
In the fall of 2011, I was running a lot (for me) and I was having trouble finding things my stomach could handle eating after running. In October, I tried adding oatmeal to my smoothies for some post-run fuel.  It worked out perfectly for me.

smoothie8

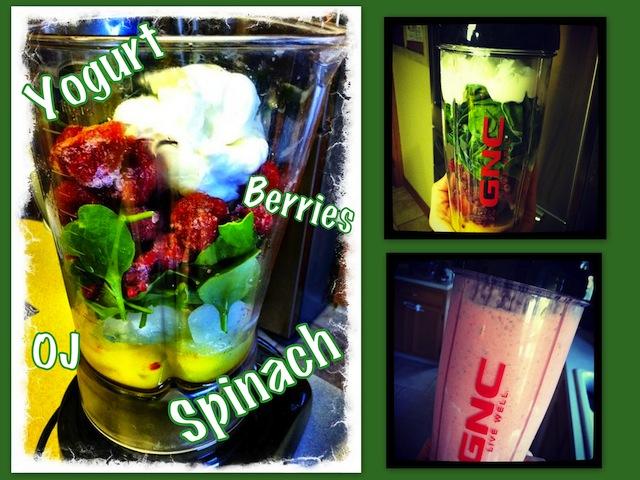
In December and January, I gradually started adding spinach to my smoothies again. It started with a very small handful….and that handful gradually increased in size over the following weeks. At the same time, I made the switch from using flavored Greek yogurts in my smoothies to plain, non-fat Greek yogurt. I started by switching to half flavored-half plain, and then eventually phased out the flavored kind all together.

Pretty soon I was buying giant tubs of spinach & plain Greek yogurt at Costco to fuel my smoothie habit 🙂

smoothie3

Using these methods, I was even able to get the hubby hooked on green monsters. And yes, I call them green monsters. Even though mine are not totally green, and still have fruit in them….the fact that there is a green vegetable in my smoothies is a MAJOR accomplishment for me!

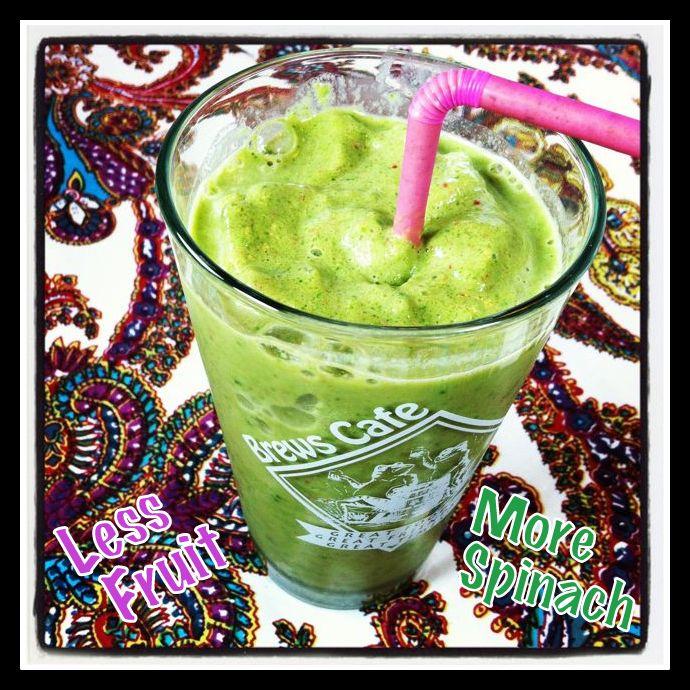
We’re now in March of 2012. I’ve decided that peaches are my favorite fruit for hiding the spinach taste. If I use just peaches instead of a berry-peach combo, and some extra spinach,  the smoothies get particularly green!

smoothie6
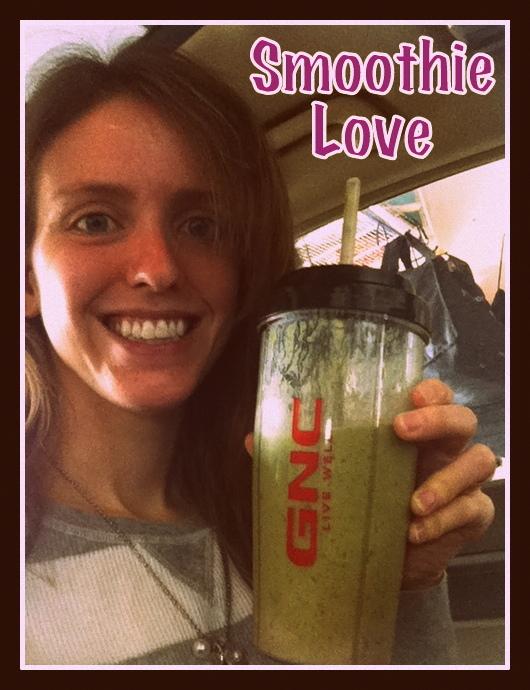
Most days though, I’m happy with my combination of a few frozen peaches and berries, a giant handful of spinach, several scoops of plain greek yogurt, some ice cubes, a splash of OJ and some chia seeds.

smoothie9

I know a lot of people add protein powder to their smoothies. I’ve tried a few brands but I’m SUPER picky about the taste of protein powders. I hate the chalky taste that most have, and I really hate the flavors, even chocolate and vanilla. But, if any of you use a really good kind that has no taste, I’d be all over that…. so let me know!!

So tell me: Are you a smoothie drinker? What do you do to make yours healthier? Leave the link to your favorite recipe if you have one!

Today’s Workout- Quick Med Ball Abs!

mar191


–Lindsay–

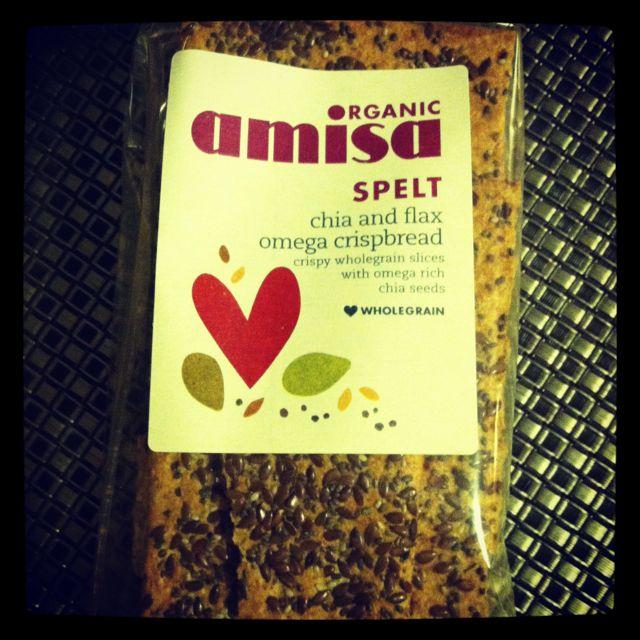
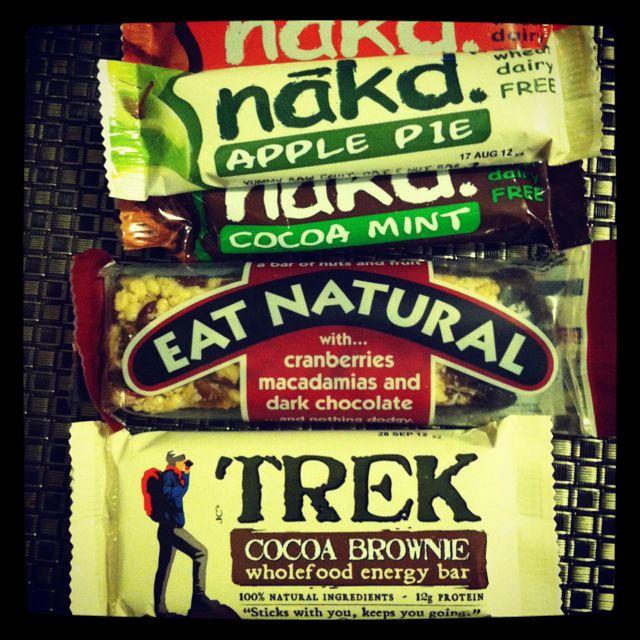
PS. I participated in a UK-US Food blogger swap and my goodies finally came in the mail the other day!!! Check out what I got from across the pond:

IMG 2409

Loved these!

IMG 2408

All sorts of fun bars!
So far I’ve tried the cocoa mint one and loved it!

Big thanks to Nicky at Kabocha Fashionista for hooking me up 🙂

Filed Under: Breakfast, Snack

Fitness Friday 14

March 16, 2012 by Lindsay 21 Comments

Hi Friends!

My parents are in town so I’m off spending the day with them, but I didn’t want to leave you hanging without a Fitness Friday post!

fitnessfriday2

I’ve decided to go back and redo some of the workouts I posted back in December and January, before I learned how to make them look pretty! So some of these might look familiar to some of you…but I know I have a lot of new readers too, so hopefully you’ll still enjoy them! Several of them left me a hot, sweaty mess.

workout

Let’s get right to it!

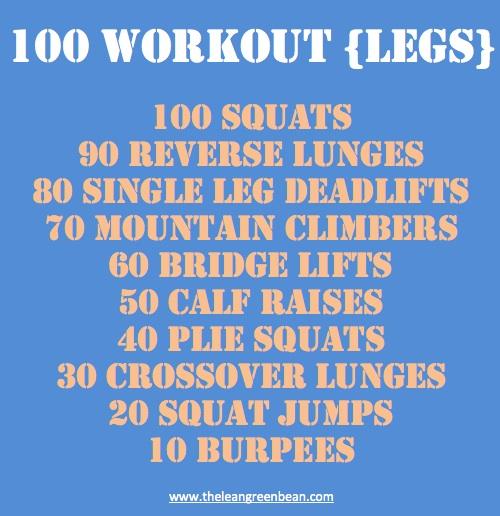
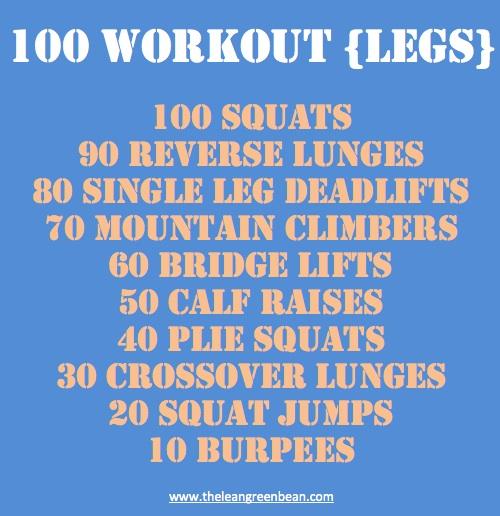
March 9th– I did one of my all-time favorite workouts- The  100 workout- legs. Use heavy dumbbells and push yourself to finish as fast as you can and it’ll leave you sore for days!

100legs
Pin It

 ————————————-

March 10th– rest day

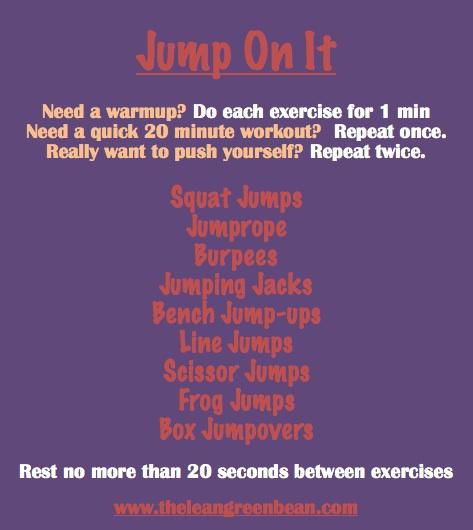
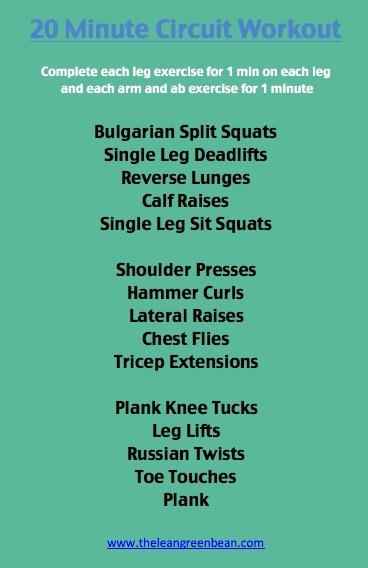
March 11th– I put together a new workout to do for a warmup, but it can also be repeated a couple of times for a full workout! I paired it with a 20 min full body circuit that I put together a few months ago for a nice 30 min workout!

mar12th

————————————–

mar11th

March 12th– rest day

March 13th– Went back an re-did an old workout. I used heavy dumbbells and really pushed myself on this one and it left me sore the next day!


March 14th- 3 mile walk in the sunshine with the pups!

photo 173

Fitness at it’s finest 🙂

photo 174

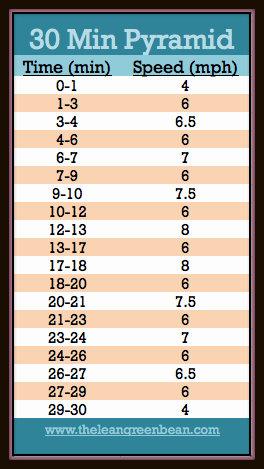
March 15th- I decided I needed to tackle a treadmill workout. However, once I got started I could tell it wasn’t going to go well. I was super ADD yesterday. I had a lot to do, my parents were coming…but, instead of giving up, I remembered Samantha’s post from Tuesday about refocusing. I completed the first half of the pyramid, then I hopped off, took the dogs for a quick one mile walk, and then hopped back on to do the second half when I got back. It worked! Splitting it up helped me stay focused during the 15 minute segments I was running, with time to clear my head in the middle.

So, tackle this workout as is if you’re in the mood. If you’re not, make it work for you. Take a break at the top to walk for a few minutes or do a quick chore and then do the rest.

mar15th

I covered 3 miles on the treadmill and a mile outside. I call that a win.

Happy Friday friends!

–Lindsay–

Filed Under: Workouts

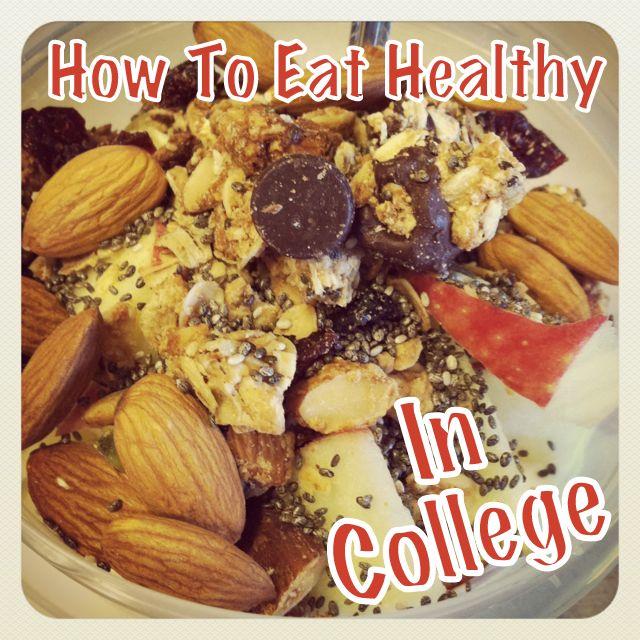
How To Eat Healthy In College

March 15, 2012 by Lindsay 53 Comments

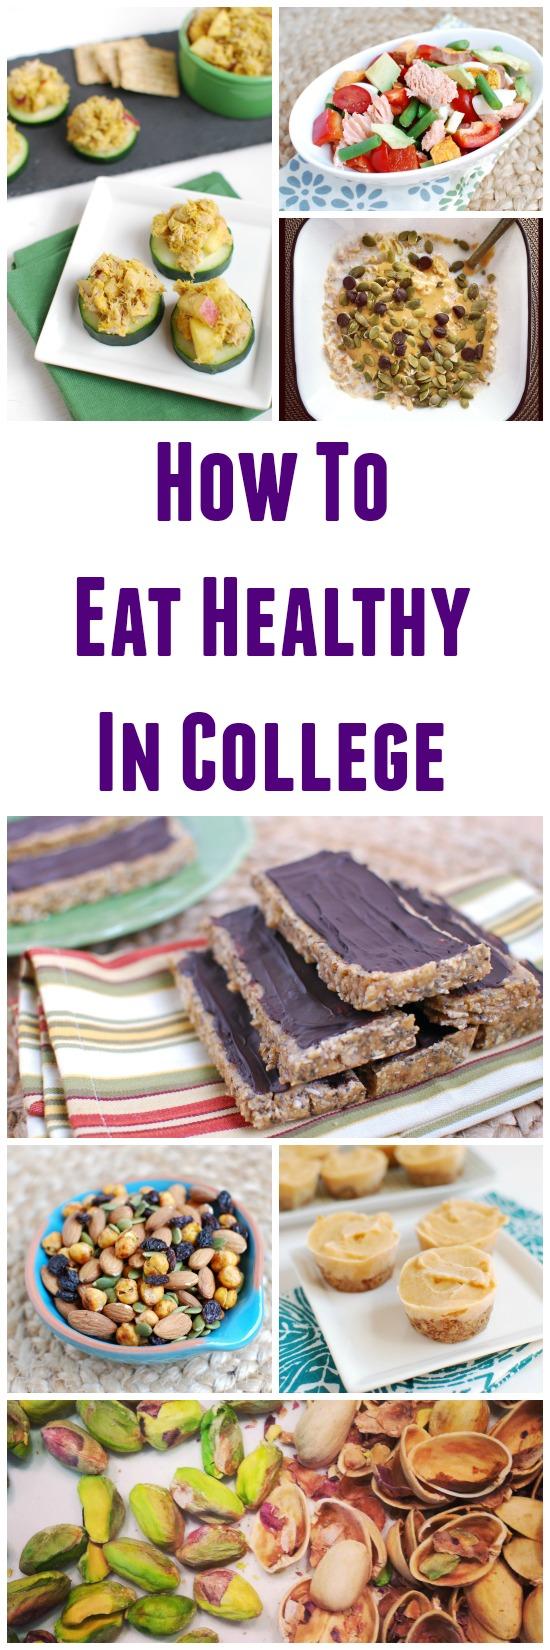
Wondering how to eat healthy in college? Here are some tips, tricks and recipes for eating healthy in a college dorm.

*Note- This post was edited and updated 1/2015. Added information is in red.

Last week I had the opportunity to give a little presentation for the ladies of CHAARG, a group of amazing women at Ohio State. CHAARG stands for Changing Healthy, Attitudes & Actions to Recreate Girls that was founded at Ohio State by Elizabeth Tavierne and Emily Richard.

(CHAARG is now a nationwide movement with chapters on tons of college campuses across the US. Check out their website to learn more!) 

 I was so honored when they asked me to come speak to their group! They pretty much gave me free reign, so I spent some time really thinking about what I wanted to talk to them about. I settled on discussing how to eat healthy in college.

Wondering how to eat healthy in college? Here are some tips, tricks and recipes for eating healthy in a college dorm.

I decided to give a talk that I wish someone would have given me when I was in college. I wanted to cover the basics of healthy eating, give them lots of ideas and inspiration, and show them what a wide variety of food you can prepare, even if you’re living in a dorm room. I figured this would appeal to the masses because if these things can be made in a dorm room, with minimal equipment and a mini-fridge, then they can definitely be made in homes and apartments with even more space and equipment.

Wondering how to eat healthy in college? Here are some tips, tricks and recipes for eating healthy in a college dorm.

Pin It

So, the evening went really well. The girls were so much fun! We rented a room in the union on campus and spent about an hour and a half chatting and whipping up some tasty snacks!

I thought it’d be fun to share my presentation with you guys!

Intro

I told them about myself and about how when I went to college the first time, we had to live on campus all 4 years. We only had apartments for our senior year. That means I spent 3 years living in the dorms. I just WISH I had thought about making some of these snacks when I lived on campus, instead of living on cereal and easy mac for 3 years, or that I had thought to stock my mini-fridge with something besides party supplies.

Equipment

Microwave – most dorms have one
Mini food processor – $20-30
Toaster – $20
Mini Blender – $30
Can opener
Mason jars/Tupperware
Knife & cutting board
Measuring cups
Dishes

Shape Your Plate

Grains

  • Hot oats – Microwave ½ c. oats, 2/3 c. water for 2 minutes. Top with 6 oz. plain greek yogurt, ¼ c. granola, 1 Tbsp chia seeds and 1 medium apple diced and you have a breakfast packed with 20 g. fiber, 26 g. protein.
  • Overnight oats – Mix oats, milk, fruit, chia seeds and nut butter. Let sit overnight. Grab & go in the morning.
  • No-bake granola bars – Combine oats, brown rice syrup or honey, cereal and your favorite mix-ins for a healthy snack.
  • Oats in a smoothie – Add cooked oatmeal or uncooked oats to your smoothies for some extra bulk and fiber.
  • Bread – Make sandwiches (like sliced turkey or tuna salad) or toast (try topped with peanut butter & banana).
  • Wraps/pitas – Use these to make hummus & veggie wraps, falafel, or burritos.
  • Cereal – Enjoy with milk for breakfast and snacks.

Protein

  • Hummus – Endless flavor combinations at your fingertips! Enjoy with veggies, crackers, or on sandwiches.
  • Dips – Try curried sweet potato & red pepper dip with crackers for an afternoon snack.
  • Nut butter – Can be made in a blender or food processor in minutes with minimal ingredients and you can customize it to your taste preferences with different nuts and mix-ins.
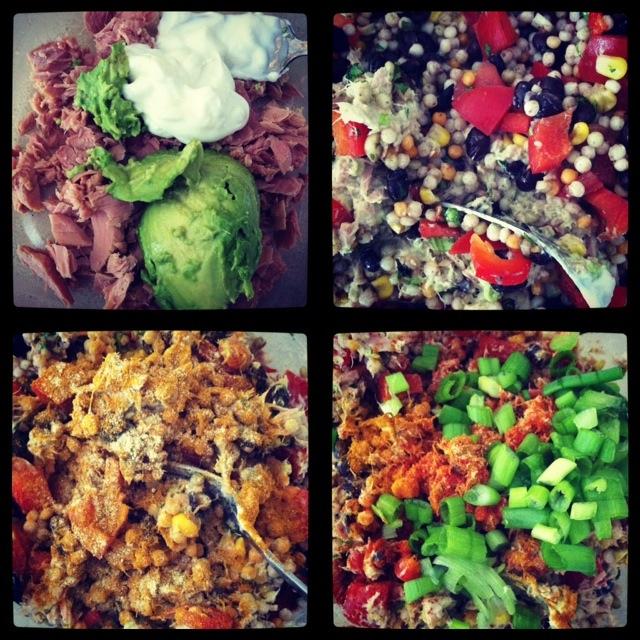
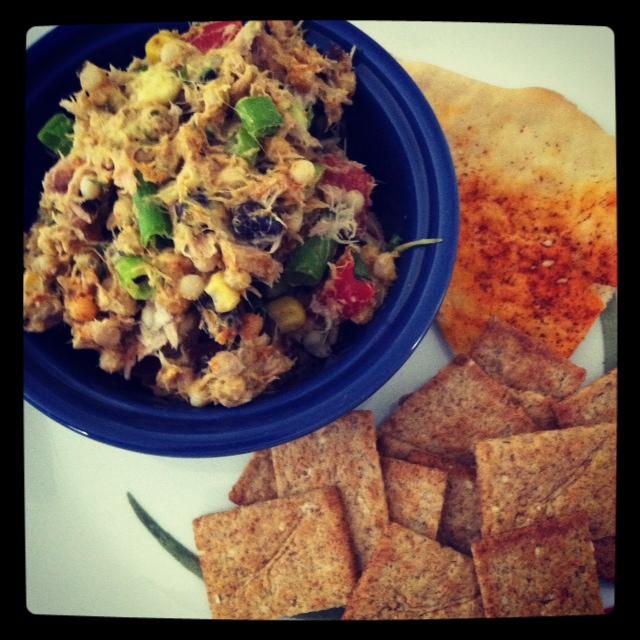
  • Tuna/chicken salad – Use low-sodium canned tuna or chicken packed in water. Mix in a small bowl with mashed avocado, hummus, or Greek yogurt instead of mayo. Add your favorite spices (try curry powder or cayenne pepper) and some chopped veggies, like onions and peppers, to bulk it up!
  • Deli meat/rotisserie chicken/pre-baked tofu – These are easy to add to wraps and sandwiches.
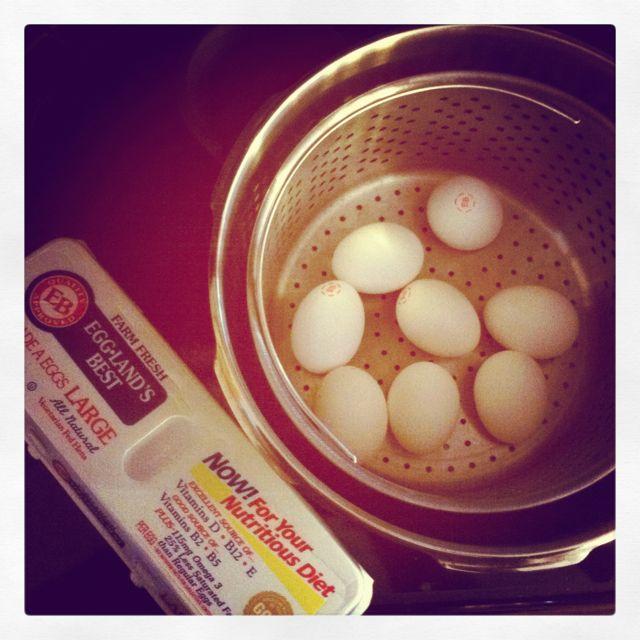
  • Hard boiled eggs – In the microwave, bring water to boil. Then, add eggs and cook on low power or ½ power for 8 minutes. Let stand a few minutes more.
  • Scrambled eggs – In the microwave, cook for 2 minutes, stir, and cook another 2 minutes.

Veggies

  • Salad in a jar – Portion out enough lettuce/spinach/mixed greens, complete with chopped veggies and a protein source, for the week and store them in mason jars or tupperware. Add the dressing to the bottom first to keep everything else from getting soggy. When you’re ready to eat, just shake it up and dig in!
  • Microwave sweet potato – Poke a sweet potato with a fork or knife all over, microwave for 5-6 minutes, top with nut butter, or beans and veggies and enjoy for lunch.
  • Raw veggies – Try dipping in hummus or guacamole!

Fruit

  • Bananas – Buy in a variety of stages of ripeness to enjoy throughout the week.
  • Apples & oranges – These make easy grab & go snacks.
  • Berries – Top your oatmeal bowls with them or mix them into Greek yogurt for some natural sweetness.

Dairy

  • Milk – Choose dairy or non-dairy.
  • Greek yogurt – Enjoy with fruit & granola. Mix a spoonful or two of the flavored kinds into plain for just a touch of sweetness.
  • Cheese – Put on top of salads and sandwiches or eat plain with crackers or veggies.

Fats

  • Salad Dressing – Make your own dressings with oil, vinegar, and spices to add flavor and healthy fats.
  • Nuts – These are full of protein and healthy fats! Enjoy a handful each day at snack time.
  • Avocado – This makes a great topping for salads and sandwiches. Also, mix it into smoothies for added creaminess.

Snacks

  • Embrace the bulk bins! You can buy the quantities you need, often more cheaply than if you buy the pre-packaged versions of nuts, seeds, and grains on the shelf.
  • Nuts & seeds – Use these for added flavor, nutrition, and texture in granola bars and trail mix.
  • Flax seeds and chia seeds – Sprinkle these on oatmeal or yogurt for added omega 3’s and protein.
  • Chia jam – Mix 2 Tbsp chia seeds, 1 c. berries, a dash of vanilla extract, and a pinch of sugar. Microwave for 2 minutes, stir, and let cool. Try spreading it on your toast!
  • Store bought bars – KIND bars, Luna bars, Larabars are some good options.
  • Homemade fruit & nut bars – Make your favorite Larabar flavors at home!

Protein powder

  • Add to your oats for an extra boost of protein
  • Mix into your smoothies post-workout
  • Mix with milk to make protein frosting 

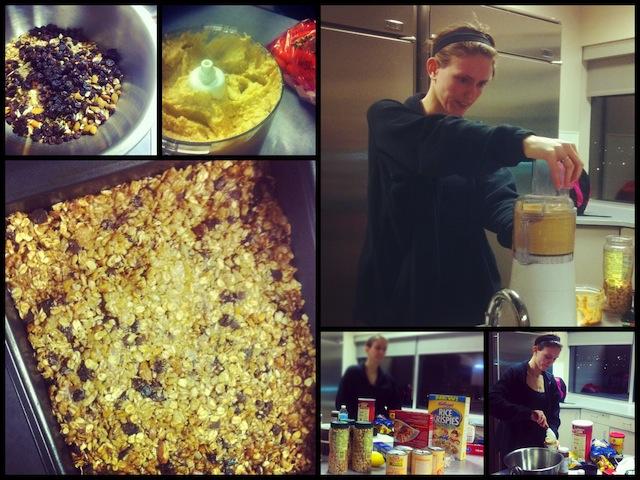
After I finished talking, we moved on to the fun part: making food. Earlier in the week, I sent over a list of some ingredients I would need them to pick up, and on the day of the presentation, I packed up a few of the ingredients I already had on hand (like tahini and brown rice syrup) and showed the girls how to make 4 easy snacks.

Wondering how to eat healthy in college? Here are so tips, tricks and recipes for eating healthy in a college dorm.

———————————————

No-Bake Granola Bars
These are totally customizable! Choose your favorite mix-ins, slice into bars or squares, and store in an airtight container or individually wrap with plastic wrap and store in the fridge!

1  ½ c. brown rice cereal
2 c. oats
2 Tbsp flax seed
2/3 c. peanut butter
½ c. brown rice syrup
¼ c. chia seeds
¼ c. pumpkin seeds
¼ c. sunflower seeds
1 tsp vanilla
½ c. chopped almonds
¾ c. raisins and/or craisins
1/3 c. chocolate chips

Directions:
Mix all the dry ingredients in a bowl.
In a separate bowl, microwave the brown rice syrup and peanut butter until melted.
Add the liquid to the dry ingredients and mix well. Use your hands if you need to!
Press into a 9×13 pan and refrigerate until set.

——————————————–

Peanut Butter
Use your favorite nut and experiment with mix-ins like honey, cinnamon, raisins, cocoa powder, etc.

2 c. nuts
2 tsp honey, or to taste
1/2 tsp cinnamon, or to taste
1-2 tsp oil, if desired for smoothness

Directions:
Place the nuts in a food processor. Add the oil if you’re using it
Process for about 5 minutes or until desired consistency is reached.
Add the honey and cinnamon and pulse a few times to combine.

————————————-

Sweet Potato Hummus
Start with a basic recipe and make it your own with mix-ins like roasted red peppers, cooked sweet potato, garlic, cayenne pepper, etc.

2 cans of chickpeas, rinsed with 1/4 c. liquid reserved
1 lemon
3 Tbsp tahini
1-2 cloves garlic
paprika, to taste
1 medium sweet potato

Directions:
Poke the sweet potato and microwave for 5 minutes to cook if using.
Add the chickpeas, reserved liquid, juice from the lemon, garlic and tahini to a food processor and process until smooth.
Add the sweet potato (skin removed) and pulse to combine.
Season as desired (try paprika or cayenne pepper for an kick!

——————————————

PB & J Larabars
Make your favorite flavor of store-bought bars at home with just a few ingredients.

2/3 c. chopped dates
½ c. raisins
½ c. dry roasted peanuts

Directions:
Place the dates and raisins in the food processor and process until they are well-combined and resemble a paste.
Remove and place in a small bowl.
Place the peanuts in the processor and pulse until chopped.
Add the peanuts to the date mixture and use your hands to combine.
Divide mixture into thirds, place one third on a piece of plastic wrap.
Use your hands to shape into desired bar shape. Repeat with remaining mixture.
Store in the fridge.

———————————————-

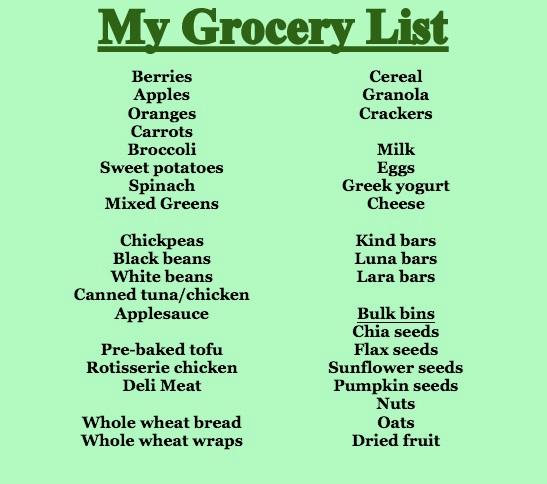
Here’s a grocery list to get you started!

Wondering how to eat healthy in college? Here are so tips, tricks and recipes for eating healthy in a college dorm.

There you go! It IS possible to eat healthy in college, even when you’re living in a dorm and have limited kitchen access/equipment. It may take a little extra effort/planning/mini-fridge organization skills… but MAN I wish I would have done it 🙂

Edited to add- Here are some other recipes to try that I’ve created since this post was originally published:

Peach Cobbler Smoothie
Microwave Sweet Potato Muffin
5 Quick, Healthy Breakfast Ideas
10 More Healthy Breakfast Ideas 
90 Second Microwave Egg Sandwich

Curried Tuna Salad with Apples
Salmon Chop Salad
Tuna Salad with Avocado
50 Packable Lunch Ideas
Salad In A Jar – 3 Ways
Salad Topping Ideas
Mexican Loaded Sweet Potatoes

Pumpkin Energy Balls
Frozen Yogurt Pumpkin Pie Bites
Sweet Potato Energy Bites
Peanut Butter Cookie Dough Dip
No Bake Granola Bars
Gingerbread Protein Balls
Black Bean Guacamole
No Bake Protein Bars
Freezer Chocolate PB Cups
Smart Snack Ideas
Healthy Ice Cream Sandwiches
Healthy Microwave Popcorn
Frozen Yogurt Trailmix Bars
Chunky Greek Hummus Plate

So let’s hear it. How was your diet in college?

[Tweet “It IS possible to eat healthy in college – and @leangrnbeanblog will show you how!”]

–Lindsay–

If you liked this post, you’ll love my ebook – The Ultimate Guide To Food Prep. It dives into detail about how to food prep (yes you can do it in college), troubleshoots common problems and provides tons of tips to make it easier! Click the image below for more details!

The Ultimate Guide To Food Prep Ebook

Filed Under: Food Prep, Lunch, Snack

Fitness Friday 13: 20 New Moves

March 9, 2012 by Lindsay 46 Comments

Hi Guys!

It’s time to power through another Fitness Friday.

fitnessfriday1

I’ve had a couple of super busy days and I’m just ready to fast-forward to next Tuesday when I get a nice little break! BUT, I do have time to share with you some of the workouts I did this week and boy did I have some good ones. I pushed myself pretty hard this week since my knee has been feeling ok. I’ve pretty much accepted that this is just how it’s gonna feel, and since it’s not terribly painful, I’m ok with it!

I wanted to highlight one workout in particular that I put together. When I first started getting back into exercising regularly about 6 months ago, I was doing about 4 basic moves: Squats, Lunges, Calf Raises and Shoulder Presses. It’s what I knew, what I was familiar and comfortable with…and it was fine for the first couple weeks.

But once I started putting together workouts and sharing them with you guys, I knew I’d have to start getting a little more adventurous or it was gonna get pretty boring, pretty fast!

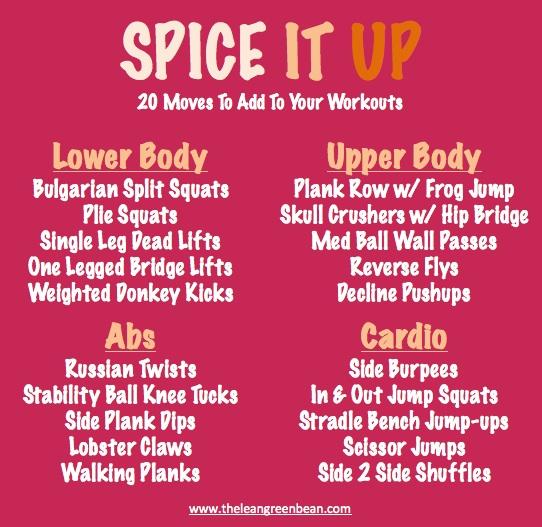
So, over the past few months I’ve been doing a lot of fitness blog reading, googling and you-tube video watching and I’ve found LOTS of new moves to incorporate into my workout routines. I thought I would share some of my favorites with you guys in case you’re looking for a new move or two to spice up your workouts!

spiceitup
Pin It

I didn’t have time to make a video for you guys this week…but here are some links to some of the moves:

Bulgarian Split Squats
Plie Squats
Single Leg Deadlifts
One Leg Bridge Lifts
Weighted Donkey Kicks

Plank Row w/ Frog Jump
Skull Crushers with Hip Bridge
Med Ball Wall Passes
Reverse Flys
Decline Pushups

Russian Twists
Stability Ball Knee Tucks
Side Plank Dips
Lobster Claws
Walking Planks

Side Burpees
In & Out Jump Squats
Stradle Bench Jump-ups
Scissor Jumps
Side 2 Side Shuffle

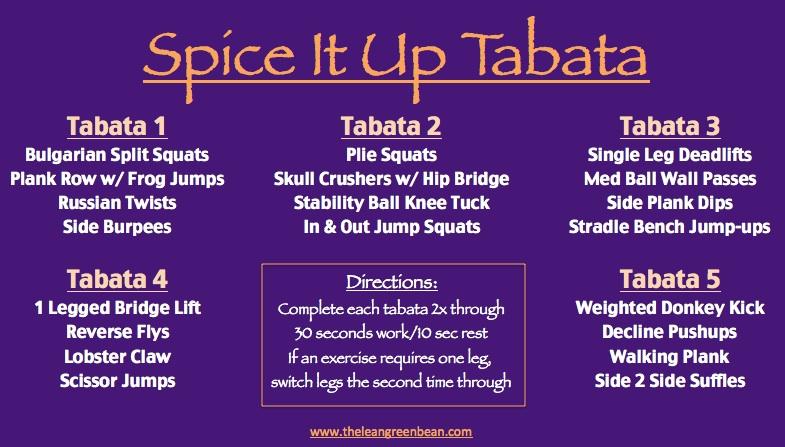
So there you go- 20 moves you might not already be doing! Then I took it a step further and turned all of those moves into a tabata for a nice workout!

mar7th

So, what did I do the rest of the week? Let’s take a look:

March 2nd– Ran 4 miles! This is pretty huge…it’s only the second time I’ve done it, EVER. I didn’t really follow a specific workout, but here’s what I did:
The first mile and a half I alternated 1 min 6.0/1 min 8.0. then I walked .2 miles and ran the last .3. Then I thought I was done. I went upstairs and after 5 min I said no, I can do more. So I went back down, and I ran a mile at 6.0. Then for a ½ mile I alternated 1 min 6.0/1 min. 4.0…then I ran the last .5 mile at 6.0! Boom. Great way to kick off a Friday.

March 3rd – Active rest day. As you recall, I spent the day at The Arnold. It was one of those days I really wish I had a pedometer (BDAY present anyone?! April 15th…just saying) Anyways, I felt like I walked a million miles around the convention center.

March 4rd– Spice it Up Tabata. I was sorer than I expected to be the next day!

March 5th– rest day

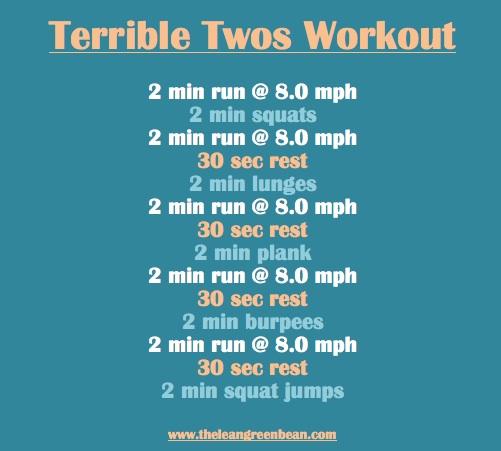
March 6th– I revisted an old workout of mine and man did I forget how awesome it is. It only takes 20 minutes and I was drenched by the end!

twos
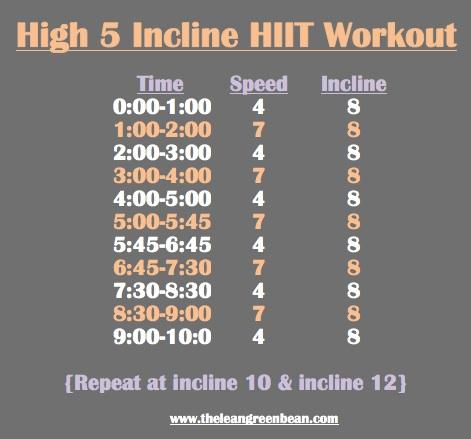
March 7th– High 5 Incline HIIT workout. Appropriately named because you’re doing 5 interval running blasts and a high incline 🙂

mar8th
March 8th-rest day. SUPER BUSY!

That’s all, friends! Tell me one new move you’ve recently started incorporating into your workout routine!!

Happy Friday 🙂
–Lindsay–

Filed Under: Workouts

Gluten-Free Banana Bread

March 8, 2012 by Lindsay 69 Comments

Hi Guys!

Just popping in to finally share the recipe for my new favorite banana bread. I’ve been tweeting about it all week, so now it’s time to spread the love!

This Gluten-Free Banana Bread is made with a mixture of chickpea and oat flours, plus greek yogurt for a little extra protein!

Let’s talk about this banana bread. Yes, it is gluten-free as long as you used certified gluten-free oats. I don’t really need it to be gluten-free, it just worked out that way! Let me tell you how awesome this bread is:

  • It uses chickpea flour. I’m not sure you guys are truly comprehending how much I love this stuff. It is amazing. Between my breakfast bars and this banana bread, I may never bake anything with wheat flour again. It’s like all the nutritional benefits of chickpeas, in flour form.
  • It uses greek yogurt and applesauce to replace a lot of the butter that’s usually in banana bread.
  • It uses less sugar than most banana breads, relying on the natural sweetness of the bananas.
  • If you cut the loaf into 12 slices, there are 5.5 grams of protein and 3 grams of fiber per slice.

This Gluten-Free Banana Bread is made with a mixture of chickpea and oat flours, plus greek yogurt for a little extra protein!

So there you have it! If you gave this to someone who didn’t know, they would never guess there was chickpea flour in it.

Gluten-Free Banana Bread

by Lindsay L

Prep Time: 5 min

Cook Time: 45 min

Keywords: bake bread breakfast snack gluten-free healthy vegetarian banana chickpeas oats

6019501


Ingredients (1 loaf)

  • 1 c chickpea flour
  • 1 c oat flour
  • 1 tsp baking soda
  • ½ tsp baking powder
  • 2 Tbsp flax seed
  • 1 tsp cinnamon
  • 1 c mashed banana- about 3 medium bananas
  • 1 tsp vanilla
  • 2 eggs
  • ¼ c plain Greek yogurt
  • 3 Tbsp butter, melted
  • 1 Tbsp apple sauce
  • ½ c sugar

Instructions

Combine the bananas, vanilla, eggs, yogurt, butter, applesauce and sugar in a bowl and mix well.

Add the flours, baking soda, baking powder, flax seed and cinnamon.

Stir until just combined and pour into a well-greased loaf pan.

Bake at 350 degrees F for 45 minutes or until a toothpick is inserted and comes out clean.

Powered by Recipage

So there you have it! Super easy to throw together and much healthier than most version!

This Gluten-Free Banana Bread is made with a mixture of chickpea and oat flours, plus greek yogurt for a little extra protein!

This Gluten-Free Banana Bread is made with a mixture of chickpea and oat flours, plus greek yogurt for a little extra protein!

This Gluten-Free Banana Bread is made with a mixture of chickpea and oat flours, plus greek yogurt for a little extra protein!


Know what the best part is? Hubby doesn’t like bananas in baked goods so this loaf is alllllll for me 🙂

Enjoy!
–Lindsay–
Filed Under: Baking, Snack

Caramelized Onion & Goat Cheese Pizza with Sweet Potato Socca Crust

March 6, 2012 by Lindsay 99 Comments

Hi Friends!

Whew! That’s a long title isn’t it? Sorry, but I couldn’t think of any way to shorten it and still describe the awesomeness that is this pizza. It’s not your traditional cheese-laden, greasy pizza. Instead, it has a protein & fiber packed crust, a spicy bean dip for the “sauce” and is topped with delicious veggies and goat cheese.

This Sweet Potato Socca Crust is gluten-free and the perfect base for this Caramelized Onion and Goat Cheese Pizza!
Pin It

I got the idea for this pizza from several places. I’d been thinking about trying socca, thanks to some encouragement from Laura, for a while now. Then Nicole posted this Mexican Socca Tostada and I finally decided I needed to try socca for myself. But I didn’t make just plain socca, I added sweet potato! I got the idea from this post but I made mine a little differently by microwaving the sweet potato before adding it and not using cheese in the crust. As for the pizza itself, my mom sent me an email last week saying that she made this pizza with a few changes and it was delicious.

mom
I wrote back saying it sounded good and that I would have used sweet potatoes instead of squash and an idea was born! So this is how it went down. I made the crust first. While it was baking, I chopped up some sweet potatoes and threw them in the oven with the crust to roast. Then I made the white bean dip to use for the sauce. Finally I caramelized the onions and sauteed the peppers.

pizza1
The night I made this I just wasn’t in the mood to take pictures. I gave it a half-hearted effort but it just wasn’t working out. Want proof? This is the best picture I took of the first pizza.

This Sweet Potato Socca Crust is gluten-free and the perfect base for this Caramelized Onion and Goat Cheese Pizza!
Yeah…not good. But this was the scene at the end of dinner:

pizza3
But this was SO good that I knew I had to share it with you guys. So what did I do? I did what any good food blogger does and I re-made the pizza for lunch the next day and took better pictures:

pizza2
Much better. And just as delicious the second time around. I made the crust a little bit thicker, per the hubby’s request and added some balsamic vinegar to the onions while I was caramelizing them.

Print

Caramelized Onion & Goat Cheese Pizza with Sweet Potato Socca Crust

4
Print Recipe

5 Stars 4 Stars 3 Stars 2 Stars 1 Star

No reviews

This Caramelized Onion & Goat Cheese Pizza with Sweet Potato Socca Crust has a protein & fiber packed crust, a spicy bean dip for the “sauce” and is topped with delicious veggies and goat cheese.

  • Author: Lindsay
  • Prep Time: 30 hours
  • Cook Time: 30 hours
  • Total Time: 60 hours
  • Yield: 4 1x

Ingredients

Scale
  • 2 medium sweet potatoes
  • 1 c chickpea flour
  • 1 c water
  • 1 medium onion
  • 1 medium sweet potato
  • 1 c sliced bell peppers (any color)
  • 2 oz goat cheese (crumbled or sliced)
  • balsamic vinegar
  • 1 15oz can of white beans (rinsed)
  • 1 Tablespoons olive oil
  • 1 tsp soy sauce
  • 2 Tablespoons sriracha hot sauce
  • 1 large clove of garlic
  • 1/2 teaspoon curry powder
  • 1/4 cup of water
  • 1 Tablespoon lime juice
  • Crackers

Instructions

For the crust:

Poke the sweet potatoes all over with a knife or fork and microwave for 6 minutes.
Let cool slightly and scoop the insides into a bowl.Add the chickpea flour and water and stir well.
Pour into a well-greased 9-inch springform pan and spread evenly around the pan.

Bake at 425 degrees for 35 minutes.

For the sauce:

Follow the directions in the linked recipe.

For the toppings:

Dice the sweet potatoes, drizzle with oil and roast in the oven along with the crust.

Saute the onions and a saucepan over medium heat with a little oil until caramelized.

Add a splash of balsamic vinegar if desired.

Saute the peppers after the onions are done.

Assembly:

Remove the crust from the pan (it will probably stick a little bit).

Top with sauce.

Add the onions, peppers and sweet potatoes.

Top with goat cheese.

Return to the oven for 7-8 minutes or until heated through.

Slice and serve drizzled with balsamic vinegar.

Notes

For the sauce, I use this recipe with no sesame oil, only 1 tsp soy sauce and lemon juice instead of lime juice.

Nutrition

  • Serving Size: 2 slices

Did you make this recipe?

Tag @theleangreenbean on Instagram

This Sweet Potato Socca Crust is gluten-free and the perfect base for this Caramelized Onion and Goat Cheese Pizza!   This Sweet Potato Socca Crust is gluten-free and the perfect base for this Caramelized Onion and Goat Cheese Pizza!
Enjoy!

Today’s workout:

mar7th1 Pin It

Thanks so much for your support. It means the world to me!

–Lindsay–

Filed Under: Dinner Tagged With: Sweet Potato

Fitness Friday 12

March 2, 2012 by Lindsay 28 Comments

Hi Guys-

So, I know it’s Fitness Friday but first things first. BIG NEWS! Foodie Penpals is expanding. I’m working with Carol Anne, a blogger over in the UK, to see if there’s enough interest to start a branch of FPP across the pond! Not sure if this will be happening this month or next. Right now we’re just trying to see how many people are interested. So, if you’re reading over in the UK, or you know any bloggers over there- spread the word! Click here to read Carol Anne’s post about it and if you are a UK or European blogger, let her know if you’re interested.

The idea is that the UK branch will be an extension of our program over here. Carol Anne will do all the organizing, matching and emailing for that group, but we will all have the same rules and reveal day and everyone will link-up on my blog for one giant party! Added bonus- we will send the American/Canadian bloggers the UK spreadsheet and vice versa to give you the opportunity to check out even more new blogs if you’re interested.

Similarly to how things run now, UK bloggers will only be exchanging with other UK bloggers- or potentially European bloggers if we decide to go that route, but not American or Canadian bloggers. However, somewhere down the line we might organize a one-month international swap just for fun!

As for our Foodie Penpals over here: we’re currently up to over 330 American & Canadian bloggers for March! INCREDIBLE!! Wanna join? Email me!!

———————————-

Ok, so moving on to regularly scheduled programing 🙂

fitnessfriday

This week has been kind of a light week. I’ve been having problem some trouble with my knee so I’ve been trying really hard to take it easy. Knee problems are actually one of my biggest fears. I spent 7 years playing volleyball and played in constant fear that I was going to tear my ACL (super common vball injury). I’ve had multiple ankle sprains, a pulled hip flexor and back problems but i’d take any of those over a knee injury any day.

So, as you can see i’m not dealing with it well. I’ve been icing it and trying to avoid squats and lunges and such which seem to bother it them most. Luckily, it doesn’t seem to be getting worse. It’s a weird feeling and sometimes it will hurt and other times it feels just fine….I think the problem might actually be stemming from my hip being super tight so I’ve been stretching a lot! On Wednesday my knee was feeling pretty good so I decided to try running. I ran two miles and felt pretty good. Then I iced it and when I woke up Thursday it still felt pretty good. There’s no intense pain, it just doesn’t feel quite right. I don’t really know how to explain it.

ANYWAYS….here’s the weekly rundown of my workouts:

Feb 24th– Rest Day. My knee was pretty sore so I didn’t work out, but I probably didn’t help it by walking miles and miles around Ikea and Jungle Jims.

——————————

Feb 25th– When I was on the rowing team in college, we did this thing during practice and races called a “power ten”. It’s pretty much what it sounds like- you pull as hard as you can for 10 strokes at a critical time in a race, ie to pass another boat or to cross the finish line…I put together three Power 10 workouts, one for lower body, upper body and abs. The key is to go HARD for 10 minutes and then you’re done.

Here’s what they look like. Do one, two or all three in a row!

feb25th
Pin It

I did the leg one but took it easy and then pushed myself on the other two and was definitely sweating by the end.

—————————

Feb 26th– Rest day. Apparently even taking it easy on the leg workout wasn’t a good idea. Spent a lot of time with the ice pack.

————————–

Feb 27th– Did an AWESOME upper body push/pull workout. I’m guest posting on Maddy’s blog today so GO HERE to check out this workout. It’s worth it. I was sore for 2 days.

——————————–

Feb 28th– Rest day. My arms definitely needed a rest and I forced myself to take a second leg rest day.

Feb 29th– After two solid days of rest, my knee was feeling pretty good, even after taking the dogs on a 2.5 mile walk…so I decided to tackle a treadmill run and see how it went. I put together a fun little 2-4-6-8 run named because the speed increases by .2 mph, then .4mph and so on. Here’s what it looked like:

feb29th

My knee felt great while running. A few twinges here and there but fine other than that! I followed this sequence until I hit 2 miles. I felt like I could have gone farther but wanted to play it safe. Keep in mind you can adjust the treadmill speeds to fit your needs. I started by decided what I wanted my fastest speed to be and then worked backwards from there!

———————————-

March 1st- Put together an ab workout because it’d been away. It’s called 3×4 abs. The concept is 4 different kinds of ab workouts- med ball, plank, stability ball and bodyweight with 3 exercises for each. Here’s what it looked like:

mar1st

Feel the burn friends 🙂

So there you have it! Tell me about your week of workouts! Any recommendations for stretches to do to help tight hips?

–Lindsay–

Filed Under: Workouts

Have a Salad

March 1, 2012 by Lindsay 67 Comments

Hi Friends!

Confession time. Prior to this week, I’m not totally certain when the last time I had a salad was.

I know, I know. Bad healthy living blogger right? Well don’t judge me too harshly. I’ve still been getting my veggies:

salad1

veg2veg3

veg4

See? But as far as salads go…not so much. Until this week. Over the weekend, the hubby and I went to our favorite restaurant and I noticed this on the menu:

22

I really wanted that salad, but I wasn’t in the mood to pay $10 for it, especially when I had all the ingredients at home!

So I’ll give you one guess what we had for dinner the next night?!

DSC 1534

Baby Spinach
Roasted Sweet Potatoes
Sliced Pears
Diced Red Peppers
Sliced Strawberries
Pecans
Fresh Goat Cheese

And I guarantee this didn’t cost $10.

So don’t be like me and go 2 months without…

Have a salad 🙂

–Lindsay–

PS: Today’s Workout: All Abs. 4 kinds of ab workouts, 3 exercises of each kind

mar1st1

Pin It

Filed Under: Uncategorized

Foodie Penpals Reveal with Go the Xtra Mile

February 28, 2012 by Lindsay 38 Comments

It’s that time again! Time to recap all of the goodies I got in this month’s Foodie Penpals box!!!


This month I received my box from Brittany @ Go The Xtra Mile! She is totally adorable and just ran her first half marathon this past weekend!

IMG 3060 thumb

She hooked me up with a delicious box of treats!

IMG 1998

The spread (cat not included):

IMG 2001

Let me just say that I tried pretty much everything
within 5 min of opening the box!

I send Justin’s nut butter a lot but had never actually tried it! It was fantastic. And that jam is my new favorite. Strawberry rhubarb? Yes please.

IMG 2003

I tried this with my lunch and absolutely fell in love. Not something I would have bought on my own, but the flavor was SO GOOD! I love green tea.

IMG 2005

I also munched on some of these veggie chips. They were better than I expected and the hubby actually ended up eating most of the bag. He’s already requested that we buy more.

IMG 2006

IMG 2007

And finally, I requested that she send me some homemade cookies and she did not disappoint!!! These were SO GOOD!

IMG 20041

I love her 🙂

———————————————-

And now it’s time for some details about Foodie Penpals.  In case you’re a new reader, here’s a reminder of what the program is all about:

-On the 5th of every month, you will receive your penpal pairing via email. It will be your responsibility to contact your penpal and get their mailing address and any other information you might need like allergies or dietary restrictions.
-You will have until the 15th of the month to put your box of goodies in the mail. On the last day of the month, you will post about the goodies you received from your penpal! 
-The boxes are to be filled with fun foodie things, local food items or even homemade treats! The spending limit is $15. The box must also include something written. This can be anything from a note explaining what’s in the box, to a fun recipe…use your imagination!
-You are responsible for figuring out the best way to ship your items depending on their size and how fragile they are. (Don’t forget about flat rate boxes!)
–Foodie Penpals is open to blog readers as well as bloggers. If you’re a reader and you get paired with a blogger, you are to write a short guest post for your penpal to post on their blog about what you received. If two readers are paired together, neither needs to worry about writing a post for that month.
-Foodie Penplas is open to US & Canadian residents.  Please note, Canadian Residents will be paired with other Canadians only. We’ve determined things might get too slow and backed up if we’re trying to send foods through customs across the border from US to Canada and vice versa. So, I’m going to keep two separate lists and match US w/ US and Canada w/ Canada!

If you’re interested in participating for March, please send  an email to me at [email protected] and include the following information:
-Your full name
-Your email address
-Your blog name/address
-Your twitter handle (if applicable)
–WHETHER YOU ARE A US RESIDENT OR CANADIAN RESIDENT. – this is SUPER important so you get on the right list!

You must submit your information by March 4th as pairings will be emailed on March 5th!

***PLEASE NOTE: if you send an email, you WILL GET A RESPONSE within 48 hours. If you don”t….please re-send your email or contact me via Twitter (@LeanGrnBeanBlog). Last month we had a few emails get lost as spam so we’re trying to avoid that!

——————————————–

Enjoy!
–Lindsay–

Filed Under: Uncategorized

Caramel Apple Bars

February 27, 2012 by Lindsay 54 Comments

Good Morning!

It’s Monday…. Don’t you hate how an especially great weekend makes coming back to reality just that much harder? Well, have no fear. I have something for you that might ease the pain.

Caramel.Apple.Bars.

Bursting with fall flavors, these Caramel Apple Bars are a lightened up alternative to a real caramel apple.

I know, I know, I told you I don’t like caramel. But I think I may be changing my mind. I started thinking about these as soon as I got this in the mail (free sample- all thoughts and opinions are my own):

IMG 18981

I knew the apple cinnamon would be perfect for baking. Confession- I made these 3 times over the weekend trying to get them just right.

Bursting with fall flavors, these Caramel Apple Bars are a lightened up alternative to a real caramel apple.

The first time, the taste was spot on but they were a little crumbly. The second time they were more bar like, but not sweet enough. Now they’re delicious.

Bursting with fall flavors, these Caramel Apple Bars are a lightened up alternative to a real caramel apple.

Print

Caramel Apple Bars

DSC 1555
Print Recipe

5 Stars 4 Stars 3 Stars 2 Stars 1 Star

No reviews

  • Author: Lindsay L
  • Prep Time: 10 minutes
  • Cook Time: 25 minutes
  • Total Time: 35 minutes
  • Category: Dessert

Ingredients

Scale
  • ¼ c nut butter
  • 3 Tbsp butter
  • 1– 6oz container of Apple Cinnamon greek yogurt, or vanilla yogurt
  • ¼ c brown rice syrup, or honey
  • 1 Tbsp applesauce
  • 1 egg
  • ½ tsp vanilla
  • 1 c oats
  • scant 1/2 c white whole wheat flour
  • ¼ tsp baking soda
  • 1 1/4 cup chopped apples
  • 1 tsp cinnamon
  • 1/2 c chopped pecans
  • 20 caramels + splash of milk

Instructions

  1. 8 x 8 Pan
  2. In a medium sized bowl melt the butter and nut butter and mix well.
  3. Add the greek yogurt, egg, brown rice syrup, applesauce and vanilla.
  4. Stir in the flour, oats, baking soda and cinnamon.
  5. Add the apples and mix well.
  6. Line an 8×8 pan with foil and grease well.
  7. Spoon the mixture into the pan and spread evenly.
  8. Melt the caramels in the microwave and pour on top of the apple mixture.
  9. Top with chopped pecans.
  10. Bake for 20-25 minutes at 375 degrees F.
  11. Let cool completely before cutting.

Notes

I highly recommend nuking these in the microwave before eating them!

Some other options for you:

If you really like caramel, you could melt some extra caramels and mix them into the batter.
If you’re a chocolate fan you could throw some chocolate chips into the mix or add them on top.

I used almond butter but peanut butter would work well too.

You could also top them with peanuts instead of pecans.

Hubby suggests adding a layer of apple slices to the bottom to ensure you get apples in every bite! Or even a layer of apple and caramel to the middle. Isn’t he a genius?

And finally, I didn’t have any in the freezer but I bet these would be amazing topped with some vanilla ice cream!

Did you make this recipe?

Tag @theleangreenbean on Instagram

Bursting with fall flavors, these Caramel Apple Bars are a lightened up alternative to a real caramel apple.

Pin It
  So there you have it! And as far as dessert goes, these are pretty healthy!   Today’s Workout:   pushpull1 Pin It

So dig in! Happy Monday friends 🙂
–Lindsay–

Filed Under: Dessert Tagged With: Apple

Just A Little Roadtrip

February 26, 2012 by Lindsay 25 Comments

On Friday the hubby & I took a little roadtrip. He took the day off work and I skipped class and after taking the dogs to get their nails trimmed, we hit the road! We’d been talking about going to Ikea for months and we finally decided to make it happen! We didn’t have any huge plans to buy anything. In hindsight-this was a mistake. If you’ve never been, Ikea is HUGE and we basically wandered around like lost puppies but it was fun! We picked up a few things but for the most part just went for the experience.

ikea5

ikea4

ikea3

After Ikea, we headed down the road to Jungle Jim’s. It’s pretty much a foodie paradise 🙂

ikea6

ikea7

ikea8

There was mind-blowing amounts of some stuff, like beer & wine, honey, Bob’s Red Mill, and nuts!

ikea9

Hubby really wanted a keg of draft beer! They’re also known for their restrooms. They’ve disguised the hallway to the restroom as the entrance to a port-a-potty!

ikea10

ikea11

We loaded up, mostly on beer and wine, plus a few foodie treats, and headed home.

ikea12

It was a good day!

What was the last road trip you took?

A workout for you: Do 1, 2 or all 3 for a total body workout. Go hard! it’s only 10 min!

feb25th
Pin It

–Lindsay–

Filed Under: Uncategorized

Fitness Friday 11

February 24, 2012 by Lindsay 20 Comments

Hi Friends!

Hard to believe it’s Friday again already! This week I don’t have a ton of workouts developed by ME to share with you, but I still did some good ones!

fitnessfriday3

But first, I have a little video for you. After I posted the paper plate workout last week, and explained that I ran out of time to do the video, several of you asked if I could still make the video to help you visualize the moves. Well, my friends, ask and you shall receive.

Here’s the workout again:

feb11th3

And here’s the video (ps…pretty proud of this video bc i figured out how to edit it and add words!):


And now for this week’s workouts:

Feb 17th– ran 2 miles outside in 17:20. It seems that 8:40 is a comfortable pace for me to run at for a few miles. I’ll take it! Then I took the dogs on a 2 mile walk.

Feb 18th– I did a random workout of new to me moves. A compilation of moves I gathered from several different workouts, like this one, this one, this one and this one– among others. I didn’t make a workout to share with you guys because to be honest I wasn’t crazy about what I did. I did a minute of each of the following exercises: Medball slams, side burpees, spiderman pushups, jumping front kicks, skull crushers in bridge position, wide stance burpees, single arm clean and press, decline plank steps, reverse flys, wall climbers.

There were some that I really liked, like the skull crushers in bridge position, side burpees and decline plank steps….but there were some I hated like spiderman pushups and wide stance burpees. The lesson I learned was to incorporate one or two moves that are new to me into a workout instead of trying to do a workout of all new-to-me moves!

Feb 19th– rest day. Not feeling well.

Feb 20th– did one round of Tina’s Life’s a Bench workout. Instead of following her reps, I did it for time, 50sec/10sec rest, which took 16 minutes and then and ran 1.5 miles in 12 minutes. Loved the bench workout!

Feb21st– did this tabata workout from Lindsay with no rest between tabatas so it took 20 minutes. This will definitely get your heartrate up! The only subs I made were regular pushups instead of spidermans and line jumps instead of tuck jumps.

Also did a quick ab workout:

feb21

Yes you will be feeling the burn by the end!

Feb 22nd– It was still around 50 degrees after work so the hubby and I headed back to the stairs at the dam to get a workout in. Hubby headed off to do his own thing, while I tackled this workout:

stairs1
Pin It

The stairs I used had 98 steps, so I ran them five times, plus 10 additional steps to get my 500. To figure out how many times you need to run your stairs, just divide 500 by the number of steps you have! Do this workout as fast as you can…and then STRETCH!! especially our calves! Use the steps to do your split squats, pushups, dips, squat jumps and plank!

Feb 23rd- Did this workout from Jess @ Blonde Ponytail and it kicked my butt! I made the following changes: I used a workout bench instead of a step platform in set #2. In set #3, I replaced the wood chops with standing russian twists with a med ball and med ball jump-overs. I also used my med ball to do med ball slams instead of sand bag throw-downs.

So there you go! How was your week of workouts? Did you bookmark any good ones?

Happy Weekend!
–Lindsay–

Filed Under: Workouts

Five Reasons to Volunteer

February 23, 2012 by Lindsay 31 Comments

Hi Friends!

Today I wanted to have a little chat with you about something I feel is super important- volunteering.

When was the last time you volunteered? When was the last time you took some time out of your day to help someone else? To really stop and think about just how lucky you are to have everything that you do?

Thanks to my parents, I started volunteering at a very young age. Every Christmas, my mom would bundle my sister and I up to go ring the bell for The Salvation Army. And every year we would adopt a family to buy Christmas presents for through the red bag program. On the day they were due, we would go help sort them and load them into semi-trucks to be delivered. I’ll never forget the first time we showed up to help sort and I saw 6 semi-trucks lined up in the street. I remember thinking that there couldn’t possibly be that many people that needed help over the holidays.

As I got older, I continued to volunteer at festivals, events and soup kitchens. In high school, I did all sorts of volunteer work for National Honor Society. I won’t say I enjoyed every single minute. Most high schoolers don’t enjoy getting up early on Saturday morning to go pick up trash…but am I glad I did it? Absolutely. Am I glad I formed a group of friends who knew the importance of volunteering and did it with me? For sure.

In college I was part of the Big Brothers, Big Sisters program. After we graduated from college, the hubby and I spent several years volunteering weekly at a local animal shelter.

When I went back to school, I started volunteering at places that were more specifically geared towards my interest in food and nutrition. I volunteered at a WIC clinic and I spent time at LifeCare Alliance working with their Senior Farmer’s Market and Meals on Wheels programs. I volunteer with Local Matters and will soon begin teaching Cooking Matters classes. I also volunteer weekly at a choice food pantry.

food

Although it may seem like it so far, this post is not about me touting what an awesome person I am, or searching for compliments. I just wanted to show you that it’s an important part of my life, and that it can be done, even if you have a busy schedule like I do.  The purpose of this post is to encourage each and every one of you to spend some time volunteering this year.

And here’s why:

Five Reasons to Volunteer

  1. It shows you care about others.
    When you’re applying for college or for a job, people are going to look to see whether you give back to your community. It shows that you understand there are people out there that need your help, and more importantly than just understanding, it shows that you’re willing to get out there and do something about it- to try to make a difference in someone’s life.
  2. There’s a huge need.
    There are SO MANY amazing organizations out there that are working tirelessly to help those in need. But they can’t do it without the help of volunteers. The food pantry I volunteer at is open 3 days a week for 8 hours each day. It takes at least 20 volunteers each day in order for them to be able to stay open for the full amount of time, have things run smoothly and even come close to meeting the demand of the community. That’s 60 volunteers a week that are needed for just one of the many volunteer opportunities in Columbus.
  3. You can do what you love while helping others.
    There are literally thousands of different ways you can volunteer. If you’re not lucky enough to work at a job that embodies your true passions, volunteering is the perfect chance to do what you love for the benefit of others! If you like kids, become a Big Brother/Big Sister or a Court Appointed Service Advocate. If you like the elderly, volunteer to help senior citizens do their grocery shopping or go spend some time at a retirement home. If you like to build things, help build a house with Habitat for Humanity…. If you’re not a people person, find an agency that needs help with data entry or stuffing envelopes. And remember that sometimes the tasks that seem the most mundane are the most important. I’ve spent many hours filing papers or pulling charts, not because I especially love filing, but because I love the organizations and the work that they’re doing and I know that sometimes, those areas are the ones where they need the most help, in order for them to keep helping people. Think about where you passions lie, and then find an organization that needs your time and assistance.
  4. Someone will always be grateful for your time.
    There’s no amount of time too small when it comes to volunteering. If you only have 2 hours a month, they’ll take it. If you can only commit to one event a year? They’ll say “yes please!” Never, ever think that just because you can’t make a weekly, or even a monthly, commitment that your time isn’t valuable or that volunteering won’t be worth it. JUST GO DO IT!
  5. If you let it, it can change your life.
    Go into each experience with a positive attitude, an open mind and an open heart. Sometimes you might feel overwhelmed by your busy schedule or question whether you’re really making a difference, but when you get a hug from someone at the food pantry and they tell you they wouldn’t have had anything to feed their kids that night without your help, or you get smothered in puppy kisses from a dog who is so grateful for a walk because he spends 23 hours a day in a cage at the shelter, or you wake up Christmas morning knowing that somewhere out there, a couple of kids are have present under the tree because of you,  IT’S ALL WORTH IT. Volunteering will humble you. It will teach you compassion. It will make you so, so grateful for everything you have in your life.  But beyond that, it’s a way to give back. It’s a way to help others and pay it forward…because you just never know when you might need a little help of your own.
—————————————
I wanted to do a little local spotlight here and give you guys a peek at one of my favorite places to volunteer here in Columbus. I’ve always been drawn to volunteering at food pantries, and they’ve come a long way since I was little. Now, lots of pantries are Choice Food Pantries, which basically means that the clients get to choose what they want, within certain limits, instead of just being handed a bag of food. 

The Mid-Ohio Food Bank, which does incredible work here in Central Ohio, recently opened their very own Choice Food Pantry and it is AMAZING. It’s by far the nicest one I’ve ever volunteered at and it’s paving the way for providing healthy, fresh and even local food to the community.

The first time I volunteered at this pantry I was literally blown away by the number of healthy options this pantry has for its clients. I am so happy to see food pantries evolving to provide people with healthy options instead of just canned peas and corn- the traditional food pantry stereotype.

I went a little picture crazy but I really wanted to show you guys some of the things I was impressed by!

I loved all the healthy cereals I saw. The heart-healthy kinds definitely outnumbered the sugary kinds. There were whole wheat pasta options, canned fruit that was unsweetened or in lite syrup and tons of bread- oatnut bread, whole wheat bread, high fiber bread….

foodbank

One of my favorite parts about the pantry is that they have a “take what you can use” policy for fresh fruits and vegetables and bread. Clients take basically take as many fresh fruits and veggies as they want, as long as they think they can use them. Also, clients can only make a full trip to the pantry 2x per month, but they can come back as many times as they want for fresh produce and bread! How cool is that?! Each week they have different produce but so far i’ve seen things like oranges, apples, pears, kiwis, bananas, spinach, lettuce, cabbage, collard greens, sweet potatoes, tomatoes, potatoes, onions…

foodbank1

The refrigerated cases also impressed me! I saw Greek yogurt, which I never would have expected, locally produced milk and even hummus! I love being able to tell clients how awesome greek yogurt and hummus are and then being able to give them some to try for themselves!

foodbank2

They have a few other cool things too, including recipe suggestions placed around the pantry that clients can take home, My Plate signs to help people learn what food groups they are choosing and they even have reusable shopping bags that were donated!

foodbank3

I look forward to going to volunteer at the pantry every week. Seeing how grateful the clients are at the amount of food we’re able to provide for them is so awesome!

So my challenge to you is to spend a little time this weekend looking at volunteer opportunities in your community. Grab your family, grab some friends, even some co-workers and head out to do a little good for others! Then come back and tell me all about it!

Tell me…do you volunteer? If so, where’s your favorite place to volunteer? If not, have I inspired you??

–Lindsay–

Filed Under: Uncategorized

Healthy Blueberry Scones

February 21, 2012 by Lindsay 62 Comments

Hi Friends!

Just popping in for a minute to share a recipe that’s been a long time coming. I actually can’t believe I haven’t shared it with you yet! It’s been my favorite scone recipe for about 10 years now.

blueberry scones

And I know I’ve promised to post it several times recently, so here it is! I like it because it’s fairly healthy. There isn’t a ton of butter or sugar, and greek yogurt adds some protein.

Healthy Blueberry Scones

by Lindsay L

Prep Time: 10 min

Cook Time: 14 min

6017937


Ingredients (12 scones)

  • 2 c white whole wheat flour (or AP, or 1/2 white-1/2 wheat)
  • 2 tsp baking powder
  • 1/2 tsp baking soda
  • 1/4 c sugar
  • 6 Tbsp chilled butter, cut into pieces
  • 1 c bluberries
  • 1 c vanilla Greek yogurt
  • 1 egg

Instructions

Preheat the oven to 400 degrees F.

In a bowl, combine the flour, sugar, baking powder and baking soda.

Add the butter and use a pastry blender, or two knives, to cut in until it resembles small peas.

Stir in the berries.

In a small bowl, mix together the egg and yogurt.

Stir the yogurt mixture into the dry ingredients and stir until just combined.

Dump the dough onto a work surface and “knead” 3-4 times.

Pat into a circle about 1/2 an inch thick.

Cut into 12 wedges and transfer to a baking sheet.

Sprinkle the tops with a pinch of sugar and bake 12-14 minutes.

Powered by Recipage

Notes:
-If you use all white whole wheat flour, you might need to add an extra dollop of yogurt or a splash of milk because it absorbs more liquid than AP flour. I’ve found 1/2 and 1/2 works best.
-These are very moist. Eat them within a few days or they may get moldy. This is never a problem in my house 🙂

Annnnnd voila!

scone13

One thing to note about these scones is the dough. It will be SUPER crumbly when you dump it out on to the workspace. And it will be sticky! That’s ok. Just do your best to “knead” it a few times and then after you press it into a circle and cut it, use your fingers to kind of smoosh the crumbly edges together on each wedge. And don’t worry if there’s a little extra flour in your bowl that doesn’t get used!

scone15

Pin It

PS…after having my Nikon for 4 years, I finally learned how to change the settings in manual mode! SO, bear with me while I practice and learn 🙂 PPS. Don’t forget to check out this week’s Tuesday Trainer. This week’s theme is Animal-Inspired moves and I did the crocodile walk!

lindsayslist.co-tuesday_trainer
Enjoy! –Lindsay– PS. Here’s the ab workout I did today: feb211 Pin It

Filed Under: Baking, Breakfast

  • « Go to Previous Page
  • Page 1
  • Interim pages omitted …
  • Page 56
  • Page 57
  • Page 58
  • Page 59
  • Page 60
  • Interim pages omitted …
  • Page 65
  • Go to Next Page »

Primary Sidebar

Lindsay Livingston The Lean Green Bean Healthy Living Tips and Tricks

I'm a Registered Dietitian and mom of three from Columbus, Ohio. I use this blog to share simple, healthy recipes, nutrition tips, and an honest glimpse of motherhood!

Learn More →

Questions? Comments? Email me: [email protected]

The Lean Green Bean Facebook The Lean Green Bean Instagram The Lean Green Bean Pinterest The Lean Green Bean Twitter The Lean Green Bean Feed
footer-logo
The Lean Green Bean Facebook The Lean Green Bean Instagram The Lean Green Bean Pinterest The Lean Green Bean Twitter The Lean Green Bean Feed
Recipes

Breakfast
Dinner
Snack
Slow Cooker

Kids

Cooking With Kids
Favorite Gifts
Toddler Meals
Indoor Activities

Resources

Easy Packed Lunches for Kids
Dinner Spark
Snack Spark
Ultimate Guide to Food Prep

About

Meet Lindsay
Become an RD
Work with Me

The Lean Green Bean is a participant in the Amazon Services LLC Associates Program, an affiliate advertising program designed to provide a means for sites to earn advertising fees by advertising and linking to amazon.com.
Read the full privacy and disclosure policy here.

Copyright © 2022 · The Lean Green Bean

table talk series

Learn how food affects your body.

Get my free Table Talk email series where I share bite-sized nutrition information about carbs, protein, and fat, plus bonus information about snacks and sugar!

[email protected]