• Skip to main content
  • Skip to primary sidebar

Learn how food affects your body. Get Free Nutrition Info Today

the-lean-green-bean-logo
  • Home
  • Recipes
  • Kids
  • Resources
    • Ebooks
    • Food Prep
    • Videos
    • Snack Round-Ups
    • Gift Guides
  • About
    • Become An RD
    • Work With Me
  • Search
the-lean-green-bean-logo
  • Home
  • Recipes
  • Kids
  • Resources
    • Ebooks
    • Food Prep
    • Videos
    • Snack Round-Ups
    • Gift Guides
  • About
    • Become An RD
    • Work With Me
  • Search

blog

Crockpot Roasted Vegetable Sauce

March 26, 2013 by Lindsay 56 Comments

Hi Friends!

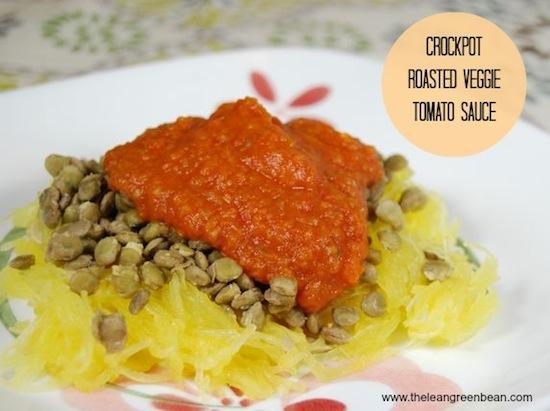
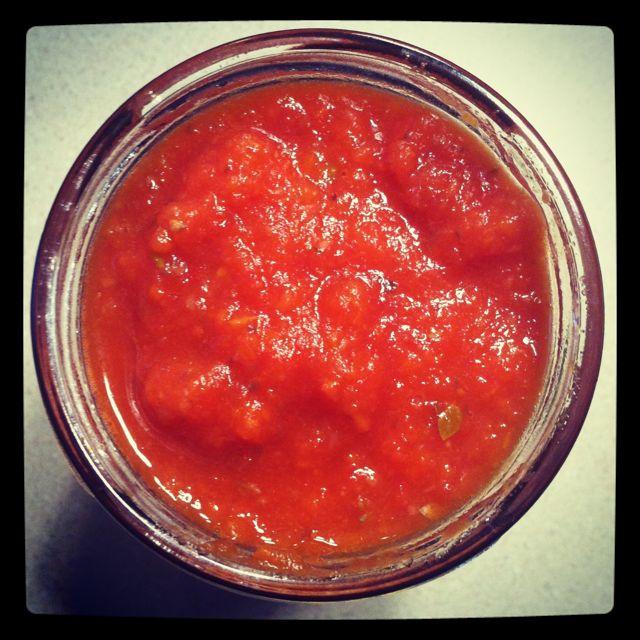
Today I have a fun sauce recipe to share with you. Crockpot Roasted Vegetable Tomato Sauce.

An easy way to add some extra vegetables to your meal, this Crockpot Roasted Veggie Tomato Sauce is super simple and easy to customize based on what you have on hand.

Let’s talk about spaghetti sauce for a minute. I love it…I don’t love how much salt is usually in it. A few years ago I started buying no-salt-added crushed tomatoes and adding my own garlic and herbs to make spaghetti sauce. It’s super easy and much healthier!

Another one of my favorite tricks for making sauce healthier is to add extra veggies. Usually I just chop them up, saute them and mix them into my sauce with some lentils and then serve over noodles. This weekend, however, I was in the mood for a less chunky sauce. So I turned to my crockpot.

An easy way to add some extra vegetables to your meal, this Crockpot Roasted Veggie Tomato Sauce is super simple and easy to customize based on what you have on hand.

Let’s back up a minute. Did you know you can roast veggies in your crockpot? It’s so easy. Just chop up some veggies of your choice, toss lightly with olive oil and spices of your choice and roast in the crockpot on high for 3-4 hours or on low for longer. The veggies will get a little softer than when you roast them in the oven and not as “blackened”, but the flavor is still great. I still have a slight preference for oven roasted veggies…but using the crockpot is a fun way to change it up.

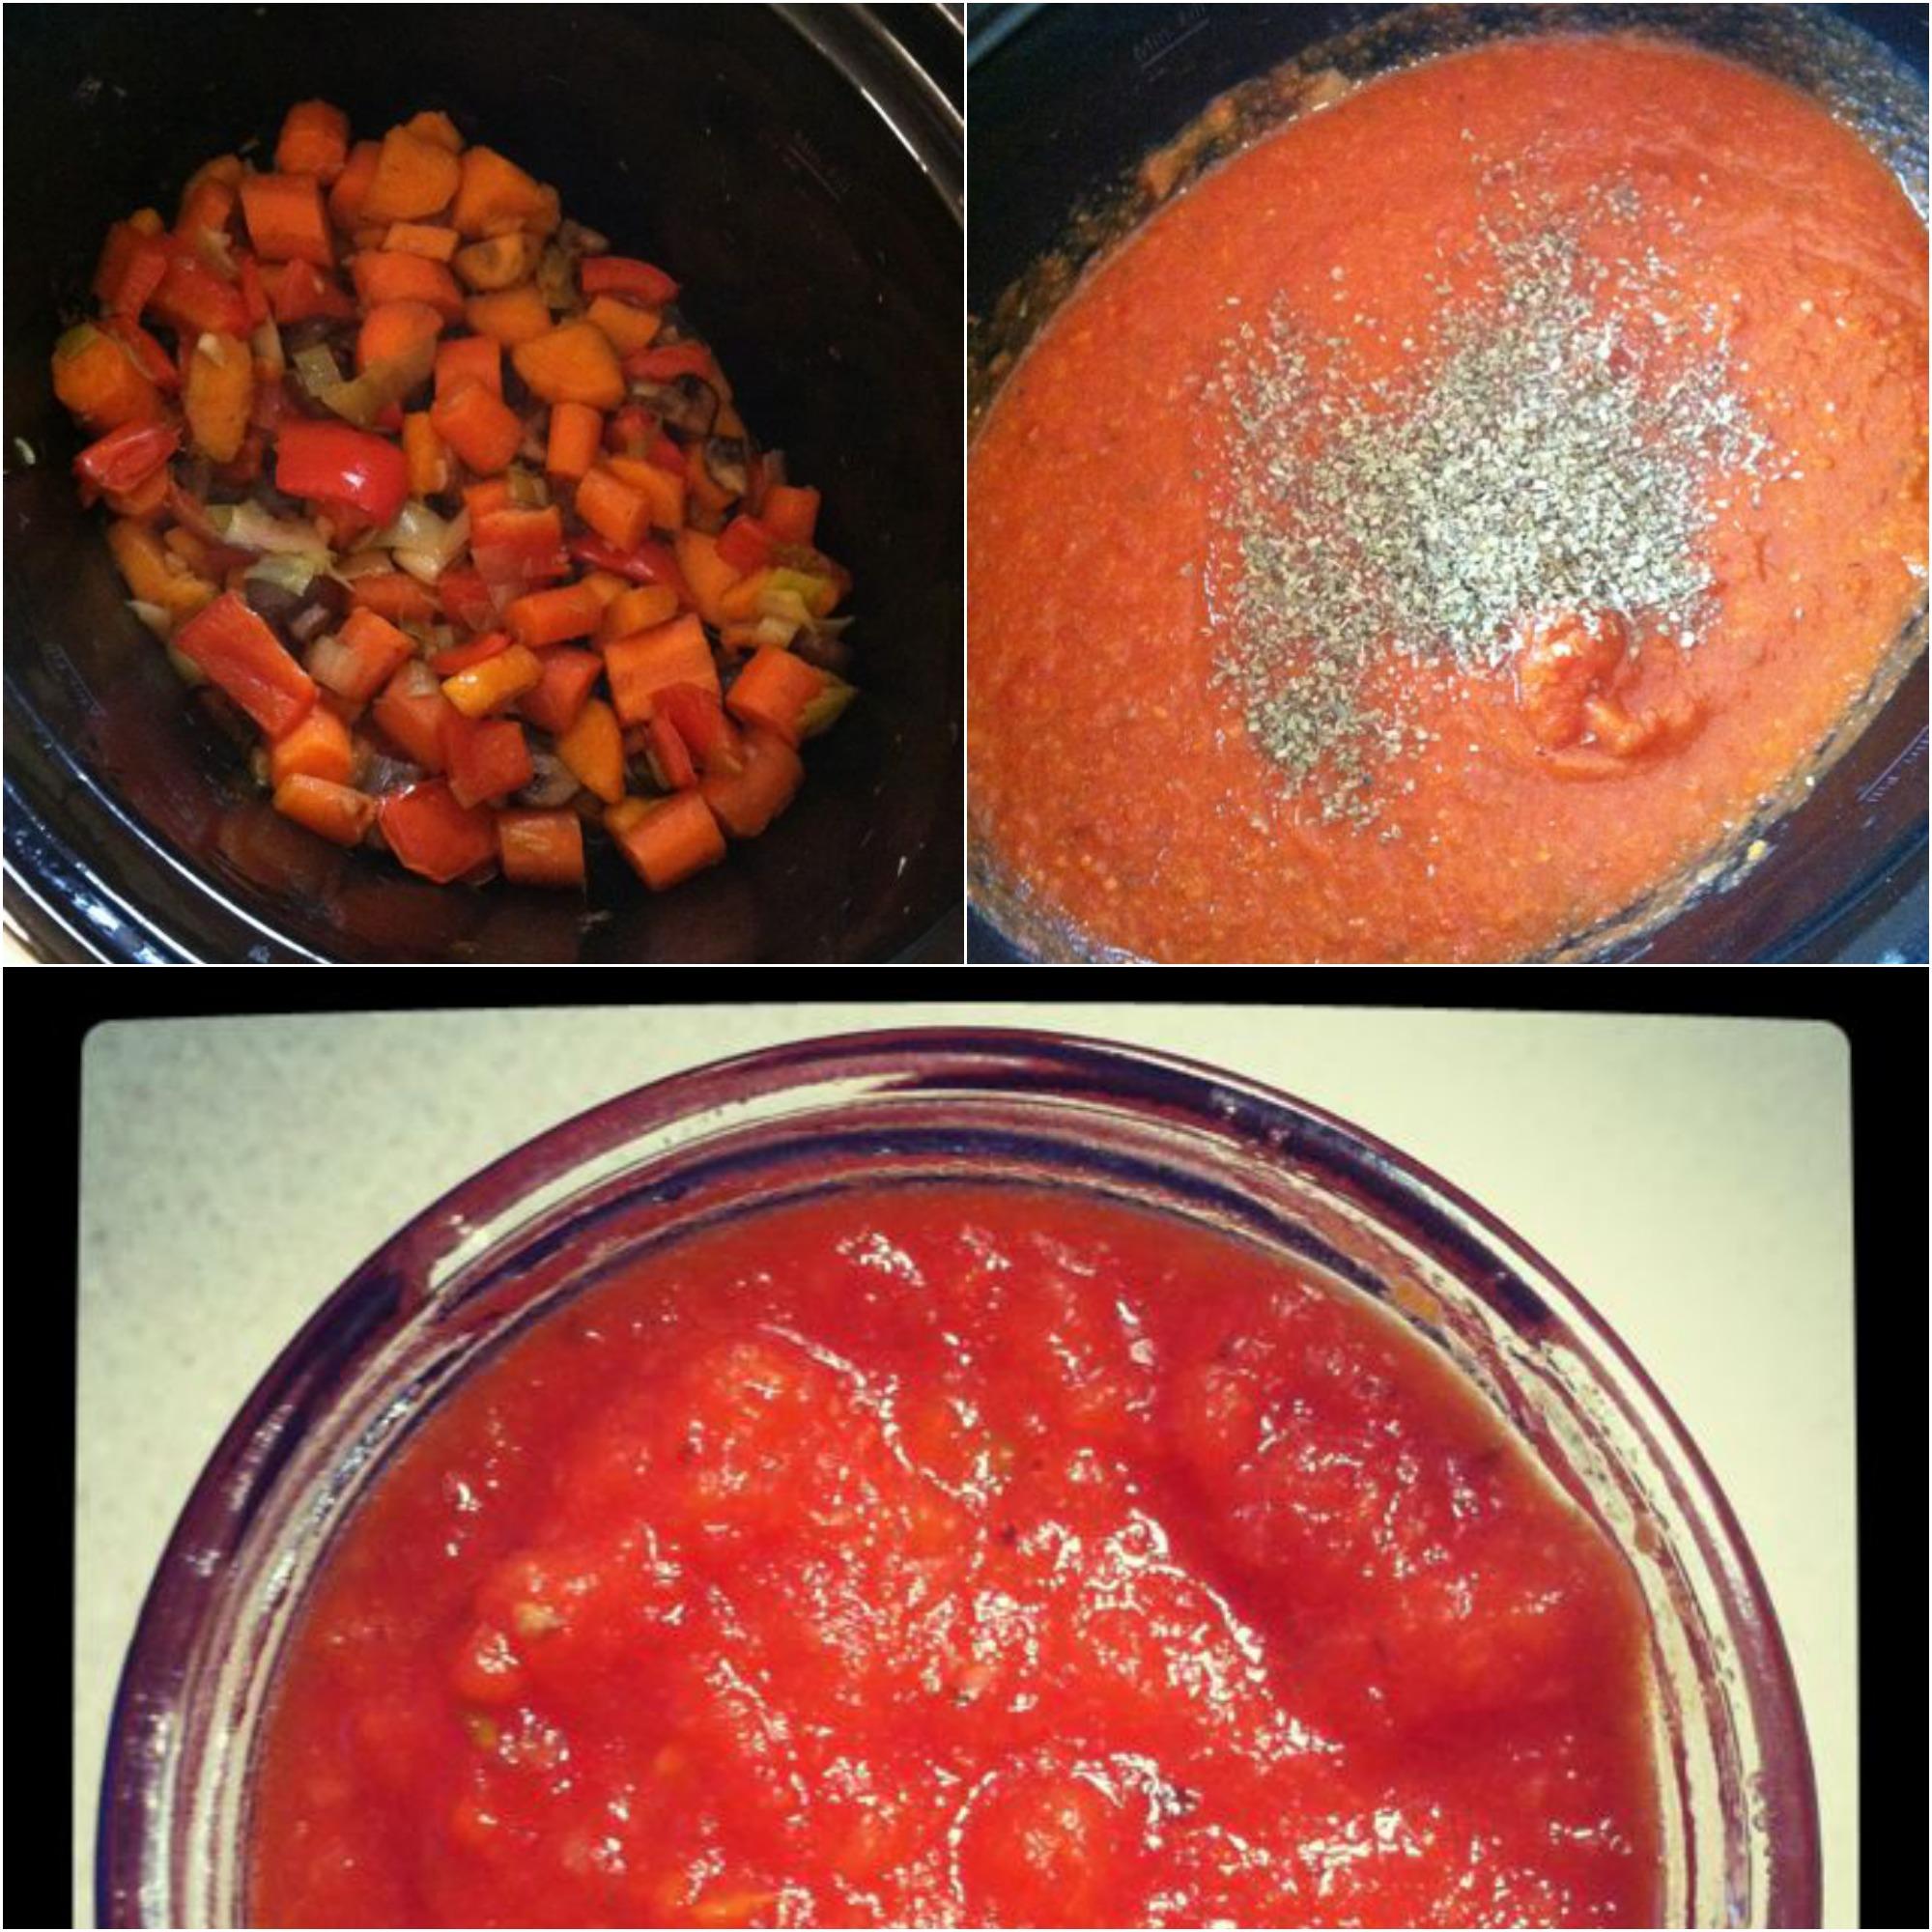
Ok, moving on. I decided to use some crockpot roasted veggies to kick my spaghetti sauce up a notch. Here’s what I did:

  • Chopped up some veggies I had on hand and some garlic.
  • Tossed in olive oil and roasted in the crockpot on high for 3 hours, stirring every hour.
  • Added 2- 28oz can of whole  tomatoes, one with liquid and one drained (you could also use 4- 14.5 oz cans of no salt added diced tomatoes, or even crushed)
  • Pureed the mixture using my immersion blender.
  • Added some spices and fresh herbs.
  • Let simmer for a couple more hours.

Voila! Roasted Veggie Sauce. The best part is you can freeze this sauce….so use some now and freeze the rest. When you need more, just pull it out and defrost it! There isn’t an exact recipe for this sauce but here’s the general idea:

Print

Crockpot Roasted Vegetable Sauce

crockpot roasted vegetable tomato sauce1
Print Recipe

5 Stars 4 Stars 3 Stars 2 Stars 1 Star

No reviews

This sauce is a cinch to make and a great way to sneak more veggies into your diet. Enjoy some today and freeze the rest for tomorrow!

  • Author: Author: Lindsay L
  • Prep Time: 5 minutes
  • Cook Time: 5 hours
  • Total Time: 5 hours 5 minutes
  • Yield: 6-8 1x

Ingredients

Scale
  • 2–3 cups chopped vegetables
  • 2 28-oz cans whole tomatoes
  • 2–3 tsp oregano
  • 2 Tbsp fresh basil
  • 3–4 cloves garlic, minced

Instructions

  1. Peel and roughly chop the vegetables. Use whatever you have on hand. I used a sweet potato, a red pepper, 2 leeks, a handful of mushrooms and 3-4 carrots.
  2. Toss lightly in olive oil and add to the crockpot with the garlic.
  3. Roast on high for 3-4 hours or until soft, stirring every hour.
  4. Add one can of tomatoes with liquid, the drain the second can and add it without the liquid.
  5. Use an immersion blender or transfer to a blender and puree until smooth.
  6. Add spices (adjust to your tastebuds- add parsley or other italian seasonings if desired).
  7. Let simmer 1-2 hours more on warm.
  8. Store in an airtight container in the fridge or freeze.

Did you make this recipe?

Tag @theleangreenbean on Instagram


You won’t outright taste the veggies, but it’s awesome knowing that they’re in there…and I think it adds a nice flavor to the sauce if you’re looking for it. Try to find no-salt-added tomatoes if you can! If you can’t, look at several brands to find the one with the lowest amount, and rinse off the tomatoes from the can you drain the liquid from!

crockpot roasted vegetable sauce

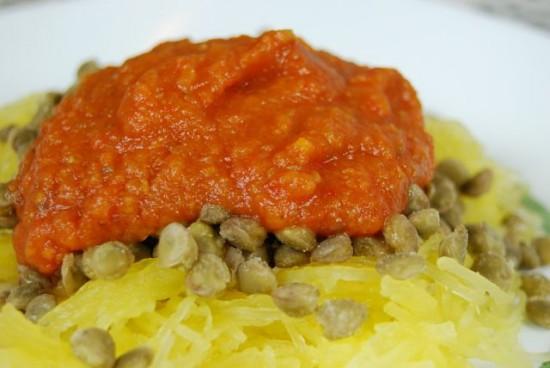
Serve this sauce over noodles or spaghetti sauce and add your favorite protein. I usually add lentils or white beans…but you could also add chicken or ground turkey.  And if you’re feeling extra “saucy”, add a dollop of pesto for some extra flavor!

An easy way to add some extra vegetables to your meal, this Crockpot Roasted Veggie Tomato Sauce is super simple and easy to customize based on what you have on hand.

Let’s chat: Do you add extra veggies to your sauce?

Enjoy!
–Lindsay–


Filed Under: Dinner, Food Prep, Side Dish, Slow Cooker

Dietetic Internship: Weeks 21-24

March 23, 2013 by Lindsay 15 Comments

Hi Friends!

Just popping in with a quick update to fill you in on the long-term care rotation of my internship! As usual, I’m behind on my recaps. In fact, I only have ONE MORE WEEK of my internship left. Which means I’ve already completed 3 weeks of my very last rotation.

So, I thought I’d spend a few minutes filling you guys in on what I did in February. It was a lot of the same stuff day after day.

IMG_1839

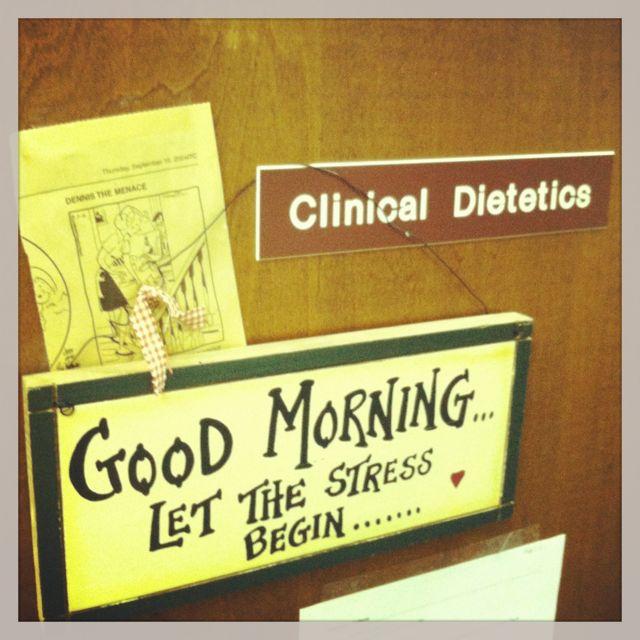
{sign on my preceptor’s door}

The place that I did my longterm care rotation was actually a  Transitional Care and Rehab facility. It’s both a long-term care facility, with a dementia unit, and a rehabilitation facility. Long-term care is not my favorite thing, but luckily for me, my preceptor primarily covered the rehab units…which I liked a lot better. There was a Diet Tech that covered most of the LTC patients, and then since my preceptor was an RD, she handled some of the more complicated cases in that involved tube feeds, serious pressure ulcers, etc.

I liked the rehab units because there was such a wide range of patients. We saw older patients recovering from fractures and surgeries, patients with cirrhosis, patients recovering from motor vehicle accidents and much more.

sunrise
{I had a 45 min drive each way so I saw a lot of pretty sunrises. Bonus!}

Here are some of the things I did while I was there:

  • Attended weight and wound team meetings with the RD and the nurse unit managers. Patients that triggered for weight loss/gain and any patients with wounds or pressure ulcers were discussed.
  • Provided diabetes education to newly diagnosed diabetic patients. I taught them how to count carbs, how to read labels, etc.
  • Conducted admissions assessments with patients to determine food preferences. These assessments also cover any recent weight loss/gain, chewing/swallowing problems, food allergies, usual body weight, labs and any other nutritional concerns the patient has.
  • Attended care conferences with patients and families to discuss comments, concerns and questions about their care.
  • Reviewed and assessed weight change and meal intake reports.
  • Used the nutrition care process to write ADIME notes. These notes include an assessment, a nutrition diagnosis that has to be written using certain standardized languages, what your interventions are going to be to correct their nutritional problems and how you will monitor/evaluate changes in their condition.
  • Used the Point Click Care computer system to chart electronically and navigate patient records.
  • Set goals for weight loss, improved labs, wound healing, etc and recommended supplements (Ensure, Healthy shot, fortified shakes) when necessary for extra calories and protein.
  • Referred patients for speech therapy consults for swallowing issues.
  • Recommended diet changes when necessary.
  • Visited patients to discuss weight changes.
  • Calculated tube feeds.
  • Completed assessments (monthly, quarterly and annual)

Although this wasn’t my favorite rotation, I liked my preceptor and it actually went by pretty quickly since I was only there for four weeks. I got to interact with a lot of patients and I got tons of practice charting, writing PES statements and coming up with interventions and goals.

photo3

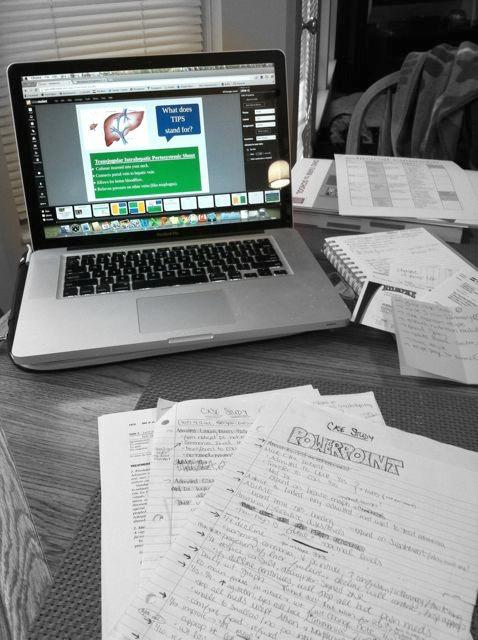
I also had to select a patient to do a case study on. My patient had alcoholic cirrhosis and hepatic encephelopathy. I’ll be presenting my case study to my class next week.

So there you go! Like I mentioned, I’m currently finishing up my very last rotation. I’m at the Central Ohio Diabetes Association and I’m loving it. Recap to come soon!

Enjoy!
–Lindsay–

PS. If you want to read more about my previous rotations, here are my recaps:

My Path & Big News

Dietetic Internship Orientation and Week 1

Dietetic Internship Weeks 2 & 3

Dietetic Internship Weeks 4 &5

Dietetic Internship Weeks 6-9

Dietetic Internship Weeks 10-16

A Day in the Life & Nobody’s Perfect

Dietetic Internship Weeks 17-20


Filed Under: Uncategorized

Fitness Friday 48

March 22, 2013 by Lindsay 25 Comments

Hi Friends!

Here we are again, another Friday! And just like that, I have two more weeks of workouts to catch you up on. When we left off, I had just completed the first workout of the Crossfit Open- workout 13.1 and I told you I was thinking about trying it again over the weekend to see if I could improve my score. Well, I tried it again. However, I didn’t exactly improve my score. Let’s recap:

Saturday
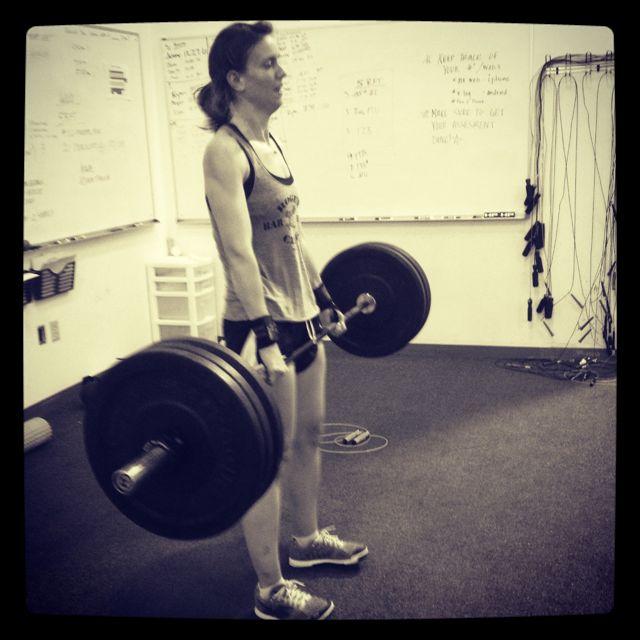
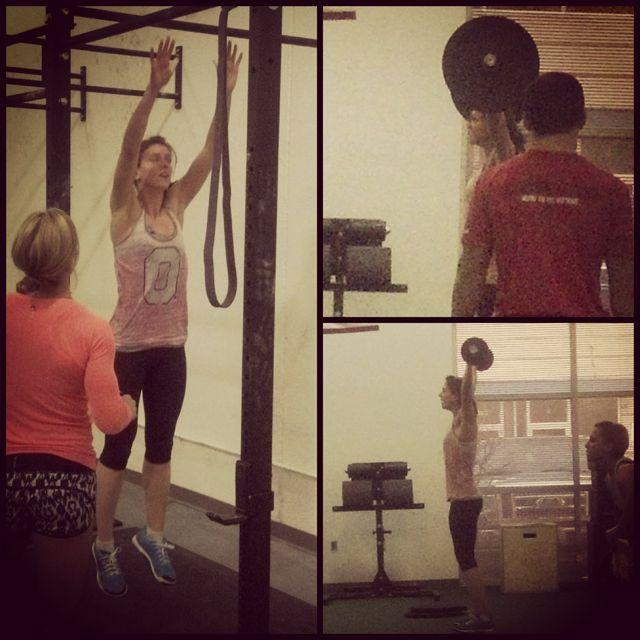
We went to open gym and I worked on those 75# snatches again. Here’s the thing…I can do them when I’m not super tired. See below:

opengym

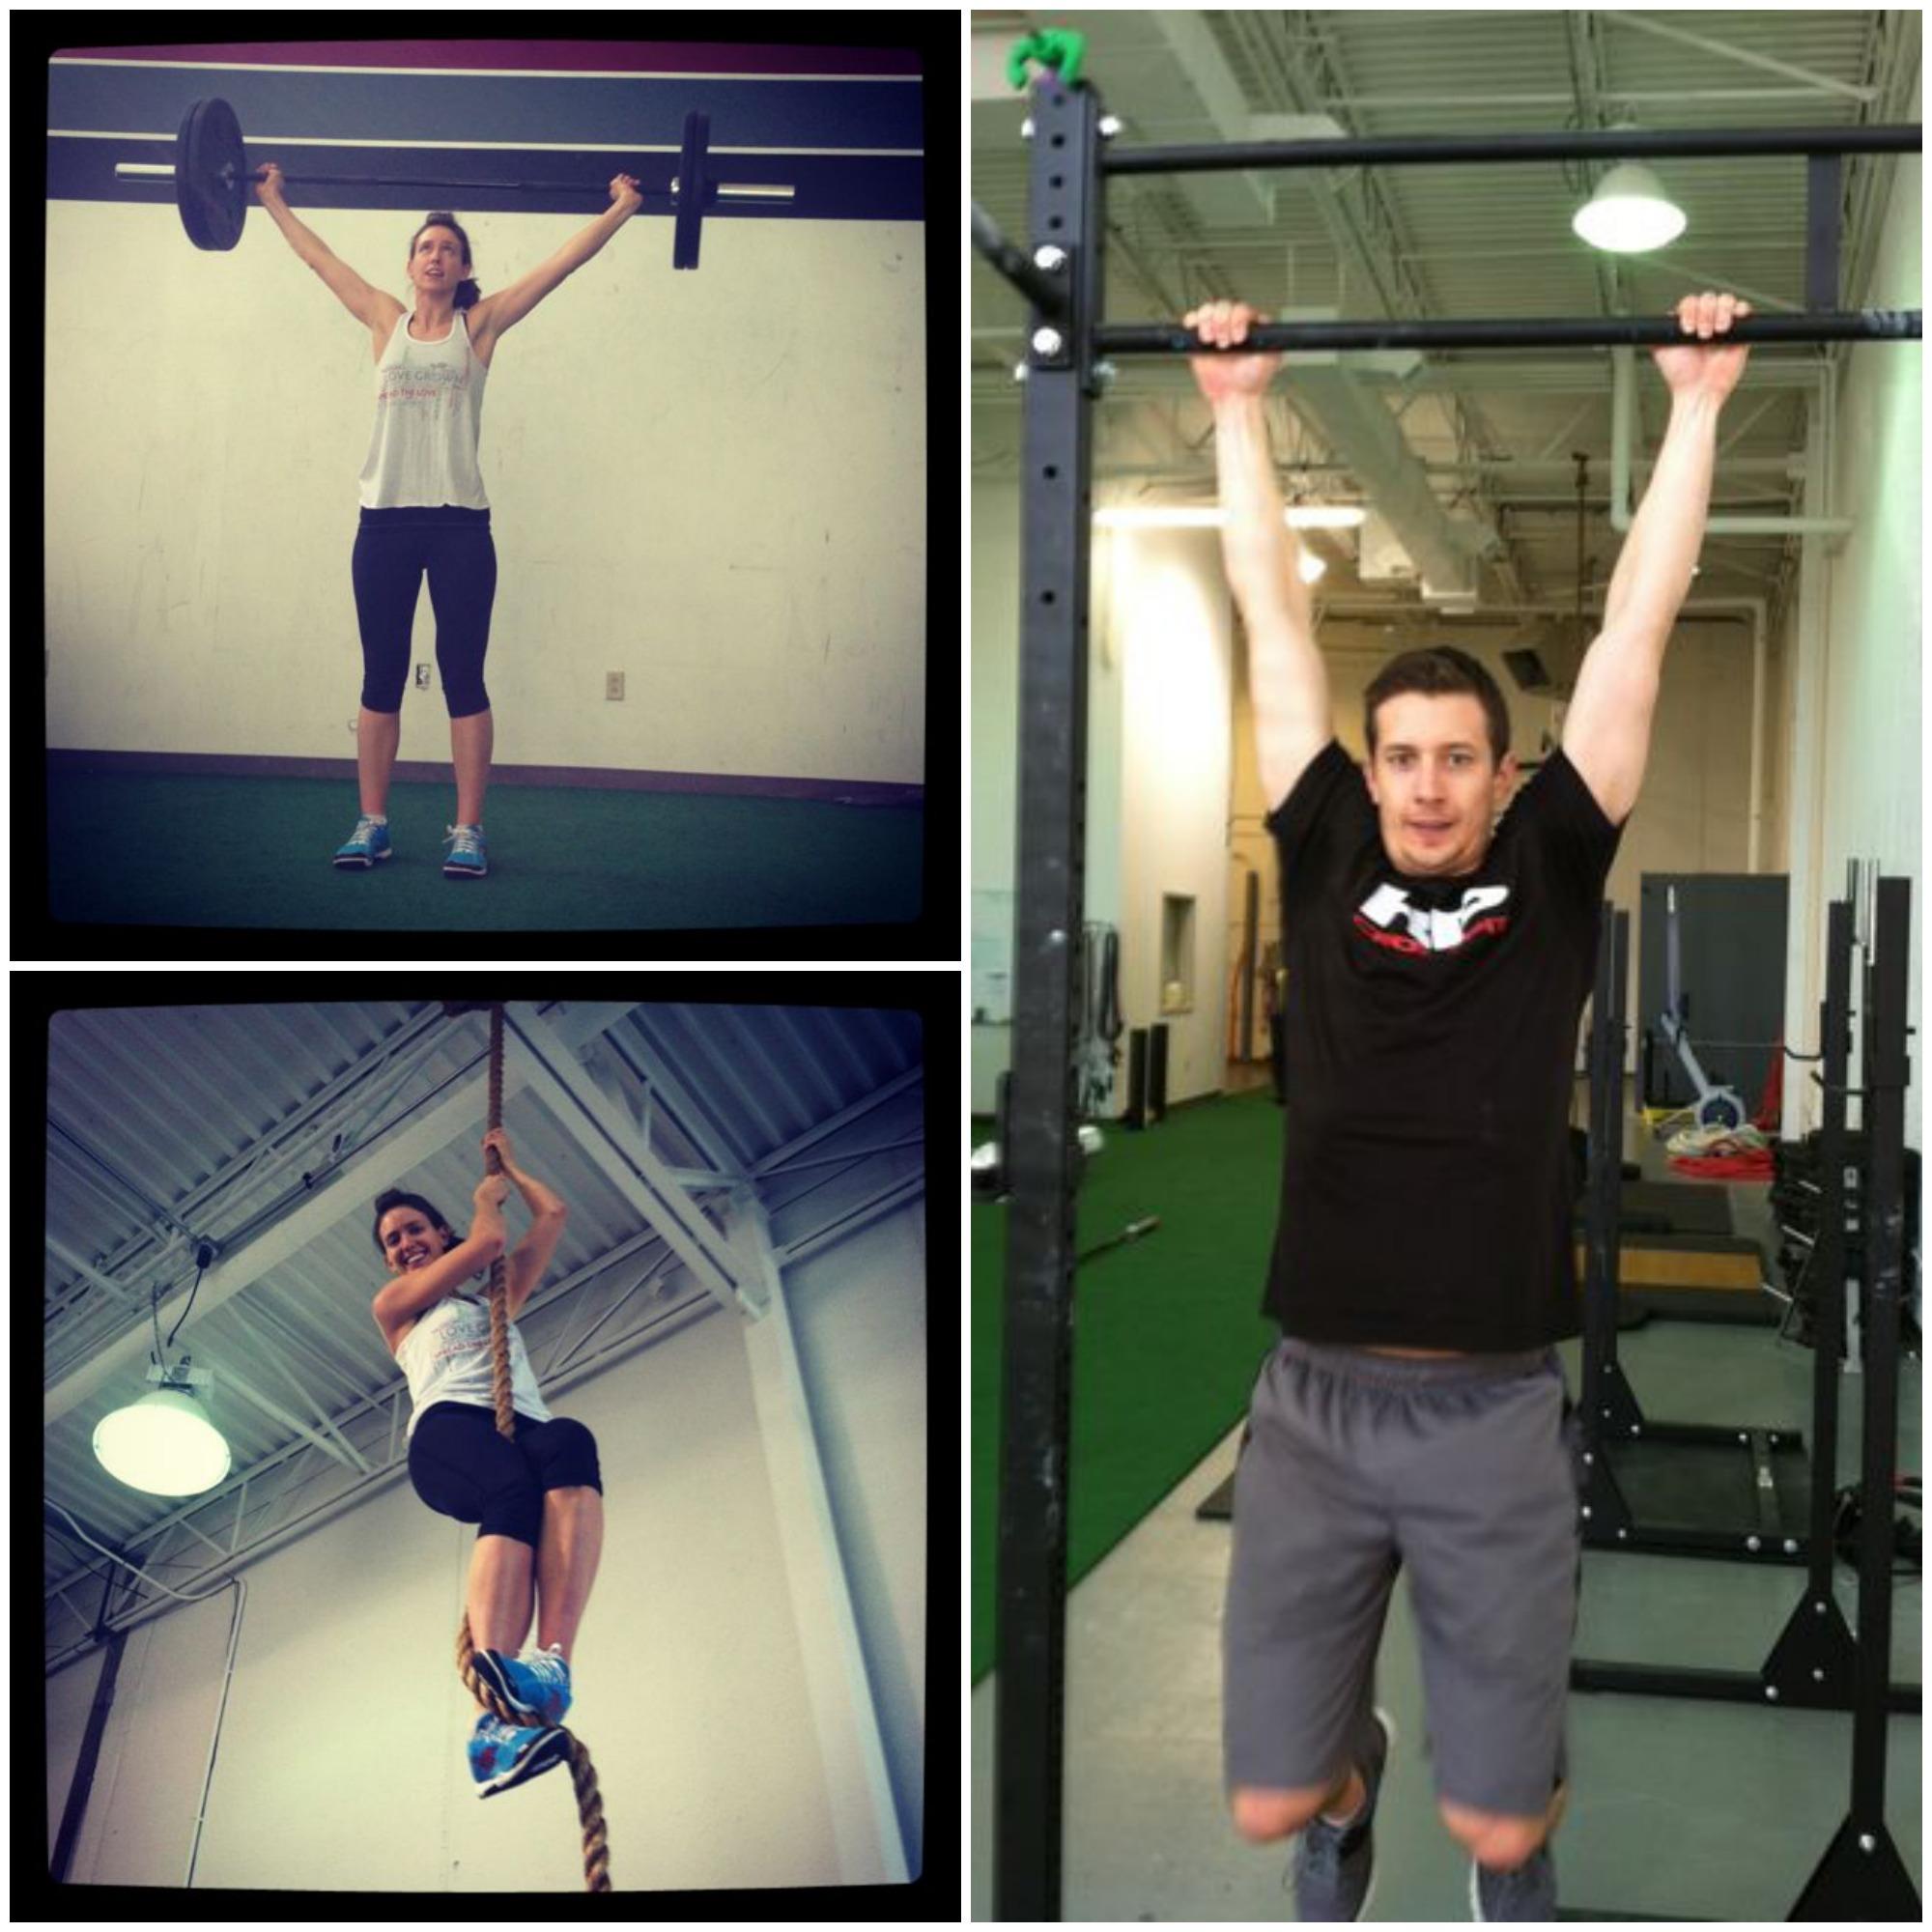
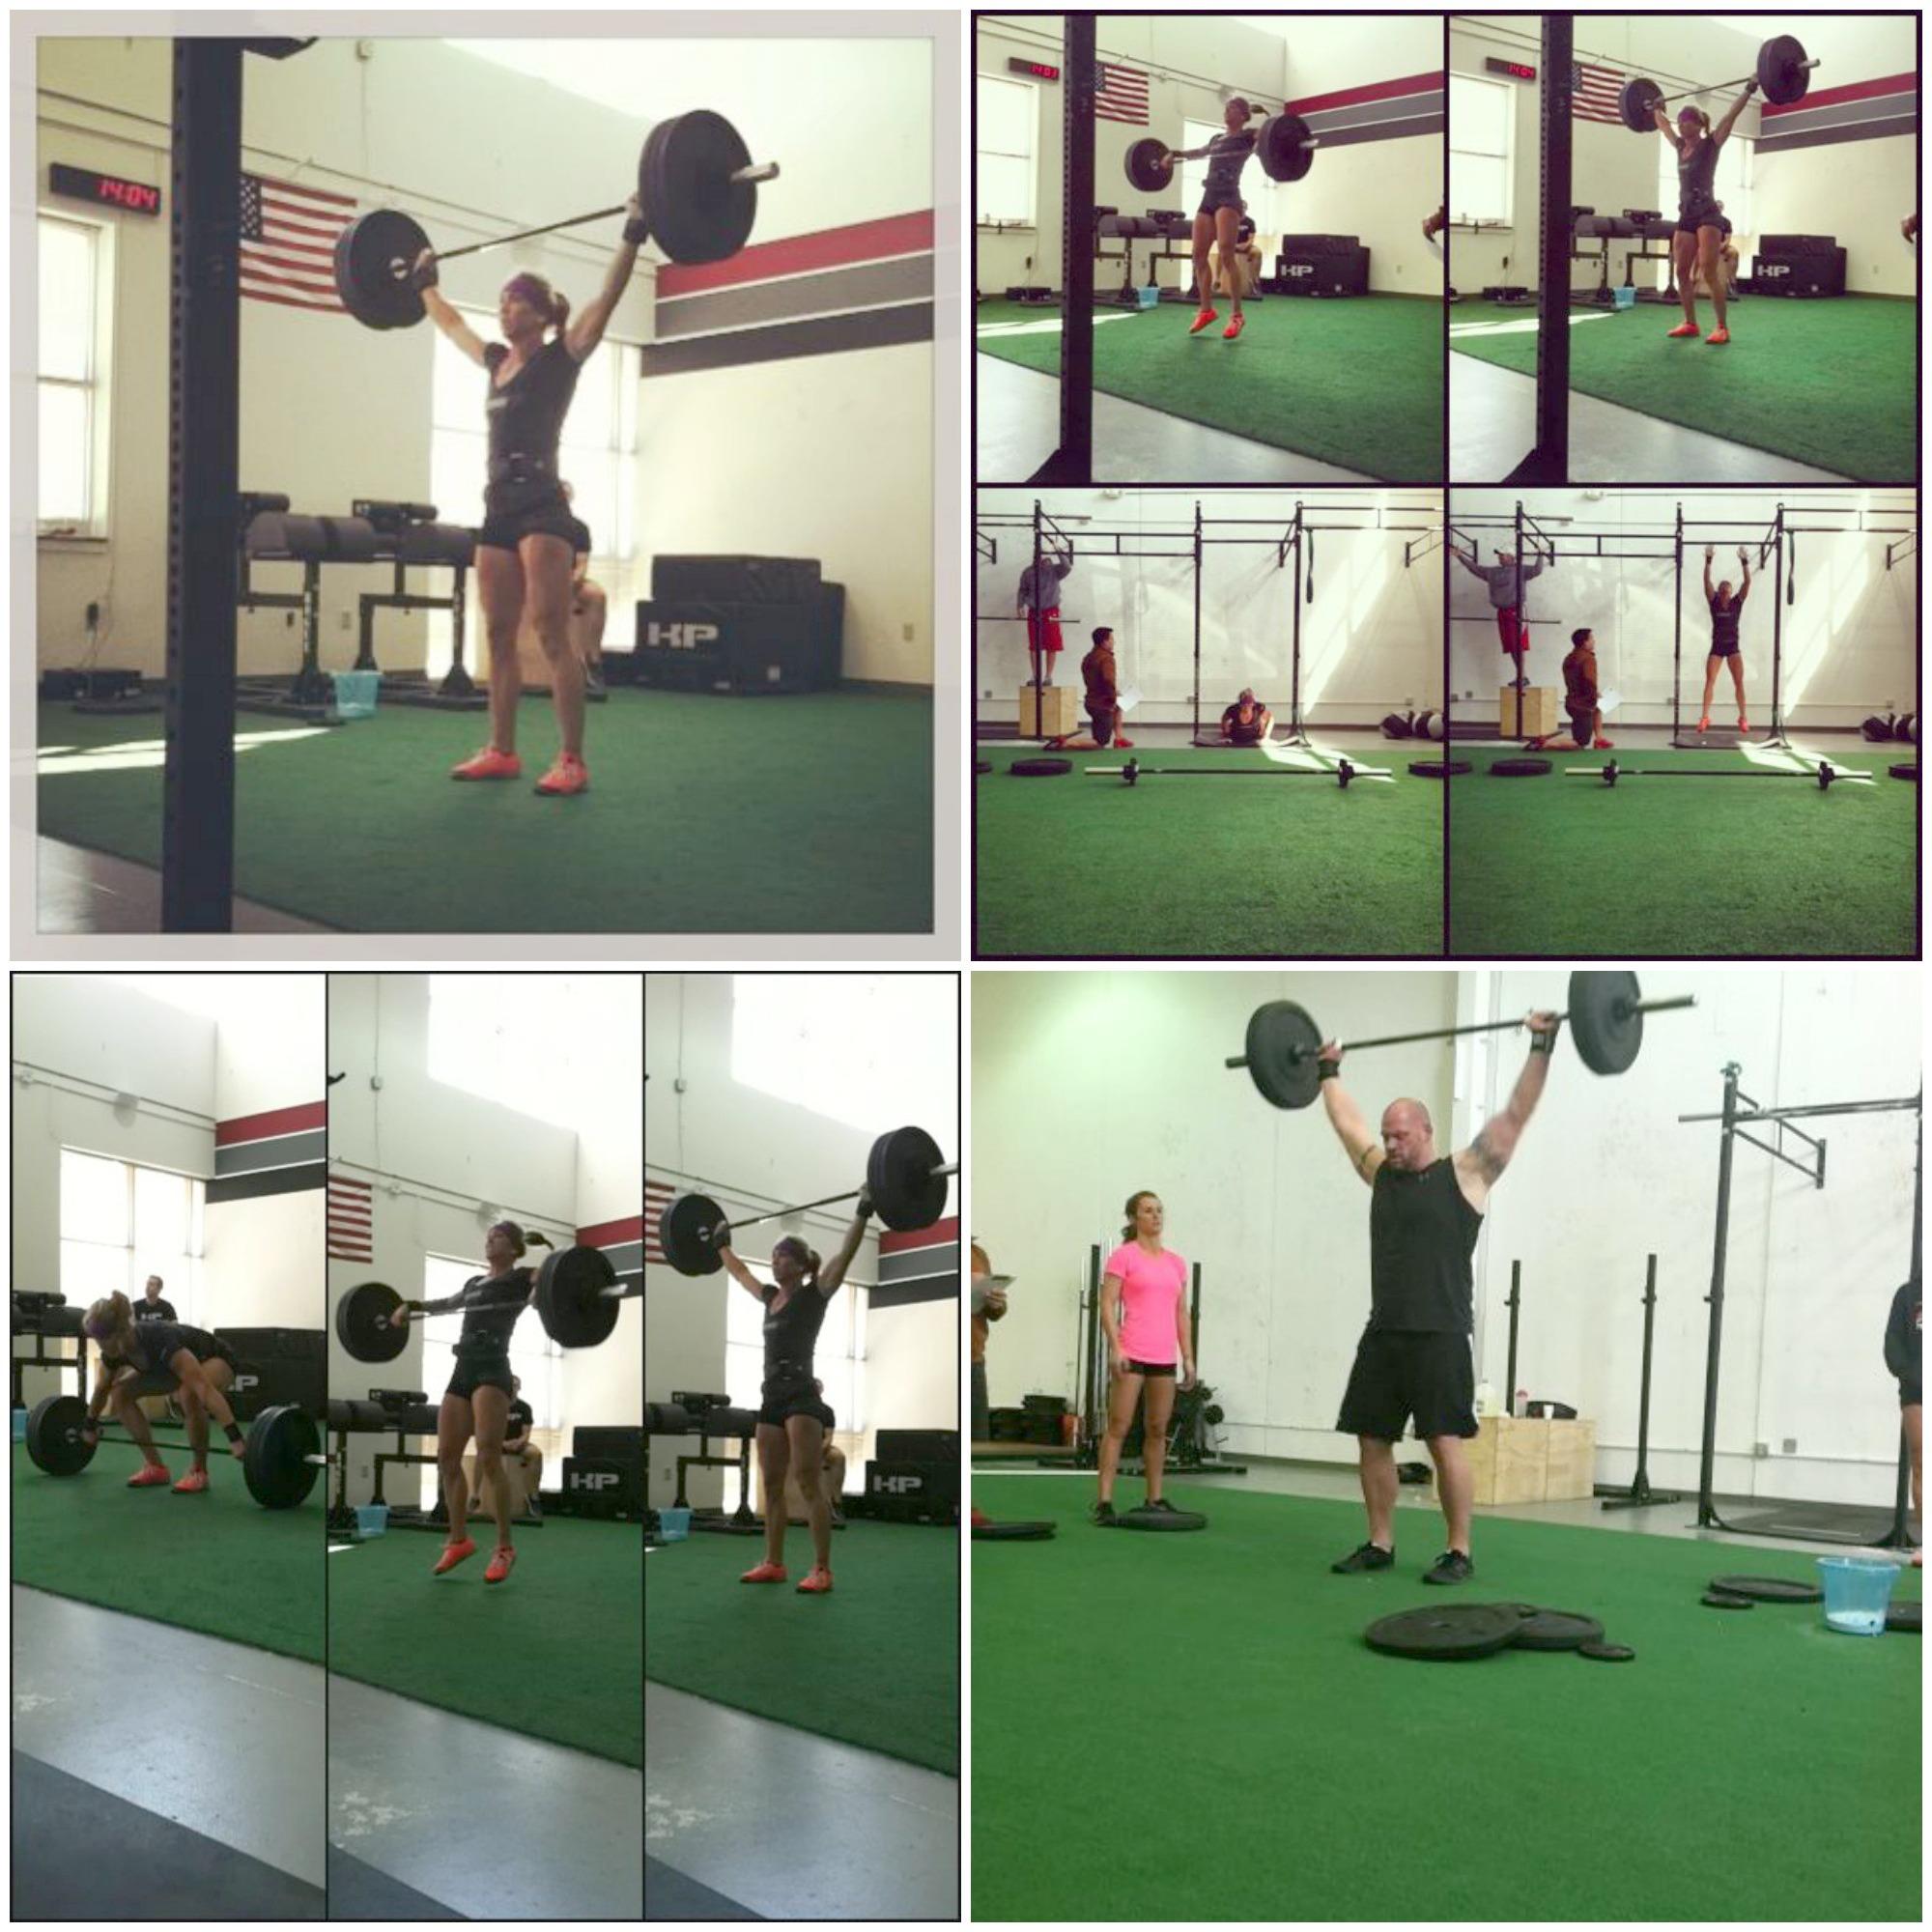
However, after doing 70 burpees and 30 snatches at 45 pounds, I have a lot of trouble with them. Turns out I also have a lot of trouble with them when I do about 100 practice reps on Saturday and then try to repeat the workout on Sunday. Whoops! On the bright side, I got my first rope climb at open gym as well. Super proud of myself! After open gym we watched our coaches do 13.1. Our coach Heather is just so awesome to watch!

opengym2

It also just so happend to be a gorgeous day so we took the boys for a nice long walk:

IMG_2593

Sunday
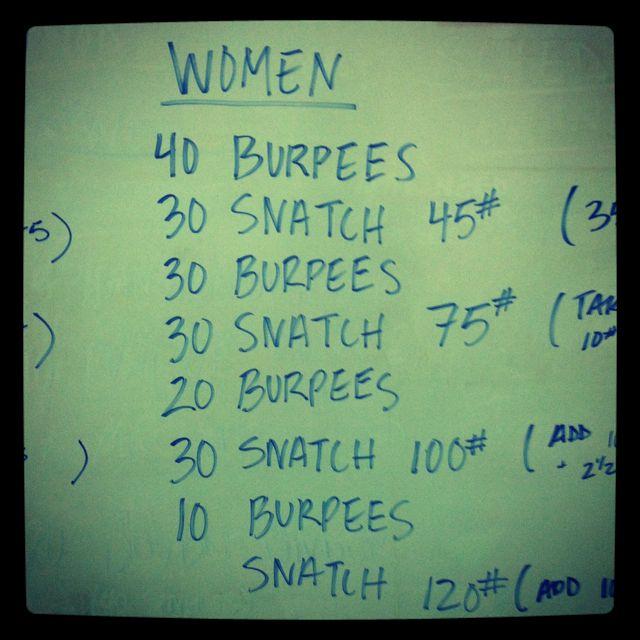
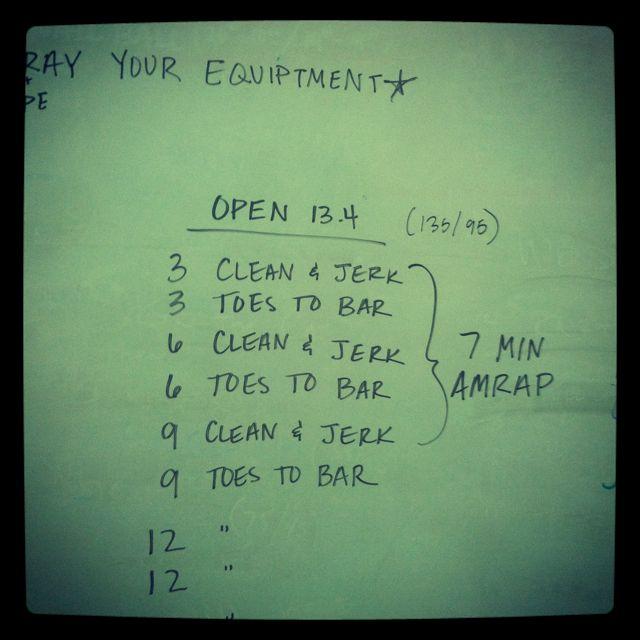
I retried 13.1. As a reminder, here’s what the workout was:

IMG_2453

Here’s what happened. I improved my splits. I did both sets of burpees and the first set of snatches about a minute and a half faster than I did the first time. However, I was too tired from all the practicing I did on Saturday and I could only get 2 reps at 75# instead of the 7 I got the first time…so I just stuck with my original score. Oh well. Can’t win ’em all! This is how I felt afterwards- totally exhausted and ready for a nap with Marcus:

IMG_2613

As for the rest of the week?

fitnessfriday

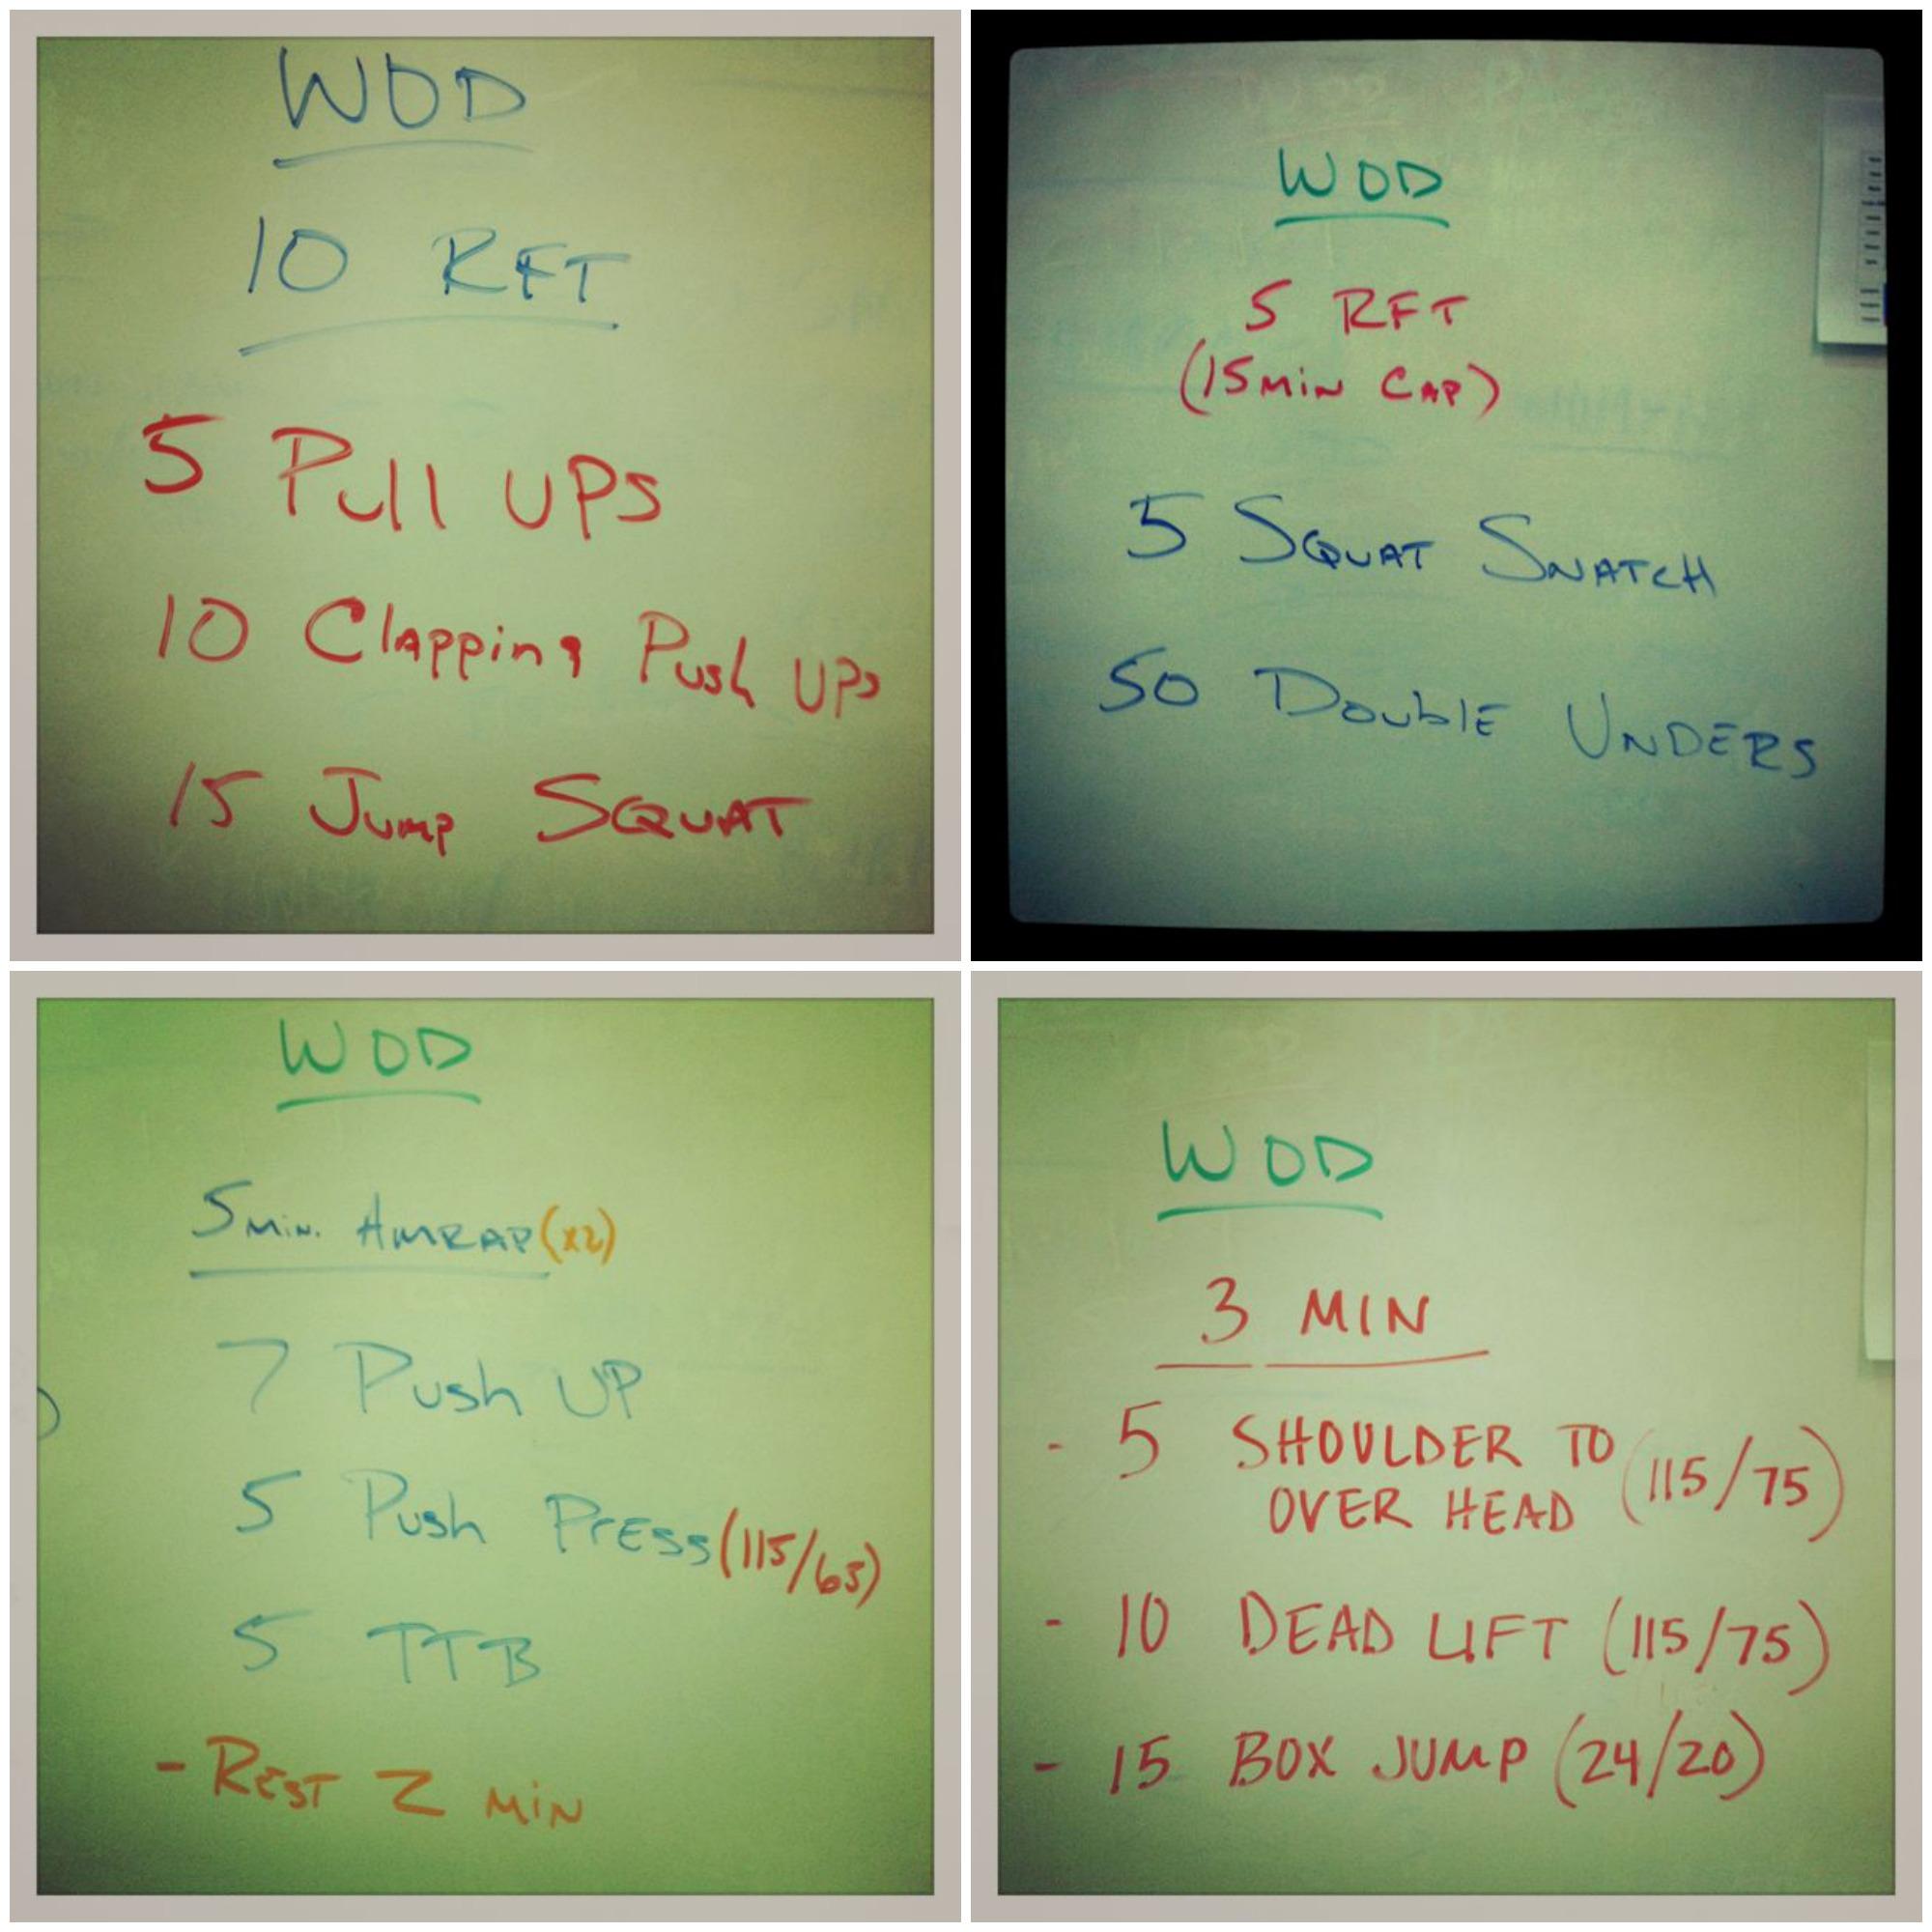
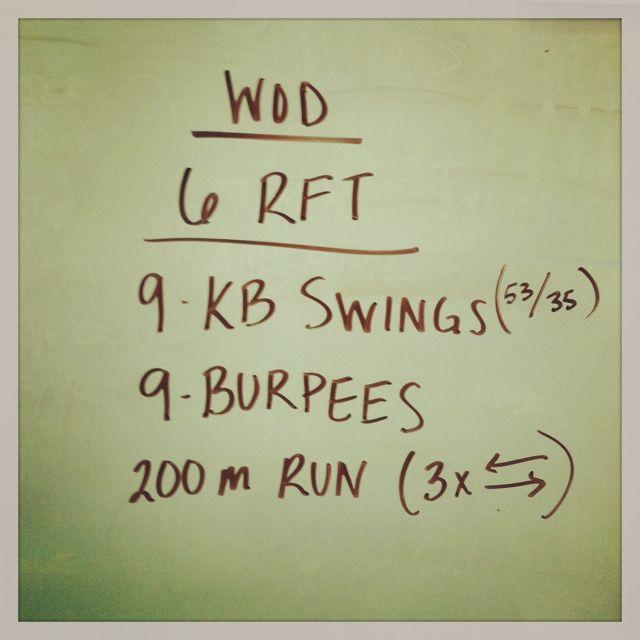
1. Monday: Because of my schedule, I had to go in and do this one by myself. It looks innocent but it was rough. Took me 15 minutes and I almost quit like 5 times.
2. Tuesday: We did back squats for strength and then did the wod. I finished all but the very last ten double unders before we hit the 15 minute cap. Squat snatch is a ridiculously hard movement and I was using more weight than I should have been. Not a dangerous amount…I just should have gone lighter and focused on form until I really get the hang of it. Lesson learned.
3. Wednesday: This one killed me. Two five minute AMRAPs sounds innocent. It was not. First one I got 4 +2, second one I got 3+5.
4. Thursday: Change of plans at our box. The open workouts are announced Wednesday night. Instead of doing them Thursday, we decided to use Thursdays as a walk-through…so we practice all the skills at are in the open WOD and do a quick run-through before doing the real thing. The second workout of the Open – 13.2, was right up my alley. i LOVE box jumps and that’s light weight for a deadlift for me. The only thing I was worried about was the shoulder to overhead because 75# is heavy for me. The actual WOD was 10 minutes. On Thursday we did it for 3 minutes just to get a sense and I got 2+24 and felt pretty good about it.

Friday: Rest day. There was a lot of talk about whether to do box jumps or step ups, which was better/faster/etc. in the Crossfit world. For me, since I’m tall and the box is only 20 inches (relatively short), it’s actually really easy for me to just step up and step down, especially when my legs are tired…so I had that to consider.

Saturday
We tackled 13.2. I decided I would do box jumps until they started slowing me down because I got tired and then switch to jump up, step down and then eventually switch to step up/step down just so I could keep moving.

IMG_2748

That’s me trying not to die after I finished it. My goal was 210 reps (7 full rounds). I got 230 reps! I was proud of myself. I really struggled with the very last shoulder to overhead I did and had to try 3 times to get it up, which cost me time…otherwise I think I could have finished that 8th round. I also hit myself in the teeth with the bar as I was moving from shoulder to overhead to deadlift. It hurt like crazy and I spent most of the workout hoping I didn’t chip a tooth!

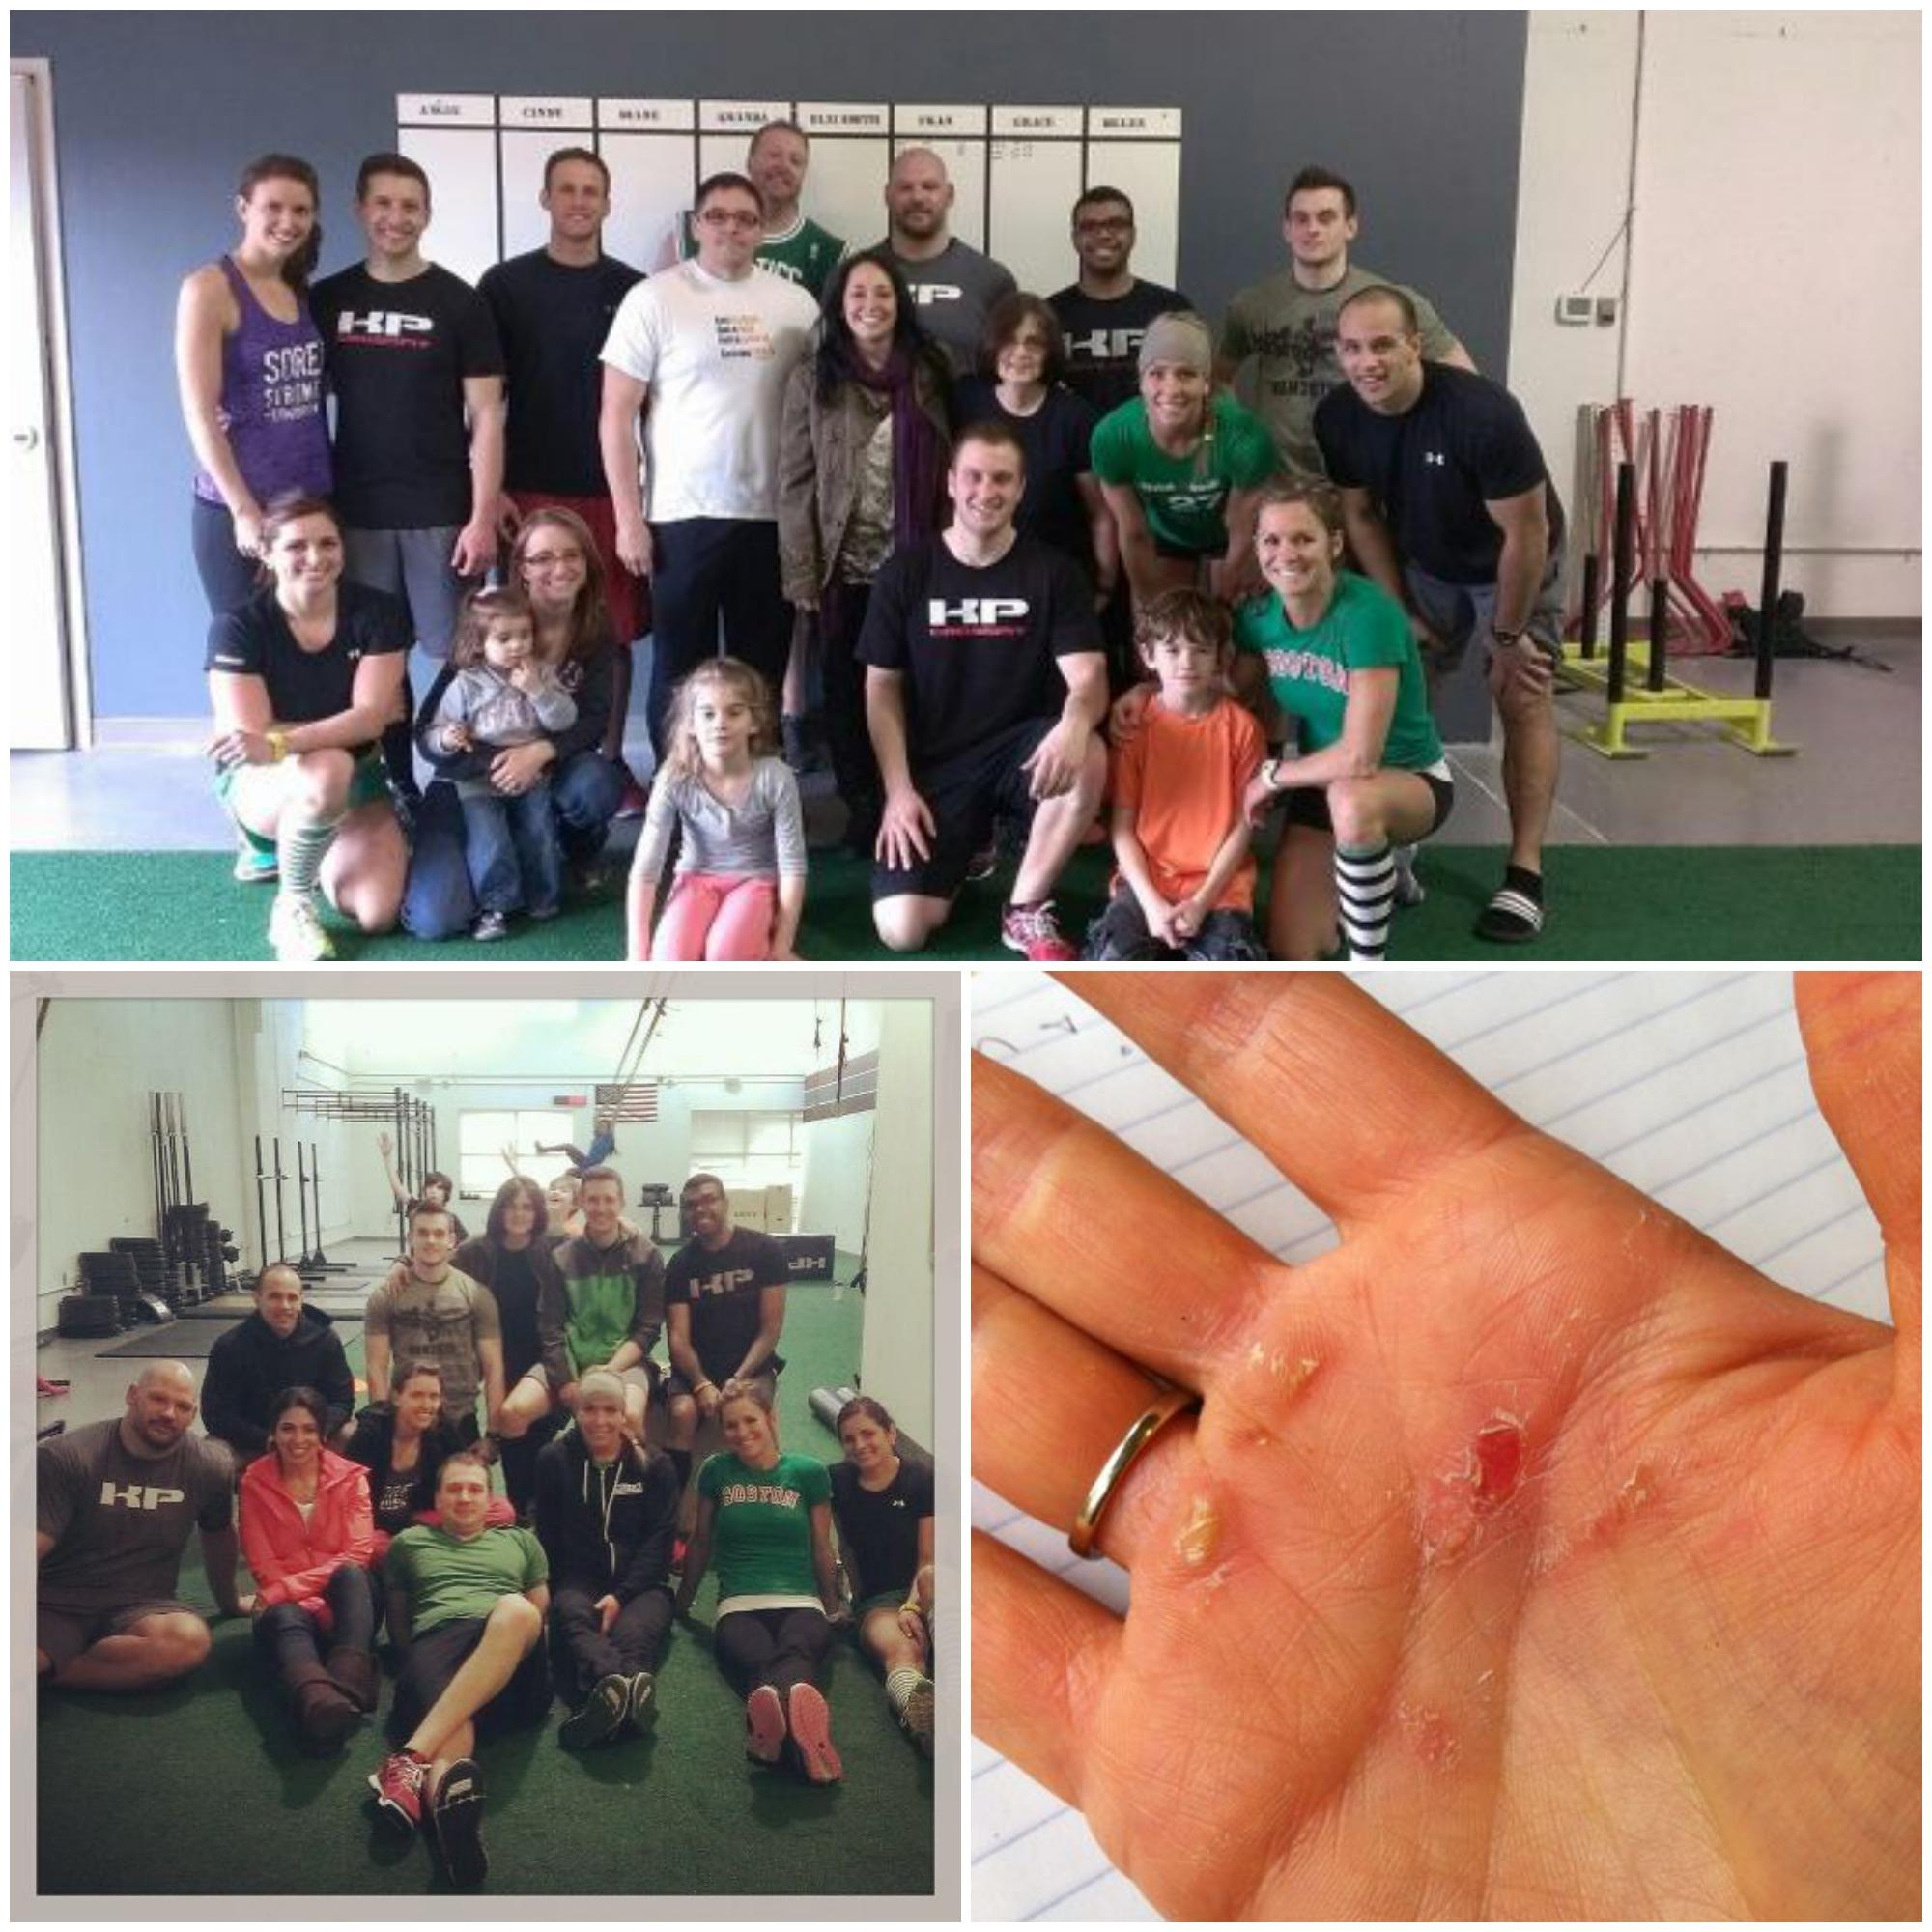
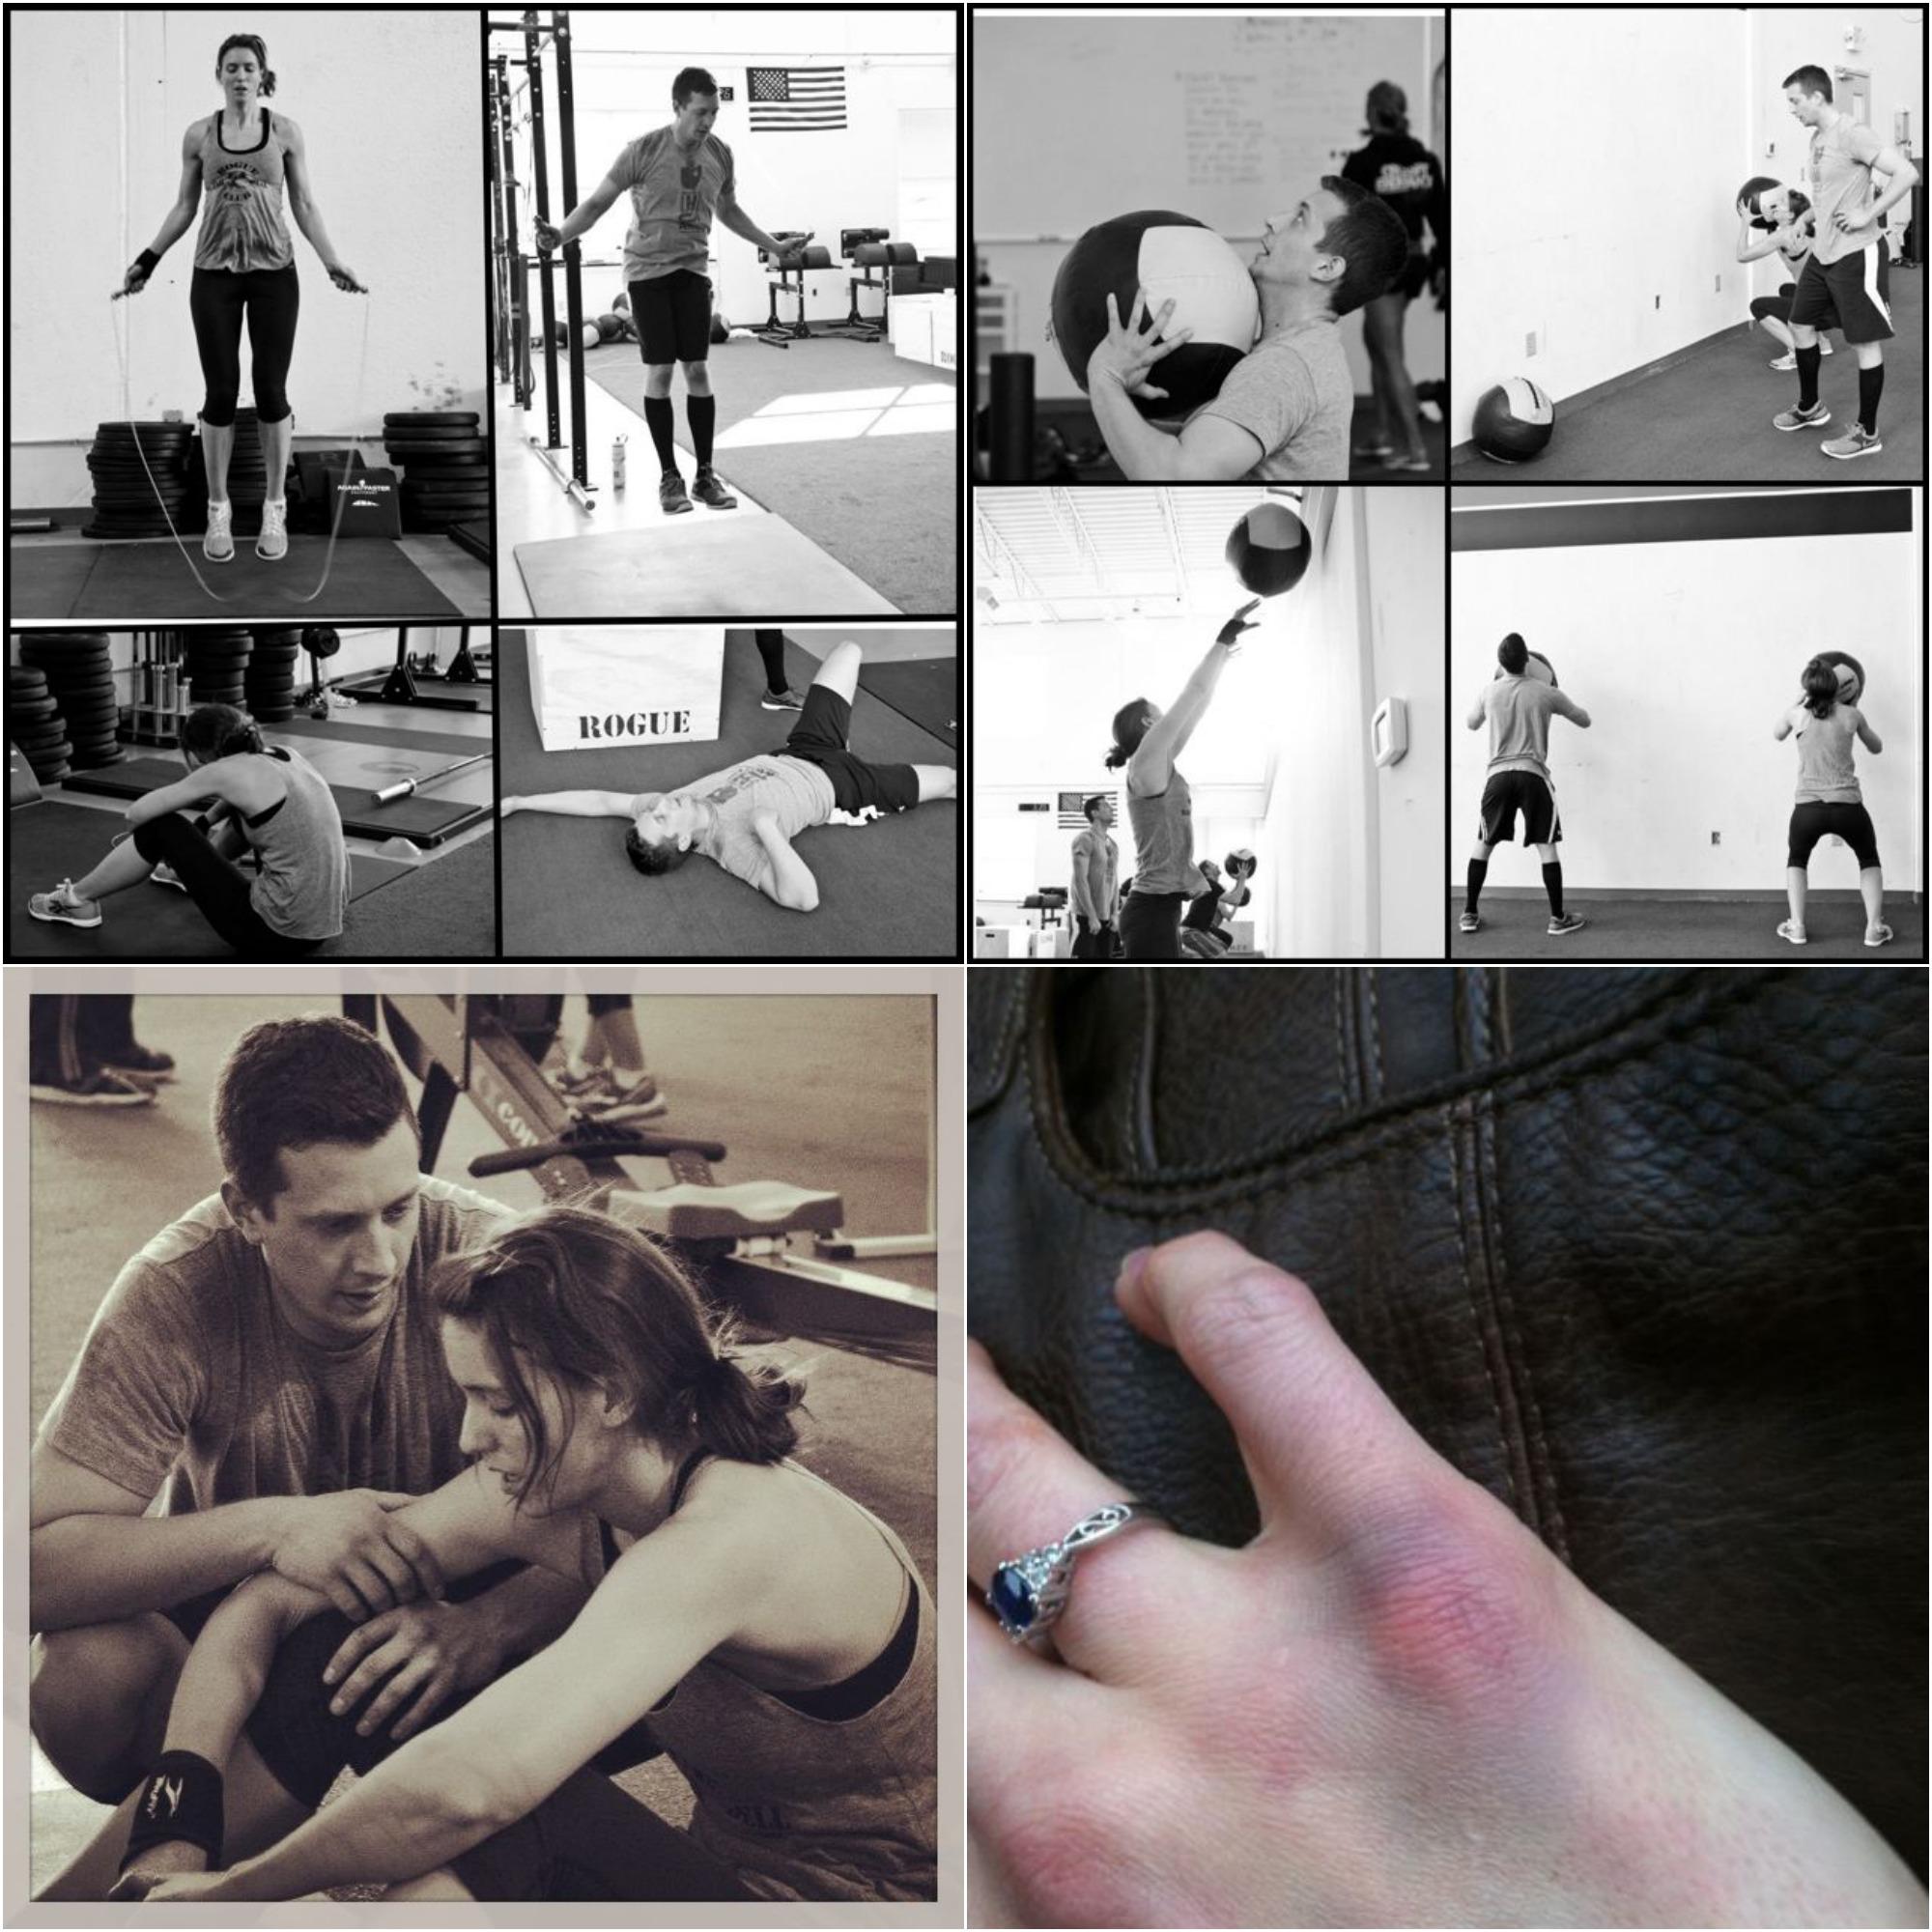
Afterwards, we watched the coaches and trainers do 13.2 and then had a little cookout. It was fun! Note the awesome photobomb on the rings in the pic on the bottom left and the sexy crossfit hands on the bottom right 🙂

cookout

Sunday: Most definitely a rest day 🙂

As for this week:

fff

1. Monday: Loved this workout! Finished in 6:59 Rx. We did back squats for strength- 5 sets of 5 working up in weight. I did my last set of 5 at 130 pounds! woot woot!
2. Tuesday: Ugh, Grace. Not my favorite. Our coach wanted us to focus on speed so I did 65 pounds and finished in 2:50. I felt pretty go so i’ll try 75 or 80 pounds next time. For strength we did bench press and I did 5 at 75# which is a PR!
3. Wednesday: Worst day at crossfit in a while. I’ve been exhausted this week. We did squat cleans for strength, which were heavy. Then we did this workout. It was hands down my least favorite crossfit workout i’ve ever done. But i survived. And now it’s over!
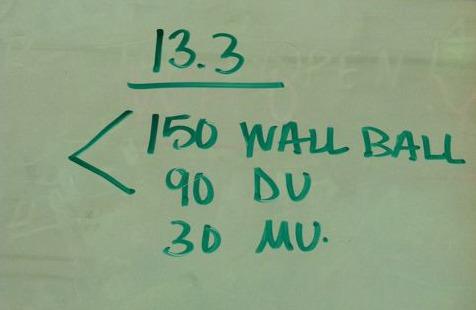
4. Thursday: Workout 13.3 was announced Wednesday night. It’s actually a repeat of one of the workouts from last year. 150 wall balls, 90 double unders, 30 muscleups. As many reps as possible in 12 minutes. I’ve done this workout before. Well, part of it. I’m nowhere even close to being able to do a muscleup so I just don’t worry about those. I have, however, done the 150 wallballs and 90 double unders and finished in exactly 12 minutes. So, my goal is to finish that part of the workout in 11 minutes. Hubby and I were both tired so we decided to rest Thursday and Friday and tackle it Saturday morning! I settled for taking the boys on a nice walk Thursday night.

I’ll let you guys know how 13.3 goes on Saturday!

How have your workouts been lately?!

Enjoy!
–Lindsay–
 

Filed Under: Workouts

30 for Thursday: Apps On My iPhone

March 21, 2013 by Lindsay 41 Comments

Hi Friends!

It’s been a while since I did a 30 for Thursday post, hasn’t it?! Today we’re focusing on iphone apps. There are obviously thousands of apps out there, but I thought I’d show you some of the ones I have on my phone. Some are free, some are not. All are awesome.

Looking for some new apps to add to your iphone? Check out 30 I have on my phone right now!


10 Apps I Use Every Day

1. Instagram – My current obsession
2. Diptic – Great app for making collages of pictures
3. Facebook – I think the app sucks but I still use it
4. FacebookPages – great for managing my blog’s fb page
5. Feedly – how I read blogs now that google reader is going away
6. Tweetbot – my fav Twitter app
7. Buffer – great way to schedule tweets
8. Wunderlist – my fav to-do list app
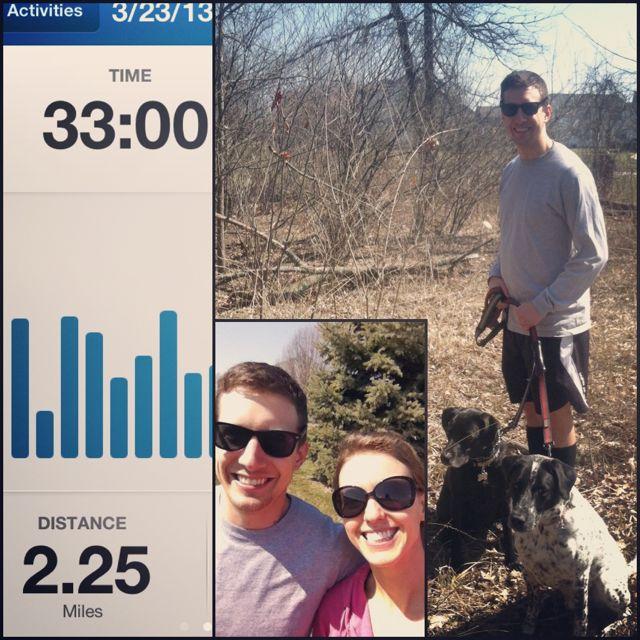
9. RunKeeper – I use it when I run and even when I’m just walking the dogs
10.  Chrome – Currently obsessed with this. If you use chrome on your computer, you need this app. It synchs with your phone, you can access the bookmarks you have saved on the computer and tabs you have open on your computer on your phone, you can open multiple tabs and swipe between them…it’s awesome.

10 Photography Apps

1. Phonto – great for adding text to photos
2. Photosynth – takes panoramic photos
3. Colorsplash – make photos black and white and you can add color to certain parts
4. PopBooth – like a photo booth on your phone
5. LensLight – add pretty light effects to your pictures
6. Aviary – great for photo editing
7. Camera+ – great for photo editing (i use this one most often)
8. Snapseed – great for photo editing
9. Labelbox – add text to photos like a labelmaker
10. Fast Camera – takes a million pics really fast and lets you pick the ones you want to save. great for action shots/sports/etc

10 Other Apps

1. Hootsuite – makes it easy to manage multiple twitter streams/hashtags/etc
2. Flashlight – never know when you’ll need it
3. Pinterest – for your pinning pleasure
4. AppGratis – offers a free app every day. sometimes they suck, sometimes they’re awesome
5. Soundhound – helps you figure out what song is playing on the radio
6. WordPress – I use it sometimes to write a short and sweet blog post, approve comments or to make last minute edits to ones I’ve already written
7. Evernote – organize your life
8. Pandora – listen to music
9. Pocket – save articles/blog posts/news stories from websites, twitter etc…then read them later, even if you don’t have internet access
10. Dropbox – this is life changing if you want to be able to access your documents from anywhere

———————–

Obviously these are not the only apps I have on my phone…but they’re definitely some of the ones I use most often.

Let’s chat: What are some of your favorite apps? I’m always looking for new ones!

Enjoy!
–Lindsay–
 

Filed Under: Uncategorized

Photo An Hour

March 19, 2013 by Lindsay 73 Comments

Hi Friends!

Random post for you today. I don’t really have a typical day, but I thought it’d be fun to give you guys a peek into my life right now. As a bonus, the pics that I took throughout the day ended up giving a pretty good glimpse into some of the things I’m doing during my last internship rotation!

5AM

The animals always wake me up in the morning. If I’m getting up around 6, I make them wait until then to eat. If I don’t have to get up until later, I’ll just get up and feed them because it’s easier for me to go back to sleep afterwards than to keep fighting them. While they’re eating and going outside, I check my email, read a few blog posts, etc…

photo1

6AM
Back to bed

7AM

I’m up and ready to face the day! I spend about an hour eating breakfast, drinking my green tea, reading blogs, scheduling tweets, answering emails, etc.

photo13

8AM

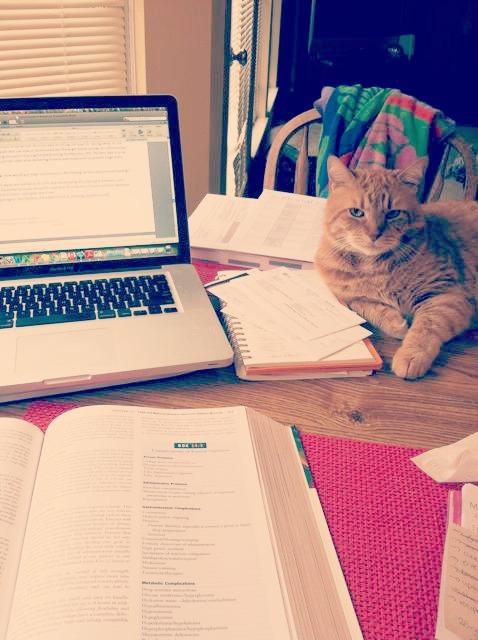
I spend some time working on my final case study for my internship. My patient had alcoholic cirrhosis and hepatic encephelopathy..among other things. I’ll be presenting my case study next week, during my last week of my internship!

photo3


9AM

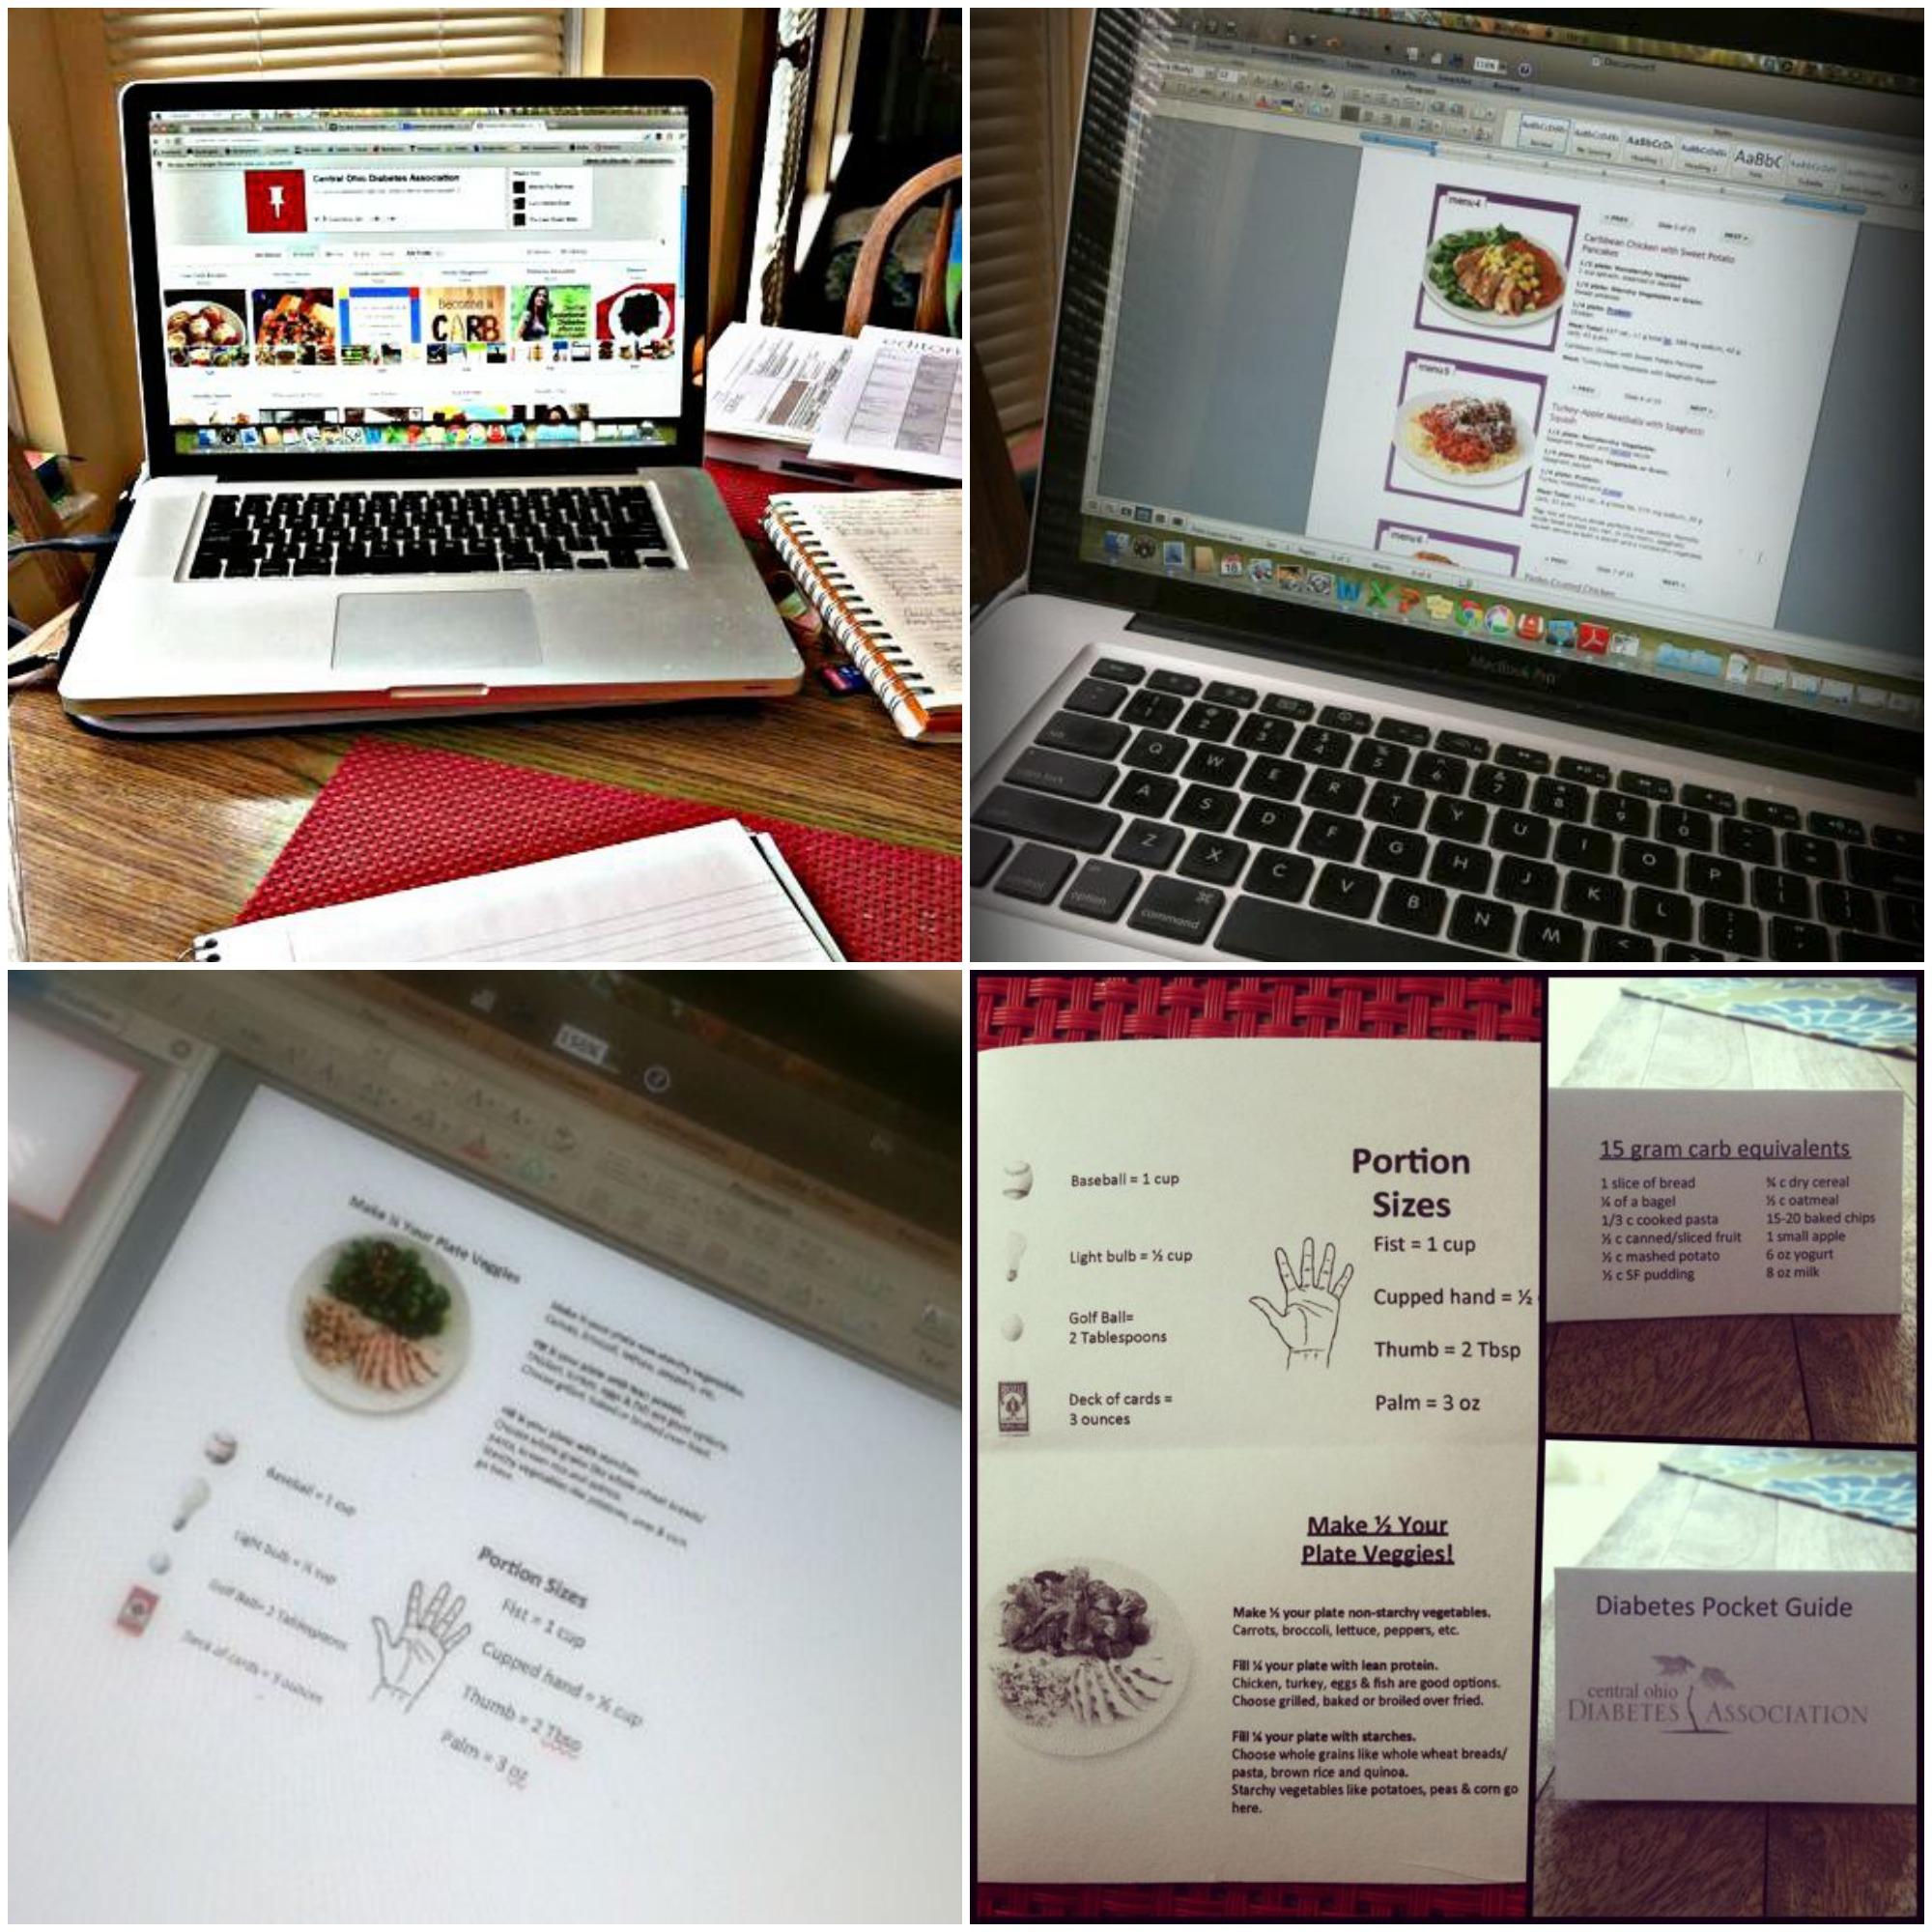
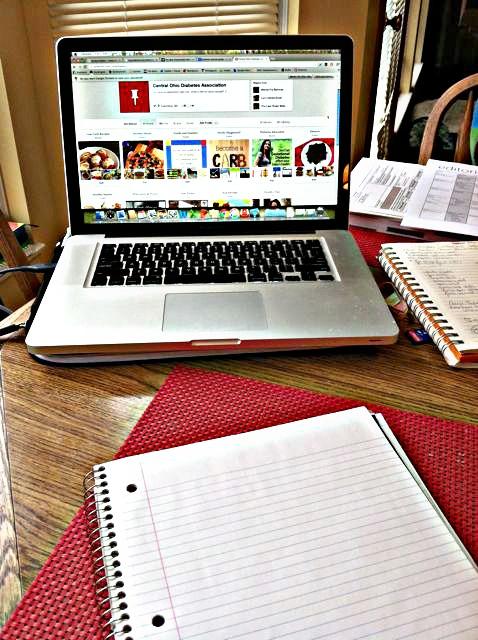
Time for internship work. Right now I’m interning at the Central Ohio Diabetes Association. I’m helping them out with various projects, including creating a Pinterest page for them! It’s intended to be a resource for their clients, so there are boards with low-carb recipes, diabetes education, newly diagnosed patients, activities for kids and families, etc.

photo4

 10AM

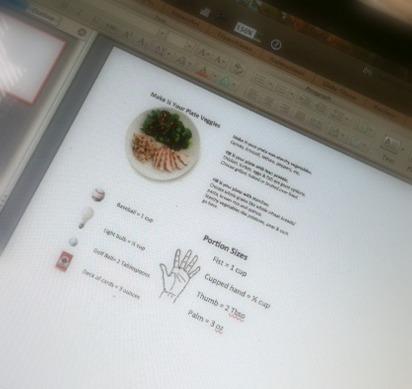
I move on to another internship project. I’m making a pocket-sized guide that CODA can pass out to their diabetes education clients. It will serve as a reminder about how they should fill their plate and list common items they can use to help estimate the portion sizes they’re eating.

photo5

 11AM

No picture, sorry friends. Just more of the same…working on the above projects!

12PM

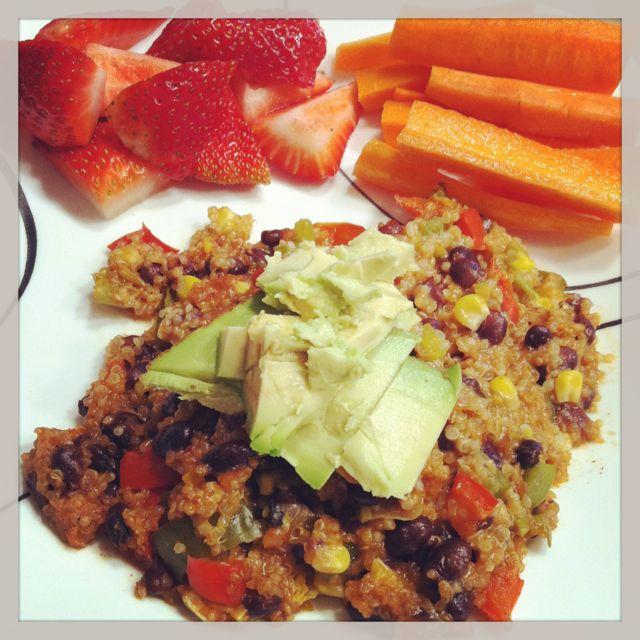
Lunch break. Hubby comes home for lunch. I love when we get to eat lunch together! Cheesy Mexican Quinoa with chips, strawberries and carrots w/hummus.

IMG_2797

1PM

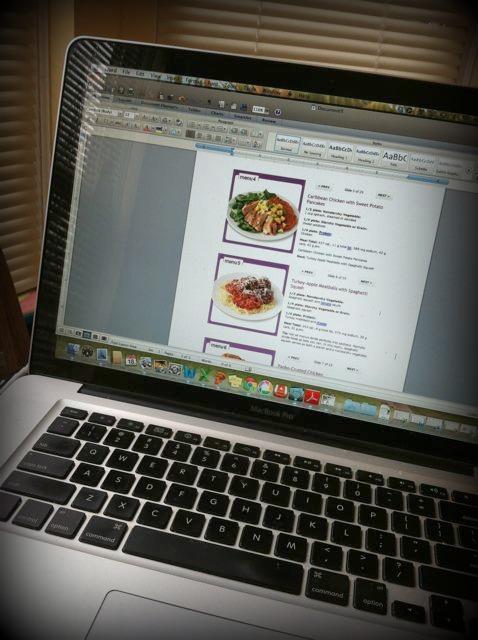
Back to work. Another internship project. I’m putting together a pretty printout of recipe ideas for CODA clients. The pictures incorporate My Plate and remind them to fill half their plate with non-starchy veggies, 1/4 with lean protein and 1/4 with starches.

photo6

2PM

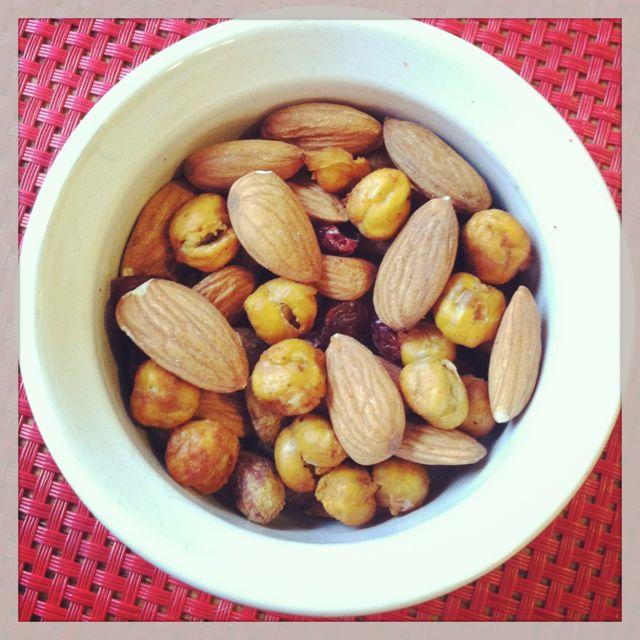
Snack time! And more projects.

IMG_2635

3PM

Marcus usually stops by around this time because he wants his dinner.

photo7

4PM

I power through one last hour of work on various projects. The dogs finally get tired of laying around and turn to their toys to entertain them since I’m being pretty boring 🙂

photo8

5PM

Crossfit time!

photo9

6PM

The WOD includes front squats, box jumps, kettlebells and wall balls-some of my fav things!

photo11

7PM

I do some prep work for my internship class. We’re meeting our cultural competency with a little research project, which we’ll be sharing tonight. We also have to make a cultural dish and I chose to make salsa.

photo (10)

8PM

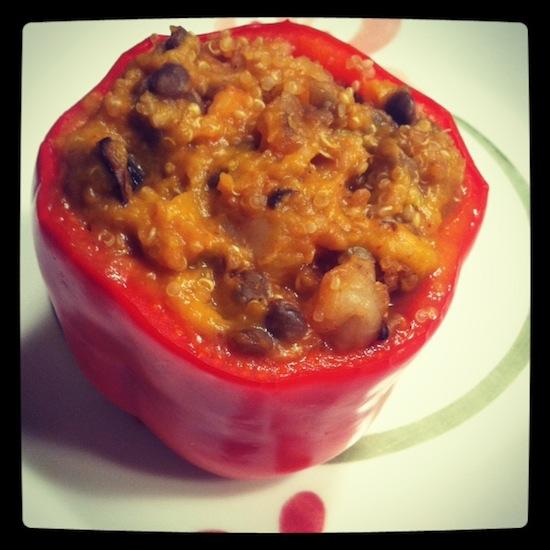
Dinner time! Stuffed peppers with quinoa, lentils, shrimp, mushrooms, onions and curried sweet potato soup.

photo-388

9PM

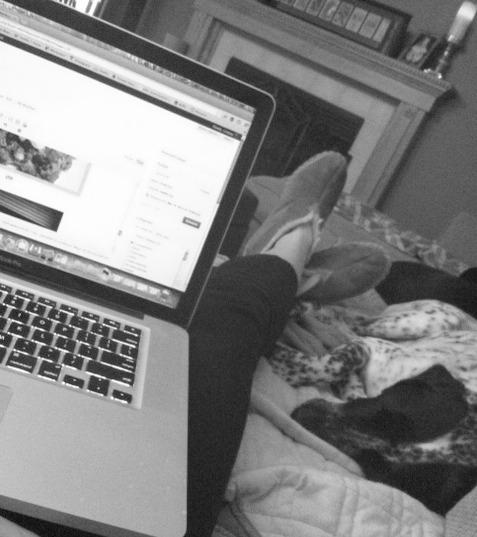
Couch time. I spend time working on modules for my internship and blogging while hubby watches TV.

photo 12

10PM

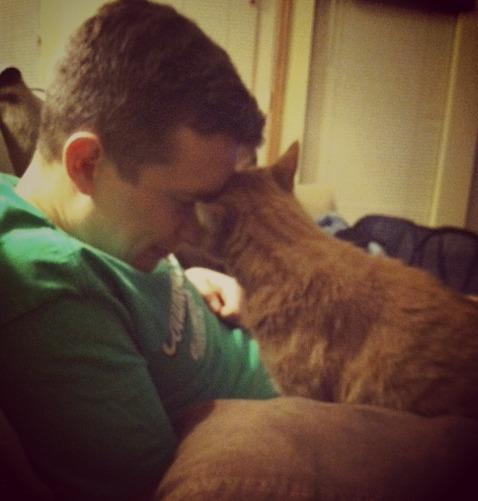
Family time.

photo15

11PM

Bedtime snack and stretching. Pigeon pose for the win!

photo 16

So there you have it. A day in my life (currently).

Important note: On days when I spend most of my time at the computer, I make a special effort to get up several times an hour to stretch my legs and you should too! Whether it’s to refill my water bottle, walk up and down the stairs a few times, spend a few minutes stretching or switching to standing up while I work for a while, it’s important to get out of your chair and get the blood pumping!

Let’s chat: Do you have a desk job? Do you make an effort to get up and moving throughout the day?

Enjoy!
–Lindsay–
Filed Under: Uncategorized

What is Crossfit?

March 15, 2013 by Lindsay 61 Comments

Hi Friends!

Now that we’ve been doing Crossfit for a while now, I feel like I’ve got a pretty good handle on the lingo. But I remember how overwhelmed I felt when I first started. Since I regularly post about my Crossfit workouts, and I know a lot of you don’t do Crossfit, I thought I’d break things down a little bit for you! I’ll explain some of the terms we use and hopefully it will help my Fitness Friday posts make a little bit more sense. Ready?

New to crossfit or thinking about starting? It's a great workout - Here's a detailed breakdown of what it entails!

So let’s start off with the basics:

What is Crossfit?
Crossfit is constantly varied, high intensity, functional movements. It includes a mix of Olympic lifting, gymnastics, plyometrics, running, rowing, bodyweight exercises and so much more!

Where do we workout?
The Box = a crossfit gym. It’s called a box because it’s typically in a warehouse-type space. Instead of seeing the machines you see in a typical gym, you’re more likely to see stacks of weights, barbells, pull-up bars and lots of open space.

What do we do?
Warm-up = Various exercises done to help loosen and warm our muscles
Skill/Strenth Session = We work on a specific skill or lift. Technique is reviewed and we work on our form, as well as increasing weight to get stronger.
WOD = Workout of the day. The “competitive” part of the session where you race the clock!


RFTAMRAP1

How are the WODs broken down?
RFT = Rounds for Time
AMRAP = As Many Rounds As Possible

What is a round? 
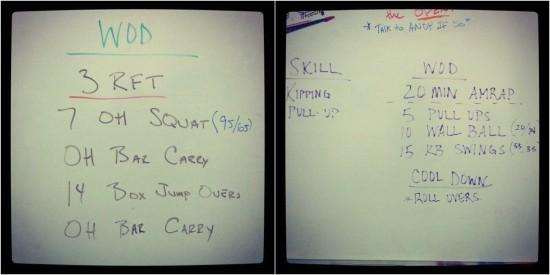
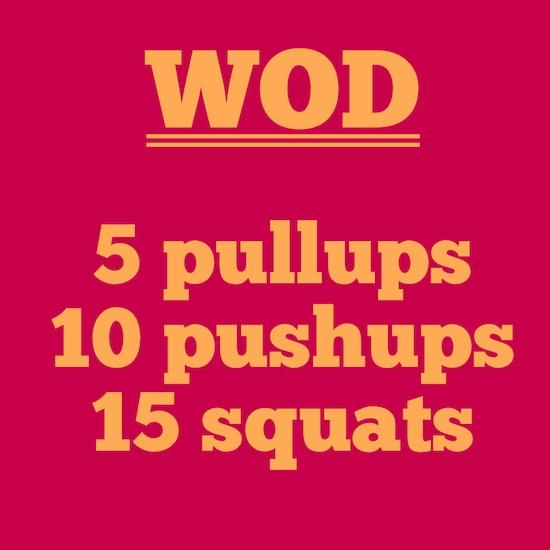
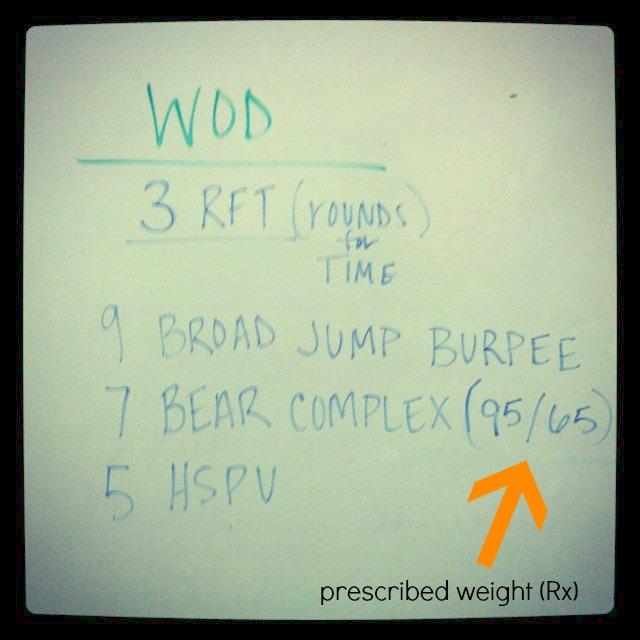
A round is a set or group of exercises that make up a workout. Here’s an example:

photo-377

One round of this WOD would be 5 pullups, 10 pushups and 15 squats. If this WOD was done as RFT, you would be given a set number of rounds to do, and you would do them as quickly as possible. So, if it was 3 RFT, you would do 5 pullups, 10 pushups, 15 squats and then start over and do it twice more. By the end, you will have done 15 pullups, 30 pushups and 45 squats as quickly as you can.

If this same workout was done as an AMRAP, you would be given a set amount of time and you would complete as many rounds as possible in that time. So, if it was a 20 minute AMRAP, you would do 5 pullups, 10 pushups, 15 squats over and over again until the time limit was reached.

How are the WODs scored?
If it’s a RFT workout, your score is the time you finish in. You want it to be as fast as possible.
If it’s an AMRAP, your score is the number of rounds you’re able to complete in the set amount of time. If you finish 15 complete rounds and then 5 pullups and 2 pushups of the next round before time runs out, your score would be 15 + 7. This shows people you completed 15 whole rounds and then got seven reps of the next round.

IMG_1375

Are there any other kinds of WODs?
Chipper = A chipper is done for time, but it’s generally a long workout that you “chip away” at it.
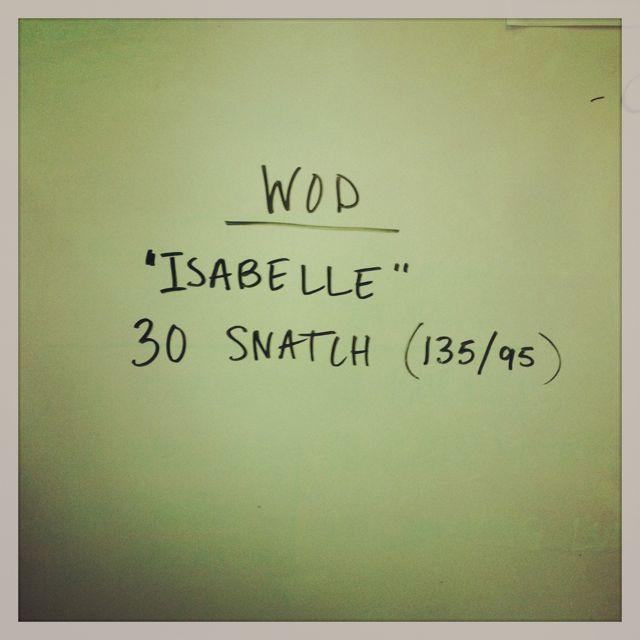
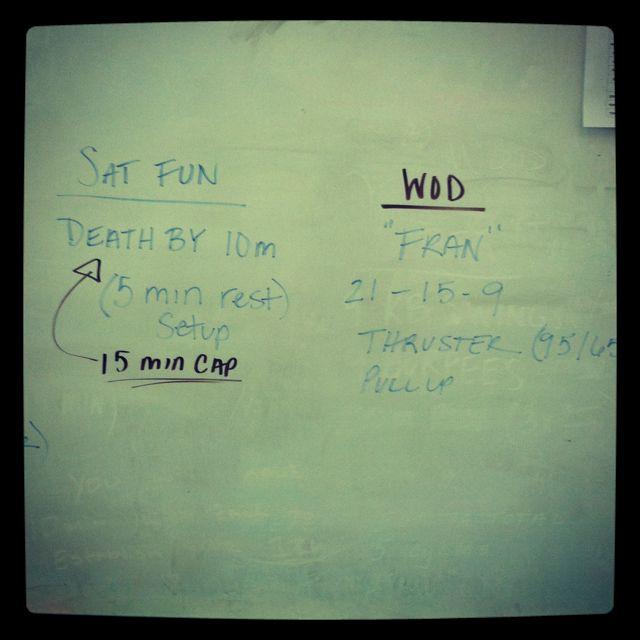
Benchmark WOD = Also known as the Crossfit girls, they are workouts with girls names, like Isabelle shown above, that can be repeated every so often to gauge your progress. They can also be used to compare your fitness level to other crossfitters. For example, one of the benchmark workouts is Fran.  You could ask someone, “What’s your Fran time?” and you could compare your time to theirs.
Hero WOD = Crossfit is often used in military training. Hero WODs are some of the most intense crossfit workouts, done to honor fallen members of the military. They’re often completed with weighted vests or masks to make them even more difficult.

Rx

How much weight should you use in the WOD?
For the exercises in the WOD that require weight, there is a “prescribed” or recommended weight. This is also know as Rx. So, if you’re strong enough, you can use the Rx weight for the WOD. If an exercise requires weight, the Rx weight will be written after the exercise in parentheses. The first weight is for men, the second is for women. For example, in the above workout, the Rx weight for the bear complex is 95# for men and 65# for women.  If you’re just starting, or haven’t lifted weights before, you can always “scale down” or use less weight.

How do you show people how much weight you used?

When you are finished with a workout, you record your score either on a dry erase board or into a computer. Depending on the type of WOD, you either write your time, or the number of rounds and reps you completed. In parentheses after that, you write any modifications you made to the WOD. If you used the prescribed weights for all exercises, you write (Rx). If you used more or less weight, you write how much weight you used. So if the Rx weight was 135# and you used 100# you would write your time/score followed by (100#). If you modified anything else, you can note that to. So, if you can’t do a pull-up and you did a jumping pullups instead, you might write (100#, JP).

————————–

So, now that we’ve got all of that down, let’s move on to a few other terms that you might encounter, especially during the skill/strength sessions.

1

Strength Session Terms

  • Rep = one performance of an exercise. For example, one squat, or one pushup, would be one rep.
  • Set = a number of repetitions. So, if you’re supposed to do 3 sets of 5 reps, that might be written 3 x 5, and you would complete 5 reps, rest, 5 reps, rest, 5 reps.
  • 1RM = One Rep Max. The heaviest weight you can use to perform a specific lift one time. For example, my 1RM for deadlift is 175#. I can do one deadlift with 175#, but if I tried to do it a second time, it would be too heavy. You can use your 1RM to calculate how much weight you should be doing during your strength sessions. For example, maybe your coach says your warmup should be 60% of your 1RM and that you should work up to 80% of your 1RM during your sets. Maybe your sets for your strength session are 6 x 3, or 6 sets of 3 reps. If I was doing deadlifts, I would warm up with about 105# and then work up to 140# over the course of those 6 sets.
  • PR = Personal record. Basically lifting a heavier weight than you have in the past. So, if my previous 1RM for deadlifts was 175# and I was able to lift 185# one or more times during a strength session, that would be a new PR!
  • EMOM = Every Minute on the Minute. For example, during a strength session you may do 2 reps of a specific exercise, like cleans, EMOM for 12 minutes. So the timer would start, you would do two cleans and then you would have the remainder of that minute to add more weight to your bar, stretch, reposition the bar, etc. When the timer got to 2 minutes, you would do two cleans again and repeat
  • OLY Lift = Olympic Lift. These are things like squats, cleans, squats and deadlifts.

Whew! I think that’s enough for now. Come back next week to learn more about different types of exercises and lifts we do during the WODs!

If you want to read more about Crossfit today, check out the post I wrote about Things Crossfit Has Taught Me!

Enjoy!
–Lindsay–

PS…if you liked this post/found it helpful, please PIN IT/tweet it/share it with friends 🙂

PPS…good luck to anyone competing in the Open that’s doing 13.2 today or this weekend! I’m doing it tomorrow morning!


Filed Under: Workouts

Registered Dietitians Who Blog

March 13, 2013 by Lindsay 64 Comments

Hi Friends!

Today’s a very special day. It’s National Registered Dietitian Day! In honor of that, I thought I’d give a little shoutout to some of the amazing RDs out there in the blog world that I think you should be following.

RDs who blog

These ladies inspire me daily. I love reading their blogs because they post great recipes, tackle interesting nutrition topics and provide great tips to help people lead healthy, active lifestyles. Here they are, in no particular order (Click the headers or the links below to visit their blogs!):

inspiredrd nutritionella fannetasticfood foodtrainers preventionrd
realmomnutrition candidrd nutritiouseats swankydietitian
professionalpalate teaspoonofspice realliferd nutritionunplugged healthfullyeverafter


sideofsneakers

And here they are listed by name:

  • Alysa at Inspired RD
  • Elle at Nutritionella
  • Anne at Fannetastic Food
  • Lauren at Foodtrainers
  • Katie at Healthy Heddleston
  • Nicole at Prevention RD
  • Sally at Real Mom Nutrition
  • Gina at The Candid RD
  • Melanie at Nutritious Eats
  • Kristen at Swanky Dietitian
  • Regan at The Professional Palate
  • Deanna & Serena at Teaspoon of Spice
  • Robyn at The Real Life RD
  • Janet at Nutrition Unplugged
  • Carlene at Healthfully Ever After
  • Heather at Side of Sneakers

As a bonus, I have to give a shoutout to Alexis at Hummusapien, and Carissa at Fit2Flex who are Dietetic Interns just like me! They’re going to make fantastic RDs soon!

hummusapien

fit2flex

And, since there are so many awesome RDs out there and I’m having a hard time limiting myself,  here are a few of my fav RDs on Twitter. Follow them for great recipes, news articles and more! (The links will take you to their Twitter pages)

  • Rebecca (@chowandchatter)
  • Amanda (@nutrititioustweet)
  • Bonnie (@eatsmartbd)
  • Rebecca (@ScritchfieldRD)
  • Kathy & Lauren (@Nutritionbabes)
  • Leah (@LeahMcGrathRD)
  • Kristina (@KristinaLarueRD)
  • Caroline (@SweetFoodie)
  • Danielle (@2eatwellRD)
  • Nutrition Blog Network (@NutritionBlogs) –> this site publishes TONS of great posts from RDs and it’s a great source of information for everyone!

I’m sure there’s some RDs I love that i’ve left out of this post. Please know it wasn’t intentional!!!

Let’s chat: Do you have a favorite RD blogger (or are you one yourself) that wasn’t mentioned above? Leave a link to their blog in the comments so everyone can check it out!

Now, go tell all the RDs in your life that you love them…and that you appreciate all of the hard work they put in to help make the world a healthier place!

Enjoy!
–Lindsay–
PS…I have to give a special shoutout to my current internship preceptor, Jenny. She’s amazing…and she also happens to have a food blog that you guys should check out! She’s just getting back into the groove of blogging again, so go show her some love: Foodie RD

foodierd


Filed Under: Uncategorized

Black Bean Meatless Meatballs

March 12, 2013 by Lindsay 39 Comments

Hi Friends!

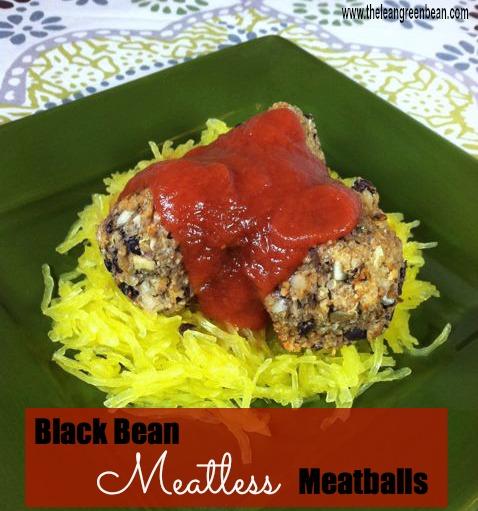
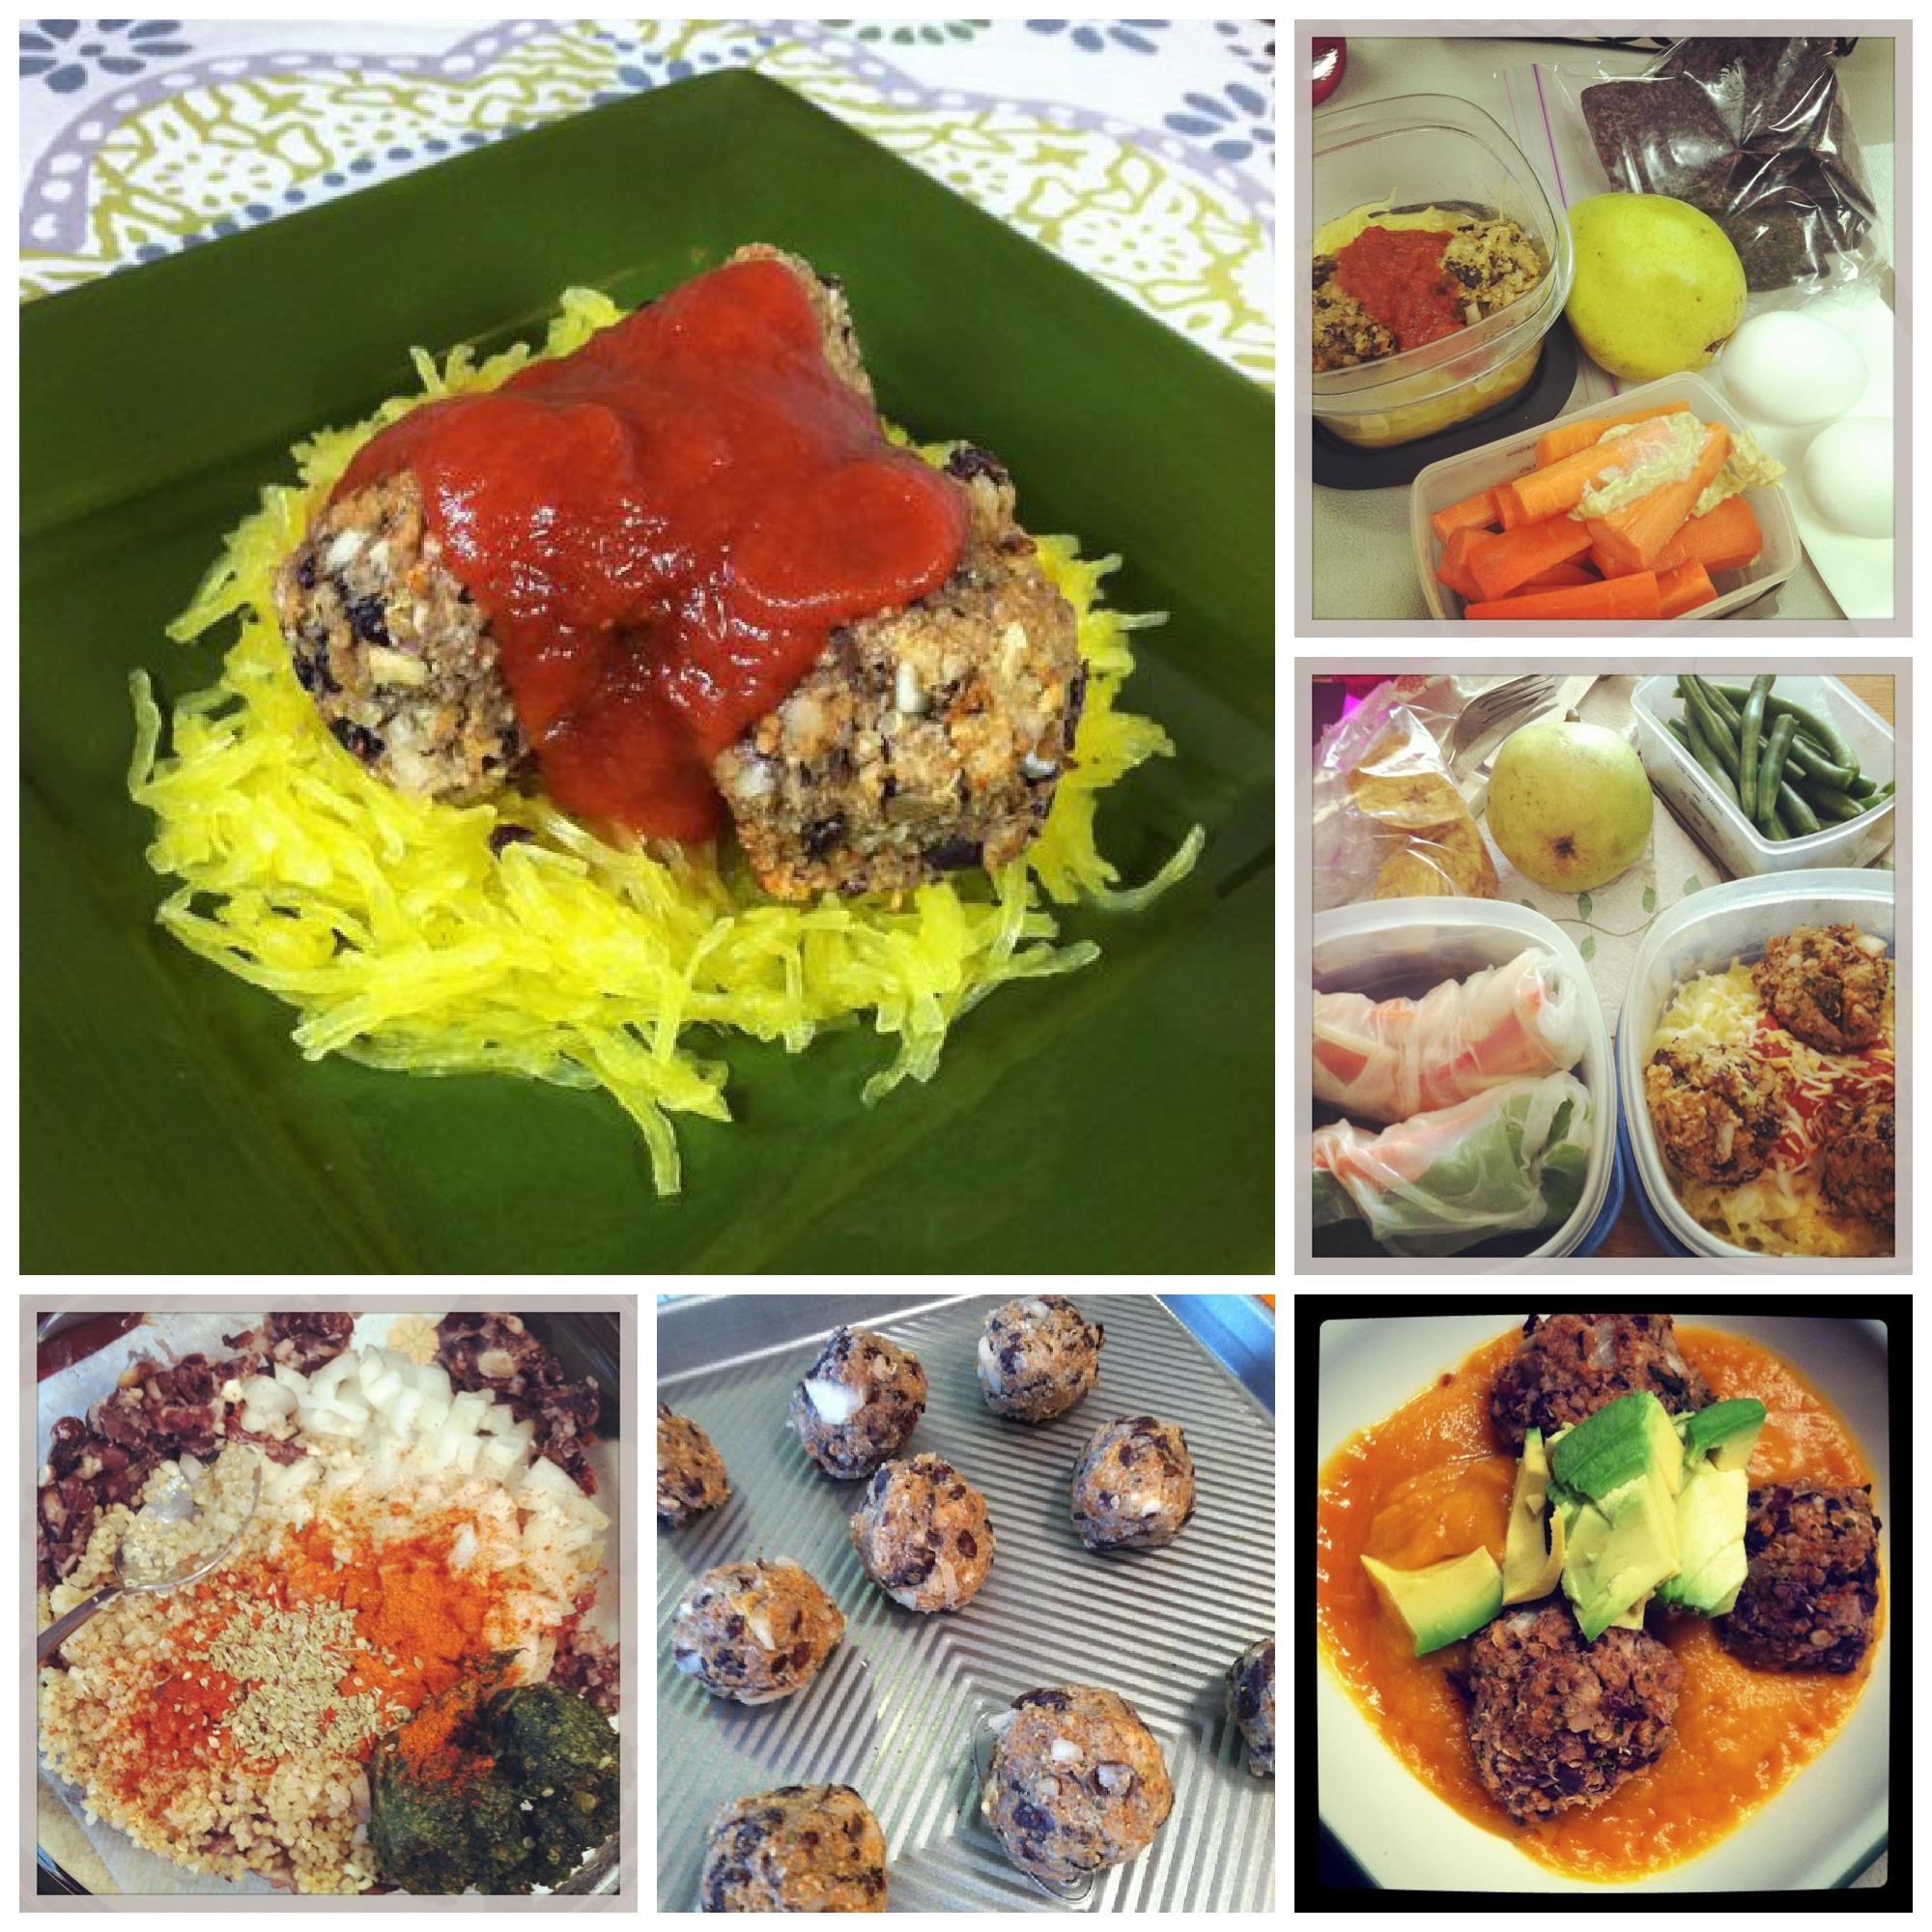
Just popping in with a quick recipe for you guys today. If you’ve been tuning in for the past few weeks, you may have noticed these black bean meatless meatballs popping up in my weekly eats! Today’s the day you get the recipe.

These vegetarian Black Bean Meatless Meatballs are protein-packed and hearty - you won't even miss the meat.

Ignore the fact that any kind of “ball” is difficult to photograph. Pretty they are not. Tasty they are 🙂

Print

Black Bean Meatless Meatballs

black bean meatless meatballs 1
Print Recipe

5 Stars 4 Stars 3 Stars 2 Stars 1 Star

No reviews

These vegetarian friendly “meatballs” are as easy as they are delicious.

  • Author: Author: Lindsay L
  • Prep Time: 5 minutes
  • Cook Time: 20 minutes
  • Total Time: 25 minutes
  • Yield: 12 1x

Ingredients

Scale
  • 2 c cooked black beans
  • 3/4 c cooked quinoa
  • 2 cloves garlic, minced
  • 1/4 c onion, diced
  • 1 Tbsp pesto
  • 3 Tbsp hummus
  • 1 tsp paprika
  • 3/4 tsp oregano
  • 1/2 tsp cayenne pepper
  • 1/4 c breadcrumbs
  • Instructions

Instructions

  1. In a bowl, smash the black beans well until they start to take on a paste-like consistency.
  2. Add remaining ingredients and mix well to combine.
  3. Form into balls, squeezing tightly to help them stick together.
  4. Bake at 400 degrees for 18 minutes, rolling them to a different side after 9 minutes.

Did you make this recipe?

Tag @theleangreenbean on Instagram


Pretty simple right?

These vegetarian Black Bean Meatless Meatballs are protein-packed and hearty - you won't even miss the meat.

I’ve been loving these little guys over spaghetti squash, but they’d also be great over real spaghetti. I also plopped a few into my sweet potato soup and guess what- AMAZING 🙂

Enjoy!
–Lindsay–
 

Filed Under: Dinner, Lunch

Fitness Friday 47

March 8, 2013 by Lindsay 44 Comments

Hi Friends!

I have two weeks worth of workouts to share with you guys since we skipped Fitness Friday last week!

fitnessfriday1

So let’s back up to two weeks ago:

FF1

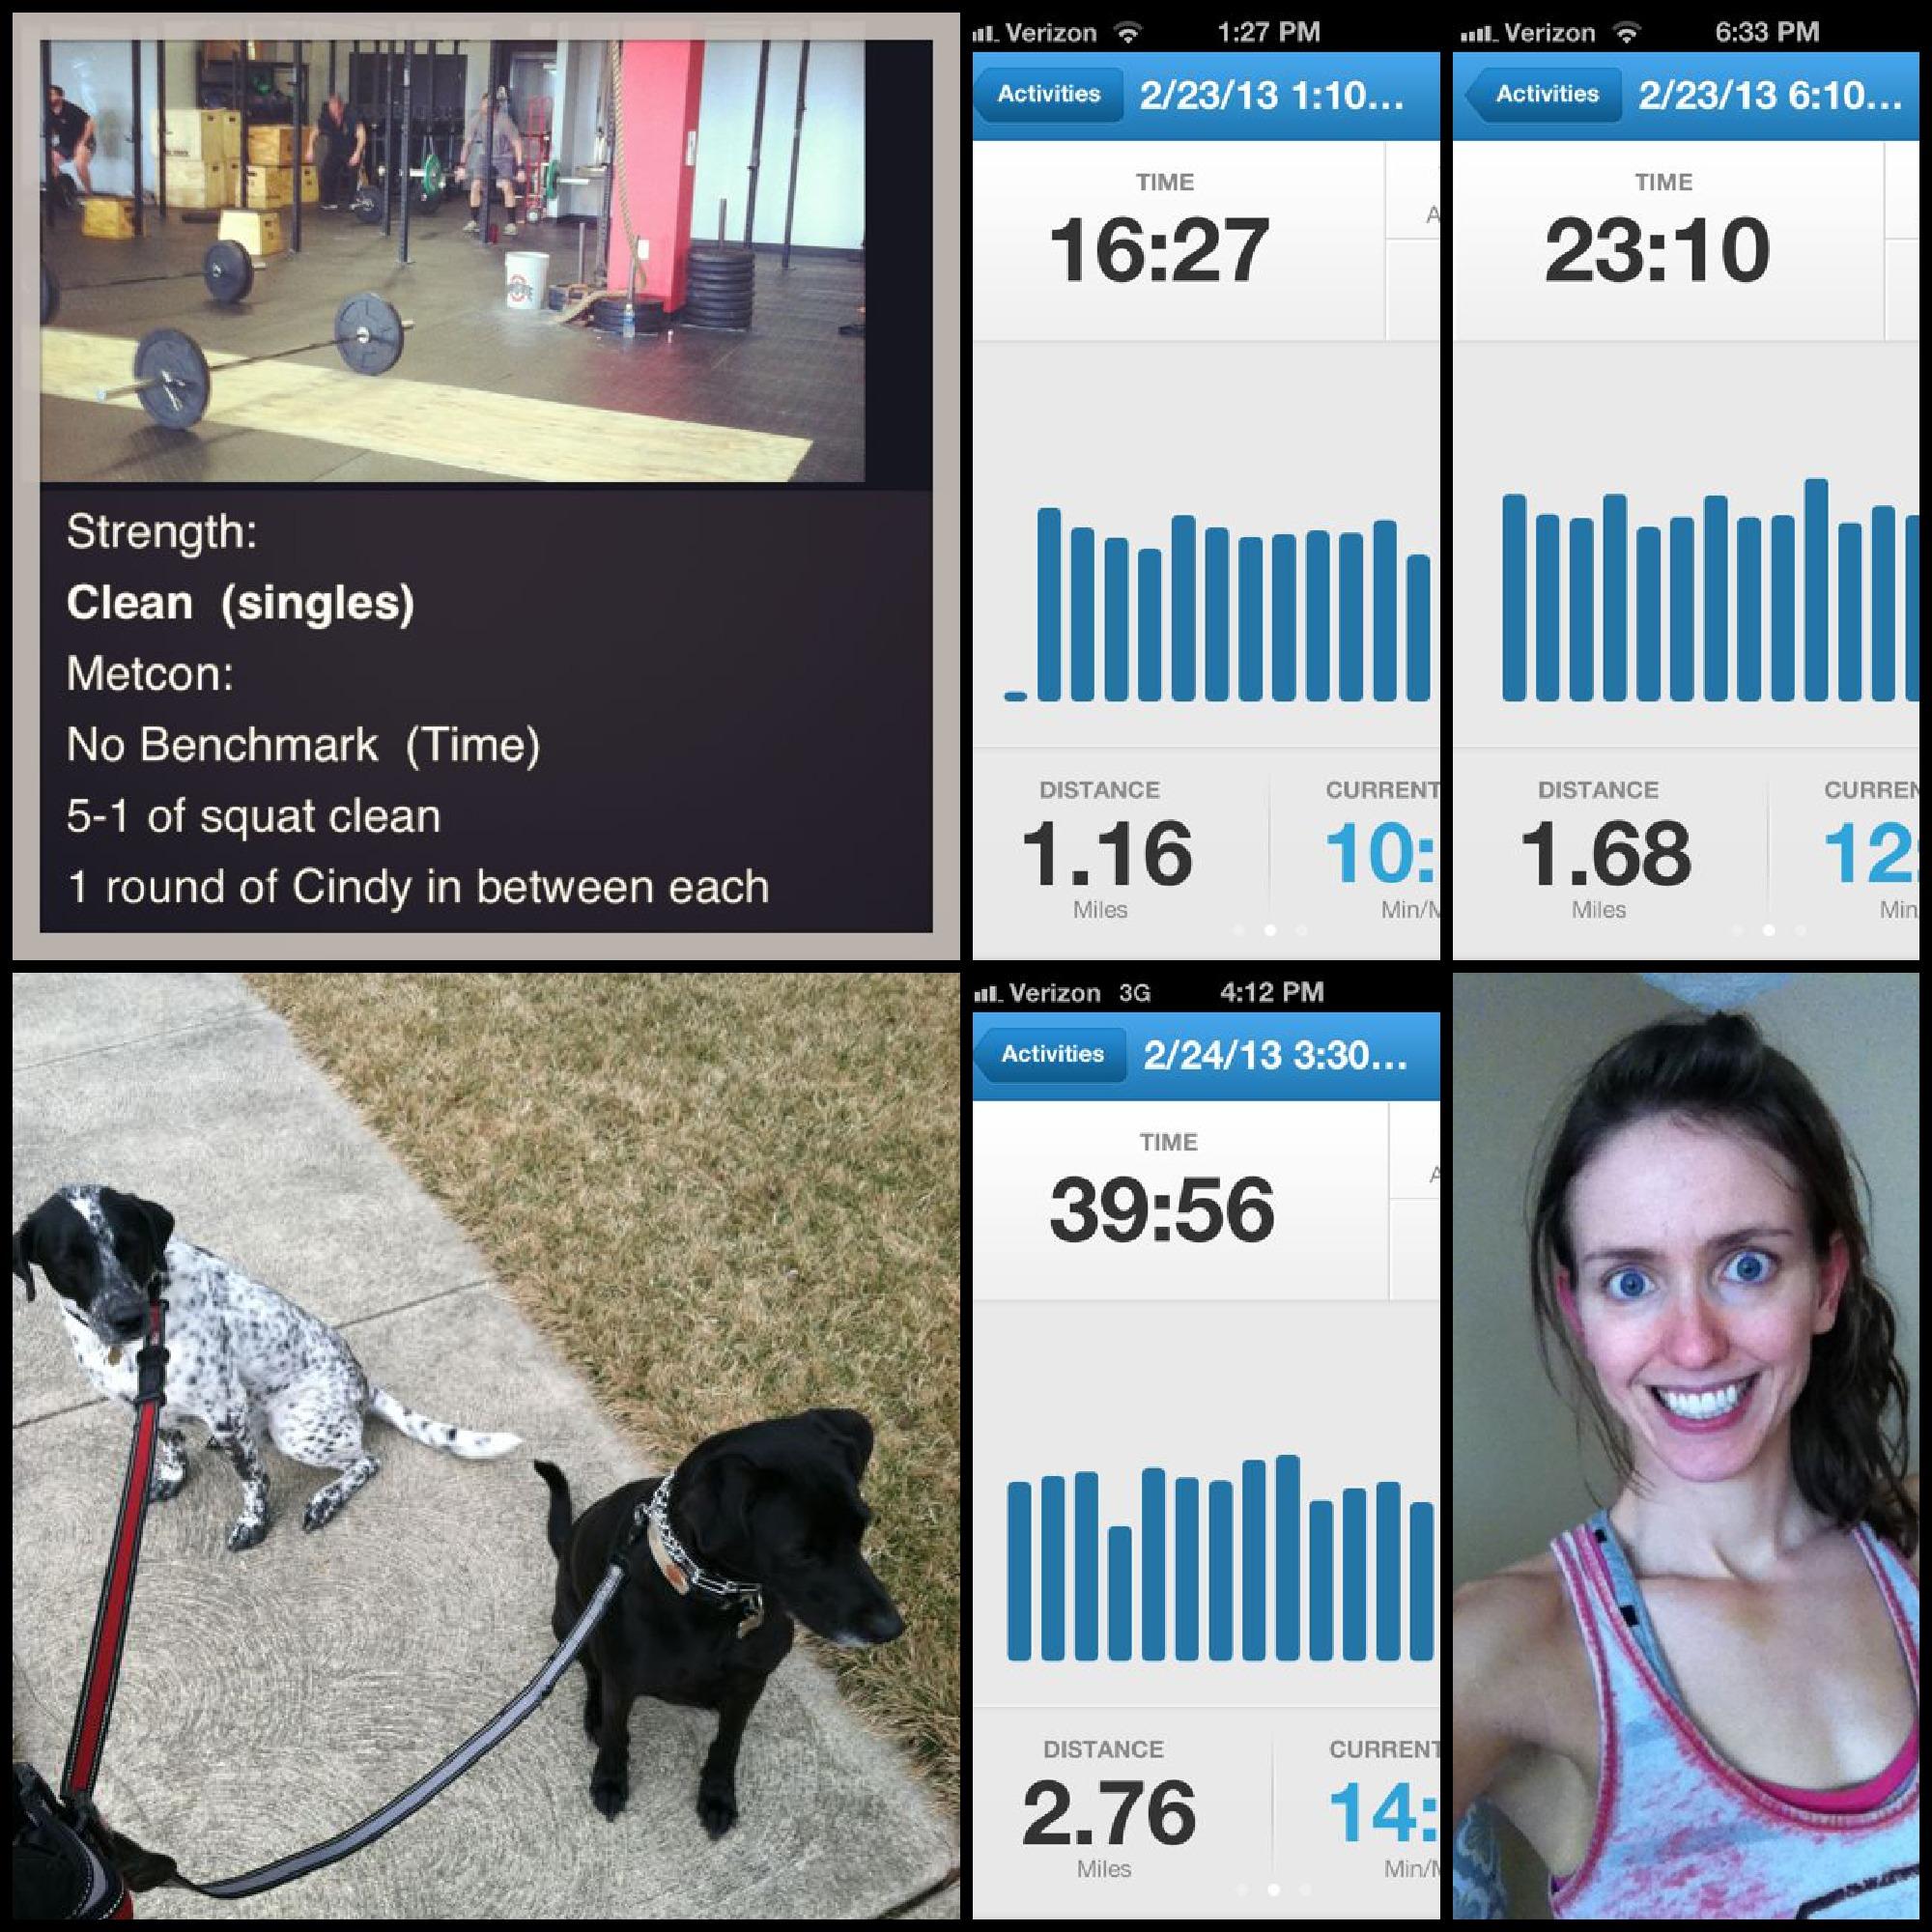
1. Saturday: I PR’d my squat clean at 105 pounds. For the workout I used 75 pounds and finished in 8:37.
2. Saturday we also took the boys on a couple of walks
3 & 4. Sunday: Active rest day. Took the boys on a walk!

FF2

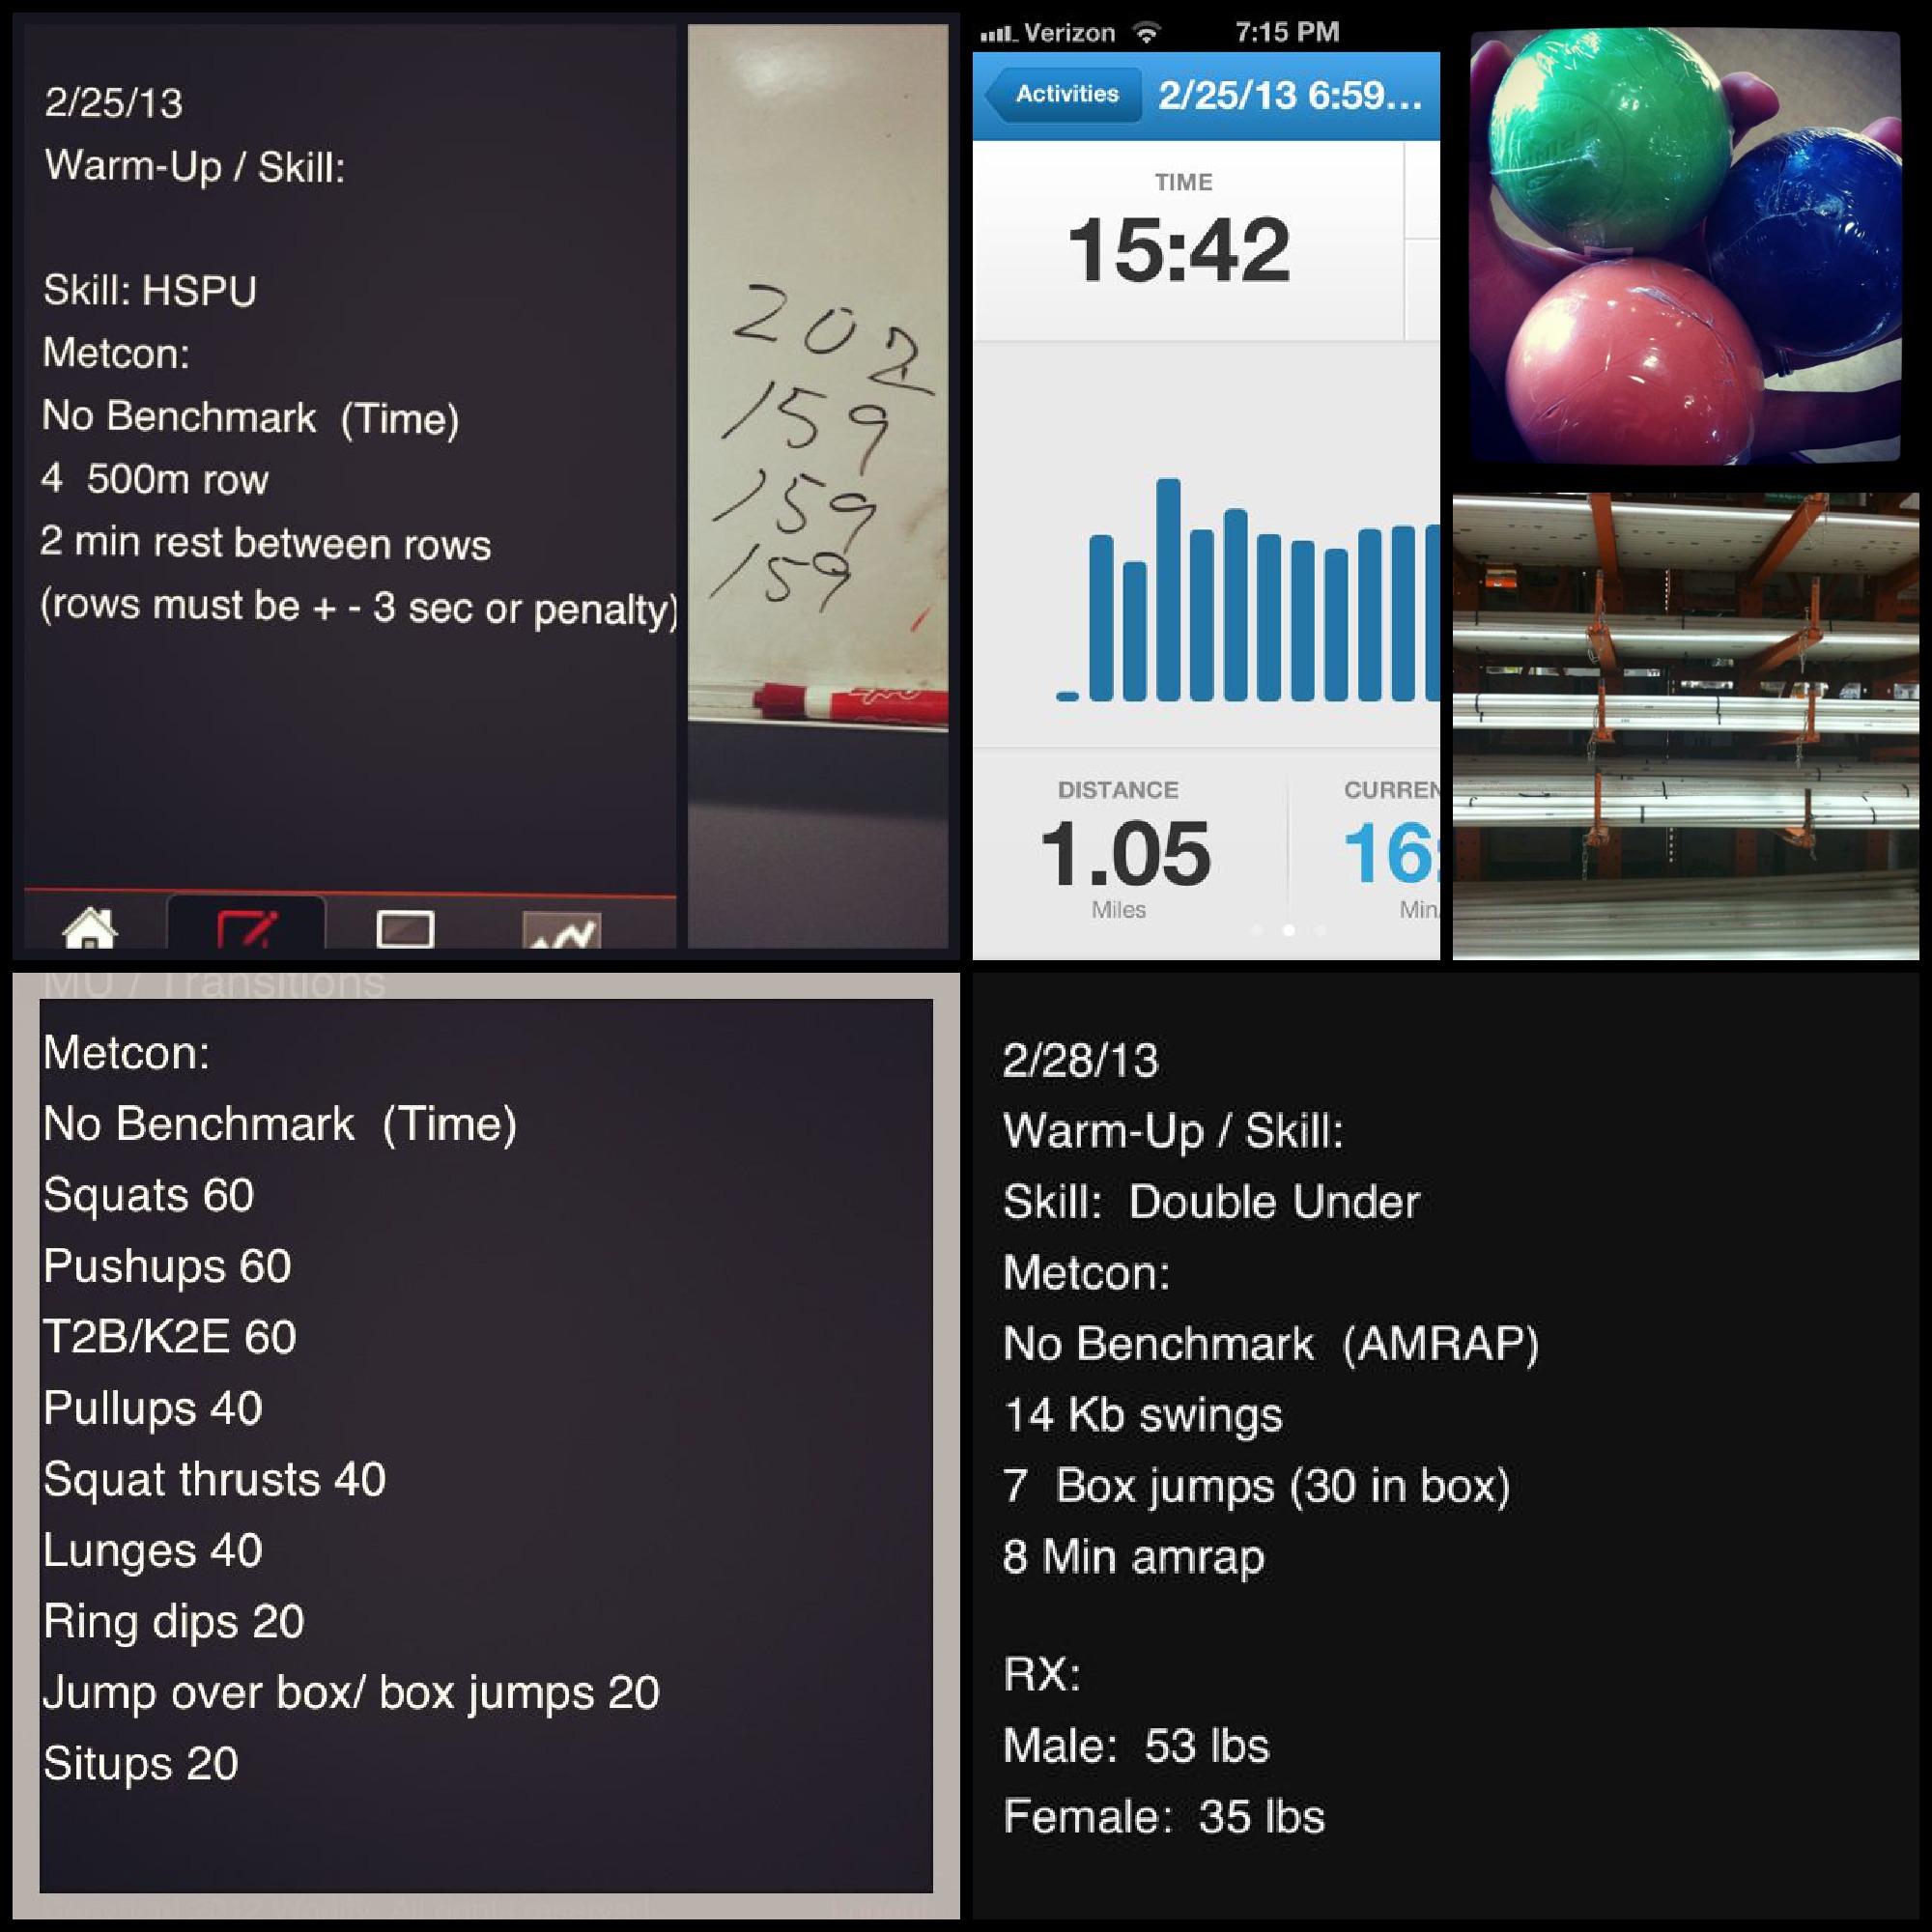
1. Monday: We worked on handstand pushups. I’m trying to get the hang of kipping handstand pushups but it’s not going so well 🙂 For the wod, you had to row 500 meters, 4 times and all your times had to be within 3 seconds of your first time. This wod was easy for me. I rowed in college so I know how to pace myself. I knew I could probably pull sub 2 but gave myself a little leeway on the first one and finished in 2:02. Then I pulled 1:59 for the next 3.
2. We also took the boys on a walk and tried out the new toys we bought over the weekend. We got some lacrosse balls, which you basically roll around on to help loosen up your muscles. It’s super painful, but it helps. We also bought a pvc pipe so we can work on our form for some of the olympic lifts.
3. Tuesday: This wod was seriously rough.  I finished in 23:10. Worst part was toes to bar, by far. I struggle to get like 10, so 60 of them in a row is pretty much ridiculous…and then having to do 40 pullups after that really sucks.
**Wednesday: Rest day**
4. Thursday: Crushed this one!  I did 8 rounds + 14 and used a 24 inch box! For the skill we did double unders and also worked on pullups. I finally figured out how to string together 5 kipping pullups! Previously I could never get more than 2-3.

FF3

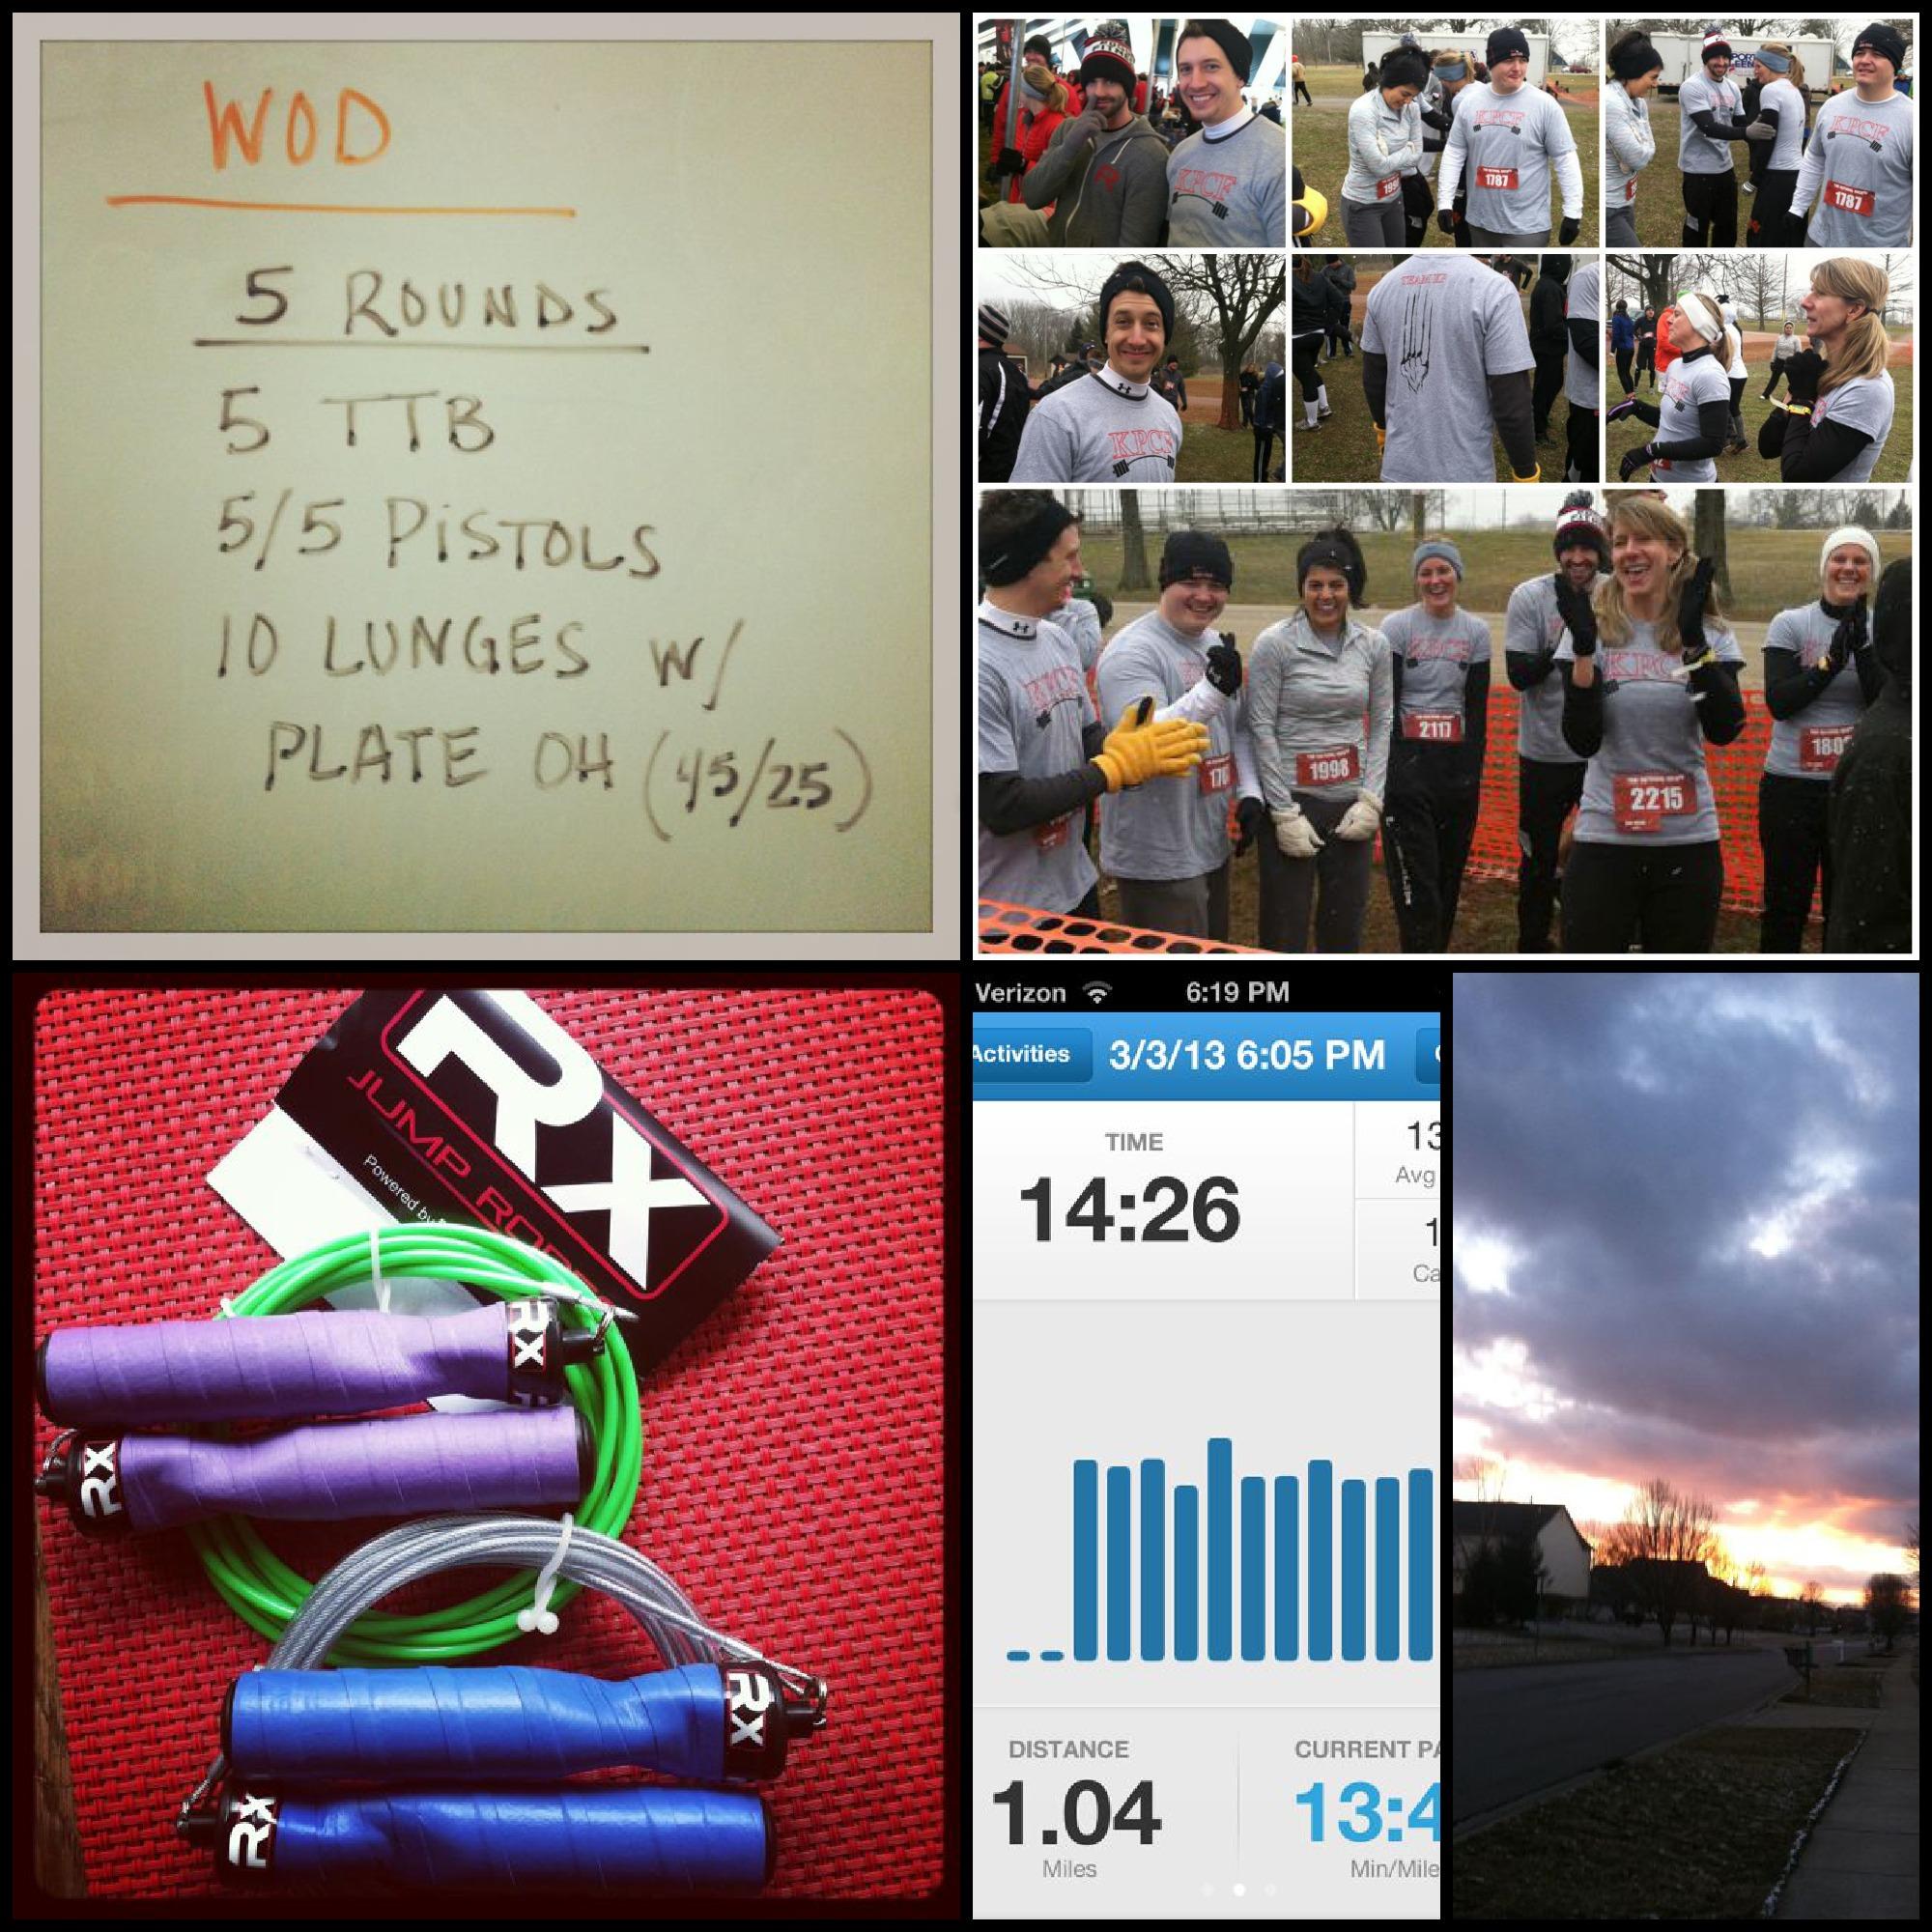
1. Friday: We both had the day off so we went to our first ever morning WOD. We also went back to our old box which is now open again! The WOD had toes to bar, which I hate, and pistols, which I love 🙂 I did this one Rx and finished in 8:13. Loved it!
2. Saturday: Hubby ran the Survival Race 5k. I decided not to run last minute because my foot has been bothering me and I was worried about the uneven ground. Turns out I made a good choice- one of our friends ended up with a stress fracture after the race and has to wear a boot for 3 weeks!
3. We got new jumpropes!
4. Sunday: A little sunset walk with the boys.

FF4

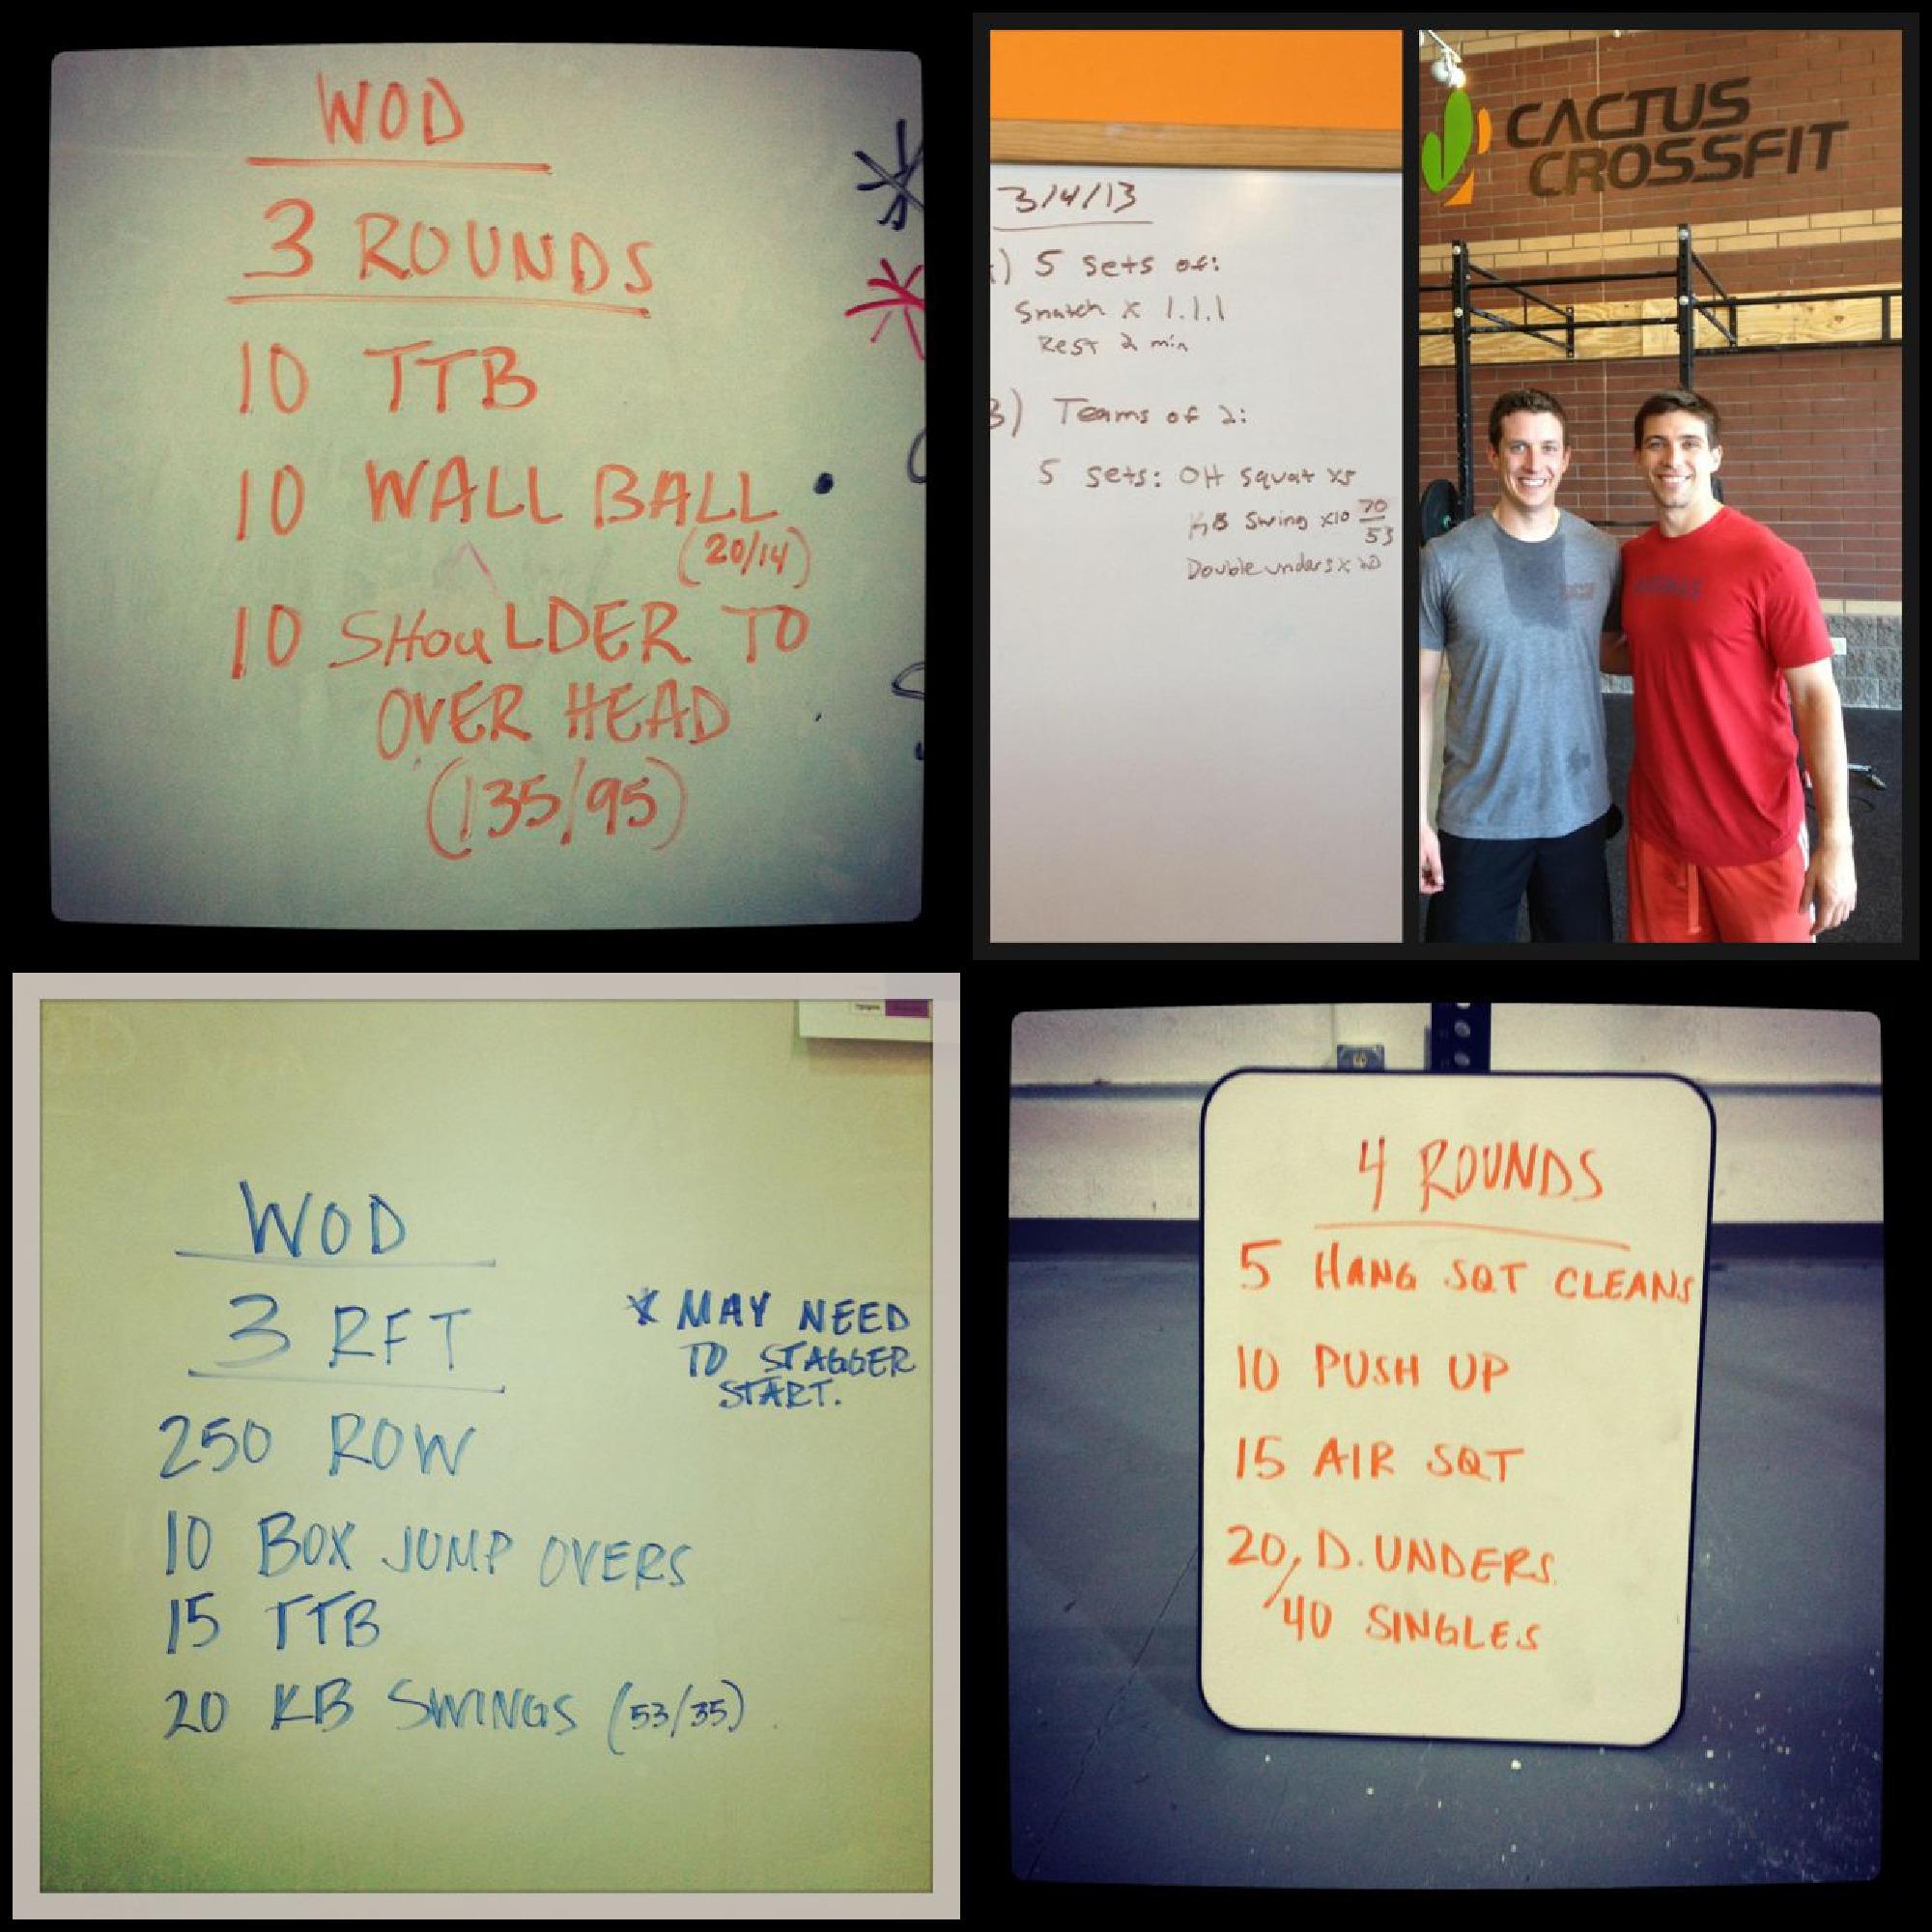
1. Monday: More toes to bar (gag me!). For skill/strength we did deadlifts and power cleans. Two more PRs for this girl! I deadlifted 175 pounds which is a 40 pound PR and cleaned 115 pounds, which is a 20 pound PR. I only used 65 pounds for the shoulder to overhead in the wod. Finished in 5:41.
2. Hubby went to Cactus crossfit while he was in AZ and did a drop-in workout. He represented well by PR’ing his overhead squat, doing 70 pound kb swings and stringing together lots of double unders!
3. Tuesday: I showed up for another morning workout because I had class Tuesday night and I almost turned around and walked out when i saw TTB were in the workout AGAIN!  This was a tough wod. I finished in 13:35.
4. Wednesday: Hardest workout in a while. We worked on hang squat cleans and I got up to 105 pounds. For the workout I used 85 pounds and let me tell you, I almost stopped and stripped down the weight. My legs were on FIRE. But I toughed it out and finished in 9:29.

a

Thursday: What I should have been doing- taking a rest day. What I did instead? The first workout of the Crossfit Open.

There are over 120,000 people registered for The Open worldwide. One new workout is announced each week for 5 weeks. You register for The Open and then after each workout is announced, you do the workout at an approved crossfit affiliate gym, or videotape yourself doing the workout and submit it online to be judged. Everyone all over the world posts their scores and after the 5 workouts are complete, the top competitors advance to regionals. Regionals are where you qualify to go to the actual Crossfit Games.

Clearly I’m just doing it for fun. I’m certain there’s going to be a workout I can’t even do because of the skill or weight required…but it’s still fun to be part of it. What’s even cooler is that one of my coaches is a crossfit superstar. Check out this article about her! She finished in the Top 25 at The Crossfit Games last year and is hoping to get first at regionals and seriously compete for a medal this year! It’s pretty awesome to have her as a coach and to get to cheer her on!

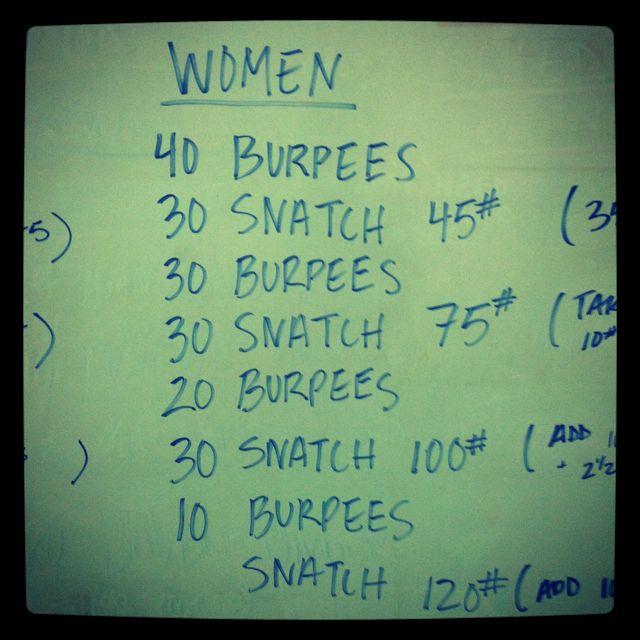
So anyways, they released the first workout (called 13.1) on Wednesday night. You could watch it be revealed online and then they had two of the top male Crossfit competitors do the workout live, just after it was announced. To give you a little perspective, the first workout last year was “as many burpees as you can do in 7 minutes.” Ridiculous right? Well this year’s first workout is even harder! Here’s what is was:

IMG_2453

Crazy right?! Burpees suck and snatches are probably the hardest olympic lift to master. My goal was to get through the first 40 burpees, the 30 snatches at 45 pounds, the next 30 burpees and then to at least get a few snatches at 75#. I knew that would be a PR for me. The most I’d ever snatched was 60#.

IMG_2463

Well guess what?! I did it! I got through the first set of burpees, the first set of snatches and then second set of burpees. Then we had to change our own weight. By the time I got the bar set up for the 75# snatches, we were 11 minutes into the workout. That meant I had six minutes left to get as many snatches as I could. In those six minutes I got 7 snatches at 75#. I also had about 20 failed reps 🙂 My form wasn’t pretty, but I’m proud of the ones I got!

Oh, and prior to the workout I had a little one on one coaching session with this guy:

IMG_2455

I had no idea who he was…just thought he was a random coach visiting our box. Turns out he’s Josh Bridges, the freakin’ runner up at the 2011 Crossfit Games!!! He’s also a Navy Seal. Sooooo…he’s pretty much a badass. And i’m pretty much clueless 🙂 Hubby, on the other hand, recognized him right away because he’d seen him on ESPN. But he didn’t bother to tell me he was famous while were there, or I would have gotten a picture with him!

Whew! Now you’re all caught up. Today is most definitely a rest day. I’m still deciding if i’m gonna try workout 13.1 again to see if I can improve my score or not. We’ll see!

Enjoy!
–Lindsay–
Filed Under: Workouts

Lasagna Soup

March 7, 2013 by Lindsay 46 Comments

Hi Friends!

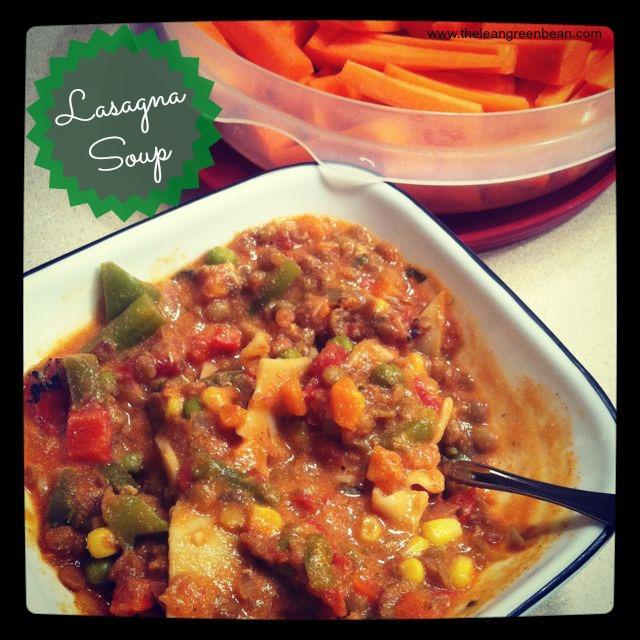
So here’s the deal. I got a little lazy and I didn’t feel like taking real pictures of this recipe. But so many of you asked for it that i’m gonna go ahead and share it with you anyways. You’ll just have to deal with the instagram photos 🙂

All the goodness of lasagna without the hassle of layering and baking it!

The whole reason this recipe came to be is because I’ve been craving lasagna for the past three weeks. A few weeks ago, I went to make some Crockpot Lentil Veggie Lasagna and I was fresh out of tomato sauce! Then I promptly forgot to buy some the next three times I was at the store. I had one can of diced tomatos and a small 8 oz can of tomato sauce in the pantry and I finally decided to just make it work.

And I succeeded! Here’s the recipe:

Print

Lasagna Soup

lasagna soup 1
Print Recipe

5 Stars 4 Stars 3 Stars 2 Stars 1 Star

No reviews

Classic comfort food with a twist, this lasagna soup is tasty and nutritious.

  • Author: Author: Lindsay L
  • Prep Time: 15 minutes
  • Cook Time: 20 minutes
  • Total Time: 35 minutes
  • Yield: 5 1x

Ingredients

Scale
  • 2 cloves garlic
  • 2/3 c onion, diced
  • 4 c diced veggies (fresh or frozen)
  • 1–14.5 oz can no salt added diced tomatoes
  • 1 cup no salt added tomato sauce
  • 4 c vegetable broth
  • 2 Tbsp fresh basil, minced
  • 2 tsp oregano
  • 1 tsp cayenne pepper
  • 1 tsp paprika
  • black pepper, to taste
  • 2 cups cooked lentils
  • 4 lasagna noodles
  • 1/2 c ricotta cheese
  • fresh spinach, optional

Instructions

  1. Saute the garlic, onion and vegetables in a large pot on the stove for about 10 minutes.
  2. Add the spices, tomatoes, tomato sauce and broth and simmer until vegetables reach desired tenderness.
  3. Stir in the lentils.
  4. Break the lasagna noodles into pieces and add them to the pot. Simmer until the noodles are cooked.
  5. Stir in the ricotta and fresh spinach (optional). Adjust the spices if necessary
  6. Serve warm.

Did you make this recipe?

Tag @theleangreenbean on Instagram


Here’s the important thing to note about this recipe. The noodles will soak up the broth if you don’t eat it all. So if you think there’s going to be leftovers, and you want it to stay soup-like, you may want to cook the noodles separately and just mix them in each time you eat it. I didn’t really think about the fact that I was going to be the only one eating this because hubby was out of town. So I had a lot of leftovers. Whoops!

IMG_2372

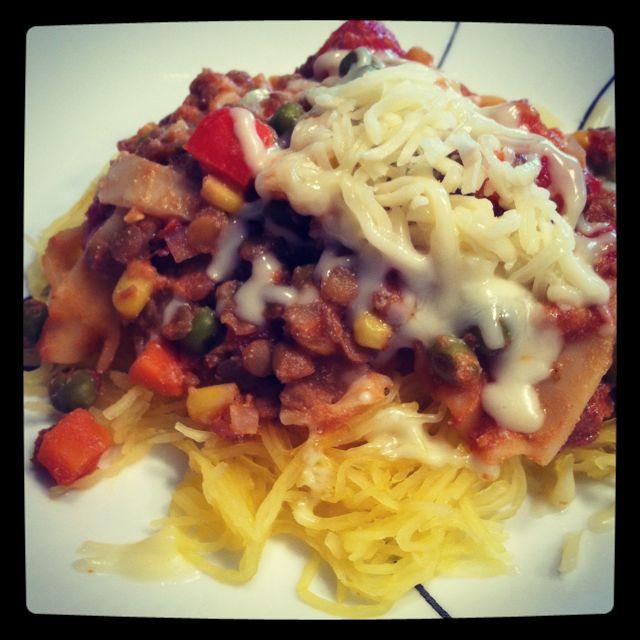
But it was fine. I kind of liked getting to eat it two different ways. I enjoyed it as soup the first night, and then I served the leftovers on a bed of spaghetti squash and topped it off with some mozzarella cheese the next three times I ate it! Delicious either way.

Another option would be to leave out the noodles all together and use spaghetti squash noodles in the soup instead!

Enjoy!
–Lindsay–
Filed Under: Dinner, Soup & Salad

Building Your Resume as a Dietetics Student

March 2, 2013 by Lindsay 10 Comments

Hi Friends!

Today I have a special treat for you guys. A while ago Rachelle, a dietetics student that I’ve gotten to know over the past couple years in the blog world, reached out to me about writing a guest post to encourage dietetics students to get involved and build up their resume while they’re still in school.

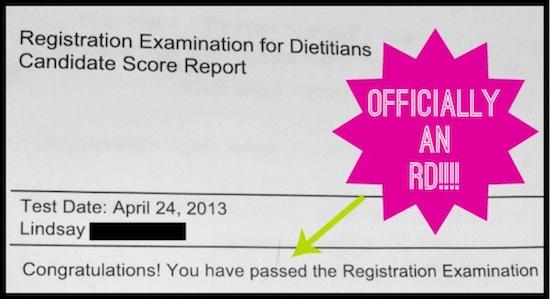
Since I’m almost done with my internship/getting ready to take my exam (read: ALMOST OFFICIALLY AN RD!!), I’m starting to get more and more questions from current and future Dietetics students about how to get started, what path to take, what to do to increase their chances of getting an internship, etc. So, I thought some of you guys might be interested in hearing what Rachelle has to say!

 ——————–

Hi Everyone,

My name is Rachelle Ausman and I am senior in the Coordinated Program in Dietetics at the University of Idaho located in the Pacific Northwest. Besides being known for huckleberries, trout, and lots of outdoor activities, Idaho is also home of the Idaho Academy of Nutrition and Dietetics.

As a student member, I currently serve as the Student ‘Eat Right Idaho’ Blog Coordinator, which is a volunteer position where I am able to communicate with dietetic students and health professionals across Idaho.

Are you a dietetic intern or student passionate promoting nutrition through social media? Then there is a great resume builder just for you: volunteering with your State Academy in social media.

According to Janet Helm, a Registered Dietitian as well as author of Nutrition Unplugged and founder of the Nutrition Blog Network, the five pillars of social media include

  • Blogging
  • Facebook
  • Twitter
  • Youtube
  • Pinterest

Through these pillars, dietetic students canpromote an evidenced-based nutrition, health, and wellness practice to the public.

How?

By emailing your State social or public media chair about possible volunteer opportunities with the State’s blog or other social media accounts. Through this you could:

  • Write a guest post on a nutrition fad or even about your internship.
  • Lead a student blog for students around your state.
  • Create a food demonstration video with a healthy recipe for other dietetic professionals through Youtube.
  • Host a Twitter chat for students around the state
  • Pin nutrition education materials for your state Registered Dietitians

There are so many benefits that come with volunteering for your State Academy including, but not limited to:

  • Promoting an evidenced-based nutrition, health, and wellness practice to the public!
  • Gaining experience in writing.
  • Learning about the latest nutrition trends, fad diets, food holidays, and nutrition related technology applications.
  • Acquiring organization and management skills.

And did I even mention that volunteering leads to great networking opportunities in your State as well as a great resume builder!

My experience as a student volunteer has taught me about how important social media is in reaching others about nutrition. I have also gained communication skills as well as how to use many different social media outlets.

If you are a student, I HIGHLY encourage you to get involved with your State Academy as it is a great learning experience and outreach opportunity to the public.  Another volunteer opportunity includes serving on a committee for your State conference!

———————

Rachelle also has a blog of her own: The Fresh Plate and you can find her on twitter: @the_freshplate

Happy Saturday!
–Lindsay–
 

Filed Under: Uncategorized

Smart Snack: Almonds

February 26, 2013 by Lindsay 56 Comments

Hi Friends!

Thanks to Blue Diamond for sponsoring this post. I think I might be developing an obsession with blog series! I’ve been wanting to start up this little series for a while now and I’m finally getting around to it. I get a lot of questions about snacks from my readers. What do I eat for a snack? What are some healthy snacks? What are some on-the-go snacks that I can keep in my bag?

So, I thought it would be fun to do a few spotlight posts on some of my favorite snacks! I’m starting with almonds for a few reasons:

  • They’re a staple in my pantry.
  • Hubby & I eat them every day.
  • They great for your heart.
  • February is National Heart Health month.

Heart Healthy Almonds

I’m also using this post as an opportunity to highlight one of my favorite companies: Blue Diamond Almonds.

Blue Diamond will actually be sponsoring my trip to Blend Retreat in May!!!! Yippee!!! More to come on that soon 🙂

If you know me, or have been reading my blog for a while now, you know that I’m pretty picky when it comes to the companies I work with. I don’t do a whole lot of sponsored posts and I turn down a lot of opportunities to work with companies simply because they don’t fit with what I believe/don’t fit with this blog.

All that being said, Blue Diamond is one company that I’m proud to work with! I love their products (heck- I buy them even when I’m not working with them) and I love all the people that represent them as a company.

Blue Diamond is a proud supporter of Heart Health month and is encouraging everyone to learn more about the importance of keeping your heart healthy!

———————–

So let’s talk about heart health for a minute. I’m sure most of you have heard that almonds are good for your health, and here I am telling you guys what a great snack they make…but do you know why?

BD_Can6oz_WN_New_FD

Here’s a little background:

The FDA approved the following claim in 2003:

“Scientific evidence suggests but does not prove that eating 1.5 ounces per day of most nuts, such as almonds, as part of a diet low in saturated fat and cholesterol may reduce the risk of heart disease.”

What exactly does that mean? Not to get all science-y on you but here’s a brief review:

Cholesterol is made up of HDL and LDL, which need to be kept in balance. When LDL is too high, it builds up on cell walls and creates plaque, which can clog blood vessels. This can cut off blood supply to the heart, or plaque can break off and cause blood clots which can lead to heard attacks and strokes. By lowering the amount of LDL cholesterol in your blood, you give the HDL a chance to clean up the excess LDL and prevent plaque from building up, thus reducing your risk for heart disease. Since heart disease is the leading cause of death in the U.S., finding ways to decrease the risk is important.

See why almonds are a great addition to your everyday diet? If you’re still not convinced, here’s a few more benefits of almonds:

  • They’re high in monounsaturated fat
  • They’re a good source of fiber
  • They’re a good source of Vitamin E, Magnesium & Copper
  • They’re a good source of protein
  • They can help improve insulin sensitivity
  • They can help reduce inflammation

Bottom line: Almonds are a smart snack for more reasons than one.

However, there is one thing  you should keep in mind. Almonds are a fairly high calorie snack, so make sure you stick to the correct portion size! A serving is 1 oz. That equals about 23 whole almonds. In that serving, you’ll find about 160 calories, 14 grams of fat (only 1 of which is saturated), 6 grams of protein and 3 grams of fiber.

BD_Bag16oz_WN_AHA

So we know why they’re good for you and how many you should eat…all that leaves is HOW you should eat them, right?

A few suggestions:

  • Raw and plain
  • In your trailmix
  • As an oatmeal topping
  • Mixed with yogurt
  • Ground into almond butter

Almonds are a heart healthy snack that can be eaten a variety of ways. Here are few ideas!

Let’s chat: Do you like almonds? What’s your favorite way to eat them?

Enjoy!
–Lindsay–
 

 **This post was sponsored by Blue Diamond. All thoughts and opinions are my own**

Filed Under: Snack, Sponsored

Fitness Friday 46

February 22, 2013 by Lindsay 15 Comments

Hi Friends!

Here we are at Friday again. That means it’s time for a quick rundown of my workouts this week!

fitnessfriday1

Friday

IMG_1880

You guys know how I love my Friday night crossfit! Well, this was a rough one. I finished in 14:29 and was definitely feelin’ it by the end. I’m still working on those knees to elbows, but I did the best I could!

Saturday

IMG_1893

Best way to kick off a weekend? Saturday morning crossfit! If you’ve never done a squat clean, I’m hear to tell you that they will set your legs on FIRE!!! We set up two barbells so I did 75 pound squat cleans and 115 pound deadlifts. I finished in 7:16.

Sunday

IMG_1960

Rest day. It was flipping freezing, but we bundled up after dinner and took the boys on a quick walk!

Monday

IMG_1974

I realized that we signed up for a 5k a while ago…and that the race is ummm, next weekend. I literally haven’t run in months. Whoops! We actually had decent weather on Monday so I decided to take the boys for a quick jog before crossfit, just to see how it went. I covered 2.5 miles doing 1/4 mile walk, 1 mile run x 2. And guess what? I felt pretty darn good! Crossfit for the win!

IMG_1978

Then we headed to crossfit and I got my ass kicked. 5 rounds of 15 burpees and 10 box jumps after running is no joke. Since the power cleans had to be unbroken, I went light and did 65 pounds to focus on technique. I think i’m finally getting the hang of them! I finished in 10:54.

Tuesday

IMG_2024

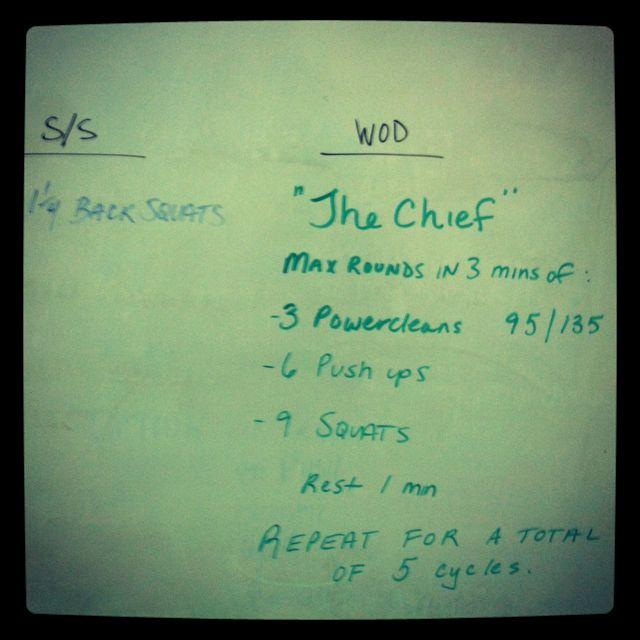
Any of you crossfitters ever done The Chief? It’s rough. Every round  you had to start over with cleans instead of just starting up where you ended after the last 3 minutes. My goal was 4 rounds during each 3 minute set and I did it…but it was HARD. I ended with 20 complete rounds and 37 extra reps…mostly cleans and pushups. For the cleans I did 85 pounds and I definitely gave myself a nice big bruise on my collarbone.

Wednesday

Rest day. I was having a bit of a foot issue on Tuesday and Wednesday that I’m pretty sure was from running those couple miles on Monday in my non-running shoes. Lesson learned. It hurt to walk and is still a bit sore so I’ve been icing it like crazy and trying to avoid jumping on it and things like that.

Thursday

IMG_2042

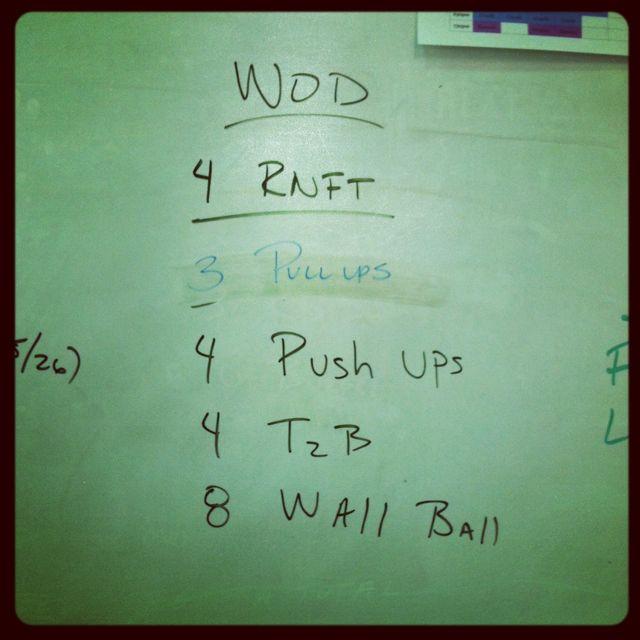
First, I PR’d in bench press during our strength session! I did 5 reps at 65 pounds! Then we did the workout above. After my success with kipping pullups during Cindy last week, I decided to just go for it and do all kipping pullups during this WOD too, even though I knew it would take me a lot longer than other people. I finished in 7:15 and was so proud of myself. I can only do 2-3 pullups at a time so I had to keep dropping down for a few seconds and then jumping back up, but I did it!

Today’s a rest day and then we’ll be up bright and early to tackle our Saturday morning WOD.

Let’s chat: How was your week?! Anybody try any fun new workouts? Leave me a link in the comments!

Enjoy!
–Lindsay–
Filed Under: Workouts

Greek Black Bean Burgers

February 21, 2013 by Lindsay 57 Comments

These Greek Black Bean Burgers are a great meatless option. Make a batch on the weekend to have on hand for quick, easy meals throughout the week! 

Hi Friends!

When I said I got my act together this weekend, I really meant it. Not only did I take pictures so I could post the Sweet Potato Banana Bites, but I also FINALLY took pictures so I could share the recipe for my Greek Black Bean Burgers. Can I just say that I hate taking pictures of burgers? They’re kinda ugly. Don’t let that deter you, though. I promise they taste great!

These Greek Black Bean Burgers are a great meatless option. Make a batch on the weekend to have on hand for quick, easy meals throughout the week!

To say we’ve been obsessed with these burgers lately would be putting it mildly.

These Greek Black Bean Burgers are a great meatless option. Make a batch on the weekend to have on hand for quick, easy meals throughout the week! Try them on a bun, on salads, or crumbled in an omelet!

We’ve been eating them for lunch, for dinner, on salads, on a bun, and even crumbled in our omelets. They’re easy and super versatile, as well as extremely delicious!

Here’s the recipe:

Print

Greek Black Bean Burgers

greek black bean burgers 1
Print Recipe

5 Stars 4 Stars 3 Stars 2 Stars 1 Star

No reviews

On a bun or over a salad, these healthy burgers are delicious however you enjoy them!

  • Author: Author: Lindsay L
  • Prep Time: 10 minutes
  • Cook Time: 18 minutes
  • Total Time: 28 minutes
  • Yield: 6-8 1x

Ingredients

Scale
  • 1 small red pepper, roasted, peeled & diced
  • 23/4 cups black beans, divided
  • 11/4 c cooked quinoa, cooled
  • 1/4 c hummus
  • 2 cloves garlic, minced
  • 1/2 c feta, crumbled
  • 1/2 c onion, diced
  • 1/2 c breadcrumbs
  • 1/2 – 1 tsp greek seasoning

Instructions

  1. Put 2 cups of black beans in a medium bowl and smash well.
  2. Add the quinoa, hummus, garlic, greek seasoning and onions and mix until well combined.
  3. Add the red pepper, feta, remaining beans and breadcrumbs. Mix until breadcrumbs are well combined.
  4. Mix and form into patties. Squeeze firmly to help make sure they stick together well.
  5. Bake at 400 degrees for 18 minutes, flipping once.

Did you make this recipe?

Tag @theleangreenbean on Instagram

These were inspired by the Asian Black Bean Burgers I made a few weeks ago. The basic formula is the same. I just tweaked the ingredients to give them a Greek spin 🙂

[clickToTweet tweet=”These Greek Black Bean Burgers from @leangrnbeanblog make a great base for any meatless meal!” quote=”These Greek Black Bean Burgers from @leangrnbeanblog make a great base for any meatless meal!”]

Enjoy!

–Lindsay–
Filed Under: Dinner, Lunch

Dietetic Internship: Weeks 17-20

February 14, 2013 by Lindsay 36 Comments

Hi Friends!

As usual, I’m behind on my internship rotation recap posts. I’m halfway through my long-term care rotation and I still haven’t filled you guys in on my four week food service rotation!

So let’s catch up, shall we?

For the month of January, I interned with the food service director of two local school districts. She has been the director of one district for several years and just last year she took over the neighboring district as well. Between the two districts, there were 10 schools: 2 high schools, 2 middle schools and six elementary schools.

I know food service rotations get a bad rep in the internship world for being stupid and boring, but I really enjoyed mine. I did have an awesome preceptor so I’m sure that helped a lot… but still, it was a lot more interesting than I expected it to be!

Unlike my last rotation, which got a bit repetitive, this rotation was something new every day. Here are some of the things I did:

IMG_1297

  • Researched new rolling coolers for the breakfast in the classroom program.
  • Researched new rules and regulations for having salad bars in the cafeteria.
  • Researched, priced and ordered new coolers for a kitchen
  • Researched the rules for the Healthier US Schools program to determine which chips could be sold as a la carte items.
  • Researched and priced electronic menu boards.

IMG_1300

  • Attended meetings with the superintendent and other employees of the district office to discuss reductions in force after a failed levy.
  • Attended meetings about redesigning/reorganizing the layout of the kitchens and cafeterias.
  • Attended a meeting with a food vendor trying to earn the district’s business back.
  • Attended a training session to learn about the commodity foods program for schools.

IMG_1512

  • Observed interviews for a head cook position.
  • Created test for head cook candidates to take during interview.
  • Learned about payroll, benefits and scheduling.
  • Learned about writing grants and applied for several.
  • Learned about unions and how they impact the hiring/firing/disciplinary actions.
  • Created a menu for a student that was gluten-free AND dairy free.

IMG_1094

  • Tasted tested product samples from vendors that could potentially be served at lunch next year.
  • Prepared and cooked food for students on the Food Committee to taste test and evaluate.
  • Met with two high school food committees to gather feedback about the food being served, student satisfaction, things they wished were being served, etc.
  • Met with students about launching a Fuel Up to Play 60 campaign at their school.
  • Created a satisfaction survey for new menu items and distributed to students.

IMG_1104

  • Observed lunch service to determine how to make it more efficient.
  • Created the 2013-2014 lunch menu for the elementary schools.
  • Input the menus into Nutrikids to determine if they met the nutritional requirements.

As you can see, I was exposed to many different aspects of schools food service. I have to say the highlight was getting to plan the elementary menu for next year. You guys know how much I LOVE menu planning, and it was so cool to know that the menu I created would only require a few small changes and then it will actually be used during the next school year!

After having a couple of 7-8 week rotations, these four week rotations are FLYING BY! Like I said, I’m doing my long term care rotation right now so I’ll fill you guys in on that one in a couple of weeks.

If you’re new to the blog and are interested in reading more about my path to becoming an RD and the rotations i’ve already completed, CLICK HERE for links to all of those posts!

Enjoy!
–Lindsay–
PS. If you have an extra minute, please go congratulate Elle and Anne! They both just passed the RD exam this week and are officially Registered Dietitians. These two ladies are AMAZING and they inspire me every single day. Since I know first hand exactly how much work goes into becoming an RD, I can tell you that they both deserve major congratulations. So go show them some love! They’re gonna do great things!


Filed Under: Uncategorized

DIY Workout Tank Top

February 12, 2013 by Lindsay 102 Comments

Hi Friends!

A couple weeks ago, I did a fun DIY project to turn a seldom worn t-shirt into a workout tank-top. I was pretty proud of myself for figuring it out! After putting pictures on FB and Instagram, lots of you asked how I did it, so I recruited hubby’s extra set of hands to make a little tutorial for you.

This easy tutorial shows you how to turn an old t shirt into a cute DIY Workout Tank Top!

Here’s the first one I made:

This easy tutorial shows you how to turn an old t shirt into a cute DIY Workout Tank Top!

For this one, I grabbed a Jayhawk shirt that hubby rarely wears (Ohio State fan), and we took pictures along the way so I could show you the process. We even managed to make some enhancements this time around to help the back from unraveling in the washer/dryer 🙂  So, here’s what you do:

DIY Workout Tank Top

This easy tutorial shows you how to turn an old t shirt into a cute DIY Workout Tank Top!

1. Procure your t-shirt and lay it flat on the floor
2. Cut out the collar, using the front outline as your guide, but cutting through both sides of the shirt (you may have to cut out more later to get your desired depth)
3. Cut off one sleeve. Start by cutting straight down for several inches and then curve out. Don’t start curving right away.
4. Flip the cut off sleeve over and place it on top of the remaining sleeve. Cut along that line when you cut off the second sleeve so they are symmetrical.
5. Cut off the bottom of the shirt just above the hem.
6. Cut off the stitching and discard so you have just a loop of t shirt material, no extra threads.
7. Take the loop and snip it so it’s no longer a loop and then STRETCH it out.

DIY workout tank top 6

8. Flip the shirt over, cut a deep “v” and discard that fabric.
9.  Snip two tiny holes, one on each side of the point of the “v” (this was hubby’s idea to keep the string secure in the laundry)
10. Take the string that you stretched out and thread it through the holes. Pull almost all the way through and leave just a couple inches on one side.
11 & 12. Tie a double knot.

DIY workout tank top 8

13. Cut two tiny holes about 4-5 inches from the top of the shirt (just like the holes you snipped at the bottom of the “v”) but make them towards the outer edge of the shirt.
14. Start at the bottom where you knotted the string, gather the back together, wrap once, and then loop the string through itself and pull tight. Continue  looping and pulling tight until work your way up to the holes at the top.
15. When you get to the top, even with the two holes you cut, thread through both the holes again and tie a secure knot.
16. Leave about 2 inches and after you tie the knot (in case the knot ever comes undone and you need to re-tie) and cut off the extra. Thread the rest of the string down through the loops to secure it.

*Note: The first time I did this, I didn’t cut little holes and thread through. I just tied the string at the bottom, wrapped around and around and around and then knotted it again at the top. That worked fine, but it started to come unraveled when I washed it…this method should hold up alot better.

This easy tutorial shows you how to turn an old t shirt into a cute DIY Workout Tank Top!

Now it’s time to fine tune. Try it on and make note of the width of the straps and the neckline. Then take it off and cut some more if you want the neckline to be lower or you want the straps to be thinner! You can also cut more off the bottom if you want it to be shorter!

This easy tutorial shows you how to turn an old t shirt into a cute DIY Workout Tank Top!

I left the neckline a little higher on this one than I did on the peanut envy one! It’s totally up to you.

Also, beware of the dogs. They will be very interested in helping with this project. DIY workout tank top

In retaliation, you can use the sleeves to make them look like little Russian Babushkas! Clearly they loved it.

IMG_1769

So there you have it! Give it a try and send me a pic if you make one!

Enjoy!
–Lindsay–
Filed Under: Workouts

Fitness Friday 44

February 8, 2013 by Lindsay 23 Comments

Hi Friends!

Let’s keep this Fitness Friday post short and sweet, shall we?

fitnessfriday1

We’ve been bouncing around to a couple of different boxes while ours is closed. So here’s what the workouts have looked like:

Friday

IMG_1590

I had a snow day so I headed to a lunchtime class. Our skill work was squats…and then we did the workout above. Seriously? Remember when I did 150 wall balls the other weekend in our competition. Well, this time I did it a minute faster! I finished that part in 8:06 instead of 9:18. Then I did the double unders. This box had different jump ropes that I had a hard time adjusting to, but I finished them with 20 seconds to spare. I love how it’s a 12 minute AMRAP and hardly anyone even made it through one full round!

Saturday

IMG_1599

One of the boxes has a community workout on Saturdays that’s free for everyone so we headed over with several people from our box. It was a fun workout that was done in groups. It looks like a lot but when you split it up between 4 people it wasn’t so bad.

While we were at crossfit, the dogs finally reached their breaking point and expressed their displeasure with the fact that they haven’t had a walk in FAR too long and have barely been outside at all for the past month since it’s been so cold.

IMG_1606

Long story short, Tucker got bored, ripped up the carpet and chewed up the carpet pad…as well as chewing on the baby gate. It’s hard to even be mad though, because it’s not really their fault. We’d been majorly slacking as dog parents.

We got the message loud and clear though, so we’ve been making an effort to walk them more!

Sunday
**Rest Day**

Monday

IMG_1626

Monday we tried out another box with some of our friends. Talk about feeling the burn. The 50 air squats between rounds was brutal. I used 65#. We had to pick a weight we could push press, even though it was pretty light for dead lifts. I finished in 10:03.

Tuesday

IMG_1632

I had a long day of interning and class, but I still managed to squeeze in a walk with the dogs. I got home from class, spent 15 minutes throwing together dinner and sticking it in the oven, and then we headed out the door. Dinner was ready when we got back!

Wednesday

Rest day. I had an evening meeting and didn’t get home until late so we couldn’t go to crossfit…but hubby and I did take the boys on a quick walk.

Thursday 

FF1

I took the boys for a walk right after I got home from work.

IMG_1659

Then we headed to crossfit. Another great workout. Those burpees were tough after the 1000m row! I finished in 8:01 and used 65# for the push press.

As for today’s workout? Hubby and I are planning to do a little partner workout that I put together.

I’ll let ya know how it goes! How was your week of workouts?

Enjoy!
–Lindsay–
Filed Under: Workouts

Pecan Crusted Salmon

February 7, 2013 by Lindsay 52 Comments

Hi Friends!

Bad news is it’s been a busy week and I don’t have much time to chat. Good news is that I do have a SUPER easy recipe to share with you.

When I say simple, I mean simple. It’s just 3 ingredients:

  • Salmon.
  • Hummus.
  • Pecans.

This Pecan Crusted Salmon requires just 3 ingredients. Diner is served!

I served it on a bed of lettuce with some quinoa and topped it with a goat cheese medallion and some raspberries. Voila!

To make the salmon:

  • Pat the salmon fillets dry.
  • Spread a layer of hummus on top.
  • Sprinkle with chopped nuts and press gently so they stick!

pecan crusted salmon1

Stick it on a foil-lined baking sheet and bake a 400 degrees until salmon is cooked through!

This Pecan Crusted Salmon requires just 3 ingredients. Diner is served!

Enjoy!
–Lindsay–
Filed Under: Dinner

Weekend Prep For Easy Weekday Meals

February 6, 2013 by Lindsay 47 Comments

Hi Friends!

Yesterday I taught you how to prep food on the weekend. Today I’m going to show you how exactly it makes life easier during the week. So, here’s what I prepped two weekends ago:

weekend prep for easy weekday meals

My weekend prep included:

  • Baked fish
  • Greek Black Bean Burgers
  • Hard boiled Eggs
  • Quinoa Breakfast Bars
  • Curried Sweet Potato Soup
  • Trailmix
  • Black Beans
  • Quinoa
  • Guacamole
  • Carrots

And here’s what we ate last week:

Breakfasts
I eat cereal every morning for breakfast during the week. 2 bowls of Kashi Heart 2 Heart cinnamon with skim milk. I also have a mug of green tea. Hubby grabs a quinoa breakfast bar from the fridge to take to work, as well as a piece of fruit sometimes, and his mug of coffeee.

weekend prep for easy weekday meals

Monday

Lunch: I packed one of the Greek black bean burgers, some of the sliced carrots with hummus and a pear. Hubby came home for lunch and made a fish taco with the cooked fish, black beans and guac and also had a couple hard boiled eggs and some blackberries.
Dinner: I made fish nachos with blue corn tortilla chips. I used the cooked fish and black beans, so I just had to chop up some red peppers and onions, then load up the nachos and top with cheese. While they were in the oven,  I cooked some green beans in the microwave and pulled out the carrots and hummus.

Tuesday

Lunch: I packed some of the curried sweet potato soup with some quinoa and black beans added in, a pear, some leftover green beans and chips with guac. Hubby ate a one of the black bean burgers and made a big salad with some of the fish and veggies on top.
Dinner:  I made sweet potato and black bean quesadillas using the black beans and a sweet potato that I diced up and microwaved for 2 minutes. Just spread the beans and potatoes in a whole wheat tortilla, add some chopped peppers and onions (leftover from the nacho prep) and cheese and pop it on the George Foreman grill. I also ate some leftover stirfry veggies and lentils with a little piece of leftover salmon and hubby had a bowl of soup with his dilla.

weekend prep for easy weekday meals
Wednesday 

Lunch: I packed some of the fish with quinoa, black beans and salsa, plus a pear, a handful of the carrots with some hummus and one of the hb eggs. Hubby ate a Chobani, two hb eggs, and a peanut butter sandwich with a couple of clementines.
Dinner: On Tuesday night, I pulled out the crockpot and made a lentil veggie soup. I threw in some roughly chopped carrots, green beans, onion, sweet potato and  red pepper with a bag of dried lentils, a container of vegetable broth, lots of curry powder, paprika and cayenne pepper and some extra water. I cooked it on low for 8 hours overnight, added a bit more water in the morning and then put it in the fridge all day to let the flavors meld. For dinner on Wednesday, all I had to do was reheat and serve with a pear and some chips.

Thursday

Lunch: My preceptor took me out to lunch to celebrate the end of my rotation. She choose a Mexican restaurant. I ordered the veggie quesadilla and added black beans, plus I asked for 1/2 the amount of cheese. Instead of the rice and beans for the side, I ordered grilled veggies. I ate half the dilla and packed up the rest. Hubby made himself a rollup with the rest of the fish, some hummus, some guacamole, cheese and quinoa and a chobani and an egg.
Dinner: We made egg sandwiches. Instead of using regular bread, we used some frozen naan from Trader Joe’s. The sandwiches had an egg, some Muenster cheese, avocado and tomato and were grilled to perfection on the panini. SO GOOD. We also had some leftover lentil veggie soup and some carrots and hummus.

weekend prep for easy weekday meals

Friday

Lunch: On Thursday night I wasn’t really in the mood to pack lunch so I threw a pear, some carrots and hummus and a pb&j in my lunchbox and called it a day. Then, I ended up having a snow day…so I ate my pb&j for a snack and made myself from eggs for lunch. I also ate my pear, carrots and hummus and a little bit of the sweet potato soup.
Dinner: We made some salmon that we had in the freezer. I served it over a bed of farro (which cooks in 15 min) with some sauteed black beans, peppers and onions and added a little balsamic vinegar for flavor.

Saturday

Lunch: We went to crossfit at 11 so we had a to refuel when we got home! We had eggs, leftover farro/black bean mixture with avocado and some greek yogurt bites from the freezer.
Dinner: We actually thought about going out to dinner for the first time in a month. In the end, we settled for picking up a veggie pizza on our way home from a baby shower and eating it at home with some carrots and hummus and hb eggs.

weekend prep for easy weekday meals

Snacks

We had the trailmix pre-made so we could just grab a serving each day for a snack and we also had the hard boiled eggs that we could easily grab out of the fridge for snacks and meals. Other snacks we ate during the week included lots of veggies with hummus, chips and salsa, cereal, greek yogurt etc.

So there you go. At the end of the week, everything was gone except some trailmix and a little guac!

Hopefully this post shows you that prepping food on the weekend makes healthy meals much easier during the week.

Enjoy!
–Lindsay–
If you liked this post, you’ll love my ebook – The Ultimate Guide To Food Prep. It dives into even more detail about how to food prep, troubleshoots common problems and provides tons of tips to make it easier! Click the image below for more details!

The Ultimate Guide To Food Prep Ebook

Filed Under: Food Prep

How to Prep Food on the Weekend

February 5, 2013 by Lindsay 104 Comments

Make the best of your Sunday by prepping healthy food for the week ahead. It makes it easier to eat healthy during the week!

Hi Friends!

Many of you have seen my Sunday meal prep pics on Instagram & Facebook and have been asking questions about them. Hopefully today’s post will be helpful for you.

When people ask me for advice about healthy eating, my number one suggestion is to be prepared. In an effort to make it easy for us to eat healthy meals at home, I’ve found that spending an hour or two on the weekend preparing food makes it much easier to throw together quick, healthy meals during the week.  I made it a goal to get back into a food prep routine for 2013 and it’s made my life so much easier! So let’s take a look at what I do on a typical weekend!

Make the best of your Sunday by prepping healthy food for the week ahead. It makes it easier to eat healthy during the week!

First Step: What do I make?

There are some staples that I prep every single weekend and some that vary week to week. Here’s a list of things I typically prepare:

  • Quinoa {or a whole grain}: I usually cook 1.5 c dry quinoa with 3 cups of water for about 12 minutes. Quinoa is my most common choice, but I also like to mix it up and cook wheatberries, farro, or brown rice from time to time.
  • Beans: I cook at least one bag of dried beans every weekend. Since I got my pressure cooker, it’s gotten SO much easier. You can put a dry (non-soaked) bag of beans in the pressure cooker and have a fully cooked pot of beans in 20 minutes. Can’t beat it. Even before I got my pressure cooker I made beans every week. I used the quick soak method on the back of the bag and it could be done in under 2 hours with very little work. I cook black beans most often because we like them best, but I also occasionally cook white or pinto beans.
  • Lentils: The great thing about lentils is they don’t need to be soaked and they cook in about 15 minutes. So, most weekends I cook one bag of dried beans and one bag of dried lentils.
  • Hard-boiled eggs: Another thing that’s gotten way easier since I got my pressure cooker! However, these can also easily be done on the stove. I usually cook about 18 eggs per weekend so we can snack on them during the week. Hubby also usually has a couple with lunch and/or dinner for extra protein.
  • Breakfast for Hubby: Like I’ve mentioned a few times, I’m on a mission to get hubby to eat breakfast. These Quinoa Breakfast Bars are his absolute fave. I double the recipe and make a 9 x 13 pan each weekend. Then, I cut them into bars, put them in ziploc bags and store them in the fridge so he can grab one in the morning. He also likes these Cranberry Sweet Potato Cottage Cheese Muffins.
  • Soup: I love making a batch of soup on Sundays because it requires very little effort. It’s basically just a matter of throwing ingredients in a pot and letting it simmer. I make a big pot and we eat it with our dinners and lunches throughout the week. Hubby’s favorite soup is this Curried Sweet Potato Soup. Other times, I just throw whatever vegetables I have (or a bag of frozen veggies) in a pot with some veggie broth and then add some of the cooked beans and quinoa and some spices.
  • Trail Mix: Hubby and I love trail mix for a snack. I either pre-portion it in baggies so we can grab and go, or I make a big batch in a container and we scoop out some each day to take with us. I usually include almonds, pumpkin seeds, sunflower seeds, dried fruit (raisins or craisins), cereal and a few chocolate chips. For the nuts and seeds, I get the plain, unsalted kind and for the craisins, I buy the 50% less added sugar.
  • Chopped Veggies: Lately it’s just been carrots, but in the past I’ve done this with bell peppers, cucumbers, etc. I spend time peeling and chopping them and then store them in tupperware containers so they’re easy to grab for packed lunches, dinners, or snacks. Usually for the carrots I add some water to the bottom of the tupperware to keep them from drying out over the course of the week.
  • Black Bean Burgers: Lately, I’ve been getting into a routine where I make a batch of black bean burgers every Sunday. We either eat them that night for dinner or on Monday night. Some of my favorites include Sweet Potato Quinoa Black Bean Burgers, Asian Black Bean Burgers, and Greek Black Bean Burgers. If you’re a meat eater, whip up a batch of hamburgers or turkey burgers.

Make the best of your Sunday by prepping healthy food for the week ahead. It makes it easier to eat healthy during the week!

Other things you could consider making:

  • Meat:  Throw some chicken or pork in the crockpot and shred to use in meals throughout the week. Or bake some chicken breasts in the oven. Prefer ground meat? Cook a package of ground turkey and throw it into casseroles, tacos, and sauces during the week.
  • Hummus: Make your own from canned (no-salt-added) or dried chickpeas. Here’s a little how to make hummus video for you.
  • Frozen yogurt bites: These are another one of my favorites to make on the weekend for an easy snack during the week. I love these frozen yogurt bites!
  • Roasted Chickpeas: They’re perfect for snacking and are also a great addition to trail mix. Here’s how I roast mine.
  • Casseroles: Make a big casserole on Sunday night. Eat some that night and have leftovers to eat throughout the week. Casseroles are similar to soups in that they require very little effort, but make a big batch of food.
  • Marinades: Whip up a marinade and add some tofu, tempeh, or meat to a bag. Let it sit overnight and pull them out to make an easy dinner on Monday night.
  • Burritos: Check out this post on how to eat healthy during the week to see how I make freezer burritos.
  • Salad: Chop up a bunch of veggies and make a big salad. Having it ready to go makes it more likely you’ll eat it during the week.

Make the best of your Sunday by prepping healthy food for the week ahead. It makes it easier to eat healthy during the week!

Next step: Storage

If you have a freezer, use it! It makes life easier. Some of my favorite things to freeze:

  • Beans and lentils: Simply cook them, let them cool completely, and then put in freezer-safe containers or ziploc bags. I usually use bags. Then, when I’m ready to use them I just smack the bag on the counter to loosen them up and dump them into whatever I’m cooking. If you use containers, just stick them in the microwave to defrost and then add to your desired dish!
  • Soups and casseroles: Did you make a double batch of soup or a giant casserole? Put half in a freezer-safe container and stick it in the freezer. Then, in a couple weeks when you have a crazy weekend and don’t have time to prep food, you can pull the container out to thaw and have dinner ready to go for at least one night that week!
  • Burgers: I’m finally getting into the habit of making more veggie burgers than we need. That way, I can leave 4 or 5 in the fridge for us to eat during the week and still have 4 or so to put in the freezer. You can freeze them cooked or uncooked. If you’re freezing them before cooking, freeze on a pan, then transfer to a container. If I freeze them after cooking, I let them cool completely, then wrap in plastic wrap and put them in containers or ziploc bags. When you’re ready to eat them, just cook from frozen if necessary (in the oven or on the stove), or defrost in the microwave and eat!

Make the best of your Sunday by prepping healthy food for the week ahead. It makes it easier to eat healthy during the week!

So… how exactly does this make things easier?

Check out this post to see what we ate for all our meals last week. It shows you how we used the food I prepped to make weekday meals quick and easy!

[clickToTweet tweet=”Want to eat healthy all week? Try food prep with these ideas from @leangrnbeanblog!” quote=”Want to eat healthy all week? Try food prep with these ideas from @leangrnbeanblog!”]

Make the best of your Sunday by prepping healthy food for the week ahead. It makes it easier to eat healthy during the week!

Enjoy!
–Lindsay–
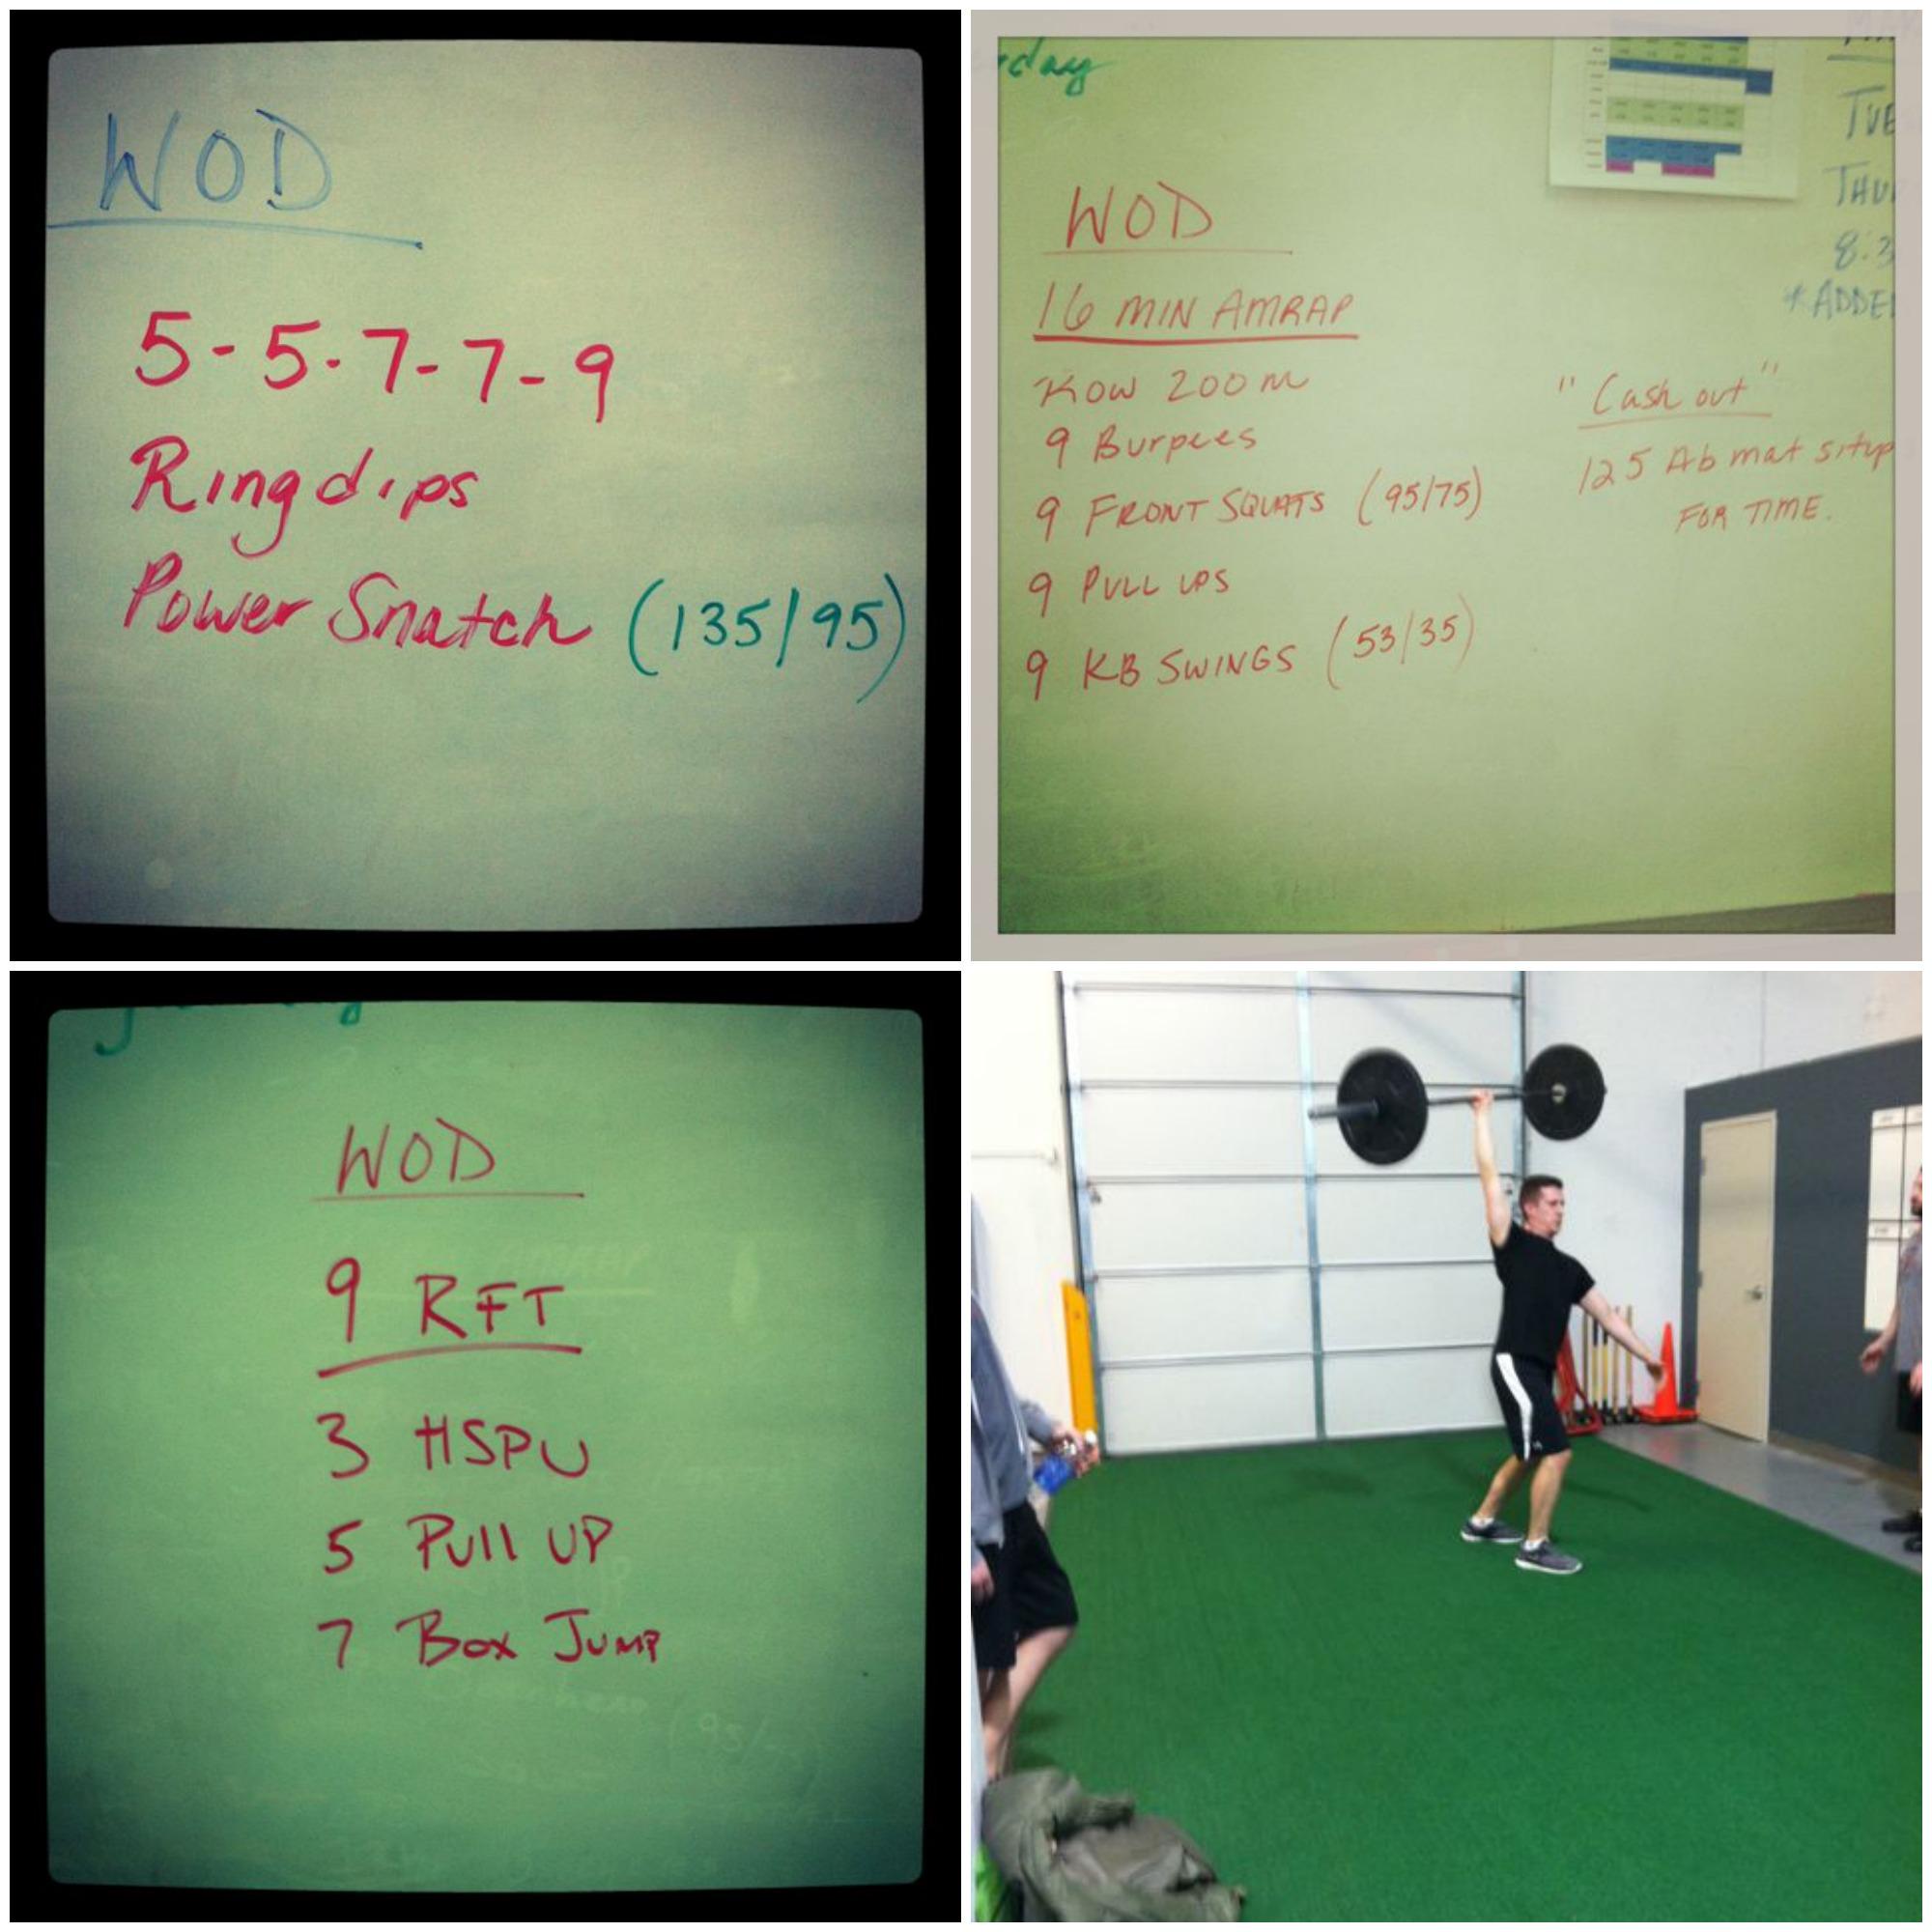
If you liked this post, you’ll love my ebook – The Ultimate Guide To Food Prep. It dives into even more detail about how to food prep, troubleshoots common problems and provides tons of tips to make it easier! Click the link below for more details!
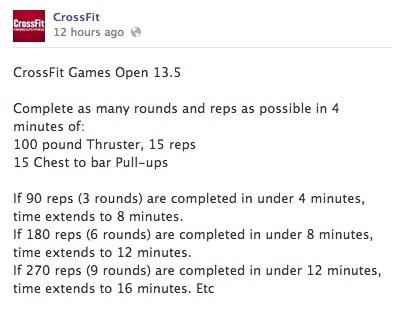
The Ultimate Guide To Food Prep Ebook

Filed Under: Food Prep

  • « Go to Previous Page
  • Page 1
  • Interim pages omitted …
  • Page 48
  • Page 49
  • Page 50
  • Page 51
  • Page 52
  • Interim pages omitted …
  • Page 65
  • Go to Next Page »

Primary Sidebar

Lindsay Livingston The Lean Green Bean Healthy Living Tips and Tricks

I'm a Registered Dietitian and mom of three from Columbus, Ohio. I use this blog to share simple, healthy recipes, nutrition tips, and an honest glimpse of motherhood!

Learn More →

Questions? Comments? Email me: [email protected]

The Lean Green Bean Facebook The Lean Green Bean Instagram The Lean Green Bean Pinterest The Lean Green Bean Twitter The Lean Green Bean Feed
footer-logo
The Lean Green Bean Facebook The Lean Green Bean Instagram The Lean Green Bean Pinterest The Lean Green Bean Twitter The Lean Green Bean Feed
Recipes

Breakfast
Dinner
Snack
Slow Cooker

Kids

Cooking With Kids
Favorite Gifts
Toddler Meals
Indoor Activities

Resources

Easy Packed Lunches for Kids
Dinner Spark
Snack Spark
Ultimate Guide to Food Prep

About

Meet Lindsay
Become an RD
Work with Me

The Lean Green Bean is a participant in the Amazon Services LLC Associates Program, an affiliate advertising program designed to provide a means for sites to earn advertising fees by advertising and linking to amazon.com.
Read the full privacy and disclosure policy here.

Copyright © 2022 · The Lean Green Bean

table talk series

Learn how food affects your body.

Get my free Table Talk email series where I share bite-sized nutrition information about carbs, protein, and fat, plus bonus information about snacks and sugar!

[email protected]