• Skip to main content
  • Skip to primary sidebar

Learn how food affects your body. Get Free Nutrition Info Today

the-lean-green-bean-logo
  • Home
  • Recipes
  • Kids
  • Resources
    • Ebooks
    • Food Prep
    • Videos
    • Snack Round-Ups
    • Gift Guides
  • About
    • Become An RD
    • Work With Me
  • Search
the-lean-green-bean-logo
  • Home
  • Recipes
  • Kids
  • Resources
    • Ebooks
    • Food Prep
    • Videos
    • Snack Round-Ups
    • Gift Guides
  • About
    • Become An RD
    • Work With Me
  • Search

blog

Goat Cheese & Cranberry Stuffed Mushrooms

October 3, 2011 by Lindsay 23 Comments

Last week I was looking for a quick little appetizer to make for the hubby and I before we enjoyed our anniversary dinner. I’ve been looking through some of my cookbooks lately and I’ve found myself repeatedly being drawn to recipes with goat cheese. So….last time we were at the grocery store I picked some up.

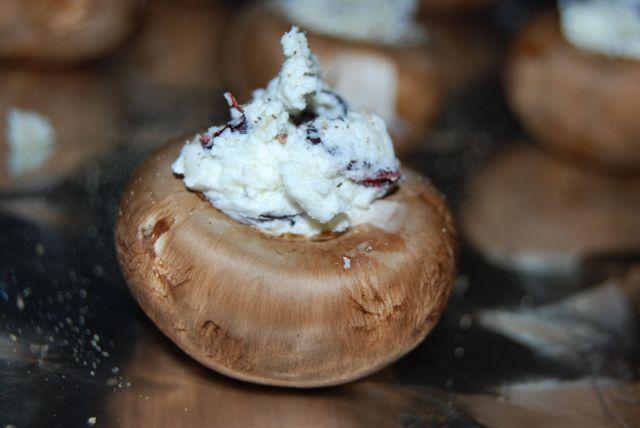
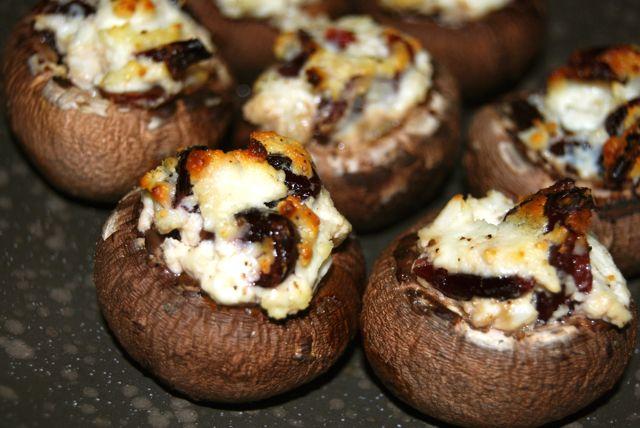
Then I spotted some mini portobello mushrooms that were just dying to be stuffed. When I got home, I whipped up what turned out to be one of the easiest, most delicious appetizers I’ve ever made.

DSC 0303DSC 0304

Goat Cheese & Cranberry Stuffed Mushrooms


by Lindsay L

Prep Time: 5 min

Cook Time: 20 min

Keywords: bake appetizer healthy vegetarian mushroom goat cheese cranberry

Ingredients (Serves 2)

  • 6-8 mini portobello mushrooms
  • 1 oz soft goat cheese
  • 2 Tbsp Craisins
  • black pepper

Instructions

Remove the stems from the mushrooms and wipe clean.

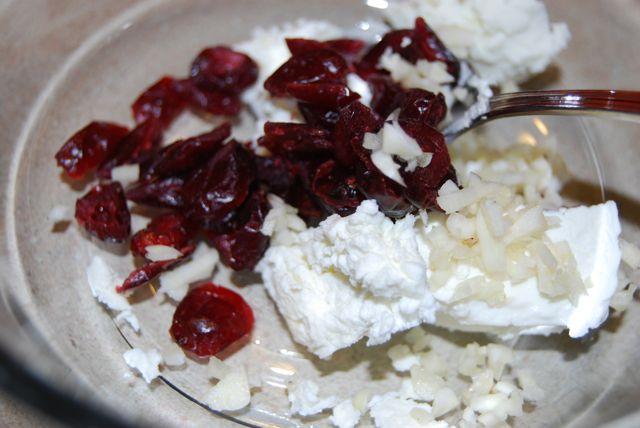
In a small bowl, mix the goat cheese and craisins together.

Divide the mixture among the mushrooms and place them on a baking sheet.

Top with black pepper and bake at 400 degrees for 20 minutes or until the mushrooms soften slightly and the cheese in golden brown.

Powered by Recipage


DSC 0312
Enjoy!
–Lindsay–

Filed Under: Appetizer

Celebrating Our 3 Year Wedding Anniversary

September 27, 2011 by Lindsay 16 Comments

Happy Anniversary to my hubby!

15
Thank you for keeping me grounded, but still letting me to live my dreams.

wedding2I love you!

Recently Updated69.27.08

Filed Under: Uncategorized

Roasted Garlic & Tomato Farro

September 22, 2011 by Lindsay 23 Comments

Hi Friends!

Here’s a quick easy recipe for you. The other day I found farro in the bulk bins at Whole Foods. I can’t even accurately express how happy that made me. I’ve been looking for it forever and all I could ever find was a tiny package for like $10. Crazy.

So I immediately snatched some up and earlier this week I whipped up a tasty little side dish. I was roasting potatoes anyways, so I while the oven was preheating, I started boiling some veggie broth. While the farro was cooking, I put some tomatoes and garlic in the oven to roast. The combination of all of these flavors, plus a little Parmesan cheese equals deliciousness.

Recently Updated4

Ready for the recipe?

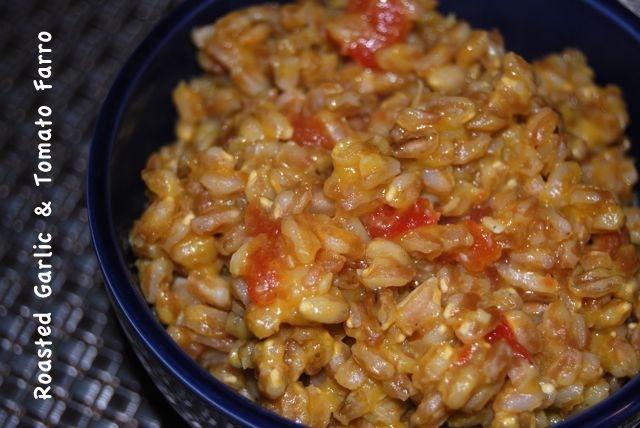
Roasted Garlic & Tomato Farro

by Lindsay L

Prep Time: 5 min

Cook Time: 30 min

Keywords: roast stovetop side healthy vegetarian farro fall winter

Ingredients (Serves 4)

  • 2 c vegetable broth
  • 1 c farro, uncooked
  • 1 bulb garlic
  • EVOO
  • 2 tomatoes
  • 1 Tbsp grated Parmesan cheese
  • black pepper to taste

Instructions

1. Cook the farro in the veggie broth according to package directions.

2. Meanwhile, slice the top off the garlic, drizzle with EVOO and wrap in foil.

3. Quarter the tomatoes, scoop out the seeds and place skin side up on a baking sheet.

4. Roast the garlic and tomatoes at 425 degrees F for 30 minutes.

5. Squeeze the garlic cloves out of the bulb and smash into a paste using a fork.

6. Peel the skin off the tomatoes and dice them.

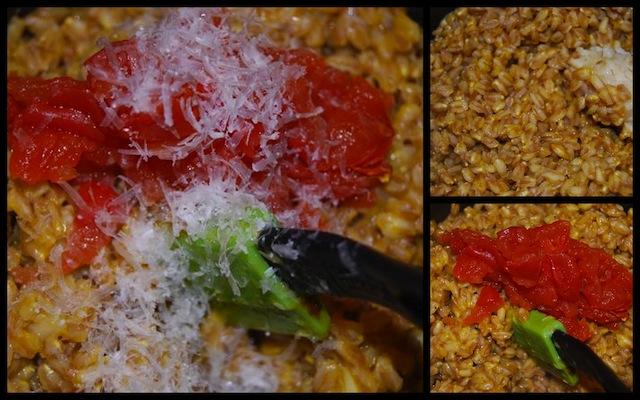
7. Add the garlic, tomatoes and Parmesan to the farro and stir until well combined. Season with pepper and serve warm.

Powered by Recipage


DSC 02441

It may not look pretty, but it’s darn tasty!

Do you like farro?

Enjoy!
–Lindsay–

Filed Under: Uncategorized

Guest Post: Elimination Diet Banana Bread

September 21, 2011 by Lindsay 7 Comments

Hi Friends!

Today is another first day of school for me…so I’ll probably be blog MIA. Have no fear though, my best friend Katharine is here to entertain you! You may remember her from her Fancy Feast guest post! She’s been experimenting with an elimination diet and recently embarked on an adventure in banana bread making! Take it away, Katharine:

————————————–

A lot of people seem to have childhood food traumas: they were forced to eat peas until they threw up or they were locked in the basement with rats after they groaned “meatloaf again?!?” Food was pretty much a non-issue in our house. I ate the, more or less, healthy meals in front of me and didn’t get too philosophical about it. My Wisconsin-born-and-raised father cultivated in me an unwavering love of peanut butter, ice cream, and cheese.

Several weeks ago I was on the phone with a dietitian-turned-integrative-doctor and family friend. We were talking about a blood disorder I discovered I have that results in a severely low platelet count. She suggested I try an elimination diet, removing certain foods from my eating regime and slowly reintroducing them one at a time. This seemed like a ridiculous suggestion at first (uh, hello, blood is in your veins…food goes in your stomach…two don’t really mix…) But I masked my skepticism with “uh huhs” as she continued on. She explained that the majority of your immune system is housed in your stomach and GI tract; therefore, problems with your diet/digestion can potentially cause problems with your immune system, maybe even make your body go all auto-immune on itself as in my case.

I’m now in my second week of the elimination diet. (“elimination” and “everything you love to eat but can no longer eat” being interchangeable.) The idea is that you embark on a 21-day stint of eating anything you’d like except dairy, gluten, soy, corn, refined sugars, caffeine, and alcohol. Easy, right?! Actually, there are many substitutes that allow you to cobble together meals that adhere to the diet. The only thing I’ve really missed is cheese (and no, there is no substitute for cheese, especially not a liquified nut), but I’ve discovered many culinary wonders I would have otherwise never considered food: coconut butter, garbanzo bean flour, arrowroot, brown rice pasta, hemp milk (this was one of the less pleasant finds, in my opinion, as it tastes like a dirty foot), and coconut aminos to name a few.

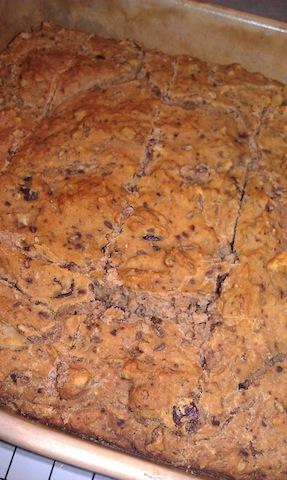
Unlike my dear friend Lindsay, I am no whiz in the kitchen. I make my way through recipes like a three-legged dog makes his was through an obstacle course–slowly and peeing on everything. (Ok, kidding about that last part.) For the past nine days, however, I’ve been doing my best hacking onions, boiling lentils, and mixing dairy-free, gluten-free, refined-sugar free, soy-free banana bread. Sounds gross, doesn’t it? It’s a lot less sweet but the texture and flavor are pretty damn close to the real deal.

To make this “banana bread” as delicious as possible I suggest listening to Fleetwood Mac’s Rumors album, the ultimate goal being to time the bread’s placement into the oven right as The Chain is cuing up. If you achieve this, then you have reached culinary greatness.

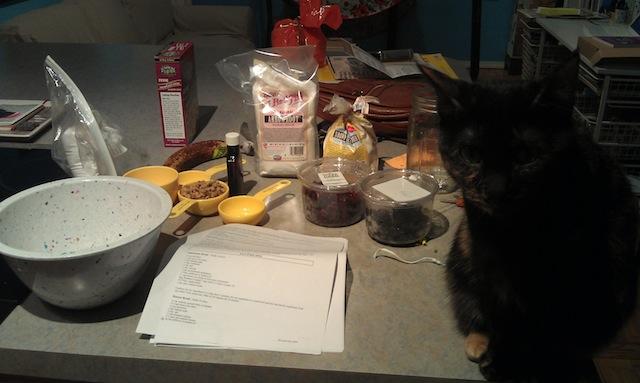
fuz1(Look closely and you will see Chef Tilly-my cat-presiding over the baking)

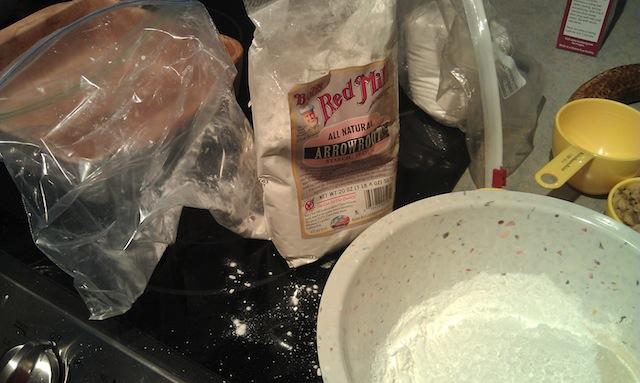
So once you’ve got Niki Stix tuned up, preheat the oven to 350. Mix the following:

-1/4 c. walnuts, finely ground in blender
-1 3/4 c. brown rice flour
-1/2 c. arrowroot (This definitely smells like something that would be an ingredient in a homemade bomb. Don’t be alarmed, it is just tapioca.)
-2 tsp. baking soda
-1/4 tsp. salt
-1/2 c. chopped walnuts

fuz2
At this point I realized I only had one banana. This is kind of a problem when making banana bread…To compensate I used, oh say, about a 1/2 c. ground walnuts. Then, in a separate bowl I mixed together:

-1 mashed banana (I would recommend, well, at least two bananas)
-1/8 c. sesame oil (Recipe calls for 1/4 cup–they are idiots.)

fuz3
And then I realized I was also lacking another ingredient–apple juice concentrate. No fears, I had unsweetened apple sauce. So I added
-7 tbsp. unsweetned apple sauce (And then later, because the dough was dry, the rest of the jar.)
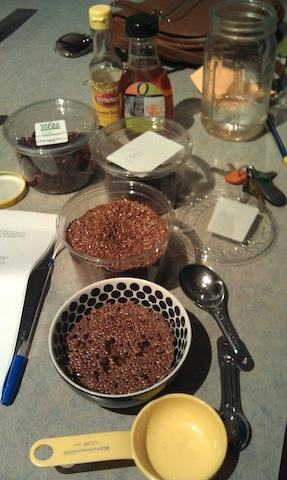
-2 “eggs” (“Eggs” are nothing like eggs. “Eggs” are made by combining 1 tbsp. flax seed with 1/3 c. water. You let this sit for about five minutes and you’re left with a gooey, liquidy substance that will, in the absence of real eggs, bind your various baked goods together. These “eggs” work surprisingly well until you try to make an omelet.)
-1 tsp vanilla extract

fuz4
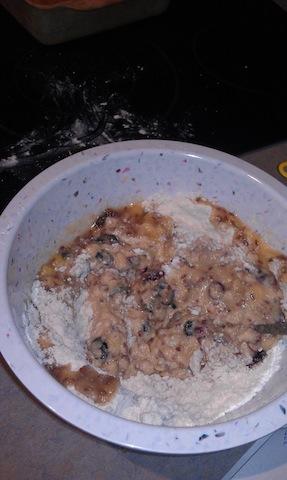
To compensate for the lack of fruit I added a handful of dried cranberries and dried cherries. I take a very Joey-from-Friends approach to cooking. My thinking is that if an ingredient by itself is tasty then surely when mixed with other tasty things it will yield one very delicious thing! That’s math, folks. So at this point add in whatever else you want to, like some agave nectar, then mix all that dough together. And then realize you also lack a bread loaf pan. (There may or may not have been a flurry of swears at this point.) In the absence of a proper loaf vehicle, an 8″ x 8″ ceramic vessel works just as well. And because this is going on Lindsay’s blog–Lindsay who’s never licked a piece of raw dough in her life, Lindsay the most disciplined person I know, Lindsay who is actually a cook with restraint–for this reason, I will underscore the fact that because there are no raw animal products in this recipe, all of you raw-dough-eating maniacs can go crazy.

Now the careful reader might be suspiciously scrolling upward to reread that part earlier about alcohol. Wait a second. I thought she said she couldn’t have alcohol? But you’re using vanilla! That has alcohol in it! You cheater!! Yes, it is true. I cheated. Five days after I started the diet I had already rationalized alcohol back into the diet as long as it was only consumed once a week and as long as the alcohol’s ingredients adhered to the diet. For those of you who know me, I’m sure you’ll agree it’s better for everyone this way.

Depending on the pan you’re using bake anywhere from 25-55 minutes, or until a pointy object of choice inserted into the middle comes out clean. Let the bread cool for about 10 minutes then eat that sucker! It’s perfect for breakfast or for after dinner when you’re craving sweets.

fuz5
In the end, I have no idea whether this diet will make one platelet of a difference. If it doesn’t, it still proved edifying. One reason I greatly admire Linds is because she thinks about what she eats and in that way respects her body. I used to think that if it was in a grocery store then it must be okay to eat. Reading ingredients labels at Whole Foods is an eye-opening experience–even there I had to search to find a chicken broth that didn’t contain evaporated cane juice or corn starch. I think everything in moderation is a good motto, but every once in a while there’s something to be learned from extremes.

———————————-

Have you ever done an elimination diet? Was it helpful?

Enjoy!
–Lindsay–

Filed Under: Uncategorized

Monster Cookies

September 20, 2011 by Lindsay 13 Comments

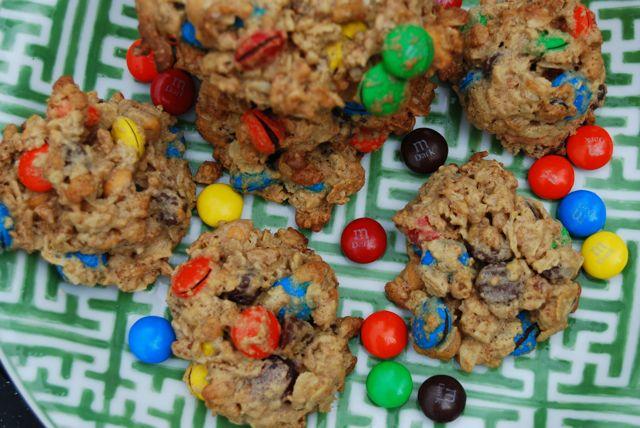
DSC 0230

Over the weekend while we were back cleaning out the house I grew up in, we spent a lot of time in the kitchen. As I was cleaning out cupboards, cabinets and drawers, I found myself lost in the memories of all the times I spent in that kitchen.

The kitchen was definitely the center of our house, both literally and figuratively. It’s where I spent some of the happiest times with my mom, learning to make new things and making things that we’d made together 100 times. It’s where I learned how to bake, how to cook without measuring and how to clean up the dishes as I went.

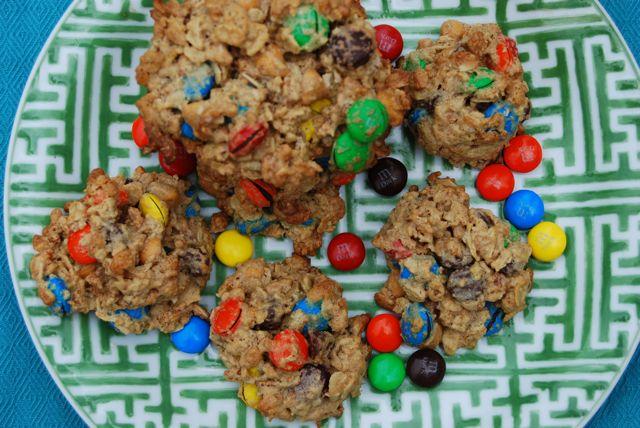
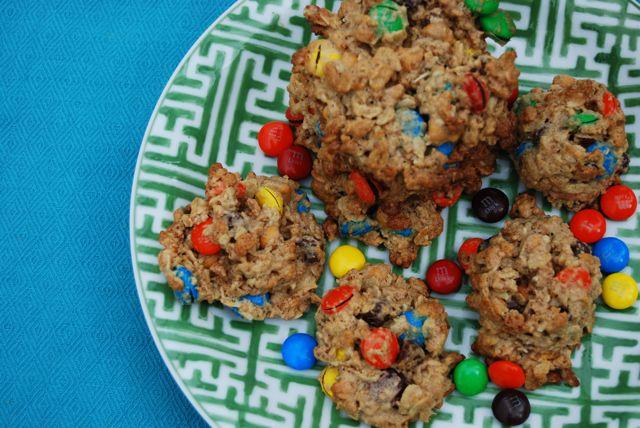
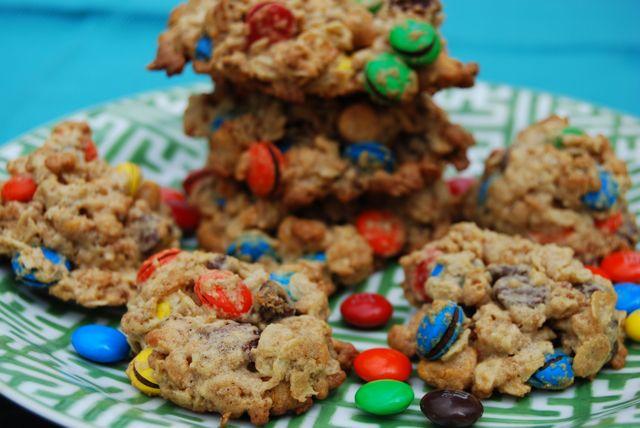
When I reached into one of the cabinets and pulled out a stainless steel mixing bowl, I immediately thought of monster cookies. They were one of my favorite cookies to make with my mom because there was very little measuring involved. And they could be different every time….and still taste just as good. Whenever we made them, she would let me throw in whatever we had laying around- even cereal- on one condition: There must ALWAYS be M&Ms. You can throw in as many things as you want, but if there are no M&Ms, they’re just not monster cookies.

I didn’t take that bowl home with me. I have plenty of mixing bowls already. But I did take home the comfort of knowing that even when circumstances force you to get rid of your “stuff”, they can never force you to get rid of your memories.

So today, on my last day of vacation before school starts back up again, I made some monster cookies in my own kitchen for a friend’s birthday tomorrow. And as I sat there eating one fresh out of the oven, I made a silent little toast to memories of the past, and to all those memories still to come.

Over the years I’ve healthified these just a bit, cut down on the butter and sugar, used brown rice krispies instead of regular, switched to natural peanut butter and added more oats. In the interest of making a recipe, I’ve given you my best estimation on how much of all the mix-ins I used…but really, it doesn’t matter. Just throw them all into the bowl, mix them around a bit and enjoy.

And NEVER forget the M&Ms.

Monster Cookies

by Lindsay L

Prep Time: 10 min

Cook Time: 10 min

Keywords: bake dessert oats peanut butter chocolate

Ingredients

  • 6 Tbsp butter, softened
  • 1/2 c brown sugar
  • 1/2 c peanut butter
  • 1 egg
  • 1 tsp vanilla
  • 1 1/4 c rice krispies
  • 1 1/4 c oats
  • 1/2 c whole wheat flour
  • 1/2 tsp baking powder
  • 1/2 tsp cinnamon
  • 1/2 c chocolate chips
  • 1/2 c butterscotch chips
  • 1 c M&Ms

Instructions

1. Cream the butter, sugar and peanut butter together in a medium-sized bowl.

2. Add the egg and vanilla and mix well.

3. Stir in the oats, flour and rice krispies.

4. Gently fold in the chocolate chips, butterscotch chips and M&M’s.

5. Scoop onto a greased cookie sheet in desired size.

6. Bake 10-12 minutes at 350 degrees F.

Note: Other add-ins could include chopped Reese’s, toffee bits, heath bars….the sky’s the limit

Powered by Recipage


DSC 0219DSC 0226DSC 0228
What was your favorite childhood cookie?

Enjoy!
–Lindsay–

Filed Under: Uncategorized

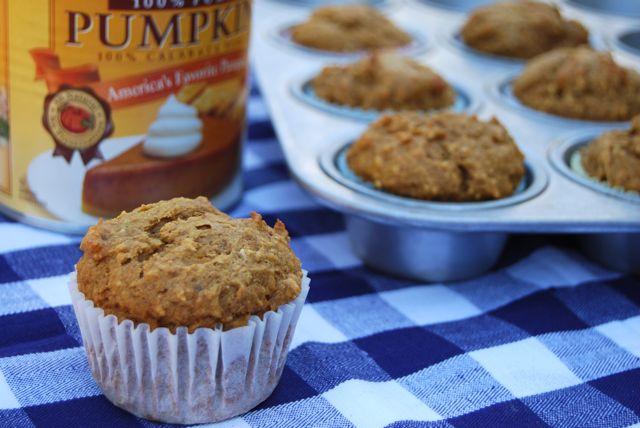
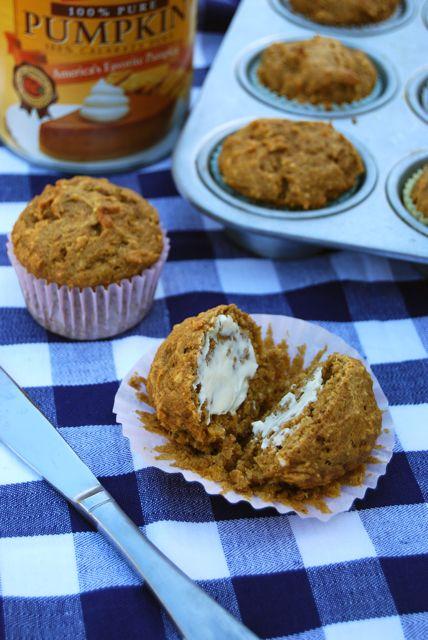
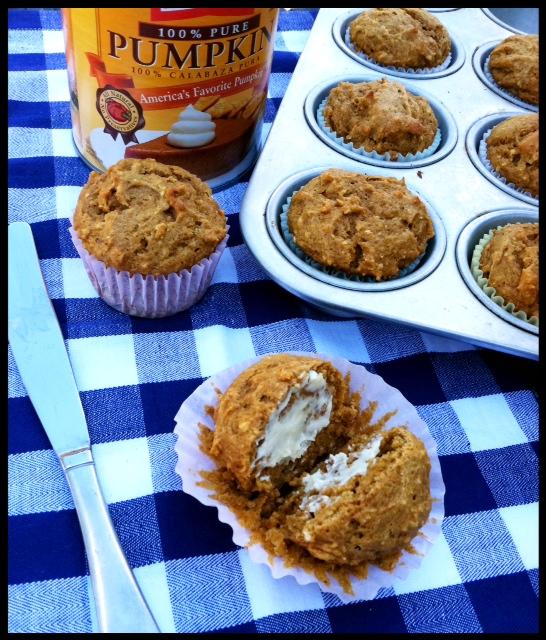
Whole Wheat Pumpkin Muffins

September 16, 2011 by Lindsay 27 Comments

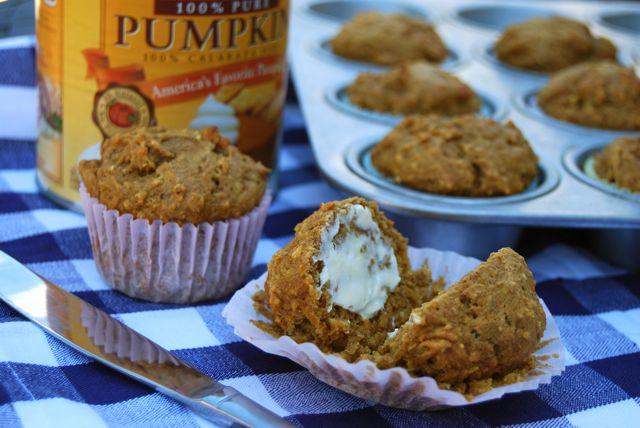
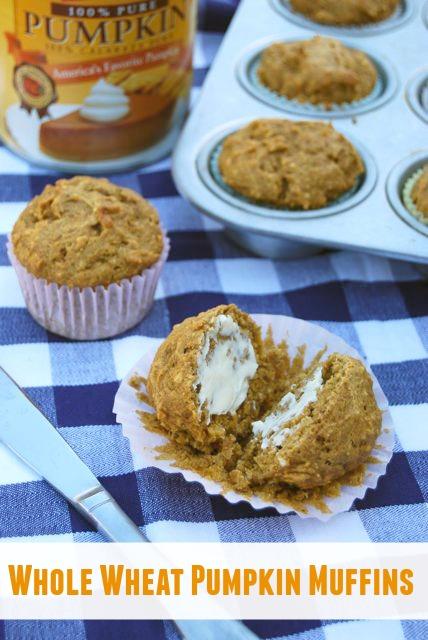
These Whole Wheat Pumpkin Muffins are lower in sugar than most recipes and filled with whole grains!

Well, friends…it’s fall. The weather’s getting cooler, the days are getting shorter and I opened my first can of pumpkin.

Unfortunately, (or fortunately?), it was a jumbo can. Fortunately, I’m still on vacation…so that means I had time for recipe testing! Over the past week I’ve been working hard on a recipe for pumpkin muffins. I knew I wanted them to be healthy and after looking at a bunch of recipes online, I wasn’t crazy about the amount of sugar that was in most of the recipes.

These Whole Wheat Pumpkin Muffins are lower in sugar than most recipes and filled with whole grains!

So, I set to work adding, subtracting and rearranging to make my own! Here are some of the recipes I used for inspiration:
Whole Wheat Pumpkin Muffins
Spiced Pumpkin Honey Muffins
Oat Flour Pumpkin Bread
Fat-Free Pumpkin Bread
Wheat-free, Dairy-free Pumpkin Bread

They all sound good…they just weren’t what I was looking for. I decided I wanted to totally eliminate brown and white sugar from the recipe, which I’d never done before. My plan was to replace it with natural sweeteners like brown rice syrup and honey.  After I’d worked out my recipe, I did a trial run. I quartered the recipe I came up with so it only made 4 muffins in case it went horribly wrong.

Trial #1
They were good enough to eat, but definitely too moist in the middle. I decided I needed to add more dry ingredients so I thought I’d try it with oats. But sometimes I’m not crazy about whole oats in my muffins, so I ground them up to make oat flour. I also reduced the amount of applesauce a little bit.

photo 55
Trial #2
Better! They definitely weren’t as wet in the middle. The oat flour gave them a little bit of texture but nothing extreme, and the flavor was good.

photo 56
Trial #3
I was pretty much satisfied with the recipe so after one more tweak (reducing the amount of applesauce again), I finalized the recipe. Then I halved it and made my final trial run. I thought it would make six muffins since my trial runs, where I quartered the recipe had been making four, but it ended up making 8 large muffins. It could easily have made 10-12 smaller muffins so that’s the one I’ve listed below.

Whole Wheat Pumpkin Muffins

by Lindsay L

Prep Time: 5 min

Cook Time: 25 min

Keywords: bake breakfast muffins snack vegetarian healthy pumpkin fall summer winter

Ingredients (8-12 muffins)

  • ½ c pumpkin
  • 1 egg
  • 2 Tbsp applesauce
  • ¼ c brown rice syrup
  • ¼ c honey
  • ½ tsp vanilla
  • 1 c white whole wheat flour
  • ¼ c oat flour
  • ¼ tsp salt
  • 1 tsp cinnamon
  • ¼ tsp ginger
  • ¼ tsp nutmeg
  • ½ tsp baking soda
  • ½ tsp baking powder

Instructions

1. Combine the wet ingredients in a bowl.

2. Add the dry ingredients and stir until just combined.

3. Spoon into greased or lined muffin tins and bake at 350 degrees F for 20-25 minutes.

*Notes:

Let cool completely before trying to remove muffin liners or they will stick.

Spice quantities can be increased or decreased based on preference.

You could also substitute pumpkin pie spice if you have it.

If you don’t have oats to make oat flour, you can use all wheat flour.

Powered by Recipage

DSC 0160DSC 0161DSC 0163


These Whole Wheat Pumpkin Muffins are lower in sugar than most recipes and filled with whole grains!These Whole Wheat Pumpkin Muffins are lower in sugar than most recipes and filled with whole grains!
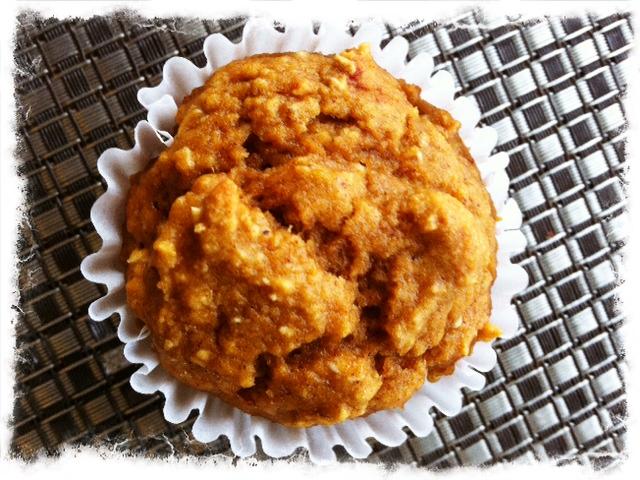
And just for fun, here’s one I snapped with my phone…pretty good, eh?

These Whole Wheat Pumpkin Muffins are lower in sugar than most recipes and filled with whole grains!
And a fun filter:

These Whole Wheat Pumpkin Muffins are lower in sugar than most recipes and filled with whole grains!

Happy Friday! Have a great weekend 🙂
–Lindsay–


Filed Under: Baking, Breakfast, Snack Tagged With: Pumpkin

Mini Pesto Bruschetta Cups

September 6, 2011 by Lindsay 16 Comments

I bought a package of wonton wrappers at the grocery store last week and I’ve had tons of ideas spinning through my head for the past few days about how I should use them up. I’ve finally settled on a Mexican version that I’m planning to make for dinner tonight, so stay tuned for that!

However, there are A LOT of little wonton wrappers in those packages and I decided that it would be boring to use them all on the same thing, so when I came home for lunch today I whipped up a little snack for myself that turned out quite well!

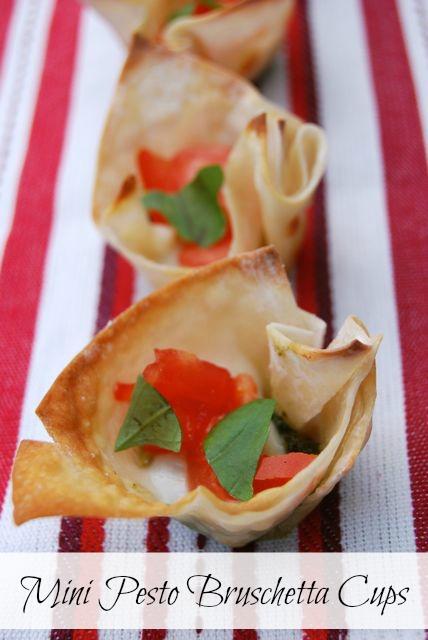
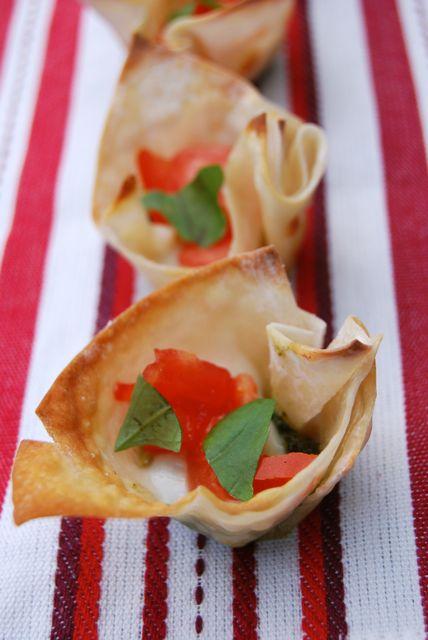
These Mini Pesto Bruschetta Cups pack a ton of flavor into each little bite and make a great appetizer!

If you haven’t noticed, I’ve been on a bit of a pesto and mozzarella kick for the past few days, and today is no exception. I can’t help it! It’s just such a good combo.

These bruschetta cups would be a great party appetizer, but they’re easy enough that you could also whip up just a few for a snack like I did.

Since they can be made in varying quantities, there’s no exact recipe but here’s what you need:

Mini Pesto Bruschetta Cups

by Lindsay L

Prep Time: 5 min

Cook Time: 10 min

Keywords: bake appetizer vegetarian mozzarella

Ingredients

  • wonton wrappers
  • olive oil/cooking spray
  • pesto
  • fresh mozzarella cheese
  • tomatoes
  • fresh basil

Instructions

Spray a mini muffin tin with EVOO or cooking spray.

Press one wonton wrapper into each hole. If the wrappers have been in the fridge, press them between your hands for a few seconds to warm them up so they don’t rip. Mist the wrappers with EVOO or cooking spray.

Place the muffin tin in the oven at 400 degrees for 4 minutes or until the wonton wrappers are just brown on the tips.

Remove from the oven, spoon a little pesto into the bottom of each cup and top with a small piece of fresh mozzarella.

Return the pan to the oven for 4 more minutes. Remove when the wontons turn a nice golden brown on the edges.

Top each cup with a few pieces of diced tomatoes and a little bit of fresh basil.

Powered by Recipage

DSC 0098DSC 0102DSC 0103

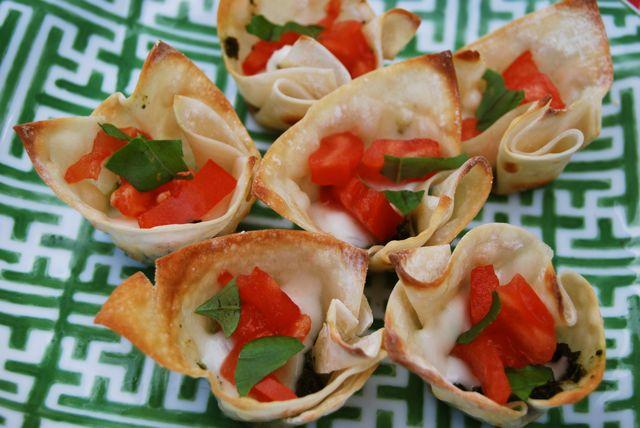
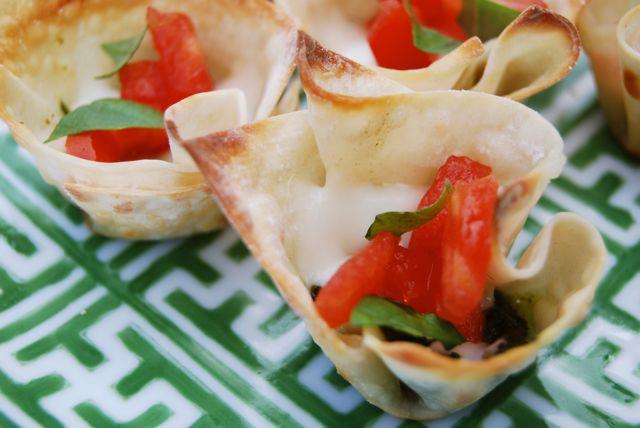
Aren’t they pretty?! These are a fun twist on traditional bruschetta and I loved every crunchy bite!

These Mini Pesto Bruschetta Cups pack a ton of flavor into each little bite and make a great appetizer!These Mini Pesto Bruschetta Cups pack a ton of flavor into each little bite and make a great appetizer!These Mini Pesto Bruschetta Cups pack a ton of flavor into each little bite and make a great appetizer!

Enjoy!
–Lindsay–
 

Filed Under: Appetizer

Pesto Potato Salad

September 5, 2011 by Lindsay 11 Comments

On Saturday we went to the Farmer’s Market and I came home with, among other things, a GIANT bag of basil. I immediately came home and made a batch of pesto. I used this recipe and it turned out great!

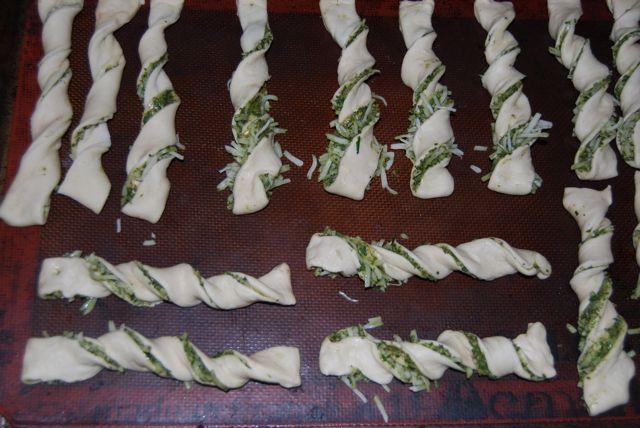
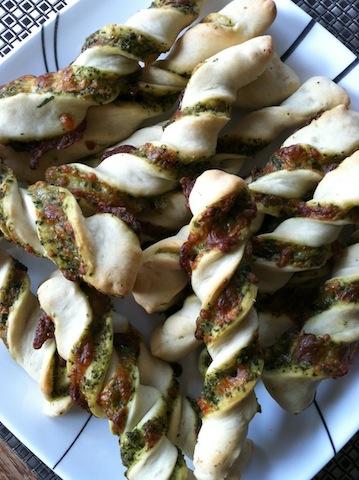
Then I immediately made these breadsticks that I’ve been dreaming about ever since Nicole posted them. The only change I made was to use mozzarella cheese instead of Parmesan.

DSC 0072DSC 0073DSC 0075

Please ignore my pictures and go look at Nicole’s. They’re much prettier 🙂

DSC 0077photo 37Yesterday I continued on my pesto kick and whipped up a little side dish that accidentally turned into dinner.

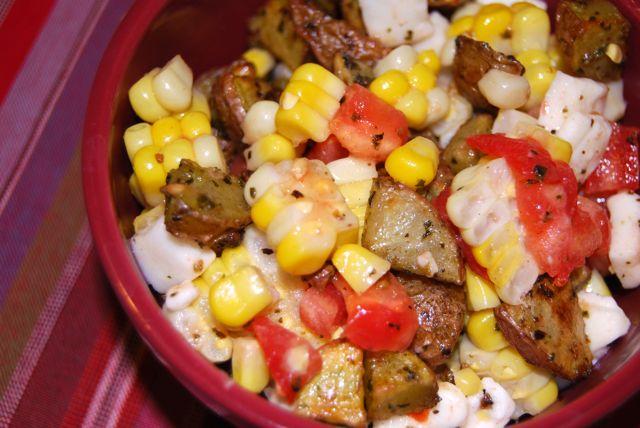
If you’re a long-time blog reader, you know we’re big fans of roasted potatoes in our house. Last night I kicked them up a notch by tossing them in pesto before roasting them. Then the plan was to enjoy them with some fresh mozzarella cubes….but while they were roasting I took it one step further and added in some corn and tomatoes.

Pesto Potato Salad

by Lindsay L

Prep Time: 5 min

Cook Time: 25 min

Keywords: roast side healthy vegetarian pesto potato fall

Ingredients (Serves 4)

  • 2 cups diced red potatoes
  • 1/2 tsp olive oil
  • 1 Tbsp pesto
  • 1 c corn
  • 1/2 c tomato, diced
  • 1/4 c diced fresh mozzarella

Instructions

1. Pour the olive oil on the potatoes and toss to coat. Add the pesto and stir to combine.

2. Roast the potatoes on a baking sheet at 425 degrees for 25 minutes, stirring occasionally.

3. Place the corn in a medium sized bowl, add the tomato and mozzarella and stir to combine. Stir in the potatoes when finished roasting and serve warm.

Notes:

Remove as much juice and seeds from the tomato as possible to keep the potatoes from getting too soggy.

Powered by Recipage


DSC 0082DSC 0083DSC 0087

DSC 0090

Oh, and in case you’re wondering, putting all these ingredients (minus the potatoes) on a piece of naan makes a killer pizza 🙂

DSC 0095
So yes we ate the whole bowl of potato salad and the pizza and called it dinner last night. Oh well 🙂

Enjoy!
–Lindsay–
Filed Under: Uncategorized

Phase 1 Complete

September 2, 2011 by Lindsay 19 Comments

In December of 2006, I graduated from college the first time with a BA in Psychology. After working a few jobs totally unrelated to that major, I made the decision to go back to school again. In January 2009, I began taking classes for a Dietetic Technician program. In June 2011, I graduated from that program and this morning I took the national exam to become a Dietetic Technician, Registered…

…AND I PASSED!!

1

ball

Somewhere in the middle of my last program I decided that I didn’t want to stop at being an DTR and wanted to go the extra mile to become a Registered Dietitian.

So I’m still in school. I have 3 more quarters and getting matched to an internship still ahead of me.

But for now, I have three weeks off (yay!), a mini vacation planned (double yay!) and lots of sleep to catch up on.

And tonight, I’m off to make this happen:

wine2

Have a great weekend, friends!
–Lindsay, DTR–

I’m just gonna go ahead and sign my posts like that for a few weeks if you don’t mind 🙂

Filed Under: Uncategorized

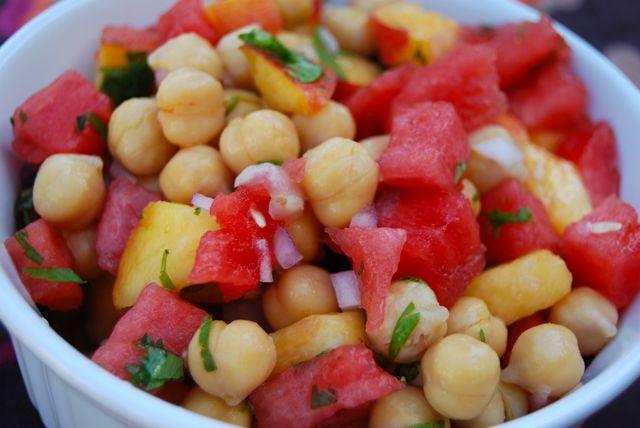
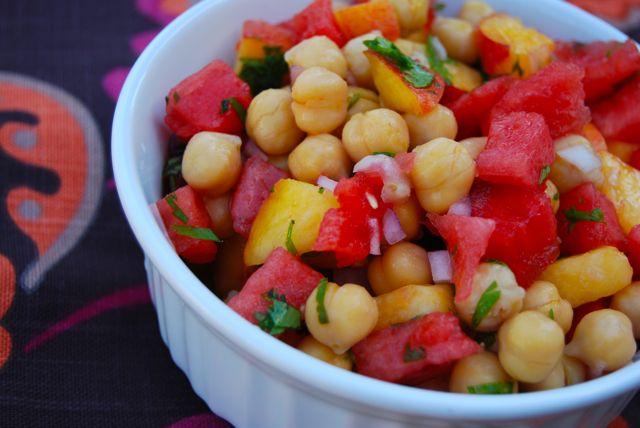
Watermelon Chickpea Salad

August 30, 2011 by Lindsay 7 Comments

This could also be called Clinging-to-the-end-of-summer-fruit-and-chickpea-salald.

Last night we grabbed what is probably one of the last watermelons of the season while we were grocery shopping. I used one of my favorite kitchen tools, the melon baller to get most of it ready to eat but I had just a little bit extra that wouldn’t git in the container. I immediately decided I would use that part to make something for lunch tomorrow…I just didn’t know what.

After sleeping on it, I woke up this morning ready to go out on a limb. For some reason, pairing watermelon with chickpeas was stuck in my head and I couldn’t get it out. After a quick google search, I appears that this is not the most popular combo out there…but I went with it anyways. And you know what? I loved it!

Watermelon Chickpea Salad


by Lindsay L

Prep Time: 5 min

Keywords: side healthy vegetarian chickpeas fruit summer

Ingredients (Serves 2-4)

  • 1 c chickpeas, drained and rinsed
  • 2 Tbsp red onion, diced
  • 1 c seedless watermelon, diced
  • 1 medium peach, diced
  • 1 Tbsp cilantro, minced
  • juice of 1/2 a lime

Instructions

1. Combine all ingredients in a small bowl. Stir gently to combine.

Notes

*I used ice cold watermelon and peaches from the fridge and I loved the temperature contrast with the room temperature chickpeas. However, this could also be served after refrigerating the mixture for an hour or so to let the flavors meld, or with all of the ingredients at room temperature.

*I really wanted to add some avocado to the mixture but none of mine were ripe yet. Next time.

*To kick it up a notch, drizzle with balsamic vinegar just before serving.

Powered by Recipage

DSC 0063

I ate this by itself but you could also probably eat it with chips, more like a salsa.

DSC 0064

Enjoy!
–Lindsay–
Filed Under: Uncategorized

Cinnamon Raisin Nut Butter

August 29, 2011 by Lindsay 25 Comments

Hi Friends!

Here’s a little treat to help get you through your Monday.

If you’re anything like me, before you discovered the blog world, the only nut butter you ever ate was peanut butter. Over the past year, I’ve broadened my horizons a bit and tried both almond butter and sunflower seed butter. )

Today I branched out even further- in three ways: 1) I made my own nut butter for the first time, 2) I made walnut butter, which I’ve never even tried and 3) I added mix-ins to my nut butter!

I buy really big bags of nuts at Costco to use in my homemade trail mix but since I’m out of school for a couple weeks, I haven’t been eating trail mix as often as I usually do. This giant bag of walnuts was looking a little lonely, so I thought today would be the perfect day to try my hand at making some nut butter at home.

DSC 0040

Quite honestly, I don’t really like walnuts that much. Whenever I eat them, I have to have something else in the same bite (like a raisin or a chocolate chip from my trail mix), so I knew I probably wouldn’t like just plain old walnut butter. I decided to add a few mix-ins to please my palate 🙂 After much deliberation I settled on cinnamon. I love the flavor and knew it would go well with the nuttiness of the walnuts. At the last minute, I decided to add some raisins as well…because really, cinnamon raisin is one of the best combos out there.

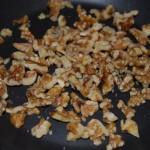
I knew from the million previous nut butter posts i’ve read, that I needed to toast the walnuts first so I measured out about 3 cups of raw, unsalted walnuts, placed them on a baking sheet and put them in the oven.

DSC 0042After they cooled, I put them in the food processor with some cinnamon and some raisins. I was too lazy to look up a recipe so I just used my best judgement on the amounts.

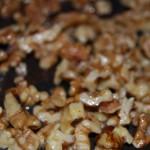
On went the food processor for about 5 minutes and voila! I stopped every minute and took a picture so you could see the progression.

walnut

I chose not to add any additional sweetener because there were already raisins in it but you could add a little bit of honey if desired. You could also add a pinch of salt.

Store in a an airtight container in the fridge!

DSC 00551DSC 0059

So easy and so good! I can’t wait to experiment with more nut butter mix-ins. Can we say Christmas presents?!

Cinnamon Raisin Nut Butter


by Lindsay L

Prep Time: 5 min

Keywords: food processor raw roast snack sandwich healthy vegetarian nuts raisins

Ingredients

  • 3 cups raw, unsalted nuts (walnuts, almonds, peanuts)
  • 1/3 c raisins
  • 3/4 tsp cinnamon

Instructions

*Optional- recommended if using walnuts- Spread the walnuts on a baking sheet and toast at 400 degrees for 6-8 minutes.

Let cool for about 20 minutes.

Place walnuts, raisins and cinnamon in a food processor.

Process for five minutes or until desired consistency is reached.

Powered by Recipage

What’s your favorite kind of nut butter? Do you make your own? Any combos I should try?!

Enjoy!
–Lindsay–
Filed Under: Uncategorized

The Bean Turns 1!

August 26, 2011 by Lindsay 14 Comments

Happy Bloggy Birthday to The Lean Green Bean! It’s pretty hard to believe that it’s been an entire year since I sat down and wrote my very first post! You can check it out here if you’re a new reader 🙂 hilarious if you ask me!

Since this is how I’m spending the next week:

13

I didn’t have a lot of time to make a cake.

I did make these… (sneak peak…recipe later!)

21So that’s just gonna have to do.

In celebration of this special day, I thought I’d highlight a few of my fav recipes from the past year in a little virtual meal that i WISH i had time to make for myself.

I’d start with some Spicy Salmon Cornmeal Cakes.

salmon

For dinner: Grilled Pork Tenderloin with Rainbow Peach Salsa

porkWith a side of:

Farmer’s Market Potato Hash

farm& a slice or two of Dutch Oven Bread

DSC 6823And for dessert, a Ginger Oatmeal Cookie w/ Cranberries & Reeses

DSC 02551and a few Almond Graham Banana Bites 🙂

nana

So there you have it…a meal for the bean. Now who’s coming over to make it for me?

Tell me, what’s your absolute favorite blog post? (Mine, yours, someone else’s…) Leave me a link!

Enjoy!
–Lindsay–
Filed Under: Uncategorized

Sweet & Spicy Baked Tofu

August 22, 2011 by Lindsay 21 Comments

Hi Friends-

We’re truckin’ right along with veggie month. I feel like the end is going be here before we know it!  When we went to the grocery store last week, I picked up two more packages of tofu to experiment with and last night I decided to use one of them.

A while back, and I do mean a while (apparently it was back in February but it doesn’t seem like it’s been that long), Courtney posted this recipe for Sweet & Spicy Tofu, which she adapted slightly from Caitlin’s Perfect Baked Tofu.

I was intrigued by the idea but wasn’t crazy about the spice mixtures. I don’t really like chili powder, and lately honey has been leaving a bad taste in my mouth (i definitely prefer brown rice syrup)…so I took stock of what I had on hand and whipped up my own little sauce.

Sweet & Spicy Baked Tofu


by Lindsay L

Keywords: bake entree healthy vegetarian tofu

Ingredients (Serves 4)

  • 2 Tbsp extra virgin olive oil
  • 3 Tbsp sweet thai chili sauce
  • 1 tsp paprika
  • 3/4 tsp cayenne pepper
  • 1/2 tsp garlic powder
  • 1 tsp sriracha
  • 1 block extra firm tofu

Instructions

1. Press the tofu for 1 hour.

2. Cut into bite sized pieces and place in a large ziploc bag.

3. Place all ingredients except the tofu in a small bowl and stir until combine.

4. Add the sauce to the ziploc bag and toss to coat all the tofu.

5. Let marinate for 3-4 hours or overnight in the fridge.

6. Pour the contents of the bag on to a baking sheet and spread the tofu out in an even layer.

7. Bake at 375 degrees for 30 minutes, shaking the pan occasionally to turn the pieces.

Powered by Recipage


DSC 01181DSC 01191DSC 01201

I had a hard time settling on what I wanted to serve with this…and when that happens, I usually turn to one of my go-to staples.

I sauteed some veggies (onion, baby bok choy, red pepper, mushroom & zucchini) with some garlic, added some orzo and gave it all a squirt of Italian dressing. This is one of my favorite pasta salads. I left the veggies a little bit crunchy to contrast with the tofu and this ended up being the perfect side. I mixed everything together once it was on my plate and it was delicious!

DSC 0121You’ll just have to excuse the terrible pictures. I was pretty tired after work last night and I just wanted to eat. One thing that’s important to note: for some reason, I was expecting the tofu to get crispy. I don’t know how that idea got into my head, but it was wrong. It was not at all crispy. At first I was disappointed….but I gave it a chance and the flavor was so great that it totally made up for it! It’s just the right mix of sweet and spicy. It leaves a little heat in your mouth but it’s not to hot to eat. Since the tofu was not crunchy, I really liked that the veggies were so everything wasn’t the same texture.

DSC 0125I went back for seconds, which RARELY happens and even the hubby liked it. We were both clean platers 🙂

What’s your favorite way to eat tofu?

Enjoy!
–Lindsay–
Filed Under: Uncategorized

No Bake Chocolate PB Oatmeal Balls

August 20, 2011 by Lindsay 21 Comments

Hi Friends!

Yesterday I was looking for a quick treat I could whip up that were semi-healthy. After I’d settled on a no-bake cookie ball of sorts, I did my prerequisite googling. Then I did my favorite thing: recipe combining.

I started with these three recipes: One, Two, Three. All of them looked good, but weren’t quite what I was looking for. So, I lined them all up in a word document and added, subtracted and combined things until I came up with this:

No Bake Chocolate PB Oatmeal Balls

by Lindsay L

Prep Time: 5 min

Keywords: raw dessert snack healthy vegetarian chocolate peanut butter oats almonds

Ingredients (14 balls)

  • 1 1/2 c oats
  • 2 Tbsp chia seeds
  • 1/2 c chopped raw almonds
  • 1/2 c Craisins
  • 1/4 c natural peanut butter
  • 1/4 c dark chocolate chips
  • 1/4 c honey

Instructions

1. In a medium bowl, combine the oats, chia seeds, almonds and cranberries.

2. In a small bowl, combine the chocolate chips, honey and peanut butter. Microwave on low until melted and mix well to combine.

3. Add the melted mixture to the oat mixture and use your hands to mix well. Form into balls and refrigerate until chilled.

4. Store in an airtight container in the fridge.

Powered by Recipage


DSC 0086DSC 0087
DSC 0088DSC 0089

When I made these I actually used 2 cups of oats, and I ended up with about 1/2 a cup of oats that I couldn’t make stick together into balls. So, I’ve adjusted the recipe above accordingly and I think 1 1/2 cups would be the right amount. Not to worry though, I didn’t let those extras go to waste! They tasted great in my Greek yogurt!

DSC 0090

I made about 14 balls that were the perfect size for snacking. In addition, you could also use brown rice syrup or agave nectar in place of honey!

DSC 01121DSC 01161

Enjoy!
–Lindsay–
Filed Under: Snack

Spicy Garlic Flatbread Crackers

August 19, 2011 by Lindsay 5 Comments

Last night at the grocery store, the hubby bought some cheap beer.

DSC 0091Have you heard of it? It’s like PBR, but with a different name. He’s been seeing it pop up at bars lately and wanted to try it out. The best part about cheap beer (to me) is that I can play around with it in my recipes without wasting a lot of money if it turns out badly 🙂

I’ve been making hummus like crazy these past couple of weeks and last night I made another batch of our current favorite- roasted garlic. Today I decided to try my hand at some crackers to eat it with. I love crispy, crunchy crackers so I settled on a batch of flatbread crackers.

I found this recipe and decided to give it a try! For the flour I used 1 c white whole wheat flour and 1 c AP flour. I probably ended up using closer to 1 c beer. I started with 3/4 c and then added just enough to make the dough stick together so I could knead it.

DSC 0092DSC 0093DSC 00951

While the dough was resting, I minced the garlic and added it to the olive oil to infuse! After about 20 minutes, I divided the dough in half, rolled it out as thin as I could and then brushed on some of the oil. I didn’t use even half of the 3 Tbsp….I just like a thin coating to help everything else stick. Then I added black pepper, red pepper, paprika, sesame seeds and a sprinkle of garlic powder. I didn’t measure, just did what looked good to me. I did add extra red pepper because I wanted them to have a bit of a kick!

I baked them at 400 degrees but mine too about 15 minutes. Then I repeated everything with the other half of the dough. Next time I’d divide it into 4 batches so I could roll it even thinner and I’d bake it on a pizza stone.

DSC 0096DSC 0099DSC 01011

I used a pizza cutter to cut into cracker sized pieces!

DSC 01091DSC 0110

I may or may not have eaten at least 1/2 of these for lunch 🙂

Enjoy!
–Lindsay–
Filed Under: Uncategorized

Black Bean & Mushroom Enchiladas

August 15, 2011 by Lindsay 17 Comments

A while ago, Brandi posted this recipe for Homemade Cream of Mushroom Soup. I immediately thought about my all-time favorite Chicken Enchiladas and I knew that next time I made them, I wanted to make the cream of mushroom and cream of chicken soup at home. Well, I never got around to making them until last week, and seeing as we’re in the middle of veggie month, I had to make a few modifications….but it all worked out!

Instead of chicken enchiladas, I made a black bean and mushroom enchiladas. I started by making the cream of mushroom soup. I made a few changes to Brandi’s recipe…here’s the recipe I used:


[print_this]

Cream of Mushroom Soup

6 oz. portobello mushrooms, diced
3 Tbsp olive oil
2 Tbsp flour
1 can (12 oz) fat free evaporated milk
1/2 tsp salt
1/4 tsp pepper

Directions:

1. Add mushrooms to a pan with 1 Tbsp of oil and cook until browned. Remove from the pan.
2. Add 2 Tbsp olive oil and flour and whisk together.
3. Slowly pour in the milk, whisking constantly, until mixture is smooth. Add the mushrooms, salt and pepper.
4. Bring to a simmer, then turn down the heat and let cook, stirring occasionally, until thickened.

[/print_this]


DSC 0017DSC 0018
DSC 0019DSC 0020

The original recipe had 12 oz of mushrooms. Clearly I had no idea how many mushrooms that was…and I felt like 6 oz was enough once I started chopping.

DSC 0021

Next, since I was on such a homemade kick, I decided to tackle homemade enchilada sauce. I’d been thinking about trying to make this at home for a while now because the canned versions have so much salt. I looked at this recipe and this recipe and ended up with a mixture of the two.


[print_this]

Homemade Enchilada Sauce

1 1/2 c water
8 oz no-salt added tomato sauce
3 Tbsp chili powder
2 Tbsp olive oil
2 Tbsp flour
3/4 tsp garlic powder
1/2 tsp cayenne pepper
1/2 tsp cumin
1/2 tsp salt

Directions:
1. Mix the flour oil and chili powder together in a sauce pan.
2. Add the water, tomato sauce and the remaining spices and whisk until smooth.
3. Bring to a boil, then reduce heat and simmer until thickened

[/print_this]


DSC 0022DSC 0023

The sauce was good, but next time I’d probably only use 2 Tbsp chili powder since the flavor can be a little overwhelming and I’d add a bit more cayenne.

Once both of those were prepared, I was ready to make the enchiladas.


[print_this]

Black Bean & Mushroom Enchiladas

2 cups black beans, cooked
1 c red pepper, diced
1 c brown rice
1 1/2 c chopped Portobello mushrooms
1 1/2 c Cream of Mushroom Soup
3/4 c low-fat Mexican cheese, divided
5 whole wheat tortillas
1/2 c enchilada sauce

Directions:
1. Mix  all of the ingredients except 1/4 c cheese in a large bowl.
2. Pour a thin layer of enchilada sauce over the bottom of a 9×13 pan.
3. Portion the mixture into the tortillas and roll up. Place seam side down in the pan.
4. Top with the remaining enchilada sauce and cheese and bake at 375 degrees for 30 minutes.

[/print_this]


DSC 0027DSC 0029DSC 0030

DSC 0031DSC 0033

Just ignore my sad looking tortillas…I had some trouble with the tortillas sticking together. Also ignore the fact that there are only 4 enchiladas in a smaller pan. I had some trouble with the tortillas sticking together.

So there ya have it, friends. About as homemade as enchiladas can get. Maybe I’ll even make my own tortillas next time!

photo 23photo 24

Enjoy!
–Lindsay–
 

Filed Under: Uncategorized

Ginger Oatmeal Cookies w/ Cranberries & Reeses

August 9, 2011 by Lindsay 8 Comments

I feel like there are gonna be two camps of people when it comes to these cookies…and you’ve probably already made your decision based solely on the title. You’re either going 1)I’m intrigued, or 2) GROSS!

I hope you’re in camp one, or you’ll be missing out on my new favorite cookie.

Over the weekend I found myself in the mood to make cookies. I’ve been craving ginger cookies for a while now, but when I asked the hubby what he wanted, he responds the same way he always does. He wanted Cranberry Oatmeal Chocolate Chip.

I decided to compromise. I had a recipe for ginger cookies that I made over Christmas break, but I wanted to find a chewier recipe. I knew that meant adding some sugar and butter but oh well 🙂

After some googling, I found this recipe and made just a few tweaks.

Ginger Oatmeal Cookies w/ Cranberries & Reeses

by Lindsay L

Prep Time: 10 min

Cook Time: 10 min

Keywords: bake dessert chocolate cranberry molasses oats

Ingredients (3 dozen)

  • 1 c brown sugar, not packed
  • 1 stick unsalted butter, softened
  • 1 egg
  • 1/4 c molasses
  • 1 tsp. vanilla
  • 1 3/4 c. flour
  • 2 tsp. baking soda
  • 1 tsp. cinnamon
  • 1 tsp. ginger
  • 2 c oats
  • 3/4 c Craisins
  • 6 Reese’s peanut butter cups, chopped

Instructions

1. Preheat oven to 350 degrees.

2) Beat brown sugar and butter until fluffy. Add the egg, molasses and vanilla and mix well.

3) Add the flour, oats, ginger, cinnamon and baking soda and mix until combined.

4) Stir in the Craisins & Reeses.

5) Scoop onto greased baking sheets and cook 9-10 minutes.

Powered by Recipage


Give these a try…you won’t regret it!

DSC 0238DSC 0244DSC 0254

What’s the weirdest cookie combo you’ve ever made?

Enjoy!
–Lindsay–

 

Filed Under: Baking, Dessert Tagged With: Cranberry

Homemade Lara-Bites!

August 5, 2011 by Lindsay 13 Comments

I’m generally not a big fan of snack bars because of all the added sugar and processing that come along with them. BUT, I do occasionally eat them, especially if someone- like Sarah- sends them to me 🙂 Way back in April, Sarah sent me my very first Larabar. I was SUPER impressed by the short list of ingredients and how natural they were. I loved every bite.

Like Larabars? You're just a few ingredients away from a homemade version! Cut them up for the kids or leave them as a bar for adults!

I thought, with an ingredient list that short, surely I can make these at home! But I never got around to buying dates…the key ingredient. So, when I found some Organic Medjool Dates when choosing my Swanson products, I immediately added them to my cart. To by honest, I don’t really know anything about dates other than that I’m constantly getting them confused with figs in my mind 🙂

DSC 0182

After doing some research to find the correct ratios, I found this great post and immediately zeroed in on the PB & J flavor.

Lara Bites

by Lindsay L

Prep Time: 5 min

Keywords: raw snack vegetarian healthy nuts raisins dates

Ingredients (15-20 bites)

  • 1/3 c chopped dates
  • 1/4 c raisins
  • 1/4 c unsalted peanuts

Instructions

In your food processor, add the roughly chopped dates and raisins and process into a paste. Transfer to a bowl.

Add the peanuts to the food processor and process until well chopped. Transfer to the bowl with the fruit.

Using your hands or a spatula, mix the two together.

Divide the mixture in half and place on two sections of plastic wrap.

Shape into bars, bites, balls…whatever shape your heart desires and store in the fridge

Powered by Recipage

*This makes 2 bars or about 12 bites. You could easily double or triple the recipe.

DSC 0183DSC 0184
DSC 0185DSC 0190

Don’t forget to remove the pit in the dates when you chop them up.

DSC 0191
DSC 0193*Sorry for the terrible pictures. It was 11pm.

I shaped mine into thin logs and stuck them in the fridge overnight.

DSC 0197In the morning, I removed the saran wrap and cut them into bites!

Like Larabars? You're just a few ingredients away from a homemade version! Cut them up for the kids or leave them as a bar for adults!Like Larabars? You're just a few ingredients away from a homemade version! Cut them up for the kids or leave them as a bar for adults!For more flavor combos, check out these ideas from Enlightened Cooking or these Key Lime balls from Jenn!

What’s your favorite Larabar flavor? Have you ever made them at home?

Enjoy!
–Lindsay–
Filed Under: Snack

Reese’s Peanut Butter Balls

August 4, 2011 by Lindsay 15 Comments

Here’s a quick little treat to help propel you towards Friday! These were inspired by Tina and the Peanut Butter Graham Truffles that she posted a few weeks ago. After reading her post, I knew immediately that I’d be making them, especially since I had all the ingredients on hand.

I made a few alterations to her recipe, namely including Reese’s since, as you’ll recall, I have a plethora of them! I also omitted the powdered sugar and cut the amount of chocolate in half.

Reese’s Peanut Butter Balls

by Lindsay L

Keywords: raw snack dessert chocolate peanut butter no bake

Ingredients

  • 8 Reese’s peanut butter cups, smashed
  • 1 c brown rice cereal
  • 1 c peanut butter
  • 1 c graham cracker crumbs
  • 6 oz dark chocolate chips

Instructions

1. Combine all ingredients except the dark chocolate chips in a bowl. Use your hands to really mix everything together well.

2. Refrigerate for at least 30 minutes.

3. Use your hands to press into balls.

4. Melt the chocolate chips, roll the balls in chocolate and return to the fridge until the chocolate sets.

Powered by Recipage


DSC 0123

Suggestions:
-These stuck together pretty well but they probably could have benefited from another 1/2 c of peanut butter. I cut the amount down because I was using the Reese’s, but they aren’t as sticky as regular peanut butter so next time I’d probably add a bit more.
-I cut down on the amount of chocolate because I like a thinner layer. If you like a thicker layer, just melt some more chips!

DSC 0128

What’s your favorite no bake treat?!

Enjoy!
–Lindsay–

Filed Under: Uncategorized Tagged With: Peanut Butter

Pan Roasted Chicken Thighs

August 2, 2011 by Lindsay 24 Comments

Hi Friends!

In case you’re still playing catch-up from the weekend, here’s a few things of note:

-Be sure to check out yesterday’s post to see if you’re interested in becoming a Foodie Penpal!

-Check out my Sweet Potato & Black Bean Tacos that were featured on Good Life Eats! I won an amazing giveaway involving a 6 ingredient recipe challenge! You can find the original recipe that I posted on The Bean in December by clicking here.

DSC 0081

Moving on….

Last night I had a little adventure in the kitchen as I made chicken thighs for the first time. I’d been thinking about them ever since I saw them in last month’s issue of Bon Appetit. They looked so good in the photographs that I just wanted to eat them right up! Then Tessa posted about them after she saw the article and it just made me want them even more!

Last time I was at the grocery store, I finally picked up a package of thighs. They were pretty cheap compared to chicken breasts! After work I hauled out my cast iron skillet and got busy.

There’s really no recipe, per say….just some instructions that I followed exactly from the Bon Appetit article.

Here’s what you do:
Season the thighs with salt and pepper. (I used very little salt and added some paprika).
Put them skin side down in a hot skillet and cook for 2 minutes.
Reduce the heat to medium high and cook for another 12 minutes, moving the thighs around occasionally.
Transfer the pan to a hot oven (the article said 475 degrees, I went with 425) for another 12 minutes.
Flip the thighs over and cook another 5 minutes.
Let rest 5 minutes before serving.

DSC 0142DSC 0146

Here’s the deal- I probably won’t be making these again…and here’s why:

-Grease everywhere. Most of the things I cook are lean and don’t release a lot of fat so I don’t have a splatter screen or anything like that. Consequently, these got grease all over the stovetop and inside of the oven. It splattered on my shirt, and on my arms when I was trying to move the thighs around
-The skin stuck! I was trying so hard to get a nice crispy skin that would look pretty and on half the thighs, it stuck to the bottom of the pan. Annoying.
-Hard to eat. Hubby and I both agreed it was a lot of work to eat these and you don’t get very much meat for your effort

On the other hand, the flavor was good and the meat stayed nice and moist, so it wasn’t a total loss.

DSC 0155

What I’m saying is, if someone else made these for me….I might be inclined to eat one 🙂 But only if they cut it up nicely for me.

I spent most of my dinner focusing on the orzo and veggie salad I made as a side. Bok choy, red peppers, carrots, zucchini and onion lightly sauteed. Add a drizzle of balsamic vinegar and a squirt of italian dressing and you’re good to go 🙂

DSC 0143DSC 0144

All together now:

DSC 0148DSC 0149

How do you feel about chicken thighs? Do you have a favorite recipes that might convince me to give them another try?

Enjoy!
–Lindsay–

Filed Under: Uncategorized Tagged With: Chicken

  • « Go to Previous Page
  • Page 1
  • Interim pages omitted …
  • Page 60
  • Page 61
  • Page 62
  • Page 63
  • Page 64
  • Page 65
  • Go to Next Page »

Primary Sidebar

Lindsay Livingston The Lean Green Bean Healthy Living Tips and Tricks

I'm a Registered Dietitian and mom of three from Columbus, Ohio. I use this blog to share simple, healthy recipes, nutrition tips, and an honest glimpse of motherhood!

Learn More →

Questions? Comments? Email me: [email protected]

The Lean Green Bean Facebook The Lean Green Bean Instagram The Lean Green Bean Pinterest The Lean Green Bean Twitter The Lean Green Bean Feed
footer-logo
The Lean Green Bean Facebook The Lean Green Bean Instagram The Lean Green Bean Pinterest The Lean Green Bean Twitter The Lean Green Bean Feed
Recipes

Breakfast
Dinner
Snack
Slow Cooker

Kids

Cooking With Kids
Favorite Gifts
Toddler Meals
Indoor Activities

Resources

Easy Packed Lunches for Kids
Dinner Spark
Snack Spark
Ultimate Guide to Food Prep

About

Meet Lindsay
Become an RD
Work with Me

The Lean Green Bean is a participant in the Amazon Services LLC Associates Program, an affiliate advertising program designed to provide a means for sites to earn advertising fees by advertising and linking to amazon.com.
Read the full privacy and disclosure policy here.

Copyright © 2022 · The Lean Green Bean

table talk series

Learn how food affects your body.

Get my free Table Talk email series where I share bite-sized nutrition information about carbs, protein, and fat, plus bonus information about snacks and sugar!

[email protected]