• Skip to main content
  • Skip to primary sidebar

Learn how food affects your body. Get Free Nutrition Info Today

the-lean-green-bean-logo
  • Home
  • Recipes
  • Kids
  • Resources
    • Ebooks
    • Food Prep
    • Videos
    • Snack Round-Ups
    • Gift Guides
  • About
    • Become An RD
    • Work With Me
  • Search
the-lean-green-bean-logo
  • Home
  • Recipes
  • Kids
  • Resources
    • Ebooks
    • Food Prep
    • Videos
    • Snack Round-Ups
    • Gift Guides
  • About
    • Become An RD
    • Work With Me
  • Search

blog

Crispy Parmesan Zucchini Fries

June 1, 2011 by Lindsay 95 Comments

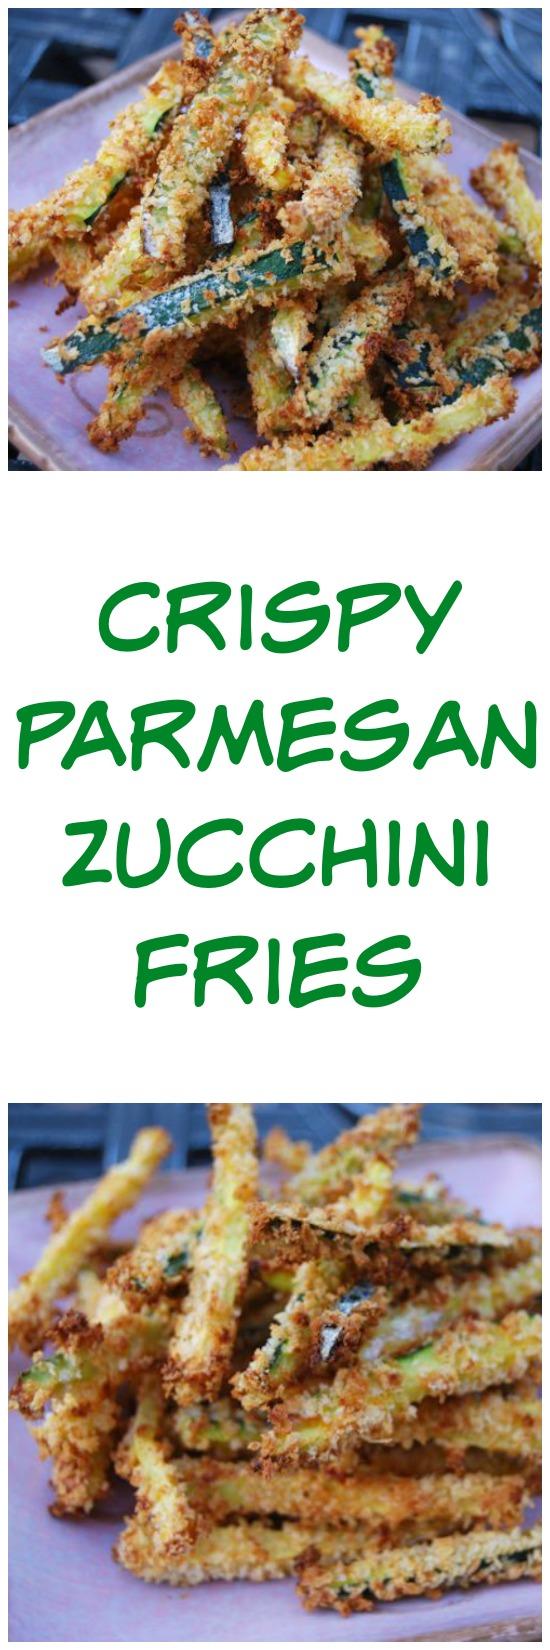
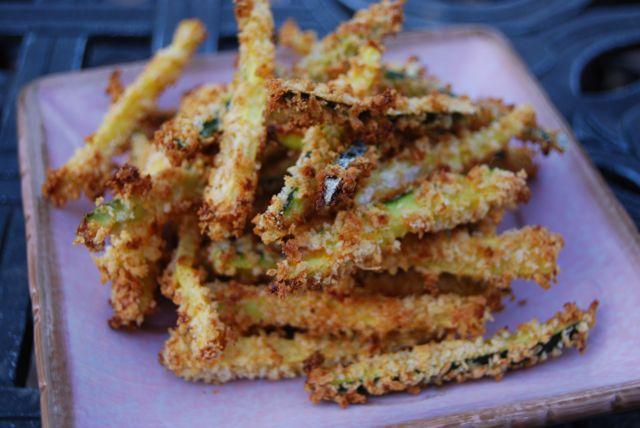
These Crispy Parmesan Zucchini Fries make the perfect dinner side dish and taste great when served with a side of marinara sauce for dipping!

Zucchini fries are nothing new. You can find them here, here and here, just to point out a few recipes for ya! But they’re semi-new to me and sometimes that’s all that matters.

These Crispy Parmesan Zucchini Fries make the perfect dinner side dish and taste great when served with a side of marinara sauce for dipping!

I had a vague recollection of making zucchini fries once before and not being too crazy about them. But after I saw Georgia’s recipe yesterday day, I knew I needed to give them another try.

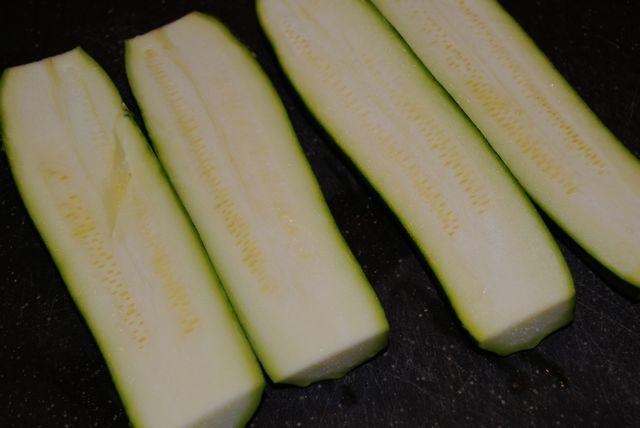
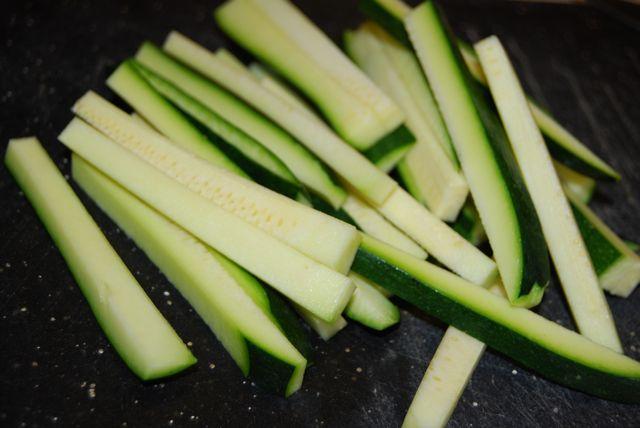
I started by cutting the zucchini into thin slices.

These Crispy Parmesan Zucchini Fries make the perfect dinner side dish and taste great when served with a side of marinara sauce for dipping!Then, I seasoned some flour with paprika and garlic powder. I rolled the slices in the flour mixture, dipped them in egg, and dropped them onto a plate with Panko breadcrumbs, Parmesan cheese, and a little more paprika and garlic powder.

DSC 9168DSC 9169DSC 9170

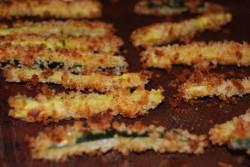
I put them in the oven at 425 degrees for 10 minutes, flipped them over, and then put them in for 10 minutes more.

DSC 9171DSC 9172

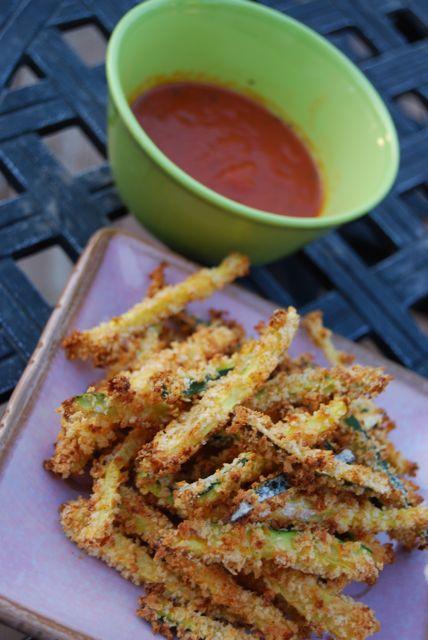
They browned up perfectly and got really crunchy. I served them with a side of marinara sauce for dipping.

These Crispy Parmesan Zucchini Fries make the perfect dinner side dish and taste great when served with a side of marinara sauce for dipping!These Crispy Parmesan Zucchini Fries make the perfect dinner side dish and taste great when served with a side of marinara sauce for dipping!

The verdict? Good! I liked the crunch from the breadcrumbs, and the sauce made it taste kinda like a crunchy eggplant parmesan!

These Crispy Parmesan Zucchini Fries make the perfect dinner side dish and taste great when served with a side of marinara sauce for dipping!

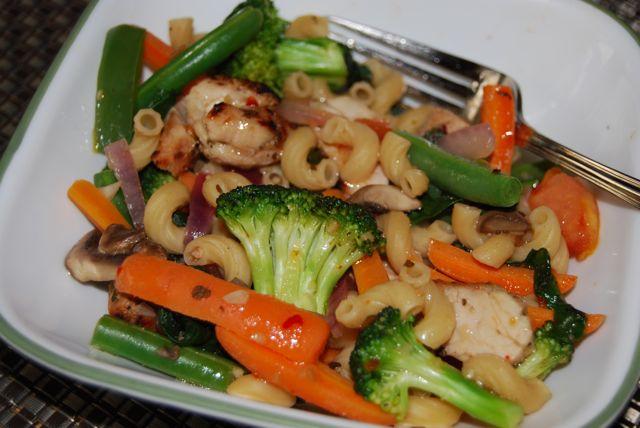
Serve with a bowl of pasta salad and you’ve got yourself a delightful dinner 🙂

DSC 9183

[clickToTweet tweet=”These Crispy Parmesan Zucchini Fries from @leangrnbeanblog make a perfect fun dinner side dish!” quote=”These Crispy Parmesan Zucchini Fries from @leangrnbeanblog make a perfect fun dinner side dish!”]

So tell me… what’s your favorite kind of fry?

Enjoy!
–Lindsay–

If you liked this post, you’ll love my ebook – The Ultimate Guide To Food Prep. It dives into even more detail about how to food prep, troubleshoots common problems and provides tons of tips to make it easier! Click the image below for more details!

The Ultimate Guide To Food Prep Ebook

Filed Under: Side Dish

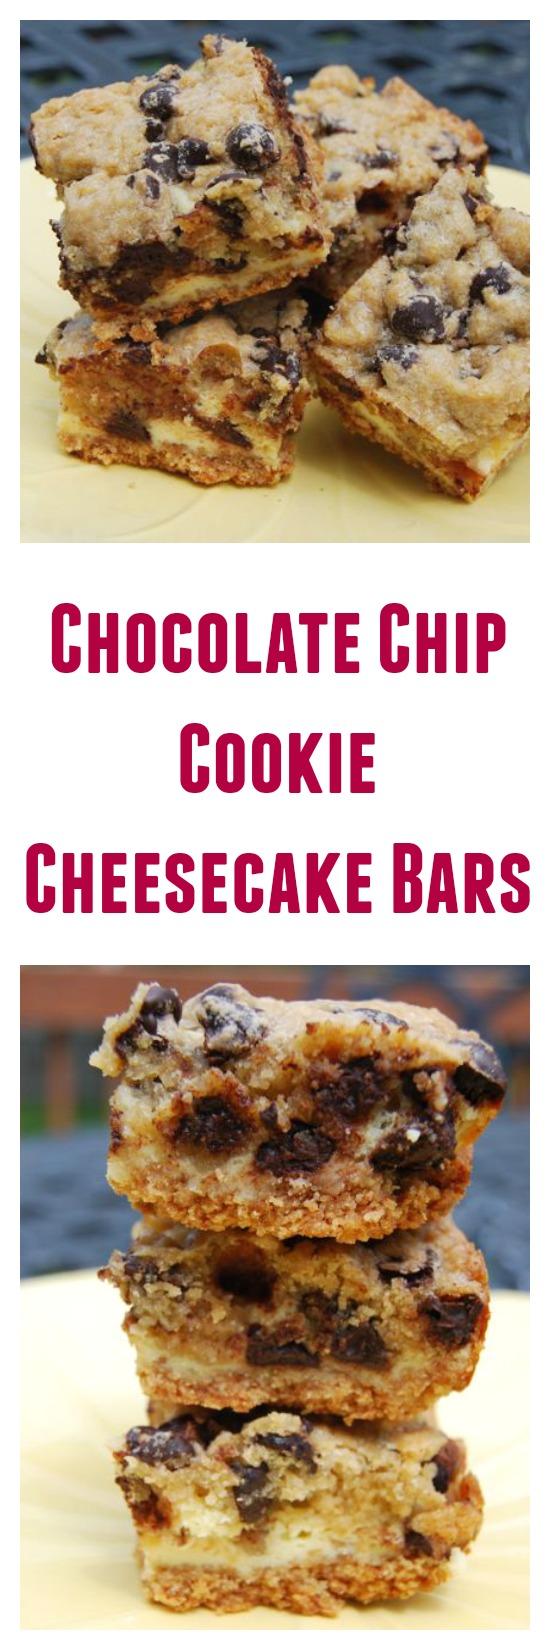
Chocolate Chip Cookie Cheesecake Bars

May 31, 2011 by Lindsay 23 Comments

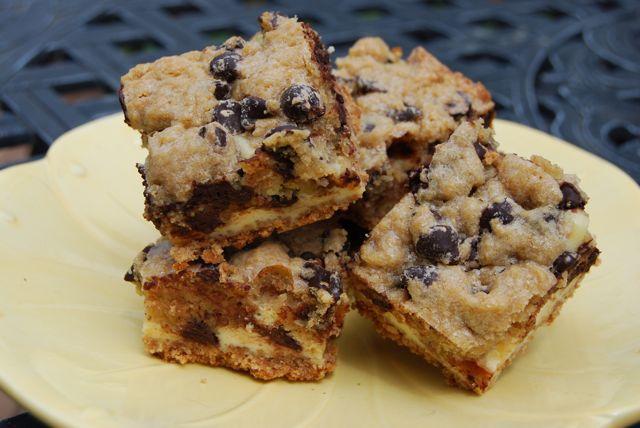
Remember how I told you I couldn’t get these cookie dough cheesecake bars out of my head?!

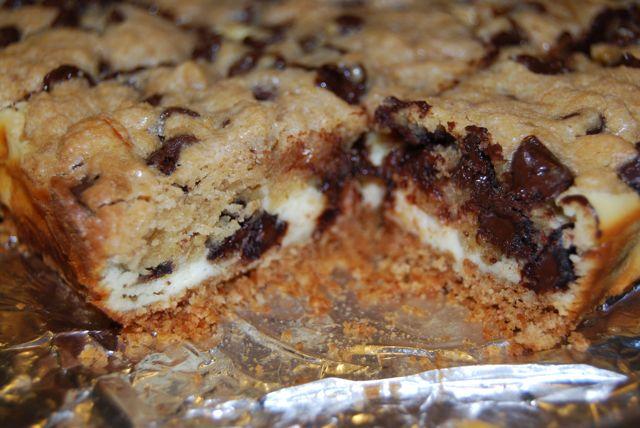
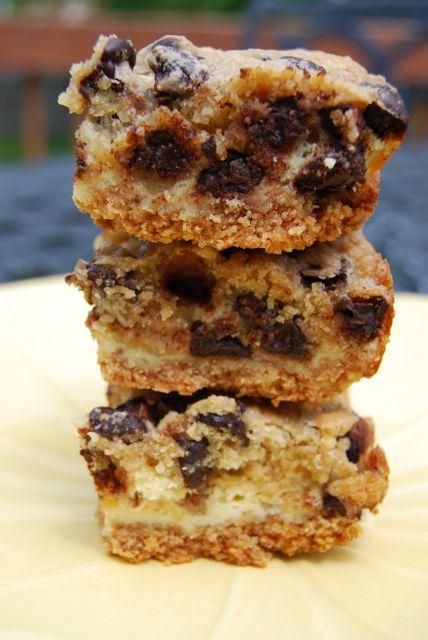
A cross between a chocolate chip cookie and a cheesecake, these dessert bars are sure to be a hit!

Well, this past weekend I decided to whip up a batch since I was in change of bringing dessert to our cookout.

I started by making the graham cracker crust.

DSC 9113DSC 9114DSC 9115

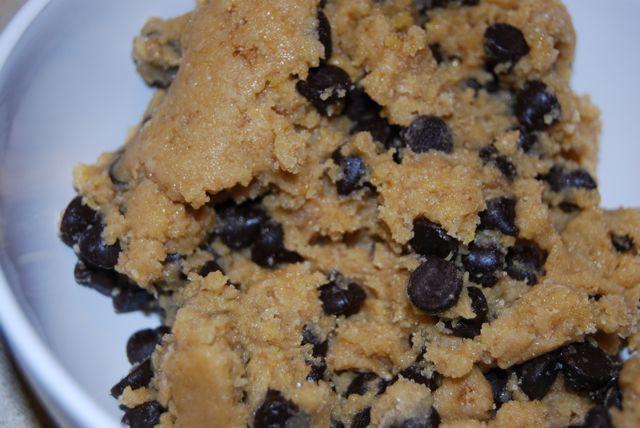
Then I made the cookie dough. I added an egg to the cookie dough because it was way to crumbly and not dough like at all. I also reduced the amount of butter because cutting one stick in half is much easier than getting those two extra Tbsps.

DSC 9116Finally, I made the cheesecake filling. At the last minute, I stirred some extra chocolate chips into the filling, just because I love them 🙂

DSC 9118

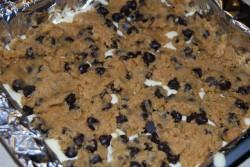
Then I spread the cheesecake filling on top of the graham cracker crust and topped it with pieces of cookie dough.

DSC 9119DSC 9120

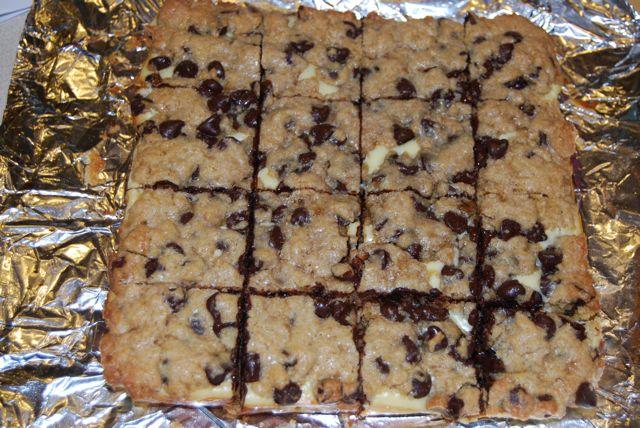
Into the oven they go and out they come! Lift out the foil and slice into squares.

A cross between a chocolate chip cookie and a cheesecake, these dessert bars are sure to be a hit!A cross between a chocolate chip cookie and a cheesecake, these dessert bars are sure to be a hit!

Since I made a few adjustments to Jamie’s recipe,  below is the recipe I used:

Chocolate Chip Cookie Cheesecake Bars

by Lindsay L

Prep Time: 10 min

Cook Time: 40 min

Keywords: bake dessert graham crackers chocolate bars

Ingredients (8×8 pan)

  • 1 1/2 cups graham cracker crumbs
  • 4 tablespoons unsalted butter, melted
  • 4 tablespoons unsalted butter, softened
  • 1/3 cup brown sugar
  • 3 tablespoons white sugar
  • 1 teaspoon pure vanilla extract
  • 3/4 cup flour
  • 1 egg
  • 1 cup dark chocolate chips
  • 8 oz cream cheese, softened
  • 1/4 cup white sugar
  • 1 large egg, room temperature
  • 1 teaspoon pure vanilla extract

Instructions

1. Preheat the oven to 325 F. Line an 8 inch square baking pan with foil and spray with nonstick cooking spray.

2. Mix the melted butter and graham cracker crumbs together and press the mixture into the bottom of the foil-lined pan. Bake for 6 minutes and set aside.

3. In a bowl, beat the butter, brown sugar, granulated sugar, salt and vanilla until smooth Mix in the egg, followed by the flour on low speed. Stir in the chocolate chips. Set aside.

4. In a separate bowl, cream together the cream cheese and sugar until smooth. Mix in the egg and vanilla. Pour the cheesecake batter over the graham cracker crust.

5. Use your hands to form clumps and distribute the cookie dough onto the top of the cheesecake batter.

6. Bake for about 30 minutes. Remove from the oven and let cool.

7. Lift the bars out of the pan using the foil, slice and serve. Store in the fridge

*These can be served cold or room temperature.

Powered by Recipage

A cross between a chocolate chip cookie and a cheesecake, these dessert bars are sure to be a hit!A cross between a chocolate chip cookie and a cheesecake, these dessert bars are sure to be a hit!

I ate these warm, room temp and cold and I think cold was my favorite, but they were pretty good at all temperatures 🙂

Enjoy!
–Lindsay–

Filed Under: Baking, Dessert

Grilled Quesadillas

May 30, 2011 by Lindsay 6 Comments

Last night I stopped and picked up some burgers for the hubby to grill for dinner. Usually we make our own burgers but we had a long day full of yard work and sometimes pre-made is just the way to go.

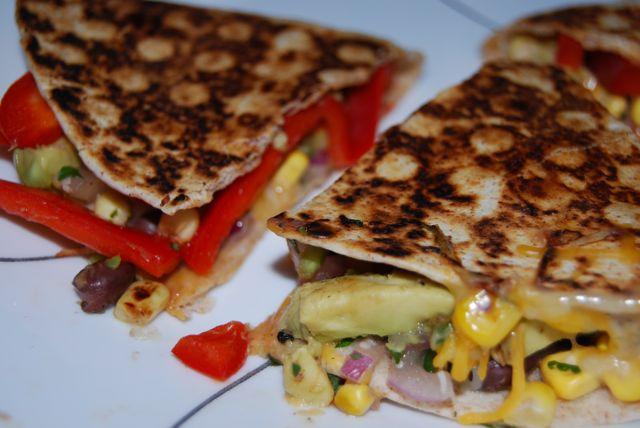
I’m not all about beef burgers, so I whipped up a tasty little ‘dilla for myself! And let me tell ya, it was GOOD!

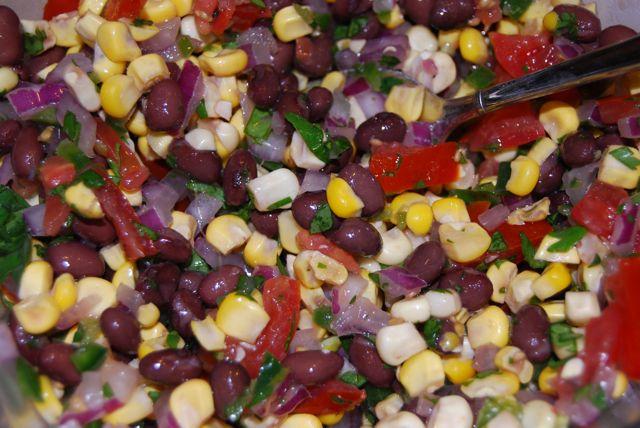
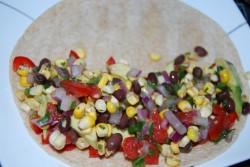
It all started with this corn and black bean salsa I made.

DSC 9140

I made a big batch and took some over to my in-laws for a cookout we were having. My salsa is a bit different every time I make it, but for this batch I used two ears of sweet corn that I cooked on the grill, one can of no-salt added black beans, 2 small tomatoes, about 1/2 c red onion, several Tbsp chopped fresh cilantro, the juice of one lime and two jalapenos. Since I made it the night before, it had plenty of time to develop a good flavor…and it was nice and spicy!

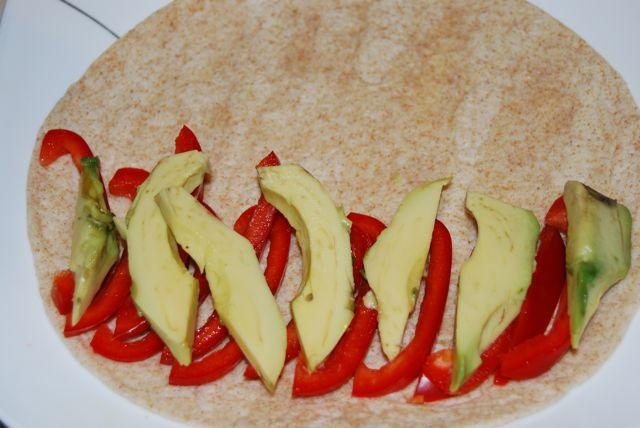
When I made my actual dilla, I started with some red pepper avocado slices.

DSC 9142

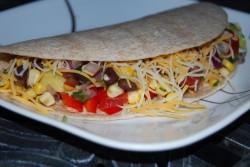
Then I added some salsa and a little bit of cheese.

DSC 9145DSC 9146

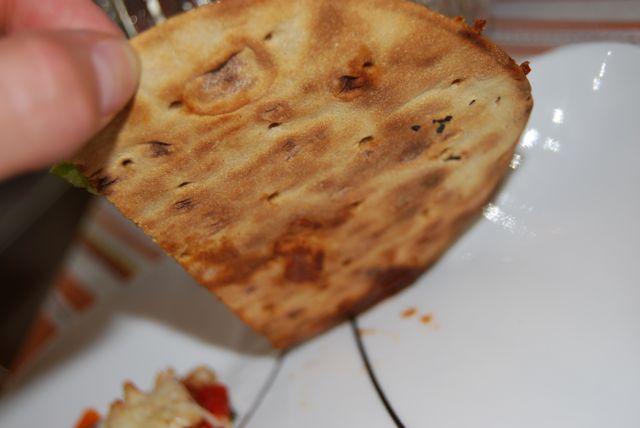
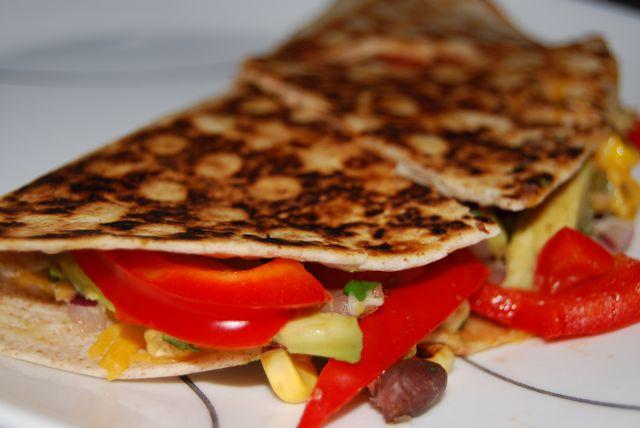
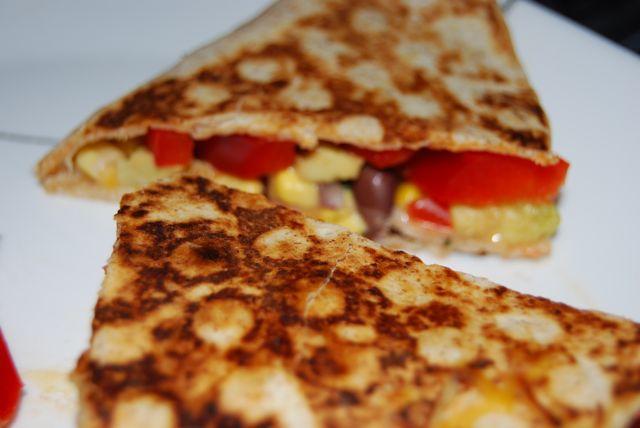
We picked up a new grill pan at Marshall’s this weekend that was much bigger than the one we had and I thought it’d be fun to see if I could grill the quesadilla and give it a nice crunchy crust.

DSC 9151DSC 9152

The result? Delicious! It got a little messy because I don’t put much cheese in my quesadillas so they don’t always stick together as well as they could. But nonetheless, the dilla was darn delicious!

DSC 9153

Enjoy!
–Lindsay–
Filed Under: Uncategorized

Balsamic Grilled Veggies

May 22, 2011 by Lindsay 7 Comments

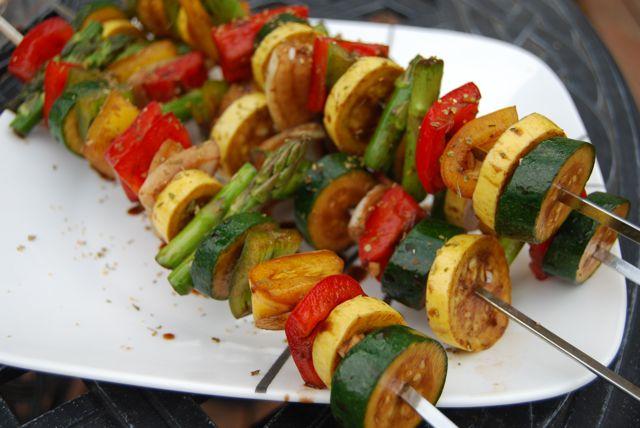
One of my absolute favorite things about summer is making kabobs on the grill. There’s something about cutting up all of the vegetables that I find very therapeutic. And I love threading them onto the skewers and picking out what pattern they’re going to go in.

Ok, so I may be a little weird….but that’s ok 🙂

Usually I just put my veggies on plain, drizzle them with olive oil and toss them on the grill. Last night I wanted to change things up a bit, so I decided to make a little marinade.

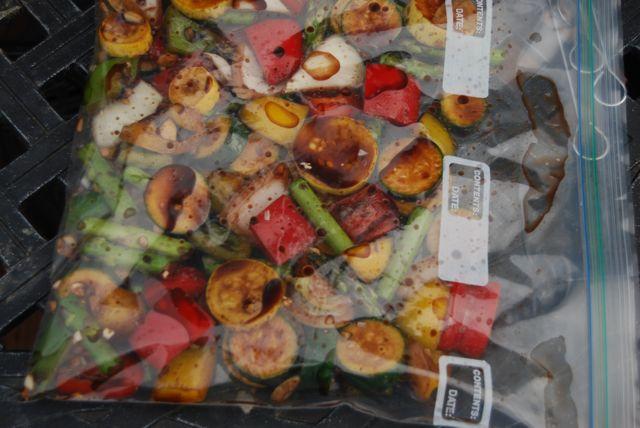
Of course we were so busy yesterday that I didn’t even think about marinating the veggies until it was already dinner time and the hubby was getting ready to light the grill. Even though I knew I only had about 1/2 an hour, I was still confident I could whip up a quick marinade and give them a good 20 minute soak.

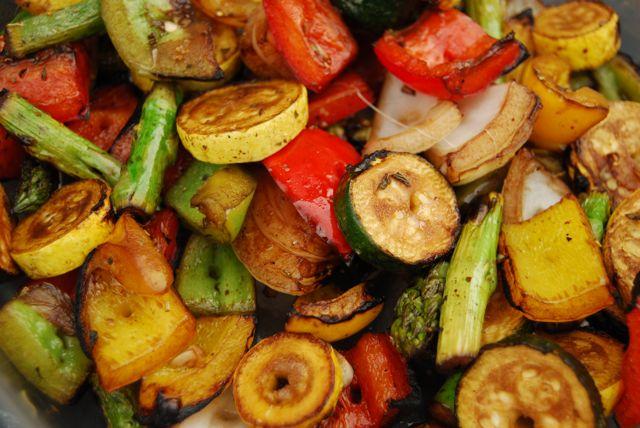
I started by dicing my veggies. Last night’s mix included zucchini, yellow squash, red/yellow/green bell peppers, onion and asparagus. *Side note, this was my first time including asparagus on my kabobs and it was awesome. Cooks perfectly along with the rest of the veggies! After dicing the veggies, I put them in a large tupperware container and added 1/2 c balsamic vinegar, 2 Tbsp olive oil, 3 cloves of garlic and lots of black pepper.

DSC 9011DSC 9012DSC 9013

After putting the lid on and shaking things up, I realized that a ziploc bag would have been a much better choice…..so I transferred them to avoid a balsamic disaster! Every few minutes I tossed the bag around to help coat the veggies.

DSC 9014

Just before the grill was ready, I dumped all the veggies back into the container and threaded them onto the skewers.

DSC 9015DSC 9016

Then I gave them all a nice little sprinkle of McCormick’s Grill Seasoning for some added flavor.

DSC 9018

Then I turned them over to the grill master!

DSC 9017

Balsamic Grilled Veggies

by Lindsay L

Keywords: grill side healthy vegetarian vegetables summer spring

Ingredients

  • 1/2 c balsamic vinegar
  • 2 Tbsp olive oil
  • 3 cloves of garlic, minced
  • black pepper
  • mixed veggies

Instructions

Combine all ingredients in a bowl.

Place veggies in a large ziploc bag.

Pour in the marinage and mix well.

Marinate at least 30 min.

Place veggies on skewers and grill to desired doneness.

Powered by Recipage

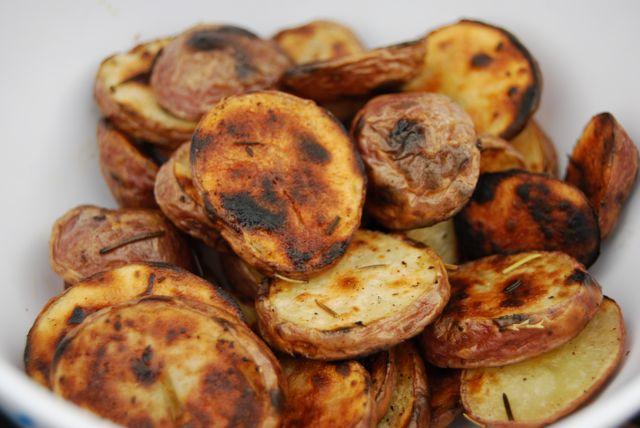
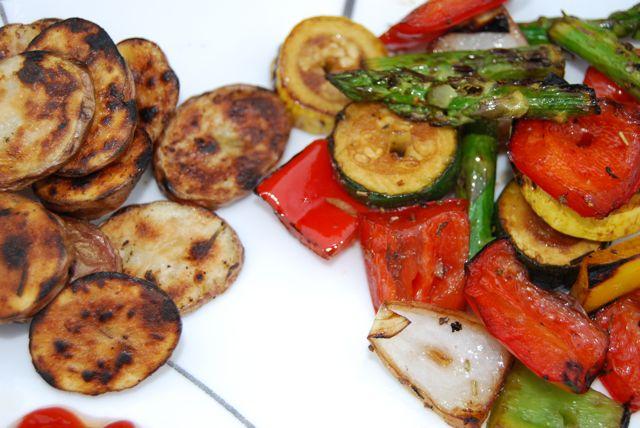
While he was busy arranging his hamburgers and the veggies on the grill, I quickly sliced some potatoes, microwaved and seasoned them and popped them on my grill plate to accompany the veggies!

DSC 9019DSC 9021

The veggies had great flavor even after just a quick marinade. If you’re good at planning ahead, give them an even longer soak for a deeper flavor!

DSC 9025

Enjoy!
–Lindsay–
Filed Under: Uncategorized

Carnitas Taco Pie

May 9, 2011 by Lindsay 8 Comments

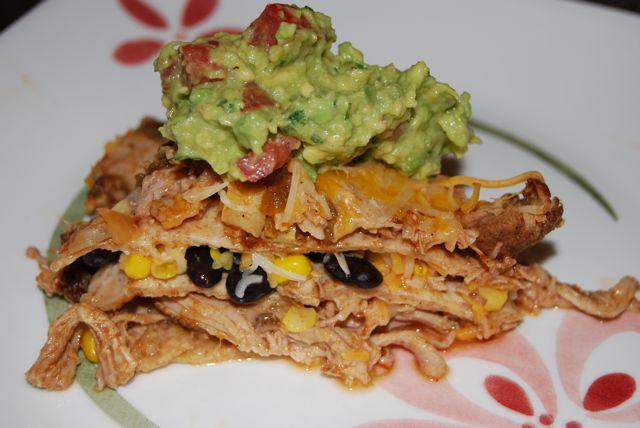
Last week while I was reading blogs, I came upon this recipe from Tessa @ Handle the Heat. I’d been looking for something to do with the pork tenderloin I had thawing in the fridge so I thought I’d giving it a whirl using pork instead of beef.

Use the crockpot to cook the pork and this Carnitas Taco Pie comes together in no time!

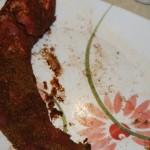
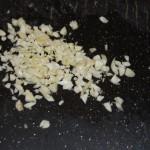
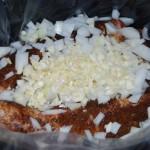
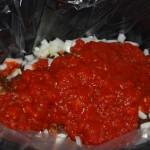
I made a spice rub using chili powder, cumin and paprika and rubbed it on the pork. Then I seared all sides in a hot pan before transferring it to my crockpot.Then I added lots of garlic (about 4 cloves), 1/2 an onion, a jar of hot salsa and about 2 cups of veggie broth.

DSC 8884DSC 8886DSC 8887
DSC 8888DSC 8889DSC 8890

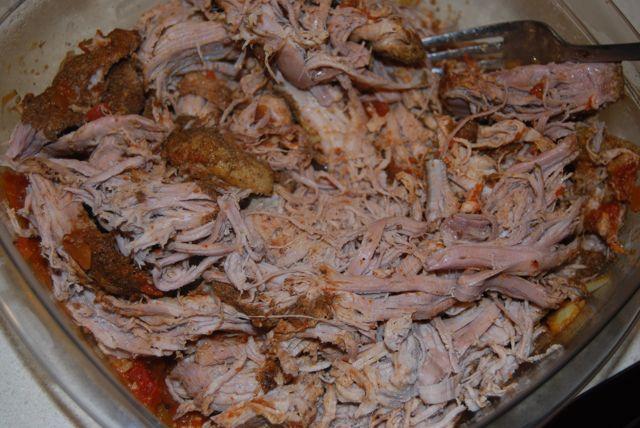
After about 6 hours in the crockpot on low, I removed the pork and shredded it with two forks.

DSC 8891

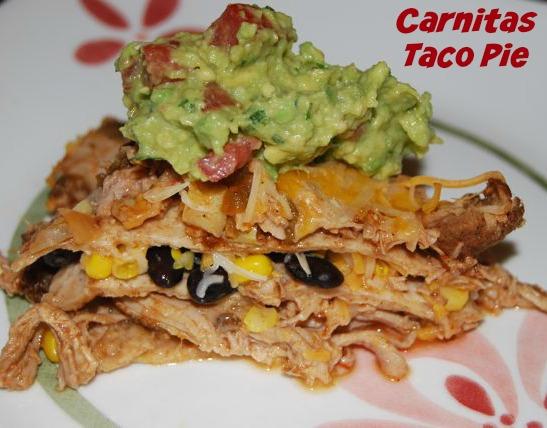
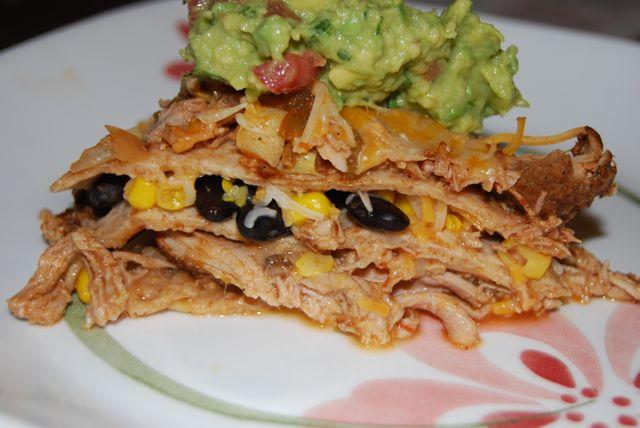
When it was time for dinner, I decided to use the pork to make a taco pie of sorts. I pulled out a cake pan and greased the bottom. Then I started with a whole wheat tortilla. I added a layer of pork, then topped it with another tortilla. For the next layer I used some leftover corn and black beans, along with a little cheese. Another tortilla, more pork and another sprinkle of cheese and into the oven it went! Since nothing really needed to cook, I just used the oven to melt the cheese and warm everything up. I had planned to add some enchilada sauce as well, but I didn’t have any!

DSC 8892DSC 8893DSC 8894
DSC 8895DSC 8896DSC 8897

While the pie was in the oven, I made some fresh guacamole. When we were ready to eat, I cut us each a wedge of pie, and topped them with a blob of guac!

Use the crockpot to cook the pork and this Carnitas Taco Pie comes together in no time!

Carnitas Taco Pie

by Lindsay L

Keywords: slow-cooker bake entree healthy avocado black beans pork

Ingredients (Serves 4)

  • 1.5 lb pork tenderloin
  • 1 Tbsp chili powder
  • 1 tsp cumin
  • 1 tsp paprika
  • 4 cloves garlic, chopped
  • 1/2 c onion, diced
  • 1 jar of hot salsa
  • 2 cups veggie broth (or chicken broth)
  • 3 whole wheat tortillas
  • 1 c black beans
  • 1/2 c corn
  • 1/2 c low-fat Mexican cheese
  • enchilada sauce & guacamole optional

Instructions

1. Mix together the spices and rub all over the pork tenderloin.

2. Sear all sides of the tenderloin in a hot pan with some EVOO.

3. Place the pork, garlic, onion, salsa and broth in a crockpot and cook on low for 6 hours.

4. Remove the pork from the crockpot and shred using 2 forks.

5. Grease the bottom of a cake pan and place a tortilla flat against the bottom.

6. Add a layer of pork and top with another toritlla.

7. Add a layer of black beans, corn, 1/4 c cheese and enchilada sauce (if desired).

8. Add another tortilla, more pork and another sprinkle of cheese and place in the oven at 375 degrees for 30 minutes or until the cheese is melted and everything is heated through.

9. Remove from the oven, slice and serve topped with guacamole.

*Notes:

-You may not use all the pork and that’s ok!

-I think my cake pan was 8 inches and the tortillas fit in there perfectly.

Powered by Recipage


This was the first time I’d done pork tenderloin in the crockpot and the hubby has since declared that shredded pork is now his favorite way to eat pork and he will no longer eat it any other way 🙂

Use the crockpot to cook the pork and this Carnitas Taco Pie comes together in no time!

Enjoy!
–Lindsay–
Filed Under: Dinner

Loaded Brownies

May 5, 2011 by Lindsay 9 Comments

Recently, my father-in-law found a new job after being out of work for a while. We went out to dinner to celebrate but I wanted to bring him some dessert. He’s a big brownie fan, so that’s where I started…but I knew I wanted to take it up a notch.

He’s also a big of Reese’s peanut butter cups so I decided to go with some sort of peanut butter brownies. After some googling, I found this recipe. I don’t make brownies from scratch all that often so I don’t really have a go to recipe.

I made a special trip to the store to track down some mini Reese’s pb cups. In addition, I decided I didn’t want to put peanuts in the brownies. I was planning to chop up some Snickers and use those instead. However, when I got to the store, Butterfingers were on sale and Snickers weren’t. Annnnnnnd my mind was made up.

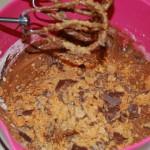
I started by making the brownies.

DSC 9325DSC 9326DSC 9328
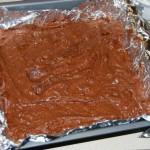
DSC 9329DSC 9330DSC 9332

Two things:
1. I crushed up about 8 fun size Butterfingers and mixed those in just before putting the batter in the pan.
2. Lining your pan with foil when making brownies is pretty much the best idea ever. I’m ashamed to say I’ve never tried it before.

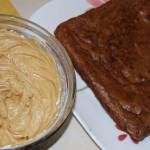
After the brownies cooked, I put them in the freezer to cool. Then I got to work on the peanut butter frosting.

DSC 9335DSC 9337DSC 9338

One thing:
This made A LOT of peanut butter frosting. I ended up only putting about half of it on. Then I threw the rest away. (Remember that…we’ll revisit it later).

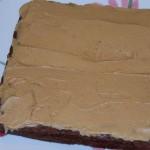
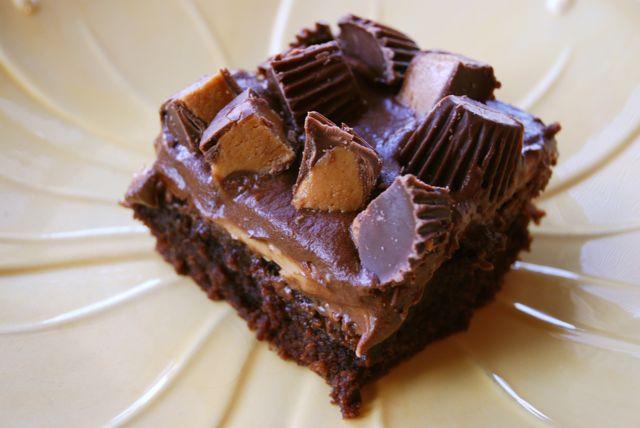
Then I started on the chocolate frosting. I spread the chocolate frosting over the pb frosting, topped the brownies with chopped Reese’s and photographed away….

DSC 9339DSC 9340DSC 9343

DSC 9350DSC 9354

Now let me let you in on a little secret. I hate tasting things while I’m cooking/baking them. I never eat raw cookie dough. I don’t lick the extra frosting off the mixer beaters. Until recently, I never tasted my sauces while cooking. I just threw everything together and hoped for the best. I can’t really explain why I don’t like tasting things, other than to say that I think I’m so afraid they won’t taste good, that I want to prolong that discovery as long as possible. Weird. I know.

Anyways, as you may have guessed, I didn’t try these brownies, or either frosting, until they were completely assembled. The result? Brownies- great! PB frosting- AMAZING. Chocolate frosting- BARF. The chocolate frosting, if you could call it that, was essentially just butter and cocoa powder, with a little bit of powdered sugar. And let me just tell you…it tasted like straight butter. I gagged a little bit while eating it. Then I went outside and pouted for about an hour.

I was angry with myself for not tasting the frosting earlier. After I regrouped, I came up with a new plan. Remove the chocolate frosting. You’re probably thinking I’m a little bit crazy at this point…and I’d be inclined to agree with you. But I really wanted these brownies to work out. So I plucked all of the chopped Reese’s off the brownies and set them aside. Then I carefully scraped off as much of the chocolate frosting as I could without removing the peanut butter frosting.

DSC 9356DSC 9357DSC 9358

Obviously I couldn’t get it all off….but I did my best. I removed enough that I knew I could just mix the rest into the pb frosting and that would overpower the butter taste. Don’t you think a little of that extra pb frosting that I THREW AWAY would have come in handy right about now? sigh….

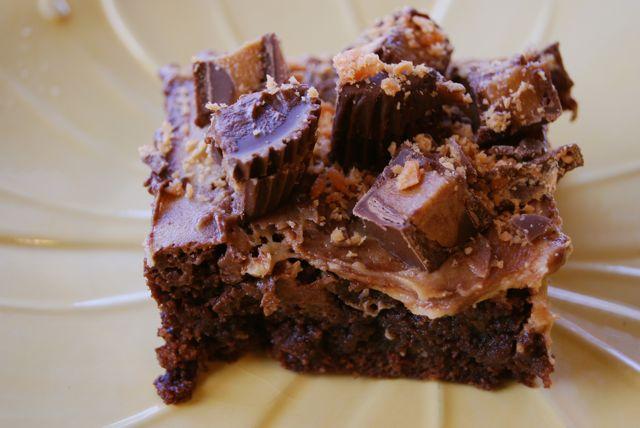
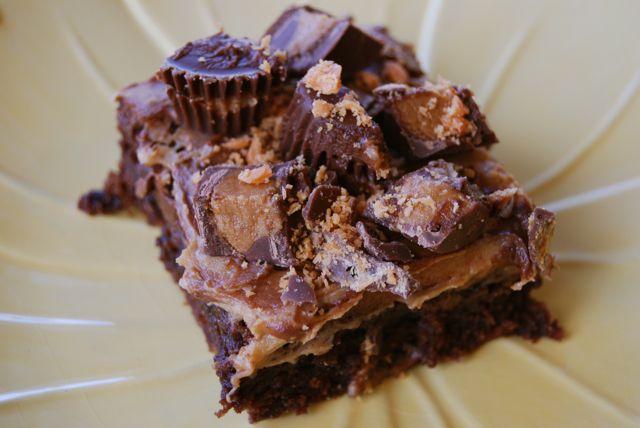
Anyways, I wanted to add a little something extra to the top to take away from the fact that it was now kind of a weird light brown color from the mix of tan and brown frostings….so I crushed up a couple more Butterfingers and after putting the Reese’s pieces back on, I sprinkled the whole thing with Butterfingers and voila! Good as new.

DSC 9359DSC 9360DSC 9366

Loaded Brownies

by Lindsay L

Prep Time: 15 min

Cook Time: 30 min

Keywords: bake dessert chocolate peanut butter bars

Ingredients (9×9 pan)

Brownie Layer

  • 3/4 cup unsalted butter
  • 8 ounces semisweet chocolate chips
  • 1 1/4 cups sugar
  • 1 1/2 teaspoons vanilla extract
  • 1/4 teaspoon kosher salt
  • 4 large eggs
  • 1 cup all purpose flour
  • 8 fun size Butterfingers, crushed

Peanut Butter Layer

  • 1 cup peanut butter
  • 1/4 cup unsalted butter, room temperature
  • 1 cup powdered sugar
  • 3 tablespoons milk
  • 1 teaspoon vanilla extract

Topping

  • 1 cup Peanut Butter Cups, cut into quarters
  • 2 fun size Butterfingers, crushed.
  • your fav chocolate frosting

Instructions

Brownie Layer

1. Preheat oven to 350 degrees. Line a 9 X 9 inch baking pan with foil and butter the foil.

2. Melt butter and chocolate in the microwave. Then beat in the sugar, eggs, vanilla and salt

3. Add the flour and stir until combined. Then stir in the Butterfingers.

4. Spread the batter in the prepared pan

5. Bake until tester inserted into center comes out with moist crumbs attached, about 30 minutes.

6. Cool the brownies to room temperature.

Peanut Butter Layer

1. Using an electric mixer, beat together the peanut butter and 1/4 cup softened butter in medium bowl.

2. Beat in the powdered sugar, milk and vanilla. The mixture should be very spreadable.

3. Spread over the brownies.

Topping

At this point, either use your favorite chocolate frosting recipe and add a chocolate layer before sprinkling with chopped Reese’s Peanut Butter Cups, or add the pb cups and sprinkle with crushed Butterfingers.

Powered by Recipage


DSC 9369

My father-in-law texted me the following the next day:

“The brownies are unbelievable!!! Should call them death by peanut butter/chocolate brownies. Too good :)”

And the day after that, he texted me this:

“Your brownies are the best I have ever had ever!”

DSC 9379

You get the idea.

Go make these now.

Enjoy!
–Lindsay–
 

Filed Under: Uncategorized

Mexican Spring Rolls

May 2, 2011 by Lindsay 32 Comments

This week we’re focusing on simple dinners. 1) Because they’ve become a necessity in my life and 2) Because they’re awesome.

In case you haven’t looked at the calendar lately, it’s already May! You know what that means? Cinco de Mayo is coming up! I thought I should whip up a Mexican-inspired recipe to get you guys in the mood.

Last week I threw some chicken breast in the crockpot with some broth and let them cook on low for 6 hours. Then I shredded them with two forks, froze half the chicken and stuck the other half in the fridge. (Side note: Katie calls these chicken boobs. Literally made me laugh out loud when I read her post the other day.)

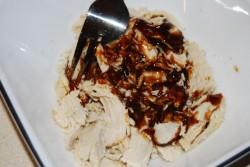
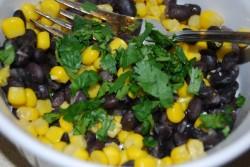
When I got home from work today, I took some chicken out of the fridge and added some barbeque sauce. Then I pulled some black beans out of the freezer, defrosted them and mixed them with some corn and about 1 Tbsp of chopped cilantro.

DSC 9381DSC 9383

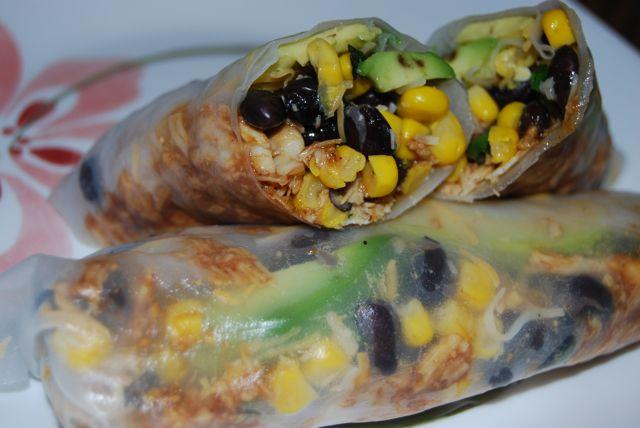
Next, I soaked a spring roll wrapper in warm water until it was soft. Then it was time to build the roll! I started with the bbq chicken, added the corn and beans and topped it off with a little bit of Mexican cheese and some avocado slices. I would have added tomatoes too but I was fresh out! Then I carefully rolled everything up, tucking in the ends as I went.

DSC 9384DSC 9386DSC 9385

Slice in half and enjoy! It’s not the prettiest thing to look at but it sure tasted good. I loved the flavor of the fresh cilantro with the bbq sauce.

DSC 9387DSC 9389

I enjoyed mine with some green beans and an orange….not Mexican in the slightest 🙂

DSC 9390

These could easily be made with regular tortillas….I’m just kinda obsessed with spring roll wrappers. 

Enjoy!
–Lindsay–
Filed Under: Uncategorized

Granola Cookies

April 26, 2011 by Lindsay 14 Comments

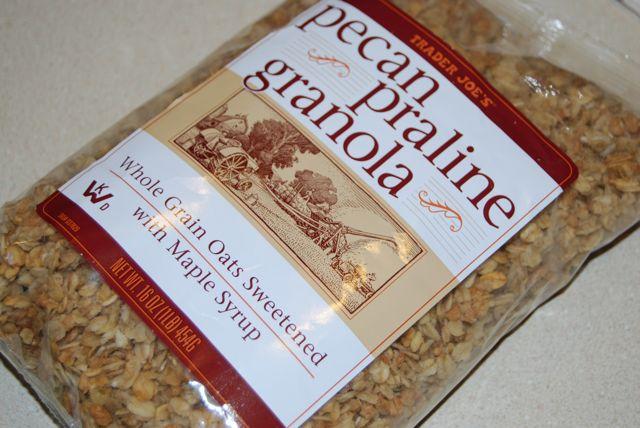
Currently I have a bit of a granola surplus on my hands.  I recently took a bit of a hiatus from the grocery store and I ran out of Greek yogurt (my favorite vehicle for enjoying granola) so I knew I needed to get a little creative and use of some of it up in a different way.

For some reason granola cookies sounded SO good. I wasn’t even really sure if that was a thing….but the thought of adding all that crunch to a cookies was intriguing. I did a little googling and came upon this recipe.

I made a few changes, including using sunflower seed butter instead of peanut butter, using whole wheat flour, reducing the sugar and butter and adding raisins and chocolate chips.

DSC 92011

You can use whatever kind of granola, nut butter and mix-ins you have on hand!

Here’s what you do:

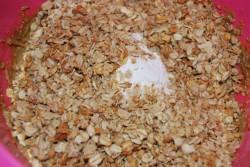
Cream the butter, sugar and nut butter together until fluffy. Add the baking powder, cinnamon and salt. Add the egg and vanilla.

DSC 9219DSC 9220

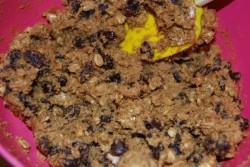
Using a spoon, stir in the flour and granola. Add the dried fruit and other mix-ins and stir until just combined.

DSC 9221DSC 9222

Use a cookie scoop to transfer the dough to baking sheets. Use a fork to flatten the cookies before baking.

Granola Cookies

by Lindsay L

Prep Time: 10 min

Cook Time: 10-12 min

Keywords: bake dessert healthy peanut butter chocolate cookie

Ingredients (3 dozen)

  • 1/4 cup butter, softened
  • 1/2 cup brown sugar
  • 1/2 cup nut butter of your choice (sunflower, peanut butter, almond butter)
  • 1/2 teaspoon baking powder
  • 1/2 teaspoon ground cinnamon
  • 1/2 teaspoon salt
  • 1 large egg
  • 1 teaspoon vanilla extract
  • 1/2 cup white whole wheat flour
  • 2 cups granola
  • 1/2 c raisins
  • 1/2 c chocolate chips

Instructions

1. Preheat oven to 350.

2. Beat the butter, brown sugar, and nut butter until light and fluffy. Add the baking powder, cinnamon and salt.

3. Mix in the egg and vanilla.

4. Stir in the flour and granola. Add the dried fruit and chocolate chips.

5. Using a cookie scoop, drop mounds of dough onto baking sheets.

6. Use a fork to flatten the cookies and bake for 10-12 minutes.

Powered by Recipage


DSC 9231DSC 9302

These Granola Cookies are crunchy, salty and sweet all at once!

Enjoy!
–Lindsay–
Filed Under: Baking, Dessert

Balsamic Onion & Jalapeno Turkey Burgers

April 25, 2011 by Lindsay 21 Comments

So remember when Erica posted these Jalapeno Cheddar Turkey Burgers?

Well, I tried really hard to wait patiently for nice grilling weather so I could make some burgers on the grill….but apparently we’re heading straight into another week of rain, so this weekend I just gave into my craving and made a batch of burgers indoors.

I was drawn to her recipe because I just so happened to have a random jalapeno that needed to to be used up. However, over the past couple of years, I’ve had a few issues with making things so spicy they they are almost inedible. So, I knew I wanted to tone down the spice a bit.

I’ve also been thinking about making burgers stuffed with caramelized onions for a while now. While I didn’t end up doing that exactly, I used that idea to make my own burger.

Here’s what I did:

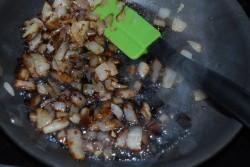
I diced up about 1/2 c onion and put it in a hot pan. I made sure not to stir it too often so that it started to caramelize.

DSC 9257DSC 9259DSC 9261

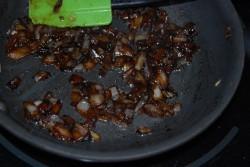
After the onions began to caramelize, I added some balsamic vinegar.

DSC 9262DSC 9263

The onions soaked up almost all of the yummy balsamic! I removed them from the pan and set them aside to cool.

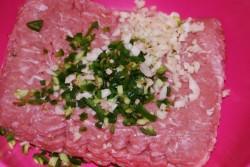
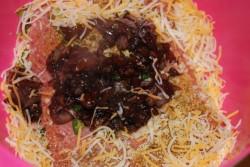
Next, I put 1 lb of lean ground turkey in a bowl, added one jalapeno (minced) and two cloves of garlic. When the onions were cool enough to handle, I added them to the bowl along with about 1/4 c shredded low-fat Mexican cheese and some McCormick’s Grill Seasoning.

DSC 9258DSC 9264

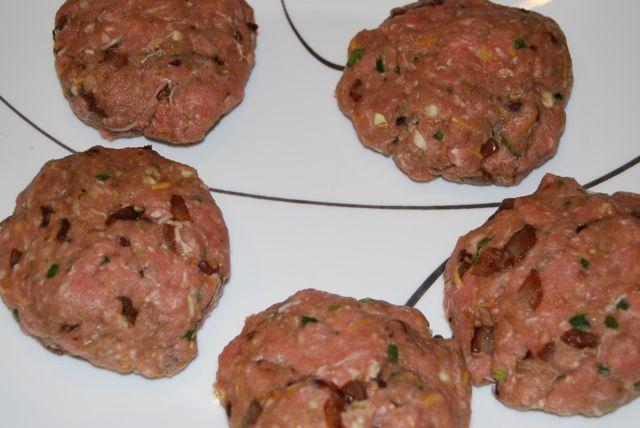
When everything was mixed together, I had five nice sized burgers:

DSC 9265

Balsamic Onion & Jalapeno Turkey Burgers

by Lindsay L

Keywords: grill pan sear burger sandwich entree healthy turkey

Ingredients (4-6 burgers)

  • 1/2 c onion, diced
  • 1 Tbsp balsamic vinegar
  • 1 lb ground turkey
  • 1 jalapeno, minced
  • 1 tsp McCormick’s Grill Seasoning
  • 1/4 c low-fat Mexican cheese

Instructions

1. In a small pan, caramelize the onions. Add the balsamic vinegar and stir to combine.

2. Combine the turkey, onions, jalapeno, seasoning and cheese in a small bowl.

3. Form into 4-5 patties.

4. Cook on the grill or in a pan, top with cheese if desired and serve.

Powered by Recipage


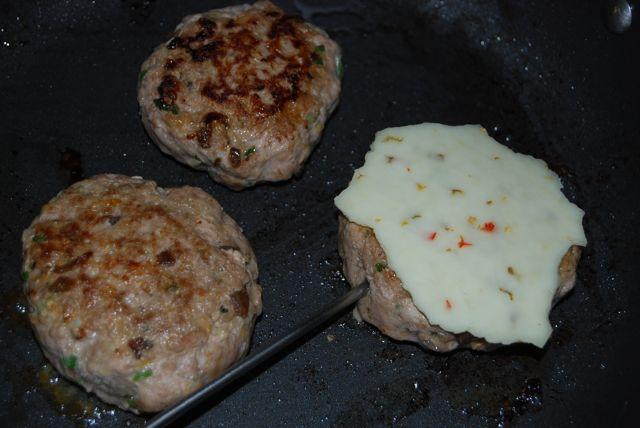
I cooked them in a pan and topped with some pepperjack cheese when they were almost done. Yes, I tear my cheese to fit the size of the burger. I hate when it drips down over the sides and gets in the pan!

DSC 9268

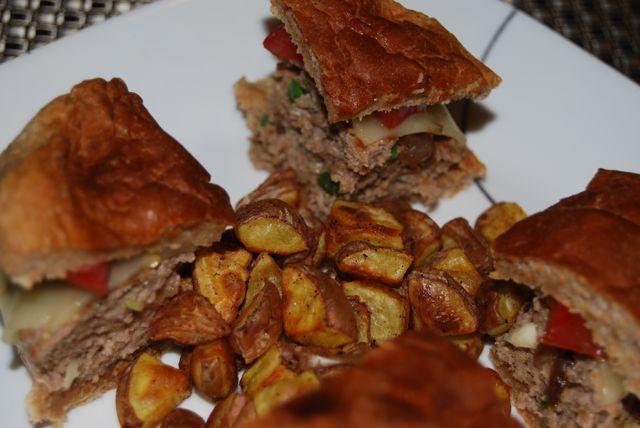
Now I’ve gotta tell you, my friends, I’m not one to get all that excited about burgers. I don’t eat them if they’re beef and usually when I cook burgers for the hubby I end up eating something else. In fact, the night I made these, I didn’t even eat one. But I did eat one the second night and let me tell you…these are GOOD! I was only planning on eating half a burger along with a bowl of Nutrition Soup, but after I ate the first half, I put that soup right back in the fridge and ate the other half! I love the flavor the onions give them…and the jalapeno gives them a little kick, but not a ton of heat.

DSC 9269

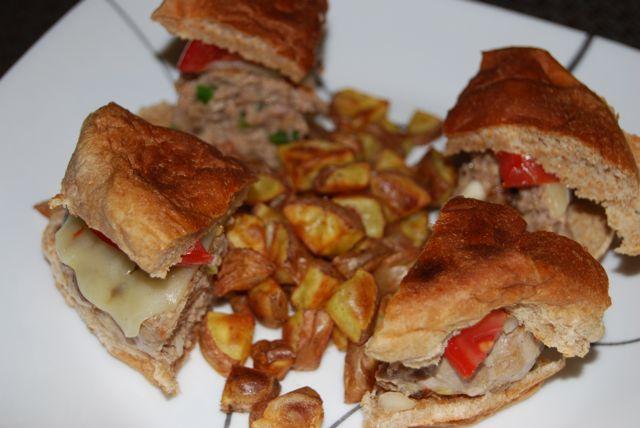
Oh, if you’re wondering why it’s cut up like that, it’s because the hubby informed me -just as I was about to get up and make these burgers that I’d been planning in my head ALL DAY- that he wanted something light for dinner…like tapas. Well, that just wasn’t happening. So cutting his burger into “burger bites” was my solution. Makes the burger seem less overwhelming!

DSC 9272DSC 9273

Serve with some roasted fingerling potatoes and you’re good to go!

DSC 9274

Enjoy!
–Lindsay–
Filed Under: Dinner

Goat Cheese, Spinach & Bacon Stuffed Chicken

April 18, 2011 by Lindsay 33 Comments

“The best chicken I’ve had.”

That’s what the hubby said to me last night while eating this. He said “Bean, this is the best chicken I’ve had.” I said, “Ever?” He said, “Yes.”

So there you have it. It’s that good, and it couldn’t be easier. Inspired by this recipe from Tessa that I’ve been thinking about for the past few weeks, here’s what I did. I was too lazy at the time to pull up the recipe again….but it turned out just fine 🙂

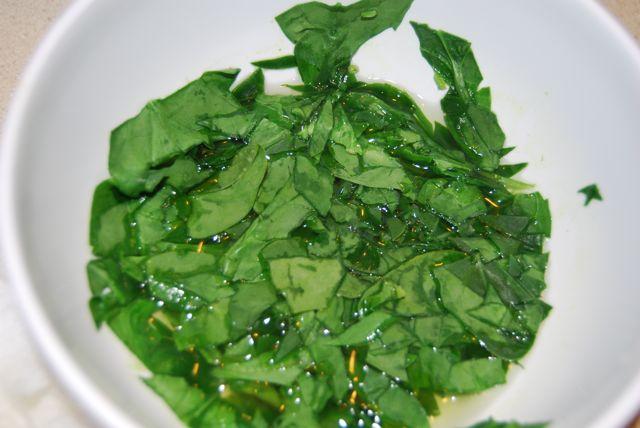
I did some prep work in the afternoon, before I left for work. I grabbed a handful of fresh spinach, diced it up and put it in a bowl with a little bit of water. After 2 minutes in the microwave it looked like this:

DSC 9188

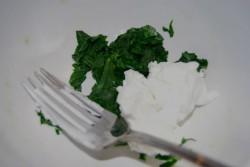
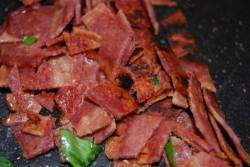
I scooped the spinach into a paper towel and wrung out the excess water before returning it to the bowl. Then I added a few tablespoons of goat cheese, and two strips of turkey bacon, diced, that I cooked up on the griddle.

DSC 9189DSC 9190

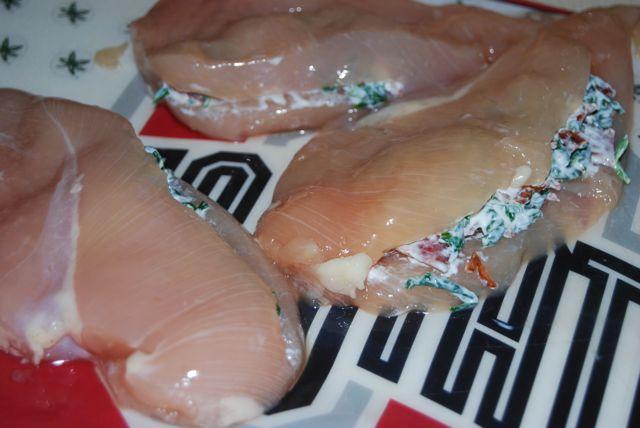
Mix it all together and set it aside. I had three chicken breasts thawed out in the fridge so I cut slits in the side (kinda difficult since they were thinner than I thought they were!) and divided the mixture between the three breasts.

DSC 9191

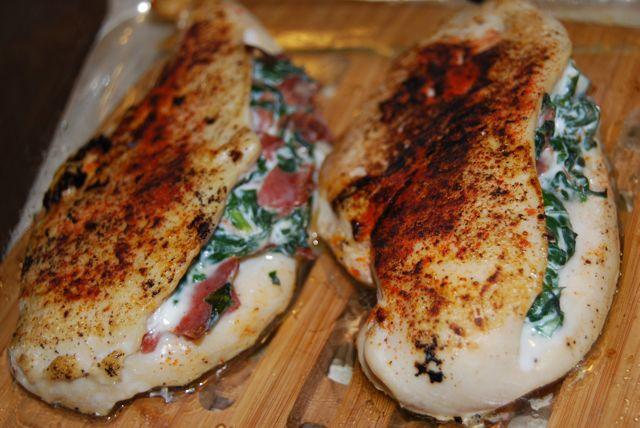
I knew I was going to bake these, but I always like to pan sear chicken for a little extra flavor. Bonus this time because, after seasoning with paprika and black pepper, I just plopped them on the griddle I cooked the bacon in for a little more bacon-y flavor. I didn’t even feel bad doing this since turkey bacon makes WAY less grease than regular 🙂

I put the chicken in a greased, glass baking dish, covered it with foil and stuck it in the fridge. Then the hubby popped it in the oven for about 20 minutes at 400 degress while I was on my way home from work, along with a sweet potato I had diced up! When I got home, dinner was almost ready.

DSC 9192

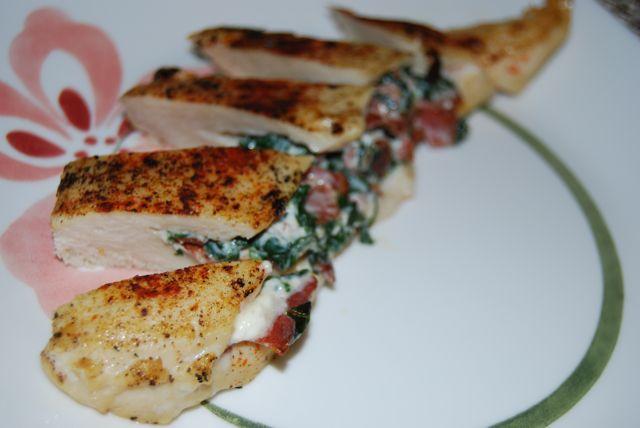
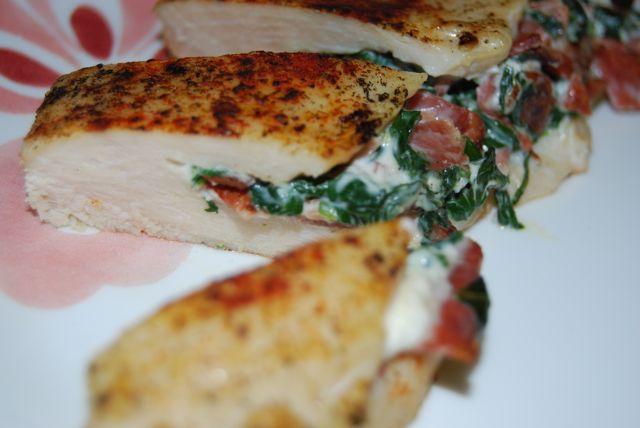
If you want to be extra fancy, slice it up so it looks pretty…but I’m not gonna lie, I only did this for you guys! Hubby got his piece whole on the plate.

DSC 9195DSC 9198DSC 9199

So there you have it! It’s good stuff, give it a try 🙂

Goat Cheese & Spinach Stuffed Chicken

by Lindsay L

Prep Time: 10 min

Cook Time: 20 min

Keywords: bake entree chicken goat cheese spinach

Ingredients (Serves 3)

  • 3 boneless, skinless chicken breasts
  • 1 cup fresh baby spinach
  • 3 Tbsp goat cheese
  • 2 strips turkey bacon, diced
  • paprika and black pepper to taste

Instructions

1. Roughly chop the spinach and place in a small bowl with 1/4 c water. Microwave on high for one minute. Drain excess water.

2. Add the goat cheese and bacon to the bowl with the spinach and stir to combine.

3. Cut a slit in the side of each chicken breast and stuff 1/3 of the mixture inside each one.

4. Sprinkle with paprika and black pepper and sear both sides in a hot pan (Optional: cook in the same pan you cooked the bacon in for added flavor).

5. Transfer the chicken to a greased baking dish, cover with foil and bake at 400 degrees for 20 minutes or until chicken is cooked through.

Powered by Recipage

Finally, thanks to everyone who commented, texted, tweeted, called and facebooked me a happy birthday!! I had a wonderful day and am lucky to have such great people in my life.

Enjoy!
–Lindsay–

Filed Under: Uncategorized Tagged With: Chicken

Loaded Spinach Salad

April 5, 2011 by Lindsay 26 Comments

This, my friends, is TBS.

The. Best. Salad.

EVER!

Actually, it’s so good that I’ve eaten it for dinner two nights in a row. That’s right. The exact same salad. And quite honestly, I’ll probably eat it again tonight. What can I say…I’m a creature of habit. In fact, if it weren’t for my hubby, I wouldn’t have a food blog…because I’d just eat the same four things over and over…and no one wants to see that. So for his sake (and yours!) I usually try to get a little more creative in the kitchen.

BUT since the hubby has been busy with work for the past few nights, I’ve allowed myself the indulgence of repetitive eating 🙂

So let’s build this salad, shall we?

Start with about 2 cups of baby spinach. Add 1/2 c quinoa. Then pile on the toppings. This should include, but is not limited to:
-strawberries
-red peppers
-apples
-red onions (forgot these the first night!)
-roasted sweet potato

Top with sesame ginger dressing and dig in!

DSC 9064DSC 9073

Lather, rinse, repeat for night 2!

DSC 9081DSC 9083

I enjoyed the other half of my red pepper and the other half of my apple on the side each night! Protein, veggies and fruit- oh my! There’s not a single thing about this salad that I don’t LOVE 🙂

So tell me, what’s your absolute favorite salad topping?

Enjoy!
–Lindsay–

Filed Under: Uncategorized

2 Hours of Food Prep on a Sunday

March 28, 2011 by Lindsay 31 Comments

This is what two hours in the kitchen on a Sunday morning can get you:

DSC 8983

That would be 10 meat muffins, 6 turkey burgers, 1 pan of lasagna (baked in 3 individual pans) and 2 containers of spaghetti sauce.

Also known as “what the hubby will be eating on Tuesdays and Thursday evenings for the next several weeks.”

Spring quarter starts today, and since I’ll now be gone on Tuesday and Thursday evenings, I knew I needed to prepare some simple meals for the hubby…unless I was ok with him eating an entire frozen pizza two nights a week! That doesn’t exactly jive with my “Dietitian in training” status so I got to work.

DSC 8976

I started with the meatloaf and the turkey burgers. Since they have pretty similar ingredients, it was easy to make them at the same time. I opted to cook the meatloaf in muffin form to make it easy to store in individual batches.

DSC 8977DSC 8978DSC 8979DSC 8981

While those were cooling, I got to work on the meat sauce for the lasagna. As usual, I added a ton of vegetables and garlic. After they had been sauteing for a while,  I added two big cans of no-salt-added crushed tomatoes and a can of no-salt-added fire roasted diced tomatoes to the pan.

DSC 8980

While the sauce simmered, I cooked the lasagna noodles and mixed together the frozen spinach and ricotta cheese. I had to trim each noodle by about 2 inches so that they would fit in the disposable pans I bought, but I knew it would be a lot easier to store the three separate pans than it would be to make room for an entire pan of lasagna in my freezer. I essentially put one “row” of my typical pan of lasagna in each container.

DSC 8982

I covered each one with foil and into the oven they went for 30 minutes. Once everything was cooled, I got it ready for the freezer. I wanted to divide everything into typical “dinner portions” for the hubby so I paired the turkey burgers and split the meat muffins into 3, 3 and 4. This will make it easy for me to simply grab a bag out of the freezer the night before and put it in the fridge so that all the hubby has to do is heat it up. For the lasagna, I can take out on pan at a time and he can eat half for dinner and the other half for lunch.

DSC 8984DSC 8985

I divided the remaining sauce into two tupperware containers so I can just pull one out and defrost it for an easy spaghetti dinner during the week!

DSC 8986

Later in the afternoon, I did some more prep work. I cooked a big batch of quinoa to eat throughout the week and I roasted a couple cans of chickpeas (one of my favorite snacks!) so that I could pack them to munch on between classes.

DSC 8997

Last week, I saw Heather’s post for Crunchy Green Split Peas and I was immediately intrigued. I’ve never cooked split peas myself and have no conscious memory of ever eating them…although I suspect my mom probably made them when I was younger…but they’re packed with protein and fiber so I decided to give them a try. Like lentils, you don’t have to soak them- just rinse them off, put them in a pot with some water and let them simmer for 20 minutes or so. Since I was already roasting the chickpeas, I decided to do the same to the peas. I patted them dry, sprayed them with olive oil and seasoned them, then stuck them in the oven at 400 degrees F, stirring them every 10 minutes or so until crunchy.

DSC 8994DSC 8995DSC 9003

The result? They’re good! I saved half of them after cooking so I can try them non-roasted. I’ll have to get back to you on my opinion.As for the roasted kind? Perfect to munch on mixed with my chickpeas.

DSC 9004

If you close your eyes and use your imagination, they taste just like candy buttons. Remember those?!

candy

Ok, so not exactly….but the size and shape are dead on!

So there you have it! I’m ready to face this quarter head on 🙂 Now you tell me- have you ever had split peas? What’s your favorite way to eat them?

Enjoy!
–Lindsay–
Filed Under: Uncategorized

Homemade Wheat Thins

March 9, 2011 by Lindsay 42 Comments

An easy, homemade version store-bought Wheat Thins!

**Pictures updated 2/2015**

Over the weekend I made a batch of Homemade Wheat Thins thanks to a deliciously simple recipe from Two Peas and Their Pod. They were simple to make and taste even better than store-bought! If you’re a cracker lover like me, give them a try!

These easy, homemade Wheat Thins taste even better than store bought!


What’s your favorite cracker? Have you ever tried to make it at home?

Enjoy, my friends!
–Lindsay–

 

Filed Under: Snack

Curried Turkey & Lentil Burgers

February 24, 2011 by Lindsay 18 Comments

Ever since Kerstin posted these Indian Saag Naanburgers about a month ago, they’ve been lurking in the back of my mind. I had some ground turkey in the fridge that was ready to be used today, so I started brainstorming.

I thought about an Indian Turkey & Lentils dish that I made a few weeks ago and thought it might be fun to use 1/2 the package of turkey and then add some lentils to the burgers.

Then I remembered these Sweet Potato & Pecan Burgers that I also had bookmarked from Cooking Light. I pulled them up to refresh my memory and realized that they actually got pretty bad reviews, especially for a Cooking Light recipe! But still, I believed I could incorporate some sweet potatoes into my burgers. I mean, curried roasted sweet potatoes are one of my favorite things after all!

So off I went to the kitchen to attempt to combine those three recipes!

I started by cooking the lentils. While they were simmering, I put the turkey in a large bowl with some garlic. I microwaved a large sweet potato and scooped half of it into the bowl. I added some spices,  panko, onion and some Chobani. Finally, I threw in the lentils. Then I dug in, mixed everything together and formed some patties!

DSC 8189DSC 8191DSC 8192

DSC 8194

I stuck them in the freezer for about 45 minutes, pan seared them on both sides and popped them in the oven. See my handy dandy thermometer?!

DSC 8196DSC 8202

I topped the burgers with some pepperjack cheese and a tomato slice.

DSC 8208

The results?! Good!  After reading the reviews of the sweet potato burgers, I was worried that these would be soft and mushy. If you’re comparing them to straight meat burgers they are definitely softer, but considering the ingredients, they turned out better than I expected. The pan searing gave them a nice brown outside. I baked them because I was worried they would fall apart if I flipped them too often in the pan, but I think they would have been fine. Next time I’m going to try pan searing them the whole way….or maybe grilling them if I get brave!

I thought about making the saag topping, but got lazy. However, I told the hubby about it and he thought he would enjoy it so I’ll definitely add that next time! You could also add more spices to the burgers, perhaps some paprika or  even some bbq sauce?!

Curried Turkey & Lentil Burgers

by Lindsay L

Prep Time: 45 min

Cook Time: 20 min

Keywords: bake pan sear sandwich entree burger healthy lentils turkey Indian

Ingredients (6-8 burgers)

  • 1/2 lb ground turkey
  • 1/2 large sweet potato
  • 1/2 c cooked lentils
  • 1/4 c onion, diced
  • 1/2 c panko breadcrumbs
  • 1/2 c Chobani non-fat Greek yogurt
  • 3 cloves garlic, diced
  • 1 tsp cumin
  • 2 tsp curry powder
  • 1/2 tsp cayenne pepper
  • black pepper, to taste

Instructions

1. Stab sweet potato with a fork all over. Microwave on high for 5-6 minutes. Cut in half length-wise and let cool.

2. Add turkey, lentils, onion, garlic & half the sweet potato to a large bowl.

3. Add spices, panko and yogurt.

4. Using your hands, mix everything together and form into patties.

5. Place in the freezer for 30-45 minutes.

6. Choose desired cooking method. Pan sear or grill until turkey is cooked through, or pan sear on both sides and bake at 400 degrees for approximately 20 minutes, or until cooked through.

Powered by Recipage


DSC 8209

DSC 8211DSC 8214

Best part? Leftovers for lunch!

DSC 8216

What’s the most creative burger you’ve ever made?!

Enjoy!
–Lindsay–
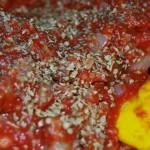
Filed Under: Uncategorized

Tex Mex Barley Bake

February 14, 2011 by Lindsay 10 Comments


A few weeks ago, I came across a recipe for a Tex Mex bake that involved barley in the March issue of Rachel Ray’s Magazine. I’d been thinking about using barley as my pick of the week for a a couple weeks and this seemed like a good way to ease into it since the hubby adores Mexican.

I wasn’t totally digging Ray Ray’s version because it had snap peas in it, which I’m all about, but not in a dish like this…I also had 1/2 lb ground turkey that I needed to use up, so I made my own version.

Here’s what you do:

Start by cooking your turkey with some garlic, onion, mushroom and green pepper. Then add some black beans, tomato and corn. I seasoned the mixture with cumin and cayenne pepper.

DSC 7854DSC 7855DSC 7856
While that’s cooking, cook your barley. I found quick-cooking pearl barley at my grocery store and decided it would be perfect. Just boil water, add and let simmer for 10 minutes.

DSC 7858

Add your barley to the meat mixture and remove from heat. Then, melt 1 Tbsp butter in a pan and add 2 Tbsp flour. Whisk together for 1 minute, then add some warm milk. Bring to a simmer, then added some shredded pepperjack cheese and stir until melted. Then add the cheese mixture to the meat mixture. I used 1 1/2 c milk and about 1 1/2 c cheese, which is a reduced amount compared to what Rachel used. I didn’t even end up using all of that once I had the cheese mixture made. It’s up to you how cheesey you want to make it. I probably would have been fine with about 3/4 c milk and 1 c cheese.

DSC 7861DSC 7865
DSC 7869DSC 7870

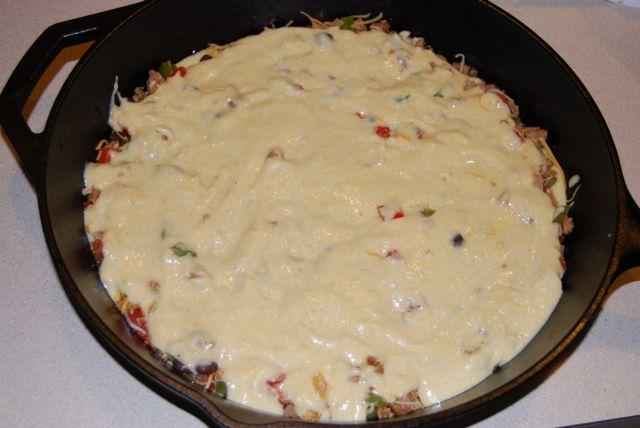
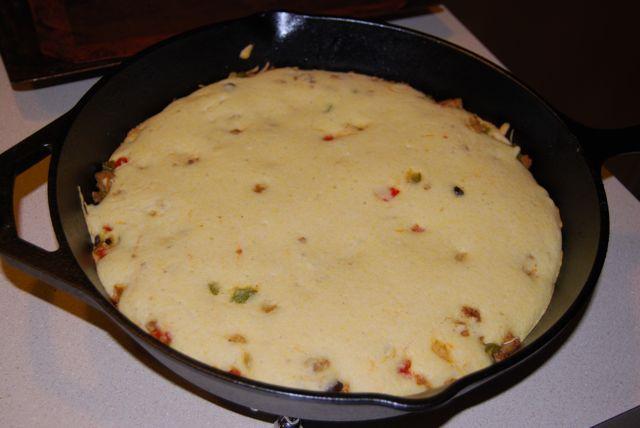
Transfer the mixture to a baking dish, cover with foil and bake at 400 degrees for 20 minutes. Uncover, top with crumbled tortilla chips and return to the oven for 10 more minutes.

DSC 7871DSC 7873

Tex Mex Barley Bake

by Lindsay L

Prep Time: 15 min

Keywords: bake saute entree healthy ground turkey barley black beans Mexican

Ingredients (Serves 4)

  • 1/2 lb ground turkey
  • 1/2 c green pepper, diced
  • 1/2 c mushroom, diced
  • 2 cloves garlic, minced
  • 1/2 c onion, diced
  • 1 can (no salt added) or 1 1/2 c black beans
  • 1 medium tomato, diced
  • 1/2 c no salt added corn
  • 1 tsp cumin
  • 1/2 tsp cayenne pepper
  • 1/2 tsp black pepper
  • 1 c cooked barley
  • 1 Tbsp butter
  • 2 Tbsp flour
  • 3/4 c skim milk, warmed
  • 1 c pepperjack cheese, shredded
  • tortilla chips

Instructions

1. Preheat oven to 400 degrees.

2. Combine garlic, onion, green pepper, mushroom and turkey in a large skillet over medium heat.

3. Add black beans, corn and tomatoes and cook until turkey is cooked through.

4. Cook barley according to package directions and add to meat mixture.

5. Melt butter in a saucepan. Add flour and whisk for 1 minute.

6. Slowly add milk and bring to a simmer.

7. Add shredded cheese, stirring until melted.

8. Pour cheese mixture over meat mixture and stir to combine.

9. Transfer mixture to a casserole dish, cover with foil and bake for 20 minutes.

10. Remove foil, top with tortilla chips and return to oven for 10 minutes.

11. Serve warm.

Powered by Recipage


I served mine with roasted balsamic asparagus for the hubby and sauteed balsamic kale for me!

DSC 7872DSC 7877

Serve with extra chips, or over extra chips like taco salad:

DSC 7874DSC 7878

DSC 7875

In conclusion, the hubby would like you to commiserate with him because he has consumed almost his entire Costco-sized bottle of Cholula. Waa waa….

DSC 7879

So tell me, are you a hot sauce fanatic?

Hope you guys enjoy this recipe. I thought it was delicious and I’m sure the hubby will be eating the leftovers in a taco for lunch tomorrow 🙂

Enjoy!
–Lindsay–
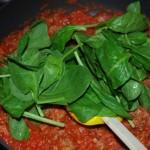
Filed Under: Uncategorized

Homemade Nutrigrain Bars

February 10, 2011 by Lindsay 42 Comments

Normally I’m pretty good at managing my time. In fact, I’d even go so far as to say I’m great at it. I’m a  busy girl, and I do a pretty good job of getting everything done on time, and in an organized fashion.

I’m also slightly obsessive. Obsessive compulsive when it comes to things like checking three times in a row to make sure my alarm is set, or that I did in fact put my keys in my bag. Other times I get obsessive about ideas. Like the time I decided, despite the fact that I had just started 3 weeks of vacation, that my office need to be cleaned and organized at one o’clock in the morning. Or the time I decided I needed to scrapbook an entire year of  photos in 2 days. Or the time I found a wallet that I was in love with but was too cheap to pay for and I decided I needed to find one at half the price they were selling it in the stores. You get the idea…

So yesterday, when I decided that I HAD to make homemade nutrigrain bars, nothing was going to stop me. Did I have other things I should have been doing instead? Yes. Do I have a huge biochem test next week that I should be studying for? Absolutely. Am I supposed to be writing a dietary menu for a renal patient and doing a 9 page case study for my practicum? Yep. Did any of that stop me? Absolutely not.

It all started on the bus ride back to my car after class. I don’t usually eat Nutrigrain bars because they higher in sugar and they have a super long list of what I view as unnecessary ingredients. But occasionally I buy them for the hubby because he likes to have things to snack on. Yesterday I was a little out of sorts and running behind and I grabbed one of the bars on my way to class. As I sat there on the bus eating it, I started thinking about fig newtons. And how they were sort of similar. And how I loved them as a kid. And how I want to try this recipe for them. Sidetracked.  And how I loved them. See what I mean about being out of sorts? What it boils down to is that I decided that I was quite capable of making my own version of homemade nutrigrain bars and that’s what I spent my evening doing. (After I took a 3 hour nap because I am feeling pre-sick and am trying to fend it off…but let’s not talk about that).

After doing some googling and not finding any recipes that I deemed super healthy, I made up my own but these two gave me a starting point: Jenna’s Fig Newtons and Carrie’s Almost Nutrigrain Bars.

Here’s what I came up with:

Combine some greek yogurt and brown sugar. Add an egg and some vanilla. Stir in some flour and oats, baking powder,  baking soda and cinnamon.

DSC 7792DSC 7794DSC 7796DSC 7797

Freeze the dough for a little bit and then press it out into nutrigrain sized rectangles (Yes I’m aware that that’s not very precise…deal with it!) Use a knife to cut off the scraggly edges.

DSC 7799

For my fruit filling, I used the leftover blackberry jam I made back in December when I was making these blackberry oatmeal bars and had stored in the freezer until now.

DSC 7798

You could also make your own by mixing some frozen berries with a little bit of sugar and letting it boil away 🙂 Or just use store bought.

Spread some fruit on the rectangles, fold the dough over the top and pinch the seams to seal.

DSC 7800DSC 7807DSC 7808

Bake and enjoy! I literally closed my eyes when I opened the oven because I was afraid the blackberries would have leaked out everywhere, but they didn’t! This was as bad as it got!

DSC 7809DSC 7810

I did learn, however, that if you’re going to put a little dough patch over a place where the dough split when folding, you should spend a little time making it blend in instead of just slapping it on there, or it will look like a tumor after baking:

DSC 7817

The result? They’re not bad guys! Considering I didn’t use any butter or oil and very little sugar! They puffed up a bit more than i thought they would, but that’s ok. I thought I was putting too much filling in, or that the filling would be too watery but it stayed put! The shell is chewy. It’s been my experience that using greek yogurt in baking makes things chewy. And the shell doesn’t have as much flavor as if I had used some butter or a little more sugar, but i’m used to doing that with my baking so it tastes pretty good to me!

DSC 7826DSC 7822DSC 7825

[print_this]

Homemade Nutrigrain Bars

1 1/4 c whole wheat flour
1 c oats
1/2 c plain Chobani greek yogurt
1 egg
1/4 c brown sugar
1 tsp vanilla
1 tsp baking powder
1/2 tsp baking soda
1/4 tsp cinnamon

Directions:
1) Mix the yogurt and brown sugar on medium for 1 minute.
2) Add the egg and vanilla.
3) Stir in the flour, oats, baking powder, baking soda and cinnamon.
4) Shape dough into a ball, cover with plastic wrap and put in the freezer for 30 min.
5) Divide the dough in half, put half back in the dough back in the freezer.
6) Roll or press the dough into a rough rectangle. Trim off the sides and cut into squares that are approximately 3 or 4 inches by 4 inches.
7) Spoon some fruit onto the square, fold dough in half and press seams to close.
8 ) Repeat with the rest of the dough.
9) Bake at 350 degrees for 20 minutes.

*Makes 8-9 bars

[/print_this]

So tell me, how would you tweak this recipe but still keep it healthy?!

DSC 7833DSC 7834

Enjoy!
–Lindsay–
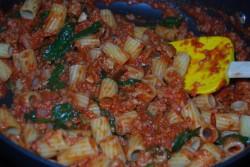
Filed Under: Uncategorized

Reader Request: Black Bean Soup

January 27, 2011 by Lindsay 5 Comments

Let me start by saying that I don’t like black bean soup. In fact, until last year, I couldn’t even eat black beans themselves. Over the past year, I’ve gotten better at adding them to things and I even kinda like them in my salsa.

Let me also say that the hubby loves black bean soup. Especially from Panera. So when some family friends put in a request for “healthy black bean soup”, I decided I would give it a try.

I started by scouring the internet for recipes. And let me tell you, there are a lot out there. Just for kicks, I looked up the nutrition facts for Panera’s black bean soup. 1,590 mg of sodium per serving. That was all the motivation I needed.

Being that I’m unfamiliar with black bean soup, let me tell you what I do know about it:
-the broth is black
-there doesn’t appear to be anything in it but black beans

However, all of the recipes I looked at involved onions, celery and red pepper. So I started with that. Except I left out the celery, for the sake of the hubby. Me being the genius that I am, I didn’t exactly read through the directions of all the recipes I was looking at. I was more focused on the ingredients. So I decided since I didn’t recall seeing any of these ingredients in black bean soup before, it must mean they were chopped up very small.

SO, I spent an inordinate amount of time chopping up my onion, red pepper and garlic into veeeeeery time pieces.

DSC 7468DSC 7469

After sauteing them for a while, I added the chicken broth, some cumin and some cayenne pepper and half a can of black beans:

DSC 7470DSC 7472DSC 7473

It was about this time that I realized why I’d never seen anything besides black beans in black bean soup. BECAUSE YOU PUREE IT! DUH. Had I read the directions a bit earlier, I might have caught onto this fact. But not to worry- I stayed cool as a cucumber, grabbed my immersion blender and proceeded. Messily, I might add. There wasn’t a lot of stuff in the pot at this point and it was very splatter-y…but I managed.

Finally, I added the rest of the black beans. To cut back on the sodium, I choose low-sodium black beans. I opted to drain and rinse one can, and use the liquid in the second. You could use the liquid from both, or do what I did, or you could use one can with liquid and another cans worth of beans from your freezer. DECISIONS, DECISIONS, my friends.

To thicken the soup even more, I mixed some cornstarch and water, poured it in and let it simmer. I also added some lemon juice.

DSC 7501

DSC 7503

The result? Not bad, but per the hubby…it needs a little work.

To kick it up a notch, here are some suggestions:

-double the amount of cumin and cayenne pepper.
-add some sweet potatoes at the very beginning and puree them up with the first ingredients

Bottom line: If you’re used to Panera’s black bean soup, your system might be in for a little shock with this low-sodium version. But with a little doctoring and a extra spices, this version can taste just as good 🙂 And you’ll be better for it!

[print_this]

Black Bean Soup

Ingredients:
olive oil
½ a medium onion, diced
1/4 red bell pepper, diced
3 garlic cloves, minced
1 1/2 cup low sodium broth
2 cans low-sodium black beans
1 teaspoon ground cumin
½ teaspoon cayenne pepper
1 ½ Tbsp cornstarch
1 ½ Tbsp water
juice of ½ a lemon

Directions:
-Heat olive oil in a pan. Add onions, garlic and red peppers and sauté until soft.
-Add broth and bring it to a boil. Reduce the heat and simmer for 5 minutes.
-Add half a can of beans (drained and rinsed) and spices. Simmer for another 5 minutes.
-Using an immersion blender (or a regular blender), puree until well blended.
-Add the rest of the beans, including the liquid from the second can.
-Mix the cornstarch and water together and add to the soup, along with the lemon juice.
-Simmer until thickened, 5-10 minutes longer.
-Garnish with non-fat Greek yogurt and cilantro if desired.

[/print_this]


So tell me, what’s your favorite way to make black bean soup healthy?

Enjoy!
–Lindsay–
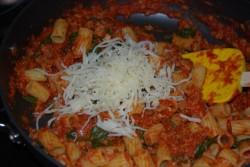
Filed Under: Uncategorized

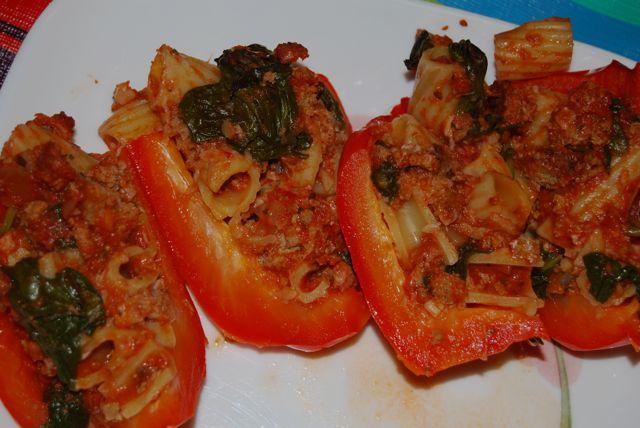
Cornbread, Apple & Sausage Stuffed Peppers

January 24, 2011 by Lindsay 6 Comments

Last night, the hubby and I put together one of the best dins we’ve had in a while. We finally went grocery shopping, so we’re all stocked up! While I’m not a big red meat fan, the hubby does love his steak. Since I never make it for him, he picked up a steak for himself and was quite excited about making it.

He wanted me to let you all know that while he is a Weber enthusiast, he was not enthused about heading out to light the grill when it was 10 degrees outside, so he cooked his steak on the Foreman…. don’t judge him 🙂

We also bought some baby bok choy which we really enjoy, but the past several weeks we’ve tried to buy it, it has not looked its best. Today we scored a great looking bunch. Although we like it, we really haven’t cooked it all that often, so the hubby did a little google research and then got to work sauteing it with some bacon, onions and garlic.

DSC 7332DSC 7335DSC 7336

DSC 7338DSC 7324DSC 7344

While he was working on that, I got to work on my dinner. I’m not a fan of traditional stuffed peppers but I thought putting this stuffing in a pepper would be delicious! I started by cooking some quinoa, and popping my red pepper in the oven.

DSC 7312And yes, that is another sweet potato but I’ll have you know that the hubby requested it tonight because he wanted potatoes with his steak 🙂

I  chopped up two of my Cranberry Corn Muffins and put them in the oven as well.

DSC 7314DSC 7315

Next, I chopped up some garlic, onion and celery and put them in a saute pan. While those cooked, I diced up a chicken sausage, half an apple and some craisins and added that to the pan as well. I also used a little bit of curry powder and paprika but didn’t want to add too much because I like the flavor of the chicken sausage.

DSC 7323DSC 7326DSC 7327

DSC 7343

When the potatoes were done, I took everything out of the oven and put the pepper on a bed on quinoa. Then, I added the muffin bits into the sausage mixture, along with a little chicken broth and mixed everything together.

DSC 7345

About this time, the hubby put his steak on the “grill”. He added some bacon for flavor and discarded it when it was done cooking.

DSC 7340DSC 7342DSC 7348

I added the stuffing mixture to my pepper and we were ready to go!

DSC 7354DSC 7361DSC 7363

DSC 7349DSC 7359

We both thoroughly enjoyed our dinners. My stuffing had great flavor and and the pepper was cooked just right! The hubby added a little blue cheese to his steak and loved every bite.

So tell me, which one do you think looks better?

The hubby also enjoyed one of his favorite beers 🙂

DSC 7318DSC 7319DSC 7322


Cornbread Apple & Sausage Stuffed Peppers

by Lindsay L

Prep Time: 20 min

Cook Time: 30 min

Keywords: bake saute entree healthy quinoa chicken sausage apple cranberry

Ingredients (Serves 2)

  • 2 red bell peppers
  • ½ c celery, diced
  • ½ c onion, diced
  • 3 cloves garlic, minced
  • 1 apple, diced
  • 1/2 tsp curry powder
  • 1/2 tsp paprika
  • 2 corn muffins, roughly chopped
  • handful of Craisins
  • 1/2 c low-sodium chicken broth
  • 2 fully cooked chicken sausages, diced
  • 1 cup cooked quinoa

Instructions

-Preheat oven to 400 degrees.

-Slice the top and bottom off the peppers and stand them on a baking sheet. Bake until tender, approximately 30 minutes.

-Roughly chop corn muffins and place on a baking sheet. Bake until slightly browned and crispy.

-Saute onion, celery and garlic until soft. Add apple and sausage and continue to cook until apple softens slightly. Add seasonings to taste.

-Add the Craisins and corn muffins to the sausage mixture along with chicken broth. Stir to combine.

-Place ½ cup quinoa on each plate and top with peppers.

-Spoon stuffing mixture into peppers and serve warm.

Powered by Recipage


Enjoy!

–Lindsay–

Filed Under: Uncategorized Tagged With: Apple

Curried Sweet Potato & Red Pepper Dip

January 21, 2011 by Lindsay 2 Comments

This whole thing started while I was thinking about making some more Sweet Potato Hummus. Since I’ve been looking for ways to use up the plain Chobani that I have left in my fridge, I contemplated mixing that in. Then I thought that sounded pretty gross. I like the idea of mixing in guacamole but hummus? Not so much. But I really wanted the sweet potato.

Hi, my name is Lindsay, and I’m addicted to sweet potatoes.

I started thinking about what I could mix with the sweet potato and Greek yogurt and I settled on a red pepper. They were on sale for $1 each at the grocery store a couple weeks ago and I may or may not have bought 10 a few. I decided roasting the red pepper was in order so into the oven it went. I poked some holes in a sweet potato and stuck it in the microwave for 6 minutes.

DSC 7218DSC 7219

DSC 7222DSC 7223

Then into the food processor it went. I added about half a container of the yogurt…and then I got a little crazy and just dumped the whole thing in.

DSC 7226DSC 7227DSC 7228

After the first mixing, I added the juice from one lemon, some paprika and some cayenne pepper.

DSC 7230

Then, as usual, I added more cayenne pepper.

DSC 7232

Then I started thinking hmm…these ingredients are suspiciously similar to what I use to make my curried roasted sweet potatoes. Except the curry powder was noticeably absent. Not gonna lie, I was a little nervous about what that would do to my lovely dip, so I scooped out a little bit (so I wouldn’t potentially ruin the whole batch), dumped in some curry powder and gave it a whirl. AND IT ROCKED.

DSC 7247

The sweet potato and roasted red pepper and pretty sweet. If you like sweet, you could definitely leave the curry powder out and enjoy it. HOWEVER, the curry powder really takes it up a notch. It helps cut the sweetness and gives it some heat. AND, it tastes just like my roasted sweet potatoes.

DSC 7244Using a food processor, you can quickly whip up this healthy, vegetarian curried sweet potato & red pepper dip.

Here’s the recipe. Give it a try!

Curried Sweet Potato & Red Pepper Dip

by Lindsay L

Keywords: food processor appetizer snack healthy vegetarian sweet potato greek yogurt

Ingredients (approx 1 cup)

  • 1 medium sweet potato
  • 1 red bell pepper
  • 1 lemon
  • 6 oz plain Greek yogurt
  • 1 tsp paprika
  • 1-2 tsp curry powder
  • 1/2 -1 tsp cayenne pepper

Instructions

Preheat oven to 425 degrees. Place red pepper on a baking tray and roast until the skin is blackened and blistered, about 40 minutes.

Allow it to cool and remove the outer skin, stem and seeds.

Poke holes in the sweet potato with a fork. Microwave on high for 6 minutes, turning once half way through.

Slice the sweet potato open and scoop out the cooked potato.

Place the red pepper and sweet potato in a small food processor.

Add the greek yogurt and combine until smooth.

Add the juice from the lemon, and the spices to your desired taste and mix again.

Chill until cold, then serve with crackers or raw veggies.

Powered by Recipage

So tell me, what’s your favorite kind of dip?

Enjoy!
–Lindsay–

Filed Under: Appetizer, Snack Tagged With: Sweet Potato

Meatloaf with Cajun Spices

January 13, 2011 by Lindsay 4 Comments

Tonight I have another family recipe for you! My mom used to make this meatloaf all the time when I was growing up. I never ate it. BUT, it wasn’t because it wasn’t good. I was just picky and hated pretty much everything that wasn’t Cheerios 🙂

My sister loves this meatloaf. My parents love it. My husband loves it. I, in my wise older years, have come to like it. Trust me, it’s a good one! While we were visiting my parents for Christmas, my dad suggested that I put it on the blog so that all of you could enjoy it to!

*If you’ve looked at my last few posts, you’ll notice I’ve started putting a printable recipe at the bottom. This was a reader request and I’m doing my best. As you know, I don’t usually measure things…so please understand that some of the recipes are not set in stone, I’m just giving you my best estimation on how much of each ingredient I used. Feel free to adjust as necessary. (Eventually I’ll hopefully add printable recipes to everything I’ve posted so far…but it might take a while).

That being said, this is the only meatloaf that I make where I actually follow the recipe!

So here we go!

Dice your veggies and saute in butter. Add the spices, Tabasco and Worcestershire.
DSC 7014DSC 7016DSC 7019

Next, add the ketchup and evaporated milk and cook for another two minutes:
DSC 7020DSC 7022

Transfer the veggies to a bowl and let them cool. Once they’ve cooled, add the meat (I used 1 lb ground pork and 1 lb ground turkey), 2 eggs and breadcrumbs. You can either mix everything together right on the pan, or in a bowl. Then form the mixture into a loaf (or two).

DSC 7025Bake at 350 degrees for 25-30 minutes or until meat is cooked through.
DSC 7029DSC 7031Cajun Meatloaf

This is one of those recipes that I can never make quite as well as my mom did, so my loaves were a little loose, but after I let them rest, they were sliceable!
DSC 7033

Cajun Meatloaf


by Lindsay L

Prep Time: 15 min

Cook Time: 30 min

Ingredients (Serves 4)

  • 2 bay leaves (optional)
  • 1 tsp salt
  • 1 tsp cayenne pepper
  • 1 tsp black pepper
  • 1/2 tsp cumin
  • 2 Tbsp butter
  • 3/4 cup onion, chopped
  • 1/2 cup celery, chopped
  • 1/2 cup green or red pepper, chopped
  • 1/4 c green onion
  • 2 Tbsp Tabasco
  • 1 Tbsp Worcestershire
  • 1/2 cup evaporated milk
  • 1/2 cup ketchup
  • 2 tsp garlic, minced
  • 1 1/2 lb ground beef (or turkey)
  • 1/2 lb ground pork
  • 1 cup breadcrumbs
  • 2 eggs

Instructions

1. Preheat oven to 350 degrees.

2. Melt butter in a large pan. Add onions, celery, peppers, green onion, garlic, Tabasco, Worcestershire, and seasonings.

3. Saute until soft, then stir in milk and ketchup. Cook 2 min more.

4. Remove from heat and cool to room temp.

5. Put meat in bowl or pan. Add eggs, breadcrumbs and vegetables (take out bay leaves if using).

6. Shape into one large loaf or two smaller loaves.

7. Bake 25-30 minutes or until meat is cooked through.

8. Let rest 10 minutes, slice and serve!

Powered by Recipage


So tell me, do you like meatloaf?

Enjoy!
–Lindsay–
Filed Under: Dinner

  • « Go to Previous Page
  • Page 1
  • Interim pages omitted …
  • Page 62
  • Page 63
  • Page 64
  • Page 65
  • Go to Next Page »

Primary Sidebar

Lindsay Livingston The Lean Green Bean Healthy Living Tips and Tricks

I'm a Registered Dietitian and mom of three from Columbus, Ohio. I use this blog to share simple, healthy recipes, nutrition tips, and an honest glimpse of motherhood!

Learn More →

Questions? Comments? Email me: [email protected]

The Lean Green Bean Facebook The Lean Green Bean Instagram The Lean Green Bean Pinterest The Lean Green Bean Twitter The Lean Green Bean Feed
footer-logo
The Lean Green Bean Facebook The Lean Green Bean Instagram The Lean Green Bean Pinterest The Lean Green Bean Twitter The Lean Green Bean Feed
Recipes

Breakfast
Dinner
Snack
Slow Cooker

Kids

Cooking With Kids
Favorite Gifts
Toddler Meals
Indoor Activities

Resources

Easy Packed Lunches for Kids
Dinner Spark
Snack Spark
Ultimate Guide to Food Prep

About

Meet Lindsay
Become an RD
Work with Me

The Lean Green Bean is a participant in the Amazon Services LLC Associates Program, an affiliate advertising program designed to provide a means for sites to earn advertising fees by advertising and linking to amazon.com.
Read the full privacy and disclosure policy here.

Copyright © 2022 · The Lean Green Bean

table talk series

Learn how food affects your body.

Get my free Table Talk email series where I share bite-sized nutrition information about carbs, protein, and fat, plus bonus information about snacks and sugar!

[email protected]