blog
Foodie Penpals: September
Hi Friends!
Happy Friday! Today it’s time to recap the first month of Foodie Penpals! In case you’re a new reader, here’s a reminder of what the program is all about:
-On the 5th of every month, you will receive your penpal pairing via email. It will be your responsibility to contact each other and get mailing addresses and any other information you might need like allergies or dietary restrictions.
-You will have until the 15th of the month to put your box of goodies in the mail. On the last day of the month, you will post about the goodies you received from your penpal!
-The boxes are to be filled with fun foodie things, local food items or even homemade treats! The spending limit is $15. The box must also include something written. This can be anything from a note explaining what’s in the box, to a fun recipe…use your imagination!
-You are responsible for figuring out the best way to ship your items depending on their size and how fragile they are. (Don’t forget about flat rate boxes!)
-Foodie Penpals is open to blog readers as well as bloggers. If you’re a reader and you get paired with a blogger, you are to write a short guest post for your penpal to post on their blog about what you received. If two readers are paired together, neither needs to worry about writing a post for that month. *US Residents only please at this time- hopefully we can expand soon!*
If you’re interested in participating for October, please send me an email at [email protected] and include the following information:
-Your full name
-Your email address
-Your blog name/address
-Your twitter handle (if applicable)
I will need to hear from you by October 4th as pairings will be emailed on October 5th!
Now on to the good stuff….
This month I received my goodies from Kayla @ SproutyBuns. I was super excited because I love Kayla’s blog and I just knew she’d find some good stuff to send me.
The post office had a little trouble with the box:
 But not to worry! Everything made it in one piece.
And was was inside you ask? Lots of goodies.


Kayla wrote me some hilarious instructions on the best ways to eat all of these foods 🙂
First, bagels! I love them. The flavor was delicious, and there are 7g of protein and 7g of fiber in each bagel! I’ve been eating them for lunch and stored them in the fridge to help them last longer since they’re preservative free!


 I’d never heard of the brand but now I can’t wait to find out if they sell them around me.
Up next: Yogi Granola Crisps. Another brand I’ve never heard of but now absolutely love! She send me the blueberry flax flavor and I’ve been enjoying them on my oatmeal and with some yogurt. They’ve got some fiber and protein, are pretty low in sugar and they taste great! I can’t wait to try other flavors!! Oh, and they’re made with all sorts of fun grains 🙂


I haven’t tried the vegan queso yet, but I have big plans to bust it out at hubby’s bday party this weekend!

And finally, my favorite of all: The mini spoon! To say i’m obsessed with this thing would be an understatement. I LOVE small spoons to begin with and have several to eat my cereal with that don’t match the rest of our silverware…and this one is even smaller! WIN!!!
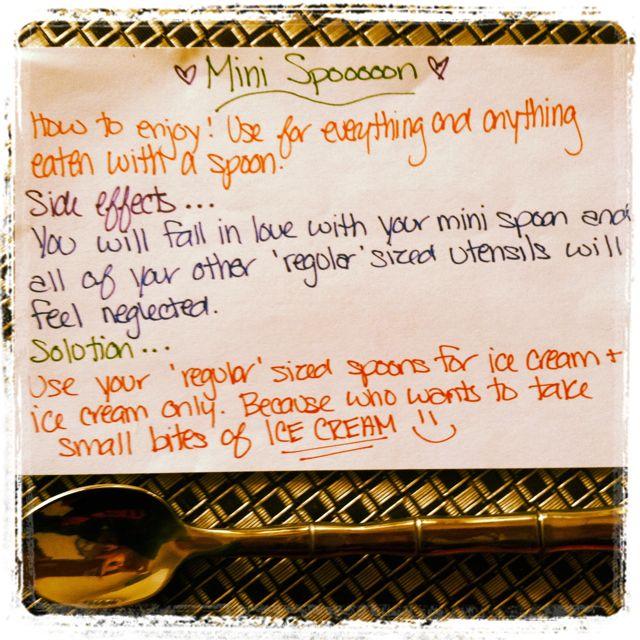 I even tweeted about it when I opened my package, and I think I fell just a little bit more in love with Miss Kayla that day 🙂
Thanks to everyone who participated in Foodie Penpals this month and special thanks to Kayla for all my goodies! If you want to join in the fun, just let me know 🙂
Enjoy!
–Lindsay
Celebrating Our 3 Year Wedding Anniversary
$1.00 Cupcakes
What’s a girl to do when she finds this at the store?
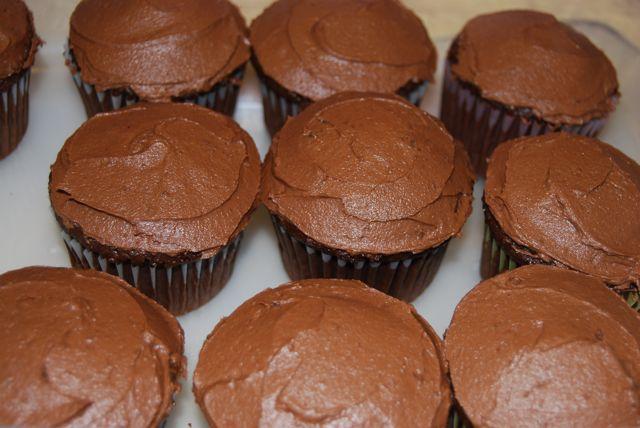
What’s a girl to do when she finds the plain chocolate cupcakes with plain chocolate frosting that her hubby requested pretty darn boring?
Add a Reese’s to the bottom and some M&M’s on the top of the next batch!
And what’s a girl to do when she’s just dying to know how her little Reese’s on the bottom experiment worked out? Cut one in half and give it a whirl!
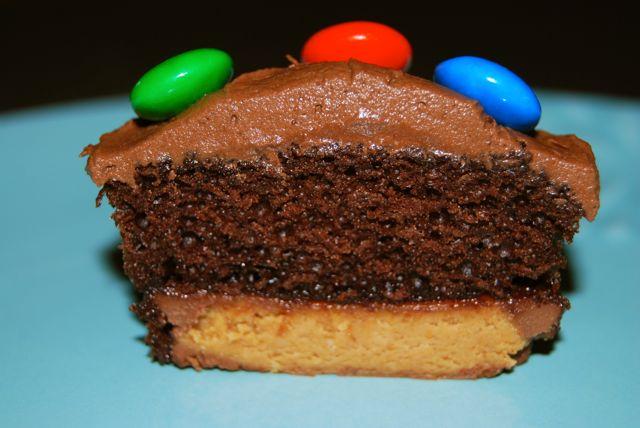

What’s a girl to do when she has 24 cupcakes sitting in her pantry? Share the wealth! Work friends…get excited!

They don’t make Reese’s the same size as the bottom of a muffin tin for no reason!
Oh, and what’s a girl to do when it’s 11pm and she needs to photograph said cupcakes for her blog? Use the flash and pray her readers look past it 🙂
Happy Monday!
–Lindsay–
PS…The cupcakes may have come from a box…but that frosting is homemade! 1 stick of butter, 2 1/2 cups powdered sugar, 1/2 cup of cocoa and 2 Tbsp skim milk. Cream the butter until smooth, sift in the cocoa and powdered sugar and beat until well mixed. Add the milk until desired consistency is reached!
Roasted Garlic & Tomato Farro
Hi Friends!
Here’s a quick easy recipe for you. The other day I found farro in the bulk bins at Whole Foods. I can’t even accurately express how happy that made me. I’ve been looking for it forever and all I could ever find was a tiny package for like $10. Crazy.
So I immediately snatched some up and earlier this week I whipped up a tasty little side dish. I was roasting potatoes anyways, so I while the oven was preheating, I started boiling some veggie broth. While the farro was cooking, I put some tomatoes and garlic in the oven to roast. The combination of all of these flavors, plus a little Parmesan cheese equals deliciousness.
Ready for the recipe?
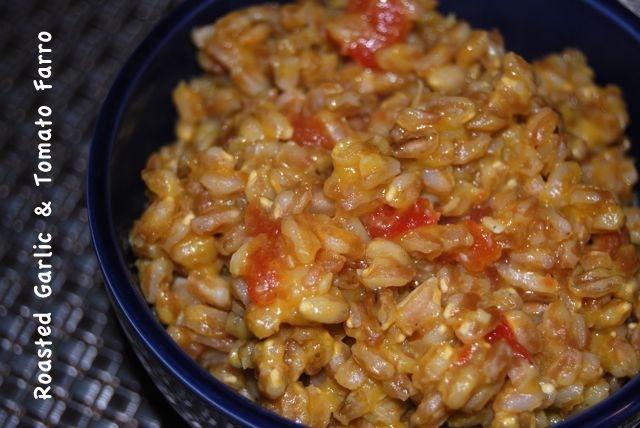
Roasted Garlic & Tomato Farro
Prep Time: 5 min
Cook Time: 30 min
Keywords: roast stovetop side healthy vegetarian farro fall winter
Ingredients (Serves 4)
- 2 c vegetable broth
- 1 c farro, uncooked
- 1 bulb garlic
- EVOO
- 2 tomatoes
- 1 Tbsp grated Parmesan cheese
- black pepper to taste
Instructions
1. Cook the farro in the veggie broth according to package directions.
2. Meanwhile, slice the top off the garlic, drizzle with EVOO and wrap in foil.
3. Quarter the tomatoes, scoop out the seeds and place skin side up on a baking sheet.
4. Roast the garlic and tomatoes at 425 degrees F for 30 minutes.
5. Squeeze the garlic cloves out of the bulb and smash into a paste using a fork.
6. Peel the skin off the tomatoes and dice them.
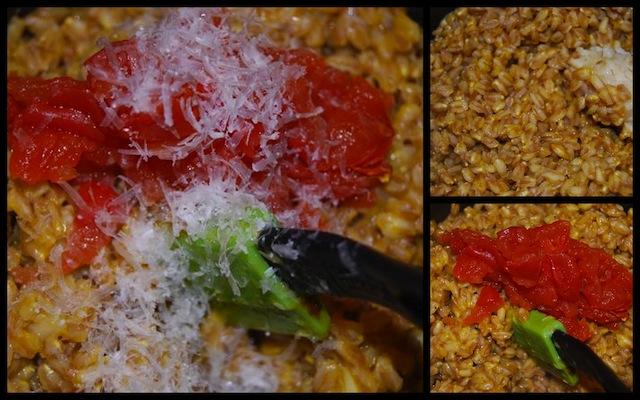
7. Add the garlic, tomatoes and Parmesan to the farro and stir until well combined. Season with pepper and serve warm.
It may not look pretty, but it’s darn tasty!
Do you like farro?
Enjoy!
–Lindsay–
Guest Post: Elimination Diet Banana Bread
Hi Friends!
Today is another first day of school for me…so I’ll probably be blog MIA. Have no fear though, my best friend Katharine is here to entertain you! You may remember her from her Fancy Feast guest post! She’s been experimenting with an elimination diet and recently embarked on an adventure in banana bread making! Take it away, Katharine:
————————————–
A lot of people seem to have childhood food traumas: they were forced to eat peas until they threw up or they were locked in the basement with rats after they groaned “meatloaf again?!?” Food was pretty much a non-issue in our house. I ate the, more or less, healthy meals in front of me and didn’t get too philosophical about it. My Wisconsin-born-and-raised father cultivated in me an unwavering love of peanut butter, ice cream, and cheese.
Several weeks ago I was on the phone with a dietitian-turned-integrative-doctor and family friend. We were talking about a blood disorder I discovered I have that results in a severely low platelet count. She suggested I try an elimination diet, removing certain foods from my eating regime and slowly reintroducing them one at a time. This seemed like a ridiculous suggestion at first (uh, hello, blood is in your veins…food goes in your stomach…two don’t really mix…) But I masked my skepticism with “uh huhs” as she continued on. She explained that the majority of your immune system is housed in your stomach and GI tract; therefore, problems with your diet/digestion can potentially cause problems with your immune system, maybe even make your body go all auto-immune on itself as in my case.
I’m now in my second week of the elimination diet. (“elimination” and “everything you love to eat but can no longer eat” being interchangeable.) The idea is that you embark on a 21-day stint of eating anything you’d like except dairy, gluten, soy, corn, refined sugars, caffeine, and alcohol. Easy, right?! Actually, there are many substitutes that allow you to cobble together meals that adhere to the diet. The only thing I’ve really missed is cheese (and no, there is no substitute for cheese, especially not a liquified nut), but I’ve discovered many culinary wonders I would have otherwise never considered food: coconut butter, garbanzo bean flour, arrowroot, brown rice pasta, hemp milk (this was one of the less pleasant finds, in my opinion, as it tastes like a dirty foot), and coconut aminos to name a few.
Unlike my dear friend Lindsay, I am no whiz in the kitchen. I make my way through recipes like a three-legged dog makes his was through an obstacle course–slowly and peeing on everything. (Ok, kidding about that last part.) For the past nine days, however, I’ve been doing my best hacking onions, boiling lentils, and mixing dairy-free, gluten-free, refined-sugar free, soy-free banana bread. Sounds gross, doesn’t it? It’s a lot less sweet but the texture and flavor are pretty damn close to the real deal.
To make this “banana bread” as delicious as possible I suggest listening to Fleetwood Mac’s Rumors album, the ultimate goal being to time the bread’s placement into the oven right as The Chain is cuing up. If you achieve this, then you have reached culinary greatness.
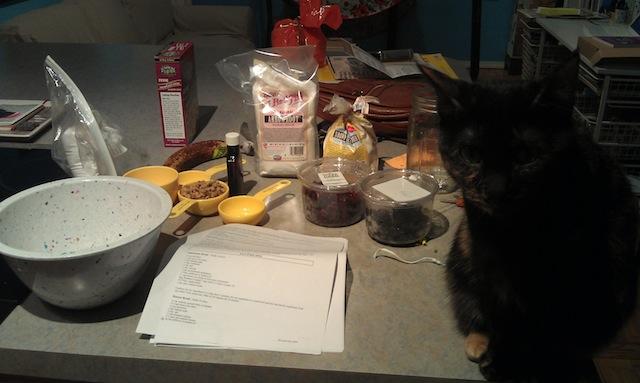 (Look closely and you will see Chef Tilly-my cat-presiding over the baking)
So once you’ve got Niki Stix tuned up, preheat the oven to 350. Mix the following:
-1/4 c. walnuts, finely ground in blender
-1 3/4 c. brown rice flour
-1/2 c. arrowroot (This definitely smells like something that would be an ingredient in a homemade bomb. Don’t be alarmed, it is just tapioca.)
-2 tsp. baking soda
-1/4 tsp. salt
-1/2 c. chopped walnuts
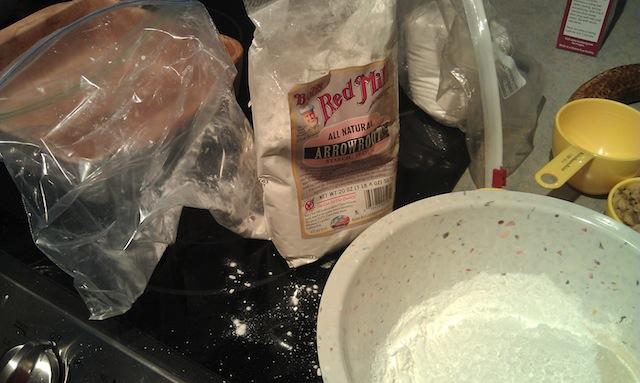
At this point I realized I only had one banana. This is kind of a problem when making banana bread…To compensate I used, oh say, about a 1/2 c. ground walnuts. Then, in a separate bowl I mixed together:
-1 mashed banana (I would recommend, well, at least two bananas)
-1/8 c. sesame oil (Recipe calls for 1/4 cup–they are idiots.)
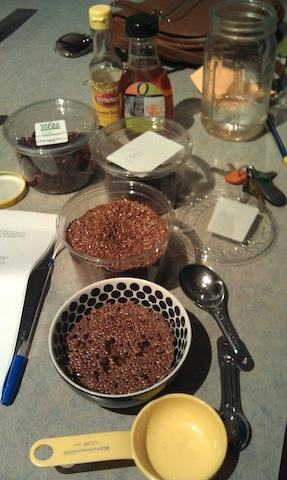
And then I realized I was also lacking another ingredient–apple juice concentrate. No fears, I had unsweetened apple sauce. So I added
-7 tbsp. unsweetned apple sauce (And then later, because the dough was dry, the rest of the jar.)
-2 “eggs” (“Eggs” are nothing like eggs. “Eggs” are made by combining 1 tbsp. flax seed with 1/3 c. water. You let this sit for about five minutes and you’re left with a gooey, liquidy substance that will, in the absence of real eggs, bind your various baked goods together. These “eggs” work surprisingly well until you try to make an omelet.)
-1 tsp vanilla extract
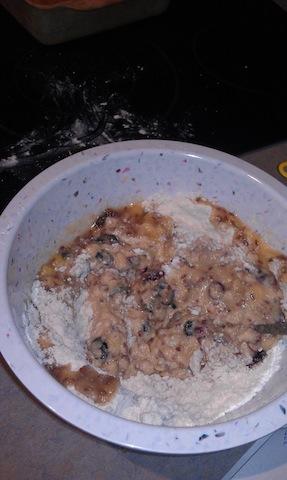
To compensate for the lack of fruit I added a handful of dried cranberries and dried cherries. I take a very Joey-from-Friends approach to cooking. My thinking is that if an ingredient by itself is tasty then surely when mixed with other tasty things it will yield one very delicious thing! That’s math, folks. So at this point add in whatever else you want to, like some agave nectar, then mix all that dough together. And then realize you also lack a bread loaf pan. (There may or may not have been a flurry of swears at this point.) In the absence of a proper loaf vehicle, an 8″ x 8″ ceramic vessel works just as well. And because this is going on Lindsay’s blog–Lindsay who’s never licked a piece of raw dough in her life, Lindsay the most disciplined person I know, Lindsay who is actually a cook with restraint–for this reason, I will underscore the fact that because there are no raw animal products in this recipe, all of you raw-dough-eating maniacs can go crazy.
Now the careful reader might be suspiciously scrolling upward to reread that part earlier about alcohol. Wait a second. I thought she said she couldn’t have alcohol? But you’re using vanilla! That has alcohol in it! You cheater!! Yes, it is true. I cheated. Five days after I started the diet I had already rationalized alcohol back into the diet as long as it was only consumed once a week and as long as the alcohol’s ingredients adhered to the diet. For those of you who know me, I’m sure you’ll agree it’s better for everyone this way.
Depending on the pan you’re using bake anywhere from 25-55 minutes, or until a pointy object of choice inserted into the middle comes out clean. Let the bread cool for about 10 minutes then eat that sucker! It’s perfect for breakfast or for after dinner when you’re craving sweets.
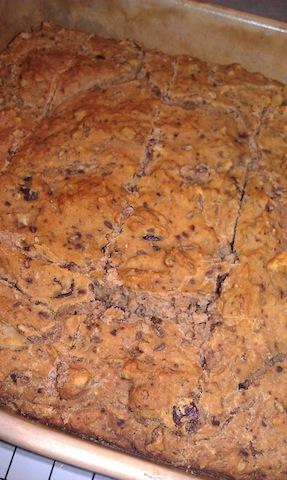
In the end, I have no idea whether this diet will make one platelet of a difference. If it doesn’t, it still proved edifying. One reason I greatly admire Linds is because she thinks about what she eats and in that way respects her body. I used to think that if it was in a grocery store then it must be okay to eat. Reading ingredients labels at Whole Foods is an eye-opening experience–even there I had to search to find a chicken broth that didn’t contain evaporated cane juice or corn starch. I think everything in moderation is a good motto, but every once in a while there’s something to be learned from extremes.
———————————-
Have you ever done an elimination diet? Was it helpful?
Enjoy!
–Lindsay–
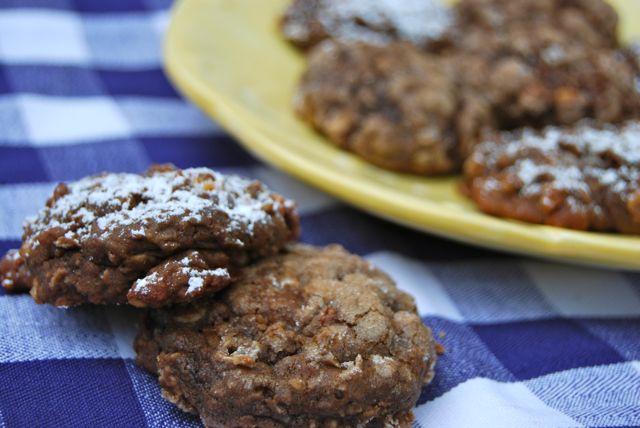
Monster Cookies
Over the weekend while we were back cleaning out the house I grew up in, we spent a lot of time in the kitchen. As I was cleaning out cupboards, cabinets and drawers, I found myself lost in the memories of all the times I spent in that kitchen.
The kitchen was definitely the center of our house, both literally and figuratively. It’s where I spent some of the happiest times with my mom, learning to make new things and making things that we’d made together 100 times. It’s where I learned how to bake, how to cook without measuring and how to clean up the dishes as I went.
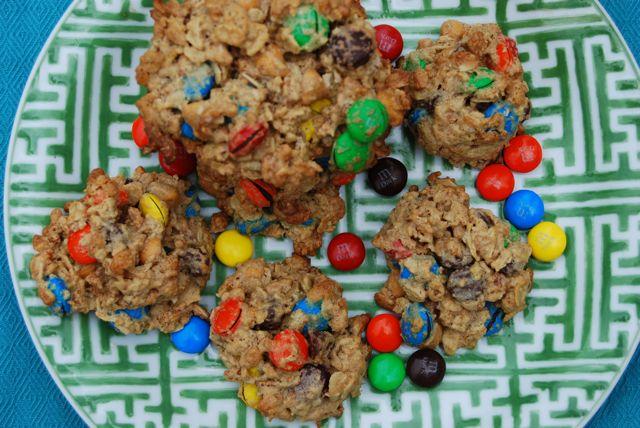
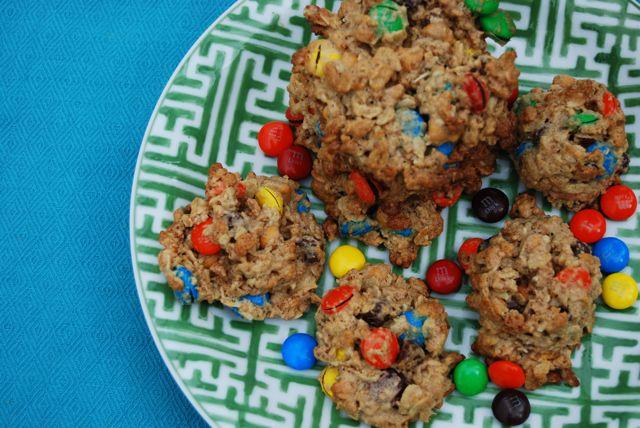
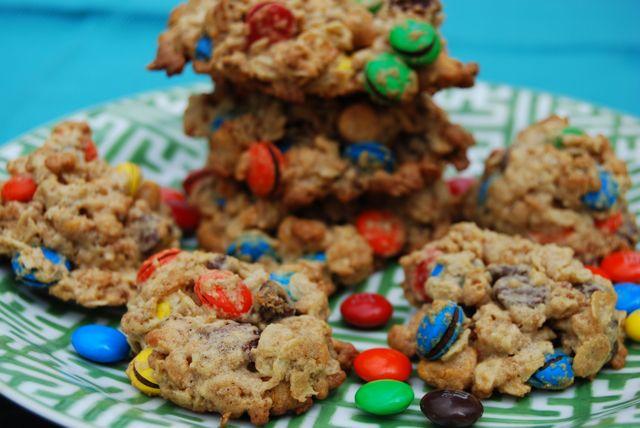
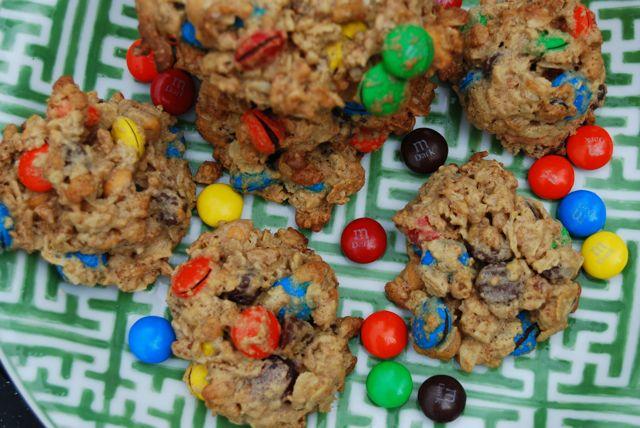
When I reached into one of the cabinets and pulled out a stainless steel mixing bowl, I immediately thought of monster cookies. They were one of my favorite cookies to make with my mom because there was very little measuring involved. And they could be different every time….and still taste just as good. Whenever we made them, she would let me throw in whatever we had laying around- even cereal- on one condition: There must ALWAYS be M&Ms. You can throw in as many things as you want, but if there are no M&Ms, they’re just not monster cookies.
I didn’t take that bowl home with me. I have plenty of mixing bowls already. But I did take home the comfort of knowing that even when circumstances force you to get rid of your “stuff”, they can never force you to get rid of your memories.
So today, on my last day of vacation before school starts back up again, I made some monster cookies in my own kitchen for a friend’s birthday tomorrow. And as I sat there eating one fresh out of the oven, I made a silent little toast to memories of the past, and to all those memories still to come.
Over the years I’ve healthified these just a bit, cut down on the butter and sugar, used brown rice krispies instead of regular, switched to natural peanut butter and added more oats. In the interest of making a recipe, I’ve given you my best estimation on how much of all the mix-ins I used…but really, it doesn’t matter. Just throw them all into the bowl, mix them around a bit and enjoy.
And NEVER forget the M&Ms.
Monster Cookies
Prep Time: 10 min
Cook Time: 10 min
Keywords: bake dessert oats peanut butter chocolate
Ingredients
- 6 Tbsp butter, softened
- 1/2 c brown sugar
- 1/2 c peanut butter
- 1 egg
- 1 tsp vanilla
- 1 1/4 c rice krispies
- 1 1/4 c oats
- 1/2 c whole wheat flour
- 1/2 tsp baking powder
- 1/2 tsp cinnamon
- 1/2 c chocolate chips
- 1/2 c butterscotch chips
- 1 c M&Ms
Instructions
1. Cream the butter, sugar and peanut butter together in a medium-sized bowl.
2. Add the egg and vanilla and mix well.
3. Stir in the oats, flour and rice krispies.
4. Gently fold in the chocolate chips, butterscotch chips and M&M’s.
5. Scoop onto a greased cookie sheet in desired size.
6. Bake 10-12 minutes at 350 degrees F.
Note: Other add-ins could include chopped Reese’s, toffee bits, heath bars….the sky’s the limit
What was your favorite childhood cookie?
Enjoy!
–Lindsay–
Silent Saturday: Beach Love
Whole Wheat Pumpkin Muffins
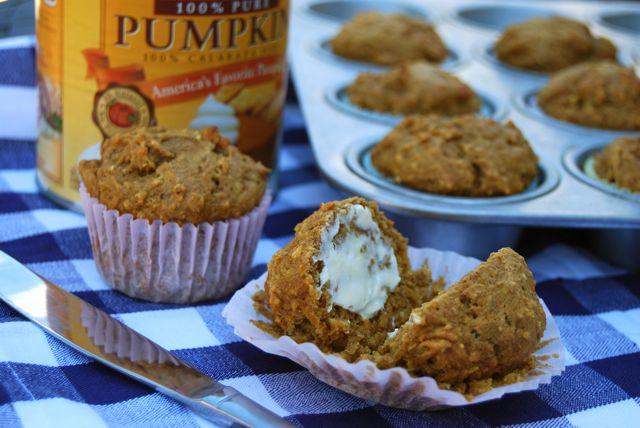
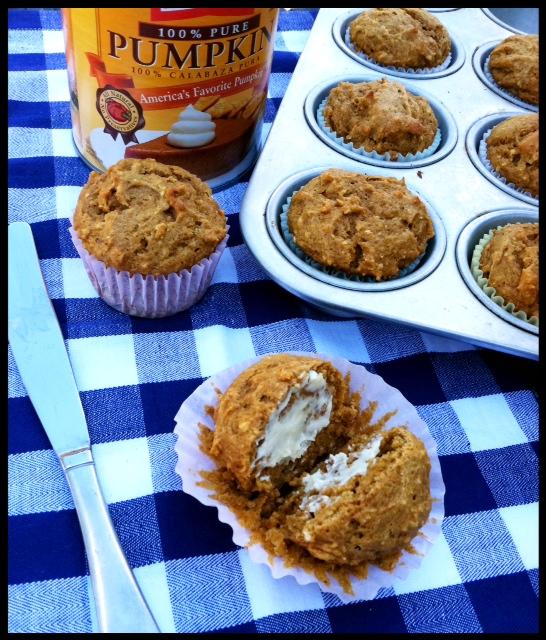
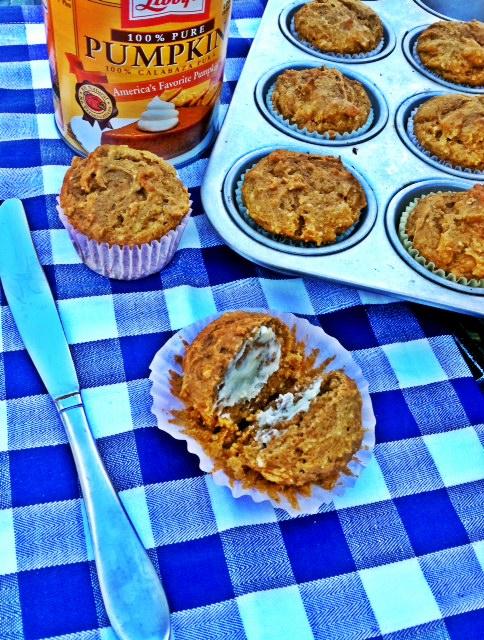
Well, friends…it’s fall. The weather’s getting cooler, the days are getting shorter and I opened my first can of pumpkin.
Unfortunately, (or fortunately?), it was a jumbo can. Fortunately, I’m still on vacation…so that means I had time for recipe testing! Over the past week I’ve been working hard on a recipe for pumpkin muffins. I knew I wanted them to be healthy and after looking at a bunch of recipes online, I wasn’t crazy about the amount of sugar that was in most of the recipes.

So, I set to work adding, subtracting and rearranging to make my own! Here are some of the recipes I used for inspiration:
Whole Wheat Pumpkin Muffins
Spiced Pumpkin Honey Muffins
Oat Flour Pumpkin Bread
Fat-Free Pumpkin Bread
Wheat-free, Dairy-free Pumpkin Bread
They all sound good…they just weren’t what I was looking for. I decided I wanted to totally eliminate brown and white sugar from the recipe, which I’d never done before. My plan was to replace it with natural sweeteners like brown rice syrup and honey. After I’d worked out my recipe, I did a trial run. I quartered the recipe I came up with so it only made 4 muffins in case it went horribly wrong.
Trial #1
They were good enough to eat, but definitely too moist in the middle. I decided I needed to add more dry ingredients so I thought I’d try it with oats. But sometimes I’m not crazy about whole oats in my muffins, so I ground them up to make oat flour. I also reduced the amount of applesauce a little bit.

Trial #2
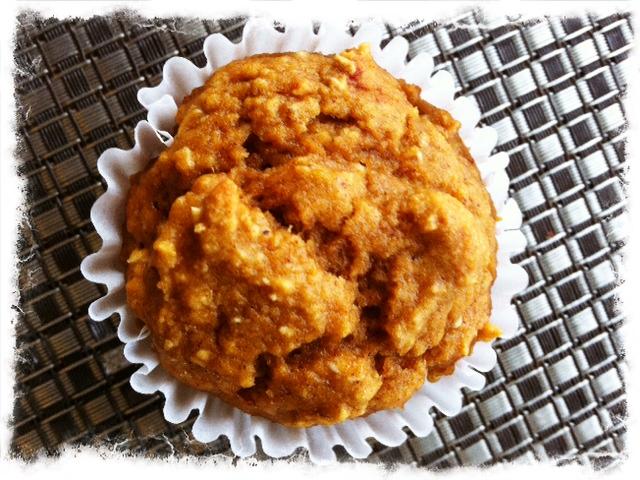
Better! They definitely weren’t as wet in the middle. The oat flour gave them a little bit of texture but nothing extreme, and the flavor was good.
Trial #3
I was pretty much satisfied with the recipe so after one more tweak (reducing the amount of applesauce again), I finalized the recipe. Then I halved it and made my final trial run. I thought it would make six muffins since my trial runs, where I quartered the recipe had been making four, but it ended up making 8 large muffins. It could easily have made 10-12 smaller muffins so that’s the one I’ve listed below.
Whole Wheat Pumpkin Muffins
Prep Time: 5 min
Cook Time: 25 min
Keywords: bake breakfast muffins snack vegetarian healthy pumpkin fall summer winter
Ingredients (8-12 muffins)
- ½ c pumpkin
- 1 egg
- 2 Tbsp applesauce
- ¼ c brown rice syrup
- ¼ c honey
- ½ tsp vanilla
- 1 c white whole wheat flour
- ¼ c oat flour
- ¼ tsp salt
- 1 tsp cinnamon
- ¼ tsp ginger
- ¼ tsp nutmeg
- ½ tsp baking soda
- ½ tsp baking powder
Instructions
1. Combine the wet ingredients in a bowl.
2. Add the dry ingredients and stir until just combined.
3. Spoon into greased or lined muffin tins and bake at 350 degrees F for 20-25 minutes.
*Notes:
Let cool completely before trying to remove muffin liners or they will stick.
Spice quantities can be increased or decreased based on preference.
You could also substitute pumpkin pie spice if you have it.
If you don’t have oats to make oat flour, you can use all wheat flour.

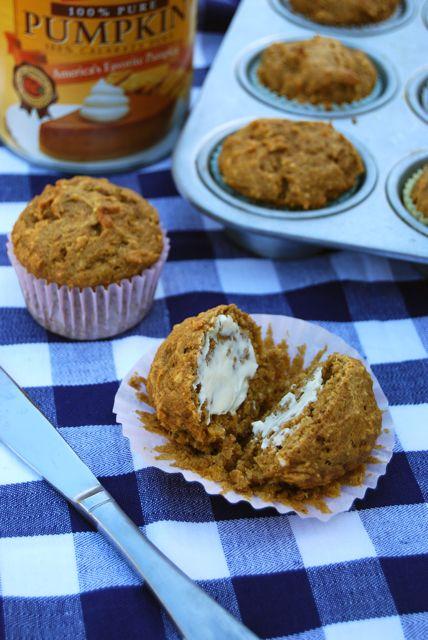
And just for fun, here’s one I snapped with my phone…pretty good, eh?
Happy Friday! Have a great weekend 🙂
–Lindsay–
Tofu & Lentil Stuffed Shells
A few months ago, Jenna posted this recipe for dairy-free stuffed shells. It was one of those that sounded intriguing but I filed it away in the back of my mind and didn’t really think I’d be making it any time soon. During our veggie month challenge, I thought of it again…but again, it fell to the bottom of the mental pile…until this week!
After we came back from Miami, the fridge was looking pretty empty…but we did have a block of tofu that we picked up when it was on sale. We also had 1/2 a jar of leftover spaghetti sauce…seemed like as good a time as any to whip up some stuffed shells.
As usual, I felt the need to put my own spin on it.
Here’s the recipe:
Tofu & Lentil Stuffed Shells
Prep Time: 30 min
Cook Time: 20 min
Keywords: bake food processor entree healthy vegetarian lentils tofu pasta Italian
Ingredients (Serves 2-3)
- 1/2 block extra firm tofu
- 1/2 c frozen spinach, chopped
- 3 cloves garlic, minced
- 1/2 c onion, chopped
- 1/2 c red pepper, diced
- 1 Tbsp pesto
- 1/2 c lentils, cooked
- 1/2 tsp cayenne pepper
- black pepper to taste
- 10 shell noodles
- 2 c marinara sauce
- 1/2 c low-fat mozzarella cheese
Instructions
1. Press the tofu for 30 minutes. Meanwhile, cook the shells according to package directions.
2. Crumble the tofu into a food processor and process until it looks like ricotta cheese, about 30 seconds.
3. Put the spinach in a small bowl with 1 Tbsp water. Microwave for 2 minutes, then drain and squeeze the excess water out of it.
4. Put the spinach and tofu in a bowl and stir to combine.
5. Saute the garlic, onion, lentils, red peppers and pesto over medium heat for 5-10 minutes until the onions are soft.
6. Add the lentil mixture to the tofu and spinach and stir until combined.
7. In a small baking dish, pour a thin layer of sauce into the bottom of the pan. Spoon the mixture evenly into 10 shells and place them in the pan. Top with remaining sauce and cheese.
8. Cover with foil and bake at 375 degrees for 20 minutes.


Here’s the good news: They were delicious! The cayenne pepper added just a little bit of spice and the lentils added some texture.
Here’s the great news: After the hubby cleaned his plate, I said: “Isn’t it cool that the tofu looks just like ricotta?” To which he replied, “What tofu?” WIN!

This recipe is super flavorful thanks to the sauce, the cayenne pepper and the pesto….and it’s healthy too! It makes just enough for two people, but could definitely be doubled or even tripled to feed more. If you don’t like lentils, you could substitute canellini beans.
Enjoy!
–Lindsay–
My Happy Place
Guest Post: Crockpot Dinners
Hi Friends!
Today we have a special visitor on The Bean. Brittany is one of the few bloggers I’ve actually met in real life! She has an adorable blog of her own that you should definitely check out…and more importantly, we share a love of our beloved Buckeyes! Since Fall is officially here, Brittany put together a few of her favorite crockpot recipes for you to enjoy!

—————————————
Hey everyone! My name is Brittany and I’m guest blogging from Sweet, Sassy, and Oh So Classy. I’m so excited to be guest posting for Lindsay today! I’ve actually met Lindsay in real life when we went to a Columbus blog dinner last winter. She is super sweet! It’s so wonderful to meet new blog friends!
When Lindsay said she needed a guest blogger I jumped at the opportunity. I had a post in mind and thought it would be great for a guest post too. But after talking to Lindsay I realized that I should probably have a food post. After all this is a food blog! Duh!
If you read my blog and know me at all you will know that I’m no cook! However I was born with baking talent and bake all the time! Weird, right? Thankfully my husband is an amazing cook and comes from a family of fabulous southern cooks!
So because of my lack of cooking skills, I try to stick with easy meals. If you can put it in the microwave, crockpot, or it has less than five steps, we’re cool. But my husband and I have also been trying to eat less processed food which in basically means, “Brittany is not allowed to cook anymore”. Again, so thankful he is a great cook. But there are ways to eat healthy, less processed food, and easy to cook.
Today I’m going to share my specialties with you…CROCKPOT MEALS!!
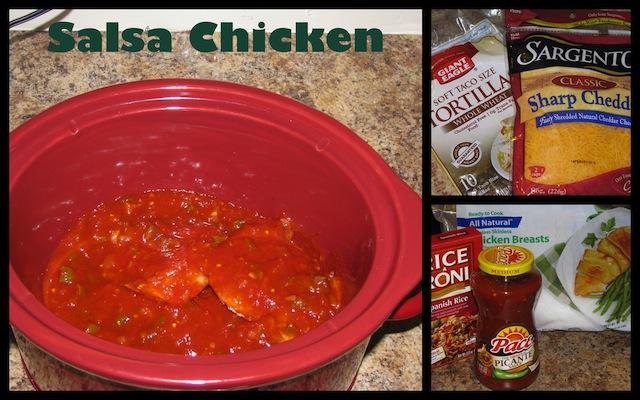
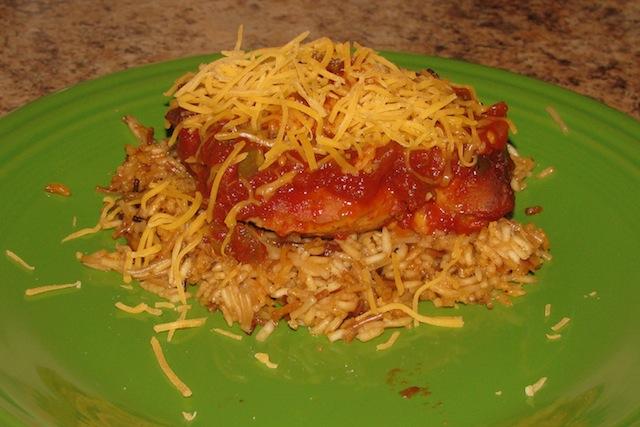
Crockpot Meal#1- Salsa Chicken: I can’t take the credit for this recipe. I found it over on Erin’s blog. However, I have to tweak it a little.
[print_this]
Salsa Chicken
4-5 chicken cutlets or boneless, skinless chicken breasts (we look for the leaner meats)
1 jar of salsa
1-2 pouches of Uncle Ben’s 90 second Santa Fe Rice (or any brand)
1 can of black beans
Shredded cheese
Directions:
1. Place chicken and jar of salsa in the crock pot. Cook on low for 6-8 hours (I check it at 6 and go from there). When it is done, add the cheese and let simmer for 10-15 minutes until melted.
2. Microwave the rice. Put the rice on a plate and scoop chicken mix over rice. You can add a little more cheese on top if you would like. (Optional: wrap it up in a tortilla and add sour cream).
[/print_this]
Notes: Hubs doesn’t like black beans so I don’t put them in there, however if you like black beans, you can put them in with the chicken and cook all day.
See how easy? I know, I’m a genius!
Crockpot Meal #2- Shredded Chicken Sandwich
[print_this]
Shredded Chicken Sandwich
4-5 boneless, skinless chicken breasts
15oz pack of onion soup (I don’t usually put the whole thing in—up to your taste)
Dash of salt
¼ cup of Italian dressing
¼ cup of water
Directions:
1. Throw everything in the crockpot and cook for 8-9 hours on low heat!
[/print_this]
Notes: You can use this chicken to make sandwiches, put over brown rice, in a salad, or whatever your heart desires. Since the hubs is on a low carb diet, we just eat the chicken and I eat a salad with it…or perhaps two ears of corn!
Easy? You betcha!!
Crockpot Meal #3- Chicken and Stuffing: This recipe I actually learned from my mom. I get my mad cooking skills from her.
[print_this]
Chicken and Stuffing
4 boneless, skinless chicken breasts
1 box of stovetop stuffing
1 can cream of mushroom soup
1 can chicken broth
Directions:
1. Place chicken in crockpot
2. Add stuffing on top of chicken
3. Add mushroom soup on top of stuffing
4. Pour the chicken broth all over it
5. Bake for 8 hours on low.
[/print_this]
Notes: This is not a very healthy meal, obviously, but it is amazing in the winter when you want some good soul/comfy food!
I’m definitely no Lindsay when it comes to cooking, but I hope you get to try one of my delicious, cheap, and easy (key word) crockpot meals! Have a great weekend!
———————————
Huge thanks to Brittany for filling in for me today. Now it’s your turn: tell us your favorite crockpot meal. Leave links for everyone to enjoy!
Happy Friday!
Lindsay
Spice Dusted Mexican Wontons
We’ve got a winner dinner here my friends. Hubby says it should be a feature on the Bean- that means he likes it 🙂
As I mentioned earlier this week, I picked up some wontons last week and have been dreaming up some Mexican wontons for a while now. I had a basic idea going into it, but this was one of those dinners that just kinda all fell into place while I was working on it.
Spice Dusted Mexican Wontons
Prep Time: 20
Cook Time: 10-12
Keywords: bake saute appetizer entree healthy vegetarian avocado black beans rice tomato
Ingredients (16 wontons)
- 1/2 c red bell pepper, minced
- 1/4 c red onion, minced
- 1/4 c mushroom, minced
- 1 1/2 c black beans, divided
- 1/4 c corn
- 2 Tbsp cilantro, minced
- 1/4 c reduced fat Mexican cheese
- 16 wonton wrappers
- paprika, cumin & cayenne pepper to taste
- 1 package 90-sec brown rice
- 1/2 an avocado
- 1 medium tomato
Instructions
1. In a medium-sized bowl, combine the first seven ingredients (only use 1/2 c of black beans).
2. Lay out several wonton wrappers on your work surface. Place a small amount of filling in the middle of each wonton.
3. Dip your finger in water and wet two consecutive edges of each wonton. Fold each wonton into a triangle, bringing the dry edge over to meet the wet edge and press firmly to seal.
4. Place a cooling rack inside a jelly roll pan and place wontons on top of the cooling rack.
5. Mist with olive oil and then sprinkle with cumin, paprika and cayenne pepper in your desired amount.
6. Bake at 400 degrees for 10-12 minutes until the wontons are golden brown.
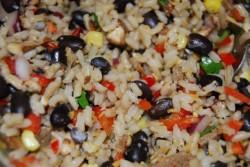
7. While the wontons are baking, cook the 90-sec rice and transfer to a bowl. Stir in the remaining cup of black beans and any remaining filling that wouldn’t fit in the wontons.
8. Place a serving of rice on the plate, arrange wontons on the bed of rice and top with diced avocado and tomatoes.
*Notes:
-You could easily include meat in the filling if you wanted. I used one leftover Morningstar vegetarian breakfast patty that we had sitting in the fridge.
-Additional topping choices include salsa, jalapenos, olives or an additional sprinkle of cheese.
A light dusting of spices gives wonderful flavor that doesn’t get lost in the filling.

I like to call this party rice. For no good reason other than with all the colors it looks like a party on your plate 🙂
Keeping the tomatoes on top, instead of in the filling, helps keep the wontons from getting soggy but still adds some moisture to the dish.
Mini Pesto Bruschetta Cups
I bought a package of wonton wrappers at the grocery store last week and I’ve had tons of ideas spinning through my head for the past few days about how I should use them up. I’ve finally settled on a Mexican version that I’m planning to make for dinner tonight, so stay tuned for that!
However, there are A LOT of little wonton wrappers in those packages and I decided that it would be boring to use them all on the same thing, so when I came home for lunch today I whipped up a little snack for myself that turned out quite well!
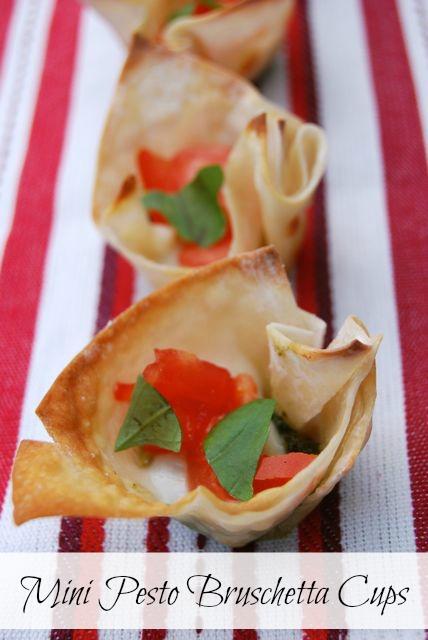
If you haven’t noticed, I’ve been on a bit of a pesto and mozzarella kick for the past few days, and today is no exception. I can’t help it! It’s just such a good combo.
These bruschetta cups would be a great party appetizer, but they’re easy enough that you could also whip up just a few for a snack like I did.
Since they can be made in varying quantities, there’s no exact recipe but here’s what you need:
Mini Pesto Bruschetta Cups
Prep Time: 5 min
Cook Time: 10 min
Keywords: bake appetizer vegetarian mozzarella
Ingredients
- wonton wrappers
- olive oil/cooking spray
- pesto
- fresh mozzarella cheese
- tomatoes
- fresh basil
Instructions
Spray a mini muffin tin with EVOO or cooking spray.
Press one wonton wrapper into each hole. If the wrappers have been in the fridge, press them between your hands for a few seconds to warm them up so they don’t rip. Mist the wrappers with EVOO or cooking spray.
Place the muffin tin in the oven at 400 degrees for 4 minutes or until the wonton wrappers are just brown on the tips.
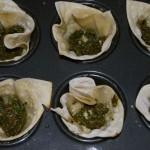
Remove from the oven, spoon a little pesto into the bottom of each cup and top with a small piece of fresh mozzarella.
Return the pan to the oven for 4 more minutes. Remove when the wontons turn a nice golden brown on the edges.
Top each cup with a few pieces of diced tomatoes and a little bit of fresh basil.
Aren’t they pretty?! These are a fun twist on traditional bruschetta and I loved every crunchy bite!
Enjoy!
–Lindsay–
Pesto Potato Salad
On Saturday we went to the Farmer’s Market and I came home with, among other things, a GIANT bag of basil. I immediately came home and made a batch of pesto. I used this recipe and it turned out great!
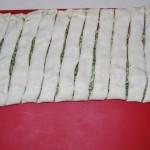
Then I immediately made these breadsticks that I’ve been dreaming about ever since Nicole posted them. The only change I made was to use mozzarella cheese instead of Parmesan.
Please ignore my pictures and go look at Nicole’s. They’re much prettier 🙂

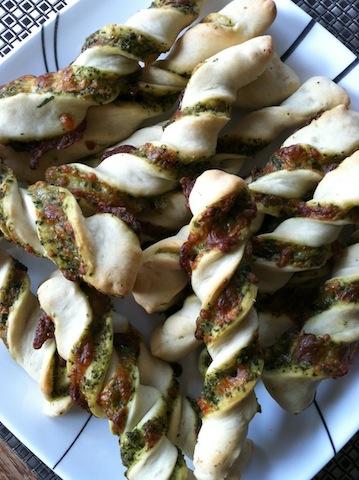 Yesterday I continued on my pesto kick and whipped up a little side dish that accidentally turned into dinner.
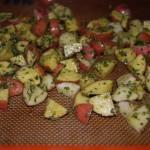
If you’re a long-time blog reader, you know we’re big fans of roasted potatoes in our house. Last night I kicked them up a notch by tossing them in pesto before roasting them. Then the plan was to enjoy them with some fresh mozzarella cubes….but while they were roasting I took it one step further and added in some corn and tomatoes.
Pesto Potato Salad
Prep Time: 5 min
Cook Time: 25 min
Keywords: roast side healthy vegetarian pesto potato fall
Ingredients (Serves 4)
- 2 cups diced red potatoes
- 1/2 tsp olive oil
- 1 Tbsp pesto
- 1 c corn
- 1/2 c tomato, diced
- 1/4 c diced fresh mozzarella
Instructions
1. Pour the olive oil on the potatoes and toss to coat. Add the pesto and stir to combine.
2. Roast the potatoes on a baking sheet at 425 degrees for 25 minutes, stirring occasionally.
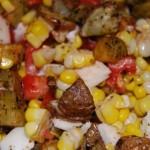
3. Place the corn in a medium sized bowl, add the tomato and mozzarella and stir to combine. Stir in the potatoes when finished roasting and serve warm.
Notes:
Remove as much juice and seeds from the tomato as possible to keep the potatoes from getting too soggy.
Oh, and in case you’re wondering, putting all these ingredients (minus the potatoes) on a piece of naan makes a killer pizza 🙂

So yes we ate the whole bowl of potato salad and the pizza and called it dinner last night. Oh well 🙂
Enjoy!
–Lindsay–
Phase 1 Complete
In December of 2006, I graduated from college the first time with a BA in Psychology. After working a few jobs totally unrelated to that major, I made the decision to go back to school again. In January 2009, I began taking classes for a Dietetic Technician program. In June 2011, I graduated from that program and this morning I took the national exam to become a Dietetic Technician, Registered…
…AND I PASSED!!

Somewhere in the middle of my last program I decided that I didn’t want to stop at being an DTR and wanted to go the extra mile to become a Registered Dietitian.
So I’m still in school. I have 3 more quarters and getting matched to an internship still ahead of me.
But for now, I have three weeks off (yay!), a mini vacation planned (double yay!) and lots of sleep to catch up on.
And tonight, I’m off to make this happen:
Have a great weekend, friends!
–Lindsay, DTR–
I’m just gonna go ahead and sign my posts like that for a few weeks if you don’t mind 🙂
Veggie Month-Week 4
We did it, friends! A successful veggie month. In the words of the hubby, “it flew by!” And it did!
So what did we eat during week 4? Hubby was out of town over the weekend so we had some different meals.
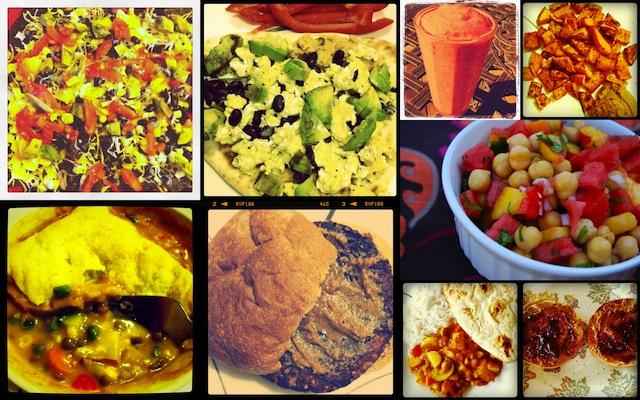
Thursday: Lentil & Veggie Pot Pies with puff pastry tops. So good! The veggies stood out more than the lentils to me and I loved the puff pastry top. I didn’t really follow a recipe but I did refer back to my last pot pie post for some guidance! (Hubby had Boca Burgers, veggies & veggie dip, blueberries and chips and salsa).
Friday: TJ naan topped with homemade hummus, scrambled eggs, black beans and avocado. (Hubby had a vegan Indian Buffet for lunch and veggie stir fry for dinner.)
Saturday: I made some pasta with veggies but just wasn’t feelin’ it…i ended up eating some hummus and chips, a smoothie and some cereal. (Hubby had a portabello and grilled cheese sandwich).
Sunday: Nachos with black beans, red & yellow peppers, corn, tomatoes, avocado and cheese.
Monday: Hubby made another delicious Chickpea Curry!
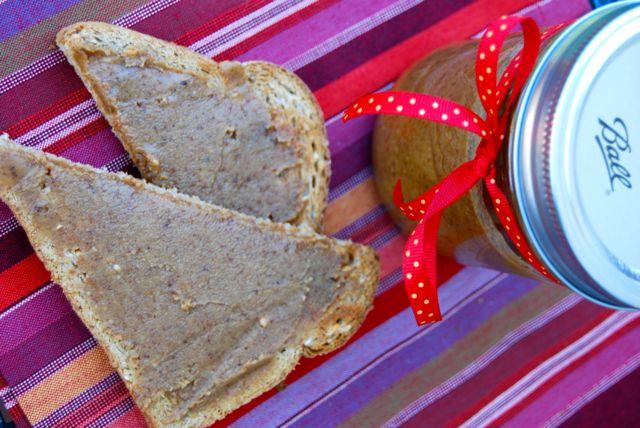
Tuesday: Black Bean Burgers and roasted sweet potatoes. I topped my burger with walnut butter and it was DELICIOUS!
Wednesday: Leftovers
For lunch:
Lots of leftovers. I made an extra pot pie to eat the next day and the batch of curry fed us for about 3 days! We also enjoyed fresh peaches and blackberries, smoothies and some watermelon & chickpea curry. Oh, and who could forget some wb &j with my new fav nut butter!
Don’t you love it when you have a really good dinner and there’s still enough left for lunch?!
The hubby says he’s not ready to stop the veggie lifestyle. We both feel good about eating more natural food, it’s saving us money on our grocery bill, our energy levels are high and we’re having fun with it! I plan to incorporate some fish back into our meals and continue eating eggs and drinking milk. We’ll take it one day at a time from now on and see where life takes us!
In case you missed it, check out the rest of the posts:
Veggie Month- Week 1
Veggie Month- Week 2
Veggie Month- Week 3
I’ll leave you with some cuteness 🙂 I’ve been playing with a new app called Lo Mob. Love it!
Enjoy!
–Lindsay–
Watermelon Chickpea Salad
This could also be called Clinging-to-the-end-of-summer-fruit-and-chickpea-salald.
Last night we grabbed what is probably one of the last watermelons of the season while we were grocery shopping. I used one of my favorite kitchen tools, the melon baller to get most of it ready to eat but I had just a little bit extra that wouldn’t git in the container. I immediately decided I would use that part to make something for lunch tomorrow…I just didn’t know what.
After sleeping on it, I woke up this morning ready to go out on a limb. For some reason, pairing watermelon with chickpeas was stuck in my head and I couldn’t get it out. After a quick google search, I appears that this is not the most popular combo out there…but I went with it anyways. And you know what? I loved it!
Watermelon Chickpea Salad
Prep Time: 5 min
Keywords: side healthy vegetarian chickpeas fruit summer
Ingredients (Serves 2-4)
- 1 c chickpeas, drained and rinsed
- 2 Tbsp red onion, diced
- 1 c seedless watermelon, diced
- 1 medium peach, diced
- 1 Tbsp cilantro, minced
- juice of 1/2 a lime
Instructions
1. Combine all ingredients in a small bowl. Stir gently to combine.
Notes
*I used ice cold watermelon and peaches from the fridge and I loved the temperature contrast with the room temperature chickpeas. However, this could also be served after refrigerating the mixture for an hour or so to let the flavors meld, or with all of the ingredients at room temperature.
*I really wanted to add some avocado to the mixture but none of mine were ripe yet. Next time.
*To kick it up a notch, drizzle with balsamic vinegar just before serving.
I ate this by itself but you could also probably eat it with chips, more like a salsa.
Enjoy!
–Lindsay–
Cinnamon Raisin Nut Butter
Hi Friends!
Here’s a little treat to help get you through your Monday.
If you’re anything like me, before you discovered the blog world, the only nut butter you ever ate was peanut butter. Over the past year, I’ve broadened my horizons a bit and tried both almond butter and sunflower seed butter. )
Today I branched out even further- in three ways: 1) I made my own nut butter for the first time, 2) I made walnut butter, which I’ve never even tried and 3) I added mix-ins to my nut butter!
I buy really big bags of nuts at Costco to use in my homemade trail mix but since I’m out of school for a couple weeks, I haven’t been eating trail mix as often as I usually do. This giant bag of walnuts was looking a little lonely, so I thought today would be the perfect day to try my hand at making some nut butter at home.
Quite honestly, I don’t really like walnuts that much. Whenever I eat them, I have to have something else in the same bite (like a raisin or a chocolate chip from my trail mix), so I knew I probably wouldn’t like just plain old walnut butter. I decided to add a few mix-ins to please my palate 🙂 After much deliberation I settled on cinnamon. I love the flavor and knew it would go well with the nuttiness of the walnuts. At the last minute, I decided to add some raisins as well…because really, cinnamon raisin is one of the best combos out there.
I knew from the million previous nut butter posts i’ve read, that I needed to toast the walnuts first so I measured out about 3 cups of raw, unsalted walnuts, placed them on a baking sheet and put them in the oven.
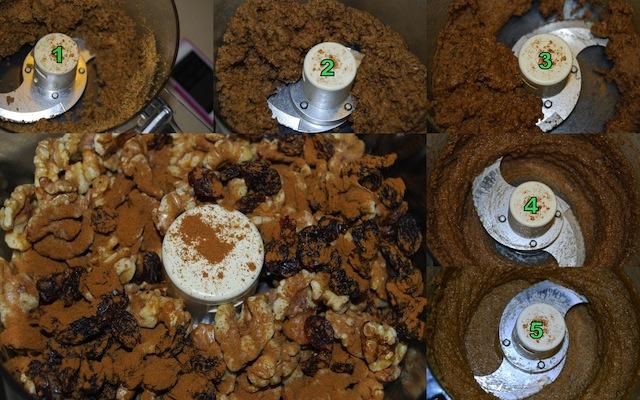
 After they cooled, I put them in the food processor with some cinnamon and some raisins. I was too lazy to look up a recipe so I just used my best judgement on the amounts.
On went the food processor for about 5 minutes and voila! I stopped every minute and took a picture so you could see the progression.
I chose not to add any additional sweetener because there were already raisins in it but you could add a little bit of honey if desired. You could also add a pinch of salt.
Store in a an airtight container in the fridge!
So easy and so good! I can’t wait to experiment with more nut butter mix-ins. Can we say Christmas presents?!
Cinnamon Raisin Nut Butter
Prep Time: 5 min
Keywords: food processor raw roast snack sandwich healthy vegetarian nuts raisins
Ingredients
- 3 cups raw, unsalted nuts (walnuts, almonds, peanuts)
- 1/3 c raisins
- 3/4 tsp cinnamon
Instructions
*Optional- recommended if using walnuts- Spread the walnuts on a baking sheet and toast at 400 degrees for 6-8 minutes.
Let cool for about 20 minutes.
Place walnuts, raisins and cinnamon in a food processor.
Process for five minutes or until desired consistency is reached.
What’s your favorite kind of nut butter? Do you make your own? Any combos I should try?!
Enjoy!
–Lindsay–
Semi-Silent Saturday
Good Morning, friends!
Just popping in to tell you to go check out my guest post on my best bloggie pal Sarah’s blog. She’s getting MARRIED today and I’m so happy to be filling in for her while she’s away. Since we’re right in the middle of back to school season, I wrote a post with some of my favorite lunch and snack ideas. Go check it out! It might inspire you to try something new in your lunchbox 🙂 Click here to view the post!
And now, for your viewing pleasure, a few shots for the 5K race we ran with our dogs last weekend!


 And then they spent the rest of the day like this:
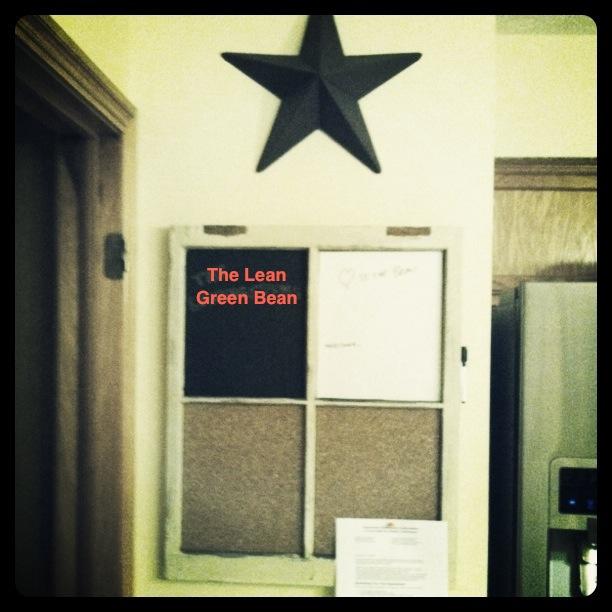
Best of all, check out what the hubby made for me! We bought this old window a long time ago and were never quite sure what to do with it. A few weeks ago, we were in a store and I saw one that had the window panes painted with chalkboard paint. I asked him to do that for me. But he did one better! He made one pane chalkboard, one pane a dry erase board and turned the bottom two panes into a bulletin board! I LOVE IT!!
Have a great weekend everyone!
–Lindsay–

