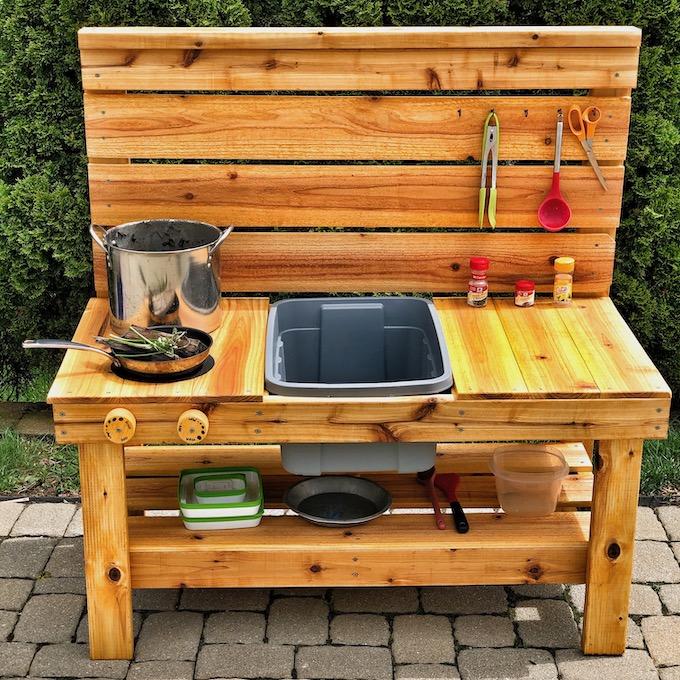
Learn how to build a mud kitchen for kids that’s perfect for keeping them entertained outside. Here are step-by-step mud kitchen plans for making an outdoor DIY mud kitchen for under $100. They’ll be cooking up nature soup and mud pies in no time.
*Originally published 5/2020. Updated 2/2023*
Hi friends!
Ready to learn how to make a DIY mud kitchen for kids? Last week, I didn’t even know there was such a thing and now here we are! I saw someone mention one on Instagram and I knew immediately that my kids would love one! They’ve been on a huge nature soup kick the past few weeks making soups and stews out of leaves, grass, dandelions, etc so a DIY mud kitchen seemed like a great fit for us.
Mud Kitchen DIY
This is one of those times (and there are a lot of them) when it’s so nice to have a handy husband! I spent a few minutes scrolling through mud kitchens on Pinterest, screenshotted a few pictures to show him and asked him if he could build us one and six hours later, voila!
This is obviously not the only way you can build one. You could easily make one with just a board and some cinder blocks or using whatever wood you have laying around, but I LOVE the way ours turned out! Several people asked for dimensions, materials etc so we put together a blueprint and directions for how my husband made ours.
Keep in mind we’re not a DIY blog AND we weren’t planning to turn this into a post so we didn’t do the best job taking photos. But my husband provided drawings for each step of assembly with measurements etc for a little outdoor kitchen plans PDF. Between those and the typed directions below, hopefully you’ll have a pretty good idea how to build one yourself!
Homemade DIY Outdoor Sink
Our plans include a sink but we don’t have it hooked up to water to make it running water. If that’s something you’re looking for you might like this Outdoor Pallet Kid’s Mud Kitchen with Working Sink!
Pallet Mud Kitchen
Speaking of pallets, we didn’t use them but you could definitely make a DIY pallet mud kitchen. Check out this tutorial for an Easy DIY Pallet Mud Kitchen (using scrap wood and pallets).
Mud Kitchen Accessories
Want to accessorize your kitchen? You could skip the stain and let your kids go wild painting it! You could add hooks for utensils, a few open shelves for dishes, extra storage shelves for pots and pans. We added knobs to make stove burners. You could add more burners or add a working sink instead of just a tub! There are so many options. Ask your kids what they want and make it happen! We even had a spice rack on ours for a little while.
How To Build A Mud Kitchen For Kids
Materials For Outdoor Play Kitchen
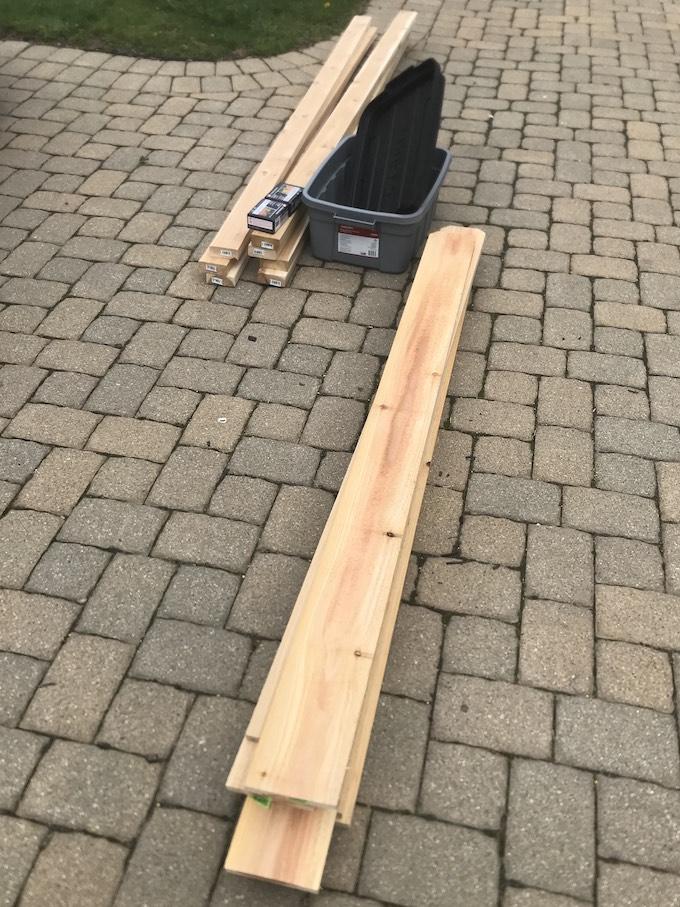
- (7) cedar 2x4s
- (8) 6′ cedar fence boards
- 1.25-inch deck screws (approx 54) and 2.5-inch deck screws (approx 50)
- exterior stain (a great way to use some up if you have it laying around! We used what we had leftover after staining our screened porch)
- sharpie
- Rubbermaid 10 gallon plastic tub
Dimensions:
Frame: 2 feet tall x 4 feet long (depth is dependent on the container you’re using for your “sink”)
Tub: We used a 10-gallon plastic Rubbermaid tub. Measuring just under the lip, it was 14.5″ wide x 20.75″ long. (We had to cut off the handles to make it fit down in the frame which was a pain so we recommend looking for one without handles.
Directions For How To Build A DIY Mud Kitchen
**Scroll down for a link to a free PDF blueprint and printable directions**
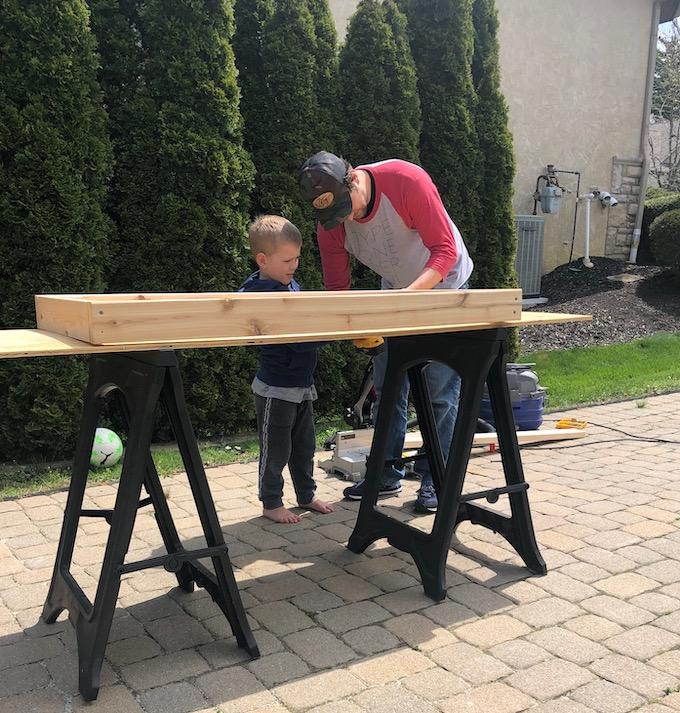
Step 1: Assemble the frame for the cooktop using 2x4s.
- Cut one 2×4 in half for the long sides, which will be almost exactly 48″.
- Measure just below the lip of the tub you’re using to get measurements for the opening for your sink. Ours was 14.5″ wide x 20.75″ long.
- Cut the 4 shorter pieces of your frame to the length of your tub.
- Drill pilot holes and then use 2.5-inch deck screws to build your rectangular frame with two pieces in the middle to hold the tub between them.
Step 2: Add legs.
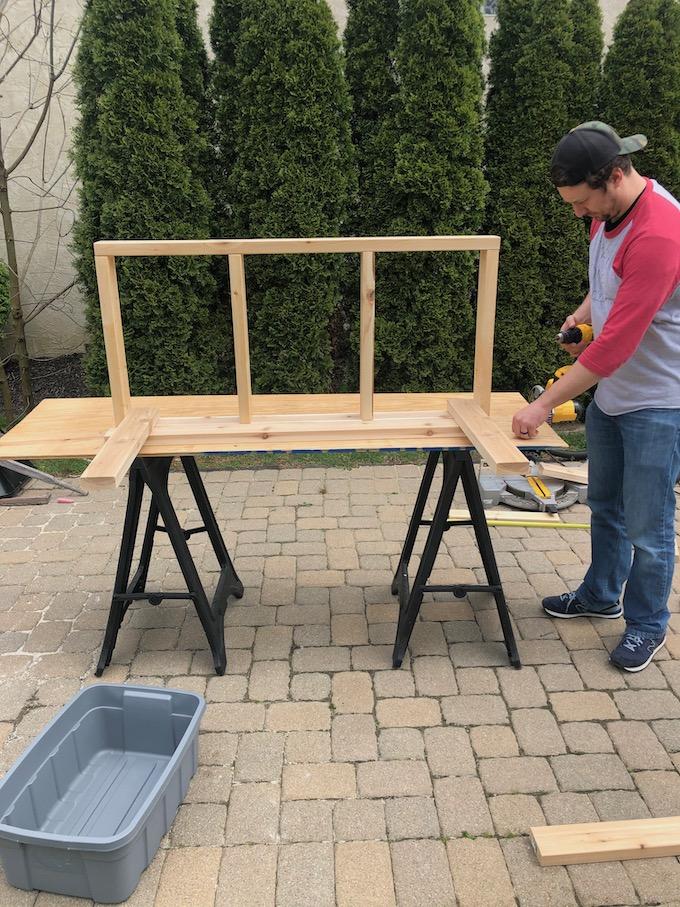
- Front legs are 24 inches, back legs are 48 inches to extend up and make the backsplash.
- Front legs go inside the frame and the back legs go outside the frame.
- Attach the front legs, then have someone hold it level while attaching the back legs.
Step 3: Make the lower shelf frame.
- Cut two 45″ pieces of 2×4 for the front and back.
- Cut three pieces that are three inches shorter than your side pieces for the cooktop. Ours were 17.75 inches since the sides to our cooktop were 20.75 inches. You can also just measure the distance between the front and back legs and subtract 3 inches.
- Drill pilot holes and use 2.5 inch deck screws.
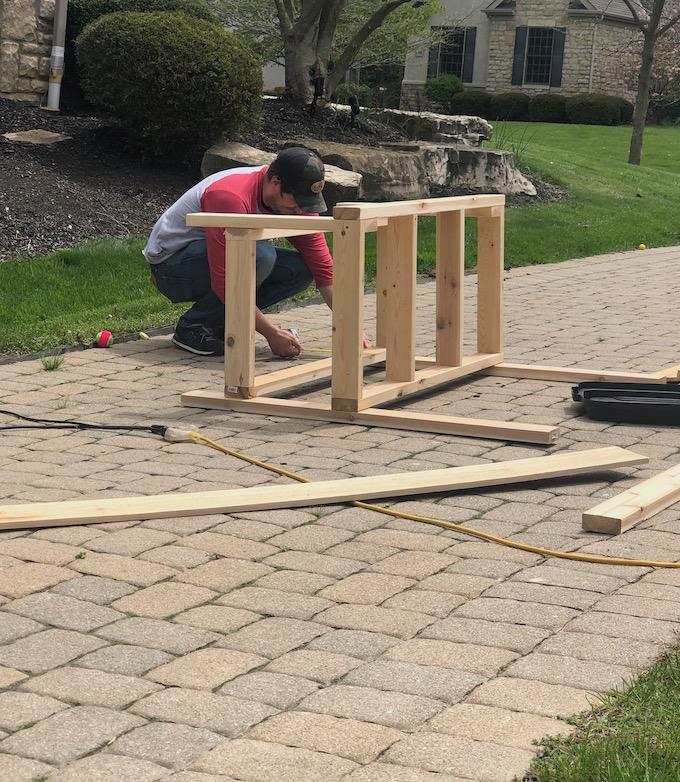
Step 4: Attach the lower shelf frame.
- Attach lower shelf frame to the back of the front legs and the front of the back legs about 6 inches from the ground using 2.5 inch deck screws.
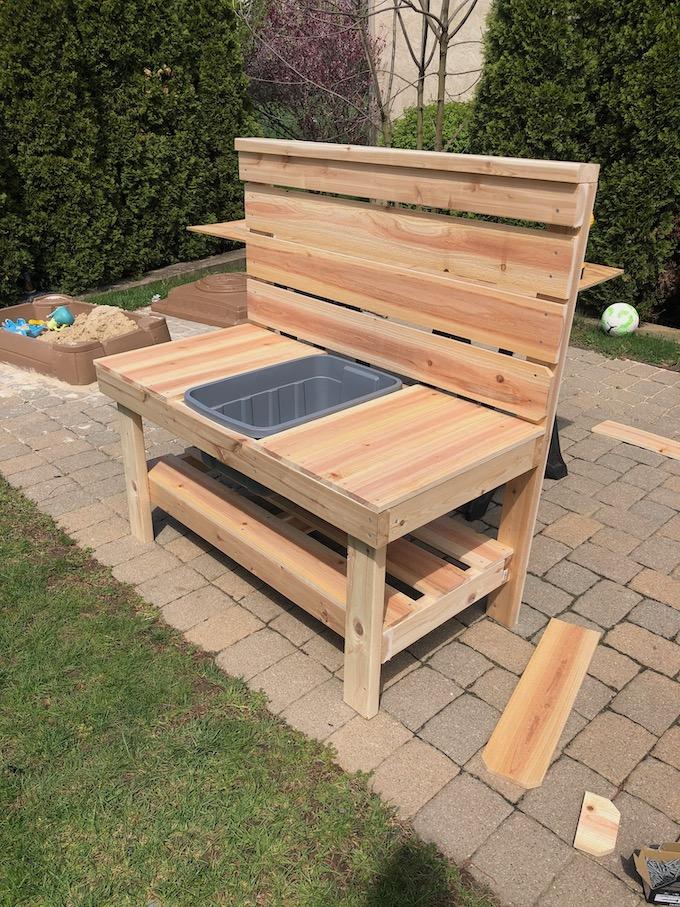
Step 5: Add cedar top, shelf top, and backsplash with fence boards
- Do the bottom shelf first. Measure from the outer edge to outer edge sides of the shelf frame. Cut 3 cedar fence boards to that length. Evenly space boards and attach with 1.25-inch deck screws to make a shelf.
- Do cooktop next. Cut 3 cedar fence boards after measuring from backsplash to front edge of 2×4. Start closest to tub on both sides and work out. There may be a little overhang on the outer pieces.
- For backsplash: Use fence board as a spacer when installing. We did 3 cedar fence boards and then a 2×4 level with the top
Step 6: Add 2×4 topper on the backsplash
- We added another 2×4 across the top, connecting it to the 2×4 running horizontally across the top of the backsplash and the top of the back legs.
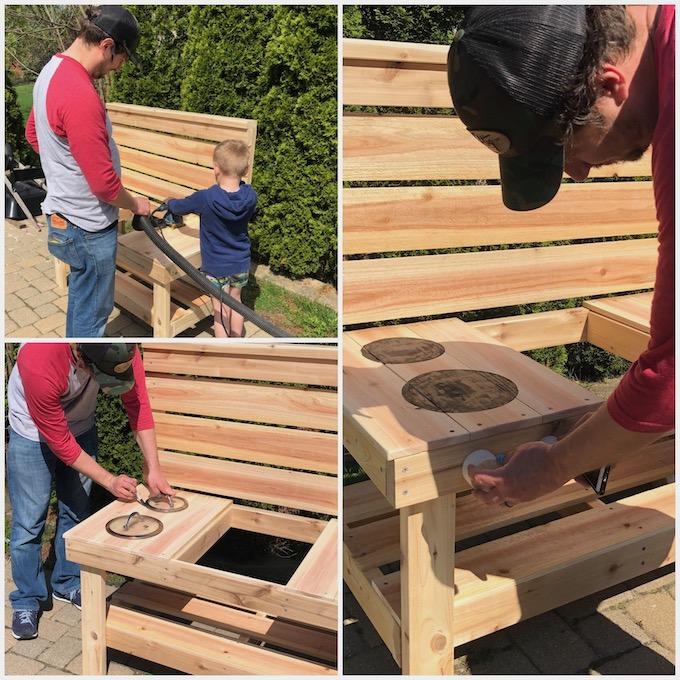
Step 7: Sand the cooktop
- The cedar fence boards are rough sawn so we sanded them until smooth with 120 grit paper and a power sander.
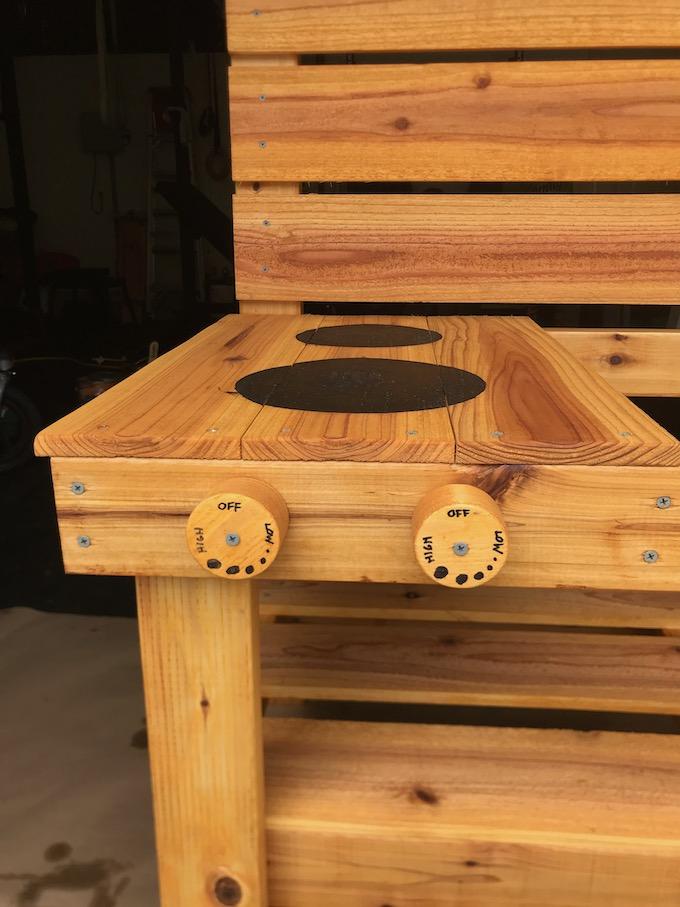
- Hubby also rounded the edges and corners. Smooth surfaces are easier to keep clean and allowed us to draw “burners”.
Step 8: Draw the “burners”
- Draw cooktop burners by tracing circles and painting them black.
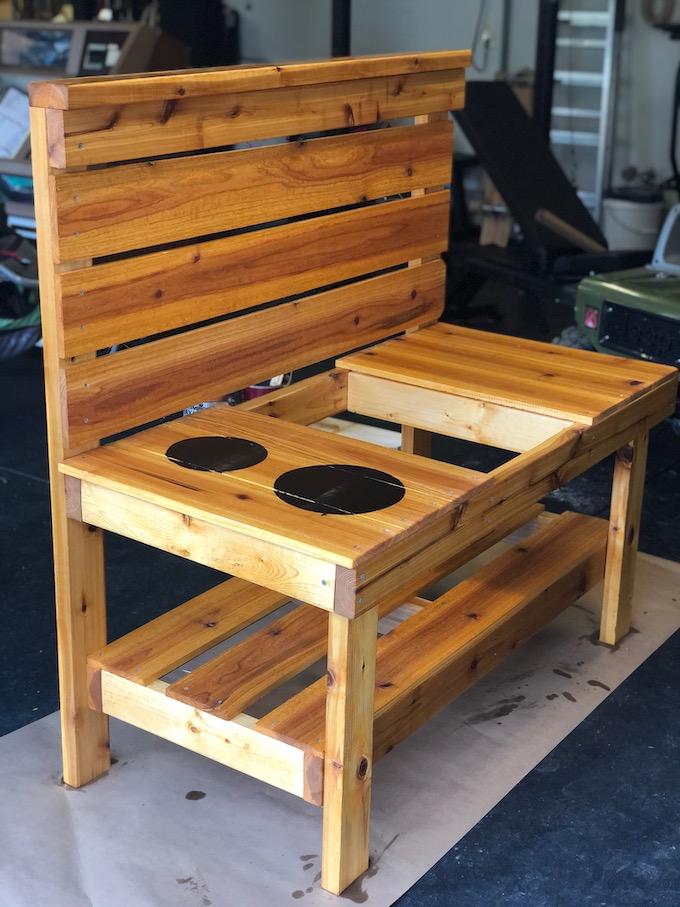
Step 9: Stain
- We used leftover stain from our porch to seal the wood.
- We also added a coat of exterior grade polyurethane to the countertop area to hold up better against mud and water. In addition, the black paint for the burners won’t accept the stain so the poly helps seal it in.
Step 10: Add the details
- We made knobs out of a leftover 2×4 to “turn the burners on”
- Add hooks, baskets etc if you want to!
- After we took the picture, we also added a cheap brass hose bibb to look like a faucet over the sink. (It was $5)
- Furnish with old pots and pans, pie tins, tupperware, old spice containers, spoons and ladles. Thrift stores and garage sales are great places to find supplies.
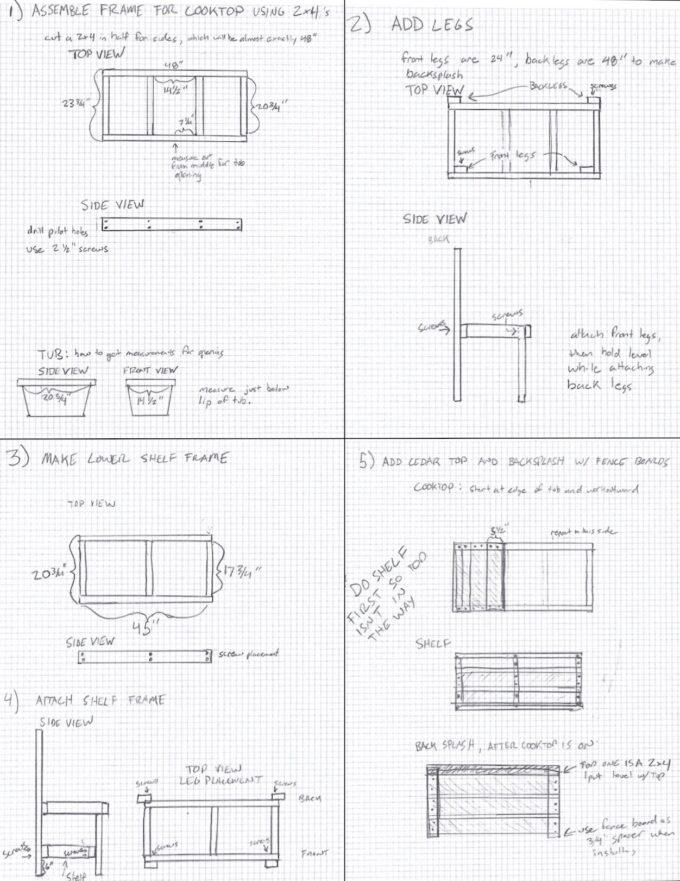
Since we didn’t have the best step-by-step photos to share, my husband sketched out a visual of each step of the process to help show you how we measured, where we put our screws etc.
CLICK HERE FOR A FREE BLUEPRINT PDF and PRINTABLE DIRECTIONS
———-
A few suggestions:
- We recommend using cedar because it’s naturally resistant to decay without any chemicals and it smells good 🙂
- Cedar 2x4s are kinda pricey but the cedar fence boards are cheap so it all evened out! Our total came out to right around $100.
- You’ll need a buddy to help hold various pieces of wood in place while you’re drilling pilot holes etc.
DIY Outdoor Mud Kitchen For Kids
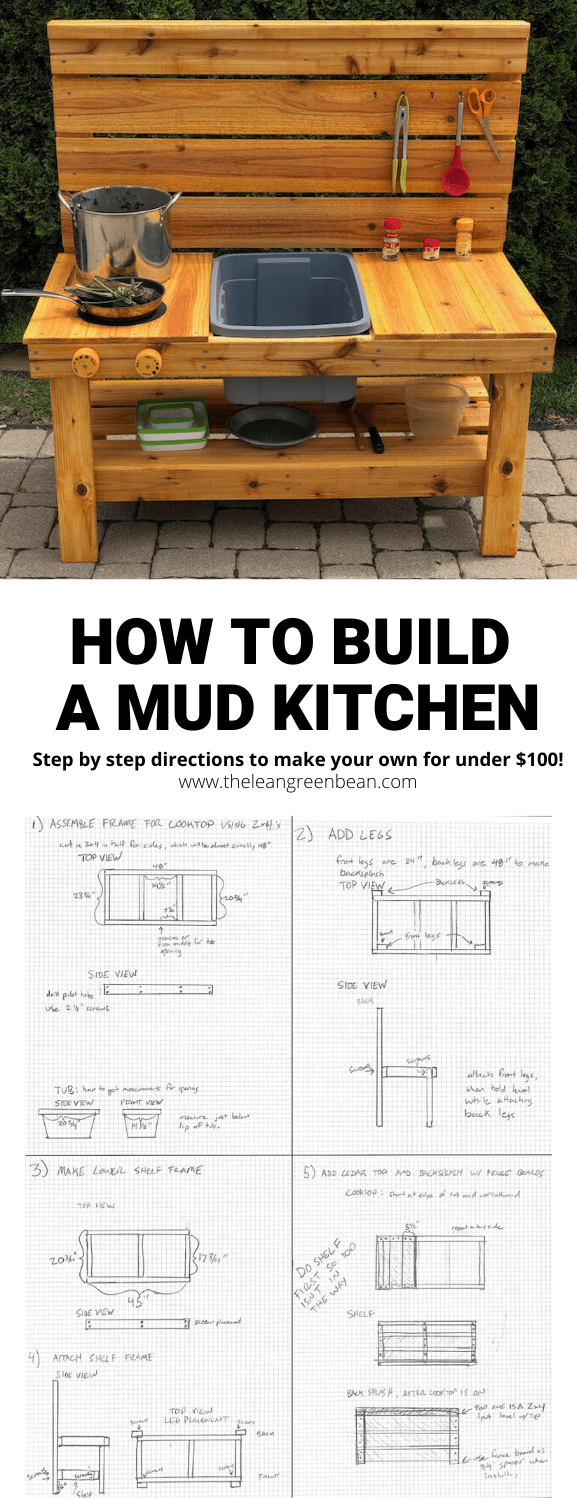
Hope this helps! Happy playing!
IKEA Hack Mud Kitchen
PS. Do you love IKEA? Check out this Mud table as an easy IKEA hack.
–Lindsay–
Get my free Table Talk email series where I share bite-sized nutrition information about carbs, protein, and fat, plus bonus information about snacks and sugar!


Thank you for the design of the mud kitchen I built one based on yours and it was a great success with my grand children. Kind regards Dermot O’Connor
Thanks for this great design! One quick question: Are the cedar fence boards 1″x6″?
yes!
I built a double mud kitchen to accomodate twins. Of course with the massive COVID lumber shortage there are no cedar 2x4s so I bolted and glued 3 1×6 cedar fencing together in place of cedar 2x4s. Cedar 2x4s are now sold by the foot! I also notched the backsplace so the tubs can be easily removed and the lids can be put on top of the tubs to keep the bugs out. Also, if you use a multitool it is fairly easy to remove the handles from the tubs. So using all fencing is a bit of a challenge due to the inconsisten shape of the boards and the warping but it did keep the mud kitchen affordable.
Great project even for those that are a bit carpenter deficient!
Thanks, Will if I could post photos I could show what I did.
glad to hear yours turned out!
Hi, this looks great! How did you attach the hose bib to the wood?
I made a mud kitchen using your design as my main inspiration. I have to say the burners are a big hit, everyone was shocked when i told them it was just sharpie! The hardest part was keeping the kids away while it dried. Thanks for posting this!
Thank you for this easy to follow project idea. I choose this as my Girl Scout Gold Award service project. I made a minor modification when constructing where the back legs were mounted at the same width as the front legs. It turned out that then when cutting the fence boards for the back splash, I needed less material therefore no dog ears showing. Thank you again for the
detailed, amazing direction!
Thank you for the great plans for the mud kitchen. After trying my hand at designing one and getting tripped up by small details I gave up trying to design my own.
I used your ideas but made it 72” wide, moved the sink to the right and added a center support to the backsplash.
Our grandson said it’s the best birthday present he ever got!
This makes me so happy to hear!